XQ-2623 - Fernseher Onn - Kostenlose Bedienungsanleitung
Finden Sie kostenlos die Bedienungsanleitung des Geräts XQ-2623 Onn als PDF.


Benutzerfragen zu XQ-2623 Onn
0 Frage zu diesem Gerät. Beantworten Sie die, die Sie kennen, oder stellen Sie Ihre eigene.
Eine neue Frage zu diesem Gerät stellen
Laden Sie die Anleitung für Ihr Fernseher kostenlos im PDF-Format! Finden Sie Ihr Handbuch XQ-2623 - Onn und nehmen Sie Ihr elektronisches Gerät wieder in die Hand. Auf dieser Seite sind alle Dokumente veröffentlicht, die für die Verwendung Ihres Geräts notwendig sind. XQ-2623 von der Marke Onn.
BEDIENUNGSANLEITUNG XQ-2623 Onn
ONN
26" Wide LCD TV
With DIGITAL TV
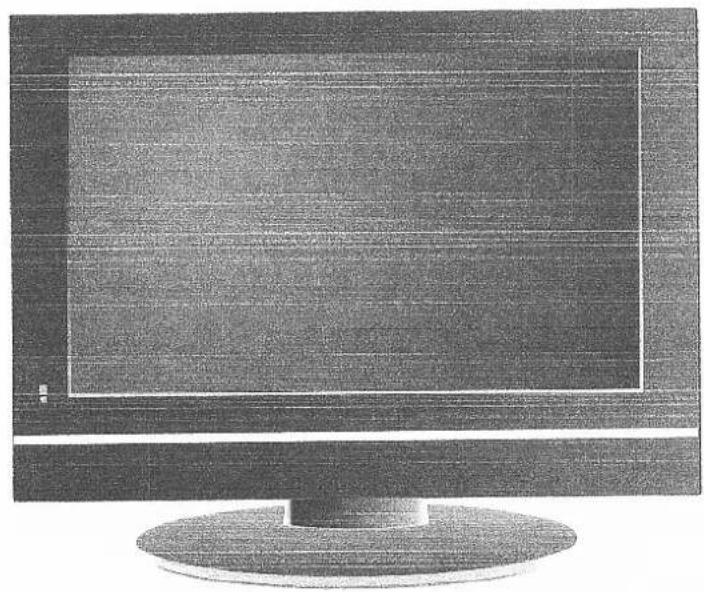
natural_image
Front view of a flat-screen computer monitor with a circular base (no visible text or symbols)Model: XQ-2623
USER MANUAL
Read this manual carefully and retain for future reference IMPORTANT: Retain these instructions for future reference

natural_image
Completely blank white image with no visible content, text, or symbols.Contents
| 1 | PREFACE | 2 | |
| 2 | SAFETY PRECAUTIONS | 3 | |
| 3 | IN THE CARTON | 4 | |
| 4 | FRONT&BACK CONNECTIONS OF LCD | 5 | |
| 5 | INSTALLATION DRAWINGS | Antenna Connection | 6 |
| HDMI Connection | 6 | ||
| PC INPUT Connection | 7 | ||
| S-VIDEO Connection | 7 | ||
| AV Connection | 7 | ||
| YPb Pr Connection | 8 | ||
| SCART Connection | 8 | ||
| 6 | REMOTE CONTROL | Remote control instructions | 9 |
| Remote control setup | 12 | ||
| 7 | ACCESSORIES | 12 | |
| 8 | TV OPERATION | SEARCH menu | 13 |
| PICTURE menu | 15 | ||
| SOUND menu | 16 | ||
| SETUP menu | 17 | ||
| SCREEN menu | 18 | ||
| SOURCE menu | 18 | ||
| 9 | DVB OPERATION | 19 | |
| 10 | TROUBLESHOOTING AND ADVICE | 24 | |
| 11 | SPECIFICATIONS | 25 |
Asda Technical helpline phone number: 0845 300 7775
SAFETY PRECAUTIONS
Preparation
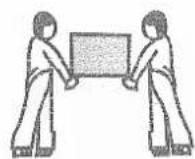
Place the LCD on a stable surface.
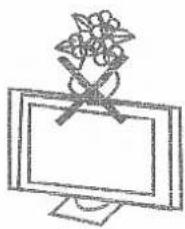
natural_image
Simple line drawing of a computer monitor with a floral arrangement on top (no text or symbols)Do not place any material on the LCD.
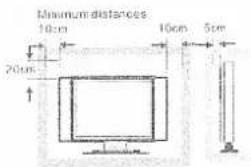
text_image
Minimum distances 10cm 20cm 10cm 5cmIf you have a wall mount, check that it is securely mounted
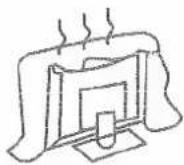
Do not block or cover the ventilation openings on the LCD
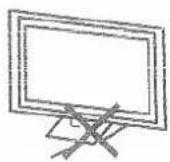
Connection cables
Power cord and cables must be properly routed and protected to prevent People from stepping on them and causing the LCD to fall.
Heating sources and humidity
natural_image
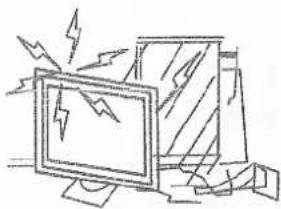
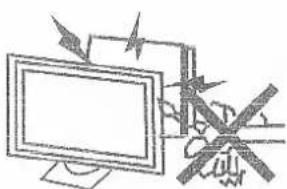
Cartoon illustration of a computer monitor with lightning bolts and scattered documents (no text or symbols)Keep the LCD dry and away from humidity.
natural_image
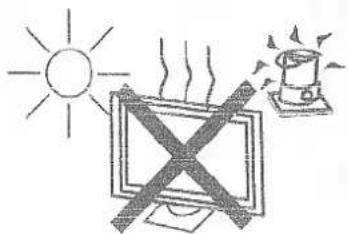
Simple line drawing of a sun, a computer monitor with X marks, and a warning light (no text or symbols)Keep the LCD away from heat sources
Cleaning and maintenance
natural_image
Illustration of a computer monitor with cables and a broken switch, no text or symbols presentUnplug the LCD before cleaning it. Do not use solvents or liquids to clean the LCD.
Only clean the LCD with a soft and dry cloth.
In case of troubleshooting, do not use spare parts other than those suggested by the manufacturer. Using inadequate spare parts can Lead to electric shocks, short-circuits fire or other incidents.
Departure in holidays
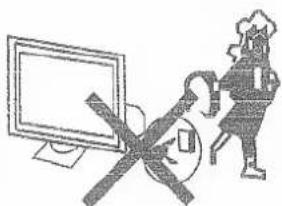
natural_image
Illustration of a person crossed out of a computer monitor, with no visible text or symbolsUnplug the LCD during lighting storms or when unused for long periods of time.
IN THE CARTON
natural_image
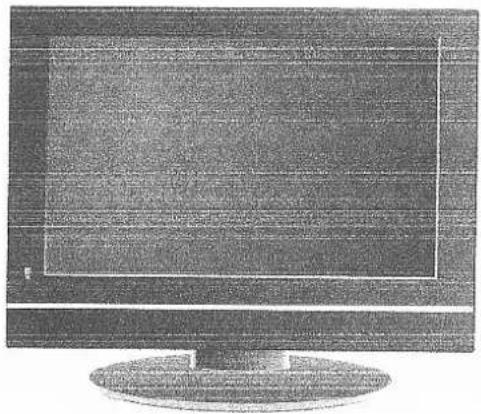
Front view of a flat-screen computer monitor with a blank screen (no visible text or symbols)LCD TV SET
natural_image
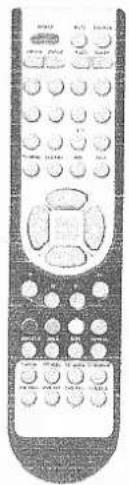
Front view of a remote control with keypad and buttons (no visible text or symbols)Remote control
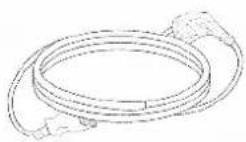
Power Cord
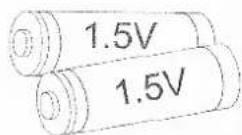
AAA Batteries

26" Wide LCD TV
With DIGITAL TV
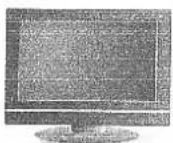
Model: XQ.2623
USER MANUAL
Reasoning manual carefully and retain for future reference IMPORTANT: Retain these instructions for future reference
Onn
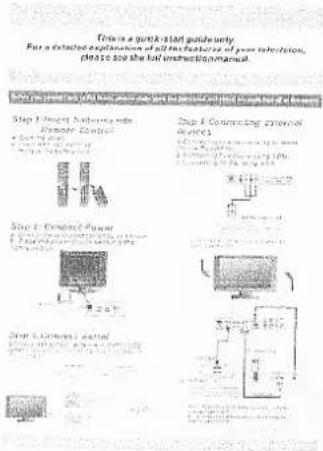
text_image
Toise a quick start guide unit. For a detailed explanation of all features of your instruction, please see the full instruction manual. Step 1: Design adherence • Design Control Step 2: Designing potential • Design Step 3: Design Power • Design Step 4: Design I/II/III/IV • Design Step 5: Design I/II/III/IV • DesignQuick-Start Guide
User Manual
Asda Technical helpline phone number: 0845 300 7775
Front&Back Connections of LCD
Front View
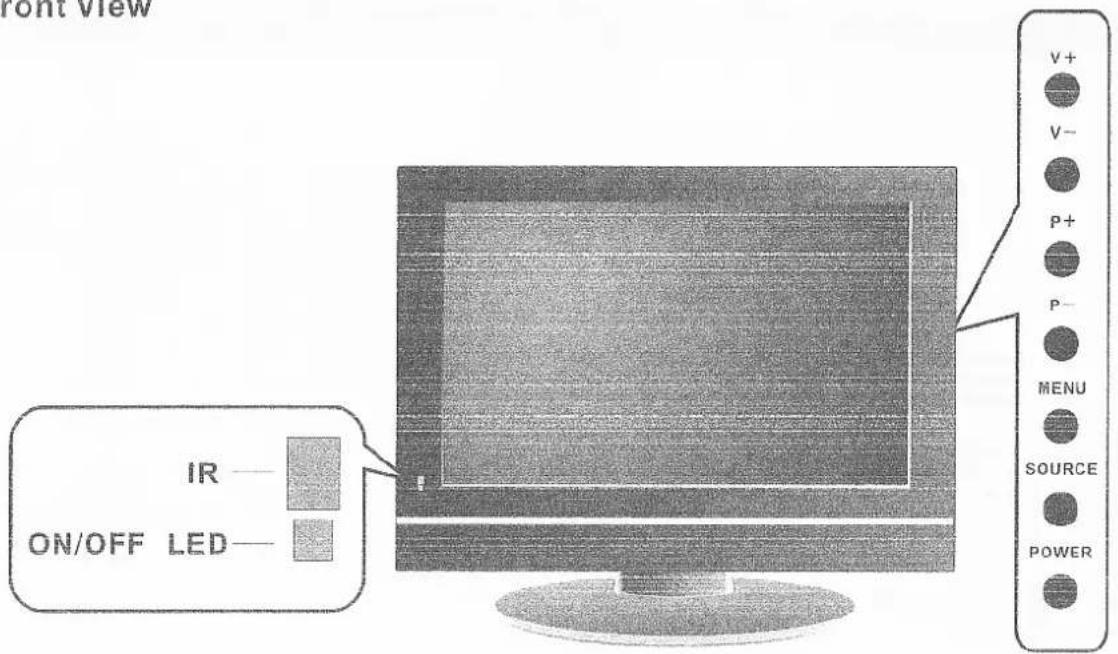
text_image
front view IR ON/OFF LED V+ V- P+ P- MENU SOURCE POWERBack View and Control Connections
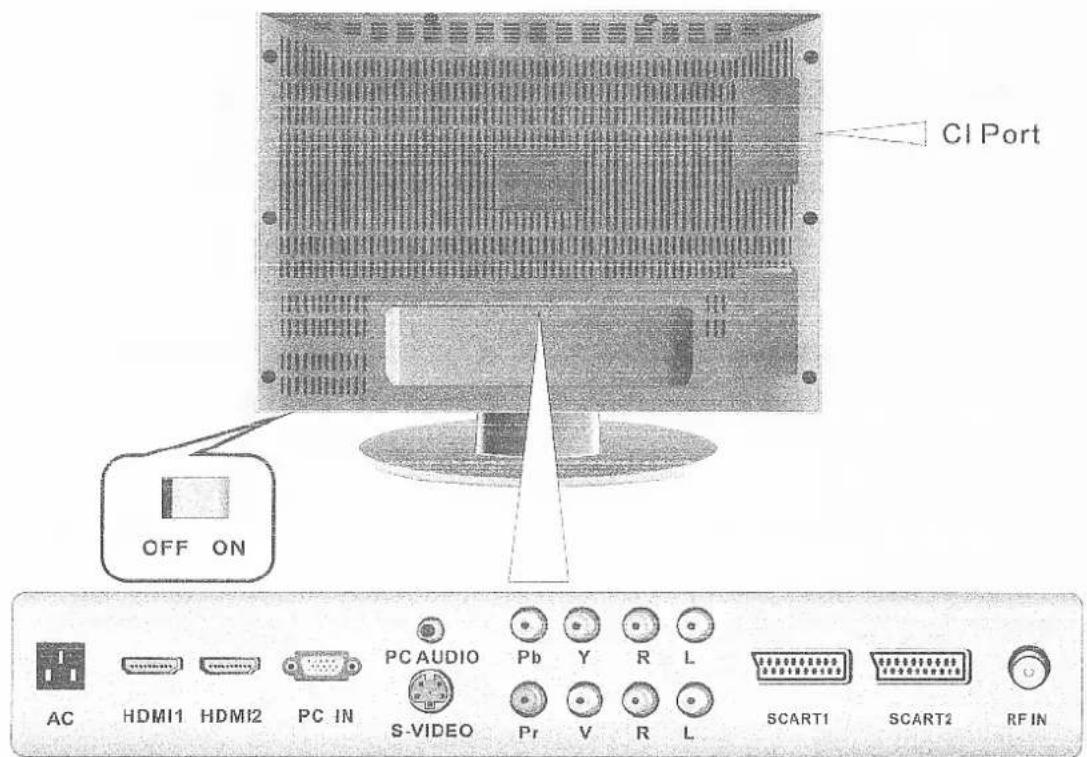
text_image
CI Port OFF ON AC HDMI1 HDMI2 PC IN S-VIDEO PC AUDIO Pb Y R L SCART1 SCART2 RF INAsda Technical helpline phone number: 0845 300 7775
TV INSTALLTION DRAWINGS
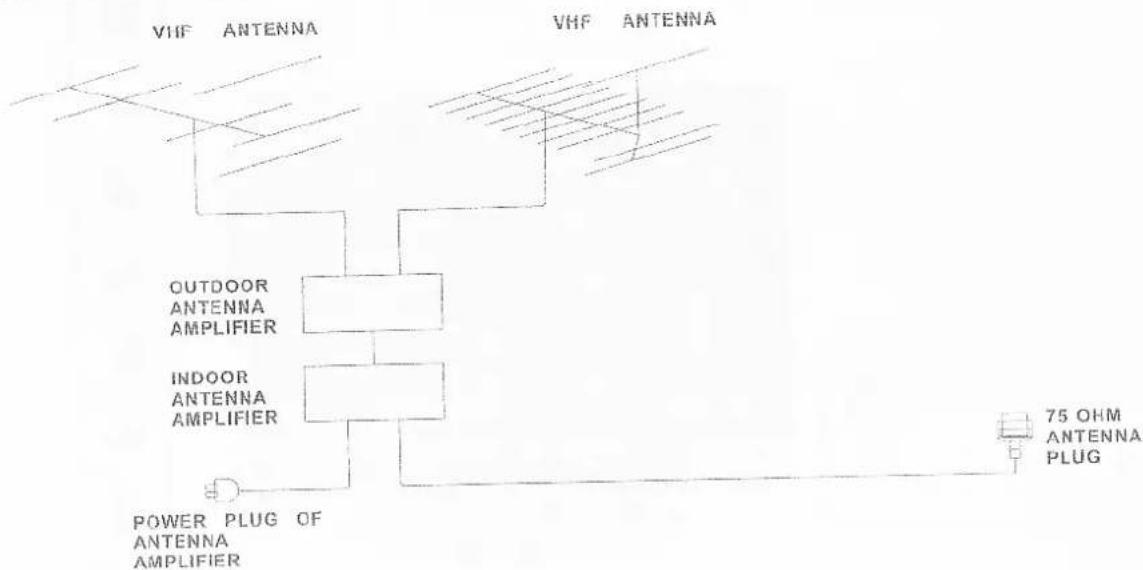
Antenna Connection
flowchart
graph TD
    A["VHF ANTENNA"] --> B["OUTDOOR ANTENNA AMPLIFIER"]
    A --> C["INDOOR ANTENNA AMPLIFIER"]
    B --> D["POWER PLUG OF ANTENNA AMPLIFIER"]
    C --> D
    D --> E["75 OHM ANTENNA PLUG"]
To ensure good picture and sound, a TV antenna system needs to be installed. Contact an antenna installer for advice if required.
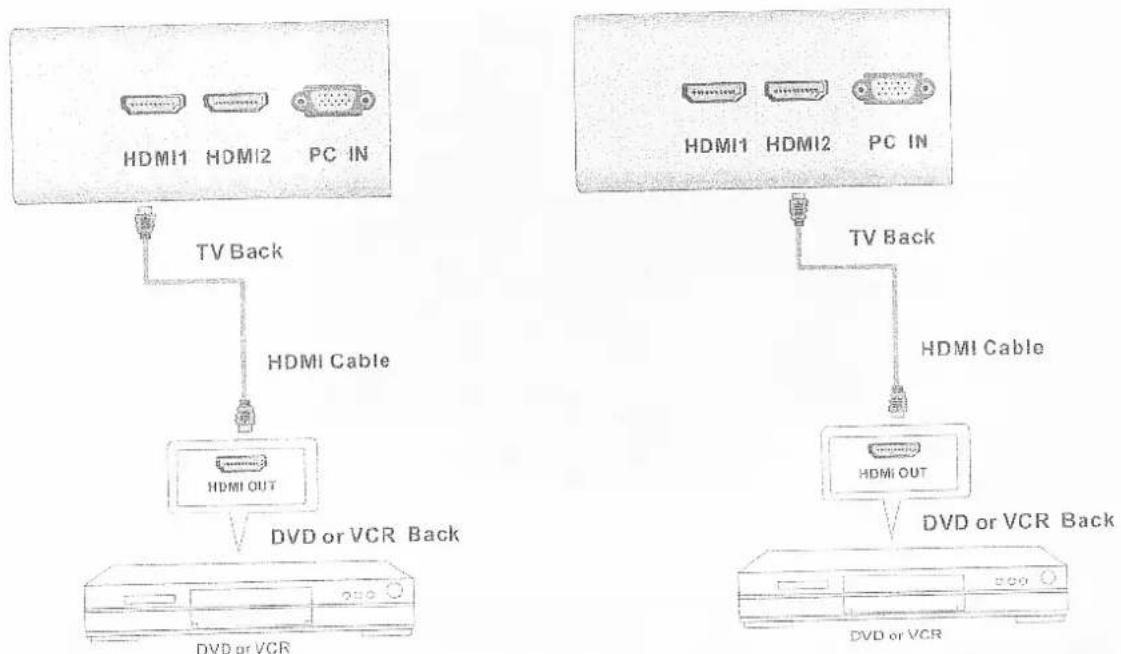
HOME CONNECTION
flowchart
graph TD
    A["HDMI1 HDMI1"] -->|TV Back| B["HDMI OUT"]
    C["HDMI2 HDMI2"] -->|HDMI Cable| D["HDMS"]
    E["PC IN"] --> F["HDMS OUT"]
    G["DVD or VCR"] --> H["HDMS OUT"]
    I["DVD or VCR"] --> J["HDMS OUT"]
    K["TV Back"] --> L["HDMI Cable"]
    M["DVD or VCR Back"] --> N["HDMS OUT"]
    O["DVD or VCR"] --> P["HDMS OUT"]
Connect HDMI output of the DVD to the HDMI input jack on the LCD TV set. Select the HDMI input source using the SOURCE button.
Asda Technical helpline phone number: 0845 300 7775
PC INPUT Connection
text_image
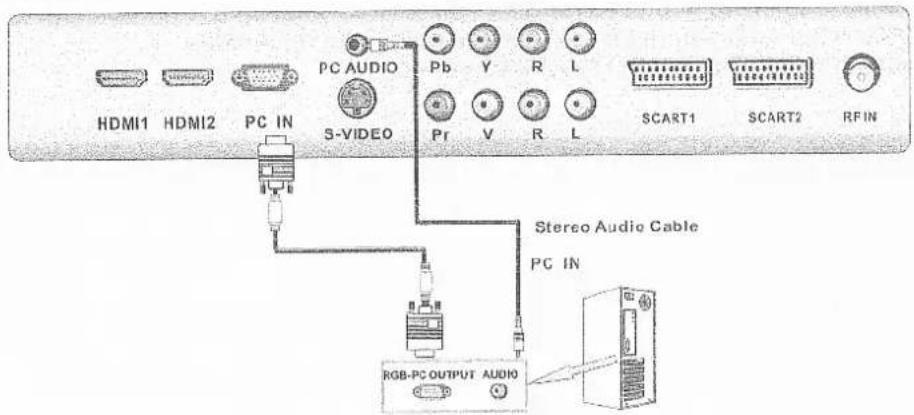
HDMI1 HDMI2 PC IN PC AUDIO S-VIDEO Pb Y R L Pr V R L SCART1 SCART2 RFIN Stereo Audio Cable PC IN RGB-PC OUTPUT AUDIOConnect the RGB output of the PC to the VGA in jack on the set Connect the PC AUDIO output of the PC to the PC AUDIO in jack on the set Select the VGA input source with using SOURCE button.
SEVID: ONE CONNECTOR
text_image
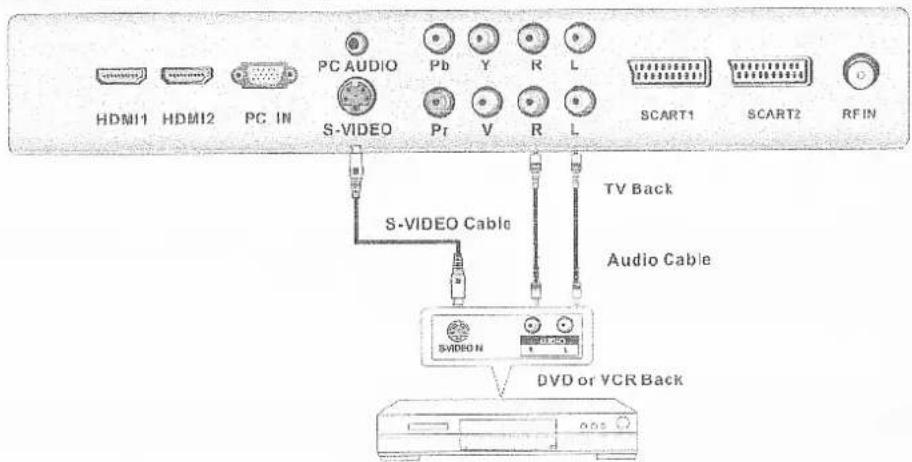
HDMI1 HDMI2 PC IN PC AUDIO Pb Y R L SCART1 SCART2 RFIN S-VIDEO Pr V R L S-VIDEO Cable TV Back Audio Cable DVD or VCR BackDVD or VCR
Connect the S-VIDEO output of the DVD or VCR to the S-VIDEO input on the set. The picture quality is improved; compared to connecting a regular VCR to the video input. Connect the Audio output of the DVD or VCR to the Audio input jacks on the set using the RCA cable.
Select S-VIDEO input source with using the SOURCE button
AVENIONAL ECONOM
text_image
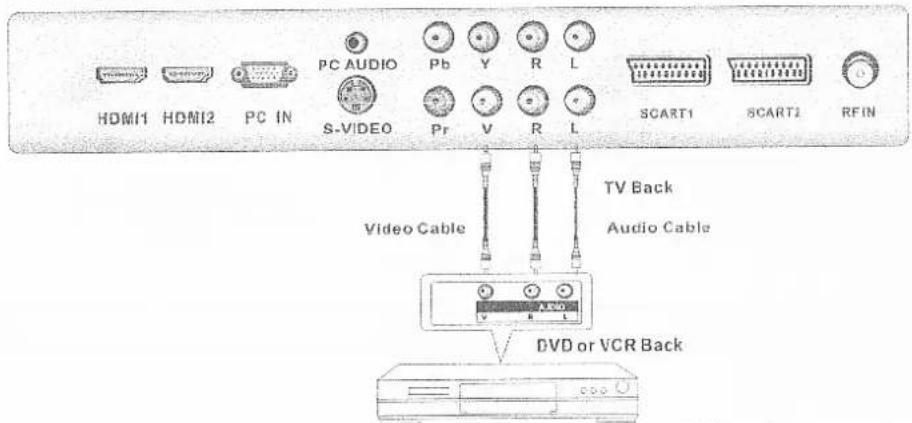
HDMI1 HDMI2 PC IN PC AUDIO Pb Y R L SCART1 SCART2 RFIN S-VIDEO Pr V R L Video Cable TV Back Audio Cable DVD or VCR BackAsda Technical helpline phone number: 0845 300 7775
DVD or VCR
Connect the AV output of the DVD or VCR to the AV input on the set. The picture quality is improved; compared to connecting a regular VCR to the video input. Connect the Audio output of the DVD or VCR to the Audio input jacks on the set using the RCA cable. Select AV input source with using the SOURCE button
YRPHP Connection
text_image
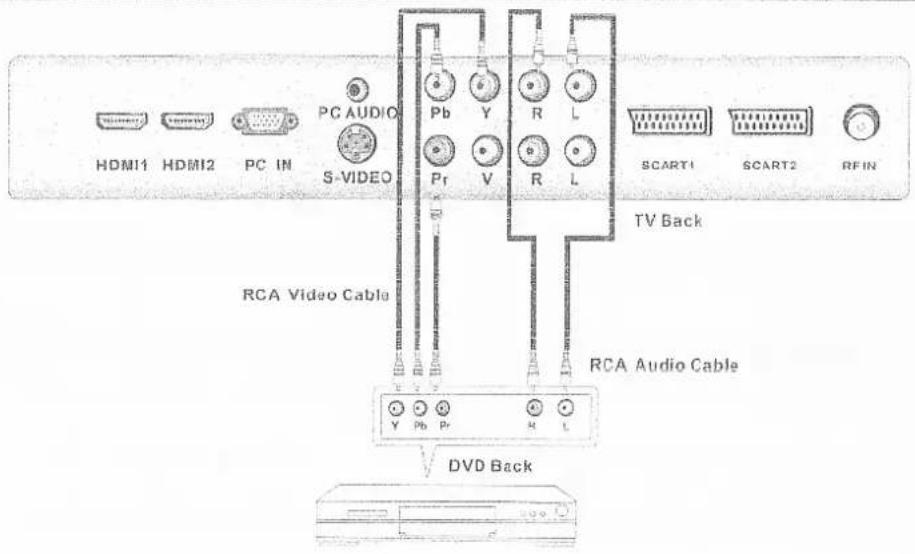
HDMI1 HDMI2 PC IN PC AUDIO S-VIDEO Pb Y R L SCART1 SCART2 RFIN RCA Video Cable TV Back RCA Audio Cable DVD BackConnect the YPbPr output of the DVD or VCR to the YPbPr input on the set. The picture quality is improved; compared to connecting a regular VCR to the video input. Connect the Audio output of the DVD or VCR to the Audio input jacks on the set using the RCA cable. Select YPbPr input source with using the SOURCE button.
STATE POLITION
text_image
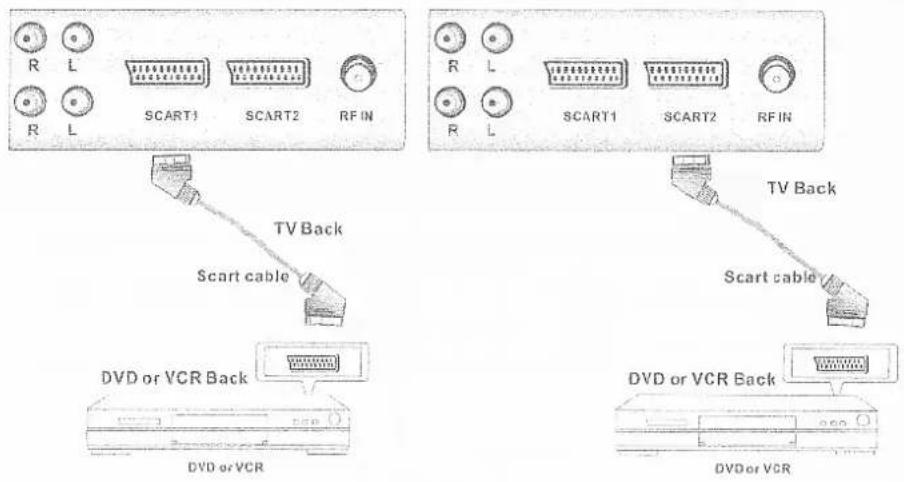
R L R L SCART1 SCART2 RF IN TV Back Scart cable R L R L SCART1 SCART2 RF IN TV Back Scart cable DVD or VCR Back DVD or VCR DVD or VCR Back DVD or VCRConnect the SCART connector on the external video device to the SCART connector on the LCD TV using a SCART cable. SCART operates as both an input and an output, connected using a switchable SCART cable.
Asda Technical helpline phone number: 0845 300 7775
REMOTE CONTROL
Remote control instructions
text_image
POWER MUTE SOURCE PMODE SMODE AUDIO SLEEP +10 TV MENU TV/TEXT MIX CALL V4 V2 SUBTITLE HOLD SIZE REVEAL D.MENU TXT INDEX TXT CANCEL TXT SUBPAGE DVB FAV- DVB FAV DVB FAV+ DVB EXITPOWER
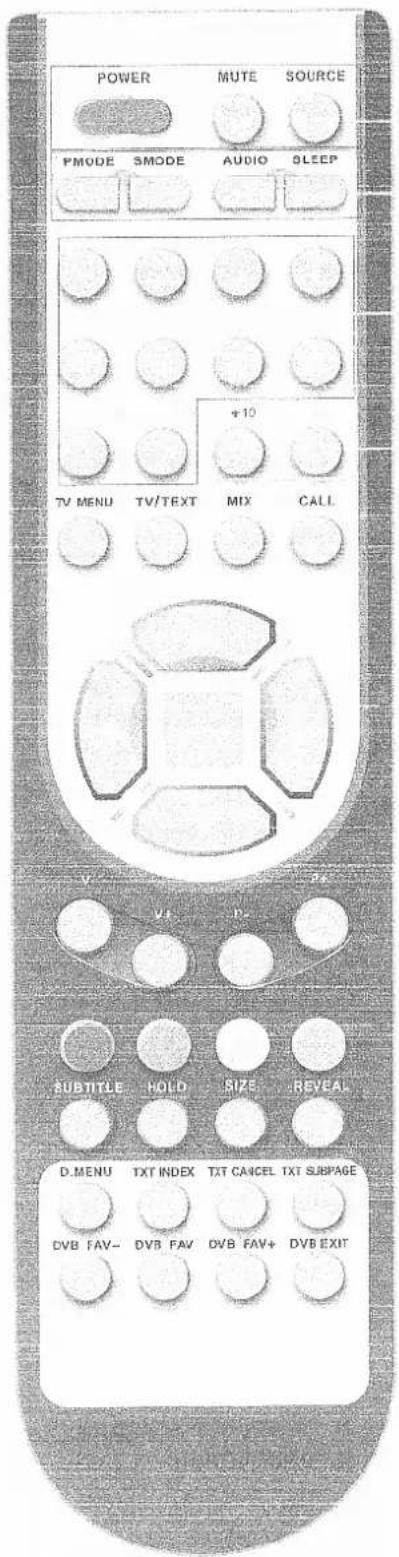
Turn the LCD TV On or Off.
MUTE
Press to mute the sound. Press again or press V+ to un-mute.
SOURCE
Press SOURCE button to list all Inputs/Outputs available on television.
PMODE
Press repeatedly to cycle through the available video picture modes.
SMODE
Press to cycle through the different sound settings.
AUDIO(I/II)
Audio selection button.
SLEEP
Let you select amount of time before your TV turns itself off automatically.
NUMBER BUTTONS
Press 0-9 to select a TV channels.
-/-/-/---
Press this button to enter a program number for multiple program channel such as 3-1, etc.
QV
Return to the previous channel viewed.
text_image
POWER MUTE SOURCE PMODE SNODE AUDIO SLEEP +10 TV MENU TV/TEXT MIX CALL V+ P SUBTITLE HOLD SIZE REVEAL D.MENU TXT INDEX TXT CANCE TXT SUBPAGE DVB FAY- DVB FAV DVB FAV+ DVB EXITTV/MENU
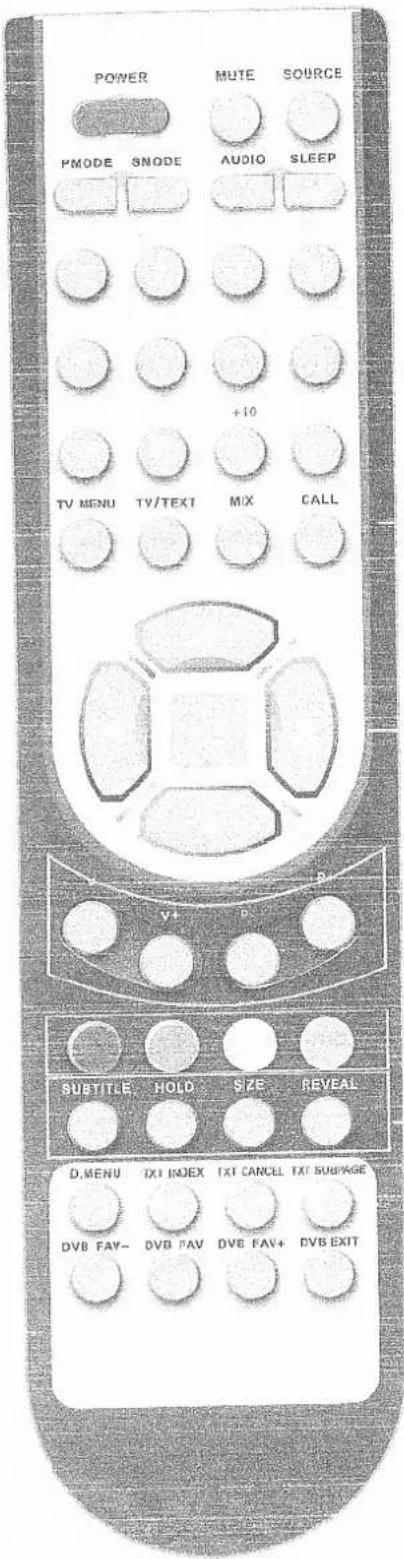
Press to displays the main menu.
TV/TEXT
Press to clears all on-screen displays and returns to TV from any menu.
MIX
TV and TEXT pictures are mixed together on a transparent background.
CALL
Press to display the source and channel information.
THUMBSTICK( ▲/▼/◄/►/OK/ENTER)
Allows you to navigate the on-screen menus and adjust the system settings to your preference in Analogue TV and Digital TV modes.
P+/-
Press to navigate through channels. To scroll quickly through channels, press and hold down either +/-button.
V+/−
Press to increase / decrease the sound level.
COLOR BUTTONS
Select 4 preferred TELETEXT/DVB pages.
SUBTITLE (Closed Captions)
To display subtitles in Digital Television mode.
HOLD
Freeze the picture.
SIZE
Toggles the display between half top page, half bottom page and normal page.
REVEAL
Press to reveal or hide words.
text_image
POWER MUTE SOURCE PMODE SMODE AUDIO SLEEP +10 TV MENU TV/TEXT MIX CALL V U4 P SUBTITLE HOLD SIZE REVEAL D:\MENU IXT INDEX IXT CANCEL IXT SUSPAGE DVB FAV- DVB FAV DVB FAV+ DVB EXITD.MENU (DIGITAL TV)
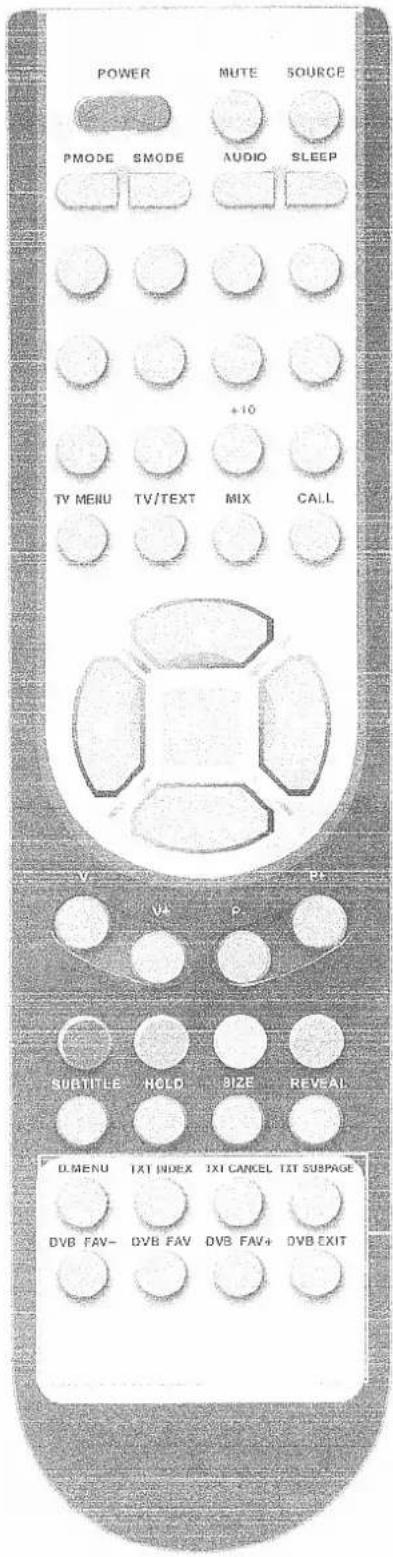
DVB MENU Access (Scanning in Digital stations).
TXT CANCEL
TELETEXT CANCEL.
TXT INDEX
Request Index page when index link is valid.
TXT SUBPAGE
TELETEXT Subpage.
FAV+/FAV/FAV-
Press to increase / decrease your favourite program.
DVB EXIT
EXIT DVB MENU in DVB mode.
Remote Control
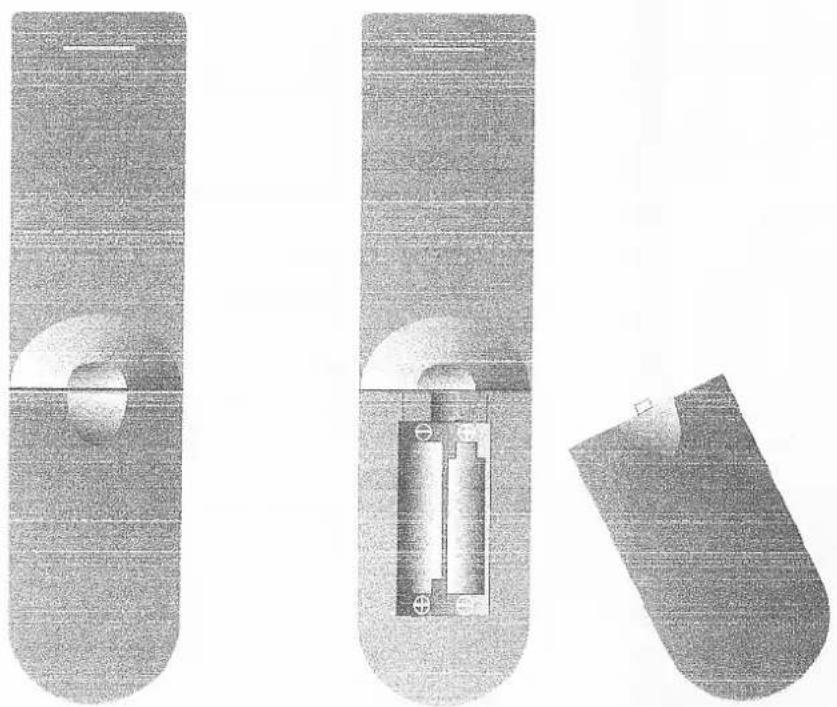
- Open the cover;
- Use AAA size batteries. When inserting the batteries, make sure the polarities are correctly aligned with the markings on the battery compartment;
- Replace the battery cover.
To prevent battery leakage which may result in bodily injury or damage to the remote control:
- Install all batteries correctly, and as marked on the remote control.
- Do not mix batteries:(OLD and NEW or CARBON and ALKALINE, etc)
Remove batteries when the remote is not used for a long time.
ACCESSORIES
- Power Cord;
- One Remote Control;
- Two Batteries 1.5V;
- One User Manual;
- Quick-Start Guide.
Asda Technical helpline phone number: 0845 300 7775
SEARCH menu
Auto Tuning
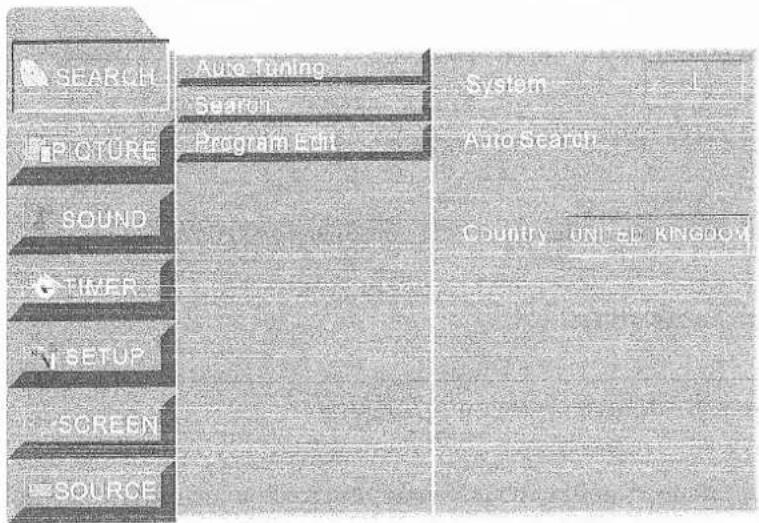
-Press TV MENU to display the OSD menu, ▲/▼ to select the menu SEARCH, and ▶ to enter the submenu.
-Press TV MENU to return to the main menu from the submenu.
text_image
SEARCH PICTURE SOUND TIMER YSETUP SCREEN SOURCE Auto Tuning Search Program Edit System Auto Search Country UNI ED KNOOD-Press ▲/ ▼ to select the selection, ◀/ ▶ to adjust the option as requirement.
-Press OK/ENTER to confirm and press TV MENU to exit the menu.
SYSTEM
It is decided by the item "country"
Auto Search
Press ▶ to start Auto search. When it is auto searching, press TV MENU to return to the preview menu.
Country
Press ◀ / ▶ to select the country as requirement.
Search
text_image
SEARCH A Auto Tuning Search Program Edit SOUND TIMER T SETUP SCREEN SOURCE Menu Channel No: 80 Sound System: 65 Color System: Auto Freq: 150 MHz Manual Search AT: 100 Skip: On Fine: Name:Asda Technical helpline phone number: 0845 300 7775
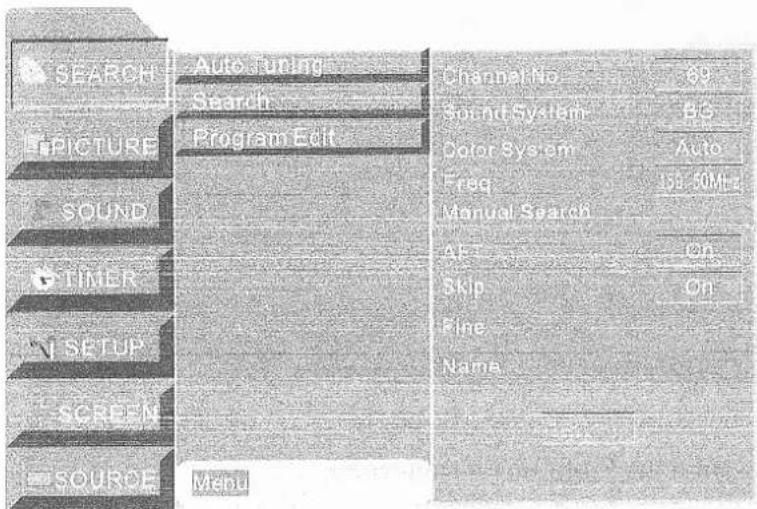
-Press ▲/▼ to select the selection, ◀/▶ to adjust the option as requirement. -Press OK/ENTER to confirm and press TV MENU to exit the menu.
Channel No. Press◀/▶ to select a channel No.
Sound System Press ▶/▶ to select sound system of the program.
Color System Press ◀ / ▶ to select color system of the program.
Freq This item is only for frequency display of the program searching.
Manual Search Press ◀ / ▶ to search backward/forward.
AFT Press ◀ / ▶ to turn on/off Automatic Frequency Control.
Skip Press ◄ / ▶ to turn on/off the function of skip when the function is turn on, the current channel will be skipped when you scan channels with P+/P-button.
Fine Press◀/▶ to fine tune when the signal of the current channel is weak.
Name Press◀/▶ to select the position of word, press▲/▼ to select the letter you want.
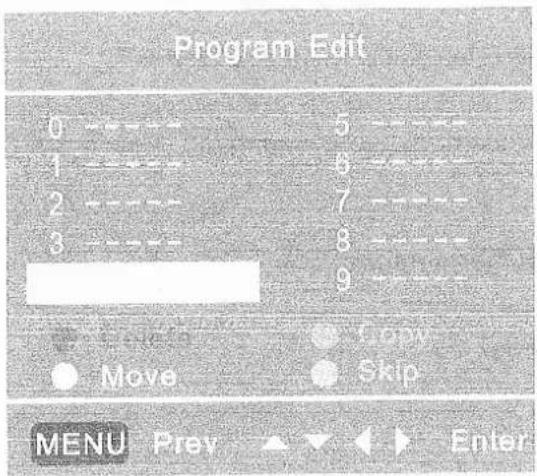
Program Edit
text_image
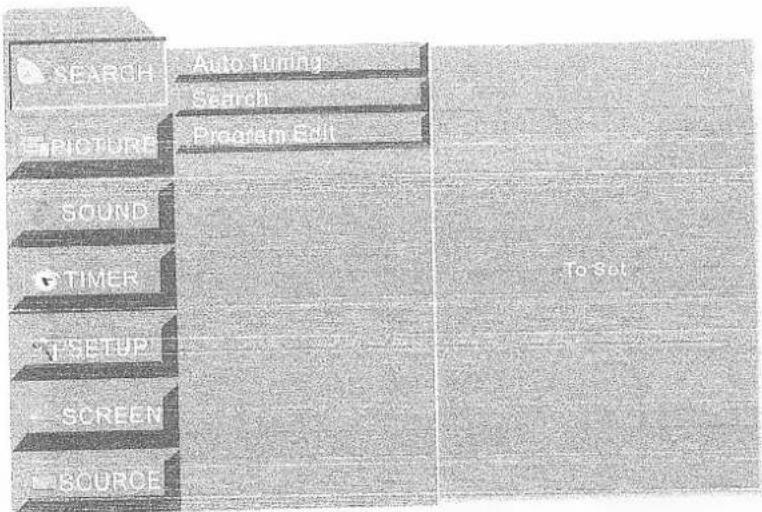
SEARCH Auto Turnover PICTURE Search Program Edit SOUND TIMER TSETUP SCREEN SOURCE To Set-Press OK/ENTER to enter the Program Edit submenu.
Asda Technical helpline phone number: 0845 300 7775
text_image
Program Edit 0 ---- 5 ---- 1 ---- 6 ---- 2 ---- 7 ---- 3 ---- 8 ---- 9 ---- Move Skip MENU Prev EnterDelete
Press ▲/▼/◀/▶ to select the channel you want to delete, and press OK/ENTER to confirm. Then press the RED on the remote control, and the color of channel will change to red. Press the RED again to delete, or press TV MENU to cancel.
Copy
Press ▲/▼/◄/► to select the channel you want to copy, and press OK/ENTER to confirm. Then press the GREEN on the remote control, and the color of channel will change to green. then use ▲/▼/◄/► to select the channel you want to be copied, and press the GREEN again to copy, or press TV MENU to cancel.
Move
Press ▲/▼/◄/► to select the channel you want to move, and press OK/ENTER to confirm. The press the YELLOW on the remote control and the color of the channel will change to yellow. Use ▲/▼/◄/► to change the position of channel you want, and press the YELLOW again to move, or press TV MENU to cancel.
Skip
Press ▲/▼/◄/► to select the channel you want to skip, and press OK/ENTER to confirm, then press the CYAN on the remote control, and the color of the channel will change to CYAN(means this program is skipped). Press the CYAN again to skip or press TV MENU to cancel.
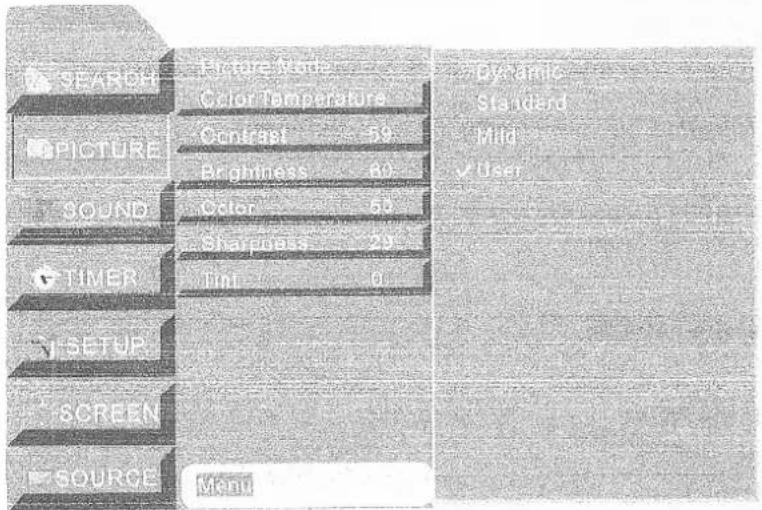
PICTURE menu
text_image
SEARCH PICTURE SOUND TIMER SETUP SCREEN SOURCE Picture Mode Color Temperature Contrast 59 Brightness 60 Color 50 Sharpness 20 Tint 0 Menu Dynamic Standard Mild UserAsda Technical helpline phone number: 0845 300 7775
TV Operation
-Press TV MENU to display the OSD menu, ▲/▼ to select the menu PICTURE, and ▶ to enter the submenu. -Press TV MENU to return to the main menu from the submenu.
Picture Mode Press ▲/▼ to select picture mode.Dynamic,Standard,Mild,User.Press OK/ENTER to confirm and return to preview menu
Colour temperature
Press ▲/▼ to adjust the colour temperature.
Contrast
Press◀ / ▶ to adjust the contrast.
Brightness
Press ◀ / ▶ to adjust the brightness.
Color
Press◀ / ▶ to adjust the color.
Sharpness
Press ◀ / ▶ to adjust the sharpness
Tint
Press ◀ / ▶ to adjust the tint(only used in NTSC mode.).
SOUND menu
text_image
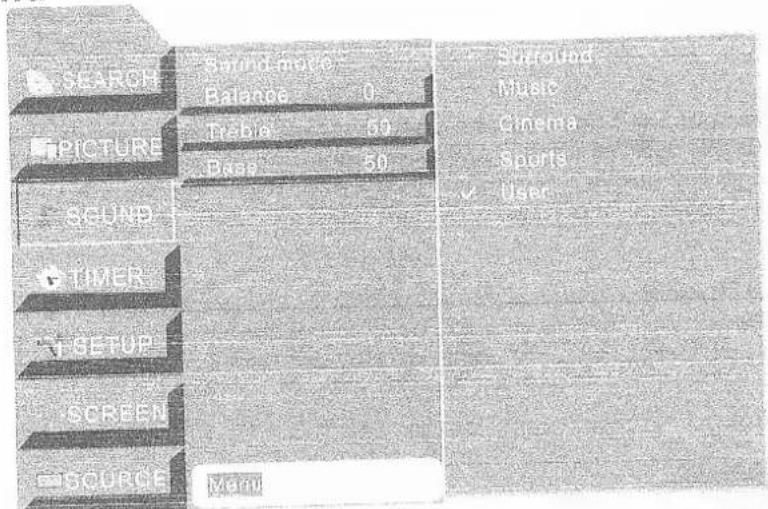
SEARCH PICTURE SOUND TIMER SETUP SCREEN SOURCE Sound name: Balance 0 Treble 50 Base 50 Vom SCHOOL Music Cinema Sports User-Press TV MENU to display the OSD menu, ▲/▼ to select the menu SOUND, and ▶ to enter the submenu. -Press TV MENU to return to the main menu from the submenu.
Sound Mode
Sound Mode Press ▲/▼ to select sound mode. Surround, Music, Cinema, Sport, User. Press OK/ENTER to confirm and return to preview menu
Balance
Press ◀ / ▶ to adjust the balance.
Treble
Press ◀ / ▶ to adjust the treble.
Bass
Press ◀ / ▶ to adjust the bass.
Asda Technical helpline phone number: 0845 300 7775
TIMER menu
text_image
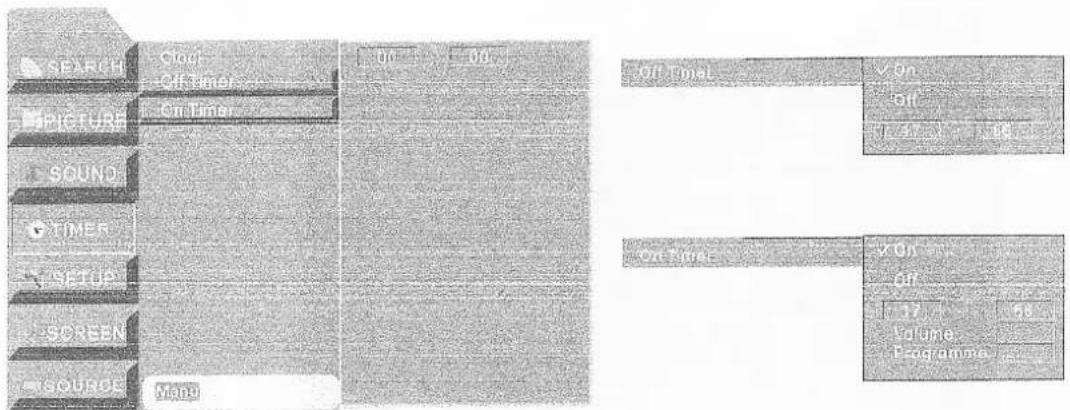
SEARCH PICTURE SOUND TIMER SETUP SCREEN SOURCE Cloud Off Time On Time Menu Off Time On Time Off Volume Programme-Press TV MENU to display the OSD menu, ▲/▼ to select the menu TIMER, and ▶ to enter the submenu. -Press TV MENU to return to the main menu from the submenu.
Clock current time
Press ◀ / ▶ to select hour or minute, press ▲/ ▼ to setup the time.
Off timer
Press ▲/▼ to select On, and press ▶ to enter the setup item, use ▲/▼ / ◀/▶ to setup the time you want the TV to be turn off.
On timer
Press ▲/▼ to select On, and press ▶ to enter the setup item, user ▲/▼/◀/▶ to setup the time, volume and program you want the TV to be turn on.
SETUP menu
text_image
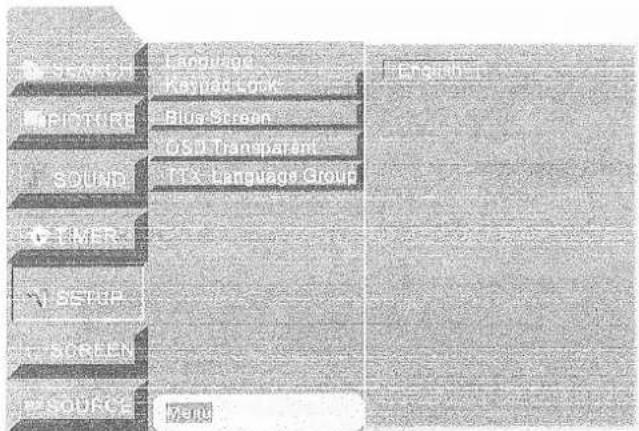
Language Blueprint Blueprint Blue Screen OSU Transparent Language Group Language Microsoft Microsoft Microsoft Language Group Menu-Press TV MENU to display the OSD menu, ▲/▼ to select the menu SETUP, and ▶ to enter the submenu. -Press TV MENU to return to the main menu from the submenu.
Language
Press ▲/▼ to select the OSD language.
Keypad lock
Press ▲/▼ to turn on/off the keypad lock.
Blue Screen
Press ▲/▼ to turn on/off the blue screen.
OSD Transparent
Press ◀ / ▶ to adjust the OSD transparent.
TTXLanguage Group
Press ▲/▼ to select the Teletext language.
Asda Technical helpline phone number: 0845 300 7775
SCREEN menu
text_image
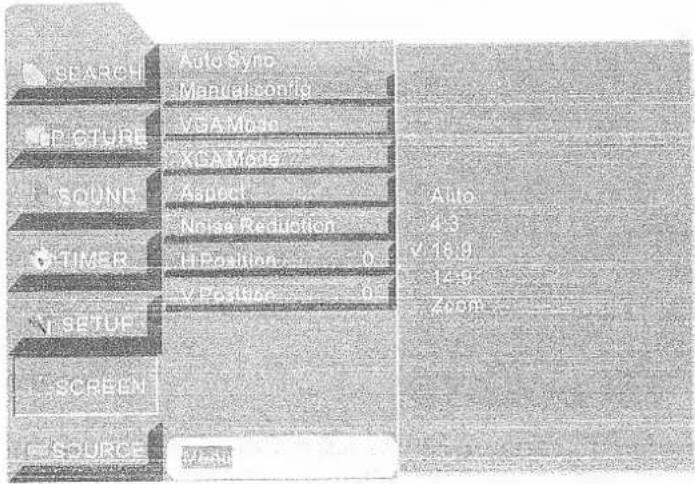
SEARCH Auto Sync Manual control PICTURE VGA Mode XCAM Mode SOUND Aspect Noise Reduction TIMER HP Position 0 V Position 0 RESET SCREEN SOURCE Auto 4:3 V 16:9 14:9 2008-Press TV MENU to display the OSD menu, ▲/▼ to select the menu SCREEN, and ▶ to enter the submenu.
-Press TV MENU to return to the main menu from the submenu.
Auto Sync
Press▶ to auto config.
Manual config
Press ▲/▼ to select Phase, Clock, H. Position, and press ◀/▶ to adjust (in VGA source).
VGA mode
Press ▲/▼ to select the definition, and press OK/ENTER to confirm(in VGA source).
Aspect
Press ▲/▼ to select the ratio of the screen, and press OK/ENTER to cofirm.
Noise Reduction
Press ◀ / ▶ to turn on/off the function of noise reduction.
H./V. H./P.Position
Press ◀ / ▶ to adjust the picture's position.
SOURCE menu
text_image
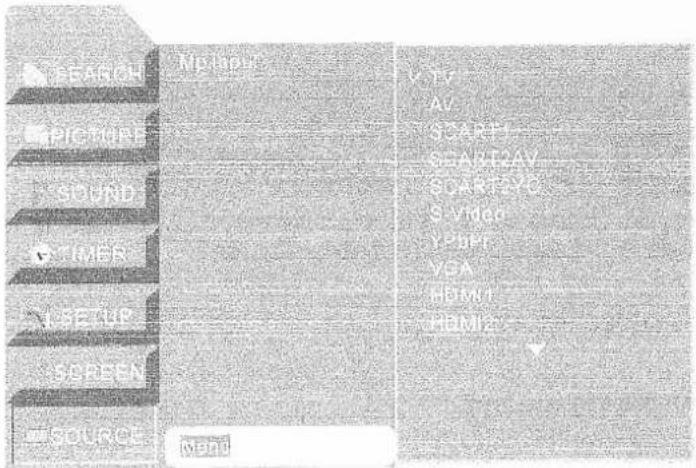
STATION PICTURE SOUND IMES SETUP SCREEN TV source Multi- V-FF AV START SAVE AV SOAREY Video VAPP VGA HDMI HDMI-Press TV MENU to display the OSD menu, ▲/▼ to select the menu SOURCE, and ▶ to enter the submenu.
-Press TV MENU to return to the main menu from the submenu.
MP input
Press ▲/▼ to select the input source of the TV, and press OK/ENTER to confirm and exit the menu.
Asda Technical helpline phone number: 0845 300 7775
DVB OPERATION
Common Interface
If you have inserted the CI card to the TV, you can see the information of the it.
text_image
Scanned text of contract clauses with partially visible title and horizontal lines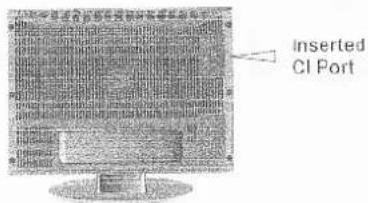
text_image
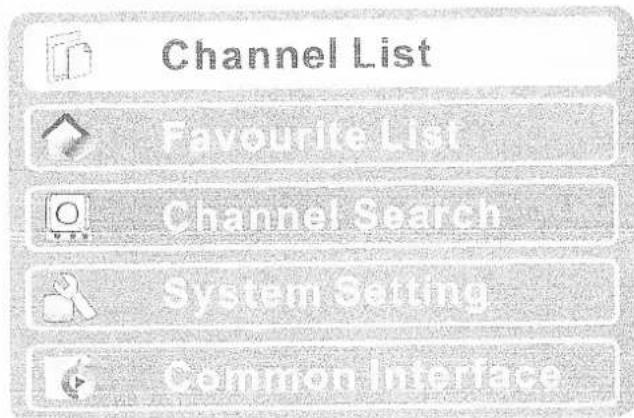
Inserted CI Port-Press DVB MENU to display the main menu in DVB mode as below:.
text_image
Channel List Favourite List Channel Search System Setting Common Interface-Press ▲/▼ button to select the option that you want to adjust and then use the OK/ENTER button to confirm it.
-Press DVB EXIT again to exit the main menu.

text_image
Scanned text of a document with dense, illegible characters and symbols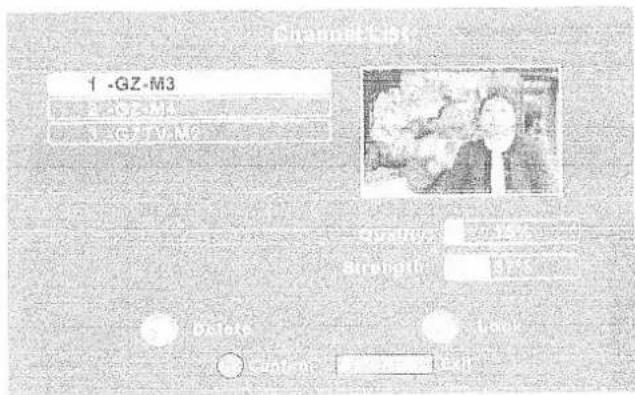
text_image
1 -GZ-M3-In this menu, you can delete or lock the channel which you select.
-Press ▲/▼ button to select the one of channel on the channel list, press the yellow button on the remote control to delete it.
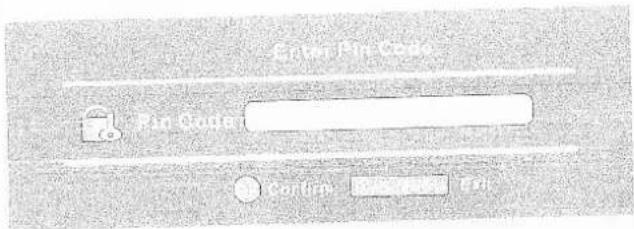
-Press ▲/▼ button to select the one of channel on the channel list, press the blue button on the remote control to lock it, it will display a pin code menu on the screen as below, the channel will be locked when you enter the correct pin code.
Asda Technical helpline phone number: 0845 300 7775
text_image
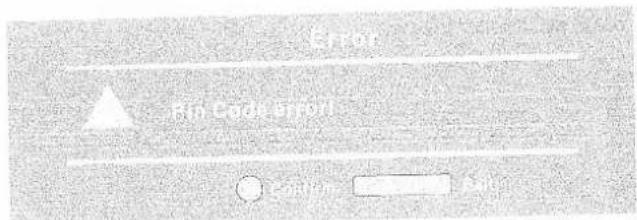
Scanned image of a document with partially visible text and two labeled boxes, likely from a form or template.-The default pin code is 888888, you can change it in the system setting menu. If the pin code is not correct the system will prompt you as below:
text_image
Scanned document with faint text and a central diagram, possibly a form or report with annotations.
text_image
Scanned text of a document with dense, illegible characters and a horizontal line at the bottom.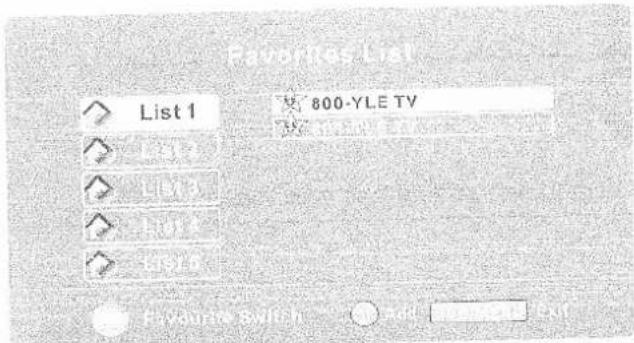
text_image
Favorites List List 1 800-YLE TV VCC VCC VCC VCC VCC VCC VCC VCC VCC VCC VCC VCC VCC VCC VCC VCC VCC VCC VCC VCC VCC VCC VCC VCC VCC VCC VCC VCC VCC VCC VCC VCC VCC VCC-In this menu, you can delete or add the channel you favorite to the favorite list.
-Press ▲/▼ button to select the desired service.
Press the red button to cycle through the available favorite list.
-Press the OK/ENTER button to add/remove it and press D.MENU to exit.

text_image
Scanned text of a document with faint, partially illegible characters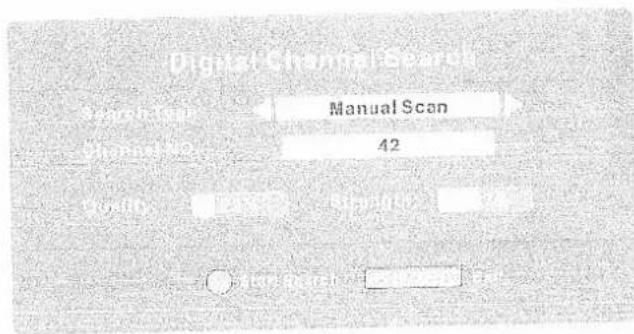
text_image
Digital Scan Manual Scan 42Asda Technical helpline phone number: 0845 300 7775
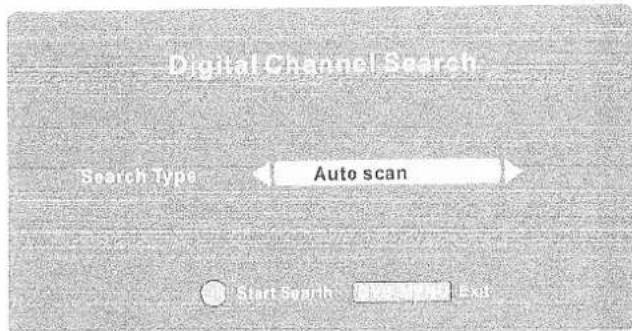
-Press ◀ / ▶ button to select the one of search type as manual scan or auto scan.
text_image
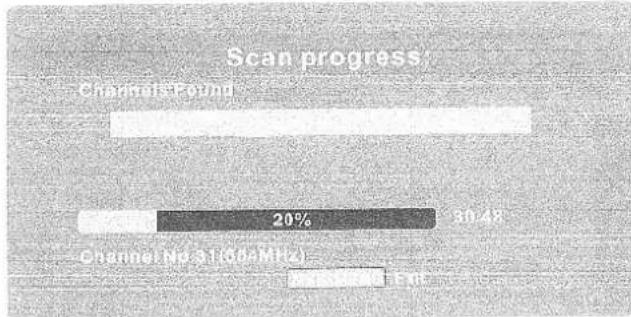
Digital Channel Search Search Type Auto scan Start Search Exit-Press OK/ENTER button to start search and D.MENU button to exit it.
text_image
Scan progress Channel found 20% 30.48% Channel No 31(50eMIz)
text_image
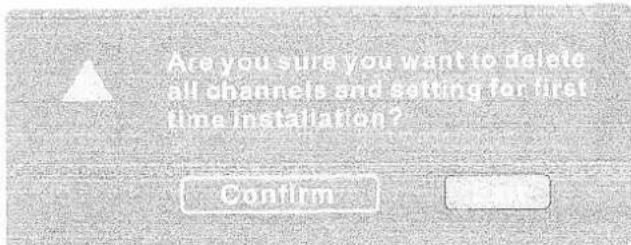
SALADY WALAWA WALAWAFirst Time Installation
text_image
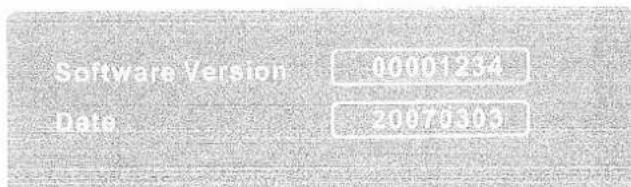
Are you sure you want to delete all channels and setting or set time installation? PositionSystem Information
text_image
Software Version 000924 Date 2017/05Asda Technical helpline phone number: 0845 300 7775
DVB Operation

text_image
Scanned text of a document with dense, illegible handwritten or printed characters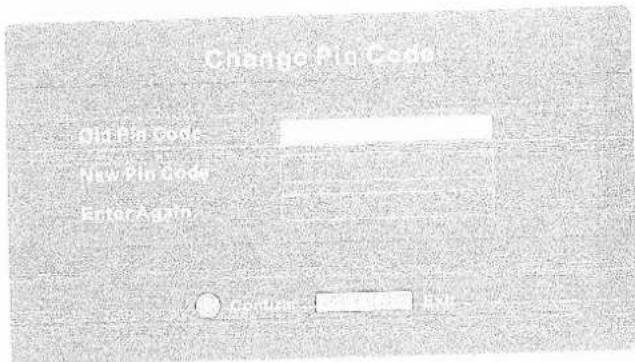
text_image
Charge Point Charge Point New Pin Price New Pin PricePress OK/ENTER button on the remote control to enter the pin code.
-Press OK/ENTER button to confirm it.

text_image
Scanned text of a document with dense, illegible characters and horizontal lines, likely a form or official record.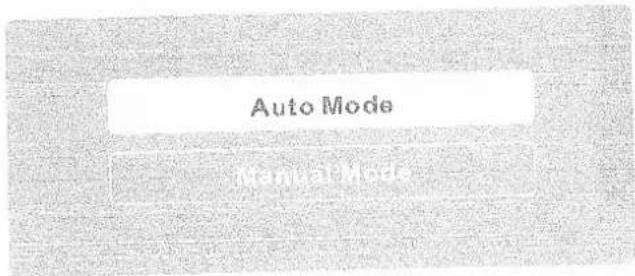
text_image
Auto Mode-There have two upgrade type as auto mode and manual mode, you can press ▲/▼ to select one of it.
text_image
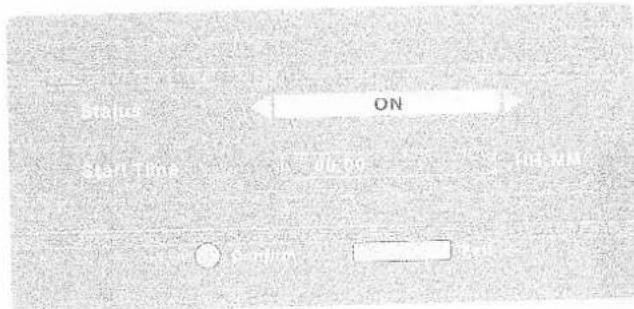
ON Tart line Tart line-Press ◀/▶ to select one of the ON or OFF and then press OK/ENTER to confirm it.
text_image
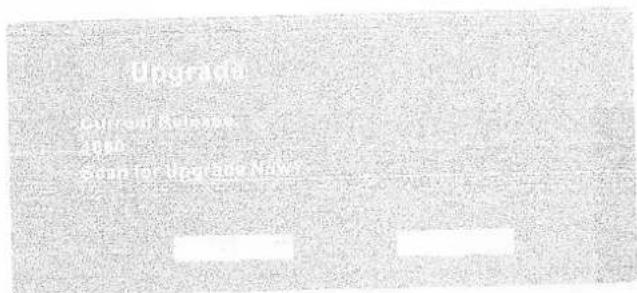
Scanned text of a formal letter or document with dense, illegible handwritten or typed characters.-Use ◀ / ▶ to start scan or cancel it.
Asda Technical helpline phone number: 0845 300 7775
图 1-2 中, 12 是 12 , 12 是 12 , 12 是 12 , 12 是 12 。
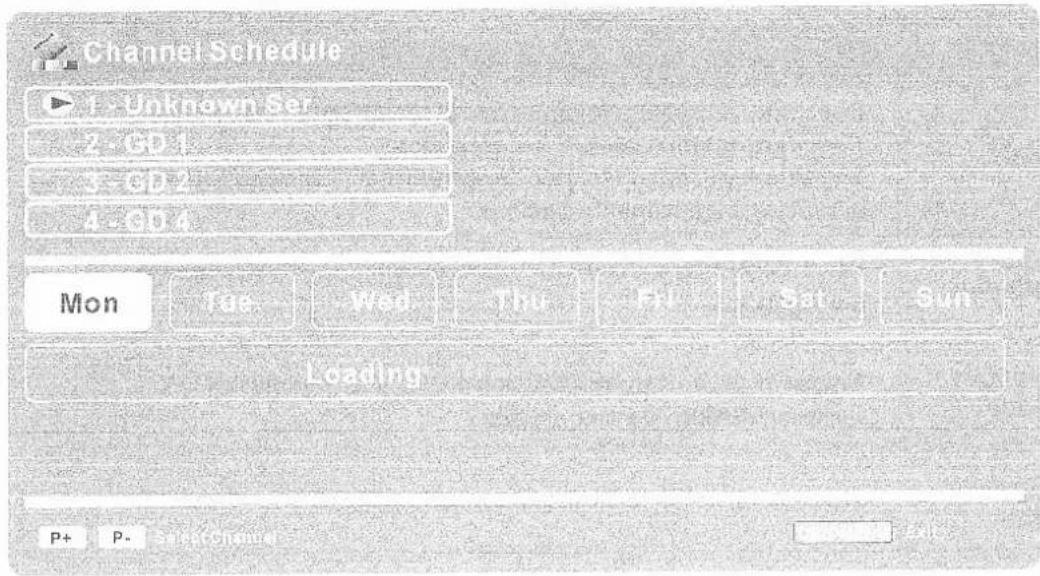
-Use EPG button on the remote control to display the EPG menu directly as below:
text_image
Channel Schedule ▶ Unknown Ser 2:03 4:03 4:04 Mon Fed Wed Thu Fri Sat Sun Loading P+ P- 5.1x Control[1] 2014年1月1日(星期二)下午13:00
- Press the D. MENU on the remote control or on the front panel to bring up the main menu on the screen and use ▲ / ▼ to select the Common Interface menu.
- Press the OK/ENTER button, the information of the card will be displayed if you insert an available card. Press the OK/ENTER button again, you can get more details of the card.
![Onn XQ-2623 - [1] 2014年1月1日(星期二)下午13:00 - 1](/content/2026/05/784835/images/b48559ec6873cfc7501d9f2de1af9228025e429a3832b59bbdfe9d63b031feea.jpg)
text_image
Scanned document page with dense text, tables, and a small circular diagram at the bottom right.NOTE:
After inserting an available card, the information of the card will be showed in the menu, otherwise, information it will show "Empty".
Asda Technical helpline phone number: 0845 300 7775
TROUBLESHOOTING AND ADVICE
Please check the TroubleShooting Guide.
| No signal | Control |
| No signal | Check that all cables and power cord's are plugged in correctly. Check the Antenna cable is securely fitted. Check that you have selected the correct Input, use the SOURCE button to navigate Input selections. |
| No colour shades | Select TV MENU on the RCU. Adjust the contrast, the colour and the brightness |
| Double or multiple display image | May be the result of an electrical wave disturbance from another TV, Computer, Gaming machine or Radio |
| Snow on the screen in TV Mode | The cables of the antenna are not correctly plugged in correctly. |
| The remote control does not work | Check the batteries order and alignment. Check that the IR of the remote control is not covered by anything. |
| No Closed Captions | Not all programs carry Closed Captions. Check that the program you are watching carries Closed Captions |
| No sound | Make sure that you have not pressed the MUTE button on the panel or Remote Control. Check the volume level of the LCD TV. Check the volume level and Mute key on any device you have input to the LCD TV. Check the Audio button on the Remote Control. |
* Subject to change without notice.
SPECIFICATIONS
| Screen Size | 26 Inch | |
| Display Type | TFT LCD | |
| Resolution(Pixel) | 1366 X 768 | |
| Brightness | 500cd/m² | |
| Color | 16.2M | |
| Contrast Ratio | 800:1 | |
| View Angle(H/V) | 160/150 | |
| Aspect Ratio | 16:9 | |
| Power Source | AC 110-240V~ 50/60Hz 120W | |
| TV System | PAL BG/DK/I SECAM BG/DK/L/L' | |
| Video Input Format | PAL/NTSC | |
| Antenna Input | Standard antenna socket 75Ω | |
| Audio Output | L/R 10WX2 | |
| Input | Video | Video 1. 0Vp-p75Ω; RCA |
| S-Video | Y:1.0Vp-p±3db C:0.3Vp-p±3db | |
| PC | 640X480/60Hz 800X600/60Hz 1024X768/60Hz | |
| Audio (Video/S-Video/PC) | R/L200mVrms (max3. 0Vp-p) 20ΩkRCA | |
| Weight | 13.5kg | |
| Dimensions (with stand) | 778X301X637mm | |
This manual is only for your reference, any change to the design and specification will not be advised.
Asda Technical helpline phone number: 0845 300 7775
natural_image
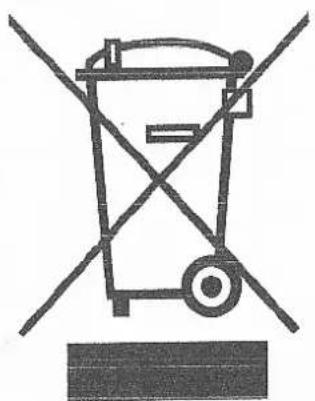
Simple line drawing of a trash bin with crossed lines indicating no waste or discharge (no text or symbols)"This symbol is known as the 'Crossed-out Wheelie Bin Symbol'. When this symbol is marked on a product, it means that the product should not be disposed of with your general household waste. Only discard electrical/electronic items in separate collection schemes which cater for the recovery and recycling of the materials contained within. You co-operation is vital to ensure the success of these schemes and for the protection of the environment."
28 day no quibble refund
If you are not desired by your project, simply bring it in art. I can 20 days for a complete school (I can't forget) individual of the school's program to implement the example course or author of paper cable and paid agency along with your receipt or other principal practice.
FREE 1 year guarantee
All on the information are provided by a mail by your ASIS unauthorized from Tuesday to July, in the whole, by mail that your product is fully or fully as simple. In order to take up, there's only what you should do
1 First call on customer help to use the
name by the help to help with the problem
2
3
Customer Helpline 08453007775
- May 16, Friday 5am - Spot Saturday (4:30) - 10 PM Sunday 1 AM - 4 PM - ENS corrected to local fans
CE
Produced for
ASDA Stores Ltd
Leeds
LS11 5AD