XQC-1519DVC - Fernseher Onn - Kostenlose Bedienungsanleitung
Finden Sie kostenlos die Bedienungsanleitung des Geräts XQC-1519DVC Onn als PDF.


Benutzerfragen zu XQC-1519DVC Onn
0 Frage zu diesem Gerät. Beantworten Sie die, die Sie kennen, oder stellen Sie Ihre eigene.
Eine neue Frage zu diesem Gerät stellen
Laden Sie die Anleitung für Ihr Fernseher kostenlos im PDF-Format! Finden Sie Ihr Handbuch XQC-1519DVC - Onn und nehmen Sie Ihr elektronisches Gerät wieder in die Hand. Auf dieser Seite sind alle Dokumente veröffentlicht, die für die Verwendung Ihres Geräts notwendig sind. XQC-1519DVC von der Marke Onn.
BEDIENUNGSANLEITUNG XQC-1519DVC Onn
ONN
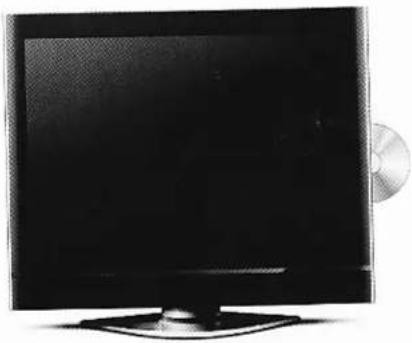
15" LCD TV
With DVD &DVB-T Combo
natural_image
Black-and-white photo of a flat-screen computer monitor with a CD on the right side (no visible text or symbols)Model: XQC-1519DVC
USER'S MANUAL
Read this manual carefully and retain for future reference IMPORTANT: Retain these instructions for future reference

natural_image
Completely blank white image with no visible content, text, or symbols.
"This symbol is known as the 'Crossed-out Wheelie Bin Symbol'. When this symbol is marked on a product, it means that the product should not be disposed of with your general household waste. Only discard electric call/electronic items in separate collection schemes which cater for the recovery and recycling of the materials contained within. You co-operation is vital to ensure the success of these schemes and for the protection of the environment."
28 day no quibble refund
FREE 1 year guarantee
Customer Heipline 0845 300 7775
CE
Produced for
ASDA Stores Ltd
Leeds
LS11 SAD
Asda Technical helpline phone number: 0045 300 7775
Contents
| 1 | PREFACE | 3 | |
| 2 | SAFETY PRECAUTIONS | 3 | |
| 3 | IN THE CARTON | 5 | |
| 4 | FRONT BACK CONNECTIONS OF LCD | 6 | |
| 5 | TV INSTALLTION DRAWINGS | Power Cord ConnectionAntennas ConnectionSCART ConnectionVIDEO ConnectionS-Video ConnectionVGA Connection | 778899 |
| 6 | REMOTE CONTROL | Remote control instructions in TV modeRemote control instructions in TELETEXT modeRemote control instructions in DVB modeRemote control instructions in DVD modeRemote control setup | 1011121314 |
| 7 | ACCESSORIES | 14 | |
| 8 | TV OPERATION | First Time InstallationTV InformationVIDEO MENU optionsAUDIO MENU optionsSETUP MENU optionsSETUP menu of TV inputSETUP menu of VGA inputSETUP menu of s-video inputSETUP menu of SCART inputTIMER MENU optionsFUNCTION MENU options | 1516161718192021212122 |
Asia Technical hotline phone number: 0845-308-1775
Contents
| 9 | DVB OPERATION | CI Card options | 24 |
| FUNCTION MENU options | 24 | ||
| Program List | 24 | ||
| DVB SETUP MENU options | 25 | ||
| EPG options | 26 | ||
| 10 | DVD OPERATION | Basic operation | 27 |
| MP3/JPEG Playback | 27 | ||
| Function Settings | 28 | ||
| DVD Function General setup | 28 | ||
| System Setup | 28 | ||
| Language Setup | 31 | ||
| Audio Setup | 32 | ||
| Dolby Digital Setup | 33 | ||
| 11 | TROUBLESHOOTING AND ADVICE | 34 | |
| 12 | SPECIFICATIONS | 35 |
Asda Technical helpline phone number: 0845 380 7775
Specifications
12. SPECIFICATIONS
| Screen Size | 15 Inch | |
| Display Type | TFT LCD | |
| Resolution(Pixel) | 1024 X 768 | |
| Aspect Ratio | 4.3 | |
| AC INPUT | AC110-240V 50/60HZ DC12V Adapter 48W | |
| TV System | PAL/SECAM | |
| Video Input Format | PAL/NTSC | |
| Antenna Input | Standard antenna socket 75Ω | |
| Audio Output | L/R 2X3W | |
| Input | Video | 1.0Vp-p +/-5%; RAC |
| S-Video | S-Y: 0.714Vp-p +/-5%; S-C: 0.266Vp-p +/-5% | |
| SCART | Full | |
| PC | 640X 480/60Hz 800X 600/60Hz 1024X 768/60Hz | |
| Audio (Video/S-Video PC) | (RMS) TYP 1.0V MAX 1.3V RAC | |
| Audio (SCART) | (RMS) TYP 1.0V MAX 1.3V | |
| Output | SCART Video | Video 1.0Vp-p +/-5% |
| SCART Audio L/R | (RMS) TYP 500mv | |
| Disc Physical Format | DVD/CD/VCD/MP3/JPEG/CD-R/RWDVD+R/RW | |
| DVD Video Output Format | PAL/NTSC | |
| Weight | 5kgs | |
| Dimensions (with stand) | 402(L)X418(H)X210(W)mm | |
★ This manual is only for your reference, any change to the design and specification will not be advised.
Asda Technical beligline phone number: 0545 389 7776
Troubleshooting and advice
11 TROUBLESHOOTING AND ADVICE
Please check if you can solve the troubleshooting by yourself.
| Troubleshooting | Control |
| No signal | Please check that all cables and cord's are correctly plugged in. |
| No color shades | Adjust the contrast, the color and the brightness |
| Stain show on the screen. | Maybe result from a lighting signal from car, motor, neon light and other electrical devices or appliances. |
| Double or multiple display image | Maybe the result of an electrical wave disturb from other TV, Computer and Game machine or Radio. |
| Snow on the screen | The cables of the antenna are not correctly plugged in. |
| The remote control does not work | Please check the batteries order and alignment. Check that the IR of the remote control is not hidden by something. |
| "Zip" made noise on TV cover | Even if the display image is correct, the noise may come from an unsteady fixation of the panel. |
| No sound | Make sure that you have not press the MUTE button of the panel or of the remote control. |
| No DVD | Make sure if the TV Set have been switched to DVD mode |
| DVD player not working properly | Ensure disc is correctly inserted into the player. Ensure the disc does not damaged and with correct format. Please wait patiently as some discs need longer time to play. |
Asita Technical Engineering photo number: 0045-300-2779
Preface/Safety precautions
1. PREFACE
Thank you for buying this TV! Please read this manual thoroughly before opening. Make sure the TV was not damaged in transit. Should the TV be damaged, do not install it and contact Your dealer. Check that you have all the accessories according to the model.
2. SAFETY PRECAUTIONS
Preparation

Put the TV on a stable surface

Do not place any material on the TV.

Do not use the TV with fixtures other than those provided or suggested by the manufacturer.

Do not block or cover the ventilation openings on the TV. If you have a wall mount, check that it is steady.

Connexion cables
Power cord and cables must be properly routed and protected to prevent people from stepping on them and causing the TV to fall.
Ava Technical hotline phone number: 0845 390 7775
Safety precautions
DVD operation
Heating sources and humidity

Keep the TV dry and away from humidity.

Keep the TV away from heat sources
Cleaning and maintenance
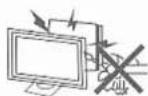
Unplug the TV before cleaning it. Do not use solvent or liquid to clean the TV.
Only clean the TV with a soft and dry cloth.
In case of troubleshooting, do not use spare parts other than those suggested by the manufacturer. Using inadequate spare parts can lead to electric shocks, short-circuits fire or other incidents.
Departure in holidays
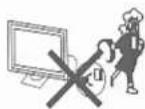
Unplug the TV during lightening storms or when unused for long periods of time.
Audio Technical Telephone photo number: 3845 306 7775
Dolby Digital Setup
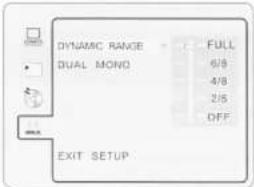
DYNAMIC RANGE
text_image
DYNAMIC RANGE FULL 6/8 4/8 2/5 OFF DUAL MONO EXIT SETUP- When switch the compress mode to "Audio output", adjust the compress ratio for different effect. When selected FULL, the peak signal value is smallest. When selected OFF, the peak signal value is biggest.
DUAL MONO

text_image
DYNAMIC RANGE DUAL MONO STIKING MONO L MONO R MIX MOND EXIT SETUP- You can select four different audio output. STEREO, MONO L. MONO R. MIX MONO. The audio out description of these. Selections is shown in the table below.
| MODE | LEFT SPEAKER | RIGHT SPEAKER |
| STEREO | STEREO-L | STEREO-R |
| L-MONO | L-MONO | L-MONO |
| R-MONO | R-MONO | R-MONO |
| MIX-MONO | L-MONO+R-MONO | L-MONO+R-MONO |
Aoda Technical hotline phone number: 0845 308 7775
DVD operation
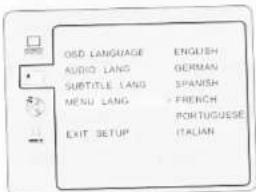
MENU LANGUAGE
text_image
OSD LANGUAGE ENGLISH AUDIO LANG GERMAN SUBTITLE LANG SPANISH MENU LANG FRENCH PONTUGUESE EXIT SETUP ITALIAN- Use navigation buttons to select the MENU LANG setup icon, press ENTER button to confirm. There are 6 languages for you selection, press ▲ ▲ ▼ buttons to toggle between different languages. (ENGLISH/GERMAN/SPANISH/FRENCH/PORTUGUESE/ITALIAN) Press ENTER button to confirm.
Audio Setup
AUDIO setup
The audio setup options are illustrated below.
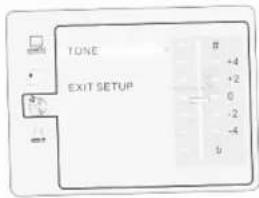
text_image
TONE EXIT SETUP # +4 +2 0 -2 -4 5TONE
- Use the Up and Down arrow button to move the scroll and adjust the TONE.
Asia Technical telephone phone numbers 0845 300 7775
in the carton
- IN THE CARTON
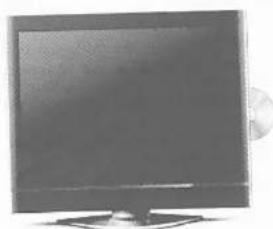
natural_image
Front view of a flat-screen computer monitor with a CD icon on the side (no visible text or symbols)LCD TV SET
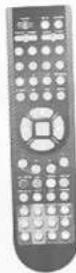
Remote Control
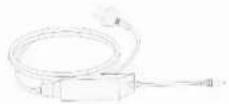
Adapter & Power Cord
AAA Batteries
text_image
ONN 15" LCD TV With DVD &USB-T Combs Model: PSS-2019000 USER'S MANUALUser Manual
text_image
Scanned document page with Chinese text, featuring a logo and product imagesQuick-start Guide
Asda Technical hotline phase number: 0645 300 7175
Front and side connections of LCD
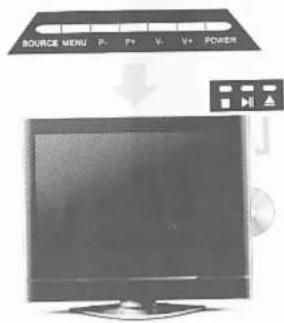
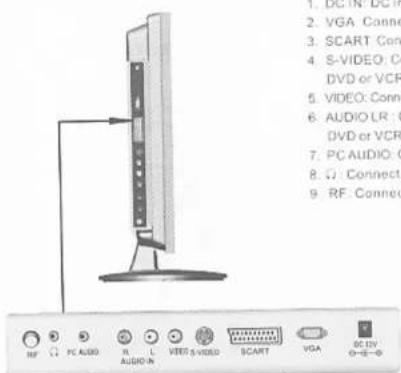
4. FRONT, BACK, CONNECTIONS OF LCD
Front View
text_image
SOURCE MENU P P+ V+ V+ POWER ↓Left View and Control Connections
text_image
1. VGA Conne 2. SCART Conne 3. S-VIDEO Conne 4. DVD or VCR 5. VIDEO Conne 6. AUDIO LR Conne 7. DVD or VCR 8. PC AUDIO Conne 9. RF ConneAnds Technical helpline phone number: 0845-369-7773
- Press "POWER" button to turn standby mode on or off.
- Press "P+" or "P-" to scan through channels
- Press "V+" or "V-" to increase or decrease the sound level.
4 Press "MENU" to bring up the main menu on the screen.
5 Press "SOURCE" to select the input source. - ■ STOP in DVD mode
- ▶ PLAY/PAUSE in DVD mode.
-
▲ OPEN/CLOSE in DVD mode
-
DC IN: DC input socket
- VGA Connect the PC-RGB output jack of PC
- SCART Connect the SCART jack of VCR or DVD
- S-VIDEO: Connect the S-VIDEO output jack of DVD or VCR.
- VIDEO: Connect the Video output jack of DVD or VCR
- AUDIO LR: Connect the right Audio out put jack of DVD or VCR for Video/S-VIDEO
- PC AUDIO: Connect the Audio output jack of PC
- ☐ Connect the headphone
9 RF Connect the antenna
DVD operation
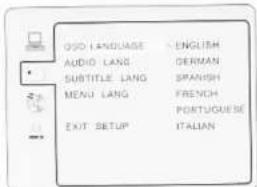
Language Setup
Press DVD SETUP button to enter the DVD OSD menu.
text_image
OSS LANGUAGE AUDIO LANG SUBTITLE LANG MENU LANG EXIT SETUP ENGLISH GERMAN SPANISH FRENCH PORTUGUERSE ITALIAN- OSD Language
Use navigation buttons to select the OSD LANGUAGE setup, icon, press ENTER button to confirm. There are 6 languages for your selection, press ▲ & ▼ buttons to toggle between different languages (ENGLISH/GERMAN/SPANISH) FRENCH: PORTUGUESE/ITALIAN). Press ENTER button to confirm.
AUDIO LANGUAGE
Use navigation buttons to select the AUDIO LANG setup icon, press ENTER button to confirm. There are 5 languages for you selection, press ▲ & ▼ buttons to toggle between different languages (ENGLISH/GERMAN/SPANISH/FRENCH/PORTUGUESE/ITALIAN). Press ENTER button to confirm.
text_image
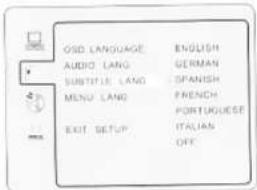
OSD LANGUAGE ENGLISH AUDIO LANG GERMAN SUBTITLE LANG SPANISH MENU LANG FRENCH PORTUGNESE EXIT SETUP ITALIANSUBTITLE LANGUAGE
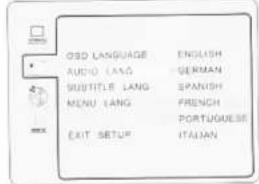
Use navigation buttons to select the SUBTITLE LANG setup icon, press ENTER button to confirm. There are 6 languages for you selection, press ▲ & ▼ buttons to toggle between different languages. (ENGLISH/GERMAN/SPANISH/FRENCH/PORTUGUESE/ITALIAN/OFF) Press ENTER button to confirm
text_image
GSD LANGUAGE AUDIO LANG SUBTITLE LANG MENU LANG EXIT SETUP ENGLISH GERMAN SPANISH FRENCH PORTUGUESE ITALIAN OFFAxila Technical helpfile phone number: 08453007775
DVD operation
text_image
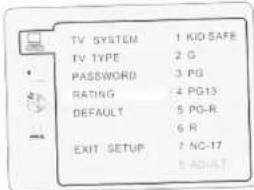
TV SYSTEM TV TYPE PASSWORD RATING DEFAULT EXIT SETUPRATING
- Playback for some discs with rating, you can select the rating setting according to your preference. Rating restriction divided in eight different category from KID SAFE to ADULT.
text_image
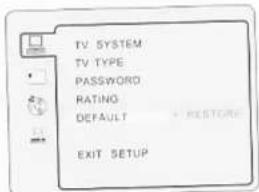
TV SYSTEM 1 KIO SAFE TV TYPE 2 G PASSWORD 3 PG RATING 4 PG13 DEFAULT 5 PG-R 6 R EXIT SETUP 7 NC-17 8 ADJATDEFAULT SETTING
- Press ENTER button to restore factory default
NOTE: Only editable when password is unlocked. And only can function when password is locked. It does not, however, reset either the Password or the Rating setting
text_image
TV SYSTEM TV TYPE PASSWORD RATING DEFAULT EXIT SETUPAsfa Technical belpline phone number: 0845 200 7375
TV installation drawings specifications
5. TV INSTALLTION DRAWINGS
Power Cord Connection
Connect the lower card correctly as shown.
Press the POWER switch of your LCD TV to switch on the LCD TV. The power indicator on the front panel lights up in Green:
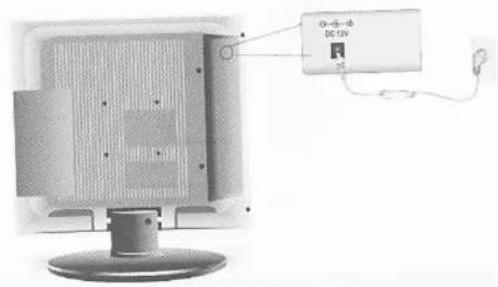
text_image
DC 12VAntennas Connection
To ensure good picture and sound, TV antenna system needs to be installed. The antenna system as shown can be sourced from TV equipment shops, which will provide service for correct installation and connection. After installation, insert the 75-ohm antenna plug into the antenna jack as shown.
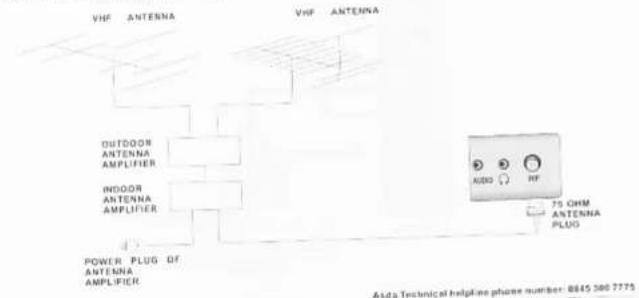
flowchart
graph TD
    A["VHF ANTENNA"] --> B["OUTDOOR ANTENNA AMPLIFIER"]
    C["VHF ANTENNA"] --> D["INDOOR ANTENNA AMPLIFIER"]
    E["POWER PLUG OF ANTENNA AMPLIFIER"] --> F["75 OHM ANTENNA PLUG"]
    B --> G["AIDO RF"]
    D --> G
    F --> G
    style A fill:#f9f,stroke:#333
    style C fill:#f9f,stroke:#333
    style E fill:#f9f,stroke:#333
    style G fill:#ccf,stroke:#333
    note right of G
        Aida Technical helpline phone number: 0845 390 7775
TV installation drawings specifications
SCART Connection
Connect the SCART connector on the external video device to the SCART connector on the set using a SCART cable.
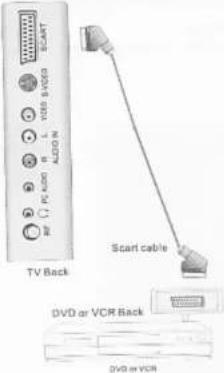
text_image
Start VTC Back Start cable DVD or VCR Back DVD or VCRVIDEO Connection
Connect the VIDEO and AUDIO output jack of the DVD or VCR to the VIDEO jacks on the set using the RCA cable. Match the jack colors: Video is yellow, Audio left is white, and Audio right is red. Select the CVBS input source with using the SOURCE button on the remote control.
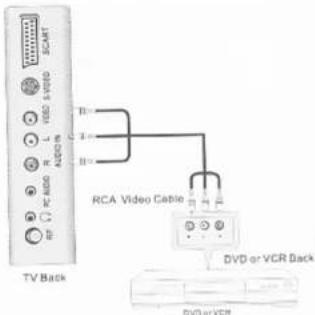
text_image
TV Back RCA Video Cable DVD or VCR Back DVD or VCRAada Technical helpline phone number: 6345-209-7775
DVD operation
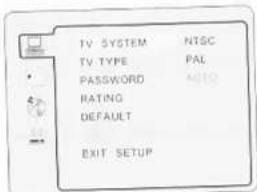
NTSC
This format is used by some other countries, e.g. USA
PAL
This is the format used in the UK and the default setting
AUTO
This format can be used if your DVD is capable of both PAL and NTSC formats.
TV TYPE
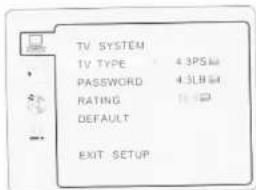
DVD are produced in a variety of screen aspect ratios. This menu enables you to select one of the three aspect ratios:
text_image
TV SYSTEM IV TYPE 4.3PS PASSWORD 4.3LB RATING DEFAULT EXIT SETUP- 4:3 PS (Normal)
• 4:3 LB (Normal)
16:9 (Wide) - Select the most appropriate aspect ratio for the JPG being viewed.
NOTE:
- Playback screen size may vary according to the discs contents.
- For media with 4:3 contents, using any mode would only display a 4:3 screen
- Screen ratio selection should be according to the connected TV / Display aspect ratio.
PassWord
- The default setting is locked. No Rating selection or change password could be done. To edit the Rating setting, please enter default password '0000' by numeric buttons, then press ENTER button to confirm.
- To change password, input any 4 digit number when the lock is unlocked. Once the 4 digit number is entered, that will be your new password.
Ands Technical helpline phone number: 0845 388 1775
DVD operation
When play or pause with picture playback, you may use D MENU button to enter preview mode.
to display E-mail:595
Press w/m button to select next / previous page or press numeric buttons to view the
Corresponding FIGUER
The maximum JPEG image size that can be displayed is 1280 x 1024.
Function Settings
DVD Function General setup
text_image
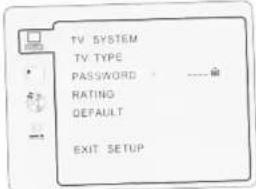
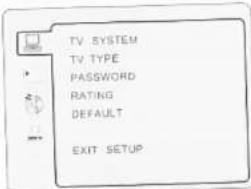
TV SYSTEM TV TYPE PASSWORD RATING DEFAULT EXIT SETUPPress DVD SETUP button to activate the DVD player OSD menu;
from a button in move and highlight between different sub-menu. Press ▲ / ▼ ENTER
Press ▼ button to move and go
button to enter the highlight box
Press DVD SETUP button to exit the OSD menu, or move the highlight to EXIT DVD SETUP
then press ENTER button to exit
System Setup
TV SYSTEM
Press ▶ button to enter the TV SYSTEM, and then press ▲ / ▼ to select one from below
text_image
TV SYSTEM NTSC TV TYPE PAL PASSWORD AUTO RATING DEFAULT EXIT SETUPSada Technical telephone phone number: 0845 308 7775
TV installation drawings specifications
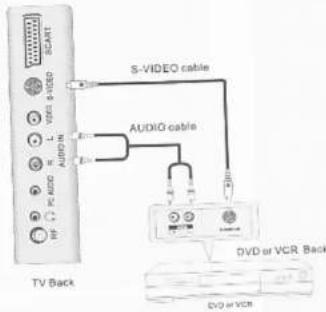
S-Video Connection
The image of the S-VIDEO output of the DVD or VCR to the S-VIDEO input on the set. The picture quality
Connect the S-VIDEO input of the video input is improved compared to connecting a regular VCR to the video input.
Connect the Audio output of the DVD or VCR to the Audio input packet on the control.
Select S-VIDEO input source with using the SOURCE button on the remote button.
text_image
SCANT VIDEO S-VIDEO L AUDIO PC AUDIO W TV Back S-VIDEO cable AUDIO cable DVD or VCR Back DVD or VCRVGA Connection
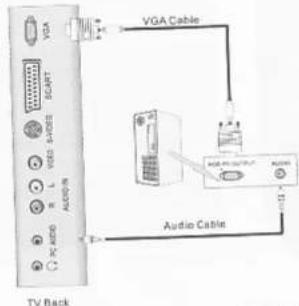
Connect the RGB output of the PC to the VGA jack on the set. Connect the AUDIO output of the PC to the PC AUDIO jack on the set. Select the VGA input source with using SOURCE button on the remote control.
text_image
VGA Cable VGA A/S/OSI VGA A/S/OSI VGA A/S/OSI VGA A/S/OSI VGA A/S/OSI VGA A/S/OSI VGA A/S/OSI VGA A/S/OSI VGA A/S/OSI VGA A/S/OSI VGA A/S/OSI VGA A/S/OSI VGA A/S/OSI VGA B/A/C/S/OSI VGA B/A/C/S/OSI VGA B/A/C/S/OSI VGA B/A/C/S/OSI VGA B/A/C/S/OSI VGA B/A/C/S/OSI VGA B/A/C/S/OSI VGA B/A/C/S/OSI VGA B/A/C/S/OSI VGA B/A/C/S/OSI VGA B/A/S/OSI VGA B/A/C/S/OSI VGA B/A/C/S/OSI VGA B/A/C/S/OSI VGA B/A/C/S/OSI VGA B/A/C/S/OSI VGA B/A/C/S/OSI VGA B/A/C/S/OSI VGA B/A/C/S/OSI VGA B/A/C/S/OSI VGA B/A C/S/OSI VGA B/A/C/S/OSI VGA B/A/C/S/OSI VGA B/A/C/S/OSI VGA B/A/C/S/OSI VGA B/A/C/S/OSI VGA B/A/C/S/OSI VGA B/A/C/S/OSI VGA B/A/C/S/OSI VGA B/A/C/S/OSI VGA B/A /C /S /O /S /O /S /O /S /O /S /O /S /O /S /O /S /O /S /O /S /O /S /O /S /O /S /O /S /O /S /O /S /O /S /O /S /O /S /O /S /O /S /O /S /O /S /O /S /O /S /O /S /NAsca Technical helpline phone number: 0845-309-7725
Remote control
6. REMOTE CONTROL
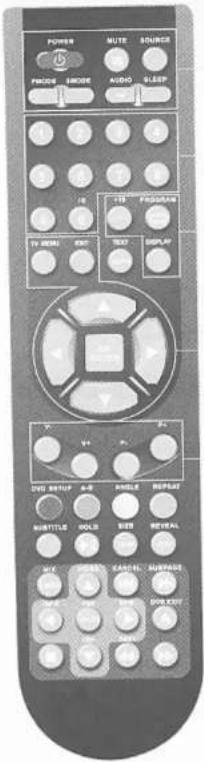
Remote control instructions in TV mode
text_image
POWER MUTE SOURCE FINDICE SMOORE AUDIO SLEEP 1 2 3 4 5 6 7 8 9 10 11 12 13 14 15 16 17 18 19 20 TV MONTH TEST TEXT DISPLAY DNS SETUP 本部 MIDDLE REPEACH SUBTITLE ROOTS REBEACH BOX ACCESS CASH OK ACCESS OFF 3.0 OFF 3.0POWER
Turn the LCD TV ON or OFF
MUTE
Press to mute the sound. Press again or press V+ to un-mute the TV.
SOURCE
Press to cycle through the input source in following

PMODE
Press repeatedly to cycle through the available video picture modes.
SMODE
Press to cycle through the different sound settings.
AUDIO(I/II)
Press to search the NICAM modes
SLEEP
Lets you select amount of time before your TV turn itself off automatically.
NUMBER BUTTONS
Press 0-9 to select a TV channel directly when you are watching TV. The channel change after 2 seconds.
(1)
Press this button to enter a program number for multiple program channel such as 2-1, etc.
(1)
Return to the previous channel viewed
DISPLAY
Press to display the source and channel's information.
THUMBSTICK(▲/▼/◄/►/OK ENTER)
Allows you to navigate the on-screen menus and adjust the system settings to your preference.
TV/MENU
Brings up the main TV menu to the screen.
EXIT
Exit the main TV menu to the screen.
V+/V-
Press to increase / decrease the sound level.
P+/P-
Press to scan through channels.
Asia Technical telephone phone number: 88453007779
DVD operation
10. DVD Operation

Basic operation
- Turn ON and OFF the DVD function
- Turn on the LCD TV and then press SOURCE repeatedly to select DVD mode
- Sequential playback
- For Super VCD & DVD discs, if PBC is "ON" status, press 📄 button will enter the disc menu. Press 📄 button to start in sequent. For others, while it stopped, press 📄 button to start in sequent.
- Program playback
- Using Program playback, you can select max. 16 tracks from the disc to playback in programmed order.
- OSD for program playback as below
MP3/JPEG Playback
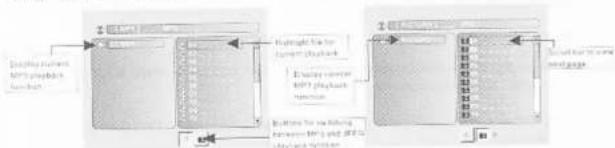
After loading the MP3/JPEG CD&DVD, it will start to scan for the stored MP3/JPEG folders. Then will firstly display the MP3 contents automatically and start to play the first file (highlighted file). Screen as follows:
flowchart
graph TD
    A["Display current MPT/Flash模块"] --> B["Module 1"]
    B --> C["Module 2"]
    C --> D["Display current MPT/Flash模块"]
    D --> E["Module 3"]
    E --> F["Module 4"]
    F --> G["Display current MPT/Flash模块"]
    G --> H["Module 5"]
    H --> I["Module 6"]
    I --> J["Display current MPT/Flash模块"]
    J --> K["Module 7"]
    K --> L["Module 8"]
    L --> M["Display current MPT/Flash模块"]
    M --> N["Module 9"]
    N --> O["Module 10"]
    O --> P["Display current MPT/Flash模块"]
    P --> Q["Module 11"]
    Q --> R["Module 12"]
- Using the navigation buttons to check your favorite folder and playback the first file or move to the your favorite file.
NOTE:
- Press ◀▶ buttons to move the highlight to folders, documents or mode selection. - Press numeric buttons to select the contents directly. Far number over 10, press -/- button first. (e.g. File number 15, press -/- then 5.)
- When playback Mp3 files, there is no picture display, only audio output. - Playing the JPEG discs press PROGRAM button to select slide effects. There are 16 slide modes, press PROGRAM button to toggle between different modes in sequent (Start from top Start from bottom Start from left Start from right Start from upper left corner Start from upper right corner Merge from left/right Horizontal blades Vertical blades Merge form 4 corners Random Playback Slide effect OFF).
- When play or pause with picture playback, you may use navigation buttons to flip / rotate the picture.
• ▲ button to flip horizontally.
• button to flip vertically
• <button to rotate left 90
- button to rotate right 90
Asda Technical beladine phone number: 0345 388 7776
DVB Operation
Program Edit
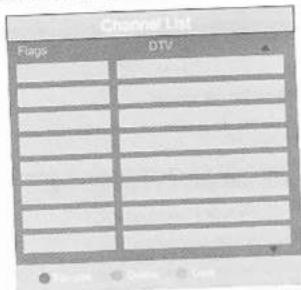
The following options to add the DTV programs according to your preferences, as following:
text_image
Channel List Flags DTVDVB SETUP MENU options
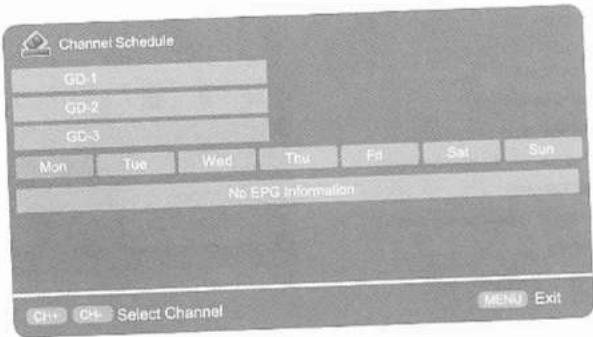
Use EPG button on the remote control to display the EPG menu directly as follows:
text_image
Channel Schedule GD-1 GD-2 GD-3 Mon Tue Wed Thu Fri Sat Sun No EPG Information CH+ CH Select Channel MENU ExitData Technical telephone phone number: 08453092778
Remote control
Remote control instructions in TELETEXT mode
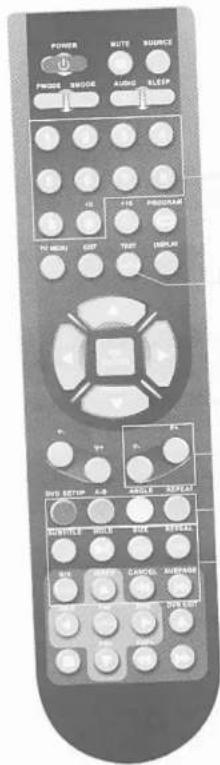
text_image
POWER MUTE SOURCE PICKERS MUIDS ALONG SLEEP +1 +2 PROMSLAM TV ECONY COST TEXT CREAM +3 +4 BUTT SETUP A-B ANGLE REPEAT CONTROL HANDLE BOX RETAIL MINI CHANGE CANCE SWITCH ON TOUTNUMBER BUTTONS
Press 0-9 to select a teletext page
TEXT
Press to switch between TV and teletext mode.
P+/P-
Page up and Page down.
COLOR BUTTONS
Select 4 Preferred TELETEXT page
SUBTITLE
To display subtitle
HOLD
Freeze the current page
SIZE
Change the picture's size
REVEAL
Reveal or hide the hidden words
CANCEL
TELETEXT CANCEL
INDEX
Request index page when index link is valid
MIX
TV and TEXT pictures are mixed together in
transparent background
SUBPAGE
TELETEXT Subpage
5-6.2 Technical guideline phone number: 8845 380 7775
Remote control instructions in DVB mode
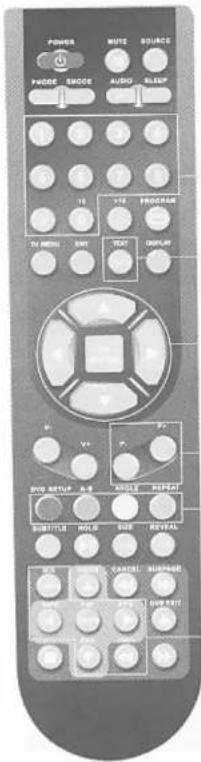
text_image
POWER MUTE SOURCE PHODE ENMODE AUDIO SLEEP 10 18 VIB PROGRAM ON METAL ORT ROOT PROGRAM B V V2 AVOC RISPET DVD SETUP B-S ANGLE SUREPT SUBTITLE HOLD SIDE REVEAL SUN CONTROL MEASURE START YOUR TESTNUMBER BUTTONS
Press 0-9 to select a channel.
TEXT
Switch on/off or mix the DVB TELETEXT mode
THUMBSTICK(▲/▼/◄/►/OK ENTER)
Allows you to navigate the on-screen menus and adjust the system settings to your preference.
P+/P-
When watching a channel, changes the channel.
COLOR BUTTONS
Color buttons (respectively red, green, yellow and blue) used in a few sub-menus.
INFO
Shows information about the current channel in DVB mode FAV+/FAV/FAV-
Press to increase/decrease your favourite program in DVB mode.
EPG
Launches the EPG (Electronic Program Guide) in DVB mode.
Anda Technical telephone phone number: 0543 300 7775
NOTE: Only the channels that you selected to FAV in Program Edit Menu could be displayed in Favorite List.
DVB SETUP MENU options
Channel Search options
- Press the ◀/▶ button to select SETUP in the main menu.
- Press the ▲/▼ button to select your option what you want to adjust in the SETUP menu.
- Press the ◀/▶ button to adjust.
- When you are satisfied with your adjustment, press the TV MENU button to return to the previous menu or press the EXIT button to exit the main menu
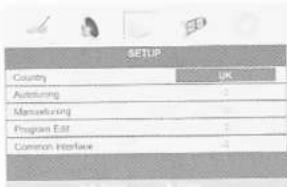
text_image
SETUP Country UK Automotive - Manufacturing - Program Edit - Common Interface -Press ▲/▼ button to select Manual Search. Press ENTER or ▶ button to set the Manual Tuning
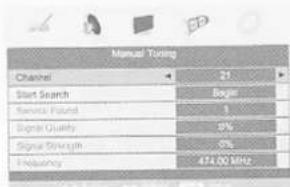
Channel
Press ◀/▶ to select the upper or lower channel. Press 0-9 to select the channel directly.
Start Search
To select whether to start searching in begin/searching/finished
Service Found
The services be found.
Signal Quality
The signal quality of current channel.
Signal Strength
The signal strength of current channel
Frequency
The frequency of current channel.
text_image
Manual Tuning Channel 21 Start Search Roger Signal Found 3 Signal Quality 9% Signal Strength 0% Frequency 474.00 MHzAada Technical help/ou phase number: 0845 300-7775
DVB Operation
8. DVB OPERATION
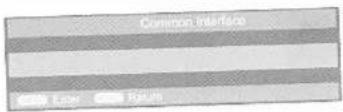
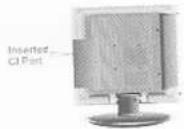
Common interface
If you have inserted the CI card to the TV, you can see the information of the
Program List
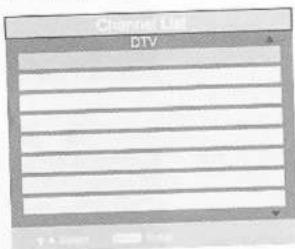
Channel List options
Press ENTER button to open the Channel List, then Press ▲/▼ to select the channel you want to
press watch
text_image
Channel List DTVFavorite List options
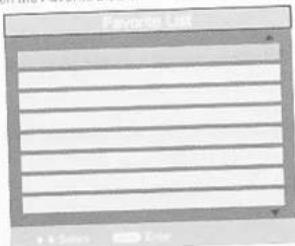
Press FAN button to open the Favorite List, then Press ▲/▼ to select the channel you want to
watch
text_image
Favorite ListAsia Technical helpline phone number: 0845-308-7716
Remote control
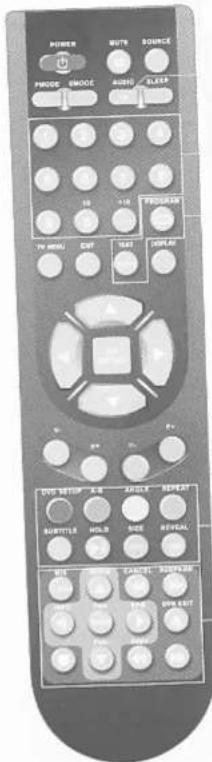
Remote control instructions in DVD mode
text_image
POWER MUTS SOURCE PHODE SMOCE AUDIO SLEEP TV MENU OUT TEXT DISPLAY OUT SETUP A B ANGLE REPEAT SUBTITLE HOLE SHOE REVEAL USE EXCEL METER ON CHILLI ON CHILLI ON CHILLI ON CHILLI ON CHILLI ON CHILLI ON CHILLI ON CHILLI ON CHILLI ON CHILLI ON CHILLI ON CHILLI ON CHILLI ON CHILLI ON CHILLI ON CHILLI ON CHILLI ON CHILLI ON CHILLI ON CHILLI ON CHILL I ON CHILL I ON CHILL I ON CHILL I ON CHILL I ON CHILL I ON CHILL I ON CHILL I ON CHILL I ON CHILL I ON CHILL I ON CHILL I ON CHILL I ON CHILL I ON CHILL I ON CHILL I ON CHILL I ON CHILL I ON CHILL I ON CHILL I ON CHILLI ON CHILLI ON CHILLI ON CHILLI ON CHILLI ON CHILLI ON CHILLI ON CHILLI ON CHILLI ON CHILLI ON CHILLI ON CHILLI ON CHILLI ON CHILLI ON CHILLI ON CHILLI ON CHILLI ON CHILLI ON CHILLI ON CHILLII ON CHILLII ON CHILLII ON CHILLII ON CHILLII ON CHILLII ON CHILLII ON CHILLII ON CHILLII ON CHILLII ON CHILLII ON CHILLII ON CHILLII ON CHILLII ON CHILLII ON CHILLII ON CHILLII ON CHILLII ON CHILLII ON CHILLII ON CHILL II ON CHILL II ON CHILL II ON CHILL II ON CHILL II ON CHILL II ON CHILL II ON CHILL II ON CHILL II ON CHILL II ON CHILL II ON CHILL II ON CHILL II ON CHILL II ON CHILL II ON CHILL II ON CHILL II ON CHILL II ON CHILL IIAUDIO(I/II)
AUDIO selection buttons in DVD mode
NUMBER BUTTONS
Numerical buttons for various data
PROGRAM
Program a disc playing in a desired sequence
GOTO
It is possible to get access to any point on the directory.
using the 'GOTO' menu.
Press GOTO to access the 'GOTO' menu.
DVD SETUP
Used for selecting programs. It may also be used to
execute commands
A-B
This button enables you to repeat a selected section.
from the disc
ANGLE
Selects various camera angles for certain scenes or
passages on the DVD during playback
REPEAT
Press REPEAT to cycle through the repeat pray operation
SUBTITLE
Select a different subtitle language(the DVD disc must
have the subtitle you selected.
▶II
PLAY/PAUSE in DVD mode.
ZOOM
In play state, press ZOOM, the player will zoom
in the picture one time.
D DIS
Press to display the DVD information of DVD mode.
THUMBSTICK(▲/▼/◄/►/OK ENTER)
Allows you to navigate the on-screen menus and
adjust the system settings to your preference

To eject the disc.

DVD STOP
◀◀
jump to previous and next track.
◀ ▶
East backward and forward key
D.MENU
DVD disc menu Access to menu.
Anda Technical helpline phone number: 08453887775
Remote controls setup
Remote control setup
a) Open the cover.
b) AAA size batteries. When inserting the batteries, make sure correct potentials as per - and - marks
on the batteries and within the battery compartment
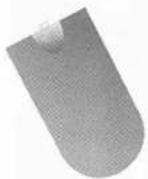
c)Replace the battery cover.
To prevent battery leakage which may result in bodily injury or damage to the remote:
- Install all batteries correctly, and as marked on the remote control
2 Do not mix batteries (OLD and NEW or CARBON and ALKALINE, etc.)
Remove batteries when the remote is not used for a long time.

natural_image
Pure electrical circuit lines without any symbols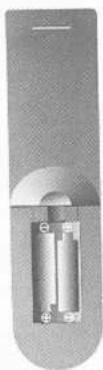
7. ACCESSORIES
- One Remote Control
2 One Adapter&Power Cord - One Transport
- 7 Batteries
3.2 Bambres 7.5V - One Livers Manual
- One User Manual
- Quick star Guide
5 Quick-start Guide
Aside Technical helpline phone number: 0845 300 1775
DVB Operation
Child Lock
Press ENTER or ▶ button to set the child lock.
You need to enter the PIN code if the Child lock is set "on", and the default PIN code is empty, you can press ENTER button directly to enter

TIPS: The superuser's (administrator's) password is 4711.
Child Lock
Press ENTER or ▶ button to set the child lock
Key Lock
Press ENTER or ▶ button to set the key lock.
Change PIN Code
Press ▶ button to enter Change PIN Code menu.
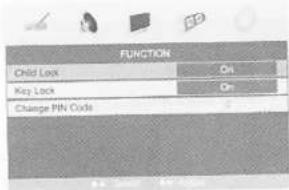
text_image
FUNCTION Child Lock Ctrl Key Lock Ctrl Change PIN CodeOld PIN Code
Press 0\~9 buttons to enter the correct old PIN code, you can not change the PIN code if you entered a wrong PIN code.
New PIN Code
Press 0-9 buttons to enter the new PIN code you want.
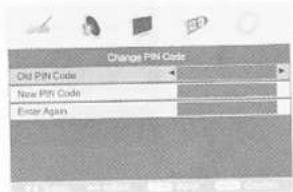
text_image
Change Pin Code Old PIN Code New Pin Code Enter AgainChange PIN Code
Press 0-9 buttons to enter the PIN code you entered in the New PIN Code menu again to confirm the new PIN code.
First Time Installation
Press ▶ button to open the first time installation menu, and the operation of this menu is in page 15.
Reset
Press ENTER or ▶ button to reset the TV to the factory default.
Asia Technical hotline group number: 8845 309 7775
TV Operation
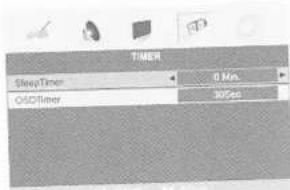
text_image
TIMER SleepTimer 0 Mio QoCTimer 30sec-
Press the ◀/▶ button to select TIMER in the main menu.
-
Press the ▲/▼ button to select your option what you want to adjust in the TIMER menu.
-
Press the ◀/▶ button to adjust
-
When you are satisfied with your adjustment, press the TV MENU button to return to the previous menu or press the EXIT button to exit the main menu.
Sleep Timer
Select the sleep time to put automatically the TV in standby mode. Timer can be selected as 0min, 15min, 30min, 45min, 60min, 75min, 90min, 105min, 120min. Also you can select the sleep time by pressing SLEEP button repeatedly.
OSD Timer
When we select the time when the OSD display on the screen such as
15Sec 10Sec 15Sec 20Sec 25Sec 30Sec
FUNCTION MENU options
Press MENU button on the front panel or TV MENU on the remote control to display the main menu.
- Press the ◀ / ▶ button to select FUNCTION in the main menu.
- Press the ▲/▼ button to select your option what you want to adjust in the FUNCTION menu.
- Press the ◀ / ▶ button to adjust.
- When you are satisfied with your adjustment, press the TV MENU button to return to the previous menu or press the EXIT button to exit the main menu.
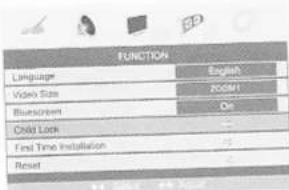
text_image
FUNCTION Language English Video Size 200M1 Bluescreen Or Cold Lock First Time Installation ResetLanguage
Press◀/▶to select the OSD language
Video Size
This option allows you to select the screen display mode which best corresponds to your viewing requirements.
Note: The available aspect mode may be different in different input signal.
Blue screen
This option allows you to select the blue background on or off. If on, the screen background will turn blue at very weak or no signal condition.
Asda Technical helpline phase number: 03453007775
TV operation

In this manual, the OSD (On Screen Display) may be different from your TV's, because this is just an example for the TV operation.
8. TV OPERATION
First Time Installation
text_image
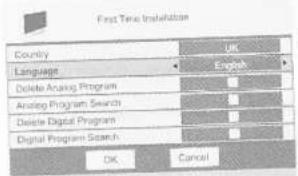
First Time Installation Country UK Language English Delete Analysis Program Analog Program Search Delete Digital Program Digital Program Search OK CancelIf this is the first time you open the TV and there is no programs in the TV memory, the First Time Installation menu will appear in the picture.
Country
Press ▲/▼ button and then use ◀/▶ to select the country.
Language
Press ▲/▼ button and then use ◀/▶ to select the OSD language.
Delete Analog Program
Pages ▲/▼ button and then use ◀/▶ to select whether to delete all the analog program
Analog Program Search
Press ▲/▼ button and then use ◀/▶ to select whether to start searching analog programs
Delete Digital Program
Press ▲/▼ button and then use ◀/▶ to select whether to delete an the digital program.
Digital Program Search
Press ▲/▼ button and then use ◀/▶ to select whether to start searching digital programs. After setting the items, select OK to finish the first time installation, or select Cancel to exit this menu.
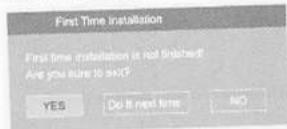
If you cancelled the first time installation, it will remind you whether to set the first time installation next time.
Audio Technical hotline phone number: 0845 100 7725
TV operation
TV Information
Program Information
Press DISPLAY or NICAM button to display the program information.

- The number of current program.
- The colour system of current program, could be selected in Manual Tuning menu (an option
of SETUP menu - The name of current program
- The label of current program, you can label it in Manual Tuning menu/an option of SETUP
meau - The sound system of current program, could be selected in Manual Tuning menu—an option
of SETUP menu) - The NICAM mode of current program

If the iron of NICAM mode is red, it means the current program supplies multi
NICAM Signals, and you can select it by pressing NICAM button.
The NICAM modes and relative icons
Mono
Stereo
Dual
Dual

3.1.2.1.1.2.2.3.4.5.6.7.8.9.10.11.12.13.14.15.16.17.18.19.20.21.22.23.24.25.26.27.28.29.30.31.32.33.34.35.36.37.38.39.40.41.42.43.44.45.46.47.48.49.50.51.52.53.54.55.56.57.58.59.60.61.62.63.64.65.66.67.68.69.70.71.72.73.74.75.76.77.78.79.80.81.82.83.84.85.86.87.88.89.90.91.92.93.94.95.96.97.98.99.100
The OSD (On Screen Display) function uses graphic displays to enable you easily acquire the screen display.
VIDEO MENU options
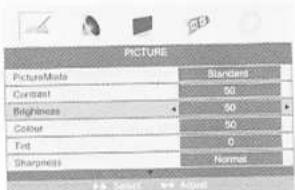
Press MENU button on the front panel or TV MENU on the remote control to display the main menu.
text_image
PICTURE PictureMedia Standard Current 50 Brightness 50 Colour 50 Text 0 Sharpness Normax- Press ◀ / ▶ button to select PICTURE in the main menu.
- Press ▲ /▼ button to select the option that you want to adjust in the PICTURE menu.
- Press ◀ / ▶ button to adjust
- When you are satisfied with your adjustment, press the TV MENU button to return to the previous menu or press the EXIT button to exit the main menu.
Picture Mode
Select Picture Mode in PICTURE menu. (Available picture mode: Standard, Personal, Movie, Sport, Mild, Game.)
Anita Technical helpline phone number: 08453007779
TV operation
text_image
PC Position Auto Sync Begin Phase 51 Clock 50 H Position 60 V Position 50 Position ResetSETUP menu will be unavailable in S-VIDEO mode
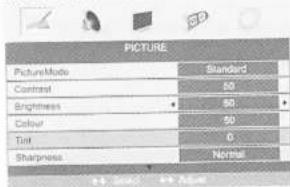
text_image
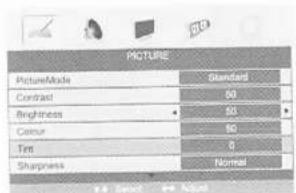
PICTURE PictureMade Standard Contrast 50 Brightness 50 Colour 50 Toll 0 Sharpness NormalSETUP menu will be unavailable in SCART mode
text_image
PICTURE PictureMode Standard Contrast 50 Brightness 90 Colour 50 Text 3 Sharpness NormalTIMER MENU options
Press MENU button on the front panel or TV MENU on the remote control to display the main menu.
Aeda Technical helpline phone number: 0845 108 7775
TV operation
Program Label
This option allows you to label a channel, you can also relabel the programs have been labeled.
- Select a channel you want to labeled.
- Press ▲/▼ select Program Label in SETUP menu.
- Press ▲/▼ to perform your selection. The menu of program label will display as follows:
Program Label

- Press the numeric buttons to input the numbers directly or press ▲/▼ to select the letters.
- Press the numeric buttons to mark the SUCSOF
- Press ▶7▶ to move the cursor.
- Press ENTER TV MENU or EXIT button to confirm and return to previous menu
AFT (Auto Fine Tune)
Due to weak signals or a wrong antenna configuration, some of the channels may not be tuned to the best reception condition. AFT function allows you to fine tune channel selected (the frequency of channel is around the value in Manual Search option).
Manual Search

This option has two functions:
- Set the frequency of channel for AFT option.
- Good, 7 button for 34 seconds and it will start auto tuning from this frequency
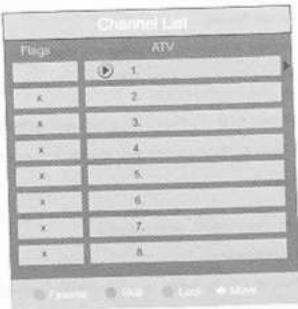
Program Edit
This function allows you to sort the TV programs according to your preferences, as following:
-
Press ▲ / ▼ to select Program Edit in SETUP menu.
-
Press ◀ / ▶ to enter into the sub menu, a channel list will display.
- Press ▲ I ▼ to select the channel in the list which you would like to sort.
- Press ▶ to perform your selection.
- Press ▲ I ▼ to select the location you would like to place the channel.
- Press ◀/▶ to perform you selection.
- Press TV MENU to return to the previous menu or press EXIT to exit.
text_image
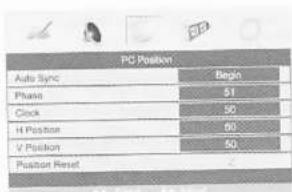
Channel List Flage ATV 1 2 3. 4. 5. 6. 7. 8.SETUP menu of VGA input (for setting the PC picture position)
Acita Technical belating phone number: 0845 300 7779
TV operation
-
In this manual, the OSD (On Screen Display) may be different from your TV's because it is just an example to help the your with the TV operation.
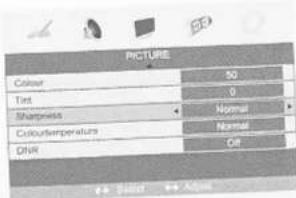
If you change the value of Contrast, Brightness, Colour, Tint, Sharpness or Colour temperature on the picture menu, the picture mode will be changed to "Personal" automatically. You may change the picture mode directly by pressing PMODE button.
- The computer version MODE button on the remote control to select the Picture Mode directly.
Contrast
Press ▶ button and then use ▶ to adjust the contrast of the picture.

After adjust the value you want, press TV MENU button to return to the preview MENU
Brightness
Press ◀ / ▶ button and then use ◀ / ▶ to adjust the brightness of the picture.
Colour
Press ◀/▶ button and then use ◀/▶ to adjust the colour saturation.
NOTE: This option is invalid in PC mode, and it will be shown in gray.
Tint
Press ◀/▶ button and then use ◀/▶ to adjust the tone of colour when your system is inverted.
Sharpness
Press ◀/▶ to select the sharpness mode of your TV. (Available Sharpness Mode: Normal, Sharp, Sharpest, Softest, Soft.)
Colour temperature
Select an optimum colour temperature mode to suit your eyes for viewing among Normal, Warm and Cold.
NOTE: This option is available only in PC mode.
DNR (Digital Noise Reduction)
If the broadcast signal received is weak, you can select the DNR option to reduce the video noise level between Off, Low, Mid and High.
text_image
PICTURE Colour 50 Text 0 Sharpness Normal Colourtemperature Normal DNR CellAUDIO MENU options
Press MENU button on the front panel or TV MENU on the remote control to display the main menu.
Ands Technical helpline phone number: 0846 306 1775
TV operation
text_image
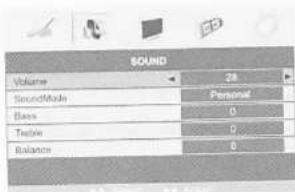
SOUND Volume 28 SoundMode Personal Bass 0 Teekie 0 Balance 0- Press the ◀/▶ button to select SOUND in the main menu.
- Press the ▲? ▼ button to select the option that you want to adjust in the SOUND menu.
-
Press the ◀ / ▶ button to adjust
-
When you are satisfied with your adjustment, press the TV MENU button to return to the previous menu or press the EXIT button to exit the main menu.
Volume
Press ▲/▼ button and then use ◀/▶ to adjust the sound level.

After adjust the value you want, press TV MENU button to return to the preview MENU.
Sound Mode
Select Sound Mode in SOUND menu. (Available sound mode: Personal, Voice, Music, Theatre.) If you change the value of Bass and Treble on the Sound menu, the sound mode will be changed to "Personal" automatically.
You may select the sound mode directly by pressing SMODE button
TIPS: You can press SMODE button on the remote control to select the Sound Mode directly.
Bass
Press ▲/▼ button and then use ◀/▶ to increase or decrease the level of the lower-pitched sounds.
Treble
Press ▲/▼ button and then use ◀/▶ to increase or decrease the level of the higher-pitched sounds.
Balance
Press ▲ / ▼ button and then use ◀ / ▶ to adjust the audio output between left and right speakers.
SETUP MEND options
Press MENU button on the front panel or TV MENU on the remote control to display the main menu.
NOTE: SETUP menus are different for different input sources, if the input source is selected VGA and there are no relative input signal. SETUP menu will be unavailable.
Asda Technical belating phone number: 0045 380 7779
TV operation
SETUP menu of TV input:
- Press the ◀ / ▶ button to select SETUP in the main menu.
- Press the ▲/▼button to select your option what you want to adjust in the SETUP menu
- Press the ◀/▶ button to adjust
- When you are satisfied with your adjustment, press the TV MENU button to return to the previous menu or press the EXIT button to exit the main menu.
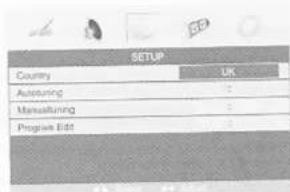
Country
This option allows you to select the country.
Auto tuning
This option allows you to tune the channels that can be received automatically.
Note: Before you perform Auto Tuning, you must choose the country where you are by selecting COUNTRY option.
Press ENTER key to start
You can press TV MENU button to stop auto tuning and close the OSD menu.
text_image
SETUP Country UK AutoRUN Manufacturing Program EditManual Tuning
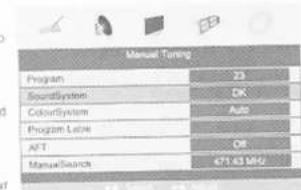
This option allows you to perform Manual Tuning.
Note: Before you perform Manual Tuning, you must choose the country where you are by selecting Country option.
- Press ◀/▶ to select Manual tuning in SETUP menu
- Press ▲/▼ to perform your selection, the menu of Manual tuning will display on the screen.
Program
The current program number. Press ◀ / ▶ to select the upper or lower program
Sound System
Press ◀ / ▶ to select a corresponding sound system, such as DK, L/L', BG,I.
Colour System
Press ◀ / ▶ to select a corresponding colour system, such as Auto, PAL, SECAM.
text_image
Manual Tuning Program 23 SoundSystem DK ColourSystem Auto Program Latte AFT OR ManualSearch €71.63 MHzAsia Technical helpline phone number: 9845 300 7775