Meteor Light - Zelt Sierra Designs - Kostenlose Bedienungsanleitung
Finden Sie kostenlos die Bedienungsanleitung des Geräts Meteor Light Sierra Designs als PDF.


Benutzerfragen zu Meteor Light Sierra Designs
0 Frage zu diesem Gerät. Beantworten Sie die, die Sie kennen, oder stellen Sie Ihre eigene.
Eine neue Frage zu diesem Gerät stellen
Laden Sie die Anleitung für Ihr Zelt kostenlos im PDF-Format! Finden Sie Ihr Handbuch Meteor Light - Sierra Designs und nehmen Sie Ihr elektronisches Gerät wieder in die Hand. Auf dieser Seite sind alle Dokumente veröffentlicht, die für die Verwendung Ihres Geräts notwendig sind. Meteor Light von der Marke Sierra Designs.
BEDIENUNGSANLEITUNG Meteor Light Sierra Designs
S I E R R A D E S I G N S
METEOR LIGHT
Your Sierra Designs METEOR LIGHT tent is very easy to pitch and maintain. Follow these instructions to pitch your tent quickly, safely and easily.
METEOR LIGHT TENT CONTENTS
Tent Body & Rainfly: 1 Pitching Instructions: 1
Tent Poles: 3 Stake Sack: 1
Tent Stakes: 10* Pole Sack: 1
Guy Cord: 2
* Sierra Design tenis include risker for pitching the body and fly under normal conditions. Additional stakes may be required in severe conditions.
First Pitch
In order to familiarize yourself with your new tent, we suggest that you "test pitch" it before embarking on a wilderness trip.
Select a Site
Look for a level spot that is protected from the wind in order to ensure sleeping comfort. Clear the area of debris such as sharp stones and sticks which might abrade or puncture the tent floor. Choose an area that will drain well when it rains.
Unfurl the Tent and Assemble the Poles
Unfurl the rent and lay the rent floor flat on the ground with the front door unzipped. Carefully unfold the shock corded pole sections and allow them to slide together. Do not allow the poles to snap together: This can lead to serious pole damage. Make certain that the insert of each pole section is fully inserted into the next pole section (Figure 1). You will have three poles of equal length.
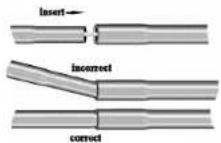
Figure 1: Carrot Pole Assembly
Stake Out the Tent Floor
The Meteor Light is a freestanding rent. Staking out the floor is not necessary in order to pitch it. However, we recommend that you stake down the rent after it is pitched for greater stability in high winds.
Erect the Tent
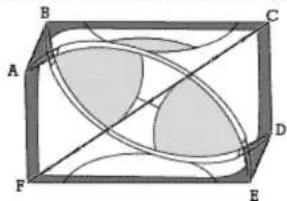
Insert one pole into the pole sleeve which runs from point A to point E (Figure 2). Insert another pole into the pole sleeve running from B to D. Insert the metal tips of the pole ends into their respective grommets at points A and B. Then, from the opposite end of the tent push the poles into the pole sleeves, one at a time, making them flex into an even curve, until you can insert the other ends of the poles into the grommets at points D and E. Next, insert the metal tips of the remaining pole into the grommets at points C and F. Locate the Swift Clip ^18 at the apex of the
natural_image
Geometric diagram of a rectangle with internal curved shapes and labeled points (A, B, C, D, E, F), no text or symbols present.Figure 2: Text Body (top view)
natural_image
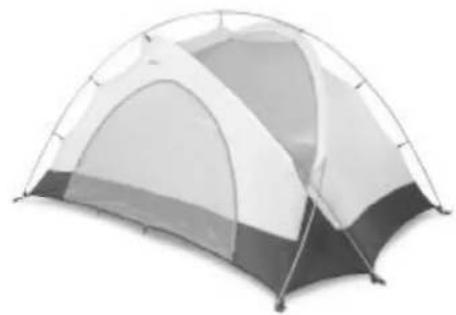
Exterior view of a simple camping tent with arched roof and shaded interior (no text or symbols)tent, along the C-F axis, and attach it to the C-F pole. Following the seam along the path of the pole, attach the remaining Swift Clips to the pole.
Flysheet
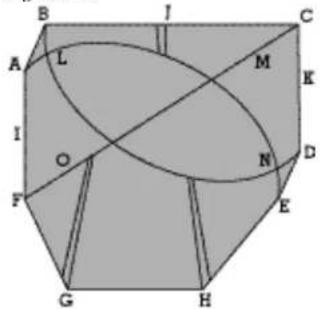
Drape the fly over the tent and position the vestibule zippers over the front and back door (Figure 3). Attach the fly to the tent poles via snap attachments located underneath the fly at points L, M, N and O. At each pole end (points A, B, C, D, E and F) there are 1" side-release "fly clip" buckles. Clip these buckles into their corresponding mates on the tent floor and pull the straps until the fly is taut (Figure 4). By first clipping the blue webbing strap on the rainfly to a blue webbing strap on the body, you are guaranteed a fast, proper rainfall set-up every time.
Stake out the fly vestibule away from the tent body at points G and II. We recommend you stake out points I, J, and K for maximum ventilation. The tent may be guyed out from points L, M, N and O for maximum stability in high winds.
text_image
B I C A L M K I O N D F E G HFigure 3: Flybeat (up view)
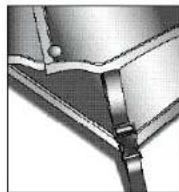
Figures 4: Fly Clip
Ventilation
Besides staking and guying out all the points listed above, optimal airflow through the tent itself can be obtained by leaving part of the double-zipped vestibule open.
Vestibule
The vestibule can be pitched in a variety of configurations to address different weather, storage, ventilation, or wind conditions. The vestibule door may be folded in half and attached to itself to form a half-cloor. The entire door may be guyed out from points G and H to form a large awning, or it may be folded in half to form a small awning. Or, the vestibule door may be rolled entirely out of the way, forming an unobstructed yet protected entrance.