Typhoon 2 - Zelt Kelty - Kostenlose Bedienungsanleitung
Finden Sie kostenlos die Bedienungsanleitung des Geräts Typhoon 2 Kelty als PDF.


Benutzerfragen zu Typhoon 2 Kelty
0 Frage zu diesem Gerät. Beantworten Sie die, die Sie kennen, oder stellen Sie Ihre eigene.
Eine neue Frage zu diesem Gerät stellen
Laden Sie die Anleitung für Ihr Zelt kostenlos im PDF-Format! Finden Sie Ihr Handbuch Typhoon 2 - Kelty und nehmen Sie Ihr elektronisches Gerät wieder in die Hand. Auf dieser Seite sind alle Dokumente veröffentlicht, die für die Verwendung Ihres Geräts notwendig sind. Typhoon 2 von der Marke Kelty.
BEDIENUNGSANLEITUNG Typhoon 2 Kelty


WARNING:
KEEP ALL FLAME AND HEAT SOURCES AWAY FROM THIS TENT FABRIC.
THIS TENT IS MADE WITH FLAME RESISTANT FABRIC WHICH MEETS CPAI-84 SPECIFICATIONS. IT IS NOT FIREPROOF. THE FABRIC WILL BURN IF LEFT IN CONTINUOUS CONTACT WITH ANY FLAME SOURCE. THE APPLICATION OF ANY FOREIGN SUBSTANCE TO THE TENT FABRIC MAY RENDER THE FLAME-RESISTANT PROPERTIES IN EFFECTIVE.
ADDITIONAL WARNINGS
- THIS TENT MUST BE PROPERLY VENTILATED IN ALL WEATHER CONDITIONS. IN EXTREME WEATHER CONDITIONS, SNOW COULD OBSTRUCT AIRFLOW AND CAUSE ASPHYXIATION UNLESS CLEARED FREQUENTLY.
- NEVER USE FUEL-BURNING, OXYGEN CONSUMING DEVICES (I.E. HEATERS, LANTERNS, COOK STOVES OR OTHER FLAME SOURCES) INSIDE YOUR TENT
- NEVER LEAVE YOUR CHILD UNATTENDED INSIDE A TENT.
- ANCHOR YOUR TENT SECURELY TO PROVIDE ADDITIONAL SECURITY FROM CHANGING CLIMACTIC CONDITIONS. SNOW PEGS, SKIS AND/ OR HEAVY ROCKS MAY BE NECESSARY TO SUPPLEMENT TENT STAKES AND GUY CORDS.
Kelty Pack Inc.
6235 Lookout Rd.
Boulder, CO 80301
www.KELTY.com
800.423.2320

Typhoon
Pitching Directions

FastFACT
All four tent poles are the same size.
The front vestibule pole is smaller
text_image
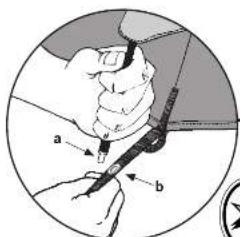
a ba- Tent pole grommet-lip b- Grommet
natural_image
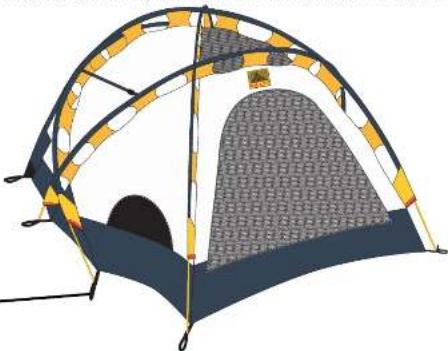
Illustration of a camping tent with geometric arches and patterned interior (no text or symbols)Take the poles out of the stuff sack and help the shockcord to assemble them.
Caution: It damages the poles if you let the shock cord snap/whack the sections together.
Unroll the tent and spread it out. If there's a wind, stake down the end of the tent that's into the wind before adding poles.
Locate the open ends of the sleeves. They are color-coded gold.
Take a tent pole, put it into the sleeve of your choice, torpedo-end first, and feed it in until it fully seats against the closed end. (see "Top View" at left)
Push the pole in all the way and set the end into the grommet (see drawing in circle above left). Repeat for the other poles.
Stake the tent down!
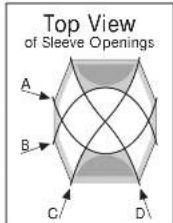
You can put the poles in the sleeves in any order but the easlest way is sleeve A first, B second, C third and D last
Taking the out tent poles starting from the sleeve's closed ends.
(Pulling separates the sections in the sleeve)
9/15/99
Pitching the Rainfly
Unfurl the rainfly and spread it out over the tent so the vestibules line up with the tent doors.
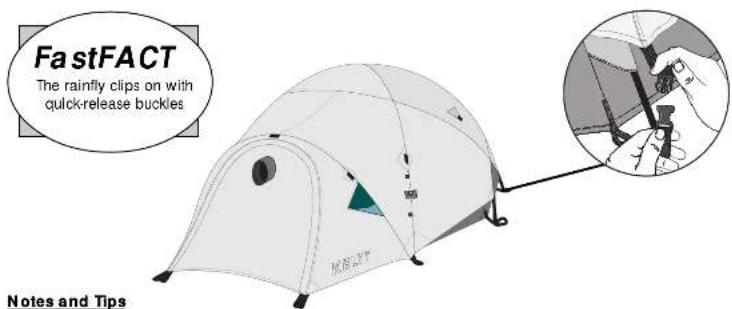
Clip the fly to the tent (see circle below) but don't tighten the webs until all the buckles are clipped.
Take the short pole and thread it through the small sleeve inside the front vestibule (near the vent) and set both pole ends in grommets.
Stake out the vestibules. If the weather is bad, don't spare the stakes. Rigid lents like the Typhoon have a lot of sail-power.
text_image
FastFACT The rainfall clips on with quick-release buckles Notes and TipsNotes and Tips
○ If you pitch the tent in a wind, anchor the tent before you put poles in.
Gear alone probably won't hold down your tent even in winds as light as 25mph. Climbers have been "maytagged" and seriously injured in their tents by high winds. Many tents have been destroyed by unexpected winds rolling them away with gear inside! Anchor every stake loop and guyout.
○ Loops on the tent's ceiling are for tying in the gear loft. You can also string cord between the loops to make a drying rack. Hanging a flashlight from them is another favorite.
Leaving the fly on the tent when you take it down is sometimes handy. Packing the tent and fly as a single connected unit, speeds setup and the tent will be immediately protected from rain when you pull it out next time. Before packing you should dry out the tent and fly. This way you won't have to carry water rolled into the tent and it will help keep the tent from mildewing.
A good trick is to tie a small rock on to the stake loop about a foot away from the tent. Then put a big rock on top of the cord and pull it back against the small rock. This method pulls tents out taut and doesn't lift the tent off the ground as does lying directly to a large rock.
- Fire near your tent is a big no-no. Your tent can burn. Never cook or use candles in your tent.
To minimize UV damage from the sun, don't keep tent set up for long periods of time or when not in use.
○ If there is any part of these directions you do not fully understand please call Kelty Customer services at 800·423·2320.
Your Tent is FlyBoy™ Equipped
Not many things are as easy to understand and use as the KELTY FlyBoy™.
FlyBoy™ does two things: it connects the rainfly to the tent poles and it accepts guyline; creating a stronger and more stable structure. The strength bonus from just clipping on the FlyBoys is considerable. Use guylines with It and you'll be prepared for Wrath-O-God weather.
FlyBoy™ works like this:
FlyBoy™ Node
FlyBoy™ Clip
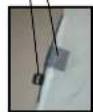
Before
① Center rainfly seam over pole
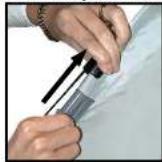
2
③ Clip directly over seam and pole
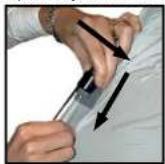
4
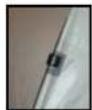
After
Guy out FlyBoy™ like this:
natural_image
Three-panel photo showing hands holding a small white object with a loop, being handled by a thin bundle of wires (no text or symbols visible)The art of the guyout
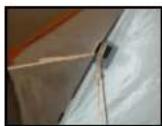
Your FlyBoy™ is guyed to an anchor (circle). The pullout (and therefore the entire tent) is prevented from moving away from the anchor but can move sideways.
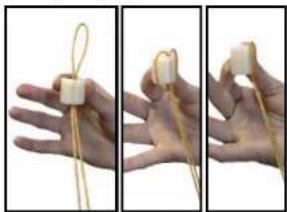
Attach cord to the FlyBoys™ like so:
○ Spool off about three armspans of cord
○ Fold cord in half and form a loop
○ Thread the loop upward through the center FlyBoy™ slot
○ Flip the loop around the FlyBoy™
○ Thread the cord ends through the loop and tighten
Now you can stake out both strands using our V-Line compression system and you can shift cord from one side to the other without untieing any knots. Is this great or what?
The image is too blurry to recognize any text content.
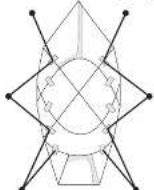
Two anchors at an angle cover for each other. If the tent is being blown leftward, the right anchor holds it. A push to the right is held by the left anchor. Put some effort into your guyouts and your tent can withstand some horrendous weather.
Most people simply run a cord straight out from their tent pullouts. This only anchors the tent from pulling away from the anchor. It doesn't help sideways motion at all. But if you run two cords at an angle from the side, all movement except toward the anchors will be prevented. Once you start using cords from the side it becomes clear that they are much more useful than straight-out cords. This means you need fewer anchors and your tent is better secured. So:
c- Thou shalt run two guyouts from each pullout at fair angle to each other.
Thine anchors shall connect to two pullouts and be placed a fair distance from the tent.