
EM-530 - Schreibmaschine BROTHER - Kostenlose Bedienungsanleitung
Finden Sie kostenlos die Bedienungsanleitung des Geräts EM-530 BROTHER als PDF.


| Produkttyp | Elektronische Schreibmaschine |
| Marke | Brother |
| Modell | EM-530 |
| Druckverfahren | Kassetten-Typenrad (96 Zeichen) |
| Druckgeschwindigkeit | 20 Zeichen pro Sekunde |
| Zeichenabstände | 10, 12, 15 CPI und Proportionalabstand (PS) |
| Zeilenabstände | Einfach (6 Zoll), 1½ (4 Zoll), Doppelt (3 Zoll) |
| Papierkapazität | bis 15,5 Zoll Breite |
| Schreibkapazität | max. 12 Zoll pro Zeile |
| Korrekturspeicher | zwei Zeilen |
| Kopienkapazität | Original + 4 Durchschläge |
| Stromverbrauch | 60 W |
| Abmessungen (B × T × H) | 19,68 × 16,85 × 5,9 Zoll (ca. 500 × 428 × 150 mm) |
| Gewicht | 19,8 lb (ca. 9 kg) |
| Stromversorgung | Netzbetrieb 220–240 V, 50/60 Hz |
| Funktionen | Auto-Papiereinzug, Zentrieren, Blocksatz, Fettdruck, Unterstreichen, Hoch-/Tiefstellung, Rahmen- und Liniengrafik, Rechtschreibprüfung, Tabulator, Seitenende-Einstellung |
| Lieferumfang | Bedienungsanleitung, Netzteil, Papierstütze, Blendschutz |
| Wartung | Reinigung mit weichem Tuch, keine Lösungsmittel |
| Sicherheit | Automatische Abschaltung bei geöffneter Abdeckung; Netzkabel leicht zugänglich |
Häufig gestellte Fragen - EM-530 BROTHER
Benutzerfragen zu EM-530 BROTHER
0 Frage zu diesem Gerät. Beantworten Sie die, die Sie kennen, oder stellen Sie Ihre eigene.
Eine neue Frage zu diesem Gerät stellen
Laden Sie die Anleitung für Ihr Schreibmaschine kostenlos im PDF-Format! Finden Sie Ihr Handbuch EM-530 - BROTHER und nehmen Sie Ihr elektronisches Gerät wieder in die Hand. Auf dieser Seite sind alle Dokumente veröffentlicht, die für die Verwendung Ihres Geräts notwendig sind. EM-530 von der Marke BROTHER.
BEDIENUNGSANLEITUNG EM-530 BROTHER
User's Guide
Brother EM-530/CM-1000 Electronic Typewriter
Please record in the blank space below the MODEL NO. and SERIAL NO. of this typewriter. The MODEL NO. and SERIAL NO. are located on the back of the typewriter.
MODEL NO.: ____ SERIAL NO: ____
Please keep these numbers in a safe place for future reference.
FCC NOTICE
This equipment generates and uses radio frequency energy and if not installed and used properly, that is, in strict accordance with the manufacturer's instructions, may cause interference to radio and television reception. It has been type tested and found to comply with the limits for a class B computing device in accordance with the specifications in Subpart J of Part I 5 of FCC Rules, which are designed to provide reasonable protection against such interference in a residential installation. However, there is no guarantee that such interference to radio or television reception, which can be determined by turning the equipment on and off, will be avoided. The user is encouraged to try to correct the interference by one or more of the following measures:
- Reorient the receiving antenna
- Relocate the computer with respect to the receiver
- Move the computer away from the receiver
- Plug the computer into a different outlet so that the computer and receiver are on different branch circuits. If necessary, the user should consult the dealer or an experienced radio/television technician for additional suggestions. The user may find the following booklet prepared by the Federal Communications Commission helpful: "How to Identify and Resolve Radio-TV Interference Problems". This booklet is available from the US Government Printing Office, Washington, D.C., 20402, Stock No. 004-000-00345-4.
THE EQUIPMENT MUST BE INSTALLED NEAR THE SOCKET OUTLET, WHICH MUST BE EASILY ACCESSIBLE.
able of Contents
GENERAL VIEW 3
SETTING UP THE TYPEWRITER .....4
Paper Supporter 4
Support arm 4
Acoustic Cover 5
Margin scale 5
Giare Screen 5
Top Cover 6
Opening the top cover 6
Closing the top cover 6
Power Switch 7
Cassette Daisy Wheel 8
Removing the daisy wheel 8
Inserting the new daisy wheel 8
Cassette Ribbon 9
Removing the old ribbon 9
Inserting the new ribbon....10
Correction Tape....11
Removing the old correction tape ..... |
Installing the new correction tape ..... 12
BASIC TYPING FUNCTIONS ...... 13
Automatic Paper Insertion 13
Manual Paper Insertion 14
Setting Start Position 15
Setting End Position....15
Paper Thickness Control 16
Setting Impact 16
Alt and Code Keys 17
Extra characters 17
Dead Keys 18
The Keyboard 18
Selecting Keyboard 18
Multilingual Keyboards 19
Setting Line Space 21
Setting Typing Pitch 21
Margins 22
Preset margins 22
Margin release 23
Setting margins 23
Setting left margin 23
Setting right margin 23
Setting And Using Tabs 24
Normal tabs 24
Auto tab setting 24
Decimal tabs 25
Tab clear 25
Ali tab clear 26
Using Shift And Caps Keys 26
Shift 26
Shift lock 27
Caps 27
Backspacing 27
Simple backspace 27
Express backspace 27
Micro backspace 28
Repeat Function 28
KEYBOARD LAYOUT 30
ADVANCED TYPING 32
Bold 32
Automatic Underline 32
Expand 33
Carriage Return 33
Manual carriage return 33
Hot zone 33
Automatic carriage return 34
Permanent spaces and hyphens ..... 35
Centering 35
Centering between margins 35
Centering between tabs 35
Centering around the carriage position 36
Right Margin Flush 37
Indentation 37
Table of Contents
| Line indentation | 37 |
| Paragraph indentation | 38 |
| Indent clear | 38 |
| Corrections | 38 |
| Automatic correction | 39 |
| Character correction | 39 |
| Word out | 40 |
| Line out | 40 |
| Insertions And Deletions | 41 |
| Insertions | 41 |
| Deletions | 42 |
| Relocation | 44 |
| Manual Correction | 44 |
| Subscript And Superscript | 45 |
| Micro index/reverse micro index | 46 |
| Line Format Memory | 46 |
| Selecting the line format | 46 |
| Changing the line format | 46 |
| Framing and Line Drawing | 47 |
| Horizontal line drawing | 47 |
| Vertical line drawing | 47 |
| Drawing a rectangular frame | 48 |
| Drawing a tabular gnd | 49 |
| On-Line Spelling-Checker | 50 |
| Spelling check | 51 |
| Find function | 51 |
| User dictionary | 51 |
MAINTENANCE AND TROUBLE-
SHOOTING 52
| Maintenance | 52 |
| Environment | 52 |
| Cleaning | 52 |
| Supplies | 53 |
Troubleshooting 54
SPECIFICATIONS ....55
APPENDIX A 56
APPENDIX B 57
INDEX 58
Self Demonstration Feature
Your typewriter has a self-demonstration that shows many of the typing features of the machine. Your dealer may already have demonstrated this to you, but if not, you can do it yourself. After you have set up the typewriter and switched it on as detailed in the following section, insert a sheet of paper, hold down the [CODE] key and press the [SHIFT] and [S] keys together.
To stop the demonstration press [CODE] + [CANCEL].
General View
PRINTER CARRIAGE
Printing mechanism that holds the ribbon cassette, daisy wheel, and correction tape. It moves back and forth along the platen
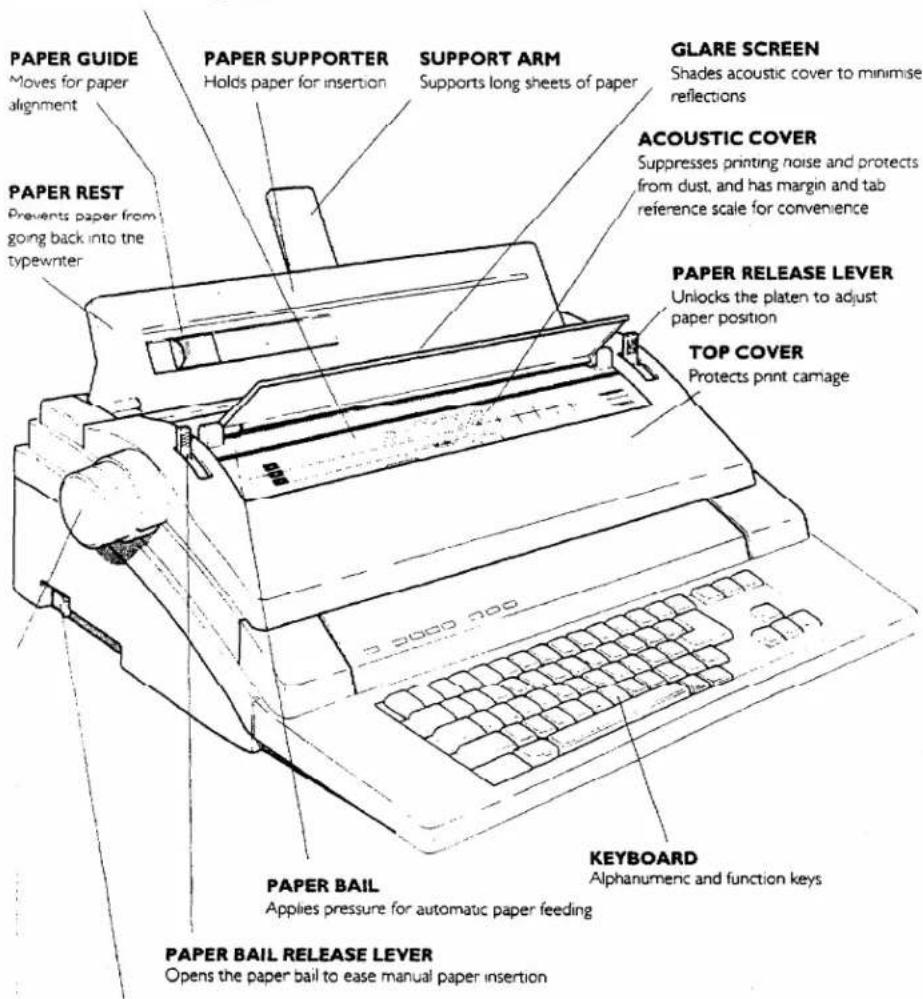
POWER SWITCH
Tums the typewriter ON and OFF
PLATEN KNOB
Feeds paper manually
Setting up the Typewriter
This section tells you how to set up your typewriter ready for typing. If you didn't remove the yellow packing pieces and fit the paper supporter when you unpacked the typewriter, now is the time to do it before you attempt to power up the machine.
natural_image
Illustration of two hands holding rectangular objects with downward arrows indicating movement or assembly (no text or symbols)Paper Supporter
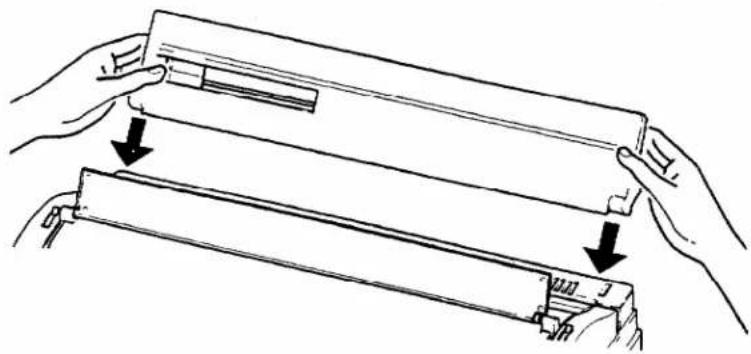
The paper supporter is used to check and adjust the position of the paper.
Attach the paper supporter by inserting the tabs into the holes provided on the top of the typewriter.
The sliding paper guide can be used to adjust the position of the left edge of the paper, relative to the extreme left position of the print carriage, which is indicated by the '0' mark on the embossed scale.
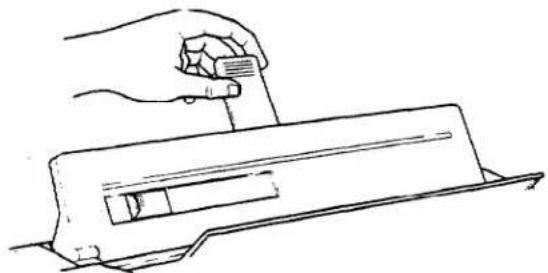
Support arm
The support arm can be folded out to provide additional support to long sheets of paper.
Setting up the typewriter
Note:
Should you need to move your typewriter, we suggest that you remove the paper supporter first to avoid the risk of damage.
natural_image
Line drawing of a hand holding a tool over a flat object (no text or symbols)Acoustic Cover
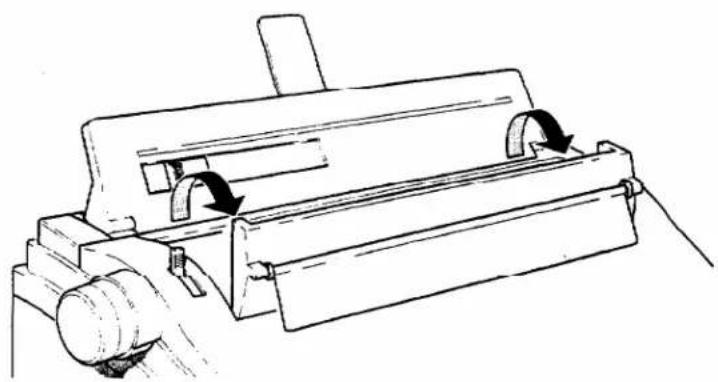
The acoustic cover suppresses the noise created by the typing carriage and prevents dust from entering the typewriter. Electronic typewriters really dislike dust, so make sure that the acoustic cover of your typewriter is always closed.
Margin scale
The margin scale is embossed on the acoustic cover. It shows the three pitch scales (for 10, 12 and 15 characters per inch), the left and right margins, the tab stop positions and the position of the carriage.
Glare Screen
The glare screen can be adjusted to shade the acoustic cover in order to reduce reflections.
natural_image
Technical line drawing of a mechanical device with rotating components and a handle (no text or symbols)Setting up the Typewriter
Top Cover
Opening the top cover
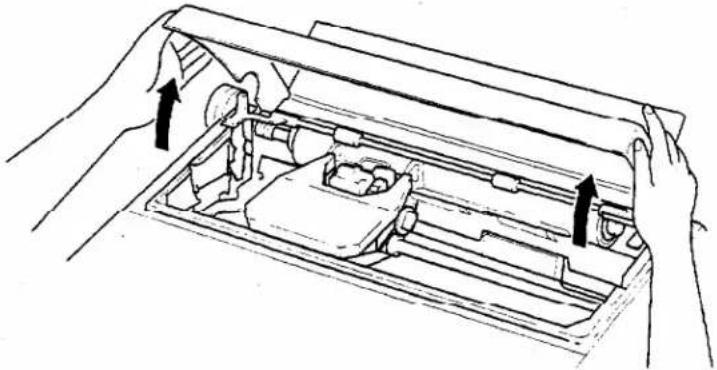
In order to insert a new cassette daisy wheel, cassette ribbon or spool of correction tape, first place the top cover of the typewriter to the upright position. Do this by placing both hands on either end of the cover and lifting it upwards until it stands by itself.
natural_image
Diagram of hands operating a mechanical device with internal components and directional arrows indicating movement (no text or symbols)Notes:
- The keyboard locks up when the cover is raised, and typing is not possible until it is closed again.
- Opening the top cover has no effect on margin settings, tab settings or the correction memory, all of which are retained without change.
Closing the top cover
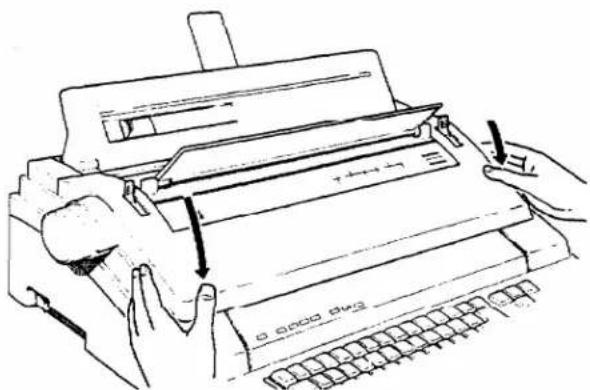
After inserting the cassette daisy wheel, cassette ribbon or spool of correction tape, close the top cover by replacing it to its original position.
Ensure that it is firmly in place after closing.
Note:
If the top cover is closed with the unit switched ON, the carriage will automatically travel to the left edge, then return to its previous position.
Setting up the Typewriter
natural_image
Line drawing of hands operating a vintage typewriter with a keyboard (no text or symbols present)Power Switch
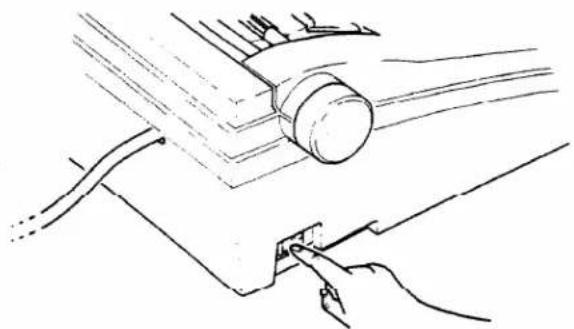
Your typewriter is now ready to be powered up. You'll find the power cord at the back of the typewriter. Simply unwrap it and plug it in.
The Power Switch is located at the left rear side of the typewriter under the platen knob.
natural_image
Line drawing of a hand using a tool to adjust or install a mechanical component (no text or symbols present)Set the Power Switch to the ON position. The following should occur:
- The carriage moves to the extreme left position.
- The daisy wheel rotates and stops.
- The carriage moves to the left margin position
Notes:
- Whenever you lift up the top cover, for example to change the cassette ribbon, the power to the typewriter will automatically go off. For this reason there is no danger
Setting up the Typewriter
in changing the cassette daisy wheel or cassette ribbon and correction tape even with the Power is ON.
- If any of the above didn't happen, take a look at the section on troubleshooting on page 54.
Cassette Daisy Wheel
Brother's slip-in, slip-out cassette daisy wheels are known the world over for their beautiful true letter quality type print. Here's your chance to discover it for yourself.
Your typewriter comes with a cassette daisy wheel already installed. You may, at some point, wish to exchange it for one with a different typeface, or to place a new one in. With the Brother typewriter, this is a very simple task.
Removing the cassette daisy wheel
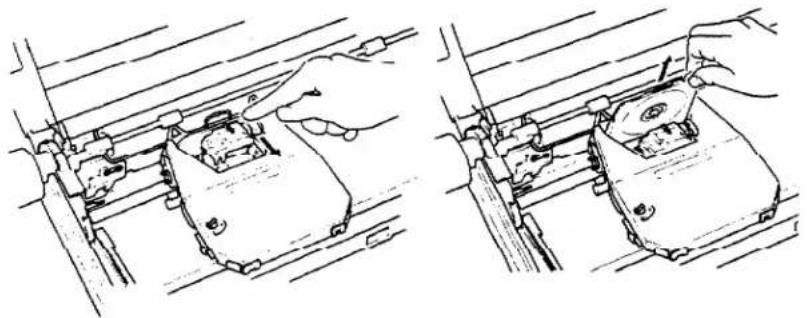
To remove the cassette daisy wheel, pull the locking lever towards you to release it, then grasp the 'ear' of the cassette daisy wheel between your thumb and forefinger and simply pull it out.
natural_image
Technical line drawing showing two mechanical assembly steps with hands adjusting components (no text or symbols)Note:
The cassette ribbon need not be removed in order to remove the cassette daisy wheel.
Inserting the new cassette daisy wheel
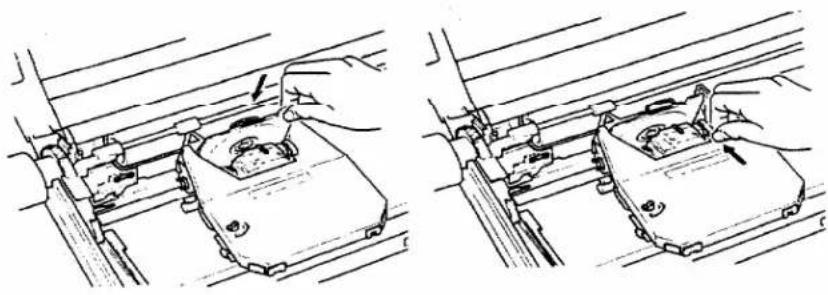
Grasping the 'ear' of the new cassette daisy wheel, slip it into the cassette guide slot and slide it in as far as it will go.
Now press the locking lever back toward the platen until it clicks into place. Do not force the lever. If you have any difficulty, recheck the cassette daisy wheel to ensure that it is properly set and try again.
natural_image
Technical line drawing showing two mechanical assembly steps with hands adjusting components (no text or symbols present)Notes:
- Be sure that the 'ear' of the cassette daisy wheel is to the right during insertion. Putting it in backwards can damage both the cassette daisy wheel and the motor mechanism.
- If the cassette daisy wheel is not properly locked into position, characters will not be properly typed.
- There is a wide selection of Brother cassette daisy wheels available.
Cassette Ribbon
The wide range of Brother cassette ribbons available have two unique features in common: they are clean and troublefree. Clean means that the ink goes where it is supposed to go, on the paper, and not on your hands!
Removing the old cassette ribbon
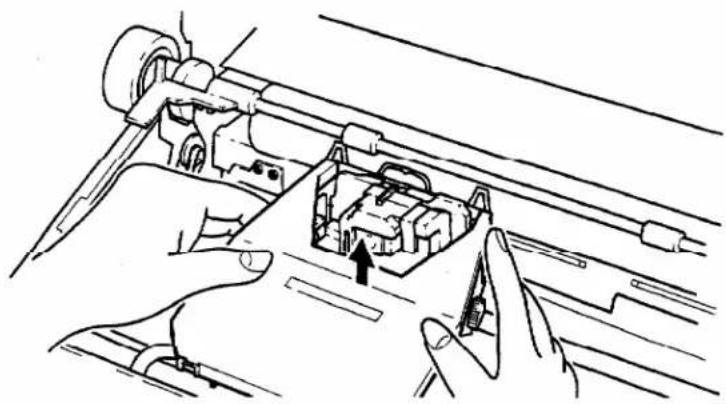
First, use the [SPACEBAR] or [BKSP] key to move the carriage to the center of the platen. To remove the cassette ribbon, hold the cassette with both hands and raise the front end (that near to the platen). Then, when the ribbon is clear, simply lift the cassette up and out.
Setting up the Typewriter
natural_image
Illustration of hands operating a mechanical device with a highlighted internal component (no text or symbols)Inserting the new cassette ribbon
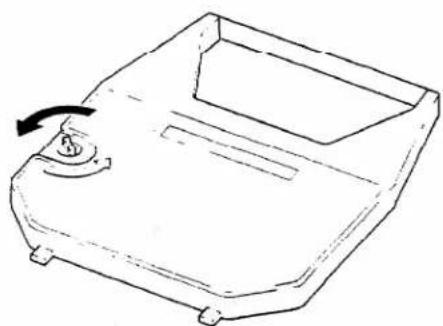
Remove the stopper from the new cassette ribbon and turn the ribbon feed knob counterclockwise to tighten the ribbon.
natural_image
Line drawing of a mechanical component with a curved arrow indicating rotation (no text or symbols)Now locate the lugs on the back edge of the cassette into the locating holes in the cassette ribbon table, and slide the ribbon between the ribbon guides.
With the ribbon set between the ribbon guides, press the cassette down until it locks into place. Tum the ribbon feed knob again slightly counterclockwise to tighten the ribbon.
Notes:
- A window is provided in the cassette to allow you to check on the remaining amount of ribbon.
Setting up the Typewriter
- Brother cassette ribbons are available in four different types:
Correctable film ribbon (standard with this model)
One-time film ribbon
Multistrike film ribbon
Nylon ribbon
The correctable film ribbon is also available in red, blue, green and brown.
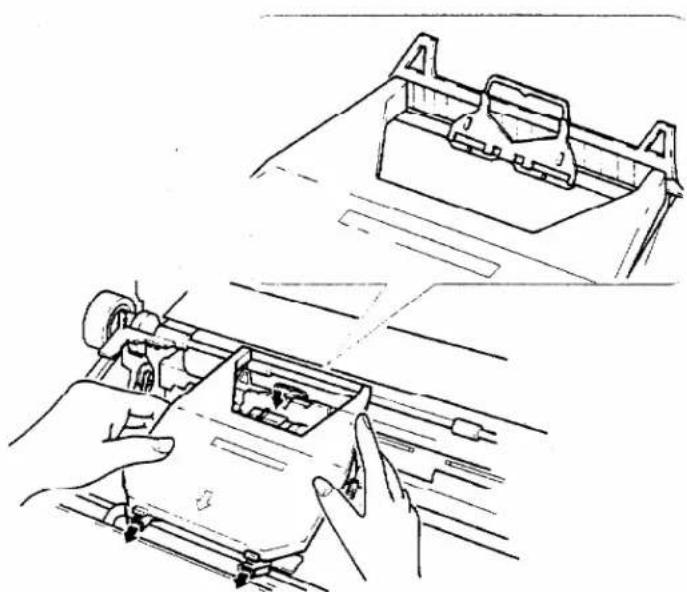
natural_image
Technical line drawing showing hands operating a mechanical component with a close-up view of the internal structure (no text or symbols)Correction Tape
The correction tape guarantees a faultless document every time. What's more, the bottom of your typewriter will never be full of pieces of old correction paper and lumps of dried up correction fluid!
Removing the old correction tape
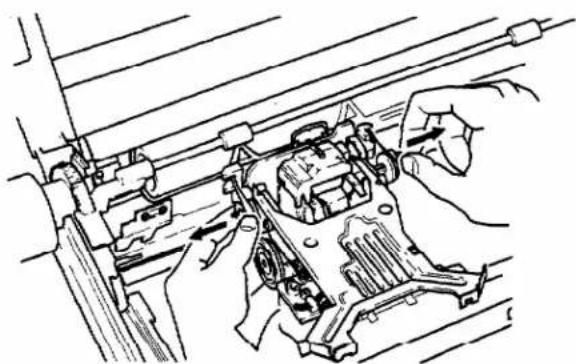
If you need to replace the correction tape, first make sure that the carriage is in the center of the platen by using the [SPACEBAR] or [BKSP] key. Then remove the cassette ribbon.
Now just pull out the left and right spools of the old correction tape from the carriage.
Setting up the Typewnter
natural_image
Technical line drawing of a mechanical assembly with hands operating a component (no text or symbols visible)Installing the new correction tape
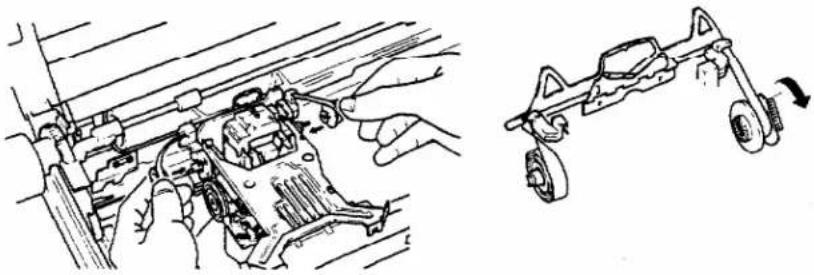
First install the left spool, then thread the tape across the left and right guide rollers and install the right spool. Make sure that the active (non-shiny) side of the correction tape is facing towards the platen.
natural_image
Technical line drawing showing mechanical assembly steps (no text or symbols)Take up the slack by turning the right spool anticlockwise until the white portion of the tape begins to wind onto the right spool.
Note:
Brother correction tapes are available in two types:
Liftoff correction tape (standard with this typewriter)
This is used together with the correctable film ribbon.
Coverup correction tape
This is used together with the multi-strike film ribbon, one-time film ribbon or the nylon ribbon.
Basic Typing Functions
Having set up your typewriter, you are now ready to insert a sheet of paper and begin typing.
Automatic Paper Insertion

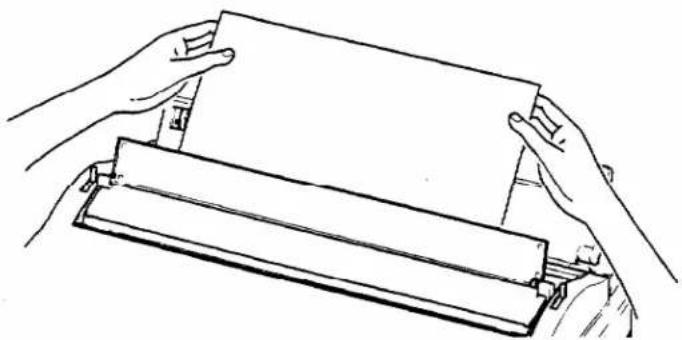
Inserting a sheet of paper into a typewriter has never been simpler, just three easy steps and you're off! Most types of smooth finish paper can be used with your typewriter. Rag content and other types of rough paper, however, are not recommended.
First, ensure that the power switch is ON, and that the PAPER RELEASE LEVER is set to the back position.
Place the paper guide in the desired position, then, holding the sheet as straight as possible, insert the paper into the slot behind the paper rest with the left edge against the paper guide.
natural_image
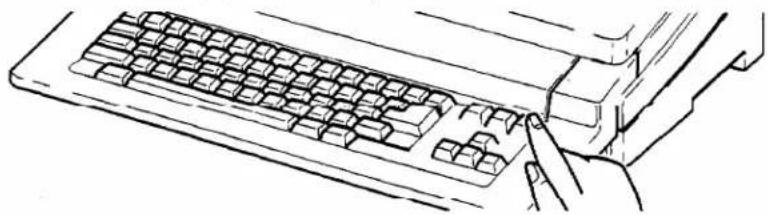
Line drawing of two hands holding a rectangular object, possibly a document or holder, with no visible text or symbols.Now press the [P INS] key. The carriage will first move to the left end of the platen and then back to the center of the margin scale, the paper bail will lift, and the platen will rotate to feed in the sheet of paper automatically.
natural_image
Line drawing of a hand typing on a keyboard (no text or symbols present)Basic Typing Functions
Hold down the [CODE] key and press the [EXPR] key, or simply press the [RETURN] key to move the carriage to the left margin position.
Notes:
- The paper is automatically fed approximately 1 inch from the top edge of the paper.
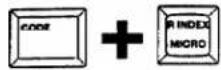
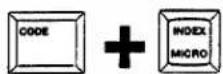
- For even more precise settings, you can also move the paper up or down half a line at a time with the [INDEX] and [R INDEX] keys.
- If the paper is crooked or not properly aligned after automatic insertion, it may be adjusted manually. First turn the platen or use the [INDEX] key to feed more paper through, then pull the paper release lever forward. This will lift the paper bail and release the paper so that it may be moved manually. Align the paper until it is straight, then return the paper release lever to its back position and turn the platen knob or use the [INDEX] and [R INDEX] keys to return the paper to the position where you wish to begin typing. For finer adjustment, use these keys with the [CODE] key held down.
- The functions of the [CODE] key are described in more detail later.
Manual Paper Insertion
You may need to use the manual method for unusual settings or for when you need to make a precise alignment in the middle of a document.
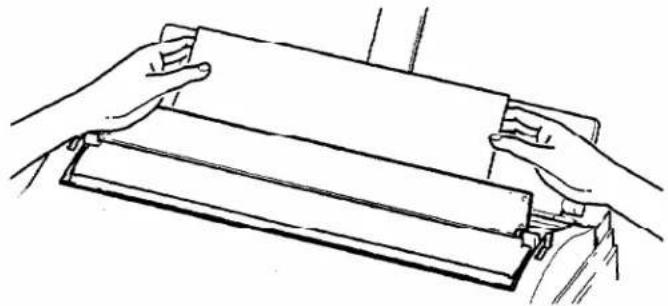
First insert the sheet of paper into the slot behind the paper rest while keeping the left edge of the paper in line with the paper guide. Set the paper release lever in its back position. Use both hands and try to keep the sheet as straight as possible.
Pull the paper bail lever forward to raise the paper bail and avoid it catching on the paper. Then turn the platen knob until the top edge of the paper is brought under the paper bail to the position desired, and release the paper bail lever. If the sheet is not straight, set the
natural_image
Line drawing of two hands holding a flat object over a wooden frame (no text or symbols)paper release lever to its forward position and straighten the sheet with both hands. Return the paper release lever to its back position and turn the platen knob until the sheet comes out to the desired position.
Setting Start Position
Automatic paper insertion normally sets the paper so that typing will start approximately one inch (25.4 mm) from the top of the page. However, you can change this position using the START SET function, so that auto-insertion will set the paper to a start position anywhere between one and six inches (25.4 and 152.4 mm) from the top of the page.
To set the start position, insert a sheet of paper and press the [PINS] key to auto-insert the page. Now, use the [INDEX] and [R INDEX] keys to adjust the position of the page to where you wish to begin typing. Then, hold down the [CODE] key and press the [S SET] key to save that setting as the start line.
Setting End Position
The appearance of multi-page documents is enhanced if the text ends at the same position on each page.
The typewriter makes this easy by allowing you to set the end position or page length using the END SET function, so that you cannot type below the end position. This feature also avoids the possibility of you typing too near the bottom edge of the paper.
To set the end position, after inserting the paper, use the [INDEX] and [R INDEX] keys to adjust the paper to the desired end position, then hold down the [CODE] key and press the [E SET] key to set the end position.
When you are typing, the three LEDs for line spacing will start flashing when the end of the last line is reached. If you attempt to perform a carriage return, the beeper will sound.
Should you wish to type beyond the end position, press the [CORRECT] key, followed by the [RETURN] key. You can then type an additional line. You can repeat this procedure for as many extra lines as you wish to type.
Notes:
- There must be at least 5 lines between the start position and the end position. (Single line spacing)
Basic Typing Functions
- The start and end positions are measured absolutely from the top edge of the page and are completely independent of each other. Changing start position does not affect end position, and vice versa.
- If you change the size of paper you must reset the end position if you want to keep the same bottom margin.
- The end position cannot be more than 16.5 inches or 420mm from the top of the page.
Paper Thickness Control
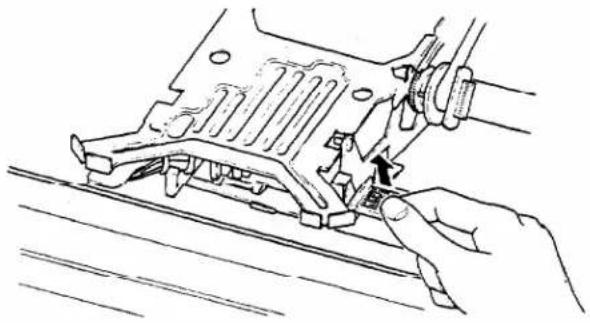
The paper thickness control is located on the right side of the cassette ribbon table.
The lever is normally pushed right down in its standard position. Pulling up the lever increases the space between the carriage print head and the platen, thus enabling you to insert thicker paper and envelopes.
natural_image
Line drawing of hands operating a mechanical component with a knob (no text or symbols)Setting Impact
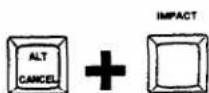
Typing impact may be adjusted according to the quality and thickness of the paper you wish to use, or to the number of carbon copies you are making.
Select the desired impact force by holding down the [ALT] key and pressing the [IMPACT] key until the required impact is indicated by the IMPACT LEDs above the [2] key. The [IMPACT] key may also be used with the [CODE] key.
Each time you press the [IMPACT] key, the impact will change in the sequence
(M)edium - (H)eavy - (L)ight - (M)edium.
Note:
- Your typewriter is able to make up to 4 carbon copies in addition to the original document.
- The functions of the [ALT] key are described in more detail later.
ALT and CODE Keys
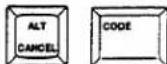
Many of the keys have secondary functions labelled on them in green, or above them in the case of the top row of keys on the keyboard. These functions are accessed using the [ALT] and [CODE] keys.
The [ALT] key in used to access keyboard selection, typing impact or line format, by holding down the [ALT] key and pressing the [KB], [IMPACT] or [FORMAT] key.
The [CODE] key is used to access all other functions labelled in green, by holding down the [CODE] key and pressing the relevant key.
The LED indicators above the keyboard normally show the status of the [SHIFT] key, the typing pitch and the line spacing. However, if the [CODE] key is pressed the LEDs will show the status of the functions shown in green above the LEDs, as described in more detail later.
The status of functions selected by the [ALT] key is indicated by the bottom row of legends on the LED indicators if the [ALT] key is pressed, as described in more detail later.
Note:
To avoid confusion, when we are talking about functions that use the [ALT] or [CODE] key, we will refer to the legend printed in green on or above the key, and not to the main legend printed on the key in black.
Extra Characters
You will see that some keys have one or two extra characters printed on them in green. These characters can be typed by holding down the [CODE] key and pressing the character key. Where two characters are shown in green, the left hand character is the one normally printed when used with the [CODE] key. The right-hand
Basic Typing Functions
character will be printed when you have selected keyboard II and installed an "International" daisy wheel, as described later. A table of extra and alternate characters is given in Appendix A at the back of this guide.
Dead Keys
The dead keys are used for diacritical marks (e.g accents) that may be placed over typed characters. The carriage does not move when a dead key is typed, so the character beneath the accent can be typed afterwards without having to backspace. When typed in the underline mode, the typed mark will not be underlined.
The Keyboard
Your typewriter has many functions that make it easy to produce attractive and professional-looking documents. The keys that control these functions are shown, with a brief explanation, in the keyboard layout on pages 30 and 31. Please refer to this layout for the key positions when reading through this guide.
Selecting Keyboard
A wide variety of daisy wheels is available for your typewriter. As well as having different typefaces, some of these daisy wheels have different sets of characters to suit different languages and applications. The typewriter has a choice of three keyboard settings to allow it to work properly with different types of daisywheel.
I (Standard)
This is probably the keyboard that you'll be using most of the time, with "AMERICAN ENGLISH" daisywheels. When an American English daisy wheel is used with keyboard I selected, the characters shown on the left side of the keytop are printed.
II (International)
This Keyboard should be used when an optional "INTERNATIONAL" daisy wheel has been inserted. You will notice that some of the keytops have characters printed on the right as well as on the left. When an international daisy wheel is used and keyboard II is selected, the characters shown on the right side of each key top are printed instead of the characters shown on the left side.
These alternative characters are shown in Appendix A at the back of this guide.
III (Symbol)
This Keyboard is for when you need to type mathematical formulas or numbers which require special symbols, using the optional "SYMBOL" daisy wheel.
The symbol keyboard layout is shown in Appendix B at the back of this guide.
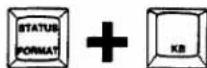
Select the desired keyboard by holding down the [ALT] key and pressing the [KB] key, until the desired keyboard selection is indicated by the KB LEDs above the [I] key. The [KB] key may also be used with the [CODE] key.
Notes:
- Be sure that the proper daisy wheel is used for the keyboard selected. For instance, when using II, an international cassette daisy wheel should be inserted, and the symbol cassette daisy wheel for III.
Multilingual Keyboards
If you wish to type in some foreign languages, for exampleTurkish, you may find that the English daisy wheel does not contain all the required characters, and for languages with non-Latin characters such as Greek the character set is completely different.
Of course, you can simply put a foreign language daisy wheel in your typewriter, but you may find the results are not very good.
When you type a character, the typewriter will rotate the daisy wheel to the correct position to print that character. If you use a foreign language daisy wheel, your typewriter does not know the arrangement of the characters on the daisy wheel, so the keyboard layout may not be the same as it would be on the proper foreign language keyboard.
Secondly, when you type a character using an English daisy wheel, the printing impact is set to suit that particular character, so that the print density remains even. (For example, a small character such as a full stop needs less impact than a capital B).
If you use a foreign language daisy wheel, the typewriter does not know the correct typing impacts for the characters on that daisy wheel, and some characters may appear darker than others.
Fortunately, the multilingual keyboard feature of the typewriter allows you to get the
best results when you use foreign language daisy wheels.
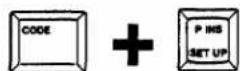
To use the multilingual keyboard feature, first install the foreign language daisy wheel, then hold down the [CODE] key and press the [SETUP] key. The SETUP LED will begin flashing.
Now type in the three-digit keyboard code for the language you wish to use. A list of keyboard codes for the countries and languages supported by the multilingual keyboard feature is given in Appendix A. As a check that you have the correct daisy wheel for the language you wish to type, note that the last two digits of the keyboard code are printed on the label fixed to the clear plastic cassette of the daisy wheel.
For example, the keyboard code for Dutch is 032, and all Dutch daisy wheels are labelled 32 or 32F, depending on whether the daisy wheel has the vertical bar (|) framing character or not.
Hold down the [CODE] key and press the [PRINT] key to print out a map of the foreign language keyboard layout. You must have the foreign language daisy wheel installed to do this.
Press [CODE] + [SETUP] again to store the new keyboard setting and return to normal typing mode.
To return to normal typing without changing the keyboard code, hold down the [CODE] key and press the [CANCEL] key.
Note:
- Multilingual keyboard settings are not backed up, and will be lost when the machine is switched off.
- Multilingual keyboard selection only changes the layout of keyboard I to suit the foreign language daisy wheel. The layout of KB II is still International and KB III is still Symbol.
- If you press the [ALT] key when a foreign language keyboard has been selected, one or both KB LEDs will flash depending on whether KB I, II, or III is selected, to warn you that a foreign keyboard is selected for KB I.
- Framing and line drawing (p. 47) does not work if a foreign keyboard is selected.
Setting Line Space
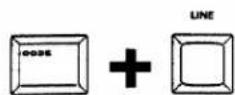
Your typewriter offers you three choices of line spacing: single line spacing, one and a half line spacing, and double line spacing. Select the desired line spacing by holding down the [CODE] key and pressing the [LINE] key. Each time the [LINE] key is pressed, line spacing
| 1 | 1 1/2 | 2 |
| ThreeChoices ofLine Spacing | ThreeChoices ofLine Spacing | ThreeChoices ofLine Spacing |
will change to the next setting in the order 1.1 1/2.2 and the LED for the selected line space will light.
Single line spacing places 1/6 inch of space between lines.
One and a half line spacing places 1/4 inch of space between lines.
Double line spacing places 1/3 inch of space between lines.
Note:
When you switch the machine off the line space setting is saved, so when you switch the machine back on, the line spacing is the one you were using when the machine was switched off.
Setting Typing Pitch
Your typewriter offers you four choices of pitch:
Pica, or 10 pitch (10 characters per inch)
Elite or 12 pitch (12 characters per inch)
Micron or 15 pitch (15 characters per inch)
Proportional Spacing
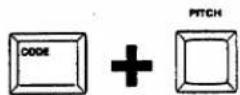
Select the desired pitch by pressing the holding down the [CODE] key and pressing the
Basic Typing Functions
10 Pitch gives a maximum of 120 characters per line.
12 Pitch gives a maximum of 144 characters per line.
15 Pitch gives a maximum of 180 characters per line.
[PITCH] key. Each time the [PITCH] key is pressed, pitch will change to the next setting in the order 10-12-15-PS, and the LED for the selected pitch setting will light.
10 pitch allows 120 characters to be typed per line.
12 pitch allows 144 characters to be typed per line.
15 pitch allows 180 characters to be typed per line.
PS, or Proportional Spacing, spaces the characters according to their actual width. For example, an I takes up less space than an M. The nominal spacing of PS is 12 pitch, but this will vary depending on the characters that are typed.
Note:
When you switch the machine off the pitch setting is saved, so when you switch the machine back on, the typing pitch is the one you were using when the machine was switched off.
Margins
As you learned earlier, when the typewriter is switched ON, the carriage moves automatically to the far left and then 10 spaces to the right. This is the preset left margin in 10 pitch.
Preset margins
The preset left margin will vary as will the right margin depending on the typing pitch as shown in the following table.
| Pitch | Left margin | Right margin |
| 10 | 10 | 75 |
| 12 | 12 | 90 |
Basic Typing Functions
Margin release


The print carriage will normally not move outside the margins. However, on occasion, you may wish to type outside the margins. It will also be necessary to move the carriage past the margins if you want to set margins outside the ones currently set.
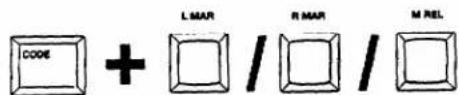
To move to the left of the left margin, use the [BKSP] key to move to the left margin, hold down the [CODE] key and press the [M REL] key, then continue to press the [BKSP] key to where you wish to begin typing.
To move past the right margin, hold down the [CODE] key and press the [M REL] key when the margin is reached, then continue typing.
Note:
You can also use the left and right cursor keys ( and ) to move the carriage to the left or to the right
Setting margins
If you do not wish to use the standard margins, you can set your own margins very easily.
Setting left margin


To set a new left margin, move the carriage to the new left margin position using the [SPACEBAR] or [BKSP] key. If the new margin position is to the left of the old margin, you will need to use the [M REL] key before you can move outside the old margin.
Hold down the [CODE] key and press the [L MAR] key. The left margin is now set.
Setting right margin


To set a new right margin, move the carriage to the new right margin position using the [SPACEBAR] or [BKSP] key.
Hold down the [CODE] key and press the [R MAR] key. The right margin is now set.
If you wish to move beyond the existing right margin to set a new one, use [CODE] + [M REL] then the [SPACEBAR]. However, you should first ensure that automatic carriage return is switched off. If it is not, you cannot move beyond the existing right margin using the [SPACEBAR] as the carriage will return automatically.
To switch off automatic carriage return, hold down the [CODE] key and press the [AUTO] key until the AUTO LED above the [3] key is off.
The minimum width between left and right margins depends on the typing pitch, as shown in the following table.
| Pitch | Min Margin Width | Expand mode |
| 10 | 20 characters | 10 characters |
| 12 | 24 characters | 12 characters |
| 15 | 30 characters | 15 characters |
Setting And Using Tabs
Tabs allow you to move the typing position quickly and automatically to a preset position. As their name suggests, they are useful for typing tables, and are also used for indenting paragraphs.
Normal tabs
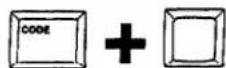
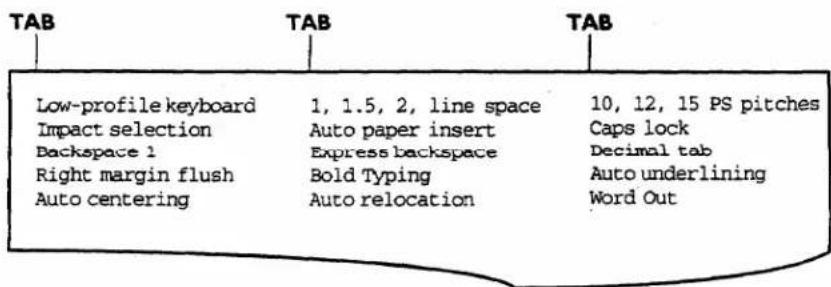
Normal (left-aligned) tabs are set by moving the carriage to the position at which a tab is required. Then hold down the [CODE] key and press the [T SET] key. To use the tab stop, press the [TAB] key, and the carriage will move to the tab position automatically.
Auto tab setting
If the [T SET] key is held down for more than half a second, tabs will be set every 10 columns to the right of the current left margin position. The beeper will sound twice and all existing tabs, both decimal and normal, will be cleared.
Auto tab setting does not work with decimal tabs.
Notes:
- When a tab is to be set in the same position as a decimal tab (see below), the decimal tab in that position will be changed to a normal tab when the [T SET] key is pressed.
- Tab positions are set according to the absolute position of the carriage (in units of 1/120 in.) based on the left edge, so they do not change even when the margins or pitch have been changed.
- A maximum of 30 tabs, including decimal tabs, can be set on your typewriter.
Decimal tabs
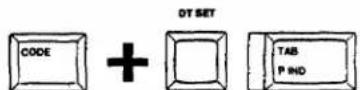
This function allows you to type columns of numbers aligned on a decimal point. Decimal tabs are set by moving the carriage to the position at which a decimal tab is desired and holding down the [CODE] key then pressing the [DT SET] key. When a decimal tab is set, the DTAB LED will flash. To move the carriage to the decimal tab stop, press the
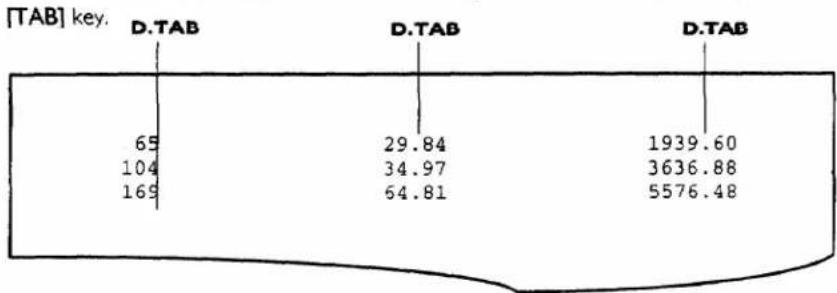
other
[TAB] key. D.TAB D.TAB D.TAB 65 29.84 1939.60 104 34.97 3636.88 169 64.81 5576.48Notes:
- When a decimal tab is set in the same position as a normal tab, the normal tab in that position will be changed to a decimal tab when the [CODE] + [DT SET] keys are pressed.
- Decimal tab positions are set according to the absolute position of the carriage (in units of 1/120in.) based on the left edge, so they do not change even when the margins or pitch have been changed.
- A maximum of 30 decimal tabs, including normal tabs, can be set on your typewriter.
Tab clear
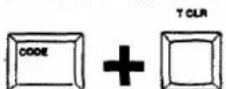
To clear a normal or decimal tab, move the carriage to the position of that tab using the [TAB] key, hold down the [CODE] key and press the [T CLR] key.
Basic Typing Functions
All tab clear
If [CODE] + [T CLR] is held down for more than half a second, the beeper will sound three times and all tabs will be cleared.
Notes:
- If you have selected paragraph indent mode (as described later) and subsequently clear the paragraph indent tab, the tab will be cleared but the typewriter will remain in paragraph indent mode until it is cancelled by holding down [CODE] and pressing [IND CLR].
- If you move to a decimal tab and clear that tab before typing anything, the tab will be cleared, but any text or numbers subsequently typed will still be printed at the decimal tab position, unless you move to another tab position or press [RETURN].
Using Shift And Caps Keys
Your typewriter normally prints lower case letters and numerals, plus the punctuation marks and symbols shown on the lower part of other keys. However, you will often want to type upper case letters (for beginning a sentence etc.) the symbols shown on the upper part of other keys.
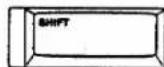
The [SHIFT] and [CAPS] keys allow you to do this.
Shift
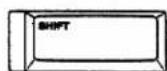
If you hold down either of the [SHIFT] keys, the SHIFT LED will light, and you may type upper case letters and the upper characters shown on other keys. Releasing this key automatically returns the keyboard to the lower case mode.
BROTHER ELECTRONIC TYPEWRITER Congratulations on becoming the proud owner of a Brother Typewriter
Basic Typing Functions
Shift lock
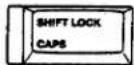
The SHIFT function can be locked on by pressing the [CAPS] key, when the SHIFT LED will stay lit even if you release the key. To return to lower case typing, press either of the [SHIFT] keys.
Caps
If you want to type upper case letters but want the lower characters on other keys (e.g. numerals), hold down the [CODE] key and press the [CAPS] key. The CAPS LED will light while holding down the [CODE] key as a reminder that you are in the caps lock mode. To return the keyboard to normal mode, hold down the [CODE] key and press the [CAPS] key again.
While the keyboard is in CAPS mode you can still access upper characters on non-letter keys by pressing the [SHIFT] key or the [CAPS] key. However, pressing the [CAPS] key overrides the [CAPS] mode because it sets all keys to upper case or upper character.
MODEL #ML432XFY ITEM X1942 MODEL #ML569PQR ITEM X1943
Some keys have characters printed on them in green. These characters are printed by holding down the [CODE] key and pressing the appropriate character key.
Backspacing

Your typewriter has three different backspace functions.
Simple backspace
Press the [BKSP] key to move the carriage to the left one space at a time. Hold down the [BKSP] key to move the carriage continuously to the left. The left cursor key (←) can also be used for backspacing.
Express backspace
Holding down the [CODE] key and pressing the [EXPR] key will bring the carriage immediately back to the left margin.
Micro backspace
Holding down the [CODE] key and pressing the [BS 1] key will move the carriage to the left by 1/120 of an inch. As the distance backspaced remains constant at 1/120 of an inch regardless of the typing pitch being used, backspacing in this case varies by pitch as shown in the following table:
| Pitch | Spacing |
| 10 | 1/12 of a character pitch |
| 12 | 1/10 of a character pitch |
| 15 | 1/8 of a character pitch |
| PS | 1/10 of a character pitch |
This function is useful in numerous different ways, including positioning a character or word when the paper has been reinserted into the typewriter, or for typing a character or word into a limited space on the document. See "Insertion And Deletions" in the next section for more information.
Note:
The cursor keys can also be used with the [CODE] key for micro positioning of the carriage to the left or to the right.
[CODE] + → micro spaces to the right.
[CODE] + ← micro backspaces, the same as [CODE] + [BS 1]
Repeat Function
All character keys on the typewriter will repeat automatically if held down for more than 1.5 seconds. In addition, the following function keys have automatic repetition.
Basic Typing Functions
Tab [TAB]
Carriage Return [RETURN]
Backspace [BKSP]
Space [SPACEBAR]
Index [INDEX]
Reverse Index [R INDEX]
Automatic Correction [CORRECT]
Left Cursor
Right Cursor →
Keyboard Layout
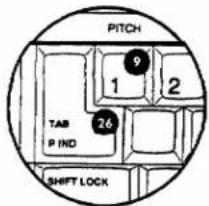
| LEDs LIT | No Key Pressed | With CODE | With STATUS |
| Shift | Caps | Setup | |
| 2 | 10 Pitch | Continuous Underline | Keyboard I |
| 2 & 3 | - | - | Keyboard II |
| 3 | 12 Pitch | Discontinuous Underline | Keyboard III |
| 4 | 15 Pitch | Bold | Light Impact |
| 4 & 5 | - | - | Medium Impact |
| 5 | Proportional Spacing | Expanded Typing | Heavy Impact |
| 6 | Single Line Spacing | Auto Camage Return | Format 1 |
| 6 & 7 | - | - | Format 2 |
| 7 | 1.5 Line Spacing | Paragraph Indent | Format 3 |
| 7 & 8 | - | - | Format 4 |
| 8 | Double Line Spacing | Decimal Tab | Format 5 |
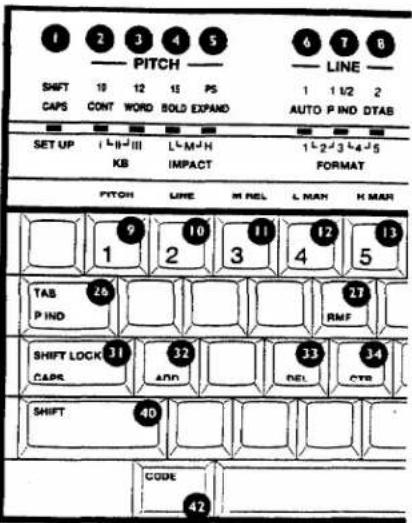
| Key | Legend | Name | Function | Key | Legend | Name | Function |
| 9* | PITCH | Typing Pitch | Sets 10, 12, 15 or PS Pitch | 24 | ALT | Alt | Used to display and set functions indicated with ^ |
| 10* | LINE | Line Spacing | Sets 1, 15, or 2 linespacing | ||||
| 11* | M REL | Margin Release | Releases margin stops | 24* | CANCEL | Cancel | Used to abandon many operations |
| 12* | L MAR | Left Margin | Sets the left margin | ||||
| 13* | R MAR | Right Margin | Sets the right margin | 25 | PINS | Paper insert | Used for automatic paper insertion |
| 14* | T SET | Tab Set | Sets a tab stop | ||||
| 15* | DT SET | Decimal Tab Set | Sets a decimal tab | 25* | SET UP | Setup | Used to set multilingual keyboards |
| 16* | T CLR | Tab Clear | Clears a tab | ||||
| 17 | UNDLN | Underline | Switches underline on/off | 26 | TAB | Tab | Moves carriage to next tab position |
| 18* | BOLD | Bold | Tums bold printing on/off | ||||
| 19* | EXPAND | Expand | Switches expanded typing on/off | 26* | P IND | Paragraph Indent | Turns on paragraph indent mode |
| 20^ | IMPACT | Impact | Sets typing impact | 27* | RMF | Right Margin Flush | Turns on right margin flush printing |
| 21 | BKSP | Backspace | Moves the carriage one space left | 28* | AUTO | Auto CR | Turns automaticcarnage return on/off |
| 21* | BS I | Micro Backspace | Backspaces 1/120 inch | ||||
| 22 | RELOC | Relocate | Returns typing carriage after corrections | 29* | Prints multilingual keyboard layouts | ||
| 22* | EXPR | Express Backspace | Returns carriage to left margin | 30 | RETURN | Camage Return | Returns the printingcamage to the left margin and advances one line |
| 23 | FRAME | Framing | Starts or ends text framing | ||||
| 23^ | FORMAT | Line Format | Selects a stored line format | 30* | IND CLR | Indent Clear | Turns off paragraph indent mode |
natural_image
Grayscale abstract texture with horizontal bands and no discernible text or symbols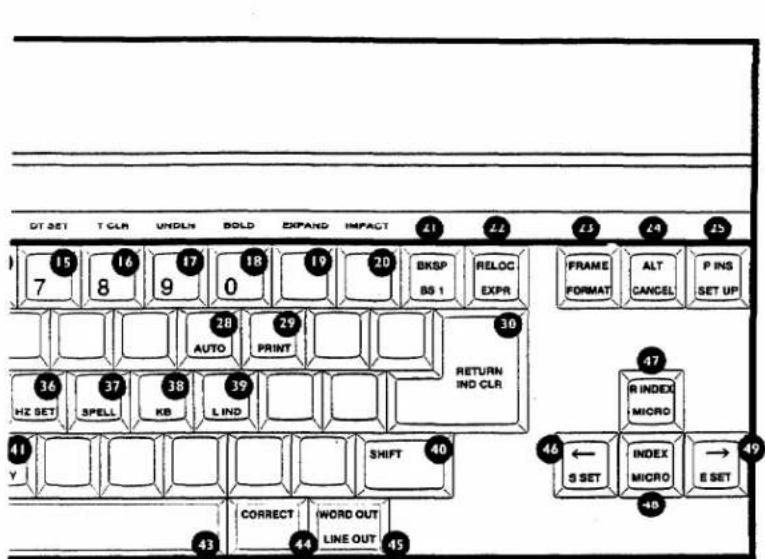
| Key Legend | Name | Function | Key | Legend | Name | Function |
| 31* SHIFT LOCK | Shift Lock | Locks shift mode on | 44 | CORRECT | Character Correct | Automatically deletes a character |
| 31* CAPS | Caps | Tums caps on/off | ||||
| 32* ADD | Add | Adds a word to the user dictionary | 44* | CORRECT | Manual Correct | Used for manual correction |
| 33* DEL | Delete | Deletes a word from the user dictionary | 45 | WORD OUT | Word Out | Automatically deletes a word |
| 34* CTR | Centring | Turns centring mode on | 45* | LINE OUT | Line Out | Automatically deletes a line of text |
| 35* FIND | Find | Finds mis-spelt words | 46 | ← | Left Cursor | Moves the typing carriage one space left |
| 36* HZ SET | Hot Zone Set | Sets the width of the hot zone | ||||
| 37* SPELL | Spelling Check | Tums the spelling checker on/off | 46* | S SET | Start Set | Set the top margin |
| 47 | R INDEX | Reverse Index | Moves the paper down 1/12 inch | |||
| 38^ KB | Keyboard | Selects keyboard I, II or III | ||||
| 39* L IND | Line Indent | Moves the damage five spaces right | 47* | MICRO | Micro Reverse Index | Moves the paper down 1/48 inch |
| 40 SHIFT | Shift | Selects shift mode or cancels shift lock | 48 | INDEX | Index | Moves the paper up 1/12 inch |
| 41* P HY | Permanent Hyphen | Prints a permanent hyphen | 48* | INDEX | Micro Index | Moves the paper up 1/48 inch |
| 42 CODE | Code | Used to display and set functions indicated with* | 49 | → | Right Cursor | Moves the carriage one space right |
| 43 | Spacebar | Moves the carriage one space right | 49* | E SET | End Set | Sets the page length |
Advanced Typing
This section takes a look at the more advanced features of your typewriter.
Bold
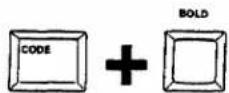
Place your typewriter in the bold typing mode by holding down the [CODE] key and pressing the [BOLD] key. All characters subsequently typed will be printed in bold.
The BOLD LED will light while holding down the [CODE] key as a reminder that you are in the bold mode.
Holding down the [CODE] key and pressing the [BOLD] key once again will clear the bold function and return the typewriter to the regular mode.
Note:
This bold function can be performed in the centering, right margin flush, and decimal tab modes.
Automatic Underline
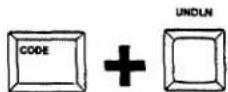
The typewriter features both continuous and discontinuous (word-by-word) underlining. To switch on continuous underlining, hold down the [CODE] key and press the [UNDLN] key until the CONT LED lights. While your typewriter is in this mode, all characters and spaces typed will be underlined.
The CONT LED will light while holding down the [CODE] key as a reminder that you are in the automatic underline mode.
To switch on discontinuous underlining, hold down the [CODE] key and press the [UNDLN] key until the WORD LED lights. While your typewriter is in this mode, all characters will be underlined, but spaces will not.
Release the automatic underline mode by holding down the [CODE] key and pressing the [UNDLN] key once again, until both the underline LEDs are OFF.
Note:
The auto underline function can be performed in the centering, right margin flush, and decimal tab modes.
Expand
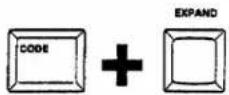
The expand function doubles the amount of space between characters typed in any pitch. To place your typewriter in the expand mode, hold down the [CODE] key and press the [EXPAND] key.
The EXPAND LED will light while holding down the [CODE] key as a reminder that you are in the expand mode.
Your typewriter is released from the expand mode by holding down the [CODE] key and pressing the [EXPAND] key once again.
This letter was typed to show you just some of the many outstanding feats this electronic typewriter can perform. In fact, you have seen some of these features already in this letter; Bold, Underline, and Expand typing can be easily done with this typewriter.
Carriage Return
The typewriter features both manual and automatic carriage return.
Manual carriage return
Pressing the [RETURN] key returns the carriage to the left margin and advances the paper by the number of lines set with the [LINE] key (1, 11/2, 2).
Hot zone
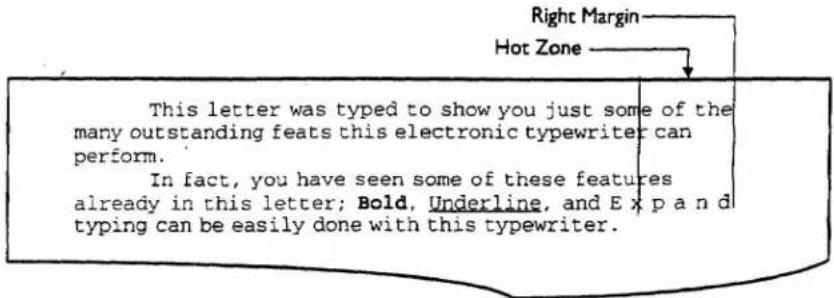
The Hot Zone is an area that begins between 3 and 12 characters before the right margin (independent of typing pitch) and extends to the right margin. You can adjust the start position of the hot zone anywhere within this range. As the carriage enters the hot zone, the beeper will sound to inform you of the fact. Once the beeper has sounded to warn you, you have the rest of the hot zone in which to end your line by splitting the last word with a hyphen or by moving the word to the next line, if necessary. If you continue to type.
Advanced Typing
the carriage will stop at the right margin and the keyboard, except for the damage return, will lock. This is to keep you from typing on past the margin, unless, of course, you use the margin release function to continue.
To set the position at which you wish the hot zone to start, move the carriage to that position, hold down the [CODE] key and press the [HZ SET] key.
If you try to set the hot zone start position closer to the right margin than 3 characters, or further away than 12 characters, the beeper will sound.
Automatic carriage return
Automatic carriage return saves you having to press the [RETURN] key every time you reach the end of a line. This function works by automatically returning the carriage to the left margin whenever you end a word by pressing the [SPACEBAR] or split a word by pressing the ☐ key with the carriage in the hot zone.
Automatic carriage return is switched on by holding down the [CODE] key and pressing the [AUTO] key. The AUTO LED will light while holding down the [CODE] key as a reminder that you are in the automatic carriage return mode.
Holding down the [CODE] key and pressing the [AUTO] key once again releases your typewriter from the automatic carriage return mode.
Note:
If you type up to the right margin with no spaces or hyphens in the hot zone, the carriage will stop at the right margin and will not return automatically. Press the [RETURN] key or [SPACEBAR] to return the carriage or the [M REL] key to continue typing beyond the margin.
Advanced Typing
Permanent spaces and hyphens
In the automatic carriage return mode, if you wish to type a space or hyphen in the hot zone without the carriage returning automatically, you may use the permanent space and hyphen functions.
To type a permanent space or hyphen, hold down the [CODE] key and press either the [SPACEBAR] or the [P HY] key.
Centering
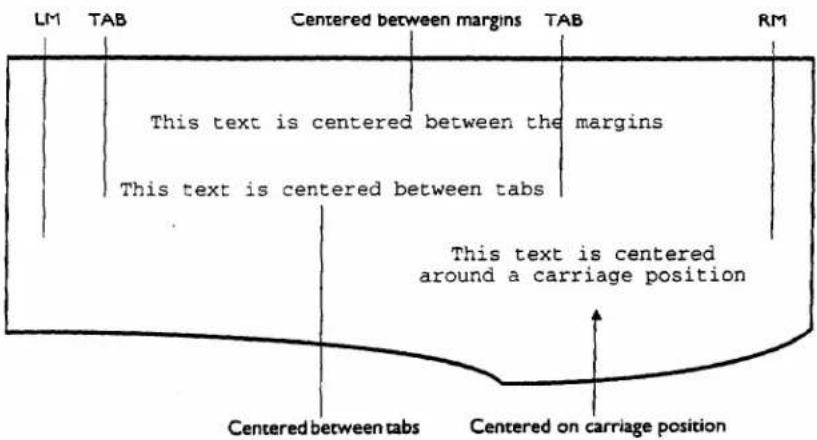
The typewriter offers three different types of centering. Text may be centered between the margins, between tabs, or around the current position of the carriage.
Centering between margins
To type text centered between margins, return the carriage to the left margin, hold down the [CODE] key and and press the [CTR] key. The carriage will move to a position halfway between the left and right margins and place the machine in the centering mode.
When you type now, the characters will not be printed on the page, but the carriage will move half a space to the left for every character and space you type. In the expand mode the carriage moves one full space to the left for every character and space you type.
When you have finished typing the line, press the [RETURN] key to print the line. After printing, the machine will leave the centering mode. The carriage will then line feed and return to the left margin.
Centering between tabs
Centening between tabs is very similar to centering between margins. Use the [TAB] key to move the carriage to the leftmost tab of the pair between which you wish to center the text, then hold down the [CODE] key and press the [CTR] key.
The carriage will move to a position halfway between the current tab position and the next normal tab position. Type the text to be centered in the same way as for centering between margins, then press the [RETURN] key or the [TAB] key to print the text. After printing, the machine will leave the centering mode. If the [RETURN] key is pressed, the carriage will line feed and return to the left margin. If the [TAB] key is pressed, the carriage will move to the next tab stop, or to the right margin if there are no more tab stops on the current line.
Advanced Typing
Centering around the carriage position
Centering around the carriage position is also very similar to centering between margins. Simply move the carriage to the position about which you wish to center, hold down the [CODE] key and press the [CTR] key.
Type and print the text in the same way as printing between tabs.
Notes:
- Corrections in the centering mode may be accomplished by pressing the [CORRECT]. [WORD OUT] or [CODE] + [LINE OUT] keys. This will wipe out all of the data entered since the [CODE] + [CTR] key was pressed and return the carriage to the center position.
- To leave the centering mode before any data has been input, pressing the [CORRECT], [WORD OUT], [CODE] + [LINE OUT]. [CODE] + [CANCEL] or [CODE] + [CTR] keys will release your typewriter from the centering mode and return the damage to the left margin.
- Centering at the current carriage position is not possible at a tab position, nor at the left or right margin.
- Since the typewriter leaves the centering mode after typing each line, if you want to type two or more lines centered above one another, you must re-select the centering mode before typing each additional line.
Right Margin Flush


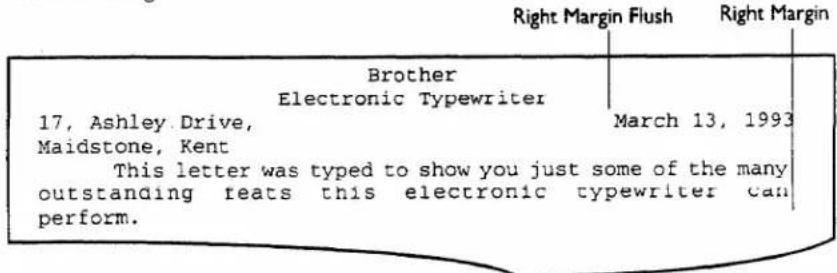
Right margin flush automatically aligns text flush with the right margin. To type text right margin flush, hold down the [CODE] key and press the [RMF] key while the carriage is anywhere to the left of the right margin. The carriage will move to the right margin, then move one space to the left for every character you subsequently type (two in the expanded mode).
When you have finished typing the line, press the [RETURN] key to print the line. After printing, the machine will leave the right margin flush mode, and the carriage will return to the left margin.
Notes:
- Corrections in the right margin flush mode may be accomplished by pressing the [CORRECT], [WORD OUT] or [CODE] + [LINE OUT] keys. This will wipe out all of the data entered since the [CODE] + [RMF] key was pressed and return the carriage to the right margin.
- To leave the right margin flush mode before anything has been typed, pressing the [CORRECT], [WORD OUT], [CODE] + [LINE OUT]. [CODE] + [CANCEL] or [CODE] + [RMF] keys will release your typewriter from the right margin flush mode and relocate the carriage to its previous position.
Indentation
This feature allows you to indent the first line of a paragraph, or an entire paragraph.
Line indentation


The [L IND] key allows you to indent the first line of your paragraphs in one step without spacing or setting a tab. With the carriage at the left margin, hold down the [CODE] key and press the [L IND] key. The carriage will automatically move over five spaces and wait for you to begin typing. Each time you press the [CODE] + [L IND], the carriage will move 5 spaces to the right.
Advanced Typing
Paragraph indentation
The paragraph indent function will indent an entire paragraph to the position of the next tab, without you having to use the [TAB] key at the beginning of each line. First set a tab at the position where you wish the paragraph to begin and move back the carriage to the left margin, then hold down the [CODE] key and press the [PIND] key. The carriage will move over to the next tab and wait. Thereafter, whenever the carriage return is pressed, the carriage will return to that first tab position rather than the left margin.
Line Indent
This letter was typed to show you just some of the many outstanding feats this electronic typewriter can perform.
In fact, you have seen some of these features already in this letter; Bold, Underline, and Ex p a n d typing can be easily done with this typewriter.
Paragraph Indent
Note:
If you want to type to the left of the paragraph indent point during the paragraph indent mode, use the [BKSP] key to move the carriage to where you want to begin typing, or [CODE] + [EXPR] to move the carriage to the left margin. To get back to the paragraph indent point after typing, press the [RETURN] key.
Indent clear
To clear the paragraph indent mode, hold down the [CODE] key and press the [IND CLR] key. The carriage will now return to the left margin when you press the [RETURN] key.
Corrections
Correcting mistakes with the typewnter is made simple by the correction memory and correction tape that allow you to erase incorrect text automatically without having to use messy correction fluid.
Automatic correction
The typewriter has a two-line correction memory, and automatic correction may be performed anywhere on the current typing line or the previous line. You can correct character-by-character, all or part of a word, and all or part of a line, automatically.
Character correction

To use automatic correction, move to the character you wish to correct, using the [SPACEBAR], [BKSP]. ← . →, [INDEX] and [R INDEX] keys as required.
My friendly Brother electronic tipewriter

When the carriage is directly over the character to be corrected press the [CORRECT] key. The character will be erased and the carriage will remain in that position.
My friendly Brother electronic t.pewriter

If you want to erase more characters to the left of the one you just erased, press the [CORRECT] key again.
You may type the correct character(s), or move on, as necessary.
My friendly Brother electronic typewriter

Notes:
- The automatic correction function works on bold, subscript, superscript, dead, and underlined characters.
- If you superimpose two characters for any reason, the automatic correction works only on the second character. The first character should be corrected manually.
Advanced Typing
Word out

The word out function will remove a whole or partial word from your document. First use the [SPACEBAR], [BKSP] ←, →, [INDEX] and [R INDEX] keys as required to move to the word you wish to correct. If you want to erase the whole word, position the carriage on the last character of the word or the space after it. If you want to erase part of the word to the left of the carriage, position the carriage on the last character you wish to correct.
Only Brother electronic typewriters guarantee the perfect document everytime!

Press the [WORD OUT] key. The typewriter will erase the character at the current carriage position and all characters to the left of it until a space between words is reached.
Only Brother electronic typewriters guarantee the perfect document

After erasing the word, the carriage will remain at the position of the last character removed and await your corrected input.
Note:
To stop the word out function, simply press the [CORRECT] key.
Line out
This function allows you to erase all or part of the current typing line or the previous line.
First move the carriage to the position of the last character of the line or portion of the line to be erased, using the [SPACEBAR], [BKSP], . , [INDEX] and [R INDEX] keys as required.
The unbeatable quality and superb performance of this electronic typewriter will more than satisfy

Advanced Typing
Hold down the [CODE] key and press the [LINE OUT] key. The typewriter will erase the character at the current carriage position and everything to the left of it.
The carriage will stop at the beginning of the line and await your corrected input.
The unbeatable quality and superb performance of
Note:
To stop the line out function, simply press the [CORRECT] key.
Insertions and Deletions
Instead of simply replacing incorrect characters or words, you may wish to insert extra characters, or delete them, or even replace words with different ones. In this case you may find that there is too much or too little space available for the correction to be inserted without running into the next word or leaving a big gap. Using the [BS I] key allows you to balance the spacing of your corrections so that it is not apparent that insertions or deletions have been made.
Insertions
If you try to insert an extra character into a word, you will be left with no space between it and the next word. You can even this up by moving the whole word half a space to the left so that there is a half space on either side of the word.
First use the [SPACEBAR]. [BKSP]. ← . →. [INDEX] and [R INDEX] keys as required. to move to the last character of the word you wish to correct.
This electronic typewriter is real typing happiness!
Press the [WORD OUT] key to delete the whole word. The carriage will remain at the position of the last character removed.
Advanced Typing
This electronic typewriter is real happiness!

Now hold down the [CODE] key and press the [BS 1] key. Each time the [BS 1] key is pressed, the carriage moves 1/120 of an inch to the left. You can also use [CODE] + ← and [CODE] + → for fine adjustment of the carriage position.
This electronic typewriter is real happiness!

The number of times you need to press the [BS 1] key for a half space depends on the typing pitch
| Pitch | No. of presses |
| 10 | 6 |
| 12 | 5 |
| 15 | 4 |
| PS | 5 |
You may now type in the correct word.
This electronic typewriter is real typing happiness!

Deletions
If you try to delete a character from a word you will be left with an extra space after the word. You can even this up using [CODE] + ← so that you have one-and-a-half spaces on either side of the word. First use the [SPACEBAR] or [BKSP] key to move to the last character of the word you wish to correct.
Advanced Typing
This electronic typewriter is real typing happiness!
Press the [WORD OUT] key to delete the whole word. The carriage will remain at the position of the last character removed.
This electronic typewriter is typing happiness!
Now use [CODE] + → to move the carriage half a space to the right.
This electronic typewriter is typing happiness!
You may now type in the correct word.
This electronic typewriter is real typing happiness!
The above examples only show the insertion or deletion of a single character. If you wish to insert or delete more than one character, or replace several words with other words, you can use the same principle by deleting several words and using the [BS 1] key to expand or reduce the spaces between the replacement words.
Advanced Typing
Relocation

After making automatic corrections, the [RELOC] key allows you to return automatically to where you left off typing before making the correction.
Manual correction
You can only perform automatic correction on the current typing line or the previous line. When you move onto a new line, the correction memory is cleared. Manual correction may be performed at any place on the page.
First move the carriage to the character to be corrected using the [INDEX], [R INDEX], [SPACEBAR], . or [BKSP] keys as necessary.
The unbeatable quality and superb performance of this electronic typewriter will more than satisfy your every typing need.
Hold down the [CODE] key and press the [CORRECT] key. Then press the key for the incorrect character.
That character will be erased and the carriage will remain in that position for you to type in a new character, or move on, as necessary.
The unbeatable quality and su erb performance
Type in the correct character.
The unbeatable quality and superb performance
Advanced Typing
If you want to correct another character, you must move to that character and use the [CODE] + [CORRECT] key again.
After finishing your corrections, use the [INDEX], [R INDEX], [SPACEBAR], ←, → and [BKSP] keys to return to your original typing position.
Notes:
- If the [SPACEBAR] is pressed after the [CORRECT] key has been pressed, the correction function is cleared and the damage will move to the right one space.
- You cannot use the [RELOC] key to return to your original typing position after making manual corrections.
- To perform manual correction on bold or underlined characters, the typewriter must be in bold and/or underline mode.
Subscript and Superscript


As well as moving the paper up and down, the [INDEX] and [R INDEX] keys can be used to place your typewriter in the subscript and superscript modes. The platen will rotate slightly up or down to allow typing of super and subscript characters 1/12 of an inch higher or lower than the base line (see micro indexing below).
To put your typewriter in the superscript mode, press the [R INDEX] key. Any characters you subsequently type will be printed as superscript, until you press the [INDEX] key to move the paper back to the original typing line.
Subscript mode is the reverse of superscript. Press the [INDEX] key to enter subscript typing and the [R INDEX] key to return to the original typing line.
With the Reverse Index key or Index key, you can type 2^3 or H_2O
Notes:
- Superscript and subscript characters will be typed with an underline, if your typewriter is in the automatic underline mode, and in bold if bold mode is selected.
- If you hold down the [INDEX] or [R INDEX] key for more than half a second, the paper will advance or reverse continuously.
Advanced Typing
Micro index/micro reverse index
Holding down the [CODE] key and pressing the [INDEX] or [R INDEX] keys will also place your typewriter in the subscript or superscript mode, but the characters typed in this mode will only be 1/48 of an inch above or below the base line.
Note:
If the index/reverse index keys are used to move the paper up or down by more than 1/12 inch, the line correction memory will be cleared.
Line Format Memory


If you use your typewriter for a variety of different documents, such as letters, memos, telephone lists, you may often need to change the margins, tabs, line spacing, typing pitch and so on, to suit the kind of document you are working on.
This information (margins, tabs, hot zone, start position, line spacing, typing pitch) is known as the "line format".
From now we will refer to "line format" to avoid having to say margins, tabs etc.
Changing the line format each time you wish to type a different kind of document can be tedious and time-consuming. To make it easier, the EM-530 has memories that allow you permanently to save up to five different line formats.
Selecting the line format
The line format currently being used will be indicated by the line format LEDs if the [ALT] key is held down. When you switch on the typewriter, the selected line format will be the one you last used before switching off the machine.
You can select a different line format at any time, and everything you type after that will use the new line format. To select a different line format, simply hold down the [ALT] key and press the [FORMAT] key until the required format is indicated by LEDs. The [FORMAT] key can also be used with the [CODE] key.
Changing the line format
After selecting a line format, you may find it is not exactly right for the document you are working on. In this case you can set new margins, tabs, etc. in the usual way. Changes you make to the currently selected line format will automatically be stored in the memory, and will be remembered if you switch to a different line format, or if the machine is switched off.
Framing and Line Drawing

The framing and line drawing function on your typewriter allows you to draw horizontal and vertical lines, and to draw rectangular boxes and tabular grids around text.
Horizontal line drawing
To draw a horizontal line, first position the carriage where you want the left-hand end of the line to be (A). You can use [SPACEBAR]. [TAB]. [BKSP]. [CODE]+[BS 1]. ←. →. [CODE]+←. [CODE]+→. [←.][INDEX]. [R INDEX]. [CODE]+[INDEX]. [CODE]+[R INDEX]. as required, to position it precisely.
Now press the [FRAME] key. The two KB LEDs will begin to flash.
Move the carriage to the point where you want the right-hand end of the line to be (B), using [SPACEBAR], [TAB], [BKSP], [CODE]+[BS 1], ←, →, [CODE]+←, [CODE]+→, as required.
Press the [FRAME] key again. The line will be printed, and the damage will then return to its original position.
Note:
You can draw a double horizontal line if you have keyboard II selected and an International daisy wheel fitted, which has the ledger line symbol (=).
You can also draw double lines if you have keyboard ill selected and a Symbol daisy wheel fitted.
Immediately after pressing the [FRAME] key for the first time, press [SHIFT] + [==] before moving the carriage to the right. When you press the [FRAME] key again, the line will be printed double.
![[FRAME] =(OPTIONAL) → → → → → → → → → → → [FRAME] A B](/content/2026/05/776749/images/634a57efeb4ffe40aa6a772e5db8bfb9f2252e9667750f6a5156260ace8eb246.jpg)
Vertical line drawing
To draw a vertical line, first position the carriage where you want the top of the line to start (A), using the above keys as required.
Now press the [FRAME] key. The two KB LEDs will begin to flash.
Advanced Typing
Move the carriage to the point where you want the bottom of the line (B), using [INDEX], [R INDEX], [CODE]+[INDEX], [CODE]+[R INDEX], as required, to position it precisely.
Press the [FRAME] key. The line will be printed, and the carriage will then return to its original position.
![[FRAME] A B [FRAME]](/content/2026/05/776749/images/e65688aa799010c29bc4d145667b0297227b3509a501d116a6b5dbf5df6f5c74.jpg)
Note:
In order to draw solid vertical lines you must have Keyboard II selected and an International daisy wheel fitted, or Keyboard III and a Symbol daisy wheel. If you use Keyboard I and a standard daisy wheel, the line will be printed as dots.
Drawing a rectangular frame
Drawing a simple frame is almost as easy as drawing lines. All you have to do is tell your typewriter where the top-left and bottom right corners of the frame are, and it will do the rest.
Begin in the same way as for drawing a line, by moving the damage to the point where you want the top left corner of the frame (A), and pressing the [FRAME] key.
As with drawing a horizontal line, if you want the top line of the frame to be a double line, press [SHIFT]+==.
Now move the carriage down and to the right, to the point where you want the bottom right corner of the frame (B). In the example, the carriage is shown as moving down first, then to the right, but in fact you can move the carriage down and right in any sequence of steps.
Advanced Typing
If you want the bottom line of the frame to be a double line, press [SHIFT]^+=
Press the [FRAME] key. The frame will be printed, and the carriage will return to the top left-hand corner of the frame.
![[FRAME] = (OPTIONAL) A B → → → → → → → → → → → = (OPTIONAL) [FRAME]](/content/2026/05/776749/images/80711c5e64b53048657a7f737e4c1ec21e799aec4a469fe0485af9474aafcdbf.jpg)
Drawing a tabular grid
In order to draw a tabular grid, your typewriter needs to know, not only the position of the top-left and bottom right corners of the frame, but also where the internal, horizontal and vertical lines of the grid will be.
Begin in the same way as for drawing a simple frame, by moving the carriage to the point where you want the top left corner of the frame (A), and pressing the [FRAME] key.
If you want the top line of the frame to be a double line, press [SHIFT]+=.
Now move the carriage down to the position of the first, internal, horizontal line of the grid, (B) and press [SHIFT]+—(underline) for a single line, or [SHIFT]+== for a double line.
Repeat this procedure for all the horizontal lines of the grid.
Now move the carriage right, to the position of the first, internal, vertical line of the grid (E), and press the key for the vertical framing character (I) (See Note 4).
Repeat the procedure for every (internal) vertical line in the grid.
Now move the carriage to the bottom right-hand corner of the grid, and press the [FRAME] key.
The grid will be printed, and the carriage will return to the top left-hand corner of the grid.
Notes:
- The above examples show only one way to draw frames and tabular grids. If you find it more convenient, you can move the carriage to the right first and define the vertical lines, before moving the carriage down and defining the horizontal lines.
- The maximum number of horizontal lines in a grid is limited to 70. If you try to set more than this, the beeper will sound.
- The maximum number of vertical lines in a grid is limited to 30. If you try to set more than this, the beeper will sound.
- If you have Keyboard I selected and a standard daisy wheel, you must press the period key [.] for the vertical lines of your frame, which will be printed as dots.
You can only use the solid vertical line symbol [] if you have keyboard II selected with an International daisy wheel or Keyboard III with a Symbol daisy wheel. - You must use keyboard II and an International daisy wheel, or keyboard III and a symbol daisy wheel, if you want to use the double ledger line (=) for horizontal lines.
- Framing only works when the default keyboard is selected for keyboard I. If you have selected a foreign language keyboard using SETUP, framing will not work at all.
![[FRAME] = (OPTIONAL) A B - OR = - OR = - OR = C D E F G → → → | → → → | → → → → [FRAME]](/content/2026/05/776749/images/12ca3794dc4fb4324985d3cd1b3e2c19a3c53e0e461b9f0c0693e5648ae778e9.jpg)
On-Line Spelling Checker
Your typewriter has an on-line spelling checker that verifies the spelling of words as they are typed.
Spelling check
To turn on the spelling checker, hold down the [CODE] key and press the [SPELL] key. The beeper will sound twice. To turn off the spell checker hold down the [CODE] key and press the [SPELL] key again.
If a word is mis-spelled the beeper will sound three times when you press the [SPACEBAR] after typing the word.
Find function
If you are a fast touch-typist, you may not wish to break your rhythm by stopping every time the beeper sounds, and you may find that you type on past the misspelled word. However, if you hold down the [CODE] key and press the [FIND] key, the carriage will move back to the misspelled word, provided the cursor has not moved to the next line.
User Dictionary

If you frequently use special words, such as technical terms that may not be in the spelling checker dictionary, you can create a user dictionary to avoid these words being flagged as misspelled.
To add the word you just typed to the user dictionary, hold down the [CODE] key and press the [ADD] key. Next time you type the word it will not be flagged as misspelled.
To print out a list of all words in the user dictionary, hold down the [CODE] key and press the [PRINT] key.
If you wish to delete a word from the user dictionary, type the word, then hold down the [CODE] key and press the [DEL] key.
To delete all words from the user dictionary, hold down the [CODE] key and press the [SHIFT] and [DEL] keys together.
Maintenance and
Troubleshooting
Your Brother electronic typewriter has been precision manufactured to give you years of trouble-free use with the minimum of routine maintenance. In the unlikely event that your typewriter fails to work correctly, the troubleshooting guide will help you to find the cause of the problem. If the steps suggested in the troubleshooting guide fail to cure the problem, please do not attempt to repair the typewriter yourself. Instead, please contact your nearest Brother dealer.
Maintenance
Environment
Your typewnter dislikes direct sunlight, excessive heat from heaters or radiators, dust and humidity.
Keep it in a cool dry, dust-free environment, and keep it covered when not in use. Do not obstruct the ventilation slots at the back of the typewriter, and do not cover them with a dust cover when the power is switched on.
You should mount the typewriter on a flat, stable surface, with easy access to a power socket.
Cleaning
The keyboard and print mechanism of your typewriter dislike dirt and foreign objects such as pins, paperclips, food and hair.
Maintenance simply consists of keeping your typewriter clean inside and outside, removing any foreign debris, and keeping the machine covered when not in use.
You should clean the typewriter with a soft cloth, and you may clean the keyboard with a proprietary keyboard cleaner, used sparingly. You should not use water, alcohol, thinners or any other solvents.
Do not attempt to push anything into the ventilation slots at the back of the typewriter, or into any other openings in the case.
Maintenance and Troublesnooting
Supplies
For best results, use only Brother branded cassette daisy wheels, cassette ribbons and correction ribbons.
After all, only the best is good enough for your Brother typewriter!
Troubleshooting
| PROBLEM1. Nothing works! | POSSIBLE CAUSE1. Typewriter not plugged in2. Typewriter not switched on3. Cover not properly closed | ACTIONPlug it in!Switch it on!Close it! |
| 2. It still doesn't work! | 1. Mains socket not working2. Blown fuse in plug | Check using another applianceCheck and replace if necessary.Contact your dealer if problem recurs |
| 3. Characters do not print or are faint | 1. Daisy wheel inserted incorrectly2. Cassette ribbon has run out3. Cassette ribbon inserted incorrectly4. Impact setting too light5. Paper thickness lever in up position | Re-insert correctlyReplaceRe-insert correctlyChange settingPush it down |
| 4. Characters are missing | 1. Daisy wheel has broken petal | Replace daisy wheel |
| 5. Correction does not work | 1. Correction tape has run out2. Correction tape installed incorrectly or back to front3. Wrong type of correction tape | ReplaceRe-install correctlyUse correct type to suit the cassette ribbon |
| 6. PITCH LEDs are flashing | 1. Top cover is open | Close it |
| 7. LINE LEDs are flashing | 1. Page end | Press P INS key or E SET key to clear |
| 8. Format 1 and 3 LEDs flashing | 1. RAM memory fault | Consult your dealer |
| 9. Format 3 and 5 LEDs flashing | 2. Program ROM fault | Consult your dealer |
| 10. KB LEDs flashing | 3. Faulty print mechanism | Consult your dealer |
| Printing Method | Cassette daisy wheel (96 characters) |
| Printing Speed | 20 characters per second |
| Typing Pitches | 10 (maximum 120 characters per line) |
| 12 (maximum 144 characters per line | |
| 15 (maximum 180 characters per line) | |
| PS (proportional spacing) | |
| Line Spacing | Single (6 lines per inch) |
| 1 1/2 (4 lines per inch) | |
| Double (3 lines per inch) | |
| Paper Capacity | 15.5" |
| Typing Capacity | 12" |
| Correction Memory | Two lines |
| Copy Capacity | Original + 4 copies |
| Cassette ribbon | Correctable film ribbon (standard equip |
| One-time film ribbon | |
| Multi-strike film ribbon | |
| Nylon ribbon | |
| Correction tape | Lift-off correction tape (standard equip |
| Cover-up correction tape | |
| Power Consumption | 60 W |
| Dimensions | 19.68 in (W) × 16.85in (D) × 5.9 in (H |
| Weight | 19.8 lb |
Appendix A
Additional and Alternate Characters
| Key/Key Combination | Key board I | Keyboard II |
| [CODE] + U | > | |
| [CODE] + V | 3 | |
| [CODE] + W | < | * |
| [CODE] + X | 2 | ¥ |
| [CODE] + Y | ¶ | # |
| [CODE] + Z | § | B |
| ± | ± | ° |
| [SHIFT] + ± | ^ | = |
| [SHIFT] + 2 | @ | " |
| [SHIFT] + 3 | # | / |
| [SHIFT] + 5 | % | £ |
| [SHIFT] + 6 | - | |
| [SHIFT] + 8 | + | ' |
| [SHIFT] + - | - | % |
| 1/2 | 1/2 | ' |
| [SHIFT] + 1/2 | 1/4 | .. |
| ] | ] | ' |
| [SHIFT] + ] | [ | I |
| [SHIFT] + : | : | |
| ' | ' | i |
| [SHIFT] + ' | " | i |
| [SHIFT] + . | . | ? |
| / | / | : |
| [SHIFT] + / | ? | : |
Keyboard III (Symbol Keyboard)
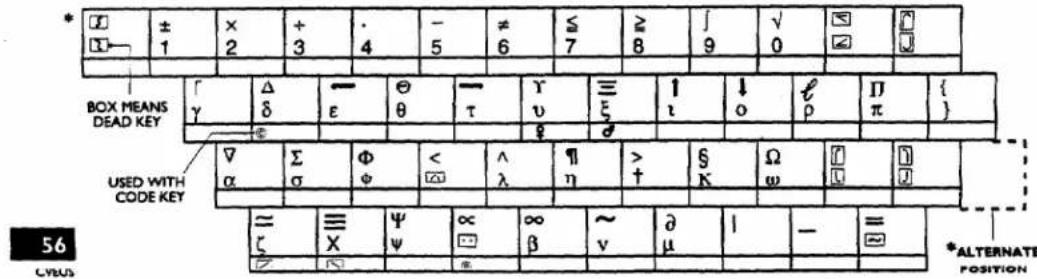
Appendix B
Keyboard and daisy wheel codes for multilingual keyboards
| Language | Keyboard Code | Daisy Wheel Label |
| American English I (with <) | 002 | A. ENG 02 |
| Brazilian (Portuguese) | 164 | POR 64 |
| Canadian French | 016 | CAN 16 |
| Danish | 170 | NOR/DAN 70 |
| Dutch | 032 | DUTCH 32 |
| English | 014 | ENG 14 |
| French | 020 | FRENCH 20 |
| German | 008 | GERMAN 08 |
| Greek | 042 | GREEK 42 |
| Icelandic | 074 | ICE 74 |
| Italian | 052 | ITALIAN 52 |
| Japanese English (with •) | 005 | J. ENG 05 |
| Latin | 053 | LATIN 53 |
| Latin American Spanish | 027 | L SPA 27 |
| Norwegian | 070 | NOR/DAN 70 |
| Portuguese | 064 | POR 64 |
| South African | 031 | S. AFR 31 |
| Spanish | 076 | S-SPAI 76 |
| Swedish | 060 | FIN/SWE 60 |
| Swiss (French/German) | 036 | SWISS 36 |
| Turkish | 029 | TURKISH 29 |
Note:
Daisy wheels with "F" suffix after the numeric code have the vertical bar framing character (I)
A
Acoustic cover 5
All tab clear 26
Alt and Code Keys 17
Advanced typing 32
Appendix A....56
Appendix B 57
Auto carriage return 34
Auto paper insertion 13
Auto tab setting 24
Auto underline....32
Automatic correction 39
B
Backspacing 27
Basic typing functions 13
Bold 32
C
Caps 27
Camage return 33
Cassette daisy wheel, removing ..... 8
Cassette daisy wheel, inserting .....8
Cassette daisy wheel 8
Cassette ribbon, removing 9
Cassette ribbon, inserting....10
Cassette ribbon 9
Centering 35
Centering around the carriage
position 36
Centering between margins ..... 35
Centering between tabs 35
Changing the line format 46
Character correction 39
Cleaning 52
Code key 17
Correction tape, removing ..... 11
Correction tape, inserting....12
Correction tape 11
Corrections 38
D
Dead keys....18
Decimal tabs 25
Deletions 42
Dictionary 51
Drawing a rectangular frame....48
Drawing a tabular grid 49
E
Environment 52
Expand 33
Express backspace 27
Extra characters....17
F
Find function 51
Framing 47
G
General view 3
Glare screen 5
H
Horizontal line drawing 47
Hot zone....33
1
Indent clear 38
Index
Indentation 37
Insertions....1
Insertions and deletions ....41
K
Keyboard 18
Keyboard Layout 30
L
Left margin, setting 23
Line drawing 47
Line format memory 46
Line indentation 37
Line out 40
M
Maintenance 52
Manual carnage return 33
Manual correction 44
Manual paper insertion ....14
Margin release 23
Margin scale 5
Margins 22
Micro backspace 28
Micro index/reverse micro index 46
Multilingual keyboards 19
N
Normal tabs 24
P
Paper supporter 4
Paper thickness control 16
Paragraph indentation ....38
Permanent spaces and hyphens ... 35
Power switch 7
Preset margins 22
R
Relocation 44
Repeat function 28
s
Right margin, setting 23
Right margin flush 37
Saving a new line format 45
Selecting keyboard 18
Setting and using tabs 24
Setting end position 15
Setting impact 16
Setting left margin 23
Setting line space 21
Setting margins 23
Setting right margin 23
Setting start position....15
Setting typing pitch 21
Setting up the typewriter ....4
Shift 26
Shift lock 27
Simple backspace 27
Specifications 55
Spelling check 50
Subscript and superscript......45
Supplies 53
Support arm 4
T
Tab clear 25
Tabs. normal 24
Tabs, decimal 25
Top cover, opening....6
Top cover, closing 6
Top cover 6
Troubleshooting 54
U
User dictionary 51
V
Vertical line drawing 47
w
Word out 40
IMPORTANT!
REMOVE THE PACKING PIECES AS SHOWN BEFORE USING THE TYPEWRITER
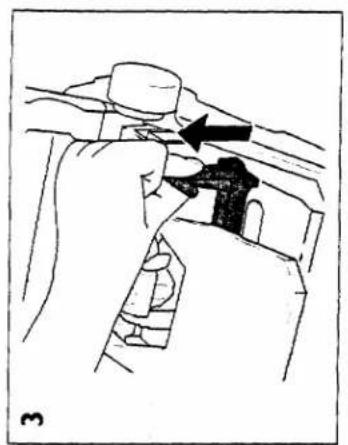
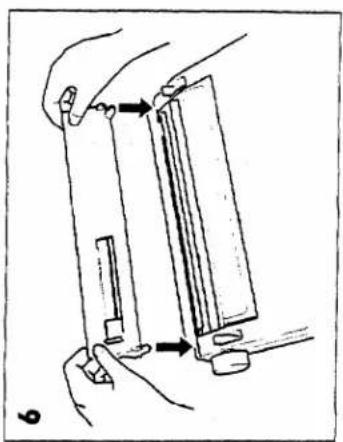
natural_image
Illustration of hands holding a mechanical component with arrows indicating motion (no text or symbols)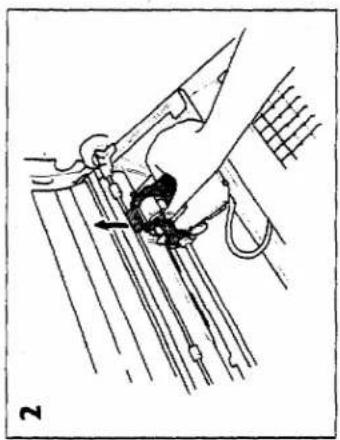
natural_image
Line drawing of a hand using a tool to adjust or install a mechanical component (no text or symbols present)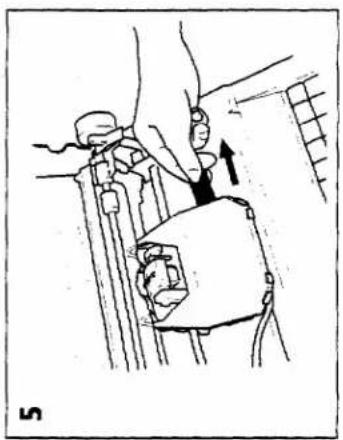
natural_image
Illustration of a hand using a tool to adjust or install a component, with no visible text or symbols.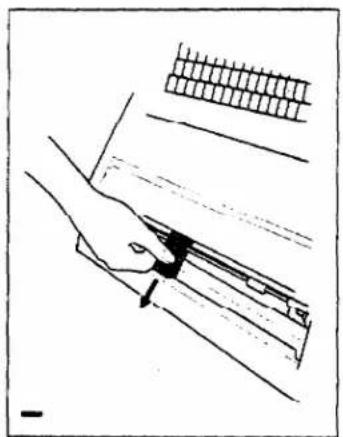
natural_image
Illustration of a hand using a tool to cut or mark a rectangular object, with a grid-patterned rectangle nearby (no text or symbols)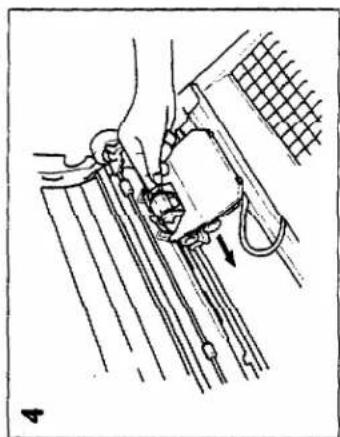
natural_image
Illustration of a hand using a tool to adjust or install a component on a grid-patterned surface (no text or symbols)


- Brother EM-530/CM-1000 Electronic Typewriter
- FCC NOTICE
- able of Contents
- GENERAL VIEW 3
- SETTING UP THE TYPEWRITER .....4
- Paper Supporter 4
- Acoustic Cover 5
- Top Cover 6
- Power Switch 7
- Cassette Daisy Wheel 8
- Cassette Ribbon 9
- Correction Tape....11
- BASIC TYPING FUNCTIONS ...... 13
- Automatic Paper Insertion 13
- Manual Paper Insertion 14
- Setting Start Position 15
- Setting End Position....15
- Paper Thickness Control 16
- Setting Impact 16
- Alt and Code Keys 17
- Dead Keys 18
- The Keyboard 18
- Selecting Keyboard 18
- Multilingual Keyboards 19
- Setting Line Space 21
- Setting Typing Pitch 21
- Margins 22
- Setting And Using Tabs 24
- Using Shift And Caps Keys 26
- Backspacing 27
- Repeat Function 28
- KEYBOARD LAYOUT 30
- ADVANCED TYPING 32
- Bold 32
- Automatic Underline 32
- Expand 33
- Carriage Return 33
- Centering 35
- Right Margin Flush 37
- Indentation 37
- MAINTENANCE AND TROUBLE-
- SHOOTING 52
- Troubleshooting 54
- SPECIFICATIONS ....55
- APPENDIX A 56
- APPENDIX B 57
- INDEX 58
- Self Demonstration Feature
- General View
- PRINTER CARRIAGE
- PLATEN KNOB
- Setting up the Typewriter
- Paper Supporter
- Support arm
- Note:
- Acoustic Cover
- Margin scale
- Glare Screen
- Top Cover
- Opening the top cover
- Notes:
- Closing the top cover
- Power Switch
- Cassette Daisy Wheel
- Removing the cassette daisy wheel
- Inserting the new cassette daisy wheel
- Cassette Ribbon
- Removing the old cassette ribbon
- Inserting the new cassette ribbon
- Correction Tape
- Removing the old correction tape
- Installing the new correction tape
- Coverup correction tape
- Basic Typing Functions
- Automatic Paper Insertion
- Manual Paper Insertion
- Setting Start Position
- Setting End Position
- Paper Thickness Control
- Setting Impact
- ALT and CODE Keys
- Extra Characters
- Dead Keys
- The Keyboard
- Selecting Keyboard
- I (Standard)
- II (International)
- III (Symbol)
- Multilingual Keyboards
- Setting Line Space
- Setting Typing Pitch
- Margins
- Preset margins
- Margin release
- Setting margins
- Setting left margin
- Setting right margin
- Setting And Using Tabs
- Normal tabs
- Auto tab setting
- Decimal tabs
- Tab clear
- All tab clear
- Using Shift And Caps Keys
- Shift
- Shift lock
- Caps
- Backspacing
- Simple backspace
- Express backspace
- Micro backspace
- Repeat Function
- Keyboard Layout
- Advanced Typing
- Bold
- Automatic Underline
- Expand
- Carriage Return
- Manual carriage return
- Hot zone
- Automatic carriage return
- Permanent spaces and hyphens
- Centering
- Centering between margins
- Centering between tabs
- Centering around the carriage position
- Right Margin Flush
- Indentation
- Line indentation
- Paragraph indentation
- Paragraph Indent
- Indent clear
- Corrections
- Automatic correction
- Character correction
- Word out
- Line out
- Insertions and Deletions
- Insertions
- Deletions
- Relocation
- Manual correction
- Subscript and Superscript
- Micro index/micro reverse index
- Line Format Memory
- Selecting the line format
- Changing the line format
- Framing and Line Drawing
- Horizontal line drawing
- Vertical line drawing
- Drawing a rectangular frame
- Drawing a tabular grid
- On-Line Spelling Checker
- Spelling check
- Find function
- User Dictionary
- Maintenance and
- Troubleshooting
- Maintenance
- Environment
- Cleaning
- Supplies
- Appendix A
- Appendix B
- A
- B
- C
- D
- E
- F
- G
- H
- 1
- K
- L
- M
- N
- P
- R
- s
- T
- U
- V
- w
Marke : BROTHER
Modell : EM-530
Kategorie : Schreibmaschine