
20003 - Waschmaschine ASKO - Kostenlose Bedienungsanleitung
Finden Sie kostenlos die Bedienungsanleitung des Geräts 20003 ASKO als PDF.


| Produkttyp | Waschmaschine |
| Modell | 20003 |
| Marke | ASKO |
| Abmessungen (H×B×T) | 82 cm × 59 cm × 59 cm |
| Gewicht | 75,8 kg |
| Stromversorgung | 1-phasig, 208-230 V, 10/15 A |
| Heizleistung | 1800-3000 W |
| Gesamtleistung | 2000-3200 W |
| Schleuderdrehzahl | 600-1500 U/min |
| Temperaturbereich | 20-95 °C |
| Programme | 11 Programme (Vorwäsche, Hauptwäsche, Spülen, Schleudern) |
| Fassungsvermögen | Vollbeladung, halbe Beladung, Drittelbeladung |
| Trommelmaterial | Edelstahl |
| Gehäusematerial | Pulverbeschichteter, feuerverzinkter Stahl |
| Wasseranschluss | Kaltwasser, 3/4-Zoll-Schlauch, 63 Zoll Länge |
| Ablaufschlauch | 63 Zoll, Innendurchmesser 3/4 Zoll |
| Wasserdruck | 1-10 bar (15-146 PSI) |
| Kindersicherung | Ja, Tasten sperren nach Programmstart |
| Selbstdiagnose | Fehlerprogramm mit Anzeige |
| Wartung | Flusensieb, Reinigung der Waschmittelschublade, Schlauchprüfung |
Häufig gestellte Fragen - 20003 ASKO
Benutzerfragen zu 20003 ASKO
0 Frage zu diesem Gerät. Beantworten Sie die, die Sie kennen, oder stellen Sie Ihre eigene.
Eine neue Frage zu diesem Gerät stellen
Laden Sie die Anleitung für Ihr Waschmaschine kostenlos im PDF-Format! Finden Sie Ihr Handbuch 20003 - ASKO und nehmen Sie Ihr elektronisches Gerät wieder in die Hand. Auf dieser Seite sind alle Dokumente veröffentlicht, die für die Verwendung Ihres Geräts notwendig sind. 20003 von der Marke ASKO.
BEDIENUNGSANLEITUNG 20003 ASKO
How to use the washing machine
Important: Instructions before using the appliance. A called by a qualified
Read all instructions. The machine must be installed by electrician. The machine must not be started until the transit packing has been removed. (It prevents the tub from shaking while the machine is being transported.) WARNING-To reduce the risk of fire, electric shock, or injury to persons, read the IMPORTANT SAFETY INSTRUCTIONS before operating this appliance.
SAVE THESE INSTRUCTIONS!
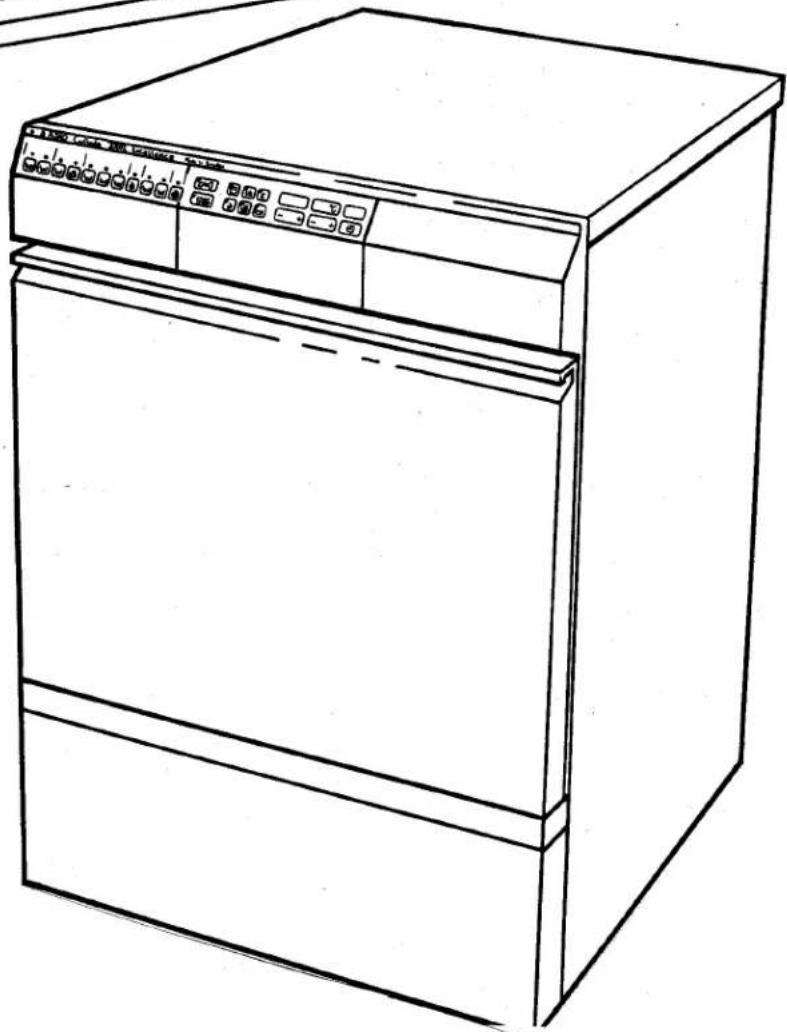
20003
natural_image
Line drawing of a kitchen appliance with front panel and control buttons (no text or symbols)WARNING - Important!
Improper connection of the conductor can result in a risk of electrician or serviceman if you check with a qualified electrician or serviceman is properly in doubt as to whether the appliance is properly grounded. The plug must be
grounded. This appliance must be grown into an appliance outlet that is proposed to be plugged into an appliance outlet that is proposed to be installed and grounded in accordance with all local codes and ordinances. Do not wash or dry articles that have been previously cleaned in, washed in, soaked in, or spotted with gasoline, dry-cleaning solvents, other flammable or gas substances as they give off vapors that
explosive could ignite or explode.
How to use the machine
Follow the figures in the strip through this booklet for brief instructions on how to use the machine.
Full details and comments can be found below the strip and must be fully read before operating the washing machine.
Contents
| How to wash | 2 |
| Guide to parts | 2 |
| The control panel | 3 |
| Opening the door | 3, 10 |
| Sort the washing | 4 |
| Detergent | 5 |
| Fabric softener | 5 |
| Which program should I use | 6 |
| Program examples | 6 |
| Program options | 7 |
| Control settings | 8 |
| Care of the machine | 9 |
| If the machine won't work | 10 |
| Fault-tracing program | 10 |
| Other signs | 10 |
| Safety | 10-11 |
| Child safety | 10 |
| Technical details | 11 |
| Installation | 11-12 |
Removing the transport braces
Adjusting the feet
Building-in the machine
Electrical installation
Water supply connection
Drainage connection
Problems and Solutions 13-14
Warranty 15
Instructions summary 16
How to use the machine
Choosing the right program
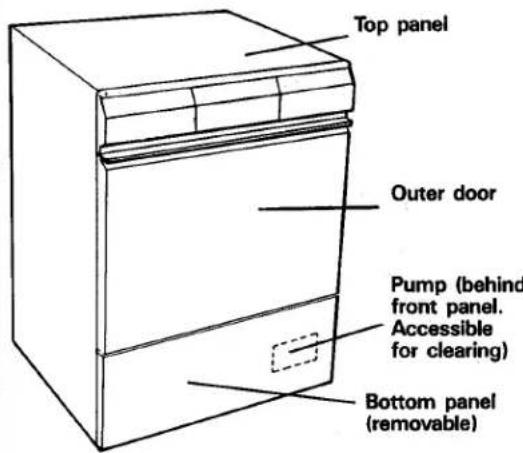
Guide to parts
natural_image
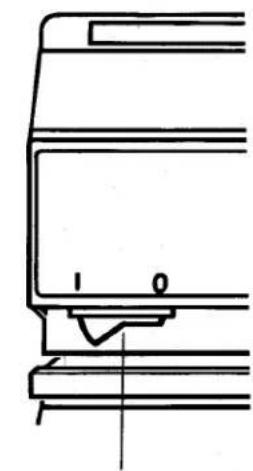
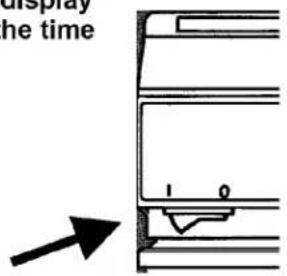
Pure technical line drawing of a mechanical component or bracket (no text or symbols)Main On/Off switch

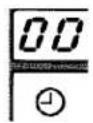
- Turn on the main switch. The display will light up and show 00 as the time remaining.
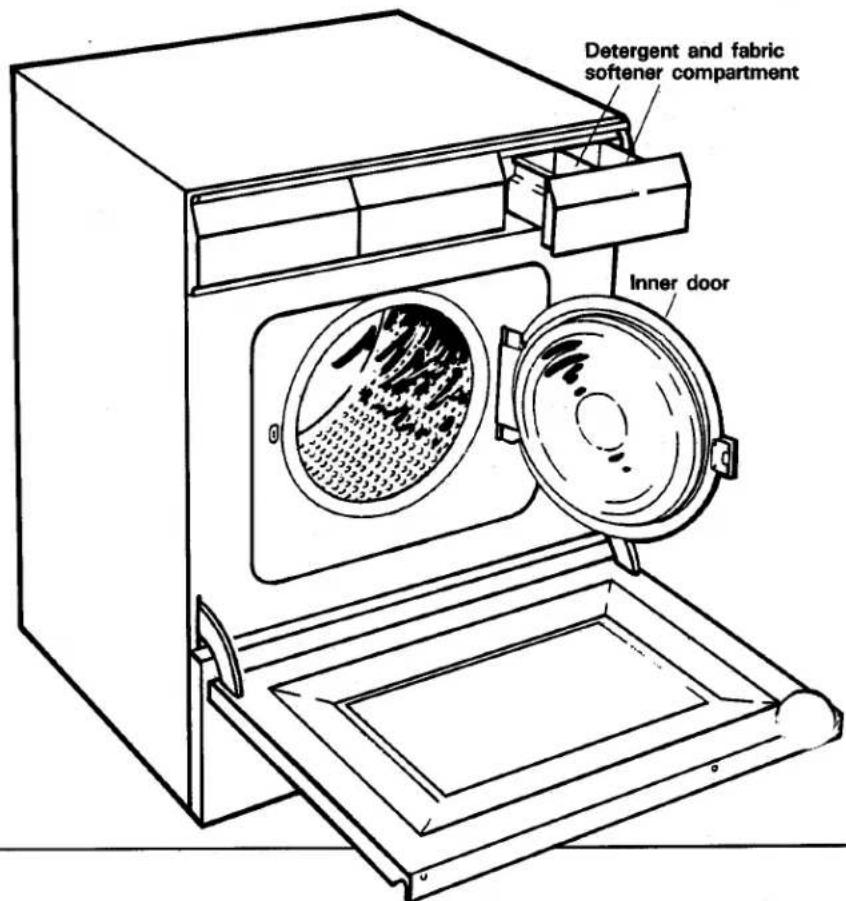
- Open the inner door by pressing
If the door does not open, see below.
To manually open door, see page 10.
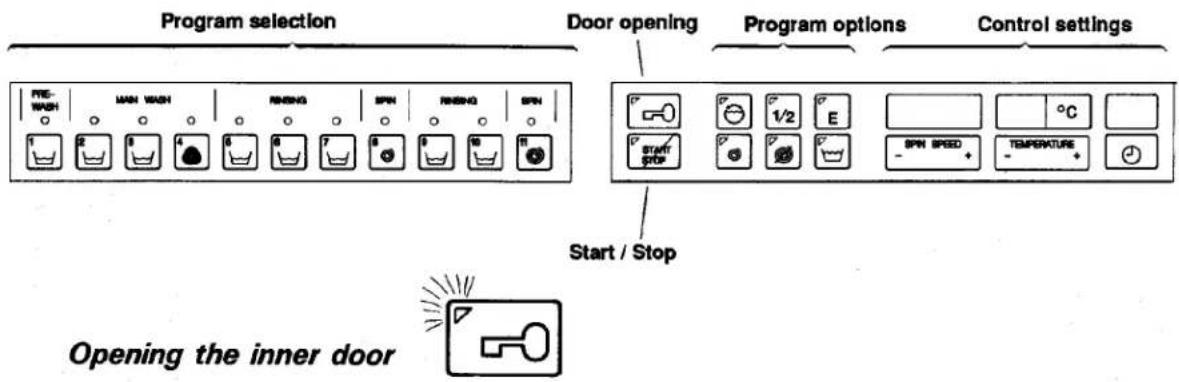
The control panel
flowchart
graph TD
    A["Program selection"] --> B["Pre-Wash"]
    A --> C["WAN WASH"]
    A --> D["RIKING"]
    A --> E["SPIN"]
    A --> F["RIKING"]
    A --> G["SPIN"]
    H["Door opening"] --> I["Start/Stop"]
    J["Program options"] --> K["1/2"]
    J --> L["E"]
    J --> M["SPIN SPEED"]
    J --> N["TEMPERATURE"]
    J --> O["Control settings"]
    P["Opening the inner door"] --> Q["Start/Stop"]
The indicator light indicates that the door is open or will be opened automatically.
To open the door, turn on the main switch and then press ☐.
To open the door, while the machine is running, press for three seconds. The machine will pump out sufficient water to allow the door to be opened without water spilling out. When you reclose the door, the program continues from where it left off.
If you press ☐ while the machine is spinning, there will be delay for safety reasons before the door is opened.
To add more washing
If you want to add more washing after the machine has started, press for three seconds. If the water level is below the edge of the door, the door will be opened immediately. If the water level is above the edge of the door, water will be pumped out until the level is below the edge of the door, after which the door will open.
Start / Stop
The indicator light shows that the machine is running.
This pushbutton starts the machine. It also stops it if held in for three seconds.
natural_image
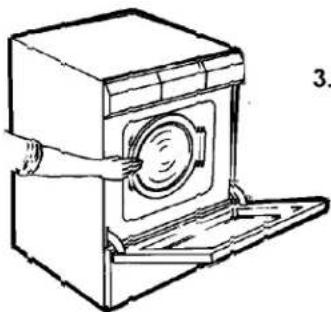
Line drawing of a washing machine with a hand inserting a circular component (no text or symbols)- Load the washing into the drum and close the door. Press firmly: the door cannot be closed by slamming. Close the outer door.
Sort the washing
Sort clothes by color, fiber content, amount of soil, lint shedding properties (cotton, chenile, and terrycloth shed), lint attracting properties (permanent press, corduroy, velveteen, flannel and synthetics attract) and those requiring a delicate cycle. Most clothes and other washable items have permanent care labels. Read these labels carefully! Care label instructions and warnings should be followed for the best cleaning results.
Load the Washer Properly
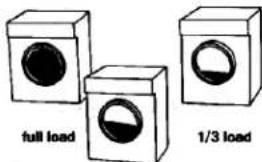
The following chart shows how full to load the washer for the best results. The load size depends on what types of fabrics you are washing.
Permanent press items need room to move freely during washing for the most wrinkle-free results. Therefore, fill the machine only half full for permanent press loads. These items should only have a brief spin cycle after which they should be promptly removed from the washer for drying. Follow the guidelines on the Program Charts for synthetics, blends and permanent press fabrics.
Machine washable wool loads should only be one-third full for the cleanest results in this shortened cycle.
Recommended load sizes
| Full Load | Half Load | Third Load |
| Cotton | Permanent Press | Wool |
| Linen | Synthetics | (machine washable) |
| Acrylics | Silk | |
| Special finish cottons | Acetates |
half load
How much is in a full load?
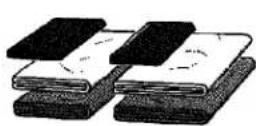
If the drum is filled without packing it tightly, it will hold the equivalent of two sheets, pillow cases and mattress pad or thin blanket off of a queen size bed or two king size sheets, two pillow cases and two to four bath towels.
Water level in the washer
There is no need to set a load size or water level because the Asko Automatic Level Control System automatically selects the correct amount of water for each load.
Preparing clothes for washing
- Turn delicate items, sweaters, synthetics, cotton/polyester blends and t-shirts inside out to prevent pilling and to protect the prints.
• Empty pockets and turn them inside out. - Remove any sharp ornaments, pins or buckles to prevent snags.
- Close zippers and hooks to prevent snagging.
- Tie sashes and strings to prevent tangling.
- Mend any small rips or tears to prevent them from getting bigger.
- Pretreat stubborn stains if necessary.

natural_image
Silhouette of a coat or jacket with no visible text or symbols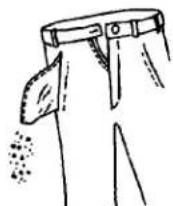
New colored items
Read labels carefully! If a label says "Wash Separately", the item will lose color (excess dye) for the first few washings. To minimize the possibility of this color transferring to white or lighter colored items, wash new colored garments with items of similar color or alone before wearing. Bright red, "hot" pink and orange dyes on cotton are the most likely to transfer colors to the wash load. Fluorescent colors should always be washed separately.
Prewash or not?
When washing items that are only sightly soiled, the prewash cycle can be omitted. Starting the machine at the main wash stage will save about 25 minutes.
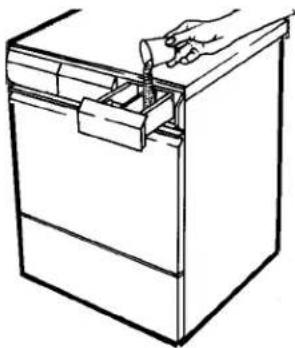
- Pour detergent (and fabric softener, if used) into the appropriate sections of the detergent compartment.
natural_image
Line drawing of a hand inserting into a drawer into a cabinet (no text or symbols)| Recommended Detergents | Main Wash Detergent Amount |
| Fab (powder) | 1/4 cup to 1/2 cup |
| Amway SA8 (powder) | 1 tablespoon to 2 tablespoons (1/8 cup) |
| Fresh Start (powder) | 2 tablespoons (1/8 cup) to 1/4 cup |
| All (powder) | 1/4 cup to 1/2 cup |
| Liquid Solo | 2 tablespoons (1/8 cup) to 1/4 cup |
| Liquid Bold | 2 tablespoons (1/8 cup) to 1/4 cup |
Detergents - What kind - How much?
What kind - How much?
- Use only low sudsing laundry detergents!
Detergents are available in low, normal and full sudsing formulas. A detergent's ability to clean is not related to the amount of suds it produces. Excess suds in a front loading washer actually interfere with cleaning action because they cushion the tumbling of clothes. High sudsing detergents are also more difficult to completely rinse out.
- Use 1/4 to 1/2 of the recommended U.S. detergents. Because of the Asko washer's low water consumption and the fact that all the wash water and detergent are completely circulated repeatedly through the laundry, ensuring that all the detergent is fully utilized, detergent usage is cut by 50% to 75% .
Different brands of detergents recommend using different amounts. Read all package labels carefully. The first time you use any detergent, start with 1/4 of the recommended amount. (For example: If the label says use 1 cup, use 1/4 cup.) If the detergent produces a good, low level of suds, you may add slightly more detergent if you have very hard water or if your clothes are not getting perfectly clean. It is advisable to check your water hardness with the local water department.
• Recommended detergents.
Avoid normal and full sudsing detergents. The chart below lists several low sudsing detergents that have been successfully tested in the Asko washer, along with the recommended amounts.
Recommended Detergents Main Wash Detergent Amount
| Fab (powder) | 1/4 cup to 1/2 cup |
| Amway SA8 (powder) | 1 tablespoon to 2 tablespoons (1/8 cup) |
| Fresh Start (powder) | 2 tablespoons (1/8 cup) to 1/4 cup |
| All (powder) | 1/4 cup to 1/2 cup |
| Liquid Solo | 2 tablespoons (1/8 cup) to 1/4 cup |
| Liquid Bold | 2 tablespoons (1/8 cup) to 1/4 cup |
In general, liquid detergents tend to be higher sudsing than powders.
Do not use powder detergents that do not wash completely out of the detergent cup as the machine fills with water.
Prewash Detergent Amounts
If you water is soft, add only about one-fourth of the recommended main wash detergent amount for prewash. (For example: If you are using 1/4 cup of detergent for the main wash cycle, add only 1 tablespoon of additional detergent for prewash.)
If your water is hard, add one-half to three-fourths of the main wash detergent amount for prewash.
Liquid detergents
Liquid detergents tend to produce more suds than powder detergents. When trying a liquid detergent for the first time, start out with a very small amount, such as 1 to 2 tablespoons. Pour the detergent into the special insert for thin-type liquid detergents and choose a program. If you don't use this liquid detergent insert, you must select programs 2, 3, or 4. If you add the detergent without the insert to program 1, it will be washed out with the prewash water.
Very thick liquid detergents may be poured directly into the main wash detergent compartment, just as you would a powder detergent.
Bleach
The use of chlorine bleach is not necessary with your washer, nor is it recommended. Non-chlorine bleaches may be used. Use only 1/4 to 1/2 of the recommended amount.
Fabric softeners
Use 1/3 to 1/2 of the recommended amount of fabric softener, because of the low water usage of the Asko washer. Fabric softeners are available in several concentrations. Read the labels carefully and use only 1/3 to 1/2 of the recommended amount. (For example: If the label says to use 1 capful, use 1/4 capful.) If more softening is desired, try adding slightly more the next time.
Oversudsing
The use of anything other than a low sudsing detergent can cause severe oversudsing. If this happens, run the wash through one or more rinses until items are thoroughly rinsed. Then, run the empty washer through an entire wash program (starting on 4) to clear the machine of any remaining high sudsing detergent.
Factors affecting suds level
There are several factors that will affect the sudsing level of detergents. Adjust your detergent amounts accordingly. • Water hardness
Detergents produce more suds in soft water. Use less detergent in soft water and more in hard water.
• Detergent formulation
Various brands of detergent are formulated to produce widely different amounts of suds. Use only the recommended low sudsing brands.
• Amount of soil in clothes
Use more detergent on heavily soiled clothes and less on lightly soiled items.
- Load size
Use less detergent for smaller loads.
• Water temperature
Detergents may suds more at the highest water temperatures. Use less detergent when selecting water temperatures of 80° to 95°C.
5. Select a program: 1 - 11
The further to the left the program that you select, the more stages it contains.
The indicator lights come on to show which stages are included in the program that you have selected.

Which program should I choose?
It's easy to select programs with the 20003 washing machine. When you press one of the program selection buttons, everything to the right of its included. You can easily see what you have selected. Program 1, for example, provides a pre-wash, a long main wash, three rinses, a short spin, two more rinses and finally a longer spin. The indicator lights above each pushbutton show what's included in the selected program.
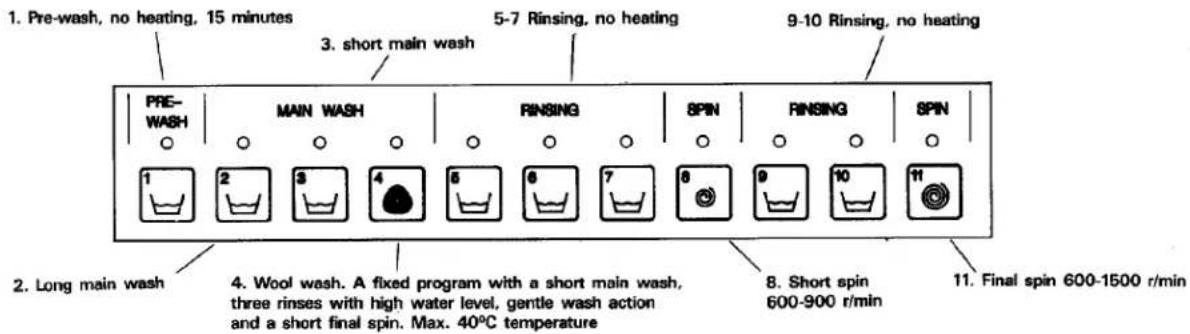
Examples of programs:
| Type of Washing | Program selections | Spin Speed | Load Size | Time In Minutes | ||
| Program Pushbutton | Temp. (C.) | Program Options | ||||
| White cotton, linenWith prewash | 1 | 90^ | 1500 | Full | 120 | |
| White cotton, linenWith prewash + economy | 1 | 60^ | E | 1500 | Full | 128 |
| White cotton, linenWithout prewash | 2 | 90^ | 1500 | Full | 110 | |
| White cotton, linenWithout prewash + economy | 2 | 60^ | E | 1500 | Full | 120 |
| Colorfast cotton, linenWith prewash | 1 | 60^ | 1500 | Full | 105 | |
| Colorfast cotton, linenWithout prewash | 2 | 60^ | 1500 | Full | 95 | |
| Non-colorfast cotton, linenWith prewash | 1 | 40^ | 1500 | Full | 95 | |
| Non-colorfast cotton, linenWithout prewash | 2 | 40^ | 12 | 1500 | Full | 60 |
| White synthetics, blendspermanent press | 3 | 60^ | 12 | 900 | 1/2 | 45 |
| Colorfast synthetics, blends,permanent press | 3 | 50^ | - | 900 | 1/2 | 50 |
| Acrylics, rayon, acetate | 3 | 40^ | 900 | 1/2 | 65 | |
| Wool (Machine washable) | 4 | 40^ | 900 | 1/3 | 45 | |
| Silk and delicates | 3 | 30^ | - | 1/3 | 60 | |
| Special finish cottons | 2 | 90^ | 12 | 900 | 1/2 | 95 |
| Quick wash | 3 | as required | 1500 | 1/2 | 45-55 | |
- Select any required program options
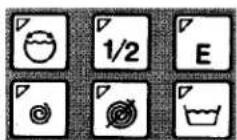
- Select spin speed: 600-1500 rpm
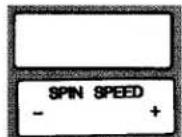
- Select temperature: 0-95 degrees
Program options
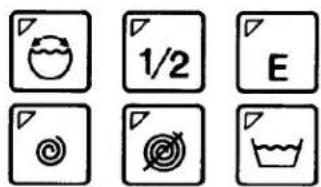
When any of these buttons is pressed, the little triangular indicator light in the top left-hand corner of the button lights up to indicate that the option is activated.
If you have forgotten to set one of the options, and the program has already started, simply press the required option pushbutton for three seconds and it will be added to the program.
In the same way, you can delete an option from the program by pressing the button for three seconds, which will remove the option from the program.

Gentle wash

Half load

Economy program

Short spin

No spin

High rinse level
With the gentle wash action, the drum pauses longer between movements, treating the garments more gently. The water level is also higher, the number of rinses is reduced to three and there is only a short spin. Use this cycle for handwashables, loosely knit items, lace, sheer fabrics, embroidered fabric and lingerie. It is also the best cycle for cotton/polyester knits to prevent pilling.
Pressing this button reduces the number of rinses from five to three, and gives a long spin. Use this button when there is only a small load in the machine.
Pressing this button extends the main wash by 22 minutes. You can save energy by reducing the temperature to 60-80°C for white and 40°C for coloreds. The extended washing time will compensate for the lower temperature.
Pressing this button gives you one short spin, at a speed of 900 r/min. You can further reduce the speed (to 600 r/min) by pressing SPIN SPEED + .
Pressing this button cancels spinning entirely. The machine stops at the end of the program with the final rinse water still in the drum. Press to pump it out. You can also press to give a short spin, which the majority of garments can stand.
Press this button for a high rinse level.
High wash water level?
If you want a high wash water level, i.e. for washing a rug, you can obtain it by:
- Press ☐ for three seconds.
- Allow the machine to fill to the required level.
- Press 📊 again for three seconds, and the program will continue.
Quick wash if you are particularly short of time
Pressing 🏠 and Ⓤ/2 will shorten the length of the main wash and reduce the number of rinses. Any temperature can be used. Use this program to save time and water if you have only a small amount of washing, which is only lightly soiled.
- Select delayed start, if required.
- Press START.

If you change your mind...
... and want a different program
Press _start for three seconds and then select a new program.
... and want to interrupt the program
press for three seconds and then =0 The machine will pump out enough water to allow you to open the door.
You want to add something
Press ☐0 for three seconds and then the machine will pump out enough water to allow you to open the door.
Control settings
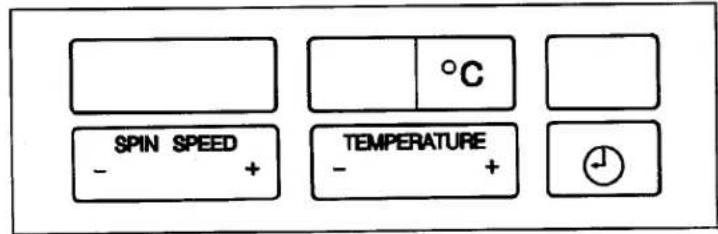
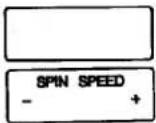
Selection of spin speed
You can select spin speeds between 600 r/min and 1500 r/min. When you press a program button, the display shows the spin speed that was last used. You can increase or decrease it in steps of 100 r/min by pressing the + or - symbols respectively, within the range 600-1500 r/min.
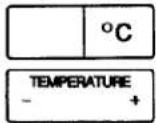
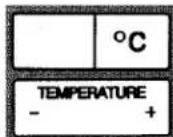
Temperature setting
Washing temperatures between 20°C (68°F) and 95°C (203°F) can be selected. When the machine is turned on, the temperature selector will always set itself to 40°C. You can raise the temperature in steps of 5°C by pressing the + symbol, or decrease it in steps of 5°C by pressing the - symbol. At the lowest temperature setting, the display will show C (cold).
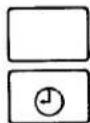
Delayed start
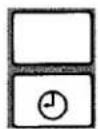
The machine can be set to start up to twelve hours after it has been loaded and programmed. Press the ⏻ button once for each hour's delay in starting. The setting will be shown on the display.
Pressing the button for the thirteenth time does not select a starting delay, but causes the display to show the time remaining that the program in use has to run. (See below) When you have set the starting time delay, start the delay period by pressing the button.
How much longer has the program to run?
The time remaining before the program finishes is shown on the display. If it exceeds 60 minutes, it will be shown as the number of hours, followed by H, and alternating with the number of minutes more than the whole hour(s) remaining, i.e. 1H - 23, 1H - 22 and so on.
The display shows 00 when the main switch is turned on.
11. When the machine has stopped:
After a program which concludes by pumping out the water, you can open the door directly by pressing ☐-0
After a program which stops with water in the machine, press ^o=0 Water pumps out and the door opens.
12. After use: turn off the machine at the On/Off switch.
Note: Don't close the door after using the machine. Leave it ajar.
Care and maintenance
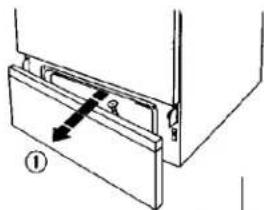
Clearing the button trap and outlet pump
The machine has a needle trap which will trap needles, hairpins, coins and similar items. Clean it at intervals as follows:
- Remove the lower front panel.
- Pull out the short drain hose, place the end in a bowl etc., pull out the plug and drain out the water left in the pump.
- Remove the clip and pull of the pump cover and strainer cone. Clean the strainer. Note that its end is removable.
- Check that there is no grit or small objects in the pump, and replace the strainer and cover. Note that there is a ridge and groove to ensure that the strainer is replaced correctly.
natural_image
Diagram of a door handle assembly with a directional arrow indicating movement (no text or symbols present)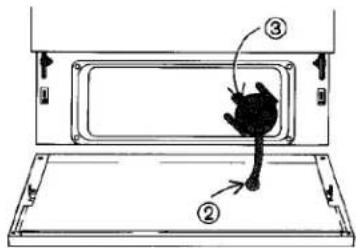
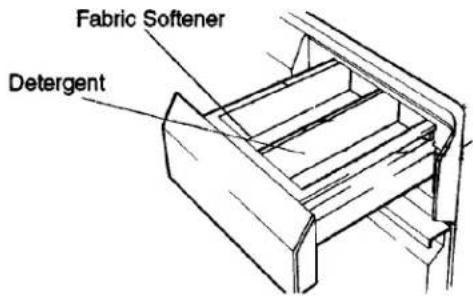
Clean the detergent compartment at intervals
- Press ☐ to flush the pre-wash detergent compartment clean. Use a brush to remove congealed residues.
- Press ☐ for three seconds to flush the main wash detergent compartment. Use the brush to remove congealed residues.
- Press ☐ for three seconds and let the machine pump itself out for about a minute to remove the water that entered the machine when cleaning the compartments.
- Stop the pump and reset the programs by pressing for three seconds.

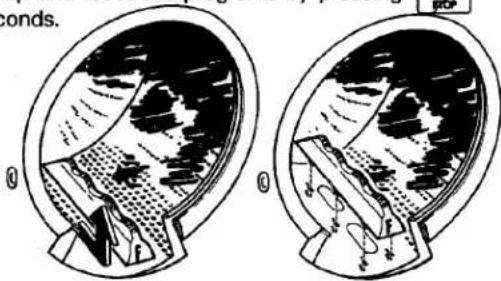
Cleaning holes under the washing blades
If an object has fallen through the cylinder down into the container, you can gain access in this way:
- Loosen the screw on the top of the blade 3 turns.
- Pull the blade towards you and lift it upwards.
- Remove the object.
- Place the blade in the fixing hole with the F marking point against you. Slide the blade away from you until it stops. Check that the blade brackets sit in their slots in the drum. Tighten the screws.
Inspect the hoses
Check the condition of the hoses at least once a year. This is particularly important in the case of the supply hose, which is under constant pressure, and should be replaced if it shows signs of cracking or other damage.
If the machine does not work
The door will not open
- Check that the main switch is turned on.
- Is power available at the machine? Check plugs and fuses. The door cannot be opened if there is no power supply.
- If the door cannot be opened in the normal manner, it can be opened as follows. Insert a screwdriver in the hole to the left of the door and press the door catch upwards to release the door.
If the door still cannot be opened in the normal way afterwards, call a service technician.
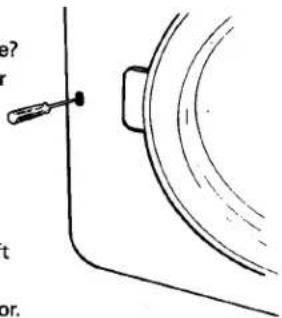
The machine does not fill with water when started
- Is the tap in the supply line open?
- Is the strainer in the inlet connection blocked? Unscrew the hose and check. Remember to turn off the water supply first.
The machine does not start when the Start button is pressed.
- Is the door properly closed? Press it shut firmly — don't slam it.
- Is power available at the machine. Check plugs and fuses.
The machine will not spin
(If the machine has failed to spin, this will be indicated by the spin speed display showing a flashing 0000)
The machine incorporates an out-of-balance detector, which reduces spin speed or prevents spinning from starting if the drum load is badly unbalanced. Open the door, redistribute the washing and restart the machine after
pressing or
A lot of foam in the final rinse water, or water left in the machine after spinning and pumping out
- Is anything blocking the outlet hose?
- Is the pump blocked? Clean it as described on page 8.
- Is the outlet hose kinked?
- Did you use a normal/full sudsing detergent?
Use only low sudsing detergents.
Fault tracing program
The machine incorporates a self-diagnostic fault-tracing program, reached by pressing ☐ 5 times within 15 seconds. The indicator lights respond by flashing as shown below. Press the buttons to test the following functions:
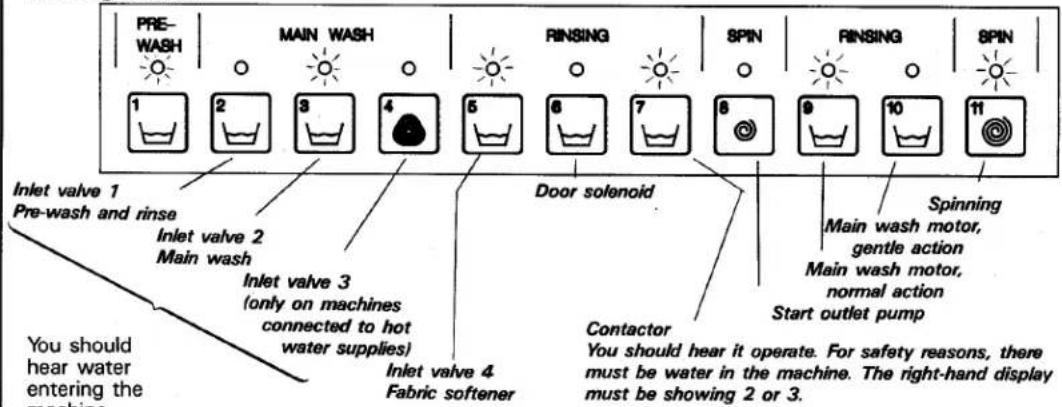
Leave the fault-tracing program by pressing v p for three seconds.
Indicates out-of-balance in the machine (for internal use only)
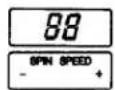
Indicates water level in machine
2 - normal
3 - high level
4 - overfilled

Other signals
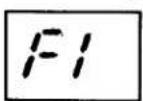
F1 A fault in the water supply
F2 Too high water level
F3 A fault in pumping out
F4 Thermistor fault (temp. control)
F5 Fault in thermal cutout
F6 Motor fault
If you want to interrupt the indicating signal, turn off the main switch or choose a new program.
Safety
The machine incorporates a door safety switch which prevents it from being started if the door is open. The door is also interlocked to prevent it from being opened when the machine is running or when it has stopped with water in. Do not touch glass window or any part of the inner door when using the hottest water temperatures.
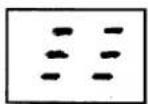
This flashing signal indicates that the door is open, even though a program is running.
Child safety
To prevent a child from altering the programs by playing with the control buttons, buttons must be pressed for three seconds to affect the program when the machine is running. Only a brief press is necessary if no program has started.
Specifications
Dimensions 32 1/4"x23 3/16"x23 3/16'
Weight 167 lbs.
Spin speed 600-1500 r/min
Rated load 2000/3200 W
Supply voltage 1-phase

208/230V
Heater rating 1800/3000 W
Material of drum Stainless steel and barrel
Material of Powder-painted,
outer casing hot-dip-galvanized steel sheet
Mounting Stationary: four
Stationary: four adjustable rubber covered feet
Water supply 63" rubber hose
Supply pressure 15-146 PSI
Outlet 63" of rubber hose, 3/4" internal diameter
Safety
WARNING – To reduce the risk of fire, electric shock, or injury to persons, read the IMPORTANT SAFETY INSTRUC-
S before operating this appliance.
Do not allow children to play on or in the appliance. Close supervision of children is necessary when the appliance is used near children.
Do not wash or dry articles that have been previously cleaned in, washed in, soaked in, or spotted with gasoline, dry-cleaning solvents, other flammable or explosive substances as they give off vapors that could ignite or explode.
Do not repair or replace any part of the appliance or attempt any servicing unless specifically recommended in the user-maintenance instructions or in published user-repair instructions that you understand and have the skills to carry out. DANGER! Improper connection of the equipment-grounding conductor can result in a risk of electric shock. Check with a qualified electrician or serviceman if you are in doubt as to whether the appliance is properly grounded.
The appliance must be grounded. The must be plugged into an appropriate t that is properly installed and grounded in accordance with all local codes and ordinances.
Installation
Removing the shipping brace
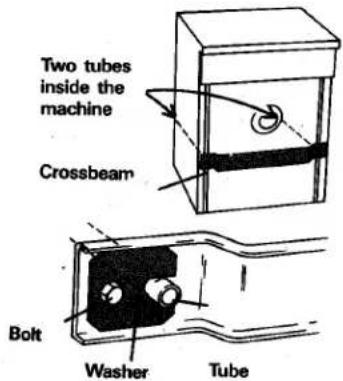
The shipping brace consists of two tubes which prevent the tub from moving around inside the machine during transport. The tubes are secured to a cross-beam at the back of the machine.
Remove the shipping brace as follows:
1.
Remove the bolts and special washers which retain the beam, and remove the beam.
2.
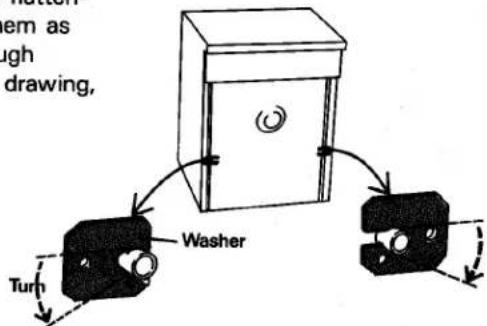
Replace the washers on the flattened part of the tubes. Use them as tools to turn the tubes through about 45°, as shown in the drawing, and pull out the tubes.
3.
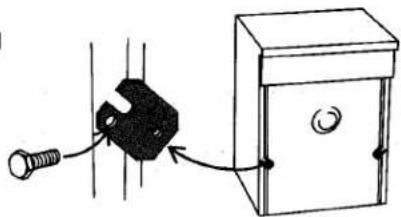
Turn the washers so that they cover the holes where the tubes were fitted and replace the bolts.
Save the tubes and cross beam, which will be needed if the machine has to be transported elsewhere. Fit them in the reverse order to that described above.
natural_image
Simple line drawing of a mechanical device with a spring attached to a bracket and a cabinet, no text or symbols present.Adjusting the feet
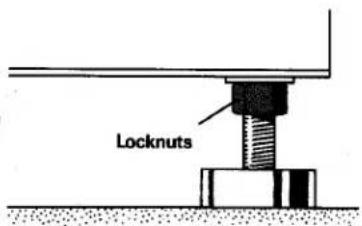
It is important that the machine does not move around when it is spinning. This means that it must be standing firmly and level on the floor. The four feet are individually adjustable. Set them carefully so that the machine is standing level, and tighten the locknuts securely.
Positioning the machine
The machine can be installed beneath a worktop with a height of 33 1/2" - 35 1/2". There must be a gap of about 1/4" all round the machine, including between the rear edge of the machine top panel and the wall behind. This is important: if no space is left, the machine may hit the wall when it starts to spin.
Electrical installation
The machine must be connected by an authorised electrician. As delivered, it is intended to suit a 10A or 15A (fuse rating) single phase supply.
The necessary changes are made beneath the top panel. A diagram of the appropriate connections is provided inside the machine.
When changing the connections for 10A or 15A supply, it is necessary also to adjust the timer that displays the amount of program time left to run. Do this by pressing the button 5 times. The display will respond by showing 3000 or 1800.
To change to1800W – press SPIN SPEED
To change to 3000W – press SPIN SPEED
After two seconds, the machine reverts to the main program. Choose a program and start the machine. Then the change has become stored.
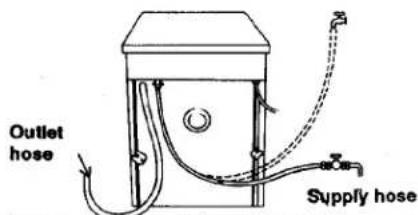
Water supply connection
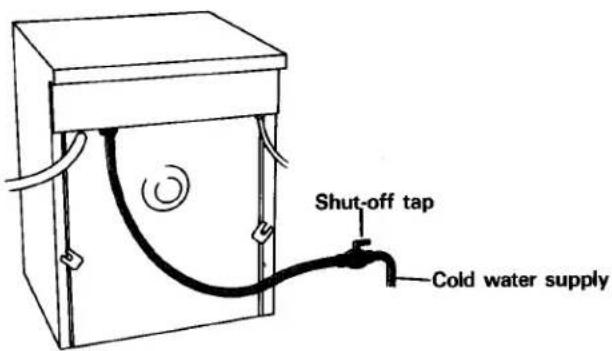
The water supply connections must be made by a person having the necessary competence. Connect the machine to the supply using the hoses supplied with the machine. Water pressure must be in the range 15–146 PSI.
A tap must be fitted in the supply pipe for the hose. If a new supply pipe has been installed for the machine, it should be flushed through thoroughly in order to remove any particles of dirt which might otherwise block the strainer in the water inlet of the machine.
Drain outlet connection
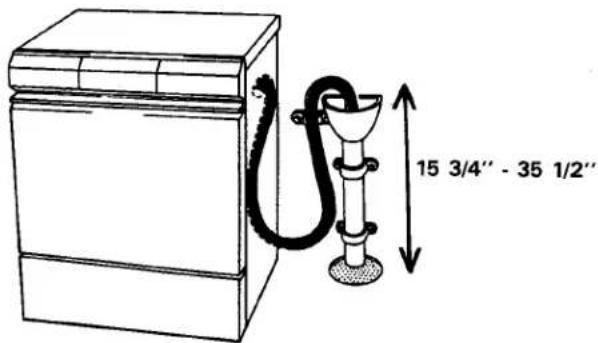
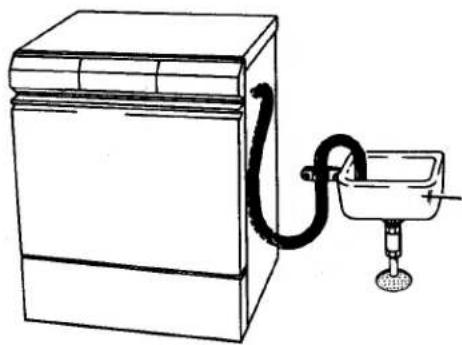
The machine is supplied with the outlet hose ready fitted. The hose should be hung at a height of 15 3/4'' - 35 1/2'' above the floor: the lower height is preferable.
Make sure that the hose is not kinked.
As supplied
1 phase, 240V
heater power 3000W
15A fuse required
Can be converted to
1 phase, 240V
heater power 1800W
10A fuse required
natural_image
Line drawing of a washing machine connected to a sink with a piping bag (no text or symbols)Problems?
Try the following remedies. Poor results may not always be caused by the machine. Read through the chart below before contacting your servicer.
| Problem | Possible Cause | Suggested Remedy |
| Door will not open | — | See "If the machine doesn't work", page 10. |
| Machine will not start | — | |
| Machine will not fill with water | — | |
| Foam in final rinse, water left in machine | — | |
| Water leaks | Hoses | All hoses, especially the inlet hose should be inspected at least once a year. Replace if they show signs of cracking. Check to see if hose connections at faucets are tight. Properly insert and secure end of drain to drain facility. |
| Extreme vibration during spin cycle | Transit packing not removed | Remove transit packing. See page 11. |
| Machine not level | Adjust machine feet and tighten locknuts. | |
| Oversudsing | Wrong detergent | Use only low sudsing detergents. See page 5.Run clothes through extra rinse cycles.Run empty machine through complete cycle starting on "4". |
| Too much detergent | Use recommended amounts. See page 5. | |
| Washer stops during cycle | Normal pauses | It is normal for the machine to pause occasionally during operation, especially between cycles and during the delicate wash program. |
| Greying clothes | Not enough detergent | You may need to add slightly more detergent if clothes are heavily soiled, have oily stains, or if your water is very hard. |
| Water not hot enough | Select hot enough temperature setting for each type of load. See charts page 6 and 16. | |
| Improperly prewashed or presoaked | Be sure to add a prewash and/or presoak for heavily soiled or oily items. | |
| Washer overloaded | Once wet, the clothes must have room to tumble freely, especially synthetics and permanent press. | |
| Soap used in hard water areas. | Be sure you use a laundry "detergent" and not a "soap". Soaps react with the minerals in hard water to form a soap curd, which can be deposited on clothes. | |
| Yellowing of clothes | Not enough detergent, water not hot enough | Caused by body oils not completely removed.Use hottest recommended temperature for each type of load and add slightly more detergent. |
| Iron or manganese in water | Install a filter to remove iron or manganese from water. A small amount of Calgon or other non-precipitating water conditioner added once a week is advisable in hard water areas. | |
| Fading and discoloring | Improper sorting | Dark clothes, especially cottons, can bleed excess dyes into wash water. White or light colored clothes can absorb the dye and discolor.Separate light from dark items. |
| Crayons or pens in pockets.Water too hot | Empty all pockets before washing.Cool or cold water is best for retaining dark or bright colors. | |
| Lint, residue left on clothes | Improper sorting of clothes | Separate clothes that shed lint (chenile and terrycloth) from clothes that attract lint (synthetics, corduroy, velveteen). |
| Nonphosphate detergent | Non-phosphate detergents can combine with minerals in hard water and form a precipitate which can appear to be lint. Use a low phosphate detergent, if possible. Install a water softener. | |
| Fabric softener used improperly | Read labels. Most softeners should only be used in the final rinse. Add softener to the softener compartment. If added to the wash cycle, softeners can have a reaction with detergents producing a white residue. | |
| Pilling | Pilling, which can look like lint, is produced by normal wear on cotton/polyester blend fabrics. To reduce, wash synthetics and cotton/polyester blends inside out. For the best results, wash cotton/polyester knits using the delicate cycle. | |
| Stains not removed | Incorrect water temperature | Protein stains, such as milk, egg, blood and soy formula should be removed in cold water. Oily stains should be washed in the hottest water recommended for each fabric type. |
| Old stains | The longer a stain remains on a fabric, the harder it is to remove. Treat stains promptly. Do not set stains by machine drying or ironing fabrics until stains are completely removed. | |
| Rips, snags, excess wear | Sharp objects in pockets | Empty all pockets and turn inside out before laundering. |
| Hooks, snaps, zippers, buckles | Fasten all hooks, snaps and zippers before laundering to avoid snags. Remove sharp buckles. Turn knits inside out. | |
| Harsh chemicals | Before washing, rinse harsh chemicals, such as battery acid, permanent wave solution, hair bleach, dyes and toilet bowl cleaners, from towels and other articles to avoid holes in fabrics. Do not allow these unrinsed items to contact other fabrics. | |
| Existing rips and tears | Mend all garments before laundering to prevent enlarging of rips. | |
| Permanent press items | These items fray at edges from the permanent press process and from normal wear, not from the washer. Only wash in half loads. Do not wash in the same load until very heavy items, such as towels or jeans. | |
| Shrinkage | Improper washing or drying | Follow garment care label instructions carefully. Some fabrics will shrink no matter how they are washed. Some may be machine washed but not machine dried. |
| Knit shrinkage | Overheating | Knits tend to shrink more than woven fabrics. If a knit has been heat shaped, wash in cool or warm water. Dry with the low setting. |
| Delayed or gradual shrinkage | Can occur when special stabilizing finishes are reduced from wear or repeated washings. Garment may sometimes be reshaped by pressing after washing and drying. | |
| Poor construction | Shrinkage can occur if the knit fabric was not stretched properly by the manufacturer. Press back into shape each time garment is washed and dried. |
Home Clothes Washers and Dryers
| Length of warranty | ASKO will pay for: |
| ONE YEAR FULLWARRANTYFrom date of purchase | ASKO replacement parts and/or repair labor to correct defect in materials or workmanship, Service must be provided by an authorized ASKO service outlet. |
| THREE YEAR LIMITEDWARRANTYOne year full plus second and third year limited from date of purchase. | ASKO replacement parts (repair labor costs not included) for any defective water or electrical distribution component. Including:Timer, Switches, Inlet valves, Motors, Pumps |
| FIVE YEAR LIMITEDWARRANTYOne year full plus second through fifth year limited from date of purchase. | ASKO replacement parts (repair labor costs not included) for any defective solid state controls. |
| TEN YEAR LIMITEDWARRANTYOne year full plus second through tenth year limited from date of purchase. | ASKO replacement parts (repair labor costs not included) for the stainless steel inner and outer drum/tub if it fails to hold water due to a manufacturing defect such as cracking or rusting. |
| ASKO will not pay for:A. Service calls to: 1. Correct the installation of the washer or dryer2. Instruct how to use the washer or dryer3. Replace house fuses or correct housing wiring4. Correct house plumbing5. Cleaning or servicing of the button trap, outlet pump of the washer6. Cleaning or servicing of the lint filter or condensing unit of the dryerB. Repair and/or parts for failure of product if washer or dryer is used in other than normal use.C. Damage resulting from accident, fire, floods, acts of God, alteration, misuse abuse, improper installation or installation not in accordance with local electrical or plumbing codes.D. Any labor or shipping costs for parts during the limited warranty.E. Replacement parts or repair labor costs for units operated outside the Continental United States.F. Pick-up and delivery. ASKO products are designed to be repaired in the home. | |
IN NO EVENT SHALL ASKO INC. BE RESPONSIBLE FOR ANY INCIDENTAL OR CONSEQUENTIAL DAMAGES.
Some states will not allow the exclusion or limitation of incidental or consequential damages, so this exclusion or limitation may not apply to you. This warranty gives you specific legal rights and you may also have other rights which vary from state to state.
For warranty service, contact the dealer from whom you purchased the unit or an authorized ASKO service outlet. Service will be provided during normal business hours. Should you have a service problem that is not resolved locally write:
ASKO USA INC.
903 N. Bowser, Suite 200
Richardson, Texas 75081
Summary of washing instructions
1
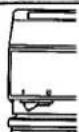
Press the main On/Off switch
2
Open the door by pushing
3
Load the washing and close the door firmly. Close the outer door.
4
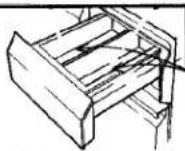
Pour detergent and fabric softener into the dispenser.
5
Select the program by pressing one of the buttons 1-11

6
Select any program options. Select spin speed
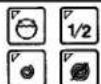
and temperature 20°C (68°F) - 95°C (203°F).
7
Press the start button.

If you change your mind.
...and you want to alter or stop the program, press the button to which you want the program move for three seconds.

...or want to step forward in the program, press the button to which you want the program move for three seconds.
8
When the machine stops:
Open the door by pressing

*The door can be opened immediately after a program in which the water has already been pumped out.
*If water is left in the machine, it will first pump in out before the door can be opened.
9
After using the machine:
Turn off the main switch.
Leave the door ajar.
Choosing the right program
| Type of Washing | Program selections | Spin speed | Load Size | |||
| Program Pushbutton | Temp. C° | Program Options | ||||
| White cotton, linen | With prewash | 1 | 90° | 1500 | Full | |
| With prewash + economy | 1 | 60° |  | 1500 | Full | |
| Without prewash | 2 | 90° | 1500 | Full | ||
| Without prewash + economy | 2 | 60° | [YY9K] | 1500 | Full | |
| Colorfast cotton, Linen | With prewash | 1 | 60° | 1500 | Full | |
| Without prewash | 2 | 60° | 1500 | Full | ||
| Non-colorfast cotton, linen | With prewash | 1 | 40° | 1500 | Full | |
| Without prewash | 2 | 40° | 1500 | Full | ||
| White synthetics, blends, permanent press | 3 | 60° | [A2CH] | 900 | 1/2 | |
| Colored synthetics, blends, permanent press | 3 | 50° |  | 900 | 1/2 | |
| Acrylics, rayon, acetate | 3 | 40° | [GYZS] | 900 | 1/2 | |
| Wool (machine washable) | 4 | 40° | 900 | 1/3 | ||
| Silk and delicates | 3 | 30° | [K80D] | 1/3 | ||
| Special finish cottons | 2 | 90° | [TOA6] | 900 | 1/2 | |
| Quick wash | 3 | 40° |  | 1500 | 1/2 | |

- How to use the washing machine
- WARNING - Important!
- How to use the machine
- The control panel
- To add more washing
- Start / Stop
- Sort the washing
- Load the Washer Properly
- How much is in a full load?
- Water level in the washer
- Preparing clothes for washing
- New colored items
- Prewash or not?
- Detergents - What kind - How much?
- What kind - How much?
- Prewash Detergent Amounts
- Liquid detergents
- Bleach
- Fabric softeners
- Oversudsing
- Factors affecting suds level
- Select a program: 1 - 11
- Which program should I choose?
- Program options
- Gentle wash
- Half load
- Economy program
- Short spin
- No spin
- High rinse level
- High wash water level?
- Quick wash if you are particularly short of time
- Control settings
- Selection of spin speed
- Temperature setting
- Delayed start
- How much longer has the program to run?
- When the machine has stopped:
- After use: turn off the machine at the On/Off switch.
- Care and maintenance
- Clearing the button trap and outlet pump
- Clean the detergent compartment at intervals
- Cleaning holes under the washing blades
- Inspect the hoses
- If the machine does not work
- The door will not open
- The machine does not fill with water when started
- The machine does not start when the Start button is pressed.
- The machine will not spin
- A lot of foam in the final rinse water, or water left in the machine after spinning and pumping out
- Fault tracing program
- Other signals
- Safety
- Child safety
- Specifications
- Installation
- Removing the shipping brace
- Adjusting the feet
- Positioning the machine
- Electrical installation
- Water supply connection
- Drain outlet connection
- Problems?
- IN NO EVENT SHALL ASKO INC. BE RESPONSIBLE FOR ANY INCIDENTAL OR CONSEQUENTIAL DAMAGES.
- Summary of washing instructions
- 1
- 2
- 3
- 4
- 5
- 6
- 7
- 8
- 9
- Choosing the right program
Marke : ASKO
Modell : 20003
Kategorie : Waschmaschine