8200DQ - Hi-Fi Audiolab - Kostenlose Bedienungsanleitung
Finden Sie kostenlos die Bedienungsanleitung des Geräts 8200DQ Audiolab als PDF.


Benutzerfragen zu 8200DQ Audiolab
0 Frage zu diesem Gerät. Beantworten Sie die, die Sie kennen, oder stellen Sie Ihre eigene.
Eine neue Frage zu diesem Gerät stellen
Laden Sie die Anleitung für Ihr Hi-Fi kostenlos im PDF-Format! Finden Sie Ihr Handbuch 8200DQ - Audiolab und nehmen Sie Ihr elektronisches Gerät wieder in die Hand. Auf dieser Seite sind alle Dokumente veröffentlicht, die für die Verwendung Ihres Geräts notwendig sind. 8200DQ von der Marke Audiolab.
BEDIENUNGSANLEITUNG 8200DQ Audiolab

Osaidias 600 Scene Cinema Pack_0.Page 1 2011-3-29 12:04:58

text_image
COAX1 COAX2 OPT1 OPT8 ALTER USB ALX VIDEO TUNER TRG B2000DQ Audiolab 8200DQ MENU BAL POWER audiolab
text_image
220-230V~50Hz 30W FUSE T1AL 250V RIGHT NAND LEFT OUTPUT INPUT OUTPUT R IN USB DIGITAL COAX2 COAX1 OPT2 OPT1 12V TRIGGER A B OUTPUT CAUTION WARNING ON CHINESE INDEX SELECT OR NULL ATTENTION WARNING ON CHINESE INDEX SELECT OR NULL AUDIOLAB AUDIOLAB, HUNTINGDON UNITED KINGDOM PEZBERU WWW.AUDIOLAB.CO.UK S.No. NAME: DAC/PRE MODEL: 8200DQ CE M110068200DQ
User Instructions
audiolab
1: Statutory & Safety Information

text_image
CAUTION! RISK OF ELECTRIC SHOCK DO NOT OPEN TO REDUCE THE RISK OF ELECTRIC SHOCK DO NOT REMOVE COVER NO USER. REMOVEABLE PARTS INSIDE REFER SERVICING TO QUALIFIED PERSONNEL ADVERTISSEMENT: RISQUE DE CHOC ELECTRIQUE- NE PAS OUVIXIR
This symbol indicates that there are important operating and maintenance instructions in the literature accompanying this unit.
This symbol indicates that dangerous voltage constituting a risk of electric shock is present within this unit.
IMPORTANT SAFETY INFORMATION
Read these instructions.
Keep these instructions. In the event that you pass the product to a third party this instruction manual should be provided along with the product.
Heed all warnings.
Follow all instructions.
Do not use this apparatus near water.
Clean only with dry cloth.
Do not block any ventilation openings.
Install in accordance with the manufacturer's instructions.
Do not install near any heat sources such as radiators, heat registers, stoves, or other apparatus (including amplifiers) that produce heat.
Do not defeat the safety purpose of the polarized or grounding type plug. A polarized plug has two blades with one wider than the other. A grounding type plug has two blades and a third grounding prong. The wider blade or the third prong is provided for your safety. If the provided plug does not fit into your outlet, consult an electrician for replacement of the obsolete outlet.
Protect the power cord from being walked on or pinched, particularly at plugs, convenience receptacles, and the point where they exit from the apparatus.
Use only attachments/accessories specified by the manufacturer.

Use only with a cart, stand, tripod, bracket, or table specified by the manufacturer, or sold with the apparatus. When a cart is used, use caution when moving the cart/apparatus combination to avoid injury from tip-over.
Unplug this apparatus during lightning storms or when unused for long periods of time.
Refer all servicing to qualified service personnel. Servicing is required when the apparatus has been damaged in any way, such as power-supply cord or plug is damaged, liquid has been spilled or objects have fallen into the apparatus, the apparatus has been exposed to rain or moisture, does not operate normally, or has been dropped.
Warning: To reduce the risk of fire or electrical shock, do not expose this product to rain or moisture. The product must not be exposed to dripping and splashing and no object filled with liquids such as a vase of flowers should be placed on the product.
No naked flame sources - such as candles - should be placed on the product.
Caution: Changes or modifications not expressly approved by the manufacturer could void the user's authority to operate this device.
This equipment has been tested and found to comply with the limits for a Class B digital device, pursuant to part 15 of the FCC rules. These limits are designed to provide reasonable protection against harmful interference in a residential installation. This equipment generates, uses and can radiate radio frequency energy and, if not installed and used in accordance with the instructions, may cause harmful interference to radio or television reception, which can be determined by tuning the equipment off and on, the user is encouraged to try to correct the interference by one or more of the following measures:
• Re-orientate or re-locate the receiving antenna.
- Increase the separation between the equipment and the receiver.
- Connect the equipment into an outlet on a circuit different from that to which the receiver is connected.
- Consult the dealer or an experienced radio/TV technician for help.
Warning: The means of disconnecting this apparatus from the mains supply is the mains plug. At all times this must be unobstructed, freely accessible, and capable of being removed in an emergency.
Warning: The battery (battery or batteries or battery pack) shall not be exposed to excessive heat such as sunshine, fire or the like.
Mains supply and safety
Class I construction. These products must be connected to earth.
Power Cord: An AC power cord is normally supplied with a mains plug suitable for your area. If you have any doubts, consult your dealer about obtaining a suitable power cord.
Mains Supply: The mains voltage of Audiolab units is shown on the rear panel. If this does not match the voltage in your area, consult your dealer. The mains supply fuse is on the rear panel. If it has broken, check for any obvious cause before replacing the fuse with one of the correct rating and type. The fuses for all areas are type T (time lag) AL 20mm.
The fuse values are: 220-230V; T1AL 250V Fuse Carrier 100V,115V; T1.6AL 250
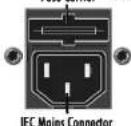
The fuse is located in a slide-in carrier which also contains a spare fuse. The carrier can only be pulled out after the IEC power cord is unplugged. When the carrier is opened the first fuse is the spare. Remove and safely dispose of the blown fuse before replacing it.
Important notice to UK users
The appliance cord is terminated with a UK approved mains plug fitted with a 3A fuse. If the fuse needs to be replaced, an ASTA or BSI approved BS1362 fuse rated at 3A must be used. If you need to change the mains plug, remove the fuse and dispose of this plug safely immediately after cutting it from the cord.
Connecting a Mains Plug
The wires in the mains lead are coloured in accordance with the code: Blue: NEUTRAL Brown: LIVE Green/Yellow: Earth
As these colours may not correspond to the coloured markings identifying the terminals in your plug, proceed as follows:
The Blue wire must be connected to the terminal marked with the letter N or coloured BLUE or BLACK.
The BROWN wire must be connected to the terminal marked with the letter L or coloured BROWN or RED.
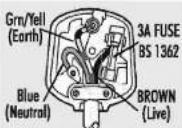
The Green/Yellow wire must be connected to the terminal marked with the symbol E or coloured GREEN or GREEN/YELLOW or marked with the Earth Symbol ⏻.
Protective earthing terminal. The apparatus should be connected to a mains socket outlet with a protective earthing connection.
2: Getting Started
Introduction: 8200DQ
The Audiolab 8200DQ is a fully-featured Preamplifier and DAC of advanced specification and impeccable performance. Please read this manual carefully before installing and operating the unit so that you can enjoy to the full the outstanding qualities of this unit.
Features:
Inputs:
• Two external SPDIF stereo LPCM coaxial digital inputs
• Two external SPDIF stereo LPCM optical digital inputs
• Three external analogue inputs.
- USB 2.0 port for replaying stereo from a compatible host.
Outputs.
- Balanced stereo analog output via XLR connectors for connecting an audio amplifier with balanced inputs.
- Unbalanced stereo analog output via RCA connectors for connecting an audio amplifier with standard inputs.
Operating Features:
• Automatic detection and decoding of external digital input sources.
- Selectable digital filter settings.
- Fully variable analogue preamplifier maintains full signal fidelity when replaying both digital and analog sources.
- Digital preamplifier mode available when replaying digital sources enabling the straightest possible signal path.
• The display can be switched on/off as required.
- Infra Red I/O to enable system control with one handset command when connected to suitably enabled units.
The USB Input
The USB input enables computers and other compatible devices with USB connectivity to be connected directly to the unit. This is one of the most exciting topics in audiophile circles and has ushered a new appreciation of the capabilities of computer audio.
Although most audio files stored on computers are compressed and of very average quality, the advent of affordable large capacity hard drives enables audiophiles to rip CDs at full resolution and play them via computers with results that are comparable to the same CDs played through the finest CD players.
The DAC and the USB featured in the 8200DQ is among the finest in the world irrespective of price.
Important Note:
The 8200DQ should be used with the outputs connected directly to a power amplifier (or amplifiers). If there are gain control/s on the power amplifier/s, set them to maximum and leave them there. Use the volume control on the 8200DQ exclusively to alter the level.
If you wish to connect the outputs of the 8200DQ into a pre-amplifier, you may wish to disable the volume control functions so that the unit operates at a fixed gain. In this mode the unit behaves as a CD/DAC operating in the digital domain. Refer to Pages 4 and 9 for this mode of operation.
Unpacking
Unpack the product fully. The carton should contain:
The Audiolab 8200DQ
- One IEC power cord suitable for your area
One Remote Handset with two AAA batteries
- This instruction manual.
If any item is missing or damaged report this to your dealer as soon as possible.
Retain the packing for future safe transport of your unit. If you dispose of the packing, do so with regard to any recycling regulations in your area.
Placement
Place the unit on a sturdy shelf or table.
The unit is designed to run warm during normal operation.
Do not place anything on top of the unit. If you are using an equipment rack ensure the unit has sufficient space to allow adequate ventilation and is on its own shelf.
Before you connect the 8200DQ to the mains, ensure your mains voltage corresponds to the rating plate on the rear of the product. If in doubt, consult your dealer. If you move to an area which has a different mains voltage seek advice from an Audiolab appointed dealer or a competent service technician.
Make sure you locate the unit so that the front panel is in view otherwise the infrared-remote handset will not work.
Before Starting
Your 8200DQ's performance is determined by the care you take in setting your system up: this includes all connected sources, amplification and loudspeakers.
Please read all the notes regarding playback from computer sources and set up the associated computer audio source with care.
3: Controls and Connectors
text_image
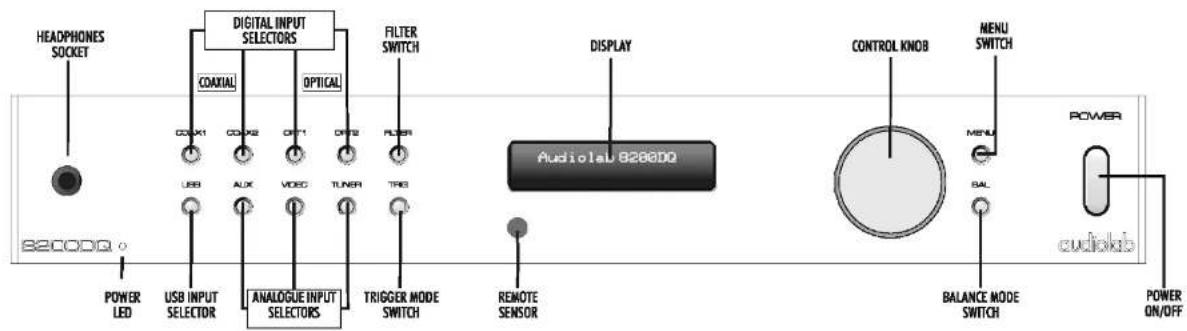
HEADPHONES SOCKET DIGITAL INPUT SELECTORS COAXIAL OPTICAL FILTER SWITCH COMX1 COMX2 OPT1 OPT2 FILTER USB AUX VIDEO TUNER TRIG AUDIO 8200DQ DISPLAY CONTROL KNOB MENU SWITCH POWER CAM BALANCE MODE SWITCH CUDIOKB POWER ON/OFF SERVCS ON/OFF SERVCS ON/OFF SERVCS ON/OFF SERVCS ON/OFF SERVCS ON/OFF SERVCS ON/OFF SERVCS ON/OFF SERVCS ON/OFF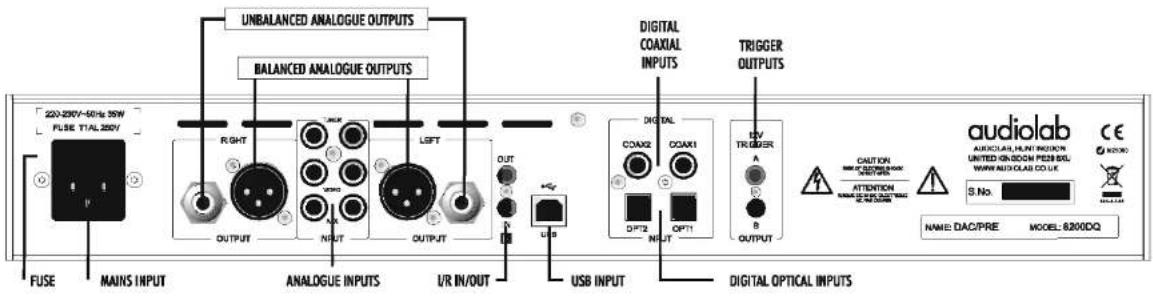
text_image
UNBALANCED ANALOGUE OUTPUTS BALANCED ANALOGUE OUTPUTS FUSE MAINS INPUT ANALOGUE INPUTS LIFT U/R IN/OUT USB INPUT DIGITAL COAXIAL INPUTS TRIGGER OUTPUTS DIGITAL COAXIAL INPUTS DIGITAL TRIGGER A OUTPUT OUTPUT OUTPUT OUTPUT OUTPUT OUTPUT OUTPUT OUTPUT OUTPUT OUTPUT OUTPUT OUTPUT OUTPUT OUTPUT OUTPUT OUTPUT OUTPUT OUTPUT OUTPUT OUTPUT OUTPUT OUTPUT OUTPUT OUTPUT OUTPUT OUTPUT OUTPUT OUTPUT OUTPUT OUTPUT OUTPUT OUTPUT OUTPUT OUTPUT OUTPUT OUTPUT OUTPUT OUTPUT OUTPUT OUTPUT OUTPUT OUTPUT OUTPUT OUTPUT OUTPUT OUTPUT OUTPUT OUTPUT OUTPUT OUTPUT Audiolab AUDIO/ALUM PROTON UNITED GNSROOM PESH RCL. WWW.Audiolab.co.uk S.No. NAME: DAC/PRE MODEL: 8200DG4: Remote Handset
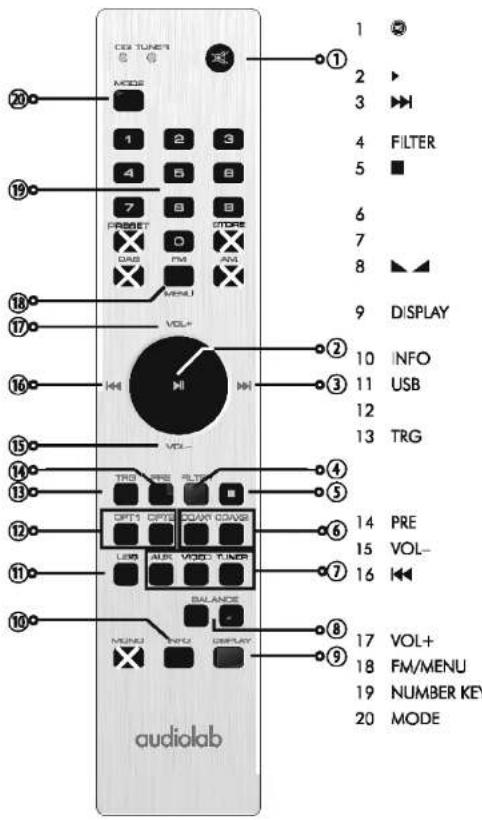
NOTE: The handset buttons shown crossed out are for use with other Audiolab units and are not operational when used with the 8200DQ.
text_image
1 2 3 4 FILTER 5 6 7 8 9 DISPLAY 10 INFO 11 USB 12 13 TRG 14 PRE 15 VOL- 16 17 VOL+ 18 FM/MENU 19 NUMBER KEY 20 MODE TUS TUNES MODE 1 2 3 4 5 6 7 8 STOP RESET ON FM MENU VOL+ 16 VOL- 17 VOL+ 18 FM/MENU 19 NUMBER KEY 20 MODE audiolabPress to fully mute the output.
Press and hold to mute the output by -10dB
Press to start and pause (USB playback)
Press to move to the next track (USB playback)
Press and hold to Fast Forward Search (USB playback)
Select a digital filter
Stop USB playback
Leave Menu Mode
Select a Digital Coaxial input
Select an Analogue input
Press once to display the current Balance level
Press and hold to alter Balance L/R
Press once to show the current display brightness
Press again to alter display brightness.
Press and hold to toggle large/normal characters.
Select the USB input
Select an Optical Digital input
Press once to select Trigger A
Press again to alter Trigger A state
Press and hold to select Trigger B
Press again to alter Trigger B state
Press to toggle Analogue/Digital Preamp mode
Lower the Volume
Press once to replay the current track (USB playback)
Press again to move to the previous track (USB playback)
Press and hold to Fast Reverse Search (USB playback)
Increase the Volume
Press to enter/leave Menu Mode.
Press to go directly to a filter/brightness level by number
Press to toggle the handset from Tuner to DQ operation.
The DQ/Tuner lights flash to show the selected mod
Fitting Batteries
Open the cover. Unwrap the supplied AAA batteries and place them in the battery compartment with the polarity as shown. Replace the cover.
Always use AAA batteries and always replace them in sets. Never mix old and new batteries. Very weak batteries can leak and damage the handset. Replace them in good time.
There is a risk of fire and burns if a battery is handled improperly. Do not disassemble, crush, puncture, short external contacts, or dispose of in fire or water.
Do not attempt to open or service a battery. Discard used batteries in full accordance with recycling regulations in force in your area.
1: Open the battery
compartment cover
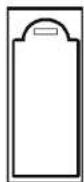
3: Replace the cover
2:Insert 2AAA batteries
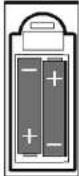
Handset Operation
The handset operates several Audio ab components.
Before using the handset always press the MODE button and check that the DQ light illuminates. This puts the handset into DQ operating mode.
Point the handset at the remote receiver and press the relevant key. The handset should be within 15 metres of the unit and there must be a clear line of sight between the two units.
5: Connections

Make sure all system components are disconnected from the mains before making or changing system connections.
ANALOGUE OUTPUTS
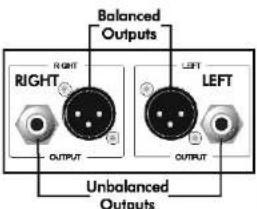
Balanced Output: Balanced connections provide greater headroom and improved S/N ratio. If your amplifier has a balanced input use the balanced connection. You need one XLR balanced cable per channel. The socket connects to the unit and the plug normally connects to the amplifier.
Unbalanced Output: Connect a high quality stereo screened RCA phono lead from the unbalanced outputs of the 8200DQ to a suitable input of the amplifier.
HEADPHONE OUTPUT
A stereo 6.3mm (1/4") jack is provided on the front panel for connecting headphones. Connecting headphones mutes the audio output signal.
Caution: Playing music at very high volumes, especially if using headphones may permanently damage your hearing.
ANALOGUE LINE INPUTS
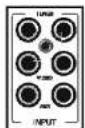
Three standard line inputs are provided. Although they are labelled Tuner, Video and Aux, these are for identification only as the inputs are identical. Connect a high quality screened RCA phono lead from the line output of your source component to the appropriate input of the 8200DQ.
DIGITAL (SPDIF) INPUTS
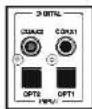
Four digital inputs (two Co-axial and two Optical) are provided for connecting the 8200DQ to an external SPDIF source. The inputs are connectable to a wide range of digital media. Connect a video or a digital cable from the SPDIF output of the source component to the appropriate input of the 8200DQ. If you are connecting a multichannel source, set the SPDIF output to PCM Stereo with the Subwoofer OFF.
USB PORT
Use a certified USB2.0 cable. Connect the cable to the 8200DQ and then to the USB port on the digital source.
text_image
Balanced Outputs RIGHT LEFT OUTPUT Unbalanced Outputs

I/R CONNECTIONS
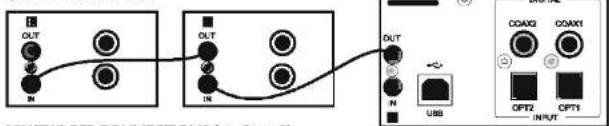
An external 3.5mm remote control bus is included to facilitate connection to suitably equipped 8200 series components and to multi-room controllers etc.
By connecting suitably equipped units in a 'daisy chain' you can establish control over an entire system with one handset.
text_image
OUT IN OUT IN USB COAX3 COAX1 OPT2 OPT1 OUTPUT CONTROL V6 (on Open)12V TRIGGER CONNECTIONS (see Page 8)
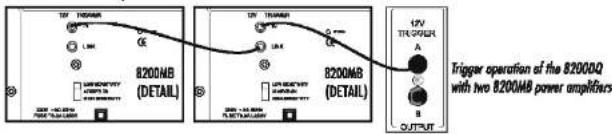
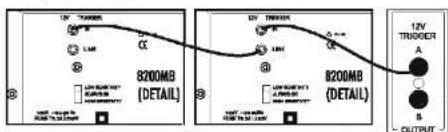
A trigger circuit is a "daisy chain" in which one unified command from the master unit (8200DQ) can bring all the connected "slave" units into or out of standby. The slave equipment is left powered on but is flipped in and out of standby in synchronism with the master. When the 8200DQ is powered on or off and/or certain other operations are performed, a trigger pulse switches all the slave equipment on/off in tandem.
Two trigger outputs are provided and they are both enabled as supplied you may fully or partially disable them as required.
text_image
8200MB (DETAIL) 8200MB (DETAIL) 12V TRIGGER A B OUTPUT Trigger operation of the 8200Q with two 8200MB power amplifiersMAINS INPUT
Before connecting the 8200DQ to the mains supply make sure that all the other connections to your system have been properly and securely made. Make sure the ON/OFF switch on the 8200DQ is switched off (released position). Switch the mains supply off at the wall socket and then, using the cable supplied, connect the socket on the back of your 8200DQ to an AC supply outlet. The unit is now ready for operation.
OPERATING THE 8200DQ WITH AN EXTERNAL PRE-AMPLIFIER (See Page 7)
The default mode of the 8200DQ is with the internal pre-amplifier enabled. This allows you to connect the 8200DQ directly to a power amplifier and control the volume.
To use the unit with a pre-amplifier you may disable the unit's gain controls. This retains only DAC functionality and input switching leaving your pre-amplifier in control. Connecting headphones enables the relevant analogue circuitry and volume control via the front panel only.
Never use this mode with a power amplifier which does not have a gain control.

p.7.pdf 2011-8-31 11:39:58
6a: Operation - 1
Switching On and Off
Connect power to all system units and switch the mains on. Switch on the 8200DQ. Switch on the power amplifier/s.
When switching off: switch off the amplifier before switching off the 8200DQ unless there are triggers enabled (P8).
When the 8200DQ is switched on:
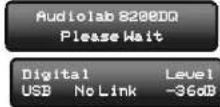
The Power LED illuminates, the display shows the welcome screen. After 15 seconds the unit boots, and defaults to the last used input and Volume level.
Selecting an Analogue Input Source
Analogue sources are selectable directly from the handset or the front panel. The inputs are labelled Tuner, Video and Aux: these are for identification only as the inputs are identical.
No playback controls are active when the 8200DQ is playing an analogue input.
Selecting a Digital Coaxial/Optical Input
Press the relevant button on the handset or the front panel to select a digital coaxial or optical input.
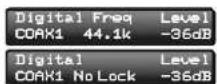
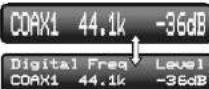
When the input is locked, the front panel displays the input source frequency.
If the input display reads "No Lock" this is because the source is switched off, in standby, or the unit is paused.
No playback controls are active when the 8200DQ is processing a digital coaxial or digital optical input.
Selecting the USB input: This is a special case and is fully covered on Pages 9-17.
Notes: To enable the upsampling circuits in the 8200DQ to work at their optimum, pass digital signals to the 8200DQ without any DSP processing or resampling at source. If there is a digital volume control on the source unit, set it at maximum and alter the level with the volume control in the 8200DQ. This preserves optimum performance. Consult the user manual on your source unit for advice if in doubt.
Altering the Volume Level
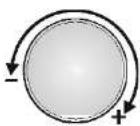
Press the Volume +/- keys or rotate the Control knob to alter the level.
In Digital replay mode the range is -80dB to +3dB.
Analogue input range is -80dB to +12dB (see P7 - Input Level Trim).
0dB is nominally 2.0V.
Altering the Balance
From the Handset
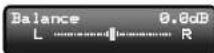
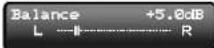
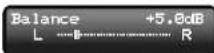
A: Press either BALANCE key to display the current Balance.
B: Press and hold a Balance key to move the balance in the wanted direction.
From the Front Panel
A: Press the BAL key to display the current Balance.
B: Rotate the Control knob in the wanted direction to alter the balance.
Muting the Volume
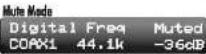
Mute Mode: Press the MUTE key or the Control knob to fully mute the output.
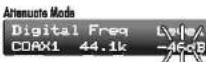
Attenuate Mode: Press and hold the MUTE key or the Control knob. The volume level is reduced by 10db and the display flashes.
Press MUTE again to restore the Volume.
If you switch the unit off when in either mute mode, the volume restores to the last used level when the unit is next switched on.
The Display
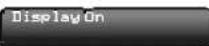
Press the DISPLAY key to toggle the display off/on.
When the display is OFF: Pressing any key brings the display on. After a few moments the display goes off again. Switching the 8200DQ off and on restores the display.
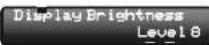
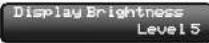
To alter the display brightness: Press and hold the DISPLAY key. The current Brightness level displays.
You can now...
1) Press the display key repeatedly to alter the level from 1-8
2) Press a number key from 1-8 to directly select the level.
Increasing the Character Height
Press the INFO key. The upper line of the display is suppressed and the lower line increases to double height. This improves readability if you are seated some distance away. Press the INFO key again to revert to the normal display.










Page 5

6b: Operation - 2
Digital Filters Available only with digital inputs
Press the FILTER key on the handset or the front panel once to display the current filter. Press FILTER again to change filters.
Pressing FILTER on the handset and then keys 1-7 will also bring up a filter as shown.
"Optimal Transient" filters exhibit no ringing - the transient nature of the music is preserved. Although exhibiting poorer performance in technical measurements, sound from this type of filter has a purity and "naturalness" that more than compensates for the lack of technical specifications. There are three Optimal Transient Filters. They exhibit identical frequency and time domain response but the internal structure of the filters varies, resulting in small but perceptibly different sonic nuances.
The "Sharp Rolloff" filter typifies industrial standard characteristics (-6dB at 1/2 Fs with significant time-domain ringing) and is included here for comparison purposes.
The "Slow Rolloff" filter starts rolling off at a lower frequency then the Sharp Rolloff filter but has a gentle rate of attenuation and significantly less "time-domain ringing".
The "Minimum Phase" filter has a gentle attenuation slope similar to the Slow Rolloff option, however it exhibits no pre-ringing in the time domain. It can be likened to an analogue filter applied in the digital domain.
The "Optimal Spectrum" filter is a digital filter which implements sampling theory and is designed for near perfect technical response in the frequency domain. This filter also has time-domain pre-ringing which can lead to listener fatigue.
The Audiolab 8200DQ offers you a choice of filters to meet your listening expectations.
Digital and Analogue Preamplifier Modes
Available only with digital inputs
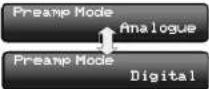
Digital Mode is technically superior; some listeners may prefer the "smoother" sound of the Analogue Mode.
Press the PRE button on the handset to display the current preamplifier mode.
Press PRE again to toggle Analogue and Digital modes.
The preamplifier mode may also be set in the main Menu.
FILTER


Digital Filter Optimal Transient

Digital Filter Optimal Transient XD

Digital Filter Optimal Transient DD

Digital Filter Sharp Rolloff

Digital Filter Slow Rolloff

Digital Filter Minimum Phase

Digital Filter Optimal Spectrum

7a: Setting up the 8200DQ - 1
THE MENU
The menu enables you to customise the unit and optimise the interface with other equipment in your system.
Some menu items are global, other menu items affect only certain inputs.
Before entering the menu:
- Select the source whose parameters you wish to alter. When navigating the menu, only options relevant to the selected source will display. Inapplicable options are skipped.
Navigating the Menu from the handset:
- Press MENU to enter the Menu
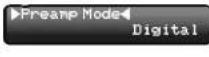
Menu items are highlighted with cursors on the top line
- Press the ◀◀/▶▶ buttons to select a Menu item.
To change a menu parameter:
- Select a Menu item.
- Press the ▶ button
The cursors move to the bottom line.
- Press the ◀◀/▶▶1 buttons to select a parameter.
- Press the ■ or the MENU button to exit Menu mode and return to normal operation.
If no key is pressed: after 5 seconds the unit will automatically exit the menu.
Navigating the Menu from the front panel:
- Press MENU to enter the Menu
Menu items are highlighted with cursors on the top line
- Rotate the Control knob to select a Menu item.
To change a menu parameter:
- Select a Menu item.
- Press the Control knob.
The cursors move to the bottom line.
- Rotate the Control knob to select a parameter.
- Press the MENU button to exit Menu mode and return to normal operation.
If no key is pressed: after 5 seconds the unit will automatically exit the menu.






7b: Setting up the 8200DQ - 2
In this manual the full procedure for navigation via the remote handset only is detailed.
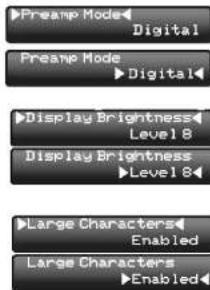
Setting the Preamp Mode (Affects all Digital Sources)
- Select Output Mode with the ◀◀/▶▶ buttons
- Press▶II to enter the Preamp mode menu.
• Alter the Output Mode with the ◀◀/▶▶I buttons
Selecting a Brightness Level (Affects all Sources)
- Access the Brightness level with the ◀/▶▶ buttons
- Press▶II to enter the menu.
- Press 1 1 1 to change the level (number keys for this parameter are disabled in menu mode).
Enabling Large Characters (Affects all Sources)
- Access Large Characters with the ◀/▶▶ buttons
- Press▶II to enter the menu.
- Press ◀◀/▶▶ to enable/disable Large Characters.
Setting the DPLL Bandwidth (SPDIF inputs only)
The SPDIF inputs are tolerant of high-jitter digital streams. When receiving input from some DVB-T and satellite receivers, games consoles etc., high jitter from these sources may cause the interface to suffer from clicking, drop-outs etc. The 8200DQ is set by default to Auto made for maximum compatibility with digital sources. However, each digital input may be altered to be more/less tolerant of jitter.
These parameters should only be changed if you are experiencing difficulties.
- Select Input DPLL with the ◀/▶▶buttons
- Press▶II to enter the menu.
- Press ◀◀/▶▶ to alter the settings.
Auto Bandwidth: this is the default setting.
Low Bandwidth: this setting offers the best performance but with the lowest tolerance of source jitter errors.
Medium Bandwidth:
High Bandwidth: this offers the greatest tolerance to high jitter or unstable data streams but with reduced performance.
text_image
Preamp Mode Digital Preamp Mode Digital Display Brightness Level 8 Display Brightness Level 8 Large Characters Enabled Large Characters Enabled


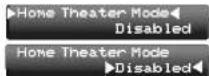
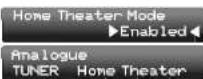
Home Theater Mode (All analogue inputs)
Home Theater Mode if enabled sets the gain to a fixed 0dB on the selected input-other inputs are unaffected. The input sensitivity of any input in Home Theater Mode can still be adjusted using the Input Trim facility (see next paragraph)
- Select the desired Analogue input. Enter MENU mode.
- Select Home Theater Mode with the I◄◄/►►I buttons.
- Press▶II to enter the menu.
- Press ◀◀/▶▶to enable/disable Home Theater mode
Enabling Home Theater Mode
Analogue input screen in Home Theater Mode
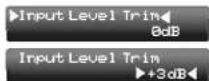
Input Level Trim (All analogue inputs)
The level of each input can be trimmed +12dB to -24dB so that different analogue sources play at similar levels.
- Select the desired Analogue input. Enter MENU mode.
- Select Input Level Trim with the ◀◀/▶▶ buttons
- Press▶II to enter the menu.
- Press ◀◀/▶▶ to alter the settings.
The displayed level adjusts by the selected number of dB when you switch to that input. If the TUNER input has a -3dB trim selected, and you are playing the AUX input with a displayed level of -20dB (and 0dB trim), if you switch to TUNER the level will be -23dB; when you go back to AUX it will again be -20dB.
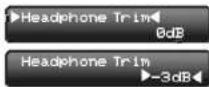
Headphone Trim (All inputs)
The Headphone level can be trimmed +/-24dB to match the level of your speakers.
- Connect the headphones. Enter MENU mode.
- Select Headphone Trim with the ◀/▶▶ buttons
- Press▶II to enter the menu.
- Press ◀◀/▶▶to alter the settings.
Other Menu Items
USB Volume Control - refer to Page 9
Trigger A and B Setup - refer to Page 8
7c: Setting up the 8200DQ - 3
Setting Up the Triggers
text_image
12V TRIGGER LMR CE 8200MB (DETAIL) 12V TRIGGER LMR CE 8200MB (DETAIL) 12V TRIGGER A C1 B OUTPUTTrigger operation of the 8200DQ with two 8200MB power amplifiers
Set the triggers up with all triggers on the circuit connected, the trigger cable disconnected from the 8200DQ and only the 8200DQ switched on. After setting up the triggers, switch the 8200DQ off, connect the trigger cable to the 8200DQ and switch all the other units on. Now switch on the 8200DQ to activate all the units.
There are two triggers:
Trigger A is the primary trigger and is the one normally used.
Trigger B is the secondary trigger.
The triggers can be set up to operate together or independently. The 8200DQ is configurable to operate in with a wide variety of combinations. The 8200DQ should always be the master device.
Trigger Functions
The default setting is with both triggers set to manual and disabled. In this mode:
When the 8200DQ is switched on/off, any units in a connected trigger loop will not be activated or deactivated.
Manual Operation of Trigger A:
1) Switch the 8200DQ on.
2) Press the Trigger button on the handset or front panel to display the trigger status.
3) Press the button again to bring trigger A on.
All units on the trigger circuit will now activate.
4) When the 8200DQ is switched off, all units on the trigger circuit will go to standby. The 8200DQ will now reset Trigger A to "off".
5) Repeat steps 1-4 to operate the system triggers again.
Manual Operation of Trigger B:
1) Switch the 8200DQ on.
2) Press and hold the Trigger button on the handset or front panel to display the trigger status.
- Repeat steps 3-5 above

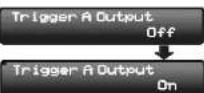

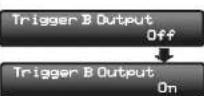
Automatic Operation:
1) Switch the 8200DQ on.
2) With the Trigger buttons on the handset or front panel select the relevant trigger.
3) Repeatedly press the button to set the trigger to "Auto". All units on the trigger circuit will activate.
4) When the 8200DQ is switched off, all units on the trigger circuit will go to standby. The 8200DQ will retain this "Auto" setting.
5) Switch the 8200DQ on.
All units on the trigger circuit will now activate.
By using different trigger combinations you can switch on/off different units in your system. You can for example switch a projector/screen combination manually when you watch AV material while retaining full auto trigger operation of your system power amplifiers.
Trigger Options in the Menu:
- Enter MENU mode.
- Select Trigger A/B with the ◀/▶▶buttons
- Press▶II to enter the menu.
- Press ◄◀/▶▶ to alter the settings.
"Manual": Refer to the procedure described above.
"Headphones": Disconnects units on the trigger when headphones are plugged in*, otherwise active as long as the unit is switched on.
" Mute": Disconnects units on the trigger when the 8200DQ is muted*, otherwise active as long as the unit is switched on.
"Headphones & Mute": Disconnects units on the trigger when headphones are plugged in, or the 8200DQ is muted*otherwise active as long as the unit is switched on.
* When the 8200DQ is muted, and/or if headphones are plugged in, all units in a connected trigger loop will be deactivated depending on the mode selected. Unplugging the headphones or coming out of mute reactivates the units.
Note: The triggers do not operate in attenuate mute mode.
Note: When the setting is "manual" the trigger must be physically set to "Auto" using the procedure described above for the triggers to operate. All other settings automatically invoke "Auto" operation.

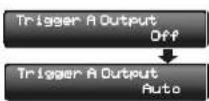





7d: Setting up the 8200DQ - 4
USB Volume Control
- Enter MENU mode.
- Select USB Volume Control with the ◀/▶ button
- Press▶II to enter the menu.
- Press ◀◀/▶▶to alter the settings.
When connecting certain units to the USB input, control of the 8200DQ volume and mute can be carried out from the source unit.
This function works well with Macs where changes on the 8200DQ are reflected in the User Interface. Windows does not support this function and will not update the system master volume when you adjust volume through the handset.
By default this feature is disabled - only enable the feature if your USB source component supports the feature.
Although you can adjust the volume into the 8200DQ when using some Media players, this is not recommended.
Restoring Factory Defaults
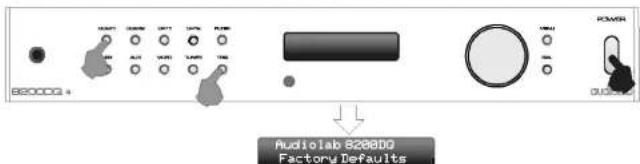
The 8200DQ can at any time be restored to factory default settings by following this simple procedure.
1) Switch the 8200DQ off.
2) Hold the COAX1 and TRIG buttons in and press the power switch.
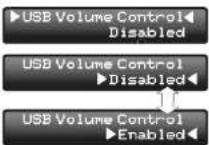
text_image
820000 + Audiolab 820000 Factory Defaults3) Release the ◀◀/▶▶ buttons when you see the above display.
4) Factory defaults are now restored.
Using the 8200DQ with a pre-amplifier
The 8200DQ can be operated as a stand-alone DAC. Full Input switching is available but analogue inputs are "passed through" - the output level is fixed.
To set a fixed output level:
• Turn the preamplifier volume control down!
- Switch the 8200DQ off.
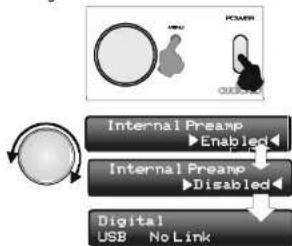
• Hold the MENU button and switch on.
- Rotate the Control Knob to enable/disable the internal preamplifier
- Press the MENU key or switch off/on to resume.
Normal operation is restored except that the volume indication is disabled.
Notes on "Fixed Volume" mode
1: Never set a fixed output level if the 8200DQ is connected to an amplifier without a gain control!
2: Turn the preamp volume down before enabling this mode.
3: In this mode the output volume display is unavailable.
4: Mute is disabled.
5: Connecting headphones restores the volume function to the headphone amplifier only. When the headphones are disconnected, fixed volume is re-instated.
flowchart
graph TD
    A["Internal Preamp"] --> B["Enabled"]
    C["Internal Preamp"] --> D["Disabled"]
    E["Digital USB No Link"] --> F["No Link"]
8a: Using the 8200DQ with a PC -1
Installation - Windows XP
The operating system must be Windows XP (SP2 or above).
It is essential that you use a fully certified USB 2.0 cable i.e a maximum length of 5 metres. Never use USB extension cables.
Switch the PC on and let it boot up.
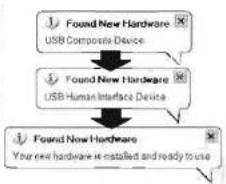
Plug the USB cable into the 8200DQ and the computer and then switch the 8200DQ on. The unit software will now interface with the computer and the drivers will automatically load. When the drivers have loaded you will see an information screen saying something like "Audio-1ab 8200 Series is now ready for use" - the actual words will depend on the installed version of Windows.
This process is automatic and normally needs no user intervention. The input does not have to be set to USB during this process. Please have your Windows Installation Disc available if prompted.
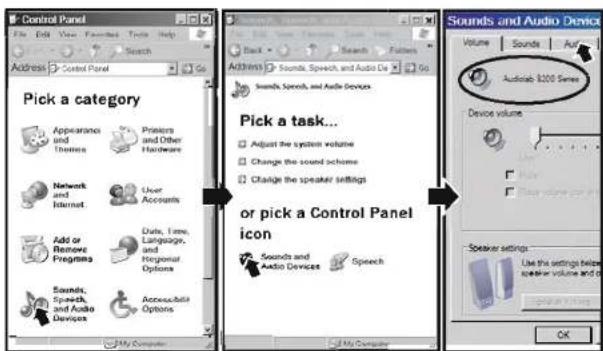
To check that the PC has recognised the 8200DQ:
Navigate to "Control Panel"
Click on "Sounds, Speech and Audio Devices"
In the next screen click on "Sounds and Audio Devices"
Confirm that "Audiolab 8200 Series" is the default device.
flowchart
graph TD
    A["Found New Hardware\nUSB Composite Device"] --> B["Found New Hardware\nUSB Human Interface Device"]
    B --> C["Found New Hardware\nYour new hardware is installed and ready to use"]
text_image
Control Panel Address Control Panel Pick a category Appearance and Features Producers and Other Hardware Network and Internet User Accounts Add or Remove Programms Date, Time, Language, and Horizontal Options Sounds, Speech, and Audio Devices Accessible Options My Documents Back Search Futures Actions Sounds, Speech, and Audio Devices Sounds, Speech, and Audio Devices Pick a task... Adjust the system volume Change the sound scheme Change the speaker settings or pick a Control Panel icon Sounds and Audio Devices Speech Audicab 1200 Series Device volume Speaker settings Use the settings below speaker volume and it OKIf the 8200DQ is not selected as the default device:
Click on the "Audio" tab,
Select "Audio"ab 8200 Series" from the list. Click OK.
Disabling Windows sounds
If you are listening to the 8200DQ while working at your PC you can suppress most of the Windows sound effects:
Click the "Sounds" tab.
In the next screen, select "No Sounds". Click "OK" to confirm.
- The device is "Plug and Play": When you disconnect or switch off the 8200DQ the default sound device in your PC will automatically be re-selected.
- If you disconnect the 8200DQ remember to deselect "No Sounds" in your Windows Sound scheme to restore the Windows sound effects.
Installation - Windows Vista/Windows 7
Use a fully certified USB 2.0 cable i.e a maximum length of 5 metres. Never use USB extension cables.
Switch the PC on and let it boot up. Plug the USB cable into the 8200DQ and the computer and then switch the 8200DQ on. The unit software will now interface with the computer and the drivers will load. The input does not have to be set to USB during this process. Please have your Windows installation Disc available if prompted.
To check that the PC has recognised the 8200DQ:
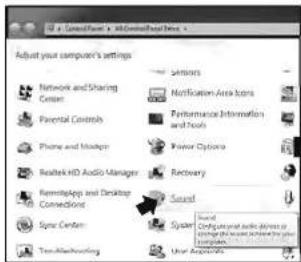
Go to Start/control Panel/all Control Panel Items
text_image
Adjust your component's settings Network and Sharing Center Parental Controls Phone and Manager Readtek HD Audio Managers Remmapapp and Desktop Connection Sync Center System Notification Area Icon Performance Information and Tools Power Options Recovery Sound Configurative audio driver or string audio device in the system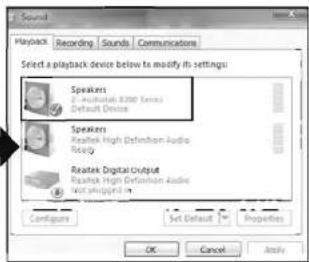
text_image
Select a playback device below to modify its settings Speakers 2. Android 8200 Series Default Device Speakers Rastek High Definition Audio Recovery Rastek Digital Output Rastek High Definition Audio Real play button Configure Set Default Properties OK Cancel ApplyClick "Sound". "Audiolob 8200 Series" should appear as the default device.
8b: Using the 8200DQ with a PC - 2
If "Audiolab 8200 Series" does not appear as the default device, enable it. A green check mark appears by the default selection
A: Select "Audiolab 8200 Series"
B: Click Properties
text_image
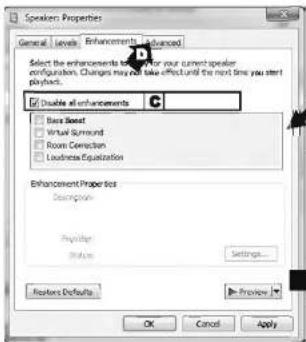
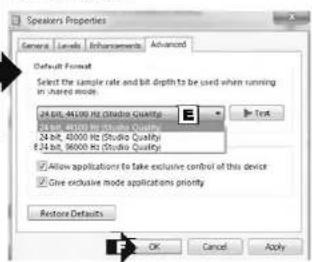
Speaker Properties General Levels Enhancements Advanced Select the enhancements to ensure that for your current speaker configuration. Changes may still take effect until the next time you start playlists. ■ Enable all enhancements C ■ Base Board □ Virtual Surround □ Room Connection □ Location Equalization Enhancement Praper Size Description Physician Status Settings... Routers Defaults Preview OK Cancel ApplyE: Select "24 bit, 44, 100 Hz (Studio Quality)" F: Click OK
text_image
Volume Mixer - Speakers (25 Audiclab 8200 Series) Device Speakers Applications System Sounds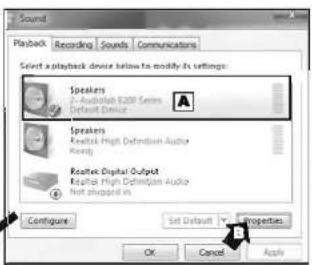
text_image
Sound Playback Recording Sounds Communications Select a playback device below to modify its settings: Speakers P-Audaluk 8201 Series Default Device Speakers Reakek High Definition Audio Ready Reakek Digital Output Reakek High Definition Audio Not should in Configure Set Default Properties OK Cancel ApplyC: Ensure "Disable all enhancements" is ticked. D: Click Advanced.
text_image
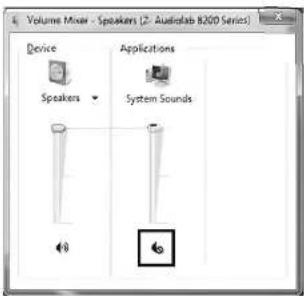
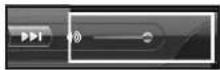
Speakers Properties General Levels Enhancements Advanced Default Format Select the sample rate and bit depth to be used when running in shared format. 24-bit, 44100 Hz Studio Quality 24-bit, 44100 Hz Studio Quality 24-bit, 48000 Hz Studio Quality 25-bit, 96000 Hz Studio Quality Allow applications to take exclusive control of this device Give exclusive mode applications priority Restore Defaults OK Cancel ApplyLaunch the Volume Mixer utility from the taskbar. Set the "Speakers" setting to Maximum. All levels should be controlled from your pre-amplifier.
Set "System Sounds" to mute. This will suppress Windows sound effects.
Setup is now complete.
Basic Operation
Verify that the 8200DQ is selected as the default player.
Use your preferred media player.
Set a low volume level on the 8200DQ (or set Mute to on).
Make sure the Volume control is at full on the media player and in the PC control panel.
Press the DIGITAL +/- buttons on the handset or the SEL
button on the front panel to select the USB input.
Select the music source in the PC and commence play.
Control the volume level via the 8200DQ.
Press ▶ to play or
Choose a track with the ◀/▶▶buttons: (press ▶ if necessary)
Press ▶▶ or◀◀ to choose the next/previous tracks.
Press ▶ to pause and restart play.
Press and hold▶▶ or▶▶to forward search.
Press and hold◀ or◀ to reverse search.
Press ■ to stop play.
*Functions depend on support from the chosen media player.
Advanced Playback in Windows
The default Windows Media Player is not capable of ultimate Audiophile performance.
Windows XP: To achieve bit perfect results you need an ASIO driver and a media player that can handle ASIO streams.
Windows Vista (SP1 and above) and Windows 7 feature WASAPI, which was created to get bit perfect data out, bypassing any internal mixers. Page 15 has details for configuring WASAPI operation in Windows7 & and Vista. ASIO is also usable (see below).
ASIO (Audio Stream Input/Output): ASIO installs a direct path from input to output. A free open-source ASIO driver is ASIO4ALL downloadab e here: http://www.asio4all.com/.
Media Players: At the time of writing, the preferred player is Foobar 2000. This is a free open source media player, highly configurable with ASIO and WASAPI support. This tutorial will help you get started with Foobar.
Getting Started with Foobar 2000: Enter this link in your web browser to download and install Foobar 2000: http://www.foobar2000.org/download.
Input playing or paused

STOP mode

No input

9a: Configuring Foobar
Using Foobar with Windows Vista and Windows 7
• Install Foobar. You will have to "allow" the installation.
• Accept all the standard prompts.
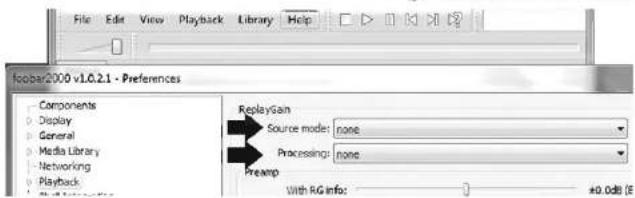
- Open Foobar and click File/Preferences
• In the Preferences Dialogue click "Playback"
• Make sure that "Replay Gain is" set to "None.
text_image
Sooper2000 v1.0.2.1 - Preferences Components Display General Media Library Networking Playback ReplayGain Source model: none Proceedings: none Preamp With RG info: 0.000 (E)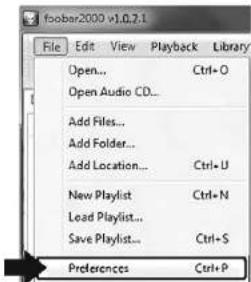
text_image
foobar2000 v1.0.7.1 File Edit View Playback Library Open... Ctrl+O Open Audio CD... Add Files... Add Folder... Add Location... Ctrl+U New Playlist Ctrl+N Lead Playlist... Save Playlist... Ctrl+S Preferences Ctrl+P• Open the Playback dialogue
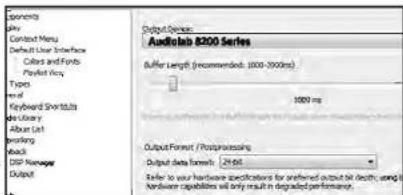
- Click "Output"
- Ensure "Audiolab 8200 Series" is the output device. If not, select it from the drop down menu.
- Set Output Data Format to 24-bit.
• Save all the changes
Foobar 2000 is now configured and ready for use.
Refer to the next column for ASIO installation.
text_image
Components givs Control Menu Default User Interface Colors and Foys Playoff Key Types Keyboard Shortcuts do Utility Album List Ordering Back DSP Manager Output Output Device Audiobat 8200 Series Buffer Length (recommended: 3000-3000ms) 1000 ns Output Format / Postprocessing Output data format: 24-bit Refer to your hardware specifications for preferred output bit depth, using hardware capabilities will only result in degraded performance.9b: Using Foobar with Windows XP
• Install Foobar.
• Accept all the standard prompts.
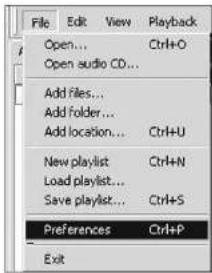
- Open Foobar and click File/Preferences
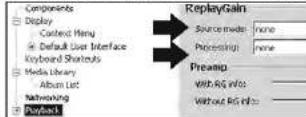
• In the Preferences Dialogue click "Playback"
• Make sure that "Replay Gain is" set to "None
• Open the Playback dialogue
- Click "Output"
- select "Audiolab 8200 Series" from the drop down menu.
• Set Output Data Format to 24-bit.
- Save all the changes
Foobar 2000 is now configured.
Although the installation is now operational, to release the sonic potential of the B200DQ we now need to install ASIO.
text_image
File Edit View Playback Open... Ctrl+O Open audio CD... Add files... Add folder... Add location... Ctrl+U New playlist Ctrl+N Load playlist... Save playlist... Ctrl+S Preferences Ctrl+P Exit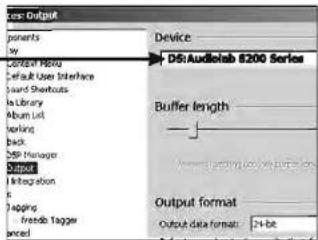
text_image
Output printers my Device D:\Audiolab 8200 Series Default Menu Default User Interface Board Sherbouts to Library Album List Working Back Sub Manager Standard Integration e Tagging friends Toggle paced Buffer length Output format: Output data format: 24-bitINSTALLING ASIO SUPPORT IN FOOBAR
To install ASIO into Foobar you need two utilities:
ASIO4ALL downloadable here: http://www.asio4all.com/.
The ASIO Plugin for Foobar downloadable from the Foobar site.
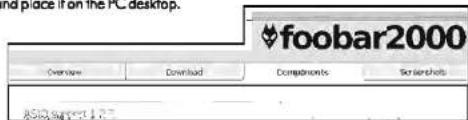
- Access the Foobar site, click on Components.
- Select ASIO Support from the list and click on the link.
• In the next screen click "Download". The file is zipped.
- Extract the plug-in and place it on the PC desktop.

text_image
foobar2000 Overview Download Components Screenshots A16348-597-179c: Using Foobar - 2
Configuring Foobar and ASIO4ALL
To install the ASIO plugin into Foobar:
• Instal ASIO4ALL:
• Make sure Foobar is closed
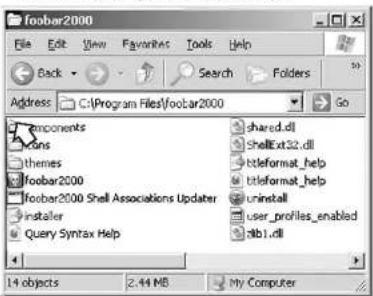
- Navigate to the Foobar program folder. This will normally be found in C:\Program Files\foobar2000.
text_image
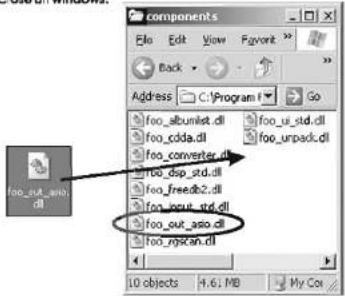
Footbar2000 File Edit View Favorites Tools Help Back Search Folders Address C:\Program Files\footbar2000 Go components themes footbar2000 footbar2000 Shell Associations Updater installer Query Syntax Help shared.dll ShellExt32.dll btleformat_help btleformat_help uninstall user_profiles_enabled lib1.dll 14 objects 2.44 MB My Computer- Open the "Components" folder
- Drag the plug-in into the folder to install it.
- Close all windows.
text_image
foo_out_asio.dll foo_block.dll foo_cdda.dll foo_converter.dll foo_dsp_std.dll foo_freed2.dll foo_out_std.dll foo_out_asio.dll foo_nsgcan.dll- Open Foobar.
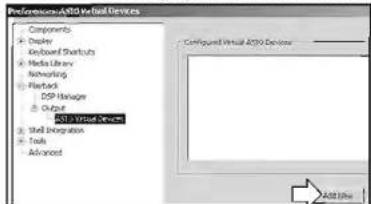
- Click File/Preferences: Select "AS/O Virtual Devices"
- Click "Add New". The program will search for devices.
text_image
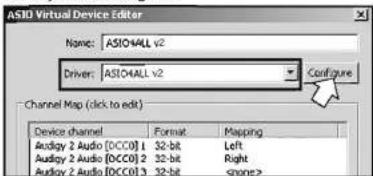
Preferences/Actio Verbal Devices Components • Display • Keyboard Shortcuts • Media Library • Networking • Flashbox • DSP Manager • Output • Active World Direct • Shell Integration • Tools • Advanced Configured Virtual Actio Devices Add UseIf there are no soundcards in the PC capable of ASIO operation, Foobar will find the B200DQ. If there is an ASIO capable device, Foobar may find only the installed device. You may see something like:
text_image
ASIO Virtual Device Editor Name: ASIO4ALL v2 Driver: ASIO4ALL v2 Configure Channel Map (click to edit) Device channel Format Mapping Audio 2 Audio [DCCO] 32-bit Left Audio 2 Audio [DCCO] 32-bit Right Audio 2 Audio [DCCO] 32-bit• Select ASIO4ALL as the driver.
- Click "Configure".
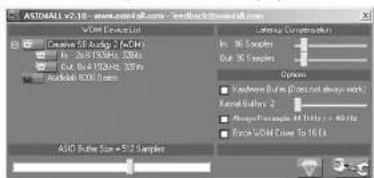
The ASIO4ALL setup screen will now deploy
text_image
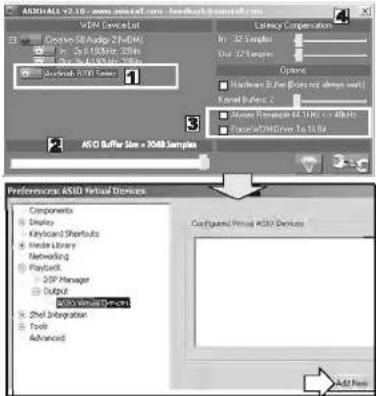
ASTMINAL v2.9 - www.astminel.com - 3D-Blocktimes@asia.com VDD Outputs List Creative SE Audio (500Hz) In: 26185MHz, 320Hz Out: 1200Hz, 320Hz Audio Mode Options Auto Buffer Size = 572 Samples Latency Compa#s In: 56 Samples Out: 56 Samples Options Horizontal Buffer (Does not always work) Horizontal Buffer 2 Vertical Buffer 440 MHz Force WDM Cover To 16 Hz1: Move the highlight to "Audiolab 8200 Series"
2: Set the ASIO Buffer Size to 2048 samples
3: Make sure these boxes are unchecked
4: Close the screen
text_image
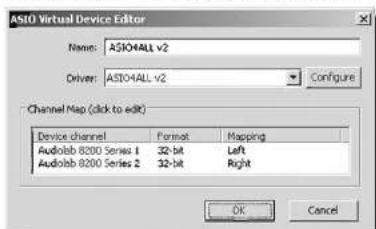
ASIO/ALB v2.10 - www.asioalb.com / feedstock.asioalb.com VISA Device List Creative Audio 2xVISA In: 32 Samples Out: 32 Samples Options Hardware Buffer (Less not always valid) Kernel Buffer 2 Mouse Format 45-100% or 90%/ Mouse/DMDriver To 10% ASIO Buffer Size = VISA Samples Preferences ASIO Virtual Devices Components Display Keyboard Shortcuts Media Library Networking Playback 2GP Manager Output ASIO Visual Devices Shelf Integration Tools Advanced Configured Virtual ASIO Devices Add New- Click "Add New". Audiolab 8200 Series will appear.
text_image
ASIO Virtual Device Editor Name: ASIO4ALL v2 Driver: ASIO4ALL v2 Configure Channel Map (click to e8R) Device channel Format Mapping Audiobab 8200 Series 1 32-bit Left Audiobab 8200 Series 2 32-bit Right OK Cancel- Click OK to close the screen. ASIO4ALL will now appear in the ASIO Virtual Devices box and the 8200 will be enabled.
- Click OK to close preferences and save the new settings.
9d: Using Foobar - 3
Final Configuration
text_image
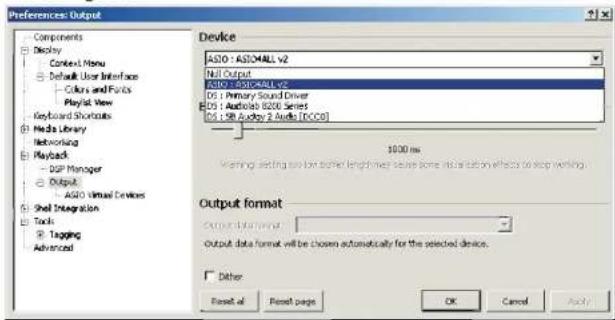
Preferences: Output Components Display Context menu Default User Interface Colors and Ports Playlist View Keyboard Shortcuts Media Library Networking Playback - DGP Manager Output ASIO Virtual Devices Shell Integration Tools Tagging Advanced Device ASIO : ASIO4ALL v2 Null Output ASIO4ALL v2 DS : Primary Sound Driver DS : Android 8000 Series DS : DB Dudley 2 Audio [8000] $300 ms Warning setting how to better length driver leaves some information effects to stop working. Output format Output data format will be chosen automatically for the selected devices. Other Reset of Reset page OK Cancel Apply• Open Foobar. Click File/Preferences/Output
- Open "Devices". Select ASIO4ALL from the menu.
Note: If you select DS: Audiolab 8200 Series you will use the Direct Sound (DS)
kernel in Windows XP. This will not provide Bit Perfect reproduction.
Using Foobar
text_image
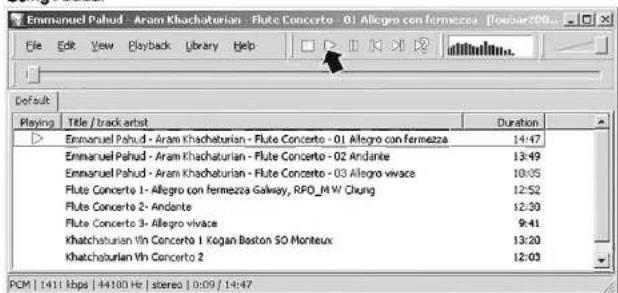
Emmanuel Pahud - Aram Khachaturian - Flute Concerto - 01 Allegro con fermezza [Tossar200] File Edit View Playback Library Help Default Playing Title / track artist Duration Emmanuel Pahud - Aram Khachaturian - Flute Concerto - 01 Allegro con fermezza 14:47 Emmanuel Pahud - Aram Khachaturian - Flute Concerto - 02 Andante 13:49 Emmanuel Pahud - Aram Khachaturian - Flute Concerto - 03 Allegro vivace 10:05 Flute Concerto 1 - Allegro con fermezza Galway, RPO_MW Chung 12:52 Flute Concerto 2 - Andante 12:30 Flute Concerto 3 - Allegro vivace 9:41 Khatchaturian Vin Concerto 1 Kogan Boston SO Monteux 13:20 Khatchaturian Vin Concerto 2 12:03 PCM | 1411 kbps | 44100 Hz | stereo | 0:09 / 14:47- Launch Foobar
- Select the location or library that holds your audio files. Press PLAY
If all is well you will hear sound through the 8200DQ.
You will also see the bit depth and sampling frequency on screen
ASIO settings:
When Foobar is playing, you will see this shortcut (green triangle) in the Quick Launch too bar at the bottom right of your screen.
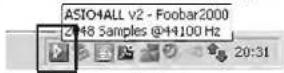
Click the shortcut to bring up the ASIO setup screen - refer to the previous page for guidance.
Operation
Set a low volume level on the 8200DQ (or set Mute to on).
Make sure the Volume control is at full on the media player Press the DIGITAL +/- buttons on the handset or the SEL button on the front panel to select the USB input.
Control the volume level via the 8200DQ.
Press▶ to play or
Choose a track with the ▶▶◀◀ buttons: (press ▶ if necessary)
Press ▶or◀ to choose the next/previous tracks.
Press▶ to pause and restart play.
Press ■ to stop play.
Disconnecting the 8200DQ
If the 8200DQ is permanently installed to the PC there should be no need to adjust any of the Foobar parameters.
When the unit is disconnected from the PC it may be necessary to re-cofigure Foobar to play through another connected device.
- Open Foobar. Click File/Preferences/Output
- Open "Devices".
- Select the alternative device from the list.
- Click OK.
When the 8200DQ is reconnected to the PC, repeat the procedure and re-enable "AS O4ALL" or "Audiolab 8200 Series" as you require.
Input playing: Win 7, Vista
XP via Direct Sound

Input playing: ASIO

STOP or pause mode

No input

9e: Using Foobar with WASAPI in Windows 7 and Windows Vista
In Windows 7 and Windows Vista, you can use ASIO or you can use WASAPI- an audio output method introduced in Windows Vista. It provides an exclusive mode that allows applications to play unaltered bitstream without passing it through the Windows mixer. It is simpler to configure and does not require installation of ASIO4ALL.
Install and configure the 8200 as shown on Pages 10-11. Install and configure Foobar following the instructions on Page 12.
The WASAPI Plugin for Foobar is downloadable from the Foobar site.
- Access the Foobar site, click on Components.
• Select WASAPI output support 2.1 from the list.
• Download and unzip the file. - Place the WASAPI icon on the desktop.
- Navigate to "Computer"/"Program Files" (x86)
• From the list open "Foobar2000"
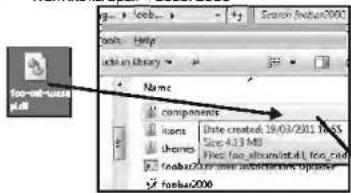
text_image
forset-up3000 Name: components items champs Date created: 19/03/2011 Tox5 Size: 4.13 Mb File: free_album/Install, free_cash forset-up3000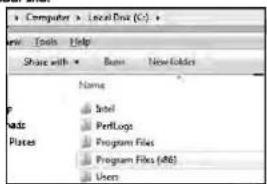
text_image
Computer > Local Data (C:) View Tools Help Share with * Base New Folders Name Intel PerLogo Program Files Program Files (.d6) Users- Drag the icon to the "components" folder
- Close all the folders to complete the installation
- Open Foobar:
- ClickFile/Preferences.
- Confirm that "WASAPI output support" appears in the installed Components Folder.
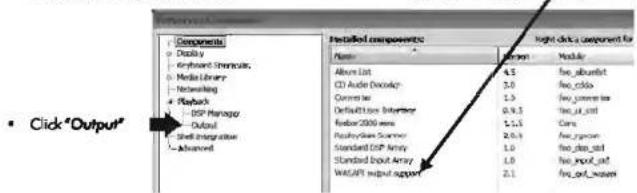
text_image
Components • Display - Keyboard Strmatics - Media Library - Networking - Playback - DSP Manager - Default - Shell Integrator - Advanced Installed components Name Position Modular Album List 4.5 iso_alphabet CD Audio Decoder 3.0 iso_cido Current List 1.3 iso connex like Default/Interferer 0.9.3 iso_int_rcat Forder2000 mini 1.1.1 Care Application Scanner 2.6.3 iso_pason Standard DSP Array 1.0 iso_data_rcat Standard Input Array 1.0 iso_input_rcat WATAPI input support 2.1 iso_out_waters • Click "Output"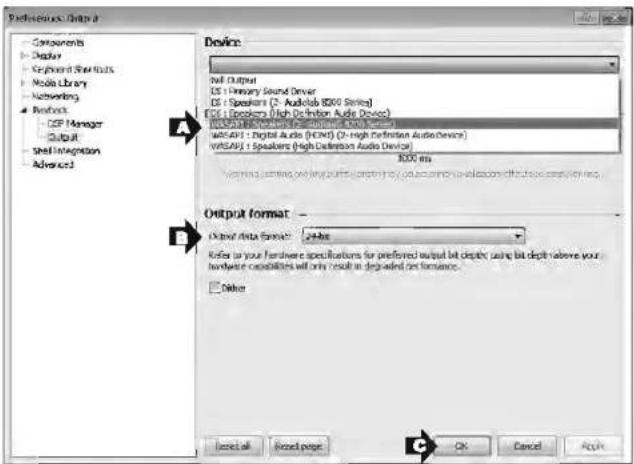
text_image
Preferences: Output Components Display Exploded Startups Mobile Library Networking Product CSP Manager Output Shell Integration Advanced Device: Full Output DS - Primary Sound Driver DS - Speakers (3 - Audioled 8000 String) DCS - Speakers (High Definition Audio Device) WRSAP1 - Digital Audio (HCM) (3 - High Definition Audio Device) WRSAP2 - Speakers (High Definition Audio Device) 8000 ms Typing settings we have output capacity by using a device to access the output configuration. Output format: Output Data Format: Active Refer in your hardware specifications for preferred output bit depth using bit depth above your hardware capabilities will only result in degraded on texture. Split Cancel OK Cancel Apply OK Cancel Apply- Open "Devices".
A: Select WASAPI: Speakers (2-Audiolab 820 Series)
B: In "Output Data Format" select 24-bit
C: ClickOK.
The system is now configured: To play your files, refer to Page 14.
10a: Using the 8200DQ with a Mac - 1
Introduction
Modern Macs come pre-loaded with Apple iTunes. Although it is possible to use alternative Media Players, iTunes has outstanding audio characteristics, and hosts a variety of advanced features. The Mac platform should ideally be OS 10.4.11 or above. The 8200 will also interface with certain other Apple devices - refer to your user manual for guidance.
It is essential that you use a fully certified USB2.0 cable. USB extension leads should be avoided.
Switch the Mac on and let it boot up. Plug the USB cable into the 8200DQ and the Mac and then switch the 8200DQ on. The device drivers will load in the background.
Initialising the 8200DQ
Click on the "System Preferences" icon in the dock.
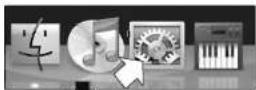
In "System Preferences"
Click on the "Sound" icon
In "Sound"
Click on the "Output" tab
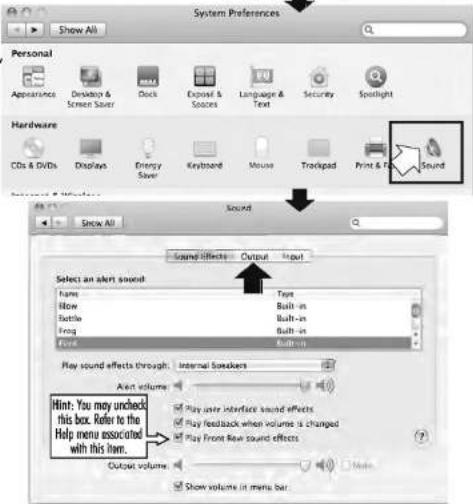
text_image
System Preferences Show All Personal Appearance Desktop & Screen Saver Dock Exposit & Spaces Language & Text Security Spotlight Hardware CDs & DVDs Display Energy Saver Keyboard Mouse Trackpad Print & F& Sound Show All Sound Effects Output Help Select an alert sound Name Type Now Built-in Bottle Built-in Frog Built-in Font Button-in Play sound effects through: Internal Speakers Alert volume Play user Interface sound effects Play feedback when volume is changed Play Front New sound effects Hint: You may uncheck this box. Refer to the Help menu associated with this item. Output volume Show volume in menu barIn "Output"
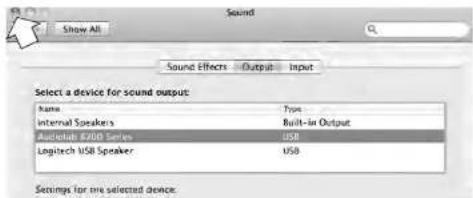
Select the
"Audiolab 8200 Series" icon as the device for sound output
Close the window.
Go to the Desktop
A: Click the "Finder" Icon
B: Click "Applications"
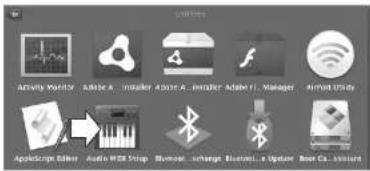
C: Click "Utilities"
text_image
Sound Show All Sound Effects Output.Input Select a device for sound output: Name工程项目 Type Internal Speakers Built-in Output AudioHub 8200 Series USB Logitech USB Speaker USB Settings for the selected device.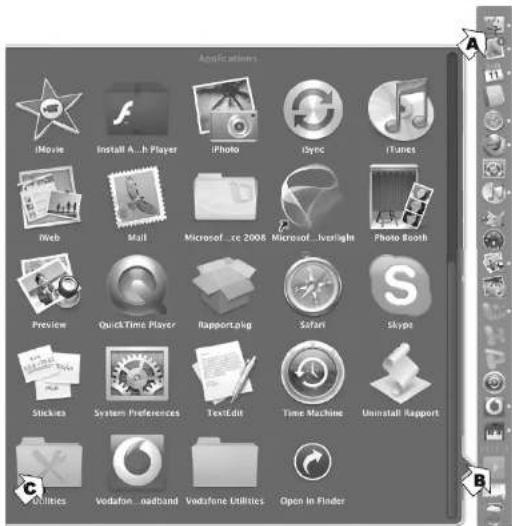
text_image
Applications iMovie Install A...h Player iPhoto Dync iTunes Web Mail Microsoft ..re 2008 Microsoft ..vlight Photo Booth Preview QuickTime Player RapportAlg Safari Skype Stickies System Preferences TextEdit Time Machine Uninstall Rapport Utilities Vodafone ...oadband Vodafone Utilities Open in Finder10b: Using the 8200DQ with a Mac - 2
From the Utilities Screen Click "Audio MIDI Setup"
text_image
Activity Manager Adobe A Insulator Adobe A - Insulator Adobe F1 - Manager Aircraft Unity Apology Editor Audio DVD Setup Bluetooth - Xchange Bluetooth - A Update Best Fit - SummaryThe "Audio Devices" Screen appears
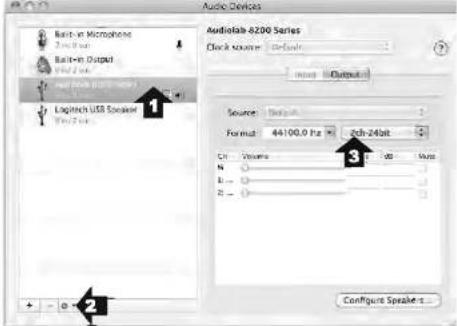
text_image
Audio Devices Basis-in Microphone Basis-in Output Logitech USB Speaker Logitech USB Speaker Audiofile-8200 Series Clock source: Default Input Output Source: Default Format: 44100.0 Hz 2ch-24bit Cn Volume Bus Mode N E R Configure Speakers...Setting Up the 8200DQ:
1: Highlight "Audiolab 8200 Series" In the list.
2: In the pop up menu: select "Use this device for sound output"
Music from iTunes will be directed to the 8200DQ but the alert sounds will be sent to your secondary speakers.
3: Set the format to "44,100 Hz - 24bit".
4: Select the USB input on the 8200DQ.
5: Start iTunes, and choose a track to play.
Press▶ to play or
Choose a track with the ➤ ➤ ➤ buttons and then press ➤
Press▶▶ or ◀◀ to select next/previous tracks.
Press ▶ to pause and restart play.
Press and hold ▶◀ or ▶◀ to search forward/reverse.
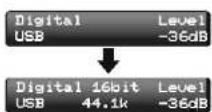
Notes: Altering Bit Depth and Sampling Rate.
The default sampling rate should be selected as 44,100 Hz 24 bit. If you are playing music at other sampling frequencies, you should set the sampling rate (see Note 4 above) to match that rate. The bit depth should at all times remain set to 24 bit.
* After changing the format, it is necessary to quit iTunes and then re-open it.
DSP Processing and Resampling:
Always pass a Digital signal to the 820CDQ without any DSP processing or resampling at the source. This will allow the upsampling circuits in the 8200DQ to work at their optimum.
Using the 8200DQ with an iPad
OS 4.2+ supports Asynchronous USB mode via the optional Apple Camera Connection Kit. Older versions of the iPad should be updated to OS4.2 to recline the sonic benefits of this connection.
To update the iPad: Connect your iPad to a computer, launch iTunes, select your iPad under devices in the left pane and press the Update button.
Refer to http://support.apple.com/kb/HT1414 for guidance. Use the USB adaptor on the kit to connect to the iPad and connect a USB cable from the adaptor to the USB part on the 8200DQ to stream high resolution sound.
The iPad is very transparent in operation with the 8200DQ. No setup is required
When you connect the iPad to the 8200DQ, the iPad switches from its internal sound output to the connected USB Audio device. You can now use the Play/Pause/Prev/Next keys on the Audiolab handset to control playback from the iPad.
11: Troubleshooting
Until you are familiar with the operation of your 8200DQ you may experience occasional difficulties. This guide will help you overcome the most likely issues.
No response/poor response to handset commands
• Is the 8200DQ switched on?
• Are there fresh batteries in the handset?
• Are you pointing the handset directly at the 8200DQ?
• Is DQ mode enabled on the handset?
No sound
• Is the correct source selected?
• Is the volume turned up?
• Is your signal source/pre/power amplifier(s) connected correctly and switched on?
- Are the trigger/s connecting the power amplifier/s correctly configured and operational?
Sound is poor quality / distorted
- Are all cables making good connections? If necessary, switch off the power, then withdraw the connector and plug it back in again, then switch on the power.
Digital Inputs display "No Lock"
- Check that the digital source is switched on and streaming.
USB input displays "No Link"
• Is the USB port correctly connected?
• The USB handshake may have gone down or the computer has "gone to sleep".
• The source device is incompatible with the 8200DQ.
My media player won't respond (Windows/USB source)
• Excessive use of Fwd/Rev Search buttons can trigger this.
- Press Stop ■ and then press ▶ to restore normal play
I hear crackles/interference when playing a USB source
- Are you using a certified USB 2.0 interconnect, connected directly to your computer?
- A bluetooth device, a webcam, wireless devices may cause interference. Avoid sharing a USB outlet between the 8200DQ and other devices and where possible, disable non-essential devices.
- If you are using an iPad: You are probably using software previous to OS4.2 and should update your software. Connect your iPad to a computer, launch iTunes, select your iPad under devices in the left pane and press the Update button.
Refer to http://support.apple.com/kb/HT1414 for guidance.
You should also use the optional Apple iPad Camera Connection Kit. Connect the USB connector to the iPad and then connect a USB cable to the 8200DQ. The iPad will now operate seamlessly with the 8200DQ.
12: Technical Description
The Audiolab 8200DQ features a state-of-the-art external Stereo Digital to Analogue converter (the ESS Sabre32 9018 DAC) and a Fully Balanced output.
Jitter Reduction - The Audiolab Solution
To deliver superb sonic performance Audiolab utilising a proprietary high performance discrete Master clock in conjunction with the Sabre32 parented sample rate converter in order to minimise Time Domain errors (Jitter) from all Digital input sources. The result is 100% Jitter attenuation within the Digital domain. This onboard Low Phase Noise Master clock, achieves sub pS jitter levels within the most critical frequency band.
Audiolab's "CATDA"- Time Domain Isolation
While the patented Sabre32 Sample Rate Converter achieves 100% Jitter attenuation within the Digital domain, external "Analogue domain" induced artefacts via RF breakthrough and PSU coupling etc. well affect the DAC's ultimate Sonic Performance. AudioloB resolves this critical issue by its uniquely developed "CATDA" (Cascaded Asynchronous Time Domain Attenuator) circuit. This circuit isolates the DAC substrate from the potentially detrimental analogue domain of effects non-synchronous digital input data. To achieve the ultimate performance level, 3 identical cascoded stages are used – each individual stage providing increased isolation, thereby maximising timing performance even at higher RF frequencies.
Upsampling / Oversampling
The Upsampling / Oversampling circuit converts the digital signal from one sample rate and bit depth to another. The sample rate is increased from the input sample frequency to 84.672MHz. With CD and USB 44.1 & 88.2 kHz inputs, the Oversampling process is synchronous, while other inputs and sample rates are Asynchronous Upsampled. All bit depths are extended to a minimum of 32 bits for internal processing.
The Audiolab 8200 CDQ operates in integer oversampling or upsampling mode, operating the DAC at 84.672MHz depending upon digital input source and sample rate:
- With its internal 44.1 kHz based Asynchronous USB, the output DAC Rate is x1920 Integer Oversampled, Other non-synchronous 44.1 kHz digital input sources are x1920 times Unsampled
• 48 kHz Digital input sources are x1764 Upsampled
• Asynchronous 88.2 kHz USB - Integer x960 times Oversampled, other 88.2 kHz input sources are x960 Upsampled
• 96 kHz Digital input sources are x882 Upsampled.
Selectable and upgradeable Audiolab Digital filters
As Digital audio reproduction technology has progressed, the importance of the characteristics of Digital filters has become appreciated and better understood. The Audiolab CDQ features in house Audiolab developed user selectable Digital filters for optimal listing and measurement modes. These, in addition to more conventional types for easy comparison, allow the user to tune the performance to his or her preference depending on system and musical tastes.
Audiolab DAC
The Sabre32 DAC integrated circuit (Chip) provides the conversion of the Digital signal to the Analogue domain. 256 individual DACs per channel are used within the chips to increase inherent conversion resolution, while also reducing static conversion errors – a total of 512 DACs are used in a true balanced stereo configuration.
The conversion process within the Audiolob 8000CDG results in the 512 DAC elements (256 DACs per channel) each operating at 84.672MHz, a conversion process switching 3840 times higher than the typical audio upper bandwidth of 22 kHz. Without this Digital Upsampling technology, the analogue filters could affect frequencies at or near the audible range, resulting in unwanted level and phase variation within the audio band.
The ESS9018 Sabre32 DAC is a hybrid Multi-Bit Delta-Sigma DAC, which aside from its unique Jitter attenuation structure utilizes a novel "Hyperstream" modulator. This is an advanced form of Multi-Bit Delta-Sigma modulator structure which combines several methods to optimise the conversion process. The Hyperstream modulator is designed for optimal transient response, thus eliminating dynamic response deficiencies and noise floor modulation artefacts typical of traditionally designed Delta-Sigma DAC's.
Discrete Class A Analogue Stages
Additional to the close attention to the Master Clock Phase noise performance (Jitter), DAC section and PCB layout, another critical part of the circuit design in the Audiolab CDQ is the DAC's True Balanced analogue outputs connected directly to a pair of proprietary AudioLab FET based Class A stages buffers per channel. These FET based High current Class A buffers make a huge difference in transparency, resolution and dynamic performance.
The unit is fully DC coupled. High Tolerance Polypropylene Film / Foil capacitors, Ultra Stable Very Low VCR 0.1% MELF SMD resistors are used in the signal path to achieve the maximum audio performance.
96kHz-24Bit Clock-Lock Asynchronous USB
When connecting the Audiolab 8200DQ to a computer via USB, the DAC operates in "Asynchronous" USB mode (This should not be confused with Asynchronous Sample Rate Conversion - ASRC), where the Audiolab DAC controls the flow (speed) of the Audio data
streamed from the computer by providing a feedback control pipe (Control signal) to the computer over the USB Bus.
In Asynchronous mode, the Audiolab DAC has total control over the timing of the Audio Data transmission. The unit will instruct the computer to slow down or speed up the data transfer as necessary, thus avoiding any negative effects of full or empty buffer levels which can manifest itself as audible dropouts, pops or clicks — this speed control of Data transfer is referenced to the DAC's internal Clock. Audio replay does not rely upon the computer's poor internal clock source. The computer is effectively Clock-Locked to the DAC's internal High precision, low Jitter Master Clock. This is the key feature that allows for Hi-Fi quality reproduction from USB sources.
Remote Control of PC Media Player
The Audiolab 8200DQ features a full system remote control, which not only allow control of other units within the Audiolab 8200 range, but also allows control of a PC / MAC / Media device over the USB connection from the armchair. When connected to the Computer, the CD identifies itself as an Asynchronous DAC, and an HID compatible device (Human Interface Device) – this allows driverless control of the PC / MAC Media Player.
The Power Supply
The stability and low noise of power in any audiophile equipment is imperative to achieving ultimate performance. The DQ uses multistage regulation – with a total of 34 regulated supplies, of which 14 are ultra low noise discrete designs, combined with LC filtering for maximal inter-stage and RF isolation, a total of almost 250,000 F of bulk storage capacitance is used within the unit.
To achieve the very best from the ESS Sabre32 DAC chip requires Ultra Low Noise digital power supplies. 10 regulators surround the DAC section with bulk decoupling provided by Organic Ultra Low ESR capacitors to eliminate noise and distortion on any supply rail within the DAC.
High Quality SMT Component Manufacturing
The Audiolab 8200 DQ uses precision SMT manufacturing, with computerised optical inspection systems for 90% of its 1700+ components. The remaining components are hand inserted by our highly trained production team, and QC tested at each stage of the manufacturing process for consistency and performance. Every component from the simplest resistor to the power transformer within the unit has been carefully selected and verified by the UK design team to achieve the highest audiophile standards.
13: Service & Warranty
Care & Cleaning
While cleaning is in progress the AC power cord must be unplugged from the AC power supply socket.
Grease or dirt on the equipment may be removed with a soft, lint-free cloth slightly moistened with a mild solution of warm water and detergent or washing-up liquid. Do not use any other solutions or solvents.
If you have any queries regarding the use of Audiolab equipment, consult your dealer.
Servicing
Servicing of Audiolab products should only be carried out by authorised service agents. If service is required the equipment should be returned, securely packaged, preferably using original packaging, to your dealer.
In the UK equipment may be returned to the IAG Service Centre address shown on this page.
Always telephone before returning any equipment.
A note should be enclosed with your name, address, telephone number, and a brief description of the reason for return.
If you require Service outside the Warranty period, do not hesitate to contact your dealer.
Service Address
IAG Service Centre
Unit 4, St Margaret's Way
Stukeley Meadows Industrial Estate
Huntingdon Cambs
PE29 6EB
Englan
Tel: +44 (0)1480 452561: Fax: +44 (0)1480 413403
Audiolab limited warranty
Audiolab Ltd. warrants this product, subject to the terms and conditions below, to be free from defects in materials and workmanship. During the warranty period Audiolab will repair or replace (at Audiolab's option) this product, or any defective part in this product, if it is found to be defective due to faulty materials, workmanship or function. The warranty period may vary from country to country.
Terms and conditions:
The warranty starts on the date of purchase (or the date of delivery if this is later).
You must provide proof of purchase / delivery before work can be carried out. Without this proof, any work carried out will be chargeable to you.
All work will be carried out by Audiolab or its authorised agents or distributors. Any unauthorised repair or modification will void this warranty.
If any part is no longer available it will replaced with a functional replacement part.
Any parts that are replaced will become the property of Audiolab.
Any repair or replacement under this warranty will not extend the period of warranty.
This warranty is valid only in the country of purchase, applies only to the first purchaser and is not transferable.
The following are not covered:
- Products on which the serial number has been removed, altered or otherwise made illegible.
• Normal wear and tear and cosmetic damage.
- Transportation or installation of the product.
- Accidental damage, faults caused by commercial use, acts of God, incorrect installation, connection or packaging, misuse, neglect or careless operation or handling of the product which is not in accordance with Audiolab's user instructions.
• Equipment that has been operated in conjunction with unsuitable, inappropriate or faulty apparatus.
• Repairs or alterations carried out by parties other than Audiolab or its authorised agents or distributors.
- Products not purchased from an Audiolab authorised dealer.
- Products that were not new at the time of original purchase.
- Products sold 'as is', 'as seen' or 'with all faults'.
Repairs or replacements as provided under this warranty are the exclusive remedy of the consumer. Audiolab shall not be liable for any incidental or consequential damages for breach of any express or implied warranty in this product. Except to the extent prohibited by law, this warranty is exclusive and in lieu of all other warranties whatsoever, both express and implied, including, but not limited to, the warranty of merchantability and fitness for a practical purpose.
This warranty provides benefits that are additional to and do not affect your statutory rights as a consumer.
Some countries and US states do not allow the exclusion or limitation of incidental or consequential damages or implied warranties so the exclusions in the paragraph above may not apply to you. This warranty gives you specific legal rights, and you may have other statutory rights, which vary from state to state or country to country.
How to claim:
To obtain warranty service contact the Audiolab authorised dealer from which you purchased this product. Do not despatch goods without the prior agreement of the dealer, Audiolab or their authorised distributors.
If asked to return products for inspection and/or repair, pack carefully, preferably in the original cartons or packaging affording an equal degree of protection, and return prepaid. If unsuitable packaging is used, Audiolab may make a charge for the supply of new packaging.
Insurance is recommended as goods are returned at owner's risk. Audiolab or their authorised distributors cannot be held liable for loss or damage in transit.
Packing, insurance and freight on the return journey will be paid by Audiolab or their authorised agents or distributor if corrective work proves to be necessary.
14: Specifications and Features
Specifications
| Output Level @ 1kHz | RCA: 2.05Vrms ±0.1dBXLR: 4.1Vrms ±0.1dB |
| Frequency Response, ref. 1kHz, 20Hz to 20kHz | RCA: ±0.2dBXLR: ±0.2dB |
| THD 1kHz, 0dB, 20Hz to 20kHz 'A' weighted | RCA: <0.0025%XLR: <0.0008% |
| Crosstalk, 1kHz | RCA: <-120dBXLR: <-130dB |
| Dynamic Range 'A' weighted | RCA: >98dBXLR: >100dB |
Product Features
• 32Bit 84.672 MHz Oversampled / Upsampled 512 Element MultiBit Array DAC
• x1920 times Oversampled with CD/USB 44.1kHz Source
- Asynchronous USB supporting 24 Bits / 96kHz with Driverless Remote Control of PC / MAC Media Player (Via HID Support)
• x2 96 kHz 24Bits Coax SPDIF Digital Inputs
• x2.96kHz 24Bits Optical Digital Inputs
- x3 Analogue Line Inputs
• Low Jitter Optical and Coax SPDIF Output (CD Digital Output only)
• High Current Single Ended & Balanced Discrete Class A Output stages
- Custom CD Servo Design – with Ultra Low Noise PSU for OPU
• Full remote control & External Remote I/O bus
• 34 Regulated supply rails
• 14 Ultra Low Noise Discrete Regulators
- User Selectable Digital Filters – Software upgradeable Via USB Port
- User Selectable Analogue/Digital output mode when replaying CD or digital inputs.
• Master Clock Jitter less then 3p5 Short Term. Measured directly at DAC "XOut"
- Organic Ultra Low ESR capacitors, High Tolerance Polypropylene film / foil capacitors, Ultra Stable Very Low VCR 0.1% MELF SMD resistors, 4 Layer PCB.
IAG-A.LAB
Correct Disposal of this product. This marking indicates that this product should not be disposed with other household wastes throughout the EU. To prevent possible harm to the environment or human health from uncontrolled waste disposal, recycle it responsibly to promote the sustainable reuse of material resources. To return your used device, please use the return and collection systems or contact the retailer where the product was purchased. They can take this product for environmental safe recycling