
Beocenter 9000 - Hi-Fi BANG & OLUFSEN - Kostenlose Bedienungsanleitung
Finden Sie kostenlos die Bedienungsanleitung des Geräts Beocenter 9000 BANG & OLUFSEN als PDF.


| Produkttyp | Kompaktanlage (Hi-Fi-System) |
| Marke | Bang & Olufsen |
| Modell | Beocenter 9000 |
| Abmessungen (B x H x T) | ca. 52 x 10,5 x 30 cm |
| Gewicht | ca. 7,5 kg |
| Stromversorgung | 230 V / 50 Hz, 60 W |
| Ausgangsleistung | 2 x 30 W RMS (8 Ohm) |
| CD-Player | Ja, mit CD-Wechsler (5 Discs) |
| Kassettenrekorder | Ja, Dolby B/Rauschunterdrückung |
| UKW/MW-Tuner | Ja, mit 30 Stationsspeichern |
| Verstärker | Integriert, 2-Kanal |
| Anschlüsse | Phono (MM), Aux, 2x Lautsprecher, Kopfhörer (6,3 mm) |
| Bedienung | Fronttasten, Fernbedienung Beolink 1000 |
| Besondere Funktionen | Beolink-Steuerung, Timer, Sleep-Timer |
| Gehäusematerial | Aluminium, schwarz oder silber |
| Reinigung | Gehäuse mit weichem, trockenem Tuch reinigen |
| Sicherheitshinweis | Netzstecker ziehen bei Gewitter oder längerer Nichtnutzung |
| Ersatzteile | Über autorisierte B&O-Händler oder B&O Service |
| Reparatur | Nur durch autorisiertes Fachpersonal |
| Design | David Lewis, ikonisches skandinavisches Design |
Häufig gestellte Fragen - Beocenter 9000 BANG & OLUFSEN
Benutzerfragen zu Beocenter 9000 BANG & OLUFSEN
0 Frage zu diesem Gerät. Beantworten Sie die, die Sie kennen, oder stellen Sie Ihre eigene.
Eine neue Frage zu diesem Gerät stellen
Laden Sie die Anleitung für Ihr Hi-Fi kostenlos im PDF-Format! Finden Sie Ihr Handbuch Beocenter 9000 - BANG & OLUFSEN und nehmen Sie Ihr elektronisches Gerät wieder in die Hand. Auf dieser Seite sind alle Dokumente veröffentlicht, die für die Verwendung Ihres Geräts notwendig sind. Beocenter 9000 von der Marke BANG & OLUFSEN.
BEDIENUNGSANLEITUNG Beocenter 9000 BANG & OLUFSEN
BANG & OLUFSEN
How to use this manual
This manual explains how to set up the Beocenter 9000 and how to use the various music sources available.
We have arranged the manual so that you can easily find your way through it - with a table of contents which you can use as a directory when choosing what you want to do.
● The instructions refer to the sensi-touch operation panel. The individual steps in the instruction sequences are indicated by small boxes with the appropriate text or symbol inside them.
● The meaning of all the symbols and cues appearing on the display panel is explained in a separate paragraph.
● The best way to learn is by doing, so try your hand at a few simple commands. Until you feel confident, you may rely on this manual to tell you exactly what to do to carry out the functions of your choice.
We suggest you keep this manual handy so that you can refer to it when necessary.

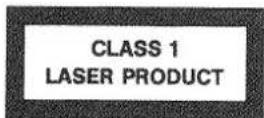
CAUTION: Use of any controls, adjustments or procedures other than those specified herein may result in hazardous radiation exposure.
The black and yellow label on the compact disc player serves as a warning that the apparatus constrins a laser system and is classified as a class 1 laser product. In case of any trouble with the compact disc player, please contact your Bang & Olufsen dealer. The apparatus must be opened by qualified servicemen only.
The Beocenter fulfils the conditions stated in the EEC directive 82/499 concerning radio frequency interference.
Principles of operation, 6
Making your Beocenter ready for use, 8
Switching on, 12
Switching off, 13
Sound adjustments, 14
Using the radio, 17
Using the compact disc player, 22
Using the tape recorder, 26
Time programming, 34
Auxiliary equipment, 37
Displayed cues and symbols, 41
Maintenance, 42
Technical specifications, 44
The Bang & Olufsen Beocenter 9000 is an integrated music system comprising tuner/amplifier, cassette deck, and compact disc player. It distinguishes itself by its timeless design and technologically advanced operation system, which actually guides you to the desired function.
The Beocenter 9000 is a so-called Beolink product, which means that it can be used as a master in a Bang & Olufsen Beolink system. In a Beolink system video and audio products are interconnected and they can be operated using only one remote control unit – the Beolink 1000.
For further information about setting up and operating the Beolink system, please refer to the special Beolink manuals.
Table of contents
| Principles of operation | 6 |
| Display panel | 6 |
| Operation panel | 6 |
| Making your Beocenter ready for use | 8 |
| Setting up | 8 |
| Connections | 9 |
| Power supply | 10 |
| Stand-by mode | 11 |
| Switching on | 12 |
| Switching off | 13 |
| Muting | 13 |
| Automatic stand-by | 13 |
| Sound adjustments | 14 |
| Volume | 14 |
| Bass, balance, and treble | 14 |
| Loudness | 15 |
| Programming functions: | |
| Presetting start-up levels | 16 |
| Details worth knowing | 16 |
© © ©
| Using the radio | 17 |
| Automatic tuning | 17 |
| Manual tuning | 18 |
| Tuning by keying in the frequency | 18 |
| Programming functions: | |
| Switching between stereo and mono on FM | 19 |
| Presetting radio stations | 19 |
| Clearing preset stations | 20 |
| Details worth knowing | 21 |
| Using the compact disc player | 22 |
| Loading a compact disc | 22 |
| Starting and stopping playing | 22 |
| Finding specific tracks or indexes | 23 |
| Searching through a compact disc | 23 |
| Stepping through tracks or indexes | 23 |
| Programming functions: | |
| Programming a sequence of tracks | 24 |
| Cancelling a programmed sequence | 24 |
| Details worth knowing | 25 |
| Using the tape recorder | 26 |
| Loading a tape | 26 |
| Starting and stopping playback | 26 |
| Finding specific tracks | 27 |
| Rewinding and fast forward | 27 |
| Stepping through tracks | 27 |
| Programming functions during playback: | |
| Programming a sequence of tracks | 28 |
| Cancelling a programmed sequence | 28 |
| Using the automatic tape reverse function | 28 |
| Using Dolby NR* | 29 |
Starting and stopping recording 30
Programming functions during recording:
Adjusting the recording level 31
Manual recording 32
Using Dolby NR 32
Cancelling the automatic tape reverse function 32
Details worth knowing 32
Time programming 34
Setting the clock 34
Programming play or recording instructions 34
Checking programmes 35
Cancelling programmes 35
"Timer" 35
Details worth knowing 36
Auxiliary equipment 37
Audio equipment 37
Master Control Link 38
Remote control 39
Video equipment 40
Displayed cues and symbols 41
Maintenance 42
Surfaces 42
Tape deck 42
Technical specifications 44
Principles of operation
Display panel
natural_image
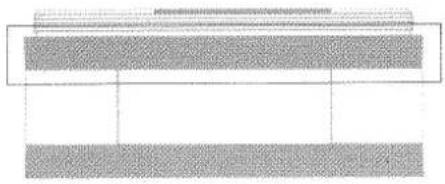
Pure diagram of layered rectangular blocks with no text, numbers, or symbolsThe upper or display panel will tell you what is going on when you use the Beocenter. It will show you which source is playing and give you the exact operational status of the Beocenter.
For an explanation of all the cues and symbols appearing on the display, please see the paragraph "Displayed cues and symbols" on page 41.
Operation panel
natural_image
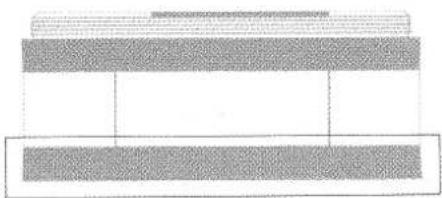
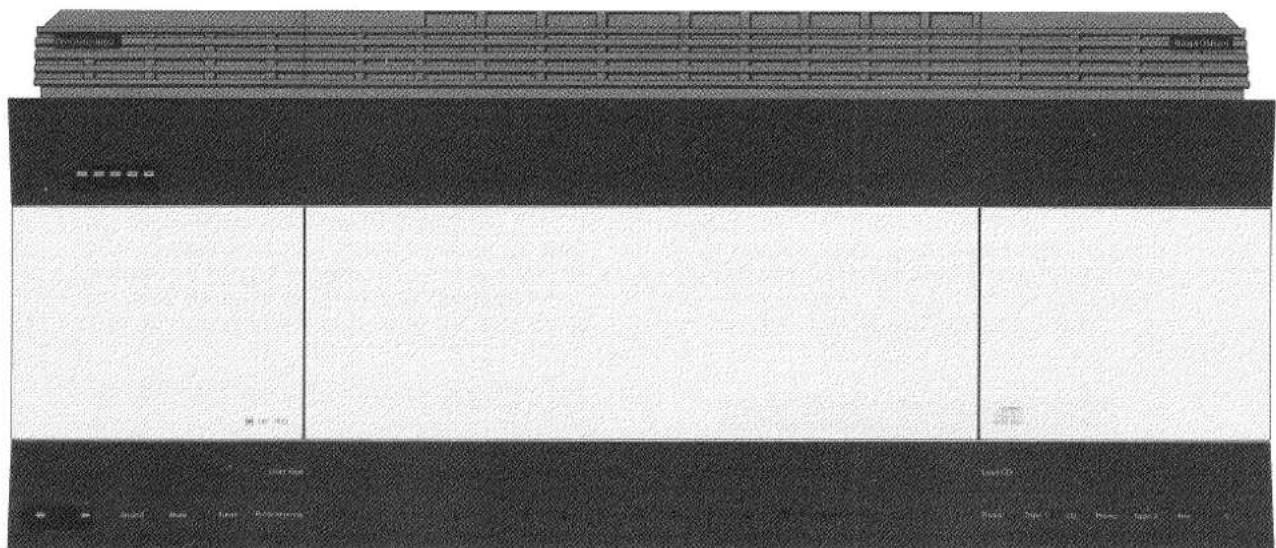
Pure diagram of layered rectangular blocks with no text, numbers, or symbolsThe lower or operation panel comprises all the controls required to operate the Beocenter. They need only a very light touch to be activated. However, you will find that not all the controls are visible or accessible at any one time, but only appear when they are appropriate to the source you are playing.
You will find that they appear in three levels:
-
The first group or level of controls are accessible at all times. They are identified by grey print and are for selecting source, adjusting sound levels and programming.
-
The controls in the second level only become accessible when you have made your choice from the first level. Only those appropriate to the source you are playing will light up.
-
Likewise, the controls in the third level will only become accessible when you have made your choice from the second level - some of them for a limited period of time (some 3 to 9 seconds). If they disappear before you have finished your instructions, you will have to start again from the second level.
text_image
Scanned image of a computer monitor with Chinese labels and control buttons at the bottomMaking your Beocenter ready for use Setting up
Removing the transport screws
flowchart
graph TD
    A["Play"] --> B{Decision}
    B -->|Yes| C["Process Step"]
    B -->|No| D["End"]
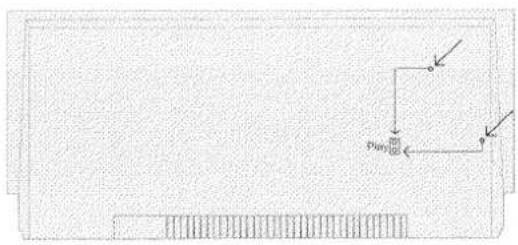
The Beocenter is provided with two screws on the base which protect the compact disc unit suspension during transport. These screws must be loosened before you can operate it. To gain access to the screws carefully turn the Beocenter upside down. Remove the two screws with a screwdriver and place them in the two holes marked PLAY for safe keeping.
If you ever have to transport the Beocenter, we strongly recommend that you reinsert the transport screws in the holes marked TRANSPORT.
Placement
natural_image
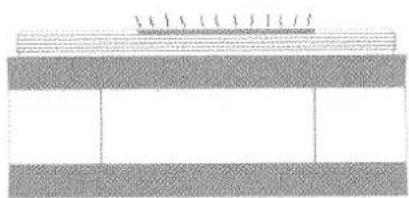
Pure diagram of layered structure with no text, numbers, or symbolsThe Beocenter must be placed on a firm, horizontal surface. Do not obstruct the ventilation apertures in any way. Avoid placing it in direct sunlight, near radiators or other sources of heat.
Adjustment to room temperature
If the Beocenter has been exposed to low temperatures, e.g. during transport, and is then placed in a warm room, condensation can form within the mechanism. If this happens, it will not play until the humidity falls to an acceptable level, so allow the Beocenter to acclimatize to normal room temperature for at least an hour or two before use.
Connections
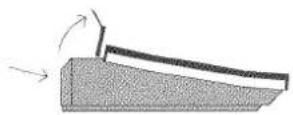
Before using your Beocenter, you must make several connections. Lift up the hinged grille at the rear (left-hand side of Beocenter) and remove the plastic foam in order to reveal the sockets.
Loudspeakers
The two pairs of loudspeaker sockets allow you to connect one or two sets of loudspeakers as required:
SPEAKERS 1:
4-pin DIN sockets for
- loudspeakers in the same room as the Beocenter, or
- the Bang & Olufsen Beolab Penta power amplifier/loudspeaker module, or
- the Bang & Olufsen Beolab 150 power amplifier.
natural_image
Architectural cross-section diagram of a building facade with internal partitions and structural elements (no text or labels)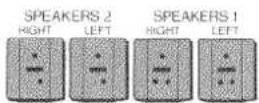
SPEAKERS 2:
3-pin DIN sockets for
- loudspeakers in an adjoining room, or
- Master Control Link installation.
Antennae
In order to pick up the FM and AM stations available in your area, you must connect both an FM antenna and an AM antenna.
AM:
Socket for AM antenna.
FM:
Socket for 60-75 ohm FM antenna.
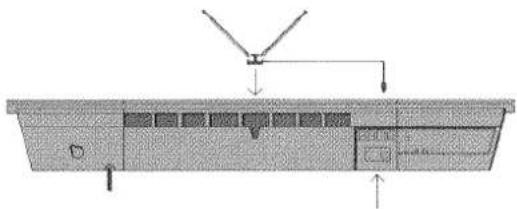
If FM reception is good in your area you may rely on an indoor FM antenna to pick up the signals. The indoor antenna (part no. 8902010) is available from your Bang & Olufsen dealer. Attach it to the Beocenter as indicated on the diagram.
text_image
Technical diagram showing a structural component with labeled parts and directional arrows indicating assembly or force.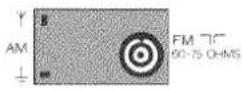
For an explanation of the other sockets, please see the paragraph "Auxiliary equipment".
Power supply
text_image
L1.0 L2.0 = 5 mm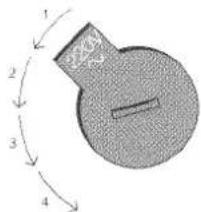
text_image
1 2 3 41: 220V
2:130V
3: 240V
4: 110V
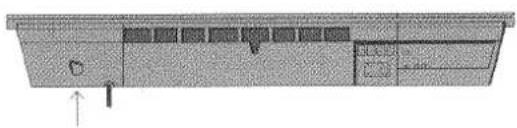
Before connecting the Beocenter to the mains, check that the mains voltage switch on the rear panel is set to the position corresponding to the voltage supply in your country: 220 V, 130 V, 240 V, or 110 V.
If for any reason you have to set the switch to another position, remember to disconnect the Beocenter from the mains beforehand. Use a screwdriver or a coin to turn the switch.
When you connect the Beocenter to the mains for the first time, or if there has been a power cut, Clock appears on the operation panel.
Please refer to the paragraph "Setting the clock" on page 34.
Power cuts lasting 20 seconds or less will not disrupt the Beocenter and it will resume playing when the power is restored.
If you are recording, any power cut will interrupt your recording, but if the power cut lasts less than 20 seconds, the source you were recording from will resume playing.
Stand-by mode
Once connected to the mains the Beocenter is in so-called stand-by mode and ready for use. The stand-by mode is indicated by a tiny red light on the right-hand side of the display panel.
The Beocenter is designed to be left in stand-by mode when not in use.
Switching on
Switch on simply by selecting any of the sources available:
Radio : Turns on the radio station you were last listening to.
Tape 1 : Turns on the cassette deck.
CD : Turns on the compact disc player.
Phono : Turns on Beogram 9000 or any Bang & Olufsen record player with Datalink connected to the PHONO socket.
Whenever you switch on, the source selected will start playing at the preset sound level stored in the memory of the Beocenter.
Tape 2 : Turns on any Bang & Olufsen tape recorder with Datalink connected to the TAPE 2 socket.
Aux : Selects the AUX socket as source. For further details please refer to the paragraph "Auxiliary equipment".
You may also switch on by pressing [Mute]. This will turn on the source you were last listening to, at the previously adjusted level.
Switching off
Switch off simply by pressing ● on the right-hand side of the operation panel.
The Beocenter then reverts to stand-by mode as indicated by the tiny red light on the right-hand side of the display panel.
Muting
Press Mute to make the sound disappear immediately.
This is useful if you want temporary silence without switching off.
Press Mute again to recall the sound.
The mute function only applies to the speakers connected to the SPEAKERS 1 sockets.
Automatic stand-by
Within 30 minutes of finishing a tape or a compact disc the Beocenter automatically returns to stand-by. If a tape or a compact disc
is left in pause for more than 30 minutes, the Beocenter will also return to stand-by.
Sound adjustments
Volume
To raise or lower the volume, press ☐ or ☐ on the left-hand side of the operation panel.
Bass, balance, and treble
The Sound control gives access to the bass, balance, and treble adjustments.
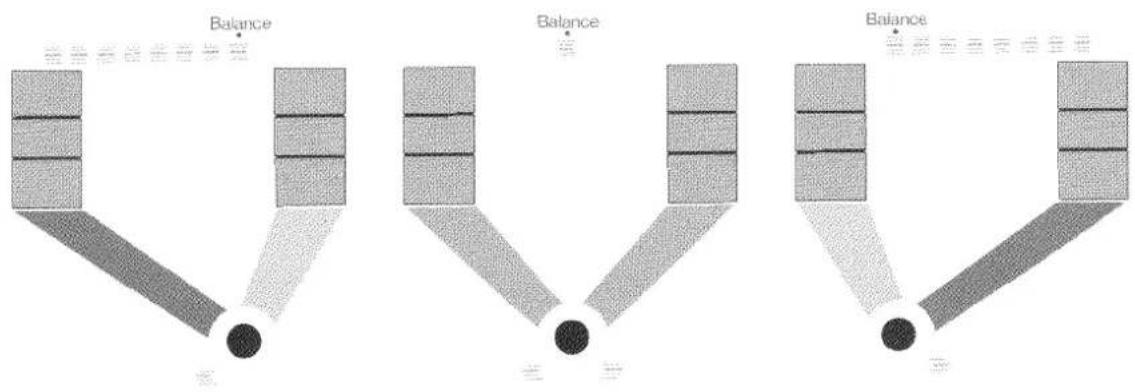
Press Sound once to gain access to bass, twice to gain access to balance, and three times to gain access to treble.
While the appropriate cue remains on the display panel, adjust the value by pressing or as required.
Pressing ☐ lowers the bass and treble values, pressing ☐ raises them.
text_image
Balance Balance BalanceIf you are adjusting balance, pressing shifts the sound towards the left-hand speaker, pressing shifts the sound towards the right-hand speaker. This function enables you to direct the sound emerging from the loud-speakers towards your favourite listening position.
The current volume, bass, balance, or treble values can be read off on the display panel and are indicated by the appropriate cue:
Volume
Bass
Balance
Treble
followed by green striations. One striation indicates the medium setting for bass, balance, and treble. The maximum volume level is indicated by a full range of 15 striations.
Loudness
The loudness function is used to compensate for the human ear's lack of sensitivity to high and low frequencies when listening to low volume levels. It 'boosts' the low and high frequencies so that the music becomes more dynamic.
If you press Sound a fourth time, you will gain access to the loudness function as indicated by the flashing cue Loudn.
Press ☐ on the left-hand side of the operation panel to cut in the loudness function. Now the Loudn cue glows constantly.
To cut out the loudness function, press Sound the appropriate number of times to step to the Loudn cue. Then immediately press on the left-hand side of the operation panel. The Loudn cue will revert to flashing intermittently, indicating that the loudness function is cut out.
Programming functions
Presetting start-up levels
Whenever the Beocenter 9000 is switched on, the source selected will start playing at a preset
sound level. You can adjust and preset this start-up level to suit your personal taste:
- Adjust volume, bass, balance, and treble as desired
- Press Programming
- Press Sound
- Press Store
Details worth knowing
- Volume can be adjusted while the Beocenter is in stand-by mode. This is useful if for instance you want to switch on at a level lower than the one preset for start-up. Just press Sound and then lower or raise the level using or. Then switch on as usual.
● The Beocenter will not start playing at a volume level exceeding 11 on the full range of 15 striations on the display. If you have preset a start-up level higher than that, it will disregard your instruction.
Using the radio
The radio must be tuned to pick up the stations available in your area.
Automatic tuning
The automatic tuning function is useful if you are not familiar with the radio stations and their frequencies.
-
Press Radio
-
Press Search
-
Press AM-FM if you want to switch from AM to FM or vice versa
-
Press << or >> on the right-hand side of the operation panel to search through the frequencies
The search process will stop automatically at the first station producing an acceptable signal
- Press << or >> again if this is not the station you want
Manual tuning
The manual tuning function is useful if you want to move slowly through the frequencies or if you
want to detune a station slightly because of noisy reception.
-
Press Radio
-
Press Search
-
Press AM-FM if you want to switch from AM to FM or vice versa
-
Press Manual
-
Tap or keep your finger on << or >> until you reach the station or frequency you want
Tuning by keying in the frequency
If you know the exact frequency of a particular station, you can key in the frequency directly so
that you don't have to go through the tuning procedure.
-
Press Radio
-
Press Search
-
Press AM-FM if you want to switch from AM to FM or vice versa
-
Press Freq
-
Key in the frequency of the station you want, using three or four digits as required
Programming functions
Switching between stereo and mono on FM
If you are tuned to an FM station broadcasting a stereo signal, this will be indicated by the cue Stereo on the display panel.
The system will automatically switch to mono if the stereo signals are not strong enough to
produce an acceptable sound. However, you can, if you wish, overrule this automatic function and select mono or stereo manually: press [Programming] and then [Mono]
Presetting radio stations
You can preset up to 20 stations. This enables you to select a particular station directly by
pressing the appropriate number.
- Find the station of your choice using any of the three tuning methods
- Press Programming
- Key in the number on which you want to preset the current station
- Press Store
Clearing preset stations
- Switch on the radio
- Press Programming
- Key in the preset number you want to clear
- Press Clear
Document your preset stations here:
-
10.
- 20.
Details worth knowing
● The display indicates AM frequencies in kHz with no decimals. FM frequencies are stated in MHz with one decimal.
● Automatic tuning on AM scans the AM band in precise steps of 9 kHz, which is the standard distance between AM stations. If tapping << or >> repeatedly while on AM you can move slowly through all the stations.
- If tuning manually, you can step through the frequencies in minute steps of 250 Hz on AM or 12.5 kHz on FM by tapping << or >> repeatedly.
- Stereo FM stations for which you have selected mono will be preset with the stereo function cut out.
Using the compact disc player
Loading a compact disc
natural_image
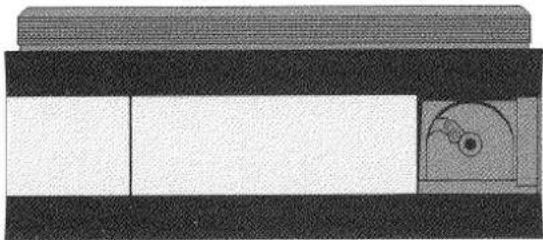
Pure diagram of layered rectangular blocks with a small circular inset, no text or symbols presentPress Load CD to gain access to the disc compartment. The panel slides open and you will see the disc tray with the laser unit.
Place the compact disc on the tray with the label facing upwards.
Press Load CD again to close the panel.
If you start playing, the panel closes automatically.
Starting and stopping playing
Press CD to start playing the compact disc.
Playing begins at track 1 as soon as all information in the compact disc has been registered.
If you press CD and there is no disc in the compartment, the panel opens automatically within a few seconds, reminding you to load a compact disc.
Press Stop to stop playing.
The compact disc pauses until you press CD again to resume playing. If playing is resumed within 30 minutes, the compact disc will start at the exact point where you left it.
You can also stop playing by switching directly to stand-by mode.
Finding specific tracks or indexes
If you want to find a specific track on the compact disc, just press the number of your choice, e.g. 5.
If the tracks on your compact disc are sub-
divided into indexes, you can go directly to the index number you want. Press the appropriate track number, e.g. 2, then Index, and then the index number of your choice, e.g. 2.
Searching through a compact disc
The and controls enable you to move through a compact disc if you want to find a specific point on the disc.
Keep your finger on << or >>. Within ap-
proximately 5 seconds the search speed accelerates slightly. Lift your finger to stop searching. Press CD to start playing.
Stepping through tracks or indexes
You can step forwards or backwards through the tracks and indexes, if any, on a compact disc.
Press Search and then >> or << if you want to step through tracks.
Press index and then >> or << if you want to step through indexes.
Programming functions
Programming a sequence of tracks
You can programme the compact disc player to play specific tracks in any sequence you require. Before you start, make sure you have selected CD as your source.
Press Stop if you don't want the compact disc to be played while you are programming:
- Press Programming
- Press Store if you want to include a track number in a sequence, or press Clear if you want to exclude a track number from a sequence
- Key in the track number of your choice
- Repeat '2' and '3' to include or exclude other track numbers
- Press CD to play the programmed sequence
You can include up to 30 tracks in a sequence. The tracks will be played in the order you have programmed them.
Cancelling a programmed sequence
If you want to cancel a programmed sequence, press Programming and then keep your finger on Clear until all the track numbers light up again.
Opening the panel also cancels a memorized track sequence.
Details worth knowing
- If you switch temporarily to another source while playing a compact disc and resume playing the compact disc within 30 minutes, it will start at the exact point where you left it.
- If you ask for a track number which does not exist, the compact disc player will try to carry out your instruction but within a second go on playing as before.
- If you ask for an index number which does not exist, the compact disc player will play the corresponding track number instead.
- Whenever you use Programming and then Clear to exclude one or more tracks when you are playing a compact disc, the remaining numbers displayed will be considered a programmed sequence. As soon as the current track ends, the compact disc player will start playing the sequence from the beginning and in strict numerical order.
Using the tape recorder
Loading a tape
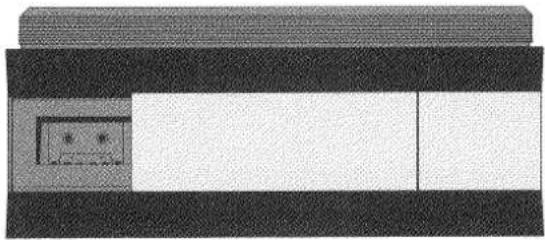
Press Load tape to open the sliding panel and reveal the tape compartment.
Insert the cassette with the tape slots facing you and side 1 (or A) facing upwards.
Press Load tape again if you want to close the panel.
natural_image
Pure diagram of a layered structure with no text, numbers, or symbols visibleStarting and stopping playback
Press Tape 1 to start playback.
If you press Tape 1 when there is no cassette in the compartment, the panel will open automatically, reminding you to load a cassette.
Press [1] if you want to find the beginning of the tape. The tape will then be rewound and playing will start immediately.
The tape recorder automatically reverses the tape at the end of the first side and within one second starts playing again. The tape side indicators on the display tell you which side you are on.
If you want to 'turn' the cassette to play the other side of the tape, press Turn.
Press Stop to stop playing.
The tape pauses until you press Tape 1 again to resume playing.
You can also stop playing by switching directly to stand-by mode.
Finding specific tracks
The tape recorder will only be able to recognize the tracks on a tape if there is a pause of at least 2.5 seconds between them.
If you want to find a specific track, just press the number of your choice, e.g. 5. The tape
recorder will then conduct a search, if necessary returning to the beginning of the tape. When it has found the track, it will start playing.
Note: You cannot ask the tape recorder to search for a track number greater than 48.
Rewinding and fast forward
Press << or >> on the right-hand side of the operation panel to rewind or wind the tape quickly.
Provided you haven't cut out the automatic
tape reverse function, rewinding always means rewinding towards the start of side 1, and winding always means winding towards the end of side 2.
Stepping through tracks
You can step through the tracks, backwards or forwards, by pressing Search and then << or >> on the right-hand side of the operation panel the number of times required to step to the track you want.
Note: pressing << only once takes you to the beginning of the track you are listening to.
Programming functions during playback
Programming a sequence of tracks
You can programme the Beocenter to play specific tracks on a tape in any sequence you require. Before you start, make sure you have
selected Tape 1 as your source. Press Stop if you don't want the tape to be played while you are programming:
- Press Programming
- Press Store if you want to include a track number in a sequence, or press Clear if you want to exclude a track number from a sequence
- Key in the track number of your choice
- Repeat '2' and '3' to include or exclude other track numbers
- Press Tape 1 to play the programmed sequence
You can include up to 30 tracks in a sequence. The tracks will be played in the order you have programmed them.
Cancelling a programmed sequence
If you want to cancel a programmed sequence, press Programming and then keep your finger on Clear until all the track numbers light up again.
Unloading the cassette, using Turn or Aut rev also cancels all information about programmed sequences the tape recorder has previously registered.
Using the automatic tape reverse function The Beocenter automatically reverses the tape at the end of the first side and within one second starts playing again. You don't have to turn the cassette manually.
The tape side indicators show which side is playing: Side 1 is the side facing upwards, Side 2 is the side facing downwards.
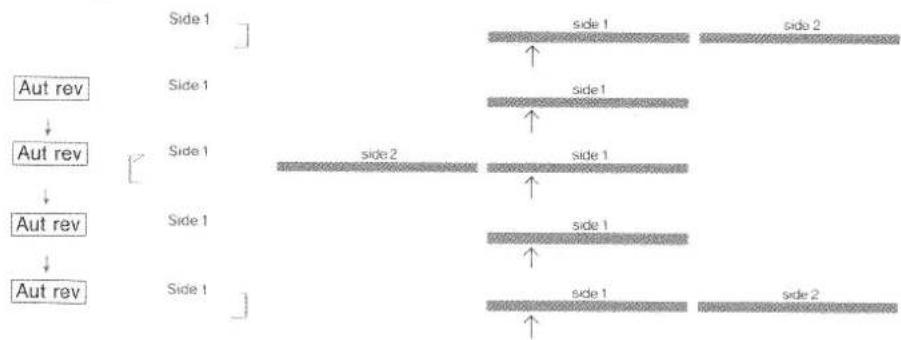
However, you can cancel the automatic tape reverse function so that only the current side will be played. The automatic tape reverse function is cut in and out in a cycle of four steps. Press Programming to gain access to Aut rev. Then press Aut rev repeatedly to step through the cycle:
flowchart
graph TD
    A["Aut rev"] --> B["Aut rev"]
    B --> C["Aut rev"]
    C --> D["Aut rev"]
    style A fill:#f9f,stroke:#333
    style B fill:#f9f,stroke:#333
    style C fill:#f9f,stroke:#333
    style D fill:#f9f,stroke:#333
    subgraph Section 1
        direction TB
        direction_LR1["Side 1"] --> direction_LR2["side 1"] --> direction_LR3["side 2"]
        direction_LR4["↑"] --> direction_LR5["↑"]
    end
    subgraph Section 2
        direction_LR6["Side 1"] --> direction_LR7["side 1"] --> direction_LR8["↑"]
        direction_LR9["↑"] --> direction_LR10["side 1"] --> direction_LR11["↑"]
    end
During this step procedure the current side is played unaffected, as indicated by the cue Side 1 which remains lit all the time. If you are on side 2 of the tape, the same cycle can be passed through, but in reverse order and with Side 2 lit instead.
Whenever you load a cassette, the automatic tape reverse function is cut in.
Using Dolby NR
Tapes recorded on the Beocenter 9000 contain information about the use of Dolby noise reduction (Auto NR codes). When playing back the tape, the Beocenter registers this information and automatically selects the correct Dolby mode: Dolby B, Dolby C or no Dolby.
When playing back tapes not supplied with the Auto NR codes, you have to select the appropriate Dolby mode. Press Programming and then Dolby repeatedly to switch between the three modes.
Starting and stopping recording
Recording tapes on the Beocenter 9000 is easy and straightforward. All you have to do is start and stop the process.
The automatic adjustment function built into the Beocenter ensures that your tapes will not be overloaded.
- Start playing the source you want to record from
- Press Record to switch to recording mode
- Press Record for the second time to start recording
- Press Stop on the left-hand side of the operation panel when desired A blank of 3.5 seconds is now inserted on the tape
- Press Record again if you want to resume recording, or press Stop again if you want to leave the recording mode
If you don't want the blanks to be inserted on the tape, press Stop twice in quick succession.
If you want to return to the start of your latest recording, press Return. Then press Tape 1 to hear it or press Record to resume recording.
During recording the recording level will be lowered automatically if the incoming signal exceeds a certain upper limit. This limit has been set to suit the majority of tapes available.
While in recording mode the Beocenter displays the recording level, as indicated by the cue Rec Level.
Programming
functions during recording
Adjusting the recording level
You can of course override the automatic mode and adjust the recording level at your discretion any time you like while in recording mode.
To do so, press Programming and then Level. Immediately press or to lower or raise the level as required.
During the adjustment process you will see
that the level setting is shown on the display, as indicated by the cue Level. Each time you tap or the level is lowered or raised by 2dB.
Within 3 seconds of adjusting the level, the display reverts to showing the recording level, as indicated by the cue Rec Level.
Adjustments BEFORE automatic recording:
This is useful if you want a recording to b made at a particularly low level or if the incoming signal is too weak to produce an acceptable recording.
After pressing Record for the first time (i.e. while in recording pause mode), lower or raise the recording level as required. Press Record again to start recording.
Recording proceeds in automatic adjustment mode, as indicated by the cue Auto.
Adjustments DURING automatic recording:
This is useful if you want to make temporary adjustments for particularly quiet or loud passages of music.
Remember to readjust the level before returning to automatic adjustment mode.
If you have lowered the level, you will have to raise it accordingly. If you have raised the level, it will be adjusted automatically as soon as you have reverted to automatic adjustment mode.
Press Record another time to revert to automatic adjustment mode.
Manual recording
You can override the automatic adjustment function entirely and adjust the recording level manually to any level you like.
After pressing Record for the first time (i.e. while in recording pause mode), press Programming as usual to gain access to Level. Keep your finger on Level until the cue Level blinks once and then adjust the level as required. Press Record again to start recording.
Recording proceeds in manual adjustment mode.
The automatic adjustment function is restored as soon as you leave the recording mode and initiate another recording.
Using Dolby NR
Before making a recording you must decide whether you want to use Dolby B, Dolby C or no Dolby at all.
After pressing Record for the first time (i.e. while in recording pause mode), press Programming to gain access to Doiby. Press
Dolby repeatedly to switch between Dolby B, Dolby C, and no Dolby.
During recording the Beocenter 9000 places a code on the tape (Auto NR code), which ensures that the appropriate Dolby mode will be selected when the tape is played back on the Beocenter 9000.
Cancelling the automatic tape reverse function
You can cancel the automatic tape reverse function so that the tape recorder will record only on the current side of the tape.
After pressing Record for the first time (i.e. while in recording pause mode), press Programming to gain access to Aut rev. Press Aut rev to cancel the automatic reverse function.
Refer to the tape side indicators on the display and check that the current side is the side you want to record on.
For details about the automatic tape reverse function, please refer to the paragraph "Using the automatic tape reverse function" on page 28.
Details worth knowing
- Record is only available if there is a cassette in the compartment, and only if the current side of the tape can be recorded on (i.e. if you have not removed one or both tabs on the cassette edge to prevent recording on one or both tape sides).
- If you are recording a compact disc* or from an auxiliary Bang & Olufsen product with Datalink, recording stops automatically when the last track on e.g. the compact disc or the record has been played.
* Subject to copyright law
- It may be useful for you to insert a blank on the tape immediately before you start a recording. Once you find the end of the last recording, press Stop on the right. Now press Record twice and then Stop on the left. The tape recorder inserts a blank of 3.5 seconds and is now in recording pause mode. You can now switch to the source you want to record from and start recording as usual.
- Whenever you use Programming and then Clear to exclude one or more tracks from a tape, the remaining numbers displayed will be considered a programmed sequence. As soon as the current track ends, the tape recorder will search for the first track in the sequence and start playing the sequence in strict numerical order.
- You can override the Auto NR code if for some reason you want to play back a tape using a different Dolby mode to that in which the tape was recorded. Just press [Dolby] to step to the Dolby mode of your choice, but do not lift your finger until Dolby blinks once. The locked Dolby mode is now indicated on the display. It will not be released until you press [Dolby] again or unload the tape.
● Passages of low music, i.e. lower than -20 dB, lasting more than 2.5 seconds will be registered as pauses. This means that the track numbers of your recording may not coincide with the track numbers of the source of your recording.
Time programming
Setting the clock
If you want to use the time programming function, the 24 hour clock built into the Beocenter has to be set to the correct time. The clock must be set while the Beocenter is in stand-by mode.
Press Programming to gain access to Clock. Press Clock and then key in the correct time, e.g.
2, 1, 0, 0 for 9 p.m. Press Store to memorize the information.
If you disconnect the Beocenter from the mains or if a power cut occurs, the clock will stop. When the power returns, you will have to set the clock to the right time, as indicated by Clock.
Programming play or recording instructions
You can programme the Beocenter to play or record any source you like at specific times within a 24 hour period or daily.
Programming must be done while the Beocenter is in stand-by mode.
- Press Programming
- Press Play or Record as required
- Select the source you want to play or record, e.g. Radio, 2 or CD
- Press Clock
- Key in the time you want playing or recording to start
- Press Store
If you want the programme to recur every day, keep your finger on Store until the display switches to showing the real time
Checking programmes
Programmes can only be checked while the Beocenter is in stand-by mode.
Press Programming to gain access to Call. Then press Call repeatedly to step through the programmes, which can be read off on the display panel.
? on the right-hand side of the display indicates the end of the programmes. Recurring
time programmes are indicated by a - (dash) in front of the start time.
When stepping through the programmes using [Call], you will first see the recording instructions and then the play instructions. The programmes will appear on the display panel in the order they have been entered, not in chronological order.
Cancelling programmes
To cancel a particular programme, follow the checking procedure. When you have found the
programme you want to cancel, i.e. when it is visible on the display, simply press Clear.
"Timer"
The Timer cue on the display panel indicates that any programmed play instructions will be executed with both the speakers in the SPEAKERS 1 sockets and those, if any, in the SPEAKERS 2 sockets cut in. Once you press Store to memorize a play instruction, the Timer cue is automatically cut in.
You can cut out the SPEAKERS 1 sockets, if you wish, so that when the Beocenter starts playing at the specified time, the speakers in the SPEAKERS 1 sockets will be muted. To do so, press Timer. The Timer cue now disappears.
Press Timer to recall the Timer cue.
Details worth knowing
- If you select Radio in a programme and fail to key in a specific preset number, or key in a vacant number, the Beocenter will default to the station to which you were last listening.
- If you want the Beocenter to switch to standby at a specific time, you must programme a play instruction, using stand-by as your source.
-
If you want to exclude a specific day from an otherwise daily programme, you must instruct the Beocenter to switch to stand-by at the exact time when it would otherwise start playing.
● The Beocenter can accept up to 12 play programmes and 6 recording programmes in its memory. -
Your programmes will be unaffected by temporary power cuts. However, you must remember to set the clock again when the power returns so that your programmes will be executed at the correct time.
● The Beocenter will not retain a programme in its memory once the instructions have been executed, with the exception of recurring daily programmes, which will of course remain in the memory until you choose to cancel them. - If you happen to make a mistake or change your mind during a programming sequence, just discontinue the sequence and wait a few seconds until the controls disappear. Then start again.
● Programmed recording instructions will be executed with the loudspeakers muted, unless, of course, the Beocenter is already playing.
Auxiliary equipment
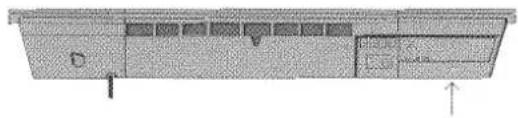
The sockets on the rear panel enable you to connect auxiliary audio and video equipment to your Beocenter. To gain access to the sockets, lift up the hinged grille at the rear (left-hand side of Beocenter).
natural_image
Architectural cross-section diagram of a building facade with internal compartments and structural elements (no text or labels)Audio equipment
text_image
RELAY UN/200A PRE AMP OUT RIGHT LEFT AUX TAPE 2 PHONORecord player
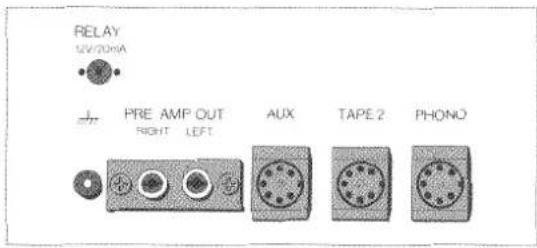
Use the 7 pin DIN socket marked PHONO. You can connect Beogram 9000 or any Bang & Olufsen record player with a 7 pin DIN plug.
If you want to connect a record player with phono plugs, you must use an adaptor (part no. 6270316), which is available from your Bang & Olufsen dealer. Remember to connect the earth lead to the earthscrew marked
Press Phono to select the PHONO socket.
Cassette deck
Use the 7 pin DIN socket marked TAPE 2. You can connect any Bang & Olufsen cassette deck with a 7 pin DIN plug, including the Beocord VHS 91 or 91.2 video tape recorder if used as an audio tape recorder.
Press Tape 2 to select the TAPE 2 socket.
Power amplifier
Use the phono sockets marked PRE. AMP. OUT - RIGHT for right channel, LEFT for left channel.
Remote Mains Switch
Use the socket marked RELAY. You can connect the Bang & Olufsen Remote Mains switch (type no. 4002) for switching on external equipment such as an amplifier or a lamp.
Miscellaneous equipment
Other equipment such as an auxiliary compact disc player or a reel-to-reel tape recorder can be connected to the socket marked AUX.
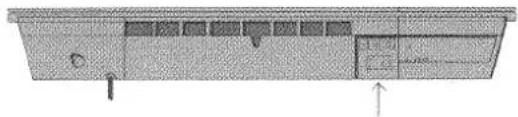
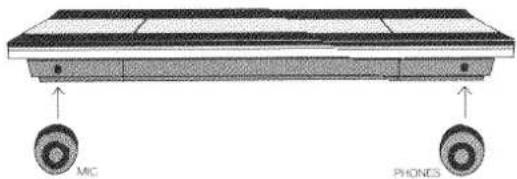
The two sockets underneath the operation panel enable you to connect a microphone and headphones.
natural_image
Diagram of a flat electronic device with two wheels labeled MIC and PHONES, no text or symbols presentMono microphone
Use the socket marked MIC on the left.
You can use the Beocenter as a microphone amplifier: press Aux, 8.
To record from the microphone, select Aux, 8 as your source and then press Record twice to start recording (cf. page 30).
Headphones
Use the socket marked PHONES on the right. If you connect headphones, the speakers in the SPEAKERS 1 sockets will be cut out.
Master Control Link
natural_image
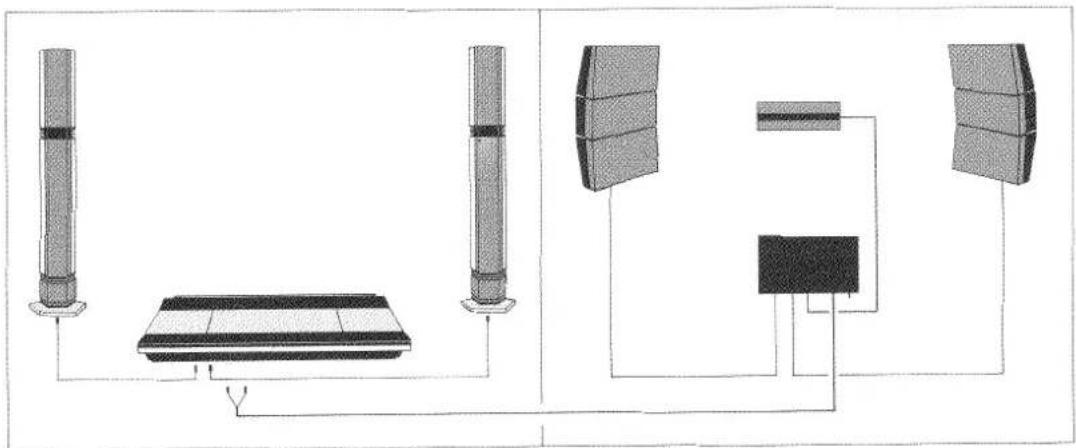
Pure electrical circuit lines without any symbolsYou can connect a Master Control Link 2 to the SPEAKERS 2 sockets, which enables you to operate and listen to your Beocenter anywhere in your house.
For further information about the Master Control Link, please contact your Bang & Olufsen dealer.
Remote control
natural_image
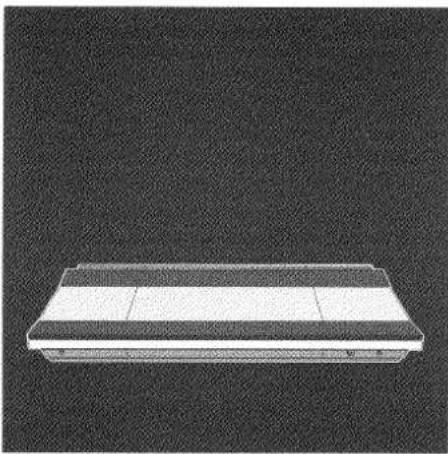
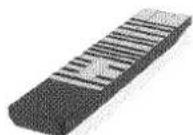
3D rendering of a rectangular electronic device with a flat top and four sides, set against a dark textured background (no text or symbols visible)The Beolink 1000 remote control enables you to carry out all the basic functions in your Beocenter from a distance.
If you have opted for the Bang & Olufsen Beolink system, you need only the Beolink 1000 remote control to operate the whole system.
Video equipment
This Beocenter is compatible with certain Bang & Olufsen video equipment. This means that you can operate your TV-set and video tape recorder via the Beocenter 9000.
Compatible Bang & Olufsen video equipment:
- Beovision LX 2500/2800 TV-set
- Beovision LX/L 2502/2802 TV-set
- Beocord VHS 91 or 91.2 video tape recorder
- Beocord VHS 82 or 82.2 video tape recorder
The TV-set must be connected to the AUX socket and the video tape recorder must be connected to the TV-set via the 21 pin A/V socket. Moreover, the TV-set must be equipped with a Datalink module. For further information about the Bang & Olufsen audio/video integration, please contact your Bang & Olufsen dealer.
Operation
TV-set:
| Switching on | Press Aux, 1 |
| Selecting preset station | Key in appropriate number |
| Automatic tuning | Press << or >> |
| Switching off | Press ● |
Video tape recorder:
| Switching on | Aux, 2Playback starts immediately |
| Stop playback | Press Stop |
| Rewinding or winding | Press << or >> |
| Switching off | Press ● |
Displayed cues and symbols
text_image
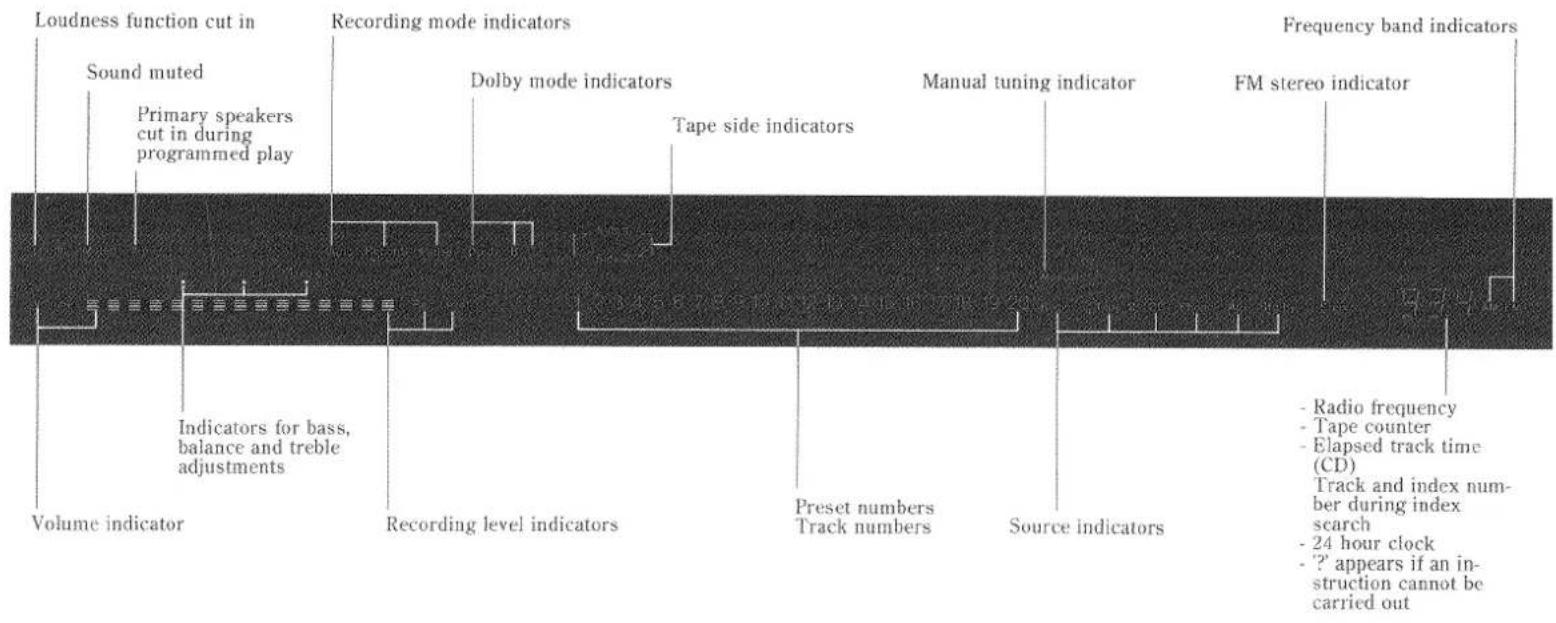
Loudness function cut in Sound muted Primary speakers cut in during programmed play Recording mode indicators Dolby mode indicators Tape side indicators Manual tuning indicator FM stereo indicator Frequency band indicators Volume indicator Indicators for bass, balance and treble adjustments Recording level indicators Preset numbers Track numbers Source indicators - Radio frequency - Tape counter - Elapsed track time (CD) Track and index num- ber during index search - 24 hour clock - ?' appears if an in- struction cannot be carried outThe cues and symbols on the upper panel, the display panel, give information about the operational status of the Beocenter.
The cues and symbols displayed will not all be visible at the same time.
Maintenance
Surfaces
Use a soft, dry cloth to wipe dust off the Beocenter. Window cleaner on a dry cloth will do to remove any fingerprints and grease stains on the glass panels.
Never use denatured alcohol to clean any parts of the Beocenter.
Tape deck
natural_image
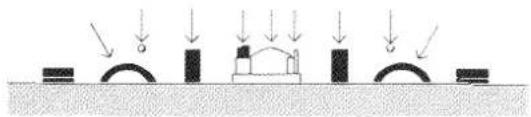
Diagram showing mechanical components with downward arrows indicating motion or force (no text or symbols)The tape path, i.e. tape heads, pinch rollers and other parts which the tape touches during play or recording, should be cleaned every now and then to prevent dust and fluff building up on them.
Use the Bang & Olufsen Deck Care Kit (part no. 3634014) or a cotton bud dipped in a special fluid designed for this purpose. The cleaning process must be carried out while the tape compartment is empty.
Technical specifications
| Beocenter 9000 | |
| Type no. | 2501/2504/2505 |
| Amplifier | |
| Long-term max. output power IEC | 2 x 80 watts/8 ohms |
| Power output 20-20,000 Hz IHF | 2 x 30 watts/8 ohms |
| Total harmonic distortion IHF | <0.1%/30 watts 20-20,000 Hz |
| Dynamic headroom | 1 dB/8 ohms |
| Intermodulation IHF | <0.1% |
| Response vs frequency, tape | 20-20,000 Hz ±1.5 dB |
| Wideband damping factor | 50 |
| Signal-to-noise ratio: | |
| Tape A-weighted, 1 W IHF | >80 dB |
| Tape A-weighted, 30 W output | >95 dB |
| Channel separation 10,000 Hz | >60 dB |
| Output: | |
| Tape 2 - AUX | 500 mV/1 kohm |
| External power amplifier | 1 V/1 kohm |
| Headphones | Max. 8 V/220 ohms |
| Bass control at 40 Hz | ±10 dB |
| Treble control at 12,500 Hz | ±8 dB |
| Tuner | |
| FM range | 2501/2505: 87.5 - 108 MHz |
| 2504: 76 - 90 MHz | |
| FM aerial impedance | 75 ohms |
| Usable sensitivity stereo | 19 dBf-2.5 μV |
| 50 dB quieting sensitivity stereo | 40 dBf-28 μV |
| Signal-to-noise ratio 65 dBf stereo | 70 dB |
| Frequency response | 20-15,000 Hz ±1 dB |
| Distortion at 65 dBf stereo | 0.2% |
| Intermodulation stereo | 0.1% |
| Spurious response | 100 dB |
| IF response ratio | 120 dB |
| Stereo channel separation | 45 dB |
| Subcarrier product rejection | 70 dB |
AM range:
| LW range | 2501 only: 150 - 350 kHz |
| MW range | 520 - 1610 kHz |
| LW sensitivity 20 dB S/N ratio | 2501 only: 80 μV |
| MW sensitivity 20 dB S/N ratio | 60 μV |
Tape recorder
| Compact cassette | C46-C60-C90-C120 |
| Recording system | HX PRO |
| Tape head | Sendust |
| Wow and flutter DIN | <0.15% |
| Frequency range chrome | 30-18,000 Hz ±3 dB |
| Signal-to-noise ratio CCIR/ARM |
| Metal Dolby NR | B: >64 dB, C: >73 dB |
| Chrome Dolby NR | B: >65 dB, C: >74 dB |
| Ferro Dolby NR | B: >63 dB, C: >72 dB |
Compact disc player
| Frequency range | 3-20,000 Hz ±0.3 dB |
| Signal-to-noise ratio | >96 dB/100 dB A-weighted |
| Dynamic range | >96 dB |
| Harmonic distortion | 0.003% at 0 dB |
| 0.03% at -20 dB |
| Channel separation | >94 dB 20-20,000 Hz |
| Channel difference | >0.5 dB |
| Converter system | 2x16 bit, 4 x oversampling 176.4 kHz |
| Low pass filter | Digital + analog |
| Damping above 20,000 Hz | >50 dB |
| Power supply | 2501/2505: 110-130-220-240 voltage switch |
| 2504: 100 volts |
| Power frequency | 50-60 Hz |
| Power consumption | Max. 200 watts |
| Dimensions WxHxD | 76 x 11 x 34 cm |
| Weight | 14 kg |
Subject to change without notice
For the UK market only
IMPORTANT
The wires in the mains lead supplied with this apparatus are coloured in accordance with the following code:
Blue: Neutral
Brown: Live
As the colours of the wires in the mains lead may not correspond with the coloured markings identifying the terminals in your unit, proceed as follows:
The wire which is coloured blue must be connected to the terminal which is marked with the letter N or coloured black.
The wire which is coloured brown must be connected to the terminal which is marked with the letter L or coloured red.
Ensure that your equipment is connected correctly. If you are in any doubt, consult a qualified electrician.
International guarantee
This Bang & Olufsen product carries a guarantee against defects in workmanship and materials. It is a national guarantee, extended by Bang & Olufsen to the country in which the product was bought. The terms of the guarantee apply principally to the country of purchase but will be met by authorized Bang & Olufsen dealers in other countries. The guarantee period
applying to the country of purchase takes priority over guarantee periods applying in other countries, even where differences exist.
In order to obtain service under this guarantee from a dealer in a country other than that in which the product was bought, the guarantee form must be completed in full and presented to the dealer.
BANG & OLUFSEN
DK-7600 STRUER
DENMARK
www.bang-olufsen.com
3502590
09-88