P-Touch ST-5 - Etikettendrucker BROTHER - Kostenlose Bedienungsanleitung
Finden Sie kostenlos die Bedienungsanleitung des Geräts P-Touch ST-5 BROTHER als PDF.


| Produkttyp | Etikettendrucker |
| Modell | P-Touch ST-5 |
| Marke | Brother |
| Abmessungen | 174 × 200 × 50 mm (7 × 8 × 2 Zoll) |
| Gewicht | ca. 820 g (mit Batterien) |
| Stromversorgung | 6 AA-Alkalibatterien |
| Druckkopf | 64 Punkte / 180 dpi |
| Bandbreite | 18 mm (3/4 Zoll) |
| Schriftarten | 7 integrierte Schriftarten |
| Druckstile | Normal, Umriss, Fett, Schatten, Vertikal, Kursiv |
| Zeichenpuffer | 99 Zeichen |
| Bilder | 298 integrierte Bilder und selbst erstellbare Bilder |
| Rahmen | 20 verschiedene Rahmen |
| Sprachfunktion | 8 Redewendungen in 7 Sprachen |
| Geheimcode | Verschlüsselung und Entschlüsselung von Nachrichten |
| Mehrfarbendruck | Mit bis zu 3 Farben (separate Farbkassetten erforderlich) |
| Sicherheit | Scharfer Cutter – nur Erwachsene wechseln; nicht für Kinder unter 6 Jahren |
| Reinigung | Druckkopf und Walzen mit trockenem Wattestäbchen reinigen; bei starker Verschmutzung mit Isopropylalkohol |
| Lebensdauer Cutter | ca. 2000 Schnitte |
| Zubehör | Nicht laminierte TZ-Bänder in verschiedenen Farben und Mustern, Farbkassetten |
Häufig gestellte Fragen - P-Touch ST-5 BROTHER
Benutzerfragen zu P-Touch ST-5 BROTHER
0 Frage zu diesem Gerät. Beantworten Sie die, die Sie kennen, oder stellen Sie Ihre eigene.
Eine neue Frage zu diesem Gerät stellen
Laden Sie die Anleitung für Ihr Etikettendrucker kostenlos im PDF-Format! Finden Sie Ihr Handbuch P-Touch ST-5 - BROTHER und nehmen Sie Ihr elektronisches Gerät wieder in die Hand. Auf dieser Seite sind alle Dokumente veröffentlicht, die für die Verwendung Ihres Geräts notwendig sind. P-Touch ST-5 von der Marke BROTHER.
BEDIENUNGSANLEITUNG P-Touch ST-5 BROTHER
Ages 6 & u
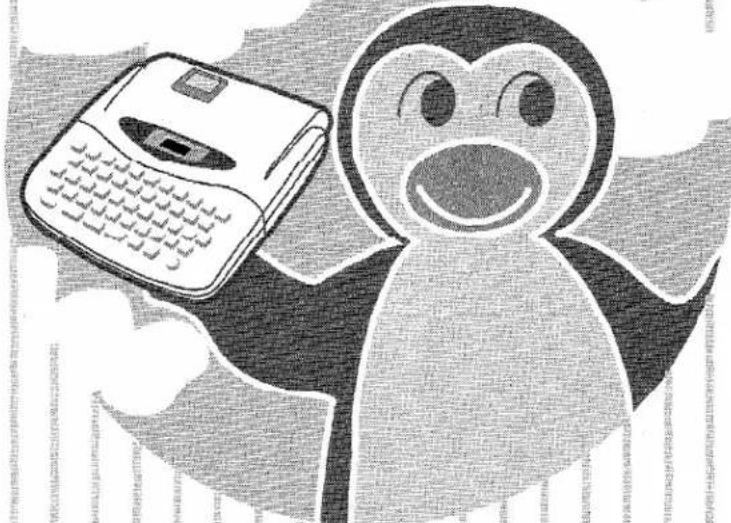
P-TOUCH Stickerkid™ Model ST-5
natural_image
Illustration of a cartoon character holding a flip phone, no text or symbols present•GUIDE BOOK•
● Read this guidebook before you start using your P-TOUCH Stickerkid.
- Keep this guidebook in a safe place, so you won't lose it.
brother®
FCC NOTICE
This equipment has been tested and found to comply with the limits for a Class B digital device, pursuant to Part 15 of the FCC Rules. These limits are designed to provide reasonable protection against harmful interference in a residential installation. This equipment generates, uses, and can radiate radio frequency energy and, if not installed and used in accordance with the instructions, may cause harmful interference to radio communications. However, there is no guarantee that interference will not occur in a particular installation. If this equipment does cause harmful interference to radio or television reception, which can be determined by turning the equipment off and on, the user is encouraged to try to correct the interference by one or more of the following measures:
- Reorient or relocate the receiving antenna
- Increase the separation between the equipment and receiver.
- Connect the equipment into an outlet on a circuit different from that to which the receiver is connected.
- Consult the dealer or an experienced radio/television technician for help.
• This product conforms to the safety requirements of ASTM F963.
• This product is designed for children, ages 6 and up.
CAUTION
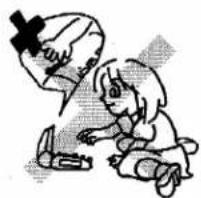
- Watch out for smaller children. Don't let them put the yellow cutter in their mouth.
- This product contains a sharp yellow tape cutter. Only adults should replace the cutter.
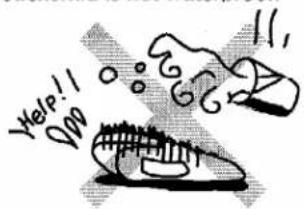
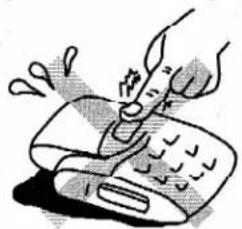
- Don't spill food or drinks on it. The Stickerkid is not waterproof.
- Don't touch the print head with your finger. It can break easily.
natural_image
Illustration of a child playing with a small object near an adult's hand (no text or symbols)- Don't push on the LCD display.
natural_image
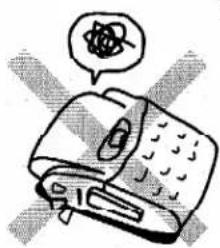
Illustration of a hand using a tool to clean or spray the surface of a cleaning board (no text or symbols)- Don't use the cutter lever while the machine is printing or feeding the label. Wait until the machine stops feeding the label.
natural_image
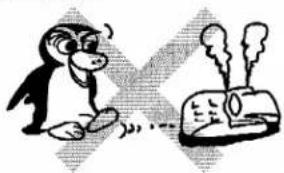
Illustration of a device with a speech bubble containing an abstract symbol (no text or labels present)- Don't print out a label if the cassette is empty or if there is no cassette in the Stickerkid.
natural_image
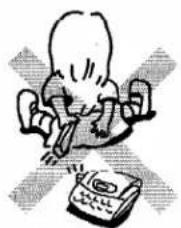
Cartoon illustration of a penguin reacting to smoke from a chimney (no text or symbols)- Don't pull too hard on the cutter lever.
natural_image
Cartoon illustration of a person using a computer (no text or symbols present)- Don't leave the Stickerkid in very hot places for a long time, like in a car, near a heater or in the sunlight.
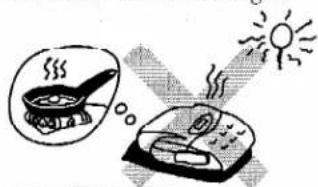
natural_image
Illustration of a cooking process showing a frying pan and a steaming refrigerator with sun in the background (no text or symbols)- Don't pull on the labels that come out of the machine.
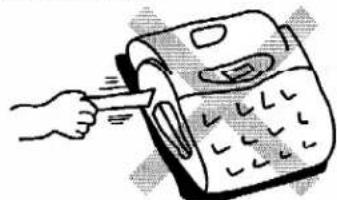
natural_image
Illustration of a hand using a power tool to press or install a machine (no text or symbols visible)CONTENTS
GET READY!
IMPORTANT PARTS OF THE STICKERKID .... 1
THE STICKERKID'S DISPLAY 2
THE STICKERKID'S KEYBOARD 3
GET SET!
HOW TO PUT IN THE BATTERIES 5
HOW TO PUT IN OR CHANGE THE TAPE CASSETTE 6
NOW, LET'S GO!
HOW TO TEACH THE STICKERKID YOUR NAME....7
HOW TO MAKE A LABEL 10
TYPE IN THE LETTERS....10
PRINT THE LABEL 11
STICK ON THE LABEL 12
CLEAR THE DISPLAY 13
HOW TO CHANGE A LABEL 14
TYPE IN ONLY CAPITAL LETTERS 14
CHANGE THE LABEL 15
HOW TO MAKE A LABEL WITH PICTURES 17
CHOOSE THE FIRST PICTURE 17
TYPE IN THE LETTERS....19
CHOOSE THE SECOND PICTURE 19
HOW TO USE SYMBOLS & A DIFFERENT FONT 21
CHOOSE A SYMBOL 21
TYPE IN THE LETTERS 22
CHOOSE THE SAME SYMBOL AGAIN 22
CHANGE THE FONT 22
HOW TO USE A DIFFERENT STYLE 24
TURN OFF CAPS 24
TYPE IN THE LETTERS 24
CHANGE THE FONT 26
CHANGE THE STYLE 27
MOVE THE CURSOR 27
CHOOSE A PICTURE 28
HOW TO CHANGE THE MARGINS & PUT IN A FRAME 30
CHANGE THE STYLE 30
CHANGE THE MARGINS 31
TYPE IN THE LETTERS 32
MOVE THE CURSOR 32
CHOOSE A FRAME 33
HOW TO CHOOSE A PHRASE 35
CHOOSE THE PHRASE 36
CHOOSE THE LANGUAGE 36
PRINT THE LABEL 37
HOW TO MAKE A RIBBON 38
CHOOSE THE PATTERN 38
CHOOSE THE RIBBON LENGTH 39
PRINT THE LABEL 39
HOW TO MAKE A PICTURE 40
TYPE IN THE LETTERS 40
MOVE THE CURSOR 41
CHOOSE A FRAME 41
MOVE THE CURSOR AGAIN 41
MAKE A PICTURE 42
HOW TO MAKE A SECRET MESSAGE 44
TURN OFF CAPS 44
TYPE IN THE MESSAGE 44
ENCODE THE SECRET MESSAGE 45
CHANGE THE FONT 45
DECODE THE SECRET MESSAGE 46
HOW TO MAKE GIANT LABELS 48
TYPE IN THE LETTERS 49
CHANGE THE FONT 49
CHANGE THE STYLE 49
PRINT THE GIANT LABEL 49
PUT TOGETHER THE LABEL 50
HOW TO PRINT WITH TWO OR THREE COLORS .... 52
TURN OFF CAPS 52
TYPE IN THE LETTERS 52
MOVE THE CURSOR 52
CHOOSE A FRAME 53
CHOOSE THE COLORS 53
PRINT THE LABEL 55
HOW TO PLAY THE FAST FINGER GAME 59
TYPE IN YOUR NAME 59
CHOOSE THE LEVEL 60
PLAY THE GAME 61
PLAY THE GAME AGAIN 62
LOOK WHAT THE KEYS CAN DO! 63
FONT KEY 63
STYLE KEY 64
FRAME KEY 67
MARGIN KEY 70
PICTURE KEY 74
MAKE PICTURE KEY 77
LANGUAGE MASTER KEY 85
SECRET CODE KEY 86
MAKE RIBBON KEY 88
MUSIC KEY 91
ERASE/CLEAR ALL KEY 92
FRENCH ACCENTED LETTER KEY 92
SPANISH ACCENTED LETTER KEY 94
SYMBOL KEY 95
PUNCTUATION MARK KEYS 96
SHIFT/CAPS KEY 96
MULTI-COLOR PRINTING KEYS 97
LEFT KEY 97
RIGHT KEY 98
PRINT/GIANT PRINT KEY 98
CODE KEY 100
SPACE/FEED KEY 100
FAST FINGER GAME KEY 100
YES KEY 101
NO KEY 101
ON/OFF KEY 101
RESETTING THE MACHINE 101
HOW TO CHANGE THE CUTTER 103
CLEANING THE PRINT HEAD AND ROLLERS 105
TROUBLESHOOTING 107
SPECIFICATIONS....108
INDEX 109
SUPPLIES 112
¡PREPARATE!
PARTES IMPORTANTES DEL STICKERKID 120
EL VISUALIZADOR DEL STICKERKID 121
EL TECLADO DEL STICKERKID 122
natural_image
Cartoon penguin character peeking over a rectangular block with partial text (no readable symbols or numbers)GET READY!
IMPORTANT PARTS OF THE STICKERKID
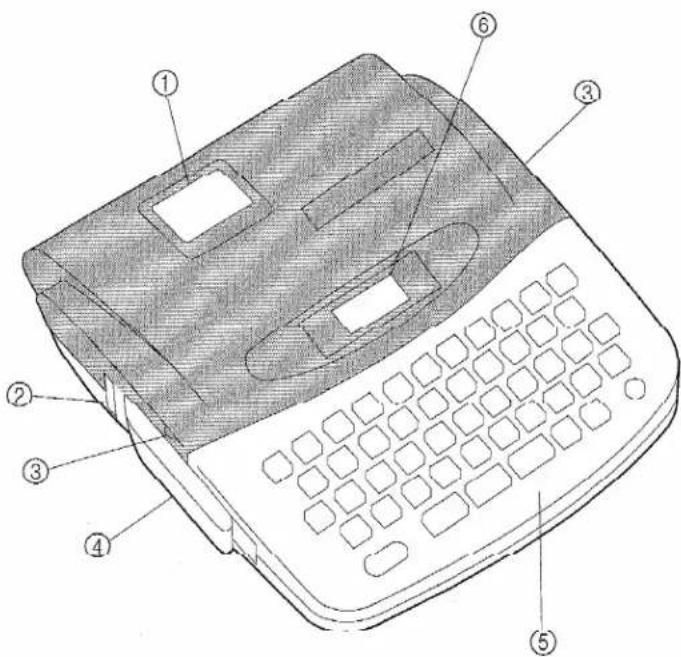
① Cassette window ... Look through it to see how much tape is left and what kind of tape it is.
② Exit slot ...... This is where your label comes out.
③ Cassette cover tabs .. Use these to lift up the cassette cover to change the cassette.
④ Cutter lever .... Use it to cut the label.
⑤ Keyboard.... Push the keys to type in your label and do lots of other things.
⑥ Display.... Look at it to see what you are typing in.
natural_image
Cartoon illustration of a penguin holding a rectangular object (no text or symbols)THE STICKERKID'S DISPLAY
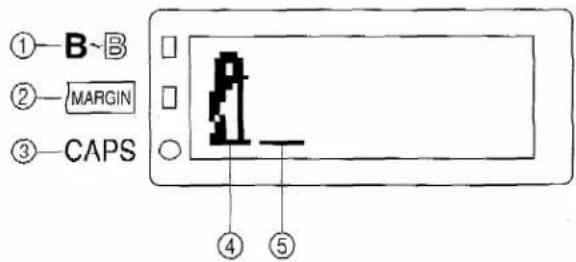
① Style indicator. ... This little square comes on when you change the way the letters in your label are printed. (The different ways of printing letters are called "styles".)
② Margin indicator ... This little square comes on when you change the size of the empty space on both sides of your label. (The empty spaces on the sides of the label are called "margins".)
③ Capital letter indicator ... This little circle comes on when all the letters that you type in are capital letters.
④ Penguin ..... You can see the penguin at the beginning of the letters.
⑤ Cursor .... This little flashing line in the letters shows you where you are.
natural_image
Cartoon illustration of a penguin with closed eyes and wide arms (no text or symbols)THESTICKERKID'S KEYBOARD
flowchart
graph TD
    A["1"] --> B["A-A"]
    C["2"] --> D["B-B"]
    E["3"] --> F["A"]
    G["4"] --> H["MARGIN"]
    I["5"] --> J["△"]
    K["6"] --> L["&"]
    M["7"] --> N["X"]
    O["8"] --> P["→"]
    Q["9"] --> R["×"]
    S["10"] --> T["√"]
    U["11"] --> V["flight"]

    W["23"] --> X["French"]
    Y["27"] --> Z["Symbol"]
    AA["26"] --> AB["A"]
    AC["25"] --> AD["S"]
    AE["24"] --> AF["SHIFT CAPS"]
    AG["24"] --> AH["PRINT"]
    AI["24"] --> AJ["GIANT PRINT"]

    subgraph Color
        AK["French"]
        AL["Spanish"]
        AM["Symbol"]
        AN["1ST COLOR 2ND COLOR 3RD COLOR"]
        AO["1ST COLOR 2ND COLOR 3RD COLOR"]
        AP["1ST COLOR 2ND COLOR 3RD COLOR"]
        AQ["1ST COLOR 2ND COLOR 3RD COLOR"]
        AR["1ST COLOR 2ND COLOR 3RD COLOR"]
        AS["1ST COLOR 2ND COLOR 3RD COLOR"]
        AT["1ST COLOR 2ND COLOR 3RD COLOR"]
        AU["1ST COLOR 2ND COLOR 3RD COLOR"]
        AV["1ST COLOR 2ND COLOR 3RD COLOR"]
        AW["1ST COLOR 2ND COLOR 3RD COLOR"]
    end

    subgraph Style
        AX["French"]
        AY["W"]
        AZ["E"]
        BA["R"]
        BB["T"]
        BC["Y"]
        BD["U"]
        BE["I"]
        BF["O"]
        BG["P"]
    end

    subgraph Color
        BH["A"]
        BI["S"]
        BJ["D"]
        BK["F"]
        BL["G"]
        BM["H"]
        BN["J"]
        BO["K"]
        BP["L"]
        BQ["?"]
    end

    subgraph Shape
        BZ["Z"]
        CA["X"]
        CB["C"]
        CD["V"]
        DB["B"]
        DC["N"]
        DD["M"]
        EE["T"]
        FF["C"]
        DG["T"]
    end

    subgraph Scale
        DH["CODE"]
        DI["SPACE FEED"]
        DJ["FAD FINGER COLOR PRINT"]
        DK["VCC NO"]
        DL["ON OFF"]
    end

    style Color fill:#f9f,stroke:#333
    style Shape fill:#ccf,stroke:#333
    style Scale fill:#cfc,stroke:#333
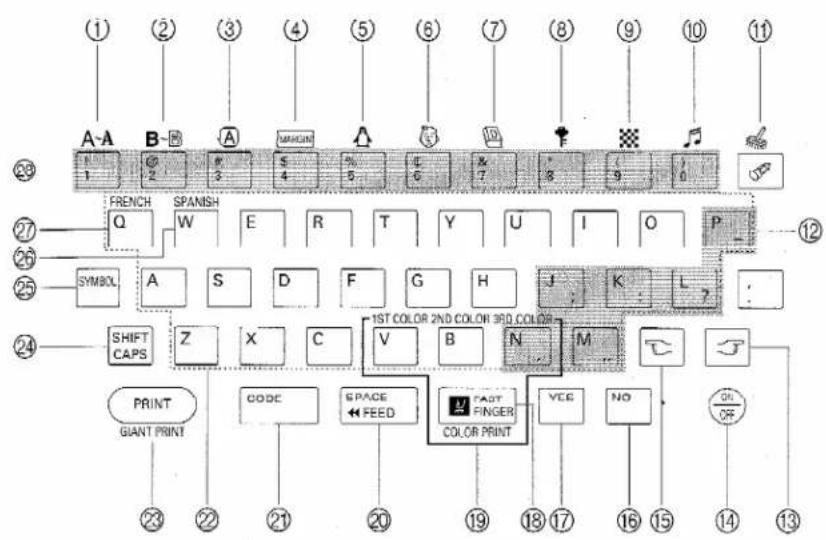
① Font key...... For changing the kind of letters used in your label Go to pages 21 and 63.
② Style key ...... For changing the way the letters are printed on your label Go to pages 24 and 64.
③ Frame key ...... For putting a frame around things in your label Go to pages 30 and 67.
④ Margin key ...... For making the empty spaces on the sides bigger or smaller Go to pages 30 and 70.
⑤ Picture key ...... For putting pictures in your label Go to pages 17 and 74.
⑥ Make picture key .. For making a picture by putting together a face and a head or a head and a body Go to pages 40 and 77.
⑦ Language master key ... For choosing a phrase in another language Go to pages 35 and 85.
⑧ Secret code key ..... For reading or writing a label In a secret code Go to pages 44 and 86.
⑨ Make ribbon key ... For making a label with a pattern on it to decorate things Go to pages 38 and 88.
⑩ Music key ...... For turning the music on or off Go to page 91.
⑪ Erase/Clear all key ..... For taking out a letter or picture from the text or getting rid of your label Go to pages 10, 14 and 92.
⑫ Punctuation mark keys ... For typing in the pink marks that are on some of the keys Go to page 96.
⑬ Right key ...... For moving the cursor to the right or move a picture down Go to page 98.
⑭ On/Off key ...... For turning the Stickerkid on or off Go to page 101.
⑮ Left key ...... For moving the cursor to the left or moving a picture up Go to page 97.
⑯ No key ...... For answering "no" when the Stickerkid asks you something Go to page 101.
⑰ Yes key ...... For answering "yes" when the Stickerkid asks you something Go to page 101.
⑱ Fast finger game key .. For playing the Stickerkid's typing game Go to pages 59 and 100.
⑲ Multi-color printing keys .. For printing a label with two or three ink colors Go to pages 52 and 97.
⑳ Space/Feed key ..... For typing in an empty space or making more of the label come out = Go to pages 17, 73 and 100.
②1 Code key ...... For doing the jobs written in green Go to page 100.
② Letter keys ...... For typing in letters Go to page 10.
②3 Print/Giant print key ... For printing your label or making your letters bigger and putting them on two, three or four labels Go to pages 10, 48 and 98.
②4 Shift/CAPS key ...... For typing capital letters, the symbols that are on the top of the number keys and only capital letters 📄 Go to pages 10, 14 and 96.
②5 Symbol key ...... For choosing a symbol or typing in the pink marks that are on some of the keys 📄 Go to pages 21 and 95.
⑳ Spanish accented letter key For typing in letters with Spanish accents Go to page 94.
⑳ French accented letter key .. For typing in letters with French accents Go to page 92.
②8 Number keys ...... For typing in numbers or the symbols that are on the top of the number keys
natural_image
Cartoon penguin character with a smiling face and raised arm, standing on a wooden surface (no text or symbols)GET SET!
HOW TO PUT IN THE BATTERIES
First, you must put in the batteries before you can use the Stickerkid. If you don't understand something, ask an adult to help you.
Turn over the Stickerkid.
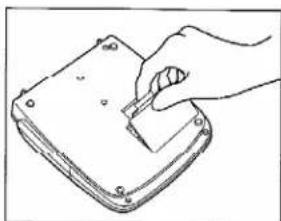
Pull the tab on the battery cover in the direction of the arrow to open it.
natural_image
Line drawing of a hand using a tool to press or install a component on a flat surface (no text or symbols)
Look at the drawing on the back of the Stickerkid. It shows you how to put in the batteries.

- If you don't put the batteries in the right way, the Stickerkid will not work.
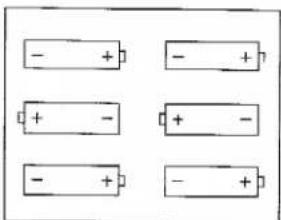
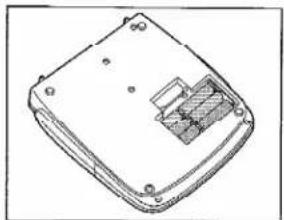
Put in six (6) new AA-size alkaline batteries.

- The batteries are not included. - If there are empty batteries in the Stickerkid, take them all out before you put in new ones.
natural_image
Technical line drawing of a device casing with internal components (no text or symbols)
Close the battery cover.
natural_image
Cartoon penguin character with closed eyes and wide arms (no text or symbols)HOW TO PUT IN OR CHANGETHE TAPECASSETTE
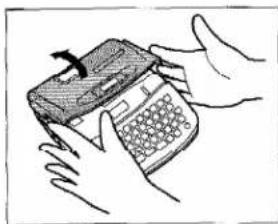
Before you can make a label, you must put in a tape cassette. If you don't understand something, ask an adult to help you.

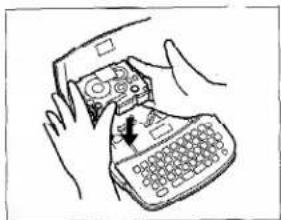
Pull up on the two cassette cover tabs to open the cassette cover.
natural_image
Illustration of hands holding a vintage mobile phone with a keypad (no text or symbols visible)
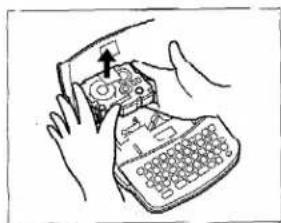
If the tape cassette is empty or if you want to use another one, use both hands to pull out the old cassette.
natural_image
Illustration of hands using a handheld device to press a keyboard (no text or symbols visible)
Put in the new cassette.

- Don't touch the print head. You may damage it.
natural_image
Line drawing of hands using a handheld device to press a keyboard (no text or symbols visible)
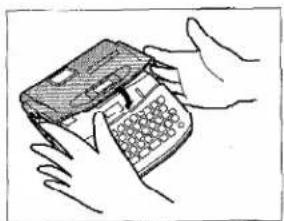
Close the cassette cover.
natural_image
Illustration of hands holding a mobile phone with a keyboard (no text or symbols visible)
NOW, LET'S GO!
HOW TO TEACH THE STICKERKID YOUR NAME
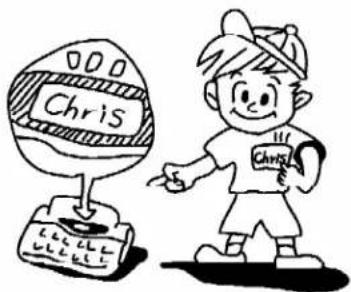
If you teach the Stickerkid your name, the penguins will say "Hello!" to you when you turn the Stickerkid on and "GOOD BYE." to you when you turn it off.

Check if the Stickerkid is turned off. If the Stickerkid is already on, push ON to turn it off again.

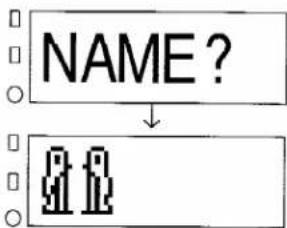
Now, hold down CODE, then push N. + at the same time. The Stickerkid plays a short tune and the message "NAME?" comes on for a short time. After that, two white penguins appear on the display.
flowchart
graph TD
    A["NAME?"] --> B["Sequence Icon"]

Type in your name.

• To type in a capital letter, hold down and push a letter key.
- If you make a mistake, push 📄 to erase the letter. Then, finish typing in your name.
- If you try to type in more than 15 letters, the Stickerkid will beep. Why don't you try typing in your nickname instead?

Here is an example. If your name is Chris:
- Hold down SHIFT and push C. Then, let go of SHIFT and C.
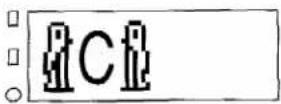
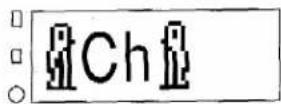
- Push H.
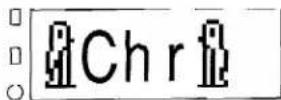
- Push [R].
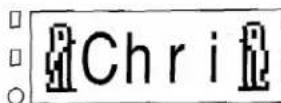
- Push □.
- Push ^s .
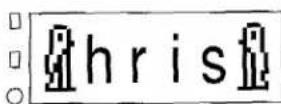

Push YES. The message "Chris Hello!" comes on with the penguins and the Stickerkid plays a tune.

- If you decide that you don't want your name to appear, push NO.
- If you don't push any keys for 5 minutes, the Stickerkid will go off.
The black penguin shows that you are at the beginning of the letters.

- If you want to erase your name, go back and do steps 1 and 2. Push 📄 to erase your name, then push YES.
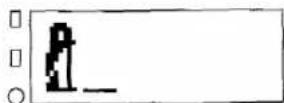
Now, you can start making labels. If you keep reading, you will find out how easy it is to make all kinds of neat labels.
REVIEW
- To type in your name, hold down CODE and push N + at the same time.
• To type in a capital letter, hold down SHIFT CAPS and push the letter key.
• To erase a letter, push
• To answer "yes", push [eS].
• To answer "no", push NO
©
STICK ON THE LABEL
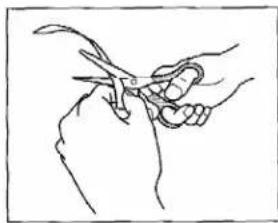
After you have made a label, you can put it on almost anything you want.
Leave the label as it is or cut it into any shape you want with scissors.
natural_image
Line drawing of hands using scissors to cut a piece of paper (no text or symbols)
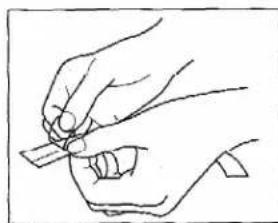
Turn the label over.
Bend the label along the line on the back. The two pieces of backing plastic should come off in the middle.
natural_image
Line drawing of a hand holding an object with a pointed tip (no text or symbols)
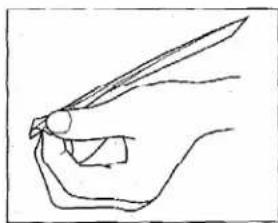
- If there is no line in the backing paper, use your fingernail to take off a corner of the paper. Then, peel off the backing paper.
Peel off the two pieces of backing plastic.
natural_image
Line drawing of a hand holding a small object, possibly a tool or device, with no visible text or symbols.
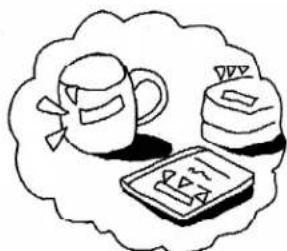
Stick your label on whatever you want.

- Don't put labels on your body or in your mouth. - Don't put labels where you are not supposed to.
natural_image
Simple line drawing of a coffee cup, a kettle, and a notebook inside a cloud-shaped frame (no text or symbols)Now, why don't you try making a name tag with your name on it? Keep reading to find out how to start a new label.
natural_image
Cartoon monkey character with closed eyes and wide ears, standing on a textured surface (no text or symbols)HOW TO CHANGE A LABEL
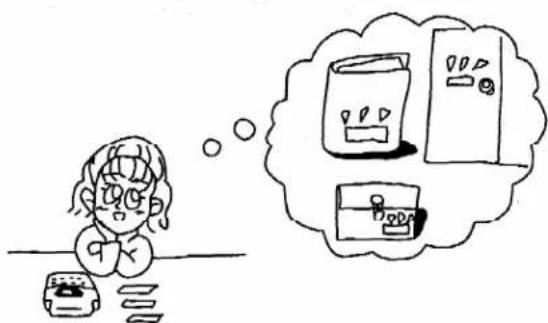
Let's make this label:
PRIVATE
In this label, let's use all capital letters and fix a mistake in the label. You can put this label on anything that you don't want other people to open, like your diary or a folder with special secret papers in it.
TYPE IN ONLY CAPITAL LETTERS
Hold down CODE and push SHIFT CAPS. Then, let go of CODE. The little circle beside CAPS comes on. This is the CAPS indicator.
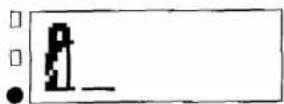
Push P.
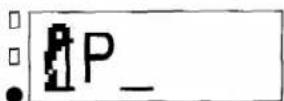
Push R.
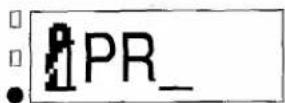
Push □.
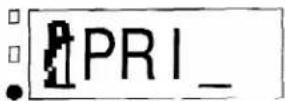
5 Push 2ND COLOR . You are right. We should be typing "V". But we are making this mistake on purpose. We will learn how to correct it later.
PRIB_
6 Push A.
PRIBA_
7 Push T.
RIBAT_
8 Push E.
IBATE_
Now, let's correct the label.
CHANGE THE LABEL
We made a mistake when we typed in "PRIBATE". The label should read "PRIVATE". So let's move the little flashing line (_) under the "A" to take out the "B". The little flashing line (_) is called a "cursor". The cursor should always be on the right of the letter that you want to erase. After we erase "B", let's put in "V" to correct the label. To put in a letter is called "inserting" a letter.
9 Push three times to move the cursor under the "A".
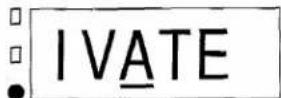
IBATE
10 Push to erase the "B".
IATE
Push ☐ to insert a "V".
Now, you can print out the label to see what it really looks like. Then, clear the display so you can make other labels.
Push PRINT to print out the label.
Pull out the cutter lever to cut the tape.
Push CODE + , then push YES to clear the display.
REVIEW
- To type in all capital letters, push CODE + CAPS. This will make the CAPS indicator come on.
- The little flashing line (_) is the "cursor".
• To move the cursor to the right, push.
• To move the cursor to the left, push
• To erase a letter, push
• To "insert" a letter means to put it in the label. - To insert a letter, move the cursor to where you want to put it in. Then, push the key for the letter that you want to insert.
natural_image
Simple line drawing of a person thinking about books and refrigerators (no text or symbols)
natural_image
Cartoon monkey character holding a blank board (no text or symbols)HOW TO MAKE A LABEL WITH PICTURES
Let's make this label:

SUMMER CLOTHES

This time, let's try making a label with all capital letters and with pictures in it. It's a label for a drawer of your dresser. It will remind you which drawer has your shorts, swimming suits and other summer clothes in it.
CHOOSE THE FIRST PICTURE
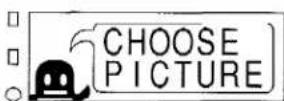
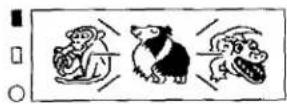
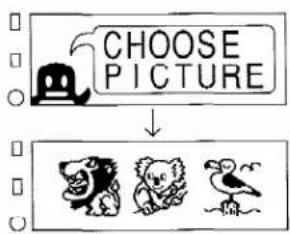
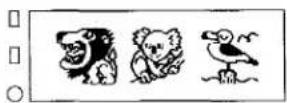
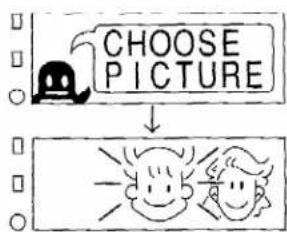
Hold down CODE and push △. The message "CHOOSE PICTURE" comes on for a short time. Then, three pictures from a group of pictures flash on the display. This means you can choose a picture from that group.
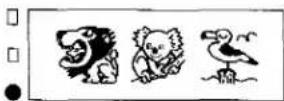
Push 📋 or 📋 until the plant group flashes. The picture we want to use is in this group.
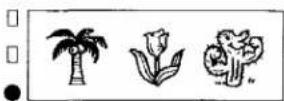
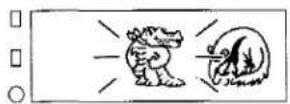
Push YES. Pictures from that group appear on the display. One of them flashes. This means you can choose that picture.
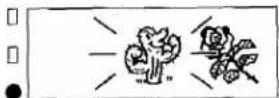

Push 📋 or 📋 until the picture of the palm tree flashes. This is the one we want to use.
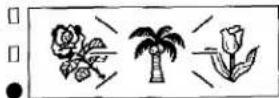

Push YES. The label comes on the display again. P appears on the display instead of the picture. But that is only on the display. The picture will look normal when it is printed on the label.
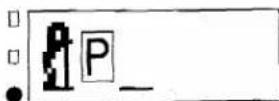

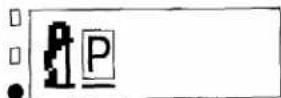
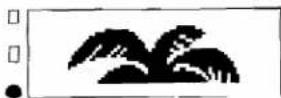
- Anytime you want to see what a picture looks like, put the cursor under P and push YES. Push to move down and push to move up, so you can see the rest of the picture. When you are finished looking at the picture, push NO or YES again to go back to the label.
Now, let's make the rest of the label.
natural_image
Cartoon illustration of a man standing on canvas with three easels and two bird paintings, accompanied by a shadowy figure (no text or symbols)TYPE IN THE LETTERS
6 Type in "SUMMER" in all capital letters.
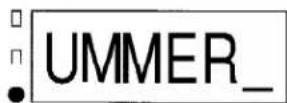
7 Push SPACE FEED to put in a space.
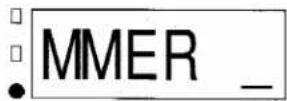
8 Type in "CLOTHES" in all capital letters.
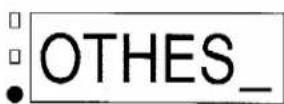
If you don't remember how to type in letters, go back to page 14.
CHOOSE THE SECOND PICTURE
- Hold down CODE and push %. The message "CHOOSE PICTURE" comes on for a short time. Then, three pictures from the last group we used flash on the display.
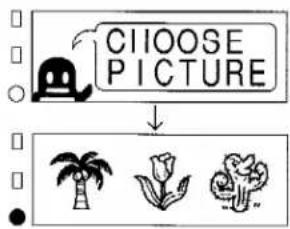
flowchart
graph TD
    A["CIOOSE PICTURE"] --> B[" "]
    B --> C[" "]
    C --> D[" "]
10 Push one time. The picture we want to use is in this sports group.
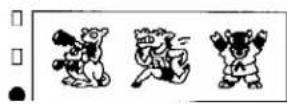

- When a picture group flashes, you can choose a picture from that group.
11 Push YES. Pictures from that group appear on the display. One of them flashes.
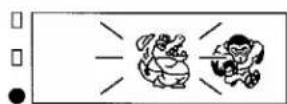

• This means you can choose that picture.
12
Push 📋 or 📋 until the picture of the swimming dog flashes. This is the one we want to use.
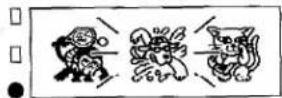
13
Push YES. The label comes on the display again. P appears on the display instead of the picture. But that is only on the display. The picture will look normal when it is printed on the label.
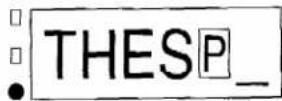
Now, you can print out the label to see what it really looks like. Then, clear the display so you can make other labels.
14
Push PRINT to print out the label.
15
Pull out the cutter lever to cut the tape.
16
Push CODE + 📄, then push YES to clear the display.
natural_image
Simple line drawing of a cartoon insect climbing a ladder, with no text or symbols present.REVIEW
• To choose a picture, push CODE + △. Push or until you find the group you want, then push YES. Push or until you find the picture you want. Then, push YES to choose it. P appears on the display.
- To see what a picture looks like, put the cursor under P and push ☐. Then, push ☐ to move down and ☐ to move up. Push ☐ or ☐ to go back to the label.
• To type in an empty space, push
natural_image
Cartoon monkey holding a blank sign (no text or symbols)HOW TO USE SYMBOLS & ADIFFERENT FONT
Let's make this label:
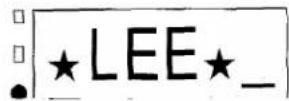
★LEE★
Now, we can try making a label with symbols and a different kind of letters. The different kinds of letters are called "fonts".
CHOOSE A SYMBOL

Hold down CODE and push SYMBOL. The message "CHOOSE SYMBOL" comes on for a short time. Then, the symbols appear on the display. The cursor is under the symbol that you can choose.
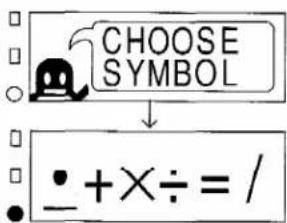

Push 📋 or 📋 until the cursor is under ★.
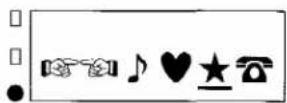

Push YES. The black penguin appears with the symbol that you chose.
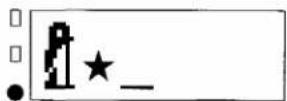
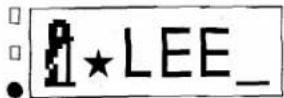
TYPE IN THE LETTERS
Type in "LEE".
If you don't remember how to type in letters, go back to page 14.
CHOOSE THE SAME SYMBOL AGAIN
Hold down CODE and push SYMBOL. The message "CHOOSE SYMBOL" comes on for a short time. Then, the cursor appears under the last symbol that we chose. This is the one that we want.
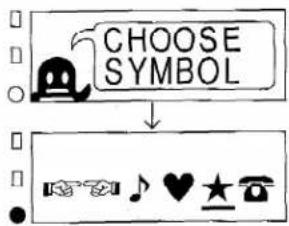
flowchart
graph TD
    A["Robot Icon"] --> B["CHOOSE SYMBOL"]
    C["Music Note"] --> D["Heart Symbol"]
    E["Telephone Icon"] --> F["Star Icon"]
Push YES. The label appears with the symbol in it.
Now, let's learn how to change the font.
CHANGE THE FONT
Hold down ☐ and push ☐. The message "CHOOSE FONT" comes on for a short time. Then, an example of the font that we are now using appears on the display.
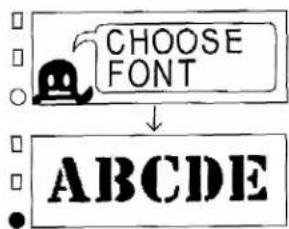
Push 📄 or 📋 until ABC appears on the display. This is the font we want to use.
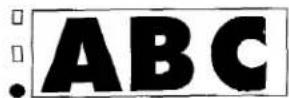
Push YES. The label appears on the display again.

- The font doesn't change when you clear the display. You have to change it when you make your next label if you want to use another font.
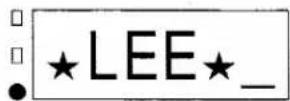
Now, you can print out the label to see what it really looks like. Then, clear the display so you can make other labels.
Push PRINT to print out the label.

Pull out the cutter lever to cut the tape.

Push CODE + , then push YES to clear the display.
REVIEW
- To show the symbols, push +. Push or until you find the one you want. Then, push to choose it.
- "Fonts" are the different kinds of letters.
- To show the fonts, push code + A-A. Push or until you find the font you want. Then, push to choose it.
natural_image
Cartoon penguin character with closed eyes and wide arms (no text or symbols)HOW TO USE A DIFFERENT STYLE
Let's make this label:


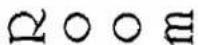

Now, let's try making a label for a school notebook. We want to use small letters, a picture and a different way of printing the letters. The different ways of printing letters are called "styles".
TURN OFF CAPS
Since we are also going to type in small letters, we can turn off the CAPS indicator.

Hold down CODE and push SHIFT CAPS. The CAPS indicator goes off.
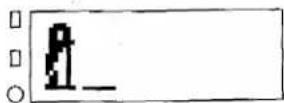
TYPE IN THE LETTERS
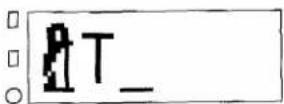
Hold down SHIFT CAPS and push T.
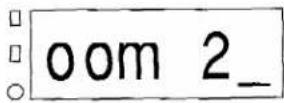
Type in "ara".
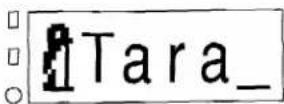

Push SPACE FEED to put in a space.
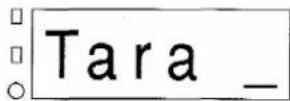

Type in "Room".
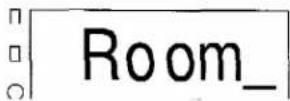

Push SPACE FEED
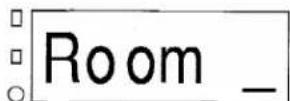

Type in "2".
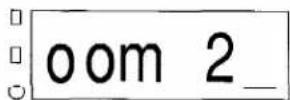
If you don't remember how to type in letters, go back to page 14.
CHANGE THE FONT

- The font does not change after you print a label or clear the display. If you want to use a different font in your next label, you will have to change it again.
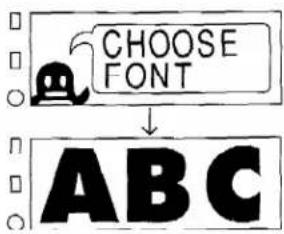
Hold down CODE and push . The message "CHOOSE FONT" comes on for a short time. Then, an example of the font that we are now using appears on the display.

Push 📋 or 📋 until ABCDEF appears on the display. This is the font we want to use.
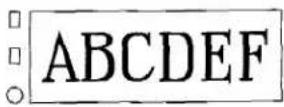

Push YES. The label appears on the display again.
Now, let's learn how to change the style of the letters.
CHANGE THE STYLE
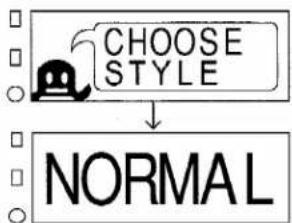
Hold down CODE and push B-B. The message "CHOOSE STYLE" comes on for a short time. Then, the name of the style that we are now using appears on the display.
flowchart
graph TD
    A["CHOOSE STYLE"] --> B["NORMAL"]
Push or until >xxxx-0<J appears on the display. This is the style we want to use.
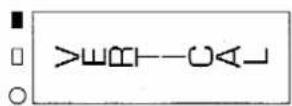
Push YES. The label appears on the display again and the little square beside B\~B comes on. This is the style indicator.
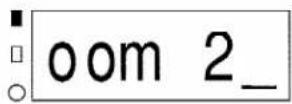

- The style doesn't change when you clear the display. You have to change it next time you make a label if you want to use another style.
MOVE THE CURSOR
We want to put a picture in the middle of the label. So we have to move the cursor to the middle of the label.
Push six times.
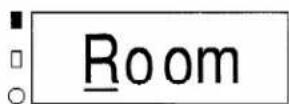
CHOOSE A PICTURE
15 Hold down CODE and push %. The message "CHOOSE PICTURE" comes on for a short time. Then, three pictures from the last group we used flash on the display.
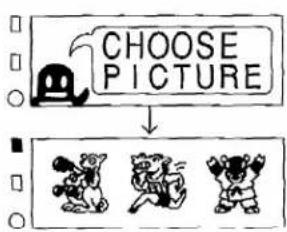
flowchart
graph TD
    A["CHOOSE PICTURE"] --> B["Cartoon Dog"]
    A --> C["Cartoon Dog"]
    A --> D["Cartoon Dog"]
16 Push 📋 or 📋 until the animal group flashes. The picture we want to use is in this group.
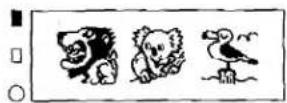
17 Push YES. Pictures from that group appear on the display. One of them flashes. This means you can choose that picture.
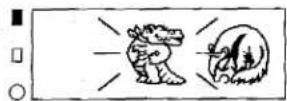
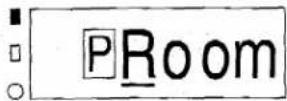
18 Push or until the picture of the collie flashes. This is the one we want to use.
19 Push YES. The label comes on the display again. P appears on the display instead of the picture. But that is only on the display. The picture will look normal when it is printed on the label.
20 Push SPACE FEED.
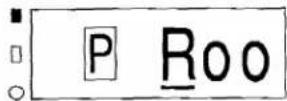
If you don't remember how to choose a picture, go back to page 17.
Now, you can print out the label to see what it really looks like. Then, clear the display so you can make other labels.
21 Push PRINT to print out the label.
22 Pull out the cutter lever to cut the tape.
23 Push CODE + , then push YES to clear the display.
- Don't put labels on books that are not yours.
natural_image
Illustration of a hand reaching toward a water surface with splashes, next to a hand holding a pen and a notebook (no text or symbols)REVIEW
- To type in small letters after typing in all capital letters, push CODE + SHIFT CAPS. This will make the CAPS indicator go off.
- "Styles" are the different ways letters are printed.
- To show the styles, push CODE + . Push or until you find the style you want. Then, push to choose it. This will make the styles indicator beside B\~B come on.
natural_image
Cartoon illustration of a penguin holding a rectangular object (no text or symbols)HOW TO CHANGE THE MARGINS & PUT IN A FRAME
Let's make this label:
Hi Kerry!
You can change the size of the spaces on the left and right sides of a label. These empty spaces are called "margins".
Let's also put a frame around this label to make it look nicer. The "frame" is the pictures and lines around the letters.
CHANGE THE STYLE

- The style does not change after you print a label or clear the display. If you want to use a different style in your next label, you will have to change it again.

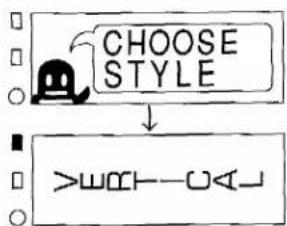
Hold down CODE and push .The message "CHOOSE STYLE" comes on for a short time. Then, the name of the style that you are now using appears on the display.
flowchart
graph TD
    A["Robot Icon"] --> B["CHOOSE STYLE"]
    B --> C["YOU-YOU"]

Push 📋 or 📋 until ITALIC appears on the display. This is the style we want to use.
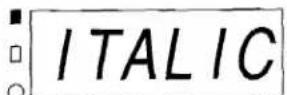

Push YES. The penguin appears on the display again and the style indicator beside B\~B stays on.
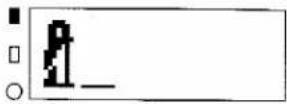
Now, let's learn how to change the margins.
CHANGE THE MARGINS

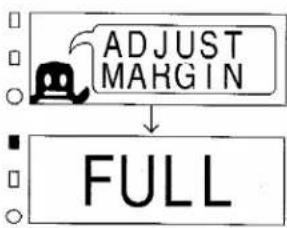
Hold down CODE and push 5. The message "ADJUST MARGIN" comes on for a short time. Then, the margin size appears on the display.

- If the Stickerkid is turned off and then turned back on again, the margin size will change back to FULL. If you want a different margin size, you will have to change it again.

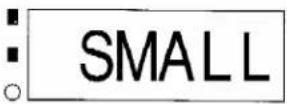
Push ☐ or ☒ until SMALL appears on the display. This is the margin size we want to use.

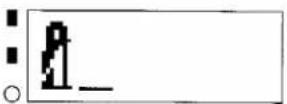
Push YES. The black penguin appears on the display and the little square beside MARGIN comes on. This is the margin indicator.

- If you print many labels with no margins, you can make one label with different fonts and styles. Go to page 70.
TYPE IN THE LETTERS

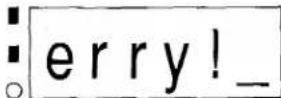
Type in "Hi Kerry".

- Push SPACE ↑HEEO to type in a space.
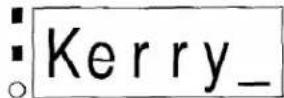
If you don't remember how to type in letters, go back to page 10.
Hold down SHIFT and push to type in the exclamation mark (!).
MOVE THE CURSOR
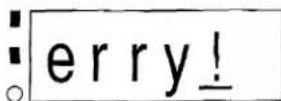
We want to put a frame around the label. The cursor must be under one of the letters that you want to frame. So we have to move the cursor back under one of the letters in the label.

Push one time. You can push more often, but you don't have to. As long as the cursor is under one of the letters that you want to frame, it is okay.
We can, now, put a frame around the letters.
CHOOSE A FRAME
You can choose from twenty different frames. And you can choose the frame before or after you type in the letters.
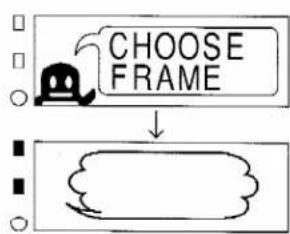
10 Hold down CODE and push 3. The message "CHOOSE FRAME" comes on for a short time. Then, a frame appears on the display.
flowchart
graph TD
    A["Robot"] --> B["CHOOSE FRAME"]
    B --> C["Arrow"]
11 Push 📋 or 📋 until 📋 appears on the display. This is the frame we want to use.
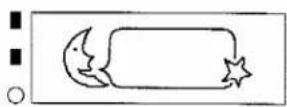
12 Push YES. The message "FRAMED" comes on for a short time. Then, the label appears with part of the frame around it. The frame will go around the whole label when it is printed.
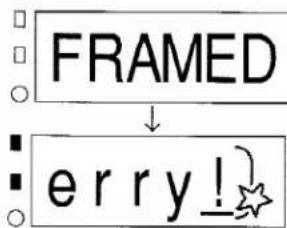
Now, you can print out the label to see what it really looks like. Then, clear the display.
13 Push PRINT to print out the label.
14 Pull out the cutter lever to cut the tape.
Because we made the margins smaller, the empty spaces on the sides of the label are not the same size anymore. But two dots are printed on the label. If you cut the label on these two dots, the margins will be the same size.
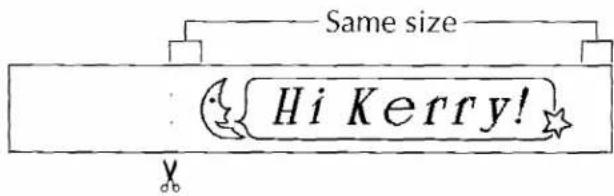
15 Push CODE + , then push YES to clear the display.
natural_image
Illustration of a closed envelope and a torn document with scribbles (no text or symbols)REVIEW
- "Margins" are the empty spaces on the sides of the label.
- To change the size of the margins, push CODE + . Push or until you find the margin you want, then push YLS. This will make the margin indicator beside MARGIN come on.
• To type in an empty space, push SPAC - "Frames" are pictures and lines around the letters.
• To put a frame around the letters, push □+ □. Push □ or □ until you find the frame you want. Then, push □ to choose it.
natural_image
Cartoon penguin character with closed eyes and wide arms (no text or symbols)HOW TO CHOOSE A PHRASE
Let's make this label:
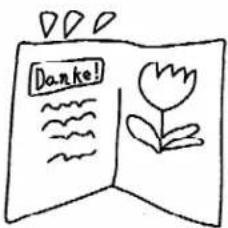
Danke!
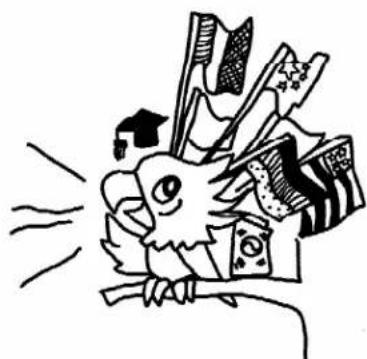
The Stickerkid's Language Master knows eight phrases in seven languages. The phrases are: "Good morning!", "Good bye.", "Thank you!", "I love you!", "Congratulations!", "How are you?", "Merry Christmas!" and "Happy Birthday!". Each phrase can be printed in seven languages. The languages are: French (FRA), German (GER), Spanish (ESP), Italian (ITA), Chinese (CHN), Korean (KOR) and English (USA).

- On these labels, the letter style will always be NORMAL and the margins will always be FULL.
Let's try making a label in another language.
natural_image
Cartoon illustration of a bird perched on a branch with floating objects including flags, books, and stars (no text or symbols)CHOOSE THE PHRASE
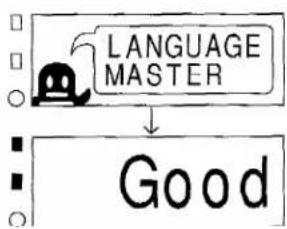
Hold down CODE and push & 7. The message "LANGUAGE MASTER" comes on for a short time. Then, the first phrase moves across the display.
flowchart
graph TD
    A["Robot Icon"] --> B["LANGUAGE MASTER"]
    B --> C["Good"]
Push 📋 or 📋 until the phrase "Thank you!" moves across the display.
CHOOSE THE LANGUAGE
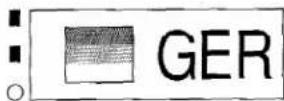
Push YES. The first language comes on the display with a picture of that country's flag.
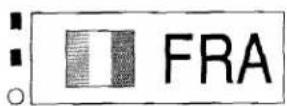

- If you look at the country's name and flag, you can tell which language is chosen.
Push 📋 or 📋 until "GFR" and 📋 appears on the display. 📋 is the German flag and "GER" stands for Germany. The language is German. This is the language we want to use.
PRINT THE LABEL
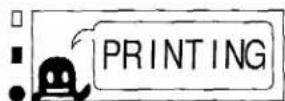
5 Push YES. The message "PRINTING" comes on and the Stickerkid prints the label.

• "Danke" means "Thank You" in German.
6 Pull out the cutter lever to cut the tape.
REVIEW
- To print a phrase in another language, push CODE + . Push or until you find the phrase you want, then push YES. Push or until you find the language you want. Then, push YES to print it out.
natural_image
Cartoon monkey character with closed eyes and wide smile, wearing a striped shirt (no text or symbols)HOW TO MAKE A RIBBON
Let's make this label:

natural_image
Repeating pattern of diamond shapes with no text or symbolsNow, let's try making a label with a pattern on it. You can use these labels to decorate cards, presents or almost anything else. There are eleven different patterns. One of them chooses a head and different faces and puts them together to make a ribbon. Your ribbon will be different each time you choose the mystery pattern.

- The ribbon labels will always have FULL margins.
CHOOSE THE PATTERN
Hold down CODE and push . The message "MAKE RIBBON" comes on for a short time. Then, the patterns appear on the display. One of them flashes. This means you can choose that pattern.
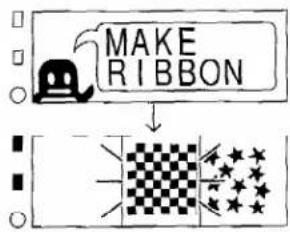

Push 📄 or 📋 until the musical note pattern flashes. This is the pattern we want to use.
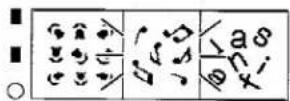

Push YES.
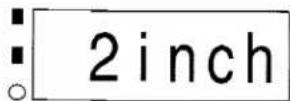
Now, you can choose how long you want the ribbon to be.
CHOOSE THE RIBBON LENGTH

Push 📋 until "4inch" appears on the display.
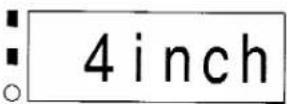
- You can also see how long the ribbon will be in centimeters. Push SPACE FEED to see the length in centimeters. Push SPACF FEED again to change the length back to inches.
PRINT THE LABEL

Push YES. The message "PRINTING" comes on and the Stickerkid prints the label.
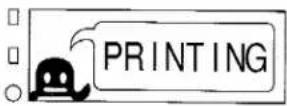

Pull out the cutter lever to cut the tape.
REVIEW
- To print a ribbon, push CODE + . Push or until you find the pattern you want, then push YES. Push or until you find the length you want. Then, push to print it out.
natural_image
Cartoon penguin character with closed eyes and wide arms (no text or symbols)HOW TO MAKE A PICTURE
Let's make this label:

I LOVE ICE CREAM!
Now, let's make our own picture and put it in a label.
TYPE IN THE LETTERS
Type in "I LOVE ICE CREAM!"

• To type in all capital letters, hold down CODE and push SHIFT CAPS. The CAPS indicator comes on.
- Push SPACE to type in a space.
- To type in an exclamation mark (!), hold down SHIFT CAPS and push A-A. If you don't remember how to type in letters, go back to page 14.
- If the Stickerkid is turned off and then turned back on again, the margin size will change back to FULL. If you want a different margin size, you will have to change it again. ☐ If you don't remember how to change the margins, go back to page 30.
REAM!
MOVE THE CURSOR
Push one time.

- The cursor must be under one of the letters you want to put in the frame.
REAM!
CHOOSE A FRAME

Hold down CODE and push A. The message "CHOOSE FRAME" comes on for a short time. Then, the frame we used last time appears on the display.
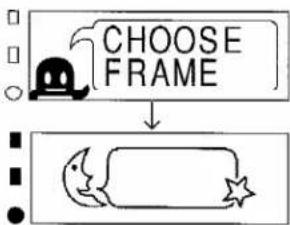
flowchart
graph TD
    A["CHOOSE FRAME"] --> B((Sunset))
    B --> C["Star"]

Push 📋 or 📋 until 📋 appears on the display. This is the frame we want to use.
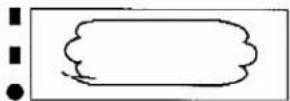

Push YFS. The message "FRAMED" comes on for a short time. Then, the label appears with part of the frame around it.
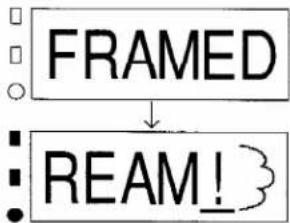
flowchart
graph TD
    A["FRAMED"] --> B["REAM!"]
If you don't remember how to choose a frame, go back to page 30.
MOVE THE CURSOR AGAIN

Hold down □ until the cursor is under the beginning of the frame.
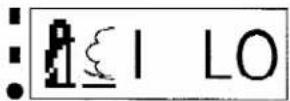
MAKE A PICTURE
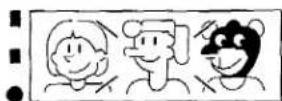
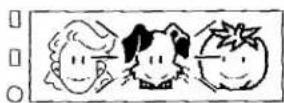
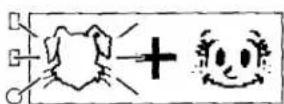
Pictures can be made by putting together a head and a face or a head and a body. The Stickerkid has lots of different heads, faces and bodies. There are even children's and animals' heads, too.
Hold down CODE and push . The message "MAKE PICTURE" comes on for a short time. Then, the types of pictures that you can make appear on the display. One of them flashes. This means you can make pictures like that.
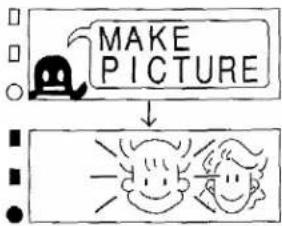
flowchart
graph TD
    A["MAKE PICTURE"] --> B["Two cartoon figures"]

Push or until flashes. This is the kind of picture we want to make.

Push YES. A head and body appear on the display. The head flashes. This means you can choose this head.
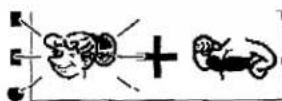

Push 📋 or 📋 until 🌿 flashes. This is the head we want to use.
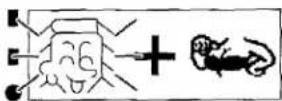

Push ☐. The body flashes. This means you can choose that body.

Push 📋 or 📋 until 🌐 flashes. This is the body we want to use.
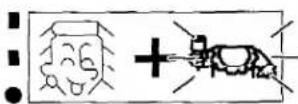

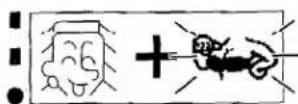
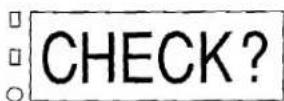
Push ☑. The message "CHECK?" comes on the display.

Push YES to see part of the picture.
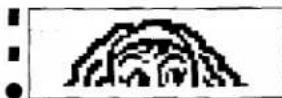
Push ☐ to move down and push ☑ to move up, so you can see the rest of the picture.
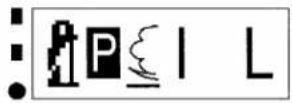
Push YES. P appears on the display instead of the picture. But that is only on the display. The picture will look normal when it is printed on the label.

- Anytime you want to see what a picture looks like again, put the cursor under P and push YES. Push F to move down and push C to move up, so you can see the rest of the picture. When you are finished looking at the picture, push NO or YES again to go back to the label.
Now, you can print out the label to see what it really looks like. Then, clear the display, so you can make other labels.
Push PRINT to print out the label.
Pull out the cutter lever to cut the tape.
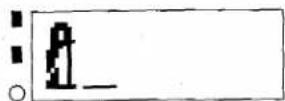
Push CODE + , then push YES to clear the display.
REVIEW
- To make a picture, push ☐ + ☐. Push ☐ or ☐ until you find the kind of picture you want to make, then push ☐. Push ☐ or ☐ until you find the head you want. Then, push ☐ to choose it. Push ☐ or ☐ until you find the face or body you want, then push ☐ to choose it. P appears on the display.
- To check the picture, put the cursor under P and push YES. Then, push <T to move down and NC to move up. Push NO or YES to go back to the label.
natural_image
Cartoon penguin character with closed eyes and wide arms, wearing a textured shirt (no text or symbols)
HOW TO MAKE A SECRET MESSAGE
Let's make these labels:
Let's meet today after school.
dDH'pSSiPDd4XXbVpBn8W1UHPmF6b.
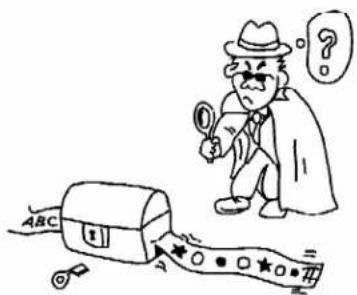
This function is awesome! With your Stickerkid, you can write and read secret messages that nobody else can read! Only a Stickerkid can crack the code. Now, let's try making a secret message. Let's also change the font to make the message smaller.
TURN OFF CAPS
We are going to type in small letters. So we can turn off the CAPS indicator.
Hold down CODE and push SHIFT CAPS. The CAPS indicator goes off.
TYPE IN THE MESSAGE
Type in "Let's meet today after school."

- To type in the apostrophe ('), hold down □ and push □ N - To type in a capital letter, hold down and push a letter key
If you don't remember how to type in letters, go back to page 10.
ENCODE THE SECRET MESSAGE
The Stickerkid can encode your message. To "encode" a message means to change your message into a secret message with a secret code. So only you and your friends will be able to read it.
Hold down CODE and push . The message "SECRET CODE" comes on for a short time. Then, the message "ENCODE" comes on the display.
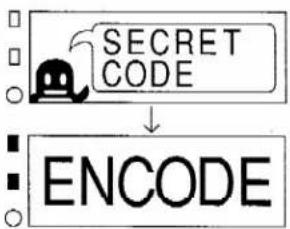
flowchart
graph TD
    A["Secret Code"] --> B["ENCODE"]
Push YES. The letters of "ENCODE" start flashing. Then, the encoded message appears on the display.
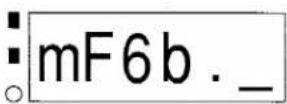
Look at the message. It is so hard to understand. I bet nobody else can read that.
Now, let's make the font smaller, so the label will be shorter.
CHANGE THE FONT
Hold down CODE and push A-A. The message "CHOOSE FONT" comes on for a short time. Then, an example of the font that we are now using appears on the display.
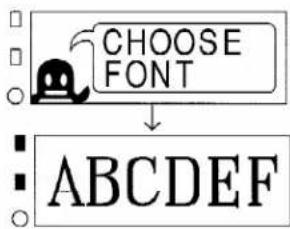
Push 📋 or 📋 until ABCDEFG appears on the display. This is the font we want to use.
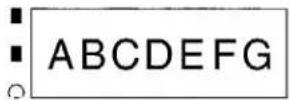
Push [vts]. The label appears on the display again.
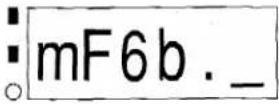
Now, you can print out the message to see what it looks like. Then, clear the display, so you can make other labels.
Push PRINT to print out the label.
Pull out the cutter lever to cut the tape.
Push CODE + , then push YES to clear the display.
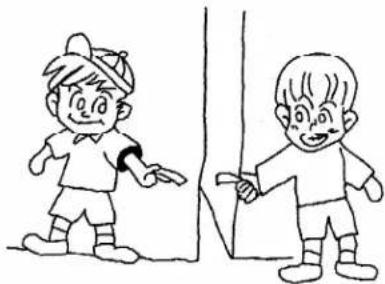
natural_image
Cartoon illustration of two children interacting near a wall, one pointing at the edge (no text or symbols present)DECODE THE SECRET MESSAGE
If you get a secret message from one of your friends, the Stickerkid can change it into a message you can read. This is called "decoding" the message.
First, you have to type in the secret message.
Type in "dDH'pSSiPDd4XXbVpBn8W1UHPmF6b."
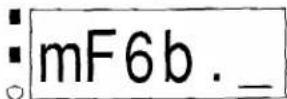
Now, you can decode it, so you can find out what it says.
Hold down CODE and push . The message "SECRET CODE" comes on for a short time. Then, the message "ENCODE" comes on the display. But we don't want to encode a message. We want to decode one.
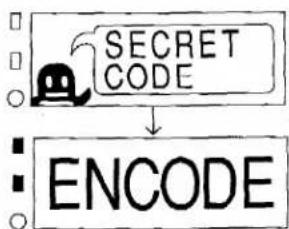
flowchart
graph TD
    A["Secret Code"] --> B["ENCODE"]
13 Push or one time. The message "ENCODE" changes to "DECODE".
DECODE
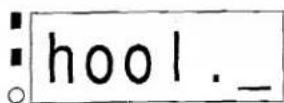
14 Push YES. The letters of "DECODE" start flashing. Then, the decoded message appears on the display. Isn't that cool?
■hool._
Now, you can print out the message to see what it looks like. Then, clear the display, so you can make other labels.
15 Push PRINT to print out the label.
16 Pull out the cutter lever to cut the tape.
17 Push CODE + , then push YES to clear the display.
REVIEW
- To "encode" a message means to use a secret code to make a message into one that everyone can't read.
• To encode a message, push CODE + and push YES.
- To "decode" a message means to use a secret code to change a secret message into one that you can read.
- To decode a message, push CODE + and push or one time until "DECODE" appears on the display. Then, push .
natural_image
Simple cartoon illustration of a penguin holding a document (no text or symbols)HOW TO MAKE GIANT LABELS
Let's make this label:
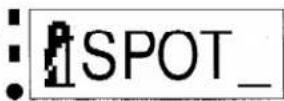
SPOT
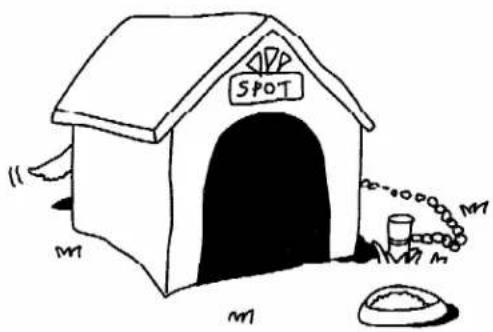
This time, let's make a label that is three times the size of a normal label. You can put giant labels on your dog's house, your cat's litterbox or your fish's bowl. You can also make a giant label with your name on it, stick it to a piece of cardboard or wood and hang the sign on your bedroom door. If you put a picture in the label, it will also be blown up bigger when it is printed out.

- The giant labels will always have 1/2" (12 mm) margins.
natural_image
Cartoon illustration of a penguin and a turtle interacting over a board (no text or symbols)
natural_image
Simple line drawing of a giraffe with black spots, standing on a horizontal surface (no text or symbols)
natural_image
Simple line drawing of an elephant with a cloud above its head, no text or symbols presentTYPE IN THE LETTERS
Type in "SPOT".
• To type in all capital letters, hold down CODE and push SHIFT CAPS. The CAPS indicator comes on.
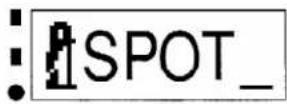
If you don't remember how to type in letters, go back to page 14.
CHANGE THE FONT
Change the font to ABC.
If you don't remember how to change the font, go back to page 21.
CHANGE THE STYLE
Change the style to NORMAL.
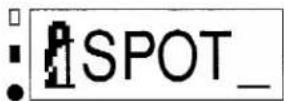
If you don't remember how to change the style, go back to page 24.
PRINT THE GIANT LABEL
You can make giant labels that are two to four times the size of a normal label. In this label, the word "SPOT" will be three times the normal size and printed on three different labels.
Hold down CODE and push PRINT. The message "GIANT PRINT" comes on for a short time. Then, you can choose how big you want the label to be.
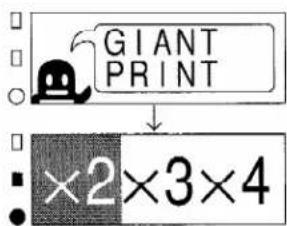

Push ☐ one time. We want to make it three times the normal size.
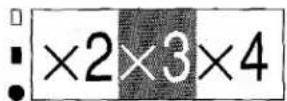
Push YES. The message "PRINTING" appears and the Stickerkid prints the labels.
Pull out the cutter lever to cut the tape.
Three labels connected together are printed out. Put them together to make a giant label.
PUT TOGETHER THE LABEL
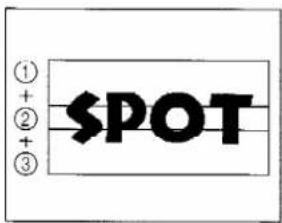
Cut out the three labels.

- Two dots are printed on the label to show you where the ends of the labels are. If you cut on these two dots, you will get three labels that are the same size.
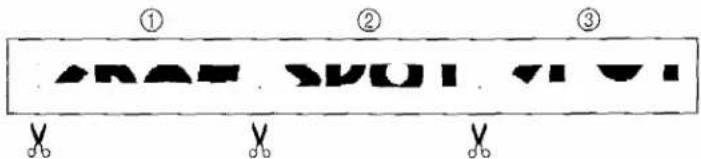
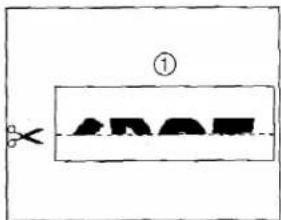
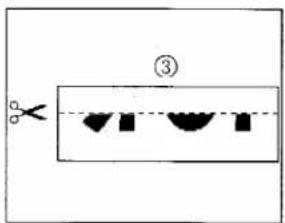
Cut off the empty space on the bottom of the first label. This is the top of the giant label.
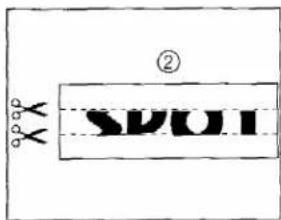
Cut off the empty spaces on the top and bottom of the second label. This is the middle of the giant label.
11 Cut off the empty space on the top of the third label. This is the bottom of the giant label.
12 Put the three labels together to make a giant label.
Now, you can stick this giant label on anything you want.
Now, you can clear the display.
13 Push CODE + , then push YES to clear the display.
REVIEW
- To print a giant label, push CODE + PRINT. Push or until you find the size you want, then push YES. Cut out the labels and put them together.
natural_image
Cartoon monkey holding a blank sign (no text or symbols)HOW TO PRINT WITH TWO OR THREE COLORS
Let's make this label:

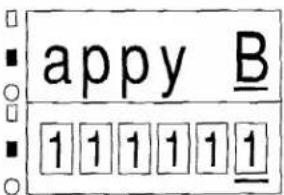
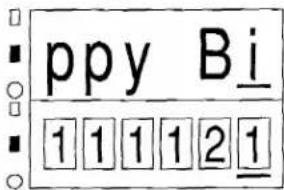
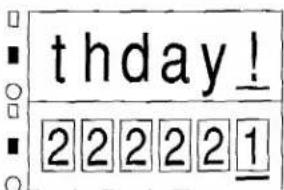
Happy Birthday!
You can also make a label with two or three different ink colors. This lets you make more colorful, original labels. You will need the special Multicolor printing ink and tape cassettes if you want to make a label with different colors.

- The multi-color printing ink and tape cassettes will be available starting in February 1996.
TURN OFF CAPS
Hold down CODE and push SHIFT CAPS. The CAPS indicator goes off.
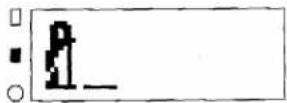
TYPE IN THE LETTERS
Type in "Happy Birthday!"
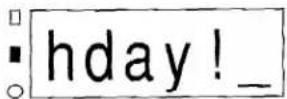
MOVE THE CURSOR
Push one time.

- The cursor must be under one of the letters you want to put in the frame.
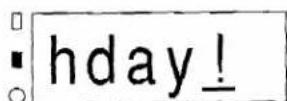
CHOOSE A FRAME

Hold down CODE and push A. The message "CHOOSE FRAME" comes on for a short time. Then, a frame appears on the display. But we want another frame.
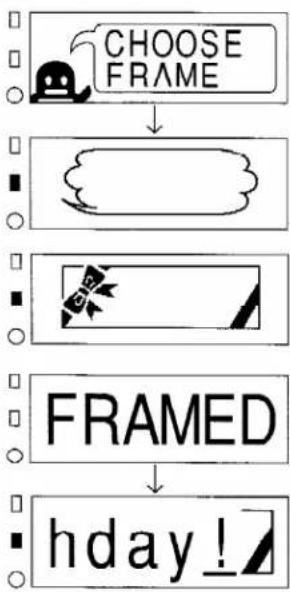
flowchart
graph TD
    A["CHOOSE FRAME"] --> B["Blank Space"]
    B --> C["FRAMED"]
    C --> D["hday!"]

Push 📋 or 📋 until 🏱 appears on the display.
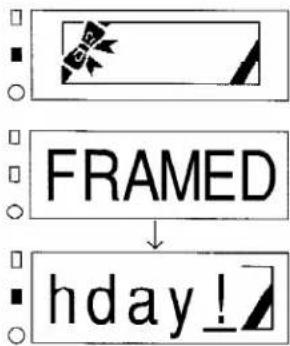
flowchart
graph TD
    A["FRAMED"] --> B["hday!"]

Push ☐. The message "FRAMED" comes on for a short time. Then, the label appears with the frame around it.
CHOOSE THE COLORS

Hold down CODE and push FAST PHASEN . The message "CHOOSE COLOR" comes on for a short time. Then, everything flashes with 1.
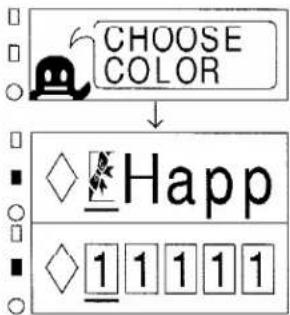

- You can decide which colors will be first, second and third.
- If you change the colors in one word many times, the letters may be printed on top of each other.

Hold down CODE and push N. The beginning of the frame will flash with 3 and the cursor moves under the "H".

- The whole frame will be printed in the same color. If you make the end of the frame flash with 1, it won't matter. The whole frame will be the color of the number at the beginning.
- If you change your mind, move the cursor to the number you want to change and change it.
- To change a color back to the first color, hold down CODE and push 1ST COLOR V.

Push □ until the cursor is under the "B".

Hold down ☐ and push ☐. The "B" will flash with ☐ and the cursor moves under the "i".

Hold down CODE and keep pushing until all of "Birthday" flashes with 2.
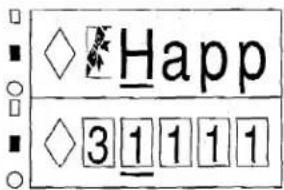
PRINT THE LABEL
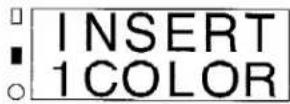
Push YES or PRINT. The message "INSERT 1COLOR" appears on the display.
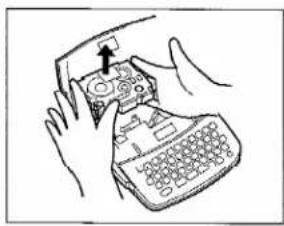
Open the cassette cover. If you have to change the tape and ink cassette, take out the cassettes that are already in there.
natural_image
Illustration of hands using a handheld device to press or install a keyboard (no text or symbols visible)
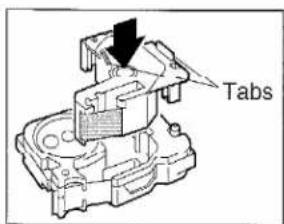
Turn the ribbon roll in the ink cassette and make the ribbon tight. Then, hold the tabs on the first color's ink cassette and put it straight into the tape cassette that you want to use. Pull out about 1/2" of tape.

- If the tape cassette is new, take the clear tape off the end of the label tape.
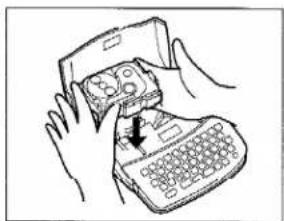
Put in the cassettes and close the cassette cover. Then, hold down CODE and push SPACE and pull out the cutter lever to cut the tape.
natural_image
Illustration of hands inserting a device into a mobile phone (no text or symbols visible)
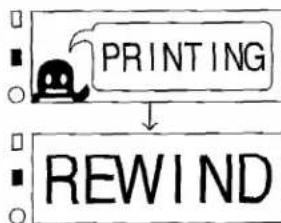
Push ☐. The message "PRINTING" comes on and the Stickerkid prints the letters with the first color. Then, the message "REWIND" appears on the display.
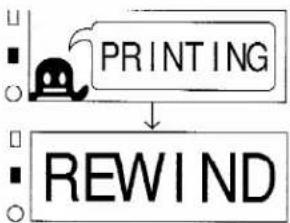
flowchart
graph TD
    A["Printer Icon"] --> B["PRINTING"]
    B --> C["REWIND"]

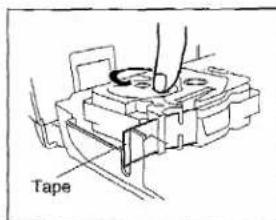
Open the cassette cover and slowly turn the tape roll with your finger to rewind the tape. Make the end of the tape go just inside the exit slot.
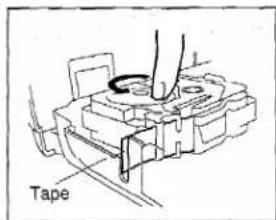
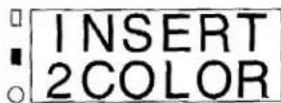
Push YES. The message "INSERT 2COLOR" appears on the display.
Hold the tabs and take out the first color's ink cassette.
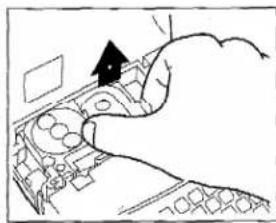
natural_image
Hand pressing a button on a device component (no visible text or symbols)
Put in the ink cassette for the second color and close the cassette cover.
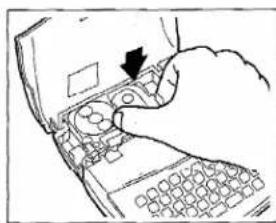
natural_image
Hand inserting a device into a mobile phone keyboard, with an arrow indicating the action (no text or symbols present)
Push YES. The message "PRINTING" comes on and the Stickerkid prints the letters with the second color. Then, the message "REWIND" appears on the display.
flowchart
graph TD
    A["Printer Icon"] --> B["PRINTING"]
    B --> C["REWIND"]
Open the cassette cover and slowly turn the tape roll with your finger to rewind the tape. Make the end of the tape go just inside the exit slot.
23 Push YES. The message "INSERT 3COLOR" appears on the display.
INSERT 3COLOR
24 Hold the tabs and take out the second color's ink cassette.
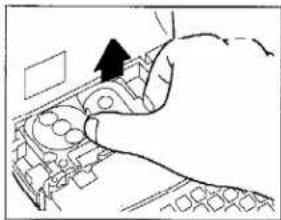
natural_image
Hand pressing a button on a computer keyboard (no text or symbols visible)25 Put in the ink cassette for the last color and close the cassette cover.
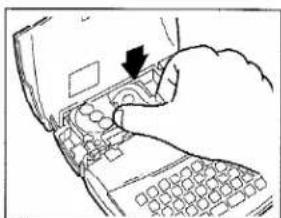
natural_image
Hand inserting a keyboard into a laptop keyboard, with a black arrow indicating the pointer (no text or symbols present)26 Push YES. The message "PRINTING" comes on and the Stickerkid finishes printing the label.
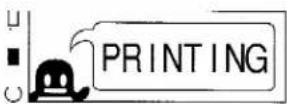
27 Pull out the cutter lever to cut the tape.
28 Push CODE + , then push YES to clear the display.
If you wind the tape too much and the end goes back into the cassette.
-
Take out the ink and tape cassettes and take ink cassette out tape cassette.
-
Use your finger to move the tape and make it go into the cassette.

- If there is only a little tape left in the cassette, pull out some tape and put it into the slot with your fingers.
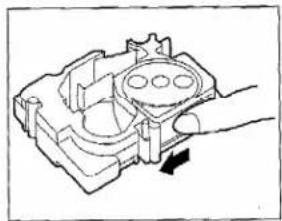
natural_image
Technical line drawing of a mechanical component with a hand operating a button (no text or symbols)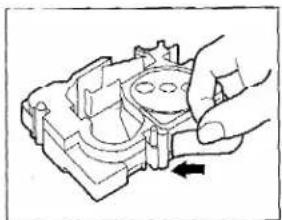
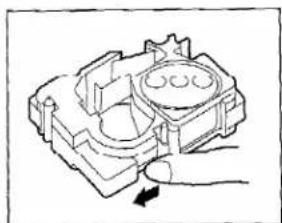
natural_image
Hand holding a mechanical component with a black arrow indicating rotation (no text or symbols)- Use your finger to make the end of the tape go through the slot.
natural_image
Technical line drawing of a mechanical component with a hand and arrow indicating motion (no text or symbols)- Use your finger to move the tape and make it go under the tape guides.

- Make sure the tape goes under the tape guide on the edge of the cassette.
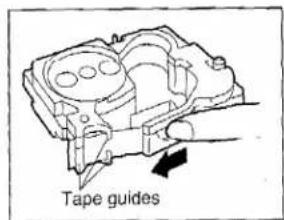
- Hold the end of the tape and rewind the tape to tighten it.

- When you rewind the tape, turn the tape roll counterclockwise ( ).
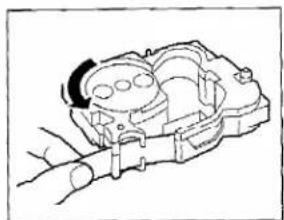
natural_image
Illustration of a hand holding a small mechanical device with no visible text or symbols
natural_image
Cartoon penguin character holding a blank board (no text or symbols)HOW TO PLAY THE FAST FINGER GAME
Try this typing game to find out how fast you are or use it to practice typing.
TYPE IN YOUR NAME

Push FAST FINGER. The message "FAST FINGER" appears for a short time. Then, the message "NAME?" comes on for a short time. After that message goes off, two white penguins appear on the display.
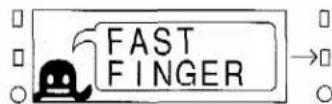


Type in your name.
If your name is Marie, the display will look like this after you type it in:
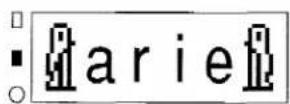
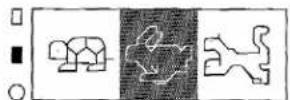
Push ☐. The message "LEVEL" comes on for a short time. Then, pictures of a turtle, a rabbit and a cheetah appear on the display. The turtle is the slowest level, the rabbit is the middle level and the cheetah is the fastest level. We have to use ☐ or ☑ to choose the level we want.

CHOOSE THE LEVEL
Push 📋 or 📋 until the rabbit is chosen. This is the level we want to try.
Push YES. First, the turtle and cheetah will disappear and a tune will play. Then, the Stickerkid will count down and the message "START!" will appear. The first letter will appear with the rabbit.
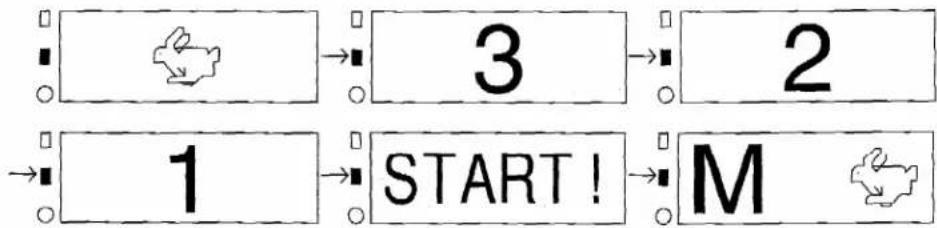
flowchart
graph LR
    A[" "] --> B["3"]
    B --> C["2"]
    D["1"] --> E["START!"]
    E --> F["M"]
PLAY THE GAME
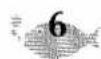
Push M.
If you push the right key at the right time, the rabbit will turn into a party cracker. Then, the next letter will appear on the display.

If you push the wrong key, the rabbit will turn into a bomb. Then, the next letter will appear on the display.


Push the key for each letter that comes on the display. After you push the key for the last letter, the message "OVER!" appears for a short time. Then, the message "PRINT?" comes on the display.

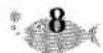
Push YES. The message "PRINTING" appears and the Stickerkid prints out your score and a message. Then, the message "DONE?" comes on the display.


- If you decide that you don't want to print a label, push NO. Your message will move across the display.
PLAY THE GAME AGAIN
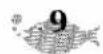
Push ☐ to play again. The message "LEVEL" comes on for a short time. Then, pictures of a turtle, a rabbit and a cheetah appear on the display again.


- If you decide that you don't want to play again, push YES.
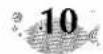
Go back to step 4. Continue until you get perfect scores in each level.
REVIEW
- Push PART FINDER. Then, type in your name and push 📄. Use 📋 or 📋 to choose the level and push 📄. Push the key for the letter that appears on the display.
natural_image
Simple line drawing of a cartoon penguin with arms and legs (no text or symbols)LOOK WHAT THE KEYS CAN DO!

FONT KEY
"Fonts" are the different kinds of letters used in your label. You can change it anytime you want.
To change the font:
Hold down 📊 and push 🐃. The message "CHOOSE FONT" comes on for a short time. Then, an example of the font that you are now using appears on the display.
Push 📋 or 📋 to find the font you want.

Push ☐ to change the font. The label appears on the display.

- The font does not change after you print a label or clear the display. If you want to use a different font in your next label, you will have to change it again.
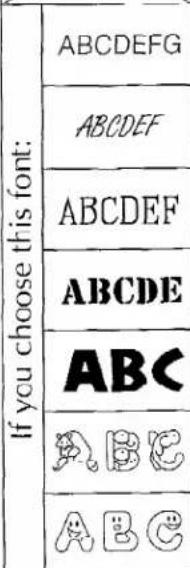
If you choose this font:
your letters will look like this:
ABCDEFG
→
ABCDEFG
ABCDEF
→
ABCDEFG
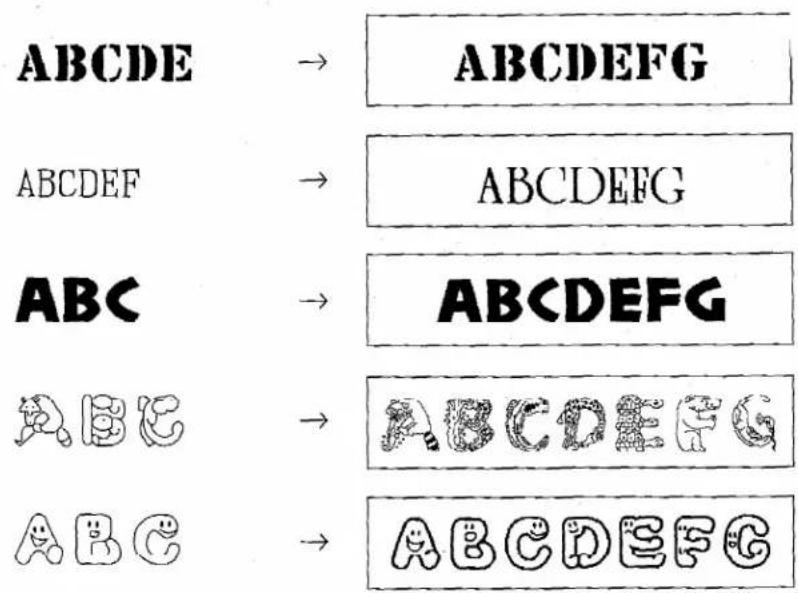

- Fonts ABC and ABC only print in capital letters. If you have small letters in your label, they will change to capital letters when the label is printed out.
To see an example on how to change the font, go to the section "HOW TO USE SYMBOLS & A DIFFERENT FONT" on page 21.

STYLE KEY
"Styles" are the different ways of printing letters in your label. You can change it anytime you want.
To change the style:

Hold down CODE and push B-图. The message "CHOOSE STYLE" comes on for a short time. Then, the name of the style that you are now using appears on the display.

Push 📋 or 📋 to find the style you want.

Push YES to change the style. The label appears on the display and the style indicator beside B-B goes on.

• The indicator will not go on when the style is NORMAL.
- The style does not change after you print a label or clear the display. If you want to use a different style in your next label, you will have to change it again.
 | and if you choose this style: | ||
| NORMAL | OUTLINE | BOLD | |
| ABC | ABC | ABC | |
| ABC | ABC | ABC | |
| ABC | ABC | ABC | |
| ABC | ABC | ABC | |
| ABC | ABC | ABC | |
 |  |  | |
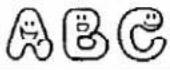 | 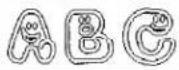 | 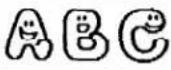 | |
| your letters will look like this: | |||
 | and if you choose this style: | |||
| SHADOW | ITALIC | >WCH--U<J | ||
| If you choose this font: | ABCDEFG | ABC | ABC | ABO |
| ABCDEF | ABC | ABC | ABC | |
| ABCDEF | ABC | ABC | ABC | |
| ABCDE | ABC | ABC | ABC | |
| ABC | ABC | ABC | ABV | |
| ABC | ABC | ABC | ABC | |
| ABC | ABC | ABC | ABC | |
| your letters will look like this: | ||||
To see an example on how to change the style, go to the section "HOW TO USE A DIFFERENT STYLE" on page 24.

FRAME KEY
"Frames" are the pictures and lines around the letters. You can choose from 20 frames and put a frame around the letters anytime you want. But you have to be careful when to choose the frame if you want only part of your label framed. You also have to be sure that you move the cursor so that it is under one of the letters that you want to put in the frame. The flashing underline (_) that tells you where you are in your label is called the "cursor".
To put a frame around the label:
Hold down CODE and push #3 . The message "CHOOSE FRAME" comes on for a short time. Then, a frame appears on the display.

Push 📋 or 📋 to find the frame you want.

Push YES to choose the frame. If the frame is put around letters, the message "FRAMED" comes on for a short time. Then, the label appears on the display.
You can choose from these frames:
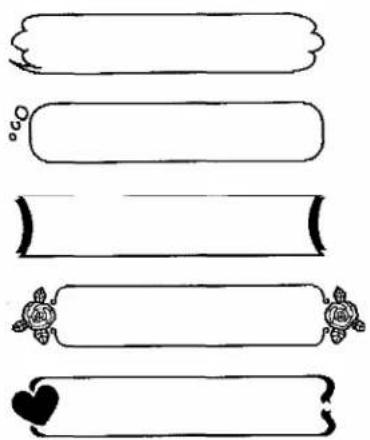
natural_image
Five decorative scroll-style frames with floral motifs, no text or symbols present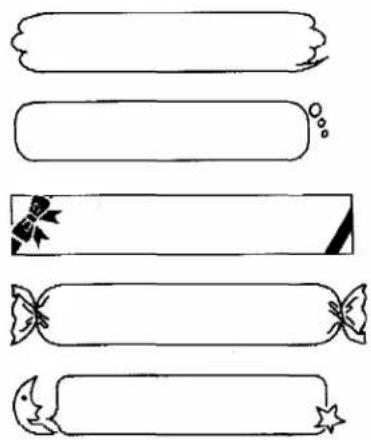
natural_image
Five decorative paper strips with star and bow designs, no text or symbols present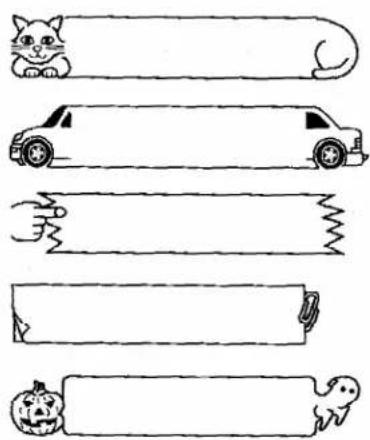
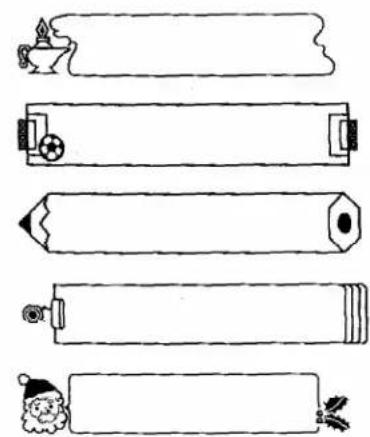
natural_image
Five blank lined-out paper strips with decorative icons (no text or symbols)EXAMPLE:
When you want to frame only part of your label, type in that part first. After you frame it, you can move the cursor and type in the rest of your label.
This example is made with the font ABCDE, NORMAL style and FULL margins.
- Type in "I wish I had a steak!"
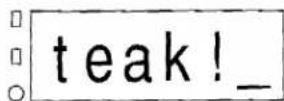
- Push ☐ one time.

- The cursor has to be under the letters you want to put in the frame. If you don't move the cursor, the frame will be put in after the letters.
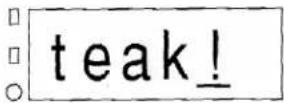
Now, let's put in a frame.
- Hold down CODE and push 43 .
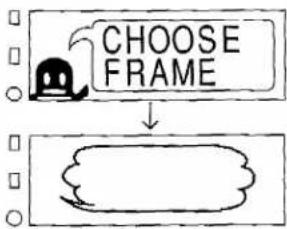
flowchart
graph TD
    A["Robot Icon"] --> B["CHOOSE FRAME"]
    B --> C["Empty Box"]
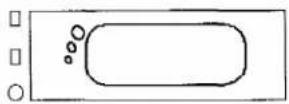
- Push 📋 or 📋 until ⚙ comes on the display.
- Push YES to choose the frame.
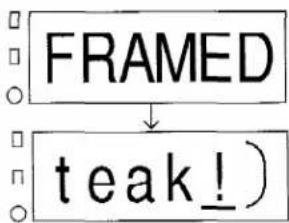
Now, let's put in a picture outside the frame.
- Hold down ☐ and push ☑ to move the cursor to the beginning of the label.
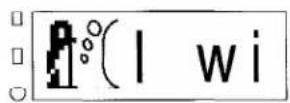

- If you want to move the cursor to the end of the label, hold down CONF and push √.
- Hold down CODE and push
- Push □ or □ until the animal picture group flashes.
- Push YES.
- Push 📋 or 📋 until the picture of the bulldog flashes.
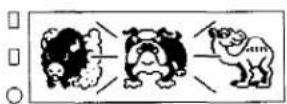
- Push YES.
If you print the label, it will look like this:

I wish I had a steak!

- Another way to put a frame around part of the label is to choose the frame first. Then, type the letters you want in the frame. When that is finished, move the cursor and type in the rest of your label.
MARGIN KEY
"Margins" are the empty spaces on the left and right sides of your label. The size of the margins can be changed at any time.
To change the margins:

Hold down CODE and push 5. The message "ADJUST MARGIN" comes on for a short time. Then, the size of the margin that you are now using appears on the display.

Push 📄 or 📋 to find the margin size you want.

Push YES to change the margins. The label appears on the display and the margin indicator beside MARGIN goes on.

- The indicator will not go on when the margin size is FULL. - The margin size does not change after you print a label or clear the display. But if the Stickerkid is turned off and then turned back on again, the margin size will change back to FULL. If you want to use different margins in your next label, you will have to change it again.
If you choose this margin:
your label will look like this:
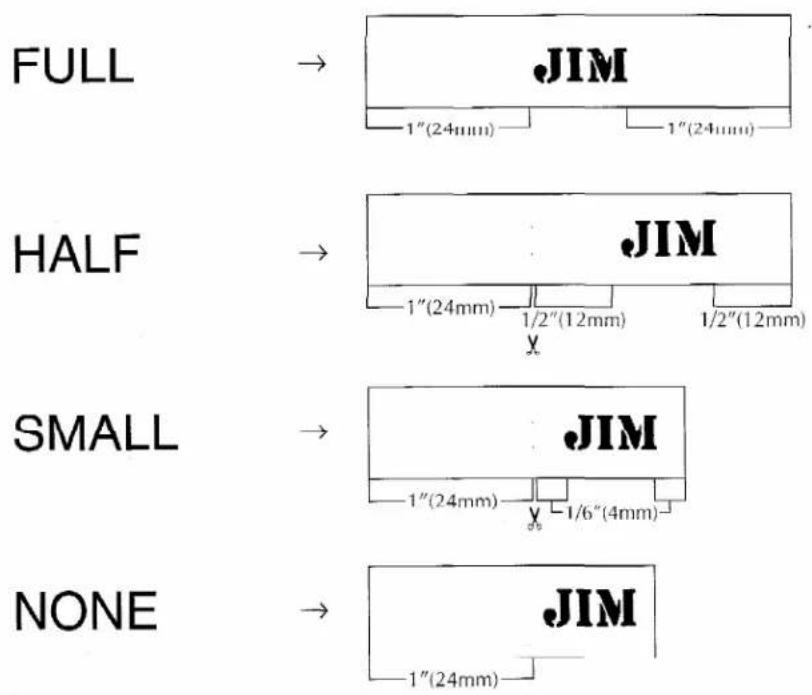
EXAMPLE:
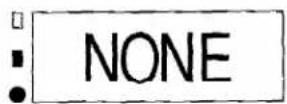
If you choose NONE, you can print many labels in a row to make one label with different fonts and styles. This example is made with CAPS on and the margins on NONE.
Let's print in the first word.
- Hold down CODE and push
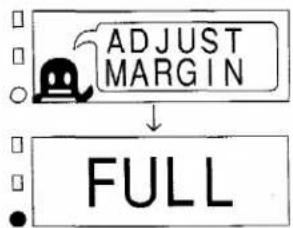
flowchart
graph TD
    A["ADJUST MARGIN"] --> B["FULL"]
- Push ☐ or ☑ until NONE appears.
- Push YES.
- Change the font to ABC.
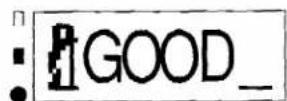
- Type in "GOOD".
- Push PRINT GIANT PRINT
- Hold down CODE and push
- Push YES.
Now, let's print in the second word.
- Change the font to ABC.
- Change the style to OUTLINE.
- Type in "LUCK".
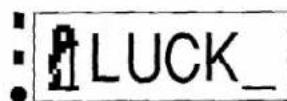
12.Push PRINT GIANT PRINT
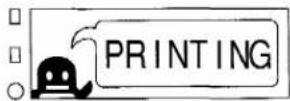
- Hold down CODE and push then push YES.
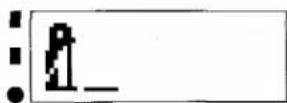
Let's print the last word to finish the label.
- Change the font to ABC.
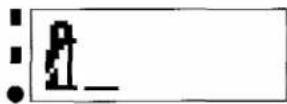
- Change the style to NORMAL.
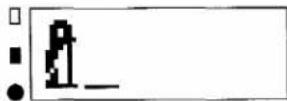
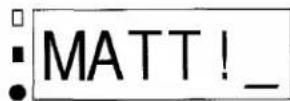
- Type in "MATT!"
- Push PRINT GIANT PRINT
- Hold down CODE and push SPACE FEED.

- When you use NONE, be sure to make more of the label come out before you cut it.
The label will look like this:

To see an example on how to change the margins, go to the section "HOW TO CHANGE THE MARGINS & PUT IN A FRAME" on page 30.

PICTURE KEY
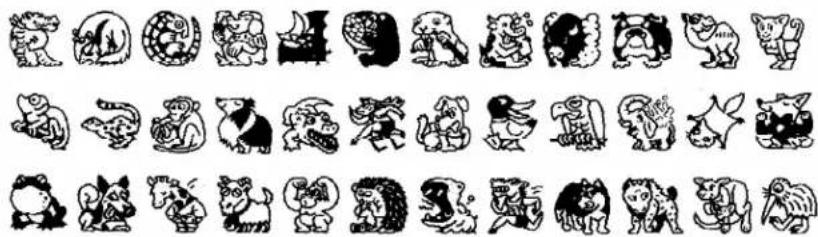
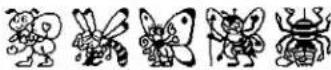
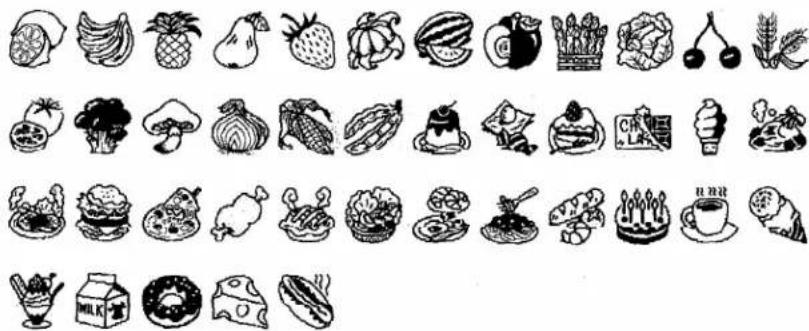
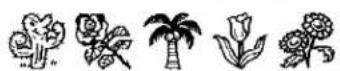
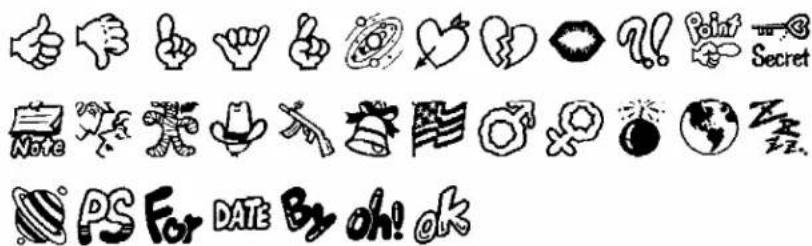
You can choose from 298 pictures. The pictures are separated into groups. The picture groups are: land animals, sea animals, bugs, dinosaurs, holiday pictures, different things, buildings, transportation, food, pictures for your diary, animals playing sports, plants and others.
To choose a picture:
1 Hold down CODE and push △. The message "CHOOSE PICTURE" comes on for a short time. Then, a picture group flashes on the display.
2 Push 📋 or 📋 to find the picture group you want.
3 Push YES.
4 Push or to find the picture you want.
5 Push YES to choose the picture. P appears in the label on the display instead of the picture. The picture will look normal when the label is printed.
- Anytime you want to see what a picture looks like again, put the cursor under P and push YES. Push to move down and push to move up, so you can see the rest of the picture. When you are finished looking at the picture, push NO or YES again to go back to the label.
You can choose from these pictures:
Animals ( 🍴 🍴 )
natural_image
Collection of black-and-white pictograms of animals and animals in various poses (no text or symbols)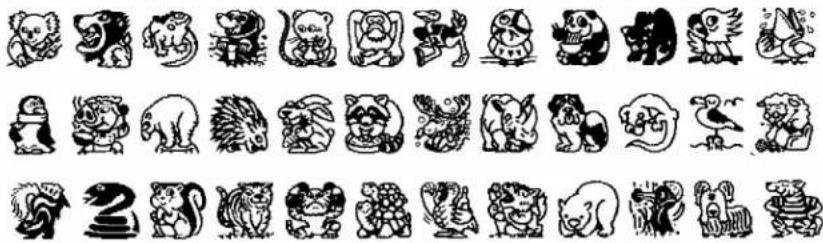
natural_image
Collection of stylized black-and-white animal and animal illustrations arranged in a grid (no text or symbols)Sea animals ( )

natural_image
Collection of black-and-white cartoon animal and fish illustrations (no text or symbols)Bugs ( )
Dinosaurs ( )

natural_image
Sequence of black-and-white line drawings of various animal or mythical creatures (no text or symbols)Holidays ( 🍴 🎋 🎋 )

Your things ( 42 5 7 )

natural_image
Collection of ten different everyday and symbolic items including TV, books, clocks, and dresses (no text or labels)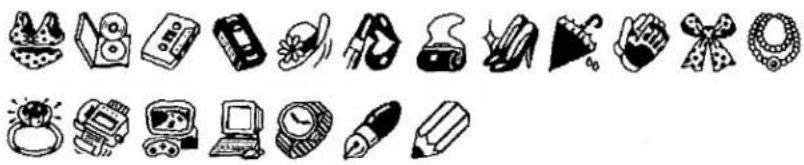
natural_image
Collection of black-and-white icons representing various objects and items (no text or symbols)Buildings ( )

Transportation ( Z 2 3 )

Food ( 🍴 )
natural_image
Collection of various food and beverage icons in black-and-white, arranged in rows (no text or symbols)Diary pictures ( 🍴️ 🎋 🌐 )

Sports ( )
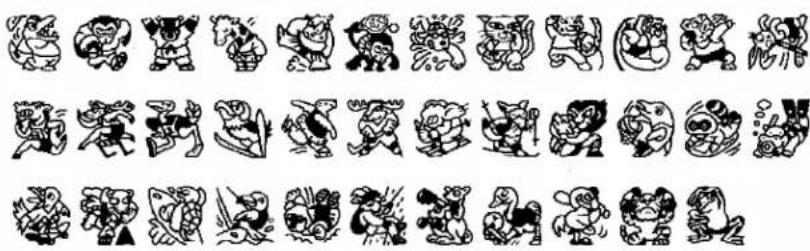
natural_image
Grid of black-and-white illustrations of various human and animal figures in various poses, no text or symbols present.Plants ( 🍴 🐵 )
Others ( 👍 👉 ❤️ )
To see an example on how to choose pictures, go to the section "HOW TO MAKE A LABEL WITH PICTURES" on page 17

MAKE PICTURE KEY
Put a head and a face or a head and a body together to make a picture. There are also two more groups of pictures from which you can choose pictures.
To make a picture:
1 Hold down color and push . The message "MAKE PICTURE" comes on for a short time. Then, an example of the picture flashes on the display.
2 Push or to find the type of picture you want to make.
3 Push YES. The head flashes.
4 Push or to find the head you want.
5 Push YES. The face or body flashes.
6 Push or to find the face or body you want.
7 Push YES to put the parts together. The message "CHECK?" comes on the display.
8 Push YES.
9 Push or to see the rest of the picture.
10 Push YES. P appears in the label on the display instead of the picture. The picture will look normal when the label is printed.
- Anytime you want to see what a picture looks like again, put the cursor under P and push YES. Push to move down and push to move up, so you can see the rest of the picture. When you are finished looking at the picture, push NO or YES again to go back to the label.
You can make pictures with these parts:
Childrens' heads
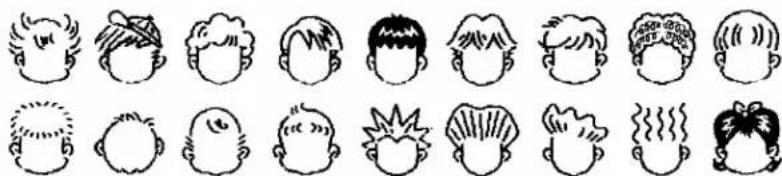
natural_image
Hand-drawn cartoon-style head drawings with different hairstyles and expressions (no text or symbols)
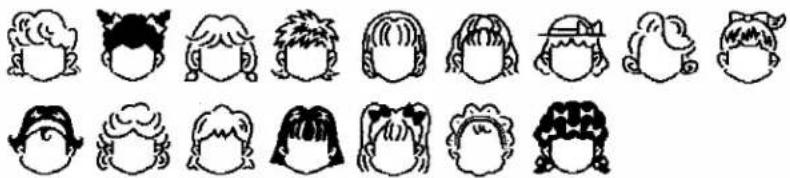
natural_image
Collection of stylized cartoon character head drawings in various colors and hairstyles (no text or symbols)Adults' heads
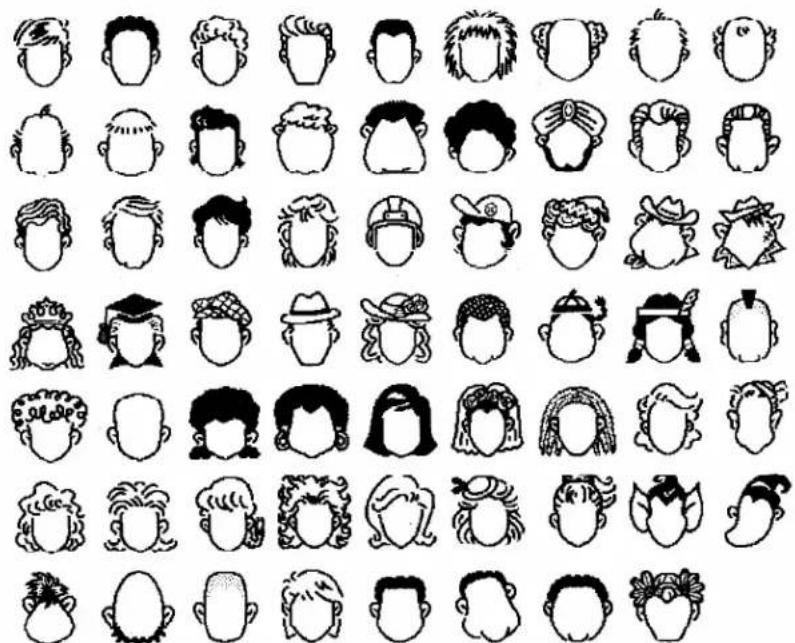
natural_image
Collection of stylized human head illustrations in various colors and designs (no text or symbols)Animals' heads
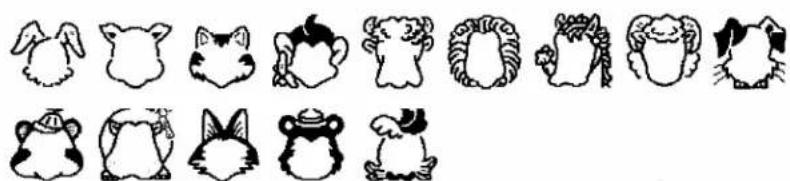
natural_image
Collection of cartoon animal illustrations in various poses, no text or symbols presentStrange heads

natural_image
Simple line drawings of six different vegetables: bell pepper, tomato, onion, celery, onion, and pineapple (no text or labels)Faces
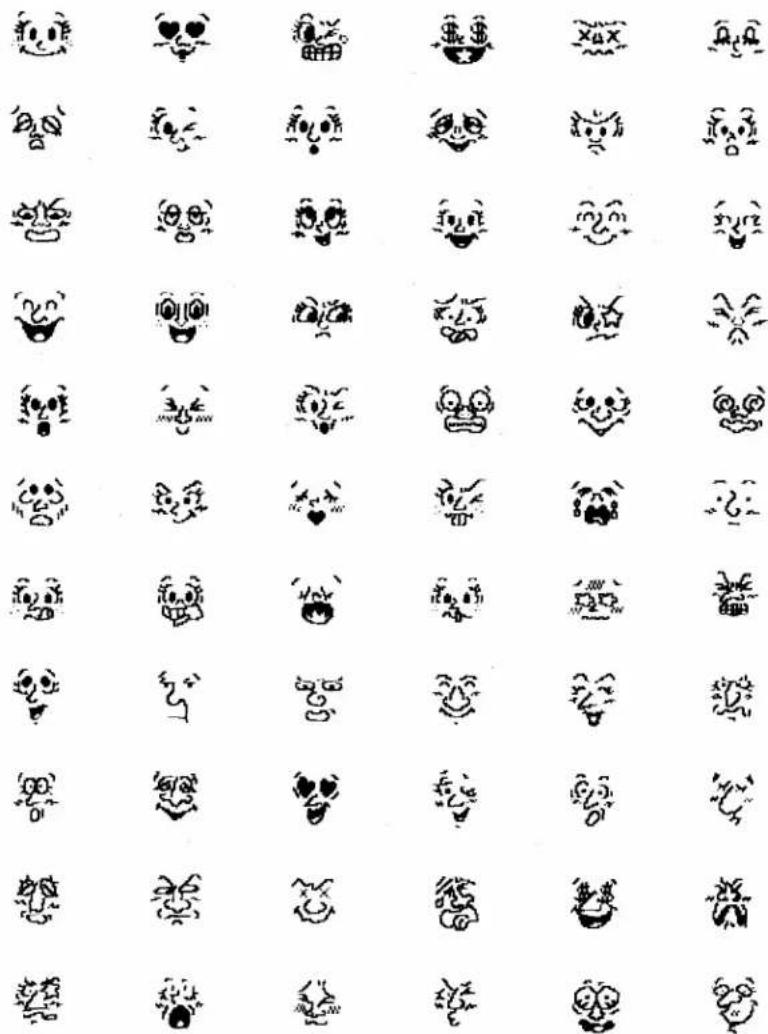
natural_image
Grid of 24 identical black-and-white cartoon face illustrations arranged in rows, no text or symbols present.Heads (Side view)
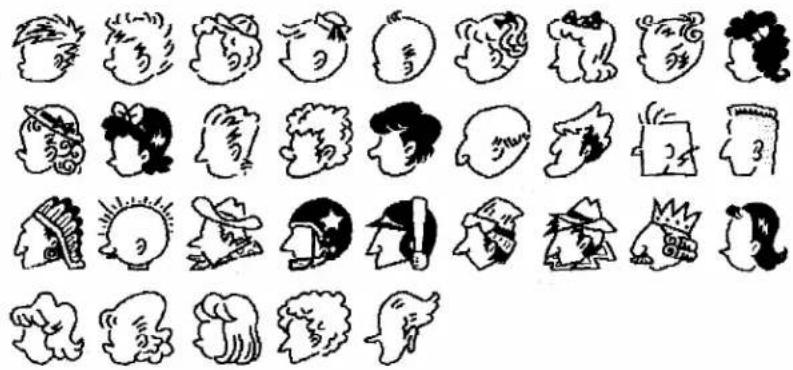
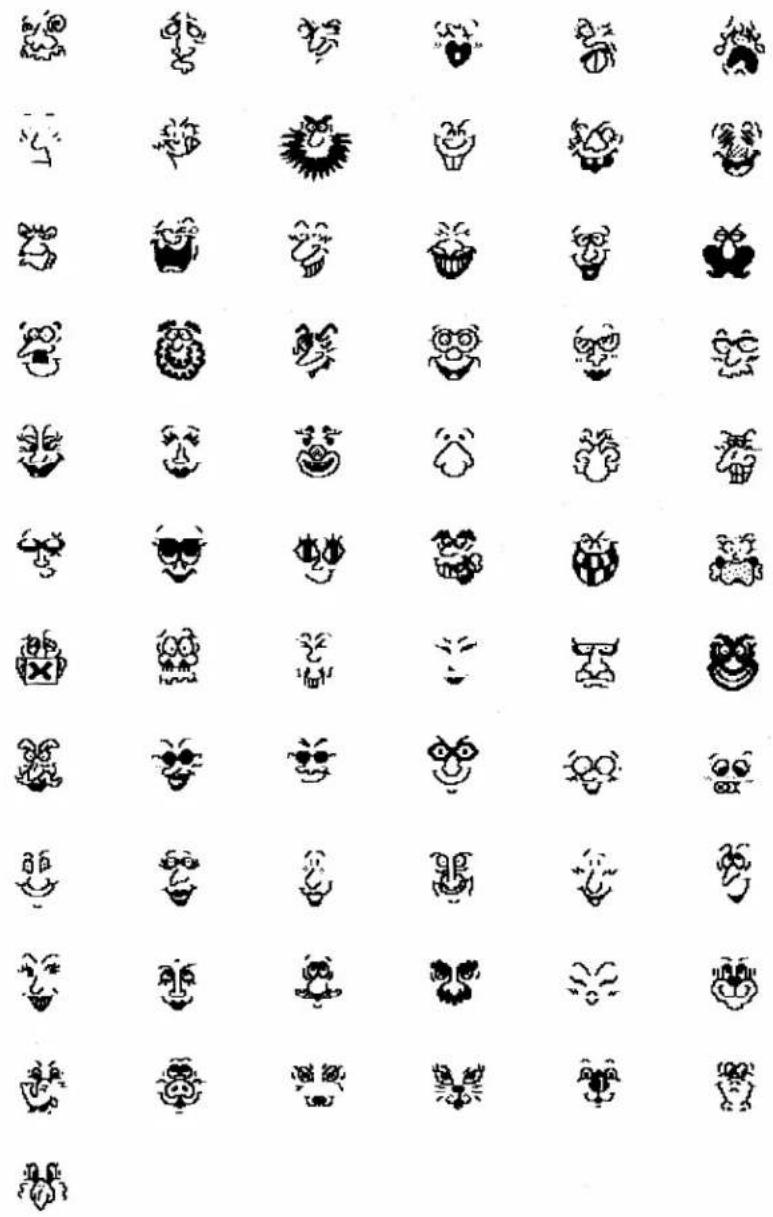
natural_image
Grid of stylized cartoon face illustrations in various angles and shapes (no text or symbols)Faces (Side view)
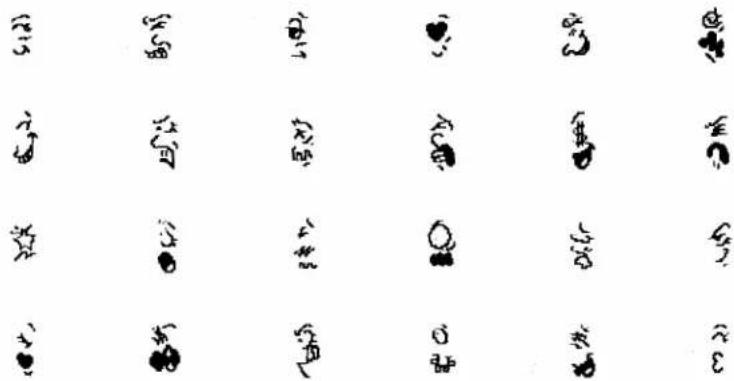
Girls' heads
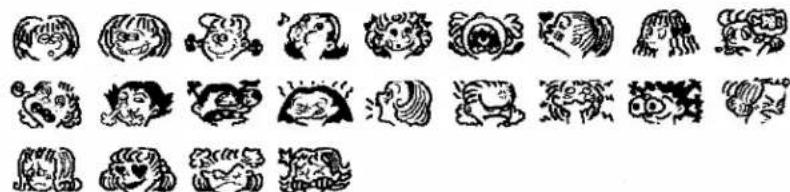
natural_image
Collection of stylized black-and-white cartoon character illustrations arranged in a grid (no text or symbols)Womens' heads

natural_image
Collection of stylized human face illustrations in various colors and shapes (no text or symbols)Animals' heads
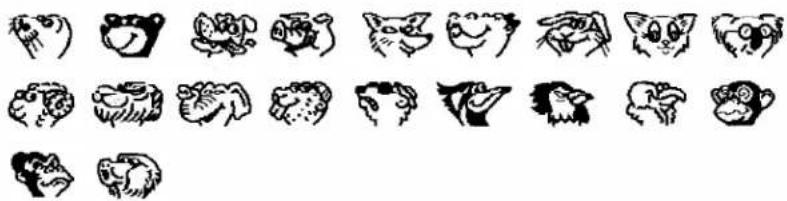
natural_image
Collection of stylized animal face illustrations in various colors and shapes (no text or symbols)Bodies
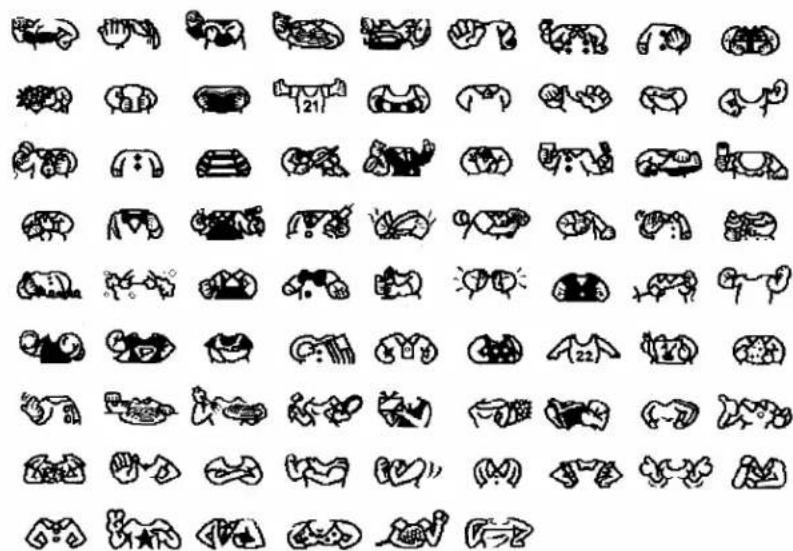
natural_image
Collection of abstract black-and-white line drawings with no text or symbolsPenguin pictures

natural_image
Sequence of black-and-white cartoon penguins and monkeys in various poses (no text or symbols)Baby pictures

natural_image
Illustration of eight cartoon animals in various poses, including a bear, rabbit, and monkey (no text or symbols)EXAMPLE:
This example is made with FULL margins.
- Hold down CODE and push € 6.
-
Push 📄 or 📋 until the animals' heads picture group flashes.
-
Push YES.
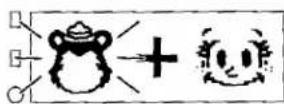
- Push 📋 or 📋 until the picture of the bear's head flashes.
- Push YES.
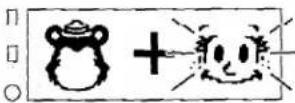
- Push or until the picture of the bear's face flashes.
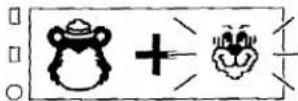
- Push [veo].
- Push YES.
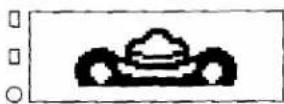
- Push ☐ to see the rest of the bear.
10.Push YFS.
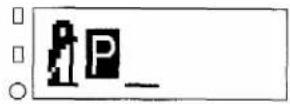
If you print this label, it will look like this:
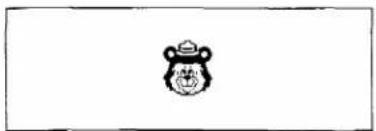
natural_image
Simple line drawing of a stylized animal head with a hat (no text or symbols)
LANGUAGE MASTER KEY
You can make labels with phrases in eight different languages. The phrases are: "Good morning!", "Good bye.", "Thank you!", "I love you!", "Congratulations!", "How are you?", "Merry Christmas!" and "Happy birthday!". Each phrase can be printed in: French, German, Spanish, Italian, Chinese, Korean and English.
To make a label with a phrase in a different language on it:
Hold down CODE and push 8. The message "LANGUAGE MASTER" comes on for a short time. Then, the first phrase moves across the display.
Push 📋 or 📋 until you find the phrase you want.
Push YES. A country abbreviation and flag appear on the display.
Push 📋 or 📋 until you find the language you want.
Push YES. The message "PRINTING" appears on the display and the Stickerkid starts printing the label.

• These labels will always be printed with the font ABC, NORMAL style and FULL margins.
If you choose this country and flag: the phrase will be in:
 | FRA | → | French |
| GER | → | German | |
| ESP | → | Spanish | |
| ITA | → | Italian | |
| CHN | → | Chinese | |
| KOR | → | Korean | |
| USA | → | English |
To see an example on how to make a label with a phrase in a different language, go to the section "HOW TO CHOOSE A PHRASE" on page 35.
SECRET CODE KEY
You can write secret messages with the Stickerkid's secret code that only you and your friends can read. With this secret code, you can write notes on labels and pass them to your friends. If anyone else sees your notes, they will never be able to read them.
To write or read a secret message:
Type in your message.

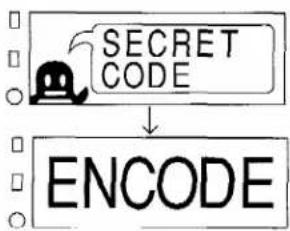
Hold down CODE and push . The message "SECRET CODE" comes on for a short time. Then, the message "ENCODE" appears on the display.
To make a secret message, push YES.
To read a secret message, push 📋 or 📋 until "DECODE" appears on the display. Then, push YES.
The letters of "ENCODE" or "DECODE" start flashing. Then, either the encoded or decoded message appears on the display.
EXAMPLE:
To encode a secret message:
This example is made with the font ABCDE, NORMAL style and FULL margins.
-
Type in "No test today!"
-
Hold down CODE and push
-
Push YES.
flowchart
graph TD
    A["Secret CODE"] --> B["ENCODE"]
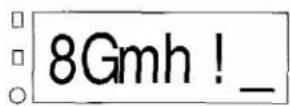
If you print the label, it will look like this:
fNO bKZ3e8Gmh!
To decode a secret message:
This example is made with the font ABCDE, NORMAL style and FULL margins.
-
Type in "fNO bKZ3e8Bmh!"
-
Hold down CODE and push
-
Push ☐ or ☑ until "DFCODE" appears on the display.
-
Push YES.
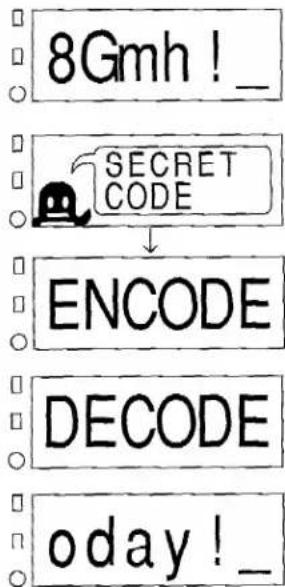
flowchart
graph TD
    A["8Gmh!_"] --> B["SECRET CODE"]
    B --> C["ENCODE"]
    C --> D["DECODE"]
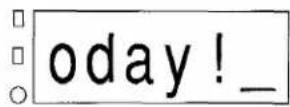
    D --> E["oday!_"]
If you print the label, it will look like this:
No test today!
MAKE RIBBON KEY
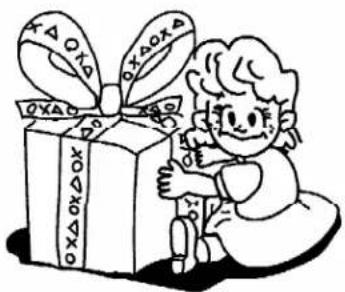
You can choose from eleven different patterns to make beautiful ribbons for decorating cards and presents. One of the patterns is a mystery pattern which chooses a head and different faces and puts them together to make a ribbon. This pattern is different each time you choose it.
To make a ribbon:

Hold down CODE and push . The message "MAKE RIBBON" comes on for a short time. Then, the patterns appear on the display. One of the patterns flashes.
Push 📋 or 📋 to find the pattern you want.
Push YES.
Push 📋 or 📋 to find the length you want.
- When you hold down one of these keys, the length will change in steps of 2 inches.
- Push SPACE to see the length in centimeters. Push SPACE again to change the length back to inches.

Push 📊. The message "PRINTING" comes on and the Stickerkid starts printing the label.

- Your ribbon can be between 2 inches (5 cm) and 20 inches (50 cm).

- These labels will always be printed with the NORMAL style and FULL margins.
If you choose this pattern:
your ribbon will look like this:
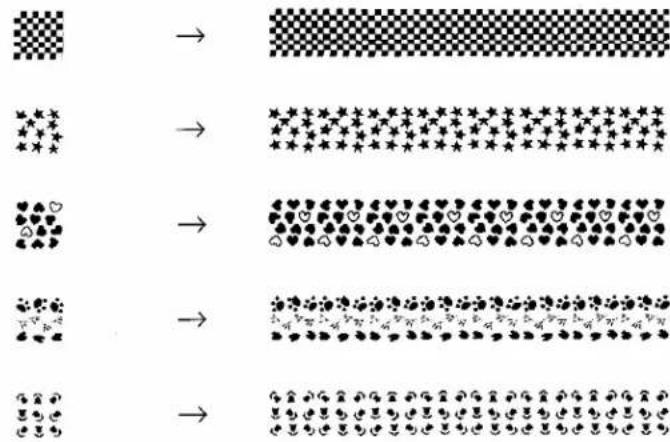
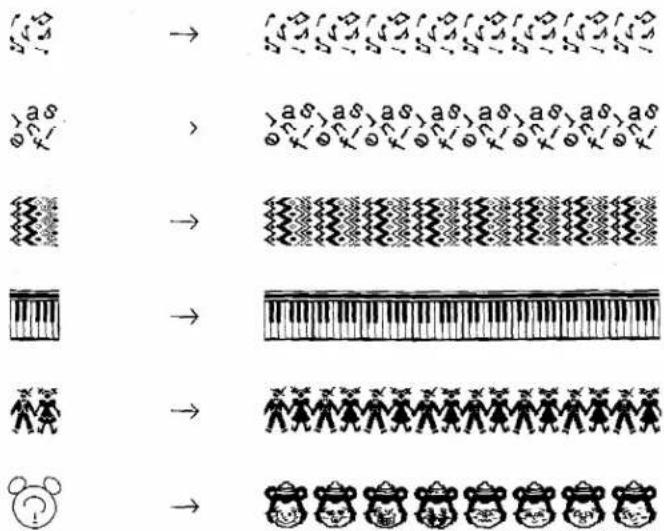

- The Stickerkid chooses a head and puts it together with different faces to make the mystery ribbon. So, each time you choose this pattern, the ribbon will be different.
To see an example on how to print a ribbon, go to the section "HOW TO MAKE A RIBBON" on page 38.
natural_image
Cartoon illustration of a girl holding a gift box with decorative ribbons (no text or symbols)
MUSIC KEY
Use this key to turn on or off the music that the Stickerkid plays every time you push a key.
To turn off the music:
Hold down CODE and push The message "OFF" comes on for a short time. Then, the label appears on the display again.
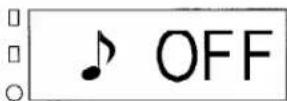

- Even if the Stickerkid is turned off, then on again, the music will stay off until you turn it back on.
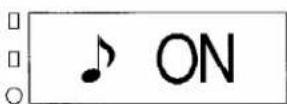
To turn on the music:
Hold down CODE and push 10. The message "ON" comes on for a short time. Then, the label appears on the display again.

ERASE/CLEAR ALL KEY
Use this key to erase a letter or picture from the label. You can also use this key to get rid of your whole label. This is called "clearing the display".
To erase a letter:
Move the cursor so that it is to the right of the letter that you want to erase.

Push
To clear:

Hold down CODE and push . The message "CLEAR?" comes on.

Push YES. The display is empty and the only thing left is the penguin and the cursor.

- When you clear the display, the font, style and margins do not change. If you want to use a different font, style or margin in your next label, you will have to change them again.

FRENCH ACCENTED LETTER KEY
Use this key to type in one of the French accented letters. "Accents" are the dots or lines on the top or bottom of a letter. The French accented letters are: , , , , , , , , , , , , , , , , , , , , , , , , , , , AE , , CE , .
To choose a French accented letter:

Hold down CODE and push Q. The message "CHOOSE FRENCH" comes on for a short time. Then, the cursor appears below one of the accented letters.
Push 📋 or 📋 until the cursor is under the letter you want.
Push YES. The letter appears in the label.
EXAMPLE:
If you want to make a label for your French pen pal, Benoît: This example is made with the font ABCDE, NORMAL style and FULL margins.
- Type in "Beno".
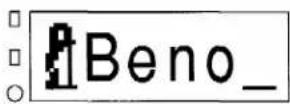
- Hold down CODE and push FRENCH
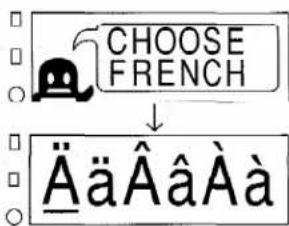
- Push 📄 or 📋 until the cursor is under "↑".
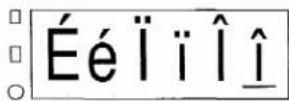
- Push YES.
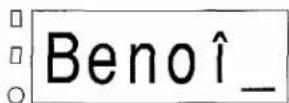
- Type in "t".
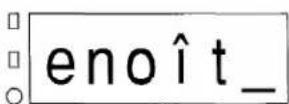
If you print this label, it will look like this:
Benoît

SPANISH ACCENTED LETTER KEY
Use this key to type in one of the Spanish accented letters "Accents" are the dots or lines on the top or bottom of a letter. The Spanish accented letters are. Ç, ζ, Ü, ü, Ñ, ñ, á, é, í, ó, ú, ÿ, ï.
To choose a Spanish accented letter:

Hold down CODE and push SPANISH. The message "CHOOSE SPANISH" comes on for a short time. Then, the cursor appears below one of the accented letters.

Push 📋 or 📋 until the cursor is under the letter you want.

Push YES. The letter appears in the label.
EXAMPLE:
If you want to make a label for your Spanish pen pal, María: This example is made with the font ABCDE, NORMAL style and FULL margins.
-
Type in "Mar".
-
Hold down CODE and push SPANISH W.
-
Push ☑ or ☑ until the cursor is under "i".
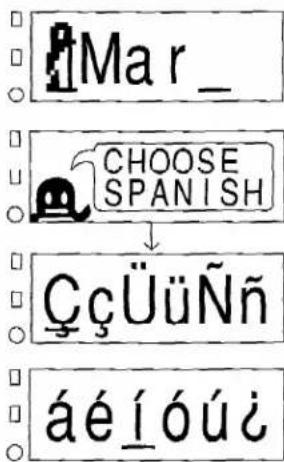
- Push YES.
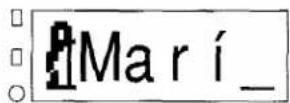
- Type in "a".
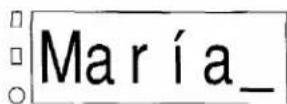
If you print this label, it will look like this:
Maria
SYMBOL
SYMBOL KEY
Use this key to choose a symbol and add it to your label. The symbols are: •, +, ×, ÷, =, /, [, ], ↑, ↓, →, ←, ☐, ☑, ♩,
♥ , ★ , 📞.
You can also use this key to type in the pink punctuation marks (-, :, :, ?, ' ,") that are on some of the keys.
To find out how to type in the punctuation marks, go to the next section "PUNCTUATION MARK KEYS".
To choose a symbol:

Hold down CODE and push SYMBOL. The message "CHOOSE SYMBOL" comes on for a short time. Then, the cursor appears below one of the symbols.

Push 📋 or 📋 until the cursor is under the symbol you want.

Push YES. The symbol appears in the label.
To see an example on how to choose a symbol, go to the section "HOW TO USE SYMBOLS & A DIFFERENT FONT" on page 21.

PUNCTUATION MARK KEYS
These keys can be used to type in the pink punctuation marks (-, ;, :, ?, ', '') that are on them.
To type in a punctuation mark:
Hold down 📋 and push the key for the punctuation mark you want.
EXAMPLE:
This example is made with the font ABCDE, NORMAL style and FULL margins.
-
Type in "Marc".
-
Hold down □ and push □.
-
Type in "s".
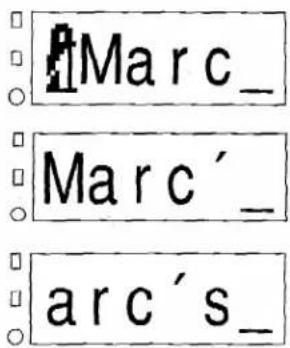
If you print the label, it will look like this:
Marc's

SHIFT/CAPS KEY
Use this key to type in capital letters or the symbols on top of the number keys.
To type in a capital letter or a symbol:
Hold the ☑CAPS key and push the key for the letter or symbol you want.
To type only in capital letters:
Hold down CODE and push SHIFT CAPS. The CAPS indicator goes on.
Type in your message.
To see an example on how to type in a capital letter, go to the section "HOW TO MAKE A LABEL" on page 10. To see an example on how to type in only capital letters, go to the section "HOW TO CHANGE A LABEL" on page 14.
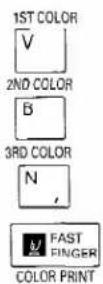
MULTI-COLOR PRINTING KEYS
You can use these keys to print lots of colorful labels with two or three ink colors.
To see an example on how to make a label with three ink colors, go to the section "HOW TO PRINT WITH TWO OR THREE COLORS" on page 52.

LEFT KEY
Use this key to move the cursor to the left or to see more of the picture. The flashing underline (_) that tells you where you are in your label is called the "cursor".
To move the cursor to the left or move a picture up:

Push.
To move the cursor to the beginning of the label:

Hold down CODE and push

RIGHT KEY
Use this key to move the cursor to the right or to see more of the picture.
To move the cursor to the right or move a picture down:

Push ↗.
To move the cursor to the end of the label:

Hold down CODE and push
PRINT/GIANT PRINT KEY
Use this key to print your label or to make your letters two to four times bigger than normal size and print them on two, three or four labels.
To print a label:

Type in your label.

Push PRINT GIANT PRINT
To make a giant label:

Hold down CODE and push PRINT. The message "GI-ANT PRINT" comes on for a short time. Then, you can choose how big you want the label to be.

Push 📋 or 📋 to find the size you want.

Push 📋. The message "PRINTING" appears and the Stickerkid prints the label.

• The margins of these labels will always be 1/2" (12 mm).
EXAMPLE:
This example is made with the font ABCDE, NORMAL style and FULL margins.
- Type in "HI!"
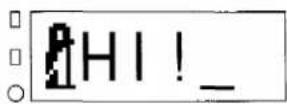
- Hold down CODE and push PRINT GIANT PRINT
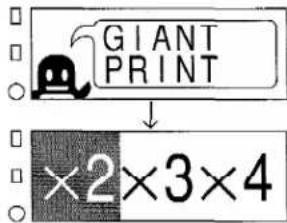
- Push 📋 or 📋 until "X3" is chosen.
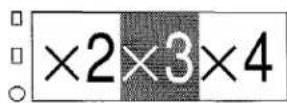
If you print the label, it will look like this:
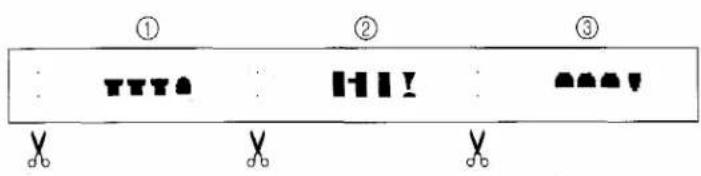
Cut the three labels and put them together like this:
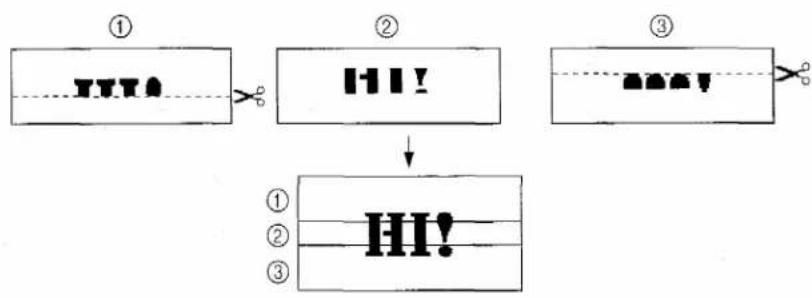
flowchart
graph TD
    A["TVT"] --> B["H!"]
    B --> C["III!"]
    C --> D["..."]
YES
YES KEY
Push this key to answer "yes".
NO
NO KEY
Push this key to answer "no".
ON OFF
ON/OFF KEY
Use this key to turn the Stickerkid on and off.
To turn it on:

Push ☑. You can start making your labels after the "Hello!" message appears.

- The Stickerkid will turn off within 5 minutes if a key is not pushed.
To turn it off:

Push Ⓞ. It will turn off after the "GOOD BYE." message appears.

- When the Slickerkid is off, the label and the settings are not erased.
RESETTING THE MACHINE
You can change the font, style, margins and all the other settings back to the ones that were used when you first bought your Stickerkid. If you reset the machine, everything will be erased, even your name.
To reset the machine:
Turn off the Stickerkid.

Hold down CODE and push R and ON at the same time. The message "RESET?" appears on the display.

Push YES. You can start making labels after the "Hello!" message appears.

- If you decide that you don't want to erase everything, push NO.

- Your name will also be erased.
natural_image
Cartoon penguin character with closed eyes and wide arms (no text or symbols)HOW TO CHANGETHE CUTTER
If the cutter does not cut well, take it out and put in a new one. Since the cutter is very sharp, ask an adult to help you.
CAUTION
- Don't touch the cutter blade.
- The cutter is very dangerous. Don't put it in your mouth and don't let smaller children put it in their mouth. Right after you change it, throw it away.

• The average life of the cutter should be about 2000 cuts.

Turn off the Stickerkid.

Open the cassette cover and take out the tape cassette.
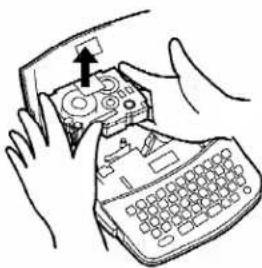
natural_image
Line drawing of hands using a handheld device to press or install a keyboard (no text or symbols visible)
Grab the big plastic part of the cutter with your fingers and pull out the cutter.
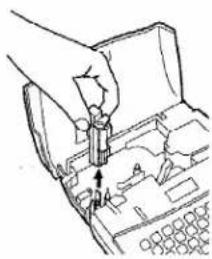
natural_image
Line drawing of a hand inserting a component into a device (no text or symbols visible)
Grab the big plastic part of the new cutter and put it over the metal bar and pole.
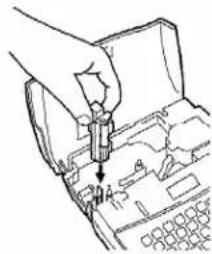
natural_image
Line drawing of a hand using a tool to insert or install electronic components (no text or symbols visible)
Put in the tape cassette and close the cassette cover.
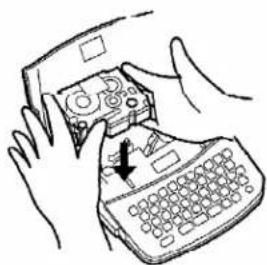
natural_image
Illustration of hands using a handheld device to press or install a keyboard (no text or symbols visible)
natural_image
Cartoon monkey character holding a book (no text or symbols visible)CLEANING THE PRINT HEAD AND ROLLERS
Sometimes, the Stickerkid cannot print well because dust and dirt are on the print head and rollers. If you use the Stickerkid outside, this may happen often. If the print head has dust on it, the label will have a blank line in it. So clean the print and rollers once in a while. If you don't understand something, ask someone to help you.

Turn off the Stickerkid.

Open the cassette cover and take out the cassette.
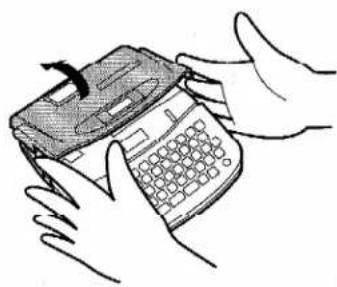
natural_image
Illustration of hands holding a mobile phone with a keypad (no text or symbols visible)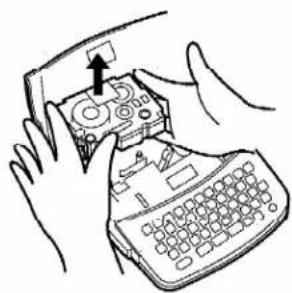
natural_image
Illustration of hands using a handheld device to press or install a keyboard (no text or symbols visible)
Cleaning the print head: Use a dry cotton swab to gently rub up and down on the print head.
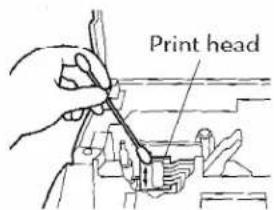
Cleaning the rollers: Rotate each roller while using a dry cotton swab to wipe up and down on them.
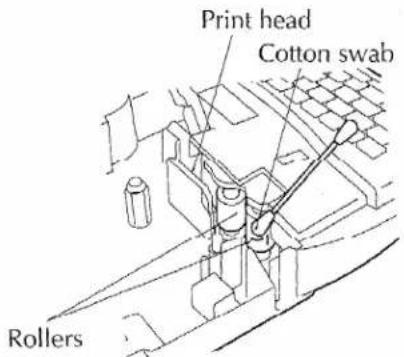

Put in the cassette and try printing again.
If there is still dust on the print head and rollers, ask an adult to help you clean them.

Take out the cassette and go back to step 3. This time use a cotton swab dipped in isopropyl (rubbing) alcohol.

Put in the cassette and try printing again.
If there is still a blank line in the label, take your Stickerkid to your service representative.
TROUBLESHOOTING
| PROBLEM | REMEDY |
| 1. Nothing comes on the display. | If there are no batteries, put them in.(Go to page 5.)If comes on the display, the batteries are low. So change the batteries.(Go to page 5.) |
| 2. The Stickerkid does not print. | If comes on the display, the batteries are low. So change the batteries.(Go to page 5.)If the tape cassette is empty, put in a new one.(Go to page 6.)If the tape cassette is not put in correctly, fix it.(Go to page 6.)If the print head is dirty, clean it.(Go to page 105.) |
| 3. The label has stripes on it. | If the tape cassette is empty, put in a new one.(Go to page 6.) |
| 4. The label does not stick. | If the paper or plastic on the back of the label is not taken off, take it off.(Go to page 12.)If the thing that you are sticking the label on is dirty or greasy, clean it. |
SPECIFICATIONS
HARDWARE
| Input device: | Keyboard - 49 keys |
| LCD: | 16 × 48 dots3 indicators |
| Print tape: | Pressure sensitive, adhesive based (TZ tapes only)26' 3" (8 m) long3/4" (18 mm Wide) |
| Power supply: | 6 AA alkaline batteriesAuto power off after 5 minutes |
| Print head: | 64 dot / 180 dpi |
| Dimensions: | 7" × 8" × 2" (174 × 200 × 50 mm) |
| Weight: | 1.8 lbs (including batteries) |
SOFTWARE
| Character size: | 4 sizes |
| Character fonts: | 7 built-in typefaces |
| Buffer size: | 99 characters |
| Number of characters: | 141 characters |
| Print styles: | Normal, Outline, Bold, Shadow, Vertical and Italic |
INDEX
A
All capital letters ..... 14, 96
B
Batteries 5,107
Battery cover 5
Bodies 42,83
Bold style 65
C
CAPS key 14,96
CAPS indicator 2, 14, 97
Cassette window 1
Cassettes 6
Changing a label 15
Changing the font 22,63
Changing the margins..... 31, 70
Changing the style...... 27, 64
Choosing a frame ...... 33, 67
Choosing a language ..... 36, 85
Choosing a pattern ..... 38, 88
Choosing a phrase...... 36, 85
Choosing a picture ..... 17, 74
Choosing a ribbon length 39, 88
Choosing a symbol ..... 21, 95
Cleaning the print head/rollers.... 105
Clear all key 13,92
Code key 100
Cursor 2,15
Cutter lever 1, 11
D
Decode 46,87
Display 1,2
E
Empty spaces.... 30, 70
Encode 45,87
Erase key 7,15,92
Exit slot ....1
F
Faces....80, 82
Fast finger game key ..... 59, 100
Feed key 73,100
Flashing line 2,15
Font key 22,63
Frame key 33,67
French accented letter key.... 92
Full margins 70
Functions 100
G
Getting rid of labels ..... 13, 92
Giant print key 48,98
H
I half margins.... 71
Heads 42,78,82
I
Ink cassette 55
Italic style....30, 66
J
Jobs 100
K
Keyboard 3
Kinds of letters.... 21, 63
L
Language master key ..... 35, 85
Left key 97
Letter keys 4
M
Make picture key...... 42,77
Make ribbon key 38,88
Making a picture 42,77
Making a secret message....44, 86
Making labels 10
Margin key 31,70
Margin indicator...... 31,70
Moving the cursor .... 15, 97, 98
Multi-color printing keys .... 52, 97
Music key 91
N
Name 7
No key 101
No margins 71
None....71
Normal style.... 49, 65
Not printing 107
Number keys 4
0
On/Off key 7,101
Outline style.... 65
p
Penguin 2,8
Phrase 36
Picture key 17,74
Pictures and lines around letters...... 30, 67
Print head 105
Print key 11,98
Punctuation mark keys ..... 96
R
Resetting 101
Right key 98
Rollers 105
S
Secret code key 45,86
Shadow style 66
Shift key 7,10
Small margins.... 31,71
Space key 19, 100
Spanish accented letter key .. 94
Sticking on labels ..... 12, 107
Stripes 107
Style key 27,64
Style indicator 27,65
Symbol key 21,95
T
Tape cassette 6,55
Turning on/off 7,101
Turning on/off CAPS ..... 14, 97
Typing in letters 8, 10
V
Vertical 27,66
W
Ways of printing 24, 64
Y
Yes key....101
SUPPLIES
You can obtain tape and ink cassettes from your nearest authorized Brother dealer. Use only Brother TZ tapes with this machine. Do not use tapes that do not have the TZ mark. Brother cannot be held responsible for trouble caused by the use of unauthorized supplies.
Non-laminated TZ Tape Cassettes
| Stock No. | Description | Q'ty | Price |
| Pastel-colored Tape Cassettes | |||
| TZ-N541 | Black letters on blue tape, 3/4" (18 mm) | 1 | 18.95 |
| TZ N641 | Black letters on yellow tape, 3/4" (18 mm) | 1 | 18.95 |
| TZ-N741 | Black letters on green tape, 3/4" (18 mm) | 1 | 18.95 |
| TZ-NE41 | Black letters on pink tape, 3/4" (18 mm) | 1 | 18.95 |
| TZ-NF41 | Black letters on purple tape, 3/4" (18 mm) | 1 | 18.95 |
| TZ-N841 | Black letters on gold tape, 3/4" (18 mm) | 1 | 18.95 |
| Patterned Tape Cassettes | |||
| TZ-PC41 | Christmas, 3/4" (18 mm) | 1 | 18.95 |
| TZ-PH41 | Heart, 3/4" (18 mm) | 1 | 18.95 |
| TZ-PF41 | Fruit, 3/4" (18 mm) | 1 | 18.95 |
| TZ-PM41 | Marine, 3/4" (18 mm) | 1 | 18.95 |
| Separate Cassettes for Multi-Color Printing | |||
| TZ-I240 | Base Tape Cassette - White, 3/4" (18 mm) | 1 | 19.95 |
| TZ-R041 | Ink Ribbon Cassette - Black | 1 | 12.95 |
| TZ-R042 | Ink Ribbon Cassette - Red | 1 | 12.95 |
| TZ-R043 | Ink Ribbon Cassette - Blue | 1 | 12.95 |
| Other | |||
| TC-6 | Tape Cutter | 1 | $7.95 |
SUPPLIES ORDER FORM
Dear Customer:
Please send this order form, along with proper payment, to the address below, OR, Visa, MasterCard or Discover holders, call toll free, anytime, 1-800-284-4357, or fax your completed order form to 1-800-947-1445.
| Stock No. | Description | Price | Quantity | Total |
Subtotal
Name: ____
Address:
City:
State/Zip: ____
Daytime Phone: ____
SEND ORDER FORM TO:
Brother International Corp.
Attn: Consumer Accessory Div.
P.O.BOX 341332
Bartlett, TN38184-1332
Accessory Subtotal: \$
AZ, CA, CT, FL, GA, IL, LA, MA, MI, MN,
MO, NC, NJ, NV, NY, TN, TX, VA, WA
residents add applicable sales tax
Shipping/Handling Options
ease choose one
• Standard (\$5.00)
• 2nd day air freight (\$8.75)
Mandatory for all deliveries
outside of the continental U.S.
(Alaska, lawaii, Puerto Rico,
Virgin Islands & Canada)
• All other overseas orders (\$25.00)
\$
TOTAL DUE \$
Method of payment (Check one)
( ) Visa ( ) MasterCard ( ) Discover ( ) Check/Money Order
Account Number ____
Expiration Date ____
Signaturo
*Prices subject to change without notice.
SUPPLIES ORDER FORM
Dear Customer:
Please send this order form, along with proper payment, to the address below. OR, Visa, MasterCard or Discover holders, call toll free, anytime, 1-800-284-4357, or fax your completed order form to 1-800-947-1445.
| Stock No. | Description | Price | Quantity | Total |
| Subtotal | ||||
Name: ____
Address:
City:
State/Zip: ____
Daytime Phone: ____
SEND ORDER FORM TO:
Brother International Corp.
Attn: Consumer Accessory Div.
P.O.Box 341332
Bartlett, TN38184-1332
Accessory Subtotal: \$
AZ, CA, CT, FL, GA, IL, LA, MA, MI, MN,
MO, NC, NJ, NV, NY, TN, TX, VA, WA
residents add applicable sales tax
Shipping/Handling Options
ease choose one:
• Standard (\$5.00)
• 2nd day air freight (\$8.75)
Mandatory for all deliveries
outside of the continental U.S.
(Alaska, Hawaii, Puerto Rico,
Virgin Islands & Canada)
• All other overseas orders (\$25.00)
\$
\$
TOTAL DUE \$
Method of payment (Check one)
( ) Visa ( ) MasterCard ( ) Discover ( ) Check/Money Order
Account Number ____
Expiration Date ____
Signature
*Prices subject to change without notice.
• GUIA DE INSTRUCCIONES •
PROCURA TENERCUIDADO PARA NO HACERTE DAÑO
4 PARANO ESTROPEAR EL STICKERKID
- No toques el cortador con los dedos. Esta muy afilado y podrías cortarte.
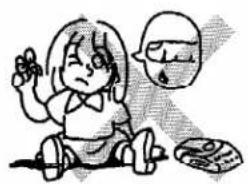
natural_image
Cartoon illustration of a child sitting with a dog and a small object nearby (no text or symbols)- No te enganches las etiquetas en el cuerpo.
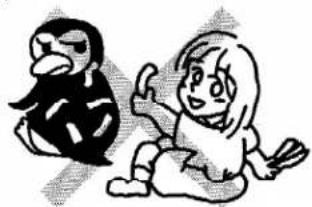
natural_image
Cartoon illustration of a penguin and a girl sitting together (no text or symbols)- No te pongas las etiquetas en la boca.
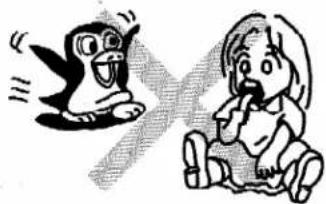
natural_image
Cartoon illustration of two penguins and a child, one waving and the other sitting with a spoon (no text or symbols)- No saques tú mismo el cortador amarillo. Pídeselo que lo haga a una persona mayor.
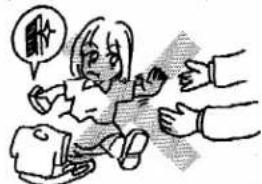
- No desmontes los casetes del Stickerkid.
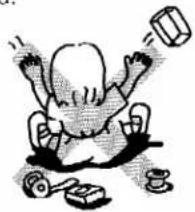
natural_image
Cartoon illustration of a baby sitting on the floor with toys and a hammer (no text or symbols)- No lo utilices en lugares con mucho polvo o con humedad.
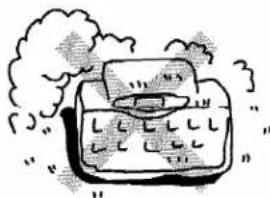
natural_image
Simple line drawing of a container with smoke rising (no text or symbols)- No lo tires al suelo.
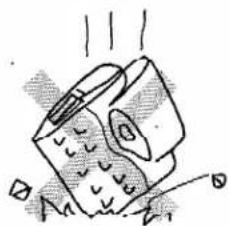
natural_image
Simple line drawing of a bag with steam rising, no text or symbols present- No pongas nada pesado encima.
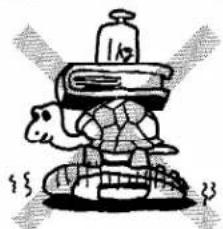
natural_image
Cartoon illustration of a person struggling under a large stack of books (no text or symbols)- Procura que no se caiga comida ni bebida encima. El Stickerkid no es impermeable.
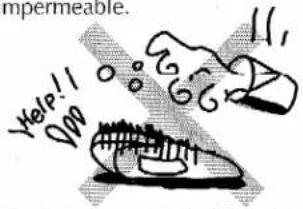
- No toques el cabezal de impresión con los dedos. Se puede romper con facilidad.
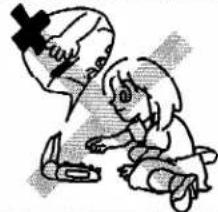
natural_image
Illustration of a child and adult interacting with a device (no text or symbols present)- No hagas presión en el visualizador de LCD.
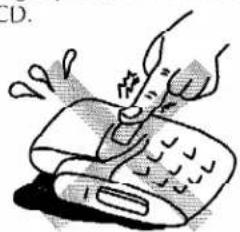
natural_image
Illustration of a hand using a tool to press or lift a device (no text or symbols visible)- No toques la palanca del cortador mientras la máquina está imprimiendo o haciendo avanzar la etiqueta. Espera a que se pare el avance de la etiqueta.
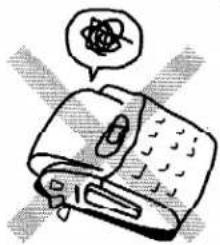
natural_image
Illustration of a computer mouse with a speech bubble containing an atom (no text or symbols present)- No imprimas etiquetas si el casete está vacío o si no hay casete en el Stickerkid.
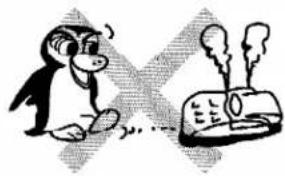
natural_image
Cartoon illustration of a penguin reacting to smoke from a steaming machine (no text or symbols)- No tires con fuerza de la palanca del cortador.
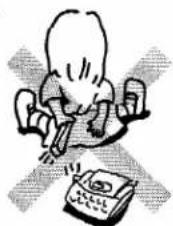
natural_image
Cartoon illustration of a person using a typewriter (no text or symbols present)- No dejes el Stickerkid en lugares muy calientes durante mucho tiempo, como por ejemplo dentro de un automóvil, cerca de una estufa o bajo la luz directa del sol.
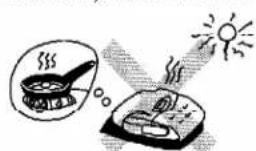
- No tires de las etiquetas cuando están saliendo de la máquina.
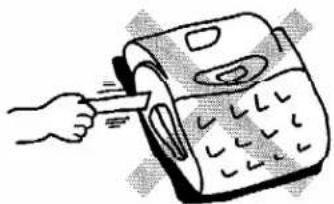
natural_image
Illustration of a hand inserting a card into a machine (no text or symbols)
¡PREPARATE!
PARTES IMPORTANTES DEL STICKERKID
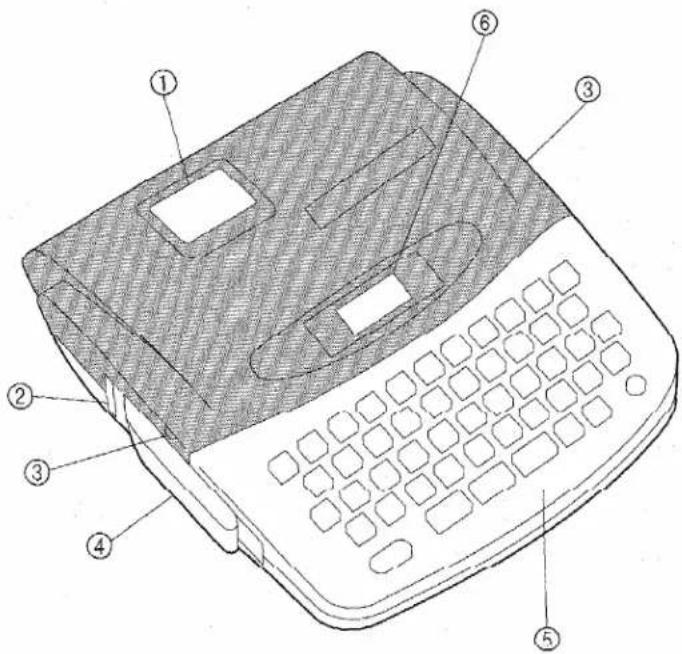
① Ventanilla del casete.. Mira por aquí para ver la cinta que queda y el tipo de cinta que es.
② Ranura de salida ... Por aquí es por donde sale la etiqueta.
③ Lengüetas de la cubierta del casete... Se usan para levantar la cubierta del casete cuando hay que cambiar el casete.
④ Palanca del cortador.... Se usa para cortar las etiquetas.
⑤ Teclado .... Las teclas sirven para escribir las etiquetas y para hacer muchas otras cosas
⑥ Visualizador ...... Míralo para ver lo que estás escribiendo.
natural_image
Cartoon monkey character holding a book (no text or symbols visible)EL VISUALIZADOR DEL STICKERKID
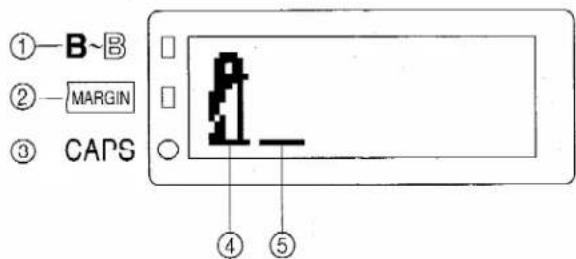
① Indicador del tipo. Este título aparece cuando cambia la forma de las letras que se imprimen en la etiqueta. (Las formas distintas de las letras de impresión se llaman "tipos")
② Indicador de margen ... Este pequeño recuadro aparece cuando cambias el tamaño del espacio vacío de ambos lados de la etiqueta. (Los espacios vacios de ambos lados de la etiqueta se llaman "márgenes".)
③ Indicador de mayúsculas... Este pequeño círculo aparece cuando escriben todas las letras en mayúsculas.
④ Pinguino ...... Veras un pingüno al principio de la letra.
⑤ Cursor ....Esa pequeña línea que parpadea en la letra te indica la posición en la que estás ahora.
natural_image
Cartoon monkey character with closed eyes and wide arms (no text or symbols)EL TECLADO DEL STICKERKID
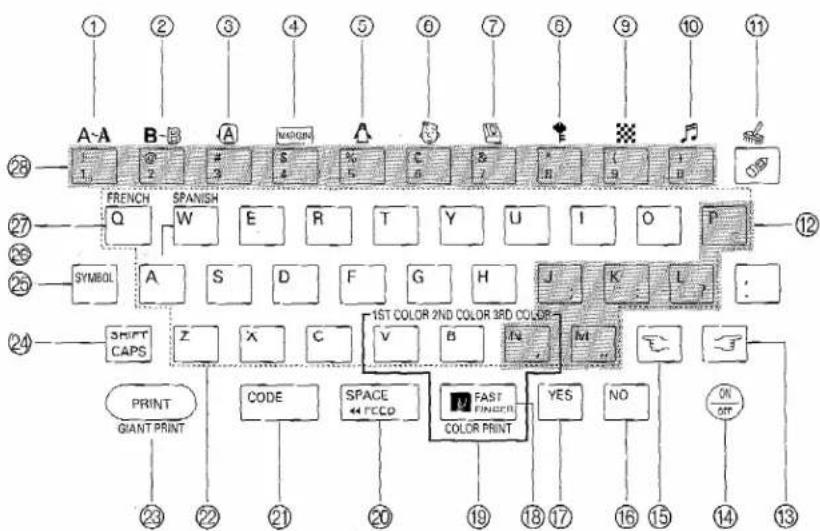
flowchart
graph TD
    A["1"] --> B["A-A"]
    C["2"] --> D["B-B"]
    E["3"] --> F["A"]
    G["4"] --> H["NADQUIN"]
    I["5"] --> J["△"]
    K["6"] --> L["C"]
    M["7"] --> N["&"]
    O["8"] --> P["H"]
    Q["9"] --> R["×"]
    S["10"] --> T["√"]
    U["11"] --> V["√"]

    W["28"] --> X["FRENCH"]
    Y["27"] --> Z["SYMBOL"]
    AA["26"] --> AB["SHIFT CAPS"]
    AC["25"] --> AD["CODE"]
    AE["24"] --> AF["SPACE ↔ PECD"]
    AG["23"] --> AH["PRINT GIANT PRINT"]

    AI["1"] --> AJ["1.1"]
    AK["2"] --> AL["@"]
    AM["3"] --> AN["#"]
    AO["4"] --> AP["S"]
    AQ["5"] --> AR["%"]
    AS["6"] --> AT["C"]
    AU["7"] --> AV["&"]
    AW["8"] --> AX["H"]
    AY["9"] --> AZ["U"]
    BA["10"] --> BB["I"]
    BC["P"] --> BD["O"]
    BE["11"] --> BF["O"]

    BG["12"] --> BH["J"]
    BI["K"] --> BJ["L"]
    BK["L"] --> BL["?"]

    BM["13"] --> BN["ON OUT"]

    BO["14"] --> BP["14"]

    B --> B1["French"]
    B --> B2["SANISH"]
    B --> B3["A"]
    B --> B4["E"]
    B --> B5["R"]
    B --> B6["T"]
    B --> B7["Y"]
    B --> B8["U"]
    B --> B9["I"]
    B --> B10["O"]
    B --> B11["P"]

    BN --> BN1["SHIFT CAPS"]
    BN --> BN2["Z"]
    BN --> BN3["X"]
    BN --> BN4["C"]

    BB --> BB1["CODE"]
    BB --> BB2["SPACE ↔ PECD"]
    BB --> BB3["FAST FININGER COLOR PRINT"]

    BC --> BC1["1ST COLOR 2ND COLOR 3RD COLOR"]

    BD --> BD1["YES"]
    BD --> BD2["NO"]
① Tecla de juego
de caracteres ...... Es para cambiar la clase de letras que usas en la etiqueta.

Consulta la página 21, 63.
② Teca de tipos ...... Sirve para cambiar la forma en la que se imprimen las letras en la etiqueta.

Consulta la página 24, 64.
③ Tecla de recuadro .... Sirve para poner un recuadro en torno a lo que escribes en la etiqueta.

Consulta la página 30, 67.
④ Tecla del margen .. Sirve para hacer espacios vacíos más grandes o más pequeños a los lados.

Consulta la página 30, 70.
⑤ Tecla de imágenes... Sirve para poner imágenes en la etiqueta.

Consulta la página 17, 74.
⑥ Tecla de hacer
imágenes ...... Sirve para hacer imágenes juntando una cara y una cabeza o una cabeza y un cuerpo.



Consulta la página 40, 77.
⑦ Tecla principal del idioma ...... Sirve para seleccionar una frase en otro idioma.

⑧ Tecla de código secreto ...... Sirve para leer o escribir una etiqueta con un código se- creto.

⑨ Tecla de lazos ...... Sirve para hacer una etiqueta con un patrón o para decorarla.

Consulta la página 38, 88
⑩ Tecla de música .... Sirve para encender y apagar la música.
⑪ Tecla de
borrar/eliminar..... Sirve para borrar una letra o imagen del texto o para eliminar la etiqueta.

⑫ Teclas de marcas
de puntuación ..... Sirven para escribir las marcas rosas que están en algunas teclas.

⑬ Tecla de la derecha ... Sirve para mover el cursor hacia la derecha o para bajar una imagen.
⑭ Tecla de encendido
apagado ...... Sirve para encender y apagar el Stickerkid.
⑮ Tecla de la izquierda ... Sirve para mover el cursor hacia la izquierda o para subir una imagen.
⑯ Teclas de No ...... Sirve para contestar "No" a las preguntas que algunas veces te hace el Stickerkid.
⑰ Teclas de Sí ...... Sirve para contestar "Sí" a las preguntas que algunas veces te hace el Stickerkid.
⑱ Tecla del juego
de dedos rápidos .. Sirve para jugar al juego de escribir del Stickerkid.
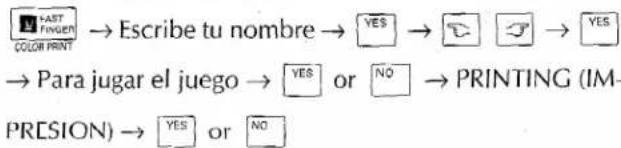
⑲ Teclas de impresión
en varios colores .. Sirven para imprimir una etiqueta don dos o tres colores de tinta.
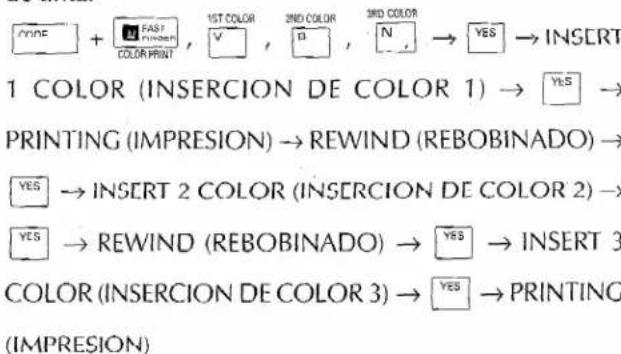
brother®
UN0683001
Printed in Jape
- P-TOUCH Stickerkid™ Model ST-5
- •GUIDE BOOK•
- FCC NOTICE
- CAUTION
- CONTENTS
- GET READY!
- GET SET!
- NOW, LET'S GO!
- HOW TO CHOOSE A PHRASE 35
- HOW TO MAKE A RIBBON 38
- HOW TO MAKE A PICTURE 40
- HOW TO MAKE A SECRET MESSAGE 44
- HOW TO MAKE GIANT LABELS 48
- HOW TO PRINT WITH TWO OR THREE COLORS .... 52
- HOW TO PLAY THE FAST FINGER GAME 59
- LOOK WHAT THE KEYS CAN DO! 63
- HOW TO CHANGE THE CUTTER 103
- CLEANING THE PRINT HEAD AND ROLLERS 105
- ¡PREPARATE!
- THE STICKERKID'S DISPLAY
- THESTICKERKID'S KEYBOARD
- HOW TO PUT IN THE BATTERIES
- HOW TO PUT IN OR CHANGETHE TAPECASSETTE
- HOW TO TEACH THE STICKERKID YOUR NAME
- Type in your name.
- REVIEW
- STICK ON THE LABEL
- HOW TO CHANGE A LABEL
- PRIVATE
- TYPE IN ONLY CAPITAL LETTERS
- CHANGE THE LABEL
- SUMMER CLOTHES
- CHOOSE THE FIRST PICTURE
- TYPE IN THE LETTERS
- CHOOSE THE SECOND PICTURE
- HOW TO USE SYMBOLS & ADIFFERENT FONT
- ★LEE★
- CHOOSE A SYMBOL
- CHOOSE THE SAME SYMBOL AGAIN
- CHANGE THE FONT
- HOW TO USE A DIFFERENT STYLE
- TURN OFF CAPS
- CHANGE THE STYLE
- MOVE THE CURSOR
- CHOOSE A PICTURE
- HOW TO CHANGE THE MARGINS & PUT IN A FRAME
- Hi Kerry!
- CHANGE THE MARGINS
- CHOOSE A FRAME
- Danke!
- CHOOSE THE PHRASE
- CHOOSE THE LANGUAGE
- PRINT THE LABEL
- CHOOSE THE PATTERN
- CHOOSE THE RIBBON LENGTH
- HOW TO MAKE A PICTURE
- I LOVE ICE CREAM!
- Type in "I LOVE ICE CREAM!"
- REAM!
- MOVE THE CURSOR AGAIN
- MAKE A PICTURE
- HOW TO MAKE A SECRET MESSAGE
- TYPE IN THE MESSAGE
- ENCODE THE SECRET MESSAGE
- DECODE THE SECRET MESSAGE
- SPOT
- PRINT THE GIANT LABEL
- PUT TOGETHER THE LABEL
- Cut out the three labels.
- Happy Birthday!
- CHOOSE THE COLORS
- If you wind the tape too much and the end goes back into the cassette.
- HOW TO PLAY THE FAST FINGER GAME
- TYPE IN YOUR NAME
- CHOOSE THE LEVEL
- PLAY THE GAME
- PLAY THE GAME AGAIN
- LOOK WHAT THE KEYS CAN DO!
- FONT KEY
- STYLE KEY
- FRAME KEY
- EXAMPLE:
- I wish I had a steak!
- MARGIN KEY
- PICTURE KEY
- MAKE PICTURE KEY
- Womens' heads
- Animals' heads
- Bodies
- Penguin pictures
- Baby pictures
- LANGUAGE MASTER KEY
- SECRET CODE KEY
- No test today!
- MAKE RIBBON KEY
- MUSIC KEY
- ERASE/CLEAR ALL KEY
- FRENCH ACCENTED LETTER KEY
- SPANISH ACCENTED LETTER KEY
- Maria
- SYMBOL KEY
- PUNCTUATION MARK KEYS
- Marc's
- SHIFT/CAPS KEY
- MULTI-COLOR PRINTING KEYS
- LEFT KEY
- RIGHT KEY
- PRINT/GIANT PRINT KEY
- YES KEY
- NO KEY
- ON/OFF KEY
- RESETTING THE MACHINE
- HOW TO CHANGETHE CUTTER
- CLEANING THE PRINT HEAD AND ROLLERS
- TROUBLESHOOTING
- SPECIFICATIONS
- INDEX
- A
- B
- C
- D
- E
- F
- G
- H
- I
- J
- K
- L
- M
- N
- 0
- p
- R
- S
- T
- V
- W
- Y
- SUPPLIES
- SUPPLIES ORDER FORM
- SEND ORDER FORM TO:
- Shipping/Handling Options
- Method of payment (Check one)
- PROCURA TENERCUIDADO PARA NO HACERTE DAÑO
- PARANO ESTROPEAR EL STICKERKID
- PARTES IMPORTANTES DEL STICKERKID
- EL TECLADO DEL STICKERKID
Marke : BROTHER
Modell : P-Touch ST-5
Kategorie : Etikettendrucker