
PHTCM28 - Camcorder Pyle - Kostenlose Bedienungsanleitung
Finden Sie kostenlos die Bedienungsanleitung des Geräts PHTCM28 Pyle als PDF.

| Produkttyp | Wildkamera (Infrarot-Nachtsicht) |
| Bildsensor | CMOS, 8 MP (interpoliert) / 5 MP |
| Videoauflösung | VGA (640x480), 30 fps, AVI |
| Infrarot-LEDs | 30 Stück, unsichtbares IR-Licht, Reichweite bis 15 m (50 Fuß) |
| Auslöseintervall | 5 s bis 60 min (einstellbar) |
| Speicher | SD-Karte (max. 32 GB) |
| Stromversorgung | 4x AA Alkaline-Batterien (empfohlen); externer DC 6V Anschluss |
| Display | LCD-Bildschirm mit Tastensteuerung |
| Wasserschutz | Spritzwassergeschützt (nicht wasserdicht) |
| Betriebstemperatur | Nicht angegeben, aber für Außeneinsatz geeignet |
| TV-Ausgang | Ja (Composite-Video) |
| USB-Anschluss | Ja (Massenspeichermodus) |
| Bildstempel | Datum, Uhrzeit, Mondphase, Temperatur |
| Abmessungen (ca.) | 140 x 100 x 70 mm (geschätzt) |
| Gewicht (ca.) | 300 g (ohne Batterien) |
| Lieferumfang | Kamera, Riemen, Bedienungsanleitung; Netzteil und TV-Kabel nicht enthalten |
| Pflegehinweise | Linsen mit weichem Tuch reinigen; vor direktem Wasser schützen. |
| Sicherheitshinweise | Keine NiMH-Akkus verwenden; Batterien korrekt einlegen; Gerät nicht öffnen. |
| Reparatur/Ersatzteile | Wenden Sie sich an den Kundendienst von Pyle (www.pyleaudio.com) |
Häufig gestellte Fragen - PHTCM28 Pyle
Benutzerfragen zu PHTCM28 Pyle
0 Frage zu diesem Gerät. Beantworten Sie die, die Sie kennen, oder stellen Sie Ihre eigene.
Eine neue Frage zu diesem Gerät stellen
Laden Sie die Anleitung für Ihr Camcorder kostenlos im PDF-Format! Finden Sie Ihr Handbuch PHTCM28 - Pyle und nehmen Sie Ihr elektronisches Gerät wieder in die Hand. Auf dieser Seite sind alle Dokumente veröffentlicht, die für die Verwendung Ihres Geräts notwendig sind. PHTCM28 von der Marke Pyle.
BEDIENUNGSANLEITUNG PHTCM28 Pyle
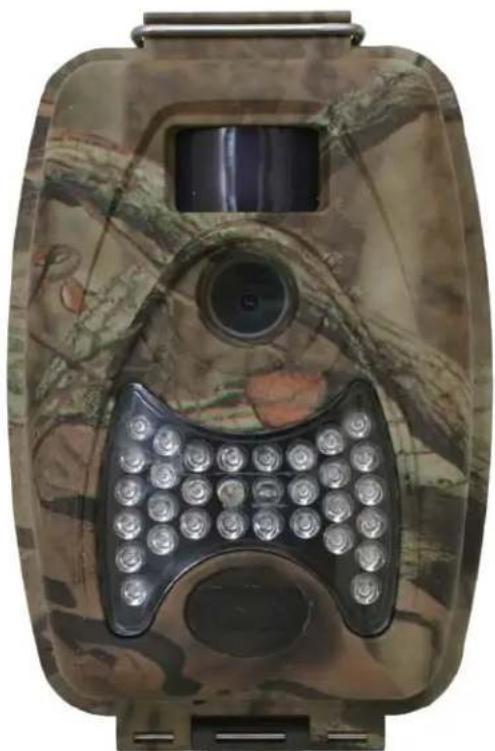
PYLE® SPORTS
Water Resistant Infrared Night Vision Game Camera
PHTCM28
natural_image
Camouflaged mobile surveillance device with a keypad and display screen (no visible text or symbols)www.pyleaudio.com
Instruction Manual
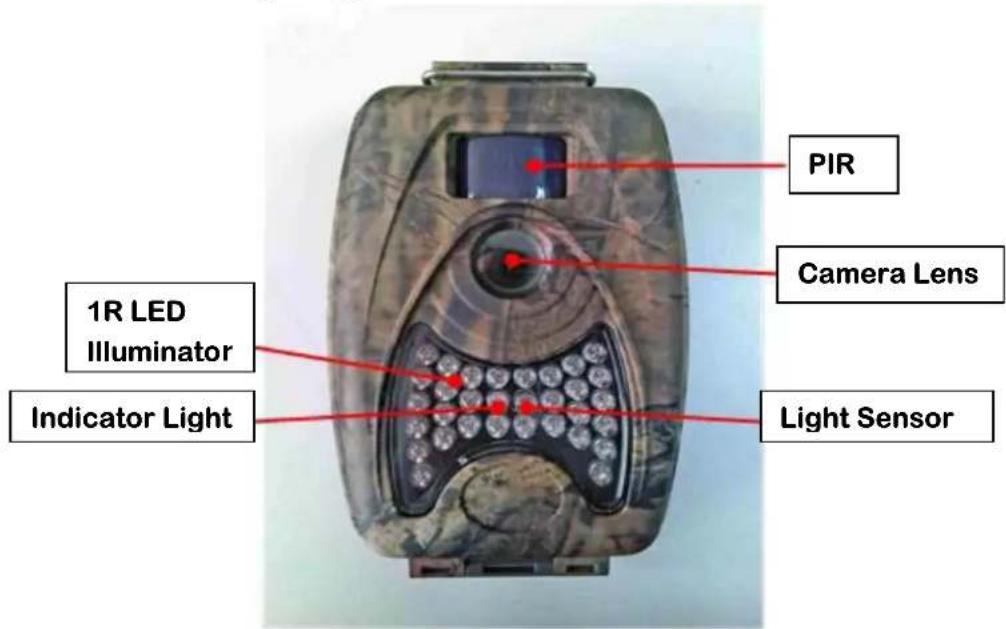
I. Your camera features 8MP images, 30 FPS videos, selectable interval, 30 IR LED's (Note#1) with 50 foot maximum illumination, up to 32GB SD card capacity, adjustable PIR (Note#2) sensitivity for ambient temperature, photos are stamped with date, time, moon phase, and temperature.
1. Front Housing Image
2. Open View
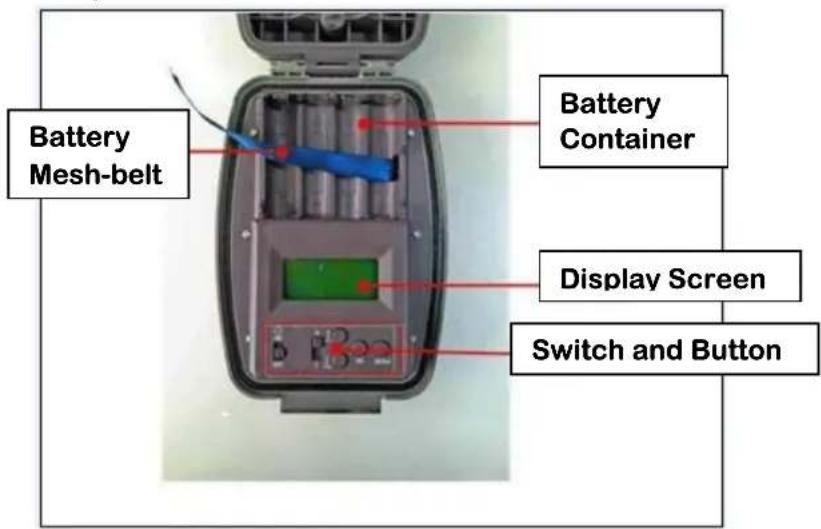
- Switch and Button Control Panel
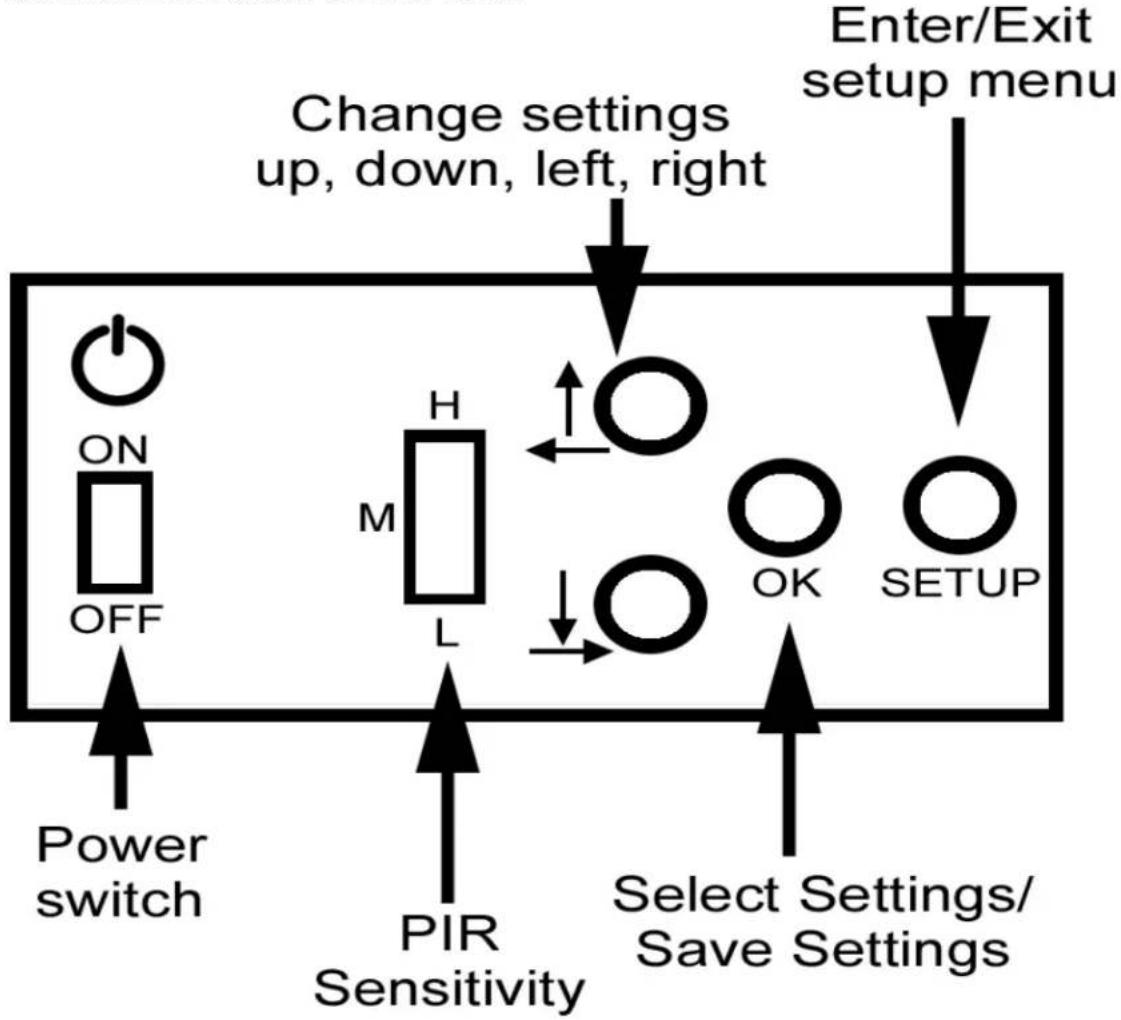
flowchart
graph TD
    A["Power switch"] --> B["ON/OFF"]
    B --> C["Change settings up, down, left, right"]
    C --> D["H/M/L"]
    D --> E["OK"]
    E --> F["SETUP"]
    F --> G["Enter/Exit setup menu"]
    H["PIR Sensitivity"] --> I["Power switch"]
    J["Select Settings/Save Settings"] --> K["OK"]
    L["Power switch"] --> M["OFF"]
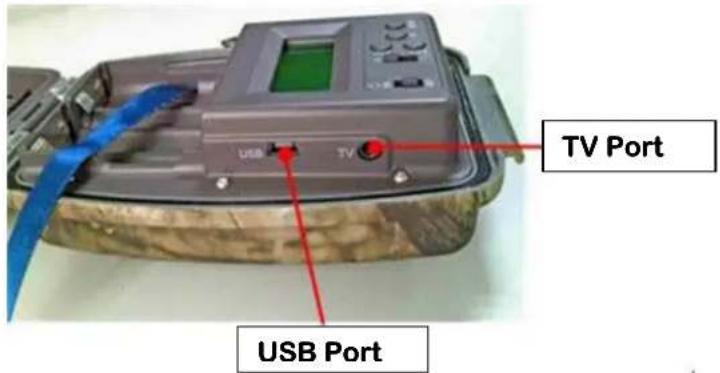
- TV & USB Interface
II. Battery Installation
- Ensure power switch is in the off position.
- Install 4AA batteries according to polarity indicated in the battery tray.
★ Recommended Alkaline battery
★nickel-hydrogen battery rechargeable never to be used (low voltage of nickel-hydrogen battery would render the camera non-working)
★Incorrect voltage or polarity (+/-) will get the battery hot and or damage unit.

natural_image
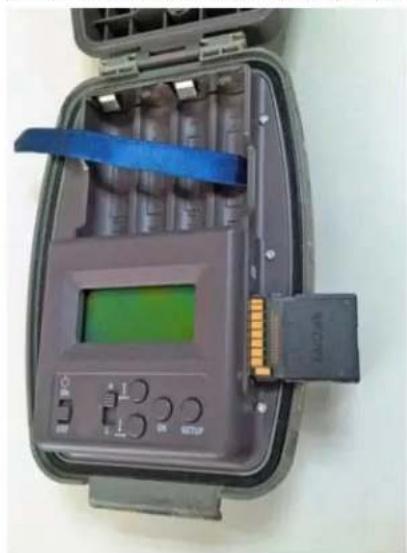
Interior view of a digital testing device with four red cylindrical batteries and a green display screen (no visible text or symbols)III. SD Card Installation
- Make sure SD Card is not write-locked before inserting.
- Insert SD memory card into the SD Card Slot completely and in the correct direction as shown on below picture at the side of the housing, until "click".
natural_image
Open industrial control box with digital display and orange connectors (no visible text or symbols)IV. Setup your Camera
- After installing the batteries and SD card correctly, turn the power switch to the on position.
| Operation Screen Display | |
| Turn on the switch | FREE MEMXXX MB |
| Press “DOWN” skip or wait for 5s | IMG00000MOV00000 |
| Press “DOWN” come to set menuor wait for 5s, come to shoot restingcondition automatically | SET DATEOr nothing |
2. Menu Installation
★when time-lapse snap, the switch status is different; the parameter setting is not the same
| Setup | OFF | ON | Data Selectable |
| Date SET DATE | 2012~2030 | ||
| Time | SET TIME | 24H | |
| Mode CAP | MODE 1P/3P/Movie | ||
| ◆1P/3P: | 8M/5M, Default=5M | ||
| ◆Movie: | 5s~15s, Default=10s | ||
| Delay DELAY | ✕ | 5s-60min, Default=1min | |
| Format | FORMAT SD CARD | FORMAT SD CARD | Y/N |
★during menu-setting, after 1 min if you do nothing, the camera would come into shoot resting condition automatically
V. Specification and Parameter
| Model | PHTCM28 (non time-lapse function) |
| Image Sensor | ◆CMOS |
| Image Format | ◆5.0 MP / 8.0 MP (interpolation)◆1 to 3pcs one time◆color daytime /black-white nighttime |
| Video Format | ◆VGA(640×480)AVI◆30fps◆5s~15s, Default=10s |
| Delay Time | ◆ 5s-60min, Default=1min |
| Memory | ◆SD card◆max up to 32GB |
| Trigger Mode | ◆ IR |
| Distance | ◆ 50 feet |
| Internal Power | ◆ 4 AA alkaline dry batteries |
| Extra Power | ◆ DC 6v |
VI. Extra Interface
1. USB interface (Mass Storage)
◆ On menu setting, insert the USB cable and connect to PC, “USB IN STORAGE” will be showed on LCD screen, then you could upload or download images from the SD card inserted in the camera.
2. TV Interface
◆ On menu setting, insert the TV cable and connect to TV, “TV OUT PREVIEW” showed on LCD, then the pictures from camera will appear on TV.
◆ press “OK” to change to Playback mode, LCD showed “TV OUT PLAYBACK”, you can press “UP/LEFT” or “DOWN/RGHT” to view the pictures.
★Press "OK" to playback and view videos.
Notes:
Note#1: The IR LED light is invisible
Note#2: PIR – Passive Infrared Radiation


Marke : Pyle
Modell : PHTCM28
Kategorie : Camcorder