
MDC DAC 2.0 - Lydudstyr NAD - Gratis brugsanvisning og manual
Find enhedens vejledning gratis MDC DAC 2.0 NAD i PDF-format.


Brugerspørgsmål om MDC DAC 2.0 NAD
0 spørgsmål om dette apparat. Besvar dem du kender, eller stil dit eget.
Stil et nyt spørgsmål om dette apparat
Download vejledningen til din Lydudstyr i PDF-format gratis! Find din vejledning MDC DAC 2.0 - NAD og tag din elektroniske enhed tilbage i hånden. På denne side er alle dokumenter nødvendige for brugen af din enhed offentliggjort. MDC DAC 2.0 af mærket NAD.
BRUGSANVISNING MDC DAC 2.0 NAD
MOUNTING INSTRUCTIONS FOR THE C 375BEE
The DAC Module is compatible with C 375BEE. Using the supplied flexible flat cable (FFC), DC power connector and screws, the DAC Module can be installed in a C 375BEE by undertaking the following procedure.
Note that if the C 375BEE has a PP375 Phono Preamplifier Module already installed, the DAC module and the PP375 can be linked together using the other supplied FFC.
STEP 1
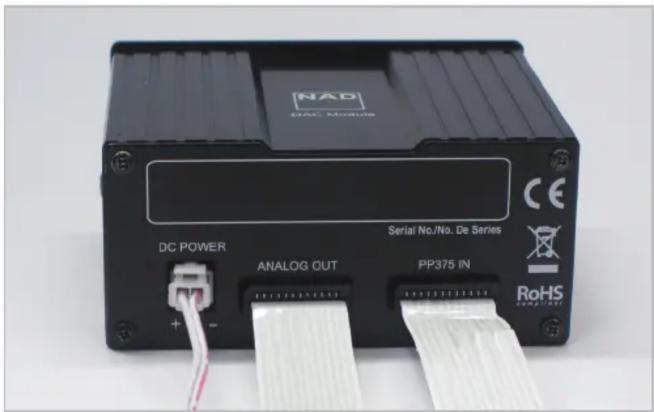
Pre-install the requisite cables to their respective connector points on the DAC Module as shown. Connect the FFC to the DAC Module's PP375 IN only if the C375BEE has a PP375 already installed.
STEP 2
Make the following connections:
1 DC POWER connector from DAC Module to corresponding P216B in C375BEE's main board.
2 FFC from DAC Module's ANALOG OUT to P213B on C375BEE's main board.
3 If the optional PP375 module is installed: FFC from DAC Module's PP375 IN to the corresponding FPC (flexible printed circuit) connector of the PP375 module.
Ensure good harnessing by flexing and safely contorting the FFC and DC POWER connectors.


natural_image
Close-up of electronic components with visible wiring and connectors, no readable text or symbols presentSTEP 3
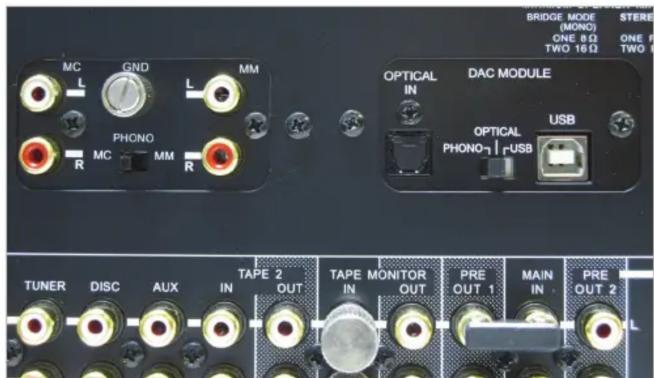
Remove the dummy cover at the back of the C375BEE and install in its place the DAC Module. Use the supplied screws to fix into place the DAC Module.
IMPORTANT!
The DAC module is only compatible with C 375BEE units that have the 0.5W standby logo on their rear panels.
MOUNTING INSTRUCTION FOR THE C 356BEE
The DAC Module is compatible with C 356BEE. Using the supplied flexible flat cable (FFC), DC power connector and screws, the DAC Module can be installed in a C 356BEE by undertaking the following procedure.
STEP 1
Pre-install the requisite cables to their respective connector points.
Connect the following
1 DC POWER connector from DAC Module to corresponding CB48 on C 356BEE's main board.
2 FFC from DAC Module's ANALOG OUT to CB36 on C 356BEE's main board.
Ensure good harnessing by flexing and safely contorting the FFC and DC POWER connectors.


STEP 2
Remove the dummy cover at the back of the C 356BEE and install in its place the DAC Module. Use the supplied screws to fix into place the DAC Module.




Mærke : NAD
Model : MDC DAC 2.0
Kategori : Lydudstyr