
4100 - Lydtuner NAD - Gratis brugsanvisning og manual
Find enhedens vejledning gratis 4100 NAD i PDF-format.


Brugerspørgsmål om 4100 NAD
0 spørgsmål om dette apparat. Besvar dem du kender, eller stil dit eget.
Stil et nyt spørgsmål om dette apparat
Download vejledningen til din Lydtuner i PDF-format gratis! Find din vejledning 4100 - NAD og tag din elektroniske enhed tilbage i hånden. På denne side er alle dokumenter nødvendige for brugen af din enhed offentliggjort. 4100 af mærket NAD.
BRUGSANVISNING 4100 NAD
NAD MARKETING ORIGINAL MASTER DO NOT SHIP
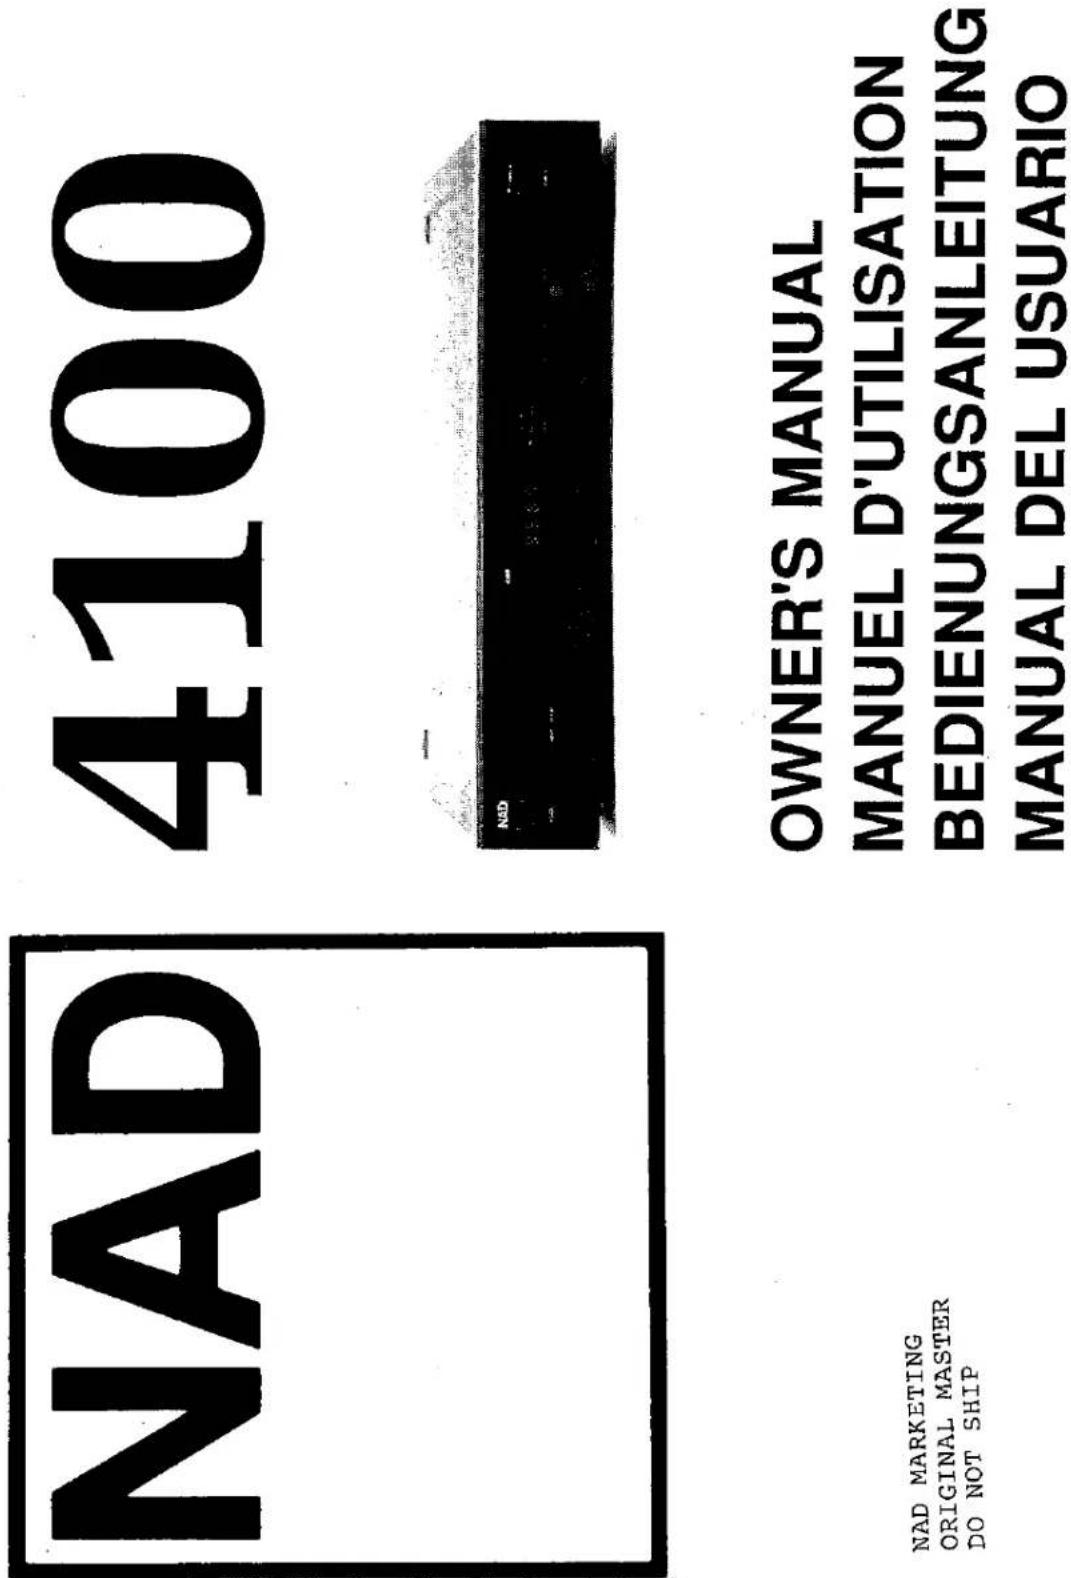
NAD 4100
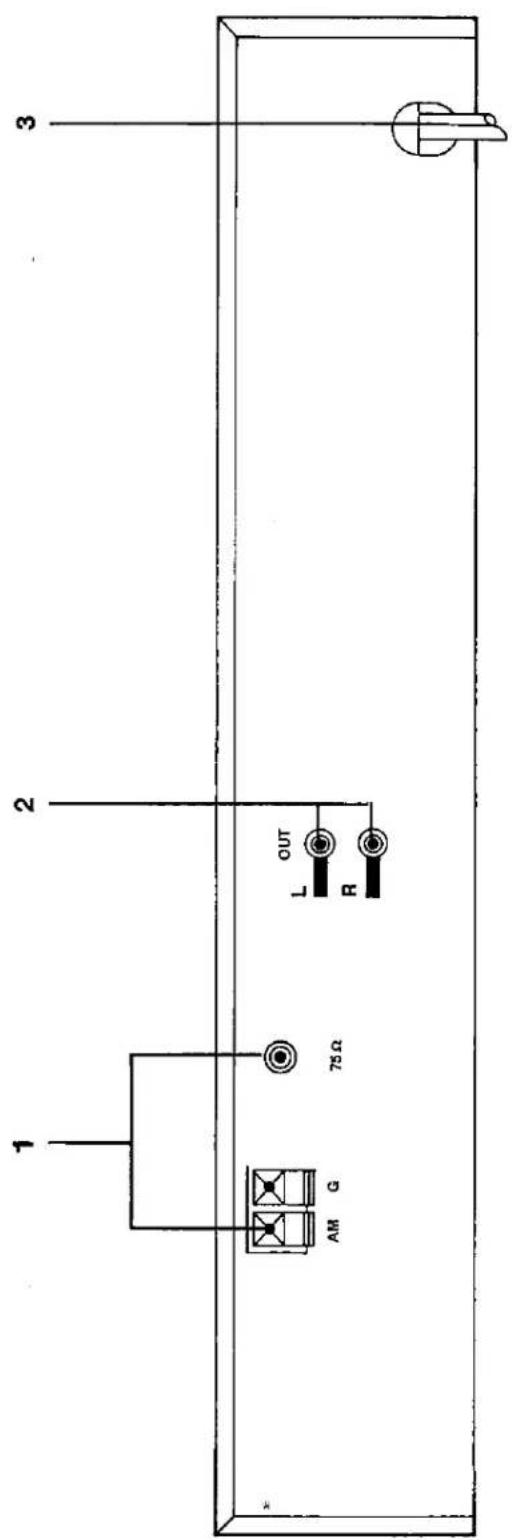
REAR PANEL CONNECTIONS

ARIN DEVITER UN CHOC ELECTRIQUE ET LES CONSEQUENCES GRAVES QUI POURRAIENT EN RESUALTER, TENTEZ PAS D'OUVRUR L'APPAREL ET DE TOUCHER AUX COMPÔSANTES INTERNES SANS LA PRESENCE D'UNE PERSONNE QUALIFIEE.
CAUTION: TO REDUCE
THE RISK OF ELECTRIC
SHOCK, DO NOT REMOVE
COVER (OR BACK).
NO USER-SERVICEABLE
PARTS INSIDE, REFER
SERVICING TO-QUALIFIED
SERVICE PERSONNEL.

PARA REDUCIR EL RIESGO DE SACUDICAS ELECTRICAS, NO DEBERA QUITARSE LA TAPA (NI PARTE POSTERIOR). CONSULTESE AL PERSONAL CAPACITADO PARA LAS REPARACIONES INTERNAS.
© 1990. NAD Electronics Ltd.
FRONT PANEL
©1990 NAD Electronics Ltd.

SPECIFICATIONS - NAD 4100 TUNER
Measured in accordance with ANSI-IEEE Standard 185 (1975), i.e. IHFT-200
NOTE: Some NAD products are equipped with dual or multi-voltage transformers (which is indicated on the back panel). If you wish to change the voltage, please bring your unit to an authorised NAD service technician for internal conversion.
ATTENTION: Quelques pièces NAD sont munies de transformateurs à double ou à multi-voltage (indiqué au panneau arrière). Si vous voulez changer le voltage, veuillez apporter votre appareil au fournisseur de NAD pour le transformer.
ZUR BEACHTUNG: Einige NAD Geräte sind mit Umschaltern für unterschiedliche Netzspannung ausgerüstet (Ein Vermerk auf der Rückseite weist darauf hin).
Die Anpassung, wenn notwendig, muß von einem qualifizieren Techniker in einer NAD Servicestation vorgenommen werden.
NOTA: Ciertos componentes de NAD están dotados de transformadores de doble tensión o de varias tensiones (lo que se indica en el panel posterior). Si se desea cambiar la tensión, sirvanse llevar el aparato a un técnico autorizado por NAD para su conversión interna.
CAUTION: TO PREVENT ELECTRIC SHOCK DO NOT USE THIS (POLARISED) PLUG WITH AN EXTENSION CORD, RECEPTACLE OR OTHER OUTLET UNLESS THE BLADES CAN BE FULLY INSERTED TO PREVENT BLADE EXPOSURE.
ATTENTION: POUR PREVENIR LES CHOCS ELECTRIQUES NE PAS UTILISER CETTE FICHE POLARISEE AVEC UN PROLONGATEUR, UNE PRISE DE COURANT OU UNE AUTRE SORTIE DE COURANT, SAUF SI LES LAMES PEUVENT ETRE INSEREES A FOND SANS EN LAISSER AUCUNE PARTIE FOND SANS EN LAISSER AUCUNE PARTIE A DECOUVERT.
PRECAUCION: PARA EVITAR SACUDIDAS ELECTRICAS, NO DEBERA UTILIZARSE ESTA CLAVIJA POLARIZADA CON UN CORDON DE PROLONGACION, RECEPTACULO. U OTRO TIPO DE SALIDA A MENOS QUE SE HAYAN INSERTASO COMPLETAMENTE LAS LENGÜETAS PARA EVITAR SU EXPOSICION.
WARNING: TO PREVENT FIRE OR ELECTRIC SHOCK, DO NOT EXPOSE THIS APPLIANCE TO RAIN OR MOISTURE.
ADVERTENICIA: PARA EVITAR EL RIESGO DE INCENDIO O SACUDIDA ELECTRICA, NO DEBERA EXPONERSE ESTE APARATO A LA LLUVIA O HUMI
| Input sensitivity | |
| Mono, -30 dB THD+N | 11.3 dBf (2.0 uV/300 ohms) |
| Mono, 50 dB S/N | 15 dBf (3.0 uV/300 ohms) |
| Stereo, 50 dB S/N | 37 dBf (40 uV/300 ohms) |
| Stereo, 60 dBf S/N | 47 dBf (120 uV/300 ohms) |
| Capture ratio (45 and 65 dBf) | <2.0 dB |
| AM rejection (45 and 65 dBf) | >65 dBf |
| Selectivity Alternate channel | 65 dBf |
| Image rejection | 90 dB |
| RF intermodulation | 65 dB |
| IF rejection | 100 dB |
| SCA rejection | 60 dB |
| Spurious rejection | 100 dB |
| Subcarrier suppression(19 & 38 Hz) | 60 dB |
| Output Impedance | 600 ohms |
| THD at 100% Modulation | |
| Mono 1 kHz | 0.09% |
| 100 Hz- 6kHz | 0.2% |
| Stereo 1 kHz | 0.09% |
| Stereo 1 kHz | 0.25% |
| Signal-to-noise ratio Mono | 80 dB |
| 65 dB, IHF weighted Stereo | 75 dB |
| Frequency Response30 Hz - 15 kHz | ±0.5 dB |
| Stereo separation 1 kHz | 50 dB |
| FM NR off 30 Hz - 15 kHz | 35 dB |
| AM SECTION | |
| Usable sensitivity | 5 uV |
| Selectivity | 35 dB |
| Image rejection | 30 dB |
| IF rejection | 35 dB |
| S/N ratio (30% mod., 50 mV input) | 45 dB |
| THD | 0.3% |
| PHYSICAL SPECIFICATIONS | |
| Dimensions | 43.5 x 8.1 x 26.3 cm |
| (Width x Height x Depth) | (17.1 x 3.2 x 10.3 in.) |
| Net weight | 3.4 kg (7 lb 8 oz.) |
| Shipping weight | 4.4 kg (9 lb 11 oz.) |
| Power requirement | 10 Watts |
| at 100, 120, 220 or 240 VAC. | |
| NOTE: Specifications are those in effect at the time of printing. NAD reservesthe right to change specifications at any time without notice.5535122537 | |
NAD ELECTRONICS
LONDON
NAD 4100 AM/FM STEREO TUNER
| REAR PANEL CONNECTIONS | ||
| 1. ANTENNA TERMINALSAM. Some form of external antenna will be needed for satisfactory reception, since the tuner does not have a built-in AM antenna. For most local broadcasting stations a simple wire up to one meter (three feet) in length will provide ample signal strength, and such a single-wire antenna is included with the tuner.Connect one end of the wire to the AM terminal. The remainder of the antenna may be allowed to hang down behind the tuner or may be tacked in place horizontally along the rear of a wooden—not metal—shelf. (A metal shelf may interfere with reception; In that case, the wire should be stretched out along the wall away from the shelf and tacked in place.) You may wish to experiment with the orientation of the AM antenna, in order to find the position that provides the best reception of the stations you listen to most often.The short-wire antenna usually will provide satisfactory reception of local AM broadcast stations. But if you wish to improve reception of distant AM stations, attach a long-wire outdoor antenna to the AM terminal. As its name implies, a "long-wire" antenna is a simple, straight wire whose length may be anything from a few feet up to about 100 feet (30 meters), mounted parallel to the earth and as high as is convenient.In some cases the effectiveness of a long-wire antenna will be improved by connecting a second wire from the Ground (G) terminal to a true earth-ground, | i.e. a copper-plated rod driven several feet into the earth. A substitute electrical ground may also prove effective: a cold-water pipe, a steam radiator, or the third hole of a modern electrical wall socket.In order to make connections to the AM antenna terminals, strip off 1 cm of insulation from each wire, and in each conductor twist together the exposed wire strands.Press down the spring-loaded plastic tab below the appropriate terminal, and hold it down while inserting the wire. Insert the bared wire into the small hole in the terminal. and release the tab. The terminal will grasp the wire and hold it in place.FM ANTENNA INPUTThe FM antenna input socket is designed to accept a 75-ohm "co-axial" cable. This type of shielded cable is employed with community cable systems, apartment building master antenna systems, and most roof-mounted antennas.If you want to connect an antenna with a 300-ohm twin-lead wire, use a "balun" (an adapter containing a 300-to-75 ohm-transformer).An antenna must be connected to the tuner for effective reception of stereo FM broadcasts. A ribbon-wire "folded dipole" antenna and a balun adapter are included to get you started. When you stretch out the ribbon-wire antenna you will note that it is in me form of a T. The "crossbar" portion of the T should be stretched out horizontally and tacked in place (on a wall), on the | back of a cabinet, or on the floor). The "vertical" section of the T goes to the tuner's antenna input. Connect its two wires to the screw terminals on the balun adapter; then plug the balun into the tuner's FM input socket.In view of the exceptional sensitivity of this tuner, you may find that the ribbon-wire dipole antenna is all you need for reception of strong local stations. But this simple antenna is not very efficient at rejecting "multi-path" and other forms of FM interference, and it cannot easily be rotated to optimize its pickup pattern for best reception of stations in different directions. Therefore, in most cases you should use a better antenna. The recommended options, in order of increasing cost, are as follows:(1) A basic "rabbit-ears" indoor TV antenna without auxiliary coils or tuning switches. Electrically, such an antenna is just another dipole (similar to the ribbon-wire antenna). But, since its tuned elements are made solid metal, it can easily be rotated. Stretch out each of its two arms to a length of 30 inches (75 cm), and orient them horizontally or at a shallow angle less than 45 degrees upward. The ribbon wire emerging from the antenna's base should be connected to the balun adapter's screw terminals in place of the simple ribbon-wire antenna. Now, for each station in turn, after you tune the station you can rotate the antenna for best reception.(2) A more elaborate rabbit-ears indoor TV antenna with a tuning switch. This type of antenna does NOT have greater sensitivity than the simpler rabbit-ears |
REAR PANEL CONNECTIONS
FRONT PANEL CONTROLS
1. POWER
| Depress this button to switch on the power. The frequency display will illuminate when the power is on. To switch the power off, press the button again and release it. |
| In many installations it may be more convenient to leave the tuner's POWER switch permanently engaged, letting the tuner be turned on and off by a "switched" convenience outlet on your amplifier. |
| If you prefer, you may plug the tuner's AC line cord into an Unswitched outlet or directly into a wall socket, and leave it permanently turned on. The tuner's power consumption is very low, so the cost of leaving it always on would be only a few dollars per year: and the useful life of the tuner would not be shortened by leaving it on. |
| NOTE:THIS UNIT REMAINS CONNECTED TO THE MAINS SUPPLY WHEN THE POWER SWITCH IS IN THE OFF POSITION. DISCONNECT THE POWER CORD WHEN THE UNIT IS NOT GOING TO BE USED FOR A LONG TIME. |
2. MONO
| The MONO button disables the stereo FM circuits in the tuner |
| Normally the tuner receives monophonic FM transmissions in mono and automatically switches on its multiplex decoding circuits when a stereo FM broad- |
| cast is received (as shown by the FM STEREO indicator). But when a very weak FM stereo signal is received, it may be excessively noisy because of the |
| multiplex encoding technique used for stereo broadcasting. In that case, depress the MONO button to lock the tuner in the mono mode, in order to obtain consistently quieter and cleaner sound. |
| Remember to disengage the MONO button when you re-tune to a stronger signal. As long as the MONO button is engaged, no broadcasts can be received in |
stereo.
| The best choice is a directional FM-only antenna, mounted as high above ground as is practical, and separated by at least two meters (7 feet) from other |
| antennas, vertically and horizontally. If desired stations are located in different directions (more than 90 degrees apart), the antenna should be mounted on a rotor for aiming. Brand names of good FM antennas in the |
| U.S. include Jerrold, Finco, Wineguard, Antennacraft, and Archer (Radio Shack).Use shielded lead-in cable rather than plain "twin-lead" wire, both to minimize interference and to |
| preserve strong signals during years of weathering. The cable may be either 75-ohm coaxial or a shielded 300-ohm type. Disconnect any indoor antenna before connecting the cable from the outdoor antenna.If you install an outdoor antenna yourself, observe these important CAUTIONS: |
| 1. Do not mount the antenna close to electric power lines. Plan the installation so that the antenna mast cannot accidentally touch power lines, either while you are installing it or later. |
| 2. Include a lightning arrestor in the installation, to protect both yourself and the tuner circuit from potential danger during electrical storms |
2. OUTPUT JACKS
| Connect a stereo patch cord from the Left and Right output jacks to the corresponding Tuner input jacks on your amplifier. |
3. AC LINE CORD
| Plug the AC line cord into a Switched outlet on your amplifier or into any AC wall outlet that provides the correct power-line voltage. |
| unit, so if your problem is that the signals you want to receive are weak than an outdoor antenna is the only effective solution. But in cities and in large buildings where signals are strong but are contaminated by reflected "multipath" interference, the tuning Switch on an elaborate indoor antenna may improve reception by reducing the interference. |
| (3) An electrically tuned indoor antenna. Again, such antennas usually do not provide any advantage over the simplest type of "rabbit-ears" unit for receiving weak signals. But where strong signals are contaminated with interference, the antenna's aiming and tuning controls can reject the interference and yield cleaner reception. |
| (4) An outdoor antenna. Even me finest indoor antenna, no matter how elaborate, cannot fully exploit the capabilities of a good FM tuner. For the lowest noise, minimum distortion, and largest choice of well-received broadcasts, an outdoor antenna is the best complement to a fine tuner. |
| A roof-mounted antenna has three fundamental advantages. First, its large size yields better sensitivity (pulling in a stronger signal from the desired station) and a narrower directional pattern for more effective rejection of multipath reflections arriving from other |
| directions. Second, its location on a roof or tall mast places it above many sources of interference—passing cars and buses, other buildings, etc. Third, the strength of received FM signals is directly proportional to the height of any antenna above the ground. |
| If you already have an outdoor television antenna, using a splitter to extract FM signals from it may produce excellent results. However, many TV antennas are deliberately designed to be relatively weak at FM frequencies in order to minimize potential interfer- |
| ence with TV signals at nearby frequencies (Channel 6 in the U.S.). You may be able to use a splitter to extract FM signals from an apartment building's master TV antenna system, but usually this yields poor results because many master antenna systems have "traps" |
to stop FM signals.
| 3. BLENDThe Blend circuit reduces noise in weak FM stereo signals by reducing the stereo separation at high frequencies.It is characteristic of stereo FM that the stereo subcarrier becomes noisier as the received signal becomes weaker. When the Blend is engaged, the contribution of the stereo subcarrier to the sound is reduced at high frequencies, giving up some stereo separation in favour of quieter reception.Remember to disengage the Blend for normal reception of strong signals.4. TUNING DISPLAYThe digital display shows the tuned frequency. On FM the frequency display always ends in 0 or 5, since tuning occurs in steps of 0.05 MHz.Centre tuning. The centre tuning indicator, at the bottom of the display window, is a rectangular bar between two triangular pointers (arrows).On FM, when the tuned frequency is in a broadcast channel but off-centre, one of the triangular pointers glows to show the direction in which the tuning should be changed. i.e. if the arrow points to the right, the right-hand portion of the Up/Down Tuning rocker should be tapped to raise the tuned frequency. When the station is correctly tuned, the triangular pointers vanish and the centre-tune bar is illuminated.On AM the triangular pointers do not function. The centre-tune bar glows when a station is correctly tuned.5. FM STEREO INDICATORThis LED illuminates when a stereo FM broadcast is being received and decoded by the tuner's multiplex decoder circuit. Note that if the MONO button is engaged, all broadcasts will be received in mono.If an FM station is broadcasting only in mono, or if a stereo broadcast signal is too weak for reasonably noise-free reception in stereo, then the tuner will automatically switch into the mono mode, and this light will not illuminate. Also, if you have mis-tuned away from | the centre of a station's broadcast channel, the stereo decoding circuits may not lock onto the signal and it may be received only in mono.6. BANK INDICATORThis LED glows either green or amber, indicating which bank of tuning pre-sets is in use.7. BANK SELECTORThis button selects which group of seven programmed stations is assigned to the pre-set buttons. The LED above the BANK button changes colour to indicate which bank is in use.8. STATION PRE-SETSYou can store the frequencies of fourteen stations in these pre-sets, using the BANK and ENTER buttons. Then, to tune those stations from day to day, just select the appropriate bank and press the desired pre-set button. The tuner will automatically switch to AM or FM accordingly.The circuit has a "last station tuned" memory. When the power is switched on, or when you switch from one tuning band to the other, it automatically re-tunes to the last station that you used on that band.The pre-sets preserve their frequency assignments when the AC line cord is unplugged, for a period of at least two weeks. Thus you can re-arrange your stereo system, or move the equipment from room to room, without losing the pre-set frequencies. But if you leave the power off for a month or more, you may have to re-program the tuning pre-sets.9. MEMORY ENTERThis button engages the Memory Enter mode. Use this mode to enter the frequencies of your favourite stations into the fourteen memory pre-sets (two banks of seven). The procedure is as follows.1. Decide which station you want to assign to each of the fourteen pre-sets. You may arrange the stations in any order that you find easy to remember or conven- | ient to use. For example the arrangement may be alphabetical (1 = WABC, 2 = WCBS, 3 = WNYC . . .), numerical (1 = BBC1, 2 = BBC2 . . .), or in order of increasing frequency (1 = 89.7, 2 = 90.9, 3 = 95.3, etc).You may enter FM stations in one bank of seven pre-sets and AM stations in the other bank, or intermix AM and FM stations in each bank. For example you could store the children's favourite stations in one bank and the parents' favourites in the other bank.2. Select the FM or AM band, as appropriate. Tune to the first station on your list. If you are not certain of station frequencies, check the station/frequency directory in a local newspaper or broadcasting guide. Check the signal-strength display (AM) or centre-tune indicator (FM) to be sure that you have tuned precisely to the centre of the station's broadcast channel.Press the BANK button to select the bank that you want to store the first station in. Press the ENTER button, then press Pre-set #1 to store the first station in the tuner's memory. (NOTE: After you press ENTER, you will have approximately ten seconds to store a station in one of the pre-sets. After that interval, the ENTER mode will automatically de-activate.)3. Tune to the second station on your list. Press the ENTER button and, within ten seconds, press Pre-set #2 to store the second station.4. Tune to the third station on your list, press ENTER, and press Pre-set #3 to store the station. Continue in this manner until you have stored seven stations in the first seven presets. Then press the BANK button to switch to the second bank of pre-sets, and continue the process for the second group of seven stations.Incidentally, if you make a mistake or change your mind, it is not necessary to re-program the pre-sets in sequence. You can re-program any pre-set simply by tuning to the desired frequency, pressing ENTER, and pressing the pre-set that you want to re-program.After you finish programming the pre-sets, you may wish to post your list of stations and associated pre-set numbers nearby for reference. |
If the Tuning button is held down with continuous pressure rather than just tapped, the tuning pauses briefly and then scans rapidly up or down in frequency. Thus, to manually tune a station, the procedure is to press continuously on the Tuning button until the tuned frequency is close to the desired broadcast frequency, and then fine-tune by tapping the Tuning button until the digital frequency display exactly matches the station's broadcast frequency as listed in a local newspaper or broadcasting guide. If you know the exact broadcast frequency, simply set the tuner to that frequency. If you know only the approximate frequency, tune to the vicinity of the station and then fine-tune for best sound. On FM, fine-tune until the centre-tune indicator (between the triangular off-tune indicators) is illuminated.
12. SEARCH MODE
When the SEARCH button is engaged, the tuner scans in a station-by-station mode rather than in small frequency increments. When the Up/Down Tuning rocker is tapped, the tuner scans up or down in frequency and automatically stops at the next station whose signal is strong enough for good reception. If you want to tune to a weak station, or if you want to fine-tune the tuner manually, disengage the SEARCH mode (button OUT), allowing the Up/Down Tuning rocker to tune in small increments.
CAUTION: In day-to-day operation, be careful not to press the ENTER button by accident. Doing so will activate the ENTER mode, and if you then press any of the pre-set buttons you will unintentionally re-program that pre-set. You would then have to manually re-tune to the station you wanted, and re-ENTER it into the pre-set. If you press ENTER accidentally, you may wait ten seconds for the ENTER mode to disengage. Or you can immediately force the tuner out of the ENTER mode in either of two ways: switch to the other tuning band (e.g. from FM to AM and back), or turn the Tuning knob to change the tuned frequency.
10.AM/FM
This button switches between the two tuning bands: FM or medium-wave AM. The digital tuning display shows the tuned frequency in MHz (for FM) or kHz (for AM).
The tuning circuit has a "last station selected" memory. When you switch between tuning bands, the circuit automatically re-tunes the last station that you were tuned to when you previously used that band.
11. UP/DOWN TUNING
The Up/Down Tuning control allows you to tune up and down the AM or FM radio spectrum. Depress the right button in order to tune to higher frequencies, or the left button to tune to lower frequencies.
When the Tuning button is pressed momentarily, the tuned frequency shifts up or down by one step, unless SEARCH has been engaged. (If SEARCH is engaged, the tuner will scan in a station-by-station mode rather than in fixed tuning steps.)
In North America the size of this tuning step is 10 kHz on the AM band. In Europe and elsewhere the tuning step is 9 kHz on AM. In either case the tuning step for the FM band is 0.05 MHz. Each time the Tuning button is tapped, the tuned frequency will shift up or down by this minimum tuning increment, as shown on
the digital frequency display.


Mærke : NAD
Model : 4100
Kategori : Lydtuner