
SX-KC600 - Tastatur PANASONIC - Gratis brugsanvisning og manual
Find enhedens vejledning gratis SX-KC600 PANASONIC i PDF-format.

Brugerspørgsmål om SX-KC600 PANASONIC
0 spørgsmål om dette apparat. Besvar dem du kender, eller stil dit eget.
Stil et nyt spørgsmål om dette apparat
Download vejledningen til din Tastatur i PDF-format gratis! Find din vejledning SX-KC600 - PANASONIC og tag din elektroniske enhed tilbage i hånden. På denne side er alle dokumenter nødvendige for brugen af din enhed offentliggjort. SX-KC600 af mærket PANASONIC.
BRUGSANVISNING SX-KC600 PANASONIC
Panasonic
KEYBOARD
sx-KC600
text_image
Musical treble clef symbol on lined paper backgroundFOR YOUR SAFETY PLEASE READ THE FOLLOWING TEXT CAREFULLY. (for UNITED KINGDOM)
This appliance is supplied with a moulded three-pin mains plug for your safety and convenience.
A 5 amp fuse is fitted in this plug.
Should the fuse need to be replaced please ensure that the replacement fuse has a rating of 5 amps and that it is approved by ASTA or BSI to BS1362.
Check for the ASTA mark 📋 or the BSI mark 🌐 on the body of the fuse.
If the plug contains a removable fuse cover you must ensure that it is refitted when the fuse is replaced.
If you lose the fuse cover the plug must not be used until a replacement cover is obtained.
A replacement fuse cover can be purchased from your local Panasonic/Technics Dealer.
IF THE FITTED MOULDED PLUG IS UNSUITABLE FOR THE SOCKET OUTLET IN YOUR HOME THEN THE FUSE SHOULD BE REMOVED AND THE PLUG CUT OFF AND DISPOSED OF SAFELY.
THERE IS A DANGER OF SEVERE ELECTRICAL SHOCK IF THE CUT-OFF PLUG IS INSERTED INTO ANY 13 AMP SOCKET.
If a new plug is to be fitted please observe the wiring code as shown below.
If in any doubt please consult a qualified electrician.
IMPORTANT: —The wires in this mains lead are coloured in accordance with the following code:—
Blue: Neutral
Brown: Live
As the colours of the wires in the mains lead of this appliance may not correspond with the coloured markings identifying the terminals in your plug, proceed as follows.
The wire which is coloured BLUE must be connected to the terminal in the plug which is marked with the letter N or coloured BLACK.
The wire which is coloured BROWN must be connected to the terminal in the plug which is marked with the letter L or coloured RED.
Under no circumstances should either of these wires be connected to the earth terminal of the three-pin plug, marked with the letter E or the Earth Symbol 12 .
How to replace the fuse. Open the fuse compartment with a screwdriver and replace the fuse and fuse cover.

text_image
FusePanasonic
OWNER'S MANUAL
Caution
Voltage (except North America, Mexico, Europe, Australia, New Zealand, China and Russia)
Be sure the voltage adjuster located on the AC adaptor is in accordance with local voltage in your area before using this unit. Use a screwdriver to set the voltage adjuster to the local voltage.
WARNING: TO REDUCE THE RISK OF FIRE OR ELECTRICAL SHOCK, DO NOT EXPOSE THIS PRODUCT TO RAIN OR MOISTURE.
BEFORE YOU PLAY, PLEASE READ THE CAUTIONARY COPY APPEARING ON PAGE 4.
Before you play
For long and pleasurable use of this instrument, and to gain a thorough understanding of your KC600 Keyboard, it is strongly recommended that you read through this Owner's Manual once.
The Owner's Manual is comprised of the following parts.
BASIC FUNCTIONS
This part includes an explanation of basic procedures and points you should be aware of for proper operation of your instrument.
PRACTICAL APPLICATIONS
This part comprises a detailed explanation of sound, effect, rhythm, Recording, Disk Drive and Setting functions.
REFERENCE GUIDE (separate booklet)
Reference guide for the contents of the Sound List, Drum Kits, MIDI Implementation Chart.
Cautions for safest use of this unit
Installation location
- A well-ventilated place.
Take care not to use this unit in a place where it will not receive sufficient ventilation, and not to permit the ventilation holes to be covered by curtains, or any similar materials. - Place away from direct sunlight and excessive heat from heating equipment.
- A place where humidity, vibration and dust are minimized.
Power source
- For the power source, use ONLY the included AC adaptor. Use of a different AC adaptor may result in malfunction or even damage to the equipment.
- If the unit is not to be used for some time, remove the AC adaptor from the wall socket.
Handling the power cord
- Never touch the power cord, or its plug, with wet hands.
- Don't pull the power cord.
Metal items inside the unit may result in electric shock or damage.
Do not permit metal articles to get inside the unit.
Be especially careful with regard to this point if children are near this unit. They should be warned never to try to put anything inside.
If, nevertheless, some such article does get inside, disconnect the power cord plug from the electrical outlet, and contact the store where the unit was purchased.
If water gets into the unit
Disconnect the power cord plug from the electrical outlet, and contact the store where it was purchased.
As a precaution, it is suggested that flower vases and other containers which hold liquids not be placed on the top of this unit.
If operation seems abnormal
Immediately turn off the power, disconnect the power cord plug from the electrical outlet, and contact the store where it was purchased.
Discontinue using the unit at once. Failure to do so may result in additional damage or some other unexpected damage or accident.
- Because the power source is located inside the unit, it is normal for the cabinet to become warm.
A word about the power cord
If the power cord is scarred, is partially cut or broken, or has a bad contact, it may cause a fire or serious electrical shock if used. NEVER use a damaged power cord for any appliance. Moreover, the power cord should never be forcibly bent.
Don't touch the inside parts of this unit.
Some places inside this unit have high voltage potential. Never try to remove the top or back panels of this unit, or to touch inside parts by hand or with tools.
Contact someone who is qualified in order to inspect the inside, or to replace a fuse, if such becomes necessary. Never attempt to do these things yourself.
Maintenance
The following suggestions will assist you in keeping the unit in top condition.
- Be sure to switch the instrument off after use, and do not switch the unit on and off in quick succession, as this places an undue load on the electronic components.
- To keep the luster of the surface and buttons, simply use a clean, damp cloth; polish with a soft, dry cloth. Polish may be used but do not use thinners or petro-chemical-based polishes.
- A wax-based polish may be used on the cabinet, although you will find that rubbing with a soft cloth will suffice.
SERVICE MUST BE CARRIED OUT BY DEALER OR OTHER QUALIFIED PERSON
Cautions for safest use of this unit 4
Controls and functions 6
BASIC FUNCTIONS
Getting started 8
Playing 9
Listen to the demonstration 11
Add an automatic accompaniment 12
Play back the included Song Disk 14
Record your performance 15
Beat Master 16
PRACTICAL APPLICATIONS
About the display 18
Part I Sounds and effects
Sound 19
Conductor 20
Solo Piano 21
Effects 21
Transpose 22
Harmony 23
Part II Playing the rhythm
Rhythm 24
Synchro Start 25
Tempo 25
Rhythm performance 26
Auto Play Chord 27
One Touch Play 29
Piano Stylist 30
Panel Memory 30
Performance Pads 31
Part III Recording
Record your performance 32
Playing back your recorded song 33
Store a chord progression 33
Part IV Disk Drive
Parts of the floppy disk drive 35
Playing the included Song Disk 35
Playback of commercial disks (Direct Play) 36
Save your recorded song 37
Part V Menu
Outline of the procedure 40
Setting menus 41
Symptoms which appear to be signs of trouble 44
Connections 45
Separately sold option 45
Index 46
Specifications 47
■ Supplied accessories
Please check the supplied accessories.
□ Music stand
□ AC adaptor
SONG BOOK
SONG DISK
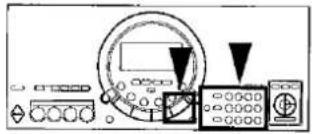
text_image
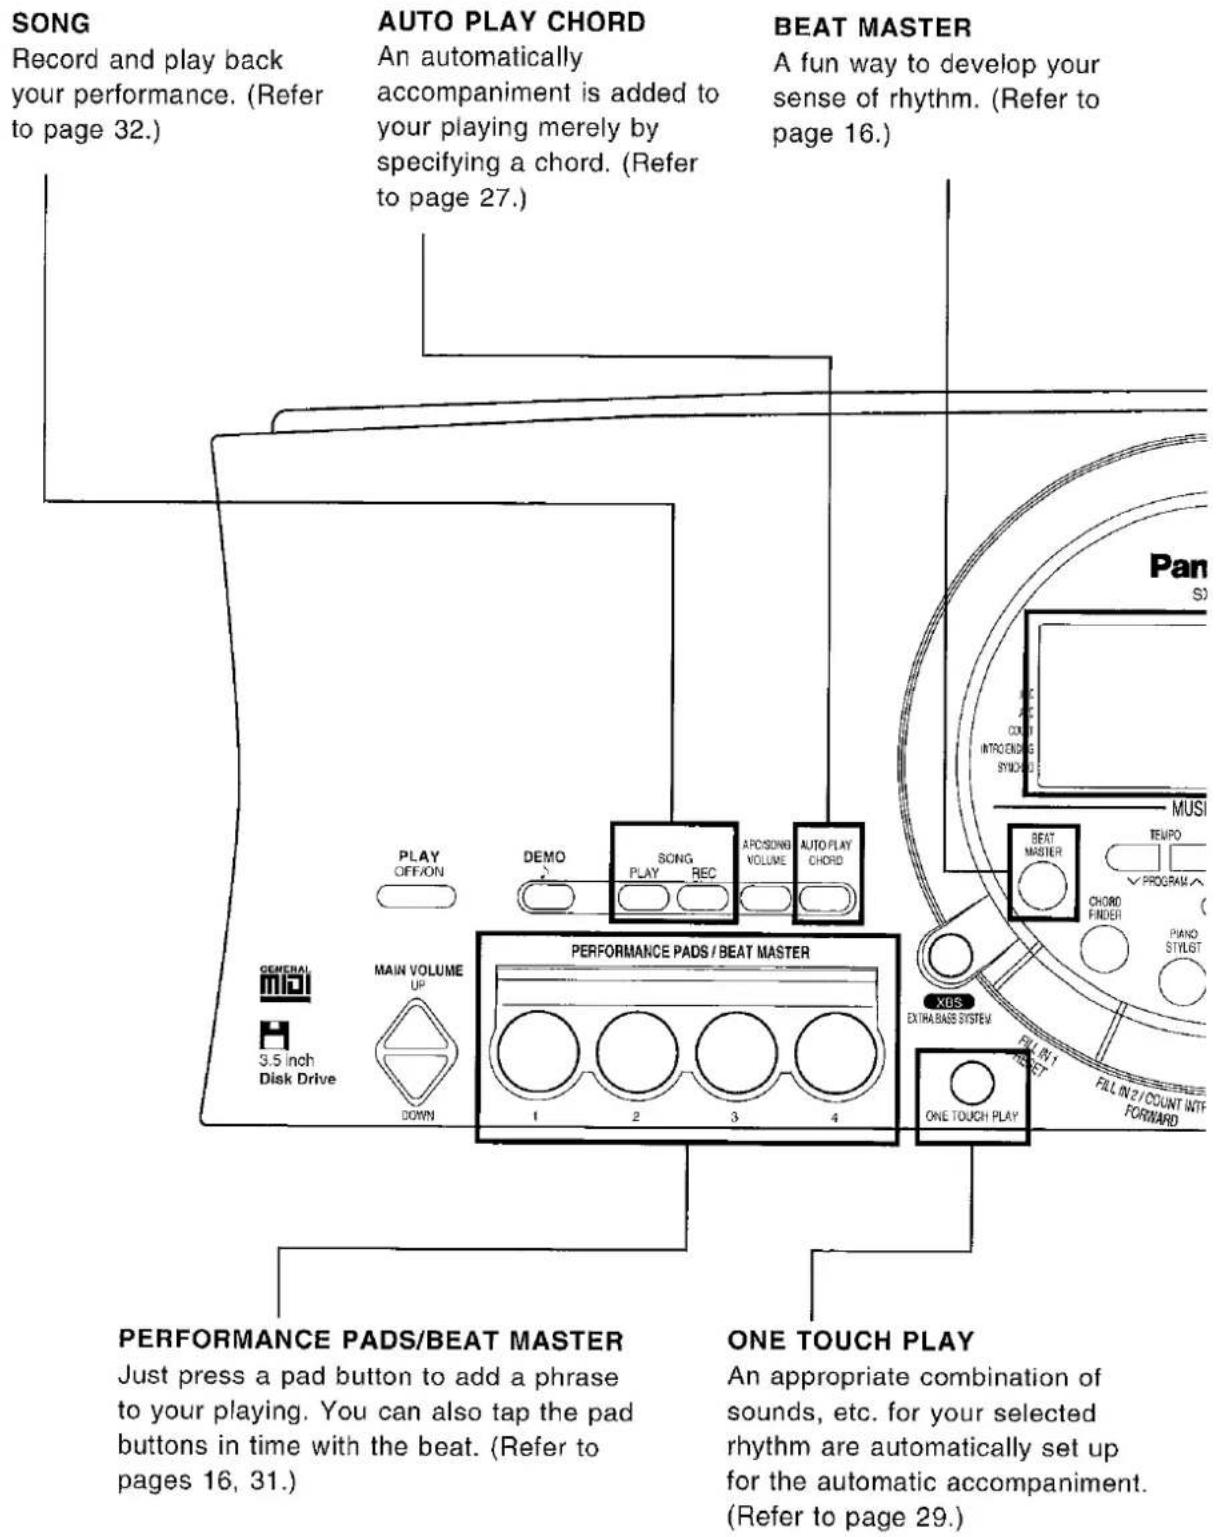
SONG Record and play back your performance. (Refer to page 32.) AUTO PLAY CHORD An automatically accompaniment is added to your playing merely by specifying a chord. (Refer to page 27.) BEAT MASTER A fun way to develop your sense of rhythm. (Refer to page 16.) GENERAL MIDI 3.5 inch Disk Drive PLAY OFF/ON DEMO SONG PLAY REC AROSING VOLUME AUTO/PLAY CHORD PERFORMANCE PADS/BEAT MASTER MAIN VOLUME UP DOWN 1 2 3 4 XGS EXTRA BASS SYSTEM ONE TOUCH PLAY PERFORMANCE PADS/BEAT MASTER Just press a pad button to add a phrase to your playing. You can also tap the pad buttons in time with the beat. (Refer to pages 16, 31.) ONE TOUCH PLAY An appropriate combination of sounds, etc. for your selected rhythm are automatically set up for the automatic accompaniment. (Refer to page 29.)Display
Displays the status of your instrument and is also used for setting the various functions. (Refer to page 18.)
MUSIC TRAINER
The MUSIC TRAINER function incorporated in this instrument can be a helpful aid to improving your performance.
Example
■ BEAT MASTER, to develop your sense of rhythm.
■ CHORD FINDER, to teach you how to play chords.
■ MINUS ONE lets you practice the melody part while listening to the other song parts.
■ The display shows a visual illustration of the keys and notes you play.
text_image
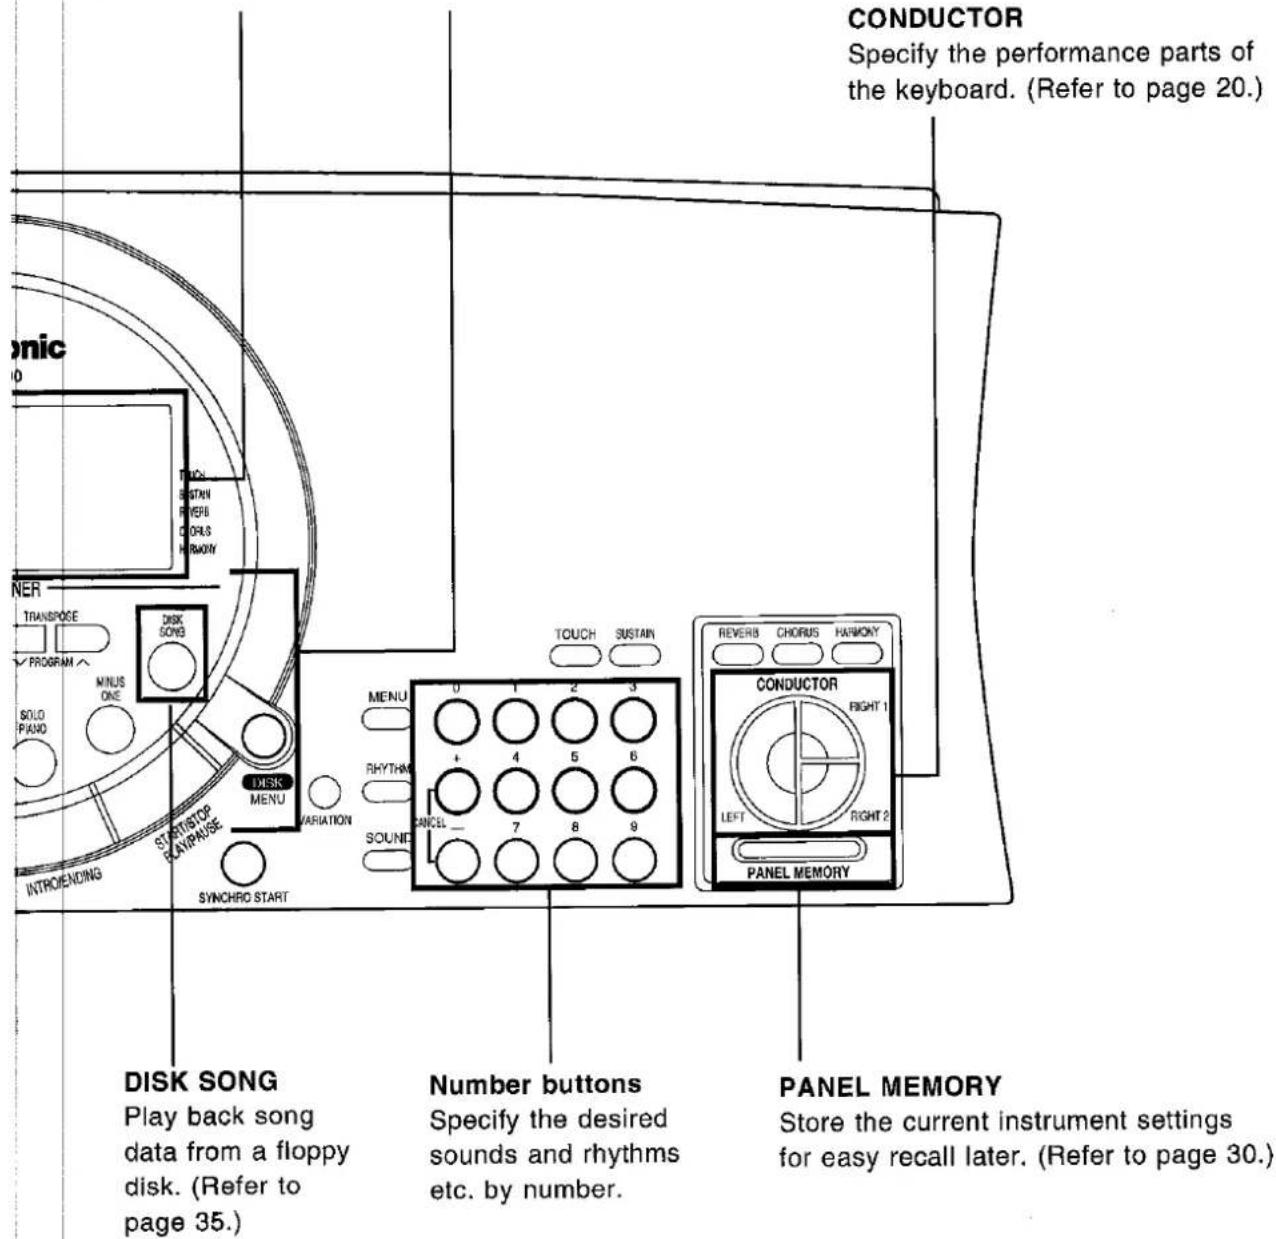
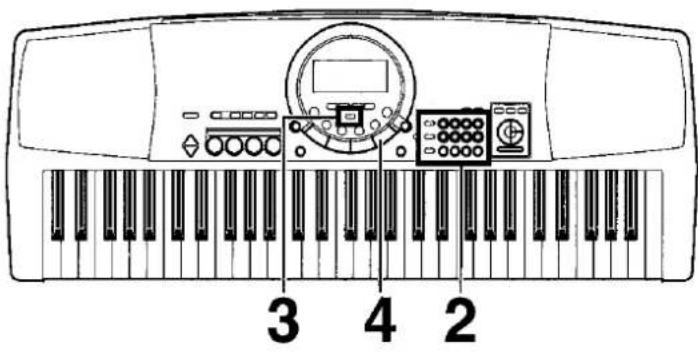
CONDUCTOR Specify the performance parts of the keyboard. (Refer to page 20.) DISK SONG Play back song data from a floppy disk. (Refer to page 35.) Number buttons Specify the desired sounds and rhythms etc. by number. PANEL MEMORY Store the current instrument settings for easy recall later. (Refer to page 30.)1
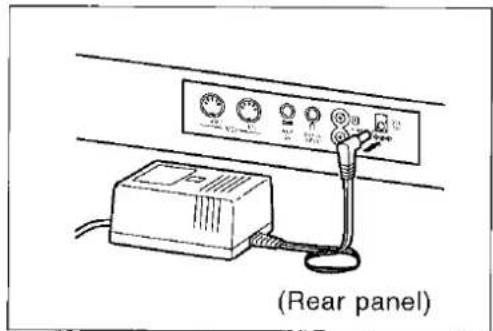
Connect the AC adaptor (included).
text_image
(Rear panel)- Do not disconnect and connect the AC adaptor when the PLAY button is on, as doing so may cause the the programmed settings and recorded contents to be deleted.
2
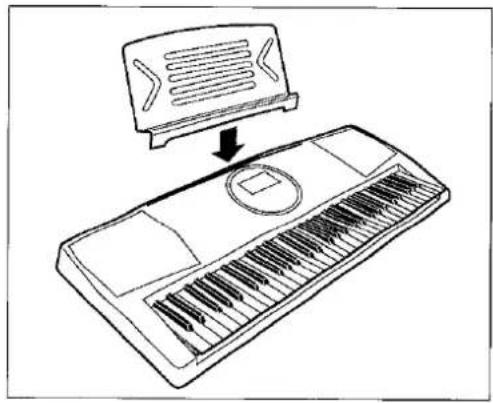
Affix the music stand as shown.
natural_image
Line drawing of a keyboard with an open top and a mouse pointer (no text or symbols)- When leaving the product unused for a long time, turn off the PLAY button of the unit and pull the AC adaptor out of the socket for power saving. (The product consumes a power of 2 W even with the PLAY button of the unit turned off.)
text_image
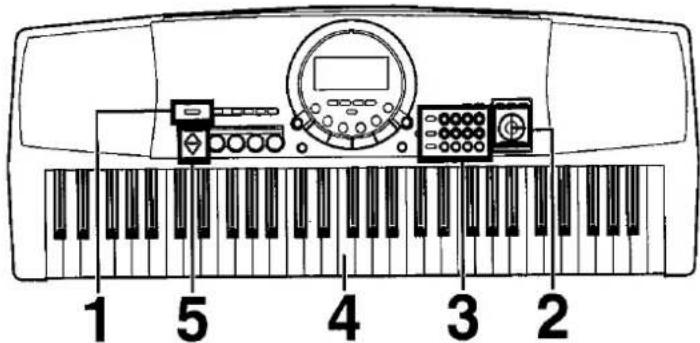
1 5 4 3 21
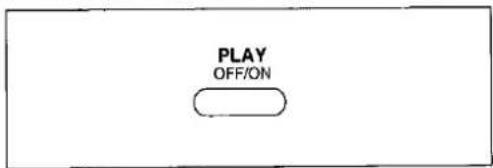
Press the PLAY button to turn it on.
text_image
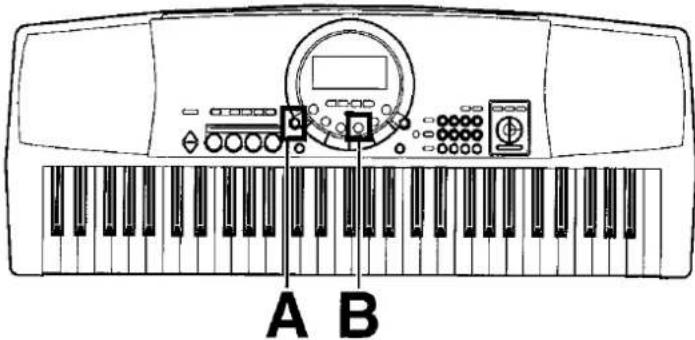
PLAY OFF/ON2
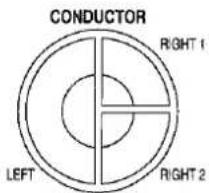
Press the RIGHT 1 button in the CONDUCTOR.

text_image
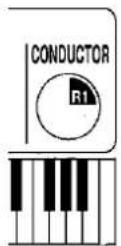
CONDUCTOR RIGHT 1 LEFT RIGHT 2- The CONDUCTOR status is shown on the display like this:
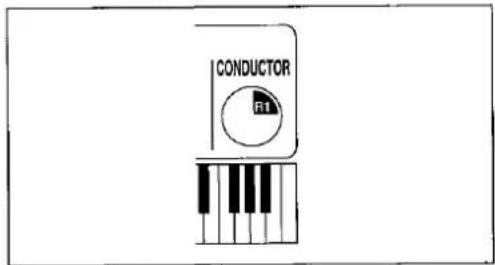
text_image
CONDUCTOR FIT3
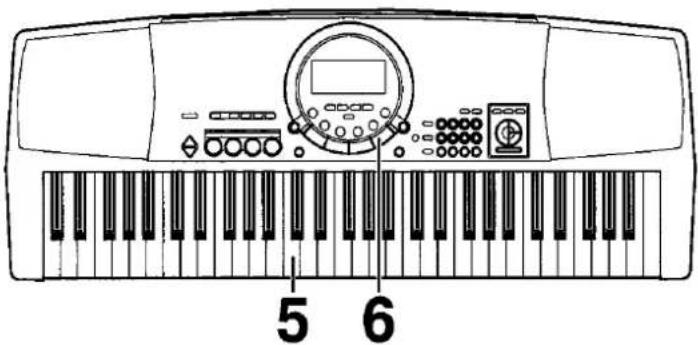
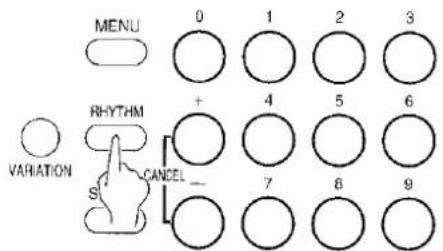
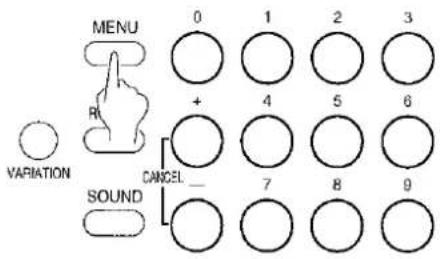
Press the SOUND button, and use the number buttons to select a sound number (three digits).
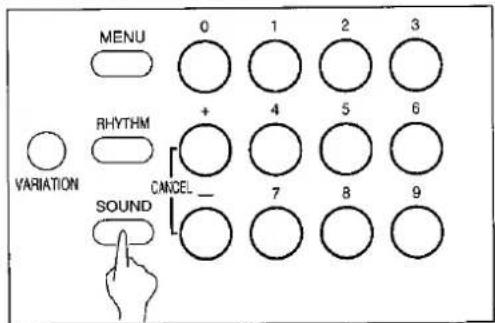
text_image
MENU 0 1 2 3 RHYTHM + VARIATION CANCEL SOUND 7 8 9- The list of SOUNDS is found near the right side of the panel.
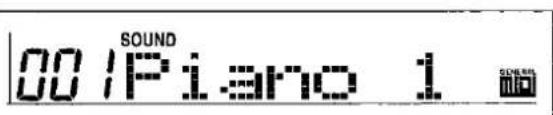
- The name and number of the selected sound are shown on the display.
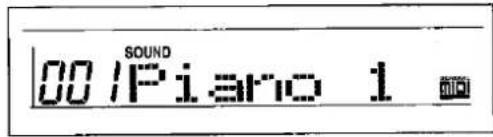
text_image
SOUND 00/Piano 14
Play the keyboard.
5
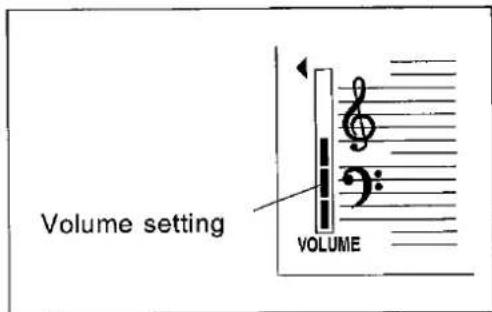
Set the MAIN VOLUME to an appropriate level.
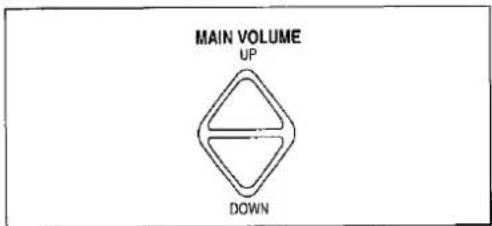
text_image
MAIN VOLUME UP DOWN- The volume setting is shown on the display.
text_image
Volume setting VOLUME• Each graduation represents two degrees of volume change.
text_image
A BExtra Bass sound emphasis

Press the XBS (EXTRA BASS SYSTEM) button.

text_image
XBS EXTRA BASS SYSTEM- You can emphasize the intensity of the sounds in the lower pitch range.
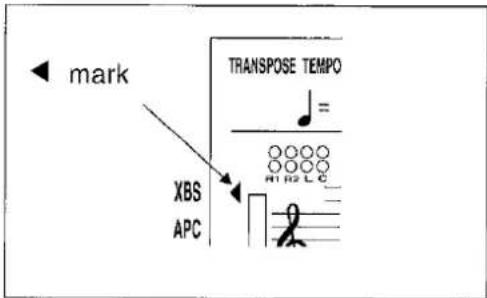
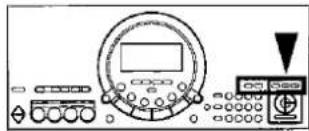
- When XBS is on, a ◀ mark on the display appears next to the XBS indication.
text_image
mark TRANSPOSE TEMPO XBS APC R1 R2 L C- Press the XBS button again to turn it off.
SOLO PIANO

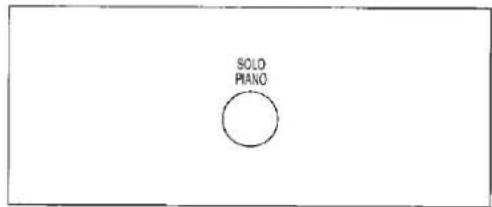
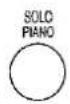
Press the SOLO PIANO button.
text_image
SOLO PIANO- The instrument settings automatically change to those appropriate for performing with piano sounds.
- The pitch of this instrument can be adjusted, for example, when playing with other instruments. (Refer to page 43.)
- For detailed information about selecting sounds, refer to page 19.
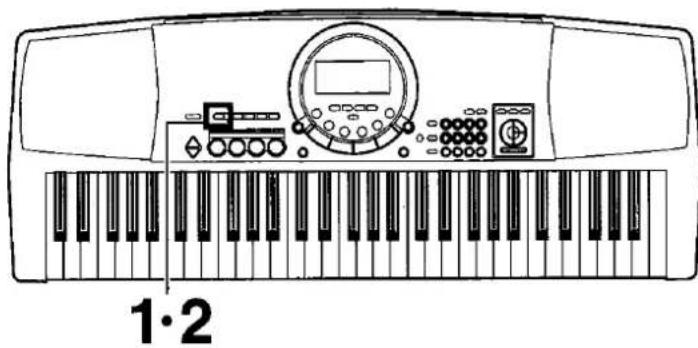
Listen to the demonstration
text_image
1·21
Press the DEMO button.
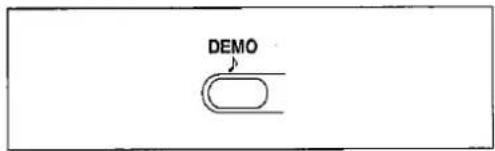
text_image
DEMO- The demonstration performance begins.
- The two demo tunes are playing continuously.
2
When you are finished listening to the demonstration performances, press the DEMO button again.
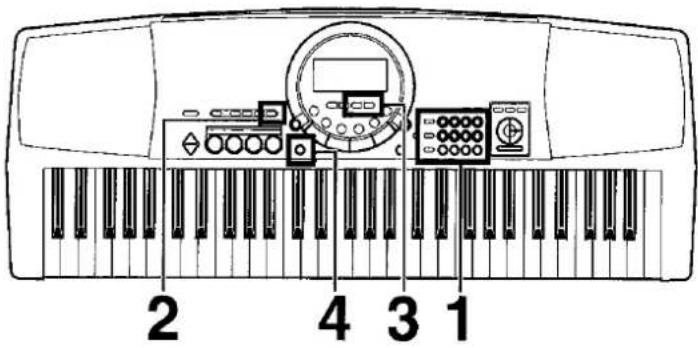
Add an automatic accompaniment
text_image
2 4 3 1
text_image
C F G7 C C F G7 C1
Press the RHYTHM button, and use the number buttons to select a rhythm number (three digits).
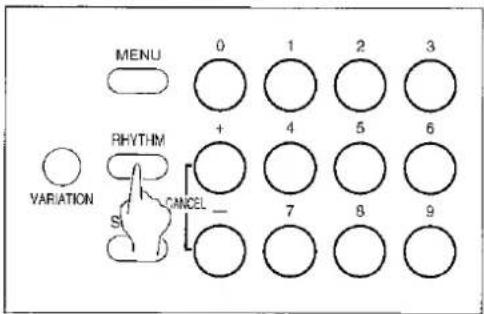
text_image
MENU 0 1 2 3 RHYTHM + 4 5 6 VARIATION S CNCEL - 7 8 9- The list of RHYTHMS is shown near the left end of the panel.
- The rhythm number and name are shown on the display.
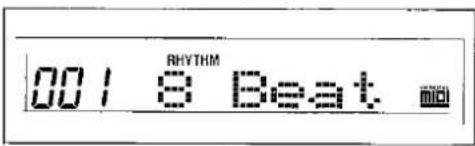
text_image
001 8 Beat2
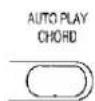
Press the AUTO PLAY CHORD button.
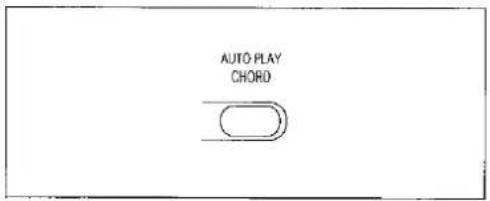
text_image
AUTO PLAY CHORD3
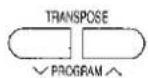
Use the TRANSPOSE/PROGRAM buttons to show "1 Finger" on the display.

text_image
J=120 1 Finger ISS APC COUNT MTC/ENDS SYNCHD VOLUME CHORD CONDUCTOR TICK BUSTAIN RENEURS CHORD HARMENY TRANSPRING ✓ PROGRAM A- Perform this operation while the PROGRAM indication is flashing on the display.
4
Press the ONE TOUCH PLAY button.
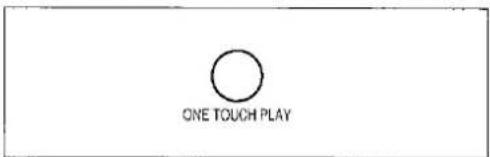
text_image
ONE TOUCH PLAY- The sounds, etc. appropriate for the selected rhythm are automatically set up.
text_image
5 65
Play the chord with your left hand, and the melody with your right hand.
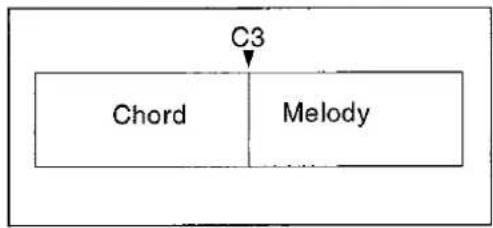
flowchart
graph TD
    A["Chord"] --> B["Melody"]
    C["C3"] --> B
- When you play the keyboard with your left hand, the automatic accompaniment starts (SYNCHRO START).
- For example, when you press a C key, an automatic accompaniment in the C major chord begins to play.
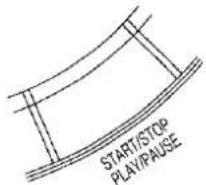
6
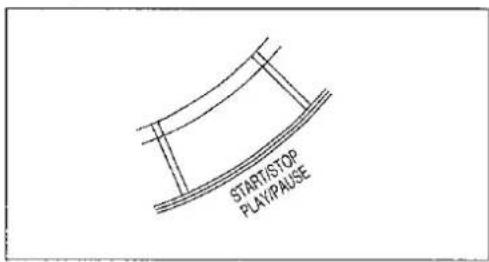
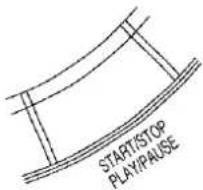
When you are finished playing the song, press the START/STOP button.
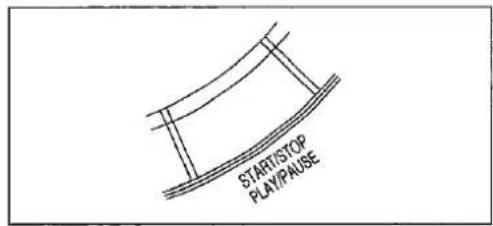
text_image
START/STOP PLAY/PAUSE• The automatic accompaniment stops.
- To end your performance with the automatic accompaniment, press the AUTO PLAY CHORD button again.
C chord
G7 chord
F chord
- For information about selecting rhythms, refer to page 24.
- For information about the automatic accompaniment, refer to page 27.
Play back the included Song Disk
text_image
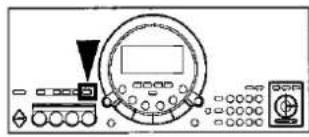
3 4 21
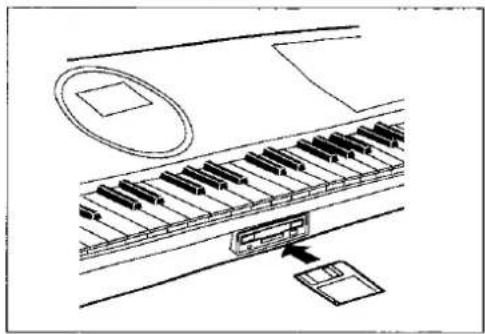
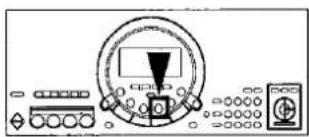
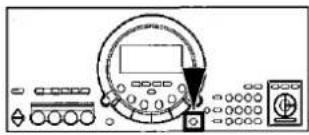
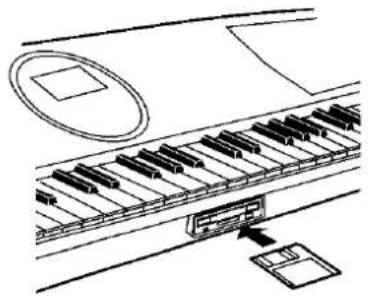
Insert the included SONG DISK into the Disk Drive slot.
natural_image
Diagram of a piano keyboard with an open control panel and a circular inset showing a tray (no text or symbols)- Insert the floppy disk correctly oriented with the label side up. Push it all the way in until it clicks into place.
2
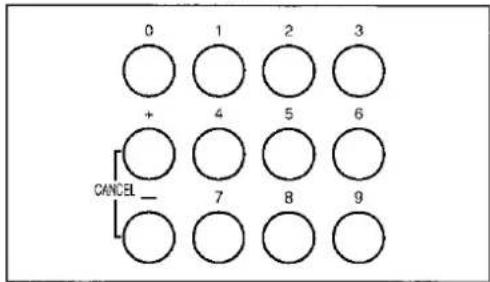
Use the number buttons to select a song number (3 digits).
text_image
0 1 2 3 + 4 5 6 CANCEL - 7 8 9- The song numbers can be found on the separate music score provided.
- The selected song number and abbreviated song name are shown on the display.
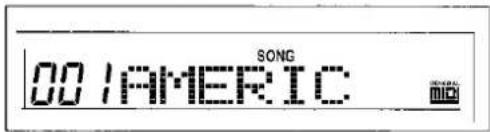
text_image
SONG 001AMERIC3
Press the EXECUTE button.

text_image
EXECUTE- When the data has been loaded to this instrument, "COMPLETE" appears on the display.
4
Press the PLAY/PAUSE (START/STOP) button.
text_image
START/STOP PLAY/Pause• The selected song is played back.
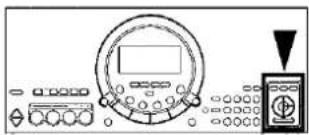
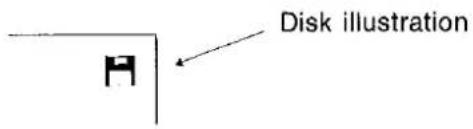
An illustration of a floppy disk appears on the display when data is being loaded from or saved to a disk. To prevent data loss, do not remove the disk from the Disk Drive or turn off the power while this illustration is shown.

text_image
Disk illustration H- For playing back commercial song disks, refer to page 36.
- For detailed information about playing back the SONG DISK, refer to page 35.
text_image
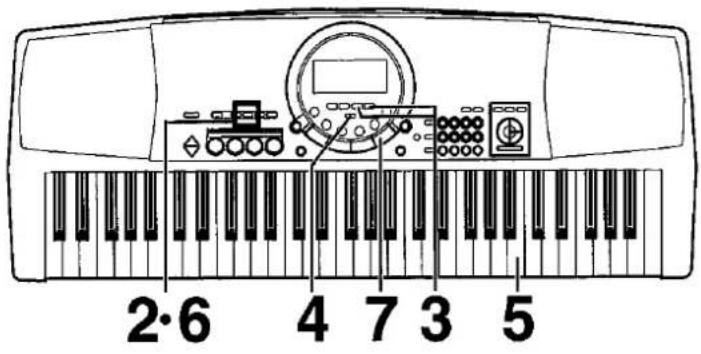
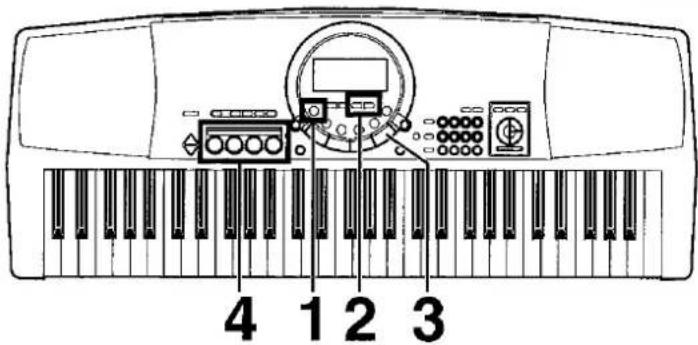
2·6 4 7 3 511 Select the desired sounds and rhythm.
- You can also record a performance that has an automatic accompaniment.
21 In the SONG section, press the REC button.
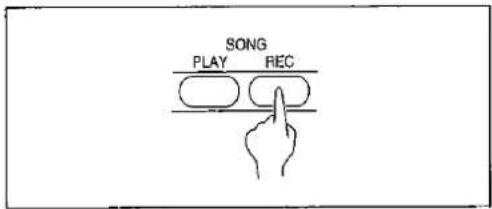
text_image
SONG PLAY REC3 | Use the TRANSPOSE/PROGRAM buttons to select EASY REC.
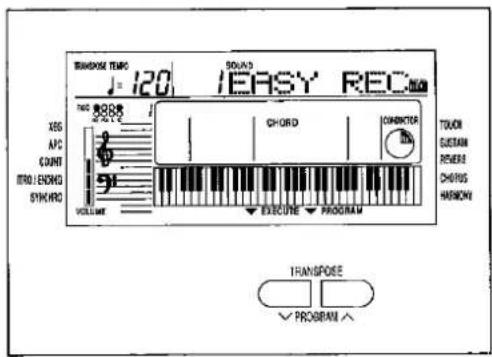
text_image
TRANSMOSE TEMP J = 120 SOUND I EASY REC TANG 300 Hz XBS APC COUNT ITEM / END OF STANDARD VOLUME CHORD CHARACTER TOUCH GUSTAIN REVERSE CHERIS HANION EXECUTE PROGRAM TRANSPOSE PROGRAM41 Press the EXECUTE button.
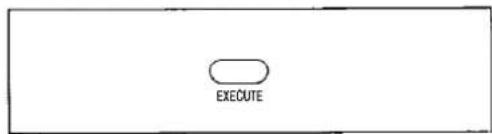
text_image
EXECUTE- All the previously recorded contents are erased.
51 Play the song on the keyboard.
6 When your performance is finished, press the REC button, in the SONG section, again.
- The recording can also be ended by pressing the START/STOP button.
7 | Press the PLAY/PAUSE (START/STOP) button.
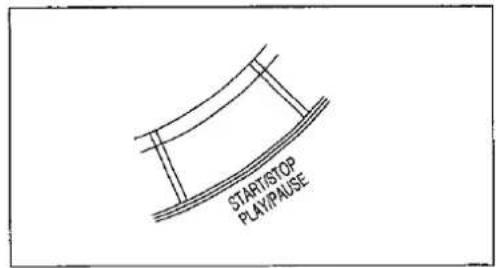
text_image
START/STOP PLAY/PAUSE- Your recorded performance is played back.
- For more information about SONG, refer to page 32.
- To play a normal rhythm performance after playing back your recorded performance, press the PLAY button in the SONG section to turn it off.
BEAT MASTER is a function that helps develop your sense of rhythm while you enjoy playing. Tap the pad buttons by following the model, and learn to perform a tune by playing in turn with the instrument (battling). An assessment of your performance is shown on the display.
text_image
4 1 2 31
Press the BEAT MASTER button.

text_image
BEAT MASTER- A welcome tune is heard and the pad indicators light up.
2
Use the TRANSPOSE/PROGRAM buttons to select a song number.
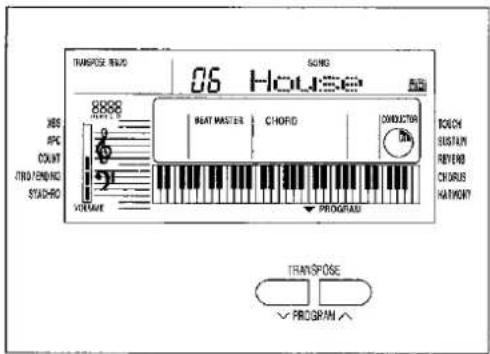
text_image
TRANSPOSE RED 86 House SUNG 8808 BEAT MASTER CHORD CNODUCTOR TOCK SUSTAIN REYERS CHORUS HATHWORT VOLUME PROGRAM TRANSPOSE PROGRAM- Select a number from 01 to 15. The higher the number, the more difficult the tune.
- Select number 15 to play back a song loaded from the disk. If data has not been loaded from a disk, "EMPTY" is shown on the display.
3
Press the START/STOP button.
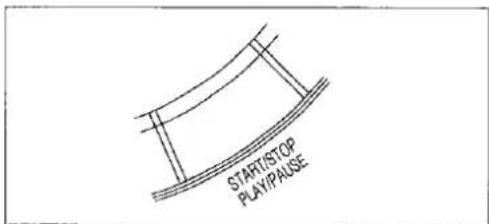
text_image
START/STOP PLAY/Pause• The tune begins to play.
4
Perform using the BEAT MASTER pad buttons.
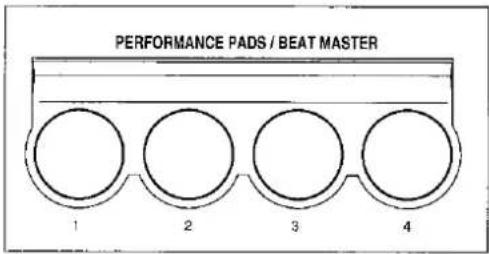
text_image
PERFORMANCE PADS / BEAT MASTER 1 2 3 4How to play
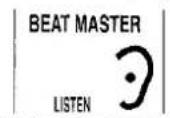
(1) As the song is played, first a number of measures of the model performance are played. At this time try to remember which pad button lights at which timing. During this time, the display looks like this:

text_image
5(2) Next the background sound of the same measures are repeated, so that you can play the pad buttons, mimicking the model performance. During this time, the display looks like this:

- The "battling" phrase of the model performance is played in time with your pad tapping.
(3) Make the song by continuing to alternate the instrument's performance with your own performance.
(4) An assessment of each phrase of your performance is shown on the display, and when the tune has ended, a total assessment is shown on the display. - An evaluation of each phrase you reproduce is shown as "Poor," "Good" or "Bravo!"
- After the evaluation of your final phrase, a total evaluation of your performance is shown as "Practice," "Fair," "Good" or "Master!"
- Repeat steps 2 to 4 to enjoy playing other tunes.
5|
To turn off the BEAT MASTER, press the BEAT MASTER button again.
Playback of BEAT MASTER songs on the disk
- BEAT MASTER songs are recorded on the included disk.
(1) Insert the disk with the BEAT MASTER song data into the Disk Drive.
(2) Press the BEAT MASTER button.
(3) Press the DISK SONG button.
(4) Use the TRANSPOSE/PROGRAM button to specify the file number to load from the disk.
- Note that the current SONG data is deleted when the BEAT MASTER data has been loaded.
(5) Press the EXECUTE button.
- When the data has been loaded to this instrument, "COMPLETE" appears on the display.
(6) Press the START/STOP button.
About the display
The display shows the status of this instrument, the played keys, etc., and is also used for setting the various functions.
Normal display
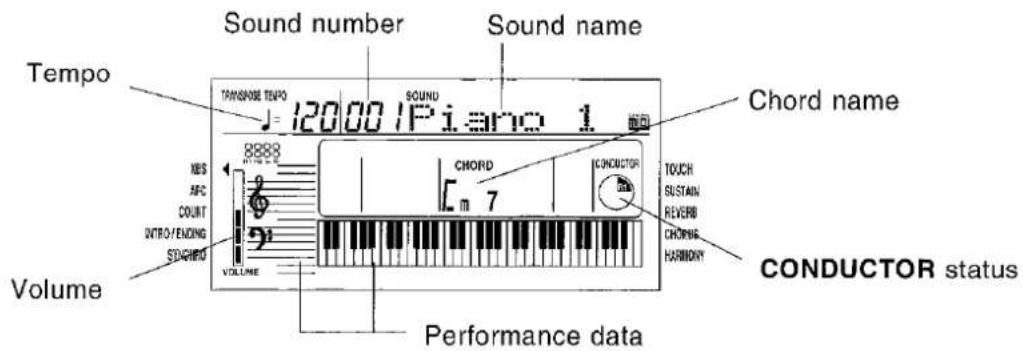
text_image
Sound number Sound name Tempo 120.00 Piano 1 Chord name Volume VOLUME Performance data CHORD CONDUCTOR TOUCH SUSTAIN REVERB CHORMA HARMONY CONDUCTOR status- A ◀ or ▶ mark next to the function name to the left or right of the display indicates that the corresponding button is ON. (In the example above, the XBS function is On.)
- The readability (LCD CONTRAST) of the display can be adjusted. (Refer to pages 40 and 43.)
Setting display example
Example: PART VOLUME
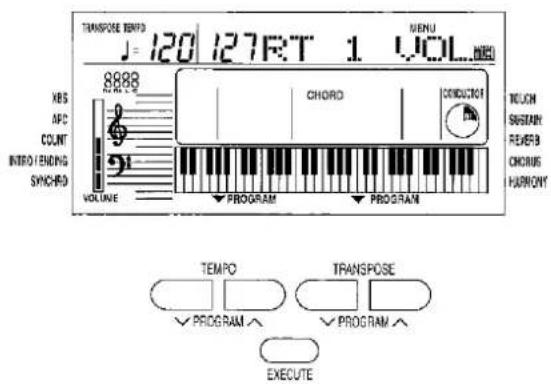
text_image
TRANSPOSE TEMPO J=120 127RT 1 VOL NET 8888 KBS APC COUNT INTRO FENDING SYNCHRD VOLUME CHORD CONDUCTOR MOUCH SUSITAN REVERB CHORUS HUMANITY PROGRAM PROGRAM TEMPO TRANSPOSE ✓ PROGRAM ^ ✓ PROGRAM ^ EXECUTEThe TRANSPOSE/PROGRAM buttons and TEMPO/PROGRAM buttons below the display, as well as the number buttons and + and - buttons, are used to select the various functions and specify values, etc.
- When the TRANSPOSE/PROGRAM buttons or TEMPO/PROGRAM buttons are used to set a function, the corresponding PROGRAM indication flashes.
- The number buttons are convenient for entering numbers directly, and the TRANSPOSE/PROGRAM buttons or the + and - number buttons are convenient for selecting the modes, etc. while viewing the display.
EXECUTE
When it is necessary to confirm that you wish to execute a function, press the EXECUTE button.
- If necessary, the EXECUTE indication on the display will flash.
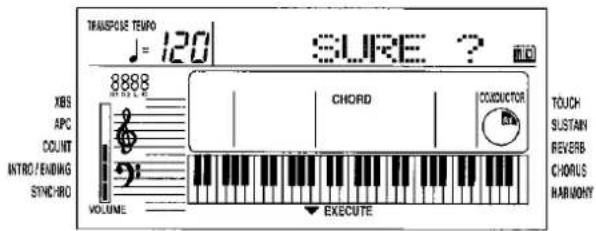
text_image
TRANSPOSE TEMPO J = 120 | SURE ? 8888 XBS APC COUNT INTRO / ENDING SYNCHRO VOLUME CHORD CONDUCTOR TOUCH SUSTAIN REVERB- CHORUS HARMOMY EXECUTE- At this time if you wish to cancel the procedure instead of executing it, press the button that you to select the function (MENU button or DISK MENU button, etc.).
- The display illustrations used throughout this manual are for purposes of explanation and may differ from the actual display you see when you are using your instrument.
Part I Sounds and effects
There are 250 different sounds permanently stored in this instrument to enhance your playing enjoyment.
Sound
natural_image
Front view of a control panel with display and keypad (no visible text or symbols)Select the sounds for the three parts you can play on the keyboard.
- In the CONDUCTOR, select a part (RIGHT 1, RIGHT 2 or LEFT).
text_image
CONDUCTOR RIGHT 1 LEFT RIGHT 2- The CONDUCTOR indication on the display shows the selected part(s).
- Press the SOUND button. Use the number buttons to select a sound number (three digits).
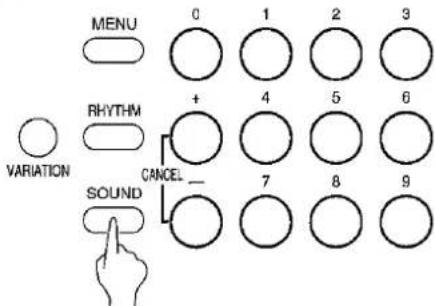
text_image
MENU 0 1 2 3 RHYTHM + 4 5 6 VARIATION CANCEL 7 8 9 SOUND- The list of SOUNDS is printed on the upper right portion of the panel.
- The selected sound number and sound name are shown on the display.
text_image
00!Piano 1- Enter three digits to specify the sound. For example, for sound number 003, press 0, 0, 3. For sound number 030, press 0, 3, 0.
- Play the keyboard.
• Non-pitched (percussion) sounds are also available.
- For DRUM KITS sounds, percussion instrument sounds corresponding to the illustration are played with the keyboard keys.
- You can use the CONDUCTOR to assign different parts to the keyboard.
■ About the number buttons
The number buttons are convenient for selecting functions with assigned numbers, such as sounds and rhythms, MENU functions, disk songs, etc.
- The + and - buttons can be used to increase or decrease the number. When a button is pressed and held, the numbers change quickly.
- If you wish to cancel the number you are in the midst of entering, press the + and - buttons at the same time. If you pause in the midst of entering a number, the entry may automatically be canceled after a few seconds.
Conductor
natural_image
Line drawing of a control panel with buttons and a device (no text or symbols)The CONDUCTOR buttons are used to assign sounds to the keyboard in many different ways. For example, you can assign two sounds to the entire keyboard so that playing one key will produce two sounds. You can even split the keyboard into right and left sections (SPLIT), and assign a different sound to each section.
| CONDUCTOR settings | How sounds are assigned to the keyboard |
 | All keys produce the RIGHT 1 sound.RIGHT 1 |
 | All keys produce the RIGHT 2 sound.RIGHT 2 |
 | All keys produce both the RIGHT 1 sound and the RIGHT 2 sound.RIGHT 1 + RIGHT 2 |
 | The left keys produce the LEFT sound and the right keys produce the RIGHT 1 sound and the RIGHT 2 sound.LEFT :RIGHT 1 + RIGHT 2 |
 | The left keys produce the LEFT sound and the right keys produce the RIGHT 1 sound.LEFT :RIGHT 1 |
 | The left keys produce the LEFT sound and the right keys produce the RIGHT 2 sound.LEFT :RIGHT 2 |
- The volume of each part can be adjusted independently. (Refer to page 41.)
- When the keyboard is divided into left and right parts, the initialized split point is at C3 (the third C from the bottom, or left end of the keyboard), but you can change the location of the split point. (Refer to page 43.)
- The following conditions are in effect when the AUTO PLAY CHORD is used.
—1 Finger mode: The LEFT part does not sound.
—1 Finger, Fingered mode: You cannot assign the RIGHT part sound to the whole keyboard.
— Pianist mode: The keyboard cannot be split.
Solo Piano
text_image
Diagram of a control panel with labeled components including dial, buttons, and display screenPress the SOLO PIANO button for a solo piano performance without having to make complicated settings.
⇒Press the SOLO PIANO button.
- The appropriate settings for a piano performance is automatically set.
- Note that the settings that were in effect immediately before this button is pressed will be lost.
Effects
natural_image
Line drawing of a control panel with display and keypad (no text or symbols)Add various effects to give expression to the sounds.
CHORUS
This effect gives the sound richness and breadth.
- Use the CONDUCTOR buttons to select the part to which this effect will be applied.
- Press the CHORUS button to turn it on.

- The ▶ mark next to the CHORUS indication on the right side of the display indicates that this effect is on.
• The display looks similar to the following.
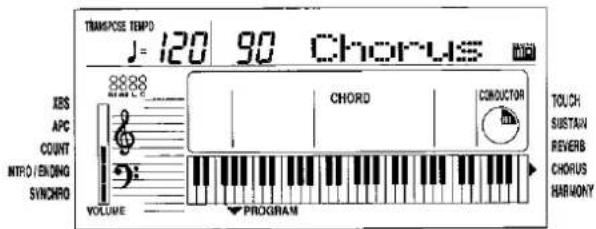
text_image
TRANSPOSE TEMPO J = 120 90 Chorus 8888 CHORD CONDUCTOR TOUCH SUSTAIN REVERB CHORUS HARWORY VOLUME PROGRAM- If necessary, use the TEMPO/PROGRAM buttons to adjust the depth of the effect (0–99).
- Perform this operation while the PROGRAM indication is flashing on the display. After a few seconds, the display returns to the previous display.
- This effect can be set to on or off for each part.
SUSTAIN
SUSTAIN is the gradual fading out of musical tones after the key is released.
- Use the CONDUCTOR buttons to select the part to which this effect will be applied.
- Press the SUSTAIN button to turn it on.

- The ▶ mark next to the SUSTAIN indication on the right side of the display indicates that this effect is on.
- This effect can be set to on or off for each part.
REVERB
REVERB applies a reverberation effect to the sound.
⇒Press the REVERB button to turn it on.

- The ▶ mark next to the REVERB indication on the right side of the display indicates that this effect is on.
• The display looks similar to the following.
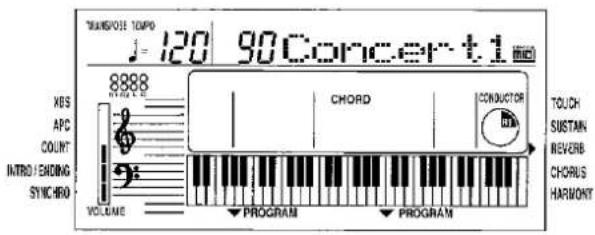
text_image
TRANSPOSE TEMPO 120 90Concerti 8888 XBS APC COUNT INTROJ EDDING SYNCHRO VOLUME CHORD CONDUCTOR TOUCH SUSTAIN REVERB CHORUS HARMONT- If necessary, use the TEMPO/PROGRAM buttons to adjust the depth of the effect (0–99), and the TRANSPOSE/PROGRAM buttons to select the type of reverb (Room1, 2, Plate 1, 2, Concert 1, 2).
- Perform this operation while the PROGRAM indication is flashing on the display. The display returns to the previous display a few seconds after you have changed the setting.
TOUCH
You can add dynamics to the sound by varying the keyboard touch.
• The initialized setting is ON.
⇒Press the TOUCH button to turn it on.

- The ▶ mark next to the TOUCH indication on the right side of the display indicates that this effect is on.
• The display looks similar to the following.
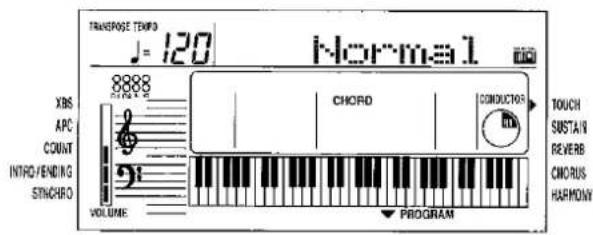
text_image
TENKROSE TEMPO J=120 Normal 8888 XBS APC COUNT INTRO/FENDING SYNCHRO VOLUME CHORD CONDUCTOR TOUCH SUSTAIN REVERB CNOBUS HARMONY PROGRAM- If necessary, the TRANSPOSE/PROGRAM buttons can be used to select the mode (Heavy, Normal, Light).
- Perform this operation while the PROGRAM indication is flashing on the display. After a few seconds, the display returns to the previous display.
Transpose

natural_image
Front view of a control panel with display and keypad (no visible text or symbols)The TRANSPOSE buttons are used to change the key of the entire instrument in semitone steps across an entire octave.
Suppose you learn to play a song—in the key of C, for example—and decide you want to sing it, only to find that it's either too high or too low for your voice. Your choice is to either learn the song all over again in a different key, or to use the TRANSPOSE feature.
⇒Adjust the key with the TRANSPOSE ∧ and ∨ buttons.
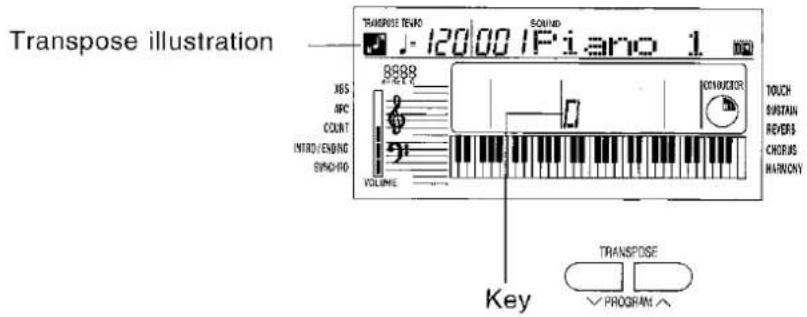
text_image
Transpose illustration TRANPOSE TEWO J: 120.00 | Piano 1 8888 XBS AFC COUNT INTRODUCTION SYND-NO VOLUME SOUND 90° NODRATOR TOUCH BUSTAIN REVERS CHORUS HARCONY Key TRANSPOSE ✓ PROGRAM ↗- Each press of the ∧ button raises the key in semitone steps, and each press of the ∨ button lowers the key in semitone steps (G - C - F#).
- If the two buttons are pressed at the same time, the key returns to C.
- When the TRANSPOSE function is active, the transpose illustration is shown on the display.
- When PROGRAM is shown on the display above the buttons, these buttons are used for various settings and cannot be used for TRANSPOSE. To access the TRANSPOSE function in this case, first exit the setting mode.
Played keys: C major
text_image
Musical notation snippet showing a treble clef, notes, and a downward arrow indicating pitch or rhythmNotes that sound: D major
Harmony
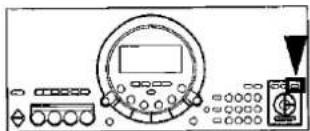
natural_image
Line drawing of a control panel with dashboard, input switches, and output device (no text or symbols)This function automatically adds harmony to the single-note melody you play in the right part, based on the chord you specify in the left part.
-
Split the keyboard into right and left sections. (Refer to page 20.)
-
Press the HARMONY button to turn it on.
-
The ▶ mark next to the HARMONY indication on the right side of the display indicates that this effect is on.
• The display looks similar to the following.

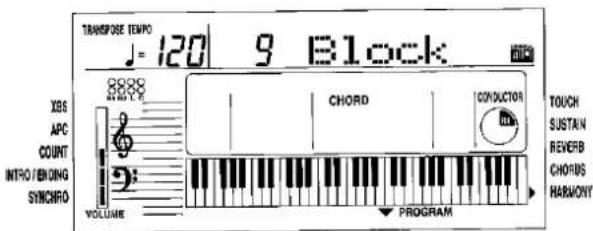
text_image
TRANSPOSE TEMPO J = 120 | 9 Block XBS APC COUNT INTRO / ENDING SYNCHRO VOLUME 8888 CHORD CONDUCTOR TOUCH SUSTAIN REVERB CHORDS HARMONY- If necessary, the TRANSPOSE/PROGRAM buttons can be used to select the type of harmony.
- If the "Octave", "Hard Rock" or "Fanfare" type is selected, HARMONY is added even when you do not specify the chords.
- Perform this operation while the PROGRAM indication is flashing on the display. After a few seconds, the display returns to the previous display.
Part II Playing the rhythm
There are 100 rhythms stored in the memory of this instrument. An additional VARIATION patterns for each rhythm is available.
Rhythm
- Press the RHYTHM button. Use the number buttons to select a rhythm number (three digits).
text_image
MENU 0 1 2 3 RHYTHM + 4 5 6 VARIATION CANCEL 7 8 9- The list of RHYTHMS is shown near the left end of the panel.
- The rhythm number and name are shown on the display.

text_image
001 8 Beat- Enter three digits to specify the rhythm. For example, for rhythm number 003, press 0, 0, 3. For rhythm number 030, press 0, 3, 0.
- The + and - buttons can be used to increase or decrease the number. When a button is pressed and held, the numbers change quickly.
-
To cancel a number you are entering, press the + and - buttons at the same time (CANCEL).
-
Press the START/STOP button.

• The selected rhythm pattern begins to play.
- You can stop the rhythm by pressing the START/STOP button again to turn it off.
- Since there is no DRUM part for the 091 CLASSIC BALLAD rhythm, the pattern does not sound unless the AUTO PLAY CHORD is used.
natural_image
Front view of a vintage electronic device with control panel and buttons (no visible text or symbols)VARIATION
When you press the VARIATION button, the rhythm changes to the variation pattern for the selected rhythm.
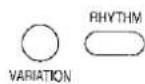
- "VARI" is shown on the display when the variation pattern is selected.

text_image
001 8 Beat RHYTHM VARI- During a rhythm performance, you can switch between the normal pattern and the variation pattern by pressing the VARIATION button.
- There is no VARIATION pattern for the METRONOME rhythm.
Synchro Start
natural_image
Front view of a control panel with display and keypad (no visible text or symbols)With the synchronized start feature, the rhythm pattern begins to play when you press a key on the keyboard.
- Select a rhythm.
- Press the SYNCHRO START button to turn it on.
- The ◀ mark next to the SYNCHRO indication on the left side of the display indicates that this function is on.
- Play a key to the left of the keyboard split point.
• The rhythm pattern begins to play.
- You can use the synchronized start feature even when the keyboard is not divided into left and right sections. To start the rhythm, press a key to the left of the specified split point (C3 in the initialized state).
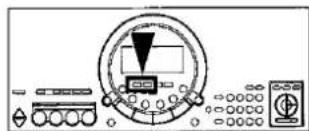
Tempo
natural_image
Front view of a control panel with display and keypad (no visible text or symbols)The tempo of the rhythm pattern is adjusted with the TEMPO buttons.
⇒Press the right button for a faster tempo, and the left button for a slower tempo ( =40-300 ).
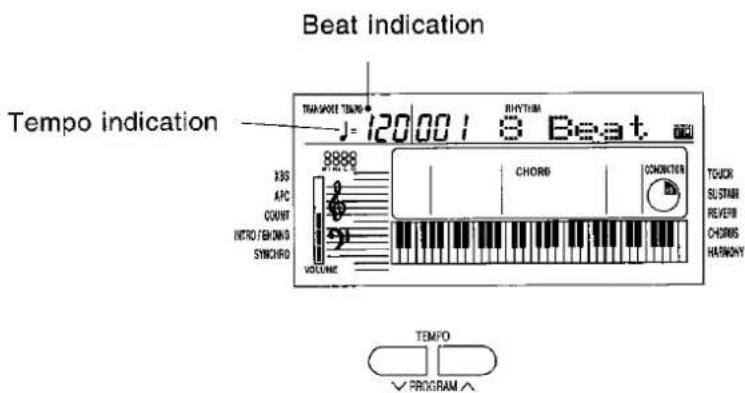
text_image
Beat indication Tempo indication J=120/001 3 Beat THAN MOUNT TEMPO RHYTHM 8888 9888 3.85 APC COUNT INTRO/BYOND SYNCHIO VOLUME CHORB CONDUCTOR TOUCH SUSTAIN REVEIR CHORDS HASWONY TEMPO PROGRAM A- Press both buttons at the same time to reset the tempo to the standard J = 120 .
• The tempo is shown on the display. - The beat is indicated above the displayed tempo.
- When "PROGRAM" appears on the display above the buttons, these buttons are used for various settings and cannot be used to adjust the TEMPO. To adjust the TEMPO in this case, you must first exit the setting mode.
Rhythm performance
text_image
Diagram of an analog multimeter with labeled control panel and dial indicatorIntro, fill-in and ending patterns are available for each rhythm.
INTRO
Begin the rhythm performance with an intro pattern.
- Press the INTRO/ENDING button to turn it on.
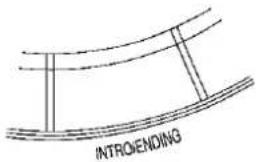
text_image
INTROENDING- The ▲ mark next to the INTRO/ENDING indication on the left side of the display indicates that this function is on.
- Press the START/STOP button to start the rhythm.
- An intro pattern is played, after which the normal rhythm pattern begins.
COUNT INTRO
You can begin the rhythm performance with a one-measure count.
- Press the FILL IN 2/COUNT INTRO button to turn it on.
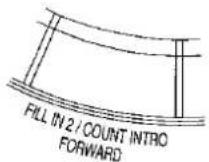
- The ▶ mark next to the COUNT indication on the left side of the display indicates that this function is on.
- Press the START/STOP button to start the rhythm.
- A one-measure count is played, after which the normal rhythm pattern begins.
FILL IN
You can insert a fill-in pattern any time during the rhythm performance. Choose from two different fill-in patterns.
-
Select a rhythm and press the START/STOP button.
-
Press the FILL IN 1 or 2 button.
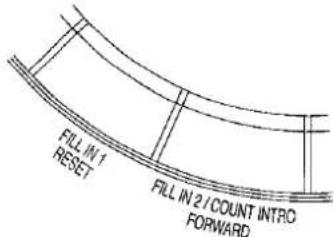
text_image
FILL IN 1 RESET FILL IN 2 / COUNT INTRO FORWARD- A fill-in pattern is heard immediately for the remainder of the measure.
- When a FILL IN button is pressed on the last beat of the measure, the fill-in pattern continues to the end of the following measure.
ENDING
Finish the rhythm performance with an ending pattern.
- Select a rhythm and press the START/STOP button.
- Press the INTRO/ENDING button to turn it on.
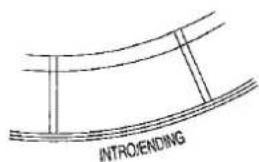
text_image
INTRO/ENDING- An ending pattern is produced, and then the rhythm performance stops.
- If you accidentally press an INTRO/ENDING button in the middle of the tune, you can press the FILL IN 1 or 2 button. The ending pattern stops, and a fill-in pattern is produced, after which the normal rhythm performance continues.
Auto Play Chord
natural_image
Line drawing of a control panel with no visible text or symbolsSimply by playing a chord on the keyboard, the AUTO PLAY CHORD function automatically plays an accompaniment pattern which matches perfectly the selected rhythm. With a real accompaniment as a background, you can concentrate on playing the melody.
⇒Choose from three ways of playing chords.
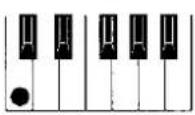
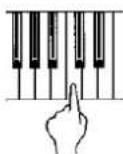
■ One Finger (1 Finger) mode
In the One Finger mode, a major chord can be played just by pressing the key for its root note.
Example: C chord
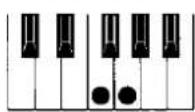
Minor, seventh and minor seventh chords are also easily produced.
| minor chord | seventh chord | minor seventh chord |
| Play the root note plus a black key to the left of it. | Play the root note plus a white key to the left of it. | Play the root note plus a black key and a white key to the left of it. |
Example: Cm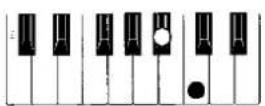 | Example: C7 | Example: Cm7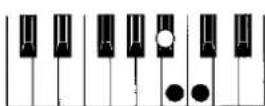 |
■ Fingered mode
In the Fingered mode, you specify the chord by playing all the notes in the chord.
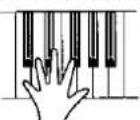
- Play at least three notes to specify the chord.
- If the CHORD FINDER procedure is used, you can see the types of chords that can be specified and the keys you press to play them. (Refer to page 29.)
■ Pianist mode
In the Pianist mode, the entire keyboard can be used to specify chords (Fingered mode) for the automatic accompaniment; a RIGHT part is assigned to all the keys, and the keyboard does not split.
- If the CHORD FINDER procedure is used, you can see the types of chords that can be specified and the keys you press to play them. (Refer to page 29.)
- When specifying chords, if you press a key a perfect 5th or more below the lowest note of the chord, the BASS part becomes a pattern based on that note.
How to use the AUTO PLAY CHORD
- Select the desired rhythm and sound(s), and set the tempo.
- Press the AUTO PLAY CHORD button to turn it on.
- The mark next to the APC indication on the left side of the display indicates that this function is on.
• The display looks similar to the following.

text_image
1 Finger- Use the TRANSPOSE/PROGRAM buttons to select the chord mode (1 Finger, Fingered, Pianist).
- Perform this operation while the PROGRAM indication is flashing on the display. After a few seconds, the display returns to the previous display.
- Start the rhythm.
-
Specify a chord.
-
If the 1 Finger or Fingered mode was selected, specify the chord on the keyboard section to the left of the split point (C3).
- The split point can be changed. (Refer to pages 40 and 43.)
- An accompaniment pattern in the specified chord is automatically played.
- The specified chord is shown in the CHORD section on the display.
- When you use the fill-in, intro and ending patterns, the automatic accompaniment is also used in these patterns.
-
Once a chord is specified, it continues to play even when the keys are released, until you specify another chord.
-
To stop the automatic accompaniment, press the START/STOP button.
-
The AUTO PLAY CHORD is comprised of five parts (ACCOMP [ACP] 1, 2 and 3, BASS and DRUMS), the volume balance for each of which can be adjusted with the PART VOLUME function. (Refer to pages 40 and 41.)
- In the 1 Finger or Fingered mode, if you specify a chord without starting the rhythm, the root bass note (R.BS) and the chord notes (CHRD) will sound. The volumes of these parts can be adjusted with the PART VOLUME function. (Refer to pages 40 and 41.)
- There is no automatic accompaniment pattern for the METRONOME rhythm.
APC/SONG VOLUME
You can lower the volume of the automatic accompaniment to balance it with the volume of the sounds you play.
- This setting also functions for the song playback volume.
- Press the APC/SONG VOLUME button to turn it on.

• The display looks similar to the following.

text_image
10APC VOL- Use the TEMPO/PROGRAM buttons to adjust the volume (0 to 10).
• A setting of 10 is the normal volume.
- Perform this operation while the PROGRAM indication is flashing on the display. After a few seconds, the display returns to the previous display.
- After the volume setting is changed, the volumes of all the parts other than the one you are playing (for example, BEAT MASTER, etc.) are also changed.
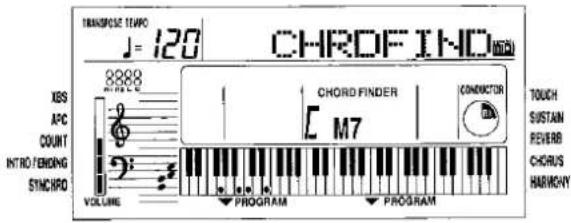
CHORD FINDER
This feature shows you the keys to press for a specific chord. You may find this convenient when you don't know how to play certain chords indicated in the sheet music.
- Select the chord mode. (Refer to page 28.)
-
Select Fingered or Pianist.
-
Press the CHORD FINDER button to turn it on.

• The display looks similar to the following.
text_image
TRANSPOSE TEMPO J = 120 CHROFINO 8888 VOLUME XBS APC COUNT INTRO/ENDING STINCHRO VOLUME CHORD FINDER M7 CONDUCTOR TOUCH SUSTAIN REVERB CHORUS HARMONY-
Use the TEMPO/PROGRAM buttons to specify the chord's root note, and the TRANSPOSE/PROGRAM buttons to specify the chord type.
-
On the display, the keys you press to play the specified chord are indicated on the keyboard illustration.
-
If you press the EXECUTE button, the selected chord will sound.
-
Press the CHORD FINDER button again to turn this function off.
One Touch Play
text_image
Diagram of a control panel with labeled buttons and a dial indicatorONE TOUCH PLAY automatically sets the sounds, etc. that match your chosen rhythm. Just by pressing a button you can immediately perform using the automatic accompaniment.
- Note that when the automatic settings are executed, the previous settings are canceled.
- With the rhythm stopped, select a rhythm pattern.
- Press the ONE TOUCH PLAY button.

- Sounds and effects, tempo, etc. that match your selected rhythm are automatically set, and the AUTO PLAY CHORD and SYNCHRO START are turned on.
- Play the keyboard.
- When you specify a chord, the automatic rhythm begins to play immediately.
- Play the keyboard.
- When you specify a chord, the automatic rhythm begins to play immediately.
Piano Stylist
natural_image
Front view of a control panel with dial, buttons, and a central screen (no visible text or symbols)Various styles for performances with automatic accompaniment using piano sounds have been prepared for your instrument. When you select a style, the matching sounds and rhythm, etc. are automatically set.
- Note that when the automatic settings are executed, the previous settings are canceled.
- With the rhythm stopped, press the PIANO STYLIST button to turn it on.

• The display looks similar to the following.
classic
-
Use the TRANSPOSE/PROGRAM buttons to select a style name.
-
Perform this operation while the PROGRAM indication is flashing on the display.
-
Sounds and effects, rhythm, tempo, etc. that match the selected style are automatically set, and the AUTO PLAY CHORD and SYNCHRO START are turned on.
-
Play the keyboard.
- When you specify a chord, the automatic rhythm begins to play immediately.
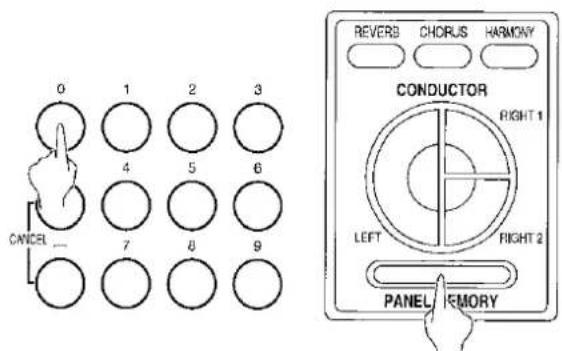
Panel Memory
natural_image
Front view of a control panel with display and keypad (no visible text or symbols)This function lets you store up to ten combinations of panel settings for easy recall at any time.
How to store the panel settings
The settings are stored in buttons 0 to 9.
- Set up the desired panel settings (sounds, rhythms, etc.).
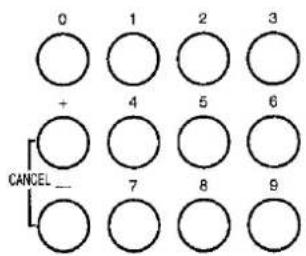
- While pressing the PANEL MEMORY button, press one of the number buttons (0 to 9).
text_image
0 1 2 3 4 5 6 7 8 9 CANCEL REVERB CHORUS HARMONY CONDUCTOR RIGHT 1 LEFT RIGHT 2 PANEL MEMORY- "COMPLETE" appears on the display, and the current panel settings will be stored in the selected number.
Recall the panel setup
- Press the PANEL MEMORY button.
-
Press the desired number button.
-
The panel setup changes to the one stored in the specified memory.
- When you press the PANEL MEMORY button, the P. MEMORY indication appears in the upper part of the display for a few seconds. Press the desired number button while this indication is shown.
- You can then change the sound settings, etc.; however, the memory itself remains unchanged until you store it again.
Performance Pads

natural_image
Line drawing of a control panel with display and keypad (no text or symbols)During your performance, you can insert various phrases just by pressing the pad buttons.
Pad performance
You can use the four pad buttons to produce four different phrases.
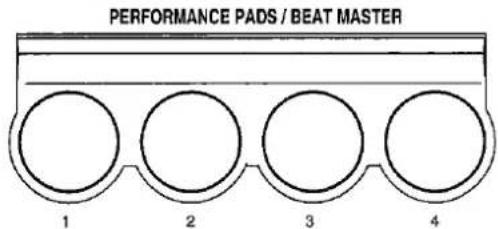
text_image
PERFORMANCE PADS / BEAT MASTER 1 2 3 4- As the phrase is being played, the indicator of the pad button you pressed is lit. Playback will stop if you press the same pad button again.
- During a rhythm performance, some phrases may play in time with the measure count.
- When the automatic accompaniment is on, some phrases play in the specified chord.
- The PAD volume can be adjusted with the PART VOLUME function. (Refer to pages 40 and 41.)
Select a bank
Six banks have been prepared so that you can play phrases that match the selected genre.
- Press the MENU button.
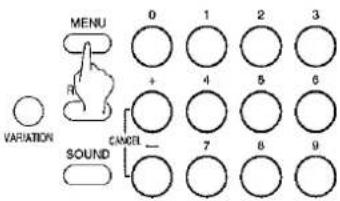
text_image
MENU 0 1 2 3 + 4 5 6 CAMER - 7 8 9 SOUND VARIATION- Use the number buttons to specify a bank number (01 to 06: two digits).
- The list of PADS BANKS is found on the panel above the pad buttons.
- Press the EXECUTE button.
• The display looks similar to the following.

• After a few seconds, the display returns to the previous display.
• Each pad produces a phrase that matches the selected bank.
Use the SONG function to record your performance.
Record your performance
natural_image
Front view of a control panel with display and keypad (no visible text or symbols)Record your performance just as you played it on the keyboard.
- Set the sounds, effects, rhythms, etc. for the parts you are going to record.
- In the CONDUCTOR, turn on the parts that you want to record.
- In the SONG section, press the REC button.
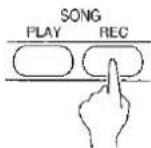
• The display looks similar to the following.

text_image
SOUND /EASY REC- Use the TRANSPOSE/PROGRAM buttons to select the recording mode.
1 EASY REC: Your performance, including the automatic accompaniment, is recorded.
- All the previously recorded contents are erased.
2 MELODY: Your performance of those parts selected in the CONDUCTOR is recorded.
3 APC REAL: The automatic accompaniment (specified chords) only is recorded.
- Be sure to turn on the AUTO PLAY CHORD button before beginning recording. Also note that recording in this mode should be completed before starting to record in the MELODY mode.
4 APC STEP: The chord progression is recorded one chord at a time. (Refer to page 33.)
- Press the EXECUTE button.
- On the display, a flashing ● mark in the REC line indicates the part that you selected to record.
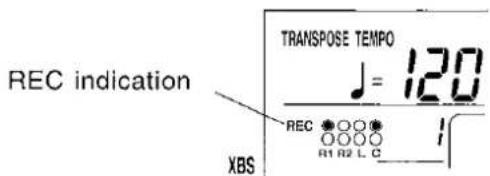
text_image
REC indication TRANSPOSE TEMPO J = 120 REC ○○○ ○○○○ R1 R2 L C XBS- A flashing ● mark in both the REC line and the PLAY line means that you have selected a part that has already been recorded. If you record this part again, the previous contents will be overwritten (deleted).
- Press the START/STOP button.
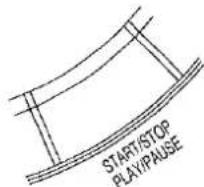
- The recording begins. Play the keyboard to record your performance.
- If you record a performance without the rhythm, begin your performance without pressing the START/STOP button. Recording begins immediately when you play the keyboard.
- The measure number is shown on the display.
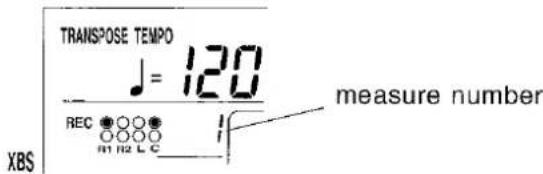
text_image
TRANSPOSE TEMPO ♩ = 120 measure number REC REC REC XBS m1 m2 L C- When you have finished recording, press the START/STOP button.
- On the display, a ● mark in the PLAY line indicates the part that you recorded.
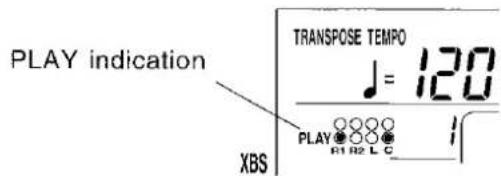
text_image
PLAY indication XBS TRANSPOSE TEMPO J = 120 PLAY G1 H2 L C- If you press the START/STOP button at this time, your recorded performance will be played back.
You can record your performance using four tracks—RIGHT 1 (R1), RIGHT 2 (R2), LEFT (L) and CHORD (C).
Multiplex recording
Multiplex recording of the MELODY mode and APC REAL mode is possible by repeating steps 1 to 6.
- In multiplex recording, recording cannot be started by playing the keyboard. You must press the START/STOP button to begin recording.
Playing back your recorded song
- In the SONG section, press the PLAY button.
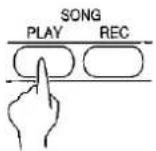
- This step is not necessary if the PLAY indication already appears on the display.
-
Press the PLAY/PAUSE (START/STOP) button.
-
Your recorded performance is played back.
- For information about the function of each button during playback, refer to page 36.
- If you wish to play back the rhythm, turn the PLAY button off.
Store a chord progression
Store the chord progression for the AUTO PLAY CHORD in the track for the CHORD part. Then, when the AUTO PLAY CHORD is used during playback, even if you do not specify the chords with your left hand, the chords change automatically.
- The chord length is specified with the CHORD STEP RECORD keys on the keyboard.
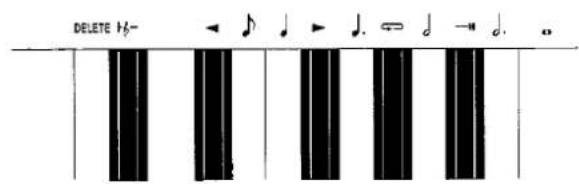
text_image
DELETE Hf- ← ♩ J J → J. ⇔ d → d. oNote value keys
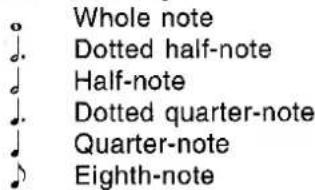
text_image
Whole note Dotted half-note Half-note Dotted quarter-note Quarter-note Eighth-noteReset key
H_ Press to begin storing from the beginning.
Correction keys
Move back one step.
▶ Move forward one step.
Repeat key
Press to end the chord-storing procedure and to specify automatic repeat playback of the stored progression.
End key
—H Press after the whole chord progression has been stored.
DELETE key
DELETE Press to erase data.
- To erase all the data from the current track, while pressing the DELETE key, press the End key ( ——).
- Note that executing this procedure will delete the recorded APC REAL data.
-
In the SONG section, press the REC button.
-
Use the TRANSPOSE/PROGRAM buttons to select 4: APC STEP.

text_image
SOUND 4APC STEP-
Press the EXECUTE button.
-
While playing a chord with your left hand, press the desired note value key with your right hand to specify the chord length. Repeat this step to store all the chords.
-
When a note value key is pressed, a "beep" tone indicates that the chord has been stored.
- Store a rest by pressing a note value key without specifying a chord.
• The display during chord recording:
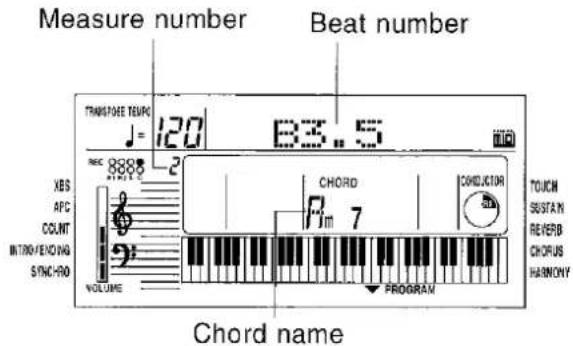
text_image
Measure number Beat number TRANSPOSE TEMPO J=120 B3.5 REC 8885 2 XBS APC COUNT INTRO/FENDING SYNC-RO VOLUME CHORD Fm 7 CONDUCTOR TOUCH SUBSTAN REVERB CHORUS HARMONY PROGRAM Chord name- The beat number is indicated in increments of ♩. For example, "B3.5" indicates 3-1/2 beats.
- You can press the INTRO [INTR], FILL IN [FIL 1/2] or ENDING [ENDG] button to store the corresponding pattern. (An INTRO or COUNT INTRO can be stored only at the beginning.) When storing a pattern or searching for a pattern, the abbreviated name is shown within square brackets [ ].
- To make corrections to the recorded chord progression, use the ◀ and ▶ keys or TRANSPOSE/PROGRAM button to display the chord you wish to modify. Next, press the DELETE key to erase the stored chord and then store a new chord. When you use the DELETE key to erase a chord, the recorded contents that follow are shifted forward by the note value of the deleted chord.
- To go to the end of the chord progression, while pressing the Reset key ( |_f ), press the key.
-
The CHORD FINDER feature, which shows you how to finger a specified chord, is available. (Refer to page 29.)
-
At the end of the chord progression, press the End key ( ——).
• The instrument exits the recording mode.
- If you wish automatic repeat playback of the chord progression, press the Repeat key ( ⊙) instead of the End key ( —+1 ).
- To store chords using the 1 Finger mode, select this mode before beginning the recording procedure. (Refer to page 28.)
Note
- When the recording procedure is performed, the previously recorded contents and song data loaded from a song disk as well as BEAT MASTER data are erased.
- You cannot record more than 999 measures.
- The total recording capacity of all tracks combined is approximately 4500 notes.
- When "MEM FULL" appears on the display, no more data can be stored and recording ends automatically.
- You cannot begin recording from the middle of a song.
• The playback volume can be adjusted. (Refer to page 28.) - Specific tracks can be muted so they are not played back. (Refer to pages 40 and 42.)
- If you wish to keep your recorded performance, save it to a floppy disk. (Refer to page 37.)
- If you record in the MELODY mode on top of the chord track (C) in which the ending pattern is stored, recording will automatically end at that point.
A 3.5 inch disk drive is built into this instrument, so you can play back the included disk and commercially sold song disks, as well as store your recorded performances on floppy disks and play them back.
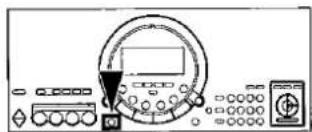
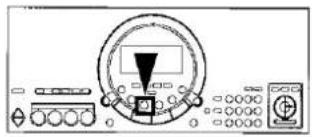
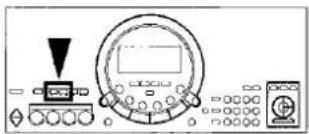
Parts of the floppy disk drive

text_image
Disk slot Lights when the power is on Eject button Press to remove the disk from the Disk Drive.- An illustration of a floppy disk appears on the display when data is being loaded from or saved to a disk. To prevent data loss, do not remove the disk from the Disk Drive or turn off the power while this illustration is shown.
text_image
Disk illustrationPlaying the included Song Disk
natural_image
Pure electrical circuit lines without any symbolsData for 100 songs is stored on the included SONG DISK for you to enjoy. These songs correspond to the separate music score provided.
- Note that recorded song data in the instrument memory will be deleted when a song on the disk is played back.
- Insert the SONG DISK into the Disk Drive.
natural_image
Diagram of a piano keyboard layout with a control panel and circular component (no text or symbols)- Insert the floppy disk correctly oriented with the label side up. Push it all the way in until it clicks into place.
- The display changes to show the song name. If it does not change, press the DISK SONG button.

- Use the number buttons to select a song number (3 digits).
text_image
0 1 2 3 + 4 5 6 CANCEL 7 8 9- The song numbers can be found on the separate music score provided.
- The selected song number and abbreviated song name are shown on the display.
00/AMERIC SONG
[Unreadable]
- The TRANSPOSE/PROGRAM buttons and the + and - buttons can also be used to select the song.
- If 000 MEDLEY is selected, the entire contents of the disk are played back repeatedly.
(Continued on the next page)
3. Press the EXECUTE button.

- The selected song data is loaded into this instrument's memory. "COMPLETE" appears on the display.
- This step is not necessary if MEDLEY was selected.
4. Press the PLAY/PAUSE (START/STOP) button.
- Playback begins.
- Playback ends at the end of the song. Use the same procedure to play other songs.
- If the APC/SONG VOLUME button is pressed, the playback volume can be adjusted. This is useful when playing the keyboard along with a song on the disk. (Refer to page 28.)
Function of each button during playback
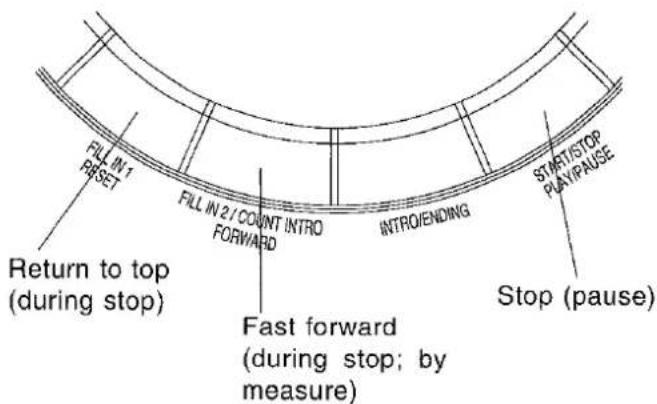
text_image
FILL IN 1 RESET FILL IN 2/COUNT INTRO FORWARD INTRO/ENDING START/STOP PLAY/PAUSE Return to top (during stop) Fast forward (during stop; by measure) Stop (pause)- If the PLAY/PAUSE button is pressed during MEDLEY playback, the MEDLEY is canceled.
- If the SONG TRACK MUTE function is used, playback of a desired track is muted, allowing you to perform that part on the keyboard. (Refer to pages 40 and 42.)
- When the MINUS ONE button is pressed, the melody (RIGHT 1) part is muted so that you can try playing it yourself. Press the MINUS ONE button again to cancel the mute.
Playback of commercial disks (Direct Play)
natural_image
Front view of a control panel with display and keypad (no visible text or symbols)You can enjoy immediate playback of disks with the GM (General MIDI) mark as well as SMF (Standard MIDI File; FORMAT 0/1) song disks.
- Note that recorded song data in the instrument memory will be deleted when a song on the disk is played back.
- Insert the song data disk into the Disk Drive.
-
The display changes to show the song name. If it does not change, press the DISK SONG button.
-
Use the TRANSPOSE/PROGRAM buttons or the number buttons to select a song.
-
The song number and song name (file name) are shown on the display.
- When using the number buttons, be sure enter 3 digits for the song number.
-
If 000 MEDLEY is selected, the entire contents of the disk are played back repeatedly.
-
If both SONG data and SMF (Standard MIDI File) data are stored on the same disk, following the TYPE indication, the display changes to the select display. In this case, use the TRANSPOSE/PROGRAM buttons to select 02 SMF. Press the EXECUTE button.
-
Press the PLAY/PAUSE (START/STOP) button.
- Playback begins.
- The RESET/FORWARD button can also be used during playback.
- The APC/SONG VOLUME button can also be used. (Refer to page 28.)
MINUS ONE
You can mute a specified part of the song data. When you wish to play the keyboard in time with the song, you can mute one part, and the other parts become your background when the song data is played back.
- Press the MINUS ONE button.

• The display looks similar to the following.
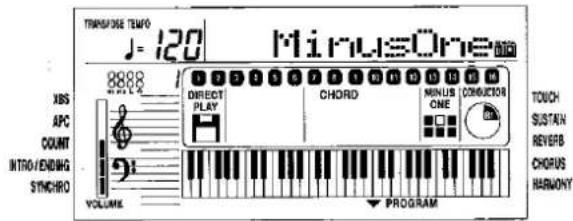
text_image
TRANSFORME TEMPO J=120 MinusOne 8888 XBS APC COUNT INTRO/ENDING SYNCHRO VOLUME DIRECT PLAY CHORD MINUS ONE CONDUCTOR TOUCH SUSTAIN REVERB CHORUS HARMONY-
Use the TRANSPOSE/PROGRAM buttons to specify the part number (it flashes) of the part you wish to mute.
-
After a few seconds, the display returns to the previous display.
- To cancel the mute function, press the MINUS ONE button again.
Save your recorded song
natural_image
Front view of a control panel with display and rotary buttons (no visible text or symbols)The recorded contents of this instrument's SONG memory can be stored on a floppy disk. Only one song can be recorded in this instrument's memory, but several songs can be saved in one floppy disk.
SONG SAVE
The SONG recorded contents, PANEL MEMORY stored settings, and the current panel settings, etc. are all stored when you save a song to a disk.
- If you attempt to save a song to an unformatted disk, "UNFORMAT" is shown on the display. Follow the DISK FORMAT procedure to format the disk. (Refer to page 39.)
- Record your performance with the SONG function.
- Press the DISK MENU button.

- Use the TRANSPOSE/PROGRAM buttons to select 1: SONG SAVE.

text_image
/SONGSAVE DISK- Press the EXECUTE button.

• The display looks similar to the following.

text_image
DISK MIDI(Continued on the next page)
- If necessary, assign a song name (up to 6 characters).
- Use the TEMPO/PROGRAM buttons to specify the character position, and the TRANSPOSE/PROGRAM buttons to select the alphanumeric character. Repeat these steps to enter the whole name.
- If you wish to erase all the characters, press both TRANSPOSE/PROGRAM buttons at the same time.
-
Press the EXECUTE button.
-
Use the TRANSPOSE/PROGRAM buttons to specify the song (file) number to save to (001 to 100).
-
Press the EXECUTE button.
- The SAVE operation begins. "COMPLETE" appears on the display.
- If you attempt to save song data to a song number in which data is already stored, "SURE?" appears on the display. Press the EXECUTE button to overwrite the existing song data, or press the DISK MENU button if you wish to cancel the procedure.
- The number of songs that can be saved to one floppy disk is limited.
■ About playback
The method to play back a song you saved is the same as that to play back a song on the included disk. (Refer to page 36.)
- If both SONG data and SMF (Standard MIDI File) data are stored on the same disk, following the TYPE indication, the display changes to the select display. In this case, use the TRANSPOSE/PROGRAM buttons to select 01 SONG. Press the EXECUTE button.
- During MEDLEY playback, playback will stops at a file that has no song data.
SONG DELETE
You can delete songs that you no longer want to keep from the disk.
-
Press the DISK MENU button.
-
Use the TRANSPOSE/PROGRAM buttons to select 2: SONG DEL.
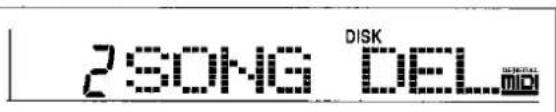
text_image
2SONG DISK DEL GENERAL MIDI- Press the EXECUTE button.
• The display looks similar to the following.

text_image
001 DISK-
Use the TRANSPOSE/PROGRAM buttons select the song number you wish to delete.
-
Press the EXECUTE button.
- "SURE?" appears on the display.
- Press the EXECUTE button again.
- "COMPLETE" appears on the display, and the selected song is deleted.
DISK FORMAT
It may be necessary to format a floppy disk for saving songs when you first use it. Also, this is a convenient way to erase all the data stored on a disk.
- This procedure clears the entire contents of the disk.
- Reformat a disk if it cannot be saved to or loaded from properly because of exposure to a magnetic field.
- You can use 3.5 inch 2DD (720KB) or 2HD (1.44MB) floppy disks.
- Be sure to specify the type of format which is suitable for the disk.
• How to distinguish the two disk types:
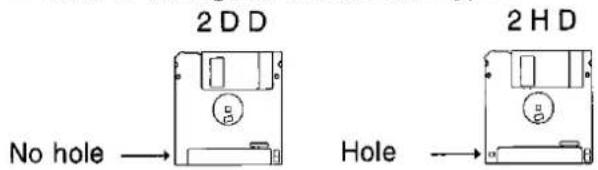
text_image
2 D D No hole → Hole → 2 H D- Although 2HD floppy disks can hold more data and are convenient for quick loading and saving, some models may be able to read only 2DD disks. Therefore, you may not be able to use your 2HD disk data with other musical instrument models.
- To format the floppy disk, the write-protect window must be closed, as illustrated.
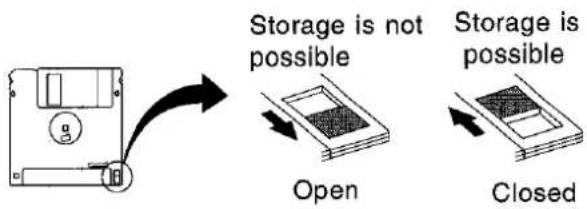
text_image
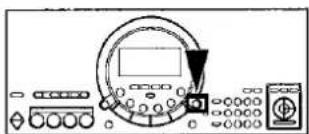
Storage is not possible Open Storage is possible Closed- Insert the floppy disk to be formatted into the Disk Drive.
- Press the DISK MENU button.

- Use the TRANSPOSE/PROGRAM buttons to select 3: FORMAT.

text_image
DISK 3 FORMAT- Press the EXECUTE button.
• The display returns to the previous display.

text_image
DISK *2DD 2HD GENERAL-
Use the TRANSPOSE/PROGRAM buttons to select a disk type (2DD or 2HD).
-
Be sure to select the type which is the same as your disk type.
- Press the EXECUTE button.
- "SURE?" appears on the display.
-
Press the EXECUTE button again.
-
Disk format begins. After a few minutes, "COMPLETE" appears on the display and formatting is completed.
- No sound is generated even if you play the keyboard during formatting. If the keyboard is played during formatting, sound may be produced when formatting is completed.
Various settings that enhance the functions of this instrument are accessed through the MENU function.
Outline of the procedure
- Press the MENU button.
text_image
MENU 0 1 2 3 R + 4 5 6 VARIATION CANCEL SOUND 7 8 9- Use the number buttons to enter the menu number of the setting you wish to display (two digits).
- The + and - buttons and the TRANSPOSE/PROGRAM buttons can also be used to select the menu number.
■ MENU list:
[ ] indicates the name shown on the display.
01 to 06: PADS BANK SELECT [PAD BANK 1-6] Select a BANK for the PERFORMANCE PADS. (Refer to page 31.)
07: PART VOLUME [PT VOL] Volume settings for each part.
08: PART SOUND [PT SOUND] Sound settings for each part.
09: PART PANPOT [PT PAN] Stereo setting for each part.
10: PART REVERB SEND [PT REV] Depth settings for the REVERB for each part.
11: PART CHORUS SEND [PT CHORS] Depth settings for the CHORUS of each part.
12: PART MIDI CHANNEL [PT MIDI] MIDI channel settings for each part
13: PART LOCAL SETTING [PT LOCAL] MIDI LOCAL CONTROL settings for each part.
14: SONG TRACK MUTE [TR MUTE] Mute setting for each track of a SONG.
15: SONG CLEAR [SONG CLR] Clear all SONG tracks.
16: TRACK CLEAR [TR CLEAR] Clear specified SONG tracks.
17: MIDI CLOCK [MIDI CLK] MIDI CLOCK mode settings.
18: MIDI REALTIME COMMAND [MIDI RTC] Setting to enable or disable the transmission/reception of MIDI REALTIME COMMAND data.
natural_image
Front view of a control panel with display and keypad (no visible text or symbols)19: SPLIT POINT [SPLIT]
Change the split point on the keyboard.
20: MASTER TUNING [TUNING]
Fine adjustment of the tuning for the whole instrument.
21: FOOT SWITCH ASSIGN [FOOT SW]
Assign a function to the Foot Switch (sold separately).
22: LCD CONTRAST [CONTRAST]
Adjust the readability of the display.
23: DEMO LED [DEMO LED]
ON/OFF settings for the LED lighting of the pad buttons during a DEMO performance.
24: ALL INITIAL [ALL INIT]
Reset this instrument to the original settings.
3. Press the EXECUTE button.
- The display changes to the setting display for the selected MENU.
4. Use the TEMPO/PROGRAM buttons, the TRANSPOSE/PROGRAM buttons, or the EXECUTE button to adjust the settings in the selected menu.
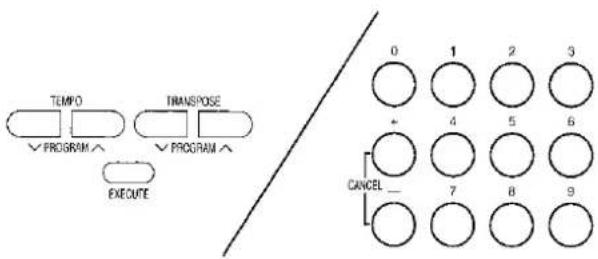
flowchart
graph TD
    A["TEMPOR"] --> B["PROGRAM"]
    C["TRANSPOSE"] --> D["PROGRAM"]
    E["EXECUTE"] --> F["0"]
    E --> G["1"]
    E --> H["2"]
    E --> I["3"]
    J["CANCEL"] --> K["4"]
    J --> L["5"]
    J --> M["6"]
    N["0"] --> O["7"]
    N --> P["8"]
    N --> Q["9"]
- When you have finished making the settings, press the MENU button again.
- If you execute a setting, there is also a menu to exit the setting mode.
Setting menus
PART VOLUME

text_image
127RT 1 VOL MENU MOI- Use the TRANSPOSE/PROGRAM buttons to select the part you wish to set.
- RT is the abbreviation for RIGHT, PT for part and ACP for ACCOMP.
- For an explanation of CHRD and R.BS, refer to page 28.
- Use the TEMPO/PROGRAM buttons to adjust the volume (0 to 127).
- Repeat these steps for each part as necessary.
PART SOUND
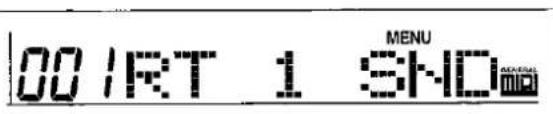
text_image
001RT 1 SNHD MENU-
Use the TRANSPOSE/PROGRAM buttons to select the part you wish to set.
-
Use the TEMPO/PROGRAM buttons or the number buttons to select a sound for the part.
PART PANPOT

text_image
64RT 1 MENU PAN-
Use the TRANSPOSE/PROGRAM buttons to select the part you wish to set.
-
Use the TEMPO/PROGRAM buttons to adjust the stereo midpoint (0 to 127).
- At 0 the center is all the way to the left, at 64 the center is midway between right and left, and at 127 the center is all the way to the right.
PART REVERB SEND

text_image
100RT 1 MENU REV- Use the TRANSPOSE/PROGRAM buttons to select the part you wish to set.
- Use the TEMPO/PROGRAM buttons to adjust the depth of the REVERB (0 to 127).
PART CHORUS SEND

text_image
100RT 1 CHO MENU- Use the TRANSPOSE/PROGRAM buttons to select the part you wish to set.
- Use the TEMPO/PROGRAM buttons to adjust the depth of the CHORUS (0 to 127).
PART MIDI CHANNEL

text_image
01RT 1 MCH MENU- Use the TRANSPOSE/PROGRAM buttons to select the part you wish to set.
- Use the TEMPO/PROGRAM buttons to set the channel (OFF, 01 to 16).
PART LOCAL SETTING

- Use the TEMPO/PROGRAM buttons to select the part you wish to set.
- Use the TRANSPOSE/PROGRAM buttons to set the LOCAL CONTROL setting (ON or OFF).
- When set to OFF, the performance for the part is transmitted as MIDI data but does not sound from this instrument.
SONG TRACK MUTE

- Use the TEMPO/PROGRAM buttons to select the track you wish to mute.
- R is the abbreviation for RIGHT and L for LEFT. C indicates the CHORD part.
- Use the TRANSPOSE/PROGRAM buttons to display the MUTE indication.
- “--” indicates that the MUTE function is turned off for the track.
SONG CLEAR

Press the EXECUTE button.
- "COMPLETE" appears on the display, and all the tracks of the SONG are cleared.
TRACK CLEAR

- Use the TRANSPOSE/PROGRAM buttons to select the track you wish to clear.
- R is the abbreviation for RIGHT and L for LEFT. C indicates the CHORD part.
- Press the EXECUTE button.
- "CLEAR?" appears on the display.
- Press the EXECUTE button again.
- "COMPLETE" appears on the display, and the specified track is cleared.
MIDI CLOCK

Use the TRANSPOSE/PROGRAM buttons to select the MIDI CLOCK mode.
INT: This instrument's internal clock is used to control the connected MIDI equipment.
EXT: The clock of the connected MIDI equipment is used to control this instrument. (The tempo is displayed as "♩=---".)
- For information about MIDI connections, refer to page 45.
- The setting is always set to INT when the power to this instrument is turned on.
MIDI REALTIME COMMAND

Use the TRANSPOSE/PROGRAM buttons to enable or disable the transmission/reception of MIDI REALTIME COMMAND data.
ON: REALTIME COMMAND (START/STOP, CONTINUE) data are transmitted/received.
OFF: REALTIME COMMAND data are not transmitted/received.
SPLIT POINT

Press the keyboard key to specify the desired split position.
- The name of the specified note is shown on the display.
• The initialized setting is at C3. - The key at the split point is the lowest note of the right keyboard section.
MASTER TUNING

Use the TRANSPOSE/PROGRAM buttons to adjust the tuning value (-38 - Center - +39).
FOOT SWITCH ASSIGN

Use the TRANSPOSE/PROGRAM buttons to select a function to assign to the Foot Switch (separately sold option).
- Select from SUSTAIN, START/STOP [ST/STOP] and GLIDE.
- In cases where the switch polarity is reversed, select a function name that is preceded by a “-” indication.
- Pressing the Foot Switch will turn the assigned function on.
- GLIDE "bends" the pitch down by about one semitone.
- For information about connecting a Foot Switch, refer to page 45.
LCD CONTRAST

text_image
MENU SECRETAL MIDUse the TRANSPOSE/PROGRAM buttons to adjust the readability of the display (1 to 10).
DEMO LED

Use the TRANSPOSE/PROGRAM buttons to specify whether or not the pad button LEDs light during a DEMO performance.
ON: The pad button LEDs light also during a DEMO performance.
OFF: The pad button LEDs do not light during the DEMO performance.
ALL INITIAL

Press the EXECUTE button.
- "COMPLETE" appears on the display, and all the settings of the instrument (except for MAIN VOLUME) are reset to the factory-preset status. Note that the SONG and PANEL MEMORY contents are cleared with this procedure.
- You can also reset the instrument with the following procedure: While pressing the TEMPO ∧ and ∨ at the same time, turn on the power to the instrument. With this method, the MAIN VOLUME setting is also initialized.
■ Memory function
The various settings and memory contents of this instrument are maintained as long as the AC adaptor is connected to this instrument and plugged into an outlet. In addition, the settings are preserved for about one week after the AC adaptor is unplugged.
- The memory function does not function until the power has been on for about 10 minutes.
- It is recommended that you save your SONG performances on floppy disks. (Refer to page 37.)
Symptoms which appear to be signs of trouble
The following changes in performance may occur in the Keyboard but do not indicate trouble.
| Phenomenon | Remedy | |
| Sounds and effects | The buttons, keys, etc. malfunction. | Turn off thePLAYbutton once, then turn it on again.If this procedure is not successful, turn off thePLAYbutton once. Then, while pressing theTEMPO^and√buttons at the same time, turn thePLAYbutton onagain. (Note that, in this case, all programmablesettings, functions and memories return to theirfactory-preset status.) |
| No sound is produced when the keys are pressed. | TheMAIN VOLUMEis at the minimum setting. Adjustthe volume with theMAIN VOLUMEcontrol.The volumes for the selected parts are set to theminimum levels. Set the volumes of the relevant partsto appropriate levels. (Refer to pages 40 and 41.)The LOCAL CONTROL for a part performed on thekeyboard is set to OFF. Set the LOCAL CONTROL toON. (Refer to pages 40 and 42.) | |
| Only percussive instrument sounds are producedwhen the keyboard is played. | ADRUM KITSsound is selected. | |
| The sound you hear is different from the sound youselected. | This sometimes occurs when you play backSONGdata which was created on a different model, or whenMIDI data is received from a connected instrument.Select the desired sounds again. | |
| Rhythm | The rhythm does not start. | ThePLAYbutton in theSONGsection is on. Whenyou are not playing back theSONGperformance, turnoff thePLAYbutton.TheDRUMSvolume is set to the minimum level. Usethe balance buttons to set theDRUMSvolume to anappropriate level. (Refer to the page 41.)The 091 CLASSIC BALLAD rhythm is selected. Thisrhythm does not sound unless theAUTO PLAYCHORDis used.MIDI CLOCK is set to EXT. Set CLOCK to INT. (Referto pages 40 and 42.) |
| AUTO PLAYCHORD | No sound is produced for the automatic accom-paniment. | TheAPC/SONG VOLUMEis set to the minimumsetting. Set it to a suitable level. (Refer to page 28.) |
| SONG | Storage is not possible. | The remaining memory capacity of theSONGis 0.Follow the SONG CLEAR or TRACK CLEARprocedure to erase the memory. (Refer to pages 40and 42) |
| Disk Drive | The Disk Drive produces a noise during recordingor playback. | This occurs when the Disk Drive is reading a disk. Itdoes not indicate a problem. |
| When the procedure to listen to a song on the diskis performed, the contents of the keyboard memoryare erased. | When performing the procedure to listen to a song onthe disk, the keyboard memory changes to that of thedata loaded from the disk. If you wish to preserve asong which is stored in the keyboard memory, save iton a disk before performing the load procedure. (Referto page 37.) | |
| Other | Noise from a radio or TV can be heard. | This sometimes occurs when electrical equipment such as a radio or TV is used near the instrument.Try moving such electrical equipment further away from the instrument.The sound may be coming from a nearby broadcast station or amateur radio station. If the sound is bothersome, consult your dealer or service center. |
| The cabinet becomes warm during use. | This instrument has a power source that heats the cabinet to some degree. This is not an indication of trouble. | |
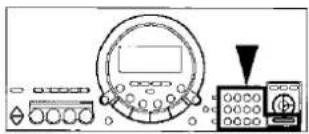
Connections
(Rear panel)
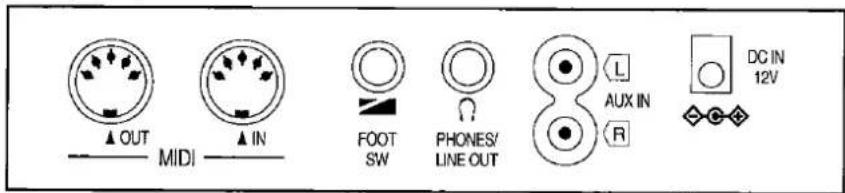
text_image
▲ OUT MIDI ▲ IN FOOT SW PHONES/ LINE OUT L AUX IN R DG IN 12VMIDI OUT
Used for transmitting MIDI data. Connect the other end of the MIDI cable to the MIDI IN terminal of another instrument. This terminal is used, for example, to generate sound from a connected instrument by playing this instrument.
MIDI IN
Used for receiving MIDI data. Connect the other end of the MIDI cable to the MIDI OUT terminal of another instrument. This terminal is used, for example, to generate sound from this instrument by playing a connected instrument.
AUX IN (stereo pin cord)
Connect to the LINE OUT terminal of another instrument to this terminal. The sound from a connected CD player, for example, can be output from this instrument's speakers.
FOOT SW
An optional SZ-P1 Foot Switch (sold separately) can be connected to this terminal to control various functions. (Refer to pages 40 and 43.)
PHONES/LINE OUT (output level 1.5 Vrms, 16 Ω) Headphones, a keyboard amplifier, or stereo equipment can be connected to this terminal. When another apparatus is connected to this terminal, the speaker system is automatically switched off, and sound is heard only through the connected device.
Separately sold option
SZ-P1 Foot Switch
Index
A
ALL INITIAL 43
APC/SOUND VOLUME 28
AUTO PLAY CHORD 27
AUX IN 45
B
BEAT MASTER 16
C
CANCEL 19
CHORD FINDER 29
CHORD STEP RECORD 33
CHORUS 21
CLOCK (MIDI) 42
CONDUCTOR 20
Connections 45
COUNT INTRO 26
D
DEMO 11
DIRECT PLAY 37
Disk Drive 35
DISK FORMAT 39
DISK SONG 35
DISK MENU 38
Display 18
E
EASY REC 15,32
ENDING 26
EXECUTE 18
F
FILL IN 26
FINGERED 27
FOOT SW 43,45
Foot Switch 45
FORWARD 36
G
GLIDE 43
H
HARMONY 23
Headphones 45
|
INTRO/ENDING 26
L
LCD CONTRAST 43
LINE OUT 45
LOCAL (MIDI) 42
M
MAIN VOLUME 9
MASTER TUNING 43
MENU 40
MIDI 45
MIDI CLOCK 42
MIDI REALTIME COMMAND 42
MINUS ONE 37
Music stand 8
MUTE 42
O
ONE FINGER 27
ONE TOUCH PLAY 29
Options 45
P
PAN 41
PANEL MEMORY 30
PART SETTING 41
PERFORMANCE PADS 31
PIANIST 27
PIANO STYLIST 30
PLAY 33
PLAY OFF/ON 9
R
REC 32
RESET 36
REVERB 22
RHYTHM 24
S
SAVE 37
SMF 36
SOLO PIANO 21
SONG 32
SONG CLEAR 42
SONG SAVE 37
SOUND 19
Specifications 47
SPLIT POINT 43
Standard MIDI File 36
START/STOP 24
SUSTAIN 21
SYNCHRO START 25
T
TEMPO 25
TEMPO/PROGRAM 18,25
TOUCH 22
TRACK CLEAR 42
TRANSPOSE 22
TRANSPOSE/PROGRAM 18
Troubleshooting 44
V
VARIATION 24
×
XBS 10
Specifications
| SX-KC600 | |
| KEYBOARD | 61 KEYS (WITH INITIAL TOUCH) |
| SOUND GENERATOR | PCM |
| MAX. POLYPHONY | 32 NOTES |
| SOUNDS | 250 SOUNDS |
| EFFECT | TOUCH, SUSTAIN, REVERB, CHORUS |
| HARMONY | 14 TYPES |
| TRANSPOSE | G - C - F# |
| RHYTHMS | 100 RHYTHMS WITH VARIATION |
| RHYTHM CONTROLS | SYNCHRO START, START/STOP, INTRO/ENDING, COUNT INTRO, FILL IN1, FILL IN 2, TEMPO |
| XBS | ○ |
| PERFORMANCE PADS | 4 PADS, 6 BANKS |
| PANEL MEMORY | 10 MEMORIES |
| AUTO PLAY CHORD | MODE: ONE FINGER, FINGERED, PIANIST |
| MUSIC TRAINER | BEAT MASTER, CHORD FINDER, PIANO STYLIST, SOLO PIANO, MINUS ONE, DISK SONG |
| SONG | PLAY, REC4 TRACKS: RIGHT1, RIGHT 2, LEFT, CHORDSTORAGE CAPACITY: APPROX. 4500 NOTES4 MODES: EASY REC, MELODY, APC REAL, APC STEP |
| DISK DRIVE | 3.5 inch FLOPPY DISK DRIVE for 2HD (1.44MB), 2DD (720KB)DIRECT PLAY (GM/SMF), SONG LOAD/SAVE, DELETE, FORMAT |
| CONTROLS | MAIN VOLUME, APC/SONG VOLUME, ONE TOUCH PLAY, EXECUTE, MENU, CONDUCTOR |
| DISPLAY | CUSTOM LCD (WITH BACKLIGHT) |
| DEMO | ○ |
| TERMINALS | MIDI IN, MIDI OUT, FOOT SW, PHONES/LINE OUT, AUX IN |
| OUTPUT | 10 W (5W × 2) |
| SPEAKERS | 12 cm × 2 |
| POWER REQUIREMENT | DC IN 12 V (WITH EXCLUSIVE AC ADAPTOR) |
| POWER CONSUMPTION | 6.6 W (WHEN POWER IS OFF BY THE PLAY BUTTON: 2 W) |
| DIMENSIONS (W × H × D) | 96.0 cm × 14.6 cm × 37.8 cm (37-25/32" × 5-3/4" × 14-7/8") |
| NET WEIGHT | 5.9 kg (13.0 lbs) |
| ACCESSORIES | AC ADAPTOR, MUSIC STAND, SONG BOOK, SONG DISK |
- Design and specifications are subject to change without notice.
EXCLUSIVE AC ADAPTOR
| PART NO. | REGION | VOLTAGE |
| QFAG028A | NORTH AMERICA AND MEXICO | 120 V |
| QFAG029A | UNITED KINGDOM | 230 - 240 V |
| QFAG030A | EUROPE | 230 V |
| QFAG031A | AUSTRALIA AND NEW ZEALAND | 230 - 240 V |
| QFAG032A | TAIWAN, MALAYSIA ETC. | 120/220/230/240 V |
| QFAG040A | CHINA | 220 V |
| QFAG041A | RUSSIA | 220 V |
| SY-AD6 | ARGENTINA, SAUDI ARABIA, KUWAIT AND HONG KONG | 120/220/230/240 V |