HP1290 - Højttalerstativ SoundTube - Gratis brugsanvisning og manual
Find enhedens vejledning gratis HP1290 SoundTube i PDF-format.


Brugerspørgsmål om HP1290 SoundTube
0 spørgsmål om dette apparat. Besvar dem du kender, eller stil dit eget.
Stil et nyt spørgsmål om dette apparat
Download vejledningen til din Højttalerstativ i PDF-format gratis! Find din vejledning HP1290 - SoundTube og tag din elektroniske enhed tilbage i hånden. På denne side er alle dokumenter nødvendige for brugen af din enhed offentliggjort. HP1290 af mærket SoundTube.
BRUGSANVISNING HP1290 SoundTube
RSi & HP Series
Install Instructions For:
1.435.647.9555 | 800.647.TUBE | www.soundtube.com
RS600i, RS800i, RS1001i-II, HP690i, HP890i, HP129i, HP1290i speakers

HP129i, HP1290i

RS600i, RS800i, RS1001i-II, HP690i, HP890i
Box contents
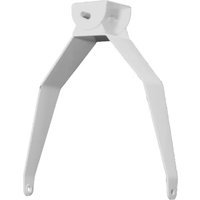
1 Surface-mount bracket
1 Safety cable

Transformer Taps Settings
©2008 SoundTube Entertainment, Inc. All rights reserved. PN INS-RS Rev 05.12.08
| Voice Coil | 70.7 Volt Transformer Taps (dB) | 100 Volt Transformer Taps (dB) | 25 Volt Transformer Taps (dB) | |
| RS600i | 8 Ohm=111 dB | 33W=105.5, 17W=103, 9W=100, 6W=98.5, 3W=95.5 | 33W=105.5, 17W=103, 9W=100, 6W=98.5 | 5W=97.5, 2.5W=94.5, 1.3W=91.5, .63W=88.5 |
| RS800i | 8 Ohm=112 dB | 66W=110.5, 35W=108, 19W=105.5, 10W=102.5, 5W=99.5 | 66W=110.5, 35W=108, 19W=105.5, 10W=102.5 | 9W=102, 4.5W=99, 2.3W=96, 1.1W=93 |
| RS1001i-II | 4 Ohm=112.5 dB | 150W=112.5, 75W=109.5, 38W=106.5 19W=103.5 | 150W=112.5, 75W=109.5, 38W=106.5 | 19W=103.5, 9.5W=100.5, 4.8W=97.5, 2.4W=94.5 |
| HP690i | 8 Ohm=117 dB | 66W=111, 35W=108.5, 19W=106 10W=103, 5W=100 | 66W=111, 35W=108.5, 19W=106 10W=103 | 9W=100, 2.5W=97, 1.25W=94, .75W=92 |
| HP890i | 8 Ohm=111 dB | 120W=115, 64W=112, 32W=109 16W=106 | 120W=115, 64W=112, 32W=109 16W=106 | 16W=106, 8W=103, 3.8W=100, 1.9W=97 |
| HP129i | 8 Ohm=119 dB | 150W=119, 75W=116, 38W=113 19W=110 | 150W=119, 75W=116, 38W=113 | 19W=110, 9.5W=107, 4.8W=104, 2.4W=101 |
| HP1290i | 8 Ohm=120 dB | 150W=120, 75W=117, 38W=114 19W=111 | 150W=120, 75W=117, 38W=114 | 19W=111, 9.5W=108, 4.8W=105, 2.4W=102 |

natural_image
Line drawing of a hand holding a cylindrical object over a tiled floor (no text or symbols)- Unpack speaker and surface-mount bracket.
natural_image
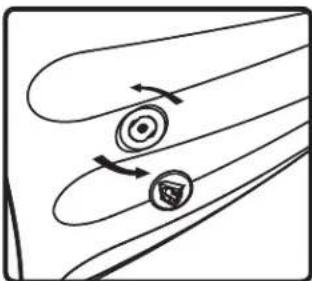
Diagram showing two curved lines with circular elements and directional arrows, no text or symbols present- Remove covers from threaded insert on each side of speaker.

natural_image
Line drawing of a cylindrical object with internal grooves and mounting holes (no text or symbols)- Attach surface-mount bracket to speaker.

natural_image
Technical diagram of a mechanical bracket with a cylindrical component and labeled 'UP' (no other text or symbols)- Mount wall-plate to secure surface with appropriate hardware (not included). Mount with wall-plate-stud pointing up.
natural_image
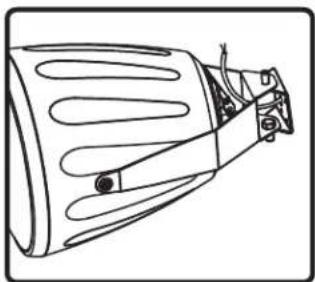
Line drawing of a mechanical component with no visible text or symbols- Mount speaker and bracket assembly to wall-plate. Use nylock nuts and washers to secure. Do not fully tighten fastening hardware.
natural_image
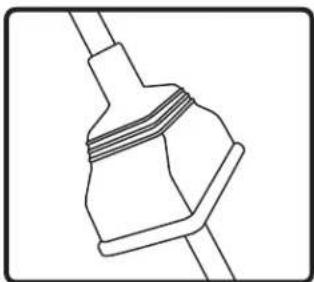
Pure technical line drawing of a mechanical component without any text, numbers, or symbols- Slip terminal weather boot over signal wire. For environmental applications, put RTV silicone around nipple and base when installation is complete.

natural_image
Diagram of a hand connecting two electrical connectors to a terminal block, with no visible text or symbols.- Connect signal wire to 4-pin Euroblock plug. Tighten unused terminal screws. Use inside positive and negative inputs for either voice coil or distributed systems. For daisy chaining, use outside positive and negative terminals.
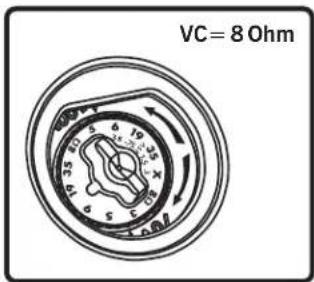
- Select the tap position by removing the rubber plug on grille to access rotary switch. Switch is preset to maximum tap setting in 70.7 V mode. Select desired setting and reinsert rubber plug. Note: The grille-mounted tap switch cover is keyed; be sure flat edge of plug lines up with flat edge of hole in grille.

natural_image
Technical line drawing of a mechanical assembly with bolts and brackets (no text or symbols)- Attach the safety cable to one of the secondary holes in the hanging bracket using the supplied hex wrench, nut, washer & bolt. Attach other end to secure surface.

natural_image
Pure electrical circuit lines without any symbols- Insert 4-pin Euroblock plug into Euroblock jack on rear of speaker. Connectors are keyed for polarity.

natural_image
Diagram of a mechanical device with rotating arrows indicating motion (no text or symbols)- Aim speaker and tighten fasteners.
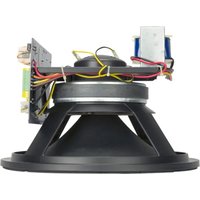
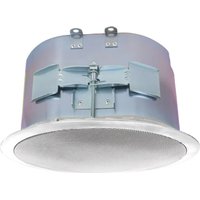


Mærke : SoundTube
Model : HP1290
Kategori : Højttalerstativ