
MM32-EZ - Højttaler SoundTube - Gratis brugsanvisning og manual
Find enhedens vejledning gratis MM32-EZ SoundTube i PDF-format.


Brugerspørgsmål om MM32-EZ SoundTube
0 spørgsmål om dette apparat. Besvar dem du kender, eller stil dit eget.
Stil et nyt spørgsmål om dette apparat
Download vejledningen til din Højttaler i PDF-format gratis! Find din vejledning MM32-EZ - SoundTube og tag din elektroniske enhed tilbage i hånden. På denne side er alle dokumenter nødvendige for brugen af din enhed offentliggjort. MM32-EZ af mærket SoundTube.
BRUGSANVISNING MM32-EZ SoundTube
Mighty Mite™
Install Instructions For:
MM43-BGM and MM32-EZ speakers

Box contents
1 Speaker
2 SpeedClamps™
1 Release key (small hex wrench)
1 Hanging cable
1 Safety cable
4 Zip ties
Transformer Taps
| 70.7 V | Output | 100 V | Output |
| 30 W | 98.5 dB | 30 W | 98.5 dB |
| 15 W | 95.5 dB | 15 W | 95.5 dB |
| 7.5 W | 92.5 dB | 7.5 W | 92.5 dB |
| 3.75 W | 89.5 dB |
1.855.663.5600 | www.soundtube.com
UL Listed 1480A
© 2021 MSE Audio SoundTube Entertainment, Inc. All rights reserved. PN INS-MM Rev 11.15.21

Warning Warning
SoundTube speakers must be installed by a professional audio installer/contractor. For safety and for optimum audio performance, installer must follow all directions issued by SoundTube Entertainment.

Do not spec or install speaker near support beam, ventilation duct or other structure that may interfere with speaker function or dispersion.
Mighty Mite™
Install Instructions For:
MM43-BGM and MM32-EZ speakers

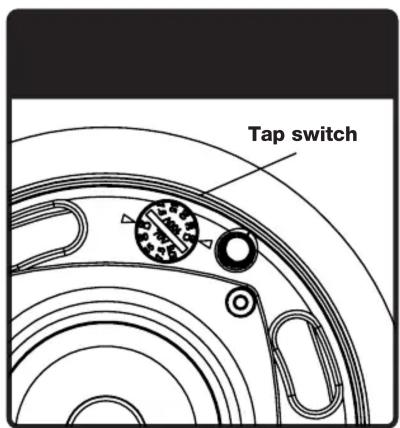
- Remove the magnetically-attached grille from the front of the speaker to reveal the rotary tap switch. Select tap position on rotary switch. Switch is preset to maximum tap setting in 70.7V mode.

- Connect signal wire to screw-down terminal block. Tighten unused terminal screws. Use inside positive and negative inputs for either voice coil or distributed systems.
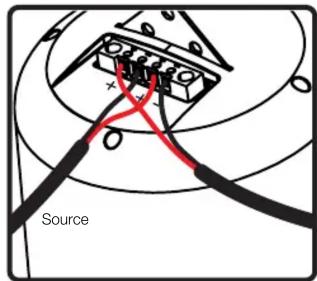
- When daisy chaining, wire the outside terminals to the inside terminals of the next speaker. This step only applies to tap settings using the transformer and not when the speaker is used on bypass.
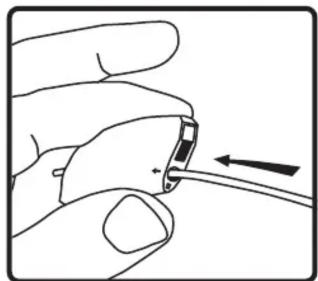
- Thread hanging or safety cable through SpeedClamp™ mechanisms as shown.
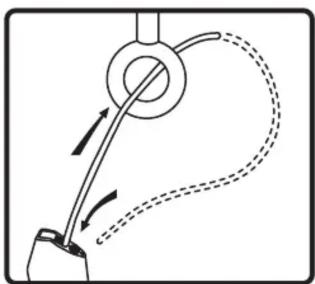
- Attach the hanging cable by securing it and the safety cable to structure as shown.
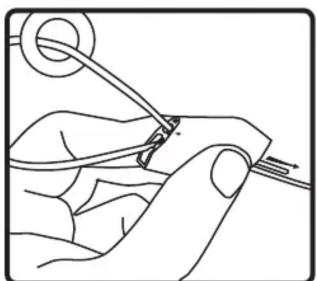
- Thread cable end(s) through SpeedClamp™ mechanisms as shown.

- Adjust speaker hanging height with SpeedClamp™ mechanism. Pull to tighten & insert release key (small hex wrench) into SpeedClamp™ as shown to loosen or adjust.

- Attach hanging cable to the center hole in the speaker hanging bracket.

- Attach the safety cable to one of the secondary holes in the hanging bracket.
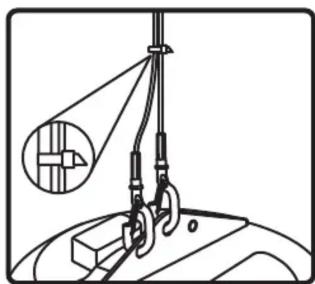
- Use zip or twist-lock ties to secure safety cable & signal wire to main hanging cables. Cable cover available for asthetic applications (SLT-10).
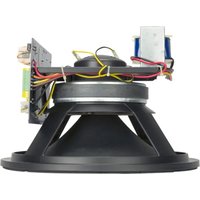
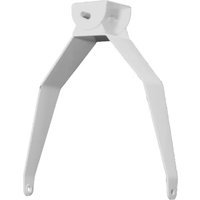
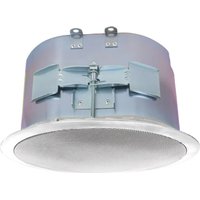

Mærke : SoundTube
Model : MM32-EZ
Kategori : Højttaler