SA1-02005 - Ukategorisert Emerson - Gratis bruksanvisning og manual
Finn enhetens veiledning gratis SA1-02005 Emerson i PDF-format.

Brukerspørsmål om SA1-02005 Emerson
0 spørsmål om dette apparatet. Svar på dem du kjenner, eller still ditt eget.
Still et nytt spørsmål om dette apparatet
Last ned instruksjonene for din Ukategorisert i PDF-format gratis! Finn veiledningen din SA1-02005 - Emerson og ta den elektroniske enheten tilbake i hendene. På denne siden er alle dokumenter som er nødvendige for bruken av enheten din publisert. SA1-02005 av merket Emerson.
BRUKSANVISNING SA1-02005 Emerson
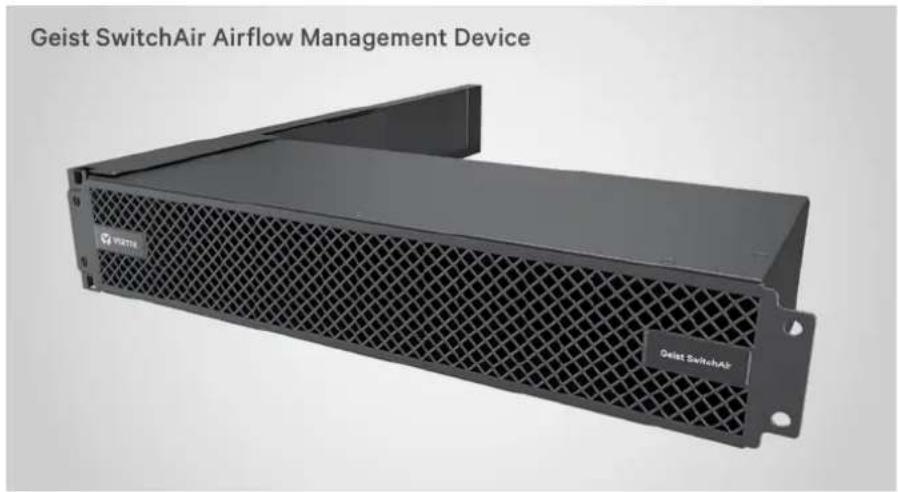
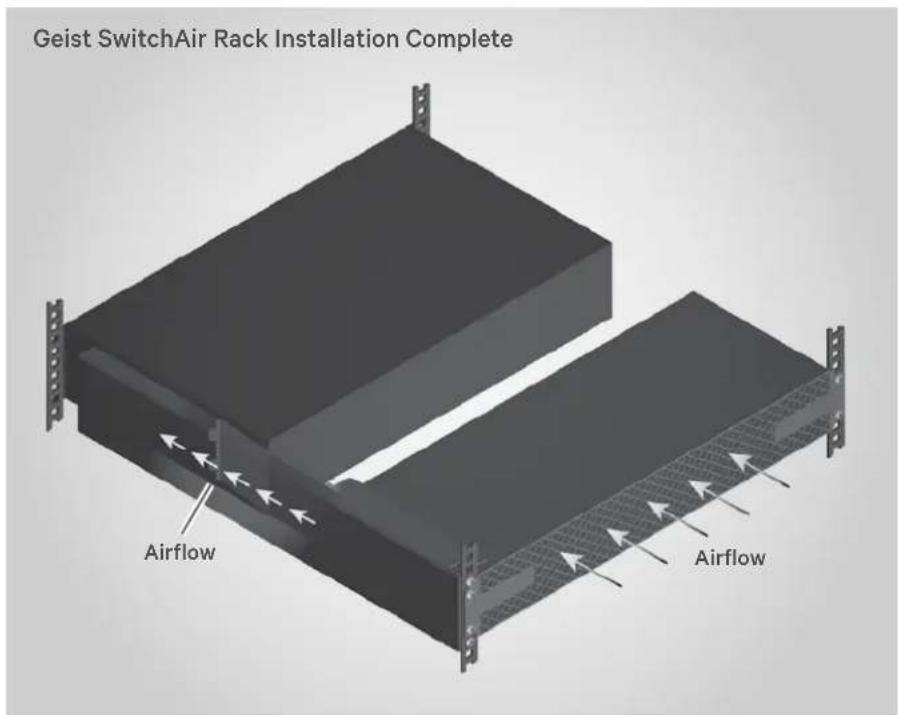
GEIST™ SWITCHAIR AIRFLOW MANAGEMENT DEVICE
Quick Installation Guide
Models:
SA1-02005
Switch Type:
Left side air intake-front (port) exhaust 2U switch
CAUTION: Ensure the required airflow for safe operation of equipment is not compromised when installing the Geist SwitchAir device.
WARNING: Take precaution to avoid interference with the switch's input power cords when installing behind a live switch.
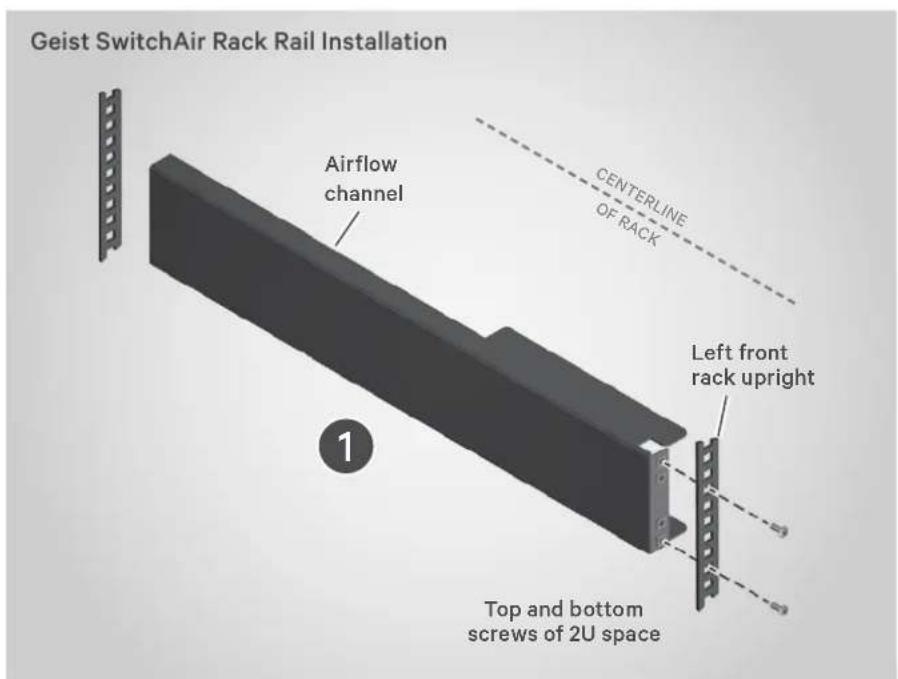
1. Installing the airflow channel
NOTE: The following instructions install the SwitchAir SA1-02005 device to move air along the left side of the rack. For right-side airflow, rotate the channel and SwitchAir device 180° and install them using the same procedure.
Using customer-provided hardware, insert the cage nuts into the four holes on the front of the channel.
Select a 2U space in the rack. With the channel facing the centerline of the rack, hold the channel on the inside of the left rack upright. Fasten in place using screws only in the top and bottom holes of the 2U space.
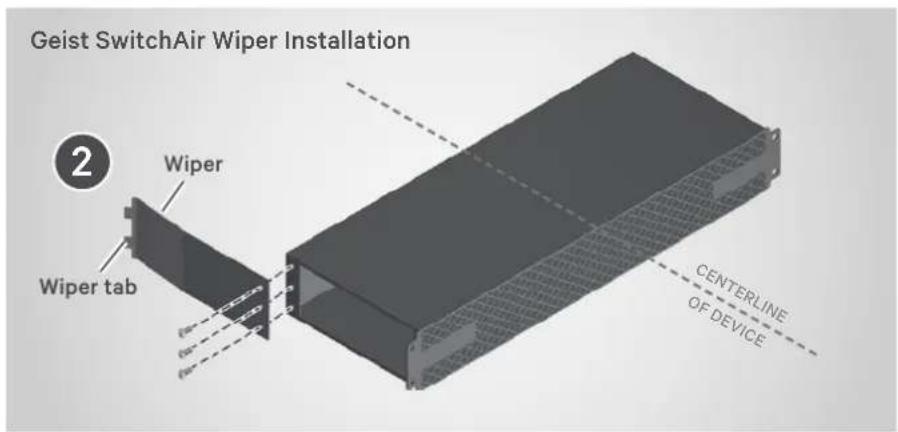
2. Installing the wiper
Attach the SwitchAir wiper using the provided screws. Orient the wiper with the tab facing away from the centerline of the switch.
3. Installing the switch
Slide the network switch into the rack's 2U space at the installed channel's height. Using customer-provided cage nuts and screws, mount the switch to the rear rack uprights.
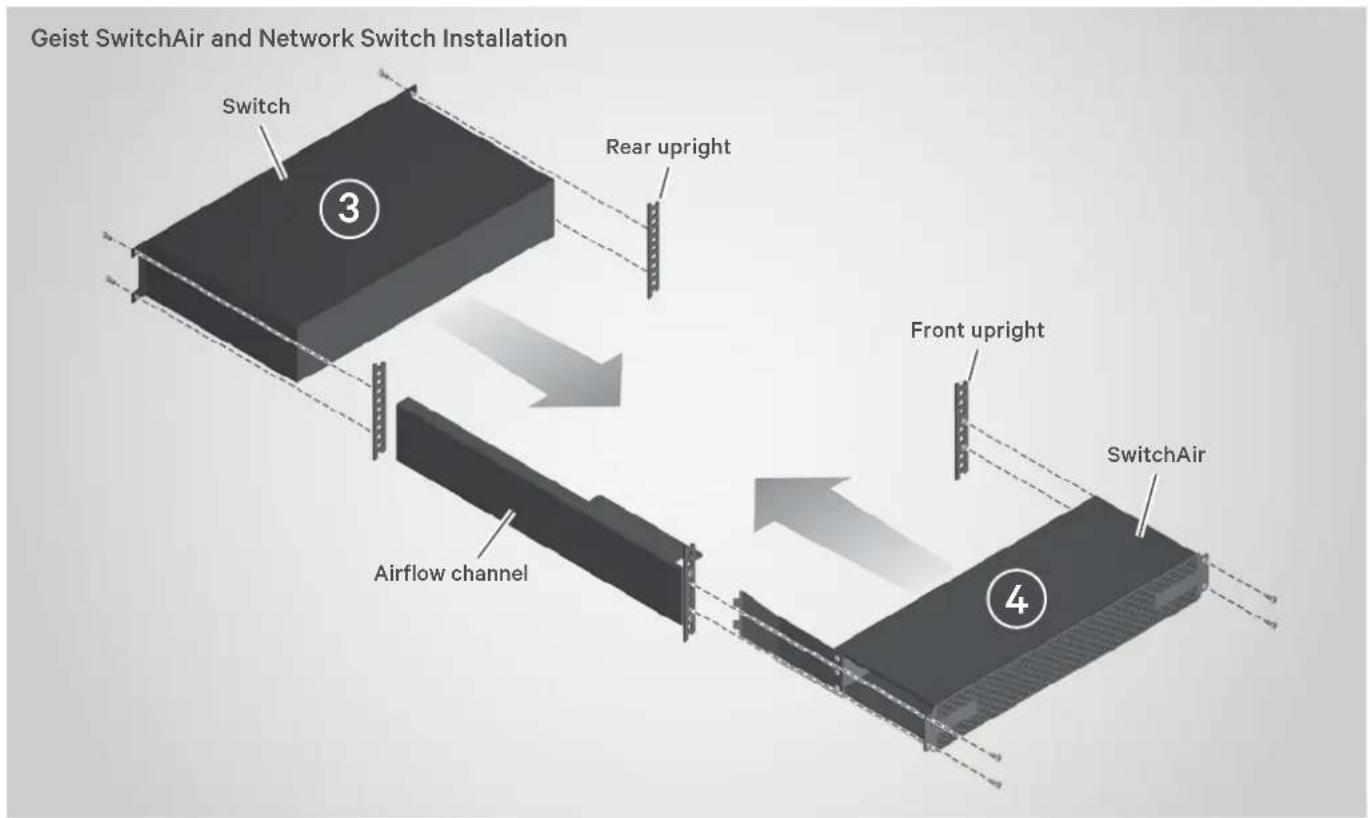
4. Installing the SwitchAir device into the rack
Insert the SwitchAir device into the open rack space at the same 2U height as the switch.
As the SwitchAir device is inserted into the space, the wiper makes contact with the rear corner of the switch.
The wiper tab acts as a guide to deflect the wiper past the switch's corner and along it's side.
Once the SwitchAir device is fully seated, install the mounting screws to fasten the unit to the front rack uprights.
To contact Vertiv Technical Support: visit www.VertivCo.com
© 2019 Vertiv Co. All rights reserved. Vertiv and the Vertiv logo are trademarks or registered trademarks of Vertiv Co. All other names and logos referred to are trade names, trademarks or registered trademarks of their respective owners. While every precaution has been taken to ensure accuracy and completeness herein, Vertiv Co. assumes no responsibility, and disclaims all liability, for damages resulting from use of this information or for any errors or omissions. Specifications are subject to change without notice.