
EX30LF - Magnetron AEG - Gratis gebruiksaanwijzing en handleiding
Vind de handleiding van het apparaat gratis EX30LF AEG in PDF-formaat.


| Type product | Magnetron, inbouw- of vrijstaand model |
| Merk | AEG |
| Model | EX30LF |
| Afmetingen vrijstaand (H×B×D) | 405 × 595 × 390 mm |
| Afmetingen inbouw (uitsparing H×B×D) | 590 × 560 × 410 mm |
| Gewicht vrijstaand | ca. 29 kg |
| Gewicht inbouw | ca. 31 kg |
| Netspanning | 220/240 V, 50 Hz |
| Zekering | 10 A / 13 A |
| Vermogen opgenomen | 1300 W |
| Magnetronvermogen (maximaal) | 700 W (100% vermogen) |
| Ontdooivermogen | 280 W (30% vermogen) |
| Variabel vermogen | 20% – 100% van volledig vermogen |
| Timer | 1 seconde – 99 min. 59 sec. |
| Inhoud ovenruimte | 23 × 38 × 36 cm |
| Verwarmingssysteem | Magnetron met draaiknop voor vermogen en voedselvoeler |
| Kookstand | Tijd, variabel vermogen en temperatuur via voedselvoeler |
| Ontdooien | Vaste ontdooistand (30% vermogen) of handmatig |
| Voedselvoeler | Ja, meegeleverd |
| Bereidingsgids | Afneembare binnenplaat met kooktips |
| Verlichting | Inwendige lamp (E14 220/240 V/25 W max. voor vrijstaand; TL 13 W voor inbouw) |
| Materiaal binnenruimte | Roestvrijstaal of geëmailleerd (keramische bodem) |
| Reiniging | Milde zeep, warm water en zachte doek; geen schurende middelen |
| Veiligheid | Niet leeg laten draaien; deur, scharnieren en afdichtingen niet beschadigen |
| Service | Neem contact op met AEG Service; vermeld model- en serienummer |
Veelgestelde vragen - EX30LF AEG
Gebruikersvragen over EX30LF AEG
0 vraag over dit apparaat. Beantwoord die u kent of stel uw eigen vraag.
Stel een nieuwe vraag over dit apparaat
Download de handleiding voor uw Magnetron in PDF-formaat gratis! Vind uw handleiding EX30LF - AEG en neem uw elektronisch apparaat weer in handen. Op deze pagina staan alle documenten die nodig zijn voor het gebruik van uw apparaat. EX30LF van het merk AEG.
GEBRUIKSAANWIJZING EX30LF AEG
Microwave oven FX 30 LF / EX 30 LF
Operating and installation instructions
Operating instructions – Please read carefully before using the oven and keep for future reference
Contents
| Page | |
| Figures (unfold for easy reference) | 3-6 |
| Features | 6 |
| Microwaves, what are they? | 7 |
| Golden rules for safe and successful operation | 7 |
| How to cook with time, variable power and the food sensor/temperature | 8 |
| Setting and changing the clock | 9 |
| Start up | 10 |
| Selecting cooking time and variable power | 10 |
| Cooking with variable power and temperature/food sensor | 11 |
| Starting, checking and finishing a programme | 12 |
| The correct utensils | 13 |
| Cooking guidelines | 14 |
| Heating guidelines | 15 |
| Defrosting guidelines | 16/17 |
| Cleaning, maintenance and replacement oft the interior cooker lamp | 18 |
| Questions and answers | 19 |
| Installation | 20 |
| Fitting the air vents | 21 |
| If you think your microwave oven is not functioning properly | 22 |
| Technical data/Rating plate | 23 |
Free-standing appliance FX 30 LF

Build-in appliance EX 30 LF

3

4
natural_image
Abstract black-and-white diagram with geometric shapes and lines, no readable text or symbols5

natural_image
Silhouette of a hand holding a pen, next to a computer monitor (no visible text or symbols)6

natural_image
Black-and-white illustration of a bowl inside a rectangular chamber (no text or symbols)7

8
9

natural_image
Abstract black-and-white graphic with a hand pointing at a diamond shape and two white circles on a horizontal line (no text or symbols)10
natural_image
Two black-and-white photos: top shows a food item on a tray, bottom shows a mug with a cable (no text or symbols visible)11
natural_image
Abstract black-and-white illustration of a stylized human figure with geometric features (no text or symbols)12

13

14
Features
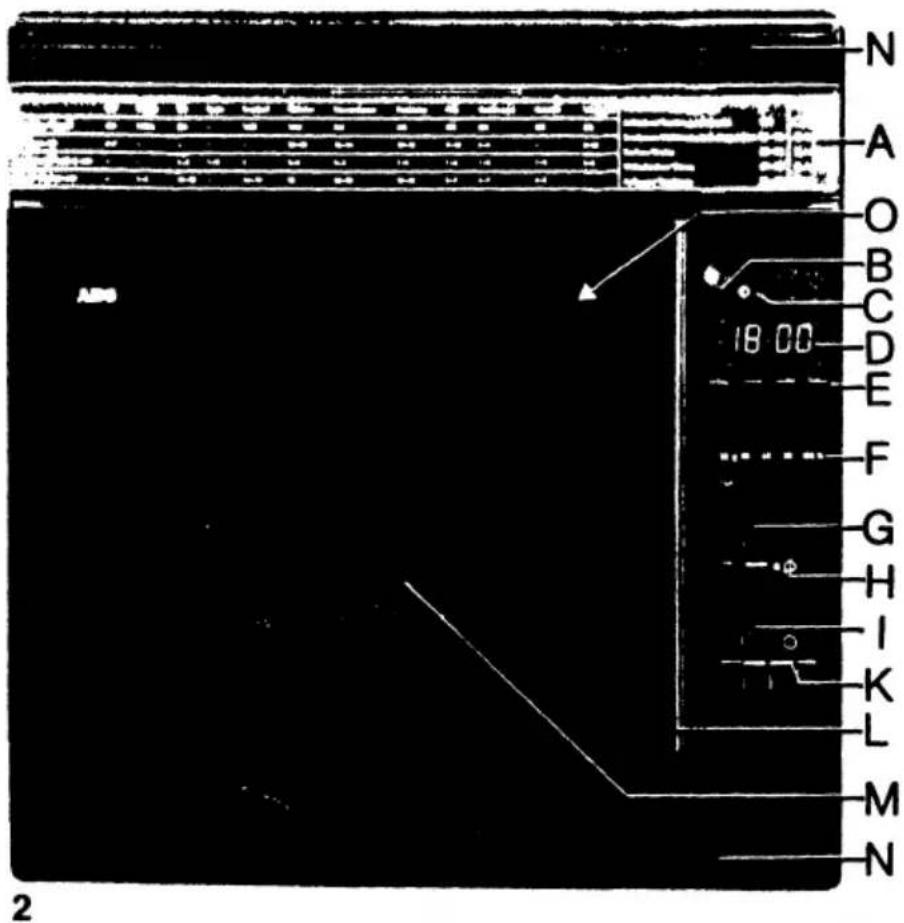
A Cooking guide (cover plate for interior lamp).
B Time-of-day button.
C Symbols for time of day, cooking time, temperature.
D Display for time of day, cooking time, temperature.
E Selector buttons for cooking time, temperature and time of day.
F Slide control to select power levels in %.
G Start button.
H Cook light.
I ON button
K OFF button
L Door handle.
M Sealed-in ceramic base.
N Build-in decor frame.
- Socket for food sensor.

natural_image
Abstract black-and-white diagram with horizontal lines, a dot, a diamond, and a circle on a dark background (no text or symbols)15

natural_image
Black and white photo of a car front view showing the roof and side grille (no visible text or symbols)
natural_image
Black-and-white photo of a modern kitchen appliance on a stand (no visible text or symbols)16
natural_image
Black-and-white illustration of a hand cleaning a window with a bottle (no text or symbols visible)17

natural_image
Black-and-white sketch of various household appliances and kitchenware (no text or symbols visible)18
Bevore you read on
Microwaves, what are they?
Microwaves are electromagnetic energy like ordinary daylight or radio waves, the only difference being the wave length.
Radio waves are broadcast through the air around us, and travel great distances; when received by a radio, the energy they carry is converted into sound. Microwaves are broadcast inside the cooker and can travel only short distances.
When they are received by the food, energy they carry is converted into heat.
The waves are alternately positive and negative, and act as magnets on the water molecules in food.
This attraction and repulsion makes the molecules vibrate, causing friction which produces heating and thus, ultimately, cooking of the food, exactly as it happens when you rub your hands.
Cooking Guidelines
The cooking guide on the appliance and the charts (pages 14–17) are general guidelines, for recipes and further details refer to the cookbook.
Golden rules for safe and successful operation
- Do not operate the oven when it is empty. Place food in the oven first, then switch on the oven.
- Keep the oven clean, particularly around the door seals.
- Take care not to damage:
the door
■ the doors hinges
■ the door seals and sealing surfaces.
Avoid unnecessary strain on the door and take care not to trap anything between the door and the frame!
- Do not operate the microwave oven when it is not functioning properly. Contact AEG Service to have the oven checked by a trained service engineer to avoid any damage.
- Only use cooking utensils suitable for microwave cooking or specifically developed microwave oven cookware. See further details on page 13.
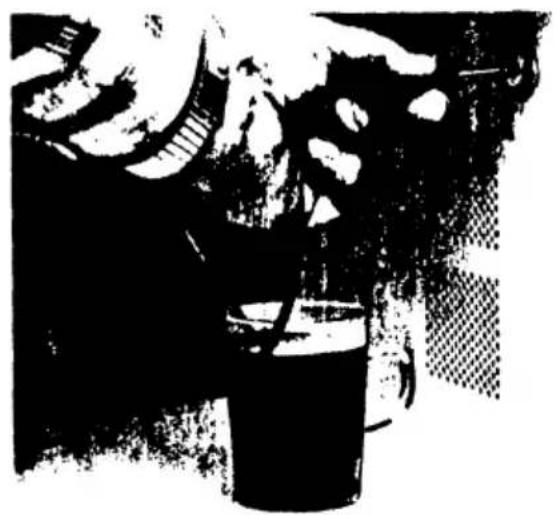
- When heating drinks or water in cups or glasses place the container in the centre of the oven. Put a metal or heat-resistant plastic spoon in the container to prevent excessive boiling.
- Eggs in shells cannot be cooked in the microwave oven as they will burst.
- Do not heat large quantities of oil (fondues or deep fat frying) in the microwave oven.
- Do not heat any closed or sealed bottles, tins etc. in the microwave oven.
- Refer to the cooking guide on the appliance and the charts on pages 14-17 for cooking information.
How to cook with time, variable power and the food sensor/temperature
The cooking guide on the appliance is a general reminder. For more detailed information please see the charts on pages 14-17.
Cooking time
The cooking time depends on the quantity of food to be cooked. For example, one cup of soup will be heated in one minute, whereas five cups require five minutes. Reason: the oven has to provide five times the energy which means that it has to work five time as long. See guidelines in the charts on pages 14-17.
Variable power
The amount of heat required to cook, heat or defrost food will vary according to the texture and quantity of food to be cooked.
The variable power enables you to increase or decrease the amount of heat similar to the various settings you have on your conventional cooker.
The settings on your microwave oven are given in % (percentage).
Highest setting 100% = 700 Watts.
On setting 50% the oven cooks on half the power (350 Watts).
Generally, cooking is started with 100% power and finished with reduced power (70%-20%).
To heat food settings between 30–80% are used. The defrost setting is 30%.
The charts on pages 14-17 provide guidelines how to use the various settings.
Cooking with temperature
The food sensor takes the guesswork out of cooking, heating or warming various foods. When the food sensor probe is located in the food and the plug inserted in the plug socket in the oven, the oven cooks by measuring the internal temperature of the food you have selected.
After the set temperature has been reached the oven automatically switches off the microwave power.
The food sensor enables you to cook for instance beef to "medium" time after time without the risk of overcooking it and on the other hand it ensures that you roast pork is cooked through completely.
Allow food to stand for 5 to 10 minutes after it is taken from the oven for the heat to equalise.
How to cook with time, variable power and the food sensor/temperature
Cooking hints
To ensure best results large items such as joints, poultry, etc. should be turned halfway through the cooking cycle.
Thin items cook more quickly than thick ones.
Small amounts give better cooking results.
Vegetables cook better when covered with a lid or clingfilm. When using clingfilm, pierce to allow steam to escape.
Refrigerated or frozen foods need longer to cook.
Place foods in the centre of the oven.
Casseroles, stews, soups, sauce etc. should be stirred occasionally to ensure fast and thorough heating.
The best policy is to undercook, taste or check the food and then if necessary, to cook further.
Allow the food to stand for a while after cooking for the heat to spread evenly through the food.
Setting and changing the clock
To set the clock after the oven has been plugged in or after a power cut or to change the time of day follow the instructions below.
When set, the time of day will always be displayed unless a cooking function is in progress. To check the time of day during cooking push button B – the time will be displayed for 3 seconds.
Figure 5
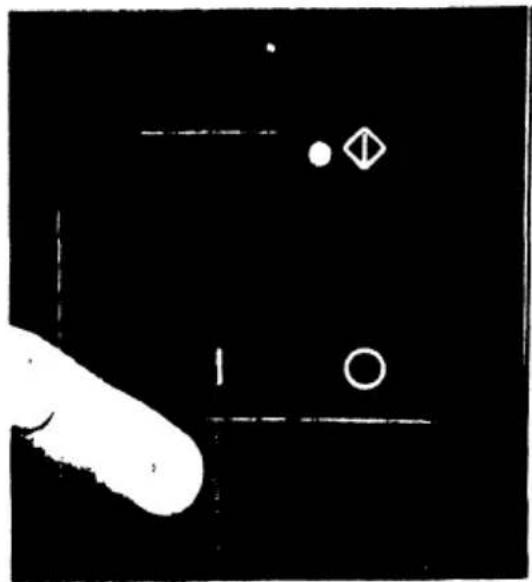
Push ON □ button (I).
Cavity is illuminated.
Display D shows 0000.
Clock symbol for cooking time is on (C).
Figure 3
Push time-of-day button (B).
Clock symbol for time of day is on.
Clock symbol for cooking time is out.
Figure 4
Push buttons (E)
Example: for 16.30:
successively to select time of day.
press buttons from left to right:
You have 3 secs. to move from one button to another.
- 1x 3. 3x
2.6x 4.0x
The time of day appears in display (D).
Figure 3
Push time-of-day button (B) again.
The time of day clock has been set.
Clock symbol for time of day is out.
Clock symbol for cooking time is on.
Display (D) shows 0000.
Figure 15
Switch off appliance.
Push OFF button ☐ (K)
Light in cavity is out.
Time of day is displayed.
Clock symbol for cooking time is out.
Start up
Figure 5
Push ON button I.
Cavity is illuminated.
Display shows 0000.
Clock symbol for cooking time is on.
Figure 6
Open the door.
Fan comes on.
Figure 7
Place food in the oven and close the door.
Fan stops.
The appliance is operational.
Selecting cooking time and variable power
Figure 8
| Push buttons E to select cooking time. | Example: 1 min. 30 sec.Push buttons from left to right:1. 0x2. 1x3. 3x4. 0x |
| Max. cooking time:99 min. 59 sec. | The display shows 0130.To change the time push buttons selecting the new time. |
Figure 9
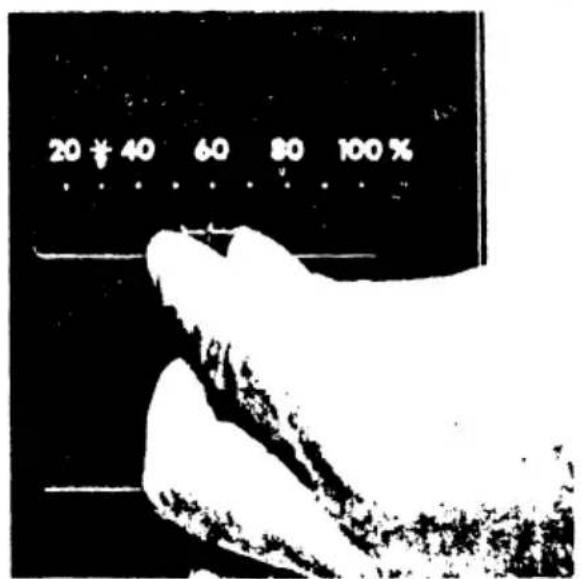
| Set slide control F to the required power level. | Example: 60 = 60% Cook light flashes. |
For defrosting:
| Select defrost symbol × = 30% |
Figure 10
Push start button ⏻ (G).
Fan is on.
Cook light is on.
Countdown of cooking time is shown in display (D).
Programme end is indicated by an acoustic signal.
See also "Starting, checking and finishing a programme".
Cooking with variable power and temperature/food sensor
Figure 7
| Place food in the oven. | Fan is on. |
Figure 11
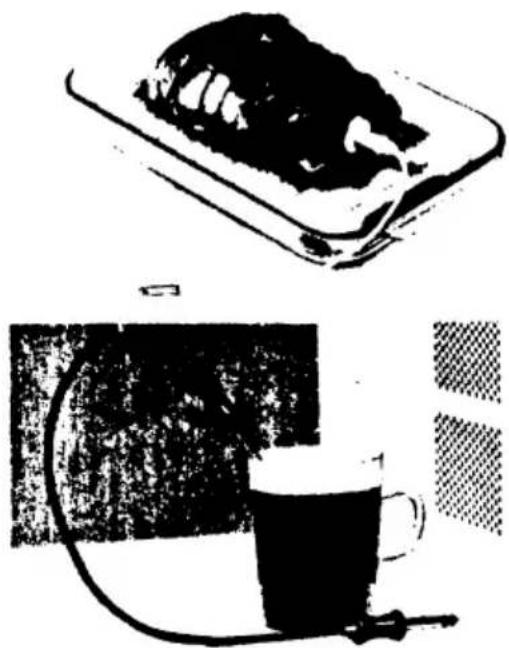
| Insert food sensor into food to be cooked or heated. In the case of meat joints insert sensor into the centre of the thickest part. |
Figure 12
| Insert food sensor plug into plug socket in the oven. | Clock symbol for cooking time will go out.Temperature symbol °C comes on.40°C will be shown on the left of display D.The lowest temperature to which foods can be heated is 40°C. |
| Close the door. | The fan will stop. |
Figure 13
| Push buttons E to select temperature: | Example: 50°C Push buttons from left to right: 1. 1x = 5 2. 0x = 0 Display shows 50°C on the left hand side. |
Figure 14
| Move the slide control tothe required power level: | Example: 100 = 100%.Cook light next to the start buttonwill flash on and off. |
Figure 10
| Push start button ◆ (G). | Fan comes on.Cook light will stay on.The appliance will start to cook.The temperature display will show40°C on the left hand side. Afterreaching 40°C the temperature increaseis shown on the display. |
| On reaching the set temperature: | 50°C will be shown twice -side-by-side - in the display.Fan will stop.Acoustic signal will come on. |
| Remove food sensor fromplug socket. | Food sensor must not be left in the oven. |
Starting, checking and finishing a programme
| Figure 10Push start button ◆ | Appliance operates according to selections made. |
| Figure 6 | |
| Checking: | For example to add ingredients or stir food. |
| Open the door: | Cooking programme will stop.Fan will come on.Cook light starts to flash. |
| Close the door: | Fan will stop.Cook light flashes.Count-down cf cooking time is stationary. |
| Push start button ◆. | Oven will only resume operation after the start button has been pushed.Count-down of cooking time resumes. |
| Figure 15 | |
| Push OFF button ○ to switch off the oven after the acoustic signal has indicated the cooking end. | All indicators will go out and the time of day will appear in the display. |
| Remove food sensor from the plug socket. | Warning! The food sensor must not be left in a switched on empty oven. |
The correct utensils
Figure 18
Ovenproof glass or glass ceramic oven dishes are the most used. These dishes allow microwaves to pass through directly to food. Dishes will remain cool unless cooking is prolonged, causing hot food to heat the dish.
Glass, sturdy china and pottery serving dishes can also be used. These should not have silver, gold, platinum or other metal trims which will be damaged by the microwaves.
Diswasher-safe plastics, usually quite rigid material can be used provided they can withstand the temperature of the food being cooked.
Hard plastic trays, picnic ware and bowls, may be used for heating but not for cooking food. To cook food in plastic utensils use specially developed microwave cookware.
Paper cups, plates, towels, wax paper and paper cartons can be used for heating.
Prolonged time in the oven can cause paper to burn. Greaseproof paper can be used as a covering during cooking.
Metal dishes and foil reflect microwaves and inhibit cooking and should not be used in a microwave oven.
Exceptions:
Small pieces of aluminium foil can be used to cover, for example wing and leg tips when cooking poultry to prevent overcooking.
It is most important that no metal or foil touches or comes close to the walls of the oven (minimum gap 2 cm).
Foil trays with ready-made meals can be used to heat the food provided they are not deeper than 2 cm and the lid is removed.
Figure 16
Microwave Browning Dishes
Special microwave browning dishes have been developed to aid the browning process when cooking meats with very short cooking times. The base of the browning dish is coated with a special material which will get very hot during pre-heating of the empty dish. The hot base will ensure a browning effect on small food items such as steaks, hamburgers, chops etc.
The pre-heating time depends on the type of food to be cooked.
Microwave Browning dishes No. E 611899644 and E 611899662 are available from your local AEG microwave oven stockist.
Cooking guidelines
| Food/quantity | 1. setting | 2. setting | Special Instructions | Standing time min. | ||
| % | min. | % | min. | |||
| Meat loaf | ||||||
| 450 g/l lb. | 100 | 15-20 | - | - | Cook uncovered | 5-10 |
| Roast pork | ||||||
| 450 g/l lb. | 100 | 4-5 | 60 | 10-15 | Turn over after first time | 5-10 |
| Chicken | ||||||
| 1 kg/2 lb (cooking) | 100 | 15-20 | - | - | Cook in covered dish | 5-10 |
| 1 kg/2 lb (roasting) | 100 | 8-10 | 100 | 8-10 | Pre-heat empty browning dish for 5-7 min. Turn chicken over after first time | |
| Roast sirloin | ||||||
| 1 kg/2 lb | 100 | 5-6 | 100 | 8-10 | Medium rare. Pre-heat empty browning dish for 5-7 min. Turn over after first time | 5-10 |
| Roast beef | ||||||
| 1 1⁄2 kg/3 lb. | 100 | 8-10 | 60 | 20-25 | Season with paprika pepper and salt. Turn over after first time | 5-10 |
| Fillet of fish | ||||||
| 450 g/1 lb. | 100 | 5-7 | - | - | Cook in covered dish | 5 |
| Cauliflower | ||||||
| 450 g/1 lb. | 100 | 9-11 | - | - | Break into florets, place in a dish with 4 tbsp. water and cover | 3-5 |
| Peas, fresh | ||||||
| 225 g/8 oz. | 100 | 3-4 | 50 | 5-20 | Place in a dish, add 125 ml/4 fl. oz. water and cover | 5 |
| Peas, frozen | ||||||
| 280 g/10 oz. | 100 | 7-8 | - | - | Place in a dish, add 4-5 tbsp. water and cover | 5 |
| Spinach, frozen | ||||||
| 280 g/10 oz. | 100 | 4-5 | 50 | 7-8 | Stir occasionally during cooking | 5 |
| Carrots, fresh | ||||||
| 340 g/12 oz. prepared weight | 100 | 10-12 | - | - | Cut into slices, add 3 tbsp. water, knob of butter and cover. Stir after 6 mins | 5-7 |
| Potatoes, baked | ||||||
| 1 = 200 g/7 oz. | 100 | 5-7 | - | - | Wash, prick with a fork and lay onto kitchen paper | 5-7 |
| Potatoes, boiled | ||||||
| 450 g/1 lb. peele | 100 | 9-11 | - | - | Cut into even sized pieces, add 4 tbsp. water with salt. Stir after 5 mins. | 5-10 |
| Rice | ||||||
| 225 g/8 oz. | 100 | 8-10 | - | - | Place rice in a 2 litre/3 1⁄2 pint glass dish, add 500 ml/1 pint water, season and cover. Stir after 4 mins | 5-10 |
| Scrambled eggs 2 | 100 | 1-2 | - | - | Stir halfway through | 2-3 |
| Fried eggs 2 | 60 | 1-2 | - | - | Pre-heat empty browning dish 1 1⁄2-2 mins. Prick egg yolk slightly | 2-3 |
Heating guidelines
| Food/Quantity | Setting % | Time / min. | Special instructions |
| Beverages | |||
| 1 cup milk | 80 | 1-112 | Place a spoon into the cup or glass (see page 7, 6.) |
| 1 cup coffee, re-heat | 80 | 30-45 sec. | Place a spoon into the cup or glass (see page 7, 6.) |
| 1 cup/glass water, boil | 100 | 112-2 | Place a spoon into the cup of glass (see page 7, 6.) |
| 1 glass wine (mulled wine) | 100 | 1-112 | Place a spoon into the cup of glass (see page 7, 6.) |
| 1 baby bottle milk (200 ml) | 80 | 1-2 | Heat bottle without teat |
| Ready made meals | |||
| 1 jar baby food | 60 | 1-2 | Heat jar without lid, stir after heating |
| 1 cup soup (200 ml) | 100 | 1-112 | Heat covered |
| 1 plated meal (400 g/14 oz.) | 80 | 2-3 | Heat covered |
| 1 portion rice, potatoes or vegetables (200 g/ 7 oz. each) | 100 | 112-2 | Heat covered |
| 1 portion meat (150 g/6 oz.) | 80 | 1-2 | Heat uncovered if coated in breadcrumbs, otherwise cover |
Defrosting guidelines
| Food/Quantity | 1. setting | 2. setting | Special instructions | Standing time min. | ||
| % | min. | % | min. | |||
| Meat and poultry | ||||||
| Joints per 450 g/1 lb. | 100 | 1 | 30 | 12-14 | Turn joint over occasionally | 10-15 |
| Cops and steaks per 450 g/1 lb. | 30 | 10-14 | - | - | Turn meat over occasionally | 5-10 |
| Cubed meat per 450 g/1 lb. | 30 | 10-12 | - | - | Rearrange in dish halfway through | 10-15 |
| Minced meat and sausage meat per 450 g/1 lb. | 30 | 10-12 | - | - | Separate with fork halfway through | 10-15 |
| Offal (liver, kidneys) per 450 g/1 lb. | 30 | 8-10 | - | - | Separate and rearrange in dish halfway through | 10-15 |
| Whole chicken per 450 g/1 lb. | 30 | 13-15 | - | - | Turn chicken over every 10 mins. Remove giblets if any. Cover warm areas with foil | 10-15 |
| Chicken portions per 450 g/1 lb. | 30 | 13-15 | - | - | Rearrange portions halfway through with thick parts to the outside of the dish | 5-10 |
| Duck 1.5-2 kg (31⁄2-41⁄2 lb.) | 100 | 3 | 30 | 15-20 | Turn duck over after first time and again during 2nd cycle. Cover warm area with foil | 10-15 |
| Fish | ||||||
| Fillets 450 g/1 lb. | 30 | 9-12 | - | - | Separate fillets after 5 mins | 10-15 |
| Whole fish per 450 g/1 lb. | 30 | 10-12 | - | - | Cover thin parts with foil | 15-20 |
| Prawns per 225 g/8 oz. | 30 | 3-5 | - | - | Break up with fork after 2 mins | 3-5 |
Defrosting guidelines
| Food/Quantity | 1. setting | 2. setting | Special instructions | Standing time min. | ||
| % | min. | % | min. | |||
| Miscellaneous | ||||||
| Butter 250 g/9 oz. | 20 | 7-8 | - | - | Remove any foil wrapper | 10-15 |
| Bread per 450 g/1 lb. | 30 | 5-7 | - | - | Turn over halfway through | 15-20 |
| Rolls, 4 | 100 | 112 | - | - | For crusty rolls reheat empty browning dish for 112 mins on 100 and turn rolls once during defrost-ing | 2-5 |
| Sponge cake per 340 g/12 oz. | 30 | 2-3 | - | - | 12 turn after 1 min. | 5 |
| Shortcrust and puff pastry per 225 g/8 oz. | 30 | 1 | - | - | 10 | |
| Ready made meals | ||||||
| 1 portion 400 g/ 14 oz. | 80 | 8-15 | - | - | Meals in foil containers can be defrosted and heated provided the con-tainer is not deeper than 2 cm and the lid is removed | 5-7 |
| Cook in bag meals 300-400 g/11-14 oz. | 80 | 2 | 80 | 6-10 | Make a slit in the bag after first time and continue to cook in a covered con-tainer | 3-5 |
| Meat casserole per 675 g/ 112 lb. | 30 | 15-20 | 80 | 5-7 | Separate with fork after first time and heat in covered container | 5-7 |
| Frozen vegetables | ||||||
| See “cooking guidelines” and cooking instructions on manufacturers' packets | ||||||
Cleaning, Maintenance and Replacement of the cooker interior lamp
Cleaning of the appliance
Cleaning must be carried out with the power supply to the microwave oven switched off.
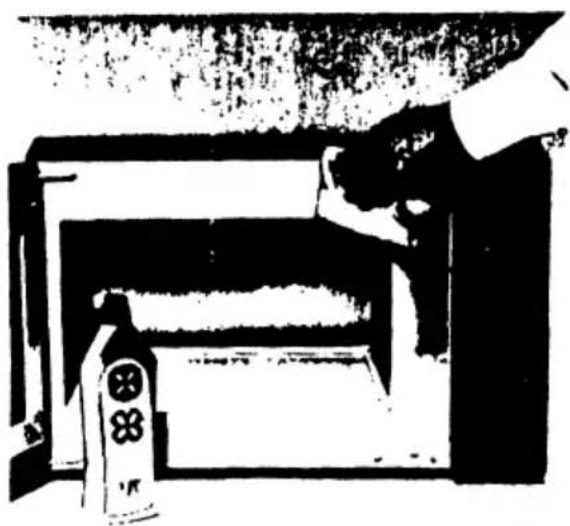
Use a mild detergent e.g. washing-up liquid, lukewarm water and a soft cloth to clean the interior and exterior surfaces and food sensor.
Do not use chemical or abrasive compounds to clean any part of the cooker.
Odours inside the cooker can be eliminated by placing in it a cup of water with lemon juice added, and boiling the mixture for a few minutes.
Note: If the door seal has been damaged or is broken do not use the cooker, have it checked by a qualified AEG engineer or AEG appointed service agent.

natural_image
Silhouette of a person opening a window with a bottle and star symbol (no text or symbols present)Fig. 19
Replacement of the cooker interior lamp
Freestanding appliance
- Switch off the cooker and disconnect from the power supply.
- Slide the cooking guide with holder to the left and lift it upwards.
- Turn the metal plate.
- Remove and replace the lamp through the hole in the cabinet (E 14 220/240 V/25 W max.)
- Re-assemble in reverse order.
Build-in model (TL 13 W) (fig. 15 and 16)


natural_image
Technical line drawing of a mechanical assembly with a magnified inset showing a component (no text or symbols)
natural_image
Silhouette of a person at a desk with a laptop, no visible text or symbolsFig. 20
Questions and answers
Question:
Can I defrost and re-heat ready-made meals in foil containers in my microwave oven?
Answer:
Yes, if the container is not more than 2 cm/3/4" deep. As microwaves are reflected by metal the food can only be heated from the top. To ensure that food is heated thoroughly without overcooking the surface, the max. depth of the dish is 2 cm/3/4".
Make sure that the clearance between metal container and oven wall is at least 2 cm/3/4".
Question:
Food cooked in a microwave oven seems to cool down faster the conventionally cooked food. Why?
Answer:
Often the dish used to store the food in the refrigerator is used to heat the food in the microwave oven. The cold dish will absorb heat from the food and it may be necessary to increase the time by 1 minute of compensate for the cold dish.
Question:
What is the reason for the moisture in the microwave oven during and after cooking?
Answer:
The moisture in the food turns to steam as it is heating. The steam is condensed on the cool surfaces of the microwave oven and the resulting moisture is quite normal and no reason for concern.
Question:
Are microwave ovens expensive to run?
Answer:
No. Microwave cooking is very economical. You save approx. 70% energy for cooking and up to 90% energy for re-heating using a microwave over as opposed to conventional cooking methods.
Question:
What happens if the microwave oven is operated when it is empty?
Answer:
Do not operate the oven when it is empty. However, if it is switched on by mistake for a short period of time no damage will occur to the magnetron.
Installation of a freestanding appliance
Installation of freestanding appliance
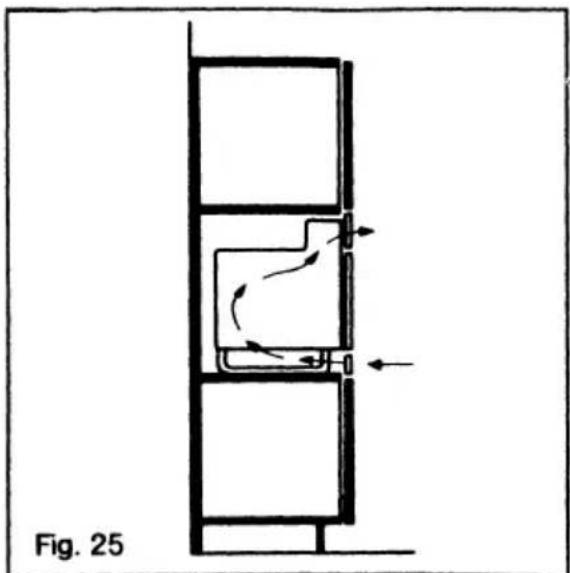
To ensure proper ventilation of the appliance allow a space of 5 cm/2" all around it.

Fig. 23
Installation of the build-in appliance
Installation of the build-in appliance
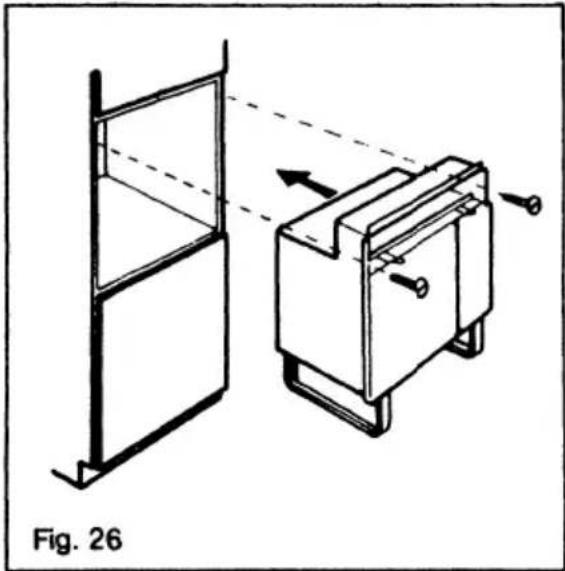
- Fit the appliance into the furniture housing unit (see illustration). The electrical supply switched connection should be accessible when the appliance is installed in the furniture housing.
- The appliance is secured to the housing unit by 2 screws (see illustration).

natural_image
Architectural floor plan diagram showing airflow or ventilation through a building facade with directional arrows (no text labels)Fitting
To fit appliance into furniture housing
natural_image
Technical line drawing of a mechanical device with an inset showing internal components and directional arrows (no text or symbols)To fit the upper air vent

To fit lower air vent.
Secure with added spiral springs (2).

natural_image
Technical line drawing of a mechanical component with a magnified inset showing a detail (no text or symbols)If you think your microwave oven is not functioning properly
Before you call out a service engineer please check the following points.
- Check that power to the microwave oven is available.
- Are the fuses in working order?
- Is the appliance door closed properly?
If you call out a service engineer in connection with one of the problems listed, the cost involved will have to be passed on to you even during the warranty period. The same applies to wrong usage or misuse of the appliance. Therefore, follow the instructions and recommendations in this booklet and the recipe book carefully.
Should you be unable to locate the cause of the problem, please contact AEG Service Department.
We reserve the right to alter specifications without prior notice.

natural_image
Simple black-and-white diagram of a rectangular container with a small black square inside and a small pixelated symbol on the left (no text or labels)When calling AEG Service Department, please quote the following numbers which you will find on the rating plate (see illustration).
Model-No.:
E.-No.:
F-No.:
Fig. 29
Technical data/Rating plate
| Supply voltage: | 220/240 V, 50 Hz | Fuse: | 10 A/13 Amp. |
| Power consumption: | 1300 W | Timer: | 1 sec. -99 min. 59 sec. |
| Microwave output power: | |||
| - Full Power: | 700 W | ||
| - Defrost: | 280 W | ||
| - Variable power: | 20%-100% of full power |
Freestanding appliance:
Dimensions (H×W×D) mm:
Cabinet: 405 × 595 × 390
Cavity: 230 x 380 x 360
Weight: approx. 29 kg
Build-in appliance:
Dimensions (H×W×T) mm:
Cut-out dimensions: 590 x 560 x 410
Cavity: 230 x 380 x 360
Front dimensions: 600 x 595 x 384
Weight: approx. 31 kg
These appliances conform to the EEC directive N 76/889/EEC and 82/499 EG on radio interference.


- Microwave oven FX 30 LF / EX 30 LF
- Operating instructions – Please read carefully before using the oven and keep for future reference
- Contents
- Features
- Bevore you read on
- Microwaves, what are they?
- Cooking Guidelines
- Golden rules for safe and successful operation
- How to cook with time, variable power and the food sensor/temperature
- Cooking time
- Variable power
- Cooking with temperature
- Cooking hints
- Setting and changing the clock
- Start up
- Cooking with variable power and temperature/food sensor
- The correct utensils
- Figure 18
- Exceptions:
- Figure 16
- Microwave Browning Dishes
- Cleaning, Maintenance and Replacement of the cooker interior lamp
- Cleaning of the appliance
- Replacement of the cooker interior lamp
- Freestanding appliance
- Questions and answers
- Question:
- Answer:
- Installation of a freestanding appliance
- Installation of freestanding appliance
- Installation of the build-in appliance
- Fitting
- If you think your microwave oven is not functioning properly
- Technical data/Rating plate
- Freestanding appliance:
- Build-in appliance:
Merk : AEG
Model : EX30LF
Categorie : Magnetron