
CTK-593 - Klaviatūra CASIO - Bezmaksas lietošanas instrukcija
Atrodiet ierīces rokasgrāmatu bez maksas CTK-593 CASIO PDF formātā.


| Produkta tips | Pārnēsājama elektroniskā tastatūra |
| Taustiņu skaits | 61 |
| Pieskāriena reakcija | Nē (nesvērti) |
| Polifonija | 12 notis |
| Toņi | 100 |
| Ritmi | 50 |
| Demonstrācijas dziesmas | 5 |
| Pavadījums | Automātisks pavadījums ar akordiem |
| Transponēšanas funkcija | Jā |
| Metronoms | Jā |
| Austiņu ligzda | 1 x 1/8" (3,5 mm) stereo |
| Ilgspēles pedāļa ieeja | Jā (izvēles pedālis) |
| MIDI | Nē |
| Skaļruņi | Iebūvēti stereo skaļruņi |
| Barošanas avots | Maiņstrāvas adapteris (iekļauts) vai 6 x AA baterijas |
| Automātiska izslēgšanās | Jā (pēc 6 minūšu dīkstāves) |
| Izmēri (P x D x A) | 949 x 304 x 122 mm |
| Svars | 4,0 kg (bez baterijām) |
| Iekļautie aksesuāri | Maiņstrāvas adapteris, nošu statīvs, lietotāja rokasgrāmata |
| Tīrīšanas norādījumi | Noslaukiet ar mīkstu, sausu drānu |
| Drošības brīdinājumi | Sargāt no mitruma un siltuma avotiem |
| Remonts un rezerves daļas | Sazinieties ar Casio servisa centru |
Bieži uzdotie jautājumi - CTK-593 CASIO
Lietotāju jautājumi par CTK-593 CASIO
0 jautājums par šo ierīci. Atbildiet uz tām, ko zināt, vai uzdodiet savu.
Uzdot jaunu jautājumu par šo ierīci
Lejupielādējiet instrukcijas savam Klaviatūra PDF formātā bez maksas! Atrodiet savu rokasgrāmatu CTK-593 - CASIO un atgūstiet kontroli pār savu elektronisko ierīci. Šajā lapā ir publicēti visi dokumenti, kas nepieciešami jūsu ierīces lietošanai. CTK-593 zīmola CASIO.
LIETOŠANAS INSTRUKCIJA CTK-593 CASIO
ES
CTK-591 CTK-593
USER'S GUIDE GUÍA DEL USUARIO
CTK591/593-ES-1
CASIO®
GUIDELINES LAID DOWN BY FCC RULES FOR USE OF THE UNIT IN THE U.S.A. (not applicable to other areas).
NOTICE
This equipment has been tested and found to comply with the limits for a Class B digital device, pursuant to Part 15 of the FCC Rules. These limits are designed to provide reasonable protection against harmful interference in a residential installation. This equipment generates, uses and can radiate radio frequency energy and, if not installed and used in accordance with the instructions, may cause harmful interference to radio communications. However, there is no guarantee that interference will not occur in a particular installation. If this equipment does cause harmful interference to radio or television reception, which can be determined by turning the equipment off and on, the user is encouraged to try to correct the interference by one or more of the following measures:
- Reorient or relocate the receiving antenna.
- Increase the separation between the equipment and receiver.
- Connect the equipment into an outlet on a circuit different from that to which the receiver is connected.
- Consult the dealer or an experienced radio/TV technician for help.
FCC WARNING
Changes or modifications not expressly approved by the party responsible for compliance could void the user's authority to operate the equipment.
Important!
Please note the following important information before using this product.
- Before using the optional AD-5 Adaptor to power the unit, be sure to check the AC Adaptor for any damage first. Carefully check the power cord for breakage, cuts, exposed wire and other serious damage. Never let children use an AC adaptor that is seriously damaged.
- Never attempt to recharge batteries.
- Do not use rechargeable batteries.
- Never mix old batteries with new ones.
- Use recommended batteries or equivalent types.
- Always make sure that positive (+) and negative (−) poles are facing correctly as indicated near the battery compartment.
- Replace batteries as soon as possible after any sign they are getting weak.
- Do not short-circuit the battery terminals.
- The product is not intended for children under 3 years.
- Use only CASIO AD-5 adaptor.
• The AC adaptor is not a toy. - Be sure to disconnect the AC adaptor before cleaning the product.

CASIO ELECTRONICS CO., LTD.
Unit 6, 1000
North Circular Road
London NW2 7JD, U.K.
This mark is valid in the EU countries only. Please keep all information for future reference.
704A-E-002A

Safety Precautions
Congratulations on your selection of the CASIO electronic musical instrument.
- Before using the instrument, be sure to carefully read through the instructions contained in this manual.
- Please keep all information for future reference.
Symbols
Various symbols are used in this user's guide and on the product itself to ensure that the product is used safely and correctly, and to prevent injury to the user and other persons as well as damage to property. Those symbols along with their meanings are shown below.

DANGER
This symbol indicates information that, if ignored or applied incorrectly, creates the danger of death or serious personal injury.

WARNING
This indication stipulates matters that have the risk of causing death or serious injury if the product is operated incorrectly while ignoring this indication.

CAUTION
This indication stipulates matters that have the risk of causing injury as well as matters for which there is the likelihood of occurrence of physical damage only if the product is operated incorrectly while ignoring this indication.
Symbol Examples

This triangle symbol ( means that the user should be careful. (The example at left indicates electrical shock caution.)

This circle with a line through it (⊗) means that the indicated action must not be performed. Indications within or nearby this symbol are specifically prohibited. (The example at left indicates that disassembly is prohibited.)

The black dot (●) means that the indicated action must be performed. Indications within this symbol are actions that are specifically instructed to be performed. (The example at left indicates that the power plug must be unplugged from the electrical socket.)

Safety Precautions

DANGER
Alkaline Batteries
Perform the following steps immediately if fluid leaking from alkaline batteries ever gets into your eyes.
-
Do not rub your eyes! Rinse them with water.
-
Contact your physician immediately. Leaving alkaline battery fluid in your eyes can lead to loss of sight.


WARNING
Smoke, Strange Odor, Overheating
Continued use of the product while it is emitting smoke, a strange odor, or heat creates the risk of fire and electric shock. Take the following steps immediately.
-
Turn off power.
-
If you are using the AC adaptor for power, unplug it from the wall outlet.
-
Contact your original retailer or an authorized CASIO Service Provider.
AC Adaptor
Misuse of the AC adaptor creates the risk of fire and electric shock. Always make sure you observe the following precautions.
- Be sure to use only the AC adaptor that is specified for this product.
- Use only a power source whose voltage is within the rating marked on the AC adaptor.
- Do not overload electrical outlets and extension cords.


AC Adaptor
Misuse of the AC adaptor's electric cord can damage or break it, creating the risk of fire and electric shock. Always make sure you observe the following precautions.
- Never place heavy objects on the cord or subject it to heat.
- Never try to modify the cord or subject it to excessive bending.
- Never twist or stretch the cord.
- Should the electric cord or plug become damaged, contact your original retailer or authorized CASIO Service Provider.


AC Adaptor
Never touch the AC adaptor while your hands are wet.
Doing so creates the risk of electric shock.

Batteries
Misuse of batteries can cause them to leak, resulting in damage to nearby objects, or to explode, creating the risk of fire and personal injury. Always make sure you observe the following precautions.
- Never try to take batteries apart or allow them to become shorted.
- Never expose batteries to heat or dispose of them by incineration.
- Never mix old batteries with new ones.
- Never mix batteries of different types.
- Do not charge the batteries.
- Make sure the positive (+) and negative (−) ends of the batteries are facing correctly.

Do not incinerate the product.
Never throw the product into fire. Doing so can cause it to explode, creating the risk of fire and personal injury.

Water and Foreign Matter
Water, other liquids, and foreign matter (such as pieces of metal) getting into the product create the risk of fire and electric shock. Take the following steps immediately.
-
Turn off power.
-
If you are using the AC adaptor for power, unplug it from the wall outlet.
-
Contact your original retailer or an authorized CASIO Service Provider.

Disassembly and Modification
Never try to take this product apart or modify it in any way. Doing so creates the risk of electric shock, burn injury, or other personal injury. Leave all internal inspection, adjustment, and maintenance up to your original retailer or authorized CASIO Service Provider.

Dropping and Impact
Continued use of this product after it has been damaged by dropping or subjecting it to strong impact creates the risk of fire and electric shock. Take the following steps immediately.
-
Turn off power.
-
If you are using the AC adaptor for power, unplug it from the wall outlet.
-
Contact your original retailer or an authorized CASIO Service Provider.

Plastic Bags
Never place the plastic bag the product comes in over your head or in your mouth. Doing so creates the risk of suffocation. Particular care concerning this precaution is required where small children are present.

Keep off of the product and stand.\*
Climbing onto the product or stand can cause it to tip over or become damaged. Particular care concerning this precaution is required where small children are present.

Location
Avoid locating the product on an unstable stand, on an uneven surface, or any other unstable location. An unstable location can cause the product to fall over, creating the risk of personal injury.

AC Adaptor
Misuse of the AC adaptor creates the risk of fire and electric shock. Always make sure you observe the following precautions.
- Do not locate the electric cord near a stove or other sources of heat.
- Never pull on the cord when unplugging from the electrical outlet. Always grasp the AC adaptor when unplugging.

AC Adaptor
Misuse of the AC adaptor creates the risk of fire and electric shock. Always make sure you observe the following precautions.
- Insert the AC adaptor into the wall outlet as far as it will go.
- Unplug the AC adaptor from the wall outlet during lightening storms or before leaving on a trip or other long-term absence.
- At least once a year, unplug the AC adaptor from the wall outlet and wipe away any dust that is built up in the area around the prongs of the plug.

Relocating the Product
Before relocating the product, always unplug the AC adaptor from the wall outlet and disconnect all other cables and connecting cords. Leaving cords connected creates the risk of damage to the cords, fire, and electric shock.

Cleaning
Before cleaning the product, always unplug the AC adaptor from the wall outlet first. Leaving the AC adaptor plugged in creates the risk of damage to the AC adaptor, fire, and electric shock.

Batteries
Misuse of batteries can cause them to leak resulting in damage to nearby objects, or to explode, creating the risk of fire and personal injury. Always make sure you observe the following precautions.
- Use only batteries that are specified for use with this product.
- Remove batteries from the product if you do not plan to use it for a long time.

Connectors
Connect only the specified devices and equipment to the product's connectors. Connection of a non-specified device or equipment creates the risk of fire and electric shock.


Safety Precautions
Location
Avoid the following locations for this product. Such locations create the risk of fire and electric shock.
- Areas subject to high humidity or large amounts of dust.
• In food preparation areas or other areas subject to oil smoke. - Near air conditioning equipment, on a heated carpet, in areas exposed to direct sunlight, inside of a vehicle parked in the sun, or any other area that subjects the product to high temperatures.

Display Screen
- Never push on the display screen's LCD panel or subject it to strong impact. Doing so can cause the LCD panel's glass to crack, creating the risk of personal injury.
- Should the LCD panel ever crack or break, never touch the liquid inside of the panel. LCD panel liquid can cause skin irritation.
- Should LCD panel liquid ever get inside your mouth, immediately wash out your mouth with water and contact your physician.
- Should LCD panel liquid ever get into your eyes or onto your skin, rinse with clear water for at least 15 minutes, and then contact a physician.

Sound Volume
Do not listen to music at very loud volumes for long periods. Particular care concerning this precaution is required when using headphones. High volume settings can damage your hearing.

Heavy Objects
Never place heavy object on top of the product.
Doing so can make the product top heavy, causing the product to tip over or the object to fall from it, creating the risk of personal injury.

Correct Stand\* Assembly
An incorrectly assembled stand can tip over, causing the product to fall and creating the risk of personal injury.
Make sure you assemble the stand correctly, following the assembly instructions that come with it. Make sure you mount the product on the stand correctly.

* Stand is available as an option.
IMPORTANT!
When using batteries, be sure to replace them or shift to one of the alternate power sources whenever you notice any of the following symptoms.
• Dim power supply indicator
• Instrument does not turn on.
• Dim, difficult to read display
• Abnormally low speaker/headphone volume
• Distortion of sound output
- Occasional interruption of sound when playing at high volumes
- Sudden power failure when playing at high volumes
• Dimming of the display when playing at high volume
• Continued sound output even after you release a key
• A totally different tone may sound
• Abnormal rhythm pattern and demo tune play
• Abnormally low microphone volume
• Distortion of microphone input
- Dim power supply indicator when a microphone is used
- Sudden power failure when using the microphone
- Loss of power, sound distortion, or low volume when playing from a connected computer or MIDI device

Main Features
□255 tones
A wide selection of tones includes stereo piano and synthesized sounds, drum sets, and much more.
□PIANO BANK button
The touch of a button takes you directly to piano tones and piano lessons.
□Advanced 3-Step Lesson System
The 3-Step Lesson System lets you practice at your own pace. The keyboard automatically grades your performances, so you can trace your progress as you improve.
- 3-Step Lesson System: Now you can learn the parts that make up the keyboard's built-in tunes step-by-step. Guidance that appears on the monitor screen helps lead you down the path to music proficiency.
- Evaluation System: The keyboard can be configured to rate your performances during Step 1 and Step 2 lessons by assigning points. You can even have the keyboard report your points vocally, both part way through and at the end of a lesson.
□Sing-along
Simply connect a commercially available microphone to the microphone jack and you can sing along with the keyboard's built-in tunes.
☐100 built-in tunes, including piano pieces
Built-in tunes are divided into two groups: a Song Bank of 50 tunes with Auto Accompaniment, and a Piano Bank of 50 piano tunes. You can simply enjoy listening to the built-in tunes, or eliminate the melody part of a Song Bank tunes or either hand part of a Piano Bank tune, and then play along on the keyboard.
□120 rhythms
A selection of rhythms cover rock, pops, jazz and just about any other musical style imaginable.
□Auto Accompaniment
Simply play a chord and the corresponding rhythm, bass, and chord parts play along automatically. One Touch Presets instantly recalls the most suitable tone and tempo settings to match the rhythm you are using.
□Musical Information System
A big LCD screen graphically shows you fingerings, keyboard keys to be pressed, and notes, making keyboard play more informative and enjoyable than ever before. A built-in backlight keeps the display easy to read, even in total darkness.
□Song Memory function
- Record up to two parts in song memory for later playback. Realistic ensemble play can also be created using the Auto Accompaniment function.
- The on-screen keyboard guide shows fingerings for the melody as recorded songs are played back.
□General MIDI compatibility
General MIDI tones let you connect to a personal computer and enjoy "desktop music" capabilities. This keyboard can be used as a desktop music input device or as a sound source, and it's just the thing for playback of commercially available pre-recorded General MIDI music software.
□Display Indications for Received MIDI Messages
When playing General MIDI data, you can have information (keyboard and pedal data) about a specific channel appear on the display. You can also turn off a specific channel and play its part on the keyboard. You can even turn off the output of a channel and play along on the keyboard.
704A-E-007A
E-5
Contents
Safety Precautions ...... E-1
Main Features ...... E-5
Contents..... E-6
General Guide...... E-8
About the display ...... E-11
Quick Reference ...... E-12
To play the keyboard ...... E-12
Power Supply ...... E-14
Using batteries ...... E-14
Using the AC Adaptor E-15
Auto Power Off E-15
Settings and Memory Contents ...... E-16
Connections ...... E-17
Phones/Output Terminal..... E-17
Connecting to a Computer or Other Equipment .... E-17
Assignable jack Terminal..... E-17
Microphone Jack E-18
Accessories and Options ...... E-18
Basic Operations...... E-19
To play the keyboard ...... E-19
Selecting a Tone.... E-19
Practicing on the Piano ..... E-21
Using the PIANO BANK Button ...... E-21
Playing a Built-in Tune..... E-22
To play back a Song Bank tune ...... E-22
To play back a Piano Bank tune ...... E-23
Musical Information System ...... E-23
Adjusting the Tempo.... E-23
To pause playback ...... E-24
To fast reverse ...... E-24
To fast forward ...... E-24
To change the melody tone ...... E-25
To play all tunes in succession ..... E-25
Advanced 3-Step Lesson ... E-26
Evaluation Mode ...... E-27
Using the Lesson Functions and Evaluation Mode .... E-27
Step 1 – Master the timing. ...... E-28
Step 2 - Master the notes. E-29
Step 3 – Play at normal speed. ...... E-30
Using the Phrase Practice Mode ..... E-30
Voice Fingering Guide E-31
Using the Metronome ...... E-31
Using a Microphone for Sing Along ....E-32
Contents

Auto Accompaniment ...... E-34
Selecting a Rhythm ...... E-34
Playing a Rhythm E-35
Adjusting the Tempo.... E-35
Using Auto Accompaniment ...... E-35
Using an Intro Pattern ...... E-38
Using a Fill-in Pattern ...... E-39
Using a Rhythm Variation.... E-39
Using a Fill-in Pattern with a Variation Rhythm ...... E-39
Synchro Starting Accompaniment with Rhythm Play E-39
Finishing with an Ending Pattern ..... E-40
Using One-touch Preset ...... E-40
Song Memory Function ..... E-41
Tracks E-41
Real-time Recording to Track 1 ...... E-42
Playing Back from Song Memory ...... E-44
Real-time Recording to Track 2 ...... E-44
Deleting the Contents of a Specific Track .... E-45
Keyboard Settings ...... E-46
Using Layer ...... E-46
Using Split ...... E-46
Using Layer and Split Together ...... E-47
Transposing the Keyboard ...... E-48
Using Touch Response ...... E-48
Adjusting the Accompaniment Volume ... E-49
Tuning the Keyboard ...... E-50
MIDI.... E-51
What is MIDI? E-51
General MIDI E-52
Changing MIDI Settings ...... E-52
Messages ...... E-56
Troubleshooting ...... E-59
Specifications ...... E-61
Care of your keyboard ..... E-63
Appendix ...... A-1
Note Table ...... A-1
Drum Assignment List ...... A-3
FINGERED Chord Chart ...... A-5
Tone List ...... A-6
Rhythm List ...... A-9
Song List ...... A-10
MIDI Implementation Chart

General Guide
30


E-8
704A-E-010A
NOTE.
• Key, button, and other names are indicated in the text of this manual using bold type.
- This keyboard has two PLAY/STOP buttons. In this manual, the PLAY/STOP button that is located under the SING ALONG button is indicated as
① POWER button
② Power indicator
③ VOLUME slider
④ MODE switch
●SONG/PIANO BANK/RHYTHM CONTROLLER
⑤ INTRO button
⑥ REW button, NORMAL/FILL-IN button
⑦ FF button, VARIATION/FILL-IN button
⑧ PAUSE button, SYNCHRO/ENDING button
⑨ PLAY/STOP button, START/STOP button
⑩ Song/Piano Bank controller indicator
⑪ Rhythm controller indicator
⑫ SONG BANK button
⑬ PIANO BANK button
⑭ TEMPO buttons
⑮ Speaker
⑯ RHYTHM list
⑰ TONE list
⑱ SONG BANK/SING ALONG list
⑲ Display
⑳ PIANO BANK list
②1 CHORD root names
② Percussion instrument list
②3 Voice 1 to 5
② MIC jack
⑲ MIC VOLUME knob
② SING ALONG button
⑳ KEY CONTROL/TRANSPOSE buttons
⑳
⑲ SETTING button
③0 SONG MEMORY button
③1 ONE TOUCH PRESET button
③2 RHYTHM button
③ TONE button
●ADVANCED 3-STEP LESSON SYSTEM
③4 SPEAK button
③5 METRONOME button
③6 LEFT button, TRACK 1 button
③7 RIGHT button, TRACK 2 button
③8 SCORING 1 button
39 PRACTICE PHRASE button
④0 SCORING 2 button
④1 STEP 1 to 3 button
④2 SPLIT button
④3 LAYER button
\*1 Attaching the Score Stand
Insert the score stand into the slot at the top of the keyboard as shown in the illustration.

704A-E-011A

General Guide
*2
![7 8 9 4 5 6 1 2 3 0 - + ✓ ^ ④ Number buttons • For input of numbers to change a displayed number or setting. • Negative values cannot be input using the number buttons. Use [+] (increase) and [-] (decrease) instead. ④5 [+]/[-] buttons](/content/2026/06/1276895/images/e626dbb5f7085f0ebf4b8d0f260148fe1158cf6a9dd1d7d1992d6be656d641dc.jpg)
Rear Panel

④6 MIDI OUT terminal
④7 MIDI IN terminal
④6 ASSIGNABLE JACK terminal
④9 DC 9V jack
⑤0 PHONES/OUTPUT terminal
Controller Indicators
Song/Piano Bank controller indicator
Pressing the SONG BANK, PIANO BANK, or SING ALONG button, or pressing the SONG BANK and PIANO BANK buttons at the same time to start demo tune play causes the Song/Piano Bank controller indicator to light. This indicates that buttons ⑤ through ⑨ are currently functioning as playback control buttons.
Rhythm controller indicator
Pressing the RHYTHM button to enter the Rhythm Mode, or pressing the RHYTHM button and then the SONG MEMORY button to enter the Song Memory mode causes the Rhythm controller indicator to light. This indicates that buttons ⑤ through ⑨ are currently functioning as rhythm control buttons.
E-10
704A-E-012A
About the display

- The icons that appear here indicate whether the keyboard is in the Sing Along Mode, Song Bank Mode, or Piano Bank Mode.
- Numeric Area: This area displays tone numbers, song numbers, evaluation values, and other numeric data.
Text Area: This area displays tone names and song names. It is also used as the display area for the Evaluation Mode, Song Memory, and other functions.
Indicator Area: This area indicates the type of data that is currently displayed in the numeric area and text area.
Example: The indicator points to "SONG BANK" when a Song Bank tune name is displayed.
- This area is a staff notation display that shows notes being played in built-in tunes, on the keyboard, or from memory, chord forms, and MIDI receive data.* Notes in the range F6 to C7 are shown in the staff notation display one octave lower, along with an octave up mark ( v 2
If you are using a pedal, a pedal mark (4) appears here whenever you press the pedal.
*1 Received notes outside the range of C2 to C7 do not appear on the display.
*2 Notes in the range of C2 through B2 are not shown while the octave up mark (8va) is on the display. - An indicator appears next to a function that is in use: touch response, General MIDI Mode, song memory, layer, split.
- This area shows fingerings and other finger information during 3-step lesson and tune play. The letters "L" (left) and "R" (right) appear to indicate left and right hand Auto Accompaniment parts and song memory tracks.
- This area shows the current measure number and beat number, a graphic metronome, and the current tempo setting (beats per minute) during rhythm, Auto Accompaniment, built-in tune, song memory play, and metronome.
- This area shows chord names during Auto Accompaniment, Song Bank, and Sing Along play.
- This area uses a graphic keyboard to show notes being played in built-in tunes, on the keyboard, or from song memory, chord forms, and MIDI receive data.
- The type of star that appears here indicates the accuracy of your timing for each note you play, when the Evaluation Mode is turned on.
- This area displays indicators that show when 3-Step Lesson, the Evaluation Mode, or Voice Fingering is turned on.
NOTE.
- Display examples shown in this User's Guide are intended for illustrative purposes only. The actual text and values that appear on the display may differ from the examples shown in this User's Guide.
- Viewing a liquid crystal display screen from an angle can change the appearance of display contrast. The display contrast of this keyboard is set to allow easy viewing for a person seated on a chair in front of the keyboard. Note that display contrast is fixed, and cannot be adjusted.
704A-E-013A

Quick Reference
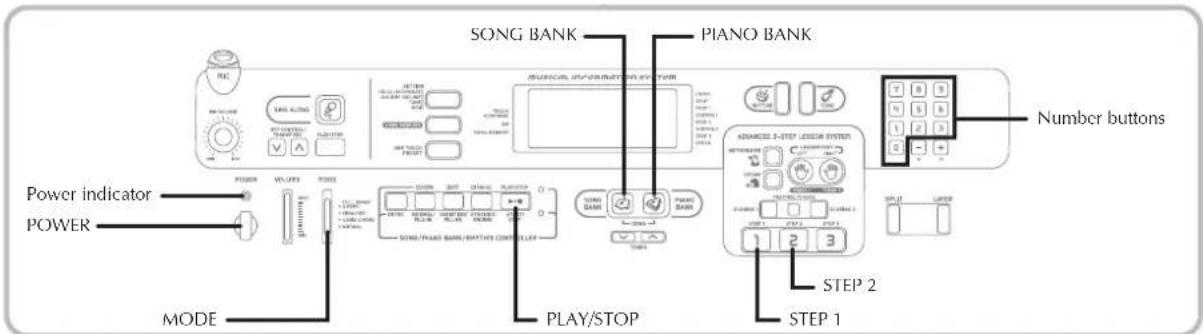
This section provides a quick overview of keyboard operation using steps one and two of the 3-step lesson feature. With the 3-step lesson feature, the on-screen keyboard guide keys light to show the next note of the tune.
To play the keyboard
1 Press the POWER button to turn on power. • This causes the power indicator to light.

2 Set the MODE switch to NORMAL.
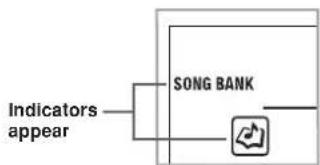
3 Press the SONG BANK button. • This causes the SONG BANK button to light.
flowchart
graph TD
    A["Indicators appear"] --> B["SONG BANK"]
    B --> C["Music Note Icon"]
4 Find the tune you want to play in the SONG BANK/ SING ALONG List, and then use the number buttons to input its two-digit number. See page A-10 for the Song Bank/Sing Along List. Example: To select "42 ALOHA OE", input 4 and then 2.

5 Press the STEP 1 button or STEP 2 button.
• The keyboard sounds a count beat and waits for you to play something on the keyboard. The keys that you need to press first flash on the display.
6 Play the melody along with the selected tune's accompaniment.
- Play in accordance with the keyboard keys, fingerings and notes that appear on the display.

E-12
704A-E-014A
If you selected lesson Step 1
- Play the notes on the keyboard.
- Accompaniment (left-hand part) plays in time with the notes.
- With Step 1, the correct melody note is played no matter which keyboard key you press.
If you selected lesson Step 2
- Play the correct notes on the keyboard.
- While an on-screen keyboard guide key is lit, press the corresponding key on the actual keyboard. In the case of a Piano Bank tune, the keyboard guide indication turns off when you press a keyboard key, and the on-screen keyboard guide key lights for the next note to be played.
- Accompaniment (left-hand part) plays in time with the notes, as long as you press the correct keyboard keys.
7 To stop play at any time, press the PLAY/STOP button.
To play an Etude or Concert Piece tune
1 When you get to step 3 of the above procedure, press the PIANO BANK button in place of the SONG BANK button.
• This causes the PIANO BANK button to light.

flowchart
graph TD
    A["Indicators appear"] --> B["Piano BANK"]
    B --> C["Icon"]
2 Find the tune you want to play in the PIANO BANK List, and then use the number buttons to input its two-digit number.
• See page A-11 for the Piano Bank List.
3 Next, continue from step 5 of the above procedure.

Power Supply
This keyboard can be powered by current from a standard household wall outlet (using the specified AC adaptor) or by batteries. Always make sure you turn the keyboard off whenever you are not using it.
Using batteries
Always make sure you turn off the keyboard before loading or replacing batteries.
To load batteries

Remove the battery compartment cover.
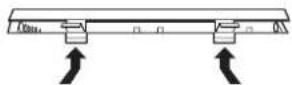

Load 6 D-size batteries into the battery compartment.
- Make sure that the positive (+) and negative (−) ends are facing correctly.


Insert the tabs on the battery compartment cover into the holes provided and close the cover.

NOTE.
- The keyboard may not function correctly if you load or replace batteries with power turned on. If this happens, turning the keyboard off and then back on again should return functions back to normal.
Important Battery Information
The following shows the approximate battery life. Manganese batteries .... 6 hours The above value is standard battery life at normal temperature, with the keyboard volume at medium setting. Temperature extremes or playing at very loud volume settings can shorten battery life.
■ Any of the following symptoms indicate low battery power. Replace batteries as soon as possible whenever any of the following occurs.
• Dim power supply indicator
• Instrument does not turn on
• Dim, difficult to read display
- Abnormally low speaker/headphone volume
• Distortion of sound output
• Occasional interruption of sound when playing at high volumes
- Sudden power failure when playing at high volumes
- Dimming of the display when playing at high volume
• Continued sound output even after you release a key
• A totally different tone may sound
• Abnormal rhythm pattern and demo tune play
• Abnormally low microphone volume
• Distortion of microphone input
- Dim power supply indicator when a microphone is used
- Sudden power failure when using the microphone
- Loss of power, sound distortion, or low volume when playing from a connected computer or MIDI device

WARNING
Misuse of batteries can cause them to leak, resulting in damage to nearby objects, or to explode, creating the risk of fire and personal injury. Always make sure you observe the following precautions.
- Never try to take batteries apart or allow them to become shorted.
- Never expose batteries to heat or dispose of them by incineration.
- Never mix old batteries with new ones.
- Never mix batteries of different types.
- Do not charge the batteries.
- Make sure the positive (+) and negative (−) ends of the batteries are facing correctly.

CAUTION
Misuse of batteries can cause them to leak resulting in damage to nearby objects, or to explode, creating the risk of fire and personal injury. Always make sure you observe the following precautions.
- Use only batteries that are specified for use with this product.
- Remove batteries from the product if you do not plan to use it for a long time.


E-14
704A-E-016A
Using the AC Adaptor
Make sure that you use only the AC adaptor specified for this keyboard.
Specified AC Adaptor: AD-5
[Rear Panel]
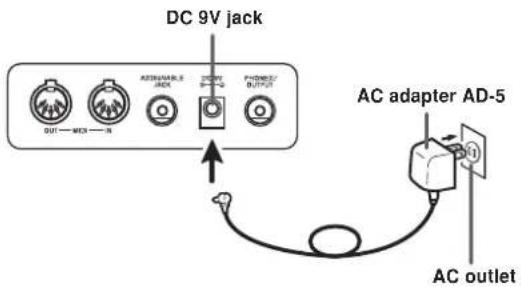
Also note the following important warnings and precautions when using the AC adaptor.

WARNING
Misuse of the AC adaptor creates the risk of fire and electric shock. Always make sure you observe the following precautions.
- Be sure to use only the AC adaptor that is specified for this product.
- Use only a power source whose voltage is within the rating marked on the AC adaptor.
- Do not overload electrical outlets and extension cords.
- Never place heavy objects on the cord or subject it to heat.
- Never try to modify the cord or subject it to excessive bending.
- Never twist or stretch the cord.
- Should the electric cord or plug become damaged, contact your original retailer or authorized CASIO Service Provider.
- Never touch the AC adaptor while your hands are wet. Doing so creates the risk of electric shock.


704A-E-017A

CAUTION
Misuse of the AC adaptor creates the risk of fire and electric shock. Always make sure you observe the following precautions.
- Do not locate the electric cord near a stove or other sources of heat.
- Never pull on the cord when unplugging from the electrical outlet. Always grasp the AC adaptor when unplugging.
- Insert the AC adaptor into the wall outlet as far as it will go.
- Unplug the AC adaptor from the wall outlet during lightening storms or before leaving on a trip or other long-term absence.
- At least once a year, unplug the AC adaptor from the wall outlet and wipe away any dust that is built up in the area around the prongs of the plug.


IMPORTANT!
- Make sure that the keyboard is turned off before connecting or disconnecting the AC adaptor.
- Using the AC adaptor for a long time can cause it to become warm to the touch. This is normal and does not indicate malfunction.
Auto Power Off
When you are using battery power, keyboard power turns off automatically whenever you leave it on without performing any operation for about 6 minutes. When this happens, press the POWER button to turn power back on.
NOTE
- Auto Power Off is disabled (it does not function) when you are using the AC adaptor to power the keyboard.
To disable Auto Power Off
Hold down the TONE button while turning on the keyboard to disable Auto Power Off.
NOTE
- When this function is turned off, the keyboard does not turn off automatically no matter how long it is left with no operation being performed.
- Auto Power Off is enabled again when you manually turn off power and then turn it back on again.

Power Supply
Settings and Memory Contents
Settings
Tone, rhythm, and other "main keyboard settings" in effect when power is turned off manually with the POWER button or automatically by Auto Power Off remain in effect when you next turn power back on.
Main Keyboard Settings
Main keyboard settings are: layer, split, split point, touch response, rhythm number, rhythm tempo, accompaniment volume, layered tone, split tone, layered split tone, General MIDI mode on/off, accomp MIDI OUT on/off, Assignable jack setting, keyboard channel, and voice fingering guide on/off.
Song Memory Contents
In addition to the above settings, data stored using the song memory function is also retained.
Electrical Power
The settings and memory data described above are retained as long as the keyboard is being supplied with electrical power. Unplugging the AC adaptor when batteries are not loaded or when loaded batteries are dead cuts off the keyboard's electrical power supply. This causes all settings to be initialized to their factory defaults and clears all data stored in memory.
Power Requirements
Note the following precautions whenever you want to ensure that current keyboard settings and memory contents are not lost.
- Make sure the keyboard is being supplied power through the AC adaptor before replacing its batteries.
- Before unplugging the AC adaptor, make sure that fresh batteries are loaded in the keyboard.
Make sure that keyboard power is turned off before replacing batteries or unplugging the AC adaptor.

Connections
Phones/Output Terminal
PREPARATION
- Before connecting headphones or other external equipment, be sure to first turn down the volume settings of the keyboard and the connected equipment. You can then adjust volume to the desired level after connections are complete.
[Rear Panel]
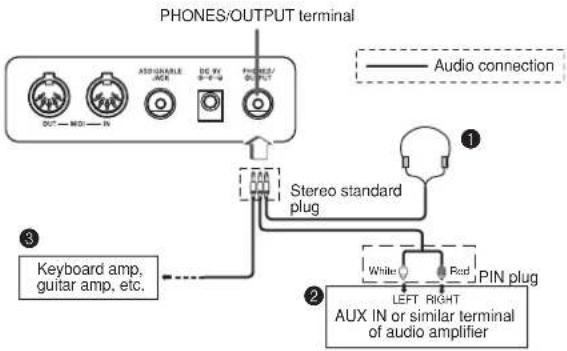
Connecting Headphones (Figure ①)
Connecting headphones cuts off output from the keyboard's built-in speakers, so you can play even late at night without disturbing anyone.
Audio Equipment (Figure ②)
Connect the keyboard to a audio equipment using a commercially available connecting cord with a standard plug on one end and two PIN plugs on the other end. Note that the standard plug you connect to the keyboard must be a stereo plug, otherwise you will be able to output only one of stereo channels. In this configuration, you normally set the input selector of the audio equipment to the terminal (usually marked AUX IN or something similar) where the cord from the keyboard is connected. See the user documentation that comes with your audio equipment for full details.
Musical Instrument Amplifier (Figure 3)
Use a commercially available connecting cord to connect the keyboard to a musical instrument amplifier.
NOTE.
- Be sure to use a connecting cord that has a stereo standard plug on the end you connect to the keyboard, and a connector that provides dual channel (left and right) input to the amplifier to which you are connecting. The wrong type of connector at either end can cause one of the stereo channels to be lost.
When connected to a musical instrument amplifier, set the volume of the keyboard to a relatively low level and make output volume adjustments using the amplifier's controls.
Connection Example
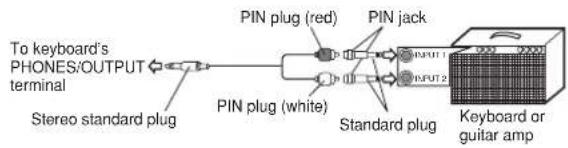
flowchart
graph LR
    A["To keyboard's PHONES/OUTPUT terminal"] --> B["Stereo standard plug"]
    B --> C["PIN plug (red)"]
    C --> D["PIN jack"]
    D --> E["Standard plug"]
    E --> F["Keyboard or guitar amp"]
    G["PIN plug (white)"] --> C
    H["INPUT1"] --> D
    I["INPUT2"] --> E
Connecting to a Computer or Other Equipment
You can also connect the keyboard to a computer or sequencer. See "MIDI" on page E-51 for details.
Assignable jack Terminal
You can connect an optional sustain pedal (SP-2 or SP-20) to the ASSIGNABLE JACK terminal to enable the capabilities described below.
For details on how to select the pedal function you want, see "ASSIGNABLE JACK (Default: SUS)" on page E-55.

Sustain Pedal
- With piano tones, depressing the pedal causes notes to linger, much like a piano's damper pedal.
- With organ tones, depressing the pedal causes notes to continue to sound until the pedal is released.
Sostenuto Pedal
- As with the sustain pedal function described above, depressing the sostenuto pedal causes notes to be sustained.
- This difference between a sostenuto pedal and sustain pedal is the timing. With a sostenuto pedal, you press the keys and then depress the pedal before you release the keys.
- Only the notes that are sounding when the pedal is depressed are sustained.
Soft Pedal
Depressing the pedal softens the sound of the notes being played.
Rhythm Start/Stop Pedal
In this case, the pedal performs the same functions as the START/STOP button.

Connections
Microphone Jack
You can connect a commercially available microphone to the microphone jack and sing along with notes played on the keyboard. For details, see "Using a Microphone for Sing Along" on page F-32.
Accessories and Options
Use only the accessories and options specified for this keyboard. Use of non-authorized items creates the danger of fire, electrical shock, and personal injury.

Basic Operations
![SING ALONG PIANO BANK SONG BANK TONE POWER VOLUME MODE PANEER INFORMATION SYSTEM ADJORDANCE 3-STOP LEMON SWITCH Number buttons [+1 / -1] 1 2 3](/content/2026/06/1276895/images/65ed967734e58218bf31144e6a19d62da17dd60ea7c2516cee5bc39267073fce.jpg)
This section provides information on performing basic keyboard operations.
To play the keyboard
1 Press the POWER button to turn the keyboard on.
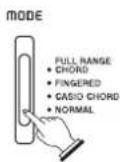
2 Set the MODE switch to NORMAL.
3 Use the VOLUME slider to set the volume to a relatively low level.
4 Play something on the keyboard.
- The keyboard's initial power on default setting is Song Bank Mode. The tone that is initially assigned to the keyboard is 096 FLUTE 1, which is the tone used by Song Bank tune number 00.
Selecting a Tone
This keyboard comes with 255 built-in tones. Use the following procedure to select the tone you want.
To select a tone
1 Find the tone you want to use in the TONE List and note its tone number.
- Not all of the available tones are shown on the tone list printed on the keyboard console. For a complete list, see the "Tone List" on page A-6.
2 Press the TONE button.

- If you were in the Song Bank Mode when you pressed the TONE button, this will cause the SONG BANK button to flash. If you were in the Piano Bank Mode, the PIANO BANK button will flash. If you were in the Sing Along Mode, the SING ALONG button will flash.
3 Use the number buttons to input the three-digit tone number of the tone you want to select.
Example: To select "049 ACOUSTIC BASS", input 0, 4 and then 9.

- Press the flashing button (SONC BANK, PIANO BANK or SING ALONG) to exit the tone select operation and stop the flashing.
NOTE
• Always input all three digits for the tone number, including leading zeros (if any). If you input one or two digits and stop, the display will automatically clear your input after a few seconds.
- You can also increment the displayed tone number by pressing [+] and decrement it by pressing [-] .
- When one of the drum sets is selected (tone numbers 246 through 254), each keyboard key is assigned a different percussion sound. See page A-3 for details.
704A-E-021A
E-19

Basic Operations
Polyphony
The term polyphony refers to the maximum number of notes you can play at the same time. The keyboard has 24-note polyphony, which includes the notes you play as well as the rhythms and auto-accompaniment patterns that are played by the keyboard. This means that when a rhythm or auto-accompaniment pattern is being played by the keyboard, the number of notes (polyphony) available for keyboard play is reduced. Also note that some of the tones offer only 12-note polyphony.
- When rhythm or auto accompaniment is playing, the number of sounds simultaneously played is reduced.
Digital Sampling
A number of the tones that are available with this keyboard have been recorded and processed using a technique called digital sampling. To ensure a high level of tonal quality, samples are taken in the low, mid, and high ranges and then combined to provide you with sounds that are amazingly close to the originals. You may notice very slight differences in volume or sound quality for some tones when you play them at different positions on the keyboard. This is an unavoidable result of multiple sampling, and it is not a sign of malfunction.

Practicing on the Piano

Using the PIANO BANK Button
Pressing the PIANO BANK button provides instant access to piano tones and piano tune selection.
Initial Piano Bank Setting
Tone: 000 Stereo Piano
To use the piano bank

Press the PIANO BANK button.
• This causes the PIANO BANK button to light.
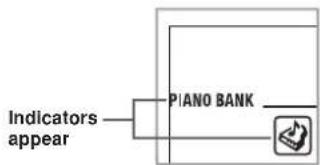
flowchart
graph LR
    A["Indicators appear"] --> B["Piano BANK"]
    B --> C["Logo"]

Now try playing something on the keyboard.
• The notes you play sound with a piano tone.

If you want to playback the built-in tune, press the PLAY/STOP button.
- This causes the currently selected tune to play in an endless loop.
• To stop playback, press the PLAY/STOP button again.
704A-E-023A

Playing a Built-in Tune
![SONG BANK PIANO BANK Number buttons [+] / [-] PLAY/STOP TEMPO](/content/2026/06/1276895/images/59781e278ab2729eb52ab50897309edd6d89dcd789b845c91e8acefb07188858.jpg)
Your keyboard comes with a total of built-in 100 tunes. You can play back built-in tunes for your own listening pleasure, or you can use them for practice and even sing-along. Built-in tunes are divided between the two groups described below.
- Song Bank/Sing Along Group: 50 tunes for one-hand play The tunes in this group are Auto Accompaniment tunes. A Song Bank Group tune can be used during a lesson for melody part practice. If you connect a microphone to the keyboard and enter the Sing Along Mode*, you can sing along with the built-in tune.
* The Sing Along Mode reduces the volume of the melody part of the built-in tunes and changes the tone selection to one that makes it easier for a vocalist to follow. - Piano Bank Group: 50 tunes for two-hand play The piano tunes in this group are subdivided between 20 etudes and 30 concert pieces. A Piano Bank Group tune can be used during a lesson for left-hand part and right-hand part practice.
To play back a Song Bank tune
PREPARATION
- Adjust the main volume (page E-19).
1 Find the tune you want to play in the SONG BANK/ SING ALONG List, and note its number.
• See page A-10 for the Song Bank/Sing Along List.
2 Press the SONG BANK button to enter the Song Bank Mode.
• This causes the SONG BANK button to light.

flowchart
graph TD
    A["Indicators appear"] --> B["SONG BANK"]
    B --> C["Music Note Icon"]
3 Use the number buttons to input the tune's two-digit number.
Example: To select "42 ALOHA OF", input 4 and then 2.
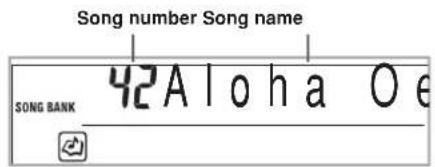
NOTE.
- Tune Number 00 is the initial default Song Bank tune setting whenever you turn on keyboard power.
- You can also increment the displayed tune number by pressing [+] and decrement is by pressing [-] .
4 Press the PLAY/STOP button to start play of the tune.

5 Press the PLAY/STOP button to stop playback of the Song Bank tune.
- The tune you select continues to play until you stop it.
E-22
704A-E-024A
To play back a Piano Bank tune
1 Find the tune you want to play in the PIANO BANK List, and note its number.
• See page A-11 for the Piano Bank List.
2 Press the PIANO BANK button to specify the Piano Bank group.

NOTE.
- Pressing the PIANO BANK button changes the tone to stereo piano (Tone Number 000).
3 Use the number buttons to input the two-digit tune number you looked up in step 1.
Example: To select tune number 16 (Ode To Joy), input 1 and then 6.

NOTE.
- Tune Number 00 is the initial default Piano Bank tune setting whenever you turn on keyboard power.
- You can also change the displayed tune number using the [+] and [-] buttons.
4 Press the PLAY/STOP button to start playback.
5 To stop playback, press the PLAY/STOP button.
- The tune you select continues to play until you stop it.
Musical Information System
When the keyboard is playing one of its built-in tunes, the display shows a variety of information about the tune.
Example: Display during Song Bank play
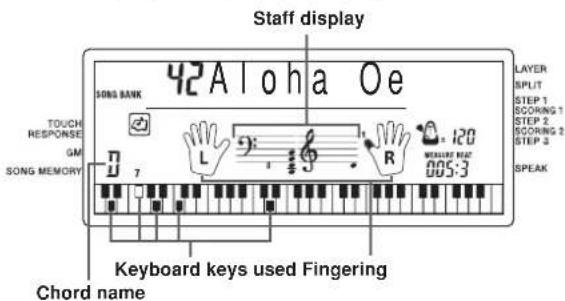
NOTE
- Chord names are not displayed for Piano Bank tunes.
Adjusting the Tempo
Each tune has a preset default tempo (beats per minute) that is set automatically whenever you select a tune. While the tune is playing, you can change the tempo setting to a value in the range of 40 to 255.
To set the tempo

Use the TEMPO buttons to set the tempo.
^ : Increases the tempo value.
√ : Decreases the tempo value.

NOTE
- While the tempo value is flashing, you can also use the number buttons or [+] and [-] to input a three-digit value. Note that you must input leading zeros, so 90 is input as 090.
- Pressing both the and TEMPO buttons at the same time automatically returns the currently selected rhythm to its default tempo.
- Piano Bank tunes have tempo changes part way through in order to produce specific musical effects. Note that the tempo setting automatically returns to the default whenever a tempo change occurs within one of these tunes.
704A-E-025A

Playing a Built-in Tune
![PIANO BANK TONE SONG BANK PANANAIS INFORMATION SYSTEM Number buttons [+] / [-] REVIEW VOLUME TICKERS 12000 12000 12000 12000 12000 12000 12000 12000 12000 12000 12000 12000 12000 12000 12000 12000 12000 12500 12500 12500 12500 12500 12500 12500 12500 12500 12500 12500 12500 12500 12500 12500 12500 12500 PANEER BANKE PANEER BANKE PANEER BANKE PANEER BANKE PANEER BANKE PANEER BANKE PANEER BANKE PANEER BANKE PANEER BANKE PANEER BANKE PANEER BANKE PANEER BANKE PANEER BANKE PANEER BANKE PANEER BANKE PAUSE PAUSE/STOP](/content/2026/06/1276895/images/f467f0dd1d58e274b295140104bae940d01d9e93d9a4ba1e6ec682a21effa9ac.jpg)
To pause playback
1 Press the PAUSE button while a tune is playing to pause it.
2 Pressing the PAUSE button again resumes play from the point where it was paused.
To fast reverse
1 While a tune is playing or paused, hold down the REW button to skip in a reverse direction at high speed.
- The fast reverse operation skips back one measure at a time.
- The measure and beat numbers on the display change while the fast reverse operation is being performed.

Beat numberMeasure number
2 Releasing the REW button starts song playback from the measure whose number is shown on the display.
NOTE.
- Fast reverse does not work while tune play is stopped.
- Certain playback conditions can cause it to take some time before fast reverse starts after you press the REW button.
To fast forward
1 While a tune is playing or paused, hold down the FF button to skip forward at high speed.
- The fast forward operation skips forward one measure at a time.
- The measure and beat numbers on the display change while the fast forward operation is being performed.
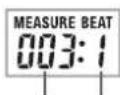
Beat numberMeasure number
2 Releasing the FF button starts song playback from the measure whose number is shown on the display.
NOTE
- Fast forward does not work while tune play is stopped.
E-24
704A-E-026A
To change the melody tone
1 Press the TONE button.
2 Find the tone you want in the TONE List, and then use the number buttons to input its three-digit number.
Example: To select "057 VIOLIN", input 0, then 5, then 7.
- You can select any one of the keyboard's 255 built-in tones.

NOTE
- You can also use the [+] and [-] buttons to change the melody tones.
- For two-hand tunes (Piano Bank tunes), the same tone is applied for both the left and right hand parts.
- Specifying the tune number for the same tune that is currently selected returns the melody tone to the default setting for that tune.
To play all tunes in succession
1 Press the SONG BANK button and PIANO BANK button at the same time.
- Playback starts from Song Bank tune number 00, followed in sequence by Piano Bank tunes.
- Both the SONG BANK button and PIANO BANK button are lit during demo play.
2 To stop tune play, press the PLAY/STOP button.
NOTE
- While a tune is playing, you can use the number buttons or [+) and [-] to change to another tune.
- You can play along with the tunes on the keyboard.

Advanced 3-Step Lesson
With the Advanced 3-Step Lesson System, you can practice the built-in tunes and even plot your progress according to the evaluation points the keyboard awards you.
The 3-Step Lesson System lets you practice at your own pace. With the Evaluation Mode, you can get an idea of how much you are progressing. You can even find out what phrases in your performance need more work and concentrate your practice there.
Lesson Progress

flowchart
graph LR
    A["Step 1"] --> B["Evaluation 1"]
    B --> C["Evaluation 2"]
    C --> D["Step 2"]
    D --> E["Step 3"]
    E --> F["Targeted Practice"]
    A --> G["Step 1"]
    B --> H["Step 2"]
    C --> I["Step 3"]
    D --> J["Step 4"]
    E --> K["Step 5"]
3-Step Lesson
The 3-step lesson feature takes you through the three distinct steps described below to help you learn to play tunes on the keyboard.
Step 1 - Master the timing.
In this step, pressing any key on the keyboard plays the correct note, so you can concentrate on getting the timing right without worrying about playing the right note. Accompaniment (left-hand part) waits until you press a key before proceeding to the next phrase.
Step 2 - Master the notes.
In this step, you learn the keys to press to play the notes. The keys you need to press light on the on-screen keyboard guide, so simply follow along as you learn to play. Accompaniment (left-hand part) waits until your play the correct note, so you can learn at your own pace.
Step 3 - Play at normal speed.
This is where you enjoy actually playing the tunes you learn using Step 1 and Step 2. The on-screen keyboard guide still shows you which keyboard keys to press, but accompaniment proceeds at normal speed regardless of whether or not you play the correct notes.
Tune Types and Their Parts
The built-in tunes of this keyboard are divided between two basic groups: Auto Accompaniment tunes (Song Bank) and two-hand accompaniment tunes (Piano Bank). The parts available for 3-step lesson practice depend on the type of tune you are using.
Auto Accompaniment Tunes (Song Bank)
As their name suggests, these tunes are made up of an Auto Accompaniment part and a melody part. When using these tunes for a 3-step lesson, you can practice playing along with the melody (right hand) part only.
Two-hand Tunes (Piano Bank)
These types of tunes are played with both hands, as in a piano solo. When using these tunes for a 3-step lesson, you can practice playing along with both the left hand and right hand parts.
Display Contents During 3-step Lesson Play
Whenever you select an Auto Accompaniment tune for 3-step lesson play, the on-screen keyboard guide and staff notation shows the note you should play and its length. The on-screen keyboard guide also shows the notes you play on the keyboard. The following describes the information that appears on the display.
Note Pitch
The key you should press lights on the on-screen keyboard guide, while the actual pitch of the note appears in the display's staff notation area. The fingers you should use to play the notes are also shown on the display.
Note Length
The key stays lit on the on-screen keyboard guide for as long as the note should be sustained. The staff notation and fingerings also remain on the display for the length of the note.
Next Note
An on-screen keyboard guide key flashes to indicate the next note to be played, while a number appears on the display near the finger you should use to play the next note.
Series of Same Pitch Notes
The on-screen keyboard guide key turns off momentarily between the notes, and lights again for each successive note. The staff notation and fingerings also turn off and back on again.
Example: When play requires pressing keys with fingers 3, 2, and then 1
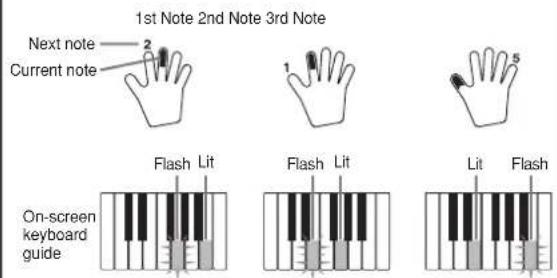
NOTE
- Note length is not indicated when you are using two-hand tunes with 3-step lesson Steps 1 and 2. As soon as you press a key that is lit on the on-screen keyboard guide, it goes out and the next key you need to press starts to flash.
- Note length is indicated by the on-screen keyboard guide when you use two-hand tunes with Step 3. In this case, the next key to be pressed does not flash when you press a lit key and the next finger number does not appear on the display. Only the current finger number is shown.
3-step Lesson Tempo Setting
Use the procedure under "Adjusting the Tempo" on page E-23 to adjust the tempo for 3-step lesson play.
Evaluation Mode
The keyboard's Evaluation Mode awards points to your performances during Step 1 and Step 2 of the 3-Step Lesson. A perfect score is 100. Also, the Evaluation Mode provides comments about your play, both on the monitor screen and by means of a simulated human voice.
Evaluation Mode Display
Level Indicator (9 Levels): This indicator shows the evaluation of your current performance at a glance. The more segments that appear, the higher your points.
Example: 50 points

Timing Indicator: In the Evaluation Mode, the configuration of the star changes with each note to let you know how your timing is. The more stars, the better your timing.
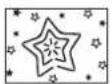


Using Tone and Voice Guide
When the keyboard senses that your timing is off, it will let you know by changing the notes you play to a tone that is different from the one you currently have selected. In the Evaluation Mode, a simulated human voice will also tell you your evaluation level. The sound effect keeps you informed of when your evaluation level is about to change.
Expressions

"Take your time": This expression is used if you do not play the correct note for a long time.
Evaluation Results
After you finish playing, the keyboard calculates an evaluation of your total performance, from beginning to end, and displays your total score on the monitor screen. The greater the score, the higher your evaluation is.
Evaluation Rank Display Messages and Sound Effects

"****": indicates that the Evaluation Mode was exited before an evaluation result could be obtained.
NOTE.
- If your play is flawless, the message "Perfect!" appears before the evaluation result.
- If you press the PLAY/STOP button and interrupt the Evaluation Mode part way through, the monitor screen shows the evaluation points you have accumulated up to that point. In this case, the keyboard does not display a message and play a sound effect.
Using the Lesson Functions and Evaluation Mode
Perform the following steps to master your favorite tunes.
704A-E-029A

Advanced 3-Step Lesson

Step 1 – Master the timing.

Select the tune you want to use.

Press the STEP 1 button to start Step 1 play.
• After a count sounds, they keyboard stands by and waits for you to play the first note of the tune.
Indicator appearsNote

• The hand you should use is indicated by arrows around it.


Press any keyboard keys to play the notes.
- The key for the next note to be played flashes on the on-screen keyboard guide and the keyboard waits for you to play it. When you press any key to play the note, the on-screen key remains lit as the note plays.
- Accompaniment (left-hand part) waits until you press any key to play a note.
- If you accidentally press more than one key in succession, accompaniment is played for the corresponding number of notes.
- Pressing more than one key at the same time counts as a single note. Pressing a key while another key is held down is counted as two notes.

To stop play at any time, press the PLAY/STOP button.
NOTE
- Left hand practice can also be performed with Piano Bank tunes. Simply select one of the two-hand tunes in step 1 of the above procedure, and then press the LEFT button following step 2.
3-step lesson does not allow simultaneous practice of both hands. - You can also use fast forward and fast reverse operations with Step 1 play.
- You cannot pause Step 1 play.
• Rhythm does not sound during Step 1 play.
Evaluation 1: Find out how the keyboard evaluates your Step 1 play.
Use the SCORING 1 button to check the evaluation of your play in Step 1.

Press the SCORING 1 button.
- This causes the SCORING 1 indicator to appear on the display.
- A count beat sounds and then evaluation mode starts.
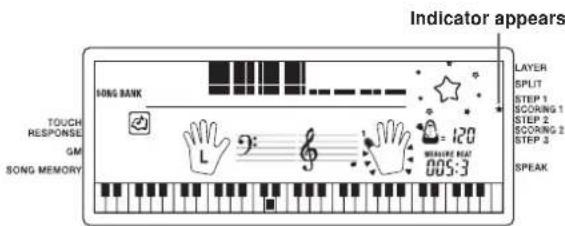

Play in accordance with the guidance on the monitor screen and as told by the voice.
- To stop evaluation, press the PLAY/STOP button. This displays only the points accumulated up to that point.
E-28
704A-E-030A
Advanced 3-Step Lesson

3 After you finished playing, your evaluation result appears on the display.
- For information about evaluation ranks and sound effects, see "Evaluation Results" on page E-27.
- The keyboard will tell you where you scored the lowest during your performance, so you can find out where you need the most work. See "Using the Phrase Practice Mode" on page E-30 for more information.
- Pressing the SONG BANK button or PIANO BANK button returns to the tune selection screen.

Step 2 - Master the notes.
1 Select the tune you want to use.
2 Press the STEP 2 button to start Step 2 play.
• After a count sounds, the keyboard stands by and waits for you to play the first note of the tune.
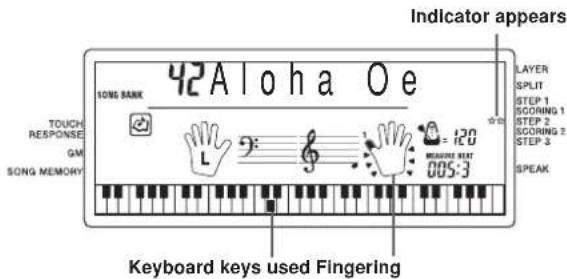
3 Play the notes as indicated by the on-screen keyboard guide.
- The key for the next note to be played flashes on the on-screen keyboard guide and the keyboard waits for you to play it. When you press any key to play the note, the on-screen key remains lit as the note plays.
- If multiple keys light on the on-screen keyboard guide when you are using a two-hand tune, it means that you must press all of the keys that are lit.
4 To stop play at any time, press the PLAY/STOP button.
NOTE
- Left hand practice can also be performed with Piano Bank tunes. Simply select one of the two-hand tunes in step 1 of the above procedure, and then press the LEFT button following step 2.
- 3-step lesson does not allow simultaneous practice of both hands.
- You can also use fast forward and fast reverse operations with Step 2 play.
- You cannot pause Step 2 play.
• Rhythm does not sound during Step 2 play.
Evaluation 2: Find out how the keyboard evaluates your Step 2 play.
Use the SCORING 2 button to check the evaluation of your play in Step 2.
1 Press the SCORING 2 button.
• This causes the SCORING 2 indicator to appear on the display.
• A count beat sounds and then evaluation mode starts.

2 Play in accordance with the guidance on the monitor screen and as told by the voice.
- To stop evaluation, press the PLAY/STOP button. This displays only the points accumulated up to that point.
3 After you finished playing, your evaluation result appears on the display.
- For information about evaluation ranks and sound effects, see "Evaluation Results" on page E-27.
- The keyboard will tell you where you scored the lowest during your performance, so you can find out where you need the most work. See "Using the Phrase Practice Mode" on page E-30 for more information.
- Pressing the SONG BANK button or PIANO BANK button returns to the tune selection screen.
704A-E-031A

Advanced 3-Step Lesson
![SPEAK METRONOME LEFT Number buttons [+] / [-] PRACTICE PIRASE SCORING 2 STEP 1 STEPS STEP 3 SCORING 1 STEP 2 PLAY/STOP TEMPO](/content/2026/06/1276895/images/013956f1870813717d4987fa2a2f7dcc0e40cc24e06073679dfff5a86b969456.jpg)
Step 3 – Play at normal speed.
1 Select the tune you want to play.
2 Press the STEP 3 button to start Step 3 play.
• Accompaniment (left hand part) starts to play at normal speed.

3 Play the notes as indicated by the on-screen keyboard guide.
4 To stop play at any time, press the PLAY/STOP button.
NOTE
- Left hand practice can also be performed with Piano Bank tunes. Simply select one of the two-hand tunes in step 1 of the above procedure, and then press the LEFT button following step 2.
• 3-step lesson does not allow simultaneous practice of both hands. - You can also use pause, fast forward and fast reverse operations with Step 3 play.
Using the Phrase Practice Mode
Perform the following procedure to find out where you scored the lowest in your performance, so you can find your weak points and focus your practice on those phrases.
1 After displaying your evaluation results, press the PRACTICE PHRASE button.
$$ \begin{array}{c c} 0 2 0 & 0 1 0 - 0 1 4 \ \text {S C O R E} & \text {M E A S U R E} \end{array} $$
- This displays the Phrase Practice Mode screen, which shows the phrase (start measure number and end measure number) where your evaluation mode was the lowest. This is the "practice phrase".
NOTE
- If there are multiple phrases that qualify as the lowest score, the phrase closest to the beginning of the tune is used for phrase practice.
- If there is no section that qualifies for phrase practice, “***-***” is displayed in place of the start and end measures.
- Phrase practice measures are cleared if you change to another tune or another mode.
To play back the practice phrase
1 While the Phrase Practice Mode screen is on the display, press the PLAY/STOP button.
- This plays back the phrase starting from the start measure number.
- Playback continues until the end of the tune is reached. After that, playback automatically jumps to the beginning of the tune. Note that playback of the practice phrase is not repeated automatically.
NOTE
- With some tunes, it may take a few seconds for playback to start after you press the PLAY/STOP button in the above procedure.
E-30
704A-E-032A
To practice the practice phrase

While the Phrase Practice Mode screen is on the display, press the STEP 1, STEP 2, or STEP 3 button.
- This starts 3-Step Lesson playback of the practice phrase in accordance with the STEP button you pressed.

Play along on the keyboard.
- Playback continues until the end of the tune is reached. After that, playback automatically jumps to the beginning of the tune. Note that playback of the practice phrase is not repeated automatically.
- To stop playback, press the PLAY/STOP button.
Voice Fingering Guide
Voice fingering guide uses a simulated human voice to call out fingering numbers during Step 1 and Step 2 one-hand part practice. If you need to press a key with your thumb, for example, voice fingering guide says, "One!" In the case of a chord to be played with your thumb, middle and little finger, voice fingering guide says, "One, three, five!"
Voice Fingering Guide calls out fingerings only when you do not press the proper key when you should.
Voice Fingering Guide
One : Thumb
Two : Forefinger
Three : Middle finger
Four : Ring finger
Five: Little finger
To turn voice fingering guide on or off
Press the SPEAK button to toggle voice fingering guide on (voice fingering guide indicator displayed) and off (indicator not displayed).

NOTE
- Note that Voice Fingering is disabled in the Evaluation Mode. Pressing the SCORING 1 or SCORING 2 button automatically turns off Voice Fingering.
- Exiting the Evaluation Mode automatically restores the Voice Fingering setting that was in effect when you entered the Evaluation Mode.
Using the Metronome
The metronome feature of this keyboard produces a bell sound for the first beat of each measure, followed by click sounds for each successive beat of the measure. It is the perfect tool for practicing tunes without accompaniment (rhythm).
To start the metronome

Press the METRONOME button to start sounding the metronome.
- This causes "Beat" to appear on the display. Perform step 2 within five seconds after "Beat" appears.

Use the number buttons or [+] and [-] to change the number of beats per measure.
- You can specify the number of beats per measure a value from 1 to 6.
6Bea t
NOTE
- The bell (indicating the first beat of a measure) does not sound while one beat per measure is specified. All beats are indicated by a click sound. This setting lets you practice with a steady beat, without worrying about how many beats there are in each measure.

Use the TEMPO buttons to set the tempo.
- Press to increase the tempo (make if faster) or to decrease it (make it slower).

NOTE
- While the tempo value is flashing, you can also use the number buttons or [+] and [-] to input a three-digit value. Note that you must input leading zeros, so 90 is input as 090.
- Pressing both the and TEMPO buttons at the same time automatically returns the currently selected rhythm or tune to its default tempo.

To turn off the metronome, press the METRONOME button.
NOTE
• The metronome is disabled whenever you are using Step 1 or Step 2 of the 3-step lesson.
- Starting play of a two-hand tune or Step 3 of the 3-step lesson while the metronome is operating or activating the metronome while either of the two above operations is already in progress causes the metronome to sound in time with the Auto Accompaniment played by the keyboard. At this time, the tempo of the metronome beat changes to that of the default tempo for the Auto Accompaniment being played.
704A-E-033A
E-31

Using a Microphone for Sing Along

You can select any of the 50 Song Bank/Sing Along Group tunes and sing along with its accompaniment.
Using the microphone jack
Connecting a commercially available microphone* to the MIC jack makes it possible to sing along with the keyboard's built-in tunes or with output from a MIDI device. When connecting a microphone, be sure to first adjust the MIC VOLUME to a relatively low setting, and then adjust to the level you want after connecting.
* If a microphone was included with your keyboard, use that microphone. If your keyboard did not come with a microphone, use a commercially available microphone that satisfies the stipulated specifications.
1 Set the MIC VOLUME knob setting so it is on the "MIN" side.
2 Turn on the microphone's ON/OFF switch.
3 Use the MIC VOLUME knob to adjust microphone volume to the level you want.

IMPORTANT!
- Be sure to use the microphone's ON/OFF switch to turn off the microphone and to disconnect the microphone from the keyboard whenever you are not using it.
Required Microphone Specifications
- Microphone Type : Metal shielded (microphone body)
- Microphone and Cord
Connector : Cannon type (3-prong)
• Keyboard Jack Connector : Standard plug (monaural)
IMPORTANT!
- Connection to the MIDI terminal of an external device can cause static in the microphone signal. Use of a Cannon type microphone with a metal-shielded body helps to prevent static.
- Be sure to disconnect the microphone from the keyboard whenever you are not using it.
Howling (Feedback Noise)
Any of the following conditions can cause howling (feedback noise).
• Covering the head of the microphone with your hand
- Positioning the microphone too near to a speaker
Should howling occur, try grasping the microphone further away from the head, and move away from any nearby speaker.
Static Noise
Fluorescent lighting can cause static noise in the microphone signal. When this happens, move away from the lighting you suspect may be causing the static.
E-32
704A-E-034A
Using a Microphone for Sing Along

To use a microphone for sing along
PREPARATION
- Adjust the main volume (page E-19), accompaniment volume (page E-49), and microphone volume (page E-32).
1 Find the tune you want in the SONG BANK/SING ALONG List, and note its number.
• See page A-10 for the Song Bank/Sing Along List.
2 Press the SING ALONG button to enter the Sing Along Mode.
• This causes the SING ALONG button to light.

flowchart
graph TD
    A["Indicators appear"] --> B["SING ALONG"]
    B --> C["Icon"]
3 Use the number buttons to input the two-digit song number.
Example: To select "ALOHA OE", which is song number 42, input 4 and then 2.
NOTE.
- The initial power on default tune setting is "00".
- You can also specify the song number using the [+] and [-] buttons.
4 Press the
- Now use the microphone to sing along with the playback.
- The Sing Along Mode is similar to the Song Bank Mode. The only difference is that the melody part in the Sing Along Mode is played back at a lower volume. Also a different tone setting is used in the Sing Along mode to make sing along easier.
5 Use the KEY CONTROL/TRANSPOSE buttons (✗) to change the overall key of the playback, if you want.
A: Raises the key by one semitone
V : Lowers the key by one semitone
6 Press the
• The same song plays in an endless loop until you stop it.
NOTE.
- To return a tune to its default key, press both of the KEY CONTROL/TRANSPOSE buttons (∧ and ∨ at the same time.

Auto Accompaniment
![RHYTHM Number buttons [+1 / -1] MODE START/STOP TEMPO](/content/2026/06/1276895/images/b2a55726d12ab62b1c1f7c52b300985d9cced6eb3ee781b34be06e20f15b32e9.jpg)
This keyboard automatically plays bass and chord parts in accordance with the chords you finger. The bass and chord parts are played using sounds and tones that are automatically selected to select the rhythm you are using. All of this means that you get full, realistic accompaniments for the melody notes you play with your right hand, creating the mood of an one-person ensemble.

Selecting a Rhythm
This keyboard provides you with 120 exciting rhythms that you can select using the following procedure.
To select a rhythm
1 Find the rhythm you want to use in the RHYTHM List and note its rhythm number.
- Not all of the available rhythms are shown on the rhythm list printed on the keyboard console. For a complete list, see the "Rhythm List" on page A-9.
2 Press the RHYTHM button.
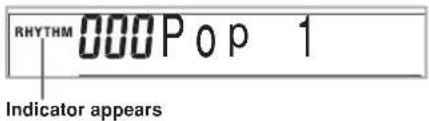
3 Use the number buttons to input the three digit rhythm number for the rhythm you want to select. Example: To select "076 RHUMBA", input 0, 7 and then 6.

NOTE.
- You can also increment the displayed rhythm number by pressing [+] and decrement it by pressing [-] .
- Some rhythms consist of chord accompaniments only, without any drums or other percussion instruments. Such rhythms do not sound unless CASIO CHORD, FINGERED, or FULL RANGE CHORD is selected as the accompaniment mode.
E-34
704A-E-036A
Playing a Rhythm
Use the following procedure to start and stop rhythm play.
To play a rhythm
1 Set the MODE switch to NORMAL.
2 Press the START/STOP button to start play of the currently selected rhythm.
3 To stop rhythm play, press the START/STOP button again.
NOTE
- All of the keyboard keys are melody keys while the MODE switch is set to NORMAL.
Adjusting the Tempo
The tempo (beats per minute) can be set to a value in the range of 40 to 255. The tempo value you set is use for Song Bank, 3-step lesson, and Auto Accompaniment chord play, as well as playback from memory and metronome operation.
To set the tempo
1 Use the TEMPO buttons to set the tempo.
^ : Increase the tempo value.
√ : Decreases the tempo value.

NOTE
- While the tempo value is flashing, you can also use the number buttons or [+] and [-] to input a three-digit value. Note that you must input leading zeros, so 90 is input as 090.
- Pressing both the and TEMPO buttons at the same time automatically returns the currently selected rhythm to its default tempo.
Using Auto Accompaniment
The following procedure describes how to use the keyboard's Auto Accompaniment feature. Before starting, you should first select the rhythm you want to use and set the tempo of the rhythm to the value you want.
To use Auto Accompaniment
1 Set the MODE switch to CASIO CHORD, FINGERED, or FULL RANGE CHORD.
2 Press the START/STOP button to start play of the currently selected rhythm.
③ Play a chord.
- The actual procedure you should use to play a chord depends on the current MODE switch position. Refer to the following pages for details on chord play.
CASTO CHORD ...... Page E-36
FINGERED Page E-37
FULL RANGE CHORD ...... Page E-37

Chord name
(The chord form that appears here may show notes that differ from those actually pressed on the keyboard. With some chords, inverted chord forms may be displayed.)
4 To stop Auto Accompaniment play, press the START/STOP button again.
NOTE.
- You can adjust the accompaniment part volume level independently of the main volume. For details, see "Adjusting the Accompaniment Volume" on page E-49.
704A-E-037A

Auto Accompaniment
CASIO CHORD
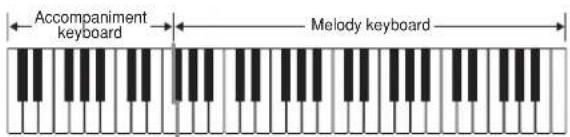
This method of chord play makes it possible for anyone to easily play chords, regardless of previous musical knowledge and experience. The following describes the CASIO CHORD "Accompaniment keyboard" and "Melody keyboard", and tells you how to play CASIO CHORDs.
CASIO CHORD Accompaniment Keyboard and Melody Keyboard
NOTE.
• The accompaniment keyboard can be used for playing chords only. No sound will be produced if you try playing single melody notes on the accompaniment keyboard.
Chord Types
CASIO CHORD accompaniment lets you play four types of chords with minimal fingering.
| Chord Types | Example |
| Major chordsMajor chord names are marked above the keys of the accompaniment keyboard. Note that the chord produced when you press an accompaniment keyboard does not change octave, regardless of which key you use to play it. | C Major (C) |
| Minor chords (m)To play a minor chord, keep the major chord key depressed and press any other accompaniment keyboard key located to the right of the major chord key. | C minor (Cm) |
| Seventh chords (7)To play a seventh chord, keep the major chord key depressed and press any other two accompaniment keyboard keys located to the right of the major chord key. | C seventh (C7) |
| Minor seventh chords (m7)To play a minor seventh chord, keep the major chord key depressed and press any other three accompaniment keyboard keys located to the right of the major chord key. | C minor seventh (Cm7) |
NOTE
- It makes no difference whether you press black or white keys to the right of a major chord key when playing minor and seventh chords.
FINGERED
FINGERED provides you with a total of 15 different chord types. The following describes the FINGERED "Accompaniment keyboard" and "Melody keyboard", and tells you how to play a C-root chord using FINGERED.
FINGERED Accompaniment Keyboard and Melody Keyboard
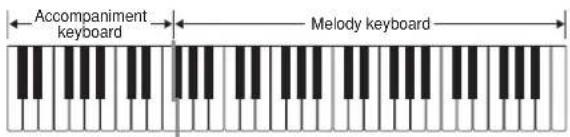
NOTE
• The accompaniment keyboard can be used for playing chords only. No sound will be produced if you try playing single melody notes on the accompaniment keyboard.
C

Cm

Cdim

Caug *1

Csus4

C7*2

Cm7 ^2
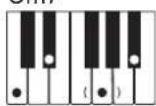
Cmaj7*2

Cm7 ^1.5

C7,5*1

C7sus4
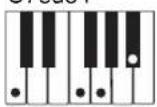
Cadd9*2

Cmadd9*2

CmM7*2

Cdim7 *1
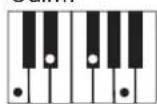
See the FINGERED Chord Chart on page A-5 for details on playing chords with other roots.
*1: Inverted fingerings cannot be used. The lowest note is the root.
*2: The same chord can be played without pressing the 5th G.
NOTE.
- Except for the chords specified in note ^1 above, inverted fingerings (i.e. playing E-G-C or G-C-E instead of C-E-G) will produce the same chords as the standard fingering.
- Except for the exception specified in note* ^2 above, all of the keys that make up a chord must be pressed. Failure to press even a single key will not play the desired FINGERED chord.
FULL RANGE CHORD
This accompaniment method provides a total of 38 different chord types: the 15 chord types available with FINGERED plus 23 additional types. The keyboard interprets any input of three or more keys that matches a FULL RANGE CHORD pattern to be a chord. Any other input (that is not a FULL RANGE CHORD pattern) is interpreted as melody play. Because of this, there is no need for a separate accompaniment keyboard, so the entire keyboard, from end to end, can be used for both melody and chords.
FULL RANGE CHORD Accompaniment Keyboard and Melody Keyboard
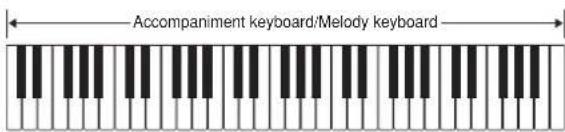
< Chords Recognized by This Keyboard >
| Chord Types | Number of Types |
| Corresponding FINGERED Chord | 15 (on this page) |
| Other Chords | 23The following are examples of chords that use C as the bass note. C_6 · Cm_6 · C_69 ^ · · · · · ^bC · ^2C · ^\#mC · · · · · ^2mC _7^b5C · ^b_7C · _7C · _7C · _7C · ^a_add9C |
704A-E-039A
E-37

Auto Accompaniment

Example: To play the chord C major.
Any of the fingerings shown in the illustration below will produce C major.

NOTE
- As with the FINGERED mode (page E-37), you can play the notes that form a chord in any combination (①).
- When the composite notes of a chord are separated by 6 or more notes, the lowest sound becomes the bass (②).
< Music Example >
Tone: 023, Rhythm: 005, Tempo: 070

Using an Intro Pattern
This keyboard lets you insert a short intro into a rhythm pattern to make startup smoother and more natural.
The following procedure describes how to use the Intro feature. Before starting, you should first select the rhythm you want to use, and set the tempo.
To insert an intro

Press the INTRO button to start the selected rhythm with an intro pattern.
- With the above setup, the intro pattern is played and the auto accompaniment with intro pattern starts as soon as you play chords on the accompaniment keyboard.
NOTE
- The standard rhythm pattern starts to play after the intro pattern is complete.
- Pressing the VARIATION/FILL-IN button while an intro pattern is playing causes the variation pattern to sound after the intro pattern is complete.
- Pressing the SYNCHRO/ENDING button while an intro pattern is playing causes the ending pattern to sound after the intro pattern is complete.
Using a Fill-in Pattern
Fill-in patterns let you momentarily change the rhythm pattern to add some interesting variation to your performances.
The following procedure describes how to use the Fill-in feature.
To insert a fill-in
1 Press the START/STOP button to start rhythm play.
2 Press the NORMAL/FILL-IN button to insert a fill-in pattern for the rhythm you are using.
NOTE.
- The fill-in pattern does not play if you press the NORMAL/FILL-IN button while an intro pattern is playing.
Using a Rhythm Variation
In addition to the standard rhythm pattern, you can also switch to a secondary "variation" rhythm pattern for a bit of variety.
To insert the variation rhythm pattern
1 Press the START/STOP button to start rhythm play.
2 Press the VARIATION/FILL-IN button to switch to the variation pattern for the rhythm you are using.
NOTE.
- To switch back to the standard rhythm pattern, press the NORMAL/FILL-IN button.
Using a Fill-in Pattern with a Variation Rhythm
You can also insert a fill-in pattern while a variation rhythm pattern is playing.
To insert a fill-in into a rhythm variation
1 While a variation rhythm pattern is playing, press the VARIATION/FILL-IN button to insert a fill-in pattern for the variation rhythm you are using.
Synchro Starting Accompaniment with Rhythm Play
You can set up the keyboard to start rhythm play at the same time you play the accompaniment on the keyboard.
The following procedure describes how to use synchro start. Before starting, you should first select the rhythm you want to use, set the tempo, and use the MODE switch to select the chord play method you want to use (NORMAL, CASIO CHORD, FINGERED, FULL RANGE CHORD).
To use synchro start
1 Press the SYNCHRO/ENDING button to put the keyboard into synchro start standby.
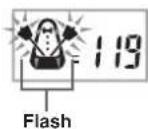
2 Playing a chord and the rhythm pattern starts to play automatically.
NOTE.
- If the MODE switch is set to NORMAL, only the rhythm plays (without a chord) when you play on the accompaniment keyboard.
- If you press the INTRO button before playing anything on the keyboard, the rhythm starts automatically with an intro pattern when you play something on the accompaniment keyboard.
- Pressing the VARIATION/FILL-IN button before playing anything on the keyboard causes play to start with the variation pattern when something is played on the keyboard.
- To cancel synchro start standby, press the SYNCHRO/ ENDING button one more time.
704A-E-041A
E-39

Auto Accompaniment
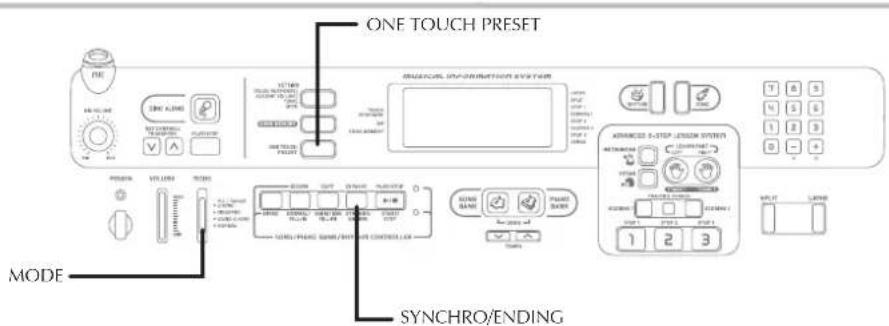
Finishing with an Ending Pattern
You can end your performances with an ending pattern that brings the rhythm pattern you are using to a natural-sounding conclusion.
The following procedure describes how to insert an ending pattern. Note that the actual ending pattern played depends on the rhythm pattern you are using.
To finish with an ending pattern

While the rhythm is playing, press the SYNCHRO/ENDING button.
- This causes the ending pattern to play, which brings rhythm accompaniment to an end.
NOTE
- The timing when the ending pattern starts depends on when you press the SYNCHRO/ENDING button. If you press the button before the second beat of the current measure, the ending pattern starts playing immediately. Pressing the button at any point in the measure after the second beat results in the ending pattern playing from the beginning of the following measure.
Using One-touch Preset
One-touch preset automatically makes the settings listed below in accordance with the rhythm pattern you are using.
- Keyboard tone
- Layer, Split, or Layer Split on/off
- Layered tone (when layer is turned on), split tone (when split is turned on), or layered split tone (when layer and split are turned on)
- Tempo
- Accompaniment volume
To use one-touch preset

Select the rhythm you want to use.

Use the MODE switch to select the accompaniment mode you want to use.

Press the ONE TOUCH PRESET button.
- This automatically configures the one-touch preset settings in accordance with the rhythm you selected, and enters synchro start standby.

Play a chord. This will cause the rhythm pattern to start to play automatically.
- Accompaniment is played using the one touch preset settings.
E-40
704A-E-042A

Song Memory Function

You can store up to two separate songs in song memory for later playback. The song memory function records your keyboard play in real time, as you play it.
NOTE.
• To use song memory, first press the RHYTHM button to enter the Rhythm Mode.
Tracks
The song memory of this keyboard records and plays back notes much like a standard tape recorder. There are two tracks, each of which can be recorded separately. Besides notes, each track can be assigned its own tone number. During playback you can adjust the tempo to change the speed of playback.
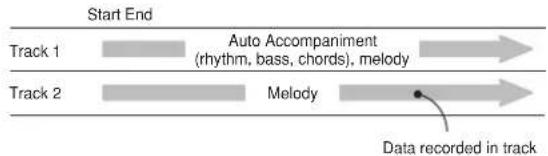
NOTE.
- Track 1 is the basic track, which can be used to record Auto Accompaniment along with the melody. Track 2 can be used for melody only, and is for adding to what is recorded in Track 1.
- Note that each track is independent of the other. This means that if you make a mistake while recording, you need to re-record only the track where the mistake was made.
SONG MEMORY Button Operation
Each press of the SONG MEMORY button cycles through the functions shown below.

flowchart
graph LR
    A["Playback Standby"] --> B["Record Standby"]
    B --> C["Normal"]
    D["SONG MEMORY\nIndicator appears"] --> E["SONG MEMORY\nFlash"] --> F["SONG MEMORY\nUnlit"]
Selecting a Track
Press the TRACK 1 button to select Track 1 and the TRACK 2 button to select Track 2. The letter "L" (left) appears on the display to indicate Track 1 is selected, and the letter "R" (right) appears to indicate Track 2 is selected.
Playback
Each press of the TRACK 1 and TRACK 2 button while the keyboard is in playback standby (see "SONG MEMORY Button Operation" above) toggles playback of the corresponding track on and off. The letter that identifies a track (L or R) appears on the display whenever playback of that track is turned on.

- With the above setting, Track 1 will play while Track 2 will not play.
704A-E-043A

Song Memory Function
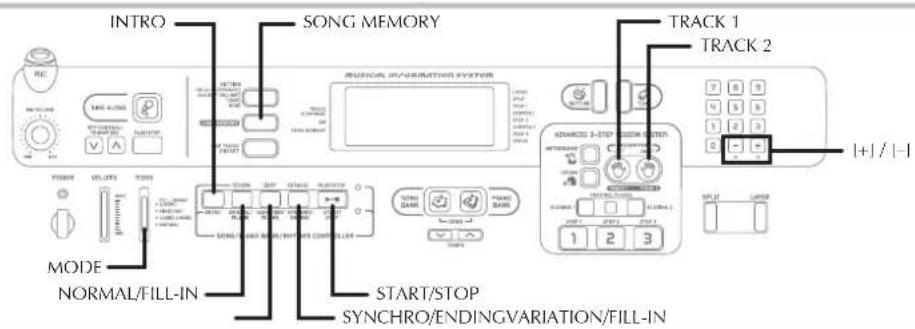
Record
Each press of the TRACK 1 and TRACK 2 button while the keyboard is in record standby (see "SONG MEMORY Button Operation") toggles recording to the corresponding track on and off. The letter that identifies a track (L or R) flashes on the display whenever recording to that track is turned on.
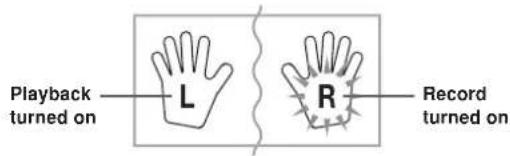
- The above indicates that Track 1 will play back while Track 2 is being recorded to.
Real-time Recording to Track 1
With real-time recording, the notes and chords you play on the keyboard are recorded as you play them.
To record to Track 1 using real-time recording
1 Use the SONG MEMORY button to enter record standby.

2 Use [+] and [-] to select 0 or 1 as the song number.
- The track is not yet selected at this point. - The above song number screen remains on the display for about five seconds. If it disappears before you have a chance to select a song number, use the SONG MEMORY button to display it again.
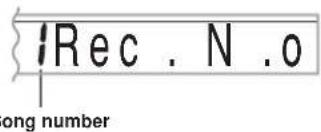
3 Press the TRACK 1 button to select Track 1. • The "L" flashes on the display to indicate the track that will be recorded to.
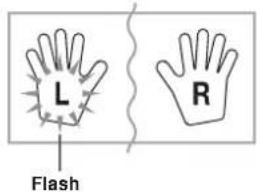
4 Make any of the following settings if you want.
- Tone number (page E-19) - Rhythm number (page E-34) - MÖDE switch (page E-35) - If you are not confident about playing at a fast tempo, try using a slower tempo setting (page E-35).
5 Press the START/STOP button to start real-time recording to Track 1.
6 Play something on the keyboard.
- Any melody and accompaniment you play on the keyboard (including Auto Accompaniment chords played on the accompaniment keyboard) is recorded. - If you use a pedal during recording, pedal operations are also recorded.
E-42
704A-E-044A

Press the START/STOP button to end recording when you are finished playing.
- If you make a mistake while recording, stop the record operation and begin over again from step 1.
NOTE.
- Using real-time recording to record to a track that already contains recorded data replaces the existing recording with the new one.
Track 1 Contents After Real-time Recording
In addition to keyboard notes and accompaniment chords, the following data is also recorded to Track 1 during real-time recording. This data is used whenever Track 1 is played back.
- Tone number
• Rhythm number - INTRO, SYNCHRO/ENDING, NORMAL/FILL-IN, VARIATION/FILL-IN button operations
- Pedal operations
Memory Capacity
The keyboard has memory for approximately 5,100 notes. You can use all 5,100 notes for a single song, or you can divide memory between two different songs.
- The measure number and note number flash on the display whenever remaining memory is less than 100 notes.

- Recording automatically stops (and Auto Accompaniment and rhythm stops playing if they are being used) whenever memory becomes full.
Memory Data Storage
- Anything previously stored in song memory is replaced whenever you make a new recording.
- Memory contents are retained as long as the keyboard is supplied with electrical power. Unplugging the AC adaptor when batteries are not loaded or when loaded batteries are dead cuts off the keyboard's electrical power supply, causing all data stored in song memory to be deleted. Be sure to plug the keyboard into an electrical outlet with the AC adaptor before replacing batteries.
- Turning off the keyboard while a record operation is in progress causes the contents of the track you are currently recording to be lost.
704A-E-045A
Track 1 Real-time Recording Variations
The following describes a number of different variations you can use when recording to Track 1 using real-time recording. All of these variations are based upon the procedure described under "To record to Track 1 using real-time recording" on page E-42.
To record without rhythm
Skip step 5. Real-time recording without rhythm starts when you press a keyboard key.
To start recording with synchro start
In place of step 5, press the SYNCHRO/ENDING button. Auto Accompaniment and recording will both start when you play a chord on the accompaniment keyboard.
To record using an intro, ending, or fill-in
During recording, the INTRO, SYNCHRO/ENDING, NORMAL/FILL-IN, and VARIATION/FILL-IN buttons (pages E-38 through E-40) can all be used as they normally are.
To synchro start Auto Accompaniment with an intro pattern
In place of step 5, press the SYNCHRO/ENDING button and then the INTRO button. Auto Accompaniment will start with the intro pattern when you play a chord on the accompaniment keyboard.
To start Auto Accompaniment part way into a recording In place of step 5, press the SYNCHRO/ENDING button and then play something on the melody keyboard to start. When you reach the point where you want Auto Accompaniment to start, play a chord on the accompaniment keyboard.

Song Memory Function
![SONG MEMORY MUSICIAL INFORMATION SYSTEM TRACK 1 TRACK 2 [+] / [-] MODE START/STOP TEMPO](/content/2026/06/1276895/images/7c09b3f1123cc34b69fadd4fe165623c187ed58216226a4d3e5b28300e882bd8.jpg)
Playing Back from Song Memory
Use the following procedure to play back song memory contents.
To play back from song memory
1 Use the SONG MEMORY button to enter playback standby, and then use [+] and [-] to select 0 or 1 as the song number.

- The above song number screen remains on the display for about five seconds. If it disappears before you have a chance to select a song number, use the SONG MEMORY button to display it again.
2 Press the START/STOP button to start playback of the song you selected. - During memory playback you can use the TRACK 1 and TRACK 2 buttons to turn playback of either track on or off.

- You can use the TEMPO buttons to adjust the tempo.
3 Press the START/STOP button again to stop playback.
NOTE
- During memory playback, the entire keyboard functions as a melody keyboard, regardless of the MODE switch setting.
- You can play along on the keyboard while playing back from song memory. You can also use layer (page E-46) and split (page E-46) to play along with more than one tone.
- You cannot use pause, fast forward or fast reverse operations with song memory playback.
Real-time Recording to Track 2
After you record Track 1, you can use real-time recording to add a melody in Track 2.
To record to Track 2 while playing back Track 1
1 Use the SONG MEMORY button to enter record standby, and then use [+] and [-] to select 0 or 1 as the song number.
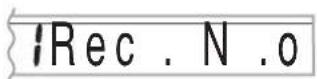
- The track is not yet selected at this point.
2 Press the TRACK 2 button to select Track 2.
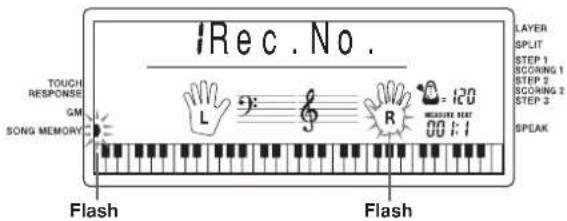
3 Make any of the following settings if you want.
• Tone number (page E-19)
- If you are not confident about playing at a fast tempo, try using a slower tempo setting (page E-35).
4 Press the START/STOP button to start real-time recording to Track 2 along with playback from Track 1.
5 Listening to the playback from Track 1, play what you want to record to Track 2 on the keyboard.
6 Press the START/STOP button to end recording when you are finished playing.
- If you make a mistake while recording, stop the record operation and begin over again from step 1.
NOTE.
- Track 2 is a melody-only track, so chords cannot be recorded there. Because of this, the entire keyboard is a melody keyboard, regardless of the MODE switch setting.
To record to Track 2 without playing back Track 1
1 Use the SONG MEMORY button to enter record standby.
2 Press the TRACK 1 button to turn off playback of Track 1.
3 Continue from step 1 under "To record to Track 2 while playing back Track 1".
- Note that the above procedure does not turn off rhythm and Auto Accompaniment.
Track 2 Contents After Real-time Recording
The following data is recorded to Track 2 during real-time recording.
- Tone number
- Pedal operations
Deleting the Contents of a Specific Track
Use the following procedure to delete all of the data currently recorded in a specific track.
To delete all of the data in a specific track
1 Use the SONG MEMORY button to enter record standby, and then use [+] and [-] to select the song (0 or 1) whose track you want to delete.

2 Hold down the SONG MEMORY button until the track delete screen appears on the display.

3 Use the TRACK 1 or TRACK 2 button to select the track whose data you want to delete. Example: To select Track 1

4 Press the [+] button.
- This deletes the selected track and enters song memory playback standby.
NOTE
- The track delete screen is cleared from the display automatically if you leave the keyboard with the track delete message on the display for about five seconds without doing anything.
- Once you select a track in step 3, you cannot change to a different track without quitting the track delete operation and starting again.
- You cannot select a track for deletion if that track does not contain any data.
- Pressing the SONG MEMORY button while the track delete screen is on the display returns to record standby.
704A-E-047A

Keyboard Settings
![TONE Number buttons [+] / [-] SPLIT LAYER SPLIT](/content/2026/06/1276895/images/8f582fa7359e32f435079b7fe31c8aa80efeda03e2292f15e97ec7e8c38190d0.jpg)
This section describes how to use layer (to play two tones with a single key) and split (to assign different tones to either end of the keyboard), and how to make touch response, transpose, and tuning settings.
NOTE
- Note that the layer and split functions are not available while playing a built-in tune or while using the lesson functions.
Using Layer
Layer lets you assign two different tones (a main tone and a layered tone) to the keyboard, both of which play whenever you press a key. For example, you could layer the FRENCH HORN tone on the BRASS tone to produce a rich and brassy sound.
To layer tones

First select the main tone.
Example: To select "078 BRASS" as the main tone, press the TONE button and then use the number buttons or [+] and [-] buttons to input 0, 7 and then 8.


Press the LAYER button.


Select the layered tone.
Example: To select "077 FRENCH HORN" as the layered tone, use the number buttons or [+] and [-] buttons to input 0, 7 and then 7.


Now try playing something on the keyboard.
- Both tones are played at the same time.

Press the LAYER button again to unlayer the tones and return the keyboard to normal.
LAYER
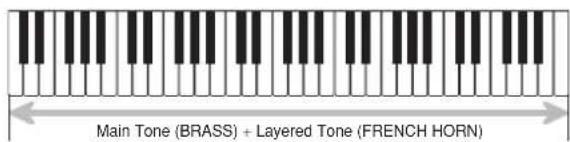
Using Split
With split you can assign two different tones (a main tone and a split tone) to either end of the keyboard, which lets you play one tone with your left hand and another tone with your right hand. For example, you could select STRINGS as the main (high range) tone and PIZZICATO STRINGS as the split (low range) tone, putting an entire string ensemble at your fingertips.
Split also lets you specify the split point, which is the location on the keyboard where the changeover between the two tones occurs.
To split the keyboard
1 First select the main tone.
Example: To select "062 STRINGS" as the main tone, press the TONE button and then use the number buttons or [+] and [-] buttons to input 0, 6 and then 2.

2 Press the SPLIT button.

3 Select the split tone.
Example: To select "060 PIZZICATO STRINGS" as the split tone, use the number buttons or [+] and [-] buttons to input 0, 6 and then 0.

4 Specify the split point. While holding down the SPLIT button, press the keyboard where you want the leftmost key of the high end range to be.
Example: To specify G3 as the split point, press the G3 key.

5 Now try playing something on the keyboard.
- Every key from F#3 and below is assigned the PIZZICATO STRINGS tone, while every key from G3 and above is assigned the STRINGS tone.
6 Press the SPLIT button again to unsplit the keyboard and return it to normal.
SPLIT

Using Layer and Split Together
You can use layer and split together to create a layered split keyboard. It makes no difference whether you layer tones first and then split the keyboard, or split the keyboard and then layer tones. When you use layer and split in combination, the high range of the keyboard is assigned two tones (main tone + layered tone), and the low range two tones (split tone + layered split tone).
To split the keyboard and then layer tones
1 Press the TONE button and then input the tone number of the main tone.

2 Press the SPLIT button and then input the number of the split tone.

• After specifying the split tone, press the SPLIT button to unsplit the keyboard.
3 Press the LAYER button and then input the number of the layered tone.
- Note that you can reverse steps 2 and 3, specifying the layered tone first and then the split tone.
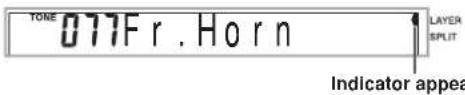
4 Press the SPLIT button or the LAYER button so both of the SPLIT and LAYER indicators are displayed.
5 Input the number of the layered split tone.

6 Specify the split point.
- While holding down the SPLIT button, press the keyboard where you want the leftmost key of the low end range to be.
704A-E-049A

Keyboard Settings
![RHYTHMSETTING Number buttons [+] / [-] KEY CONTROL/ TRANSPOSE SPLIT LAYER SPLIT](/content/2026/06/1276895/images/168aa33347123bebcfa6f32ab49a4eb44e45ede5f58de36b24aabe7ddd3febad.jpg)
7 Play something on the keyboard.
- Press the LAYER button to unlayer the keyboard, and the SPLIT button to unsplit it.
LAYER SPLIT

Transposing the Keyboard
Transpose lets you raise and lower the overall key of the keyboard in semitone units. If you want to play an accompaniment for a vocalist who sings in a key that's different from the keyboard, for example, simply use transpose to change the key of the keyboard.
To transpose the keyboard
1 Press the RHYTHM button to enter the Rhythm Mode.
- Note that you cannot transpose the keyboard while in the Song Bank Mode or Piano Bank Mode.
2 Use the KEY CONTROL/TRANSPOSE buttons (✗) to change the key of the keyboard.
^ : Raises the key by one semitone
V: Lowers the key by one semitone
Example: To transpose the keyboard five semitones upwards.
05Trans.
NOTE
- The keyboard can be transposed within a range of -12 (one octave downwards) to +12 (one octave upwards).
- The default transpose setting is "00" when keyboard power is turned on.
- If you leave the transpose screen on the display for about five seconds without doing anything, the screen is automatically cleared.
- The transpose setting also affects playback from memory and Auto Accompaniment.
- To return the keyboard to its default key, perform the above procedure and press both of the KEY CONTROL/TRANSPOSE buttons (And) at the same time in step 2. You could also use the [+] and [-] buttons to change the transpose setting to "00".
- The effect of a transpose operation depends on the pitch of each note and on the tone you are currently using. If a transpose operation causes a note to be outside of the allowable range for a tone, the same note in the nearest octave within the range will be substituted.
Using Touch Response
When touch response is turned on, the relative volume of sound output by the keyboard is varied in accordance with the amount of pressure applied, just like an acoustic piano.
Touch response provides a choice of three settings, described below.
OFF: This setting turns off touch response. Keyboard pressure does not have any affect on the output notes.
1: This setting provides touch response that is suited for normal play.
2: This setting increases touch response, so stronger keyboard pressure has a greater effect than the "1" setting.
E-48
704A-E-050A

Press the SETTING button until the TOUCH RESPONSE SELECT screen appears.
!Touch

Use the [+] and [-] or [0] and [1] buttons to change the setting.
Example: To select touch response 2.
2Touch
- Touch response is on when touch response indicator is on.

- Touch response is off when touch response indicator is off.
NOTE
- Touch response not only affects the keyboard's internal sound source, it also is output as MIDI data.
- Song memory playback, accompaniment, and external MIDI note data does not affect the touch response setting.
About SETTING button
Each press of the SETTING button cycles through a total of 11 setting screens: the touch response screen, the accompaniment screen, the tuning screen, and 8 MIDI setting screens (page E-52). If you accidentally pass the screen you want to use, keep pressing the SETTING button until the screen appears again.
Adjusting the Accompaniment Volume
You can adjust the volume of the accompaniment parts as a value in the range of 000 (minimum) to 127.
To adjust the accompaniment volume

Press the SETTING button twice to display the accompaniment volume adjustment screen.
071AcompVol
Current accompaniment volume setting

Use the number buttons or the [+]/[-] buttons to change the current volume setting value.
Example: 110
110AcompVol
NOTE
- The current accompaniment volume value that appears in Step 1 automatically clears from the display if you do not input anything within about five seconds.
- Pressing [+] and [-] buttons at the same time automatically sets an accompaniment volume of 077.
704A-E-051A

Keyboard Settings

Tuning the Keyboard
Use the following procedure to fine tune the keyboard to match the tuning of another musical instrument.
To tune the keyboard
1 Press the SETTING button three times to display the tuning screen.
00Tune
2 Use the [+] , [-] , and the number buttons to adjust the tuning value. Example: To lower tuning by 20
-20Tune
NOTE
- The keyboard can be tuned within a range of -50 cents to +50 cents.
* 100 cents is equivalent to one semitone. - The default tuning setting is "00" when keyboard power is turned on.
- If you leave the tuning screen on the display for about five seconds without doing anything, the screen is automatically cleared.
• The tuning setting also affects playback from song memory and Auto Accompaniment. - To return the keyboard to its default tuning, perform the above procedure and press the [+] and [-] buttons at the same time in step 2.
E-50

MIDI
What is MIDI?
The letters MIDI stand for Musical Instrument Digital Interface, which is the name of a worldwide standard for digital signals and connectors that makes it possible to exchange musical data between musical instruments and computers (machines) produced by different manufacturers. MIDI compatible equipment can exchange keyboard key press, key release, tone change, and other data as messages. Though you do not need any special knowledge about MIDI to use this keyboard as a stand-alone unit, MIDI operations require a bit of specialized knowledge. This section provides you with an overview of MIDI that will help to get you going.
MIDI Connections
MIDI messages are send out through the MIDI OUT terminal of one machine to the MIDI IN terminal of another machine over a MIDI cable. To send a message from this keyboard to another machine, for example, you must use a MIDI cable to connect the MIDI OUT terminal of this keyboard to the MIDI IN terminal of the other machine. To send MIDI messages back to this keyboard, you need to use a MIDI cable to connect the other machine's MIDI OUT terminal to the MIDI IN terminal of this keyboard.
To use a computer or other MIDI device to record and playback the MIDI data produced by this keyboard, you must connect the MIDI IN and MIDI OUT terminals of both machines in order send and receive data.

- To use the MIDI THRU function of a connected computer, sequencer, or other MIDI device, be sure to turn this keyboard's LOCAL CONTROL off (page E-54).
MIDI Channels
MIDI allows you to send the data for multiple parts at the same time, with each part being sent over a separate MIDI channel. There are 16 MIDI channels, numbered 1 through 16, and MIDI channel data is always included whenever you exchange data (key press, pedal operation, etc.)
Both the sending machine and the receiving machine must be set to the same channel for the receiving unit to correctly receive and play data. If the receiving machine is set to Channel 2, for example, it receives only MIDI Channel 2 data, and all other channels are ignored.
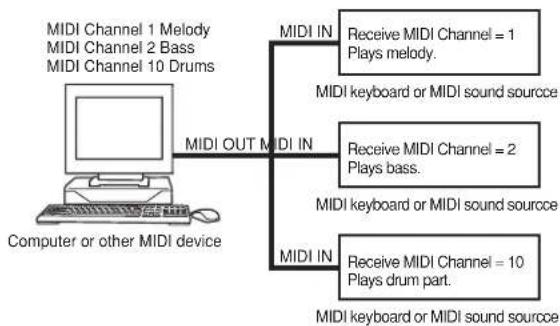
flowchart
graph TD
    A["Computer or other MIDI device"] --> B["MIDI OUT MIDI IN"]
    B --> C["MIDI IN: Receive MIDI Channel = 1 Plays melody."]
    B --> D["MIDI keyboard or MIDI sound source: Receive MIDI Channel = 2 Plays bass."]
    B --> E["MIDI keyboard or MIDI sound source: Receive MIDI Channel = 10 Plays drum part."]
This keyboard is equipped with multi-timbre capabilities, which means it can receive messages over all 16 MIDI channels and play up to 16 parts at the same time.
Keyboard and pedal operations performed on this keyboard are sent out by selecting a MIDI channel (1 to 16) and then sending the appropriate message.

MIDI
![SETTING MUSICAL ST --------------------------------------------- POWER VOLUME PRICE 100% 100% 100% SUN & PARE BACK/WHIP CONTROLER ADAMINED 3-STEP LEMON CENTER INTRODUCTION 1 2 3 Number buttons [+] / [-]](/content/2026/06/1276895/images/76a8d6c2bc8b9b56a56ec1ade243cc442b92eb3924115e2e4f0cf1d423a46019.jpg)
General MIDI
As we have already seen, MIDI makes it possible to exchange musical data between devices produced by different manufacturers. This musical data does not consist of the notes themselves, but rather information on whether a keyboard key is pressed or released, and the tone number.
If tone number 1 on a keyboard produced by Company A is PIANO while tone number 1 on a Company B's keyboard is BASS, for example, sending data from Company A's keyboard to Company B's keyboard produces a result entirely different from the original. If a computer, sequencer or other device with auto accompaniment capabilities is used to produce music data for the Company A keyboard which has 16 parts (16 channels) and then that data is sent to the Company B keyboard which can receive only 10 parts (10 channels), the parts that cannot be played will not be heard.
The standard for the tone numbering sequence, the number of pads, and other general factors that determine the sound source configuration, which was arrived at by mutual consultations by manufacturers, is called General MIDI.
The General MIDI standard defines the tone numbering sequence, the drum sound numbering sequence, the number of MIDI channels that can be used, and other general factors that determine the sound source configuration. Because of this, musical data produced on a General MIDI sound source can be played back using similar tones and identical nuances as the original, even when played on another manufacturers sound source.
This keyboard conforms with General MIDI standards, so it can be connected to a computer or other device and used to play back General MIDI data that has been purchased, downloaded from the Internet, or obtained from any other source.
Changing MIDI Settings
You can use this keyboard in combination with an external sequencer, synthesizer, or other MIDI device to play along with commercially available General MIDI software. This section tells you how to make the MIDI settings required when connecting to an external device.
SETTING Button
Each press of the SETTING button cycles through a total of 11 setting screens: the touch response screen, the accompaniment screen, the tuning screen, and 8 MIDI setting screens. If you accidentally pass the screen you want to use, keep pressing the SETTING button until the screen appears again. Also note that leaving a setting screen is automatically cleared from the display if you do not perform any operation for about five seconds.
GM MODE (Default: Off)
on: This keyboard plays General MIDI data from a computer or other external device. MIDI IN CHORD JUDGE cannot be used when GM MODE is turned on.
oFF: MIDI IN CHORD JUDGE can be used.
1 Press the SETTING button until the GM MODE screen appears.
Example: When GM MODE is turned off

2 Use the [+] and [-] or [0] and [1] buttons to turn the setting on and off.
Example: To turn GM MODE on

Indicator appears
E-52
704A-E-054A
KEYBOARD CHANNEL (Default: 1)
The keyboard channel is the channel used to send MIDI messages from this keyboard to an external device. You can specify one channel from 1 to 16 as the keyboard channel.
1 Press the SETTING button until the KEYBOARD CHANNEL screen appears.
01Keybd Ch
2 Use the [+] , [-] , and the number buttons to change the channel number. Example: To specify channel 4
04Keybd Ch
NAVIGATE CHANNEL (Default: 4)
When MIDI messages are received from an external device for play on this keyboard, the navigate channel is the channel whose note data appears on the display. You can select one channel from 1 to 8 as the navigate channel. Since this setting lets you use the data on any channel of commercially available MIDI software to light on the on-screen keyboard guide, you can analyze how different parts of an arrangement are played.
1 Press the SETTING button until the NAVIGATE CHANNEL screen appears.
4Nav i. Ch
2 Use the [+] , [-] , and the number buttons [1] through [8] to change the channel number. Example: To specify channel 2
2Nav i. Ch
NOTE
• The navigate channel automatically changes to 1 whenever you turn MIDI IN CHORD JUDGE on.

MIDI
![SETTING TRACK 1 TRACK 2 Number buttons [+] / [-]](/content/2026/06/1276895/images/1d6a856c133425660507cc97685d9af135fa1622f4ff97a2faf44afd132b280c.jpg)
To turn off specific sounds before playing back MIDI data that is being received
<>
While playing MIDI data, press the TRACK 2 button.
- This cuts the sound of the navigate channel, but on-screen keyboard guide keys continue to light in accordance with the channel's data as it is received. Press TRACK 2 button again to turn the channel back on.
<>
While playing MIDI data, press the TRACK 1 button.
- This cuts the sound of the channel whose number is one less than the navigate channel, but on-screen keyboard guide keys continue to light in accordance with the channel's data as it is received. Press TRACK 1 button again to turn the channel back on.
Example: If the navigate channel is channel 4, the above operation turns off channel 3. If the navigate channel is channel 1 or 2, the above operation turns off channel 8.
MIDI IN CHORD JUDGE (Default: Off)
on: When a chord specification method is selected by the MODE switch, chords are specified by the keyboard channel note data input from the MIDI IN terminal.
oFF: MIDI IN CHORD JUDGE is turned off.

Press the SETTING button until the MIDI IN CHORD JUDGE screen appears.
offChord

Use the [+] and [-] or [0] and [1] buttons to turn the setting on and off.
Example: To turn MIDI IN CHORD JUDGE on
on Chord
NOTE
- MIDI IN CHORD JUDGE automatically turns off whenever you change the navigate channel to any channel besides 1.
LOCAL CONTROL (Default: On)
This setting determines whether or not the keyboard and sound source of this keyboard are connected internally. When recording to a computer or other external device connected to this keyboard's MIDI IN/OUT terminal, it helps if you turn LOCAL CONTROL off.
on: Anything played on the keyboard is sounded by the internal sound source and simultaneously output as a MIDI message from the MIDI OUT terminal.
oFF: Anything played on the keyboard is output as a MIDI message from the MIDI OUT terminal, without being sounded by the internal sound source. Turn LOCAL CONTROL off whenever you are using the MIDI THRU function of a computer or other external device. Also note that the no sound is produced by the keyboard if LOCAL CONTROL is turned off and no external device is connected.

Press the SETTING button until the LOCAL CONTROL screen appears.
Example: When LOCAL CONTROL is on
on Local

Use the [+] and [-] or [0] and [1] buttons to turn the setting on and off.
Example: To turn LOCAL CONTROL off
offLocal
E-54
704A-E-056A

flowchart
graph TD
    A["Sound Source"] -->|MIDI OUT| B["MIDI OUT"]
    A -->|MIDI IN| C["MIDI IN"]
    C --> D["MIDI THRU"]
    D --> E["MIDI IN"]
    E --> F["Sound Source"]
    style A fill:#f9f,stroke:#333
    style B fill:#ccf,stroke:#333
    style C fill:#cfc,stroke:#333
    style D fill:#fcc,stroke:#333
    style E fill:#cff,stroke:#333
    style F fill:#ffc,stroke:#333
LOCAL CONTROL On
Notes played on the keyboard are sounded by the internal sound source and output as MIDI messages from the MIDI OUT terminal.
Notes played on the keyboard are output as MIDI messages from the MIDI OUT terminal, but not sounded directly by the internal sound source. The MIDI THRU terminal of the connected device can be used to return the MIDI message and sound it on this keyboard's sound source.
LOCAL CONTROL Off
ACCOMP MIDI OUT (Default: Off)
on: Auto Accompaniment is played by the keyboard and the corresponding MIDI message is output from the MIDI OUT terminal.
oFF: Auto Accompaniment MIDI messages are not output from the MIDI OUT terminal.
1 Press the SETTING button until the ACCOMP MIDI OUT screen appears.
Example: When ACCOMP MIDI OUT is off
oFF A comp Out
2 Use the [+] and [-] or [0] and [1] buttons to turn the setting on and off.
Example: To turn ACCOMP MIDI OUT on
on AcompOut
ASSIGNABLE JACK (Default: SUS)
SUS(sustain): Specifies a sustain ^*1 effect when the pedal is depressed.
SoS (sostenuto): Specifies a sostenuto*2 effect when the pedal is depressed.
SFt (soft): Specifies reduction of the sound's volume when the pedal is depressed.
rHy (rhythm): Specifies START/STOP button operation when the pedal is depressed.
1 Press the SETTING button until the ASSIGNABLE JACK screen appears.
Example: When sustain is currently set
SUS Jack
2 Use the [+] and [-] or [0] , [1] , [2] , and [3] buttons to change the setting.
Example: To select rhythm
rHYJack
\*1 Sustain
With piano tones and other sounds that decay, the pedal acts as a damper pedal, with sounds being sustained longer when the pedal is depressed. With organ tones and other continuous sounds, notes played on the keyboard continue to sound until the pedal is released. In either case, the sustain effect is also applied to any notes that are played while the pedal is depressed.
\*2 Sostenuto
This effect performs the same way as sustain, except that it is applied only to notes that are sounding already when the pedal is depressed. It does not affect notes that are played after the pedal is depressed.
704A-E-057A

MIDI
![SETTING RUSICAL INFORMATION SYSTEM Number buttons [+] / [-]](/content/2026/06/1276895/images/f120a797d4ff99ef63e854d891c008c28c3d500fd4639e3a8ca481a8a2a5e74c.jpg)

bar_stacked
| Condition | Keyboard depressed | Sustained notes | | --------- | ------------------ | --------------- | | When SUS is set | 10 | 25 | | Pedal depressed | 15 | 20 | | Pedal released | 10 | 30 | | When SoS is set | 15 | 25 | | Pedal depressed | 10 | 20 | | Pedal released | 10 | 40 |SOUND RANGE SHIFT (Default: On)
on: Shifts low range tones one octave lower and 020 GLOCKENSPIEL/095 PICCOLO one octave higher.
oFF: Plays low range tones and 020 GLOCKENSPIEL/095 PICCOLO at their normal levels.

Press the SETTING button until the SOUND RANGE SHIFT screen appears.


Use the [+] and [-] or [0] and [1] buttons to change the setting.
Example: To turn SOUND RANGE SHIFT off

Messages
There is a wide variety of messages defined under the MIDI standard, and this section details the particular messages that can be sent and received by this keyboard. An asterisk is used to mark messages that affect the entire keyboard. Messages without an asterisk are those that affect only a particular channel.
NOTE ON/OFF
This message sends data when a key is pressed (NOTE ON) or released (NOTE OFF).
A NOTE ON/OFF message include a note number (to indicate note whose key is being pressed or released) and velocity (keyboard pressure as a value from 1 to 127). NOTE ON velocity is always used to determine the relative volume of the note. This keyboard does not receive NOTE OFF velocity data.
Whenever you press or release a key on this keyboard, the corresponding NOTE ON or NOTE OFF message is sent from the MIDI OUT terminal.

flowchart
graph LR
    A["Press the key"] --> B["MIDI OUT Terminal"]
    B --> C["NOTE ON"]
    C --> D["Note number (tone)"]
    C --> E["Velocity (volume)"]
    F["Release the key"] --> G["MIDI OUT Terminal"]
    G --> H["NOTE OFF"]
    H --> I["Note number (tone)"]
    H --> J["Velocity (volume)"]
NOTE
- The pitch of a note depends on the tone that is being used, as shown in the Note Table on page A-1. Whenever this keyboard receives a note number that is outside its range for that tone, the same tone in the nearest available octave is substituted.
E-56
704A-E-058A
PROGRAM CHANGE
This is the tone selection message. PROGRAM CHANGE can contain tone data within the range of 0 to 127.
A PROGRAM CHANGE message is sent out through this keyboard's MIDI OUT terminal whenever you manually change its tone number. Receipt of a PROGRAM CHANGE message from an external machine changes the tone setting of this keyboard.
NOTE.
- This keyboard supports 128 tones in the range 0 to 127. However, Channel 10 is a percussion-only channel, and Channels 0, 8, 16, 24, 25, 32, 40, 48, and 62 correspond to the nine drum set sounds of this keyboard.
PITCH BEND
This message carries pitch bend information for smoothly sliding the pitch upwards or downwards during keyboard play. This keyboard does not send pitch bend data, but it can receive such data.
CONTROL CHANGE
This message adds effects such as vibrato and volume changes applied during keyboard play. CONTROL CHANGE data includes a control number (to identify the effect type) and a control value (to specify the on/off status and depth of the effect).
The following is a list of data that can be send or received using CONTROL CHANGE.
| Effect Control Number | |
| BANK SELECT*1 | 0, 32 |
| ★Modulation 1 | |
| ★Volume 7 | |
| ★Pan 10 | |
| ★Expression 11 | |
| Hold1 64 | |
| Sostenuto 66 | |
| Soft Pedal 67 | |
| RPN*2 | 100 / 101 |
| Data Entry | 6 / 38 |
★ indicates receive-only messages
*1 The BANK SELECT setting of PROGRAM CHANGE can be used to access any of this keyboard's 255 tones when selecting tones on this keyboard from an external machine.
Bank 0: 128 General MIDI tones (PROGRAM CHANGE 0 to 127)
Bank 1: 118 panel tones (PROGRAM CHANGE 0 to 117)
Bank 120: 9 drum sets
(PROGRAM CHANGE 0,8,16,24,25,32,40,48 and 62)
Immediately prior to sending the PROGRAM CHANGE message, send two successive CONTROL CHANGE messages containing the following data.
CONTROL NUMBER=0, CONTROL VALUE=
Example: To select tone number 96 (panel tone "FLUTE 1") from an external MIDI machine.
CONTROL NUMBER=0,
CONTROL VALUE=1 (bank number)
CONTROL NUMBER=32, CONTROL VALUE=0
PROGRAM CHANGE=96
*2 RPN stands for Registered Parameter Number, which is a special control change number used when combining multiple control changes. The parameter being controlled is selected using the control values of control numbers 100 and 101, and then settings are made using the control values of DATA ENTRY (control numbers 6 and 38).
This keyboard uses RPN to control this keyboard's pitch bend sense (pitch change width in accordance with bend data) from another external MIDI device, transpose (this keyboard's overall tuning adjusted in halftone units), and tune (this keyboard's overall fine tuning).
NOTE.
- Sustain (control number 64), sostenuto (control number 66), and soft (control number 67) effects applied using the foot pedal are also applied.

MIDI
ALL SOUND OFF
This message forces all sound being produced over the current channel to turn off, regardless of how the sound is being produced.
ALL NOTES OFF
This message turns off all note data sent from an external device and currently being sounded on the channel.
- Any notes being sustained using a sustain pedal or sostenuto pedal continue to sound until the next pedal off.
RESET ALL CONTROLLERS
This messages initializes pitch bend and all other control changes.
SYSTEM EXCLUSIVE\*
This message is used to control system exclusives, which are tone fine adjustments that are unique to a particular machine. Originally, system exclusives were unique to a particular model, but now there are also universal system exclusives that are applicable to machines that are different models and even produced by different manufacturers.
The following are the system exclusive messages supported by this keyboard.
■GM SYSTEM ON ([F0][7E][7F][09][01][F7])
GM SYSTEM ON is used by an external machine to turn on this keyboard's GM system. GM stands for General MIDI.
- GM SYSTEM ON takes more time to process than other messages, so when GM SYSTEM ON is stored in the sequencer it can take more than 100msec until the next message.
■GM SYSTEM OFF ([F0][7E][7F][09][02][F7])
GM SYSTEM OFF is used by an external machine to turn off this keyboard's GM system.
Troubleshooting
| Problem | Possible Cause | Action | See page |
| No keyboard sound | Power supply problem.Power is not turned on.Volume setting is too low.The MODE switch is in the CASIO CHORD or FINGERED position.LOCAL CONTROL is off.MIDI data has changed the VOLUME and EXPRESSION settings to 0. | Correctly attach the AC adaptor, make sure that batteries poles (+/-) are facing correctly, and check to make sure that batteries are not dead.Press the POWER button to turn on power.Use the VOLUME slider to increase volume.Normal play is not possible on the accompaniment keyboard while the MODE switch is set to CASIO CHORD or FINGERED.Change the MODE switch setting to NORMAL.Turn on LOCAL CONTROL.Adjust both parameters. | Pages E-14,15Page E-19Page E-19Page E-35Page E-54Page E-57 |
| Any of the following symptoms while using battery power.Dim power supply indicatorInstrument does not turn on.Dim, difficult to read displayAbnormally low speaker/ headphone volumeDistortion of sound outputOccasional interruption of sound when playing at high volumesSudden power failure when playing at high volumesDimming of the display when playing at high volumeContinued sound output even after you release a keyA totally different tone may soundAbnormal rhythm pattern and demo tune playAbnormally low microphone volumeDistortion of microphone inputDim power supply indicator when a microphone is usedSudden power failure when using the microphoneLoss of power, sound distortion, or low volume when playing from a connected computer or MIDI device | Low battery power | Replace the batteries with a set of new ones or use the AC adaptor. | Pages E-14, 15 |
| Auto Accompaniment does not sound. | Accompaniment volume is set to 000. | Use the SETTING button to increase the volume. | Page E-49 |
| Sound output does not change when key pressure is varied. | Touch response is turned off. | Press the SETTING button to turn it on. | Page E-48 |
704A-E-061A
![CASIO CTK-593 - ■GM SYSTEM OFF ([F0][7E][7F][09][02][F7]) - 1](/content/2026/06/1276895/images/bad9dcfaaa8bf1b98254e39a0e2313595cbc3cdd73d90dfc8c324f92e63f73b7.jpg)
Troubleshooting
| Problem | Possible Cause | Action | See page |
| On-screen keyboard guide keys stay on. | Keyboard is waiting for play of the correct note during Step 1 or Step 2 play. | 1. Press the lit key to continue with Step 1 or Step 2 play.2. Press the PLAY/STOP button to quit Step 1 or Step 2 play. | PagesE-28, 29PagesE-28, 29 |
| When playing with another MIDI instrument, keys or tunings do not match. | Transpose or tuning is set to a value other than 00. | Use the SETTING button to display the applicable setting screens and set both transpose and tuning to 00. | PagesE-48, 50 |
| Cannot record Auto Accompaniment or rhythm. | Track other than Track 1 is selected as the recording track. | Use the track select buttons to select Track 1. (Track 2 is melody track.) | Page E-42 |
| When playing General MIDI data with a computer, playback notes do not match those produced when lit keys on the on-screen keyboard guide are pressed. | Wrong SOUND RANGE SHIFT setting | Use the SETTING button to display the SOUND RANGE SHIFT screen and correct the setting. | Page E-56 |
| Playing on the keyboard produces an unnatural sound when connected to a computer. | The computer's MIDI THRU function is turned on. | Turn off the MIDI THRU function on the computer or turn off LOCAL CONTROL on the keyboard. | Page E-54 |
| Cannot record chord accompaniment data on a computer. | ACCOMP MIDI OUT is turned off. | Turn on ACCOMP MIDI OUT. | Page E-55 |
| Static noise when a microphone is connected. | 1. Use of a microphone that is a different from the type that is recommended.2. Use of the microphone in the vicinity of fluorescent lighting. | 1. Use a full metal shielded Cannon type microphone.2. Move the microphone away from source of the static. | Page E-32Page E-32 |
| No microphone sound | 1. Microphone volume setting is too low.2. Microphone on/off switch is set to OFF. | 1. Increase the microphone volume setting.2. Change the microphone on/off switch setting to ON. | Page E-32Page E-32 |
Specifications
| Model: CTK-591/CTK-593 | |
| Keyboard: 61 standard-size keys, 5 octaves (with touch response on/off) | |
| Tones: 255 (118 panel tones + 128 General MIDI tones + 9 drum sets); with layer and split | |
| Rhythm Instrument Tones: 61 | |
| Polyphony: 24 notes maximum (12 for certain tones) | |
| Auto AccompanimentRhythm Patterns: 120Tempo: Variable (216 steps, = 40 to 255)Chords: 3 fingering methods (CASIO CHORD, FINGERED, FULL RANGE CHORD)Rhythm Controller: START/STOP, INTRO, NORMAL/NORMAL FILL-IN, VARIATION/VARIATION FILL-IN, SYNCHRO/ENDINGAccomp Volume: 0 to 127 (128 steps)One Touch Presets: Recalls settings for tone, tempo, layer, split, and accompaniment volume in accordance with rhythm. | |
| 3-step Lesson: 3 lessons (Step 1, 2, 3)Playback: Evaluation Mode: Voice Fingering Guide: | Repeat play of a single tuneScoring 1, Scoring 2, Phrase PracticeOn/Off |
| Song Bank, Piano BankNumber of Tunes:Controllers: | 100 (Song Bank/Sing Along: 50, Piano Bank: 50)PLAY/STOP, PAUSE, FF, REW, LEFT/RIGHT |
| Musical Information Function: | Tone, Auto Accompaniment, Song Bank, Piano Bank, Sing Along numbers and names; staff notation, tempo, metronome, measure and beat number, step lesson display, chord name, fingering, pedal operation, Keyboard, Song Bank icon, Piano Bank icon, Sing Along icon, Voice Fingering Guide, Evaluation Mode |
| Sing Along ModeNumber of Tunes:Controllers: | Song Bank/Sing Along: 50PLAY/STOP, KEY CONTROL (25 steps, -12 semitones to +12 semitones) |
| Metronome:Beat Specification: | On/Off1 to 6 |
| Song MemorySongs:Recording Tracks:Recording Method:Memory Capacity: | 22Real-timeApproximately 5,100 notes (total for two songs) |
| MIDI: | 16 multi-timbre receive, GM Level 1 standard |
| Other FunctionsTranspose:Tuning: | 25 steps (-12 semitones to +12 semitones)101 steps (A4 = approximatory 440Hz ±50Cents) |
| TerminalsMIDI Terminals:Assignable Jack:Headphone/Output Terminal:Output Impedance: 100ΩOutput Voltage:Microphone In: | IN, OUTStandard jack (sustain, sostenuto, soft, rhythm start/stop)Stereo standard jack4V (RMS) MAXStandard jack (with microphone volume knob)Input impedance: 3KΩInput sensitivity: 10mV |
| Power Jack: | 9V DC |
704A-E-063A

Specifications
| Power Supply: 2-wayBatteries: 6 D-size batteriesBattery Life: Approximately 6 hours continuous operation on manganese batteriesAC Adaptor: AD-5Auto Power Off: Turns power off approximately 6 minutes after last key operation. Enabled under batter power only, can be disabled manually. | |
| Speaker Output: 2.5W + 2.5W | |
| Power Consumption: 9V 7.7W | — |
| Dimensions: 96.0 x 37.5 x 14.5 cm (37 ^13/_16 x 14^3/_4 x 5^11/_16 inch) | |
| Weight: Approximately 5.3 kg (11.7 lbs)(without batteries) | |
- Design and specifications are subject to change without notice.

Care of your keyboard
Avoid heat, humidity or direct sunlight.
Do not overexpose the instrument to direct sunlight, or place it near an air conditioner, or in any extremely hot place.
Do not use near a TV or radio.
This instrument can cause video or audio interference with TV and radio reception. If this happens, move the instrument away from the TV or radio.
Do not use lacquer, thinner or similar chemicals for cleaning.
Clean the keyboard with a soft cloth dampened in a weak solution of water and a neutral detergent. Soak the cloth in the solution and squeeze until it is almost dry.
Avoid use in areas subjected to temperature extremes.
Extremely high or low temperature can cause figures on the LCD screen to become dim and difficult to read. This condition should correct itself when the keyboard is brought back to normal temperature.
NOTE.
- You may notice lines in the finish of the case of this keyboard. These lines are a result of the molding process used to shape the plastic of the case. They are not cracks or breaks in the plastic, and are no cause for concern.

Appendix/Apéndice
Note Table/Tabla de notas
(1): Tone number/Número de sonido
(2): Maximum polyphony/Polifonía máxima
(3): Range type/Tipo de gama
| (1) | (3)(2) | |
| 0 | 12 | A |
| 1 | 24 | A |
| 2 | 24 | A |
| 3 | 24 | A |
| 4 | 12 | A |
| 5 | 24 | A |
| 6 | 12 | A |
| 7 | 12 | A |
| 8 | 12 | A |
| 9 | 12 | A |
| (1) | (3)(2) | |
| 10 | 12 | A |
| 11 | 24 | A |
| 12 | 12 | A |
| 13 | 12 | A |
| 14 | 12 | A |
| 15 | 12 | A |
| 16 | 12 | A |
| 17 | 12 | A |
| 18 | 24 | A |
| 19 | 24 | A |
| (1) | (3)(2) | |
| 20 | 24 | B |
| 21 | 24 | A |
| 22 | 24 | A |
| 23 | 12 | A |
| 24 | 12 | A |
| 25 | 12 | A |
| 26 | 12 | A |
| 27 | 12 | A |
| 28 | 12 | A |
| 29 | 12 | A |
| (1) | (3)(2) | |
| 30 | 12 | A |
| 31 | 12 | A |
| 32 | 12 | A |
| 33 | 12 | A |
| 34 | 12 | A |
| 35 | 12 | A |
| 36 | 12 | A |
| 37 | 24 | A |
| 38 | 24 | C |
| 39 | 24 | C |
| (1) | (3)(2) | |
| 40 | 12 | C |
| 41 | 24 | C |
| 42 | 12 | C |
| 43 | 24 | C |
| 44 | 12 | C |
| 45 | 24 | C |
| 46 | 24 | C |
| 47 | 24 | C |
| 48 | 12 | C |
| 49 | 24 | C |
| (1) | (3)(2) | |
| 50 | 12 | C |
| 51 | 24 | C |
| 52 | 24 | C |
| 53 | 24 | C |
| 54 | 24 | C |
| 55 | 24 | C |
| 56 | 24 | C |
| 57 | 24 | A |
| 58 | 24 | A |
| 59 | 24 | C |
| (1) | (3)(2) | |
| 60 | 24 | A |
| 61 | 24 | A |
| 62 | 24 | A |
| 63 | 24 | A |
| 64 | 12 | A |
| 65 | 24 | A |
| 66 | 12 | A |
| 67 | 24 | A |
| 68 | 24 | A |
| 69 | 24 | A |
| (1) | (3)(2) | |
| 70 | 12 | A |
| 71 | 12 | A |
| 72 | 12 | A |
| 73 | 24 | A |
| 74 | 24 | C |
| 75 | 24 | C |
| 76 | 24 | A |
| 77 | 12 | C |
| 78 | 24 | A |
| 79 | 12 | A |
| (1) | (3)(2) | |
| 80 | 12 | A |
| 81 | 12 | A |
| 82 | 12 | A |
| 83 | 12 | A |
| 84 | 24 | A |
| 85 | 24 | C |
| 86 | 24 | C |
| 87 | 12 | C |
| 88 | 24 | C |
| 89 | 24 | C |
| (1) | (3)(2) | |
| 90 | 12 | C |
| 91 | 12 | C |
| 92 | 24 | C |
| 93 | 24 | A |
| 94 | 24 | A |
| 95 | 24 | B |
| 96 | 24 | A |
| 97 | 24 | A |
| 98 | 12 | A |
| 99 | 24 | A |
| (1) | (3)(2) | |
| 100 | 24 | A |
| 101 | 24 | A |
| 102 | 12 | A |
| 103 | 12 | A |
| 104 | 12 | A |
| 105 | 12 | A |
| 106 | 12 | A |
| 107 | 12 | A |
| 108 | 12 | A |
| 109 | 24 | A |
| (1) | (3)(2) | |
| 111 | 12 | A |
| 111 | 12 | A |
| 112 | 12 | A |
| 113 | 12 | A |
| 114 | 12 | A |
| 115 | 12 | A |
| 116 | 12 | A |
| 117 | 12 | A |
| 118 | 24 | A |
| 119 | 24 | A |
| (1) | (3)(2) | |
| 120 | 12 | A |
| 121 | 12 | A |
| 122 | 24 | A |
| 123 | 24 | A |
| 124 | 24 | A |
| 125 | 24 | A |
| 126 | 24 | A |
| 127 | 24 | A |
| 128 | 12 | A |
| 129 | 24 | A |
| (1) | (3)(2) | |
| 130 | 24 | A |
| 131 | 24 | A |
| 132 | 24 | A |
| 133 | 12 | A |
| 134 | 12 | A |
| 135 | 12 | A |
| 136 | 12 | A |
| 137 | 12 | A |
| 138 | 24 | A |
| 139 | 12 | A |
| (1) | (3)(2) | |
| 140 | 24 | A |
| 141 | 12 | A |
| 142 | 24 | A |
| 143 | 24 | A |
| 144 | 24 | A |
| 145 | 24 | A |
| 146 | 24 | A |
| 147 | 24 | A |
| 148 | 24 | A |
| 149 | 24 | A |
| (1) | (3)(2) | |
| 150 | 24 | A |
| 151 | 24 | A |
| 152 | 24 | A |
| 153 | 24 | A |
| 154 | 24 | A |
| 155 | 24 | A |
| 156 | 24 | A |
| 157 | 24 | A |
| 158 | 24 | A |
| 159 | 24 | A |
| (1) | (3)(2) | |
| 160 | 24 | A |
| 161 | 24 | A |
| 162 | 24 | A |
| 163 | 24 | A |
| 164 | 24 | A |
| 165 | 24 | A |
| 166 | 24 | A |
| 167 | 24 | A |
| 168 | 24 | A |
| 169 | 12 | A |
| (1) | (3)(2) | |
| 170 | 24 | A |
| 171 | 24 | A |
| 172 | 12 | A |
| 173 | 12 | A |
| 174 | 24 | A |
| 175 | 24 | A |
| 176 | 24 | A |
| 177 | 24 | A |
| 178 | 12 | A |
| 179 | 24 | A |
| (1) | (3)(2) | |
| 180 | 12 | A |
| 181 | 12 | A |
| 182 | 24 | A |
| 183 | 24 | A |
| 184 | 24 | A |
| 185 | 24 | A |
| 186 | 24 | A |
| 187 | 24 | A |
| 188 | 24 | A |
| 189 | 24 | A |
| (1) | (3)(2) | |
| 190 | 24 | A |
| 191 | 24 | A |
| 192 | 24 | A |
| 193 | 24 | A |
| 194 | 12 | A |
| 195 | 24 | A |
| 196 | 24 | A |
| 197 | 24 | A |
| 198 | 12 | A |
| 199 | 12 | A |
| (1) | (3)(2) | |
| 200 | 12 | A |
| 201 | 12 | A |
| 202 | 12 | A |
| 203 | 12 | A |
| 204 | 12 | A |
| 205 | 12 | A |
| 206 | 12 | A |
| 207 | 24 | A |
| 208 | 12 | A |
| 209 | 12 | A |
| (1) | (3)(2) | |
| 210 | 12 | A |
| 211 | 12 | A |
| 212 | 12 | A |
| 213 | 12 | A |
| 214 | 12 | A |
| 215 | 12 | A |
| 216 | 12 | A |
| 217 | 12 | A |
| 218 | 12 | A |
| 219 | 12 | A |
| (1) | (3)(2) | |
| 220 | 12 | A |
| 221 | 12 | A |
| 222 | 24 | A |
| 223 | 24 | A |
| 224 | 24 | A |
| 225 | 24 | A |
| 226 | 24 | A |
| 227 | 12 | A |
| 228 | 12 | A |
| 229 | 24 | A |
| (1) | (3)(2) | |
| 230 | 24 | A |
| 231 | 24 | A |
| 232 | 12 | A |
| 233 | 24 | D |
| 234 | 24 | D |
| 235 | 24 | D |
| 236 | 12 | D |
| 237 | 24 | D |
| 238 | 24 | A |
| 239 | 24 | A |
| (1) | (3)(2) | |
| 240 | 12 | D |
| 241 | 24 | D |
| 242 | 24 | D |
| 243 | 24 | D |
| 244 | 12 | D |
| 245 | 24 | D |
| 246 | 24 | D |
| 247 | 24 | D |
| 248 | 24 | D |
| 249 | 24 | D |
| (1) | (3)(2) | |
| 250 | 24 | D |
| 251 | 24 | D |
| 252 | 24 | D |
| 253 | 24 | D |
| 254 | 24 | D |
NOTE
- The meaning of each range type is described to the right.
NOTA
- El significado de cada tipo de gama se describe a la derecha.
704A-E-131A


A-2
Drum Assignment List
Lista de asignación de batería
| Key/Note number | Drumset 1 STANDARD SET | Drumset 2 ROOM SET | Drumset 3 POWER SET | Drumset 4 ELEC SET | Drumset 5 SYNTH SET | Drumset 6 JAZZ SET | Drumset 7 BRUSH SET | Drumset 8 ORCHESTRA SET | Drumset 9 VOICE SET | |
| E.1 27 | HIGH Q | ← | ← | ← | ← | ← | ← | CLOSED HI-HAT | ← | |
| E1 28 | SLAP | ← | ← | ← | ← | ← | ← | PEDAL HI-HAT | ← | |
| F1 29 | SCRATCH PUSH | ← | ← | ← | ← | ← | ← | OPEN HI-HAT | ← | |
| G1 31 | F#1 30 | SCRATCH PULL | ← | ← | ← | ← | ← | ← | RIDE CYMBAL 1 | ← |
| STICKS | * | * | * | * | * | * | * | * | ||
| A.1 32 | SQUARE CLICK | ← | ← | ← | ← | ← | ← | ← | ← | |
| A1 33 | METRONOME CLICK | ← | ← | ← | ← | ← | ← | ← | ← | |
| B.1 34 | METRONOME BELL | ← | ← | ← | ← | ← | ← | ← | ← | |
| B1 35 | ACOUSTIC BASS DRUM | POWER BASS DRUM 2 | POWER BASS DRUM 2 | POWER BASS DRUM 2 | SYNTH BASS DRUM 2 | JAZZ BASS DRUM 2 | JAZZ BASS DRUM 2 | JAZZ BASS DRUM 1 | SYNTH BASS DRUM 1 | |
| C2 36 | C#2 37 | BASS DRUM | POWER BASS DRUM 1 | POWER BASS DRUM 1 | ELEC BASS DRUM | SYNTH BASS DRUM 1 | JAZZ BASS DRUM 1 | JAZZ BASS DRUM 1 | CONCERT BASS DRUM | VOICE BASS DRUM |
| SIDE STICK | ← | ← | ← | SYNTH RIM SHOT | ← | ← | ← | SYNTH RIM SHOT | ||
| D2 38 | ACOUSTIC SNARE 1 | ROOM SNARE 1 | POWER SNARE 1 | ELEC SNARE | SYNTH SNARE 1 | JAZZ SNARE 1 | BRUSH TAP | CONCERT SNARE | VOICE SNARE | |
| E.2 39 | HAND CLAP | * | * | * | * | * | BRUSH SLAP | CASTANETS | * | |
| E2 40 | ACOUSTIC SNARE 2 | ROOM SNARE 2 | POWER SNARE 2 | DANCE SNARE | SYNTH SNARE 2 | JAZZ SNARE 2 | BRUSH SWIRL | CONCERT SNARE | SYNTH SNARE 1 | |
| F2 41 | F#2 42 | LOW FLOOR TOM | ROOM LOW FLOOR TOM | ROOM LOW FLOOR TOM | ELEC LOW FLOOR TOM | SYNTH LOW FLOOR TOM | ← | ← | TIMPANI F | SYNTH LOW FLOOR TOM |
| CLOSED HI-HAT | ← | ← | ← | SYNTH CLOSED HI-HAT 1 | ← | ← | TIMPANI FI | VOICE CLOSED HI-HAT | ||
| G2 43 | HIGH FLOOR TOM | ROOM HIGH FLOOR TOM | ROOM HIGH FLOOR TOM | ELEC HIGH FLOOR TOM | SYNTH HIGH FLOOR TOM | ← | ← | TIMPANI G | SYNTH HIGH FLOOR TOM | |
| A.2 44 | PEDAL HI-HAT | ← | ← | ← | SYNTH CLOSED HI-HAT 2 | ← | ← | TIMPANI A' | VOICE PEDAL HI-HAT | |
| A2 45 | LOW TOM | ROOM LOW TOM | ROOM LOW TOM | ELEC LOW TOM | SYNTH LOW TOM | * | * | TIMPANI A | SYNTH LOW TOM | |
| B.2 46 | OPEN HI HAT | * | * | * | SYNTH OPEN HI HAT | * | * | TIMPANI B' | VOICE OPEN HI HAT | |
| B2 47 | LOW MID TOM | ROOM LOW MID TOM | ROOM LOW MID TOM | ELEC LOW MID TOM | SYNTH LOW MID TOM | ← | * | TIMPANI B | SYNTH LOW MID TOM | |
| C3 48 | HIGH MID TOM | ROOM HIGH MID TOM | ROOM HIGH MID TOM | ELEC HIGH MID TOM | SYNTH HIGH MID TOM | ← | ← | TIMPANI C | SYNTH HIGH MID TOM | |
| D3 50 | C#3 49 | CRASH CYMBAL 1 | ← | ← | ← | SYNTH CYMBAL | ← | ← | TIMPANI C' | SYNTH CYMBAL |
| HIGH TOM | ROOM HIGH TOM | ROOM HIGH TOM | ELEC HIGH TOM | SYNTH HIGH TOM | * | * | TIMPANI D | SYNTH HIGH TOM | ||
| E.3 51 | RIDE CYMBAL 1 | ← | ← | ← | ← | ← | ← | TIMPANI E' | ← | |
| E3 52 | CHINESE CYMBAL | ← | ← | REVERSE CYMBAL | ← | ← | ← | TIMPANI E | ← | |
| F3 53 | RIDE BELL | * | * | * | * | * | * | TIMPANI F | * | |
| F#3 54 | TAMBOURINE | * | * | * | * | * | * | * | * | |
| G3 55 | SPLASH CYMBAL | ← | ← | ← | ← | ← | ← | ← | ← | |
| A.3 56 | COWBELL | ← | ← | ← | SYNTH COWBELL | ← | ← | ← | SYNTH COWBELL | |
| A3 57 | CRASH CYMBAL 2 | * | * | ← | ← | ← | * | CONCERT CYMBAL 2 | * | |
| B.3 58 | VIBRA-SLAP | ← | ← | ← | ← | ← | ← | ← | ← | |
| B3 59 | RIDE CYMBAL 2 | ← | ← | ← | ← | ← | ← | CONCERT CYMBAL 1 | ← | |
| C4 60 | HIGH BONGO | ← | ← | ← | ← | ← | ← | ← | ← | |
| C#4 61 | LOW BONGO | * | * | * | * | * | * | * | * | |
| D4 62 | MUTE HIGH CONGA | ← | ← | ← | SYNTH MUTE HIGH CONGA | ← | ← | ← | SYNTH MUTE HIGH CONGA | |
| E.4 63 | OPEN HIGH CONGA | ← | ← | ← | SYNTH OPEN HIGH CONGA | ← | ← | ← | SYNTH OPEN HIGH CONGA | |
| E4 64 | LOW CONGA | ← | ← | ← | SYNTH LOW CONGA | ← | ← | ← | SYNTH LOW CONGA | |
| F4 65 | HIGH TIMBALES | * | * | * | * | * | * | * | * | |
| F#4 66 | LOW TIMBALES | ← | ← | ← | ← | ← | ← | ← | ← | |
| G4 67 | HIGH AGOGO | ← | ← | ← | ← | ← | ← | ← | ← | |
| A.4 68 | LOW AGOGO | ← | ← | ← | ← | ← | ← | ← | ← | |
| A4 69 | CABASA | ← | ← | ← | ← | ← | ← | ← | ← | |
| B.4 70 | MARACAS | ← | ← | ← | SYNTH MARACAS | ← | ← | ← | SYNTH MARACAS | |
| B4 71 | SHORT WHISTLE | ← | ← | ← | ← | ← | ← | ← | ← | |
| C5 72 | LONG WHISTLE | * | * | * | * | * | * | * | * | |
| C#5 73 | SHORT GUIRO | * | * | * | * | * | * | * | * | |
| D5 74 | LONG GUIRO | ← | ← | ← | SYNTH CLAVES | ← | ← | ← | SYNTH CLAVES | |
| E.5 75 | CLAVES | ← | ← | ← | ← | ← | ← | ← | ← | |
| E5 76 | HIGH WOOD BLOCK | ← | ← | ← | ← | ← | ← | ← | ← | |
| F5 77 | LOW WOOD BLOCK | ← | ← | ← | ← | ← | ← | ← | ← | |
| F#5 78 | MUTE CUICA | ← | ← | ← | ← | ← | ← | ← | ← | |
| G5 79 | OPEN CUICA | * | * | * | * | * | * | * | * | |
| A.5 80 | MUTE TRIANGLE | * | * | * | * | * | * | * | * | |
| A5 81 | OPEN TRIANGLE | * | * | * | * | * | * | * | * | |
| B.5 82 | SHAKER | ← | ← | ← | ← | ← | ← | ← | ← | |
| B5 83 | JINGLE BELL | ← | ← | ← | ← | ← | ← | ← | ← | |
| C6 84 | BELL TREE | * | * | * | * | * | * | * | * | |
| C#6 85 | CASTANETS | ← | ← | ← | ← | ← | ← | ← | ← | |
| D6 86 | MUTE SURDO | ← | ← | ← | ← | ← | ← | ← | ← | |
| E.6 87 | OPEN SURDO | * | * | * | ← | * | * | * | * | |
| E6 88 | APPLAUSE 1 | * | * | * | * | * | * | * | * | |
| F6 89 | APPLAUSE 2 | * | * | * | * | * | * | * | * | |
704A-E-133A
| Key/Note number | Drumset 1STANDARD SET | Drumset 2ROOM SET | Drumset 3POWER SET | Drumset 4ELEC SET | Drumset 5SYNTH SET | Drumset 6JAZZ SET | Drumset 7BRUSH SET | Drumset 8ORCHESTRA SET | Drumset 9VOICE SET | |
| F#6 90 | FAN-FARE | * | * | * | * | * | * | * | * | |
| G6 91 | - | ← | ← | ← | ← | ← | ← | ← | ← | |
| A,6 92 | ONE | ← | ← | ← | ← | ← | ← | ← | ← | |
| A6 93 | TWO | * | * | * | * | * | * | * | * | |
| B,6 94 | THREE | ← | ← | ← | ← | ← | ← | ← | ← | |
| B6 95 | FOUR | ← | ← | ← | ← | ← | + | ← | ← | |
| C7 96 | FIVE | * | * | * | * | * | * | * | * | |
NOTE.
- “←” Indicates the same sound as STANDARD SET.
NOTA
- “←” Indica el mismo sonido que STANDARD SET.
A-4
704A-E-134A
FINGERED Chord Chart Cuadro de acordes digitados
| aug sus4 | 7 sus4 m | add9 m M7 7 | .5 add9 | ||||
| C | 5.3.1 | 15.2.1 | 5.3.2.1 | 14.8.2.1 | 5.3.2.1 | 15.3.2.1 | 14.3.2.1 |
| C#(D#) | 5.3.1 | 15.2.1 | 5.3.2.1 | 14.8.2.1 | 5.3.2.1 | 15.3.2.1 | 14.3.2.1 |
| D | 5.3.1 | 15.2.1 | 5.3.2.1 | 14.8.2.1 | 5.3.2.1 | 15.3.2.1 | 14.3.2.1 |
| Eb(D#) | 5.3.1 | 15.2.1 | 5.3.2.1 | 14.8.2.1 | 5.3.2.1 | 15.3.2.1 | 14.3.2.1 |
| E | 5.3.1 | 15.2.1 | 5.3.2.1 | 14.8.2.1 | 5.3.2.1 | 15.3.2.1 | 14.3.2.1 |
| F | 5.3.1 | 15.2.1 | 5.3.2.1 | 14.8.2.1 | 5.3.2.1 | 15.3.2.1 | 14.3.2.1 |
| F#(G#) | 5.3.1 | 15.2.1 | 5.3.2.1 | 14.8.2.1 | 5.3.2.1 | 15.3.2.1 | 14.3.2.1 |
| G | 5.3.1 | 15.2.1 | 5.3.2.1 | 14.8.2.1 | 5.3.2.1 | 15.3.2.1 | 14.3.2.1 |
| A#(G#) | 5.3.1 | 15.2.1 | 5.3.2.1 | 14.8.2.1 | 5.3.2.1 | 15.3.2.1 | 14.3.2.1 |
| A | 5.3.1 | 15.2.1 | 5.3.2.1 | 14.8.2.1 | 5.3.2.1 | 15.3.2.1 | 14.3.2.1 |
| Bb(A#) | * | 15.2.1 | 5.3.2.1 | 14.8.2.1 | 5.3.2.1 | 15.3.2.1 | 14.3.2.1 |
| B | * | 15.2.1 | 5.3.2.1 | 14.8.2.1 | 5.3.2.1 | 15.3.2.1 | 14.3.2.1 |
| Foci\Line | M | m | 7 | m | 7 | dM7 m7 | i | 5 | m dim |
| C | [5.3.1] | [5.3.1] | [5.3.2.1] | [5.3.2.1] | [5.3.2.1] | [5.3.2.1] | [5.3.2.1] | [5.3.2] | |
| C#(D,') | [5.3.1] | [5.3.1] | [5.3.2.1] | [5.3.2.1] | [5.3.2.1] | [5.3.2.1] | [5.3.2.1] | [5.3.2] | |
| D | [5.3.1] | [5.3.1] | [5.3.2.1] | [5.3.2.1] | [5.3.2.1] | [5.3.2.1] | [5.3.2.1] | [5.3.2] | |
| E>(D#) | [5.3.1] | [5.3.1] | [5.3.2.1] | [5.3.2.1] | [5.3.2.1] | [5.3.2.1] | [5.3.2.1] | [5.3.2] | |
| E | [5.3.1] | [5.3.1] | [5.3.2.1] | [5.3.2.1] | [5.3.2.1] | [5.3.2.1] | [5.3.2.1] | [5.3.2] | |
| F | [5.3.1] | [5.3.1] | [5.3.2.1] | [5.3.2.1] | [5.3.2.1] | [5.3.2.1] | [5.3.2.1] | [5.3.2] | |
| F#(G,') | [5.3.1] | [5.3.1] | [5.3.2.1] | [5.3.2.1] | [5.3.2.1] | [5.3.2.1] | [5.3.2.1] | [5.3.2] | |
| G | [5.3.1] | [5.3.1] | [5.3.2.1] | [5.3.2.1] | [5.3.2.1] | [5.3.2.1] | [5.3.2.1] | [5.3.2] | |
| A>(G#) | [5.3.1] | [5.3.1] | [5.4.2.1] | [5.4.2.1] | [5.4.2.1] | [5.4.2.1] | [5.4.2.1] | [5.3.2] | |
| A | [5.3.1] | [5.3.1] | [5.4.2.1] | [5.4.2.1] | * | [5.4.2.1] | [5.4.2.1] | [5.3.2] | |
| B>(A#) | [5.3.1] | [5.3.1] | [5.4.2.1] | [5.4.2.1] | * | [5.4.2.1] | [5.4.2.1] | [5.3.2] | |
| B | [5.3.1] | [5.3.1] | [5.3.2.1] | [5.3.2.1] | * | [5.3.2.1] | [5.4.2.1] | [5.3.2] |
NOTE.
- Chords marked with asterisk (*) cannot be played in the Fingered Mode on this keyboard.
• See "Full Range Chords" on page E-37 for information about playing a piece that includes one of the chords marked with an asterisk.
NOTA
- En este teclado, los acordes marcados con asterisco (*) no pueden ejecutarse en el modo de digitación.
- Para informarse acerca de la ejecución de una pieza que incluya uno de los acordes marcados con un asterisco, vea la parte titulada “Acordes de gama completa” en la página S-37.
704A-E-135A
Tone List
Lista de sonidos
| ● Panel Tones/Sonidos de panel |
| PIANO |
| 000 STEREO PIANO |
| 001 GRAND PIANO |
| 002 BRIGHT PIANO |
| 003 MELLOW PIANO |
| 004 MODERN PIANO |
| 005 DANCE PIANO |
| 006 STRINGS PIANO |
| 007 HONKY-TONK |
| 008 OCTAVE PIANO |
| 009 ELEC.GRAND PIANO |
| 010 MODERN E.G.PIANO |
| 011 ELEC.PIANO |
| 012 CHORUSED EP |
| 013 MODERN E.PIANO |
| 014 SOFT E.PIANO |
| 015 E.PIANO PAD |
| 016 HARPSICHORD |
| 017 COUPLED HARPSICHORD |
| 018 CLAVI |
| CHROMATIC PERC |
| 019 CELESTA |
| 020 GLOCKENSPIEL |
| 021 VIBRAPHONE |
| 022 MARIMBA |
| ORGAN |
| 023 DRAWBAR ORGAN 1 |
| 024 DRAWBAR ORGAN 2 |
| 025 DRAWBAR ORGAN 3 |
| 026 PERC.ORGAN 1 |
| 027 PERC.ORGAN 2 |
| 028 ELEC.ORGAN 1 |
| 029 ELEC.ORGAN 2 |
| 030 JAZZ ORGAN |
| 031 ROCK ORGAN |
| 032 CHURCH ORGAN |
| 033 CHAPEL ORGAN |
| 034 ACCORDION |
| 035 OCTAVE ACCORDION |
| 036 BANDONEON |
| 037 HARMONICA |
| GUITAR |
| 038 NYLON STR.GUITAR |
| 039 STEEL STR.GUITAR |
| 040 12 STR.GUITAR |
| 041 JAZZ GUITAR |
| 042 OCT JAZZ GUITAR |
| 043 CLEAN GUITAR |
| 044 ELEC.GUITAR |
| 045 MUTE GUITAR |
| 046 OVERDRIVE GT |
| 047 DISTORTION GT |
| 048 FEEDBACK GT |
| BASS |
| 049 ACOUSTIC BASS050 RIDE BASS051 FINGERED BASS052 PICKED BASS053 FRETLESS BASS054 SLAP BASS055 SAW.SYNTH-BASS056 SQR SYNTH-BASS |
| STR/ORCHESTRA |
| 057 VIOLIN058 SLOW VIOLIN059 CELLO060 PIZZICATO STRINGS061 HARP |
| ENSEMBLE |
| 062 STRINGS063 SLOW STRINGS064 CHAMBER065 SYNTH-STRINGS 1066 SYNTH-STRINGS 2067 CHOIR AAHS068 CHOIRS069 VOICE DOO070 SYNTH-VOICE071 SYNTH-VOICE PAD072 ORCHESTRA HIT |
| BRASS |
| 073 TRUMPET074 TROMBONE075 TUBA076 MUTE TRUMPET077 FRENCH HORN078 BRASS079 BRASS SECTION080 BRASS SFZ081 ANALOG SYNTH-BRASS082 SYNTH-BRASS 1083 SYNTH-BRASS 2 |
| REED |
| 084 SOPRANO SAX085 ALTO SAX 1086 ALTO SAX 2087 BREATHY A.SAX088 TENOR SAX 1089 TENOR SAX 2090 BREATHY T.SAX091 T.SAXYS092 BARITONE SAX093 OBOE094 CLARINET |
| PIPE |
| 095 PICCOLO096 FLUTE 1097 FLUTE 2098 MELLOW FLUTE099 RECORDER100 PAN FLUTE101 WHISTLE |
| SYNTH-LEAD |
| 102 SQUARE LEAD103 SAWTOOTH LEAD104 SINE LEAD105 CALLIOPE106 VOICE LEAD107 BASS+LEAD |
| SYNTH-PAD |
| 108 FANTASY109 WARM PAD110 WARM VOX111 POLYSYNTH112 POLY SAW113 BOWED PAD114 HALO PAD115 ATMOSPHERE116 BRIGHTNESS117 ECHO PAD |
| ● GM Tones/Sonidos GM |
| PIANO |
| 118 PIANO 1 |
| 119 PIANO 2 |
| 120 PIANO 3 |
| 121 HONKY-TONK GM |
| 122 E.PIANO 1 GM |
| 123 E.PIANO 2 GM |
| 124 HARPSICHORD GM |
| 125 CLAVI GM |
| CHROMATIC PERC |
| 126 CELESTA GM |
| 127 GLOCKENSPIEL OCT |
| 128 MUSIC BOX |
| 129 VIBRAPHONE GM |
| 130 MARIMBA GM |
| 131 XYLOPHONE |
| 132 TUBULAR BELL |
| 133 DULCIMER |
| ORGAN |
| 134 ORGAN 1 |
| 135 ORGAN 2 |
| 136 ORGAN 3 |
| 137 PIPE ORGAN |
| 138 REED ORGAN |
| 139 FRENCH ACCORDION |
| 140 HARMONICA GM |
| 141 BANDONEON GM |
| GUITAR |
| 142 NYLON STR.GUITAR OCT |
| 143 STEEL STR.GUITAR OCT |
| 144 JAZZ GUITAR OCT |
| 145 CLEAN GUITAR OCT |
| 146 MUTE GUITAR OCT |
| 147 OVERDRIVE GT OCT |
| 148 DISTORTION GT OCT |
| 149 GT HARMONICS |
| BASS |
| 150 ACOUSTIC BASS OCT |
| 151 FINGERED BASS OCT |
| 152 PICKED BASS OCT |
| 153 FRETLESS BASS OCT |
| 154 SLAP BASS 1 OCT |
| 155 SLAP BASS 2 OCT |
| 156 SYNTH-BASS 1 |
| 157 SYNTH-BASS 2 |
| STR/ORCHESTRA |
| 158 VIOLIN GM |
| 159 VIOLA |
| 160 CELLO GM |
| 161 CONTRABASS |
| 162 TREMOLO STRINGS |
| 163 PIZZICATO GM |
| 164 HARP GM |
| 165 TIMPANI |
704A-E-137A

Appendix/Apéndice
| ENSEMBLE |
| 166 ORCHESTRA STRINGS 1 |
| 167 ORCHESTRA STRINGS 2 |
| 168 SAW.SYNTH-STRINGS 1 |
| 169 SAW.SYNTH-STRINGS 2 |
| 170 VOICE AHH |
| 171 VOICE DOO GM |
| 172 SYNTH-VOICE GM |
| 173 ORCHESTRA HIT GM |
| BRASS |
| 174 TRUMPET GM |
| 175 TROMBONE OCT |
| 176 TUBA OCT |
| 177 MUTE TRUMPET GM |
| 178 FRENCH HORN OCT |
| 179 BRASS GM |
| 180 SYNTH-BRASS 1 GM |
| 181 SYNTH-BRASS 2 GM |
| REED |
| 182 SOPRANO SAX GM |
| 183 ALTO SAX OCT |
| 184 TENOR SAX OCT |
| 185 BARITONE SAX OCT |
| 186 OBOE GM |
| 187 ENGLISH HORN |
| 188 BASSOON |
| 189 CLARINET GM |
| PIPE |
| 190 PICCOLO OCT |
| 191 FLUTE GM |
| 192 RECORDER GM |
| 193 PAN FLUTE GM |
| 194 BOTTLE BLOW |
| 195 SHAKUHACHI |
| 196 WHISTLE GM |
| 197 OCARINA |
| SYNTH-LEAD |
| 198 SQUARE WAVE |
| 199 SAWTOOTH WAVE |
| 200 CALLIOPE LEAD |
| 201 CHIFF LEAD |
| 202 CHARANG |
| 203 SOLO VOX |
| 204 FIFTH LEAD |
| 205 BASS LEAD |
| SYNTH-PAD |
| 206 NEW AGE |
| 207 WARM SYNTH |
| 208 POLYSYNTH GM |
| 209 SPACE CHOIR |
| 210 BOWED GLASS |
| 211 METAL PAD |
| 212 HALO SYNTH |
| 213 SWEEP PAD |
| SYNTH-SFX |
| 214 RAIN DROP |
| 215 SOUND TRACK |
| 216 CRYSTAL |
| 217 ATMOSPHERE PAD |
| 218 BRIGHT PAD |
| 219 GOBLINS |
| 220 ECHOES |
| 221 SF |
| ETHNIC |
| 222 SITAR |
| 223 BANJO |
| 224 SHAMISEN |
| 225 KOTO |
| 226 THUMB PIANO |
| 227 BAG PIPE |
| 228 FIDDLE |
| 229 SHANAI |
| 230 TINKLE BELL |
| PERCUSSIVE |
| 231 AGOGO |
| 232 STEEL DRUMS |
| 233 WOOD BLOCK |
| 234 TAIKO |
| 235 MELODIC TOM |
| 236 SYNTH-DRUM |
| 237 REVERSE CYMBAL |
| SOUND EFFECTS |
| 238 GT FRET NOISE |
| 239 BREATH NOISE |
| 240 SEASHORE |
| 241 BIRD |
| 242 TELEPHONE |
| 243 HELICOPTER |
| 244 APPLAUSE |
| 245 GUNSHOT |
| ● Drum Sounds/Sonidos de batería |
| 246 STANDARD SET |
| 247 ROOM SET |
| 248 POWER SET |
| 249 ELECTRONIC SET |
| 250 SYNTH SET |
| 251 JAZZ SET |
| 252 BRUSH SET |
| 253 ORCHESTRA SET |
| 254 VOICE SET |
Rhythm List
Lista de ritmos
| POPS I |
| 000 POP 1 |
| 001 WORLD POP |
| 002 SOUL BALLAD 1 |
| 003 POP SHUFFLE |
| 004 POP BALLAD |
| 005 POP 2 |
| 006 BALLAD |
| 007 FUSION SHUFFLE |
| 008 POP 3 |
| 009 SOUL BALLAD 2 |
| POPS II |
| 010 16 BEAT 1 |
| 011 16 BEAT 2 |
| 012 16 BEAT 3 |
| 013 8 BEAT 1 |
| 014 8 BEAT 2 |
| 015 8 BEAT 3 |
| 016 POP 4 |
| 017 DANCE POP |
| 018 POP FUSION |
| 019 POP WALTZ |
| DANCE/FUNK |
| 020 JUNGLE |
| 021 RAVE |
| 022 TECHNO |
| 023 GROOVE SOUL |
| 024 DISCO |
| 025 EURO BEAT |
| 026 RAP |
| 027 TRANCE |
| 028 FUNK |
| 029 VERY FUNKY |
| ROCK I |
| 030 ROCK WALTZ |
| 031 SLOW ROCK 1 |
| 032 SLOW ROCK 2 |
| 033 SOFT ROCK 1 |
| 034 SOFT ROCK 2 |
| 035 SOFT ROCK 3 |
| 036 FOLKIE POP |
| 037 POP ROCK 1 |
| 038 60'S SOUL |
| 039 POP ROCK 2 |
| ROCK II |
| 040 ROCK 1 |
| 041 ROCK 2 |
| 042 POP ROCK 3 |
| 043 RIFF ROCK |
| 044 HEAVY METAL |
| 045 50'S ROCK |
| 046 TWIST |
| 047 NEW ORLNS R&R |
| 048 CHICAGO BLUES049 R&B |
| JAZZ/FUSION |
| 050 BIG BAND051 JAZZ VOICES052 SLOW SWING053 SWING 1054 SWING 2055 FOX TROT056 MODERN JAZZ057 ACID JAZZ058 LATIN FUSION059 JAZZ WALTZ |
| EUROPEAN |
| 060 POLKA 1061 POLKA 2062 MARCH 1063 MARCH 2064 SLOW WALTZ065 VIENNESE WALTZ066 WALTZ 1067 FRENCH WALTZ068 SERENADE069 TANGO |
| LATIN I |
| 070 BOSSA NOVA 1071 BOSSA NOVA 2072 SAMBA 1073 SAMBA 2074 JAZZ SAMBA075 MAMBO076 RHUMBA077 CHA-CHA-CHA078 MERENGUE079 BOLERO |
| LATIN II/VARIOUS I |
| 080 SALSA081 REGGAE082 PUNTA083 CUMBIA084 PASODOBLE085 RUMBA CATALANA086 SEVILLANA087 SKA088 TEX-MEX089 FOLKLORE |
| VARIOUS II |
| 090 COUNTRY091 BLUEGRASS092 TOWNSHIP093 FAST GOSPEL094 SLOW GOSPEL095 RAI096 ADANI |
| 097 BALADI098 ENKA099 STR QUARTET |
| FOR PIANO I |
| 100 PIANO BALLAD 1101 PIANO BALLAD 2102 PIANO BALLAD 3103 EP BALLAD 1104 EP BALLAD 2105 BLUES BALLAD106 MELLOW JAZZ107 JAZZ COMBO108 RAGTIME109 BOOGIE-WOOGIE |
| FOR PIANO II |
| 110 ARPEGGIO 111 ARPEGGIO 2112 ARPEGGIO 3113 PIANO BALLAD 4114 6/8 MARCH115 MARCH 3116 2 BEAT117 WALTZ 2118 WALTZ 3119 WALTZ 4 |
704A-E-139A

Appendix/Apéndice
Song List/Lista de canciones
Song Bank/Sing Along List
Lista del banco de canciones/cantando en conjunto
00 HERO ("SPIDER-MAN" THEME)
01 COMPLICATED
02 HERO
03 MY HEART WILL GO ON
("TITANIC" THEME)
04 HAPPY BIRTHDAY TO YOU
05 WE WISH YOU A MERRY CHRISTMAS
06 JINGLE BELLS
07 SILENT NIGHT
08 JOY TO THE WORLD
09 O CHRISTMAS TREE
10 WHEN THE SAINTS GO MARCHING IN
11 GREENSLEEVES
12 AMAZING GRACE
13 AULD LANG SYNE
14 TWINKLE TWINKLE LITTLE STAR
15 UNDER THE SPREADING CHESTNUT TREE
16 SUMM SUMM SUMM
17 LONG LONG AGO
18 ACH DU LIEBER AUGUSTIN
19 SIPPIN' CIDER THROUGH A STRAW
20 GRANDFATHER'S CLOCK
21 MICHAEL ROW THE BOAT ASHORE
22 DANNY BOY
23 ANNIE LAURIE
24 MY BONNIE
25 MY DARLING CLEMENTINE
26 J'AI PERDU LE DO DE MA CLARINETTE
27 I'VE BEEN WORKING ON THE RAILROAD
28 LITTLE BROWN JUG
29 AURA LEE
30 OH! SUSANNA
31 HOUSE OF THE RISING SUN
32 SHE WORE A YELLOW RIBBON
33 CAMPTOWN RACES
34 SWANEE RIVER (OLD FOLKS AT HOME)
35 YANKEE DOODLE
36 RED RIVER VALLEY
37 TURKEY IN THE STRAW
38 MY OLD KENTUCKY HOME
39 HOME ON THE RANGE
40 JAMAICA FAREWELL
41 LA CUCARACHA
42 ALOHA OE
43 SAKURA SAKURA
44 AJO MAMMA
45 LA PALOMA
46 SANTA LUCIA
47 TROIKA
48 SZLA DZIEWECZKA
49 WALTZING MATILDA
Piano Bank List
Lista del banco de piano
ETUDES
00 MINUET (J.S.BACH)
01 GAVOTTE (GOSSEC)
02 ARABESQUE (BURGMÜLLER)
03 CHOPSTICKS
04 FRÖHLICHER LANDMANN
05 INVENTIONEN no.1
06 AVE MARIA (GOUNOD)
07 JESUS BLEIBET MEINE FREUDE
08 CANON (PACHELBEL)
09 SONATINA op.36 no.1 1st Mov.
10 SONATA op.13 "PATHÉTIQUE" 2nd Mov.
11 SONATA K.331 1st Mov.
12 PRELUDE op.28 no.7 (CHOPIN)
13 VON FREMDEN LÄNDERNUND MANSCHEN
14 JE TE VEUX
15 RÊVERIE
16 ODE TO JOY
17 SERENADE FROM
"EINE KLEINE NACHTMUSIK"
18 GOING HOME FROM
"FROM THE NEW WORLD"
19 BEAUTIFUL DREAMER
CONCERT PIECES
20 FÜR ELISE
21 TURKISH MARCH (MOZART)
22 THE ENTERTAINER
23 MAPLE LEAF RAG
24 GYMNOPÉDIES no.1
25 ETUDE op.10 no.3
"CHANSON DE L'ADIEU"
26 SONATA op.27 no.2
"MOONLIGHT" 1st Mov.
27 HUNGARIAN DANCES no.5
28 TRÄUMEREI
29 LA FILLE AUX CHEVEUX DE LIN
30 HUMORESKE (DVO ÁK) R
31 PROMENADE FROM
"TABLEAUX D'UNE EXPOSITION"
32 MOMENTS MUSICAUX op.94 no.3
33 LE CYGNE FROM
"LE CARNAVAL DES ANIMAUX"
34 VALSE op.64 no.1 "PETIT CHIEN"
35 CHANSON DU TOREADOR FROM
"CARMEN"
36 LARGO (HÄNDEL)
37 WEDDING MARCH FROM
"MIDSUMMER NIGHT'S DREAM"
38 AMERICAN PATROL
39 CSIKOS POST
40 DOLLY'S DREAMING AND AWAKENING
41 LA CHEVALERESQUE
42 SONATA K.545 1st Mov.
43 LA PRIÈRE D'UNE VIERGE
44 TURKISH MARCH (BEETHOVEN)
45 NOCTURNE op.9 no.2 (CHOPIN)
46 LIEBESTRÄUME no.3
47 MARCHE MILITAIRE no.1
48 BLUMENLIED
49 GRANDE VALSE BRILLANTE op.18 no.1



704A-E-142A



704A-E-143A


704A-E-144A


704A-E-145A

Models CTK-591/CTK-593 MIDI Implementation Chart Version: 1.0
| Function ... Transmitted Recognized Remarks | |||
| Basic Default Channel Changed | 1-16*11-16 | 1-161-16 | *1Hold in memory as long as the power is supplied |
| Default Mode Messages Altered | Mode 3X*************** | Mode 3X*************** | |
| Note Number: True voice | 36 - 96*************** | 0-12712 - 108*2 | *2See Note Table on page A-1. |
| Velocity Note ON Note OFF | O 9nH v = 1-127X 9nH v = 0 | O 9nH v = 1-127X 9nH v = 0, 8nH v = XX | XX = no relation |
| After Key's Touch Ch's | XX | X O^*3 | |
| Pitch Bender | X | O | |
| Control 11 Change 64 | 0,3216,387106667100, 101 | OX O^*4 XXX O^*5 O^*5 O*5O*4 | OO*3O*4OOOOOOO |
| 67100, 101 | O*5O*4 | O*4 | |
704A-E-146A
| Change | 64 | O^*5 | O | Hold1 |
| 66 | O^*5 | O | Sostenuto | |
| 67 | O^*5 | O | Soft pedal | |
| 100, 101 | O^*4 | O^*4 | RPN LSB, MSB | |
| 120 | X | O | All sound off | |
| 121 | X | O | Reset all controller | |
| Program Change: True # | O 0-127 | O 0-127 | ||
| ********** | ********** | |||
| System Exclusive | O^*6 | O^*6 | ||
| System : Song Pos Common : Song Sel : Tune | X | X | ||
| X | X | |||
| X | X | |||
| System : Clock Real Time : Commands | O | X | ||
| O | X | |||
| Aux : Local ON/OFF : All notes OFF Messages : Active Sense : Reset | X | X | ||
| X | O | |||
| X | O | |||
| X | X | |||
| Remarks | *3 Modulation and after touch for each channel are the same effect.*4 FINE TUNE, COARSE TUNE send/receive, and PITCH BEND SENSE, RPN Null receive*5 In accordance with assignable jack setting*6 GM on/off GM ON : [F0] [7E] [7F] [09] [01] [F7] GM OFF : [F0] [7E] [7F] [09] [02] [F7] | |||
Mode 1: OMNI ON, POLY Mode 2: OMNI ON, MONO Mode 3: OMNI OFF, POLY Mode 4: OMNI OFF, MONO O: Yes X: No
704A-E-147A

This recycle mark indicates that the packaging conforms to the environmental protection legislation in Germany.
Esta marca de reciclaje indica que el empaquetado se ajusta a la legislación de protección ambiental en Alemania.
CASIO®


- CTK-591 CTK-593
- NOTICE
- FCC WARNING
- Important!
- Safety Precautions
- Symbols
- DANGER
- WARNING
- CAUTION
- Symbol Examples
- Alkaline Batteries
- Smoke, Strange Odor, Overheating
- AC Adaptor
- Batteries
- Do not incinerate the product.
- Water and Foreign Matter
- Disassembly and Modification
- Dropping and Impact
- Plastic Bags
- Keep off of the product and stand.\*
- Location
- Relocating the Product
- Cleaning
- Connectors
- Display Screen
- Sound Volume
- Heavy Objects
- Correct Stand\* Assembly
- Main Features
- □255 tones
- □PIANO BANK button
- □Advanced 3-Step Lesson System
- □Sing-along
- ☐100 built-in tunes, including piano pieces
- □120 rhythms
- □Auto Accompaniment
- □Musical Information System
- □Song Memory function
- □General MIDI compatibility
- □Display Indications for Received MIDI Messages
- Contents
- Safety Precautions ...... E-1
- Main Features ...... E-5
- Contents..... E-6
- General Guide...... E-8
- Quick Reference ...... E-12
- Power Supply ...... E-14
- Connections ...... E-17
- Basic Operations...... E-19
- Practicing on the Piano ..... E-21
- Playing a Built-in Tune..... E-22
- Advanced 3-Step Lesson ... E-26
- Using a Microphone for Sing Along ....E-32
- Auto Accompaniment ...... E-34
- Song Memory Function ..... E-41
- Keyboard Settings ...... E-46
- MIDI.... E-51
- Troubleshooting ...... E-59
- Specifications ...... E-61
- Care of your keyboard ..... E-63
- Appendix ...... A-1
- MIDI Implementation Chart
- NOTE.
- ●SONG/PIANO BANK/RHYTHM CONTROLLER
- ●ADVANCED 3-STEP LESSON SYSTEM
- \*1 Attaching the Score Stand
- General Guide
- Controller Indicators
- Song/Piano Bank controller indicator
- Rhythm controller indicator
- About the display
- add 69
- aug+5
- b b b b b b b b b b b b b b b b b b b b b b b b b b b b b b b b b b b b b b b b b b b b b b b b b b b b b b b b b b b b b b b b b b b b b b b b b b b b b b b b b b b b b b b b b b b b b b b b b b b b
- Quick Reference
- To play the keyboard
- If you selected lesson Step 1
- If you selected lesson Step 2
- To play an Etude or Concert Piece tune
- Power Supply
- Using batteries
- To load batteries
- Important Battery Information
- Using the AC Adaptor
- Auto Power Off
- NOTE
- To disable Auto Power Off
- Settings and Memory Contents
- Settings
- Main Keyboard Settings
- Song Memory Contents
- Electrical Power
- Power Requirements
- Connections
- Phones/Output Terminal
- PREPARATION
- [Rear Panel]
- Connecting Headphones (Figure ①)
- Audio Equipment (Figure ②)
- Musical Instrument Amplifier (Figure 3)
- Connection Example
- Connecting to a Computer or Other Equipment
- Assignable jack Terminal
- Sustain Pedal
- Sostenuto Pedal
- Soft Pedal
- Rhythm Start/Stop Pedal
- Microphone Jack
- Accessories and Options
- Basic Operations
- Selecting a Tone
- To select a tone
- Polyphony
- Digital Sampling
- Practicing on the Piano
- Using the PIANO BANK Button
- To use the piano bank
- Playing a Built-in Tune
- To play back a Song Bank tune
- To play back a Piano Bank tune
- Musical Information System
- Adjusting the Tempo
- To set the tempo
- To pause playback
- To fast reverse
- To fast forward
- To change the melody tone
- To play all tunes in succession
- Advanced 3-Step Lesson
- 3-Step Lesson
- Step 1 - Master the timing.
- Step 2 - Master the notes.
- Step 3 - Play at normal speed.
- Tune Types and Their Parts
- Auto Accompaniment Tunes (Song Bank)
- Two-hand Tunes (Piano Bank)
- Display Contents During 3-step Lesson Play
- Note Pitch
- Note Length
- Next Note
- Series of Same Pitch Notes
- 3-step Lesson Tempo Setting
- Evaluation Mode
- Evaluation Mode Display
- Using Tone and Voice Guide
- Expressions
- Evaluation Results
- Evaluation Rank Display Messages and Sound Effects
- Using the Lesson Functions and Evaluation Mode
- Step 1 – Master the timing.
- Evaluation 1: Find out how the keyboard evaluates your Step 1 play.
- Evaluation 2: Find out how the keyboard evaluates your Step 2 play.
- Step 3 – Play at normal speed.
- Using the Phrase Practice Mode
- To play back the practice phrase
- To practice the practice phrase
- Voice Fingering Guide
- To turn voice fingering guide on or off
- Using the Metronome
- To start the metronome
- Using a Microphone for Sing Along
- Using the microphone jack
- Required Microphone Specifications
- Howling (Feedback Noise)
- Static Noise
- To use a microphone for sing along
- Auto Accompaniment
- Selecting a Rhythm
- To select a rhythm
- Playing a Rhythm
- To play a rhythm
- Using Auto Accompaniment
- To use Auto Accompaniment
- CASIO CHORD
- Chord Types
- FINGERED
- FULL RANGE CHORD
- < Music Example >
- Using an Intro Pattern
- To insert an intro
- Using a Fill-in Pattern
- To insert a fill-in
- Using a Rhythm Variation
- To insert the variation rhythm pattern
- Using a Fill-in Pattern with a Variation Rhythm
- To insert a fill-in into a rhythm variation
- Synchro Starting Accompaniment with Rhythm Play
- To use synchro start
- Finishing with an Ending Pattern
- To finish with an ending pattern
- Using One-touch Preset
- To use one-touch preset
- Song Memory Function
- Tracks
- SONG MEMORY Button Operation
- Selecting a Track
- Playback
- Record
- Real-time Recording to Track 1
- To record to Track 1 using real-time recording
- Track 1 Contents After Real-time Recording
- Memory Capacity
- Memory Data Storage
- Track 1 Real-time Recording Variations
- To record without rhythm
- To start recording with synchro start
- To record using an intro, ending, or fill-in
- To synchro start Auto Accompaniment with an intro pattern
- Playing Back from Song Memory
- To play back from song memory
- Real-time Recording to Track 2
- To record to Track 2 while playing back Track 1
- To record to Track 2 without playing back Track 1
- Track 2 Contents After Real-time Recording
- Deleting the Contents of a Specific Track
- To delete all of the data in a specific track
- Keyboard Settings
- Using Layer
- To layer tones
- Using Split
- To split the keyboard
- Using Layer and Split Together
- To split the keyboard and then layer tones
- Transposing the Keyboard
- To transpose the keyboard
- Using Touch Response
- About SETTING button
- Adjusting the Accompaniment Volume
- To adjust the accompaniment volume
- Tuning the Keyboard
- To tune the keyboard
- MIDI
- What is MIDI?
- MIDI Connections
- MIDI Channels
- General MIDI
- Changing MIDI Settings
- SETTING Button
- GM MODE (Default: Off)
- KEYBOARD CHANNEL (Default: 1)
- NAVIGATE CHANNEL (Default: 4)
- To turn off specific sounds before playing back MIDI data that is being received
- MIDI IN CHORD JUDGE (Default: Off)
- LOCAL CONTROL (Default: On)
- ACCOMP MIDI OUT (Default: Off)
- ASSIGNABLE JACK (Default: SUS)
- \*1 Sustain
- \*2 Sostenuto
- SOUND RANGE SHIFT (Default: On)
- Messages
- NOTE ON/OFF
- PROGRAM CHANGE
- PITCH BEND
- CONTROL CHANGE
- ALL SOUND OFF
- ALL NOTES OFF
- RESET ALL CONTROLLERS
- SYSTEM EXCLUSIVE\*
- ■GM SYSTEM ON ([F0][7E][7F][09][01][F7])
- ■GM SYSTEM OFF ([F0][7E][7F][09][02][F7])
- Troubleshooting
- Specifications
- Care of your keyboard
- Avoid heat, humidity or direct sunlight.
- Do not use near a TV or radio.
- Do not use lacquer, thinner or similar chemicals for cleaning.
- Avoid use in areas subjected to temperature extremes.
- Appendix/Apéndice
- Note Table/Tabla de notas
- Tone List
- Lista de sonidos
- Rhythm List
- Lista de ritmos
- Song List/Lista de canciones
- Song Bank/Sing Along List
- Lista del banco de canciones/cantando en conjunto
- Piano Bank List
- Lista del banco de piano
- ETUDES
- CONCERT PIECES
- CASIO®
Zīmols : CASIO
Modelis : CTK-593
Kategorija : Klaviatūra