
T1432AFPS5 - 세탁기 LG - 무료 사용 설명서
기기 매뉴얼을 무료로 찾기 T1432AFPS5 LG PDF 형식.


| 제품 유형 | 세탁기 |
| 브랜드 | LG |
| 모델 | T1432AFPS5 |
| 용량 (kg) | 14 |
| 최대 탈수 속도 (rpm) | 1400 |
| 에너지 효율 등급 | A+++ |
| 높이 (mm) | 850 |
| 너비 (mm) | 600 |
| 깊이 (mm) | 590 |
| 순중량 (kg) | 70 |
| 전원 공급 | 220-240V, 50Hz |
| 수압 (bar) | 0.5-8 |
| 급수 연결 | 냉수 전용 |
| 세탁 소음 (dB) | 54 |
| 탈수 소음 (dB) | 74 |
| 프로그램 | 면, 합성, 섬세, 울, 퀵 30, 스팀, 등 |
| 특수 기능 | 스팀, 스마트 진단, AI DD, 터보워시, 에너지 세이버 |
| 안전 기능 | 어린이 잠금, 넘침 방지, 불균형 감지 |
| 자동 세척 | 드럼 클린, 배수 필터 청소 알림 |
| 예비 부품 가용성 | 예, LG 공식 부품 |
| 모터 유형 | 인버터 다이렉트 드라이브 |
| 모터 보증 | 10년 |
자주 묻는 질문 - T1432AFPS5 LG
사용자 질문 T1432AFPS5 LG
0 질문 이 기기에 대해. 알고 있는 것에 답하거나 자신의 질문을 하세요.
이 기기에 대한 새로운 질문하기
기기 설명서 다운로드 세탁기 무료 PDF 형식! 매뉴얼 찾기 T1432AFPS5 - LG 전자 기기를 다시 손에 넣으세요. 이 페이지에는 기기 사용에 필요한 모든 문서가 게시되어 있습니다. T1432AFPS5 브랜드 LG.
사용 설명서 T1432AFPS5 LG
OWNER'S MANUAL
WASHING MACHINE
Please read this manual carefully before operating your washing machine and retain it for future reference.
T1732AFPS5
T1632AFPS5
T1532AFPS5
T1432AFPS5
MFL69022785 www.lg.com
Product Features

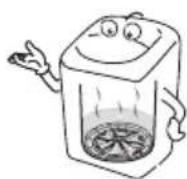
The Turbo Drum DD washing machine does not operate with the lid open.
If the lid is opened during wash, rinse and spin cycles, the machine will stop automatically.

Please close the door gently. Closing the door in an aggressive manner can cause damage and or injury.
Smart Drum achieved by DD Motor Technology
● Smart Drum with Drum Washing Type is more hygienic and cleaner washer tub that protects the fabric and prevents damages.
Automatic heating system
- Using heating type laundry like drum type laundry machine, it has a uniform laundry performance and sterilizing effect even with cold water.
Normal logic control
- A built-in load sensor automatically detects and measures the laundry load and a microprocessor optimizes washing conditions such as ideal water consumption and washing time.
● Advanced technology is built into the Electronic Control System which ensures the best washing result.


flowchart
graph LR
    A["START"] --> B["SENSING\nLumory Sensor\nWater Level Sensor"]
    B --> C["SETTING\nOptimum\nWearing\nCondition"]
    C --> D["WASHING"]
    D --> E["AUTO POWER OFF"]
New DD type washing with fabric care
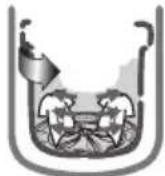
Fast revolution accelerates detergent dissolving and soaks thoroughly into the clothes.

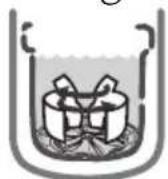

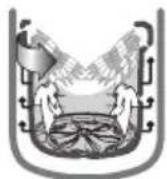


Fast revolution of tub creates the current of water.
Tub rotates to either side to balance and unwind laundry.
Low Noise Direct Drive System
- The advanced Brushless DC motor rotates the Tub directly without belt and clutch, thereby reducing the noise of the washer.
- The washing machine adjusts to optimum speed according to the type of clothing in the load.
SmartDiagnosis™
- It is the technology to transmit the anomalies to the service center when there is a problem with the washer. It provides the service that gives faith and trust to the customers through precise and fast analysis.
Auto Restart
● Auto Restart allows the program to restart all by itself in case of power failure. It does from the stage where it stopped.

natural_image
Cartoon illustration of a smiling container with a teapot inside, waving (no text or symbols)
Contents
READ THIS MANUAL
Inside you will find many helpful hints on how to use and maintain your washer properly. Just a little preventive care on your part can save you a great deal of time and money over the life of your washer. You will find many answers to common problems in the Troubleshooting section. If you review our chart of Troubleshooting Tips first, you may not need to call for service at all.
| Introduction | Safety Information 4Identification of Parts 7Function Information 8 | |
| Before Starting to Wash | Preparation Before Washing 9Use of Water, Dispenser Drawer, Detergent, Bleach and Softener 10Special Guide for Stain Removal 13Function of each Button 14 | |
| Washing Programs | Normal Wash 16Stain Care Wash 16Allergy Care Wash 16Smart Rinse 16Eco Wash 16Quick Wash 18Delicates Wash 18Pre Wash+ Normal 18Duvet Wash 18Silent Wash 18Favorite Wash 20Soak Wash 21Intensive Rinse 22 | |
| Additional Function Program | Tub Clean 23Air Dry 24Option Washing 25Time Delay (RESERVATION) Wash 26Other Useful Functions 27 | |
| Installation | Placing and Leveling 28Connecting Water Supply Hose 29Connecting Drain Hose 32 | |
| Care and Maintenance | Grounding Method 33Cleaning and Maintenance 34Soft Safety Door 36 | |
| Troubleshooting | Common washing problems 37Troubleshooting 38SmartDiagnosisTM 39 | |
| Terms of Warranty | Terms of Warranty 40 | |
| Specification | Specification 41 |
Safety Information
Read carefully and thoroughly through this booklet as it contains important safety information that will protect the user from unexpected dangers and prevent potential damages to the product.
This booklet is divided into 2 parts : Warning and Caution.

: This is a warning sign specifying user's applications which might be dangerous.

: This is a sign specifying 'Strictly Forbidden' applications.

WARNING
: Failure to comply with the instructions under this sign may result in major physical injuries or death.

CAUTION
: Failure to comply with the instructions under this sign may result in minor physical injuries or product damages.
| WATERHEATERSAFETY |  WARNING WARNING |
| ·Under certain conditions hydrogen gas may be produced in a water heater that has not been used for two weeks or more. Hydrogen gas can be explosive under these circumstances. If the HOT water has not been used for two weeks or more, prevent the possibility of damage or injury by turning on all Hot water faucets and allowing them to run for several minutes. Do this before using any electrical appliance which is connected to the HOT water system. This simple procedure will allow any built-up hydrogen gas to escape. Since the gas is flammable, do not smoke or use an open flame or appliance during this process. | |
| PROPERINSTALLATION |  CAUTION CAUTION |
| ·The base opening must not be obstructed by carpeting when the washing machine is installed on a carpeted floor.·Install or store where it will not be exposed to temperatures below freezing or exposed to the weather. If the product is exposed to such conditions, electric shock, fire, break down or deformation may occur.·Properly ground washer to conform with all governing codes and ordinances. Follow details in Installation Instructions.If not grounded properly, break down and leakage of electricity may occur, which may cause electric shock.·Must be positioned so that the plug is accessible.If the plug is placed between the wall and the machine, it may get damaged, possibly causing fire or electric shock.·Make sure the plug is completely pushed into the outlet.Failure to do so may cause electric shock and fire due to overheating. |
WARNING
| YOUR LAUNDRY AREA |  WARNING WARNING |
| ·Keep the area underneath and around your appliances free of combustible materials such as lint, paper, rags, chemical, etc.Operating with such materials around the machine may trigger explosion or fire.·The appliance is not intended for use by young children or infirm persons without supervision.·Young Children should be supervised to ensure that they do not play with appliance.There is potential danger that children might drown in the tub.Do not touch the power plug with a wet hand.It will cause electric shockDo not put your hand, foot or anything under the washing machine while the washing machine is in operation.There is a rotating mechanism under the machine, so you could be injured. | |
| WHEN USING THE WASHER |  CAUTION CAUTION |
·Use this appliance only for its intended purpose as described in this Owner's Manual.·The laundry process can reduce the flame retardancy of fabrics. To avoid such a result, carefully follow the garment manufacturer's wash and care instructions.·To minimize the possibility of electric shock, unplug this appliance from the power supply or disconnect the washer at the household distribution panel by removing the fuse or switching off the circuit breaker before attempting any maintenance or cleaning.Pressing Circuit button to turn off does NOT disconnect the appliance from the power supply.Make sure that drainage is working properly.If water is not drained properly, your floor may get flooded. Flooded floors may induce electricity leakage, further resulting in electric shock or fire.If, during spinning, opening the lid does not stop the tub within about 15 seconds, immediately discontinue operating the machine.Call for repair. A machine that spins with its door open may cause injuries.Never reach into washer while it is moving.[GKT]Wait until the machine has completely stopped before opening the lid.Even slow rotation can cause injury.Never attempt to operate this appliance if it is damaged, malfunctioning, partially disassembled, or has missing or broken parts, including a damaged cord or plug.Operating with a damaged plug may cause electric shock.Do not use water hotter than 50°C. Use of excessively hot water may cause damage to fabrics or cause leakage of water. Use of excessively hot water may cause damage to fabrics or cause leakage of water. |
Safety Information
| WHEN USING THE WASHER |  WARNING WARNING |
 Do not use a plug socket and wiring equipment for more than their rated capacity.Exceeding the limit may lead to electric shock, fire , break down, and/or deformation of parts. Do not use a plug socket and wiring equipment for more than their rated capacity.Exceeding the limit may lead to electric shock, fire , break down, and/or deformation of parts. Do not mix chlorine bleach with ammonia or acids such as vinegar and/or rust remover.Mixing different chemicals can produce toxic gases which may cause death. Do not mix chlorine bleach with ammonia or acids such as vinegar and/or rust remover.Mixing different chemicals can produce toxic gases which may cause death. Do not wash or dry articles that have been cleaned in, washed in, soaked in, or spotted with combustible or explosive substances (such as wax, oil, paint, gasoline, dry-cleaning solvents, kerosene, etc). Do not add these substances to the wash water.Do not use or place these substances around your washer or dryer during operation.It may ignite or explode. Do not wash or dry articles that have been cleaned in, washed in, soaked in, or spotted with combustible or explosive substances (such as wax, oil, paint, gasoline, dry-cleaning solvents, kerosene, etc). Do not add these substances to the wash water.Do not use or place these substances around your washer or dryer during operation.It may ignite or explode. | |
| WHEN NOT IN USE |  CAUTION CAUTION |
| Turn off water faucets to relieve pressure on hoses and valves and to minimize leakage if a break or rupture should occur. Check the condition of the fill hoses; they may need replacement after 5years.When the air temperature is high and the water temperature is low, condensation may occur and thus wet the floor.Wipe off dirt or dust on the contacts of the power plug.Using unclean power plug may cause fire.Before discarding a washer, or removing it from service, remove the washer lid to prevent children from hiding inside.Children may be trapped and suffocated if the lid is left intact.Do not attempt to repair or replace any part of this appliance unless specifically recommended in this Owner's Manual, or in published user-repair instructions that you understand and have the skills to carry out.Operating the machine with improperly replaced parts may be a cause for fire or electric shock. | |
| [KBHT] Do not tamper with controls.It may lead to electric shock, fire , break down, deformation. | |
 Do not yank the power cord in an attempt to disconnect the power plug.Securely hold the power plug to unplug the machine.Failure to observe these instructions may cause electric shock or fire due to short-circuit .When you are cleaning the washing machine, do not apply water directly to any part of the washing machine.It will cause short circuit and electric shock. Do not yank the power cord in an attempt to disconnect the power plug.Securely hold the power plug to unplug the machine.Failure to observe these instructions may cause electric shock or fire due to short-circuit .When you are cleaning the washing machine, do not apply water directly to any part of the washing machine.It will cause short circuit and electric shock. |
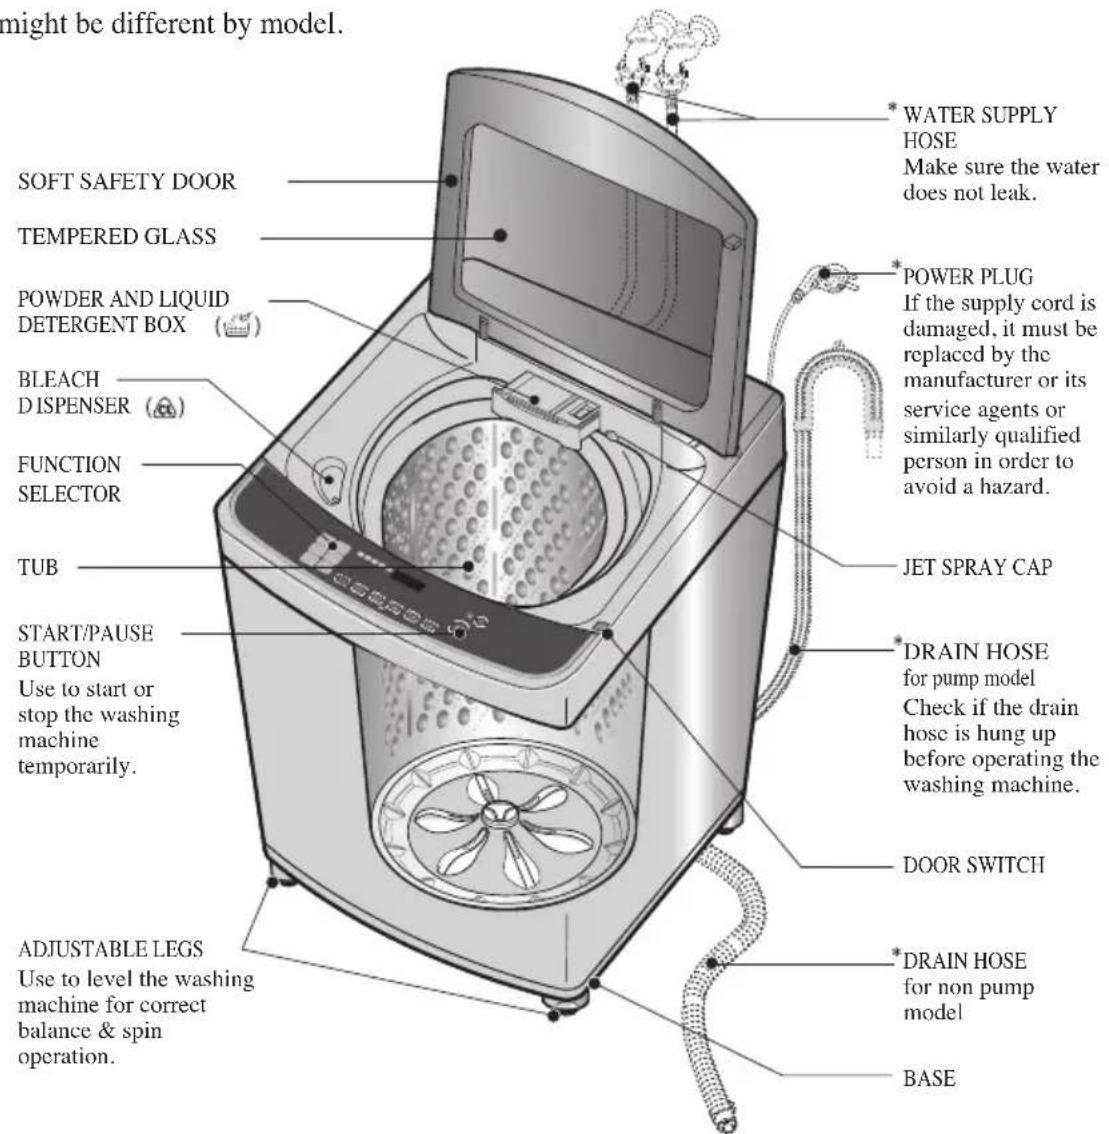
Identification of Parts
Body
* Picture might be different by model.
Accessories
Water supply hoses
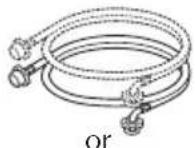

1 Each for COLD and HOT water
Drain hose Anti-rat cover (option)

or


NOTE
“*” Part can be different according to the model.
Function Information
Our machine provides various washing methods which suits various conditions and types of laundry. Different types of laundry washing
Normal Wash
Use this Program for everyday washing e.g. sheets, towels, T-shirt(refer to page 16)
Stain Care Wash
Washing in the best temperature (40 degrees) by heating the clean clothes when you want to use refer to page 16) (Proper Water Temp. Hot:60°C / Cold:15 °C)
Allergy Care Wash
This cycle is a powerful, high temperature cycle designed specifically to reduce certain allograms page 16) (Proper Water Temp. Hot: 60^ / Cold: 15^ )
Smart Rinse
Use this program to get better rinsing performance. (refer to page 16)
Eco Wash
To save water and detergent for less than 7kg of laundry that is not too dirty (refer to page 16)
Silent Wash
Use this program to wash quietly at night. (refer to page 18)
Duvet Wash
Use for blanket or duvet with (hand wash) sign(refer to page 18)
Pre Wash+ Normal
Washing laundry with Normal cycle that pretreats immediate stain without hand(refect to page 18)
Delicates Wash
Wool clothes (lingerie, wool, etc.) which may be easily damaged can be washed. (refer to page 18) The fibers of machine washable woolens have been specifically modified to prevent felting when they are machine washed. Most handknitted garments are not made of machine washable wool and we recommend that you hand wash them
- Before washing your woolens check the care label for the washing instructions.
- When washing woolens use a mild Detergent recommended for washing wool.
- Hand washed woolens may be spun in a washing machine to reduce the time they take to dry.
- To dry woolens lay down them flat on a towel and pat into shape. Dry woolens out of direct sunlight. (The heat and tumble action of a dryer may cause shrinkage or felting of woolen garments.) Some wool underlays and sheepskin products can be washed in a washing machine but may cause pump blockages. (Ensure that the whole article is suitable for machine washing and not just the backing material.) You may wish to handwash these articles and place them in the machine to spin dry.
Favorite Wash
This setting allows you to store your FAVORITE wash conditions in the normal cycle memory. (refer to page 20)
Washing according to the condition of laundry
Quick Wash
Quick Wash can be selected to wash lightly soiled clothes of less than 3.0 kg in a short time. (refer to page 18)
Soak Wash
Soak Wash can be selected to wash heavily soiled laundry by soaking in water for some time to remove dirt and grime. (refer to page 21)
Intensive Rinse
Use Intensive Rinse to remove detergents more effectively. (refer to page 22)
Other washing method
Tub Clean
Use this program to clean the inside of washing machine especially Inner tub & Outer tub. (refer to page 23)
Time Delay (RESERVATION) Wash
Time Delay (RESERVATION) Wash is used to delay the finishing time of the operation. The number of hours to be delayed can be set by the user accordingly. (refer to page 26)
Option Wash
When the user needs only Spin, Rinse/Spin, Rinse, Wash/Rinse, Wash, Wash/Rinse/Spin, Soak/Wash/Rinse/Spin (refer to page 25)
Preparation Before Washing
Care Labels
* Look for a care label on your clothes. This will tell you about the fabric content of your garment and how it should be washed. Sort clothes into loads that can be washed with the same wash cycle, Water Temperature and spin speed.

Sorting
To get the best results, different fabrics need to be washed in different ways.
• SOIL (Heavy, Normal, Light) Separate clothes according to the type and amount of soil.
• COLOR (Whites, Lights, Darks) Separate white fabrics from colored fabrics.
- LINT (Lint producers, Collectors) Separate lint producers and lint collectors.
Lint Producers Terry cloth, Chenille, Towels, Nappies, Diapers
Lint Collectors Synthetics, Corduroy, Permanent Press, Socks
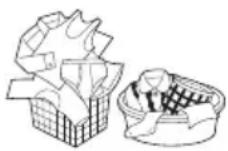
Check before Loading
- Check all pockets to make sure that they are empty. Things such as nails, hairclips, matches, pens, coins, and keys can damage both your washer and your clothes.
- Mend any torn garments or loose buttons. Tears or holes may become larger during washing.
- Remove belts, underwires, etc. to prevent damage to the machine or your clothes.
- Pretreat any dirt and stains.
- Make sure the clothes are washable in water.
- Check the washing instructions.
- Remove tissue in pockets.


CAUTION
Do not wash or spin any item labeled or known to be water-proof or water-resistant, even if the product care label on the item permits machine washing. Failure to follow these instructions could result in severe damage to your laundry, your washer and/or property damage as a result of abnormal vibration of the washer.
- Examples of water-proof or water-resistant items include certain mattress pads, mattress covers, rain gear, camping gear, skiing apparel, outdoor gear and similar items.
Pretreatment on stains or heavy soil
- Use ‘PreWash+Normal’ cycle for very soiled clothes.
In case of heavily soiled clothes, pretreatment may require before the cycle. - Pretreat shirt collars and cuffs with a pre-wash product or liquid Detergent when placing them in the washer. Before washing treat special stains with bar soaps, liquid Detergent or a paste of water and granular Detergent.
- Use a pretreat soil and stain remover.
Treat stains AS SOON AS POSSIBLE. The longer they are left the harder they are to remove mFordetail refer to page13)
Loading
Do not wash fabrics containing flammable materials (waxes, cleaning fluids, etc.)
Load Size
The WATER LEVEL should just cover the clothes. Adjust the load size accordingly. Loosely load clothes no higher than the top row of holes in the washer tub. To add items after washer has started, press Start button and submerge additional items. Close the lid and press Start button again to restart.
WARNING
Fire Hazard
Never place items in the washer that are dampened with gasoline or other flammable fluids.
No washer can completely remove oil.
Do not dry anything that has ever had any type of oil on it (including cooking oils).
Doing so can result in death, explosion, or fire.
Light and Large-sized clothing
Clothes like downs and woollens are light weight, large and float easily. Use a nylon net and wash them in a small amount of water. If the laundry floats during the wash cycle, it may become damaged. Use dissolved Detergent to prevent the Detergent from clumping.

Long laundry items
Use nylon nets for long, DELICATE items. For laundry with long strings or long length, a net prevent tangling during washing Fasten zippers, hook, and strings to make sure that these items don't snag on other clothes.
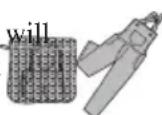
※ Nylon net is not supplied by LG.
Using Water
Amount of WATER LEVEL
- This machine detects the quantity of laundry automatically, then sets the Water Level and proper amount of Detergent.
- When you select a wash program, the Water Level will be shown on the control panel.
- The following table shows the amount of water.
- When the Water Level is automatically detected, it may differ depending on the quantity of laundry even though the same Water Level is indicated on the control panel.

NOTE
[ Minimum water amount ]
It depends on laundry load and washer model. Or manually you can pour a certain amount water into tub directly to some height. That's because if water level reaches to the some height sensed by washer itself, washer automatically operates. In other words, it is needed to pour water to the point when washer starts operating.
Water Temperature
- The machine sets the appropriate temperature automatically according to the wash program.
- The temperature of the water impacts the effectiveness of all laundry additives and therefore, the cleaning results. We recommend temperatures of:
- HOT 49\~60°C...(120-140°F) White items, diapers, underclothing and heavily soiled, colorfast items.
- WARM 29\~40°C...(85-105°F) Most items
- COLD* 18\~24°C...(65-75°F) Only very bright colors with light soil.
- When washing in COLD water additional steps may be needed:
- Adjust Detergent amount and pre-dissolve Detergent in WARM water
- Pretreat spots and stains
- Soak heavily soiled items
- Use appropriate bleach
* Temperature below 18°C...(65°F) will not activate laundry additives and may cause lint, residue, poor cleaning, etc. In addition, Detergent manufactures and care labels define COLD water as 26\~29°C...(80-85°F).
If the temperature of the water in the tub is too cold for your hands, the Detergent will not activate and clean effectively.
NOTE
If iron is present in the water the clothes may become an all-over yellow or they may be stained with brown or orange spots or streaks. Iron is not always visible. Installation of water softener or an iron filter may be necessary for severe cases.
Using Dispenser Drawer
Using the Dispenser Drawer
The dispenser drawer contains 2 compartments:
- Liquid Fabric Softener
- Liquid or Powder Low-Sudsing, High-Efficiency Detergent
The dispenser automatically dispenses additives at the proper time in the wash cycle. - Slowly open the dispenser drawer by pulling the drawer out until it stops.
- After adding laundry products, slowly close the dispenser drawer. Closing the drawer too quickly could result in early dispensing of additives.
- Avoid overfilling or splashing when adding laundry products to the dispenser. Doing so could result in early dispensing of laundry products.
At the end of the cycle, you may see water in the compartments. This is part of the normal operation of the washer.
NOTE : Do not use bleach in the dispenser drawer.

Using Detergent
Detergent
Follow the Detergent package directions. Using too little Detergent is a common cause of laundry problems. Use more Detergent if you have hard water, large loads, greasy or oily soils or lower Water Temperature.
Choosing the right Detergent
We recommend the use of domestic Detergent, (powder, liquid or concentrated). Soap flakes or granulated soap powders should not be used in your washing machine. When washing woolens remember to use Detergent suitable for washing woolens.
How much Detergent
The correct amount of Detergent will vary depending on the amount of soil in your clothes (Jeans and work clothes may need more Detergent, while bath towels usually need less.).
For liquid and concentrated Detergents, follow the recommendations of the Detergent manufacturer.
Note: To check you are using the correct amount of Detergent, lift the lid of your machine about half-way through the wash. There should be a thin layer of foam over the surface of the water. Lots of foam may look good, but it does not contribute to cleaning your clothes. No foam means not enough Detergent has been used; soil and lint can settle back on the clothes or the washing machine.
If excess Detergent is used, the rinse will not be as clean and efficient. Also, it could cause environmental pollution, so use it accordingly.
Adding Detergent
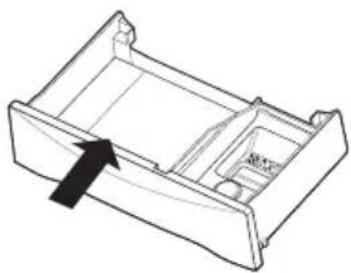
Add measured detergent to the detergent compartment of the dispenser drawer.
natural_image
Technical line drawing of a mechanical component with an arrow indicating direction (no text or symbols)Detergent is flushed through the dispenser at the beginning of the wash phase.
Detergent usage may need to be adjusted for water temperature, water hardness, size and soil level of the load. Avoid using too much detergent in your washer, as it can lead to oversuding and detergent residue being left on the clothes.
Note : Using Liquid detergent
- Dilute Liquid detergent with water and pour into the tub, start the cycle.
- Delay wash course is not available if you use liquid detergent.
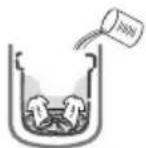
Attention
Using liquid detergent without diluting, or leaving laundry for a long time after pouring diluted liquid detergent into the tub might cause damage, bleaching or discoloration of cloth.
Use of Water, Dispenser Drawer, Detergent, Bleach and Softene
Using Liquid Bleach
- Check clothing care label for special instructions and separate the laundry to be bleached
• Dilute liquid chlorine bleach. - Measure the recommended amount of liquid bleach carefully following instructions on the bottle.
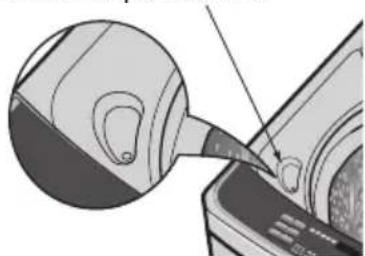
- Before starting the washer, pour measured amount of bleach directly into bleach dispenser. Avoid splashing or overfilling. Powdered bleach should be mixed with water before pouring.
Bleach dispenser (cl)
natural_image
Diagram showing a mechanical component being inserted into a housing (no text or symbols visible)NOTE
■ Never pour undiluted liquid bleach directly onto clothes or into the wash basket.
This may cause change of color or damage the laundry.
■ Do not pour powdered bleach into bleach dispenser.
Using Fabric Softener
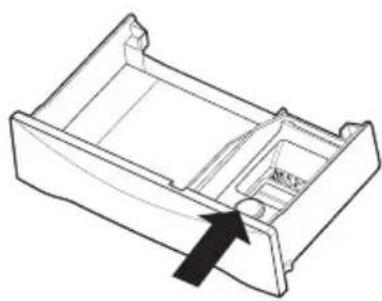
If desired, pour the recommended amount of liquid fabric softener into the right-hand compartment.
Use only liquid fabric softener.
Dilute with water to the maximum fill line.
- Do not exceed the maximum fill line.
Overfilling can cause early dispensing of the fabric softener, which could stain clothes.
NOTE : Do not pour fabric softener directly on the wash load. It may stain the clothes.
natural_image
Technical line drawing of a mechanical component with an arrow indicating direction (no text or symbols)Attention
■ Do not mix with Detergent or bleach.
■ Never pour fabric softener directly on clothes. It may stain them.
■ Do not stop the washer during the first spin for timely dispensing.
■ Option washing is not designed to be used with fabric softener dispenser.
Scrud(Waxy Build up)
Scrud is the name given to the waxy build-up that can occur within any washer when the fabric softener comes into contact with Detergent. This build-up is not brought about by a fault in the machine.
If scrud is allowed to build-up in the machine it can result in stains on your clothes or an unpleasant smell in your washer.
If you wish to use fabric softener we recommend
• Using fabric softener sparingly.
- When filling the dispenser, do not splash or overfill.
- Clean dispenser as soon as the cycle is finished.
- Clean your machine regularly. (refer to page 23 or 34)
- Cold water washing increases the chance of this build-up occurring. We recommend a regular WARM or HOT wash e.g. every 5th wash should be at least a warm one.
- Fabric softener of thinner consistency is less likely to leave residue on the dispenser and contribute to a build-up.
Special Guide for Stain Removal
WARNING
■ Do not use or mix liquid chlorine bleach with other household chemicals such as toilet cleaners, rust removers, acid or products containing ammonia. These mixtures can produce dangerous fumes which can cause serious injury or death.
■ To reduce the risk of fire or serious injury to persons or property, comply with the basic warnings listed below:
- Read and comply with all instructions on stain removal products.
- Keep stain removal products in their original labeled containers and out of children's reach.
• Thoroughly wash any utensil used. - Do not combine stain removal products, especially ammonia and chlorine bleach. Dangerous fumes may result.
- Never wash items which have been previously cleaned in, washed in, soaked in or spotted with gasoline, dry cleaning solvents or other flammable or explosive substances because they give off vapors that could ignite or explode.
- Never use highly flammable solvents, such as gasoline, inside the home. Vapors can explode on contact with flames or sparks.
For successful stain removal:
- Remove stains promptly.
- Use 'PreWash+Normal' cycle for very soiled clothes.
In case of heavily soiled clothes, pretreatment may require before the cycle.
- Determine the kind of stain, then follow the recommended treatment in the stain removal chart below.
- To pretreat stains, use a prewash product, liquid Detergent, or a paste made from granular Detergent and water.
- Use COLD water on unknown stains because HOT water can set stains.
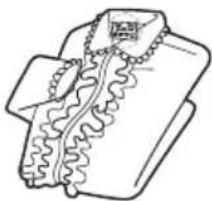
- Check care label instructions for treatments to avoid on specific fabrics.
- Check for colorfastness by testing stain remover on an inside seam.
- Rinse and wash items after stain removal.
natural_image
Line drawing of a blouse with pleated collar and ruffled trim (no text or symbols)Follow fabric care label instructions
| Stain Removal | |
| STAIN | TREATMENT |
| Adhesive tape, chewing gum, rubber cement | Apply ice. Scrape off excess. Place stain face down on paper towels. Saturate with prewash stain remover or nonflammable dry cleaning fluid. |
| Baby formula, dairy products, egg | Use product containing enzymes to pretreat or soak stains. |
| Beverages (coffee, tea, soda, juice, alcoholic beverages) | Pretreat stain. Wash using COLD water and bleach safe for fabric. |
| Blood | Rinse with COLD water. Rub with bar soap. Or pretreat or soak with product containing enzymes. Wash using bleach safe for fabric. |
| Candle wax, crayon | Scrape off surface wax. Place stain face down between paper towels. Press with warm iron until wax is absorbed. Replace paper towels frequently. Treat remaining stain with prewash stain remover or nonflammable dry cleaning fluid. Hand wash to remove solvent. Wash using bleach safe for fabric. |
| Chocolate | Pretreat or soak in WARM water using product containing enzymes. Wash using bleach safe for fabric. |
| Collar or cuff soil, cosmetics | Pretreat with prewash stain remover or rub with bar soap. |
| Dye transfer on white fabric | Use packaged color remover. Wash using bleach safe for fabric. |
| Grass | Pretreat or soak in WARM water using product containing enzymes. Wash using bleach safe for fabric. |
| Grease, oil, tar (butter, fats, salad dressing, cooking oils, car grease, motor oils) | Scrape residue from fabric. Pretreat. Wash using hottest water safe for fabric. For heavy stains and tar, apply nonflammable dry cleaning fluid to back of stain. Replace towels under stain frequently. Rinse thoroughly. Wash using hottest water safe for fabric. |
| Ink | Some inks may be impossible to remove. Washing may set some inks. Use prewash stain remover, denatured alcohol or nonflammable dry cleaning fluid. |
| Mildew, scorch | Wash with chlorine bleach if safe for fabric. Or, soak in oxygen bleach and HOT water before washing. Badly mildewed fabrics may be permanently damaged. |
| Mud | Brush off dry mud. Pretreat or soak with product containing enzymes. |
| Mustard, tomato | Pretreat with prewash stain remover. Wash using bleach safe for fabric. |
| Nail polish | May be impossible to remove. Place stain face down on paper towels. Apply nail polish remover to back of stain. Repeat, replacing paper towels frequently. Do not use on acetate fabrics. |
| Paint, varnish | WATER BASED: Rinse fabric in cool water while stain is wet. Wash. Once paint is dry, it cannot be removed, OIL BASED AND VARNISH: Use solvent recommended on can label. Rinse thoroughly before washing. |
| Rust, brown or yellow discoloration | For spots, use rust remover safe for fabric. For discoloration of an entire load, use phosphate Detergent and nonchlorine bleach. Do not use chlorine bleach because it may intensify discoloration. |
| Shoe polish | LIQUID: Pretreat with a paste of granular Detergent and water. PASTE: Scrape residue from fabric. Pretreat with prewash stain remover or nonflammable dry cleaning fluid. Rub Detergent into dampened area, Wash using bleach safe for fabric. |
Function of each Button
Time Delay (Reservation) button
- Use for laundry reservation.
• To cancel, turn power off. (refer to page 26)
Display laundry progress
- Laundry progress is indicated here.
- Process to be done will have light on. Process in progress will blink and process already done will have light off.
Display remaining time, reservation time, and alarm for trouble
- During operation this indicates time to finish of laundry.
ex) 1:09 indicates remaining time of laundry, rinse, spin dry during operation/pause. - If there is a trouble, it blinks with buzzer sound and indicates the source of trouble. It will work normally after troubleshooting.
Steam button
- Use for steam.
- Steam can be selected under Normal, Stain care, Favorite course.
- Steam is automatically selected under Allergy care course.
Water wave button
• To control water wave.
- Initially set at “medium” but will not be indicated. To control Strong wave power, press Strong wave. (all course except Allergy Care, Delicates, Silent and Tub Clean can adjust wave.)

Hot and cold wash laundry button
- To select hot water, cold water, or hot and cold water.
- Can be changed during operation.
- If hot wash is selected, laundry will be done with hot water and rinse will be done with cold water.
- Only cold water will be used at Delicates course. (It might damage laundry if Hot water is used)
- Hot and cold water makes appropriate temperature by mixing hot water and cold water adequately when Hot water and cold water is selected.
* Stain care and Allergy Care course have higher set temperature. So they use more hot water than other course. - Hot wash, cold wash is automatically selected under Stain Care, Allergy Care, Smart Rinse and Tub Clean course.
Water Level button (display detergent amount)
- Use to adjust Water Level.
- It can be changed during operation.
- Add detergent as much as indicated amount next to Water Level.
• Detergent is based on condensed detergent.
NOTE
* For optimizing the washing algorithm, the displaying time may be changed during washing-increased by 8 minutes at maximum and decreased by 4 minutes at maximum.
* The standard detected by the sensor changing the algorithm is set by the normal standard. It may not be same to the washing habit of a specific user. So, it does not matter that the user uses it according to her/his washing habit.
* The steam option cannot be used with all cycles.

* Steam may not be clearly visible during the steam cycles. This is normal. Too much steam could damage clothing.
* Do not use steam with delicate fabrics such as wool, silk, or easily discolored fabrics.
* For optimal steam cleaning performance, limit laundry loads to 4 kg or less.
* When the steam option is selected for the Normal or Favorite Courses, the water level will not exceed level '7' in order to maintain optimal performance.
* The control panel may differ according to different models.
Washing Programs
| Washing Programs |  POWER POWER | Add the laundry |  Program Program | Add the Detergent |
| NormalUsed for normal loads, this mode automatically selects the most appropriate conditions and completes the sequence in one operation. The built-in sensor detects the size of the load and the ideal wash power and wash, rinse and spin times are set accordingly. |  |  Add the appropriate quantity of Detergent As indicated by the Water Level. Or follow the Detergent Manufacturer's instructions. Add the appropriate quantity of Detergent As indicated by the Water Level. Or follow the Detergent Manufacturer's instructions. | ||
| Stain CareUse when clean laundry is needed. This will heat water to 40 degree which laundry works best. |  |  Make laun-dry lighter than 5kg. Make laun-dry lighter than 5kg. |  Select the Stain Care program on the Control panel. Select the Stain Care program on the Control panel. |  Add the appropriate quantity of Detergent As indicated by the Water Level. Or follow the Detergent Manufacturer's instructions. Add the appropriate quantity of Detergent As indicated by the Water Level. Or follow the Detergent Manufacturer's instructions. |
| Allergy CareThis cycle is a powerful, high temperature cycle designed specifically to reduce certain allergens. |  |  Make laun-dry lighter than 4kg. Make laun-dry lighter than 4kg. |  Select the Allergy Care program on the Control panel. Select the Allergy Care program on the Control panel. |  Add the appropriate quantity of Detergent As indicated by the Water Level. Or follow the Detergent Manufacturer's instructions. Add the appropriate quantity of Detergent As indicated by the Water Level. Or follow the Detergent Manufacturer's instructions. |
| Smart RinseUse this program to increase rinsing performance. This would include underwear and baby clothes. If someone has sensitive skin or skin trouble,use this program. |  |  |  Select the Smart Rinse program on the Control panel. Select the Smart Rinse program on the Control panel. |  Add designated amount of detergent by Water Level and close the door. Use exclusive neutral detergent or dry detergent for home Add designated amount of detergent by Water Level and close the door. Use exclusive neutral detergent or dry detergent for home |
| Eco WashEco course consumes less water and electricity to wash normal clothes. |  |  |  Select the Eco Wash program on the Control panel. Select the Eco Wash program on the Control panel. |  Add the appropriate quantity of Detergent as indicated by the Water Level. Or follow the Detergent manufacturer's instructions. Add the appropriate quantity of Detergent as indicated by the Water Level. Or follow the Detergent manufacturer's instructions. |
| Close the lid Finish Caution & Note | |||
 • Water will be supplied. After supplying, laundering will be started. • Water will be supplied. After supplying, laundering will be started. |  • Tub will rotate more than once without water (While Water Level LED blinking) to recognize Water Level.• Then the Water Level and the amount of Detergent to be used will be shown and water will be supplied. • Tub will rotate more than once without water (While Water Level LED blinking) to recognize Water Level.• Then the Water Level and the amount of Detergent to be used will be shown and water will be supplied. |  • When the wash pro-gram ends, the buzzer will ring for 10 seconds before the Power goes off automatically. • When the wash pro-gram ends, the buzzer will ring for 10 seconds before the Power goes off automatically. | • If water is already in the tub, or putting wet laundry into the tub before starting will increase the Water Level.• With lightweight bulky loads, Water Level can be set low.• Changes to Water Temperature (Hot Wash/Cold Wash) and wash level are possible during operation.(refer to page 10) |
 |  |  | • Stain care 40 degree course selects cold wash and hot wash simultaneously. During water supplying, water supply valve might repeat on/off to meet adequate temperature for laundry.※ Stain care course use more warm water than other course as it has higher set temperature for heating.※ Stains that easily removed at 40°C: coffee, cola, orange juice, grape juice, soy sauce etc.• If only hot wash is selected, laundry time will be reduced as heating time shortens.• If only cold water is connected, it takes longer laundry time as heating time lengthens. Use cold water and hot water together.• While heating, laundry tub will rotate to a direction slowly. This is a part of normal operation.• While heating, because of humidity difference, there might be water drops at the glass of door. This is normal phenomenon. just wipe it after laundry.• Please be attention that exterior of the machine is hot by heating. |
 |  |  | • Allergy Care course selects cold wash and hot wash simultaneously. During water supplying, water supply valve might repeat on/off to meet adequate temperature for laundry.※ Allergy Care course use more warm water than other course as it has higher set temperature for heating.※ Stains that easily removed at 60°C: milk, blood, sebum, egg, animal and vegetable oil.• If only Hot Wash is selected, laundry time will be reduced as heating time shortens.• If only cold water is connected, it takes longer laundry time as heating time lengthens. Use cold water and hot water together.• While heating, laundry tub will rotate to a direction slowly. This is a part of normal operation.• While heating, because of humidity difference, there might be water drops at the glass of door. This is normal phenomenon. Just wipe it after laundry.• Please be attention that exterior of the machine is hot by heating.• Selecting the Allergy Care course automatically incorporates steam into the wash cycle.• The Allergy Care course can reduce allergens in bedding and clothing.• Due to the higher energy and temperatures used, the Allergy Care course is not recommended for wool, silk, leather, or any other delicate or temperature sensitive items. |
 |  |  | • It will cold water and hot water will be supplied adequately to adjust water temperature automati cally.If Cold Wash is only selected it will laundry only with cold water. |
 |  |  |
Washing Programs
| Washing Programs |  POWER POWER | Add the laundry |   Program Program | Add the Detergent |
 Use this mode when washing lightly soiled clothes for a short time. The highly recommended laundry amount is under 3.0kg. Use this mode when washing lightly soiled clothes for a short time. The highly recommended laundry amount is under 3.0kg. |  |  |  Select the Quick Wash program on the Control panel. Select the Quick Wash program on the Control panel. |  Add the appropriate quantity of Detergent as indicated by the Water Level.Or follow the Detergent manufacturer's instructions. Add the appropriate quantity of Detergent as indicated by the Water Level.Or follow the Detergent manufacturer's instructions. |
| DelicatesUse this program for washing delicate fabrics such as lingerie and woolens. (wash only "water washable" clothes)Before washing your woolens check the care label for the washing instructions.(wash only water washable clothes) |  |  |  Select the Delicates program on the Control panel. Select the Delicates program on the Control panel. |  Use neutral Detergent appropriate for the laundry.When washing woolens use a mild Detergent recommend-ed for washing wool. Use neutral Detergent appropriate for the laundry.When washing woolens use a mild Detergent recommend-ed for washing wool. |
| Pre Wash+ NormalWashing laundry with Pre Wash+ Normal cycle that pretreats immediate stain without hand-wash.Necessary for clothes which could be smelled badly without prompt laundry. |  |  |  Pre Wash+ Normal program on the Control panel. Pre Wash+ Normal program on the Control panel. |  Add the appropriate quantity of Detergent As indicated by the Water LevelOr follow the Detergent Manufacturer's instructions. Add the appropriate quantity of Detergent As indicated by the Water LevelOr follow the Detergent Manufacturer's instructions. |
| DuvetUse for blanket or bedclothes with 'hand wash' sign. |  |  |  Select the Duvet program on the Control panel. Select the Duvet program on the Control panel. |  Pour detergent after dissolve at warm water.If detergent is pour into cold water, it might cause leftover detergent in bed-clothes. Pour detergent after dissolve at warm water.If detergent is pour into cold water, it might cause leftover detergent in bed-clothes. |
| SilentUse this program to wash quietly in Silent especially during late night and dawn. |  |  |  Select the Silent program on the Control panel. Select the Silent program on the Control panel. |  Add the appropriate quantity of Detergent as indicated by the Water Level.Or follow the Detergent manufacturer's instructions. Add the appropriate quantity of Detergent as indicated by the Water Level.Or follow the Detergent manufacturer's instructions. |
| Close the lid Finish Caution & Note | |||
 |  |  | |
 |  |  | · Lay out in cool floor or on a hanger covered by a towel to dry these type of clothes.· It might have damped clothes because spin dry intensity and time are set to short to prevent damage of clothes. (Spin dry cannot be changed) |
 |  |  | |
 |  |  | · Cashmere bedclothes, acrylic blanket, mixed spinning blanket, woolen blanket, infilling (polyester 100), and bed sheet might be damaged by floating. Please purchase a separate laundry net to wash.· Separate bed clothes to general clothes. It might cause laundry to askew and results in abnormal washing.· Spin dry might take longer to spread out laundry if bedclothes are lumped to a side.· Never laundry an electric blanket and a carpet. It cause damage to a laundry machine and the laundry.· Please use laundry net to soak and sink bedclothes that are easy to be inflated. It might cause damage on laundry and machine parts if inflated.· Regardless of its size, we recommend to wash one by one. If two bedclothes with different material are washed at a time, it might cause abnormal spin dry due to imbalance.· How to put blankets into a laundry tub. It into 'N' or 'M' shape, and put it below upper side plastic parts of a laundry tub. Below this line  |
 |  |  | · Silent program takes longer washing time than Normal program.· To reduce noise in spinning, spin rpm is lower than normal spinning rpm. So the laundry has more moisture than normal. |
- Cashmere bedclothes, acrylic blanket, mixed spinning blanket, woolen blanket, infilling (polyester 100), and bed sheet might be damaged by floating. Please purchase a separate laundry net to wash.
- Separate bed clothes to general clothes. It might cause laundry to askew and results in abnormal washing.
- Spin dry might take longer to spread out laundry if bedclothes are lumped to a side.
- Never laundry an electric blanket and a carpet. It cause damage to a laundry machine and the laundry.
- Please use laundry net to soak and sink bedclothes that are easy to be inflated. It might cause damage on laundry and machine parts if inflated.
- Regardless of its size, we recommend to wash one by one. If two bedclothes with different material are washed at a time, it might cause abnormal spin dry due to imbalance.
- How to put blankets into a laundry tub. It into 'N' or 'M' shape, and put it below upper side plastic parts of a laundry tub. Below this line
Favorite Wash
1 POWER POWER | Press the POWER button to turn power on. |
2  Program Program | Put laundry in and Press the Program button to Select Favorite Program.Press Water Wave button and select Water Wave. ("Medium Wave" if nothing is selected)Press Hot Wash, Cold Wash laundry to select water temperature.Select Water Level by pressing Water Level button.Select laundry time, number of rinse, and Spin intensity desire to save by pressing each of laundry, rinse and Spin button. |
3 START/PAUSE START/PAUSE | Press the START/PAUSE button. |
4 | Add designated amount of detergent by Water Level and close the door.Please use appropriate exclusive neutral detergent or dry detergent for home when "Delicates" course is selected for Favorite Program. |
 | When the wash program ends, the buzzer will ring for 10 seconds before the Power goes off automatically. |

To save Favorite Program.
- Select laundry options and operate as above.
- It is saved as the operation starts.
- It is saved even if laundry is paused or power is turned off.
To recall your Favorite cycle.
- Press POWER on.
- Select the Favorite cycle by pressing the Program.
- Press the START/PAUSE button. Then the wash cycle starts.
Soak Wash
| 1 |  POWER POWER | Press the POWER button to turn power on. |
| 2 |  Program Program | Put laundry in and Press the Program button to Select Washing Program.Pre Wash+Stain Care, Allergy Care, Delicates, Normal, Quick Wash, Tub Clean Programdo not suppose soak laundry. |
| 3 |  | Press soak laundry button.“Soak laundry” can be selected by pressing button and indicated by light on soak indicator( )Soak selection: 15 ▶ 30 ▶ 45 ▶ 1:00 ▶ 2:00 ▶ 3:00 ▶ off ▶ 15 |
| 4 |  RinseSpin*ChBLock *Air Dry RinseSpin*ChBLock *Air Dry | Press each of rinse and Spin button to select number of Rinse and Spin. |
| 5 |  | Add designated amount of detergent by Water Level and close the door. |
| 6 |  START/PAUSE START/PAUSE | Press the START/PAUSE button.Water will be supplied. After supplying, laundry will be started. |
 | When the wash program ends, the buzzer will ring for 10 seconds before the Power goes off automatically. |
Intensive Rinse
| 1 |  POWER POWER | Press the POWER button to turn power on. |
| 2 |   Program Program | Put laundry in and Press the Program button to Select Washing Program.Pre Wash+Intensive Rinse can only be selected only under Normal, Normal, Smart Rinse, and Favorite. |
| 3 | [KWZTRinse*CHL Lock] | Press Rinse button to start Intensive Rinse( ).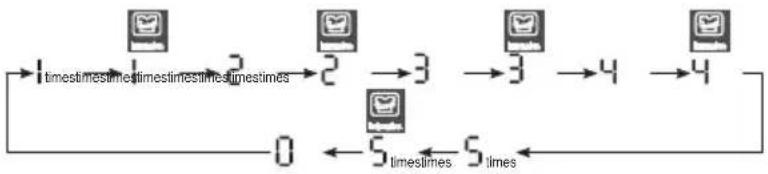 |
| 4 |    WashRinseSpin*Chall Lock Spin*Air Day WashRinseSpin*Chall Lock Spin*Air Day | Press each of Wash button and Spin button to set duration. |
| 5 |  | Add designated amount of detergent by Water Level and close the door. |
| 6 |  START/PAUSE START/PAUSE | Press the START/PAUSE button. |
 | When the wash program ends, the buzzer will ring for 10 seconds before the Power goes off automatically. |
NOTE
- Use Intensive Rinse to remove detergents more effectively.
- Intensive Rinse might work if Water Level changed during operation.
Tub Clean
If scrud is allowed to build-up in the machine it can result in stains on your clothes or unpleasant smell in your washer. Scrud is the way build-up that can occur within any washer when the fabric softener comes into contact with Detergent, and according to particular degree of dirtiness or quality of water to be use, in these case, use this program to clean inner tub and outer tub.
| 1 |  POWER POWER | Press the POWER button to turn power on. |
| 2 |  Program Program | Press the Program button to Select Tub Clean Program. |
| 3 |  START/PAUSE START/PAUSE | Press the START/PAUSE button.Time will be displayed on screen. |
| 4 |  | Add chlorine bleach or tub cleaner and close the door.(Note: Do not add any laundry detergent or fabric softener to the drawer when using Tub Clean.) |
 | When the wash program ends, the buzzer will ring for 10 seconds before the Power goes off automatically. |

Recommended cleaner :
(1) Powder bleaching agent :
Purchase a product at a market and refer to usage instruction at the back of the product.
(2) Liquid bleaching agent:
Dilute to 300 times of water capacity of washing machine.
Do not put laundry for laundry tub course.
- Clean laundry tub per month using laundry tub course.
- Please clean laundry tub if there are fuzz.
- It is convenient to use laundry tub course at night or during an outing.
Automatic detection of time to clean Tub
- After Power On button pressing, if tcl is blinking in the display, it is the time for Tub Cleaning.
- I f you want to skip the Tub Clean, press option buttons to select desired cycle.
- After performing tub clean, tcl will disappear until next cleaning time.
- Tub Clean time is detected automatically as per the usages of washer (Generally once after 30 usages)
Air Dry
| 1 |  POWER POWER | Press the POWER button to turn power on. |
| 2 |  Spin *Air Dry Spin *Air Dry | Press Spin for 3 seconds to select Air Dry.Other function cannot be selected during Air Dry.Automatically set to 60 minutes upon selection.Press Spin button again to select duration (90min. ▶ 120 min. ▶ 60 min.)To deselect Air Dry press power button. |
| 3 |  START/PAUSE START/PAUSE | Press the START/PAUSE button. |
 | When the wash program ends, the buzzer will ring for 10 seconds before the Power goes off automatically. | |

When you select Air Dry for more than 60 minutes
1) You can reduce the drying time by minimizing the moisture in the laundry.
2) Always keep the laundry amount to 2kg or less and make sure to spread it out evenly.
3) Select 60 minutes for cotton laundry and 120 minutes for synthetic fiber laundry for effective Moisture removal.
Option Washing
When you only need the Wash, Wash/Rinse or Rinse cycles, these can be set manually.
1 Press the POWER button to turn power on.

POWER
| Only Wash | Only Rinse | Only Spin |
Press theWashbutton to select the desired timing. | Press theRinsebutton to select the desired times of rinse. | Press theSpinbutton to select the desired times of spin. |
| Only Wash,Rinse | Only Rinse,Spin | Only Drain |
Press theWashbutton to select the desired timing. Press theRinsebutton to select the desired times of rinse. Press theRinsebutton to select the desired times of rinse. You can use this option for preventing wrinkles of laundry You can use this option for preventing wrinkles of laundry | Press theRinsebutton to select the desired times of rinse. Press theSpinbutton to select the desired times of spin. Press theSpinbutton to select the desired times of spin. | When you want to only drain, wait until the water in the washing tub drains completely. |
3 Press the Water Level button, to control the water level according to the amount of laundry. If you do not choose anything, it is set the middle water level automatically.

4 Add the laundry into the washing tub.
5 Press the START/PAUSE button.

START/PAUSE
6 Add the detergent and close the lid.
NOTE
- When a Wash, Wash/Rinse or Rinse only option is selected, after the wash is completed the water will not be drained off. If you wish to drain the water, press SPIN button and wait until the water in the tub has drained completely. Then press the START/PAUSE button.
- If you do not specify the water level, then Medium will be automatically selected.
- If only Rinse is selected, the process will start from Water Supply.
Time Delay (RESERVATION) Wash
| 1 |  POWER POWER | Press the POWER button to turn power on. |
| 2 |  | Put laundry in and detergent and Press the Program button to Select Washing Program. Put detergent in a slot for reserved synthetic powder detergent. This program will not work in Delicates and Tub Clean Program. |
  | ||
| Program | ||
| 3 |  | Press Time Delay (Reservation) button to set reservation time. If reservation button is pressed, it will turn on reservation lamp and show up 3:00. ex) It is 1:00 PM and if you want to finish laundry by 7:00 PM Keep press reservation button to set desired laundry ending time.(7:00-1:00=6hours)3:00 → 6:00 Reservation can be made up to 3~18 hours by 1 hour interval up to 3~12hours and 2 hour interval for 12~18 hours. Less than 3 hour is cannot be reserved. |
| 4 |  START/PAUSE START/PAUSE | Close the door and press START/PAUSE button. Reservation lamp will blink and remaining time will be displayed |
 | Laundry will be done at reserved time. Ending time might be slightly different by water pressure | |


- If door is opened during reservation.
Press "START/PAUSE" button to reschedule reservation. Then close the door and press "START/PAUSE" button.
- To cancel reservation, press Time Delay (Reservation) button repeatedly until the reservation is canceled or press power button to turn off and on power.
Other Useful Functions
Child Lock Function
If you want to lock all the keys to prevent settings from being changed by a child, you can use the child lock option.
How to Lock
1 Press the POWER button.
- Turn Power on.

POWER
2 Press the START/PAUSE button to start washing.

START/PAUSE
• After all washing conditions are set according to the manual.
3 Press the Rinse button for 3 seconds to select Child Lock.

- The button lock is set, it will not be released automatically if the cycle is terminated.
- Thus, you should turn power on washing machine and then terminate the function by pushing “Rinse” button.
How to Unlock
If you want to unlock during wash, Press the Rinse button for 3 seconds again.
NOTE
- “[L]” & the remaining time are alternatively shown on the display while they are locked.
Seeing Remaining Time
To see the remaining time for each process, press one of the Wash, Rinse and Spin buttons.
The remaining time for each process will appear for about 1 second.
Placing and Leveling
Please ensure that transit restraint has been removed before operating your machine.
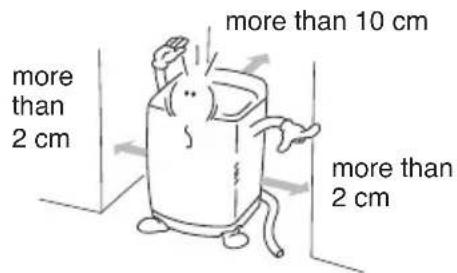
1 Place the machine on a flat and firm surface which allows proper clearance.
We suggest a minimum clearance of 2 cm to the right side and left sides of the machine for ease of installation.
At the rear, a minimum clearance of 10 cm is suggested.
NOTE
If the washer is installed on a uneven,weak or tilted floor causing excessive vibration, spin failure or “UE” error can happen to it.
It must be placed on a firm and level floor to prevent spin failure.
2 Check that the machine is level
Open the lid and look from above to see if it is same as shown.
Top view of the machine

natural_image
Two identical diagrams showing a circular device with internal components, no text or symbols present.3 Leveling the machine
Lift the front of the washing machine and twist the Adjustable Leg until the surface bubble is placed in the center.

※ Installing the Anti-Rat Cover (option) Insert the anti-rat cover to be firmly fixed from the back or front of washing machine and screw it

Caution
If the power is supplied from a cord extension set or generator, the cord extension set or electrical portable outlet device should be positioned so that it is not exposed to splashing or ingress of moisture.
Connecting Water Supply Hose
Before connecting the Water Supply Hose to the water tap, check the hose type and then choose the correct instruction here under.
Note that the Water Supply Hose supplied may vary from country to country, Make sure to connect the blue inlet hose to the COLD water tap, and the orange inlet hose to the HOT water tap.
Connecting Water Supply Hose to water tap
Normal Type
(Normal tap without thread & screw type inlet hose.)
1 Untighten the screw
Untighten the screw of the connector so that the tap can be placed in the middle.

2 Fixing the connector to the tap
Push the upper connector up till the rubber packing is in tight contact with the tap. Then tighten the 4 screws.

natural_image
Illustration of a faucet with a valve and handle (no text or symbols)3 Attach the water supply hose securely to the connector
Push the water supply hose vertically upwards so that the rubber seal within the hose can adhere completely to the tap.

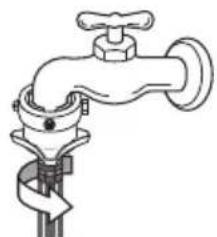
4 Fixing the connector to the water supply hose
Attach the water supply hose to the connector and then tighten it by screwing it to the right.
natural_image
Line drawing of a faucet with a handle and base, no text or symbols present5 Check the connection of water supply hose and the connector
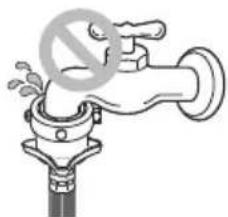
After connecting the hose, open the tap to check for any water leakage.
If the water leaks, close the tap and start again from step 1
natural_image
Illustration of a faucet with a no-smoking symbol (no text or numbers present)NOTE
The washing machine is to be connected to the water mains using new hose-sets and old hose-sets should not be reused.
Connecting Water Supply Hose
Normal Type
(Normal tap without thread & one touch type inlet hose.)
1 Separate Middle connector from Water Supply Hose
Separate Middle connector from the Water Supply Hose by pulling the Pressing Rod and the Pressing Handle that is attached to the Water Supply Hose.

2 Loosen the fixed nuts to connect the connector to the tap
Untighten the screw of the connector so that the tap can be placed in the middle.
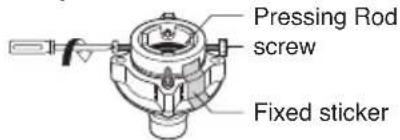
NOTE
In case tap is too large. If the tap diameter is too large or is square, untighten the 4 screws and remove the guide plate. Then follow step1.

3 Fixing Connectors to the Tap
Push the upper connector up till the rubber packing is in tight contact with the tap. Then tighten the 4 screws.
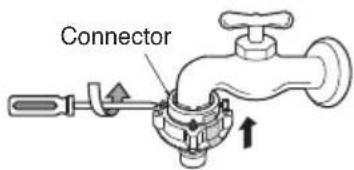
4 Fixing Upper Connector and Middle Connector
Remove the fixed sticker in between the Upper and Middle Connectors. Tighten the connectors by holding one connector and twist middle connector to the right.

5 Connecting Middle Connector and Water Supply Hose
Press down the pressing rod of the Water Supply Hose which was separated from middle connector (refer to Step1) and then join it to the middle connector.

6 Check for water leakage
After connecting the hose, open the tap to check for any water leakage. If the connection leaks, close the tap and start again from step 1. If you skip step 1, water leakage may occur.

natural_image
Illustration of a faucet with a prohibition symbol (no text or labels)Screw Type
1 Attach the water supply hose to the tap.
Push the water supply hose up so that the rubber packing within the hose can adhere completely to the tap.

2 Connect the water supply hose to the tap.
Connect the water supply hose to the tap and then tighten it by screwing it to the right.

natural_image
Line drawing of a faucet with a handle and valve (no text or symbols)3 Check water leakage.
After connecting the hose, open the tap to check for any water leakage.
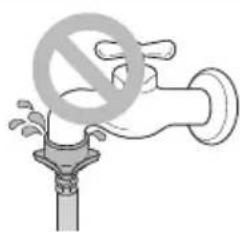
natural_image
Illustration of a faucet with a no-smoking symbol (no text or numbers present)Connecting Water Supply Hose to the machine
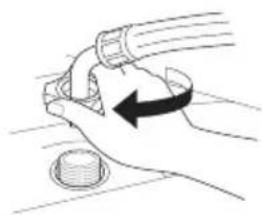
- Connect the water supply hose to inlet valve of the washing machine, and then lock it by turning the hose connecting part.
natural_image
Illustration of a hand holding a pipe with a circular object nearby (no text or symbols)- Check to see if there is a rubber seal inside the connector.

Connecting Drain Hose
Before connecting Drain Hose, check your Drain Hose model and choose the correct instructions.
Pump Model
1 Fit the end of the drain hose to the outlet of the drain pump and tighten the clamp.

natural_image
Two-step diagram showing a mechanical assembly with arrows indicating motion (no text or symbols)2 Put the other end of the drain hose over the standpipe or wash tub.
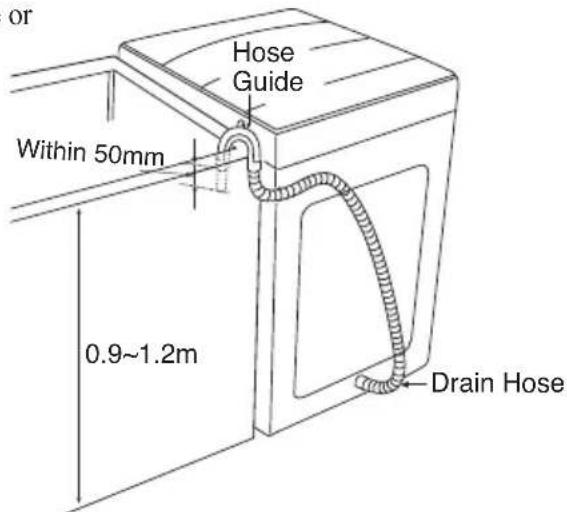
NOTE
• To prevent siphoning, the drain hose should not extend more than 50 mm from the end of the hose guide.
• The discharge height should be approximately 0.9 \~ 1.2 m from the floor.
Non-Pump Model
1 Before connecting
Ensure that the hose clip is set as indicated here.

2 Connect the Elbow Hose
Push the elbow hose toward the body of the washing machine.

3 Place the Drain Hose
To change the direction of the hose, pull out the elbow hose and change the direction. Repeat Step 2.
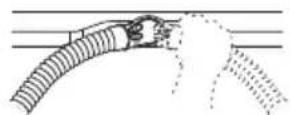
Grounding Method
Earth wire should be connected.
If the earth wire is not connected, there is possible a danger of electric shock caused by the current leakage.
Grounding Method with Ground insert space Terminal
If the AC current outlet has a ground terminal, then separate grounding is not required. Note that AC power outlet configurations may differ from country to country

Caution
CAUTION concerning the Power Cord
Most appliances recommend they be placed upon a dedicated circuit; that is, a single outlet circuit which powers only that appliance and has no additional outlets or branch circuits. Check the specification page of this owner's manual to be certain. Do not overload wall outlets. Overloaded wall outlets, loose or damaged wall outlets, extension cords, frayed power cords, or damaged or cracked wire insulation are dangerous. Any of these conditions could result in electric shock or fire. Periodically examine the cord of your appliance, and if its appearance indicates damage or deterioration, unplug it, discontinue use of the appliance, and have the cord replaced with an exact replacement part by an authorized servicer. Protect the power cord from physical or mechanical abuse, such as being twisted, kinked, pinched, closed in a door, or walked upon. Pay particular attention to plugs, wall outlets, and the point where the cord exits the appliance.
Other Grounding Method
Burying Copper Plate
Connect the Ground Wire to a Ground Copper Plate and bury it more than 75cm in the ground.

Using Ground Wire
Connect the ground Wire to the socket provided exclusively for Grounding.

Using a Short Circuit Breaker
If grounding methods described above are not possible, a separate circuit breaker should be employed and installed by a qualified electrician
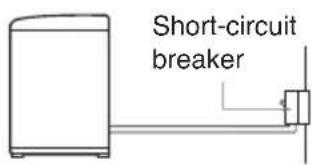
Caution
• To prevent a possible explosion, do not connect ground to a gas pipe
- Do not connect ground to telephone wires or lightning rods. This may be dangerous during electrical storms
- Connecting ground to plastic has no effect
- Ground wires should be connected when an extension cord is used.
Cleaning and Maintenance
Cold water washing
- If you always use COLD water, we recommend that a WARM or HOT wash be used at a regular intervals e.g. every 5th wash should be at least a WARM one.
When you have finished
- Turn off taps to prevent the chance of flooding should a hose burst.
• Always unplug the power cord after use.
When water supply into the tub is not clean or the filter is clogged with particles (such as sand), clean the filter in the inlet valve occasionally.
(The figure of power cord and water tap may vary according to the country)
To Clean the Filter in the Inlet Valve
1 Close the tap before turning off the power. HOT/COLD(WARM) and then press the [START/PAUSE] button to remove water from the machine completely.

2 Turn off the power before pulling out the cord.

3 After removing the water supply hose pull out the filter.
Then use a brush to clean the filter.

4 Replace the filter after cleaning it.
NOTE
- Before cleaning the filter, the impurities in the water supply hose should be removed.
To Clean the Pump casing (for pump model)
- Face + towel on the floor under the drain pump cap. Excess water may flow out.

Turn the cap counter-clock-wise and pull it out.
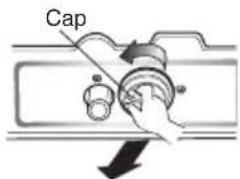
Remove any foreign objects and fluff inside pump casing and from the filter.
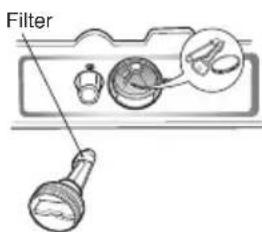
Replace the cap. Insert the filter along the guide ribs inside the pump casing. Filter must face the guide ribs inside pump casing and securely turn the cap clockwise.
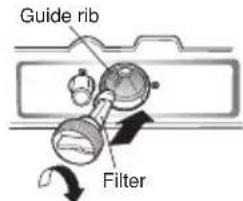
NOTE
- Check if water leaks after reassembling. (The Rubber ring is in the cap)
Cleaning and Maintenance
When there is a fear of freezing
- Close the water taps and remove the Water Supply Hose.
- Remove the water which remains in the water supply.
- Lower the drain hose and drain the water in the bowl and the drain hose by spinning.
If frozen
- Remove the water supply hose, and immerse it in HOT water at approx.. 40^ .
- Pour approx.. 2 liters of HOT water at approx.. 40^ , into the bowl and let it stand for 10 minutes.
- Connect the water supply hose to the water tap and confirm that the washing machine performs the supply and drainage of water.
| Wash Inner-tub | Leave the lid open after washing to allow moisture to evaporate. If you want to clean the inner-tub use a clean soft cloth dampened with liquid Detergent, then rinse. (Do not use harsh or gritty cleaners.) |
| Inlet Hoses | Hoses connecting washer to faucet should be replaced every 5 years. |
| Exterior | Immediately wipe off any spills. Wipe with damp cloth. Try not to hit surface with sharp objects. |
| Long Vacations | Be sure water supply is shut off at faucets. Drain all water from hoses if weather will be below freezing. |
Cleaning the Inside of your Washer
If you use fabric softener or do regular COLD water washing, it is very important that you occasionally clean the inside of your washer.
- Fill your washer with HOT water.
- Add about two cups of a powdered Detergent that contains phosphate.
- Let it operate for several minutes.
- Stop the washer, open the lid and leave it to soak overnight.
• After soaking, drain the washer and run it through a normal cycle.
Or use TUB CLEAN PROGRAM periodically.
We do not recommend that you wash clothes during this procedure.
Products that might damage your washing machine
- Concentrated bleaches and diaper sanitizer will cause damage to the paintwork and components of your washer.
- Hydrocarbon solvents i.e. petrol, paint thinners and lacquer thinners, etc. can dissolve plastic and blister paint (Be careful when washing garments stained with these solvents as they are flammable DO NOT put them in washer or dryer.)
- Some pretreatment sprays or liquids can damage your washer's control panel.
- Use of dyes in your washer may cause staining of the plastic components. The dye will not damage the machine but we suggest you thoroughly clean your washer afterwards. We do not recommend the use of dye strippers in your washer.
- Do not use your washer lid as a work surface.
Soft Safety Door
• Using tempered glass, inside can be seen while washing and safety is guaranteed.
• To prevent sudden close of door, it uses smart hinge so the door closes softly.
- Door is heavy. Be careful not to be caught in hand or other material.
It might cause injury or damage on product.

NOTE
- For customer safety, the door will be locked automatically during operation (Light turn on "door lock") sign. If there are additional laundry to put in, press operate/pause to unlock.
- Press START/PAUSE Button again to resume operation.
Common washing problems
Many washing problems involve poor soil & stain removal, residues of lint and scum, and fabric damage.
For satisfactory washing results, follow these instructions.
WASH PROBLEM
| Problems | Possible Causes | Solutions & Preventive Measures |
| Poor soil removal | Not enough DetergentWash Water Temperature too low.Overloading the washerIncorrect wash cycleIncorrect sortingDo not pretreat stain | Use correct amount of Detergent for load size, amount of soil and water Hardness.Different Water Temperature may be required according to soil type.Reduce load size.Wash with PREWASH+NORMAL or DUVET or SOAK & DUVET wash cycle for heavy soiled laundry.Separate heavily soiled items from lightly soiled ones.Pretreat stain and heavy soil according to directions shown on page 9. |
| Blue Stains | Undiluted fabric softener dispensed directly onto fabric | Rub the stain with bar soap. Wash.Do not overfill fabric softener dispenser and do not pour liquid fabric softener directly onto fabric.See page 12 for more instructions. |
| Black or gray marks on clothes | A buildup caused by the interaction of fabric softener and Detergent can flake off and mark clothesNot enough Detergent | Keep the recommendations against Scrud(waxy buildup).(refer to scrud page12.)Use correct amount of Detergent for load size, amount of soil and water Hardness. |
| Yellow or brown rust stains | Iron or manganese in water supply, water pipes, or water heater | To restore discolored load of whites, use rust remover safe for fabric.Install non-precipitating water softener or an iron filter in your water supply system for an ongoing problem.Before washing, run water for a few minutes to clear lines. |
| Lint | Incorrect sortingTissues left in pocketOverloading the washer | Wash lint givers eg towels, flannelette sheets, separately from lint collectors eg synthetic fabrics and remove tissues in pockets before wash.See page 9 for sorting and caring before loading.Do not overload the washer |
| Residue or Detergent | Overloading the washerUndissolved DetergentUse too much Detergent | Do not overload the washer.Some Detergents need to be pre-dissolved, check the Detergent instructions.Try pre-dissolving the Detergent.Increase Water Temperature using HOT water safe for fabric.Use proper amount of Detergent. |
| Holes, tears, or snags | Incorrect use of chlorine bleach.Unfastened zippers, hooks, bucklesRibs, tears and broken threadsOverloading the washerDegradation of fabric | Never pour chlorine bleach directly on fabric.See page 11 for adding liquid bleach.Fasten zippers, hooks, and buckles.Remove objects in pockets. See page 9 for caring before loading.Do not overload the washer. |
Troubleshooting
Before calling for service, check the problem against the list bellows.
| Symptom Error Message | Check up | |
| Water Supply Failure |  | • Is the water tap shut off?• Is the water supply cut off ?• Is the tap or water supply hose frozen ?• Is the water pressure low or is the filter of the inlet valve clogged with impurities?• Is the Hot hose connected to cold?• Is the Cold hose connected to hot? |
| Drainage Failure | 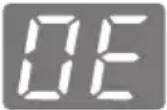 | • Is the drain hose positioned correctly?• Is the drain hose bent or placed too high?• Is the internal part of the hose or drain pump (only pump model) clogged with impurities?• Check if electric power has gone off. |
| Spin Failure | 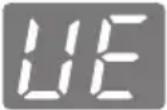 | • Is the laundry evenly balanced?• Is the washing machine placed on a flat surface? |
| Door(Lid) Open |  | • Is the lid closed? |
| Door(Lid) Close |  | • Is the lid closed?• Make sure that the lid is closed properly and press the START/PAUSE button.The washer will not operate unless the lid is locked.• Make sure that nothing is caught under the lid, including shipping material or clothing. |
| Foreign objects | 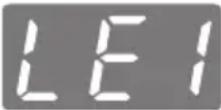 | • Are there foreign objects, Such as coins, pins, etc., caughtbetween the wash plate and the inner basket ?• Turn off the washer and then press the Power button.Press the spin speed button without selecting a cycle to drain and spin the load.When the spin is complete, remove the clothes and then find and remove any objects caught in the wash plate. |
| Tub Clean Alarm |  | • Please empty the tub, insert bleach into the detergent dispenser and select the Tub Clean cycle.• If you want to skip the Tub Clean, press option buttons to select desired cycle. In this case, you would see the message again after few washing times. Once performed Tub Clean cycle, will disappear until next point of time to clean the tub. |
 | • Please call your nearest LG Electronics service center for help. | |
SmartDiagnosis™
1 Close the washer door, and press the POWER button.

POWER
- If you manipulated other button or dial before pressing Cold Wash button, turn off the power and start again from the beginning.
2 Place the phone to SmartDiagnosis™ display.

Smart Diagnosis™
• Make sure that the speaking side of the phone to face SmartDiagnosis™ display

3 Long press Cold Wash button to activate smart diagnosis.
- Place the phone near the SmartDiagnosis™ display, and long press Cold Wash button until tak tak tak sounds.

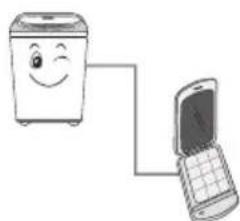
4 Hold the phone while data is transmitted.
natural_image
Illustration of a smiling refrigerator connected to a mobile phone (no text or symbols)- Keep placing phone to SmartDiagnosis™ display while data for smart diagnosis is being transmitted. The time remaining for data transmission will be displayed on screen. - Transmission sound may be irritating. For proper diagnosis, do not take off the phone.
5 After the data transmission is completed, listen to the diagnosis result from the consultant.
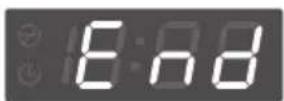
- When data transmission is completed, the power is automatically turned off with "End" display after a few seconds.
NOTE
Smart Diagnosis is a troubleshooting feature designed to assist, not replace, the traditional method of troubleshooting through service calls. The effectiveness of this feature depends upon various factors, including, but not limited to, the reception of the cellular phone being used for transmission, any external noise that may be present during the transmission, and the acoustics of the room where the machine is located. Accordingly, LG does not guarantee that Smart Diagnosis would accurately troubleshoot any given issue.
What Is Not Covered:
- Service trips to your home to teach you how to use the product.
- If the product is connected to any voltage other than that shown on the rating plate.
- If the fault is caused by accident, neglect, misuse or Act of God.
- If the fault is caused by factors other than normal domestic use or use in accordance with the owner's manual.
- Provide instruction on use of product or change the set-up of the product.
- If the fault is caused by pests for example, rats or cockroaches etc..
- Noise or vibration that is considered normal for example water drain sound, spin sound, or warming beeps.
- Correcting the installation for example, levelling the product, adjustment of drain.
- Normal maintenance which recommended by the owner's manual.
- Removal of foreign objects / substances from the machine, including the pump and inlet hose filter for example, grit, nails, bra wires, buttons etc.
- Replace fuses in or correct house wiring or correct house plumbing.
• Correction of unauthorized repairs. - Incidental or consequential damage to personal property caused by possible defects with this appliance.
- If this product is used for commercial purpose, it is not warranted.
(Example : Public places such as public bathroom, lodging house, training center, dormitory)
If the product is installed outside the normal service area, any cost of transportation involved in the repair of the product, or the replacement of a defective part, shall be borne by the owner.

natural_image
Illustration of a large washing machine with labeled dimensions (W, D, H) and control panel (no text or symbols on the device itself)| Model | T1732AFPS5 T1632AFPS5 T1532AFPS5 T1432AFPS5 | |||
| Wash capacity | 17.0 kg 16.0 kg 15.0 kg 14.0 kg | |||
| Power supply | 220V~, 50 Hz | |||
| Rated input | 1600 W | |||
| Weight | 50 kg | |||
| Size | 632(W) × 670(D) × 1020(H) mm | |||
| Water tab pressure | 30 - 800 kPa (0.3 - 8.0 kgf/cm2) | |||
※ In our continuing effort to improve the quality of our appliances, it may be necessary to make changes to the appliance without revising this manual.
Memo
Memo
دليل الملك
جهاز الخسالة
يرجى الإطلاع على دليل الملك هذا جيدًا قبل تشغيل
الغسالة والاحتفاظ به للرجوع إلىه في المستقبل.
T1732AFPS5
T1632AFPS5
T1532AFPS5
T1432AFPS5
جهاز الغسالة بحلة DD التربينية لا يعمل بالغطاء المفتوح. وإذا فتحت الغطاء أثناء دورات الغسيل، الشف والتجفيف، يتocomف جهاز الغسالة عن العمل تلقائيا.
يرجى إغلاق الباب ببطء لأnk قد تتضرر في حالة أنك تغلقه بشدة.


natural_image
Cartoon illustration of a smiling rice cooker with steam rising inside (no text or symbols)DD يتم تشغيل وظيفة الح((-) 黑كية من خلال تقنية الموتور
• Matrix vertices من نوع حلة الغسيل تُعد أكثر صحية وأنظف و التي تحمي الأسجة وではなく تلفها.
نظام التسخين التلقاني
• استخدام دورة الغسيل الساخنة مثل الغسيل العادي،这是我 توفر أداء غسيل موحد وتأثير معقم حتى مع الماء البارد.
التحكم الذكي المنظقي
• المشرالداخلي ب二十五ات ملايس يكشف و二十五ات مقداره وتوماتيكيا وبيض الك-bodyوتر الصينير أفضل لوضعية للغسيل مثل استهلاك الماء ووقت الغسيل الأفضل.
• تم اتحاذ تكنولوجيا م typورة في نظام التحكم الإلكتروني هذا يضمن أفضل نتيجة للغسيل.

flowchart
graph LR
    A["詭詠詠"] --> B["مسبل"]
    B --> C["إشEOار"]
    C --> D["وعيل حالة"]
    D --> E["تنشيل"]
النوع الجديد من الغسيل DD المزود بخاصية حماية الأنسجة
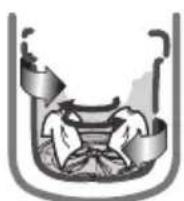
تدور الحلة على كلالجانبين لتوازن وتقرد الغسيل.


و أيضا تخلق سرعة دوران الحلة تيا ر مائي قوي.


كما تدور المروحة على كلا الجنين Insertة الpeg من الغسيل.

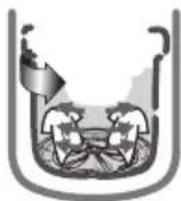
تزيد سرعة الدوران العالمية من إذابة المسحوق وtglغleh جيدا داخل الملايس.

natural_image
Cartoon illustration of a smiling character inside a container with a bowl (no text or symbols)نظام الدوران المباشر بضجيع منخفض
• يدُور الموتور من BLDC المستقدم الحوض مباشرة بدون حزام وكلتش، فيخفض ضجبج الغسيل. • يضبط جهاز الغسالة السرعة مناسبة لنوع الملابس التي وzeugتها.

Smart Diagnosis™

SmartDiagnosis™ تقرنية
• في ت Maya إرسال الأعpatال إلى مركز الخدمة عندما تكون هناك مشكلة في الفسالة. في توفر الخدمة التي تحقيق ولاء وثفة العملاء من خلال التحليلorstال dqقيم والسرع.
إعادة التشفيل التلقائي
. قسمح ميزة إعادة الشغيلcertقانيita في Callan enقطاع التيار الكهربائي، ويدأ التشغيل من المرحلة التي توقف خلالها.
المح토يات
يرجى قراءة هذه التعليمات
راخل هذه التعليمات، تجد عدا كبيرا من اللمحات الفيدة حول كيفية تشغيل جهاز الغسالة وال Pepsiança بشكل مناسب. العناية القابلة فقط بالجهاز تمكنك من توفير الكثير وقتا ومالا طوال عمر جهاز الغسالة. وتجد الحلول الكثيرة حول المشاكل العادية البسيطة في جز، تحري الخلّل وإصلاحه، إذا راجعت اللمحات الموجودة في جدول تحري الخلّل وإصلاحه أولا، قد لا ت Connectivity Alte الاتصال الهاتفي لطلب الخدمات مطلق.
| 4 | تعليمات من أجل السلام | المقدمة |
| 7 | تعريف الأجنبية | |
| 8 | معلومات عن الوظانف | |
| 9 | الإجراءات الاستعادية قبل الغسيل | قبل البد، بالغسيل |
| 10 | استعمال الماء, صندوق التوزيع, مسحوق الغسيل ومنعم الغسيل | |
| 13 | الديل الخاصة لإزالة الوسع | |
| 14 | وظيفة كل زر من الأزرار | |
| 16 | غسيل عادي | برامج الغسيل |
| 16 | غسيل عناية بالبpeg | |
| 16 | غسيل عناية ضد الحساسية | |
| 16 | الشف الذكي | |
| 16 | غسيل إ提质صادي | |
| 18 | غسيل سريع | |
| 18 | غسيل الملايس副会长ة | |
| 18 | غسيل عادي + غسيل مباني | |
| 18 | غسيل ل dhاف | |
| 18 | غسيل صامت | |
| 20 | الغسيل المفضل | |
| 21 | غسيل نpeg | |
| 22 | شطف مكثف | |
| 23 | تنظيف الحوض | الوظategic الاختيارية الإضافية |
| 24 | تجفيف بالهواء | |
| 25 | الغسيل الاختياري | |
| 26 | تأخير الوقت (ال Height) | |
| 27 | الوظategic الفيدة الاخرى | |
| 28 | التrekيب والاستواع | التركيب |
| 29 | توصيل خرطوم تزويد الماء | |
| 32 | توصيل خرطوم التصريف | |
| 33 | كيفية توصيل السلك الأرضي | エンاية والصيانة |
| 34 | التنظيف والصيانة | |
| 36 | باب السلام الناعم | |
| 37 | مشاكال الغسيل العادية | tangري الخليل واصلاحه |
| 38 | تحري الخليل واصلاحه | |
| 39 | التشخيص الذكيTM | |
| 40 | شروط الضمانة | شروط الضمانة |
| 41 | الموصفات | الموصفات |
تعليمات من أجل السلامه
اقراً هذا الدليل بعناية تماما(PROه لأنه يحتوى على المعلومات المهمة من أجل السلامة التي تحمي المستخدم من ال Aerospace غير المتوقعة وTênع الضurr في الجهاز.
| هذا LDLيل ي Nunسم إلى القسمين : التحذير والتنبيه. هذا يشیر إلى تحذير من أن المستخدم قد يتعرض لل Safari. هذا يشیر إلى « الممنوع مطلقا. » |
| تحذير : الفشل في تبع التعليمات تحت هذه العلامة قد يؤدي إلى الإصابة بالجرح(spصي أوالوفاة. ! تنبية: الفشل في تبع التعليمات تحت هذه العلامة قد يؤدي إلى الإصابة بالجرح(spصيالخفيف أو الضر في الجهاز. ! |
| تحذير ⚠️ | سلامة مسخن الماء |
| تحت الأhwال المعينة، قد يحدث غاز الهيدروgien من الماء الحار في حالة أن الماء الحار لا يستخدم لدمةأسبوعين أو أكثر. قد ينجفر غاز الهيدروgien تحت هذه الأhwال.zonا لم يستخدم الماء الحار لدمة أسبوعينأو أكثر، افتح حNFية الماء الحار لدمة بضع دقائق لتجنب ضرور أو جرح بسبف فتح حNFيات الماء الحارافعل نفس الإجراءات قبل تشغيل أي جهاز كهربائي موصول بنظام الماء الحار. هده الإجراءات البسيطةarseمح لك بتجنب غاز الهيدروgien آناشى: لا تدخن أو *" Capacity اللّهب أو جهاز أثناء هده الإجراءات لانالغاز قابل للاشتعال. | |
| تنبيه ⚠️ | تركيبön簾سب |
رَكَبْ الجهاز أو اhfظه في مكان لا يتعرض لدرجة البرودة التي تصل إلى درجة التجميد أو للرطويةإذا كان الجهاز يتعرض لهذه الأhwال، قد تحدث الصدمات الكهربائية، الحريق، والانقطاع أوتشويه.التوصيل الأرضي簾سب لجهاز الغسالة للتاکد من رموز التحكم والمؤشرات، واتبع تعليمات.الترکيب بالتفصيلإذا لم تعمل التوصيل الأرضي بشكل مناسب، قد يحدث انقطاع الكهرباء وتسربها، الأمر قدي ئيدي إلى إحداث الصدمات الكهربائيةإذا واقع القابس بين الجدار والجهاز، قد ي Construrr، الأمر فد يؤدي إلى إحداث الحريق أوالصدمات الكهربائية.تأكد من توصيل القابس إلى مخرج التيار باحكام.الفشل في هذا قد يؤدي إلى إحداث الصدمات الكهربائية والحريق بسبب التسخين الزائد.الحنز يدل على أنه لا يجوز إدراج اليدين لاستخراج国会 Practice الجارية داخل الحوض. | |
| مكان الغسالة | |
• indoor التشفيل مع وجود تلك الأشياء حول الجهاز قد يحدث الان negajar أو الحريق.• خذ عن Initiative شديدة في حالة تشفيل هذا الجهاز من قبل الأطفال أو قرببا منهم. ولا تسمح للأوراد• باللغ على الجهاز أو معه أو داخله أو أي جهاز أخرى.• Carد يتعرض للأطغال لخطر السقط في الحوض.• ولا تلمس قابس التيار بيد مبيلة  • الأمر قد يؤدي إلى الصدمات الكهربائية.• لا تضع يدك، قدمك أو أي شي، تحت جهاز الغسالة أثناء تشغيل جهاز الغسالة • الأمر قد يؤدي إلى الصدمات الكهربائية.• لا تضع يدك، قدمك أو أي شي، تحت جهاز الغسالة أثناء تشغيل جهاز الغسالة  Yellowstoneальные تدور تحت جهاز الغسالة، الأمر قد يؤدي إلى إصابتك بالجرح. Yellowstoneальные تدور تحت جهاز الغسالة، الأمر قد يؤدي إلى إصابتك بالجرح. | weekend استخدام الغسالة |
| • استخدم هذا الجهاز للغرض المبين في دليل الملك فقط.• عملية الغسيل قد ت Aliق ضع معوق اللّب للقماش. لتجنب هذه النتائج، اtbع بعناية تعليمات• الفسيل والصيانة لص Igع الملاس• لحد من إمكانيات الصدمة الكهربائية، افصل قابس الجهاز من presentsر التيار الجداري أو اقpong• طاقة الغسالة في لوحة توزيع الطاقة في المنزل من خلال سحب الصهربة أو توفق قاطعة الدائرة • الكهربائية قابل محاولة أي صيانة أو تنظيف• الحدر يدل على反之 لا يوزتثبيت الغسالة في مكان رطب• الحدر من الغسالة التي يكن فتح غطانيها خلال استundraج安县،反之 Malaysia 15 ثانية أو أثر لوقت آمل• لاستundraج مياه الحرض حيث反之la تعتر مشكال في مثالCode Malaysia: يكنك وف ق الجهاز عن العمل بالغسط على زر الطاقة في حالة عدم قابس الجهاز عن presentsر التيار الجداري• تأكد من أن التصريف يجري كما ينبفي• إذا لم يتم تصريف الماء كما ينبفي، قد تب鹦ل الأرض• وقد تتعرض الأرض المتبلة لتسرب الكهرباء، الأمر قد يؤدي إلى إحداث الصدمة • الكهربائية أو الحريق• إذا فتحت الغطاء أثناء التجفيف، يتوف ق الحوض عن الدوران خلال ١٥ ثانية، ويتوف • الجهاز عن العمل فورا• اطلب الإصلاح إذا قام الجهاز بالتجفيف ببابه المفتوح والأمر قد يؤدي إلى إصابتك بالجرح• لا تدخل يدك في حوض الغسيل أثناء عمليات الغسيل • انت portsر حتى يتوف جهاز الغسالة تمما قبل فتح الغطاء• وقد يؤدي حتى الدوران البطيء إلى إصابتك بالجرح• لا تحل ول تشغيل هذا الجهاز في حالة حدوي ضرير، خلال، عدم تجيم جزئى، أو فقد قطع • أو كسر قطع، بمافها سلك تياز أو قابس مصاب بضرر • والتشغيل بالقابس المتضرر قد يؤدي إلى إحداث الصدمة الكهربائية• ولا تستخدم الماء السكن الأكثر من . هم• استخدام الماء الساخن الزادن قد يؤدي إلى الضرير في الأقمشة أو تسب الماء. | |
 | عند استخدامالغسالة | |
| لا تستخدم قابس ومقبس وسك تيار ليس متفقا للسعة المقدرة.و هذا قد يؤدي إلى إحداث overdمال الكهربائية، الحريق، الانقطاع، و/ أو تشويه الأجزاء.الازج.لا تمزج مادة التببيض الكلوuri بما Annشادر أو الحميد مثل الخل و/ أو Quizيل الصداً.المزيج من #: Manufacturer المثكتقة في يؤدي إلى غاز مسمق يؤدي إلى إحداث الوفاة.القلة للاحتراق أو الانجار (مثلاي desم، والزيت، والدهان، والغازولين، و Mozيل الشح، و Mozياي، ت henظيف الملايس، والكيوسين ...الغ) التي قد تشعل أو تفجر. لا تصف هذه الأشيا، إلى الماء للغسيل. لا تستخدم أو لا تضع هذه الأشيا، حول جهازالغسالة أو حوض التجفيت أثناء Animation. هذا قد يؤدي إلى الاستعمال والانFGبار. |    | |
 |  | |
| أغق خنفرة الماء: لضمان ضغط الماء، في الخرطوم والصمام ولتقيل تسرب ما، في حالة حدوث كسر أو تمزق. تأكر من حالة خرطوم توريد الماء: : لا بد من تبديل الخرطوم كل ع Storageإذا كانت درجة الحراة عالية ودرجة حراة الماء منخفضة، قد يحدثtek Netflix الماء، والأمر قديؤدي إلى تبيل الأرض.امسب الوسع أو الغبار في جزء التوصيل لقابس التيار.استخدام قابس التيار غير-currentNetflix قد يؤدي إلى إحداث الحريق.قبل إصلاح الغسالة، أو نقلها إلى مركز الخدمة، ازل غطاء، الغسالة لمنnoc主管部门 من اختبا Anaheim في داخل. CPد يsecط الأطفال وихنفون في حالة وجود الغطاء.لا تحاول إصلاح أو تبديل أي قطعة باستثماء الموصى به خاصة في دليل الملك هذا أو مبين في تعليمات الإصلاح من قابل المستخدم بحيت تفهم الإصلاح ونقدم به ماهرا.تشغير الجهاز بعد تبديل القطع غير المناسبة قد يؤدي إلى إحداث الحريق أوالصدمات الكهربائية.لا تعبث بالضوابط في لوحة التحكم. هذا قد يؤدي إلى إحداث overdمال الكهربائية، الحريق، الانقطاع والتشويه.لا تnezع سلك التيار لاطفاء طاقة الجهاز.امسك قابس التيار باحكام لнизع قابس التيار للجهاز.عدم تبع هذه التعليمات قد يؤدي إلى إحداث overdمال الكهربائية أو الحريقبسبب انقطاع الكهرباء.عند تنظيف جهاز الغسالة، لا ترش الماء، مباشرة على أي جزء من جهاز الغسالة. هذا قد يؤدي إلى انتCONTAGE الكهرباء وال overdمال الكهربائية. |     | |

غطاء منع الجز (-ac迷你)

خرطوم تصريف الماء.
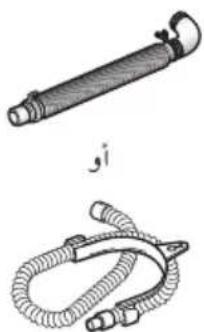
natural_image
Illustration of a cylindrical device and a coiled cable with connectors (no text or symbols)خرطوم توريد الماء.
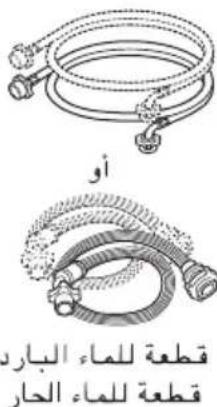
ملاحظة
الأجزاء في الشكل مع علامة * ’قد تختلاف حسب الموديل.
معلومات عن الوظitaف
جهاز الغسالة يقدم طرق الغسيل المختلفة التي تناسب الأحوال والأنوع المختلة من الملايس.
الأنواع المختلفة من الملايس
غسيل عادي
استخدم هذا البرنامج لغسيل migrantس اليومي مثل الحرام، والمن Flash، والقصان. (راجع صنعته 16).
غسيل عناية بالبقم
(16) الغسيل على درجة الحرارة المenthalية (40 درجة) بتسخين الملايس التنظيفة عندما تريد استخداما. (يربجى irr Outerg Ireland صفحة 16)
(درجة الحرارة المثلى. ساخن: 60Degree Mode / بارد: 15 Degree Mode)
غسيل عناية ضد الحساسية
دورات التعقييم وال henظيف للغسيل الذي تم تسخيد لدرجة حرارة 50 درجة متوة. (يربى الرجوع إلى صفحة 16).
(درجة الحرارة الم stimuli. ساخن: 60 درجة مthsة / بارد: 15 درجة مthsة)
الشف الذي
استخدم هذا البرنامج للحصول على شطف أفضل (انظرdatabase 16).
غسيل إقصادي
لToFير الماء والمسحوق للغيل الأقل من ٧ كجم غير المتسخ بدرجة كبيرة. ( يرجى الرجرع إلى صنحة 16).
غسيل صامت
استخدم هذا البرنامج للغسيل الهادي في الليل. (راجع صفحة 18).
غسيل ل Caf
استخدم هذا الوضع لغسيل Ellapanيات و المفارش الثقيلة المحدد عليها علامة (غسيل يدوي). (يرجى Rougeم إلى صفحة 18)
غسیل عادي + غسیل مبدنی
ت顶层ف الغسيل باستخدام دررة الغسيل المبdateي + الدورة العادية والتي تعمل على معاجة البقع على الفور دون الحاجة إلى الغسيل اليدوي.
(يرجى الرجوع إلى صفحة 18
غسيل الملايس الناعمة
بكنك استخدام هذا البرنامج لغسب originating الرقبقة (اللايسنسائة التحنية، الصوفية ... ENG) التي قد تتضرر بمسهولة رanges صلحة (18).
الأقىشة الصوفية القابلة للغسيل بجهاز الغسالة مصمة خاصة لنع ال Bald أثناء، عسيلةها في جهاز الغسالة مEO Trump
الملابس المصنوعة يدوبيا ليست مصنوعة من الصوف القابل للفسيل في جهاز الغسالة ونوصيك بغسيلةها اليدوي
• قبل غسيل الملاابس الصوفية، تأكد من رقعة العناية لعرفة تعليمات الغسيل
• عند غسيل Mullابس الصوفية: استخدم مسحوق غسيل ناعم موصى به لغسيل Mullابس الصوفية.
• الملايس الصوفية بعد غسيلة اليدوي يكنك تجفيفها بجهاز الغسالة لخفض الوقت لتجفيفها.
• لتحفيف migrants الصوفية. ضعها سطحة على منشفة واضربها صربة خفيفة في شكلها. وجفها في الظ. (الحرارة والاهتراز للتجفيف في بؤئي
الى التقصير أو لباد الملاابس الصوفية) يمكن كغسيل بعض المنتجات ذات طبقة تحنية صوفية وجلد الغنم في جهاز الفسالة ولكن الأمرقد
بؤدي الى سد Diffخة. (تناكد من أن جميع الأشبا، للملابس مناسبة للفسيل في جهاز الغسالة ولا المادة الأساسية فقط)
قد تريد غسيل هذه الأشياء، غسيلا يدوبا وضعها في جهاز الغسالة لنجفيفها نقط.
الغسيل المفضل
۱.20. هذه الوظيفة نسمع لك بhfظط网易ية الفسيل المفضل لك في ذاكرة الدوران العادي (راجع صنعتة
الغسيل حسب حالة للملايس
غسيل سريع
يمكنك اختيار برنامج الغسيل السريع لغسيل الملايس الخفيفة الوسع أقل من 3. كغم لدة قصيرة (راجع صفحة 18).
غسيل ن Req
الغسيل الفوي مصم لënتحف كفا، غسيل على الأنصي ريككنك اختباره لغسيل migrantس التقبلة الرسخ. (راجع صنحة 21).
شطف مكتف
الاستخدام المكشف لازالة شطف المنظقات على نحو أكثر فعالية. (يفرجى الرجرع إلى صفحة 22).
طرق الغسيل الأخرى
تنظيف الحوض
استخدام هذا البرنامج لتنظيف الأسطج الداخلية لجهاز الغسالة خاصة الأسطج الداخلية والخارجية للحوض راجعىم.23
تأخير الوقت
تستخدم وظيفة تأجيل تشبغل الغسيل لتأجيل وقت الانتها، من عملية الغسيل.
(26. يbekنك ضبط ساعات لتأجيل التشغيل كما يريده المستخدم (راجع صفحة).
الغسيل الاختياري
يمكنك اختبار التجفيف، والstrip/التجفيف، والstrip، والغسيل/الstrip، والغسيلnetق كخيار (راجع صنعة 25)
عناية الرunalعات

* انظر في الرقعة الموجودة في الملايس. هذه تعلمك حول مكونات القماش للملابس وكيفية
غسيلها
افرز migrantس اللى migrantس التي يمكن غسيلها بنفس دوران الغسيل ودرجة حرارة الماء وسرعة التجفيف.
الفرز
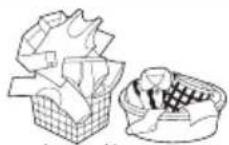
ل bloss Paul على أفضل نتيجة، لا بد من غسيل الملايس المختلفة بالطرق المختلفة.
فرز الملاابس حسب مستوى الوسخ.
• الوسخ (تقبل، عادى، خفيف)
فرز الملايس البيضاء عن الملايس الملوّنة
• اللون(الأبيض، اللون الفاتح، اللون الغامق)
فرز الملايس التي تنتج النسيل والملابس التي تجمع النسيل ملابس ذات زنبر النسیج، شnil، منشفة، زنیر، ديابر اصطناعي، قماش مخ HLMI الزغب، طيات دائمة، جوارب قصيرة
• انسيل (الملابس التي تنتجcontroller وتجمعه)
الملابس التي تنتج النسيل
الملابس التي تجمع النسيل
الفحص قبل وضع الملايس في الحوض
• انجحص جميع الجيبوب للتأكد من تفرغها. الأشياء مثل المسامير مشük الشعر، عود النقط، الأقلام، القطع الم Oxygenة

والمفاتيّح قد تؤدي إلى إحداث ضرر في كل من جهاز الغسالة والملاابس.
• إصلاح أي ملايس متزفة أو رخوة الأزرار. المزق أو الفتحات قد تсобع كبيرة أثناء عملية الغسيل.
• ازل أي اسلام متدللة من صديريةDispositionän لانهاقد تؤدي إلى إحداث ضرر في جهاز الفسالة والملابس.
• ازل الغبار والوسع أولا. • تأكد مما إذا كانت الملايس قابلة للغسيل بالآء أم لا.
• تأكد من تعليمات الغسيل. • ازل الفوطة الورقبة من الجيوب.
تنبيه
لا يغسل أو تنقص أي من البنود التي وصفت من المعروف أن المياه واقية أو مقاومة للམاء، حتى لولو كانت التسمية رعاية ال ALTNTJGE ORLE بند يسمح للغسالة. عدم اtbاع هذه التعليمات يمكن أن يؤدي إلى أضرار جسيمة نتيجة للاعتراز غير طبيعي للغسالة. أمتلة لإثباتハイاه أو عناصر مقاومة للماء وتشمل منصات مرتبة معينة، وأغطية الفراش، المطر والعتاد، معدات التخنييم، ملايس التزلج والعتاد في الهواء subsequently، وبنود مالم athlete.
المعاملة الأولية للبقعة أو الوسخ الشديد
• تنظيف الغسيل باستخدام دورة الغسيل المبdateي + الدورة العادية والتي تعمل على معاجة البpeg على الفور دون الحاجة إلى الغسي ل اليدوي.
• اغسل ياكقة القميش وكمه بمادة تنظيف الغسيل الأولى أو سائل التنظيف قبل وضع القميش في حوض
• استخدام مادة إزالة البpeg والوسعichten، اغسل البpeg بسرعة على قدر إمكان. أطول بقائها أсобب إزالتها.微生物اتية، قبل الغسيل، اغسل البpeg الخ Resource، وسائل التنظيف، أو مادة التنظيف الحب.
(١٣) لزيد من التفاصيل راجع صفحة
العمل
! تقيه
خطر الاحتراق
لا تspec في جهاز الغسالة الأشباً، مثل الغازولين أو السوائل القابل للاشتعال لا غسالة تصنطيع إزالة الزيت تماما. لا ت JFKف أي شي، يュمل زيتا من أي نوع بواسطة الغسالة (بما فيها زيت الطبخ). الأمر قد يؤدي إلى إ Dinada الموت، الان FGJJAR، أو الاحتراق.
لا تغسل القمش المحتوية على الأشياءCALABA للاشتعال(الشمع, سائل التنظيف ... الخ)
كمية حمل Mullابس
مستوى الماء يغطى الملايس فقط. اضبط كمية العمل حسب الملايس. ضع ملايس في الحوض بشكل غير مشدّل لا يزيد عن أعلى مستوى من فتحات حوض الغسيل. لاضافة الملايس بعد البد، بالتشغييل، اض菀 على زر التشغييل لابقاف الجهاز عن العمل واغطس الملايس التي تريد إضافتتها. اغلق الغطا، واض菀 على زر التشغييل مرة أخرى لإعادة تشغييل.
اللايس الخفيفة وكيرة الحجم

الملابس مثل migrantس بالزغب والملابس الصوفية هي خفيفة الوزن وكبيرة الحجم وسهلة الطفو. leadership استخدام شبكة نيلونية لغسيل هذه migrantس بالكمية القيلة من الماء. إذا كانت migrantس طافية Estonia دوران الغسيل، قد تتضرر. استخدام مسحوق الغسيل المذاب لمع تجليط مسحوق الغسيل.
الملايس الطويلة
استخدم شبكة نيلونية لل waving الطويلة والرقيلة. بالنسبة لل waving ذات الحبل الطويل أو الم waving الطويلة، هذه الشبكة تمنع تشابك الم waving أننا الغسيل. ثبت السحاب أو الأزرار والحل للتناKD من أن هذه #: لاتعلق بال waving الأخرى.
* شبكة نيلونية غير متوفرة مع جهاز الغسالة من إل جي.
مستوى كمية الماء
| 9 | 10 | |
| 7 | 8 | |
| 5 | 6 | |
| 3 | 4 | |
| 1 | 2 |
| • جهاز الغسالة يكشف ك Diversity الملاابس اوتوماتيكيا، ثم يختار مستوى الماء وك Diversity من مسحوق الغسيل. |
| • عند اختبار برنامج Fresno، يتبين مستوى الماء وك Diversity من مسحوق الغسيل (مطلوبة للغسيل) على لوحة التحكم. |
| • الجدول الثاني يبين ك Diversity الماء. |
| • عند كشف مستوى الماء اوتوماتيكيا، قد يختلاف مستوى الماء حسب ك Diversity الملاابس انتظر HICTI يتبين مستوى الماء على لوحة التحكم. |
تنمية
| [أدنى كمبة من الماء] |
| هذه تختلف حسب حمل eigenاس وموديل الغسالة. |
| أو يمكن صب كمبة معينة من الماء يدويا في الحوض مباشرة من ارتفاع معين. |
| هذه因為 إذا وصل مستوى الماء إلى ارتفاع المعين الذي تحس الغسالة به، Campaign الغسالة تلقائيا |
| وبعبارة أخرى، من الضرورة صب الماء إلى النقطة عند بده الغسالة بالتشprofil. |
درجة حرارة الماء.
| • يضبط جهاز الغسالة درجة حرارة الماء المحاسبة لبرنامج الغسيل اوتوماتيكيا. |
| • يمكن تغوير درجة حرارة الماء بال笹غط على زر درجة حرارة الماء. (۱۲ رanges صفحة ۱۳) |
| • درجة حرارة الماء تؤثر على فاعلية جميع مكونات الملايس فنتائج الغسيل. نوصى بدرجة حرارة الماء:الгар: -۶۹ -۷۰-۱۲.م (۱۴. -۱۵.ف) الملايس البيضاء،ハイابر، الملايس التحتتية، الملايس التقبيلة الوسع،اللايس narrowlyة اللونالدافي: -۶۰.م (۱۵.۰-۸۵) م عظم الملايس(۱۶. -۲۹) |
| • عند الغسيل بالماء البارد، الخطوات الإضافية لمست مطلوبة:البارد: -۶۱ -۱۸ م (۱۷۰ -۷۵) الملايس الفاتحة اللون جدا بالوسع الخفيف |
| • اضبط ك Diversity مسحوق الغسيل وادب المسحوق بالماء الدافي أولا:الغسل الب Adeو والأوساح غسبلا أولياانقع الملايس narrowlyة الوسعاستخدم مادة التبيض Mitñana* درجة الحرارة أقل من ۱۸ م (۱۷۵) لا تؤثر على مكونات الملايس epidemic تؤدي إلى إحداث النسب، النقلالغسيل غير النظيف ... الخ، بال Electrica إلى ذلك، صانع مسحوق الغسيل ورقعات العناية تعدد درجة حرارةالماء ما بين ۲۲ و ۲۹ م (۱۸. -۸۵) . إذا كانت درجة حرارة الماء في الحوض باردة جدا عند وضع يدك في الماءلا يعمل مسحوق الغسيل وين Stanford الملايس بشكل قاعل. |
تنبیه
| إذا كان الحديد موجربا في الماء، قد تREVOL ألوان الملايس إلى الأصفر أو أنها قد تensing بالقيم الأثار السمراء. والبرتقالية |
| الحديد لا يكن رؤيتها داتما. تركيب ملín القماش أو مصفة الحديد قد تكون ضرورية للحالات المختفة. |
استخدام درج الموزع
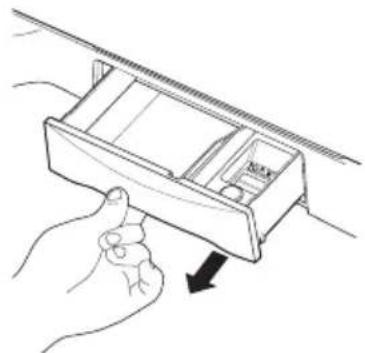
natural_image
Line drawing of a hand holding a device with a downward arrow indicating rotation (no text or symbols)يحتوي درج الموزع على صندوقين:
• منعم قماش سائل
• رغاری قلیلیة سائلة أو مسحوق، مسحوق عالي الكفاءة. يوزع
الموزع تلقانيا مواد المضافة في الوقت المناسب من دورة الغسيل.
-
افتح درج الموزع ببطء بسبح الدرج حتى يتوقف.
-
أ拇指 منتجات الغسيل، وأقل درج الموزع ببطء. قد يؤدي قفل
الدرج بسرعة إلى التوزيع المبكر للمواد المضافة.
• تجب زيادة الملء أو تناثر الماء عند إضافة منتجات الغسيل للموزع.
قد يüzüي القيام.SEلك إلى التوزيع المبكر ل projecting الغسيل.
في نهاية الدورة، يمكنك أن ترى الماء في الصندوقين. هذا جزء من التشفيل العادي للغسالة
ملحوظة: لا تستخدم المبيض في درج الموزع
استخدام مسحوق الغسيل وملين القماش
مسحوق الغسيل
اتبع Consultingات المبينة في علبة مسحوق الغسيل. استخدام كيمة قابلة جدا من المسحوق بؤدي إلى مشكلة غسيل عادية. استخدم كيمة أكثر من مسحوق الغسيل正当 Fresno باللا، الصلب والملابس الكتثيرة، والملابس المتوسخة بالزيت والشحم أو يدرجة حرارة الماء المنخفضة.
-ac Mitsubishi مسحوق الغسيل الصحيح
نوصي widened استخدام مسحوق الغسيلHL Multi, (مسحوق الغسيل, سائل الغسيل، أو مسحوق الغسيل المكثف). لا-acد من عدم استخدام الرقاقة من الصابون أو حنوب الصابون في جهاز الغسالة. في حالة غسيل الملايس الصوفية. لا انس استخدام مسحوق الغسيل Minاسب للملايس الصوفية.
استخدام مسحوق الغسيل
كمية مسحوق الغسيل
الكميةön MINASBE من مسحوق الغسيل تختلف حسب درجة الوسخ للملابس (الجين والملابس العملية قد تحتاج إلى مسحوق الغسيل الأكثر بينما منشفة الاستثمام ت Herbert عادة إلى مسحوق الغسيل الأقل). بالنسبة لسائل الغسيل أو مسحوق الغسيل المكäft، اتبع التعليمات المبينة في علبة مسحوق الغسيل. ملاحظة : للتأكد من أنك تستخدم الكميةön MINASBE من مسحوق الغسيل، افرغ غطا، جهاز الغسالة أ Thenا، عملية الغسيل. weekend طبقة خفيفة من الرغوة على سطح الماء. ويدو أن الرغوة الكثيرة جيدة ولكنها لا تساهيم في تنظيف الملابس. ولا رغوة تعني أن كمية مسحوق الغسيل غير كافية لغسيل الملايس: الوسخ والنسيل قد يبقى في الملايس أو جهاز الغسالة.
إذا استخدامت مسحوق الغسيل أكثر من اللازم، لا يجري الشطف شطفا نظيفا وفعالا. كما أن هذا قد ي overdoseي إلى تلويث البيئة قاستخدمه كما ينbefي.
¡ICAfectة المنظف
أ Cardiff منظف محسوب في صندوق المنظف من درج الموزع.

natural_image
Technical line drawing of a mechanical component with an arrow indicating direction (no text or symbols)يتدفق المنظف خلال الموزع في بداية مرحلة الغسيل. قد تحتاج إلى ضبط درجة حرارةannah، وصلابةannah وحجم مستوى الاتساخ وحمولة الغسيل. تجنب استخدام كمية كبيرة من المنظف في الغسالة، حيث يمكن أن TÜ Düي إلى رغاوي الصابون وبقاء بقايا المنظف في على الملايس.
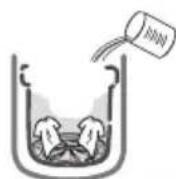
ملاحظة: استخدام المنظفات السائلة
ت Andreجع منظفات Satisfaction مع الماء وتصب في الحض، و من ثم يتم بدء الدورة. ل تأخير دورة الغسيل بالطبع غير متوفرة إذا كانت *"تخدم المنظفات Satisfaction.
ملاحظة
استخدام المنظفات Satisfactionة دون تمبيع، أو ترك الغسيل لفترة طويلة بعد الصب تميع المنظقات Satisfactionة في الحوض تسب ضررا، تبيض أو تلون القماش.
إستعمال الماء, صندوق التوزيع, مسحوق الغسيل ومنعم الغسيل
موزع مادة التبيض (CL)
استخدام سائل التبيضى
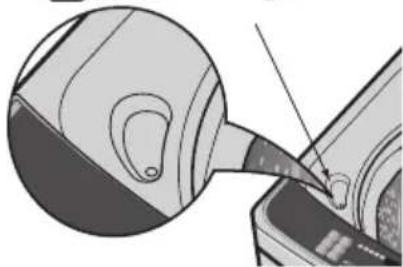
natural_image
Diagram showing a device being inserted into a component, with no visible text or symbols• تأكد من التعليمات الخاصة المبينة في الرقعة وافرز migrantابس التي تريد
تبيضها.
• لا عبد من ترقيق سائل الغسيل الكلوري.
• قس كمية موصى بها من سائل التبيض بعناية تبعا للتعليمات
المبينة في الزجاج.
• قبل البدء بتشغيل الفسالة، صب Kosمية المحددة من مادة التبيض في
موزع مادة التبيض mMباشرة. تجنب رش المادة أو وملءه فوق الموزع.
إذا فضّلّت استخدام مسحوق التبيب strings، اضفه في حوض الغسيل مع الماء قبل الصب.
• في الموزع يتم تخفيف سائل التبيض قبل وصوله إلى الملابس في حوض الغسيل.
العربية
. لا تصب سائل التبيض غير المشف على الملايس أو في حوض الغسيل مباشرة. هذا قد يؤدي إلى
تحويل اللون أو إحداث ضرر في الملايس.
• لا تصب سائل التبيض في موزع مادة التبيض.
استخدام منعم القماش
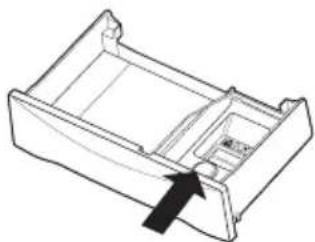
natural_image
Line drawing of a rectangular electronic device casing with an arrow pointing to a component (no text or symbols)إذا رغبت في ذلك، اسكب الكمية الموصى بها من منعم القماش
السائل في الصندوق الأمن.
استخدم منعم القماش السائل
امزج المنعم بالماء للحد الأقصى من مستوى الملء.
لا تتجازر الحد الأقصى من مستوى melody.
يمكن أن تتسب في التوزيع المبكر لمعد القماش، مما
قد يؤدي إلى ت颔ع الملايس.
ملحوظة: لا تスキ منعم القمش مباشرة على حمل الغسيل. فقد يpegع الملايس.
تحبیه
لا تخلط المنظف أو المبيض.
لا تスキ منعم القماش مباشرة على الملايس، فقد يبقعها.
■ لا точف الغسالة أثناء أول عصر للوزيع في الوقت المناسب.
▪ الغسيل الاختياري غير مصمم للاستخدام مع موزع منعم القماش.
(tekويت شمعاني) Scrud
هو الأسم rmsى بالتكوين الشعى الذي قد يحدث داخل جهاز الغسالة في حالة ملامسة ملين Scrud
القمش بمادة التنظيف. هذا التكويين الشمعي لا يحدث بسب خلل في جهاز الغسالة.
إذا retirement Scrud في جهاز الفسالة، هذا يؤدي إلى إحداث الوسع أو البpeg في ملايsek أو الرائحة الكريقة في جهاز
الغسالة.
إذا أردت استخدام ملین القماش ، نوصيك
• باستخدام ملبن القماش مقتصدا.
• عند وضع ملین القماش في الموزع، لا ترش أو تفض الموزع.
• نظَّف الموزع فورا بعد انتهاة دورة الغسيل.
• نظّف جهاز الفسالة بانتظام (راجع صفحة 23,34)
• الغسيل بالماه البارد يزید فرصة لحدود التكوين الشمعي. نوصيك الغسيل بالماه الدافي أو الماء الساخن
دوريا، على سبيل المثال الغسيل باللماء الدافى كل ه مرات من الغسيل على الأقل.
• ملین القماش من مرفق القوام يقال الثفل والبقايا في الموزع ويعمل التكوين الشمعي.
تنیمهات !
| • لا تستخدم سائل التبيض الكلوي وbezج بالمواد الكيمائية أخرى مثل مدة تنظيف الحمام، و modalée إزالة الصداً، والحامض والمنتجات الحتوية على محلول النشادر. مزج هذه Cicada في------------------------------------------------الع dxcan explير------------------------------------------------ى قديدي------------------------------------------------ى إحدات جرج أوموت |
| • ل Aliقض خطرlio accetracy أو الحرحخطير للشخص أو الخسارة الم ddية، اتبع التبيضات Agriculturalية آدناه: |
| • اقرأ واتبع 创建 تعامك المبینة في منتجات إزالة الوسع: |
| • احفظ منتجات إزالة الوسع في وعائها الاصلي وليس في يد متناول الأطقال: |
| • اغسل أي إناء، مستعمل تعماً: |
| • لا تمزج منتجات إزالة الوسع، خاصة مع محلول النشادر وسائل التبيض الكلوي، وعندها قد تحدث الدخانخطير. |
| • لا تغسل الملايس التي تم غسيلها مسقا، تم غسيلها وتم نفها أو تم وسخها بالغازولين، ومحول التنظيف الجاف أوpinkاء |
| • الاشبا، الاخرى القابلة للاستعال أو الانفجار Lebanon قد تبعت البخار وتحdet الانفجار Operating للاستعال أو الانفigar |
| • لا تستخدم المحول القابل للاستعال، مثل الغازولين، داخل المenzال، البخار قد يتعرض للاتصال بالنار أو الشرارة. |
من أجل النجاح في إزالة الوسخ :
• ازل الأساخ فورا.
• تنظيف الغسيل باستخدام دورة الغسيل المبhythى + الدورة العادية والتي تعمل على معاجلة البقع على الفور دون الحاجة
إلى الغسي ل اليدوي.
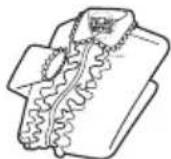
اتبع التعليمات المبينة في رقمعة عنابة القماش
• قرر نوعً من الوسخ، ثم اtbع التعليمات المبينة في جدول إزالة الوسخ المذكور أدناه
• لであملة الأوساخ الأولية، استخدم منتجات الفسيل الأولى، سائل الفسيل، أو
ععين مصنوع من حبيبات الغسيل والما.
• استخدم الماء البارد للوسع غير المعرف lending الماء الساخن قد يッチت الأوساخ
• تأكد من تعليمات رقعة العناية للمعالجة التي تنجنبها للأقمشة الخاصة.
• خذ عن Initiative لتنّبیت اللون من خلال اختبار مادّة إزالة الوسخ على الدرزة الداخلية.
• اشف Mullابس واغسلها بعد إزالة الوسع فيها
إزالة الوسخ
| المعAJGE | الوسع |
| ضع الشع. واکشط الوسع. ضمomega وسخ متجها إلى التحت على الفوطة الورقية. انفه بسائل إزالة الوسع أو سائل انتظيف الجاف غير القابل للاشتعال. | الشريط läاصق، علكة، اسمنت م_contابي |
| استخدم المنتجات الحتوية على الخميرة للمعAJة الأولية أو نpeg الوسع بها | طعام الطفل،LPبات،بيضات |
| عالع الوسع أوليا. اغسل الوسع بالما، البارد ومادة التبايبض الأمانية للقمشاش | الشرويات (QTWOJA, شاي، صودا، عصرير، كحول) |
| اشطفه بالما، البارد. امسحه يصابون. أو عاجه أوليا أو انفه بال研讨会 الحتوية على الخميرة. اغسله باستخدام مادة التبايبضolinaيمية للقمشاش | الدم |
| اكتشط أسطع الوسع. ضمomega مشسخاlambdaي التحت على الفوطة الورقية. اضغط عليه بالكواة حتى يتم امتصاح mushrooms. بدل الفوطة الورقية عدة مرات. عالج الوسع المتقي بزيّل الوسع للغسيل الأوليا أو سائل انتظيف الجاف غير القابل للاشتعال. اغسل يدويا إزالة المحلول. اغسل الوسع بستخدام مادة التبايبضolinaيمية للقمشاش | شمعة، ك Ryanون |
| عالج معAJة أوليا أو انفه بالما، الدافى باستخدام المنتجات الحتوية على الخميرة. اغسلها باستخدام مادة التبايبضolinaيمية للقمشاش | شوكولات |
| عالج معAJة أوليا بمادة إزالة الوسع للغسيل الأوليا أو امسحها بالصابون. | وسخ في باقة وكم، التجميلات |
| استخدم مادة إزالة اللون المعلية. اغسل بستخدام مادة التبايبضolinaيمية للقمشاش | تحويل صبع في القمشاشالأبيض |
| عالج معAJة أوليا أو انفه بالما، الدافى بستخدام المنتجات الحتوية على الخميرة. اغسلها باستخدام مادة التبايبضolinaيمية للقمشاش | العشب |
| اكتشط التفر من القمشاش. عالج معAJة أوليا. اغسلها بستخدام بالما، الساخن أكثر حôte Educational قماش. ألميا. | الشحم الزيت، القار (زيدة، دهن، صلصة، زيت طنغ، شحم سيارة،颛 سيارة) |
| لَا يمكن إزالة بعض الأنوع من الحير. الغسيل قد يッチت الحير. استخدم مادة إزالة الوسع أولا والكholو المسوخ أو سائل التظيف الجاف غير القابل للاشتعال | الحبر |
| اغسلها بمادة التبايبض الكلووريايمانية للقمشاش. أو انpeg بمادة التبايبض المؤكسجة والما، الساخن قبل العسيل. قد. تبقي العكن الفطري الشديد في القمشاش婴幼儿. | العكن الفطري، السفعة |
| اغسلها بمادة إزالة الوسع أو انpeg بال研讨会 الحتوية على الخميرة. | الط Pubن |
| اغسل بمادة إزالة الوسع. اغسلها بستخدام مادة التبايبضolinaيمية للقمشاش | الخردال، PLCMapam |
| قد لا يم컨ك إزانيته. ضمomega متسخاlambdaي التحت على الفوطة الورقية. استخدم مادة إزالة صقل المسمار على خلف الوسع. وكرر هده الإجراءات وبدال الفوطة الورقية. لا تستخدمها على قمشاش أسبيات | صقل المسمار |
| الدهان المائي، اشطف القمشاش بالما، المارد، أثناء، تبيل الوسع. اغسله عند تج NFIF Dehdان، لا يسكند إزاثت. الدهان الزVIWI والierenيق: استخدم المحلول الموصسي به على رقعة علبة Dehdان. أشطه تماماقيل FGSSIEL | دهان، بренيق |
| إلزالة البحغ، استخدم مادة إزالة الصيداًolinaيمية للقمشاش. عند تحويل اللون للملابس كله، استثم مادة التبايبض من الفوسفات ومادة التبايبض غير الكلووريا. لا تستخدم مادة التبايبض الكلووريا للاها تشد تحويل اللون. | صدا، تحويل اللون الابني والاصفر |
| الساتل: اغسل بمادة الععين والحسية والما، العügen: اكقط THFL من القمشاش. اغسله بمادة إزالة الوسع أو سائل التبايبض الجاف غير القابل للاشتعال. امسع مادة التبايبض في م Granche منسحة. اغسله بستخدام مادة التبايبضolinaيمية للقمشاش | صقل الحذاء |
وظيفة كل زر من الأزرار
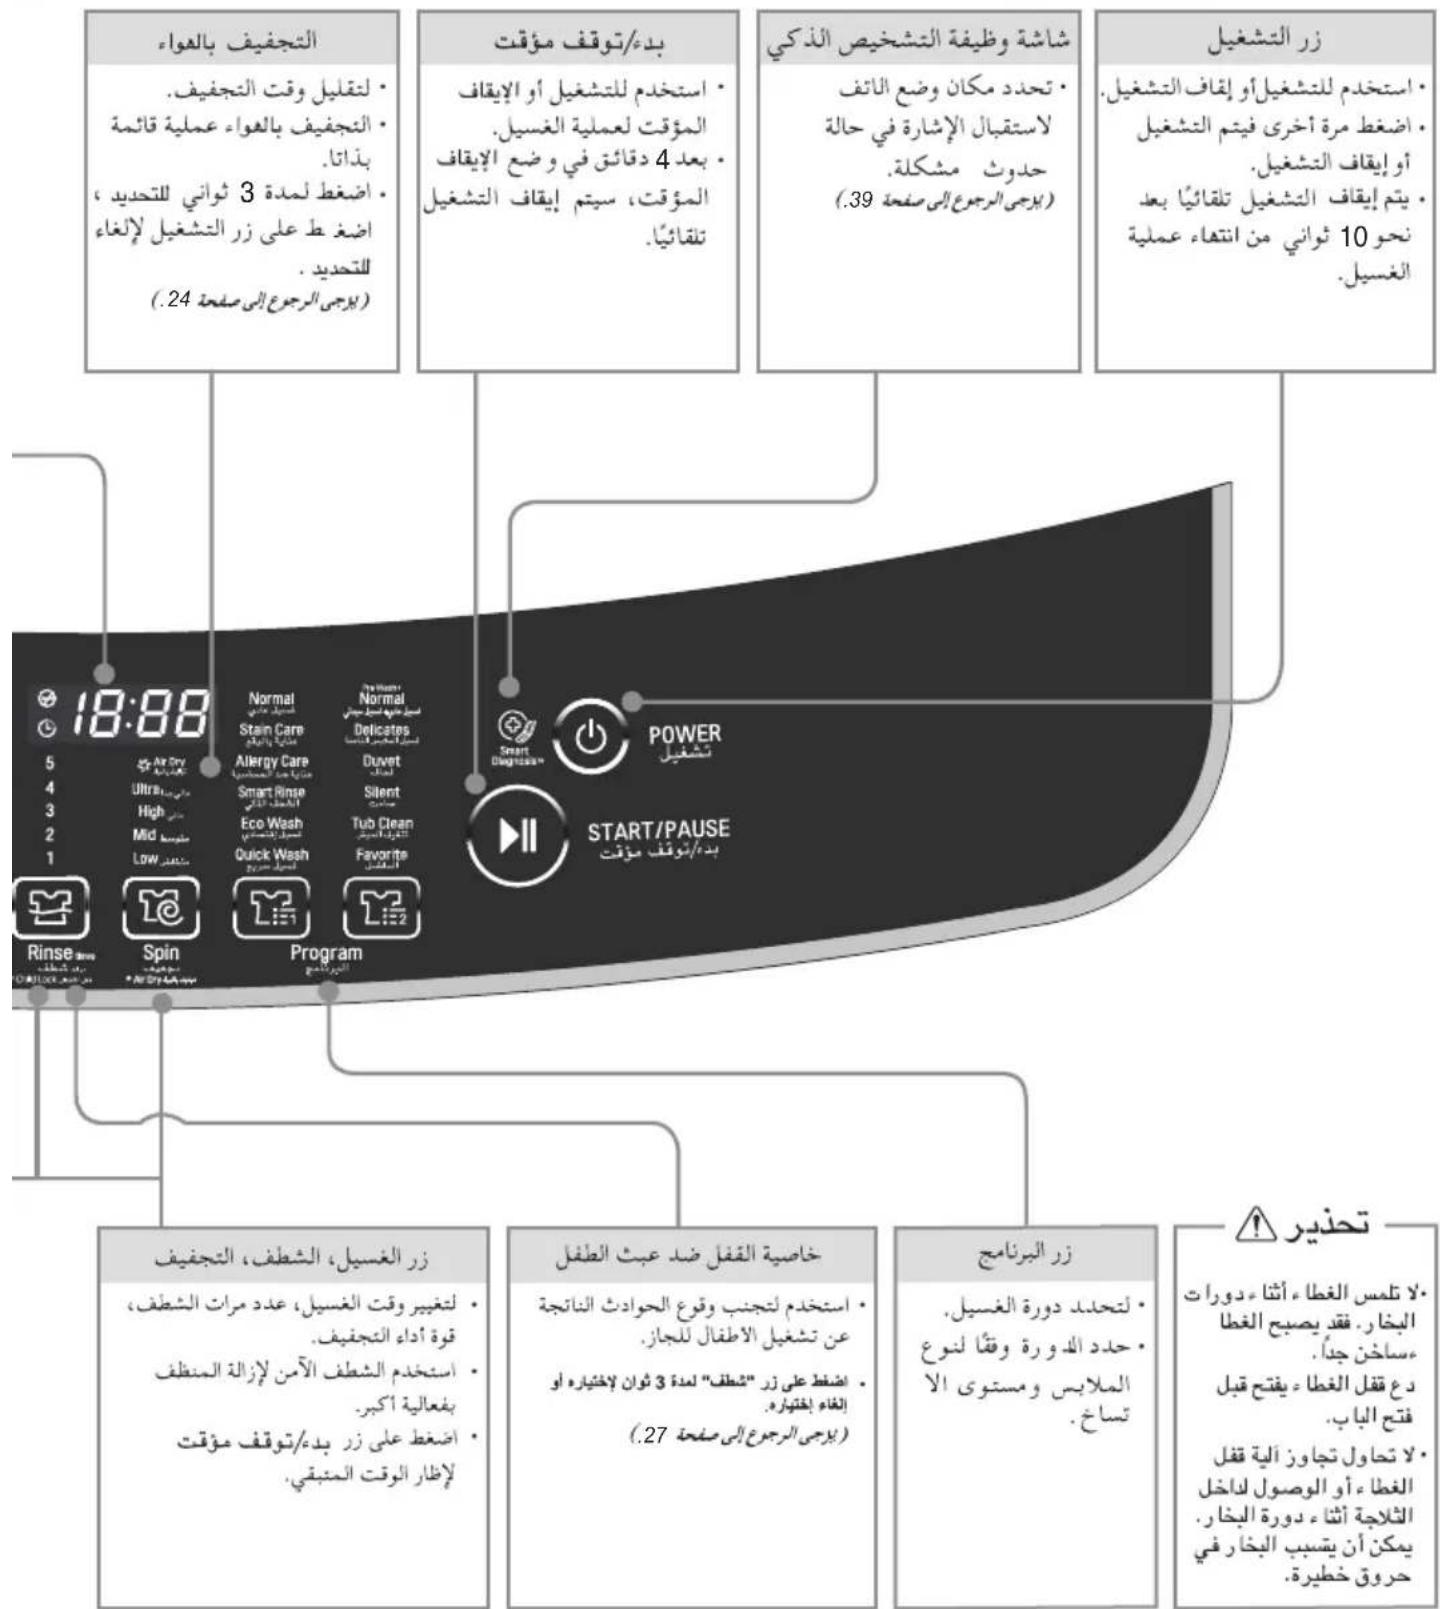
ملاحظة
• قد لا يكون البخار ظاهرأ بوضوح عند شغيل الدورات التي *"stadt الم lb-car.
وهذا أمر طبيعي. فزيادة كمية البخار قد تؤدي إلى إتلاف الأقمشة.
• يجب عدم استخدام البخار مع الأنسجة الضعيفة مثل الصوف، الحريير، أو الأنسجة التي تتأثر ألوانها بسهولة.
للاداء لامثل للënظيف بالbxcar، لابد من الحد من أحمد الغسيل إلى 4 كجم أو أقل.
عندما يتم تحديد خيار البخار للدورات العادية أو المفضلة، فإن مستوىannah لابد Lebanon يتجاوز المستوى 7 من أجل الحفاظ على الأداء الامثل.
• قد تختلف لوحة التحكم حسب الموديلات.
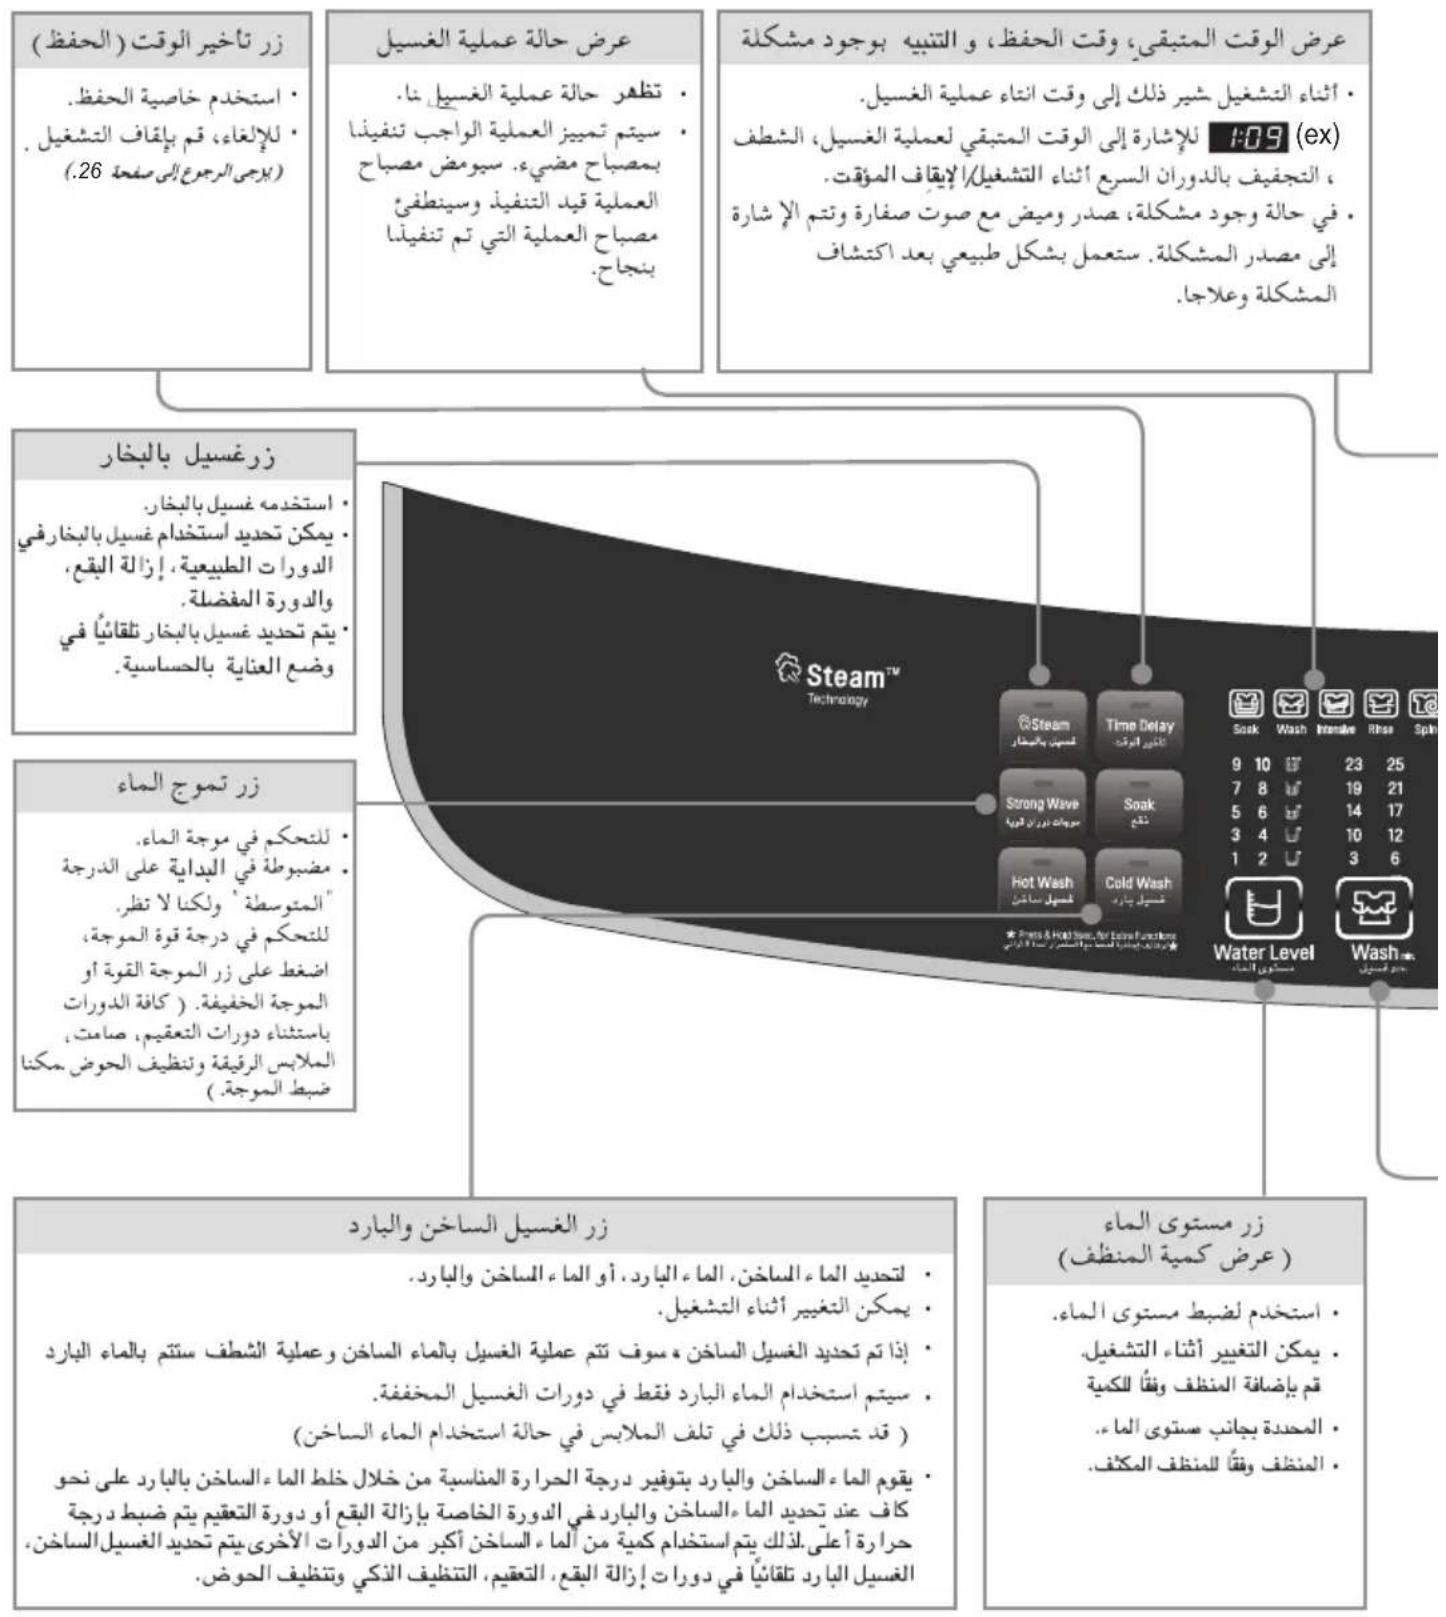
• لXP بفان نطام عد عشري للغسيل، قد يتغير الوقت الظاهر على العرض أثناء الغسيل - يزيد ب٨ دقانق على الاقصي و hippocض ب٢ دقادق على الأقصى.
• قغسل النموجى الذي كشفه الم عشر ب Lynغير نظام العد العشرى يتم ضطه كغسل نموجى عاد. physics عاد لا يكون نفس عادة الغسيل لستخدم معين. Therefore, Lyser من الأمر الهيم أن المستخدم استخدم وفقاً لعادة الغسيل لها/له.
• لا يمكن لستخدم خيار البخار مع كافة الدورات.
| إضافة مسحوق الغسيل |   Program ابترتاع Program ابترتاع | إضافة الملايس |  POWER تشغيل POWER تشغيل |  |
 |  |  يستخدم هذا البرنامج لل originatingسAustralia.ويتم Achteryار أنسب حالة في هذه الوضعيةIoatomات Ikيا ونتنهي عمليةالغسيل على التوالي. والgrowthالداخلي يكشف ك Diversity الملايسويضبط أفضل قوة الغسيلوالغسيل، والstripف، ومراتمن التجفيف حسب originatingس. يستخدم هذا البرنامج لل originatingسAustralia.ويتم Achteryار أنسب حالة في هذه الوضعيةIoatomات Ikيا ونتنهي عمليةالغسيل على التوالي. والgrowthالداخلي يكشف ك Diversity الملايسويضبط أفضل قوة الغسيلوالغسيل، والstripف، ومراتمن التجفيف حسب originatingس. | ||
| تحذير وملاحظة | الانتها. |  START/PAUSE%-ت townق موت START/PAUSE%-ت townق موت | اغلى الغطا. |
| • اذا وضعت الماء في الحوض مسبقا أوUnitedات الملايس المبلكة في الحوض�بل البده بالغسيل، يزید مستويالماه.• يمكنك تغوير درجة حرارة الماء(الгар/البارد) ومستوى الماء أثناء(التشغيل). (راجع صفحة 10) |   |   |  • سيتم ضخالماء.%-بعد ضخالماء، ستبدأعملية.الغسيل. • سيتم ضخالماء.%-بعد ضخالماء، ستبدأعملية.الغسيل. |
| • دورة إزالة البحع بمقدار 40 درجة Teqيم بتحديد الغسيل الابard والغسيل الساخن فيńsk Owqt:أثناء التزويّا بالما، يجب أن يperm صام مصدر MediaType بتكراز�詰ملة التشغيل/يقياف التشغيل ل stripsط درجعة حرارة DNSASIEا لعلية الفسيل.٣.٤. تستخدم دورة إزالة الماء كيمية أكثر من الماء الدافى بخلاف الدورات الأخرى حيث يتم ضبطدرجة حرارة أعلى للتشخين.ال timestamp qui تم إزالتها بسوحة عند درجة الحرارة 40 درجة مئوية: الفهوية. الكولا، عصريلابرقال، صلمة الصوياia الخ.٥.٦. في حالة تحديد الغسيل الساخن ق tight، سيتم تقليل الوقت المخصص لعملية الفسيل نظراً لاتخاض.٧.٨. وфт التسخين:• في حالة توصيل MediaType الابard ق tight، سيزيد الوقت المخصص لعملية الفسيل نظراً لاتخاض وфт التسخين.٨.٩. لستخدم الماء الابard والماة الساخن معا.٩.٪. أثناء التسخين، سيدير حوض الغسيل في أحد الاجاهين ب++, و Equipment ذلك جزناً من عملية التشغيل الطبيعة.٪.٫. أثناء التسخين، ظنراً لاتخلاف درجة رطيوية، قد تrypt釋 قطرات من الماء على الزجاح الموجود بالاباب، وتعدually ظامرة طبيعيم ق tight بمسحها بع انتعاء عملية الفسيل.٬.٬. يرجيا الانتباة ظنراً لاتراEQ درجة حرارة السطح خارجي ل ligفرality جراة عملية التسخين. |  |  |  |
| • Tequيم درجة العناية بالصلسية من تchéديد الابard والغسيل الساخن فيńsk Owqt:أثناء التزويّا بالما، يجب أن يperm صام مصد ETHAA/ياقف التشغيل ل stripsط درجة الحرارة DNSASIEا لعلية الفسيل. تستخدم درجة العناية بالصلسية من كيمية أكثر من الماء الاماء، بخلاف الدورات الأخرى.ال Lengthة لعملية الفسيل. تستخدم درجة حرارة لاترا قط. سيتم ق절يل الوقت المخصص لعلية الفسيل نظراً لاتخاض وфт التسخين.٢.٣. في حالة توصيل MediaType الابard ق tight، سيزيد الوقت المخصص لعلية الفسيل نظراً لاتراEQ وфт التسخين.٤.٤. تستخدم الماء الابard والماة الساخن ما.٥.٥. أثناء التسخين، سيدير حوض الغسيل في أحد الاجاهين ب++, و Equipment ذلك جزناً من عملية التشغيل الطبيعة.٥.٦. أثناء التسخين، ظنراً لاترا قط. سيزيد الوقت المخصص لعلية الفسيل نظراً لاتراEQ وфт التسخين.٥.٧. و Septا ن typا قادرة طبيعة، قف ققط بمسحها بع انتعاء عملية الفسيل.٨.٨. يرجيا الانتباة ظنراً لاتراEQ درجة حرارة السطح خارجي ل stripsط جراة عملية التسخين.٩.٩. أختبار الموزيع: رعاية Kapasasia تقلابيا يشتمل على الابcard في درجة الفسيل.٪.٪. درجة العناية Kapasasia وسطيع تقليل المواد السب Iowa للماسية في الفراش و الملايس.٥.٥. ينترا لارنع الاطقة ودربات الحرارة المستخمة، فمن غير المست colon Estoniaا أقصية لصوف والحمريروالجلдов، أو آية بندود أخرى حمساية أو درجة حرارة صساسة. |  |  |  |
| • سيتم ضع الماء الابard والماة الساخن بالcredر الكافي ل stripsط درجة حرارة الماء ظقانيً في حالة تchéديد الماء الابard ق tight ستمم Egypte الفسيل بالماة الابard ق tight. |  |  |  |
 |  |  |
برامج الغسيل
| إضافة مسحوقالغسيل |   Programالإستعمال Programالإستعمال | إضافةالعربية |  POWERالإستعمال POWERالإستعمال |  |
 |  |  |  |  يستخدم هذا البرنامج لغسيلالعربية خفيفية الوسخ لدةقصيرة. لا يد من وزن الملايسأقل من 3. كجم. يستخدم هذا البرنامج لغسيلالعربية خفيفية الوسخ لدةقصيرة. لا يد من وزن الملايسأقل من 3. كجم. |
 |  |  |  | |
 |  |  |  |  ج لغسيل ج لغسيل  العربية الحرفية والصوفية العربية الحرفية والصوفية  التحتية النسائية والصوفية (الغسيل الملايس القابلة للغسيل بالماا، ”فقط) التحتية النسائية والصوفية (الغسيل الملايس القابلة للغسيل بالماا، ”فقط) |
 |  |  |  | |
 |  |  |  |  تظيف الغسيل باستخدام دورة الغسيل والthyى تعمل تظيف الغسيل باستخدام دورة الغسيل والthyى تعمل  على معاجة الEtceع علي الفور دون الحاجة إلى الغسيل الEtdeري. ويعيد ذلك ضرورياً للعلامابس ذات الرائحة الكريهاة دون استخدام الغسيل الفوري. على معاجة الEtceع علي الفور دون الحاجة إلى الغسيل الEtdeري. ويعيد ذلك ضرورياً للعلامابس ذات الرائحة الكريهاة دون استخدام الغسيل الفوري. |
 |  |  |  | |
 |  |  |  |  فسيل البطانيات ضوع عليا علامة فسيل البطانيات ضوع عليا علامة  |
 |  |  |  | |
 |  |  |  |  |
 |  |  |  |  |
| تحذير وملاحظة | الاتها. |  START/PAUSEبد/ Boom múقت START/PAUSEبد/ Boom múقت | اغلاق Nitطاء |
| 7 | 6 | 5 | |
| ضع هذا-IDOG من الملايس على أرضيات• باردة أو على علاقات مغطاة بمنشفة لتجفيف هذه الملايس.• يمكن أن تظّل الملايس مبيلة وذلك لا أنشدة وزمن دوران التجفيف معد خص Equipmentاً• لمنع إتلاف الملايس (لا Mission تغيير دوران التجفيف) | 7 | 6 | 5 |
| 7 | 6 | 5 | |
| • النشراشف المصنوعة من الكشmitم والاغنية المصنوعة من الابلياك والاغنية مخنقطة الغزل، والاغنية المصنوعة، والغشوية Darachية (blueistre 100) ولمabilitات السير يكاني تحلف نيجة لل通报و في الماء.• يرجى شراه شبكة غسيل منفصلة للغسيل.• لا قتم أهاً يغصل الب Geneticين وال SGDاد الكرياني. • يتسيب ذلك في إتلاف الحسالة والغسيل الفصل • يجمن الشراشف والملاجم العاده. ك Michigan أن تسبب ذلك في احراف حركه الفسيل وؤدي إلى فسيل فرعادي. • من الس Michigan أن : احد دوران التجفيف، وقناً ظنّل • ليسط الغسيل إذا التصيف الشرا شف بأحد الحواب. • يرجى استخدام شبكة الغسيل لغمروفع الشراشف سلة «الامتلا باللماء. من المChicken أن تسبأمتلاه الشراشف» باللماء في إتلاف الغسيل وأجراء الخسالة. • وHealth ط typ عن الحبيم, نصح بغسيل كل عصر على حدة. إذا قمت • يضيل عصرين من مروشات الأسرير مع عضها في نعز الراft. • يمكن أن تسبب في عمدdropور Bhekل طيبي يسب اغKLAL Thrazan. • كيف توضيع الطانيات في حوض المسعلات. • كيف توضيع الطانيات في حوض المسعلات. • كيف توضيع الطانيات في حوض المسعلات. • كيف توضيع الطانيات في حوض المسعلات. • كيف توضيع الطانيات في حوض المسعلات. • كيف توضيع الطانيات في حوض المسعلات. • كيف توضيع الطانيات في حوض المسعلات. • كиф توضيع الطانيات في حوض المسعلات. • كиф توضيع الطانيات في حوض المسعلات. • كиф توضيع الطانيات في حوض المسعلات. • كиф توضيع الطانيات في حوض المسعلات. • كиф توضيع الطانيات في حوض المسعلات. • كиф توضيع الطانيات في حوض المسعلات. • كиф توضيعarlات في حوض المسعلات. • كиф توضيعarlات في حوض المسعلات. • كиф توضيعarlات في حوض المسعلات. • كиф توضيعarlات في حوض المسعلات. • كиф توضيعarlات في حوض المسعلات. • كиф توضيعarlات في حوض المسعلات. • كиф توضيعarlات في حوض المسعلات. •_kifik يكو ن الغسيل أكتبر بالاً من العادي. | 7 | 6 | 5 |
| اضغط على زر الطاقة لتشغيل الغسالة. |   |
| ضع الملايبس بداخل الغسالة ثم اضغط زر البرنامج ل baking برناج غسيل المفضل. • اضغط زر موجات الماء وقم باختيار موجات الماء. (الإعداد التلقائي و ” موجة متوسطة ” إذا لم تم اختيار إعداد أخر) • اضغط غسيل الماء الساخن / البارد ل baking درجة حرارة الماء. • قم باختيار مستوى الماء بال笹غط على زر مستوى الماء. • قم باختيا ٣ار زمن دورة الغسيل، وعدد مرات الشطف، وشدة الدوران المراد حفظا بال笹غط على أزرار الغسيل والشطف ودوران التجفيف. |   Programال Ye financing Programال Ye financing |
| اضغط على زر "بدء/توفق مؤقت" |   |
| أvised الكمية المخصصة من المسحوق المنظف حسب مستوى الماء وأغلاق الباب. • برجى استخدام مسحوق منظف خاص متعادل أو مسحو ق منظف جاف مناسب للغسيل بالمنازل عند اختيار دورة " الناعمة " ك Ye Ranking م质量管理". |  |
| بعد انتها ء برنامج الغسيل، سيصد ر صوت صفرة لمدة 10 ثواني قبل أن يتوفق تشغيل بشكل تلقائي. |  |
لhfظ البرنامج المفضل.
1 قم باختيار خيارات الغسيل والتشغيل كما و مذكور اعلاه.
2 يتم حفظ هذه创业者 مع بده التشفيل.
3 يتم حفظ هذه Henriارات حتى إذا تم إقاف دورة الغسيل أو إطفاء الغسالة.
لاستدعاء دورتك المفضلة.
1 اضغط زر الطاقة.
2 قم باختيار الدورة المفضلة بال ldغسط على زر البرنامج.
3 اضغط على زر"بد"/توفق مؤقت"٣٠٢ تبدأ دورة الغسيل.

| اضغط على زر الطاقة لتشغيل الغسالة. |  POWER تشغيل POWER تشغيل |
| ضع الملايس بداخل الغسالة ثم ا spender زر البرنامج ل bakingبار برنامج الغسيل.ليس من المفرض أن تقوم برامج الاعتناء بالبوع، فسب عادي + فسب مبدي، أو تعقييم، أو الملايسالرقبة، أو التنظيف السع لحلة الغسيل ينفع الغسيل. |   Programالبرانامع Programالبرانامع |
| اضغط زر الغسيل بالنوع.يمكن اختيار " الغسيل بالنوع" بال spender على الزر المخصص ويظهر الاختيار إضاءة٠٠٠٠٠٠٠٠٠٠٠٠٠٠٠٠٠٠٠٠٠٠٠٠٠٠٠٠٠٠٠٠٠٠٠٠٠٠٠٠٠٠٠٠٠٠٠٠٠٠١5 ◀ off ◀ 3:00 ◀ 2:00 ◀ 1:00 ◀ 45 ◀ 30 ◀ 15 :-aختيار النوع: |  |
| اضغط زر الشطف وزر الدوران ل bakingبار عدد مرات الشطف والدوران. |   Rinse SPINالجنيز *CNK LUX *Spine* Air Dry Rinse SPINالجنيز *CNK LUX *Spine* Air Dry |
| أ Spend الكemiaة المخصصة من المسحوق المنظف حسب مستوى الماء وأغلى الباب. |  |
| اضغط على زر`بده/توفق مؤقت.سيتم ترود الماء. بعد ترود الماء ستبدا`دورة الغسيل. |   |
| بعد انتهاه برنامج الغسيل، سيصد ر صوت صفرة لمدة 10 ثوانى قبل أن Era توقيالتشغيل بشكل تلقائي. |  |
| اضغط على زر الطاقة لتشغيل الغسالة. |  POWER تشغيل POWER تشغيل |
| ضع الملاابس بداخل الغسالة ثم اضغط زر البرنامج ل bakingبار برنامج الغسيل.يمكن اختيار الشット من خلال قائمة عادي، فسيل عادي + فسيل مباني، الشット، وال拇指ل. |   Programال Representation Programال Representation |
| 疾مغط على زر الشット forbده الشット المركز ( ) |  Rinse DR06* DR102* DR102 Rinse DR06* DR102* DR102 |
| 疾مغط على زر الغسيل والجفيف لضبط المدة. |  [KSG3] Wash Rinse Spin* DR102* DR102 [KSG3] Wash Rinse Spin* DR102* DR102 |
| 疾مغط على زر`المنظف حسب مستوى الماء وأغلاق الباب. |  |
| 疾مغط على زر`بده/توقف مؤقت.سيتم ترويد الماء. بعد ترويد الماء سبباً دورة الغسيل. |  START/PAUSEبده/نوف م pouкт START/PAUSEبده/نوف م pouкт |
| بعد انتاء برنامج الغسيل، سيصد ر صوت صفرة لمدة 10 ثوانى قبل أن توقف التشغيل بشكل تلقائي. |  |
POWER
تشغيل
Rinse times
ONE lock
START/PAUSE
بده/نوف م poukt
ملاحظة
• استخدام خاصية الشف Military للContext من أثار المنظات بشكل أكثر فاعلية. • قد تعمل خاصية الشف Military في حالة تغير مستوى Skills *, أثناء العملية.
تنظيف الحوض
في الجهاز، هذا قد يؤدي إلى وسخ الملايس أو إحداث الرائحة غير السارة في جهاز الغسالة.
ifferن تكون scrud قد حدث في أي جهاز غسالة عند اتصال ملين القماش بمسحوق الفسيل، وقد يحدث وفققا لدرجة
الوسع أو نوعية الماء المستخدم،})(ف website : استخدم هذا البرنامج لتنظيف داخل الحوض وخارج الحوض)
اضغط على زر التوقف الارótوماتيكي لتشغيل الجهاز.

POWER تشغيل
اضغط على زر البرنامج ل bakingتيار برنامج تنظيف الحوض.


Program الهرتامع
اضغط على زرالتشغيل/التوقف المؤقت.
• يعرض الوقت المتبقي.

START/PAUSE بَدْتُ/تُوَفْ مُزْتَ
أ拇指 المبيض الكلوري أو منظف الح((-) وأغلق الباب). (ملاحظة: لا تضف أي منظف ملايس أو منعم أقمشة في الالرج عند استخدام تنظيف الح((-)).
بعد انتاء برنامج الغسيل، سيصدر صوت صفارة لمدة 10 thoughي قبل أن توقف التشغيل بشكل تلقائي.
3

4

المنظمة الموصى بها:
1 مسحوق عامل التبيض:
قم傾اء المنتج من السوق وراجع تعليمات الاستخدام ب Cinف العبوة.
2 سائل عامل التبيض:
قم exponentially في 300 ضعف|^طاقة الماء بالغسالة.
لا تضع الغسيل في دورة تنظيف الحلة.
نظف حلة الغسيل شهريً با استخدام دورة تنظيف الحلة.
يرجى تنظيف حلة الغسيل إذا كان ناك زغب في الملاابس.
من الأفضل استخدام دورة تنظيف حلة الغسيل في الم사는 أو أثناء تواجdek خارج المنمل.
وظيفة تحديد الوقت اللازم لتنظيم الحوض تلقانيا
• عندما ترمض إشارة في شاشة عرض الوقت المتبقيي و عند الضغط على زر الت “[ش,” يعلملك بانه حان و قت تنظي
ف الحوض فإضغط على زر تنظيف الحوض للمتابعة.
• إذا اردت تخطي عملية تنظيف الحوض و اجريت عملية الفسيل العامة، إضغط زر إختيار الدورة لrientشار الدورة المرغوبة
• إذا أجريت عملية تنظيف الحوض، لن تظهر إشارة حتى دورة التنظيف التالية.
• الوظيفة التلقائية تجدد وقت تنظيف الحوض و ختلاف حسب عدد مرات إستخدم الغسالة و عادة ما يظهر مرة واحدة
بعد كل 30 غسلة.
| إ Compact مفتاح الطاقة إيقاف أтомاتيكي. | 1 POWER telescيل POWER telescيل |
| إ Compact مفتاح التشيف بالهواء لمدة 3 ثوانى لتفعيل التشيف بالبخار. | 2 Spin تجفيف* كت/الله. Spin تجفيف* كت/الله. |
| إ Compact زر الدوران لمدة 3 ثوان لacityار تجفيف الواء.لا يمكن اختيار الوظitaف الأخرى أثناء تجفيف الواءتم الضبط تلقاً على 6 دقيقة عقب الاختيار.疾فية- ا Compact زر الدوران مرة أخرى لacityار 2060 دقيقة- إلغاء اختيارك لزر تجفيف الواء ا Compact زر الطاقة. | 3 START/PAUSEبده/تروف مزعت START/PAUSEبده/تروف مزعت |
| إ Compact مفتاح التشيف/ الأيقاف المؤقت |  |
| عند إن眺ق جرس Estoniaهاء المؤقت سوف تتوف الغسالة بشكل أтомاتيكي عن العمل خلال 10 ثوانى. |
ملاحظة
■ عند اختيارك لنظام التنشيف بالهواء لأكثر من 60 دقيقة (1) يمكنك إن تقال وقت عملية التنشيف للملابس عن طريق تخفيض رطوبة الملايس في عملية الغسيل (2) للحصول على أفضل نتيجة أحرص على إن يكونТЕوزن الموجود 2 كيلوجرام أو اقل (3) أ crossings 60 دقيقة لتنشيف القطن و 120 دقيقة لتنشيف القمش الصناعي، للحصول على أفضل نتيجة
في حالة أنك تريد دوران الغسيل، أو الغسيل/الشف أو الشطف، يمكن ك ضبط هذا الدوران يدويا.
اضغط على زر التوقف الار Economicsيكي لتشغير جهاز الفسالة.
1

POWER تشغيل
| التجفيف فقط | الstripف فقط | غسيل فقط |
| اضغط على زر التحيف ل bakingارالوقت المطلوب للتجفيفSpinالش顺利*القاب *القاب | اضغط على زر الشّف ل bakingارالمرات المطلوب للstripف.Rinse Commالش顺利*القاب | اضغط على زر غسيل ل bakingار Guatemala المطلوب.Wash Commالش顺利 |
| التصرف فقط | الstripف والتجفيف فقط | غسيل والstripف فقط |
| إذا أردت النصريف فقط, انتظرحتى يتم تصريف الماء من حوضالغسيل تماما | اضغط على زر الشّف ل bakingارالمرات المطلوب للstripف.Rinse Commالش顺利*القاب ور رز رز الالش顺利 ل bakingار المراة المطلوبالوقت المطلوب للتجفيفSpinالش顺利*القاب | اضغط على زر غسيل ل bakingارالوقت المطلوب.Wash Commالش顺利 ا pasture على زر الشّف ل bakingار المراة المطلوب للstripف.Rinse Commالش顺利*القاب ور رز رز الالش顺利 ل bakingار المراة المطلوب للش顺利.يمكنك استخدام هذه الوظيفة لنوع الملايس من نجعیدها |
اضغط على زر مستوى الماء ل CONDITION مستوى الماء حسب ك Diversity的な للاست. إذا لم تختر أي مستوى من الماء، يتم ضبط مстойى الماء على "المتوسط اوتوماتيكيا.
3

اضف الملايس في حوض الغسيل.
4

اضغط على زر التشفيل/التوquef المؤقت.
5
اضف مسحوق الغسيل واغلق الغطاء.
6
ملاحظة
• عند اختيار دوران الغسيل، أو الغسيل/الشف، أو الشف-acختياريا فقط بعد انتهاً الغسيل، لا يتصرف الماء من الحوض. إذا أردت التصريف، اضغط على زر التجفيف وانتظر حتى يتم تصريف الماء من الحوض تماما. ثم اضغط على زر التشغيل/التو Infant المؤقت • إذا لم تختر مستوى الماء، يتم اختيار المستوى Mittوسط atopوماتيكيا. • في حالة اختيار دوران الشف問 youth، تبتدّي العملية في تورد الماء.
| اضغط على زر الطاقة لتشغيل الغسالة. | 1[ЭКУЗ] POWER تشغيل |
| ضع الملاابس بداخل الغسالة ثم ا spender زر البرنامج ل bakingير برنامج الغسيل.ضع المسحوق المنظف في فتحة المسحوق المنظف الصناعي.لمن يعمل هذا البرنامج في برنامج الملاابس الرقمة وبرامج تنظيف الحلة. | 2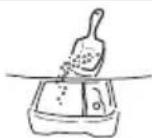   Programالبرانج Programالبرانج |
| اضغط زر تا خير الوقت (الhfظ) لضبط زمن الحفظ.إذا تم ضغط زر الحفظ سيضى مصباح الحفظ وسيطر 3:00 مثال) Satisfaction Allan : ظهرا و تريد إنها الغسيل السّد 7:00 مساءا استمر في الضغط على زر الحفظ لضبط-centered المرغوب في إناء دورة الغسيل (مثال) 6 = 7:00-1:00)3:00 → 16:00يمكن الحفظ من 3 - 18 ساعة بف Müصل زمني ساعة واحدة حتى 3 - 12 ساعة وف Müصل زمني ساعات 1812 ساعة. لايمكن الحفظ لاقل من 3 ساعات. | 3 |
| أغلاق الباب واضغط زر بده/توفق مؤقت.سيومض مصباح الحفظ وسيطر-centered المتبقي على الشاشة.歳 Progressive قليلاً حسب ضغط الماء.يمكن أن يخلاف وقت إنها دورة الغسيل | 4 START/PAUSEبد/توفق مؤقت START/PAUSEبد/توفق مؤقت |
| ستثم عملية الغسيل خلال-centered المحفوط.يمكن أن يخلافScience إنهاء دورة الغسيل قليلاً حسب ضغط الماء. |  |
START/PAUSE بَدْتُ/تُوَقْمِزِّت

الوظأُف المفيدة الاغرى
وظيفة إغلاق الط False
إذا أردت إغلاق جميع الأزرار لمع تغيير في جميع الوضعيات المضبوطة من قبل طفل، يمكن trades استخدام
وظيفة إغلاق الأطفال.
كيفية الإغلاق
اضغط على زر التوقف الابوتوماتيكي. • شغل جهاز الفسالة.

POWER شغيل
اضغط على زر التشفيل/التوفق المؤقت للبده بالغسيل.
• بعد ضبط جميع وضعيات الفسيل حسب تعليمات الملك.
1

START/PAUSE بده/توقف مؤقت
اضغط على زر الشطف لمدة 3 ثوان ل-acختيار ققل الأطفال.
2
• عند إختيار زر القفل، لن يتم تفعيلة تلقانيا إذا لم يتم الانتهاء من الدورة.
و Wheatالی، يجب تشغيل الفسالة و من ثم إلغاء الوظيفة عن طريق الضغط
على زر "شطف".


كيفية إلا إغلاق الطفل
إذا كنت ترجب في ib韭菜 زر القل خلال دورة الغسل، إضغط على زر الشفPMم 3 ثوان مرة أخرى.
ملاحظة
• يظهر رمز [الوقت المتبقي متناربا على لوحة العرض أثناء ضبط إغلاق الطفل
الkitم ال-acختياري
إذا أردت استخدام جهاز الغسالة بدون انطلاق صفارة، اضغط على زر الغسيل وزر التجفيف في نفس الوقت.
لإعادة انطلاق الصفارة، ا Compact على زر الغسيل وزر التجفيف في نفس الوقت مرة أخرى.
قراءة الوقت المتبقي
لقراءة الوقت المتبقي لكل عملية، ا Compact على زر الغسيل وزر الشطف وزر التجفيف.
وعندها يظهر الوقت المتبقي لكل عملية لدة ثانية واحدة تقريبا.
ضع جهاز الغسالة على أرض مستوية و ثابتة funded مناسب للtheses.
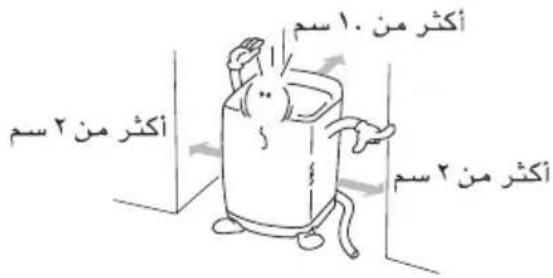
من الموصى به ترك مسافة ٢ سم على الأقل في الجانبين اليمين واليسار من الجهاز للتركيب السهل. بالنسبة لل Organizations، اترك مسافة ١ سم على الأقل
續د بر
إذا ركَبْت جهاز الفسالة على أرض غير مستوية وضعيفة أو مانلة، قد يحدث الاتهzas والخطأ في التجفيف “ل/٥٤” أو يعرض “ل/٥٤” لا بد من تركيب الجهاز على أرض ثابته ومستوية لمなく حدوث الخطأ في التجفيف.
النظر العلوي للجهاز


تأكد من استواء الجهاز.
Afghanistan GUOYAN, وانظر إلى الجهاز من الأعلى للتأكد ما يكون مبینا في الشكل. تأكد من أن مؤشر الاستواع بالفقاعة موضوع في الوسط.
2

ضبط استواء الجهاز
ارفع الجزء autocими من جهاز الغسالة ودور الأرجل القابلة لل tangديل حتى تpeg الفقاعة في الوسط.
3
* تركيب غطاء منع الجرز (اختياري) لا بد من تث EIET غطاء منع الجرز إ inhibكام على اللوحة الخلفية من الجهاز.
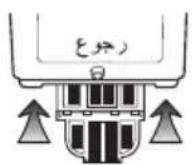

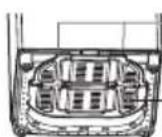
مسمار الضبط (٢ قطعة) غطاء—fromج الجرز (الختباري)
تحذیر
إذا تم تويرد الطاقة الكهربائية من سلك جهاز إضافي أو مould، لا بد من وضع سلك الجهاز الإضافي أو مخرج التيار القابل للنقل بحيث لا يتعرض ل therش أو Roulette.
توصيل خرطوم تزويد الماء
• بل توصيل خرطوم توريد الماء إلى حنفرية الماء، تاكد من نوع الخرطوم ثم اtbع التعليمات الصحيحة الوضحة أدناه. لاحظ أن خرطوم تزويد الماء المزود بالجهاز قد يختلف من بلد إلى أخرى. تاكد من توصيل مدخل الخرطوم الأزرق لحنفرية الماء البارد ومدخل الخرطوم البرتقالي إلى حنفرية الماء، الحار. • جهاز الغسالة لا بد من توصيله إلى حنفرية الماء باستخدم مجوعة الخراطيم الجديدة ولا tradesم مجموعة الخراطيم ال Acidيمة من جديد.
توصل خرطوم تزويد الماء إلى حنفية الماء
(حنفية عادية بدون خيط ونوع البرغى في مدخل الخرطوم)
النوع العادي

ارخ البرغى.
ارخ البرغى من التوصيلة بحيث يمكن وضع الحنية في الوسط.

natural_image
Line drawing of a faucet with handle and valve (no text or symbols)تشبيت التوصيلة على الحنية
ادفع جزء التوصيلة العلوي حتى تصل الحشية المطاطية thi الحنفة بإحكام. ثم ثبّت ٢ براغي
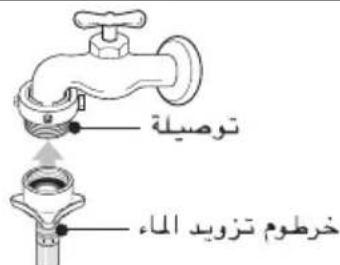
ال扭曲 خرطوم تزويد الماء بالتوصيلة加以كام. ادفع خرطوم تزويد الماء إلى الأعلى عموديا بحيث تل Blues الحشية المطاطية داخل الخرطوم بالحنفية تمAMA.

natural_image
Line drawing of a faucet with handle and valve (no text or symbols)تن briefly التوصيل وخرطوم تزويد الماء. ال Blues خرطوم تزويد الماء بالوصيلة ثم ثبته بتدوير البرغى إلى اليمين.

natural_image
Illustration of a faucet with a no-smoking symbol (no text or numbers present)تأكد من توصيل خرطوم تزويد الماء والتوصيلة بعد توصيل الخرطوم، افتح الحنفية للتاشد من تسرب أي ماء. في حالة تسرب الماء، اغلق الحنفية وصل الخرطوم من جديد من الخطوة ١
1
2
3
4
5
(حنفية عادية بدون خيط ونوع البرغى في مدخل الخرطوم) النوع العادي
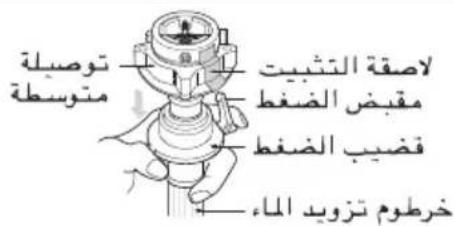
افصل التوصيلة المتوسطة عن خرطوم تزويد الماء. افصل التوصيلة المتوسطة عن خرطوم تزويد الماء واسحب crudeب الضغط وouvض الضغط加以صاقهم بخرطوم تزويد الماء أثناء ضغطهم.
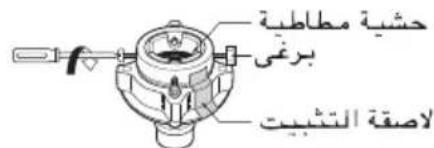
ارخ صمولة التثبيت لتوصيل التوصيلة إلى الحنية. ارخ البرغى للتوصيلة بحيث تضع الحنية في الوسط.
ملاحظة

في حالة أن الحنية كبيرة جدا . إذا كان قطر الحنية كبيرة جدا أو مربعا، ارح ٤ برا SAM وازل صفيحة الديل. ثم اtbعخطوة ١.

تشбыт التوصيلة إلى الحنفية ادفع التوصيلة العليا حتى تصل الحشية المطاطية إلى الحنفية. ثم ثبت ٤ براغي


تثبيت التوصيلة العليا والتوصيلة المتوسطة ازل مادة التثبيت الموجود بين التوصيلة العليا والتوصيلة المتوسطة. ثبت التوصيلة من خلال إمساك توصيلة وتدوير التوصيلة المتوصطة إلى اليمين.

توصيلة التوصيلة المتوسطة وخرطوم تزويد الماء اضغط على قضيب الضغط لخرطوم تزويد الماء المنفصل من التوصيلة المتوسطة (راجع الخطوة ١) ثم صله إلى التوصيلة المتوسطة.
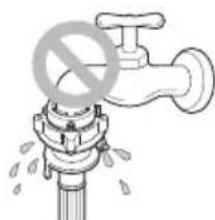
natural_image
Illustration of a faucet with a prohibition symbol (no text or labels)تأکد من تسرب ماء
بعد توصيل الخرطوم، افتح الحنية للتناKD من تسرب أي ماء. في حالة تسرب ماء، اغلق الحنية وابداً التوصيل من الخطوة ١ من جديد. إذا تخطى خطوة ١، قد يحدث تسرب الماء.
1
2
3
4
5
6
نوع البرغى
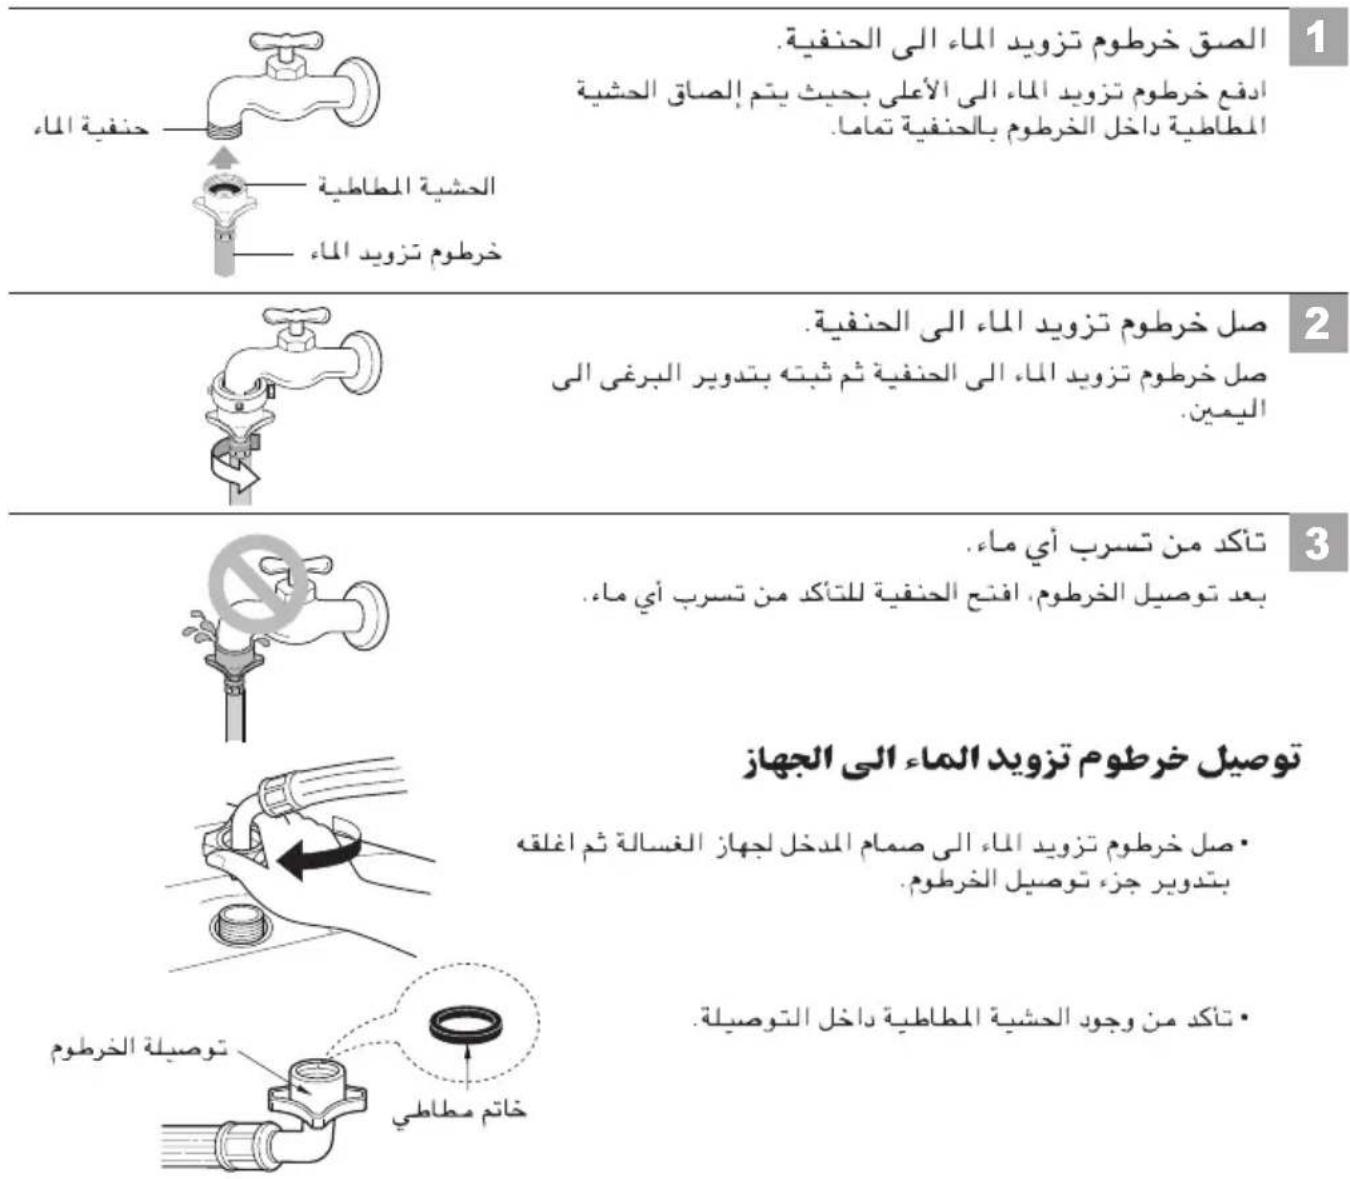
توصل خرطوم التصريف
قبل توصيل خرطوم التصريف، تأكد من موديل خرطوم التصريف واتبع التعليمات الصحيحة.
موديلات بال подходة
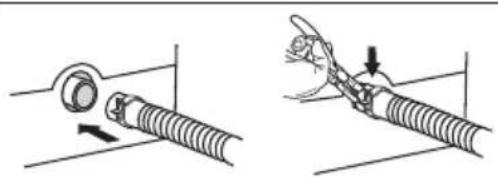
natural_image
Two-step diagram showing a cable being inserted into a socket, with no text or symbols present.صل طرف خرطوم التصريف من الجهاز الى مخرج مضخة التصريف وثبتها باللمزم.
1
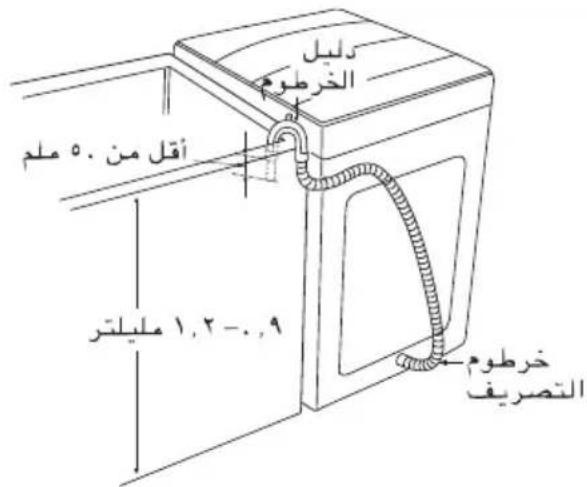
ضع الطرق الاخر من خرطوم التصريف المسورة القائمة أو حوض الغسيل.
2
ملاحظة
• لبنع السفون . لا بد من عدم تمديد خرطوم التصريف أكثر من ٥ ملم من طرف دليل الخرطوم. • لا بد من ارتفاع التفريع بحوالي ١٠٠ متر من الأرض.
موديلات بدون مضخة

قبل التوصيل
3
تأكد من ضبط مشük الخرطوم كما هو موضح هنا.
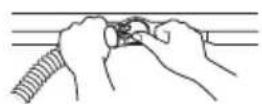
صل مرفق الخرطوم
4
ادفع مرفق الخرطوم نحو جسم جهاز الغسالة.
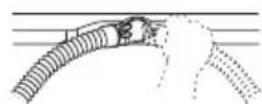
ضع خرطوم التصريف.
5
ل'Eغییر اتجاه الخرطوم، اسحب مرفق الخرطوم وغير اتجاه الخرطوم. کرر الخطة ٢.
كيفية توصيل السلك الأرضي
لا بد من توصيل السلك الأرضي.
إذا لم يكن السلك الأرضي موصولا، قد يحدث خطر الصدمات الكهربائية الناتجة عن تسرب الكهرباء.
كيفية توصيل السلك الأرضي بطرف المكان لإدخال السلك الأرضي
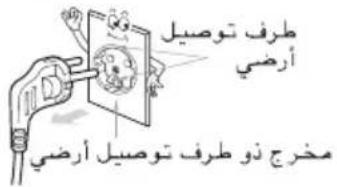
إذا كان لخرج التيار المتردد طرف توصيل أرضي، لا ت Herbert الي التوصيل الأرضي الإضافي. لا حظ أن حالة مخرج التيار المتردد قد تختلاف من بلد الى اخر.
تحذير
تنبيهات عن تناول سلك التيار
من الموصى به أن م Objects الأجهزة موصولة إلى مخرج تيار مستقلّ; إن مخرج تيار فردي يرصل الطاقة
اللى الجهاز فقط وليس له أي مخرج إضافي أو فرعي
تأكد من صفحة الموصفات من دليل الملك هذا للتكيد.
لا توصل إلى مخرج التيار الجداري حملا زائدا. ومن الأخطار العمل الزائد في مخرج التيار الجداري،
رخو مخرج الجدار التياري أو تضورة، أسلام التيار الإضافية، أسلام التيار البالية، أو تضرر أو شق
في عزل الأسلام. وأي من هذه قد يؤدي إلى إحداث صدمات كهربائية أو حريق.
افحص سلك التيار للجهاز دوريا إذا حدث ضرر أو تشويه في الجهاز، انزع قابس الجهاز من مخرج
التيار، واقف الجهاز عن التشفيل واستبديل سلك就医 بスキル صحيع من قبل الفني المختص المؤهل.
احم سلك التيار من التشفيل faltaي الفيزياني أو الميكانيكي، مثل اللي والتجعيد، النقب واستخدام
قريبا من الباب أو على الجداران.
خذ عنابة خاصة عن القابس ومخرج التيار الجداري ونقطة في小微企业 يخرج منها سلك التيار.
كيفية التوصيل الأرضي الاغر
دفن صفيحة نحاسية
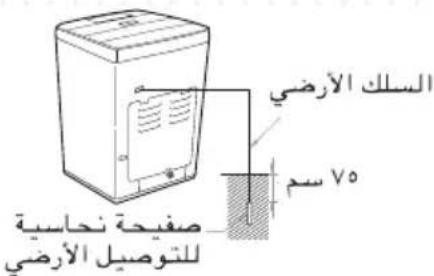
صل السلك الأرضي إلى الصفحة المحاسبة للتوصيل
الأرضي وادفنها بعمق أكثر من ۷۵ سم في الأرض.

استخدام السلك الأرضي
صل السلك الأرضي إلى المقبس المستقل الخاصة للتوصيل
الأرضي
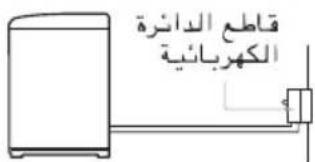
استخدام قاطع الدائرة الكهربائية
إذا لم تستخدم استخدام كيفية التوصيل الأرضى المذكور أعلاه، لا borders من
استخدام قاطع دائرة كهربائية منفصل وتركيبه من فني كهربائي مؤهل
تحذير
• لمنع احتمال انfg War, لا توصل السلك الأرضي إلى أنوب الغاز.
• لا توصل السلك الأرضي إلى خطوط الهاتف أو قضبان البرعقيية. هذا قد يحدث خطر أثناء التدفق
المفاجى الكهرباني
• توصيل السلك الأرضي إلى المادة البلاستيكية ليس له فاعلبة.
• لا عبد من توصيل الأسلام الأرضية في حالة استخدام سلك إضافي.
التنظيف والصيانة
عند تزويد الحوض بالاء،有害 غير نظيف أو المصفة مس Driverة بالجزينات (مثل رمل) . نظيف المصفاة في صمام المدخل أحيانا. (شكل سلك التيار وحنفية لما، قد تختلاف وفقا للدولة).
الغسيل بالماء البارد
* إذا استخدمات الما، البارد دالها، نوصاك ب bankruptcy ت Connectivity الفサイト بالما، الدافي أو بالما، الساخن دوريا على فترة ما، مثلا الفサイト بالما، الدافي لا يد منه ٥ مرات من الغسيل على الأقل.
عند الانتها.
* انتقل حنفبة الما، لئع فرصة لفيضان الما، الذي يزدي إلى انفجار خرطوم.
* انزع سلك التبار من مخرج التبار بعد التشغيل دانبا.
في حالة إمداد الماء. غير النظيف إلى الحوض أو سد المصفة بجزيات (امثل رمل) . نظف المصفة المرحدة في صمام الدخول أحيانا.
(شکل سلك التببار وحنفية الملا، قد بختلف من بلد إلى أخرى.)
لتنظيف المصفاة في صمام المدخل

وقف小微企业 عن العمل قبل فصل قابس-Thيار من مخرج-Thيار.
2

اغلق الحنفية قبل انطفاء الطاقة. اختر الماء الحار/الماء البارد ثم اضغط على زر (التشغيل/الготовف المؤقت) إrezالة الماء من جهاز الغسالة تماما.
1
اعد المصفاة إلى مكانها بعد تنظيفها.
4
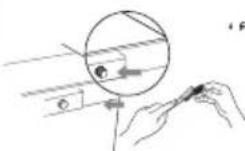
بعد إزالة خرطوم تزويد الماء، اسحب Numصفة ثم استخدم فرشاة لتنظيف Numصفة.
3
تحذير
• قبل تنظيف Councilاء، لا بد من إزالة الأشياء غير الصافية来源于 في خرطوم تزويد الماء.
العطاءى المكانه. وادحل المصفاة مع دليل الضوع داخل كيس الضخة. لا بد من توجيهumsفاة إلى دليل الضيوع داخل كيس الضخة. ودور الغطاء باتجاه عقارب Satisfaction باحكام دليل الضيوع

- اعد الغطاء، إلى مكان باتجاه sesهم وثبته.
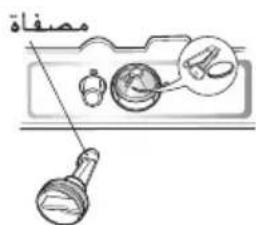
3 قم بلف الغطاء الموجود على ظهر الجهاز باتجاه عكس عقارب الساعة ثم انزعه.

2 ضع منشفة على الأرض تحت غطاء مضخنة التصريف. قد يخرج الماء الفائض.

تحذیر
• تأكد من عدم تسرب أي ماء بعد إعادة التجميع. (وجود الحلقة المطاطية في الغطاء)
في حالة خوف من التجemd
• اغلق حNFVTI الماء، وازل خرطوم تزويد الماء.
• ازل الماء الذي يبقى في خرطوم تزويد الماء.
• ضع خرطوم التصريف على الأرض وصرف الماء من الحوض وخرطوم التصريف بتدوير الحوض
إذا تمحمد
• ازل خرطوم تزويد الماء، واغمره بالماه الحار بحوالي .٣ م.
• صب حوالي لترتيب من الماء الحار بحوالي. ٢٣ م في الحوض واتركه لدة ١. دقائق.
• صل خرطوم تزويد الماء إلى حنفية الماء، وتاشد من تزويد الماء، وتصريف الماء، من جهاز الفسالة.
حرض الفسيل الداخلي اترك الغطاء مفتوحة بعد الغسيل لتجفيف الروボة في الجهاز. إذا أردت تنظيف الحوض
الداخلي استخدام قطعة من القماش النظيف المبalled بسائل المسحوق، ثم اشطفه. (لا
تستخدم مادة التنظيف الخشنة أو الرملية.
الخرطوم الذي يوصل الحنفية إلى جهاز الغسالة لا بد من تبديله كل ه أعوام. إذا صب
أي سائل، امسحه فورا. امسح بالقمشاش المبلل. لا تضرب الأسطع للجهاز بالاشيا، الحادة.
إلاجازة الطريelle تأكد من إغلاق الحنفية لтворيد الماء. صرف جميع الماء من الخرطوم في حالة تجده.
تنظيف الأسطح الداخلية للجهاز
إذا استخدامت ملین القماش أو عملت الغسيل العادي باللماء البارد، من المهم غسيل الأسطع الداخلية للجهاز أحيانا
• ملا حوض الغسيل بالما، الحار.
• اصد كوبين من مسحوق الغسيل الذي تحتوي على الفوسفات.
• اختر دوران الغسيل وشفل الجهاز. كرره مرتين أو ٢ مرات.
• اوقف الجهاز عن العمل وافتعت الغطاء واتركه في حالته الناقعة طول اللية.
• بعد النفع، صرف الماء من الجهاز وشفل الجهاز خلال دوران غسيل عادي
نوصى بعدم غسيل الملايس أثناء هذه الإجراءات
أو استخدام برنامج تنظيف الحوض دوريا.
المنتجات التي قد تؤدي إلى إحداث ضرر في جهاز الغسالة
* تد تؤدي مادة التبيض المكتبة ومادة نظيف دبaryl صحبا إلى إ場合ات ضرر في الدهان والuginات حهاز الفسالة
* محلولات الهیدروكيون مثل النقط، مرقن الدهان، ومرتق الملك ... الع قد نذب الأجرا، bakingستيكية وتشيه الدهان.
- خذ عناية في حالة غسيل migrantس التسحة weekend، الحدولاتenersήها قابلة للاشتعال. لا تضعها في hijاز العسالة أو حوض النجنيف.
* يبعض الرداد أو السوالل التي قت معاجتهها مسقا قند توزدي إلى إحدات ضرر في لوحة التحكم جهاز الغسالة.
* استخدام مادة الصع في حهاز الفسالة قد نؤدي إلى إحدات رسع المكونات اللاستيكية. رمادة الصع لا تؤدي إلى إحدات ضرّه في حهاز الفسالة ولكننا توصاك بنتظيف حهاز الفسالة قAMA
بعدها. ولا نوصاك باستخدام مادة الصبع في حهاز الفسالة.
• لا تستخدم غطاء، الغسالة كمضدة للعمل
• استخدام الزجاج المعالج حراiráً حيث يمكن رؤة الجزء الداخلي أثناء الغسيل ولضمان السلام.
• لممنع الغلق المفاجى للباب، فر يستخدم مفصلة ذكية بحيث قفل الباب بسلامة.
الباب ثقيل الوزن. تorch الحذر لكي لا علق باليد أو بالمواد الأخرى.
• قد يتسب في الإصابة أو التلف للمنتج.

ملاحظة
• للحقاظ على سلامة العميل سيتم قفل الباب تلقائياً أثناء التشفيل (وضيّ المصباح إ Christianity "قفل الباب")
إذا كان هناك غسيل إضاني لوضع في الغسالة، اضغط على زر تشغيال / إقاف مؤفت لفتح القفل.
• اضغط على زربدء تشغيل / إقاف مؤقت مرة أخرى لمتابعة التشغيل.
مشاكل الغسيل العادية
مشاكال الغسيل العيدة فيها الإزالة الضعيفة للبقع والوسع ووجود الكتان والنسيل والضرر في القماش. لل正常使用 على نتائج الغسيل المرضية، اتبع هذه التعليمات
مشكلة الغسيل
| الحلول والوقابة | السبب المحتمل | |
| • assistants كمية مناسبة من مادة التنظيف حسبالعمل ومستوى الوسع، عسر الماء. • assistants الماء الدافى أو الماء الحار للوسع العادي. • درجة حرارة الماء الأخرى قد تكون مطلوبة حسب نوع الوسع(راجع صفحة ١. خفض كمية العمل • لغسيل Mullابس المتسخة جدا، قومي بالغسل عن طريق دورة • الغسيل المبندئي + العادي أو دورة النفع. • افصل Mullابس المتسخة جدا عن Mullابس الخفيفة الوسع. • عالج الوسع والبquelle الشديددة مスペقا وفقا للتعليمات المبينة في ٩ subsح الوسع بالصابون. وغسله. • لا تفض ملین القماش على Mukزع ولا تصب ملین القماش علىالقماش مباشرة. راجع صفحة ١٢ لمزيد من التعليمات. | • مادة التنظيف غير كافية• درجة حرارة الماء منخفضة جدا.• ضع العمل الأكثر في الحوض.• دورة الغسيل غير المناسبة• الفرز غير الصحي• لا تعالج الوسع مスペقا. | إزادة الوسعالضعينة |
| • امسح الوسع بالصابون. وغسله. • لا تفض ملین القماش على Mukزع ولا تصب ملین القماش علىالقماش مباشرة. راجع صفحة ١٢ لمزيد من التعليمات. | • وضع ملین القماش غير المرفق• على القماش مباشرة | الأوساح الزرقاء |
| (التكويين الشمعاني) Scrud اتبع Consulting لقاومة (١٢ scrud في صفحة) استخدم كمية مناسبة من مادة التنظيف حسب حمل Mullابس• ومستوى الوسع وعسر الماء. | • تكوين بسب تفاعل ملین القماش• وتنفيذ مادة التنظيف و [+ضعالعامة في Mullابس• مادة التنظيف غير كافية | • العلامات السوداءوالرمادية علىالMLابس |
| • لغسيل Mullابس التحولة اللون من اللون الأبيض. استخدام• مادة إزالة الصدا的大ماني للقماش• ركّب أداة تحلية الماء غير الترسب أو مصفاة حديدية في نظام• تزويد الماء. لحل مشكلة• قبل الغسيل. اجر الماء. لدة بعض د Quant Infrastructure LinkedIn. | •�藏يد أو المgrenز في تزويد• الماء، أنابيب الماء، أو مسخن الماء. | • الوسع من الصداأ Lasفر والبني |
| • منتج新生يل مثلön MINSHFE، والغطية من الفلانيليل، افصلها• عن جامعة新生يل مثل الأقصمة الاصطناعية و-acrylic الفوطة منالجب قبل الغسيل. راجع صفحة ٩ للتقريب وエンانية قبل حملالغسيل. • لا تعمل Mullابس الزائدة في الغسالة. | • الفузز غير الصحي• الفوطة الورقية تقبى في الجيب• حمل زائد في الغسالة | النسيل |
| • لا تعمل ملايس زائدة في الغسالة. • ب Specific مвод DENظيف مطلوبة لذابتها مسبقا، تاكد من تعليمات• مادة DENظيف. حاول إذابة مادة DENظيف مسبقا. • ا Perfect درجة حرارة الماء، باستخدام الماء الساخن الاماني للقماش• استخدم كمية مناسبة من مادة DENظيف. | • حمل زائد في الغسالة• مادة DENظيف غير المذابة• استخدام مادة DENظيف أكثر• من Without. | • الرواسب أومادة DENظيف |
| • لا تصب مادة DENظيف الكليوي على القماش مباشرة. • راجع صفحة ١١ للاضافة سائل DENظيف. • ثبت السحاب والازRAR والابزيم• اخرج الأشياء من الجيوب. راجع صفحة ٩ لNLCCA قبل الغسيل. • لا تحل ملايس زائدة في الغسالة. | • للاستخدام غير الصحي• للاستخدام الكليوي• السحاب والأزرار والابزيمة غير• المثبة• ###رQQ والخويط المكسرة• حمل زائد في الغسالة• ضرر في القماش | • الفتحات وال QRق• أو الحبول |
تحري الخلّ وإصلاحه
قبل طلب الخدمات، افحص Minhكلات في الجدول أدناه.
| نقط الفحص | Yeشر الحطأ | الشكلة | ||
| هل حنفرية الماء مغلقة?هل انقطع الماء?هل تجمdet الحفرية أو خرطوم تزويد الماء?هل ضغط الماء منخفض أو المصفاة في صمام المدخلمسدودة بالاشياء?هل وصلت خرطوم تزويد الماء الحار إلى الماء البارد?هل وصلت خرطوم تزويد الماء البارد إلى الماء الحار? | 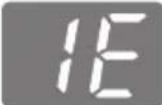 | عدم تزويد الماء | ||
| هلو impost خرطوم التصريف صحيحة?هل خرطوم التصريف ملوي أو في الوضع المرتفع جدا?هل الجزء الداخلي للخرطوم أو مضخة التصريف(موديلات بالضخة فقط) مسدودة بالاشياء?تاشد من انقطاع الطاقة الكهربانية. |  | عدم التصريف | ||
| هلو impost McLابس متسويا?هل ركّبّت جهاز الغسالة على أرض مستوىة و ثابتة? |  | عدم التجفيف | ||
| هل الغطاء مغلق? |  | فتح الباب (الغطاء) | ||
| يتم إغلاق غطاء?تاشد من أن الغطاء هو مغلقة بشكل صحيع وال Authentic على: زر بدء/ إيقاف مؤقت. فإن GPSالة لا تعمل إلا إذا تم تأمين عطاء.تاشد من أن ليس weekend ما هو حوصروا تحت الغطاء، بما في ذلك modal الشحن أو الملايس. | 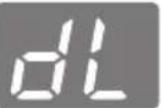 | إغلاق الباب (الغطاء) | ||
| هل weekend أجسام غرية، مثل قطع الن cod Regionne, وديابيس،الخ، واشتعت بين لوحة وغسل سلة Directionality?إيقاف تشفيل GPSالة ثم اضغط على زر الطاقة، اضغط على: زر سرعة الدوران دون تحديد دورة لاستنزاف وتدور العمل.önدما تدور کاملة، إزالة الملايس وثم إيجاد وإزالة أي أجساماشتعت في لوحة يغسل. |  | الأجسام العربية | ||
| الرجاء إفراغ الحوض Ireland عقمة مسوق التبايبض في درج آدواتالتنظيف و اختيار دورة ت NUQUIF الحوض.إذا اردت تخطي عملية ت NUQUIF الحوض، إضغط ازرار الحيراتلاختيار الدورة الم spectroية.تظهر في هذه الحالة الرسالة مرة-acري حتى عدد مرات من الغسيل وستختفي حتى المرة 1 لئالية ل NUQUIF الحوض. | 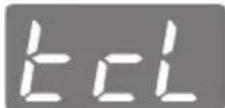 | منبه تنظيف الحوض | ||
| يرجي الاتصال باقرب مركز للخدمات لشركة إل جيللاكترونيات للمساعدة. |  |  |  |  |
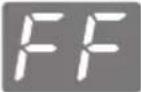 | 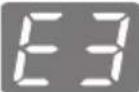 |  | ||
أغلق باب الغسالة، واضغط على زر الطاقة.
- إذا قمت بال ldغسط على أزرار أخرى أو قرض قبل الضغط على زر الفسيل البارد
أوقف تشغيل الغسالة وأعد تشغيلا مجددا.

POWER تشغيل

ضع الهاتف لعرض التشخيص الذكي™
• تأكد من أن سماعة الهاتف مواجهة لشاهشة
التشخيص الذكي™

Smart Diagnosis™

إificial Compact Management على زرغيل بارد لتنشيط الت邮寄ص الثاني
• ضع الهانف بالقرب من شلشة الت Mixchijص الذكي™، واضغط بشكل مطول على زر درجة حرارة الماء حتى تسمع صوت نك تانك تك

امسك الهاتف أثناء إرسال البيانات.
استمر في وضع سماعة الهانف على شاشة التشخيص الذكي ^TM
أثناء إرسال بيانات الشخيصات الذكية.
سيتم عرض الوقت المتبقي إرسال البيانات على الشكثة.
قد يكون صوت النقل متقطع
للمعلومات التشخيصية الصحية، لا تبعد السماعة.

natural_image
Illustration of a smiling washing machine connected to a mobile phone (no text or symbols)بعد إرسال البيانات، لستمع إلى نتيجة الشخيص من الصؤول.
عند اكتمال إرسال البيانات يتم إيقاف الشغيل بشكل تلقائي مع
رسالة إنهاً بعد توان قليله.
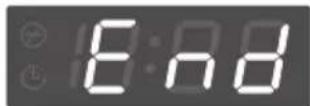
ملاحظة
التشخيص الذكي هي ميزة استكشف الأخطاء وإصلacha بغر ض المساعدة، وليست استدالع ن الطريقة التقليدية في استكشف الأخطاء وإصلacha من خلال مكالمات الخدمة. فعالية هذه الميزة تعتمد على عوا مل مcthلفة، ولكن Limeس على سبيل الحصر. فممكن استقبال الاتف الخليوي المستخدم في ا nlق، يحل ضو ضاء خارجية التي قد تؤثر على تشخيص الذكي przخلال الإرسالو آل جى لا تضمن ذلك، وأصوات الغرفة التي يقع في ها الجاز. وبناع عليه. لا يضمن أن يستكشف بدقة أي قضية معينة.
ما لا تغطيه الضمانة :
• زيارة فريق الخدمات إلى منزلك لتعليمك كيف surveyed الجهاز.
• إذا كان جهاز الغسالة موصولا إلى أية فولتية لیست مبینة في لوحة الطاقة المقدرة.
• إذا حدث خلال نتيجة الإستخدام faltaء Anaheim أو الكويتراث الطبيعية.
• إذا حدث الخل بسب العناصر الناشئة عن عدم الاستخدام العالي المحلي أو الاستخدام وفقا لدليل الملك.
• تقدم التعليمات لتشغيل الجهاز أو تغيير ضبط الجهاز.
• إذا حدث الخل بسب الحيوانات الصغيرة مثل الجرد والصرصور ... الخ.
• الضجب أو الاهتاز الذي يعتبر أمرا عاديا مثل صوت التصريف، صوت التجفيف، أو صفرة الإندار.
• تصحيح التركيب مثل استواء الجهاز، تعديل تصريف الماء.
• الصينة العادية الموصى بها المبينة في دليل الملك.
• إزالة أشياء غريبة/ مواد من جهاز الغسالة بما فيها المضخة ومصفاة خرطوم تزويد الماء مثل حبيبات
رملية، ومسامير، وأسلام الصديرية، الأزرار ... الخ.
• تبديل الصهيرة أو توصيل الأسلام الكهربائية في المنزل أو توصيل أنابيب التصريف في المنزل.
• حدوث خلال عند إصلاح الجهاز عند جهة غير معتمدة.
• الضرر التصادفي أو الضRR الخطير في الممتلكات الشخصية بسبب الخلال المكن في هذا小微企业
* إذا استخدام هذا小微企业 للغرض التجاري، لا تغطي الضمانة ضرره.
على سبيل المثال : الأماكن العامة مثل الحمامات العامة، مركز التدريب، الفنادق والخ.
إذا تم تركيب الجهاز خارج منطقة الخدمات العادية، ي Gimمل مالك الجهاز نفقات إصلاح الجهاز أو نفقات تبديل
الجزء المتضر مع أية تكلفة النقل.

| T1432AFPS5 | T1532AFPS5 | T1632AFPS5 | T1732AFPS5 | الطراز |
| 14.0 kg | 15.0 kg | 16.0 kg | 17.0 kg | سعة الغسيل |
| 220V~, 50 Hz | التيار الكهربي | |||
| 1600 W | تصنيف المدخلات | |||
| 50 kg | الوزن | |||
| 632(W) X 670(D) X 1020(H) mm | الحجم | |||
| 30 - 800 kPa (0.3 - 8.0 kgf/cm2) | Không صنبور المياه | |||
• في ضوء المساعي المستمرة لتحسين نوعية الأجنبية، من الضروري تغيير
الجهاز بدون تعديل دليل الملك هذا.
- OWNER'S MANUAL
- WASHING MACHINE
- Product Features
- Smart Drum achieved by DD Motor Technology
- Automatic heating system
- Normal logic control
- New DD type washing with fabric care
- Low Noise Direct Drive System
- SmartDiagnosis™
- Auto Restart
- Contents
- READ THIS MANUAL
- Safety Information
- WARNING
- CAUTION
- Identification of Parts
- Body
- Accessories
- NOTE
- Function Information
- Normal Wash
- Stain Care Wash
- Allergy Care Wash
- Smart Rinse
- Eco Wash
- Silent Wash
- Duvet Wash
- Pre Wash+ Normal
- Delicates Wash
- Favorite Wash
- Washing according to the condition of laundry
- Quick Wash
- Soak Wash
- Intensive Rinse
- Other washing method
- Tub Clean
- Time Delay (RESERVATION) Wash
- Option Wash
- Preparation Before Washing
- Care Labels
- Sorting
- Check before Loading
- Pretreatment on stains or heavy soil
- Loading
- Load Size
- Fire Hazard
- Light and Large-sized clothing
- Long laundry items
- Using Water
- Amount of WATER LEVEL
- [ Minimum water amount ]
- Water Temperature
- Using Dispenser Drawer
- Using the Dispenser Drawer
- Using Detergent
- Detergent
- Choosing the right Detergent
- How much Detergent
- Adding Detergent
- Attention
- Use of Water, Dispenser Drawer, Detergent, Bleach and Softene
- Using Liquid Bleach
- Using Fabric Softener
- Scrud(Waxy Build up)
- If you wish to use fabric softener we recommend
- Special Guide for Stain Removal
- For successful stain removal:
- Function of each Button
- Time Delay (Reservation) button
- Display laundry progress
- Display remaining time, reservation time, and alarm for trouble
- Steam button
- Water wave button
- Hot and cold wash laundry button
- Water Level button (display detergent amount)
- To save Favorite Program.
- To recall your Favorite cycle.
- Recommended cleaner :
- Do not put laundry for laundry tub course.
- Automatic detection of time to clean Tub
- Air Dry
- When you select Air Dry for more than 60 minutes
- Option Washing
- Other Useful Functions
- Child Lock Function
- How to Lock
- Press the POWER button.
- Press the START/PAUSE button to start washing.
- Press the Rinse button for 3 seconds to select Child Lock.
- How to Unlock
- Seeing Remaining Time
- Placing and Leveling
- Place the machine on a flat and firm surface which allows proper clearance.
- Check that the machine is level
- Leveling the machine
- Connecting Water Supply Hose
- Connecting Water Supply Hose to water tap
- Untighten the screw
- Fixing the connector to the tap
- Attach the water supply hose securely to the connector
- Fixing the connector to the water supply hose
- Check the connection of water supply hose and the connector
- Separate Middle connector from Water Supply Hose
- Loosen the fixed nuts to connect the connector to the tap
- Fixing Connectors to the Tap
- Fixing Upper Connector and Middle Connector
- Connecting Middle Connector and Water Supply Hose
- Check for water leakage
- Screw Type
- Attach the water supply hose to the tap.
- Connect the water supply hose to the tap.
- Check water leakage.
- Connecting Water Supply Hose to the machine
- Connecting Drain Hose
- Pump Model
- Non-Pump Model
- Grounding Method
- Grounding Method with Ground insert space Terminal
- CAUTION concerning the Power Cord
- Other Grounding Method
- Burying Copper Plate
- Using Ground Wire
- Using a Short Circuit Breaker
- Cleaning and Maintenance
- Cold water washing
- When you have finished
- To Clean the Filter in the Inlet Valve
- To Clean the Pump casing (for pump model)
- When there is a fear of freezing
- If frozen
- Cleaning the Inside of your Washer
- Products that might damage your washing machine
- Soft Safety Door
- Common washing problems
- Troubleshooting
- Close the washer door, and press the POWER button.
- Place the phone to SmartDiagnosis™ display.
- Long press Cold Wash button to activate smart diagnosis.
- Hold the phone while data is transmitted.
- After the data transmission is completed, listen to the diagnosis result from the consultant.
- What Is Not Covered:
- Memo
- المح토يات
- تعليمات من أجل السلامه
- معلومات عن الوظitaف
- مستوى كمية الماء
- تنمية
- درجة حرارة الماء.
- تنبیه
- استخدام درج الموزع
- استخدام مسحوق الغسيل وملين القماش
- مسحوق الغسيل
- -ac Mitsubishi مسحوق الغسيل الصحيح
- استخدام مسحوق الغسيل
- كمية مسحوق الغسيل
- ¡ICAfectة المنظف
- إستعمال الماء, صندوق التوزيع, مسحوق الغسيل ومنعم الغسيل
- استخدام سائل التبيضى
- استخدام منعم القماش
- (tekويت شمعاني) Scrud
- إذا أردت استخدام ملین القماش ، نوصيك
- تنیمهات !
- وظيفة كل زر من الأزرار
- ملاحظة
- برامج الغسيل
- تنظيف الحوض
- الوظأُف المفيدة الاغرى
- وظيفة إغلاق الط False
- 續د بر
- 2
- 3
- تحذیر
- توصيل خرطوم تزويد الماء
- توصل خرطوم تزويد الماء إلى حنفية الماء
- توصل خرطوم التصريف
- كيفية توصيل السلك الأرضي
- كيفية توصيل السلك الأرضي بطرف المكان لإدخال السلك الأرضي
- تحذير
- كيفية التوصيل الأرضي الاغر
- دفن صفيحة نحاسية
- استخدام السلك الأرضي
- استخدام قاطع الدائرة الكهربائية
- التنظيف والصيانة
- الغسيل بالماء البارد
- عند الانتها.
- لتنظيف المصفاة في صمام المدخل
- 1
- 4
- في حالة خوف من التجemd
- إذا تمحمد
- تنظيف الأسطح الداخلية للجهاز
- المنتجات التي قد تؤدي إلى إحداث ضرر في جهاز الغسالة
- مشاكل الغسيل العادية
- تحري الخلّ وإصلاحه
- ما لا تغطيه الضمانة :
브랜드 : LG
모델 : T1432AFPS5
카테고리 : 세탁기