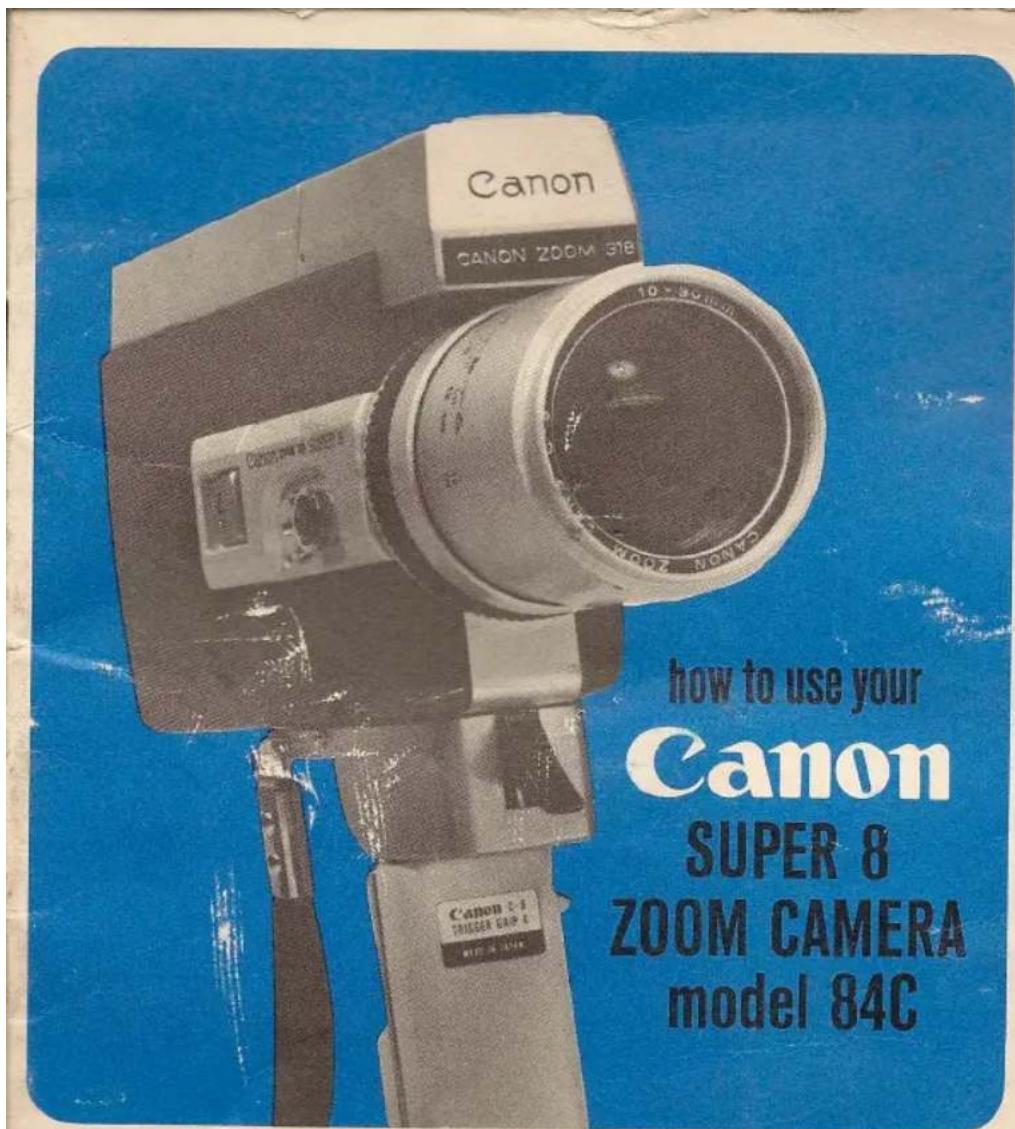
Zoom 84C - 2867 CANON - Panduan pengguna gratis
Temukan panduan perangkat secara gratis Zoom 84C CANON dalam format PDF.

Pertanyaan pengguna tentang Zoom 84C CANON
0 pertanyaan tentang perangkat ini. Jawab yang Anda tahu atau ajukan milik Anda sendiri.
Ajukan pertanyaan baru tentang perangkat ini
Unduh instruksi untuk 2867 dalam format PDF gratis! Temukan panduan Anda Zoom 84C - CANON dan ambil kembali perangkat elektronik Anda. Di halaman ini diterbitkan semua dokumen yang diperlukan untuk penggunaan perangkat Anda. Zoom 84C merek CANON.
PANDUAN PENGGUNA Zoom 84C CANON

natural_image
Black-and-white photo of a young man and a young woman in close embrace, no visible text or symbols
natural_image
Black-and-white photo of a couple kissing a pear, no visible text or symbols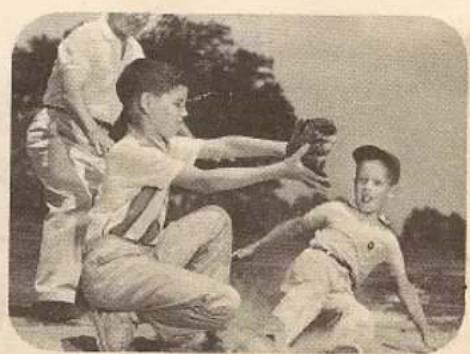
natural_image
Black-and-white photo of three individuals in outdoor setting, one kneeling and gesturing, another standing with arms outstretched (no visible text or symbols)welcome to Bell & Howell/Canon ownership
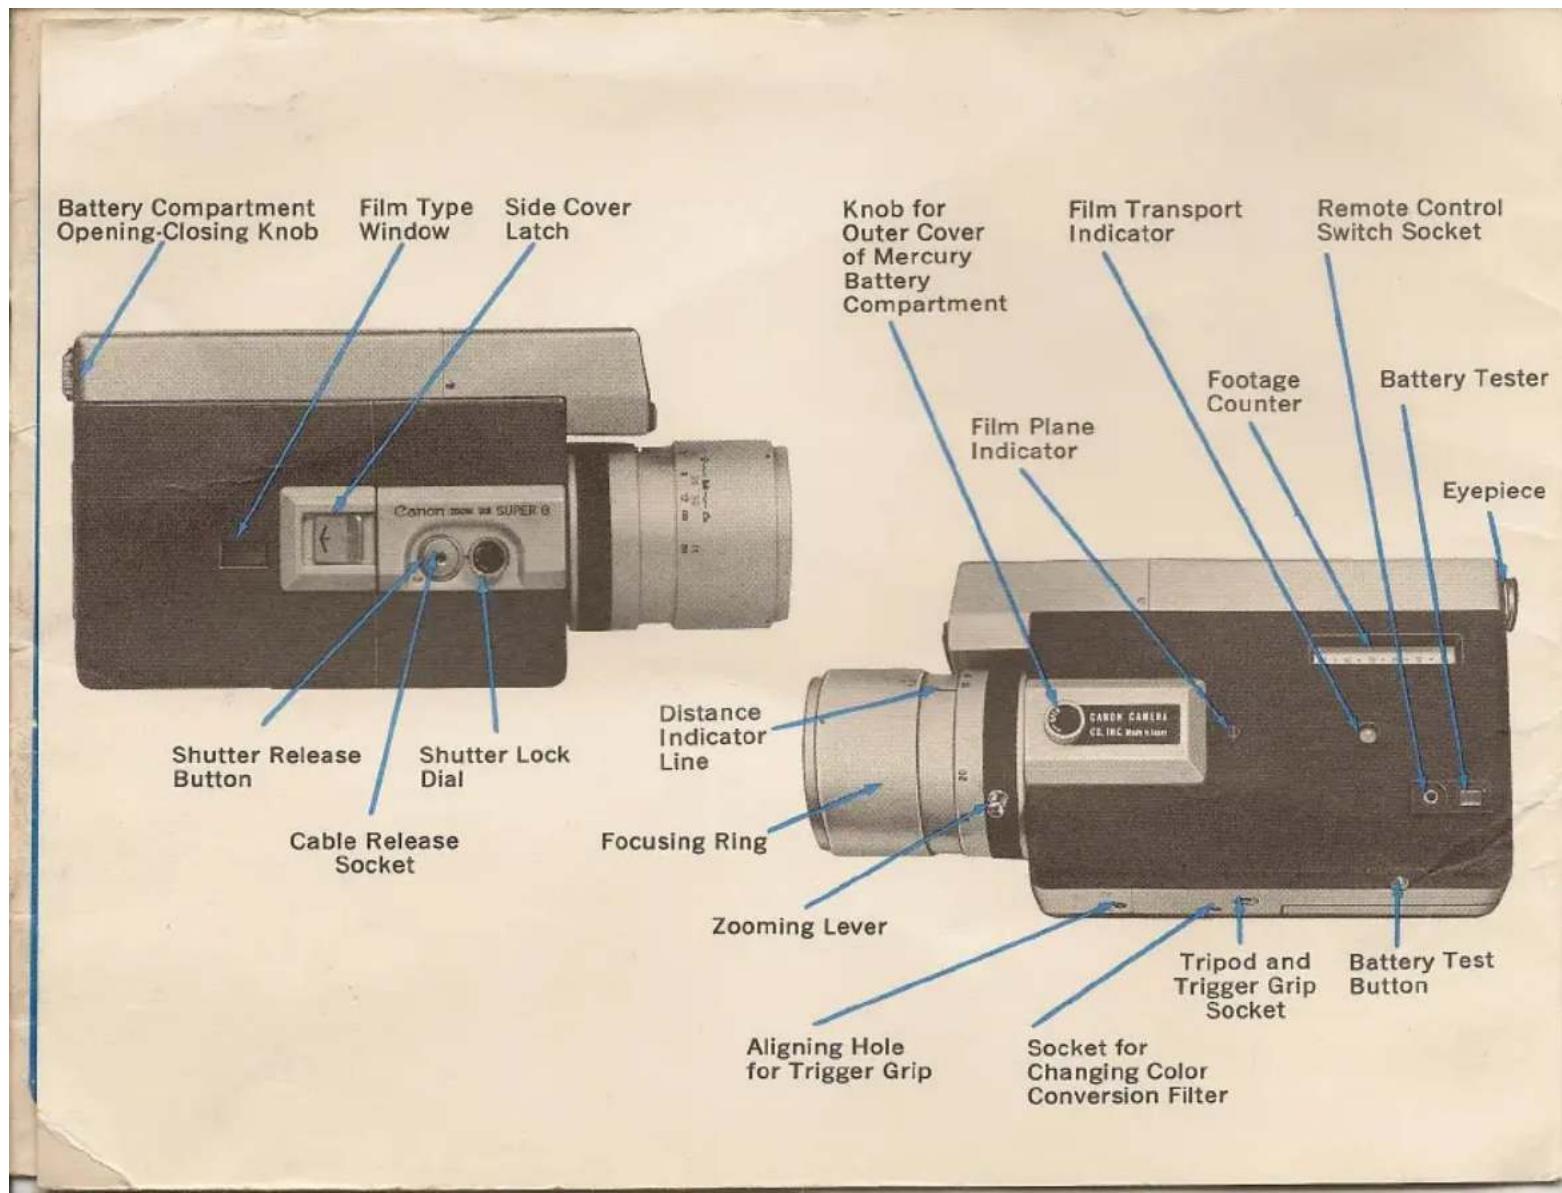
open this flap of your instruction booklet
Keep the flap open as you read through the instructions that follow. This will give you a quick reference to all the working parts of your Canon Super 8 camera. Familiarity with these names before operating your camera will assure complete success with your first roll of film.
Super 8 gives you new opportunities to enjoy taking movies simply, easily, creatively. Super 8 eliminates every bit of film handling, permits the camera to make almost every setting for you.
SUPER 8 FILM When you purchase film make sure you specify Super 8. Your camera will not operate with conventional 8mm film. Super 8 film with its 50% larger picture area can only be used in Super 8 cameras & projectors.
NO MESSY SPOOLS TO HANDLE OR THREAD Just slip in the entire cartridge, right out of the box.
NO ASA OR FILTER SETTINGS—or type film to worry about. The specially notched cartridge automatically tells the camera what settings to make. The camera will handle every film speed from ASA 16 to ASA 160.
NO FLIP OVER FOR THE SECOND SIDE—or rehandling at the end. Super 8 is a continuous 50 foot length of film. Run it through completely, then send the whole thing—cartridge and all—to the processor.
Canon cameras are sold, serviced and guaranteed in the U.S. and Canada by the Bell & Howell Co.
after you have installed the batteries and focused the eyepiece (see following pages), you simply follow these simple steps:
-
Insert Super 8 film cartridge.
-
Focus for distance.
-
Look through the viewfinder.
natural_image
Black-and-white photo of a young girl holding a vintage camera and a handheld device (no visible text or symbols)
natural_image
Close-up of hands operating a vintage camera with lens and control knobs (no visible text or symbols)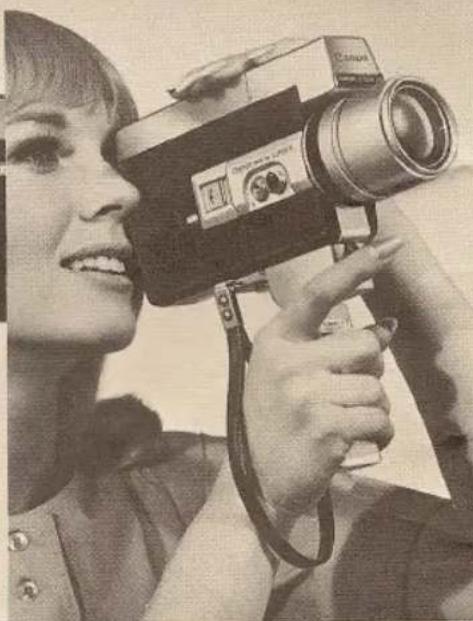
natural_image
Black-and-white photo of a person holding a vintage camera, smiling (no visible text or symbols)-
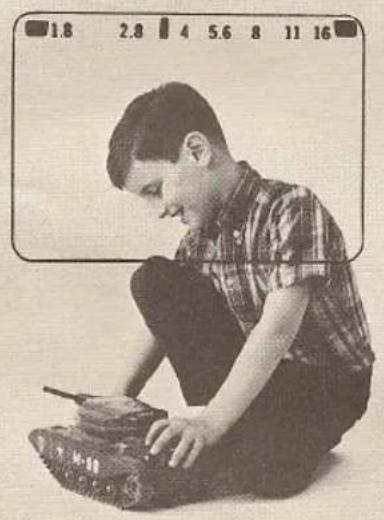
Aim and check whether the exposure meter needle is within the proper range
-
Rotate zooming lever and adjust size of subject.
-
Squeeze the trigger.
natural_image
Black-and-white photo of a young boy crouching while sitting on a tank, no visible text or symbols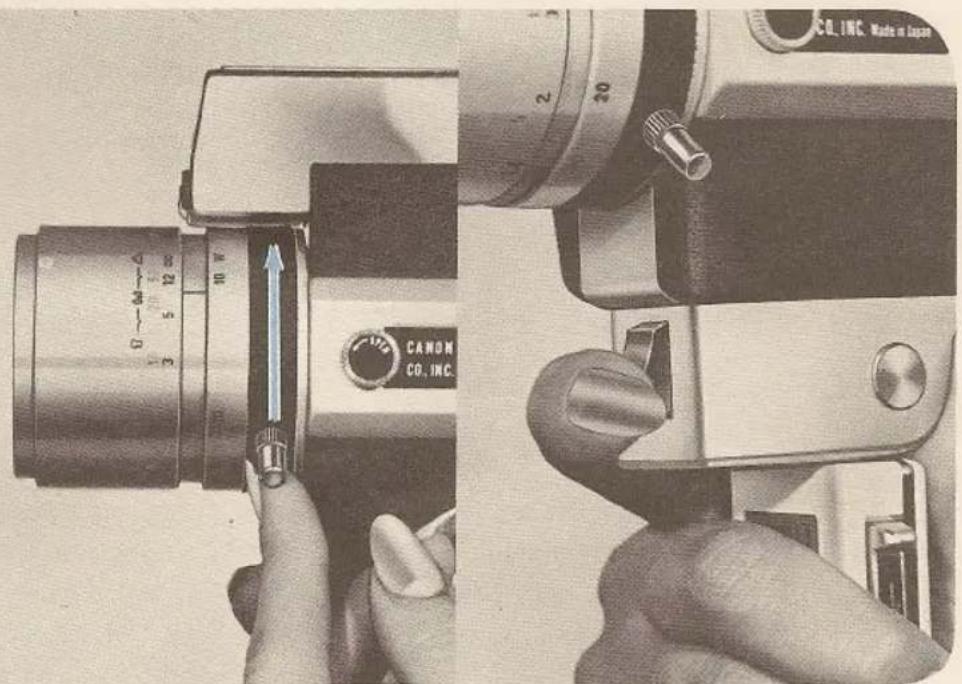
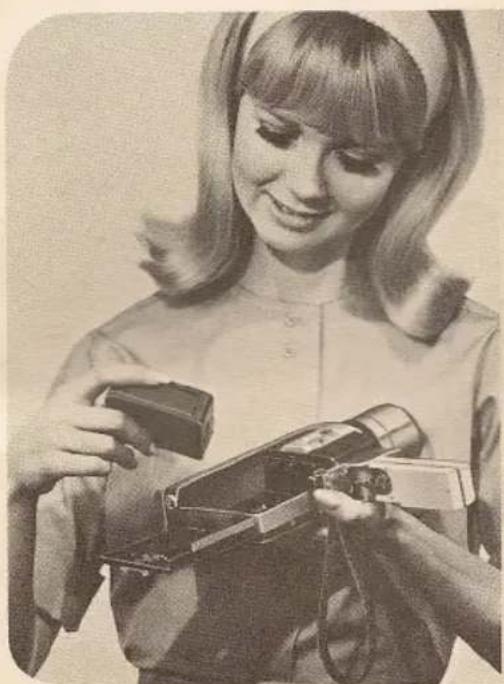
mercury batteries for electric eye
Before using your new camera, load it with the two mercury batteries packed in a separate envelope. If the batteries are not inserted, the electric eye will not function.
Do not leave fingerprints or stains on the mercury batteries. Before inserting the mercury batteries into the camera, wipe all poles clean of all fingerprints or stains with a dry cloth. If this is not done, they may cause corrosion and damage the contact points. When the camera is not to be used for a prolonged period of time, remove the mercury batteries and keep them in a dry place.
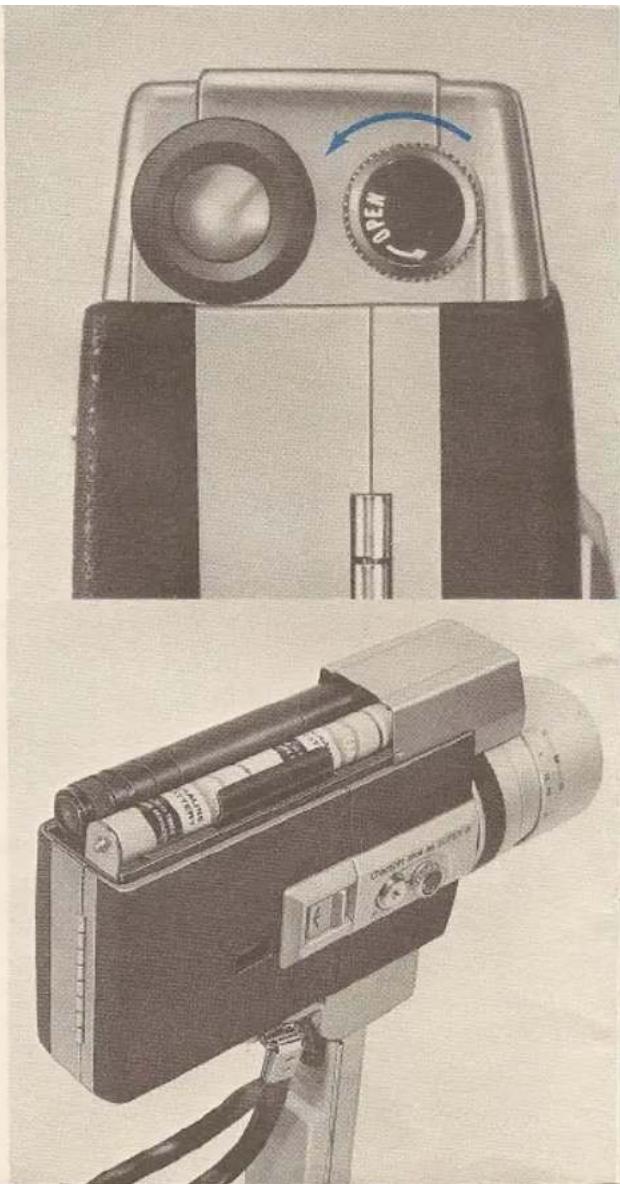
loading of mercury battery
- Remove the outer cover plate of the mercury battery compartment by turning the outer cover knob to the left.

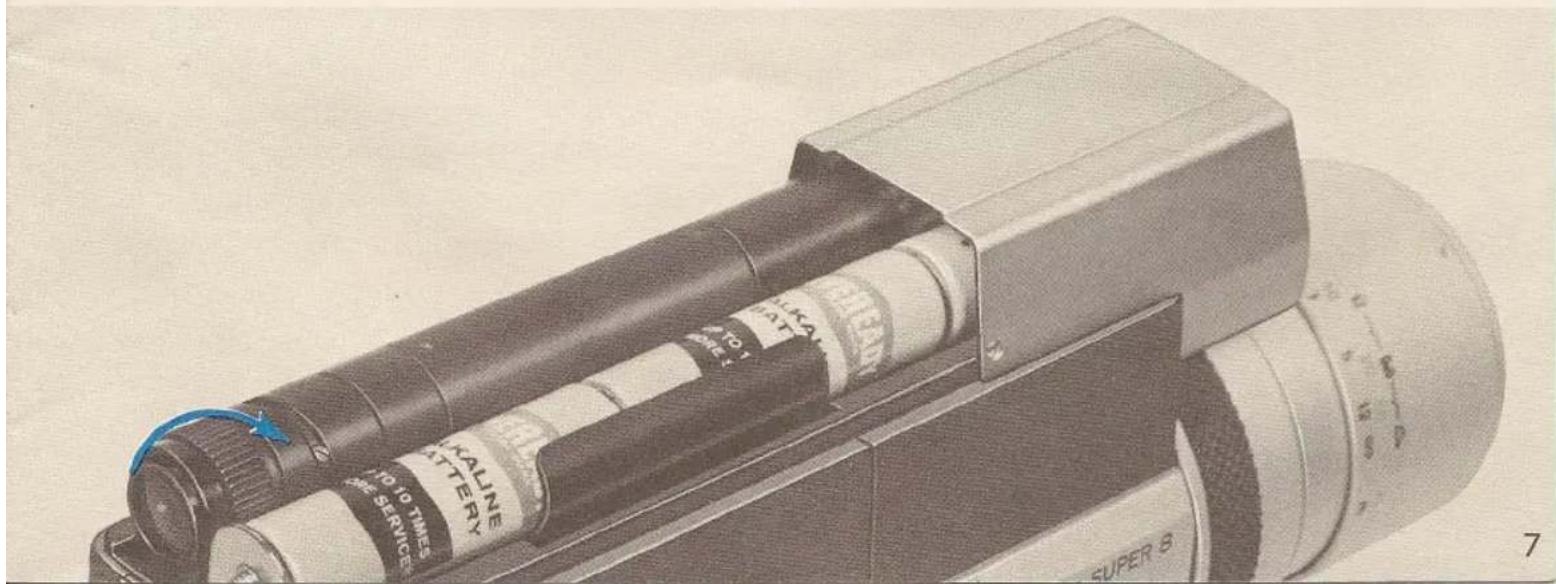
penlight batteries for film drive
- Loosen the battery compartment opening-closing knob by turning it to the left.
- Remove the top cover by sliding it backwards.
- Insert three 1.5V penlight (size AA) batteries, with the (+) poles facing towards the front according to the instructions inside the battery compartment.
When the camera is not to be used for a prolonged period of time, remove the batteries.
natural_image
Two vintage camera modules: one with a rotary dial and the other with a mounted device (no visible text or symbols)eyepiece adjustment
- Adjust the eyepiece before putting on the top cover.
Aim the camera in the direction of a bright light or subject. Then look into the viewfinder while turning the eyepiece adjustment ring and make adjustments so that the aperture stop figures can be clearly seen.
- After the eyepiece adjustment has been completed, slide the top cover back on and then tighten the battery compartment opening-closing knob by turning it to the right.
natural_image
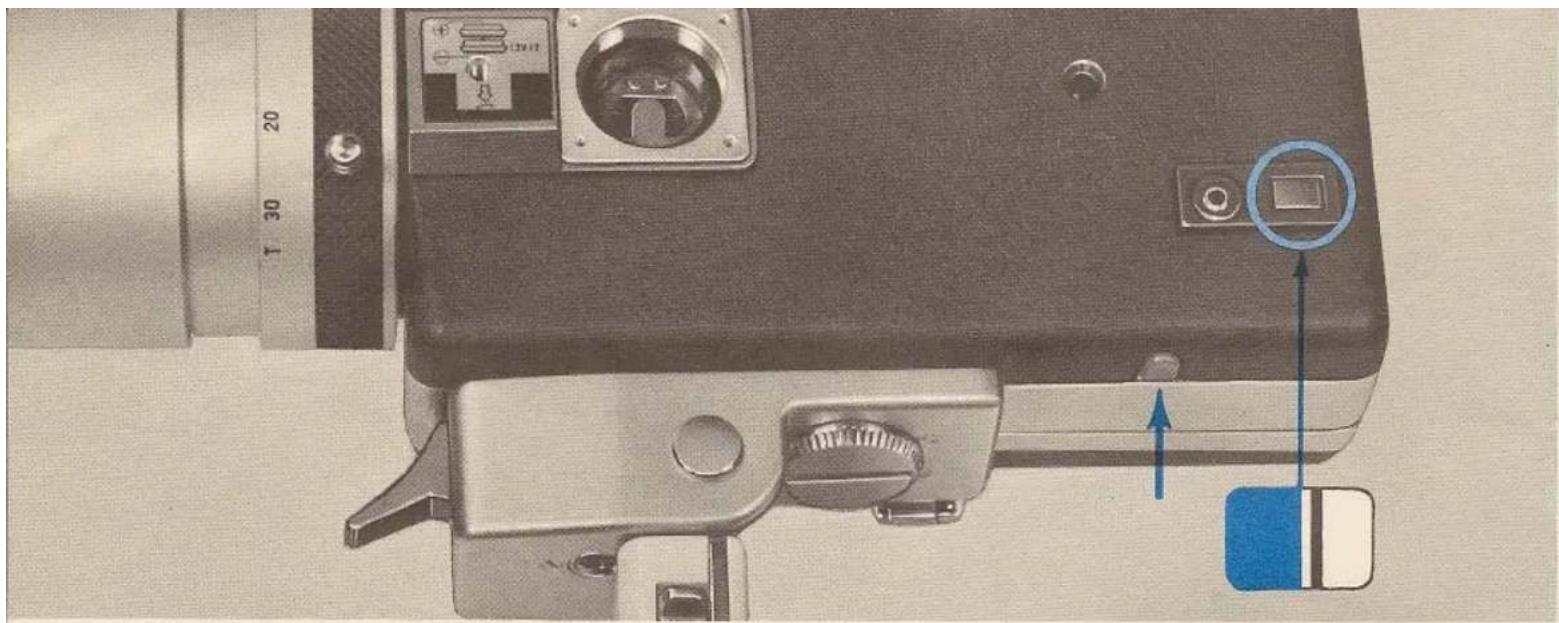
Close-up of a vintage camera with adjustment knobs and a blue square button (no text or symbols visible)battery check
After the dry batteries have been loaded, check to see whether the capacity of the batteries is sufficient.
-
Press the red button at the bottom of the camera and check the position of the needle seen in the battery test window.
-
If the needle moves past red zone, it means the batteries have sufficient capacity. Otherwise, the batteries must be replaced.
▶Always check the battery tester before shooting.
loading and unloading of SUPER 8 film cartridge
- Open the side cover by sliding the side cover latch in the direction of the arrow.
- Slide the Super 8 film cartridge in, right-side-up, towards the front of the camera, and then set the film cartridge into position by pressing down on it. Close the side cover by pressing it.
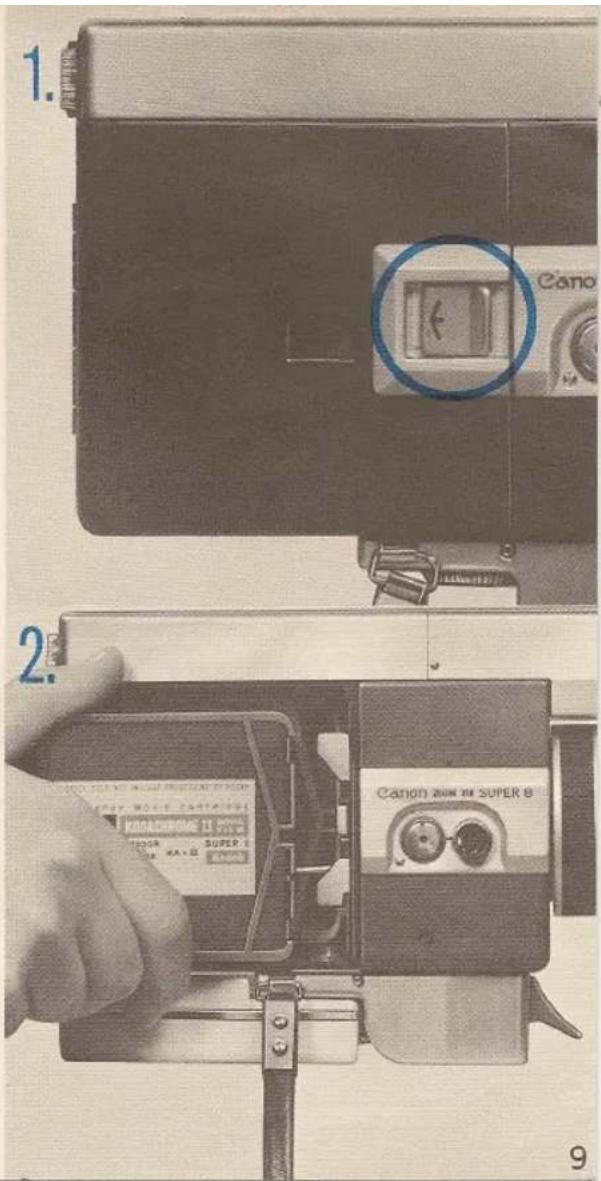
loading (continued)
- Set the shutter lock dial at R and press the shutter button. If a film winding sound can be heard and the white dot in the film transport indicator revolves, it means preparations for shooting have been completed.
- The Super 8 cartridge contains a continuous 50-foot length of film. The footage indicator needle tells you how many feet you have exposed. Stop shooting when it reaches "F". No flip-over or rehandling is necessary.
The footage counter automatically resets to 0 when the cartridge is taken out.
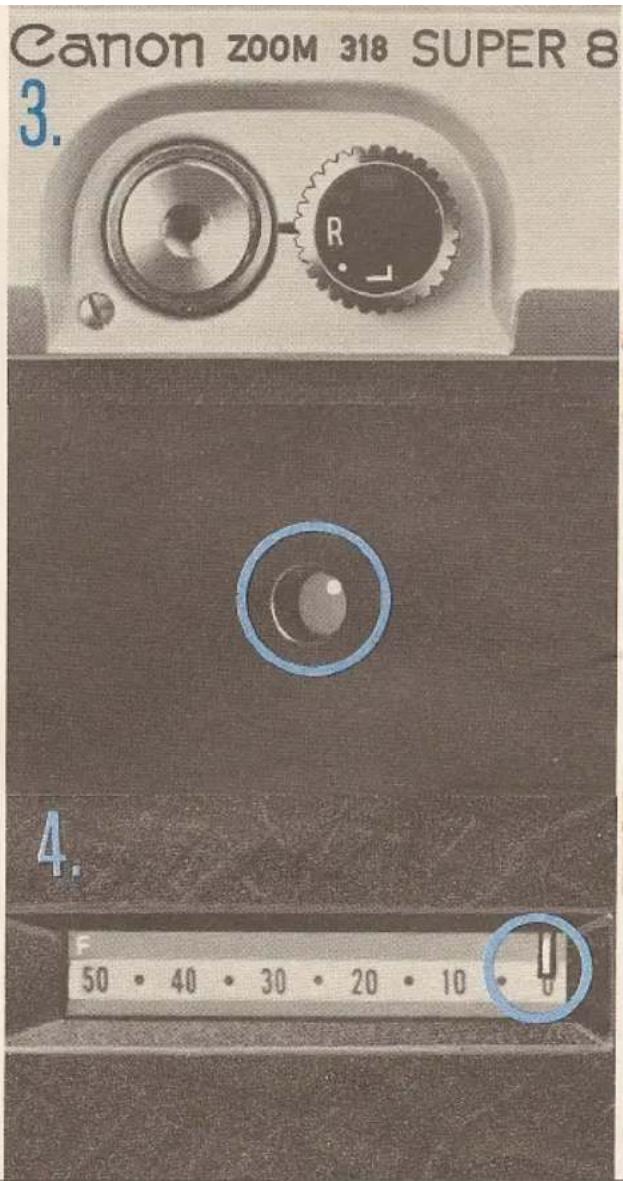
focusing
Estimate the distance from your camera to the subject, and then set the distance by matching the number on the focusing ring to the indicator line on the lens barrel. Focusing can also be easily performed by using the zone focus marks.
The zone focus marks are for determining approximate distances. Thus, even when photographing one person, if the distance from the camera to the person is distant, set the needle to the group or scenery marks.
Use the distance scale for accurate focusing.
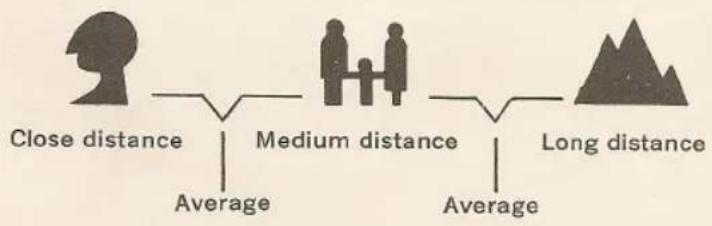
flowchart
graph LR
    A["Close distance"] --> B["Average"]
    C["Medium distance"] --> D["Average"]
    E["Long distance"] --> F["Average"]
natural_image
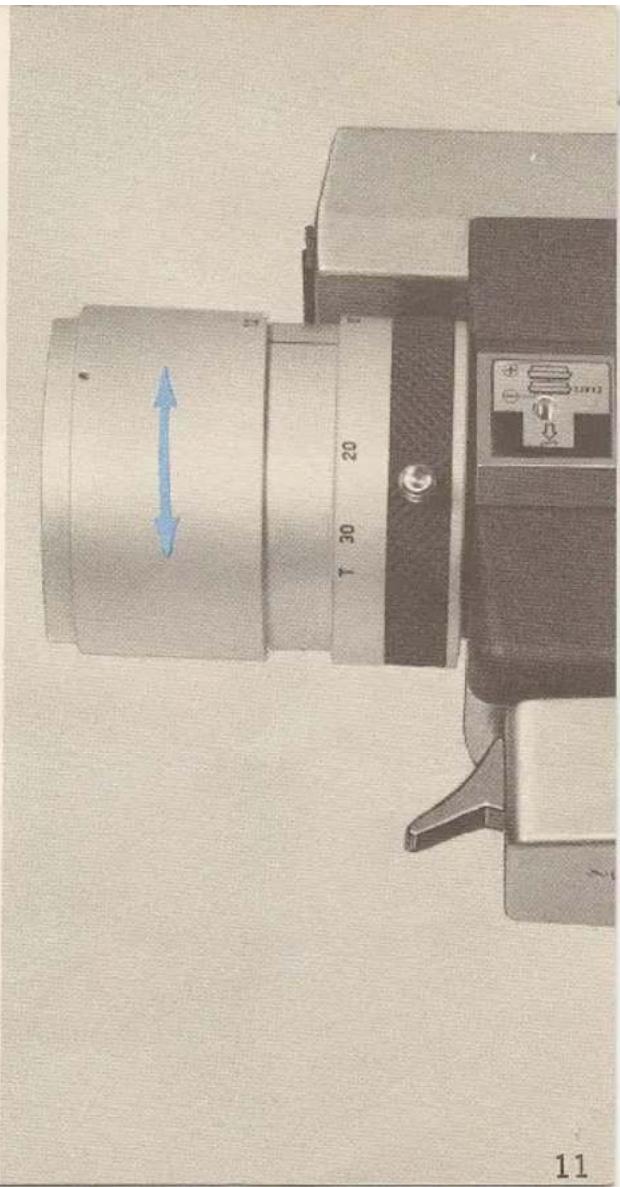
Close-up of a mechanical device with a blue double-headed arrow indicating left motion, no visible text or symbols.zooming
The image seen through the viewfinder will change in magnification and the field-of-view will also change by turning the zooming ring. The field-of-view seen through the viewfinder is exactly what will be exposed on the film. When zooming is performed during shooting, any desired zooming effect can be reproduced on the film.
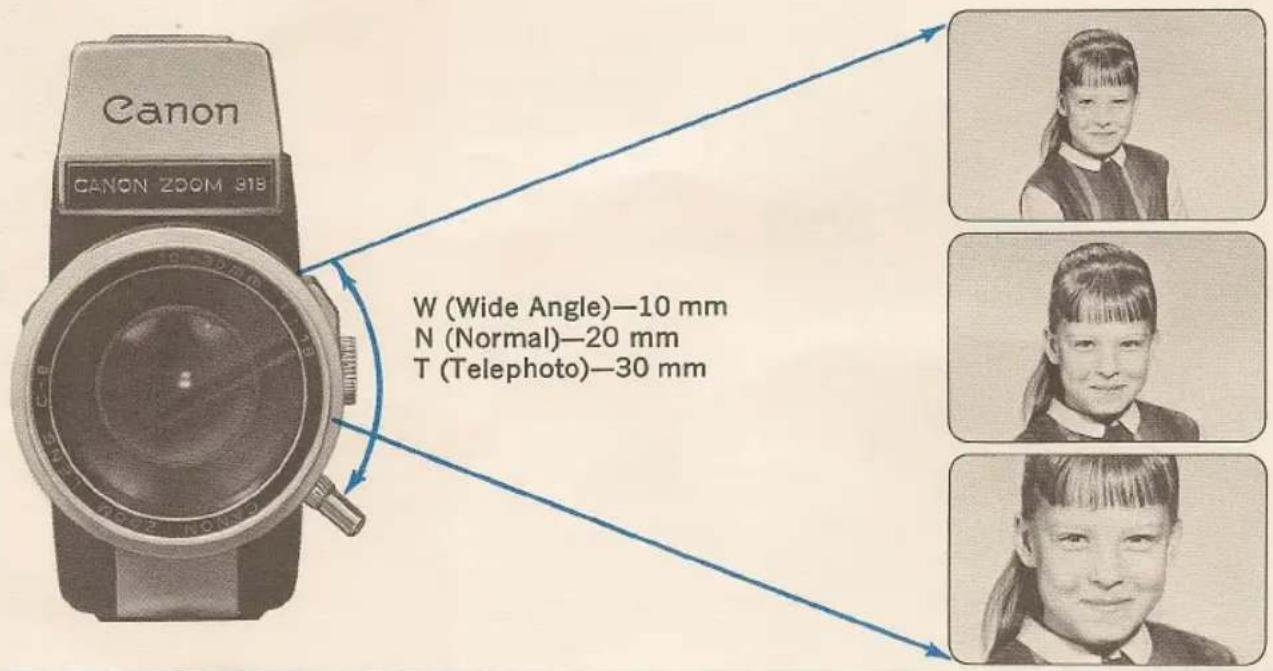
W (Wide Angle)—10 mm
N (Normal)—20 mm
T (Telephoto)—30 mm
shutter release button
When the shutter release button is pressed, shooting starts and the footage counter advances simultaneously. The shutter lock dial must be set at R. The shutter lock dial performs the following two functions:
1. safety lock
When the shutter lock dial is set at L, the mercury battery circuit is disconnected. The shutter release button is also locked and prevents inadvertent film advance.
natural_image
Person holding a vintage camera with visible lens and control lever (no text or symbols on device)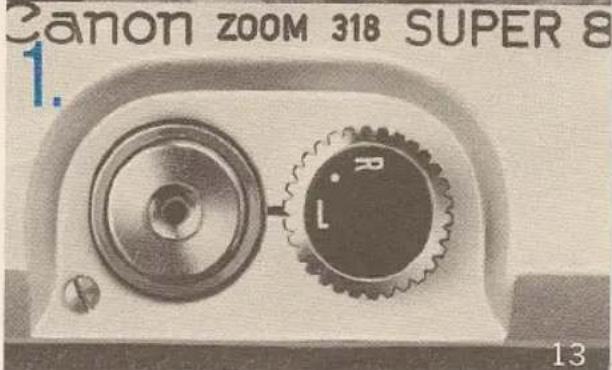
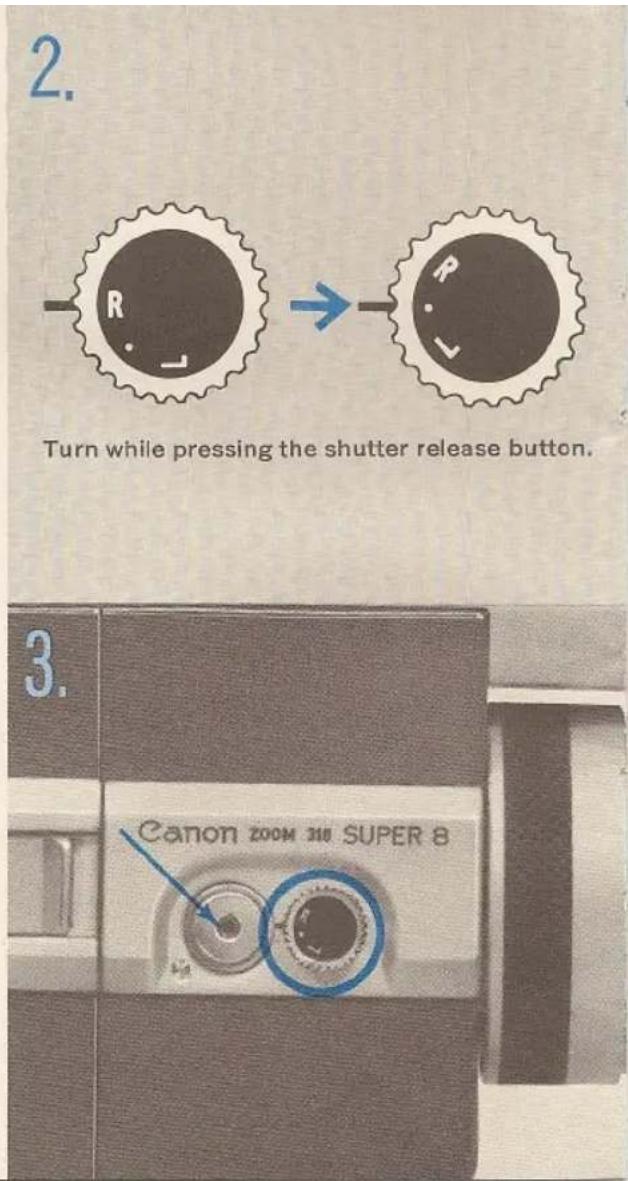
2. running lock
With the shutter lock dial at R, press the shutter release button, starting the camera to run. Next, while still holding the button down, turn the shutter lock dial to ● position. Then you can release the button and the camera will continue to run until the dial is returned to R position allowing the shutter release button to pop out stopping the camera.
This operation will allow you to get into the movie with the rest of the family. Just remember to place the camera on a tripod or other firm support first.
3. cable release socket
When shooting movies using a tripod, use a cable release by screwing it into threaded hole in the center of the shutter release button.
automatic exposure control
Your camera is completely automatic. Exposure adjustments or film speed settings are absolutely unnecessary.
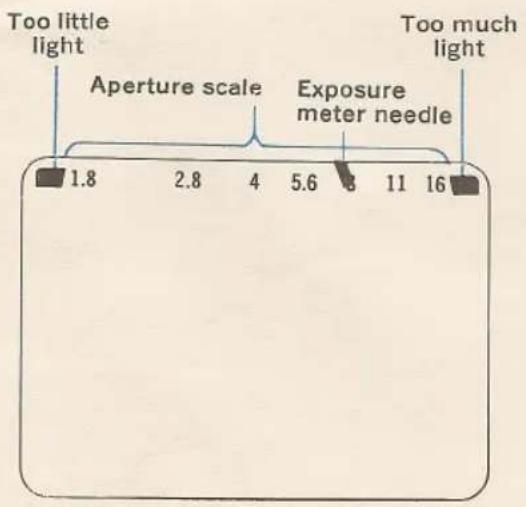
Before pressing the shutter release button, aim the camera at the subject and check the position of the exposure meter needle inside the viewfinder. If the needle is pointing somewhere within the range of the aperture scale, you can press the shutter release button. It means the exposure meter needle is pointing to the proper aperture stop.
Warning Mark If the exposure meter needle is pointing to either of the red warning marks on both sides of the aperture scale, shooting under proper exposure conditions is impossible. However, if the needle is pointing to the over-exposure warning mark on the left side, shooting will become possible if a neutral density filter is attached in front of the lens to restrict the light intensity.
When checking the exposure meter needle, remember that the needle will not move unless the shutter lock dial is set at R.
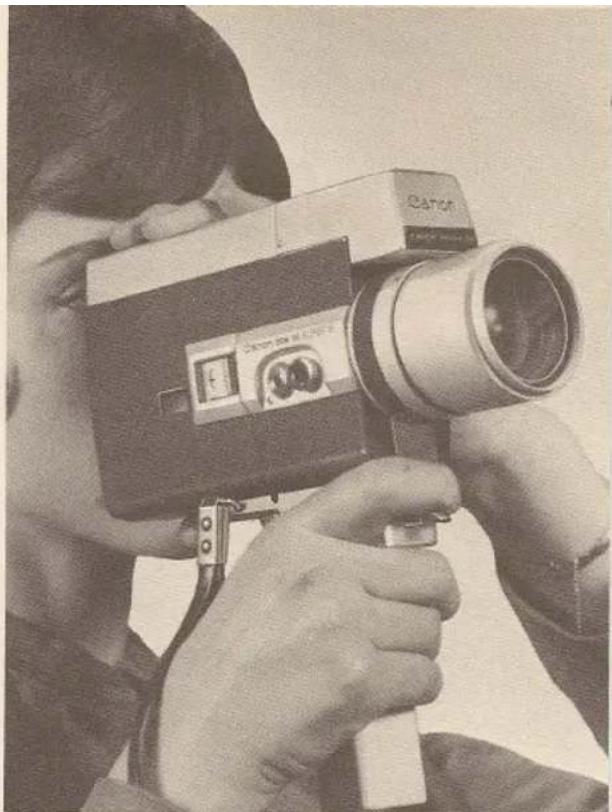
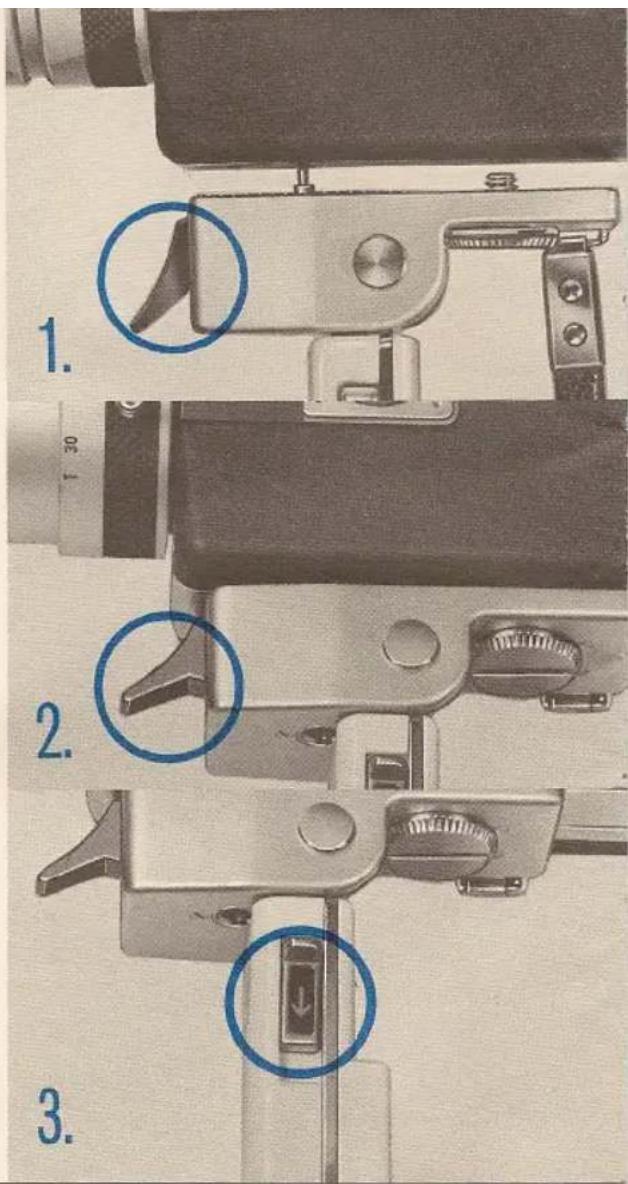
folding trigger grip
- To install the grip, align the connecting parts of the grip and camera, and attach the grip onto the camera by screwing the attachment screw into the tripoid socket.
- Hold the grip with the right hand and squeeze the trigger. The shutter will function and the film will advance.
- To fold the grip, just push the locking lever down and swing the handle back.
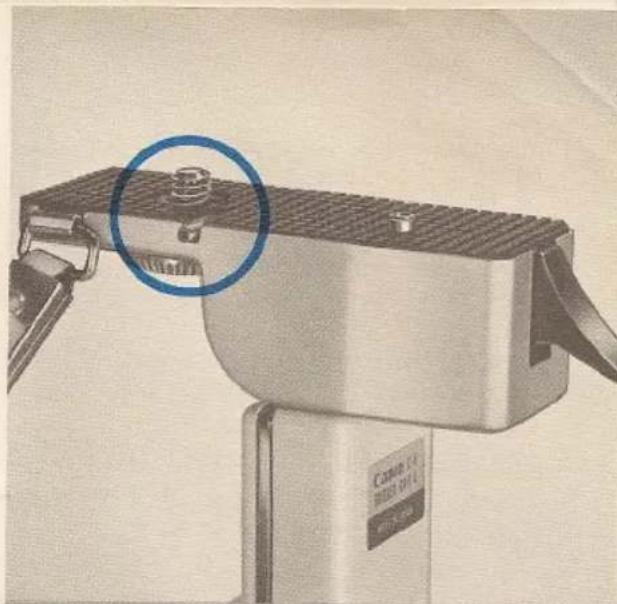
4. SHOOTING WITH ARTIFICIAL LIGHT
Normally, the Super 8 film you buy for your camera will be "Indoor Type A", and your camera is shipped to you with its built-in filter already properly set for shooting outdoor (natural light) pictures.
When you want to shoot indoors with artificial light, remove the trigger grip and turn up the pin as indicated on the diagram which is at the rear of handle. (The pin swings the filter out of way.) Then replace trigger grip with the pin in the proper hole, and you are all set to shoot with flood lamps or movie lights.
When the grip is not attached to the camera, or when the grip is attached to the camera with the filter cancellation pin folded, the camera is set for daylight shooting.
When using black and white or daylight type color films, the type A filter is automatically eliminated with the insertion of the film cartridge. When shooting under artificial lighting with daylight type color film, use blue lamp or Color Conversion B type filter over the lens.
natural_image
Close-up of a mechanical device with a blue circle highlighting a component, no visible text or symbols.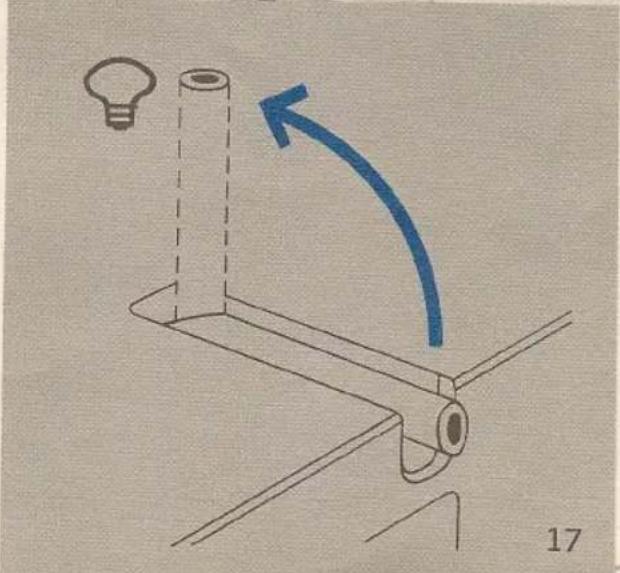
natural_image
Simple line drawing of a light bulb mounted on a stand with an arrow indicating rotation (no text or symbols)remote control switch
With the use of a separately available remote control switch you can operate the camera from a distance.
- Insert the plug of the remote control switch cord into the remote control switch socket of the camera.
-
Set the shutter lock dial at ●, while pressing the shutter release button, to set the camera in running condition.
-
When release button of the remote control switch is pressed down and slid in the direction of the arrow, the film advances and is set into running lock condition.
When disconnecting the cord of the remote control switch from the camera, be sure to return the shutter lock dial of the camera to R first.
If the cord of the remote control switch is disconnected from the camera before the shutter lock dial is set at R, the shutter will actuate and the film will start advancing.
The length of the cord for the remote control switch is 26 feet.
- When shooting pictures with the remote control switch, it is advisable to cover the eyepiece to shut out bright light.
NOTES
Bell & Howell/Canon GUARANTEE
This new Bell & Howell/Canon product is guaranteed to be free from imperfections in both material and workmanship for one year from date of original purchase. Should any part of this equipment be defective, it will be replaced or repaired free of charge (except for transportation), providing the equipment has been operated according to the instructions accompanying it.
No liability is assumed for film which is damaged or is unsatisfactory for any reason and no liability is assumed for interruptions in operation of equipment. This guarantee is void:
a) If equipment has been damaged by accident or mishandling;
b) If equipment has been serviced by other than Bell & Howell approved service stations*;
c) If adaptations or accessories other than Bell & Howell have been made or attached.
The foregoing is in lieu of all other warranties expressed or implied and Bell & Howell Company neither assumes nor authorizes any person to assume for it any other obligation or liability in connection with this product.
General Service Dept.
Bell & Howell Co.
7100 McCormick Rd.
Chicago, III. 60645
General Service Dept.
Bell & Howell Co.
623 Rodier Dr.
Glendale, Calif. 91201
*Location of nearest approved service station will be furnished on request.
CANON CAMERAS ARE SOLD, SERVICED AND GUARANTEED
IN U.S. AND CANADA BY BELL & HOWELL
BELL & HOWELL • 7100 McCormick Rd. • Chicago, Ill. 60645
PRINTED IN U.S.A.