VTM-LCD561KT - 129 Vitek - Panduan pengguna gratis
Temukan panduan perangkat secara gratis VTM-LCD561KT Vitek dalam format PDF.

Pertanyaan pengguna tentang VTM-LCD561KT Vitek
0 pertanyaan tentang perangkat ini. Jawab yang Anda tahu atau ajukan milik Anda sendiri.
Ajukan pertanyaan baru tentang perangkat ini
Unduh instruksi untuk 129 dalam format PDF gratis! Temukan panduan Anda VTM-LCD561KT - Vitek dan ambil kembali perangkat elektronik Anda. Di halaman ini diterbitkan semua dokumen yang diperlukan untuk penggunaan perangkat Anda. VTM-LCD561KT merek Vitek.
PANDUAN PENGGUNA VTM-LCD561KT Vitek
LCD SPECIFICATIONS
| Model | VTM-LCD561 |
| Display Type | 5.6" TFT LCD Panel |
| Input Signal | NTSC or PALVideo: 1Vp-p/75 ohmAudio: 1Vp-p/100k ohm |
| Display Frequency | NTSC: Fh=15.73KHz, fv=60HZPAL: Fh=15.63KHz, fv=50HZ |
| Display Resolution | 960 x 234 dpi |
| Display Color | Full color |
| Input | Video Input x2Audio input x2 |
| Functions | Functions controlled by OSD (On screen display)Audio Volume: Audio output power: 0.5 WattsVideo Control: Video 1 / Video 2 / Reverse Picture, Contrast, Bright color, Up / Down (picture), Reset |
| Power Input | DC 12V+/- 15% |
| Operation Temp | -20 C ~ +70 C |
| Storage Temp | -30 C ~ +80 C |
| Humidity | 10-90% RH |
| Dimensions | 153 (H) x 134 (V) x 29.5 (D) mm |
| Viewing Angle | 40 Degrees Horizontal / 90 Degrees Vertical |

VTM-LCD561
5.6" TFT Color LCD Display Monitor
natural_image
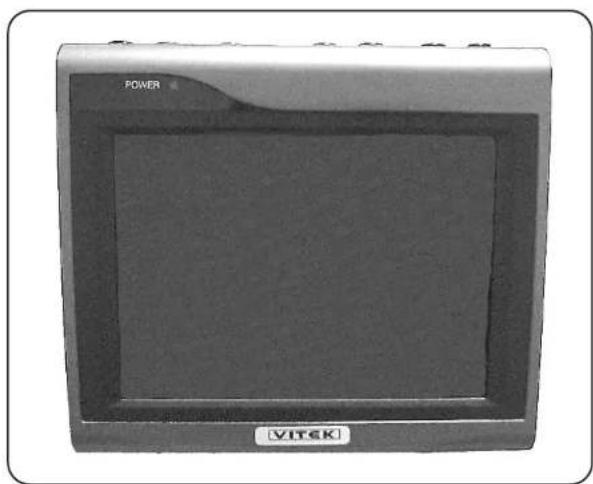
Front view of a VITEK device with a power screen and logo (no visible text or symbols on the device body)Product Manual
INSTALLATION
OPERATION
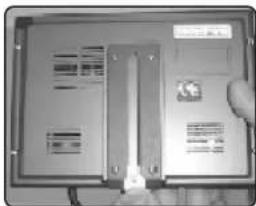
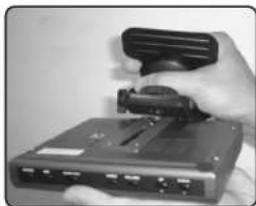
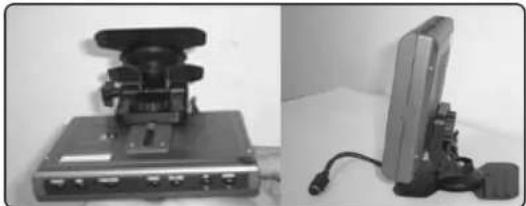
Bracket Installation
natural_image
Close-up of a computer monitor with a partially open screen and a small logo, no visible text or symbols on the device itself.1) Insert metal plate into Slot on back of unit.
natural_image
Hand holding a device with a black clip attached, no visible text or symbols2) Attach bracket to metal plate.
natural_image
Two electronic devices: a mounted device with a switch and a flat-screen monitor with cables (no visible text or symbols)3) Adjust to comfortable viewing angle to complete.
Wiring Diagram
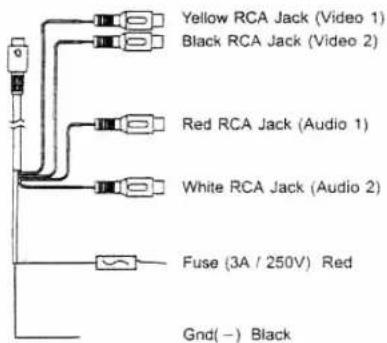
Output device:
(Recorder, Camera, Etc.)
Yellow RCA Jack
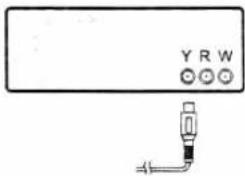
LCD Buttons
Top of LCD Unit
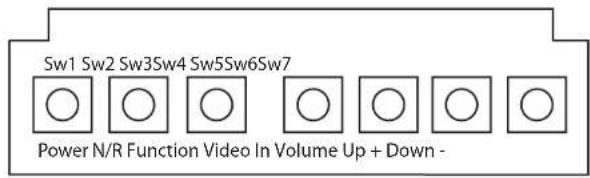
SW1 : Power On / Off
Powers the unit On or Off.
SW2 : Normal / Reverse
Changes the display to a horizontally mirrored image, as seen below.

flowchart
graph TD
    A["ABC"] --> B["CBA"]
    B --> A
SW7 : Function
Used in conjunction with the Up / Down keys, the function button adjusts the video settings as seen below.

flowchart
graph LR
    A["Contrast Brightness Color"] --> B["Reset"]
    B --> C["Up/Down"]
SW4: Video Input
Adjusts the input setting between: Video/Audio 1 and Video/Audio 2.
SW3 : Volume
Use in conjunction with the Up / Down keys to adjust the LCD volume.
SW6:Up Key
SW5 : Down Key