
Silhouette 153604 - Range hood BROAN - Free user manual and instructions
Find the device manual for free Silhouette 153604 BROAN in PDF.


| Product Type | Range Hood |
| Brand | Broan |
| Model | Silhouette 153604 |
| Width | 36 inches |
| Mounting Type | Under-cabinet |
| Venting Type | Convertible (ducted or recirculating) |
| Maximum Airflow (CFM) | 600 CFM |
| Noise Level (Sones) | 1.5 to 6.5 sones |
| Filter Type | Aluminum mesh, dishwasher safe |
| Lighting | 2 x 20W halogen (GU10) |
| Controls | Rocker switches for light and fan (3 speeds) |
| Electrical Rating | 120V / 60Hz / 5.0A |
| Duct Size | 8 inch round (vertical or horizontal) |
| Optional Recirculating Kit | Model S1104 for non-ducted installation |
| Height (range) | 6 to 12 inches (adjustable) |
| Depth | 18 inches |
| Weight | 28 lbs |
| Certifications | UL listed, HVI certified |
| Warranty | 1 year limited |
Frequently Asked Questions - Silhouette 153604 BROAN
User questions about Silhouette 153604 BROAN
0 question about this device. Answer the ones you know or ask your own.
Ask a new question about this device
Download the instructions for your Range hood in PDF format for free! Find your manual Silhouette 153604 - BROAN and take your electronic device back in hand. On this page are published all the documents necessary for the use of your device. Silhouette 153604 by BROAN.
USER MANUAL Silhouette 153604 BROAN
- Use this unit only in the manner intended by the manufacturer. If you have questions, contact the manufacturer at the address or telephone number listed in the warranty.
- Before servicing or cleaning unit, switch power off at service panel and lock the service disconnecting means to prevent power from being switched on accidentally. When the service disconnecting means cannot be locked, securely fasten a prominent warning device, such as a tag, to the service panel.
- Installation work and electrical wiring must be done by a qualified person(s) in accordance with all applicable codes and standards, including fire-rated construction codes and standards.
- Sufficient air is needed for proper combustion and exhausting of gases through the flue (chimney) of fuel burning equipment to prevent backdrafting. Follow the heating equipment manufacturer's guideline and safety standards such as those published by the National Fire Protection Association (NFPA), and the American Society for Heating, Refrigeration and Air Conditioning Engineers (ASHRAE), and the local code authorities.
- When cutting or drilling into wall or ceiling, do not damage electrical wiring and other hidden utilities.
- Do not use this range hood with an additional speed control device.
- Ducted fans must always be vented to the outdoors.
- To reduce the risk of fire, use only metal ductwork.
- Use with approved cord-connection kit only.
- This unit must be grounded.
TO REDUCE THE RISK OF A RANGE TOP GREASE FIRE:
- Never leave surface units unattended at high settings. Boilovers cause smoking and greasy spillovers that may ignite. Heat oils slowly on low or medium settings.
- Always turn hood ON when cooking at high heat or when cooking flaming foods.
- Clean ventilating fans frequently. Grease should not be allowed to accumulate on fan or filter.
- Use proper pan size. Always use cookware appropriate for the size of the surface element.
TO REDUCE THE RISK OF INJURY TO PERSONS IN THE EVENT OF A RANGE TOP GREASE FIRE, OBSERVE THE FOLLOWING:*
- SMOTHER FLAMES with a close-fitting lid, cookie sheet, or metal tray, then turn off the burner. BE CAREFUL TO PREVENT BURNS. If the flames do not go out immediately, EVACUATE AND CALL THE FIRE DEPARTMENT.
- NEVER PICK UP A FLAMING PAN - You may be burned.
- DO NOT USE WATER, including wet dishcloths or towels - a violent steam explosion will result.
- Use an extinguisher ONLY if:
A. You know you have a Class ABC extinguisher and you already know how to operate it.
B. The fire is small and contained in the area where it started.
C. The fire department is being called.
D. You can fight the fire with your back to an exit.
* Based on "Kitchen Fire Safety Tips" published by NFPA.

NuTone®

natural_image
Isometric line drawing of a rectangular electronic component with a recessed top and base (no text or symbols)MODEL 1530
SILHOUETTE RANGE HOOD
MODELO 1530
SILUETA EXTRACTOR
- For general ventilating use only. Do not use to exhaust hazardous or explosive materials and vapors.
- To avoid motor bearing damage and noisy and/or unbalanced impellers, keep drywall spray, construction dust, etc. off power unit.
- When using a thermostat with this product, fan may start automatically. To reduce the risk of injury, switch power off at service panel and lock service panel to prevent power from being switched on accidentally.
- Your hood motor has a thermal overload which will automatically shut off the motor if it becomes overheated. The motor will restart when it cools down. If the motor continues to shut off and restart, have the hood serviced.
- Please read specification label on product for further information and requirements.
PLAN THE INSTALLATION
Your new hood will fit a standard 30" wide flush bottom or recessed bottom, framed or frameless kitchen cabinet which has a minimum depth of 11" from face to inside of back wall.
The unit is ducted vertically. Horizontal ducting can be accomplished as shown.
For safe operation, the mounted hood must be a minimum of 18" above the cooking surface.
For easiest installation, range hood should be installed in cabinet before mounting cabinet to wall.
NOTE
REMOVE GLASS DRAWER FROM UNIT BEFORE INSTALLING HOOD IN CABINET TO PROTECT DRAWER FROM DAMAGE. SEE STEP 13 ON PAGE 3.
This hood can easily be installed by following these basic steps:
• Mark and cut out cabinet bottom.
- Secure hood to cabinet.
- Mount cabinet on wall.
- Connect ductwork and power cable. (FIG. 1)
INSTALL THE HOOD
- Mark and cut-out cabinet bottom. (FIG. 2) Prepare the cabinet bottom as shown in Figure 2. Be sure to locate the cut-out and four holes from the front of the cabinet to assure a flush mount.
- Attach damper/duct connector. (FIG. 3) Use two (2) screws (provided) to attach connector to housing. Damper flap should open in direction indicated by arrow.
- Remove electrical knockout. Choose either the top or side of housing for electrical cable entrance. Remove the appropriate knockout.
- Set housing into opening. (FIG. 4) Carefully lower housing into cabinet opening with slide control to the front.
- Remove access cover. (FIG. 5)
FIG. 1

FLUSH BOTTOM CABINET
GABINETE CON FONDO A RAS
RECESSED BOTTOM CABINET
GABINETE CON FONDO AHUECADO

FIG. 3

FIG. 4

FIG. 5

PRECAUCION
Pull drawer slides out. Rotate panel clips and swing panel open.
- Install mounting brackets.
Insert bent end of installation rod into access hole in housing. (FIG. 8)
Choose the mounting bracket with the center hole. Hang the bracket from the rod, through this center hole, as shown. Pull bracket up between cabinet and housing. (FIG. 9)
Hold mounting bracket in place with rod. Two sets of screws are provided. Use short screws for flush bottom cabinets or long screws for recessed bottom cabinets. Insert two (2) screws through housing and into mounting bracket. Do not tighten screws completely. (FIG. 10)
Insert two (2) screws, short or long as appropriate, through control box and into other mounting bracket. Do not tighten screws completely. (FIG. 11)
- Secure hood to cabinet. (FIG. 12)
Align hood with sides and front edge of cabinet. Tighten screws in each mounting bracket. Place plastic caps (provided) over the ends of these screws from inside of cabinet.
Install two (2) additional screws into cabinet bottom, through holes along the front edge of hood. (See FIG. 11)
- Replace access cover.
Secure access cover with two (2) screws removed in Step 5.
- Mount cabinet on wall.
Make sure cabinet is securely attached to the wall and/or adjoining cabinets. Mounted cabinet must be able to support the added weight of the hood.
- Attach ductwork and front trim. (FIG. 13)
Complete the ductwork from the hood, to the outside, using a roof cap or elbow and wall cap. Tape all joints. Shelves may be installed if trimmed to clear ductwork.
The front trim piece covers the gap between the housing and the front edge of cabinet cut-out. Mount front trim to housing with two (2) screws (provided).
- Connect electrical wiring. (FIG. 14)
Remove the wire box cover. Attach power cable to hood using proper connector. Connect black to black, white to white and green or bare wire to ground screw. Replace wire box cover.
- CAUTION
DO NOT CONNECT POWER AT SERVICE EN- TRANCE AT THIS TIME.
- Install glass drawer assembly. (FIG. 15)
Slide the glass into the drawer slides, above each drawer clamp (see FIG. 16). Align drawer trim and tighten thumb screws to secure drawer.
To remove glass drawer:
Simply loosen thumb screws and pull glass from drawer slides.
- Fine adjustments to drawer trim position. (FIG. 16)
The drawer slides each have a screw for adjusting the height of the drawer trim, if necessary. The vertical adjustment screw allows the top and bottom edges of the drawer trim to be matched with the control trim.
-
Connect power at service entrance.
-
Check operation.
FIG. 6

FIG. 7

FIG. 8

FIG. 9

FIG. 10

- Abra el panel del filtro. (FIG. 6 & 7)
Always turn your hood on before you begin cooking to establish an air flow in the kitchen. Let the hood run for a few minutes to clean the air after you turn the range off. This will keep the whole kitchen cleaner and brighter.
Controls
The hood is "OFF" when the drawer is pushed completely in.
LIGHT - The light will turn "ON" when the drawer is pulled out approximately 1/2 inch.
BLOWER - The blower will turn "ON" when the drawer is pulled out approximately 1-1/2 inches.
The blower speed is set using the slide control, located to the right of the drawer.
Heat Sentry™
Your hood is equipped with a Heat Sentry™ thermostat. This thermostat is a device that will turn on or speed up the blower if it senses excessive heat above the cooking surface.
If your blower is not on, or if it is running at low speed, the Heat Sentry™ will sense excessive cooking heat, override the normal blower control and turn the blower on to high speed. The blower will run until the temperature drops to normal operating level. The blower will then automatically return to its original setting.
Cleaning
WARNING
ALWAYS DISCONNECT ELECTRIC POWER SUPPLY BEFORE SERVICING HOOD.
Use a mild detergent suitable for painted surfaces. DO NOT USE ABRASIVE CLOTH, STEEL WOOL PADS, OR SCOURING POWDERS. Vacuum blower to clean. Do not immerse blower in water.
Wash the foam filter in a mild detergent solution.
The glass drawer assembly and light lens are easily removable for cleaning:
See Step 13 on page 3 for removal of glass drawer assembly. DO NOT clean in a dishwasher.
Remove the light lens by opening the filter panel (Step 6, page 3) and rotating the 2 metal clips holding the lens in place.
Light Bulb Replacement
Your hood uses a 24" long F20T12 fluorescent tube and an FS-2 starter, which are available at most hardware stores or home centers.
To check or replace tube: 1) Pull drawer out. 2) Rotate filter panel clips and lower filter panel.
If the tube flickers or does not light, check the prongs on the ends of the tube to make sure they are properly seated in the tube holders.
If the tube continues to flicker or does not light, replace the tube. Slide the tube into the holders and rotate the tube so that the prongs in the holders grip the tube and hold it in place.
If the ends of the tube light but the center does not, the starter may require replacement. The starter is located behind the filter panel on the right hand side. Install the new starter by pushing the starter in and turning it clockwise.
If the tube still does not light, order a 99270651 Ballast Transformer available from your Broan distributor or from the Broan Service Department. Write Broan Mfg. Co., Inc., P.O. Box 140, Hartford, WI 53027.
FIG. 11


FIG. 12

PLASTIC CAP
TAPA DE PLASTICO
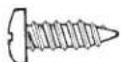
8-1B x 1/2'
FIG. 13

FIG. 14
GROUND SCREW
TORNILLO DE TIERRA

FIG. 15

FIG. 16

USO Y MANTENIMIENTO
- Your range hood provides a protective barrier
between the cooking surface and the cabinets. - Keep fan, filters and grease laden surfaces CLEAN according to instructions.
- Always turn hood ON when cooking at high heat to keep the cooking area and the hood cooler.
- Use high heat settings only when necessary.
- Never leave cooking surface unattended. Boil-over causes smoking and greasy spillovers that may ignite.
• Always use adequate-sized utensils. - If preparing flaming foods, such as Cherries Jubilee, always turn hood ON to HIGH to prevent a high heat situation which can cause damage or fire.
HOW TO EXTINGUISH A COMMON RANGE-TOP GREASE FIRE
- Never pick up a flaming pan. If dropped, flames can spread quickly.
- DO NOT USE WATER! A violent steam explosion may result. Wet dishcloths or towels are also dangerous.
- Smother flames with a close fitting lid, cookie sheet or metal tray.
- Flaming grease can also be extinguished with baking soda or a multi-purpose dry chemical extinguisher.
- Turn off surface units - if you can do so without getting burned.
COMO EVITAR QUE OCURRA UN INCENDIO DEBIDO A LA GRASA QUE SE ACUMULA EN UN EXTRACTOR COMUN
* Standard Hardware. May be purchased locally.
** Not Illustrated.
Order replacement parts by "PART NO." - NOT by "KEY NO."
Broan-NuTone LLC warrants to the original consumer purchaser of its products that such products will be free from defects in materials or workmanship for a period of one year from the date of original purchase. THERE ARE NO OTHER WARRANTIES, EXPRESS OR IMPLIED, INCLUDING, BUT NOT LIMITED TO, IMPLIED WARRANTIES OF MERCHANTABILITY OR FITNESS FOR A PARTICULAR PURPOSE.
During this one-year period, Broan-NuTone LLC will, at its option, repair or replace, without charge, any product or part which is found to be defective under normal use and service.
THIS WARRANTY DOES NOT EXTEND TO FLUORESCENT LAMP STARTERS AND TUBES. This warranty does not cover (a) normal maintenance and service or (b) any products or parts which have been subject to misuse, negligence, accident, improper maintenance or repair (other than by Broan-NuTone LLC), faulty installation or installation contrary to recommended installation instructions.
The duration of an implied warranty is limited to the one-year period as specified for the express warranty. Some states do not allow limitation on how long an implied warranty lasts, so the above limitation may not apply to you.
BROAN-NUTONE LLC'S OBLIGATION TO REPAIR OR REPLACE, AT BROAN-NUTONE LLC'S OPTION, SHALL BE THE PURCHASER'S SOLE AND EXCLUSIVE REMEDY UNDER THIS WARRANTY. BROAN-NUTONE LLC SHALL NOT BE LIABLE FOR INCIDENTAL, CONSEQUENTIAL OR SPECIAL DAMAGES ARISING OUT OF OR IN CONNECTION WITH PRODUCT USE OR PERFORMANCE. Some states do not allow the exclusion or limitation of incidental or consequential damages, so the above limitation may not apply to you.
This warranty gives you specific legal rights, and you may also have other rights, which vary from state to state. This warranty supersedes all prior warranties.
To qualify for warranty service, you must (a) notify the appropriate company at the address or phone number slated below, (b) give the model number and part identification and (c) describe the nature of any defect in the product or part. At the time of requesting warranty service, you must present evidence of the original purchase date.
In the U.S. contact: Broan-NuTone LLC, 926 West State Street, Hartford, WI 53027
(1-800-637-1453)
In the U.S. contact: NuTone, Inc., 4820 Red Bank Road, Cincinnati, OH 45227
(1-800-543-8687)
GARANTIA BROAN-NUTONE LLC LIMITADA POR UN AÑO
- PLAN THE INSTALLATION
- INSTALL THE HOOD
- PRECAUCION
- DO NOT CONNECT POWER AT SERVICE EN- TRANCE AT THIS TIME.
- Controls
- Heat Sentry™
- Cleaning
- WARNING
- ALWAYS DISCONNECT ELECTRIC POWER SUPPLY BEFORE SERVICING HOOD.
- Light Bulb Replacement
- 8-1B x 1/2'
- USO Y MANTENIMIENTO
- HOW TO EXTINGUISH A COMMON RANGE-TOP GREASE FIRE
- COMO EVITAR QUE OCURRA UN INCENDIO DEBIDO A LA GRASA QUE SE ACUMULA EN UN EXTRACTOR COMUN
- GARANTIA BROAN-NUTONE LLC LIMITADA POR UN AÑO
Brand : BROAN
Model : Silhouette 153604
Category : Range hood