
AP200057 - Other Kitchen Appliances Stirling - Free user manual and instructions
Find the device manual for free AP200057 Stirling in PDF.


| Product Type | Smart Thermo Cooker |
| Model | AP200057 |
| Brand | Stirling |
| Motor Power | 800 W |
| Heater & Motor Power | 1500 W |
| Input Voltage | 220-240 V a.c. 50 Hz |
| Speed Settings | 1-10 |
| Temperature Range | 30°C to 120°C (5°C increments) |
| Max Bowl Capacity | 3 litres (max fill 2.5 L for water) |
| Built-in Scale | Yes, max 5000 g, increments 5 g |
| Display | 7-inch LCD touchscreen |
| Wi-Fi Connectivity | Yes, 802.11 b/g/n |
| Bowl Material | Stainless steel |
| Blade Material | Stainless steel (4 blades) |
| Accessories Included | Inner basket, steamer basket, butterfly whisk, spatula, measuring cup, cleaning brush |
| Guided Cooking | Yes, preloaded recipes with step-by-step instructions |
| App Control | Yes (iOS 9.0+, Android 6.0+) |
| Safety Features | Overheat protection, lid lock, blade safety, automatic speed limit at high temperature |
| Dishwasher Safe Parts | Bowl, lid, inner basket, steamer basket, butterfly whisk, spatula, measuring cup (excluding blade and cleaning brush) |
| Warranty | 3 years |
| Compliance | AS/NZS 60335.1, AS/NZS 60335.2.14, AS/NZS 60335.2.15 |
| Spare Parts Availability | www.balcobrands.com/thermocooker |
Frequently Asked Questions - AP200057 Stirling
User questions about AP200057 Stirling
0 question about this device. Answer the ones you know or ask your own.
Ask a new question about this device
Download the instructions for your Other Kitchen Appliances in PDF format for free! Find your manual AP200057 - Stirling and take your electronic device back in hand. On this page are published all the documents necessary for the use of your device. AP200057 by Stirling.
USER MANUAL AP200057 Stirling
natural_image
Exploded view of a Stirling kitchen appliance showing internal pan, side dish, and digital display (no text or symbols visible)SMART THERMO COOKER
Model: AP200057
INSTRUCTION MANUAL
Contents
Welcome 4
Warranty Note 5
Warranty Details 6
Safety Signal Words 7
Safety Instructions 8
Features & Technical Specifications 10
Product Overview 11
Smart Thermo Cooker 11
Touchscreen control panel 12
Quick Reference 15
Using the cooking accessories 16
Cooking with the Smart Thermo Cooker 18
Getting Started
Before first use 24
Setting up the Smart Thermo Cooker 24
Cooking with the inner basket 26
Cooking with the steamer basket 28
Using the butterfly whisk 30
Operation
Manual cooking function 34
Guided recipe function 35
Mobile app
Connecting the Smart Thermo Cooker to the app 38
Calendar function 40
Shopping list function 40
Create your own recipes function 41
Hints & tips
Auto power save 42
Food preparation 42
Cleaning & storage 42
Disposal 43
FAQs
Fault codes 44
Common questions 45
Repair and Refurbished Goods or Parts Notice
Welcome
Congratulations on choosing to buy a Stirling ® product.
All products brought to you by Stirling® are manufactured to the highest standards of performance and safety, and, as part of our philosophy of customer service and satisfaction, are backed by our comprehensive 3 Year Warranty.
We hope that you will enjoy using your purchase for many years to come.
Important
Getting the most out of your Smart Thermo Cooker:

Read the manual carefully
It will help you set up with ease

Visit www.balcobrands.com
We have additional support videos and guides

Call After Sales Support - 1300 663 907
Available Monday - Friday, 8:30am - 6:00pm AEST

Email customercare@balcobrands.com
We're always happy to help
Warranty Note
If you experience any issues with this product or its performance is not what you had expected, please contact us at Balco Brands.
It is likely that we can resolve any problems for you via phone or email.
We can be reached on:
Phone: 1300 663 907 (Mon - Fri; 8:30am - 6:00pm AEST)
Email: customercare@balcobrands.com
Web: www.balcobrands.com
This manual has been designed using resources from Flaticon.com

STIRLING
SMART THERMO COOKER Warranty Details
REGISTER YOUR PURCHASE AT www.aldi.com.au/en/about-aldi/product-registration/ TO KEEP UP-TO-DATE WITH IMPORTANT PRODUCT INFORMATION
The product is guaranteed to be free from defects in workmanship and parts for a period of 36 months from the date of purchase. Defects that occur within this warranty period, under normal use and care, will be repaired, replaced or refunded at our discretion. The benefits conferred by this warranty are in addition to all rights and remedies in respect of the product that the consumer has under the Competition and Consumer Act 2010 and similar state and territory laws.
Our goods come with guarantees that cannot be excluded under the Australian Consumer Law. You are entitled to a replacement or refund for a major failure and for compensation for any other reasonably foreseeable loss or damage. You are also entitled to have the goods repaired or replaced if the goods fail to be of acceptable quality and the failure does not amount to a major failure.

Safety Signal Words
Signal words
Note the use of signal words WARNING and CAUTION with the safety messages.
The signal word for each message has been selected using the following guidelines:
WARNING
Indicates a hazardous situation which, if not avoided, could result in death or serious injury.
CAUTION
Indicates a hazardous situation which, if not avoided, could result in injury.

HOT SURFACE
Indicates that the marked item can be hot and should not be touched without taking care!
NOTICE
Is used to address practices not related to physical injury.
This product complies with AS/NZS 60335.1, AS/NZS 60335.2.14 AND AS/NZS 60335.2.15
Safety Instructions
When using electrical appliances, basic safety precautions should always be followed. Only use the Smart Thermo Cooker in accordance with this instruction manual. Read all the instructions.
This appliance is intended for indoor domestic use only, and has not been designed for commercial, industrial or trade use.
WARNING
Electrical shock hazard
- Unplug the Smart Thermo Cooker from outlet when not in use, and before cleaning. Do not put on or take off parts while the Smart Thermo Cooker is in operation.
• Do not put the Smart Thermo Cooker in water or other liquid. Clean with a damp cloth only. No water or dirt should enter the base unit. - Do not operate the Smart Thermo Cooker if the cord or plug becomes damaged, if the appliance malfunctions, or if the Smart Thermo Cooker is dropped or damaged in any manner. The Smart Thermo Cooker can only be disassembled and repaired by the manufacturer, its service agent or similarly qualified persons in order to avoid a hazard.
- Avoid spillage on the connector.
- If winding the power cord, avoid tight bends as this could damage the cord.
To avoid scalding, burn injury and laceration hazard, do not try to open the bowl lid by force.
- Never force the bowl lid open.
- Only open the bowl lid when the speed is set to "O".
If the hole in the bowl lid is blocked with food and the heating is active, an overpressure can build up in the bowl and the hot contents can erupt from it.
- While cooking, if you find the hole in the bowl lid blocked or if the measuring cup is being pushed up, unplug the Smart Thermo Cooker. DO NOT touch the controls.
- Do not fill the bowl past the max fill line (3 litres).
- Ensure that the hole in the bowl lid remains free of food.
- Never hold down or fix the measuring cup when processing hot food.
You may get burned or scalded by escaping hot food or steam or by touching hot surfaces. The heating element surface is subject to residual heat after use.
- If the appliance is overfilled, boiling water may be ejected.
- Remove the bowl carefully to help prevent contents from spilling or splashing.
- Do not let the power cord hang over the edge of a table or counter, or touch any hot surface, such as a stove.
- Place the Smart Thermo Cooker on a clean, solid, even surface to help prevent it from slipping.
- The use of attachments or items not recommended or sold by Balco Brands may cause fire, electric shock or injury.
- To avoid injury when processing hot food, place the measuring cup into the opening of the bowl lid. Never touch, hold down or fix the measuring cup when processing hot food.
- Using the pulse mode or abruptly increasing mixing speed with hot food may result in scalding injury. When processing hot food, increase the speed gradually.
• Do not touch the surface of the bowl, the bowl lid, the steamer kit and parts of the measuring cup as they will become hot when processing hot food.
- Touch only the handles on the sides of the steamer kit when the steamer kit is hot.
- The Smart Thermo Cooker can generate a constant flow of steam while cooking depending on the chosen settings. Keep away from the steam. Hot steam will continue to rise up through the hole in the bowl lid when removing the entire steamer kit. Hot steam may escape at the sides and from the top of the Steamer lid during operation.
- Do not use the Smart Thermo Cooker with damaged accessories.
- Scalding due to food boiling over may occur if heating large quantities of food at high temperatures. If boiling over occurs, switch off the power button to stop the machine.
- When removing the steamer lid, tilt the lid away from your face and body to avoid escaping steam.
• Ensure that some slots of the steamer basket and tray remain uncovered of food to avoid an uncontrolled escape of steam.
• Position the steamer kit correctly onto the bowl and the Smart Thermo Cooker to prevent the steamer kit from becoming detached.
- Remove spatula from the inner basket after removing inner basket and placing it on a level surface. If left in inner basket, spatula may cause inner basket to tip and spill hot contents.
- Contents of inner basket may splash during removal. Use care when removing the inner basket.
- Do not disassemble the blade from the bowl while it is hot.
- Be careful if hot liquid is poured into the Smart Thermo Cooker as it can be ejected out of the appliance due to a sudden steaming.
Safety Instructions
Fire hazard
• The Smart Thermo Cooker may catch fire or be damaged if exposed to an outside heat source. Do not place on or near a hot surface or stove top.
Laceration hazard
- BLADES ARE SHARP. HANDLE CAREFULLY. Do not touch the blades. Hold the upper part of the blade when removing or re-inserting it.
- Do not touch the blade especially when they are running.
- Care should be taken when handing the sharp cutting blades, emptying the bowl and during cleaning.
- Use care when removing the blade to prevent it from falling out accidentally.
- Wait until moving parts have stopped running before you remove the parts of the Smart Thermo Cooker.
- Keep hands and utensils out of the bowl while it is in operation to reduce the risk of injury to persons or damage to the mixer.
- The spatula is only used for moving the food out of the bowl. Do not use it while the blade is running.
The Smart Thermo Cooker is not intended for use by persons (including children) with reduced physical sensory or mental capabilities or lack of experience and knowledge, unless they have been given supervision or instruction concerning use of the appliance by a person responsible for their safety
- Children should be supervised to ensure that they do not play with the Smart Thermo Cooker.
• The Smart Thermo Cooker shall not be used by children. Keep the Smart Thermo Cooker and its cord out of reach of children.
The magnets in the Smart Thermo Cooker may affect pacemakers
- The magnets in the Smart Thermo Cooker may affect pacemakers or internal defibrillators. Keep the Smart Thermo Cooker away from pacemakers or internal defibrillators. Warn people with pacemakers or internal defibrillators.
CAUTION
- Pinching hazard from moving the Smart Thermo Cooker parts.
- Avoid contact with moving parts. Never touch the locking arms when opening or closing the Smart Thermo Cooker.
- Keep hair and clothing away from moving parts of the Smart Thermo Cooker.
- Switch off the Smart Thermo Cooker and disconnect from supply before changing accessories or approaching parts that move in use.
• Damaged accessories may cause injury. - If any of the Smart Thermo Cooker accessories are damaged by the blade during food preparation, discard food. Contact Balco Brands for replacement accessory.
• Do not operate the Smart Thermo Cooker with damaged parts or accessories, you may suffer injury or damage the Smart Thermo Cooker or property. - There is a potential injury from misuse. Please handle it with care.
- Do not modify the Smart Thermo Cooker or any accessories.
- Ensure that the Smart Thermo Cooker is switched off before removing it from the stand.
- Never use the Smart Thermo Cooker in combination with parts or equipment not provided by Balco Brands.
- Never leave the Smart Thermo Cooker unattended while it is running.
- An imbalance of the Smart Thermo Cooker may develop when kneading dough or chopping food and cause the device to move along the counter. Keep your Smart Thermo Cooker away from the edge to help prevent it from falling off.
- The Smart Thermo Cooker must only be repaired by an authorised service facility. Improper repair works or improper handling may result in a serious risk of injury. Balco Brands accepts no liability for any damages that may arise after using a non-authorised repairer.
- Food safety recommendations when using the Smart Thermo Cooker.
• Always use only the freshest ingredients. - Ensure all meat, seafood, poultry and game has been refrigerated and is not contaminated.
- Wash hands before performing any food preparation.
• Thoroughly clean the parts that will come into contact with food before you use the Smart Thermo Cooker for the first time.
NOTICE
- When the Smart Thermo Cooker is used for the first time it may emit an odour.
- Leaks from around the blade may damage the Smart Thermo Cooker. Ensure that the blade airproof ring is fitted to the blade assembly. Ensure that the blade is locked into the bowl base correctly.
- To help prevent corrosion of the Smart Thermo Cooker, ensure that the contact pins of the mixing bowl are thoroughly dried after cleaning so that moisture does not enter the Smart Thermo Cooker.
- Do not use outdoors.
- When the temperature in the bowl is at or above 60ircC , you will find: 1) The blending speed is limited at speed 1-4. 2) The appliance will automatically switch the blending speed to speed 4, even if the speed is set at speed 5-10.
SAVE THESE INSTRUCTIONS
Features & Technical Specifications
Features
• Family size 3L max stainless-steel bowl
• Large 7" touchscreen controls
- Simple touchscreen control, adjustable settings for speed, time and temperature
- Wi-Fi connectivity built-in to control the Thermo Cooker via the app
- Timer and scale built-in for added convenience
- Easy to follow step by step guided cooking
• Full glossary of preloaded recipes
• 4 stainless steel blades
• Excellent blending and chopping
Technical Specifications
Motor power: 800W
Heater & motor power: 1500W
Input voltage: 220-240V a.c. 50Hz
Rotate speed: 1-10 speeds
Adjustable temperature: From 30°C-120°C
Scale max weight: 5000g
WiFi protocol: 802.11 b/g/n
Product Overview
Smart Thermo Cooker

- Measuring cup
- Bowl lid
- Inner basket
- Butterfly whisk
- Spatula
-
Cleaning brush
-
Blade assembly
a. Blade
b. Blade airproof ring
c. Blade nut
-
Bowl
-
Steamer lid
-
Steamer tray
- Steamer basket
- Main unit
a. LCD touchscreen
b. Start/stop button
c. On/off button
Product Overview
Touchscreen control panel


Product Overview
Ref Icon Setting Description
| 1 Tem |  | Can be set from 30-120°C and will increase in 5°C increments. Press the +/- controls or slide the circle to the right temperature. It will show real time temperature of the bowl when the bowl is in place and machine is turned on. | |
| 2 Blad |  | This can be set from 1-10 (10 being the fastest setting). You can press the +/- controls or slide the circle to the right speed setting. | |
| 3 Time |  | This can be set from 0 seconds to 99 minutes. You can press the +/- controls or slide the circle to the right time. | |
| 4 |  | Tutorial | Runs through a list of icons buttons on screen and what their purpose is. |
| 5 | [KXD2] | Pulse | Press and hold for a short burst of power (at blending level 10). |
| 6 Stop |  | stop/clear the current program. | |
| 7 |  | Start/pause | Press to start a program, press again to pause (does not clear the program). |
| 8 |  | Reverse blades | Press reverse and then select speed level. Reverse only operates in speeds 1-3. |
| 9 | [Z5WS] | Preset functions | The Smart Thermo Cooker is equipped with 5 pre set functions which include jam, steaming, soup, kneading 500g, kneading 800g. These are basic settings to be used for quick everyday recipes. They are a guide ONLY and you may need to repeat steps once complete. |
| 10 |  | Recipe | This takes you back to the recipe guide. |
| 11 |  | Search | Allows you to search through the built-in recipes |
| 12 |  | Favourites | Add your favourite recipes here for quick reference – you can have a total of 60 favourites. |
| 13 |  | Manual cooking | Takes you to the control panel for full manual control cooking. |
| 14 |  | Scale | Press the scale button any time to bring up the weigh screen, press again to zero contents and add additional ingredients. Press again to clear.NOTE:The scale can take a moment to register so add ingredients slowly. For small quantities it is best to use the measuring cup. The scale weighs in increments of 5g |
| 15 |  | Wi-Fi | Connects your machine to the app. SeeMobile appon page 38 for more information. |

natural_image
Close-up of a colorful table with various dishes (no visible text or symbols)
Quick Reference
Getting Started
Using the cooking accessories
Inner Basket

natural_image
Black plastic basket with vertical slots, no text or symbols visibleUsed for: Cooking rice, eggs, pasta. Keeps contents away from the blades for cooking in water or steaming.
How to use: Add water to the bowl and ingredients inside basket. Secure lid and set heat and cooking time.
Special Notes: Do not overfill bowl, keep water level at 2.5L maximum.
Steamer Basket

natural_image
Stacked black plastic food pot with lid and side handles, no visible text or symbolsUsed for: Cooking with steam – great for meats, vegetables or buns.
How to use: Add water to the bowl secure lid without measuring cup. Set basket over the lid. Heat the water and set cooking time.
Special Notes: Must have water in the bowl >0.5L < 3L. If using baking paper to line the tray create small holes in the paper to allow the moisture to penetrate the paper.
Butterfly Whisk

natural_image
Black mechanical device with four arms and a central pin (no text or symbols visible)Used for: Whisking cream, creaming butter and sugar, risottos, sauces, creams and consistent stirring.
How to use: Fit over the blade assembly, push on top of blade to secure. Make sure you stop to scrape the bowl to ensure all ingredients are mixed well.
Special Notes: Only use on speeds 1-4.
Measuring Cup

natural_image
Transparent plastic cup or lid with a small circular base, isolated on white background (no text or symbols)Used for: Measuring small quantities and sealing the lid while cooking.
How to use: Twist to secure inside the lid. Use the measuring cup when you want to retain heat or avoid splashing when blitzing at high speed. Remove when sauteing or using the steamer basket.
Special Notes: Take care when removing after long cooking time as it will retain heat.
Getting Started
Bowl

natural_image
Close-up of a stainless steel kitchen pot with black handles (no visible text or symbols)Used for: All cooking and food preparation functions.
How to use: Insert into the base with the blade assembly firmly in place.
Special Notes: Handle goes to the back of the machine, the bowl must click into place securely or the machine will not operate.
Bowl Lid
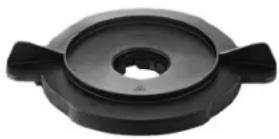
Used for: All cooking using the machine.
How to use: Fit over the bowl and turn clockwise until it clicks into place. Turn anti-clockwise to remove.
Special Notes: The machine will not operate unless the lid is securely in place.
Spatula

Used for: Scraping and mixing by hand.
How to use: Use after high speed processing to combine ingredients.
Special Notes: The hook at the end can be used to lift the inner basket from the bowl to avoid touching hot surfaces.
Blade

natural_image
Close-up of a four-bladed propeller or fan assembly (no visible text or symbols)Used for: All cooking and food preparation functions.
How to use: Insert into the bowl with the airproof ring and blade nut and lock into place.
Special Notes: The blades are very sharp so take care when handling them.
Cleaning brush

natural_image
Black hairbrush with textured bristles against white background (no text or symbols)Used for: General cleaning.
How to use: Use with warm water and a small amount of dishwashing liquid to remove any residual food from the bottom of the bowl.
Special Notes: Ensure to remove the blade before use to prevent damage to the brush or dulling of the blades.
Getting Started
Cooking with the Smart Thermo Cooker
Dice

natural_image
Close-up of chopped green onions on a wooden cutting board (no text or symbols visible)Accessory: Blade
Use: Fine chopping such as onion, garlic or grated cheese
Cooking notes: Use a high speed (7-10) for 5 second intervals, scrape between mixing to ensure consistency
Chop

natural_image
Close-up of orange square cutouts, likely carrots or similar vegetables (no text or symbols visible)Accessory: Blade
Use: Chop multiple ingredients such as vegetables, herbs and cheese to your desired size
Cooking notes: Use low speed (2-4) for 5 second intervals, scrape between mixing to ensure consistency
Slow Cook

natural_image
Close-up of a colorful Indian-style food dish in a metal pan, garnished with herbs and chili (no visible text or symbols)Accessory: Blade - Reverse speed (1-3)
Use: Curries, stews and soups
Cooking notes: Use blade on reverse to avoid chopping and blending food during cooking process. There is a maximum run time of 99 minutes in one go
Steam

natural_image
Close-up of a wooden plate with mixed vegetables including broccoli, carrots, and broccoli (no text or symbols visible)Accessory: Steamer basket
Use: Steaming hard vegetables, fish and meat
Cooking notes: Add water to the bowl and heat at 100°C. Set basket over lid without measuring cup
Weigh

Accessory: None required, the scales are inbuilt into the bowl
Use: Weigh as you go
Cooking notes: Press scale any time to weigh, press again to zero scale to weigh individual ingredients. The scale weighs in 5g increments
Mix & Blend

natural_image
Close-up of a hand stirring a creamy yellow mixture in a white bowl with a wooden spoon (no text or symbols visible)Accessory: Blade
Use: Mixing ingredients such as cake batters and sauces
Cooking notes: Add ingredients and mix at low speed 1-4 for 2-5 minutes to blend and aerate the mixture
Getting Started
Emulsify
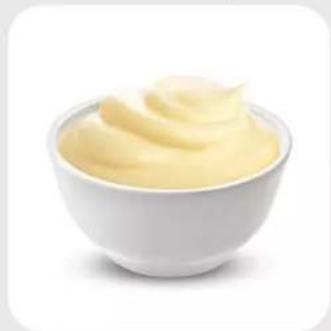
natural_image
White bowl filled with yellow creamy substance, no text or symbols visibleAccessory: Blade
Use: Combine two ingredients that don't usually mix well (e.g. oil and mayonnaise)
Cooking notes: While the first ingredient is mixing on high speed in the bowl add the other ingredient through the hole in the lid.
Knead

natural_image
Close-up of a dough ball on a floured surface with a glass bottle in the background (no text or symbols visible)Accessory: Blade
Use: Bringing flours together to make dough or pastry
Cooking notes: Add ingredients to the bowl and knead on reverse speed 1-3 in one minute intervals
Whisk

natural_image
Close-up of a bowl containing a creamy substance with a small container nearby (no visible text or symbols)Accessory: Butterfly whisk
Use: whisking cream, creaming butter and sugar and stirring during cooking for sauces and risotto
Cooking notes: Only use on speeds 1-4
Boil

natural_image
Two bowls of white rice with chopsticks, placed on a wooden table (no text or symbols visible)Accessory: Inner basket
Use: Boil rice, pasta, vegetables or eggs
Cooking notes: Ensure water is in the bowl, for quick cooking use boiling water. For extra flavour add stock or herbs to the water while cooking
Mill

natural_image
Close-up of white powder being poured into a glass jar (no text or symbols visible)Accessory: Blade
Use: Making flours or milks
Cooking notes: Blitz ingredients at high speeds for extended periods. Use the measuring cup in the lid to avoid splashing. Sift or sieve ingredients after processing to ensure the desired outcome.
Sauté
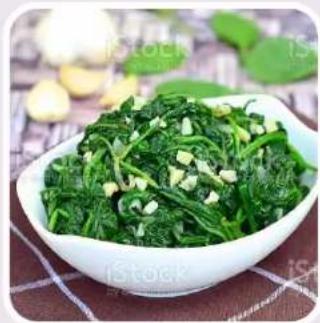
natural_image
A bowl of stir-fried green leafy vegetables garnished with chopped garlic, placed on a checkered tablecloth (no text or symbols visible)Accessory: Blade
Use: Fry vegetables, spices or other ingredients in oil
Cooking notes: Add ingredients and set heat to 100C, speed 2 or 3 and time dependent on ingredients. Do not add measuring cup to the lid to allow steam to escape.
Handy Tips & Reminders
Tips & Cooking Reminders
 | Puree Hot FoodsThe bowl needs to be under 60°C to process over speed 4, this is a safety feature of the productAs the bowl is stainless steel this can take some time to cool. To save time, empty contents into another bowl and rinse the Thermo Cooker bowl under cold water. Once the bowl has cooled add ingredients back into bowl and process, heat again before serving if required |
 | Measuring CupUse in the lid when you want to retain heat or avoid splashing (high speed blitzing)Remove when sauteing or using the steamer basket |
 | To Chop FineUse a high speed (7-10) for 5 second intervals, scrape between mixing to ensure consistency |
 | To Cut RoughlyUse low speed (2-4) for 5 second intervals, scrape between mixing to ensure consistency |
 | Reverse SpeedWill maintain texture when cooking. Avoid over cutting and use reverse speed for slow cooking |
 | Butterfly WhiskWill keep ingredients stirring without chopping. Use for risottos, sauces and creams.Only suitable for speeds 1-4 |
 | Inner BasketGreat for rice, eggs, pastaKeeps contents away from the blades for cooking in water |
 | Steamer BasketUse on top of Thermo Cooker, great for steaming while cooking other ingredients in the machineUse over the lid with measuring cup removed |
Cooking Cheat Sheet

Sauté onion & garlic
- Peel garlic and onion. Quarter onion and add to the bowl. Blitz on speed 8 for 5 seconds
- Scrape bowl, add 20g oil and heat at 100°C for 3 minutes at speed 2

Steamed veggies
- Add 800g of water to the bowl
- Secure lid and add steamer basket over the lid without the measuring cup
- Add veggies to the steamer basket, hard at the bottom, soft on the tray
- Steam at 100°C speed 1 for 10-15 minutes, check throughout the process to not overcook

Herbs
- Add 20g of herbs to the bowl, blitz for 3 seconds, speed 8

Potatoes
- Steamed: cut into pieces and boil in inner basket, add water and cook 100ircC , speed 1 for 20 minutes
- Grated: 1kg cut into pieces, blitz for 10 seconds, speed 10

Fish
- Place 2 fish fillets in steamer basket
- Add water and cook 100ircC , speed 1 for 17 minutes

Grating cheese
- Cut into 3cm cubes, set for 5 seconds on speed 9

Brown rice
- 1600ml water to the bowl, 250g brown rice in the inner basket
• Cook at 120°C for 25 minutes at speed 2

Creaming butter & sugar
- Insert butterfly whisk add room temperature butter and sugars, whisk for 30 seconds on speed 4
- Scrape the bowl and repeat 30 seconds on speed 4

Smoothie • Add 500g milk, 200g of any fruit, 120g of any yoghurt, 8 ice cubes, blitz for 10 seconds on speed for two 10

Icing sugar
- Add white sugar to the bowl
• Mix for 1 minute at speed 10

Whipped cream
- Insert butterfly whisk, add 200g cream and 2 tsp caster sugar, mix for 1 minute on speed 3
- Scrape the bowl and mix again for 10 seconds if required

Caster sugar
- Add white sugar to the bowl
• Mix for 10 seconds speed 10

Nut/oat flour
- Add ingredients to the same quantity as your recipe requires
• Mix for 1 minute at speed 10 - Sift flour and check for any large pieces, reprocess any large pieces until smooth

Crushed ice
- Place required amount of ice into bowl
- Blitz on speed 9 for 3 second intervals until desired consistency is reached

Savoury pastry
- Add 225g of plain flour, 125g of butter and 12 tsp salt into the bowl and mix for 5 seconds, speed 8
- Scrape the bowl, mix again for 5 seconds, speed 8
- Add 1 egg yolk, and 30g cold water and mix again for 10 seconds, speed 4
- Bring the mix together, wrap in plastic wrap and refrigerate for 30 minutes before using

Nut butter
- Add 500g of unsalted roasted nuts and a pinch of salt to the bowl
- Blend for 30 seconds, speed 5 and scrape down the bowl
- Blend for 2 minutes, speed 5 and scrape down the bowl
- Repeat process until you reach the desired consistency

natural_image
Close-up of a table with various dishes including fried chicken, fried egg, and colorful food items (no visible text or labels)
Getting Started
Getting Started
Before first use
Remove any packaging material before using your Smart Thermo Cooker for the first time. Wash all the components in warm soapy water before first use. Thoroughly dry, then assemble as shown below. Position the base of your Smart Thermo Cooker on a firm level table or bench.
Setting up the Smart Thermo Cooker
- Blade assembly
WARNING
BLADES ARE SHARP. HANDLE CAREFULLY. Do not touch the blades. Hold the upper part of the Blade when removing or re-inserting it.
a. Secure air proof ring under the blade assembly
b. Lower the blade into the bowl
c. Secure the blade by turning the bowl upside down, carefully holding the blade and twisting the blade nut to the underside of the bowl
d. Check the nut is tightly connected
e. Lubricate the blades with vegetable oil before first use and occasionally during ongoing use
NOTE: The blade air proof ring, and the nut must be secured properly, or liquid will leak into the main unit and can cause damage.

natural_image
Exploded view of a kitchen blender with a propeller and cleaning ring (no text or symbols)- Installing and removing the bowl from the main unit
a. Insert the mixing bowl with the handle pointing to the back and push it gently into position. Using the two side handles, gently push the bowl down to fit the bowl securely into the base
b. Bowl will click into place
c. Squeeze the buttons on the underside of the handles and gently lift to remove the bowl from the unit

natural_image
White kitchen blender with a side panel showing food images, no visible text or symbols on the device itself.Getting Started
3. Close the lid
a. Put the lid on the bowl
b. Rotate the lid clockwise to align the handles and lock the lid onto the bowl
NOTE: The machine and controls will not work unless the lid is locked onto bowl
c. Insert the measuring cup into the lid
NOTE: Some recipes will require mixing without the measuring cup inserted, however it is generally advised to insert it when using higher speeds

natural_image
Person holding a white digital kitchen appliance with a black lid and scroll, no visible text or symbols- Once bowl has been fitted correctly, switch the on/off button on the side of the machine to start using
- Open the lid a. Rotate the lid anti-clockwise to remove
Getting Started
Cooking with the inner basket
WARNING
Please make sure you do not fill the bowl with more than 2.5L of water. Be careful not to scald yourself with steam. Do not touch the metal part of the bowl. Touch only the handles. Always use spatula to remove basket safely when cooking.
- Install the blade assembly

natural_image
Exploded view of a kitchen blender with a propeller and plastic lid (no text or symbols visible)- Add water to the bowl

natural_image
White Stirling cooking cooker with digital display showing food images (no text or symbols on main body)Getting Started
- Put inner basket in bowl (with ingredients)
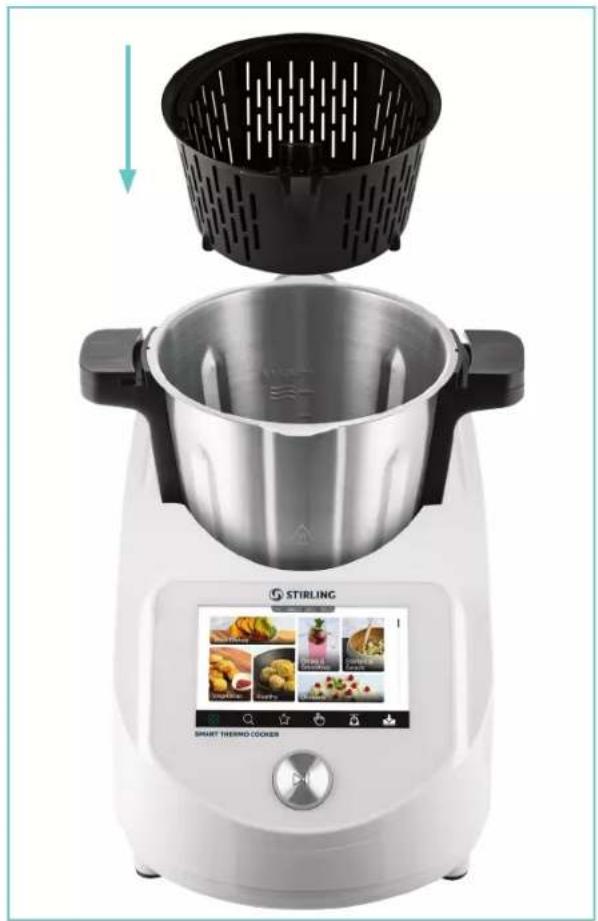
natural_image
White Stirling kitchen appliance with a black filter top and digital display showing food images (no readable text or symbols on main body)-
Close bowl lid
-
For steaming add the measuring cup to the lid. If boiling remove the measuring cup
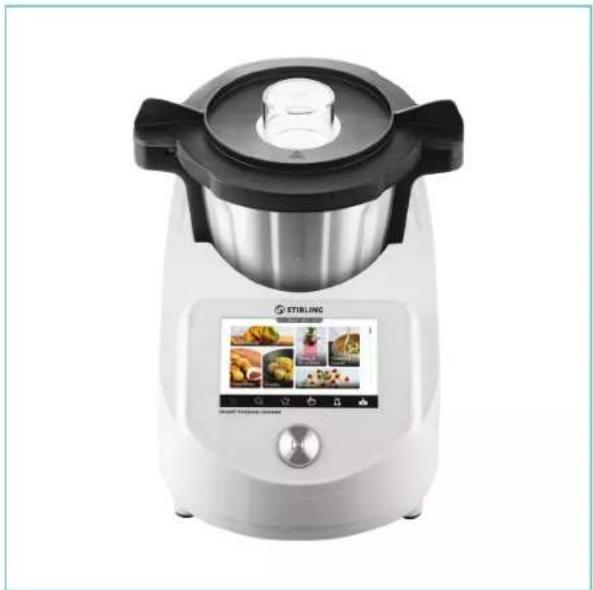
natural_image
White stainless steel kitchen appliance with black lid and digital display showing food images (no visible text or symbols on main body)- After cooking, remove the lid carefully to avoid burning by steam build up in the bowl.
- Use the hook on the spatula to pick up the basket by the handle to avoid touching hot contents
Getting Started
Cooking with the steamer basket
WARNING
Scalding hazard
- The Smart Thermo Cooker can generate a constant flow of steam while cooking depending on the chosen settings. Keep away from the steam. Be aware that hot steam will continue to rise up through the hole in the bowl lid when removing the entire steamer kit. Be aware that hot steam may escape at the sides and from the top of the steamer lid during operation.
- Touch only the handles on the sides of the steamer kit when the steamer kit is hot.
- Tilt the lid away from your face and body to avoid escaping steam.
- Using the pulse mode or abruptly increasing mixing speed with hot food may result in scalding injury. When processing hot food, increase the speed gradually.
- Ensure that some slots of the steamer dish and tray remain uncovered of food to avoid an uncontrolled escape of steam.
- Position the steamer kit correctly onto the bowl and Smart Thermo Cooker to prevent the steamer kit from becoming detached.
1. Install the blade assembly
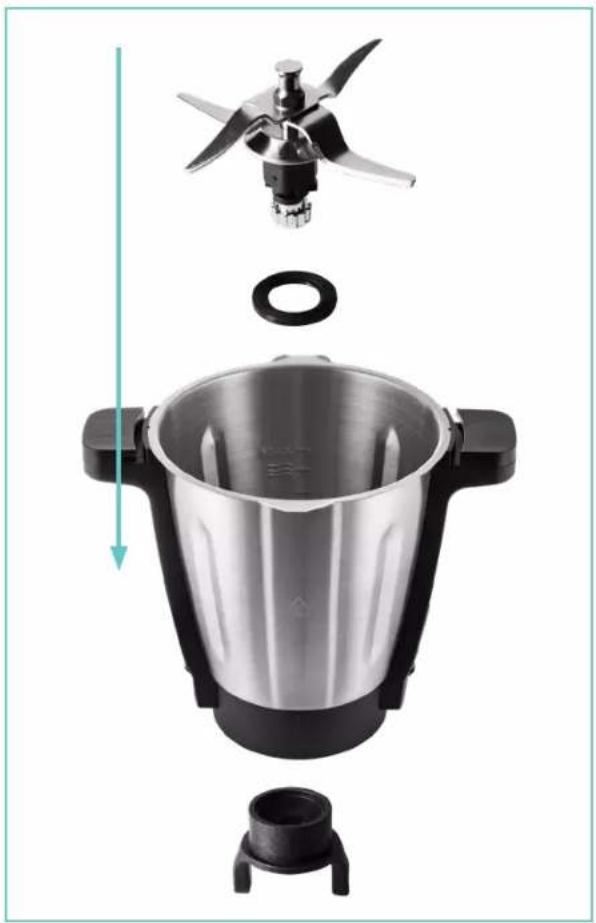
natural_image
Exploded view of a kitchen blender with a propeller and washer, showing internal components (no text or symbols)2. Add water to the bowl (>0.5L < 3L)

Getting Started
- Close lid (without measuring cup)

natural_image
White stainless steel kitchen appliance with digital display showing food images (no visible text or symbols on the device itself)- Cover ingredients with the lid

natural_image
Modern kitchen cooking oven with digital display showing food images (no visible text or symbols)- Put steamer basket on the bowl lid, align the basket to sit securely on the lid

natural_image
White kitchen oven with black lid and digital display showing food images (no visible text or symbols)NOTE: Steamer basket can be used with or without the inner tray. Be careful not to scald yourself with steam. Do not touch the metal part of the bowl. Touch only the handles.
Getting Started
Using the butterfly whisk
- Install the blade assembly

natural_image
Exploded view of a kitchen blender with a propeller and plastic lid (no text or symbols visible)- Push the butterfly whisk on top of the blade assembly, it will click into place once secure

natural_image
White Stirling cooking pot with digital display showing food images, no visible text or symbols on the device itself.Getting Started
3. Close and secure lid to operate
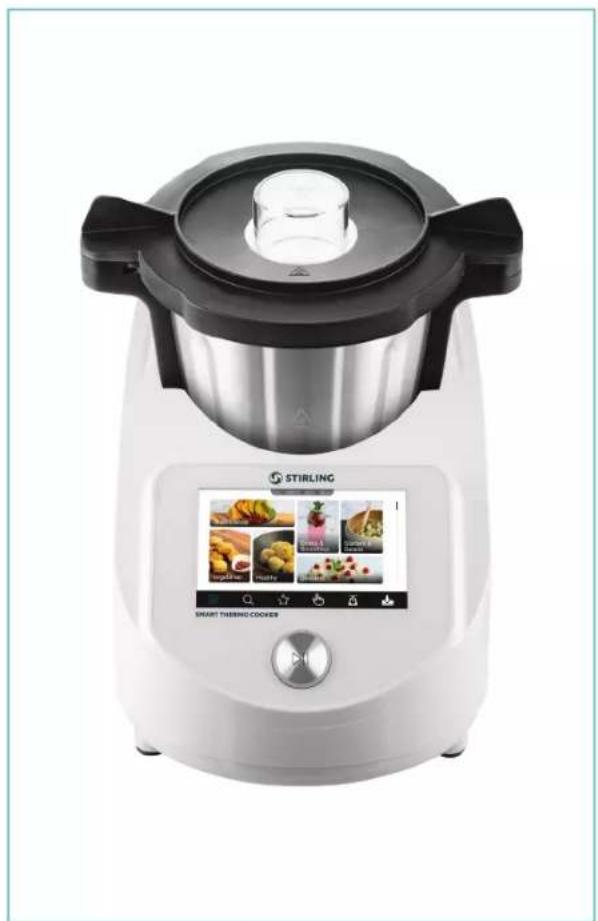
natural_image
White Stirling kitchen appliance with digital display showing various food items (no readable text or symbols on main body)NOTE: Only turn blades on if the butterfly whisk is firmly in place. Only for use with liquids (no solids). Only use on speeds 1-4.

natural_image
Close-up of a plated dish with meat, vegetables, and sauce on a wooden board (no visible text or symbols)
Operation
Operation
WARNING
Your Smart Thermo Cooker may catch fire if exposed to an outside heat source.
- Do not place on or near a hot surface or stove top.
- Dropping the Smart Thermo Cooker may lead to injuries.
- Place the Smart Thermo Cooker on a clean, solid, even surface to help prevent it from slipping.
- Touching hot surfaces can lead to burns.
- Do not touch the surface of the bowl, the bowl lid, the steamer kit and parts of the measuring cup as they will become hot when processing hot food.
Manual cooking function
You can set the working time, speed and temperature to your recipe's requirements:

-
Set the working speed (1 - 10), time (0 - 99mins) and temperature (30°C - 120°C)
-
If you do not set a temperature the ingredients will be processed without heat
NOTE: If you do not set a temperature, the ambient/room temperature will be displayed
-
If you don't set a countdown time the processor will count up
-
The unit will beep when the working time is less than 5 seconds
-
Blades must be set to at least 1 for the unit to work. If you do not want the ingredients to be processed set the machine to reverse by pressing the reverse blade then setting the speed setting (speeds 1-3)
NOTE: Reverse stirs at low speeds against the blade to avoid chopping the ingredients
Operation
Guided recipe function
Guided cooking allows you to make delicious meals quickly while doing other things, like helping the kids with homework, cleaning or entertaining guests.
WARNING
Never leave the Smart Thermo Cooker unattended while it is running
The recipes will advise you on ingredients to add at each step, then simply press the play button and the machine will complete the step.
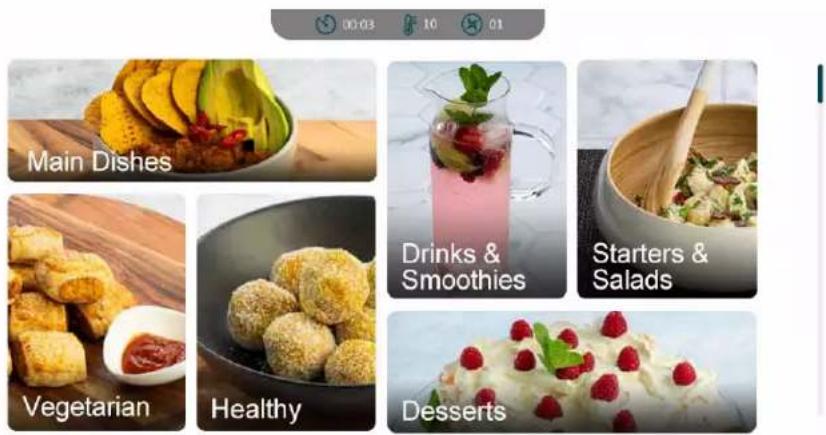
There are 12 different recipe categories which include a range of different recipes to suit all tastes, including:
- Sauces, Dips & Spreads
- Soups
- Starters & Salads
- Lunch Ideas
- Main Dishes
- Vegetarian
- Desserts
- Cakes & Baking
- Breakfast
- Healthy
• The Basics - Drinks & Smoothies

natural_image
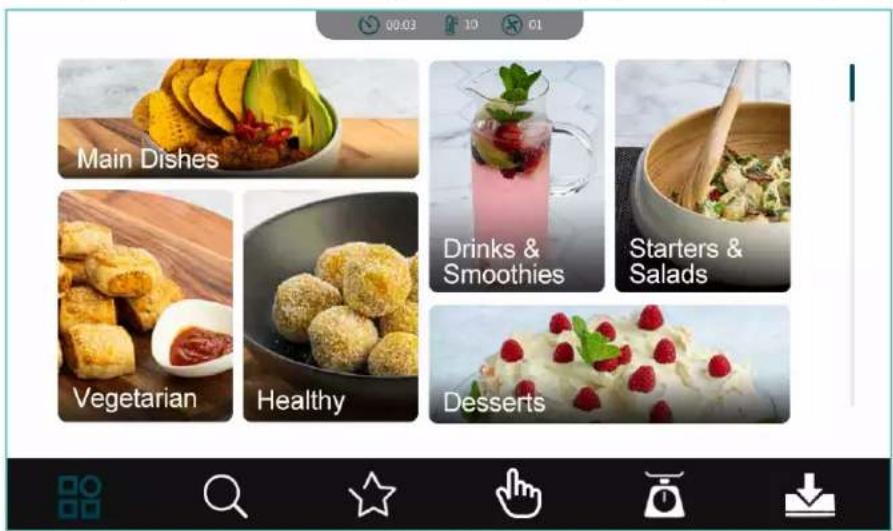
Pure icon set with six white symbols on black background: square, magnifying glass, star, hand gesture, money bag, and download arrow (no text or labels)Operation
To use the guided recipe function:
- Select the recipe tab from the main menu

- Choose desired category. You can search through each category by scrolling vertically over the screen
Operation
- Once you have selected the food category you want to make, click once on the recipe. This will bring you to the recipe overview page which displays ingredients required and an overview of the recipe steps

- Select MAKE to begin the guided recipe function. From here it will guide you through the recipe step by step

- Follow the instructions on the screen and press the start/pause button to continuing moving through each step of the recipe
Visit www.balcobrands.com/thermocooker to see a step by step video on using the guided recipe function
Mobile app
The Smart Thermo Cooker is designed to work without internet connection, however there are some additional features available on the app.
The app will control the unit in the exact same way if using it via the control panel on the machine. For full instructions and explanation please refer to pages 12-13
Via the app you can check the status of the recipe, eg. What is the remaining cooking time on a step without looking at the machine. Ideal if you want to get on with other jobs while you cook.
There are 3 functions available on the app:
- Shopping list: You can create one shopping list for a number of recipes, totalling the ingredient amount.
- Calendar: Enter a reminder to start cooking at a certain time.
- Custom recipes: Create and develop your own recipes here. Press the + in the top right corner to get started.
Connecting the Smart Thermo Cooker to the app
- Install the app to your phone by scanning the QR code below or by searching for Smart Thermo Cooker in the App Store or Play Store

- Open WiFi settings on your phone
- Press the WiFi button on your Smart Thermo Cooker to display the ID and password
NOTE: This ID and password cannot be changed

Mobile app
- Search for the matching ID from your Smart Thermo Cooker on your phone and press connect to confirm
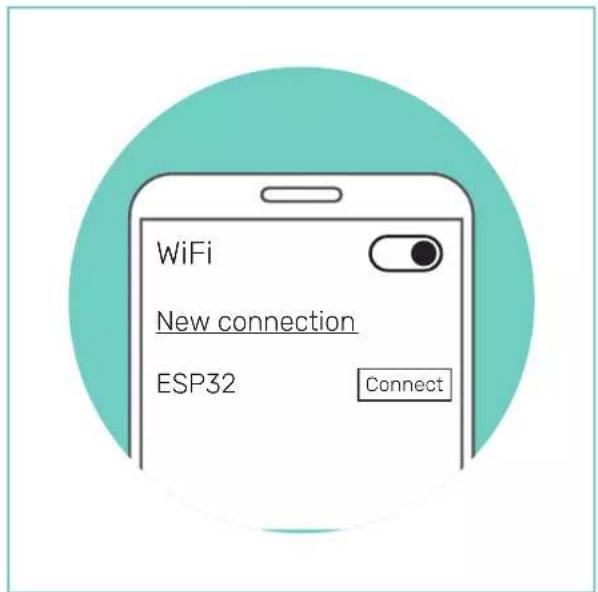
- The WiFi logo on the Smart Thermo Cooker will turn green (from grey) once the connection has been established
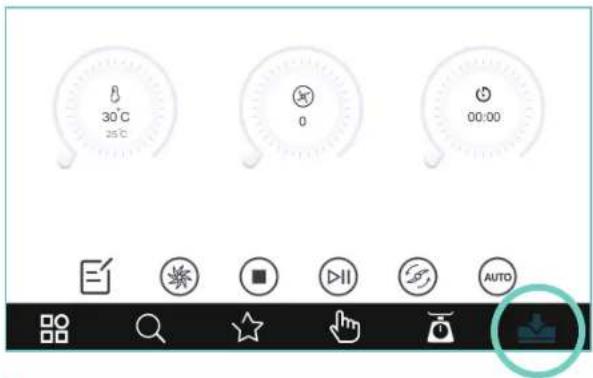
- The app will control the unit in the exact same way if using it via the control panel on the machine. For full instructions and explanation please refer to pages 12-13
WARNING
Never leave the Smart Thermo Cooker unattended while it is running
NOTE:
- The Smart Thermo Cooker can only be controlled by the app if the phone is in WiFi range. You cannot operate the device outside of WiFi connection
- From time to time we may update or add recipes. When we do this you will get a prompt through the app. If you accept the update the new recipes will automatically be loaded onto your Smart Thermo Cooker - standard data rates apply.
• The Smart Thermo Cooker can only be connected to one phone at a time - App only works with software version iOS 9.0 and higher, Android 6.0 and higher
- Ensure your phone does not automatically lock and stays on during any updates
Mobile app
Calendar function
- Press the shortcut key and select Calendar
- Select the date, enter the event and select a time. Press the ☐ con to save
- You may need to allow notifications to get the event reminder on your phone
- To see saved calendar events press the icon at the top right of screen
- To delete an event go to saved events and press the icon on the right of the event

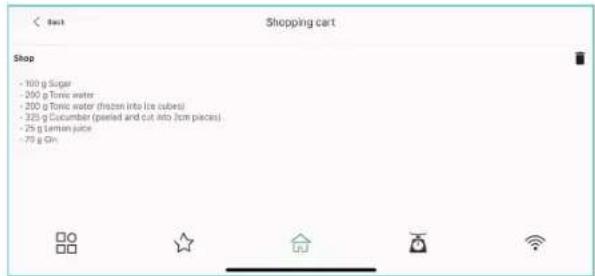
Shopping list function
- Press the shortcut key and select Shopping list
- Press the icon to bring up the recipes, select the recipe category and then the recipe, then press the shopping cart symbol in the top right corner
- All ingredients will be added to the shopping list
- Select as many recipes as you like and the ingredients will total if repeated throughout each recipe
- To review your shopping list return to the home screen and press the shortcut key and select shopping list
- To delete the list, press the icon on the top right side of the shopping list
Mobile app
Create your own recipes function
- Press the shortcut key ⏱ and select Creating recipes
- Then press the + in the top right corner
- Enter the following data
a. Recipe name
b. Ingredients: Enter each individually and press √ to confirm, repeat for each ingredient
c. Preparation method: Enter each step individually, selecting the relevant settings. Press + after each step.
- Temperature
• Speed (or reverse speed) -
Time
-
Repeat after each step until complete
-
Once all steps have been entered press the icon in the top right to confirm
NOTE: You can save a photo, either chose from library or take the photo directly
NOTE: Any recipes created via the App will be stored on the App only and cannot be transferred to the thermo cooker main unit

Hints & tips
Auto power save
The Smart Thermo Cooker will automatically turn off its screen if it sits unused for 5 minutes. Switch the unit off then back on to start using again.
Food preparation
In order to get the best results from the Smart Thermo Cooker, it is vital that all ingredients are cut to under 3cm prior to processing.

natural_image
Colorful vegetable arrangement on white background, including broccoli, carrots, corn, onion, and carrot slices (no text or symbols)Cleaning & storage
- Before cleaning, switch off the appliance and remove the plug and socket
- Unlock the blade nut and carefully remove the blades
WARNING
- Blades are very sharp. Only hold the upper part of the blade while removing or re-inserting it.

natural_image
Close-up of hands using a tool to clean or wash yellow liquid from a kitchen sink (no text or symbols visible)- Hand wash the blade with dishwashing liquid, warm water and a sponge
- Use the cleaning brush with warm water and a small amount of dishwashing liquid to remove any residual food from the bottom of the bowl
Hints & tips
- Dry all parts thoroughly. Once all parts are completely dry, reassemble the Smart Thermo Cooker
NOTICE:
- All accessories are dishwasher safe, except the cleaning brush and blade which must be hand washed.
- If the bowl and blades are very hard to clean, add some hot soapy water to the machine and run the machine at speed 1 for 5 seconds.
- The main unit should never be placed in water or in a dishwasher. Clean only by wiping with a damp cloth
- Make sure pins on the bottom of the bowl are clean and dry before use.
- Periodically lubricate the blades with vegetable oil before use.
When in storage, ensure the Smart Thermo Cooker is switched off, unplugged from any power outlet, clean and dry.
Disposal
At the end of its working life, do not throw this product out with your household rubbish. Electrical and electronic products contain substances that can have a detrimental effect on the environment and human health if disposed of inappropriately. Observe any local regulations regarding the disposal of electrical consumer goods and dispose of it appropriately for recycling. Contact your local authorities for advice on recycling facilities in your area. Please keep the original packaging carton and materials in a safe place. It will help to prevent any damage if the product needs to be transported in the future. In the event it is to be disposed of, please recycle all packaging material where possible.
FAQs
Fault codes
In the unlikely event of a fault, the Smart Thermo Cooker will provide a fault code, see below for how to easily solve some faults.
In all cases, the below error code will display on the screen and the ▶ button will turn red.
| Code Explanation Solution | ||
| E1 | Temperature sensor error | Switch off unit completely and contact after sales support for assistance |
| E2 | Main unit not picking up bowl sensors | Take out the bowl and reinstall it according to the operating instruction* |
| E3 | Lid was not placed on main bowl correctly | Take out the lid, and reinstall it according to the operating instruction* |
| E4 | Motor may have been running for too long | Firstly power off, and then restart the appliance after 1 hour* |
*If any problem persists, please contact after sales support.
Common questions
| Question Answer | |
| How do I stir my food without chopping? If you do not want the ingredients to be processed, set the machine to reverse. Reverse operation at a low speed is intended for gently stirring delicate food which is not to be chopped | |
| What parts are dishwasher safe? The bowl and all accessories except for the blade and brush are dishwasher safe. The blade must be carefully hand washed and dried thoroughly | |
| The start/stop button on my Smart Thermo Cooker is red | This means that the bowl is not fitted and secure. Ensure you have followed instructions on page 10. The start/stop button will illuminate white once fitted correctly |
| My machine will not blend after cooking The | Smart Thermo Cooker has a built-in safety feature which will only blend at speeds 1-4 if the contents are over 60°C. Allow for the unit to cool down before blending at high speeds |
| What is the maximum cooking time? The Smart Thermo Cooker can operate for a maximum of 99 minutes in one go. For operation longer than that, the contents needs to be checked and set again every 99 minutes | |
| Why won't my machine start processing? | The bowl will not process if it is above 60°C. This is a safety precaution. Wait for your bowl to cool before trying to process again |
| How do I remove any discolouration (caused by spices) from my accessories? | Some ingredients such as turmeric, carrots, tomatoes, etc. may stain plastic. To avoid these kinds of stains, you need to wipe any coloured food off the plastic parts as quickly as possible |
| How do I use guided cooking? Simply select | a recipe and follow the step-by-step instructions on the display, with predefined times, temperatures and speeds for each step. You can also watch a step by step video on using the guided cooking function at www.balcobrands.com/thermocooker |
| Are spare parts available? Yes, if you require | spare parts for your Smart Thermo Cooker, please visit www.balcobrands.com/thermocooker for a list and to order |

STIRLING
SMART THERMO COOKER
Repair and Refurbished Goods or Parts Notice
Unfortunately, from time to time, faulty products are manufactured which need to be returned to the Supplier for repair.
Please be aware that if your product is capable of retaining user-generated data (such as files stored on a computer hard drive, telephone numbers stored on a mobile telephone, songs stored on a portable media player, games saved on a games console or files stored on a USB memory stick) during the process of repair, some or all of your stored data may be lost.
We recommend you save this data elsewhere prior to sending the product for repair.
You should also be aware that rather than repairing goods, we may replace them with refurbished goods of the same type or use refurbished parts in the repair process.
Please be assured though, refurbished parts or replacements are only used where they meet ALDI's stringent quality specifications.
If at any time you feel your repair is being handled unsatisfactorily, you may escalate your complaint. Please telephone us on 1300 663 907 or write to us at:
Balco Brands Pty Ltd
PO BOX 537
Bayswater Business Centre
Bayswater, VIC 3153
Balco Brands Help Desk 1300 663 907
(Operating Hours: Mon-Fri 08:30AM to 6:00PM)
customercare@balcobrands.com
www.balcobrands.com.au

ALDI guarantees that our exclusive brand products are developed to our stringent quality specifications. If you are not entirely satisfied with this product, please return it to the nearest ALDI store within 60 days from the date of purchase, for a full refund or replacement, or take advantage of our after sales support by calling the supplier's Customer Service Hotline.

Made in China
Stirling is a registered trademark of ALDI stores
Distributed by:
ALDI STORES
1 Sargents Rd
Minchinbury NSW 2770
www.aldi.com.au
AFTER SALES SUPPORT 709561


1300 663 907
customercare@balcobrands.com
MODEL:
AP200057
09/2022

YEAR WARRANTY
- SMART THERMO COOKER
- Contents
- Welcome 4
- Quick Reference 15
- Getting Started
- Operation
- Mobile app
- Hints & tips
- FAQs
- Repair and Refurbished Goods or Parts Notice
- Welcome
- Important
- Warranty Note
- STIRLING
- SMART THERMO COOKER Warranty Details
- Safety Signal Words
- Signal words
- WARNING
- CAUTION
- HOT SURFACE
- NOTICE
- Safety Instructions
- When using electrical appliances, basic safety precautions should always be followed. Only use the Smart Thermo Cooker in accordance with this instruction manual. Read all the instructions.
- Electrical shock hazard
- Fire hazard
- Laceration hazard
- The Smart Thermo Cooker is not intended for use by persons (including children) with reduced physical sensory or mental capabilities or lack of experience and knowledge, unless they have been given supervision or instruction concerning use of the appliance by a person responsible for their safety
- The magnets in the Smart Thermo Cooker may affect pacemakers
- SAVE THESE INSTRUCTIONS
- Features & Technical Specifications
- Features
- Technical Specifications
- Product Overview
- Quick Reference
- Using the cooking accessories
- Cooking with the Smart Thermo Cooker
- Handy Tips & Reminders
- Cooking Cheat Sheet
- Before first use
- Setting up the Smart Thermo Cooker
- Close the lid
- Cooking with the inner basket
- Cooking with the steamer basket
- Scalding hazard
- Install the blade assembly
- Add water to the bowl (>0.5L < 3L)
- Using the butterfly whisk
- Close and secure lid to operate
- Manual cooking function
- Guided recipe function
- To use the guided recipe function:
- Connecting the Smart Thermo Cooker to the app
- NOTE:
- Calendar function
- Shopping list function
- Create your own recipes function
- Auto power save
- Food preparation
- Cleaning & storage
- NOTICE:
- Disposal
- Fault codes
Brand : Stirling
Model : AP200057
Category : Other Kitchen Appliances