
2240 - Kitchen scale Cardinal Detecto - Free user manual and instructions
Find the device manual for free 2240 Cardinal Detecto in PDF.


| Product Type | Digital Kitchen Scale |
| Brand | Cardinal Detecto |
| Model | 2240 |
| Dimensions (Approx.) | 20 x 15 x 2 cm (7.9 x 5.9 x 0.8 in) |
| Weight (Approx.) | 0.5 kg (1.1 lb) |
| Power Source | 2 x AAA batteries (not included) |
| Maximum Capacity | 5000 g (11 lb) |
| Accuracy | ±1 g (0.05 oz) |
| Display | LCD, backlit (optional) |
| Units of Measurement | g, kg, oz, lb:oz, ml, fl.oz |
| Functions | Tare, Auto-off, Overload indication, Low battery indicator |
| Auto-off Time | 1 minute of inactivity |
| Platform Material | Stainless steel |
| Housing Material | Plastic |
| Maintenance & Cleaning | Wipe with a damp cloth; do not immerse in water |
| Safety | Not for commercial use; keep away from excessive moisture |
| Spare Parts / Repair | Batteries only; no user-serviceable parts inside |
| General Information | Manual available for free download at notice-facile.com |
Frequently Asked Questions - 2240 Cardinal Detecto
User questions about 2240 Cardinal Detecto
0 question about this device. Answer the ones you know or ask your own.
Ask a new question about this device
Download the instructions for your Kitchen scale in PDF format for free! Find your manual 2240 - Cardinal Detecto and take your electronic device back in hand. On this page are published all the documents necessary for the use of your device. 2240 by Cardinal Detecto.
USER MANUAL 2240 Cardinal Detecto
natural_image
Abstract black ink brushstroke design on white background (no text or symbols)Cardinal
Cardinal Scale Manufacturing Co.
Digital Counting Scale
Models 2240 and 2241
Operation Manual
INTRODUCTION
We wish to thank you for your purchase of our Digital Counting Scale. This instrument has been designed and manufactured at our factory in Webb City, MO U.S.A. with quality and reliability.
This manual will help aquaint you with the features of this instrument and instruct you in the proper installation, operation and maintenance of your new scale. Please read it before attempting to use the scale and keep it handy for future reference.
FCC COMPLIANCE STATEMENT
WARNING! This equipment generates, uses and can radiate radio frequency and if not installed and used in accordance with the instruction manual, may cause interference to radio communications. It has been tested and found to comply with the limits for a Class A computing device pursuant to Subpart J of Part 15 of FCC rules, which are designed to provide reasonable protection against such interference when operated in a commercial environment. Operation of this equipment in a residential area may cause interference in which case the user will be responsible to take whatever measures necessary to correct the interference.
You may find the booklet "How to Identify and Resolve Radio TV Interference Problems" prepared by the Federal Communications Commission helpful. It is available from the U.S. Government Printing Office, Washington, D.C. 20402. Stock No. 001-000-00315-4.
All rights reserved. Reproduction or use, without expressed written permission, of editorial or pictorial content, in any manner, is prohibited. No patent liability is assumed with respect to the use of the information contained herein. While every precaution has been taken in the preparation of this manual, the Seller assumes no responsibility for errors or omissions. Neither is any liability assumed for damages resulting from use of the information contained herein. All instructions and diagrams have been checked for accuracy and ease of application; however, success and safety in working with tools depend to a great extent upon the individual accuracy, skill and caution. For this reason the Seller is not able to guarantee the result of any procedure contained herein. Nor can they assume responsibility for any damage to property or injury to persons occasioned from the procedures. Persons engaging the procedures do so entirely at their own risk.
Serial Number
Date of Purchase
Purchased Form
RETAIN THIS INFORMATION FOR FUTURE USE
TABLE OF CONTENTS
Introduction 1.
Specifications 2.
Installation 3.
Components and Controls 4.
Precautions 5.
Interconnections 6
Key Functions 8.
Reset Function 10
Annunciators 10
Operation Without ID 12
Standard Sampling and Counting ..... 12
Counting with an Insufficient Sample ... 12
Adjusting the Sample Quantity ..... 13
Counting Out of A Container ..... 13
Accumulator 13
Weight Display 14
Push Button Tare 14
Tare Weight Entry 15
Metric Conversion 15
Operation Using ID(S) 15
Adding and Deleting ID Numbers ..... 16
Selecting the ID Number ..... 17
Verifying Active (Current) ID Number . . . 17
Turning Off The Active ID Number .....17
Operation With Stored Tare Weigh ..... 18
Standard Sampling and Counting ..... 18
Counting with an Insufficient Sample ... 19
Adjusting the Sample Quantity ..... 19
Counting Out from a Container .....20
Accumulators 21
Calibration and Setup 24
Calibration Seal Installation ..... 30
Sampling and Count Accuracy ..... 3 1
Error and Status Displays ....33
Before You Call Service ....33
Care and Cleaning 33
Optional Battery Pack Operation .... 34
Thermal Label Formats 36
Parts Identification .... 37
PRECAUTIONS
Before using this instrument, read this manual and pay special attention to all "WARNING" symbols:

IMPORTANT ELECTRICAL WARNING
SPECIFICATIONS
Power Requirements ..... 115VAC 50/60Hz (2240) 220/240 VAC 50/60Hz (2241)
Power Consumption .....20 Watts (maximum)
Power Cord 2240: 6 foot, 3-pin polarized - 2241: 6 foot
Operating Temperature ..... 14° F to 104° F (-10° C + 40° C)
Internal Resolution 1,000,000
Weight Displayed Resolution .. 10,000 divisions
Sample Rate 2 samples per second
Load Cell Excitation 9.3 VDC
ID Number Capacity .... 300
Dimensions 13½" W x 13¼" D x 4" H (345mm W x 339mm D x 102mm H)
Shipping Weight 28 lbs (incl. optional battery)
MODEL Capacity x Division Value Commodity Tray Dimensions
| 2240-5 | 5 lb x 0.0005 lb or 2 kg x 0.0002kg 1312" W x 1014" D |
| 2241-5* | |
| 2240-10 | 10 lb x 0.001 lb or 5 kg x 0.0005kg 1312" W x 1014" D |
| 2241-10* | |
| 2240-20 | 20 lb x 0.002 lb or 10 kg x 0.001kg 1312" W x 1014" D |
| 2241-20* | |
| 2240-50 | 50 lb x 0.005 lb or 20 kg x 0.002kg 1312" W x 1014" D |
| 2241-50* | |
| 2240-100 | 100 lb x 0.01 lb or 40 kg x 0.005kg 1312" W x 1014" D |
| 2241-100* |
* 220/240 VAC 50/60Hz models
Standard Features:
• 0.6" high red LED 6 Character Count/Data display
• 0.6" high red LED 5 Character Weight Display
• LED Operating Status Annunciators
• Metric (lb/kg) Conversion
• Bi-Directional RS-232 Printer Port
• Fixed Printer Port Data Format, 9600 baud, 8 data bits, No parity and 1 stop bit
• Mechanical Overload Protection
- Adjustable Leveling Feet and Bubble Level Indicator
• User-accessible Setup Parameters
• Digital Calibration
• Auto Recall of Last Piece Weight
• Simplified Operation Selection
• Automatic Recomputation of Average Piece Weight
• Manual Count Accumulators
• Auto Shut-Off Feature
• Auto Selection of Optional Remote Scale
- Switch between Local and Remote Scale during Sample or Count Operation
• Non-volatile Memory stores up to 300 ID's and retains associated data base
Optional Features:
- Battery Operation using readily available Sealed Lead-Acid Camcorder battery Approximately 10 hours use on fully charged battery (without remote scale)
- Remote Scale
- Label Printer
INSTALLATION
Unpacking
Before beginning installation of your Digital Counting Scale, make certain the instrument has been received in good condition. Carefully remove the instrument from the shipping carton and inspect it for any evidence of damage (such as exterior dents or scratches) that may have taken place during shipment. Keep the carton and packing material for return shipment if it should become necessary. It is the responsibility of the purchaser to file all claims for any damages or loss incurred during transit. Refer to the Counting Scale Unpacking and Re-Packing Instructions, 8526-M246-01, for additional information.
Placement
Place the scale on a stable, vibration-free level surface away from direct sunlight and from any rapidly moving air source (heating/cooling vents, fans, etc.). Make certain the power cord and peripheral cables are routed out of the way of normal traffic.

CAUTION! DO NOT place the scale on any unstable cart, stand or table. The scale may fall causing injury to the operator, and seriously damage the unit, or proper operation of the scale may be inhibited.
Level Adjustment
Check to make certain the scale is level. The level indicator is located in the center of the weighbridge under the Stainless Steel commodity tray. Remove the commodity tray and observe the level bubble (see Figure No. 1). If the scale is not level (the bubble will not be centered), loosen the locking nut on all four (4) mounting feet (see Figure No. 2) and adjust them as required to center the bubble and attain a level scale. Once a level condition has been obtained, lock the mounting feet in place by tightening the adjustment nuts against the bottom of the scale.
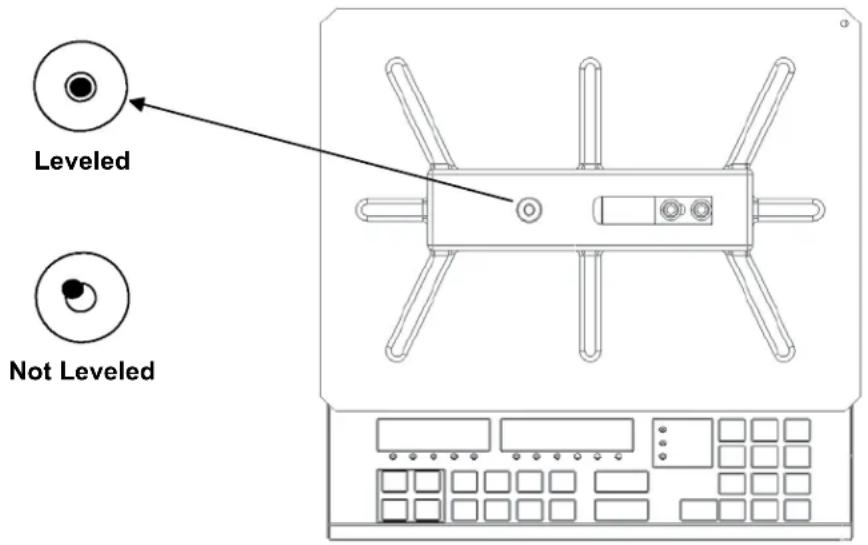
Figure No. 1
Power Connection
The scale contains a power supply which converts the 110/120/220/240 VAC 50/60Hz wall supply to the power required by the scale circuitry. The power supply also contains the circuitry necessary to monitor and recharge the optional battery and is capable of operating the scale and recharging the battery simultaneously.
INSTALLATION, Cont.
AC Operation (Model 2240)
Plug the power cord into a grounded, polarized wall receptacle that supplies 110/120 VAC 50/60Hz power. If it is necessary to use an extension cord, make certain it is a 3-wire, fully grounded type using a minimum of 18 gauge wire. Be certain the power cord is routed out of the way of normal traffic. If only a ungrounded wall receptacle is available, it is the customer's responsibility to contact a qualified electrician to replace the ungrounded receptacle with a properly grounded polarized wall receptacle or have a grounding adapter properly installed.

CAUTION! To avoid electrical hazard, DO NOT under any circumstances, cut, remove, alter, or in any way bypass the power cord grounding prong.
AC Operation (Model 2241)
It is the responsibility of the customer to contact a qualified electrician to install the proper power cord connector. Plug the power cord into a grounded, polarized wall receptacle that supplies 220/240 VAC 50/60Hz power. Be certain the power cord is routed out of the way of normal traffic.
COMPONENTS and CONTROLS

Figure No. 2
PRECAUTIONS
Most scales are designed for an office type environment. The Digital Counting Scale is no exception to that rule. Such an environment is free of excessive dust and moisture and provides a comfortable temperature. In general, the scale will perform well over a temperature range of 32^ to 104^ F ( 0^ to +40^ C). In order to keep cooling requirements to a minimum, the scale should be placed out of direct sunlight and to provide adequate air circulation, keep the area around the scale clear. Make certain the scale is not directly in front of a heating or cooling vent. Such a location will subject the scale to sudden temperature changes and air currents which may result in unstable weight readings. Insure that the scale has good, clean AC power and is properly grounded. In areas subject to lightning strikes, additional protection to minimize lightning damage, such as surge suppressors, should be installed.


CAUTION! When in parallel runs, locate external Load Cell cables a minimum of 24 inches away from all AC wiring.
INTERCONNECTIONS
Remote Scale Connection
If a remote scale is used, it connects to the counting scale via a 9-pin "D" connector (REMOTE SCALE) located on the rear panel of the scale (see Figure No. 2). Before connecting your remote scale to the counting scale, verify that your scale cable is correctly wired. Refer to Figure No. 3 for pin identification of the remote scale connector.
The Digital Counting Scale ships from the factory configured for remote scales that do not use load cells with sense leads (4 wire load cells). The sense jumpers, J1 and J2 are installed for proper operation with 4 wire load cells. If your remote scale uses load cells with sense leads (6 wire load cells), jumpers J1 and J2, located on the printed circuit board (see Figure No. 5) should be placed on one pin only or disconnected.
Make certain that the connector retaining screws are used to hold the remote scale cable connector securely to the rear panel.
REMOTE SCALE

PIN LOCATION AS VIEWED FROM CABLE ATTACHMENT SIDE


Figure No. 3
MATING CONNECTOR INFORMATION
PART NO. VENDOR PART NO.
6610-2379 DE-9P CONNECTOR
6610-1131 DE-24657 SHELL
INTERCONNECTIONS, Cont.
Printer Port Connection
The Digital Counting Scale has a serial printer port that may be used to print weight and associated data. The data is sent to the printer on demand when the PRINT key is pressed. The printer connects to the counting scale via the 25-pin "D" connector (PRINTER) located on the rear panel of the scale. Refer to Figure No. 4 for pin identification of the printer port connector.
NOTE: The serial printer port has a fixed data format, configured for 9600 baud, 8 data bits, No parity and 1 stop bit (9600,8,N,1) operation.
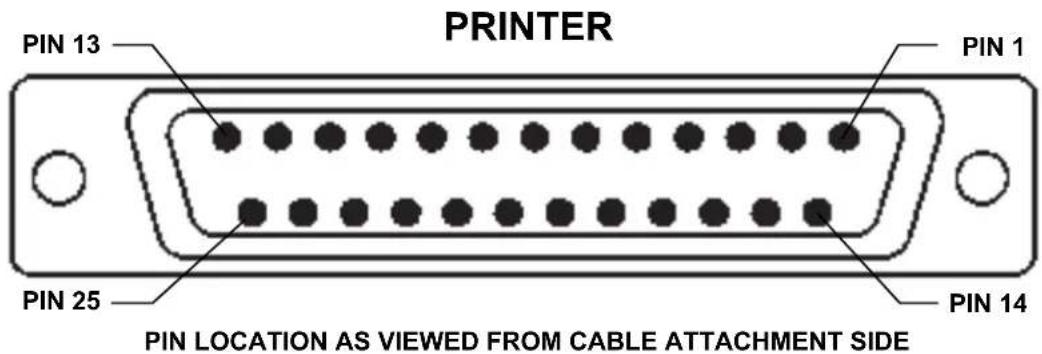
Figure No. 4
Printer Port Rs-232 Connector Pin Definitions
3 TXD Output to printer (Transmit)
2 RXD Input from printer (Receive, not used)
7 COMMON Common (Signal Ground)
19 CTS Input from printer (Clear To Send)
MATING CONNECTOR INFORMATION
PART NO. VENDOR PART NO.
6610-2047 DB-25P CONNECTOR
6610-2218 BACKSHELL

Figure No. 5
KEY FUNCTIONS
This section describes the use of each of the keys on the Digital Counting Scale. It will be helpful to refer to the scale keyboard or Figure No. 6 when reading this section.

The membrane keyboard is not to be operated with pointed objects (pencils, pens, fingernails, etc). Damage to keyboard resulting from this practice will NOT be covered under warranty.
ZERO
The ZERO key is used to perform a variety of functions depending on the current mode of operation:
- Weight Display Mode (lb or kg annunciator on): Pressing the ZERO key will set the weight display to zero and turn on the ZERO annunciator if the displayed weight is within ± 4% of scale capacity.
- Count Mode (COUNT annunciator on): Pressing the ZERO key while in the Count mode will reset the count quantity to zero.
- Accumulator Mode (ACCUM annunciator on): Pressing the ZERO key while in the Accum mode will reset the contents of the currently selected accumulator to zero.
Pressing the PRINT key will transmit RS-232 data to an optional printer, recording time, date, weight, piece count and ID or part number. Refer to the Thermal Label Formats section of this manual and Figure No. 12 for typical print formats.
SAMPLE
The SAMPLE key is used to weigh a known number of pieces to be added or removed from the scale in preparation for a new counting operation. The SAMPLE key is also used to change the sample quantity. Pressing the SAMPLE key repeatedly will cause the sample size to step through pre-established sample sizes of 5, 10, 25, 50 and 100 pieces. In this manner sample quantities other than the first one requested by the scale can be used for counting operations. Sample quantities may also be entered using the numeric keypad in any quantity desired.
COUNT
The COUNT key is pressed after removing or adding the requested sample, and will place the scale in the COUNT mode and start the counting operation.
ACCUM
Pressing the ACCUM key will cause the scale to display the contents of the accumulator (the number of pieces accumulated since the last time the accumulator was zeroed) for the currently selected identification (ID) number.
+ (plus)
The + (plus) key is used to add the current piece count value to the accumulator of the currently selected identification (ID) number. The ACCUM annunciator will flash to indicate the accumulation has taken place.
- (minus) The - (minus) key is used to subtract the current piece count value from the accumulator of the currently selected identification (ID) number. The ACCUM annunciator will flash to indicate the subtraction has taken place.
ID
Pressing the ID key will cause the scale to display the currently selected identification (ID) number and allow the entry of a new ID number.
LOCAL Pressing this key while displaying any weight information will select the SCALE instrument platform (LOCAL) for sampling, counting or weighing operations.
KEY FUNCTIONS, Cont.
NET Pressing this key will toggle the weight display between the Net and Gross weight display modes. NOTE: If a valid tare weight has not been entered, pressing this key will toggle between Net and Gross modes (illuminating the appropriate annunciator) with no change on the display.
TARE The TARE key is used to display the current tare weight (or zero if no tare has been entered) and/or using the numeric keypad, to enter a new tare weight. It is also used when entering a tare under a specific indentification (ID) number.
TIME DATE Pressing this key will allow the entry of hours-minutes-seconds (6 digits) followed by the entry of the month-day-year (6 digits). NOTE: The time and date formats are selected during setup of the counting scale.
Ib/kg Pressing this key will toggle the weighing units between pounds (lb) and kilograms (kg). NOTE: The currently selected weighing unit is indicated by illuminating either the lb or kg annunciator (LED).
REMOTE Pressing this key while displaying any weight will select the optional external SCALE scale (REMOTE) for sampling, counting or weighing operations. The Remote Scale annunciator (LED) will illuminate to indicate the external (REMOTE) scale is in use. NOTE: The REMOTE scale cannot be selected until it has first been enabled in Setup and then calibrated.
ENTER The ENTER key is used to signal the completion of the data entry process and starts the scale processing the data entered.
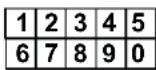
0 These keys are used to enter numeric data during setup and calibration as well through as during normal operations. NOTE: The 1 and 0 keys have dual functions. They are used to enter numeric data during setup and calibration as well as during normal operations and are also used to answer Yes (1=YES) or No (0 = NO) to various prompts.
• This is the decimal point key used to enter a decimal point where required when entering numeric data.
CE The CE key is used to perform different functions depending on the current mode of operation:
Data Entry: The CE key is used to clear an incorrect entry from the display without processing the data. If an incorrect entry is made, press the CE key and re-enter the correct data. NOTE: The CE key must be pressed before the ENTER key to ensure the data is not processed.
Sample Mode (SAMPLE annunciator on): Pressing the CE key while in the Sample mode during the initial Add display will reset the Add value to 5. This display indicates the number of sample pieces to be added to (or removed from) the scale platform.

NOTE: An invalid key entry will produce a long tone and no change on the display.
RESET FUNCTION
A hidden key (under the Cardinal bird emblem) is provided to be used as an reset function to abort the current operation and return the scale to the weight display mode. This allows the operator to start the operation again from the beginning.

Figure No. 6
ANNUNCIATORS
The annunciators are turned on to indicate that the scale is in the mode corresponding to the annunciator label or that the status indicated by the label is active. It will be helpful to refer to the scale keyboard or Figure No. 6 when reading this section. The following describes the functions of each annunciators.
GROSS
The GROSS annunciator is turned on to show that the weight displayed is the gross weight. Gross weight may be displayed only when in the weight mode and a zero tare weight (or no tare weight) value is stored. Note that the GROSS annunciator is only active when the display is in the weight mode as shown by the illumination of the lb or kg annunciator.
TARE
The TARE annunciator is turned on to show that the scale is in a weight mode in which a known tare (container) weight may be keyed in via the numeric keypad, or in a mode that will display the current TARE weight.
NET
The NET annunciator is turned on to show that the weight displayed is the net weight. Net weight is determined by subtracting the stored tare weight from the gross or scale weight. The tare weight, usually the weight of the container, is entered using the tare key. Note that the NET annunciator is only active when a zero tare weight or tare weight value is stored and the display is in the weight mode as shown by the illumination of the lb or kg annunciator.
kg
The kg annunciator is turned on to show that the weight displayed is in kilograms. The lb/kg key may be used to select kilogram as the weighing units.
lb
The lb annunciator is turned on to show that the weight displayed is in pounds. The lb/kg key may be used to select pounds as the weighing units.
ZERO
The ZERO annunciator is turned on to show that the scale gross weight is within ±14 of a division of true zero (center-of-zero).
ANNUNCIATORS, Cont.
MOTION
The MOTION annunciator shows that the scale weight is unstable. An unstable weight reading may be caused by motion on the scale platform. Accumulation of piece counts, Zero and printing cannot take place when the MOTION annunciator is illuminated.
ID
The ID annunciator is used to show the status of the Identification Number mode. During operation, the ID annunciator will be ON (not flashing) to indicate that an ID number is active. When the scale is in the ID ADD, EDIT or DELETE modes of operation, the ID annunciator will be flashing.
ACCUM
The ACCUM annunciator shows that the display is in the Accumulator mode and that the value displayed is the current contents of the accumulator. Individual counts are adjusted via the (+) and (-) keys or optionally, any count may be entered using the numeric keypad. Note, a flashing ACCUM annunciator indicates that the current count has been added to the accumulator (count annunciator is also lit).
SAMPLE
The SAMPLE annunciator shows that the display is in the Sample mode and that the value displayed is the sample quantity requested in pieces.
COUNT
The COUNT annunciator shows that the display is in the Count mode and the value displayed is the count quantity of either the pieces removed from the scale platform (reverse counting) or the number of pieces added to the scale platform (normal counting). The count value is determined by dividing the net or gross weight (as selected) by the average piece weight.
INSUFFICIENT SAMPLE
The INSUFFICIENT SAMPLE annunciator is located between the display and the numeric keypad and shows that the sample selected is too small to calculate an accurate piece weight. If a counting function is continued by pressing the COUNT key a second time without increasing the sample size, the INSUFFICIENT SAMPLE annunciator will flash. Note that increasing the sample size by the amount indicated prior to pressing the COUNT key a second time, will turn off the INSUFFICIENT SAMPLE annunciator and result in an accurate piece weight.
BATTERY LOW
The BATTERY LOW annunciator is used with the battery operation and will flash slowly to indicate that the internal battery requires charging. If continued use furthers drains the battery, the annunciator will stop flashing and stay on continuously. No change in operation will occur until just before the battery voltage drops to a level where operation is affected. At this level, the scale will automatically turn itself off. Note that when the scale is charging the battery, BATTERY LOW annunciator will flash until charging has been completed.
REMOTE SCALE
The REMOTE SCALE annunciator is illuminated when the optional remote scale platform has been selected for use. The remote scale is selected by pressing the REMOTE SCALE key.
POWER ON
The Power Switch is located on the right side panel towards the front of the scale. Place the power switch in the on position. The scale will perform a brief lamp test. This test consists of illuminating all display segments and annunciator LED's for approximately three (3) seconds to allow the operator to make a visual verification that the display is operational. After completion of the lamp test, the scale will display the model number and software revision level, then the weight display will show zero weight, indicating the scale is ready for use.
OPERATION WITHOUT ID
Standard Sampling and Counting
- With the scale on and warmed up (on for approximately 10 minutes) and in the Weight mode (Count display is blank) press the SAMPLE key.
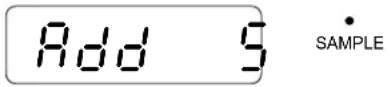
- Add the number of pieces indicated on the count display and press the COUNT or ENTER key.
- Add the pieces to be counted and read the total count.
- Press the ENTER key to complete the counting operation and return to the Weight mode.

Automatic Average Piece Weight Re-Computation
Immediately after a standard sampling operation, if a quantity of pieces, less than the original sample size is added to the scale platform, a new average piece weight will be calculated automatically. This new average piece weight is based on a larger sample than that used initially therefore improving the accuracy of the count.
NOTE: The automatic recomputation of the average piece weight occurs only once for each new sample. Note also that the recalculation of the average piece weight will not take place if the quantity of pieces added is equal to or greater than the original sample quantity, nor will it take place if the display mode is changed before the pieces are added.
Counting With an Insufficient Sample
- With the scale on and warmed up (on for approximately 10 minutes) and in the Weight mode (Count display is blank) press the SAMPLE key.
- Add (or remove) the number of pieces indicated on the count display and press the COUNT or ENTER key.
- If the sample weight is too small, the INSUFFICIENT SAMPLE annunciator will flash and the display will show the number of pieces to be added or removed.
- Add or remove the number of pieces requested and press the COUNT or ENTER key or if Manual Count Override* is enabled, press the COUNT key to force a count function. Note that if the pieces are not added or removed, the INSUFFICIENT SAMPLE annunciator will continue to flash to show the out-of-tolerance count.
NOTE: If the Manual Count Override is not enabled and less than the displayed number of pieces are added or removed when requested to add additional pieces, the counting operation will terminate and the scale will return to the weight display.
-
Add or remove the pieces to be counted and read the count.
-
Press the ENTER key to complete the counting operation and return to the Weight mode.

* Refer to Calibration and Setup section
OPERATION WITHOUT ID, Cont.
Adjusting the Sample Quantity
- Press the SAMPLE key. Press the SAMPLE key again to step to the next sample quantity.
Note, pressing the SAMPLE key repeatedly will cause sample quantity to step in the following sequence: 5, 10, 25, 50, 100, 5, 10, etc. OR
- Using the numeric keypad, key-in any desired sample value, then press the COUNT or ENTER key.
- Add or remove indicated sample quantity and press the COUNT or ENTER key.
- Add or remove the pieces to be counted and read total the count.
- Press the ENTER key to complete the counting operation and return to the Weight mode.
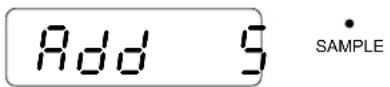
then
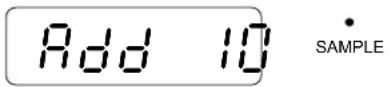


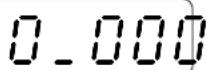


Counting Out From a Container
- Place the filled container on the scale platform and press the SAMPLE key.
- Remove the number of pieces shown on the display and press the COUNT or ENTER key.
- Press the ZERO key to zero the count, then remove the pieces from the container and read the total number removed.
- Press the ENTER key to complete the counting operation and return to the Weight mode.




Accumulator
Displaying the Accumulator.
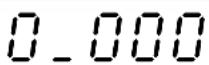
With scale in the Weight mode (Count display is blank) or in the Count mode (COUNT annunciator ON), press the ACCUM key (ACCUM annunciator illuminates) to display the contents of the accumulator. Press the ACCUM key again to return to the previous display or press the SAMPLE key to go to the sample display.
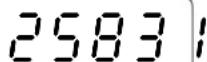

Clearing the Accumulator.
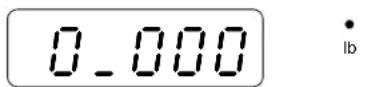
With scale in the Weight mode (Count display is blank) or in the Count mode (COUNT annunciator ON), press the ACCUM key (illuminating the ACCUM annunciator) to display the contents of the internal accumulator.
Press the ZERO key to reset the accumulator to zero, then press the ACCUM key to return to the previous display.



OPERATION WITHOUT ID, Cont.
Accumulator, Cont.
Manually Adding to the Accumulator.
- With the display showing the current count (COUNT annunciator ON), press the + key to add to (or the - key to subtract from) the displayed count of the accumulator.
- The ACCUM annunciator will flash to show that the adjustment to the accumulator has taken place and will continue to flash until all pieces are removed from platform and the display returns to zero in preparation for the next counting operation.
- Press the ENTER key to complete the counting operation and return to the Weight mode.





NOTE: Additional accumulator adjustments can not take place until the next counting operation has been completed.
Weight Display
Displaying Weight.
Press the ENTER key. The display will show the weight on the scale platform. The GROSS and lb or kg annunciator will illuminate to indicate which unit of weight has been selected and that the scale is in the Weight mode. Note, the count display will be blank.


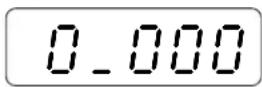
Zero the Weight Display.
With the display in the Gross Weight mode (GROSS annunciator illuminated), press the ZERO key. The weight display will return to zero. The ZERO annunciator will illuminate, indicating a center-of-zero gross weight condition.


Push Button Tare
- With the display in the Gross Weight mode (GROSS annunciator illuminated and the Count display blank), place the empty container on the scale platform.
- Press the TARE key, then the ENTER key. The weight display will change to zero and the NET annunciator illuminates, indicating net weight is being displayed. The empty container's weight has been entered as "tare weight".
- To return to a zero tare, simply remove all material from the scale platform and press the TARE key, then the ENTER key, which will reset the tare weight to zero.
- Press the NET/GROSS key, to return to the Gross weight mode. Note, the selection of Gross weight mode is indicated by illumination of the GROSS annunciator.



OPERATION WITHOUT ID, Cont.
Tare Weight Entry
- With the scale in the Gross Weight mode (GROSS annunciator illuminated and the Count display blank), press the TARE key. The display will show zero or the previously entered tare (if any) and the TARE annunciator will turn on.
- Using the numeric keypad, enter the desired tare (container) weight. Note: When entering tare values, a maximum of 4 digits can be entered and that the numbers advance from right to left in the display. The number of leading or trailing zeros required to obtain your desired tare entry is dependent upon the DIVISION VALUE selected in the calibration procedure.

For example:
Division Value: 0.001
Desired Tare Value: 0.50lb
Key Sequence: · 5
Division Value: 0.01
Desired Tare Value: 1.5lb
Key Sequence: 1 · 5
- After the desired tare value has been entered, press the ENTER key. The display will show the Net weight (Gross minus tare) and the NET annunciator will illuminate.
- Proceed with the counting or weighing operation.
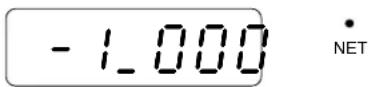
Metric Conversion
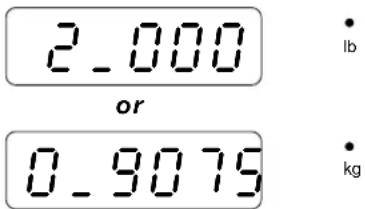
To change weighing units, simply press the lb/kg key to toggle between pounds and kilograms.
Note that either the lb or kg annunciator will illuminate to indicate which weighing unit is selected.
This section describes the various operating procedures of the Digital Counting scale using the ID mode. The ID (identification number) function may be thought as a catalog of stored values for up to 300 separately identifiable counting operations. Those values, stored under an assigned ID number, are: the TARE WEIGHT ^1 (if used), the UNITS (Average Piece Weight) and the ACCUMULATED COUNT of a counting operation. They are accessed by entering the assigned ID number.
^1 A TARE WEIGHT value can be stored for both the Local and Remote scale, allowing the operator to use a small container for the sample and a pallet, tote or the shipping box for the final item count. If required, the stored Tare weight value for an ID can be added or updated before or during a Count or Sample operation.
OPERATION USING ID(S), Cont.
Adding ID Numbers

NOTE: If a stored tare weight is desired for an ID, it is recommended to select the scale (Local or Remote) and place the empty container to be used for the tare on the appropriate scale before pressing the ID key in step 1.
- With the counting scale on, and in the Weight mode (the Count display is blank), press the ID key.
- The ID annunciator will flash and the weight display will show d ± . NOTE: If this is the first ID to be added, the count display will be blank, otherwise the current active ID number will be shown in the count display.
- Key-in up to a 12 digit identification number and press the ID key. Note, that when entering an ID number, the digits start displaying on the left side of the count display and proceed to the right. When an ID greater than 6 digits is used, the digits will automatically scroll off the left side of the count display to show the additional digits on the right as they are entered.
- The display will change to r= and show the current tare weight (the weight of the empty container). Press the ENTER key if the current scale weight is to be used for the tare or using the numeric keypad, key-in the tare and press the ENTER key. Note, entering a 0 (zero) for tare and pressing the ENTER key will select no tare.
- The display will change to Un &S. If the Average Piece Weight is known, use the numeric keypad to key-in the value and press the ENTER key OR if the average piece weight isn't known press the ENTER key.
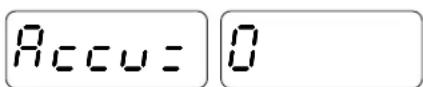
- The display will change to R_CCU and show the current value of the accumulator associated with the ID number. If the displayed value is to remain unchanged, press the ENTER key OR using the numeric keypad, key-in the desired accumulator value and press the ENTER key.
- The ID annunciator will stop flashing and stay on, indicating the ID has been stored and is now the current active ID. Counts will accumulate from this point.
- Repeat the above steps for all ID numbers to be added. When completed, proceed to the "Standard Sampling and Counting" section of this manual.



Deleting ID Numbers
- With the counting scale on, and in the Weight mode (the Count display is blank), press the ID key.
- The ID annunciator will flash, the weight display will show d_z , and the count display will show the current active ID.


NOTE: If 7 to 12 digit ID numbers have been used, press the "-" (minus) key to scroll the number displayed to the right and the "+" (plus) key to scroll the number displayed to the left to view the complete ID number.
OPERATION USING ID(S), Cont.
Deleting ID Numbers, Cont.
- If the current ID is to be deleted, key-in the displayed number and press the ID key OR if another ID is to be deleted, key-in that ID number and press the ID key.
- The weight display will change to dEld and the count display will change to nono.
- Press the YES/1 key to toggle the count display to YES, then press the ENTER key to delete the ID.
- The ID number entered and its associated accumulator will be deleted. The ID annunciator will stop flashing and remain off and the scale will return to the Weight mode.
Selecting The ID Number
- With the counting scale on, and in the Weight mode (the Count display is blank), press the ID key.
- The ID annunciator will flash, the weight display will show d_- , and the count display will show the current active ID.
- If the current ID is to be used, press the ENTER key OR if another ID is to be used, using the numeric keypad, key-in the desired identification number and press the ENTER key.

NOTE: If the ID does not exist, the scale will beep and return to the weight mode.
- The ID annunciator will stop flashing and stay on, and the scale will return to the Weight mode.
Verifying Active (Current) ID Number
- With the counting scale on, and in the Weight mode (the Count display is blank), press the ID key.
- The ID annunciator will flash, the weight display will show d_z , and the count display will show the current active ID.
- Press the ENTER key. The ID annunciator will stop flashing and stay on, and the scale will return to the Weight mode.
Turning Off The Active (Current) ID Number
- With the counting scale on, and in the Weight mode (the Count display is blank), press the ID key.
- The ID annunciator will flash, the weight display will show , and the count display will show the current active ID.
- Press the CE key, then the ENTER key.
- The ID annunciator will stop flashing and remain off and the scale will return to the Weight mode.

Operation With Stored Tare Weight Values
The Digital Counting Scale can store separate Tare weight values for each ID for both the Local and Remote scale. This allows the operator to use a small container for sampling and a larger container such as a pallet, tote or the shipping box for the final item count.
The TARE WEIGHT value can be programmed (stored) when first adding an ID or it can be added to the ID before or during a Count or Sample operation. Note, that if an ID has a stored Tare weight value and the Tare weight is updated during a Count or Sample operation, the updated value will become the stored Tare Weight value.

NOTE: When an ID is selected that has a stored Tare weight, the scale will automatically switch to the Net mode operation when the SAMPLE key or the COUNT key is pressed and display a negative weight (the Tare) if the container is not on the scale.
Standard Sampling and Counting
-
With the counting scale on, unloaded, warmed up (on for approximately 10 minutes), and in the Weight mode (the Count display is blank), press the ID key.
-
The ID annunciator will flash, the weight display will show _z^ , and the count display will show the current active ID.
-
If the current ID is to be used, press the ENTER key OR if another ID is to be used, using the numeric keypad, key-in the desired identification number and press the ENTER key.
-
The ID annunciator will stop flashing and stay on, and the scale will return to the Weight mode.
-
Press the SAMPLE key.
-
Add or remove the number of pieces indicated on the display and press the COUNT or ENTER key.
-
Add the pieces to be counted and read the total count.
-
Press the ENTER key to complete the counting operation and return to the Weight mode.

Automatic Average Piece Weight Re-Computation
Immediately after a standard sampling operation, if a quantity of pieces less than the original sample size is added to the scale platform, a new average piece weight will be calculated automatically. This new average piece weight is based on a larger sample than that used initially therefore improving the accuracy of the count.
NOTE: The automatic recomputation of the average piece weight occurs only once for each new sample. Note also that the recalculation of the average piece weight will not take place if the quantity of pieces added is equal to or greater than the original sample quantity, neither will it take place if the display mode is changed before the pieces are added.
OPERATION USING ID(S), Cont.
Counting With an Insufficient Sample
- With the counting scale on, unloaded, warmed up (on for approximately 10 minutes), and in the Weight mode (the Count display is blank), press the ID key.
- The ID annunciator will flash and the weight display will show ' , and the count display will show active ID.
- If the current ID is to be used, press the ENTER key OR if another ID is to be used, using the numeric keypad, key-in the desired identification number and press the ENTER key.
- The ID annunciator will stop flashing and stay on, and the scale will return to the Weight mode.
- Press the SAMPLE key, then add the number of pieces indicated on the display and press the COUNT or ENTER key.
- If the sample weight is too small, the INSUFFICIENT SAMPLE annunciator will flash and the display will show the number of additional pieces to be added.
- Add or remove the pieces requested, then press the COUNT or ENTER key or if Manual Count Override* is enabled, press the COUNT or ENTER key to force a count function. If the pieces are not added or removed, the INSUFFICIENT SAMPLE annunciator will continue to flash to show the out-of-tolerance count.
NOTE: If the Manual Count Override is not enabled and less than the displayed number of pieces are added or removed when requested to add additional pieces, the counting operation will terminate and the scale will return to the Weight mode.
8 Add or remove the pieces to be counted and read the count.
9. Press the ENTER key to complete the counting operation and return to the Weight mode.
* Refer to Calibration and Setup section

Adjusting the Sample Quantity
- With the scale in the Weight mode (the Count display is blank), press the ID key.
- The ID annunciator will flash, the weight display will show _z , and the count display will show the current active ID.
- If the current ID is to be used, press the ENTER key OR if another ID is to be used, using the numeric keypad, key-in the desired identification number and press the ENTER key.
- The ID annunciator will stop flashing and stay on, and the scale will return to the Weight mode.

OPERATION USING ID(S), Cont.
Adjusting the Sample Quantity, Cont.
- Press the SAMPLE key. Press the SAMPLE key again to step to the next sample quantity. Note that pressing the SAMPLE key repeatedly will cause the sample quantity to step in the following sequence:
5, 10, 25, 50, 100, 5, 10, etc. OR
- Using the numeric keypad, key-in any desired sample value, then press the ENTER key.
- Add or remove the indicated sample quantity and press the COUNT or ENTER key.
8 Add or remove the pieces to be counted and read the total count. - Press the ENTER key to complete the counting operation and return to the Weight mode.

Counting Out From a Container
- With the scale in the Weight mode (the Count display is blank), press the ID key.
- The ID annunciator will flash, the weight display will show _-^l , and the count display will show the current active ID.
- If the current ID is to be used, press the ENTER key OR if another ID is to be used, using the numeric keypad, key-in the desired identification number and press the ENTER key.
- The ID annunciator will stop flashing and stay on, and the scale will return to the Weight mode.
- Place the filled container on the scale platform and press the SAMPLE key.
- Remove the number of pieces shown on the display and press the COUNT or ENTER key.
- Press the ZERO key to zero the count, then remove the pieces from the container and read the total number removed.
- Press the ENTER key to complete the counting operation and return to the Weight mode.


OPERATION USING ID(S), Cont.
Accumulators
Displaying the Accumulator for the Active ID.
- With scale in the Weight mode (the Count display is blank), press the ID key.
- The ID annunciator will flash, the weight display will show ' , and the count display will show the current active ID. Press the ENTER key.
- The ID annunciator will stop flashing and stay on, and the scale will return to the Weight mode.
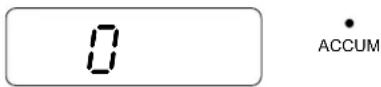
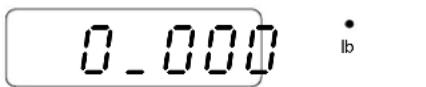
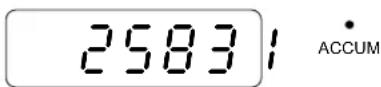
- Press the ACCUM key to display the contents of the accumulator. The ACCUM annunciator will illuminate.
- Press the ACCUM key to return to the Weight mode.



Clearing the Accumulator for the Active ID.
- With scale in Weight mode (the Count display is blank), press the ID key.
- The ID annunciator will flash, the weight display will show = , and the count display will show the current active ID. Press the ENTER key.
- The ID annunciator will stop flashing and stay on, and the scale will return to the Weight mode.
- Press the ACCUM key (illuminating the ACCUM annunciator) to display the contents of the accumulator for the ID entered.
- Press the ZERO key to reset the accumulator to zero.
- Press the ACCUM key to return to the Weight mode.



Displaying the Accumulator for a Non-Active ID.
NOTE: The following steps change the Non-Active ID to the Active ID to Display the Accumulator.
- With scale in the Weight mode (the Count display is blank), press the ID key.
- The ID annunciator will flash, the weight display will show _-^t , and the count display will show the current active ID.
- Using the numeric keypad, key-in the desired identification number and press the ID key.
- The ID annunciator will stop flashing and stay on, and the scale will return to the Weight mode.
- Press the ACCUM key to display the contents of the accumulator. The ACCUM annunciator will illuminate.
- Press the ACCUM key to return to the Weight mode.


OPERATION USING ID(S), Cont.
Clearing the Accumulator for a Non-Active ID.
NOTE: The following steps change the Non-Active ID to the Active ID to Clear the Accumulator.
- With scale in Weight mode (the Count display is blank), press the ID key.
- The ID annunciator will flash, the weight display will show , and the count display will show the current active ID.
- Using the numeric keypad, key-in the desired identification number and press the ENTER key.
- The ID annunciator will stop flashing and stay on, and the scale will return to the Weight mode.
- Press the ACCUM key to display the contents of the accumulator. The ACCUM annunicator will illuminate.
- Press the ZERO key to reset the accumulator to zero.
- Press the ACCUM key to return to the Weight mode. manual accumulator Adjustment


Adding to the Accumulator for the Active ID.
- With scale in the Weight mode (the count display is blank), press the ID key.
- The ID annunciator will flash, the weight display will show ' = , and the count display will show the current active ID. Press the ENTER key.
- The ID annunciator will stop flashing and stay on, and the scale will return to the Weight mode.
- Press the SAMPLE key, then add or remove the number of pieces indicated on the display.
- Press the COUNT or ENTER key, add or remove the pieces to be counted and read the total count.
- With the display showing the current count (COUNT annunciator ON) press the + key to add to (or the - key to subtract from) the displayed count of the accumulator. The ACCUM annunciator will flash to show that the adjustment to the accumulator has taken place and will continue to flash until all pieces are removed from platform and the display returns to zero in preparation for the next counting operation.



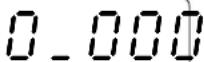

- Press the ENTER key to return to the Weight mode.

NOTE: Additional accumulator adjustments can not take place until the next counting operation has been completed.
OPERATION USING ID(S), Cont.
Adding to the Accumulator for a Non-Active ID.
NOTE: The following steps change the Non-Active ID to the Active ID to ADD to the Accumulator.
-
With scale in the Weight mode (the Count display is blank), press the ID key.
-
The ID annunciator will flash, the weight display will show d_z , and the count display will show the current active ID.
-
Using the numeric keypad, key-in the desired identification number and press the ENTER key.
-
The ID annunciator will stop flashing and stay on, and the scale will return to the Weight mode.
-
Press the SAMPLE key, then add or remove the number of pieces indicated on the display.
-
Press the COUNT or ENTER key, add or remove the pieces to be counted and read the total count.
-
With the display showing the current count (COUNT annunciator ON) press the + key to add to (or the - key to subtract from) the displayed count of the accumulator. The ACCUM annunciator will flash to show that the adjustment to the accumulator has taken place and will continue to flash until all pieces are removed from platform and the display returns to zero in preparation for the next counting operation.
-
Press the ENTER key to return to the Weight mode.

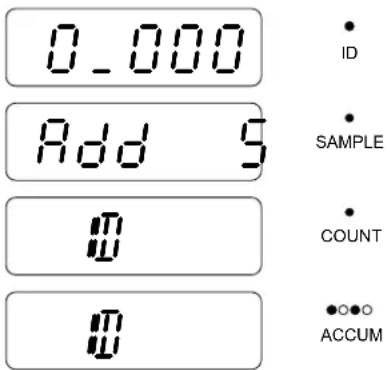


NOTE: Additional accumulator adjustments can not take place until the next counting operation has been completed.
CALIBRATION and SETUP
This scale was calibrated at the factory and should not require adjustment. In the event that the scale should need recalibration, the following describes the Calibration of the Digital Counting Scale. A qualified technician should perform this function to maintain the instrument's high degree of accuracy.
Before beginning calibration, the following equipment is required:
Calibrated test weights (Full capacity for all models, e.g. 5 lbs for 5 lb, . . . 100 lbs for 100 lb) Small Flat Blade screwdriver (to remove calibration sealing screw)

If sealing wires require breaking for purposes of calibration, proper procedures under National Institute of Standards and Technology Handbook 44 must be adhered to.

Figure No. 7
- With the scale power off, remove the calibration sealing screw on the right side panel, see Figure No.7.
- With the screw removed, place the power switch in the ON position. The scale will perform a brief lamp test. This test consists of illuminating all display segments and annunciator LED's for approximately three (3) seconds to allow the operator to make a visual verification that the display is operational. After completion of the lamp test, the scale will display the model number and software revision level, then the weight display will change to SCALE.
- Select the LOCAL scale by pressing the LOCAL SCALE key.
- The weight display will change to L08d and the count display will change to xxxxxx. Note that xxxxxx is the capacity of the scale and the load required to calibrate the scale. This will vary depending on the capacity of the scale and the units of measurement selected.
- Press the lb/kg key to select the units of measurement for calibration. Note that the "lb" or "kg" annunciator will be illuminated to indicate which unit of measurement has been selected and the count display will show the corresponding load.
- Press the + key to cycle up through or the - key to cycle down through the following capacity values: 5, 10, 20, 50, 100 for pounds (lb) or 2, 5, 10, 20, 40 for kilograms (kg).

CAUTION: The capacity value selected must match the load cell installed in the scale. Proper operation of the scale may be inhibited and the warranty will be voided if the required load cell is not used. Refer to the Load Cell Table in the Parts Identification section of this manual for the required load cell for the capacity selected.
- Place the required calibrated test weight on the scale platform, wait about 5 seconds for the scale to stabilize, then press the ENTER key to start calibration.
CALIBRATION and SETUP, Cont.
- The display will start to fill with dashes from the left of the weight display and proceed to the right of the count display. When finished, the unit will display UnLOAD on the count display.
- Remove the weight from the scale, wait about 5 seconds for the scale to stabilize, then press the ENTER key to finish calibration.
- The display will start to fill with dashes from the left of the weight display and proceed to the right of the count display. When finished, the display will change to cBLb donE.
- If operational setup is required (or a remote scale is to be used) proceed to the Operational Setup procedure.
- If only calibration was required and the LOCAL (integral) scale is the only scale, turn the scale off and replace the calibration sealing screw on the right side panel of the scale. Place the power switch in the ON position. The scale is now ready for use.
OPERATIONAL SETUP
The Operational Setup of the Digital Counting Scale is accomplished entirely by using the scale keypad and can easily be performed using one of the following methods:
Calibration Method (sealing screw REMOVED)
At the completion of the Calibration procedure (Local or Remote scale), the display will change to cRtB done. Press the ENTER key. The weight display will show SCALE. Press the ENTER key again. The weight display will change to ScRt2, the first setup prompt. The scale is now ready to begin setup.
Operation Method (sealing screw INSTALLED)
With the scale power off, apply power by placing the power switch in the ON position. While the weight display is showing 2240 or 2241 (the model number) and the count display is showing xx r22 (the capacity and the software revision level), press the ENTER key. The weight display will change to the first setup prompt, Sc82. The scale is now ready to begin setup.

During the setup process it will be necessary to enter operational parameters using the counting scale's keypad. Pressing the ENTER key will cause the data entered or displayed to be retained and the setup process will advance to the next prompt.
NOTE: If an incorrect entry is made, pressing the CE key will clear the display and allow re-entering the correct data.
ZERO TRACKING
The display will show 0tr-8c, the prompt to enable or disable the automatic Zero Tracking feature and display the current setting. This feature, when enabled will automatically maintain the center-of-zero within one division. To change the setting, press the YES/1 key to enable or the NO/0 key to disable, then press the ENTER key to save the setting and proceed to the next prompt.
FOUR PERCENT ZERO RANGE LIMIT
The display will show 4 PcE, the prompt to select whether a 4% limit be placed on the push button zero and display the current setting. If enabled, the push button zero is limited to 4% of the scale capacity. If disabled, the push button zero will operate up to the full capacity of the scale. Press the YES/1 key to enable or NO/0 to disable, then press the ENTER key to save the setting and proceed to the next prompt.
UNITS OF MEASUREMENT
The display will show UNK5, the prompt to select the Units of Measurement and display the current setting. To change the setting, use the keypad to select a new value (1 to 3) for the units, then press the ENTER key to save the setting and proceed to the next prompt.
$$ 1 = \text { Pounds (lb) only } $$
$$ 2 = \text { Kilograms (kg) only } $$
$$ 3 = \text { Pounds / Kilograms (lb / kg) } $$
CALIBRATION and SETUP, Cont.
OPERATIONAL SETUP, Cont.
SCALE 2 (Optional remote scale)
The display will show 5c812, the prompt to enable or disable the optional remote scale and display the current setting. To change the setting, press the YES/1 key to enable or the NO/0 key to disable, then press the ENTER key to save the setting and proceed to the next prompt. NOTE: The REMOTE scale cannot be used until it has been calibrated (refer to the Calibration Procedure - Remote Scale section).
AUTO LOCAL-TO-REMOTE SWITCH
The display will show R Sut, the prompt to enable or disable the Auto Switching from the sample scale to the bulk scale for counting operations and display the current setting. This feature, when enabled will use the integral (local) scale for the sample then automatically switch to the bulk (remote) scale for counting with the acceptance of the sample. To change the setting, press the YES/1 key to enable or the NO/0 key to disable, then press the ENTER key to save the setting and proceed to the next prompt.
AUTO RECALL OF LAST AVERAGE PIECE WEIGHT
The display will show R rcl, the prompt to enable or disable the Auto Recall of the Average Piece Weight on power up and display the current setting. This feature, when enabled will automatically recall the last average piece weight after turning the scale on. To change the setting, press the YES/1 key to enable or the NO/0 key to disable, then press the ENTER key to save the setting and proceed to the next prompt.
AUTO ACCUMULATION
The display will show A Acc, the prompt to enable or disable Auto Accumulation of counts and display the current setting. This feature, when enabled will automatically accumulate the counts after a counting operation. If disabled, the operator must press the ACCUM key to accumulated the counts. To change the setting, press the YES/1 key to enable or the NO/0 key to disable, then press the ENTER key to save the setting and proceed to the next prompt.
BEEPER
The display will show bEEP, the prompt to enable or disable the internal beeper and display the current setting. This feature, when enabled will sound the beeper each time a key is pressed and when an error occurs. If disabled, the beeper will only sound when an error occurs. To change the setting, press the YES/1 key to enable or the NO/0 key to disable, then press the ENTER key to save the setting and proceed to the next prompt.
STORE ID
The display will show 5εr σ, the prompt to enable or disable the Identification Number (ID) feature and display the current setting. To change the setting, press the YES/1 key to enable or the NO/0 key to disable, then press the ENTER key to save the setting and proceed to the next prompt.
12 HOUR CLOCK
The display will show 12 hr, the prompt to enable or disable the 12 Hour clock feature and display the current setting. This feature, when enabled will select the 12 hour time format for printing the time on tickets. Note that an "a" for am or an "p" for pm will not print on the ticket. If disabled, the time will be in the 24 hour (military) time format. To change the setting, press the YES/1 key to enable or the NO/0 key to disable, then press the ENTER key to save the setting and proceed to the next prompt.
NOTE: The 12 Hour Clock feature only affects how the time is printed on tickets. The time is set using the 24 hour (military) format whether the 12 Hour clock feature is enable or disabled.
CALIBRATION and SETUP, Cont.
OPERATIONAL SETUP, Cont.
EUROPEAN DATE
The display will show EuroP, the prompt to enable or disable the European Date format and display the current setting. This feature, when enabled will print the date on tickets in the European (International) format of day/month/year (DD/MM/YYYY). If disabled, the date on the tickets will print in the month/day/year (MM/DD/YYYY) format. To change the setting, press the YES/1 key to enable or the NO/0 key to disable, then press the ENTER key to save the setting and proceed to the next prompt.
MANUAL COUNT OVERRIDE
The display will show a net, the prompt to enable or disable the Manual Count Override and display the current setting. This feature, when enabled will allow a counting operation to continue while the Insufficient Sample annunciator is illuminated. If disabled, the counting operation can not be continued until additional sample pieces are placed on the scale platform. To change the setting, press the YES/1 key to enable or the NO/0 key to disable, then press the ENTER key to save the setting and proceed to the next prompt.
PRINTER OUTPUT
The display will show Printer, the prompt to enable or disable the Printer output and display the current setting. To change the setting, press the YES/1 key to enable or the NO/0 key to disable, then press the ENTER key to save the setting and proceed to the next prompt.

If printer output is enabled, additional setup prompts (TICKET FORMAT and PRINT BARCODE) will be displayed. If printer output is disabled, the setup procedure will advance to the UNITS OF MEASUREMENT prompt.
TICKET FORMAT
If Printer Output was enabled, then the display will show __r , the prompt to select the format for ticket printing and display the current setting. The available formats are:
1 = Vertical Printing (The printed line is parallel with the print head)
2 = Horizontal Printing (The printed line is at right angle to the print head)
3 = Generic Text Printer (ASCII text output with CR/LF control codes only)
To change the setting, on the numeric keypad press the YES/1 key to select the vertical format, the 2 key to select the horizontal format or the 3 key to select the Generic Text Printer. Press the ENTER key to save the setting and proceed to the next prompt.
NOTE: The maximum number of digits in an ID number is dependent upon the Ticket Format selected. When using format 1, the maximum is 10 digits. When using format 2, the maximum length of an ID number is 12 digits.
PRINT BARCODE
If Printer Output was enabled, and Ticket Format 1 or 2 was chosen, then the display will show b8rco, the prompt to enable or disable printing barcode on the ticket and display the current setting. To change the setting, press the YES/1 key to enable or the NO/0 key to disable, then press the ENTER key to save the setting and proceed to the next prompt.
NOTE: Barcode printing is available only when Ticket Format 1 or 2 have been selected. Ticket Format 3 (Generic Text Printer) does not support bardocde.
CALIBRATION and SETUP, Cont.
OPERATIONAL SETUP, Cont.
COUNT ACCURACY
The display will show _Rcr , the prompt to select the Count Accuracy percentage and display the current setting. This refers to the set-point for the INSUFFICIENT SAMPLE annunciator. There are two pre-selected values, .1 and .5 percent. If the weight of a sample is less than .1% or .5% of the gross capacity of the scale, (.1 lb or .5 lb for a 100 lb capacity scale) sample accuracy is not guaranteed. The Insufficient Sample annunciator will illuminate, and the scale will calculate the minimum additional number of pieces required to raise the sample weight to the .1% or .5% preset and display the quantity.
To change the setting, use the numeric keypad to key-in a new value (1 or 5, with no decimal) for the count accuracy, then press the ENTER key to save the setting and proceed to the next prompt.
AUTO SHUTOFF
The display will show R oFF, the prompt to enable or disable the Auto Shutoff feature and display the current setting. This feature, when enabled will automatically turn the scale off after a select period of inactivity to prolong battery life. To turn the instrument back on you must toggle the power switch from the ON position to the OFF position and then back to the ON position.
To change the setting, using the numeric keypad, key-in the number of minutes (1 through 9, time approximate) of inactivity before turning the scale off, then press the ENTER key to save the setting and proceed to the next prompt. Note, that entering a zero (0) disables the Automatic Shutoff feature.
DISPLAY INTENSITY
The display will show b \& E , the prompt to adjust the display intensity and display the current setting. This feature allows the display intensity (brightness) to be adjusted to compensate for lighting conditions at the scale's location. Also, when operating from the battery, lowering the display intensity decreases the load on the battery, increasing operating time before recharging is required. To change the setting, use the numeric keypad to key-in a new value (1 to 3) for the display intensity, then press the ENTER key to save the setting and proceed to the next prompt.
$$ 1 = \text { DIM } 2 = \text { NORMAL (default setting) } 3 = \text { HIGH } $$
CLEAR MEMORY
The display will show cur^ , the prompt to enable the Clear Memory operation and display the current (default) setting NO. This operation, when enabled will clear all ID's and associated accumulators from the scale memory. The Clear Memory operation is performed after turning the scale OFF and back ON with YES selected for the setup prompt. After clearing memory, the setup prompt will automatically return to NO, the default setting.

NOTE: The Clear Memory operation does not clear the Calibration or Setup information from the scale. The Calibration and Setup data are stored in non-volatile memory (NOVRAM) and can only be changed using their respective procedures.
To enable the Clear Memory operation, press the YES/1 key, then press the ENTER key to save the setting and proceed to the next prompt.
CALIBRATION and SETUP, Cont.
OPERATIONAL SETUP, Cont.
PRINT SETUP
The display will show PrSET, the prompt to enable printing a record of the scale's current Operational Setup and display the current (default) setting NO. This operation, when enabled and with a printer connected to the printer port will print a summary of the Operational Setup.
To print the summary, press the YES/1 key, then press he ENTER key. The summary will begin to print immediately after pressing the ENTER key. Upon completion of printing, the setup prompt will automatically return to NO, the default setting and then proceed to the next prompt.

Please note, that in order to print the Operational Setup, a serial dot matrix printer and 8½" x 11" paper must be used NOT the thermal label printer used for printing labels. The serial dot matrix printer must have a RS232 serial interface configured for 9600 baud, 8 data bits, No parity and 1 stop bit (9600,8,N,1).
SETUP DONE
If Setup was performed using the Calibration Method (sealing screw REMOVED), the display will change to SETuP donE when completed. Place the power switch in the OFF position and replace the calibration sealing screw on the right side panel of the scale. Return the power switch to the ON position. The scale will power up to the Weight Display mode and is now ready for use.
When using the Operation Method (sealing screw INSTALLED), at the completion of Setup, the scale will return to Weight Display mode and is ready for use.
CALIBRATION PROCEDURE - REMOTE SCALE

If sealing wires require breaking for purposes of calibration, proper procedures under National Institute of Standards and Technology Handbook 44 must be adhered to.
- With the scale power off, remove the calibration sealing screw on the right side panel, see Figure No.7.
- With the screw removed, place the power switch in the ON position. The scale will perform a brief lamp test. This test consists of illuminating all display segments and annunciator LED's for approximately three (3) seconds to allow the operator to make a visual verification that the display is operational. After completion of the lamp test, the scale will display the model number and software revision level, then the weight display will change to SCALE.
- Select the REMOTE scale by pressing the REMOTE SCALE key.

NOTE: The REMOTE scale cannot be selected until it has first been enabled in Setup (refer to Operational Setup section).
- The weight display will change to cRP = (capacity) .
- Key-in the scale capacity (max 6 digits) and press the ENTER key.
- The display will change to m = (interval or division) .
- Key-in the interval (division value) (max 4 digits) then press the ENTER key. The following values are allowable for the interval: 1, 2, 5, .1, .2, .5, .01, .02, .001, .002, .005, .0001, .0002 and .0005.
CALIBRATION and SETUP, Cont.
CALIBRATION PROCEDURE - REMOTE SCALE, Cont.

NOTE: When selecting the interval, the total number of divisions can not exceed 10,000 divisions. To calculate the total number of divisions, divide the capacity of the scale by the interval. For example:
10 lb (scale capacity) ÷ .001 (interval) = 10,000 (divisions).
- The weight display will change to units (units), the prompt to select the Units of Measurement. Press the lb/kg key to select the units of measurement for calibration. Note that the "lb" or "kg" annunciator will be illuminated to indicate which unit of measurement has been selected and the count display will show the corresponding load.
- The weight display will change to LORD. Place a known calibrated test weight on the Remote scale platform, key-in the weight (max 6 digits), wait about 5 seconds for the scale to stabilize, then press the ENTER key to start calibration.
- The display will start to fill with dashes from the left of the weight display and proceed to the right of the count display. When finished, the unit will display UnLORD on the count display
- Remove the weight from the scale, wait about 5 seconds for the scale to stabilize, then press the ENTER key to finish calibration.
- The display will start to fill with dashes from the left of the weight display and proceed to the right of the count display. When finished, the display will change to cBLb donE.
- Turn the scale off, then replace the calibration sealing screw on the right side panel of the scale.
- The scale is now ready for use OR the Operational Setup procedure (if required).
CALIBRATION SEAL INSTALLATION
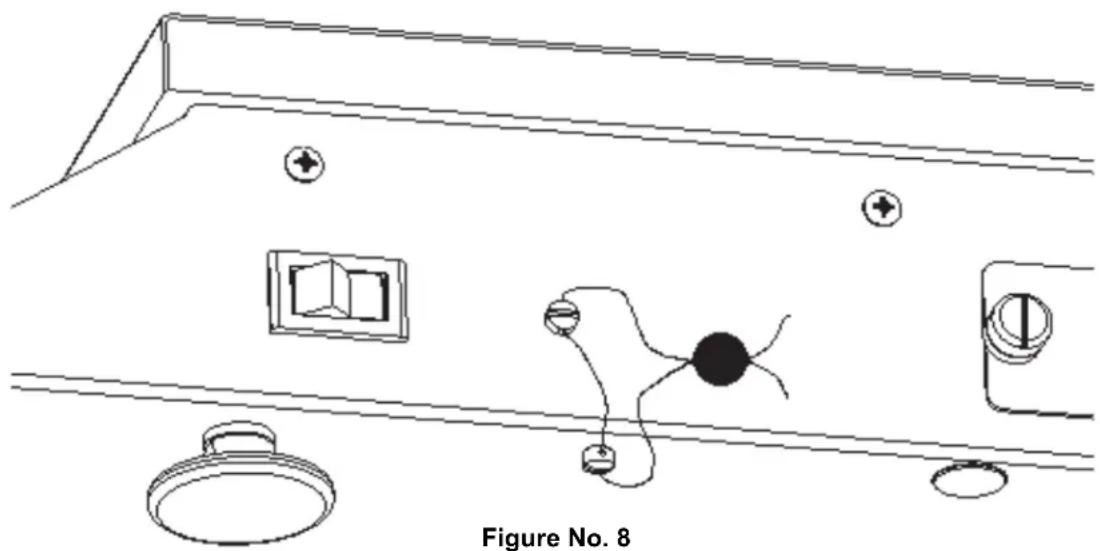
If your Digital Counting Scale is used in a commercial application it must be tested and sealed by your local weights and measurement official. The scale is designed to accept a lead and wire security seal to prevent unauthorized access to the calibration adjustments. Refer to the Figure No. 8 for details on the installation of the seal.
natural_image
Line drawing of a kitchen sink with fixtures including a door, toilet, and washing machine (no text or symbols)SAMPLING AND COUNT ACCURACY
This section describes certain conditions that determine the accuracy of a parts counting operation and procedures you can follow to assure optimum performance of your Digital Counting Scale. Accurate counts depend upon the following conditions:
• Functional accuracy of the scale.
• Individual part weight variance
• Determination of parts sampling quantities.
• Variance of container weights in tare operations.
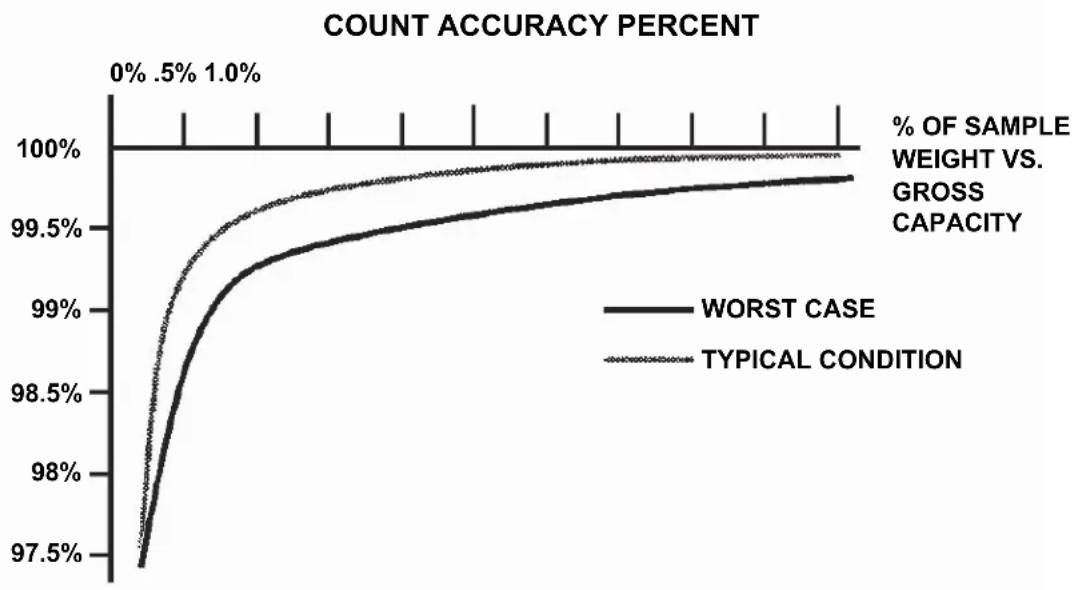
ACCURACY OF THE SCALE (Refer to Figure No. 9)
TYPICAL CONDITION ACCURACY - on a stable surface, applied load less than 70% of scale capacity, with no air currents or vibrations present, using parts with weight variance less than 1%; the total weight of all parts in the sample must be:
0.2% (1/500) of scale capacity for 99.5% accuracy 0.1% (1/1000) of scale capacity for 99% accuracy.
WORST CASE ACCURACY - on an unstable surface, applied load near 100% of scale capacity, with air currents or vibrations present, using parts with weight variance less than 1%; the total weight of all parts in the sample must be:
0.5% (1/200) of scale capacity for 99.5% accuracy
Counting accuracy will be greater than 99.5% when the total weight of all parts in the sample exceeds 0.5% of scale capacity.
line
| % OF sample weight vs. gross capacity | WORST CASE | TYPICAL CONDITION | | ------------------------------------- | ---------- | ---------------- | | 0% | 97.5% | 97.5% | | 0.5% | 98.5% | 98.5% | | 1.0% | 99.5% | 99.5% |Figure No. 9
SAMPLING AND COUNT ACCURACY, Cont.
INDIVIDUAL PART WEIGHT VARIANCE
For a given sample quantity, as the total weight of all parts in the sample increases, the average per-piece weight of the sample used becomes representative of the average per-piece weight of the group of parts to be counted. The errors caused by part weight variance are reduced with larger sample quantities. With knowledge of the typical percentage of variation in per-part weight of items to be counted, refer to the graph in Figure No. 10 to determine the sample quantity needed to obtain a desired percentage of counting accuracy.
NOTES:
- As your need for counting accuracy increases, the size of your samples must also increase.
• As individual uniformity of your parts decreases, sample size must increase. - Manual counting errors may occur if samples larger than necessary are used.
- Because of variation of individual container weights, be certain to "tare off" each container by placing the empty container on the scale and pressing the ZERO key before proceeding with the count operation.
% OF SAMPLE ACCURACY

line
| QUANTITY OF PARTS SELECTED FOR SAMPLING | % VARIATION IN SAMPLE PART WEIGHT | | ---------------------------------------- | --------------------------------- | | 5 | 0.5% | | 10 | 1% | | 25 | 2% | | 50 | 3% | | 100 | 4% | | 250 | 5% |Figure No. 10
- Select the typical % of variation in the sample part-weight on the left-hand side of the graph.
- Follow the selected curve to the right and upward to the \% of sample accuracy.
- Read down vertically from the \% of accuracy to the corresponding minimum quantity of parts required for sampling to obtain the desired minimum \% of count accuracy.
ERROR AND STATUS DISPLAYS
The Digital Counting Scale is equipped with a diagnostic software program that tests various portions of the instrument's circuitry and verifies proper operation. Should a problem be detected, an error or status message will be displayed alerting the operator to that condition. The following lists these errors and status displays and their meaning:
Display Meaning
| bELD | Indicates the scale is attempting to display a negative weight greater than 4 digits |
| ocRPocRP | Indicates the scale weight capacity or counting capacity (999,999) has been exceeded. |
| Full | Indicates there is no more space available for accumulator storage. |
| CALb | Indicates improper stored calibration data, calibration is necessary. |
| RRa | The analog to digital circuit has failed. Consult scale serviceman. |
BEFORE YOU CALL FOR SERVICE
The Digital Counting Scale has been designed to provide you with years of trouble-free operation. In spite of this, troubles sometimes happen. Before calling for service assistance you should make some initial checks to verify that a problem does exist. The following describes several types of symptoms along with suggested remedies.
| Problem | Possible Solutions |
| Display does not turn on | AC Operation:Is the AC power cord fully inserted into the wall receptacle? Check wall receptacle for proper AC power.Try another electrical appliance in the same receptacle,does it work? Check the circuit breaker. Has there been power failure.Battery operation:Check if battery is installed and installed correctly. Is battery discharged - replace or recharge. |
| Incorrect weight displayed | Has the instrument been calibrated? Insure that the scale platform isn't touching an adjacent object. Have proper operation procedures been followed? |
| Scale will not display weight | Refer to Error and Status Display section and make certain that the 88 18 message is not displayed. If so, perform the calibration sequence. |
CARE AND CLEANING
- DO NOT submerge scale in water, pour or spray water directly on instrument.
- DO NOT use acetone, thinner or other volatile solvents for cleaning.
- DO NOT expose equipment to temperature extremes.
- DO NOT place equipment in front of heating/cooling vents.
- DO clean the indicator with a damp soft cloth and mild non-abrasive detergent.
- DO remove power before cleaning with a damp cloth.
- DO provide clean AC power and adequate protection against lightning damage.
- DO keep the surroundings clear to provide clean and adequate air circulation.
The Digital Counting Scale can operate from a readily available Sealed Lead-Acid Camcorder type battery (not included). If you wish to operate the scale from a battery, you must first obtain and install a CAM-350 Type 12 volt 2000 mAh (2.0 Ah) battery before operations can begin. The battery is contained inside the instrument and is easy to install. Access is via a removable panel on the right side of the scale (See Figure No. 11). The scale will operate with a "fully charged" battery for approximately ten (10) hours and is easily recharged with the scale's built-in charger.

NOTE: The battery can be purchased from the Cardinal Scale Parts Department (p/n 6800-0018) or ordered from the following companies online:
• www.planetbattery.com www.ebatts.com
• www.discountcell.com www.mobilizenow.com
Installation
- Unplug the AC power cord from the back of the scale.
- Loosen the retaining thumbscrew securing the Battery Access Cover to the side of the scale and position the cover towards the rear of the scale, exposing the battery access opening.
- Make certain the (+) plus polarity markings of the battery pack are positioned up (toward the platter).
- While holding the cover open, slide the battery into the opening until you feel resistance and the battery in almost flush with the side panel of the scale (See Figure No. 11).
- Close the Battery Access Cover and finger-tighten the thumbscrew, securing the battery in place.

Figure No. 11
Battery Pack Removal
- Unplug the AC power cord from the back of the scale.
- Loosen the retaining thumbscrew securing the Battery Access Cover to the side of the scale and position the cover towards the rear of the scale, exposing the battery access opening.
- An internal spring will push the battery partially out of the opening. Grasp the end of the battery and slide it out of the opening.
- Close the Battery Access Cover and finger-tighten the thumbscrew.
OPTIONAL BATTERY PACK OPERATION, Cont.
Discharging the Battery Pack
The battery pack is discharging when the scale is operated without the AC power cord plugged into a wall outlet. The Battery Low annunciator on the scale keypad serves to indicate the state of the battery pack.
When the scale is operating by battery power, and the battery pack has sufficient charge to power the scale, the Battery Low annunciator is off. If the battery becomes discharged while the scale is in use, the Battery Low annunciator will flash slowly to indicate the battery pack needs to be charged. When this occurs, the battery pack will have sufficient charge to power the scale for a short time, approximately (5) five minutes. If continued use further drains the battery pack, the Battery Low annunciator will stop flashing and stay on until the battery pack becomes severely discharged. When the battery pack is unable to power the scale, the scale will turn off automatically to prevent damaging the battery.
Due to the nature of batteries, shutting the scale off will cause the battery pack to recover slightly. If the scale is operated after turning itself off, it may run for a few minutes before the Battery Low annunciator begins to flash again. If the battery pack is too discharged to power the scale, it will not power up when the power switch is place in the ON position, but will illuminate the Battery Low annunciator for one minute to show the operator that a charge is needed before operations can continue.
If the battery pack has become severely discharged, the scale may not respond at all when turned on. This is a safety feature to prevent the scale from being powered up when the battery voltage is excessively low. Plug the scale into the AC wall outlet to charge the battery pack.
Charging the Battery Pack
The battery pack can be recharged with the built-in charger in the scale. The charger in the scale is a dual-level float charger. The first level does most of the charging rapidly, while the second level adds the remaining charge gradually. This type of charge profile greatly prolongs the life of the battery pack. Due to the sophisticated nature of the charger the battery pack can be left connected to the charge indefinitely, without risk of damage.
When the battery pack installed in a scale needs to be charged, simply plug the AC power cord into a wall outlet and charging will begin. Note that operating the scale during charging only minimally affects the charge time of the battery pack. The scale can operate at a 100% duty cycle and will only prolong the charge time by less than 20%. Note too that charge time is dependent on the depth of the discharge and will vary from one application to the next, but will typically not exceed 10 hours even with the scale turned on.
While the battery pack is charging, the Battery Low annunciator will flash. It will continue to flash until the battery is fully charged. Upon reaching full charge, the annunciator will turn off. This gives the operator a visible indication of the charging status of the battery. Note that the Battery Low annunciator is only on when the scale is on. If the battery pack is charged with the scale off, the scale must be turned on to determine status of the battery.
OPTIONAL BATTERY PACK OPERATION, Cont.
Optimum Battery Pack Performance
The life of the battery pack depends greatly on the duty cycle of the scale, depth of discharge and operating temperature. The battery pack will normally provide eight (8) hours of continuous operation over an operating range of 14^ to 104^ F ( -10^ to +40^ C). Several steps can be taken to optimize the performance and life of the battery pack.
- Enable the Auto Shut-Off feature of the scale by entering a 1 (YES) when the scale prompts for Auto Off during Setup. (Refer to the Setup and Calibration section for an explanation of the setup feature). This selection will cause the scale to shut itself off after the period of inactivity selected in setup, thus preserving the battery pack.
- If possible, plug the AC power cord into a wall outlet after each work shift to allow the battery pack to recharge. This will minimize the depth of discharge and greatly increase the number of cycles the battery pack can undergo.
- If conditions permit, avoid charging and discharging the battery pack in extreme cold. Due to the chemistry of batteries, low temperatures decrease the capacity of the battery pack significantly causing a greater depth of discharge at colder temperatures than at room temperature. The battery pack will function without problems at temperatures as low as 14^ F ( -10^ C) but will not last as many cycles as it would at room temperature.
- Avoid storing the battery pack after discharging. If the battery pack is to be left for several days or more, make certain that it is charged before storage. The optimum environment for batteries is to charge while stored. The type of charger used in the scale will not damage batteries in any way even if the battery pack is left charging indefinitely.
THERMAL LABEL FORMATS
Ticket Format (1)
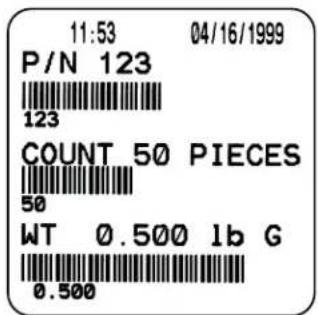
Ticket Format (2)

Figure No. 12
PARTS IDENTIFICATION
Item Part Number Description
1 See Table LOAD CELL W/CABLE ASSEMBLY
2 6013-0039 #6-32 HEX NUT
3 6013-0045 ¼ - 20 HEX NUT
4 6021-0654 #6-32 X .25 PAN HEAD MACHINE SCREW
5 6021-0665 #6-32 X .375 PAN HEAD MACHINE SCREW
6 6021-1020 #10-32 X .500 PAN HEAD MACHINE SCREW
7 6021-1197 #6-32 X .500 STAINLESS STEEL FILLISTER SCREW
8 6021-1401 ¼ - 20 X .500 ZINC PLATED SOCKET HEAD CAP SCREW
9 6021-2071 #6-32 X .250 STAINLESS STEEL FILLISTER SCREW
10 6021-6007 #6-32 X .250 PAN HEAD MACHINE SCREW
11 6024-0039 ¼ HELICAL LOCK WASHER
13 6540-1130 LEVELING FOOT
14 6610-2000 JACK SOCKET
15 6610-4019 1/4 ASB 3AG-1/4 ASB FUSE (2240)
15 6610-4012 1/8 ASB 3AG-1/8 ASB FUSE (2241)
16 6610-4046 FUSE HOLDER
19 6680-0004 #6 ZINC PLATED INTERNAL TOOTH LOCK WASHER
20 6680-0163 #6 X .375 SPACER
22 6680-1088 SELF CLINCHING LOW PROFILE PANEL FASTENER
23 6910-3026 BLACK SWITCH SNAP-IN FRAME
25 8526-B213-08 BATTERY DOOR
26 8526-B214-08 LOAD CELL SPACER
27 8526-B222-0A BATTERY POWER BOARD
28 8526-B232-08 BATTERY COVER SPRING (not shown)
29 8526-B233-08 INTERNAL SERIAL CABLE ASSEMBLY
30 8526-C206-08 WEIGHBRIDGE
31 8526-C207-08 COMMODITY TRAY
32 8526-C210-08 TOP BATTERY GUIDE
33 8526-C211-08 BASE PLATE
34 8526-C212-08 BOTTOM BATTERY GUIDE
35 8526-D201-0A CONTROLLER BOARD
36 8526-D203-08 DUST COVER
37 8526-D204-0A DISPLAY AND KEYPAD INTERFACE
38 8526-D205-08 BASE ENCLOSURE
39 8526-D209-0A FRONT PANEL
40 8526-D216-08 KEYPAD OVERLAY
41 8526-D217-0A ANALOG BOARD
42 8544-B032-0A LINE FILTER FILTER ASSEMBLY
6800-0018
BATTERY: CAM-350 TYPE 12 VOLT 2000 mAh (not shown)
LOAD CELL TABLE
Scale Capacity Load Cell Assembly
5 lb (2 kg) 2950-C114-1A
10 lb (5 kg) 2950-C114-1A
20 lb (10 kg) 2950-C116-2A
50 lb (20 kg) 2950-C119-1A
100 lb (50 kg) 2950-C120-4A
It should be noted that when replacing the load cell, the four (4) bolts holding the load cell to the scale base and the weighbridge to the load cell must be torqued to 80 in-lb +/- 5 in-lb.

COUNTING SCALE UNPACKING and PACKING INSTRUCTIONS

RETAIN THE CARTON, PACKING MATERIAL AND SHIPPING SCREW!
In the event this scale needs to be returned to the factory for service or shipped to another location, the original carton, packing material and shipping screw must be used. If damage to scale is determined to have been caused by improper packing, the warranty will be voided!
UNPACKING INSTRUCTIONS
IMPORTANT! Please read through instructions carefully before starting to unpack scale.
UNPACKING THE SCALE
- Open the carton containing the counting scale.
- Remove the commodity tray and AC power cord and set them aside.
- Turn the carton on its side (with the open side facing you) and the long side of the scale (angled front, with keypad) down.
- Place one hand on the carton so that you are holding the top flap down and grasp the back of the scale with your other hand.
- While holding the carton down, pull the scale and packing inserts out of the carton. Set the carton aside.
- Turn the scale and packing inserts over on either side so that the scale is resting on the packing insert.
- Grasp and hold the back of the scale with one hand.
- With the other hand, grasp the packing insert and with a lifting motion, remove it from the scale. Set the packing insert aside.
- Continue holding the scale with one hand and with your other hand, remove the plastic wrapped weighbridge from the packing insert. Set it aside.
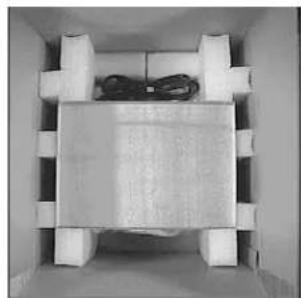
natural_image
Interior view of a cardboard box with white foam blocks and a cable, no visible text or symbols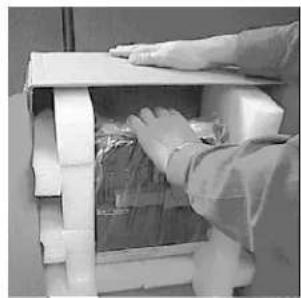
natural_image
Person in protective suit handling a transparent cylindrical object (no visible text or symbols)
natural_image
Interior view of a room with a dark rectangular object wrapped in plastic, placed on white shelves (no visible text or symbols)
natural_image
Person holding a transparent plastic bag over a cylindrical object, with no visible text or symbols.
natural_image
Person handling a wrapped package or item, no visible text or symbols
natural_image
Close-up of hands holding a rectangular object with textured surface, possibly a material or paper sample (no visible text or symbols)Cardinal DETECTO
COUNTING SCALE UNPACKING and PACKING INSTRUCTIONS
-
While still holding the scale with one hand, hold the packing insert down with your other hand. Pull and lift the scale out of the packing insert and set it aside.
-
Position the scale so that the rear of the scale is facing you, then carefully cut the tape at the rear of the scale where the plastic bag is rolled up.
-
Unroll the plastic bag and remove the scale, Quick Reference card and Operation manual.
-
Next, carefully cut the tape on the plastic bag containing the weighbridge, open the plastic bag and remove the weighbridge.
-
Return the packing inserts and plastic bags to the shipping carton.

natural_image
Close-up of hands handling a transparent plastic bag with small items, placed on a wooden surface (no visible text or symbols)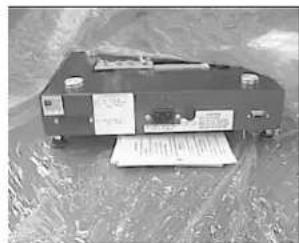

natural_image
Close-up of hands handling a transparent plastic bag over a wooden surface (no text or symbols visible)
natural_image
Close-up of a plastic bag wrapped in crumpled paper, with no visible text or symbolsINSTALLING THE WEIGHBRIDGE
-
Position scale so the keyboard is in front of you.
-
Remove the 2 wing nuts from weighbridge mounting plate attached to the load cell and set them aside.
-
Align the holes in the weighbridge with the 2 10-24 threaded studs in the mounting plate, then place the weighbridge over the studs.
-
Make sure the weighbridge is square with the scale base and secure with the 2 wing nuts.
-
To insure proper operation, the wing nuts must be completely snug against the weighbridge, however, DO NOT use tools to tighten the wing nuts. They must be hand tightened only.
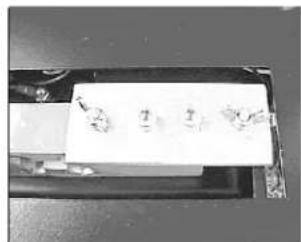
natural_image
Close-up of a mechanical component with four small circular features on its surface (no visible text or symbols)
natural_image
Person holding a small tool with multiple pliers placed on a dark tray, next to a control panel (no visible text or symbols)
natural_image
Hand holding a small object on a flat surface, no visible text or symbols
natural_image
Hand inserting a small component into a device (no visible text or symbols)
IMPORTANT! In the event this scale needs to be returned to the factory for service or shipped to another location, the weighbridge must be removed from the scale.
Cardinal DETECTO
COUNTING SCALE UNPACKING and PACKING INSTRUCTIONS
REMOVE THE SHIPPING SCREW
The load cell is protected from shipping damage by a single shipping thumb screw located on the bottom of the scale.
- Turn the scale over so that it is resting on the weighbridge.
- Locate the shipping thumb screw on bottom of the scale.
- Remove the shipping thumb screw by turning it counter-clockwise.
- Return the scale to the upright position and remove the warning label form the keypad.
- Retain the thumb screw to be re-installed before transporting or shipping the scale.

PACKING INSTRUCTIONS
INSTALL the SHIPPING SCREW
- Remove the commodity tray and set aside.
- Turn the scale over so that it is resting on the weighbridge.
- Locate the threaded hole for the shipping screw on the bottom of the scale.
- Install the shipping thumb screw on the bottom of the scale, turning it clockwise and only hand tighten.
- While the scale is still resting on the weighbridge, screw the adjustable feet down until they set against the bottom of the scale.
- Return the scale to the upright position.

Cardinal DETECTO
COUNTING SCALE UNPACKING and PACKING INSTRUCTIONS
REMOVE and PREPARE the WEIGHBRIDGE
- Locate the 2 wing nuts securing the weighbridge.
- Remove the wing nuts (turn counter-clockwise), then remove the weighbridge and set it aside.
- Place the 2 wing nuts on the threaded studs in the mounting plate and hand tightened only.
- Remove the flat plastic bag from the shipping carton and insert the weighbridge into it.
- Fold the bag around the weighbridge and tape the bag closed.
- Set the weighbridge aside.

natural_image
Close-up of a metallic electronic device with a rectangular slot and mounting holes (no visible text or symbols)
natural_image
Hand holding a small object on a dark surface, no visible text or symbols
natural_image
Folded plastic bag wrapped around a small object, no visible text or symbols
natural_image
Two plastic-wrapped items on a wooden surface, one with a dark object and the other partially visible (no text or symbols)PREPARE the SCALE
- Position the scale so that the rear of the scale is facing you.
- Remove the large plastic bag from the shipping carton.
- Insert the angled front (keypad) end of the scale into the plastic bag.
- Place the Quick Reference card and Operation Manual into the plastic bag (under the scale).
- Roll up the plastic bag at the rear of the scale and tape closed.

natural_image
Top-down view of a rectangular electronic device with ports and connectors (no visible text or symbols)

natural_image
Folded plastic bag attached to a wooden surface (no text or symbols visible)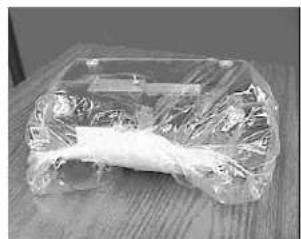
natural_image
Folded plastic bag containing a white cylindrical object on a wooden surface (no text or symbols visible)Cardinal DETECTO
COUNTING SCALE UNPACKING and PACKING INSTRUCTIONS
PACKING the SCALE and WEIGHBRIDGE
- Place one of the packing inserts on its side with the angled opening away from you.
- Insert the scale (angled front, keypad end away from you) into the opening in the packing insert.
- Next, insert the short side of the weighbridge into the slot next to the scale. The top or flat side of the weighbridge should be towards the scale.
- Align the other packing insert over the scale and weighbridge, then push the insert down over the scale and weighbridge until they meet the insert side supports.
- Carefully turn the packed scale over so that it is in the normal position (the keypad will be visible and the weighbridge is under the scale).
- Grasp the packed scale from the bottom of the front and back, and place it in the shipping carton.
- Place the commodity tray in the indents in the top of the packing insert, then place the AC power cord in the opening behind the scale or in the opening over the keypad.
- Close the flaps on the shipping carton and secure with packing tape.

natural_image
White plastic bottle-shaped object placed on a wooden surface (no text or symbols visible)
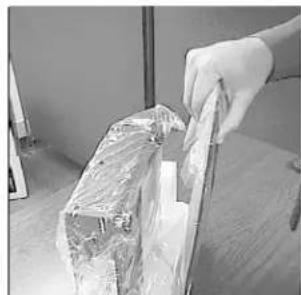
natural_image
Person wearing gloves handling a wrapped cardboard box on a wooden surface (no visible text or symbols)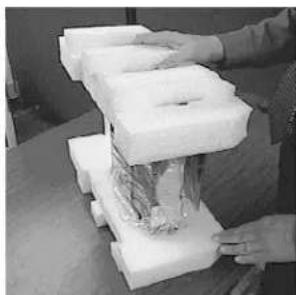
natural_image
Person handling a white 3D-printed object with layered blocks and a textured base (no visible text or symbols)
natural_image
Person handling a transparent plastic container with wrapped items, enclosed in a white frame (no visible text or symbols)
natural_image
Top-down view of a cardboard box with white cutouts and a small cable on top (no text or symbols visible)NOTES


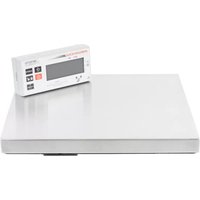
- Cardinal
- Digital Counting Scale
- INTRODUCTION
- FCC COMPLIANCE STATEMENT
- TABLE OF CONTENTS
- PRECAUTIONS
- SPECIFICATIONS
- Standard Features:
- Optional Features:
- INSTALLATION
- Unpacking
- Placement
- Level Adjustment
- Power Connection
- INSTALLATION, Cont.
- AC Operation (Model 2240)
- AC Operation (Model 2241)
- INTERCONNECTIONS
- Remote Scale Connection
- MATING CONNECTOR INFORMATION
- INTERCONNECTIONS, Cont.
- Printer Port Connection
- Printer Port Rs-232 Connector Pin Definitions
- KEY FUNCTIONS
- ZERO
- SAMPLE
- COUNT
- ACCUM
- + (plus)
- ID
- KEY FUNCTIONS, Cont.
- RESET FUNCTION
- ANNUNCIATORS
- GROSS
- TARE
- NET
- kg
- lb
- ANNUNCIATORS, Cont.
- MOTION
- INSUFFICIENT SAMPLE
- BATTERY LOW
- REMOTE SCALE
- POWER ON
- OPERATION WITHOUT ID
- Standard Sampling and Counting
- Automatic Average Piece Weight Re-Computation
- Counting With an Insufficient Sample
- OPERATION WITHOUT ID, Cont.
- Adjusting the Sample Quantity
- Counting Out From a Container
- Accumulator
- Displaying the Accumulator.
- Clearing the Accumulator.
- Accumulator, Cont.
- Manually Adding to the Accumulator.
- Weight Display
- Displaying Weight.
- Zero the Weight Display.
- Push Button Tare
- Tare Weight Entry
- Metric Conversion
- OPERATION USING ID(S), Cont.
- Adding ID Numbers
- Deleting ID Numbers
- Deleting ID Numbers, Cont.
- Selecting The ID Number
- Verifying Active (Current) ID Number
- Turning Off The Active (Current) ID Number
- Operation With Stored Tare Weight Values
- Adjusting the Sample Quantity, Cont.
- Accumulators
- Displaying the Accumulator for the Active ID.
- Clearing the Accumulator for the Active ID.
- Displaying the Accumulator for a Non-Active ID.
- Clearing the Accumulator for a Non-Active ID.
- Adding to the Accumulator for the Active ID.
- CALIBRATION and SETUP
- CALIBRATION and SETUP, Cont.
- OPERATIONAL SETUP
- ZERO TRACKING
- FOUR PERCENT ZERO RANGE LIMIT
- UNITS OF MEASUREMENT
- OPERATIONAL SETUP, Cont.
- SCALE 2 (Optional remote scale)
- AUTO LOCAL-TO-REMOTE SWITCH
- AUTO RECALL OF LAST AVERAGE PIECE WEIGHT
- AUTO ACCUMULATION
- BEEPER
- STORE ID
- HOUR CLOCK
- EUROPEAN DATE
- MANUAL COUNT OVERRIDE
- PRINTER OUTPUT
- TICKET FORMAT
- PRINT BARCODE
- COUNT ACCURACY
- AUTO SHUTOFF
- DISPLAY INTENSITY
- CLEAR MEMORY
- PRINT SETUP
- SETUP DONE
- CALIBRATION PROCEDURE - REMOTE SCALE
- CALIBRATION PROCEDURE - REMOTE SCALE, Cont.
- CALIBRATION SEAL INSTALLATION
- SAMPLING AND COUNT ACCURACY
- ACCURACY OF THE SCALE (Refer to Figure No. 9)
- SAMPLING AND COUNT ACCURACY, Cont.
- INDIVIDUAL PART WEIGHT VARIANCE
- NOTES:
- ERROR AND STATUS DISPLAYS
- BEFORE YOU CALL FOR SERVICE
- CARE AND CLEANING
- Battery Pack Removal
- OPTIONAL BATTERY PACK OPERATION, Cont.
- Discharging the Battery Pack
- Charging the Battery Pack
- Optimum Battery Pack Performance
- THERMAL LABEL FORMATS
- PARTS IDENTIFICATION
- Item Part Number Description
- LOAD CELL TABLE
- Scale Capacity Load Cell Assembly
- COUNTING SCALE UNPACKING and PACKING INSTRUCTIONS
- RETAIN THE CARTON, PACKING MATERIAL AND SHIPPING SCREW!
- UNPACKING INSTRUCTIONS
- UNPACKING THE SCALE
- Cardinal DETECTO
- INSTALLING THE WEIGHBRIDGE
- REMOVE THE SHIPPING SCREW
- PACKING INSTRUCTIONS
- INSTALL the SHIPPING SCREW
- REMOVE and PREPARE the WEIGHBRIDGE
- PREPARE the SCALE
- PACKING the SCALE and WEIGHBRIDGE
Brand : Cardinal Detecto
Model : 2240
Category : Kitchen scale