
E1SW2418M - Screen Element - Free user manual and instructions
Find the device manual for free E1SW2418M Element in PDF.


| Product Type | LED Monitor |
| Model | E1SW2418M |
| Screen Size | 23.8 inches diagonal |
| Resolution | 1920 x 1080 pixels (Full HD) |
| Color Depth | 16.7 million colors |
| Brightness | 200 cd/m² |
| Contrast Ratio | Dynamic Contrast Ratio (DCR) supported |
| Horizontal Frequency | 30 - 80 kHz |
| Vertical Frequency | 55 - 75 Hz |
| Input Connectors | VGA, HDMI |
| Power Supply | 12V DC, 2.5A (External adapter) |
| Power Consumption | Approximately 30W (typical) |
| VESA Mount | Not specified, possibly 100x100 mm |
| Picture Modes | Standard, Movie, FPS, RTS, EyeSaver |
| Color Temperature Settings | Cool, Warm, User (adjustable RGB) |
| Aspect Ratio Options | Auto, 16:9, 4:3 |
| On-Screen Display (OSD) | Yes, with joystick-style navigation |
| Auto Adjustment | Yes, for optimal picture settings |
| Operating Temperature | 0°C to 40°C |
| Storage Temperature | -20°C to 60°C |
| Humidity | Less than 80% (operating) |
| Weight | Approximately 3.5 kg (estimated) |
| Dimensions (with stand) | Approximately 541 x 407 x 180 mm (estimated) |
| Safety | Class II double insulated, FCC compliant |
| Cleaning | Use a soft dry cloth; no solvents |
Frequently Asked Questions - E1SW2418M Element
User questions about E1SW2418M Element
0 question about this device. Answer the ones you know or ask your own.
Ask a new question about this device
Download the instructions for your Screen in PDF format for free! Find your manual E1SW2418M - Element and take your electronic device back in hand. On this page are published all the documents necessary for the use of your device. E1SW2418M by Element.
USER MANUAL E1SW2418M Element
natural_image
Black-and-white photo of a modern computer monitor displaying a scenic lake at dusk with mountains in the background (no text or symbols visible on screen)INSTRUCTION MANUAL
Please read all the instructions carefully before using this Monitor, and keep the manual for future reference.
Important Safety Instructions 2
Additional Safety Information 3
Preparations 4
What is Included 4
Power indicator light 5
Screen image setups 5
Basic setup 6
Customizing Monitor Settings 7
Navigating the On-screen Display 7
BRIGHTNESS 8
CONTRAST 8
DCR (Dynamic Contrast Ratio) 8
MODE 9
COLOR TEMP. 10
ASPECT 11
INPUT 12
ADJUST 13
OTHER 14
EXIT 15
Compatible Resolutions 16
Features 16
FCC Notes 17
Specifications 17

IMPORTANT SAFETY INSTRUCTIONS
- Read these instructions – All the safety and operating instructions should be read before this product is operated.
- Keep these instructions – The safety and operating instructions should be retained for future reference.
- Heed all warnings – All warnings on the appliance and in the operating instructions should be adhered to.
- Follow all instructions – All operating and use instructions should be followed.
- Do not use this apparatus near water – The appliance should not be used near water or moisture – for example, in a wet basement or near a swimming pool, and the like.
• Clean only with dry cloth. - Do not block any ventilation openings. Install in accordance with the manufacturer's instructions.
- Do not install near any heat sources such as radiators, heat registers, stoves, or other apparatus (including amplifiers) that produce heat.
- Do not defeat the safety purpose of the polarized or grounding-type plug. A polarized plug has two blades with one wider than the other. A grounding-type plug has two blades and a third grounding prong. The wide blade or the third prong are provided for your safety. If the provided plug does not fit into your outlet, consult an electrician for replacement of the obsolete outlet.
- Protect the power cord from being walked on or pinched particularly at plugs, convenience receptacles, and the point where they exit from the apparatus.
- Only use attachments/accessories specified by the manufacturer.
- Use only with the cart, stand, tripod, bracket, or table specified by the manufacturer, or sold with the apparatus. When a cart is used, use caution when moving the cart/apparatus combination to avoid injury from tip-over.

- Unplug this apparatus during lightning storms or when unused for long periods of time.
- Refer all servicing to qualified service personnel. Servicing is required when the apparatus has been damaged in any way, such as the power-supply cord or plug is damaged, liquid has been spilled or objects have fallen into the apparatus, the apparatus has been exposed to rain or moisture, does not operate normally, or has been dropped. - Please keep the unit in a well-ventilated environment.
WARNING: To reduce the risk of fire or electric shock, do not expose this apparatus to rain or moisture. The apparatus should not be exposed to dripping or splashing. Objects filled with liquids, such as vases should not be placed on apparatus.
WARNING: The main plug is used as disconnect device, the disconnect device shall remain readily operable.
WARNING: To reduce the risk of electric shock, do not remove cover (or back) as there are no user-serviceable parts inside. Refer servicing to qualified personnel.
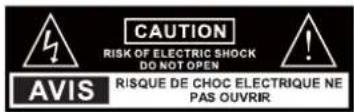
This lightning flash with arrowhead symbol within an equilateral triangle is intended to alert the user to the presence of non-insulated "dangerous voltage" within the product's enclosure that may be of sufficient magnitude to constitute a risk of electric shock.
The exclamation point within an equilateral triangle is intended to alert the user to the presence of important operating and maintenance instructions in the literature accompanying the appliance.
This equipment is a Class II or double insulated electrical appliance. It has been designed in such a way that it does not require a safety connection to electrical earth.

"HDMI, the HDMI logo and High-Definition
Multimedia Interface are trademarks or registered trademarks of HDMI Licensing LLC."
To ensure reliable and safe operation of this equipment, please read carefully all the instructions in this user guide, especially the safety information below.
Electrical Safety
- The Monitor set should only be connected to a main power supply with voltage that matches the label at the rear of the product.
- To prevent overload, do not share the same power supply socket with too many other electronic components.
- Do not place any connecting wires where they may be stepped on or tripped over.
- Do not place heavy items on them, which may damage the leads.
- Hold the main plug, not the wires, when removing from a socket.
- During a thunderstorm, or when not using the monitor for extended period of time, turn off the power switch on the back of the monitor.
- Do not allow water or moisture to enter the Monitor or power adapter. Do NOT use in wet, moist areas, such as bathrooms, steamy kitchens or near swimming pools.
- Pull the plug out immediately, and seek professional help if the main plug or cable is damaged, liquid is spilt onto the set, if accidentally exposed to water or moisture, if anything accidentally penetrates the ventilation slots or if the set does not work normally.
- Do not remove the safety covers. There are no user serviceable parts inside. Trying to service the unit yourself is dangerous and may invalidate the product's warranty. Qualified personnel must only service this apparatus.
Physical Safety
- Do not block ventilation slots in the back cover. You may place the Monitor in a cabinet, but ensure at least 5cm (2") clearance all around.
- Do not tap or shake the Monitor screen, or you may damage the internal circuits.
- To clean the Monitor use a soft dry cloth. Do not use solvents or petroleum based fluids.
- Do not install near any heat sources such as radiators, heat registers, stoves or other apparatus (including amplifiers) that produce heat.
- Protect the power cord from being walked on or pinched particularly at plugs.
- Unplug the apparatus during lightning storms or when unused for long periods.
- Refer all servicing to a qualified service personnel. Servicing is required when the apparatus has been damaged in any way, such as power-supply cord or plug is damaged, liquid has been spilled, or objects have fallen into the apparatus, has been exposed to rain or moisture, does not operate normally, or has been dropped.
What is Included?
User Manual
Quick Start Guide
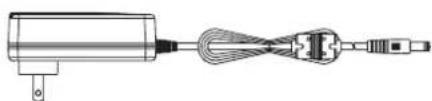
natural_image
Pure electrical circuit lines without any symbolsAdapter
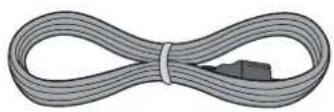
VGA Cable
Power indicator light
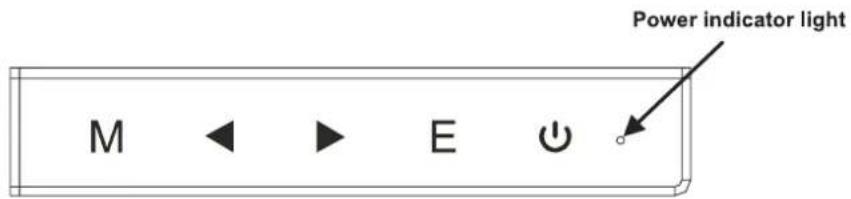
- Blue light indicates the power is on.
- Blue light indicates the signal is operating normally.
- Blue flash indicates there is no input signal.
Screen image setups
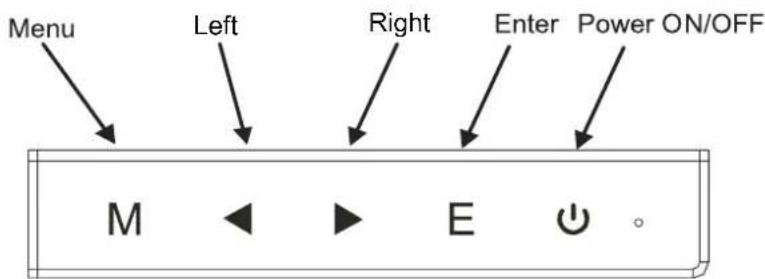
- The Control panel at the bottom right corner have five keys to adjust the monitor settings with the aid of the Onscreen Display
The control panel buttons:
- Menu : Pops up the menu/Backs to the previous menu (in case of main menu, exits from the whole menu).
- Left: When the menu is activated, used as the left function selection key, and decreases progressively the value of the progress bar;
- Right: When the menu is activated, used as the right function selection key, and increases progressively the value of the progress bar; when the menu is inactivated, used as the specified shortcut mode hot key (FPS/RTS mode).
- Enter: If the menu is activated, chooses the corresponding function.
• Power ON/OFF: Powers on/off the monitor.
Basic setup
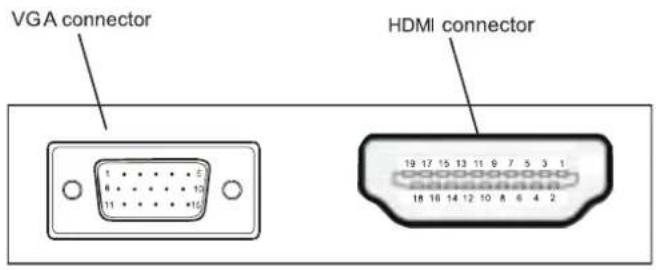
a) Connect the VGA cable (signal cord) from the PC graphic card to the monitor VGA connector.
b) The monitor has a wide power voltage range; it can be used on AC 100-240 50/60Hz power supply.
c) Connect the power cable to the Monitor power socket and to the power source in the room.
d) Turn on the power source supply.
e) To switch on the monitor, press the power control on/off key (first button from the bottom at the right panel.
Navigating the On-screen Display
- Press the MENU button to display the main menu/Backs to the previous menu (in case of main menu, exits from the whole menu).
- Press the ◀/▶ buttons to navigate and select the available menus.
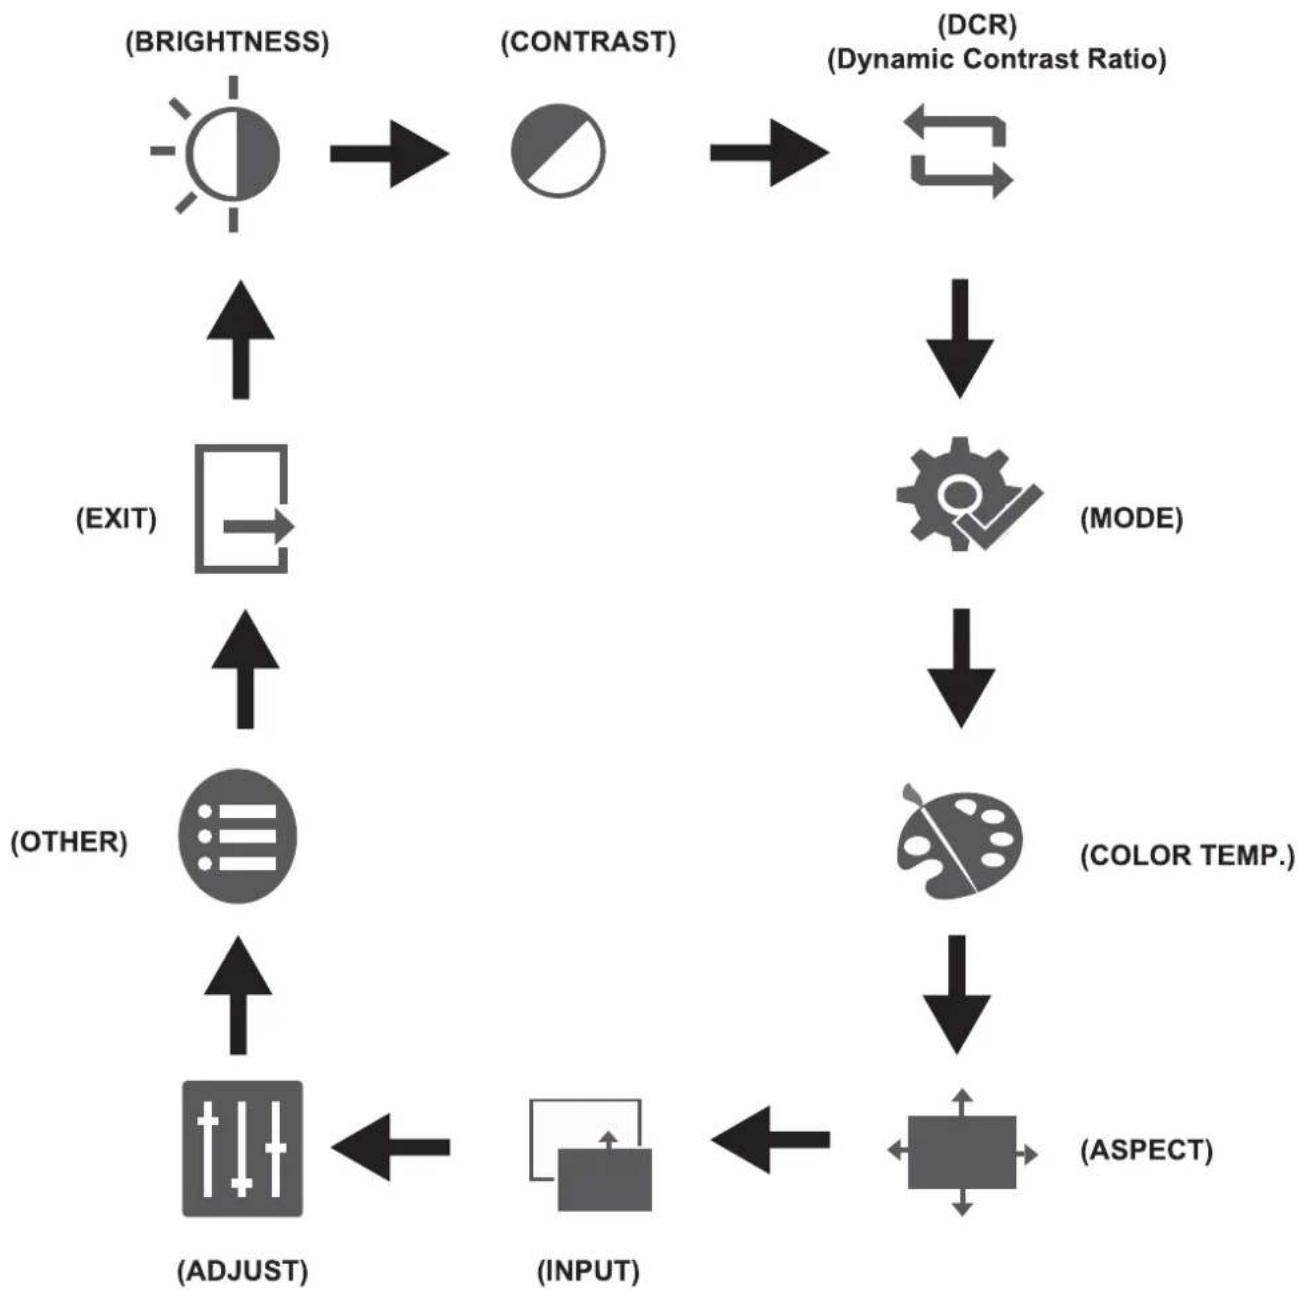
flowchart
graph TD
    A["(BRIGHTNESS)"] --> B["(CONTRAST)"]
    B --> C["(DCR) Dynamic Contrast Ratio"]
    C --> D["(MODE)"]
    D --> E["(COLOR TEMP.)"]
    E --> F["(ASPECT)"]
    F --> G["(INPUT)"]
    G --> H["(ADJUST)"]
    H --> I["(EXIT)"]
    I --> J["(OTHER)"]
    J --> K["(ADJUST)"]
BRIGHTNESS/CONTRAST/DCR (Dynamic Contrast Ratio)
- Press the MENU button to display the main menu then press the ◀/▶ buttons to select BRIGHTNESS menu and then press the E button to enter.
- press the ◀/▶ buttons to adjust each option's setting and then press the E button to save.

| Main Menu Item | Main Menu Icon | Submenu Item | Main Menu Icon | Submenu Options | Main Menu Icon | Description |
| Brightness | NONE | NONE | NONE | NONE | Adjust display brightness |
- Press the MENU button to display the main menu then press the ◀/▶ buttons to select CONTRAST menu and then press the E button to enter.
- press the ◀/▶ buttons to adjust each option's setting and then press the E button to save.

| Main Menu Item | Main Menu Icon | Submenu Item | Main Menu Icon | Submenu Options | Main Menu Icon | Description |
| Contrast | NONE | NONE | NONE | NONE | Adjust display contrast |
- Press the MENU button to display the main menu then press the ◀/▶ buttons to select DCR (Dynamic Contrast Ratio) menu and then press the E button to enter.
- press the ◀/▶ buttons to adjust each option's setting and then press the E button to save.

| Main Menu Item | Main Menu Icon | Submenu Item | Main Menu Icon | Submenu Options | Main Menu Icon | Description |
| DCR |  | On | NONE | NONE | Activate dynamic contrast | |
| Off | NONE | NONE | Turn off dynamic contrast | |||
| Return | NONE | NONE | Return to the previous menu | |||
| Exit | NONE | NONE | Exit from the whole menu |
MODE
- Press the MENU button to display the main menu then press the ◀/▶ buttons to select MODE menu and then press the E button to enter.
- press the ◀/▶ buttons to adjust each option's setting and then press the E button to save.

| Main Menu Item | Main Menu Icon | Submenu Item | Main Menu Icon | Submenu Options | Main Menu Icon | Description |
| Mode |  | Standard |  | NONE | NONE | Normal work mode |
| Movie |  | NONE | NONE | Movie mode | ||
| FPS |  | NONE | NONE | FPS game mode | ||
| RTS |  | NONE | NONE | RTS game mode | ||
| EyeSaver |  | NONE | NONE | Eyes Protection ray filter application model | ||
| Return |  | NONE | NONE | Return to the previous menu | ||
| Exit |  | NONE | NONE | Exit from the whole menu |
COLOR TEMP.
- Press the MENU button to display the main menu then press the ◀/▶ buttons to select COLOR TEMP. menu and then press the E button to enter.
- press the ◀/▶ buttons to adjust each option's setting and then press the E button to save.

| Main Menu Item | Main Menu Icon | Submenu Item | Main Menu Icon | Submenu Options | Main Menu Icon | Description |
| Color Temp. |  | Cool | NONE | NONE | Set as cold color temperature | |
| Warm | NONE | NONE | Set as warm color temperature | |||
| User |  | Red | Fine tuning of red color temperature | |||
| Green | Fine tuning of green color temperature | |||||
| Blue | Fine tuning of blue color temperature | |||||
| Return | [DX02] | NONE | NONE | Return to the previous menu | ||
| Exit | NONE | NONE | Exit from the whole menu |
ASPECT
- Press the MENU button to display the main menu then press the ◀/▶ buttons to select ASPECT menu and then press the E button to enter.
- press the ◀/▶ buttons to adjust each option's setting and then press the E button to save.
| Main Menu Item | Main Menu Icon | Submenu Item | Main Menu Icon | Submenu Options | Main Menu Icon | Description |
| Aspect |  | Auto | [C06W] | NONE | NONE | Automatically adjust picture aspect ratio |
| 16:9 | [8245] | NONE | NONE | Picture in 16:9 mode | ||
| 4:3 |  | NONE | NONE | Picture in 4:3 mode | ||
| Return |  | NONE | NONE | Return to the previous menu | ||
| Exit |  | NONE | NONE | Exit from the whole menu |
INPUT
- Press the MENU button to display the main menu then press the ◀/▶ buttons to select INPUT menu and then press the E button to enter.
- press the ◀/▶ buttons to adjust each option's setting and then press the E button to save.
natural_image
Simple diagram with a gray rectangle and an upward arrow inside, enclosed by a black outline (no text or symbols)| Main Menu Item | Main Menu Icon | Submenu Item | Main Menu Icon | Submenu Options | Main Menu Icon | Description |
| Input |  | VGA | NONE | NONE | VGA(analog) signal input | |
| HDMI |  | NONE | NONE | HDMI (digital) signal input | ||
| Return |  | NONE | NONE | Return to the previous menu | ||
| Exit |  | NONE | NONE | Exit from the whole menu |
ADJUST
- Press the MENU button to display the main menu then press the ◀/▶ buttons to select
ADJUST menu and then press the E button to enter.
- press the ◀/▶ buttons to adjust each option's setting and then press the E button to save.

| Main Menu Item | Main Menu Icon | Submenu Item | Main Menu Icon | Submenu Options | Main Menu Icon | Description |
| Adjust |  | Auto adjust |  | NONE | NONE | Automatically adjust the horizontal/vertical location, focusing and clock of pictures |
| Auto color |  | NONE | NONE | Adjust the white balance of pictures | ||
| Gamma | [CBD6] | Gamma1 |  | Adjust color tone brightness grey 1 | ||
| Gamma2 |  | Adjust color tone brightness grey 2 | ||||
| Return |  | Return to the previous menu | ||||
| Exit |  | Exit from the whole menu |
OTHER
- Press the MENU button to display the main menu then press the ◀/▶ buttons to select OTHER menu and then press the E button to enter.
- press the ◀/▶ buttons to adjust each option's setting and then press the E button to save.
| Main Menu Item | Main Menu Icon | Submenu Item | Main Menu Icon | Submenu Options | Main Menu Icon | Description |
| Other |  | Language | English | English | English | |
| Française | Française | Française | ||||
| Español | Español | Español | ||||
| Return | [W60H] | Return to the previous menu | ||||
| Exit | [C00B] | Exit from the whole menu | ||||
| Power Off |  | On | ON | Automatically turn off after saving power for 1 minute | ||
| Off | OFF | Deactivate the function of automatic power off | ||||
| Return |  | Return to the previous menu | ||||
| Exit | [07ZX] | Exit from the whole menu | ||||
| Reset | YES |  | Reset to factory setup | |||
| NO |  | Exit from this function | ||||
| Return |  | Return to the previous menu | ||||
| Exit | [588W] | Exit from the whole menu | ||||
| Return | [786S] | NONE | NONE | Return to the previous menu | ||
| Exit | [CB-K] | NONE | NONE | Exit from the whole menu |
EXIT
- Press the MENU button to display the main menu then
press the ◀/▶ buttons to select
EXIT menu and then press the E button to enter. - press the ◀/▶ buttons to adjust each option's setting and then press the E button to save.
natural_image
Simple gray arrow pointing right inside a rectangular frame (no text or symbols)| Main Menu Item | Main Menu Icon | Submenu Item | Main Menu Icon | Submenu Options | Main Menu Icon | Description |
| Exit | NONE | NONE | NONE | NONE | Exit from the whole menu |
| Resolution | H-Frequency (KHz) | V-Frequency (Hz) |
| 720×400 | 31.47 | 70.0 |
| 640×480 | 31.47 | 60.0 |
| 640×480 | 37.86 | 72.8 |
| 640×480 | 37.50 | 75.0 |
| 800×600 | 37.87 | 60.0 |
| 800×600 | 48.07 | 72.0 |
| 800×600 | 46.87 | 75.0 |
| 1024×768 | 48.36 | 60.0 |
| 1024×768 | 56.48 | 70.0 |
| 1024×768 | 60.02 | 75.0 |
| 1280×1024 | 63.98 | 60.0 |
| 1280×1024 | 79.97 | 75.0 |
| 1440×900 | 55.47 | 60.0 |
| 1440×900 | 55.94 | 60.0 |
| 1680×1050 | 64.67 | 60.0 |
| 1680×1050 | 65.29 | 60.0 |
| 1920×1080 | 67.50 | 60.0 |
| Resolution | PixelClock(Unit:MHz) | Hsync(Unit:KHz) | Vsync(Unit:Hz) |
| 720X480I | 13.5 | 15.73 | 59 |
| 720X480P | 27.027 | 31.5 | 60 |
| 720X576I | 13.5 | 15.62 | 50 |
| 720X576P | 27 | 31.25 | 50 |
| 1280x720P | 74.25 | 45 | 60 |
| 1280x720P | 74.25 | 37.5 | 50 |
| 1920x1080I | 74.25 | 28.125 | 50 |
| 1920x1080I | 74.25 | 33.75 | 60 |
| 1920x1080P | 148.5 | 67.5 | 60 |
| 1920x1080P | 148.5 | 56.25 | 50 |
Features
a) 16.7M high quality image colors
b) Smart image screen setting – OSD with simple layout and easy selection
c) Smart control interfaces for easy settings
d) Auto function; when no settings are set, it will auto-adjust to optimum settings

This device complies with Part 15 of the FCC Rules. Operation is subject to the following two conditions:
(1) this device may not cause harmful interference, and
(2) this device must accept any interference received, including interference that may cause undesired operation.
- "Warning: Changes or modifications to this unit not expressly approved by the party responsible for compliance could void the user's authority to operate the equipment."
- "NOTE: This equipment has been tested and found to comply with the limits for a Class B digital device, pursuant to Part 15 of the FCC Rules. These limits are designed to provide reasonable protection against harmful interference in a residential installation. This equipment generates, uses and can radiate radio frequency energy and, if not installed and used in accordance with the instructions, may cause harmful interference to radio communications.
However, there is no guarantee that interference will not occur in a particular installation. If this equipment does cause harmful interference to radio or television reception, which can be determined by turning the equipment off and on, the user is encouraged to try to correct the interference by one or more of the following measures:
• Reorient or relocate the receiving antenna.
- Increase the separation between the equipment and receiver.
- Connect the equipment into an outlet on a circuit different from that to which the receiver is connected.
- Consult the dealer or an experienced radio/Monitor technician for help."
Please send all correspondence to:
Element TV Company, LP. Customer Service
1-888-842-3577
www.elementetelectronics.com
customerservice@elementelectronics.com
SPECIFICATIONS
| Dimension | 23.8" diagonal |
| Brightness | 200cd/m2 |
| Color | 16.7M |
| Resolutions | 1920x1080pixels |
| H-frequency | 30~80KHz |
| V-frequency | 55~75Hz |
| Power Input | 12V==2.5A |
| Environment | Operation Temp: 0° - 40°CHumidity:Less than 80%Storage Temp: -20° - 60°C |
Design and specifications are subject to change without prior notice.
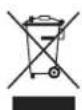
This product contains electrical or electronic materials. The presence of these materials may, if not disposed of properly, have potential adverse effects on the environment and human health. Presence of this label on the product means it should not be disposed of as unsorted waste and must be collected separately. As a consumer, you are responsible for ensuring that this product is disposed of properly.
- INSTRUCTION MANUAL
- Important Safety Instructions 2
- Additional Safety Information 3
- Preparations 4
- Customizing Monitor Settings 7
- Compatible Resolutions 16
- FCC Notes 17
- Specifications 17
- IMPORTANT SAFETY INSTRUCTIONS
- Electrical Safety
- Physical Safety
- What is Included?
- Power indicator light
- Screen image setups
- Basic setup
- Navigating the On-screen Display
- BRIGHTNESS/CONTRAST/DCR (Dynamic Contrast Ratio)
- MODE
- COLOR TEMP.
- ASPECT
- INPUT
- ADJUST
- OTHER
- EXIT
- Features
Brand : Element
Model : E1SW2418M
Category : Screen