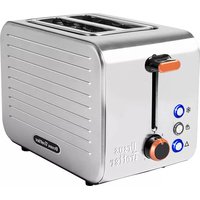
UT-ECKART 2 - Toaster Ursus Trotter - Free user manual and instructions
Find the device manual for free UT-ECKART 2 Ursus Trotter in PDF.


| Product Type | Toaster |
| Brand | Ursus Trotter |
| Model | UT-ECKART 2 |
| Colour | Black/Stainless Steel |
| Dimensions (W x D x H) | 30 x 20 x 15 cm |
| Weight | 1.2 kg |
| Power Supply | 220-240 V, 50/60 Hz |
| Power Consumption | 800 W |
| Number of Slots | 2 |
| Browning Control | Rotary dial, 6 levels |
| Reheat Function | Yes |
| Defrost Function | Yes |
| Cancel Button | Yes |
| Auto Centering Bread Guides | Yes |
| Removable Crumb Tray | Yes |
| Cord Storage | Underneath |
| Non-slip Feet | Yes |
| Materials | Stainless steel and plastic |
| Cleaning | Wipe with damp cloth; empty crumb tray regularly |
| Safety | Automatic shut-off, cool-touch housing |
| Spare Parts Availability | Crumb tray, heating elements |
Frequently Asked Questions - UT-ECKART 2 Ursus Trotter
User questions about UT-ECKART 2 Ursus Trotter
0 question about this device. Answer the ones you know or ask your own.
Ask a new question about this device
Download the instructions for your Toaster in PDF format for free! Find your manual UT-ECKART 2 - Ursus Trotter and take your electronic device back in hand. On this page are published all the documents necessary for the use of your device. UT-ECKART 2 by Ursus Trotter.
USER MANUAL UT-ECKART 2 Ursus Trotter
German Engineering & Design
ELEKTRISCHE TOASTER
Tostador 2 panes


natural_image
White Ursus Tretter with two built-in tortoes and fresh avocado slices on a wooden cutting board (no text or symbols visible)BREAD GUIDE – GUIA PARA EL PAN HOUSING - CARCASA CARRIAGE HANDLE – PALANCA PARA TOSTADO
PRESS KEY - BOTON EYECTOR KNOB - PERILLA BASE - BASE
UPPER COVER PLATE – PLACA SUPERIOR LEFT DECORATIVE PLATE – PLACA DECORATIVA IZQ CRUMB TRAY HANDLE – MANILLA DE BANDEJA DE MIGAS
CRUMB TRAY - BANDEJA DE MIGAS POWER CORD - CABLE ELECTRICO
Read this manual thoroughly before using and save it for future reference
Important safeguards
When using electrical appliance. Basic safety precautions should always be followed including the following:
- Read all instructions.
- Make sure that your outlet voltage corresponds to the voltage stated on the rating label of the toaster.
- Do not touch hot surface. Use handles or knobs only.
- To protect against electrical shock, do not immerse cord, plug, or any part of the toaster in water or other liquid. Unplug unit from outlet when not in use and before cleaning.
- Allow to cool before putting on or taking off parts.
- Children should be supervised to ensure that they do not play with the appliance.
- Allow the unit to cool completely before cleaning or storing.
- Do not operate any appliance with a damaged cord or plug or after the appliance malfunctions or has been damaged in any manner. Return appliance to the nearest authorized service facility for examination, repair, or adjustment.
- Do not let the cord hang over edge of table or counter, or touch hot surface.
- Do not place on or near a hot gas or electric burner, or in a heated oven.
- Do not use the appliance for other than its intended use.
-
Oversized food, metal foil packages or utensils must not be inserted in the toaster as they may cause fire or electric shock.
-
As bread may burn, toasters must not be used near or below curtains and other combustible materials, they must be watched.
- The use of accessory attachments not recommended by the appliance manufacturer may cause injuries.
- Use the appliance on a level and stable work surface.
- Don't attempt to dislodge food when toaster is plugged in.
- Be sure to take the bread out carefully after toasting so as to avoid injuries.
- The appliance is not intended to be operated by means of an external timer or separate remote-control system.
- This appliance is not intended for use by persons (including children) with reduced physical, sensory or mental capabilities, or lack of experience and knowledge, unless they have been given supervision or instruction concerning use of the appliances by a person responsible for their safety.
- Children should be supervised to ensure that they do not play with the appliance.
- Don't use the appliance outdoors.
- This appliance is intended to be used in household and similar applications such as:
- Staff kitchen areas in shops, offices and other working environments;
- Farm houses;
- By clients in hotels, motels and other residential type environments;
- Bed and breakfast type environments.
- A fire may occur if toaster is covered or touching flammable material including curtains, draperies, walls, and the like, when in operation.
Know your toaster
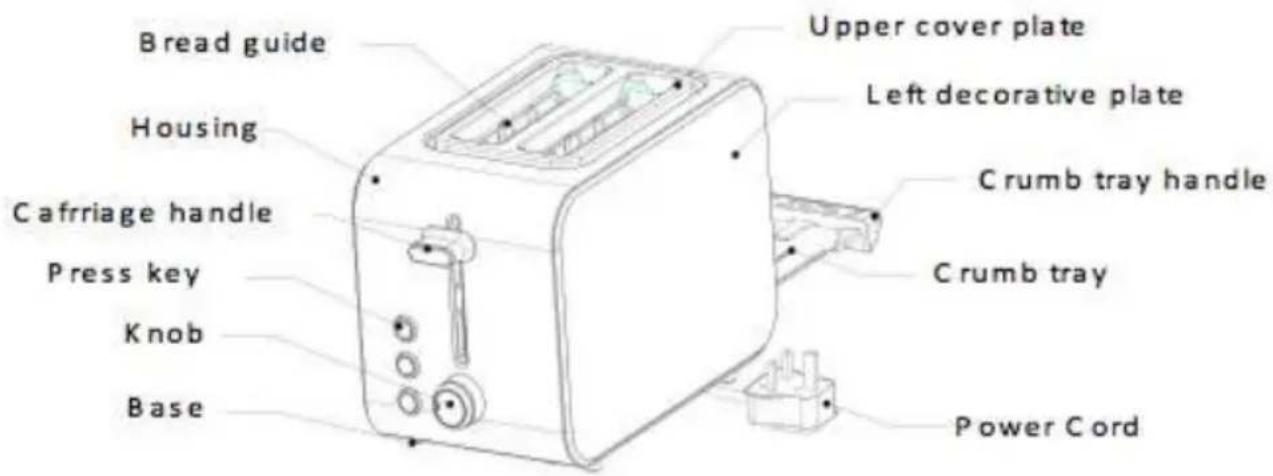
Control panel: (see below)
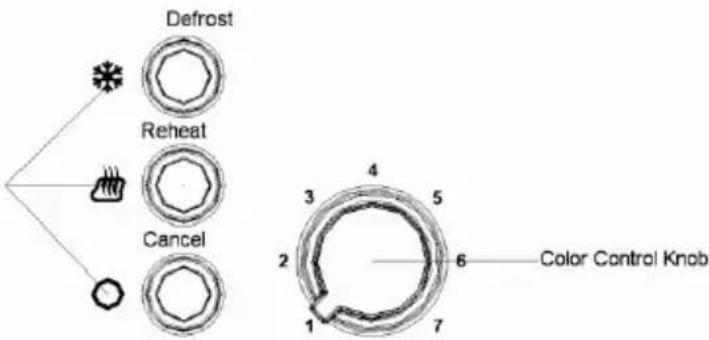
For the first use
As there is manufacturing residue or oil remained in the toaster or heat element, usually it will emit the odor for the first use. It is normal and will not occur after several times use, for the first use it is suggested operating according to the below steps, except without bread, then let the toaster cool down and begin toasting the first slice.
OPERATION
- Insert regular bread slice into the bread slot, which can be inserted with two slices at most each time. Note: Make sure the crumb tray is completely positioned in place before use.
- Plug the power cord into the outlet.
- Turn color control knob to your desired color. There are 7 color levels, the lowest "1" is for white and the highest "7" is for dark. The middle "4" can toast the bread to golden color.
Note: 1). Toasting color for one slice is darker than that for two bread slices at the same level.
2). If toasting continuously, toasting color for the latter bread is darker than that
for the anterior bread at the same level.
- Lower carriage handle down vertically until it is latched in place, and the appliance will begin toasting at once. Note: Carriage handle can be latched only when the unit is plugged in.
- Once the bread has been toasted to the preset color, the carriage handle will be automatically pop up. Also you can uplift the carriage handle a little to remove the bread readily.
Note: During toasting, you may also observe the toasting color. If it is satisfactory, you can press the Cancel button to cancel the operation at any time, but never lift carriage handle to cancel toasting.
CAUTION
- If toaster starts to smoke, press Cancel button to stop toasting immediately.
- Remove all protective wrappings prior to placing bread slice into toaster.
- Avoid toasting the food with extremely runny ingredients such as butter.
- Never attempt to remove bread jammed in the slots without unplugging the toaster from the electrical outlet first, Be sure not to damage the internal mechanism or heating elements when removing bread.
- In order to achieve uniform color we recommend that you should wait minimum 30s between each toasting so that color control can reset automatically.
- The bread slot is only applicable for toasting regular bread.
Cleaning and maintenance
- Before cleaning, unplug from the appliance and let the appliance cool down completely 2. Wipe the outside with soft dry cloth, never use metal polish.
- Pull out crumb tray at bottom of toaster and empty it. If toaster is used frequently, accumulated bread crumbs should be removed at least once a week. Make sure the crumb tray is completely closed before using the toaster again.
- When not in use or storage, the power cord may be twisted under the bottom of toaster.
ENVIRONMENT FRIENDLY DISPOSAL
You can help protect the environment!
Please remember to respect the local regulations: hand in the non-working electrical equipments to an appropriate waste disposal center.

POLIZA DE GARANTIA

natural_image
Stylized emblem featuring a central eagle with a shield and wings, enclosed in a laurel wreath (no text or symbols)Ursus Trotter
Brand : Ursus Trotter
Model : UT-ECKART 2
Category : Toaster