
DS31-EZ - Loudspeaker SoundTube - Free user manual and instructions
Find the device manual for free DS31-EZ SoundTube in PDF.


| Product Type | In-ceiling/in-wall loudspeaker |
| Model | DS31-EZ |
| Brand | SoundTube |
| Driver Size | 3-inch polypropylene cone |
| Frequency Response | 100 Hz - 20 kHz |
| Impedance | 8 ohms (nominal) |
| Sensitivity | 84 dB (1W/1m) |
| Power Handling | 20W RMS / 40W peak |
| Outer Dimensions (Diameter x Depth) | 4.5 x 2.8 inches (114 x 71 mm) |
| Cutout Size | 4.0 inches (102 mm) diameter |
| Mounting Depth | 2.5 inches (64 mm) |
| Weight | 1.5 lbs (0.7 kg) |
| Enclosure Material | UV-stabilized ABS plastic |
| Grille | White, paintable, magnetic attachment |
| Input Connection | Spring-loaded terminals (accepts bare wire up to 14 AWG) |
| Installation Features | EZ-mounting dog ears (tool-free), integral bezel |
| Application | Indoor, distributed audio systems, home theater |
| Warranty | 5 years (limited) |
Frequently Asked Questions - DS31-EZ SoundTube
User questions about DS31-EZ SoundTube
0 question about this device. Answer the ones you know or ask your own.
Ask a new question about this device
Download the instructions for your Loudspeaker in PDF format for free! Find your manual DS31-EZ - SoundTube and take your electronic device back in hand. On this page are published all the documents necessary for the use of your device. DS31-EZ by SoundTube.
USER MANUAL DS31-EZ SoundTube
Install Instructions For:
DS31-EZ
Box contents
(1) Speaker assembly
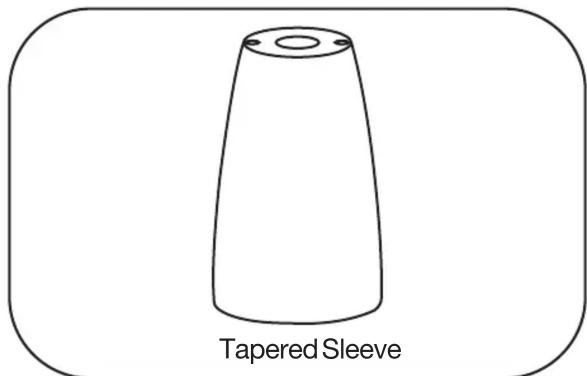
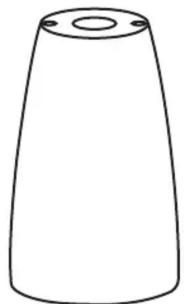
(1) Cylindrical or Tapered sleeve
(1) Magnetic grille
(1) Mounting Assembly
(2) Mounting screws
(2) 2.25" sleeve screws
(2) 0.50" screws
(2) Wire nuts


Dual-Gang Junction Box (not included)
Mounting plate
Adjustment loop
| I | II | III | IV | V | |
| 100V | * | 20W | 10W | 5W | 2.5W |
| 70V | 20W | 10W | 5W | 2.5W | 1.3W |
| 25V | 5W | 2.5W | 1.3W | 0.72W | 0.36W |
Tap Settings

1.435.647.9555
800.647.TUBE
www.soundtube.com
©2022 SoundTube Entertainment, Inc. All rights reserved. PN INS-DS31-EZ Rev 11.02.22

Warning Warning
SoundTube speakers must be installed by a professional audio installer/contractor. For safety and for optimum audio performance, installer must follow all directions issued by SoundTube Entertainment.

Do not spec or install speaker near support beam, ventilation duct or other structure that may interfere with speaker function or dispersion.
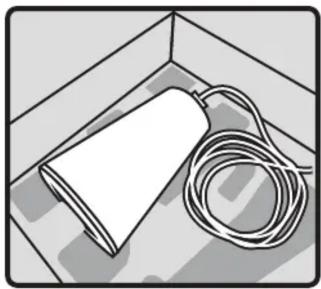
- Remove speaker body from box and unravel signal wire.

- Unpack Designer Sleeve.

- Select tap setting on the back face of the speaker body. Each numeral setting corresponds to a wattage shown in tap setting table on back of speaker (also shown on Page 1). Use 8Ω for transformer bypass.

- If necessary, attach safety cable by first inserting into side of mounting bracket.
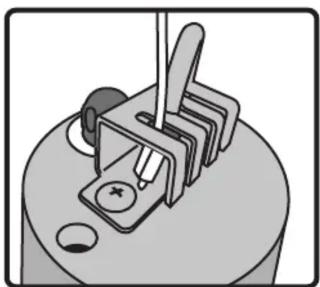
- Align safety cable with bracket slot and pull up to secure.

- Unpack grille and attach grille safety restraint by placing the large end of the clip over the mounting bracket screw on the top face of the speaker body (the face opposite the front of the speaker).

- You will need to slightly loosen/unscrew one of the hanging bracket screws in order to fit the safety clip underneath. Slide the safety clip until the small end snaps into place around the screw.

- Thread signal wire through Designer Sleeve central hole, then gently slide sleeve down OVER safety clip wire and speaker body. Then use two included 2.25" Phillips-head screws to secure sleeve to speaker body (Tapered Sleeve shown).

- If using both Cylindrical Sleeve pieces, use two included 0.50" Phillips-head screws to secure the two sleeve pieces to one another.
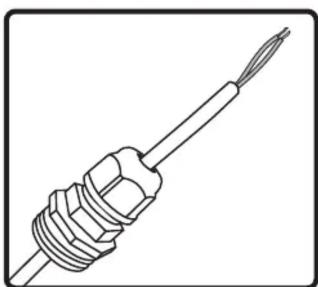
- Thread signal wire through included Strain Relief Bushing.

- Screw bushing into Designer Sleeve, pulling excess wire through until snug.

- Tighten down top gland to secure the signal wire. Gland must be tightened around signal cable to prevent water ingress and maintain IP rating.
DS31-EZ
- Unpack Mounting Assembly and separate hemispherical cover plate from mounting plate. Thread signal wire through hemispherical cover plate and central hole in mounting plate.

- Where needed, connect safety leash to secure point on structure/ junction box.
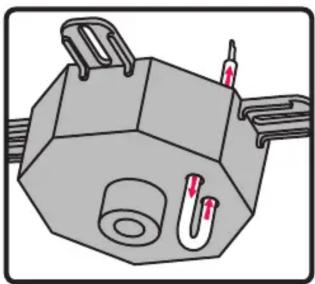
- Loop wire down through one of the smaller holes on the mounting plate, then back up through adjacent hole. Run signal wire from amplifier to the speaker and connect it to the speaker's signal wire using included wire nuts. Red is positive, black is negative.

- Screw mounting plate into the junction box (not included) using the mounting screws provided.
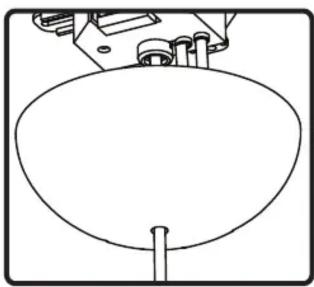
- Move cover plate up speaker wire, begin to thread cover plate into mounting plate, leaving half an inch between cover plate and mounting surface.

- Excess wire can be hidden inside of cover plate by wrapping excess wire clockwise and into gap between plate and surface.
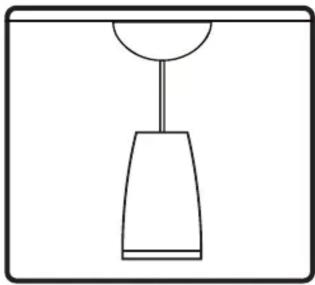
- Completely thread cover plate to secure speaker.
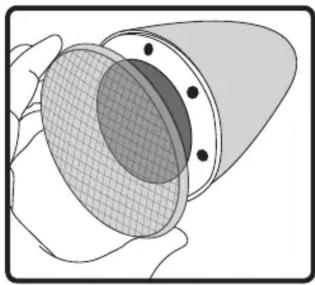
- Magnetically attach grille to the front of the speaker. Done.
Brand : SoundTube
Model : DS31-EZ
Category : Loudspeaker