CKSS7801WM - Digital Alarm Clock Emerson - Free user manual and instructions
Find the device manual for free CKSS7801WM Emerson in PDF.


| Product Type | Smart Thermostat |
| Brand | Emerson |
| Model | CKSS7801WM |
| Dimensions | 4.7 x 4.7 x 0.9 inches (120 x 120 x 22 mm) |
| Weight | 0.5 lbs (225 g) |
| Power Supply | 24 VAC (common wire required) or 2 AA backup batteries |
| Display | Color touchscreen |
| Connectivity | Wi-Fi 802.11 b/g/n |
| Compatibility | Standard HVAC systems (gas, electric, heat pump) |
| Programmable Schedules | 7-day customizable |
| Energy Saving Features | Smart away mode, geofencing, energy reports |
| Temperature Range | 45°F to 95°F (7°C to 35°C) |
| Humidity Sensor | Built-in |
| Safety Certifications | UL, FCC, ENERGY STAR |
| Installation | Wall mount with included screws and base |
| Cleaning Instructions | Wipe with soft, dry cloth; no liquids or sprays |
| Spare Parts Available | Faceplate, mounting base, screws, installation guide |
| Warranty | 2 years limited |
| Manufacturer Country | China |
Frequently Asked Questions - CKSS7801WM Emerson
User questions about CKSS7801WM Emerson
0 question about this device. Answer the ones you know or ask your own.
Ask a new question about this device
Download the instructions for your Digital Alarm Clock in PDF format for free! Find your manual CKSS7801WM - Emerson and take your electronic device back in hand. On this page are published all the documents necessary for the use of your device. CKSS7801WM by Emerson.
USER MANUAL CKSS7801WM Emerson
SmartSet® Sunrise Clock with Bluetooth, 4 Soothing Sounds and 2 Wake up Sounds, Dual Alarm, 8-Color Dimmable LED Décor
(SmartSet® Patent No. 6,567,344)
OWNER'S MANUAL CKSS7801WM

Visit our website at www.emersonradio.com To obtain a manual in Spanish, please download it from our website: https://www.emersonradio.com/documents/
WARNING
TO PREVENT ELECTRIC SHOCK HAZARD, DO NOT CONNECT TO MAINS POWER SUPPLY WHILE GRILLE IS REMOVED. TO REDUCE THE RISK OF FIRE OR ELECTRIC SHOCK, DO NOT EXPOSE THIS APPARATUS TO RAIN OR MOISTURE
POUR ÉVITER TOUT DANGER DE CHOC ÉLECTRIQUE, NE PAS RACCORDER AU SECTEUR TANT QUE LA GRILLE N'APAS ÉTÉ REMISE EN PLACE. POUR RÉDUIRE LE RISQUE D'INCENDIE OU DE CHOC ÉLECTRIQUE, NE PAS EXPOSER
IMPORTANT SAFETY INSTRUCTIONS
1.) Read these instructions. Keep these instructions. Follow all instructions. Heed all
warnings.
2.) Do not use this apparatus near water.
3.) Clean only with dry cloth.
4.) Do not block any ventilation openings. Install in accordance with the manufacturer's
instructions.
5.) Do not install near any heat sources such as radiators, heat registers, stoves, or other apparatus (including amplifiers) that produce heat.
apparatus (including amplifiers) that produce heat.
6.) Do not outlet the safety purpose of the polarized or groundbreaking-type plug. A polarized plug has two blades with one wider than the other. A grounding type plug has two blades and a third grounding prong. The wide blade or the third prong is provided for your safety. If the provided plug does not fit into your outlet, consult an electrician for replacement of the obsolete outlet.
7.) Protect the power cord from being walked on or pinched particularly at plugs
convenience receptacles, and the point where they exit from the apparatus.
8.) Only use attachments / accessories specified by the manufacturer.
9.) Unplug this apparatus during lightning storms or when unused for long periods of time. 10.) Refer all servicing to qualified service personnel. Servicing is required when the apparatus has been damaged in any way, such as power-supply cord or plug is damaged liquid has been spilled or objects have fallen into the apparatus, the apparatus has been exposed to rain or moisture, does not operate normally, or has been dropped.
11.) Use only with the cart, stand, tripod, bracket, or table specified by the manu
sold with the apparatus. When a cart is used, use caution when moving th
cart/apparatus combination to avoid injury from tip-over.
12.) The apparatus shall not be exposed to dripping or splashing and that no objects filled with liquids, such as vases, shall be placed on apparatus.
13.) Mains plug is used as disconnect device and it should remain readily
operable during intended use. In order to disconnect the apparatus from
the mains completely, the mains plug should be disconnected from the
mains socket outlet completely. 14.) Battery shall not be exposed to
14.) Battery shall not be exposed to excessive heat such as sunshine, fire or the like.
13.) Battery cannot be subjected to high or low extreme temperatures, low air pressure at high altitude during use, storage or transportation.
at high altitude during use, storage of transportation. Disposal of a battery into fire or a hot oven, or mech
a battery, that can result in an explosion.
A battery subjected to extremely low air
or the leakage of flammable liquid or gas.
CAUTION: Danger of explosion if battery is incorrectly replaced. Replace only with the
same or equivalent type.
- minimum distances 10 cm around the apparatus for sufficient ventilations.
- the ventilation should not be impeded by covering the ventilation openings with items such
as newspaper, table-cloths, curtains etc. No one cooperative acts definitions over the claims of viewing journal, one space, up
• attention should be drawn to the environmental aspects of battery disposal.
• the use of apparatus in tropical and/or moderate climates.
Maximum recommended ambient temperature is 25°C
The socket-outlet shall be installed near the equipment and shall be easily accessible

This product contains a coin/button cell battery. If the coinbutton is swallowed, it can save square internal hums in 2 hours and can lead to death.

If the battery compartment does not close securely, stop using the product and keep it away from children.






WARNING
a) Remove and immediately recycle or dispose of used batteries according to local regulations and
keep away from children. Do NOT dispose of batteries in household trash or incinerate.
b) Even used batteries may cause severe injury or death.
c) Call a local poison control center for treatment; information d) Compatible battery type: CR2032
e) Nominal battery voltage: 3.0V
f) Non-rechargeable batteries are not to be recharged.
g) Do not force discharge, recharge, disassemble, heat above (manufacturer's specified
(temperature rating) or incinerate. Doing so may result in injury due to venting, leakage or
explosion resulting in chemical burns.
h) Ensure the batteries are installed correctly according to polarity (+ and -).
1) DO NOT MIX OLD AND NEW BATTERIES, different brands or types of batteries, such as alkaliene, carbon-zinc, or rechargeable batteries.
i) Remove and immediately recycle or dispose of batteries
extended period of time according to local regulations.
k) Always completely secure the battery compartment. If the battery compartment does not cl
securely, stop using the product, remove the batteries, and keep them away from children.
The Ground Truth image displays a single, solid horizontal line. According to Rule 2 (UNDERSCORE & LINE RULES), this is a stylistic or background line, not a placeholder underscore. Therefore, the OCR result must ignore it. The provided OCR content is "____", which consists of four underscores. This is an incorrect interpretation of the line as a placeholder, violating the rule that stylistic lines must be ignored. The OCR has hallucinated text (underscores) where none should exist. Hence, the result is inconsistent with the Ground Truth.
Important Notes
Avoid installing this unit in places • Operate controls and switches
exposed to direct sunlight or close to as described in the manual.
heat radiating appliances such as: • Before turning on the power.
electric heaters, on top of other stereo make certain that the AC
electric heaters, on top of other stored environment that radiates heat places adapter is properly installed
equipment that radiates heat, places
lacking ventilation, dusty areas, places • when moving the set, be sure to first disconnect the AG
subject to constant vibration and/or to first disconnect the AC
humid or moist areas adapter.
In fact of moist areas
FCC Information
This equipment has been tested and found to comply with the limits for a Class B digital
device, pursuant to Part 15 of the FCC Rules. These limits are designed to provide
reasonable protection against harmful interference in a residential installation. This
equipment generates, uses, and can radiate radio frequency energy and, if not installed
and used in accordance with the instructions, may cause harmful interference to radio
communications. However, there is no guarantee that interference will not occur in a
particular installation. If this equipment does cause harmful interference to radio or
television reception, which can be determined by turning the equipment off and on
television reception, which can be determined by turning the equipment on and on, the user is encouraged to try to correct the interference by one or more of the following
the user is encouraged to try to correct the interference by one or more of the following
measures.
• Reorient or relocate the receiving antenna.
- Increase the separation between the equipment and receiver.
- Connect the equipment into an outlet on a circuit different from that to which the
receiver is connected.
- Consult the dealer or an experienced radio/TV technician for help. This device complies
with Part 15 of the FCC Rules. Operation is subject to the following two conditions:
(1) This device may not cause harmful interference, and
(2) This device must accept any interference received, including interference that may
cause undesired operation
Changes or modifications to this unit not expressly approved by the party responsible for
compliance could void the use's authority to operate the equipment. This equipment
compliance should void the use of authority to operate the equipment. This equipment complies with the FCC RE radiation exposure limits sel forth for an uncontrolled environment
This equipment should be installed and operated with a minimum distance of 30 centimeters.
This equipment should be installed and operated with a minimum distance of 20 centimeters between the radiates and your body.
between the radiator and your body.
Thank you for purchasing this Emerson SmartSet® Dual Alarm Clock Speaker. This clock
uses Emerson's patented SmartSet® Automatic Time Setting System. The first time you
connect this clock to your AC outlet, and after every power interruption, within seconds
the clock will automatically set itself to the correct Year, Month, Date, Day, and Time. In
addition, all changes from Standard Time to Daylight Saving Time, and back to Standard
Time, are made automatically. There are dual alarms that can be set and used
independently, and both of the alarms can be programmed for everyday operation.
weekdays only, or weekend's only. There is a long life lithium battery installed in this clock
Wednesday's only, of Westonia's only. There is a long line medium battery installed in the stock when you buy it. This battery can maintain the time and alarm settings for 1 to 2 years, or
When you buy it: This battery can maintain the time and alarm settings for 1 to 2 years, or even longer. We have taken every precaution to make sure this clock was in perfect
even longer. We have taken every precaution to make sure this clock was in perfect working order when it left our factory. If you encounter any problems with the set up or
working order when it left our factory. If you encounter any problems with the set up of operation of this item, please call the Foreign Consumer Products Corp. Customers
operation of this item, please call the Emers Service Hotline, toll free, at 1-800-898-9020.
Service Hotline, toll free, at 1-000-050-5026.
3 Preparation For Use
Remove the clock from the carton and remove all packing material from the clock. Save the packing material, if possible, in case the clock ever needs to be serviced or transported. The original carton and packing material is the only safeway to pack your clock to protect it from damage in transit.
Remove any descriptive labels, stickers or protective films on the front or top of the cabinet, if any.
Do not remove any labels or stickers from the back or bottom of the cabinet. Note the serial number on the bottom of your clock and write this number in the space provided on the Warranty page of this manual.
Place your clock on a level surface such as a table, desk or shelf, convenient to an AC outlet, out of direct sunlight, and away from sources of excess heat, dirt, dust, moisture, humidity, or vibration.
Protect Your Furniture
This model is equipped with non-skid rubber 'feet' to prevent the product from moving when you operate the controls. These 'feet' are made from non-
migrating rubber material specially formulated to avoid leaving any marks or stains on your furniture. However certain types of oil based furniture polishes wood preservatives, or cleaning sprays may cause the rubber 'feet' to soften, and leave marks or a rubber residue on the furniture. To prevent any damage to your furniture we strongly recommend that you purchase small self
adhesive felt pads, available at hardware stores and home improvement centers everywhere, and apply these pads to the bottom of the rubber'feet before you place the product on fine wooden furniture.
Power Source
This clock is designed to operate on normal 120V 60Hz AC power only. Do not attempt to operate the clock on any other power source. You could cause
damage to the clock that is not covered by your warranty. This clock should be connected to an AC outlet that is always 'live'. Do not connect it to an outlet that is controlled by a wall switch. When the power to the clock is interrupted,
the built in lithium battery takes over to maintain the time and alarm settings. To maximize the life of the lithium battery keep the clock connected to a 'live'
AC outlet at all times.
Package Contents
• CKSS7801WM Clock Speaker x1
- Owner's Manual
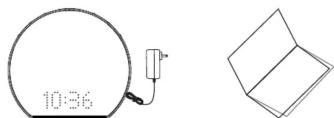
natural_image
Simple line drawing of a circular device with a connected plug and a separate 3D geometric shape (no text or symbols)5 Location of Controls and Indicators
FRONT PANEL

TOP PANEL

REAR PANEL

-
Bluetooth Indicator (Blue color)
-
Low Battery Indicator (Red Color)
-
LED Dot Matrix Display
-
AI 1 Indicator (White Color)
-
AL 1 Indicator (White Color)
-
AL 2 Indicator (White Color)
-
AL Z Indicator (White Color)
-
TIME ZONE/ ON/OFF ('ON/Standby) (3-Level) Button
Button 15. LED Decor DIMMER (5-Level) Button
-
CLOCK SET/∅ (MODE) Button
-
▶II Button
-
Button
-
▶ Button
-
SNOOZE / LED Décor Button
-
AL 1 (Alarm 1) Set/VOL - Button
-
AL 3 (Alarm 3) Set/VOL + Button
-
AL2 (Alarm 2) Set/VOL+ Button
-
SLEEP/LED DISPLAY DIMMED
-
SLEEP/LED DIS
(3-Level) Button
-
LED Decor DIMMER (5-Level) Button
-
SUNRISE Butto
-
AC Adapter
-
Adapter Cable
Setting the Time Zone
Initial Default Setting at Clock Mode
IMPORTANT: The first time you connect your new SmartSet® clock radio to the AC outlet the internal computer will automatically set the time correctly for the Eastern Time Zone, which is the initial default setting. The display will scan for a few seconds and then show the correct Day and Time in the Eastern zone. If you live in the Eastern Time zone, there's nothing else to do. Your clock is set correctly and running. If you do not live in the Eastern Time zone you must change the default zone display to your own zone. You only do this one time and the SmartSet® will remember the new default zone setting and will always return to that setting after power interruption.
here are 7 time zones programmed into your SmartSet® clock radio as follows
ZONE 01 — Atlantic Time ZONE 02 — Eastern Time (Default Setting)
ZONE 03 — Central Time ZONE 04 — Mountain Time
ZONE 05 — Central Time ZONE 01 — Mountain Time ZONE 06 — Yukon Time
ZONE 03 — Pacific Time ZONE 07 — Hawaiian Time
ZONE 07-
- Press and hold 2. Press ▶ or ◀ 3. Press TIME ZONE again to save
TIME ZONE, the new zone number and resume
then release. to clock mode

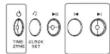

SNOOZE

Note: Time zone and clock settings can only be adjusted in Standby mode, where the function of Bluetooth and Soothing Sound are disabled.
Setting the Clock Manually
Checking the Current Year-Date-Day of Week-Time Settings
Press briefly the CLOCK SET button once to see the year, date in sequence. To restore time display mode, leave it idle for a few seconds.
Setting the Year
① Press and hold the CLOCK SET button during Standby mode until the
Year 'Flashes', the release the button;
② Press the ◀ or ▶ button to adjust Year;

Setting the Date
③ Press the CLOCK SET button again and release, the Month'Flashes
④ Press the 📁 or ➕ button to adjust the Monti
④ Press the ▼or▶button to adjust the month ⑤ Pass the 0.00K SET button again and
⑤ Press the CLOCK SET butt
release, the Date 'Flashes';
⑥ Press the ▶ or ▶ button to adjust the Date:
For example, April 16th will appear as '4, 16'
Setting the Time
⑦ Press the CLOCK SET button again and release.
the HaverFlashback
the Hour Flashe
⑧ Press the ◀ or ▶ button to adjust the Hour
® Does the CLOCK SET button press and set
⑨ Press the CLOCK S
the Minute 'Flashes'
⑩ Press the ◀or▶button to adjust the Minutes;
⑪ Press the CLOCK SET button again to store
① Press the SECOND SET button again to store all new settings and restore it to time display mode.
all new settings and restore it to time display mode.

8 Daylight Saving and Leap Year Adjustment
All Daylight Saving Time (DST) and Leap Year adjustment are made
automatically by the SmartSet ^® internal computer as follows:
Start of Daylight Saving time:
At 2:00 AM on the 2nd Sunday in March, the clock will automatically advance to 3:00 AM
End of Daylight Saving time:
At 3:00 AM on the 1st Sunday in November, the clock will automatically reset to 2:00 AM
- 2017年1月1日
Leap Year: Al 12:00 Midnight on February 28th, the calendar display will change to "3.20"
IMPORTANT NOTES
Turn Daylight Saving Function OFF/ON (in Standby Mode Only)
Daylight Saving Time is NOT observed in Hawaii, American Samoa, Guam, Puerto
Daylight Saving Time is No. 1 deserved in Hawaii, American Barnes, Sham, United Rico, the Virgin Islands and in most of Arizona, with exception of the Navajo Indian
Reservation in Arizona. If you do not want the clock to adjust itself automatically.
Reservation in Arizona. If you do not want the clock to adjust itself automatically according to Daylight Saving Time, you can disable it by pressing and holding the
according to Daylight Saving Time, you can enable it by pressing and holding the button or buttons for about 5 seconds until 'DST' shown on the display.
which means the auto Daylight Saving Time has been enabled ("ON" by default). Press
which means the auto Daylight Saving Time has been enabled ('ON' by de the, or button accordingly to toggle between 'OFF' and 'ON' for both
the "Q" or "P" button accordingly to toggle between "O" and "N" for both DST start and end dates. I leave it idle for a few seconds to store your new DST
DST start and end dates. Leave it rule for a few seconds to store your new DST settings and resume to clock mode.
settings and resume to clock mode. NOTE: If you manually adjust the f
NOTE: If you manually adjust the time, your new setting is entered into the
SmartSet® memory. If the power is interrupted, the display will re
new setting, not the original setting, when the power is restored.
9
Setting the Alarm
IMPORTANT: Alarm settings can only be adjusted in Standby mode.
Your clock speaker has two separate alarms Alarm1(AL1) and Alarm2(AL2) that can be set and used independently. You may use the alarms to wake two persons at different times, or you may use one alarm for weekdays and the other one for weekends. Please ensure that you have set the wake up time and alarm week mode correctly.
Adjusting the Wake Up Time, Alarm Volume and Sunrise Light Intensity The procedure for adjusting the wake up time is the same for both Alarm1 and Alarm2
- Press and hold either the AL1 or AL2 button until the display changes from the current time to the Alarm1 or Alarm2 wake up time and the Hour blinks.

- Release the AL1 (AL2) button, then press the ◀ or ► button to adjust Hour,
press the AL1 (AL2) button again to confirm the hour & the Minute blinks; press the ◀ or ▶ button to adjust Minute. Press the AL1 (AL2) button again to adjust Alarm Volume V94.1/6 by - Press the AL1 (AL2) button again to adjust Alarm volume V01-V16 by pressing the ▶ or ▶button
Press the AL1 (AL2) button again to adjust Alarm Week Mode if necessary by pressing the ◀ or ▶ button.
• Everyday -the alarm will turn on all 7 days

- Weekdays only-the alarm will only turn on Monday through Friday

- Weekends only -the alarm will only turnon Saturday and Sunday

Press the AL1 (AL2) button again to choose the wake up sound (the built-in 2 wake-up sounds: WS1 or WS2) if necessary by pressing the ▶ or ▶ button.
Press the AL1 (AL2) button again to choose the wake-up Sunrise light intensity L0-L5 (L0=Off) if necessary by pressing the ◀ or ▶ button.
- Press the AL1 (AL2) button to save the new alarm setting and resume to clock mode.
Checking the Wake Up Times and Alarm Week Mode
To check the wake up time or the alarm week mode settings, press either the AL1 or AL2 button. The display will change from current time to wake up time and the DAY OF WEEK icons will be displayed on one continuous scroll to show you the alarm time and alarm week mode which is currently selected. It will return to the current time display in 3 seconds after showing the wake up time
showing the wake up time.


Activating and Deactivating the Alarm
- Press and release the AL1 or AL2 button continuously to turn On your desired Alarm Mode: Wake to Sound, Wake to Buzzer, or Off.
- When the "≡" icon shown on the display,
the wake up to Sound alarm will be On.

- When the 'BiBi' icon shown on the display, the wake up to Buzzer alarm will be On.

- To completely turn Off the alarm, press and release AL1 or AL2 button continuously until "OFF" shown on the display.

Note:
1.) If the alarm sets at on, the Sunrise light begins to gradually turn on 2 minutes before your set wake-up time, when the alarm time comes, the light reaches to the maximum brightness you set, meanwhile, the alarm will sound, quietly at first, then gradually building up to the set volume. 2.) Press the ON/OFF button to cancel the alarm when it is invoked, the sound will be stopped and Sunrise light will be turned off, however, the alarm remains set and will turns on again at the same time on the following day (depending on the Alarm Week Mode setting).
Snooze Alarm When the alarm comes On, press the SNOOZE button to pause it for 9 minutes. Alarm indicator will flash during Snooze Alarm mode. Turn off Snooze Alarm, press the ON/OFF button once.

Note: If not turned off, the Snooze Alarm will only be ac
SNOOZE
10 Listening to Bluetooth Speaker
- Press the ON/OFF button to turn the unit ON.
- Press the ☑ (MODE) button to select Bluetooth (BT) mode, the Bluetooth indicator flashes for pairing.
- Enable your Bluetooth device and select CKSS7801WM from its Available/Paired device list. If pairing successful, the unit will prompt and Bluetooth indicator will become solid.
• Automatic connection with your Bluetooth devices is possible if they have been paired, successfully with this unit before.
• After paired, you can play your music through this Bluetooth Speaker. • Press briefly the ▶ button can pause or resume playback streaming over your Bluetooth device.


Note:
- If pairing unsuccessful, all previously paired Bluetooth devices around should be disconnected first by pressing and holding the ▶ button until it prompts, or turn Off their Bluetooth connection, in order to avoid making any auto reconnection between them. Then, set this unit to Bluetooth mode, and tap the Bluetooth switch on your phone/device Off and back On again to refresh/search any nearby CKSS7801WM for pairing.
- When it connects to an iOS device via Bluetooth, the clock time will be automatically synchronized with the time of the connected device.
11 Listening to the Built-in Soothing Sounds
1.) Press the ON/OFF button to turn the unit ON.
2.) Press the ⏻ (MODE) button to select Soothing Sound playback mode.

3.)Press briefly the ▶|| button can pause or resume playback
4.) Press the ▶ or ◀ to select the sound track, the track numbers 01-04 for the 4 Soothing Sounds and WS1/WS2 for the 2 Wake Up Sounds.
12 Sleep Timer & Sunset Simulation


- Press the SLEEP button during power on. the display will show the sleep timer.
- Press the SLEEP button repeatedly to choose your desired sleep timer (10-90 minutes or OFF) the following Sleep icon displays once.

Notes: When you change the sleep timer from the 10-minute default timing to different setting, this new setting becomes the default timing. • To display the sleep timer during count down process, press the SLEEP button.
- To cancel the sleep timer during count down process, press the ON/OFF button to shut Off the unit.
- If the LED Décor is on while sleep timer is activated, the LED Décor will be changed to Sunset mode automatically, the light changes to Brilliant Yellow color and it will slowly turn from bright to dark 2 minutes before the sleep timer ends.
13 Multi-Color 5-Level LED Décor
Press the 🎨 button to turn night LED on when needed.

- Press the 📋 button repeatedly to change the color of LED lights in the following cyclical manner:
Brilliant Yellow → White → Green-yellow → Green → Blue → Purple → Pink → Red → Color Auto Change
- Press the DIM button to adjust the brightness level (5-level) of the LED lights.
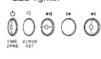


- Press and hold the 🔊 button to turn the LED lights off.
14 Sunrise Demonstration
Press the SUNRISE button to enter Sunrise demonstration mode, the Brilliant Yellow light begins to gradually turn on reaches to the maximum brightness in 5 minutes.
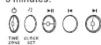


15 3-Level Dimmer Control Time Display
Press the SLEEP/※ DIM button while in Standby mode and select any of the three levels.


16 Changing the Lithium Battery

CR2032(3V)

The lithium backup battery needs replacement when the LOW BATTERY indicator flashes, otherwise, the time and alarm settings will be lost/reset after a power outage. - Leave the AC adapter connected to your AC outlet to retain memory while the original battery is removed.
- Unscrew the battery cover from the cabinet with a small screwdriver and insert a new battery with the same CR2032 or equivalent type into the slot the same way, observing the positive (+) polarity before putting the cover back into the slot. The LOW BATTERY indicator should then be Off.
BE CAREFUL NOT TO LOSE THIS SMALL SCREW!
17 Care and Maintenance
Care Of Cabinets
If the cabinet becomes dusty, wipe it with a soft cloth. If the cabinet becomes smudged or dirty, clean it with a soft, slightly dampened cloth. Never allow water or any liquid to get inside the cabinet. Never use any abrasive cleaners or cleaning pads as these will damage the finish of your radio.
Lithium Battery Precautions
- Dispose of the old battery properly. Do not leave it lying around where a young child or pet could play with or swallow it. If the battery is swallowed, contact a physician immediately.
- The battery may explode if mistreated. Do not attempt to recharge it or disassemble it. Do not dispose of the old battery in a fire.
18 IC Information
This device complies with Industry Canada Licence-exempt RSSs. Operation is subject to the following two conditions:
(1) this device may not cause harmful interference, and
(2) this device must accept any interference, including interference that may cause undesired operation of the device.
Emerson Radio Corp. warrants this product to be free from manufacturing defects in original material, including original parts, and workmanship under normal home use and conditions ("manufacturing defect") for a period of ninety (90) days from date of original purchase in, and if used in the United States. Should service be necessary under this warranty, Emerson will provide the following at our Return Repair Facility provided the manufacturing defect is verified along with the date of purchase:
* Repair service for ninety (90) days from date of original purchase at no charge for labor and parts.
To Receive Authorization to Return a Defective Item, please contact Emerson Customer Service at 1-800-898-9020 or at http://www.emersonradio.com/service/return-policy.Have your Model number, Serial Number and dated Proof of Purchase with you when you call.
In the event the product must be returned to Emerson:
* Pack the unit in a well-padded heavy corrugated box. Please insure the item is well padded to avoid damage while in transit back to our facility. If the item incurs damage, it will NOT be replaced and the consumer will be responsible for return freight costs to receive their same unit back.
* Enclose your check or money order payable to Emerson Radio in the amount of \$10 to cover return shipping and handling costs.
s. Enclose a note with your name, address, phone
number and brief reason for returning the unit.
* Enclose a copy of your proof of purchase (warranty service will not be provided without dated proof of purchase).
* Ship the unit prepaid via UPS or parcel post (SHIP INSURED and obtain a tracking number)
NOTE: This warranty does not cover:
(a) Damage to equipment not properly connected to the product.
(b) Cost incurred in the shipping of the product to and from Emerson's Return Facility.
(c) Damage or improper operation of unit caused by customer abuse, misuse, negligence or failure to follow operating instructions (including cleaning instructions) provided with the product.
(d) Ordinary adjustments to the product which can be performed by customer as outlined in the owner's manual.
(e) Signal reception problems caused by external antenna or cable systems. (f) Products not purchased in the United States
(g) Damage to product if used outside the United States.
THIS WARRANTY IS NON-TRANSFERABLE AND APPLIES ONLY TO THE ORIGINAL PURCHASER AND DOES NOT EXTEND TO SUBSEQUENT OWNERS OF THE PRODUCT. ANY APPLICABLE IMPLIED WARRANTIES, INCLUDING THE WARRANTY
PRODUCTANTAPID ISGABLE IMATED WARRANTIES, INCLUDING THE WARRANTY OF MERCHANTABILITY, ARE LIMITED IN DURATION TO A PERIOD OF THE EXPRESSED WARRANTY AS PROVIDED HEREIN BEGINNING WITH THE DATE OF ORIGINAL PURCHASE AT RETAIL AND NO WARRANTIES, WHETHER EXPRESSED OF MERCHANTABILITY, ARE LIMITED IN DURATION TO A PERIOD OF THE EXPRESSED WARRANTY AS PROVIDED HEREIN BEGINNING WITH THE DATE OF ORIGINAL PURCHASE AT RETAIL AND NO WARRANTIES, WHETHER EXPRESSED OR IMPLIED, SHALL APPLY TO THE PRODUCT THEREAFTER. EMERSON MAKES NO WARRANTY AS TO THE FITNESS OF THE PRODUCT FOR ANY PARTICULAR
PURPOSE OR USE. THE EXTENT OF EMERSON RADIO CORP'S LIABILITY UNDER THIS LIMITED WARRANTY IS THE REPAIR OR REPLACEMENT PROVIDED ABOVE AND, IN NO EVENT, SHALL EMERSON RADIO CORP'S LIABILITY EXCEED THE WARRANTY OF THIS WARRANTY. ANY OTHER INFORMATION IS NOT TO BE CIRCUMSTANCES SHALL EMERSON RADIO CORP. BE LIABLE FOR ANY LOSS DIRECT, INDIRECT, INCIDENTAL, SPECIAL, OR CONSEQUENTIAL DAMAGE ARISING OUT OF OR IN CONNECTION WITH THE USE OF THIS PRODUCT. THIS WARRANTY IS VALID ONLY IN THE UNITED STATES OF AMERICA. THIS WARRANTY GIVES YOU SPECIFIC LEGAL RIGHTS. HOWEVER, YOU MAY HAVE OTHER RIGHTS WHICH MAY VARY FROM STATE TO STATE. SOME STATES DO NOT ALLOW LIMITATIONS ON IMPLIED WARRANTIES OR EXCLUSION OF CONSEQUENTIAL DAMAGE.
10-90-1402A
The serial number can be found on the back cabinet. We suggest that you record the serial number of your unit in the space below for future reference
Model Number: CKSS7801WM Serial Number:

▲WARNING
• INGESTION HAZARD: This product contains a button cell or coin battery.
• DEATH or serious injury can occur if ingested.
• A swallowed button cell or coin battery can
cause Internal Chemical Burns in as little as 2 hours.
- KEEP new and used batteries OUT OF REACH of CHILDREN
- immediate medical attention if a battery is suspected to be swallowed or inserted inside any part of the body.

CALIFORNIA RESIDENTS ONLY-
WARNING: Cancer and Reproductive Harm – www.P65Warnings.ca.gov
- OWNER'S MANUAL CKSS7801WM
- WARNING
- IMPORTANT SAFETY INSTRUCTIONS
- Important Notes
- Preparation For Use
- Package Contents
- Location of Controls and Indicators
- Setting the Time Zone
- Initial Default Setting at Clock Mode
- Setting the Clock Manually
- Daylight Saving and Leap Year Adjustment
- Setting the Alarm
- Listening to Bluetooth Speaker
- Listening to the Built-in Soothing Sounds
- Sleep Timer & Sunset Simulation
- Multi-Color 5-Level LED Décor
- Sunrise Demonstration
- 3-Level Dimmer Control Time Display
- Changing the Lithium Battery
- BE CAREFUL NOT TO LOSE THIS SMALL SCREW!
- Care and Maintenance
- IC Information
- ▲WARNING
Brand : Emerson
Model : CKSS7801WM
Category : Digital Alarm Clock