
VRFCH-75U - Interface vidéo automobile CRUX - Free user manual and instructions
Find the device manual for free VRFCH-75U CRUX in PDF.


| Product Type | Interface Module for Front Camera and AV Inputs |
| Compatible Vehicles | 2017-2018 Jeep Compass and Renegade with factory backup camera |
| Inputs | 2 AV inputs (RCA), 1 front camera input (RCA) |
| Outputs | 1 video output (RCA) to radio, differential video output |
| Video Switching | Automatic to rear camera in reverse, automatic to front camera for 10 sec after reverse (up to 10 MPH), manual via steering wheel |
| Power Supply | 12V DC (ACC and constant), ground, 12V camera power (blue wire) |
| DIP Switch Settings | 8 DIP switches for enabling AV1, AV2, front camera, transmission type (manual/auto), brightness |
| Installation Type | Plug-and-play T-harness behind head unit |
| Module Dimensions | Approx. 2.5 x 1.8 x 0.8 inches (estimated) |
| Weight | Approx. 0.2 lbs (estimated) |
| Included Components | VRFCH-75U module, T-harness, video harness, audio harness |
| Front Camera Power | 12V output (blue wire), camera not included |
| Steering Wheel Control | Right middle button: toggle AV sources; hold 3s: enter/exit AV mode; Left ◀ button: toggle front/rear camera; hold 3s: forced camera view |
| Video In Motion | Allowed only for vehicles with factory backup camera |
| Brightness Setting | Adjustable via DIP switch #7 (ON recommended, OFF if display issues) |
| Transmission Setting | DIP #6: OFF for manual, ON for automatic |
| Maintenance | No regular maintenance required; ensure connections are secure |
| Safety Precautions | Disconnect battery before installation; avoid short circuits |
| Spare Parts / Repairability | Not user-serviceable; contact CRUX for support |
| Certifications | Not specified |
Frequently Asked Questions - VRFCH-75U CRUX
User questions about VRFCH-75U CRUX
0 question about this device. Answer the ones you know or ask your own.
Ask a new question about this device
Download the instructions for your Interface vidéo automobile in PDF format for free! Find your manual VRFCH-75U - CRUX and take your electronic device back in hand. On this page are published all the documents necessary for the use of your device. VRFCH-75U by CRUX.
USER MANUAL VRFCH-75U CRUX
- Front View Camera + 2 AV nputs
- Automatically switches screen to Rear-view when Reverse gear is engaged and to Front camera view when gear is engaged to drive
- Manual activation of the front camera using the steering wheel control button
- Plug & Play Installation
• Video in Motion function
For vehicles with factory installed backup camera ONLY.
PARTS INCLUDED:


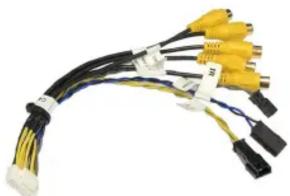
natural_image
Coiled network of yellow and black connectors with blue and white wires (no text or symbols visible)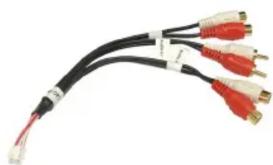
natural_image
Close-up of a black cable with multiple red and white connectors, no visible text or symbolsVRFCH-75U Module VRFCH-75U Harness Video Harness Audio Harness
INSTALLATION DIAGRAM:

flowchart
graph TD
    A["To Radio"] --> B["8-Pin Molex"]
    B --> C["SIABILING MODEL"]
    C --> D["Audio IN to Radio"]
    C --> E["Audio OUT from Interface"]
    D --> F["Audio In 1"]
    D --> G["Audio In 2"]
    C --> H["DIF. Video OUT"]
    C --> I["DIF. Video IN"]
    H --> J["Video 1"]
    H --> K["Video 2"]
    I --> L["Video 4"]
    I --> M["Video Out"]
    J --> N["Not Used"]
    K --> O["Not Used"]
    L --> P["Front Camera (not included)"]
    M --> P
    style A fill:#f9f,stroke:#333
    style P fill:#ccf,stroke:#333
DIP SWITCH SETTINGS:
| SETTING | DIP 1 | DIP2 | DIP3 | DIP4 | DIP5 | DIP6 | DIP7 | DIP8 | |||||||
| ON | AV 1 | Enabled | AV 2 | Enabled | Front Camera Enabled | Set to OFF | Set to OFF | Manual Transmission | Brightness Set to ON* | Set to ON | |||||
| OFF | AV 1 | Disabled | AV 2 | Disabled | Front Camera Disabled | Set to OFF | Set to OFF | Automatic Transmission | |||||||
*We recommend setting DIP #7 to ON, however, if the video does not display correctly, set DIP #7 to OFF instead.
INSTALLATION INSTRUCTIONS:
The interface module is installed behind the headunit.
INSTALLING THE INTERFACE MODULE
- Carefully remove the radio to gain access to the radio harness.
- Unplug the radio connector and plug it into the female connector of the VRFCH-75U T-harness.
- Plug in the T-harness (10-pin Molex connector), Video and Audio harnesses to the VRFCH-75U module.
- Install the front camera (not included) following the manufacturer's instructions.
- After installation of the front camera, plug in the camera's video RCA to the female RCA (Front Camera) and connect the camera power to the BLUE wire (Front Camera Power 12V) of the VRFCH-75U harness.
- Plug in any other Audio/Video devices to be installed to the AV inputs of the VRFCH-75U.
- Connect the AUDIO IN and AUDIO OUT on the VRFCH-75U harness. See diagram on page 1.
- Connect the DIF. Video IN and DIF. Video OUT connectors. See diagram on page 1.
- Set the DIP switches on the VRFCH-75U module following the chart above.
- Connect the ACC, 12V Constant and Ground wires of the VRFCH-75U to the vehicle power. See diagram on page 1.
OPERATION:
- Putting the gear in REVERSE automatically shows the rear camera onto the display.
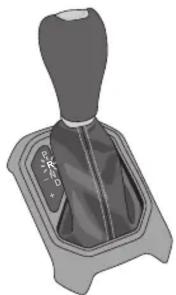
natural_image
Mechanical gear shift lever diagram showing blade and shaft (no text or symbols)- If a front camera is installed, the VRFCH-75U automatically shows the front camera for 10 seconds or until the vehicle reaches a speed of 10 MPH after a reverse process.

natural_image
Mechanical gear shift lever diagram showing internal components (no text or symbols)- To enter or exit the AV mode, please and hold the middle button on the right rear side steering wheel controls for 3 seconds.
- A quick press of the middle button on the right side steering wheel controls toggles between the AV sources.
- To enter forced camera view mode, please and hold the ◀ button on the left side steering wheel controls for 3 seconds.
- A quick press of the ◀ button on the left side steering wheel controls toggles between Front and Rear view cameras.
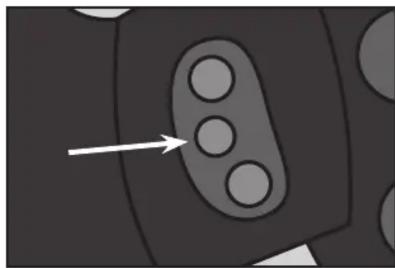
natural_image
Abstract diagram with three circles inside an oval shape and an arrow pointing to one circle (no text or symbols)
VEHICLE APPLICATIONS:
JEEP
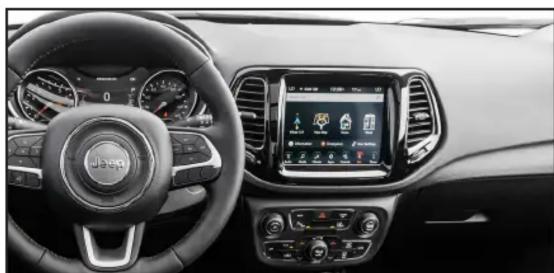
2017 - 2018 Compass
2015 - 2018 Renegade
Radio Compatibility:
Uconnect
NOTE:
Vehicle must have a factory installed backup camera.
natural_image
Interior view of a car dashboard with Jiroën branding and digital display (no visible text or symbols)2017 Compass 2017 Renegade

natural_image
Interior view of a car dashboard with digital display and steering wheel (no visible text or symbols)
Brand : CRUX
Model : VRFCH-75U
Category : Interface vidéo automobile