TBS-2121XTS - Teapot Fetco - Free user manual and instructions
Find the device manual for free TBS-2121XTS Fetco in PDF.


| Product Type | Electric Teapot with Temperature Control |
| Model | TBS-2121XTS |
| Brand | Fetco |
| Capacity | 1.7 L (approx.) |
| Material | Stainless Steel (inner body), BPA-Free Plastic (exterior) |
| Power | 1500 W (approx.) |
| Voltage | 120 V AC (US standard) / 230 V AC (EU) |
| Frequency | 50/60 Hz |
| Dimensions (L x W x H) | 22 x 16 x 25 cm (approx.) |
| Weight | 1.2 kg (approx.) |
| Cord Length | 75 cm (approx.) |
| Temperature Settings | Preset temperatures for green tea, white tea, oolong, black tea, herbal, and boil |
| Keep Warm Function | Automatic keep warm for up to 1 hour |
| Display | Digital LED display with temperature readout |
| Auto Shut-Off | Yes, after boil or when removed from base |
| Boil-Dry Protection | Yes, automatic shut-off if operated with insufficient water |
| Base | 360-degree swivel base with cord storage |
| Filter | Removable mesh filter for clean pouring |
| Lid | Hinged lid with one-button opening |
| Cleaning | Descaling recommended every 1-3 months with citric acid or vinegar solution |
| Maintenance | Wipe exterior with damp cloth; do not immerse in water |
| Safety Certifications | UL, ETL, or CE listed (varies by region) |
| Warranty | Limited 1-year manufacturer warranty |
| Spare Parts Availability | Contact Fetco customer service or authorized dealers for lid, filter, base |
| Repairability | Serviceable by qualified technicians; user-replaceable parts: filter, lid |
Frequently Asked Questions - TBS-2121XTS Fetco
User questions about TBS-2121XTS Fetco
0 question about this device. Answer the ones you know or ask your own.
Ask a new question about this device
Download the instructions for your Teapot in PDF format for free! Find your manual TBS-2121XTS - Fetco and take your electronic device back in hand. On this page are published all the documents necessary for the use of your device. TBS-2121XTS by Fetco.
USER MANUAL TBS-2121XTS Fetco
natural_image
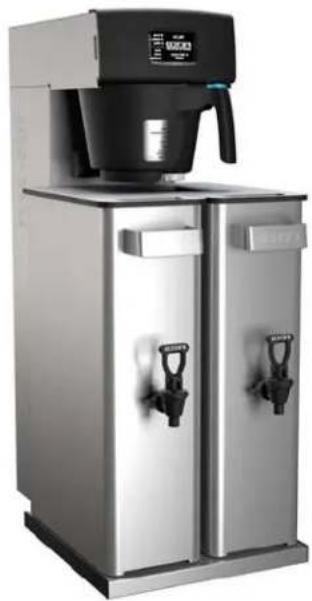
Modern stainless steel water dispenser with control panel and side grilles (no visible text or symbols)T85-2121 Iced Tea Brewer
natural_image
Exterior view of a modern stainless steel coffee water heater with control knobs and a digital coffee maker (no visible text or symbols)TBS-2121 Iced Tea Brewer with dual-3 gallon slim dispensers
JTD-2135 3.5 gallon Dual Slim dispenser / 3 gallon-in usel are available separate
NOTICE TO INSTALLER: Please leave this User Guide with the brewer.

Table of Contents
Contact Information ....2 Accessing batch and programming menu screens ....8
Description & Features....2 Operating Instructions....10
Specifications....3 Programming- operator access programming....12
Requirements ....3 Programming-category screens: Menu Tree....14
Weights Capacities and Measurements....3 Test, Calibration and Flow Rate adjustment....15
Electrical Configuration and Brewing Efficiency....3 List of Error codes for TBS-2121:....18
Installation....5 Optional tea dispenser instructions and cleaning....20
Final Setup....7 Parts diagrams, bill of materials lists ....22
Three position brewbasket and touch screen display. ...7 Wiring diagrams....26
FETCO®, LUXUS®, EXTRACTOR®, INTERMITTENT BREW, and Driven To Innovation™
are trademarks or trade names of Food Equipment Technologies Company.
Contact Information
FETCO®
Food Equipment Technologies Company
600 Rose Road
Lake Zurich • IL • 60047-0429 • USA
Internet: www.fetco.com
Phone: (800) 338-2699 (US & Canada)
(847) 719-3000
Fax: (847) 719-3001
Email: sales@fetco.com
techsupport@fetco.com
Description & Features
The TBS-2121 Iced Tea EXTRACTOR® series brewer features our universal spray over technology.
The following variables are programmed for each of nine menus (3 batches Left, Center, Right positions)
Brew volume
❖ Prewet percent (Percentage of the brew volume)
Brew time
❖ Prewet delay (The time between prewetting and the brew cycle.)
❖ Adjustable number of pulses
✿ Drip delay (The time between the end of the brew cycle to empty the brewbasket and end of the brewing cycle.)
❖ Dilution volume & time in cycle
❖ Expandable separately available base platform system
Using these variables, the software calculates how much water to use for prewetting, brewing, and dilution. The total brew time is divided into several cycles. Within these cycles, the software calculates how long to spray water over the tea, and how long to pause before the next cycle begins.
Features
❖ Touchscreen Operation
◆ Recipe copy
- Up to nine fully programmable menus/batch sizes
- Color coded handle insert for brewbasket handle
- Three position brewbasket/dispenser
❖ Magnetic flux brew basket sensor
✿ 7 pc Interchangeable brewbasket orifice set
❖ Shipped ready to operate out of the box
- Batch and dilution sizing for volume and ratio
◆ Digitally adjustable brew mechanism - Customizable batch name
- Brew at temperature protection
❖ Totalizing counters for brewer functions
❖ Cascading Spray Dome-no holes to clog - Save and load programs from SD cards
✿ SD card firmware program and upgrade
Specifications
Requirements
Water Requirements:
TBS-2121: 35-50 psig (241-345kPa) 1½gpm/(5.7lpm)
◆ Coffee Filter Size:
15" X 5 ½" – standard FETCO # F001
Factory calibrated for 45 psi water supply to inlet
Electrical: See electrical configuration chart.
❖ Water inlet fitting is a 3/8 inch male flare.
✿ Brew Volume: 3-5 gallon [3 gallon factory set]
Temperature:
200°F (93°C) inside water tank (at sea level) 195°F (91°C) ± 5° at sprayhead
Ratio: TBS-2121 (user adjustable) factory setting automatically adds 2 gallons of cold water for a 1:2 ratio Iced Tea (one third hot / two thirds cold).
Water Supply Pressure: Unit is factory calibrated to a stable, non-fluctuating water supply at 45 psi.
Unit may require calibration for other water pressures. See "Dill. Volume" setting in "PROGRAMMING" menu
Designs, materials, specifications, physical dimensions, firmware and software protocol for equipment or replacement parts are subject to change by FETCO without notice.
Weights Capacities and Measurements
| Weights and Capacities & Measurements-TBS-2121—Without Sweetener Option | ||||||||
| Height | Width | Depth | Empty Weight | Filled Weight | Hot Water Tank Volume | Total Weight-Brewer & Filled Dispenser* | Shipping Weight | Shipping Dimensions |
| 33 7/8 in 859mm | 13.5 in 343mm | 19 1/2 in 495mm | 35 lbs 15.9 kg | 43.7 lbs 24.6 kg | 10.4 liter 2.75 gallon | 77.8lb 40.3 kg | 46 lbs 20.9 kg | 24" x 15" x 38" 591 x 268 X 943mm |
*Measurement made with a single ITD-2135 Iced Tea Dispenser
Electrical Configuration and Brewing Efficiency
| Electrical Configurations TBS-2121-3 gallon brewer without Sweetener Option | ||||||||
| Configuration Code | Heater Configuration | Voltage | Phase | Wires | Electrical Connection US/Canada | KW | Maximum Amp Draw | Batches per Hour (3gal/11.4L per batch) |
| T212101 | 1 X 1680 120 | 1 2+G | NEMA | 5-15P | /5-20P-c 1.7 | 14 | 4 | |
Designs, materials, specifications, physical dimensions, firmware and software protocol for equipment or replacement parts are subject to review and change by FETCO without notice
Dimensions & Utility Connections—Rough-in drawings
![17½ [446] 29½ [593] 10½ [261] 33½ [851]](/content/2026/05/996984/images/f3d41daa2f4f590f1df546e3e7000496dad4b480cb262ae0bdb251e73f63d406.jpg)
![245 8 [626] 263 8 [669]](/content/2026/05/996984/images/8882b95e2114f374ce65a87a269b035e5fc80bf30764d564a379e50856049de9.jpg)
Rough-in TBS-2121
shown with two ITD-2135 3.5 gallon Dual Slim dispensers
![9 [229] 33 7 [860] PET100 PET100 22 3/4 [578] 13 1/4 [335]](/content/2026/05/996984/images/e3a84dd03288e08f798983724f262af9bf57b343e0a7ad0eecfd4d391d17684c.jpg)
![BACK VIEW 10½ [258] 6½ [165] E 3½ [88] W 3¾ [95]](/content/2026/05/996984/images/e6a95e1f3ec800446e537bf8c4d58fddbbe56391ef9650f74a7c255f2a774887.jpg)
Utility Connections—TBS-2121
Installation
(For Qualified Service Technicians Only)
Guide to A Successful Installation
If not installed correctly by qualified personnel, the brewer will not operate properly and damage may result. Damages resulting from improper installation are not covered by the warranty, and will void the warranty. Here are the key points to consider before installation:
Electrical:
All FETCO brewers require an electrical ground wire. Installation without grounding is dangerous.
❖ Verify voltages, polarity, circuits, and circuit breaker access before attaching equipment.
The electrical diagram is located in the Users Guide and online at www.fetco.com.
The installation must comply with applicable federal, state, and local codes having jurisdiction at your location. Check with your local inspectors to determine what codes will apply.
Plumbing:
All installations must comply with applicable federal, state, or local plumbing codes.
An inline water filter is highly recommended. It should be installed after a water shutoff valve and in a position to facilitate filter replacement.
The water line and newly installed filter cartridge must be flushed thoroughly prior to connecting it to the brewer to prevent debris from contaminating the machine.
✿ Verify that the water line will provide a flow rate of 112 gpm/(5.7lpm) per minute and water pressure is between 35-50 psig (241-345kPa) before making any connections. A pressure regulator may be required
- Install a backflow prevention device if required. Many municipalities require a recognized backflow preventer. Usable on all hot beverage and cold beverage equipment is a WATTS® SD-2 or SD-3. These spring loaded double check valve models are accepted by most zoning authorities. The check valve should be as close to the water supply inlet of the beverage equipment as possible.
General:
◆ Utilize only qualified beverage equipment service
◆ technicians for installation.
A Service Company Directory is available at www.fetco.com.
![BACK VIEW Power Cord Power Switch [Optional] B.I.B. Connector for Sweetener Utility slide on back of brewer Water Supply Connection 10 1/8 [258] 6 1/2 [165] E 3 1/2 [88] W 3 3/4 [95]](/content/2026/05/996984/images/aa7c73ff0ce69d22be9f5467d3768483d31cc6beb1d6ba1c26ece0a7c778dba4.jpg)
Installation Instructions
Brewer Setup
- Review the dimensions for the unit and verify that it will fit properly in the space intended for it. Verify that the counter or table will support the total weight of the brewer and dispensers when filled (specifics-page 3). Allow a counter for a unit that is 19 12 inches/495mm deep from front to the wall
- Place the brewer on the counter or stand.
- When the brewer is in position, level it front to back as well as side-to-side by adjusting the legs.
- For Sweetener Delivery units, provide space near the TBS-2121 for the sweetener boxes
Water Connection
- Water inlet is a 3/8 inch male flare fitting.
- Connect brewer to a cold water supply line only.
- Install a water shut off valve near the brewer to facilitate service. An in-line water filter should be used, it should be installed after the water shut off valve and in a position to facilitate filter replacement.
- Flush the water supply line and filter before connecting it to the brewer
- Verify that the water line will provide at least 1½gpm (5.7lpm) per minute and also that the water pressure is between 35-50 psig (241-345kPa) before connecting it to the brewer.
- Note that during use all water filters will clog and will slow the water flow. The reduced water flow affects the operation of the TBS-2121. Always schedule changing water filters per the manufactures specification.
- Unit was calibrated to a stable, non-fluctuating water supply at 45 psi. Unit may require a pressure regulator OR calibration for other water pressures. See "Dill. Volume" setting in "PROGRAMMING" menu
Electrical Connection
- Verify that the actual voltage at the electrical service connection is compatible with the specifications on the brewer's serial number label.
- Plug in unit into an appropriate 120v circuit. Note that the plug is either a NEMA 5-15P or NEMA 5-20P. The NEMA 5-15P is for a minimum 15 amp circuit the NEMA 5-20P a minimum 20 amp circuit [USA].
- The temperature and the fill level of the water tank are pre-set at the factory. There is no need to turn off the heaters during the installation process. The control board automatically disables the heaters until the tank is full of water. The heating process will start automatically when the tank has filled with water.
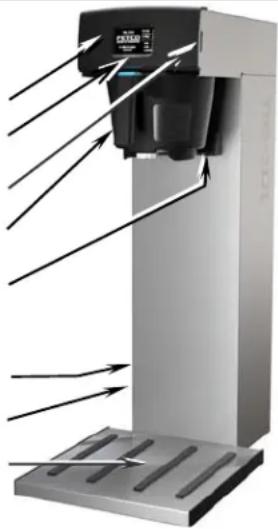
Features of your FETCO Brewer
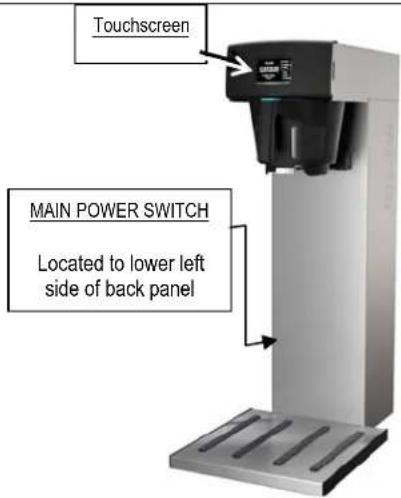
Touch-screen for brewer operation Brew basket sensor (not accessible) SD card interface port (Load & Save)
Three Position Brew Basket Dilution shelf-[behind brew basket]
Removable back panel for service Main power switch Platform for two slim-line dispensers
natural_image
Diagram of a digital water level instrument with directional arrows indicating flow or movement (no text or symbols present)
Warning: To prevent electrical shock, this unit must be properly grounded.

WARNING—DANGER
Do not plug-in or electrically energize this equipment, or attempt operation without all covers in place and all screws fastened.
Final Setup
- Turn on incoming water supply line and carefully inspect both inside and outside of the brewer for leaks in all fittings and tubes
- Turn power on—by pressing the brewer's main power switch (located on the lower right of the back of the equipment)
- The water tank will begin filling. FETCO Home Screen #1 will read "FILLING".
- When the water level rises and is sensed by the probe at the top of the tank the heaters will activate
- Heaters are automatically disabled until the tank is full.
- While the water is heating Screen #2 "HEATING" will display and the actual water temperature will be displayed.
- After the water has reached the set temperature Screen #3 will display "READY"
- Review the Operating Instructions. Brew one full batch (water only) to confirm proper fill levels. The brewer is factory set with water only (no tea) to dispense the correct amount of water. If the actual volume is slightly different from the programmed volume, fine-tuning the brewer may be necessary.
- Re-attach the covers after one final inspection for leaks. Look closely in the top of the brewer section at the dispense fittings during this inspection.
Danger: Do not operate without covers in place
FETCO Home Screen #1 "FILLING"
| TBS_2121 | Ready |
| Heating | |
| FETCO | Filling |
| ©2013 all rights reserved | Touch screen to unlock |
FETCO Home Screen #2 "HEATING"
| TBS_2121FETCO | □ Ready■ Heating□ Filling |
| ©2013 all rights reserved | Touch screen to unlock |
FETCO Home Screen #3 "READY
| TBS_2121 | ■ | Ready |
| □ | Heating | |
| FETCO | □ | Filling |
| ©2013 all rights reserved | Touch screen to unlock | |
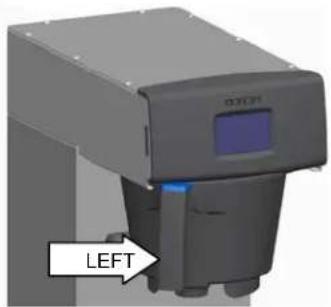
Three position brewbasket and touch screen display.
Brewbasket handle—LEFT Brewbasket handle—CENTER Brewbasket handle—RIGHT
natural_image
3D rendering of a mechanical device with a labeled left arrow pointing to a component (no readable text or symbols)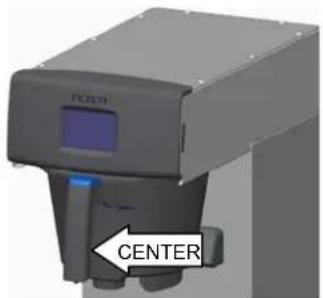
natural_image
3D rendering of a mechanical device labeled 'PCTRI' with an arrow pointing to the center (no readable text or symbols beyond label)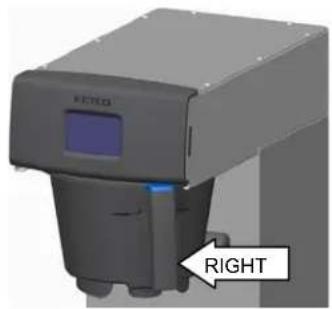
natural_image
3D rendered image of a mechanical device with a labeled right button (no readable text or symbols)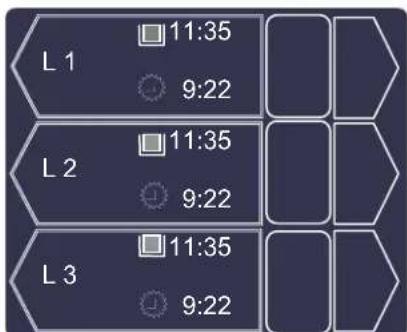
Left screen, L1(top) is permanent
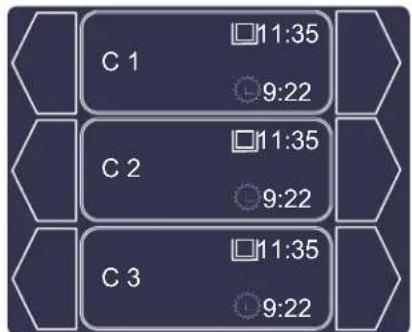
Center screen—recommended for 5 gal brews
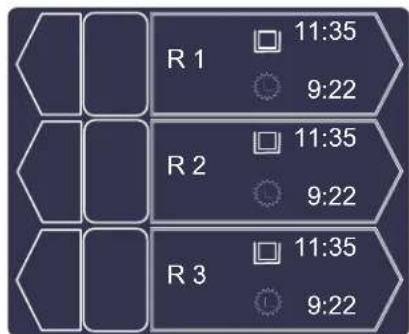
Right screen, R1(top) is permanent
-Position of the brewbasket handle activates left, right, or center menu screens for nine menu settings.
-L1 and RI brew positions are permanent screen menu settings; all or any of the other seven can be deleted.
-We recommend the center menu screen for brewing into dispensers over 3.5 gallons.
-Only the center and right menu screen contains dialog and controls for the (optional) sweetener option..
Accessing batch and programming menu screens
Batch selection and brew operation menu screens
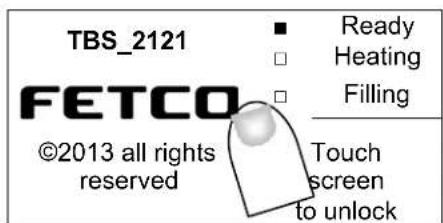
This screen displays when the TBS-2121 is in standby mode
← Tap FETCO HOME SCREEN to enter batch selection screen.
Align brewbasket handle to select, center position batches (center shown)→
Touch and hold activated top, middle or bottom (C1, C2, C3) recipe batch selector to begin brew.
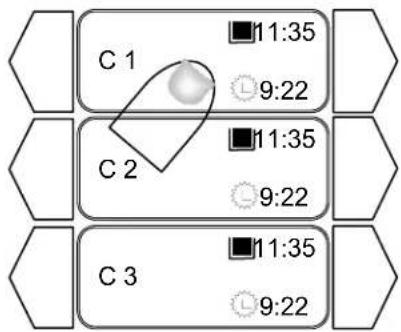
Operation screens
FETCO home screen
Programming menu screens
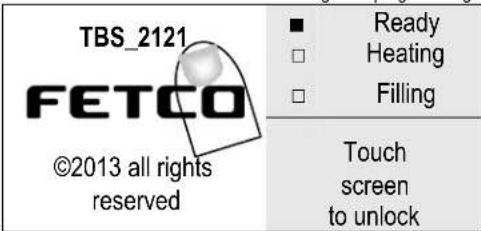
To access programming
(Power off and power on the equipment-then touch and hold screen) ←Switch TBS-2121 power "OFF"
Turn main power switch to "ON"—The touch screen will illuminate. Immediately touch and hold finger to enter programming In 5-8 seconds "PROGRAMMING" screen will appear
Illuminated touch screen-touch and hold finger for programming
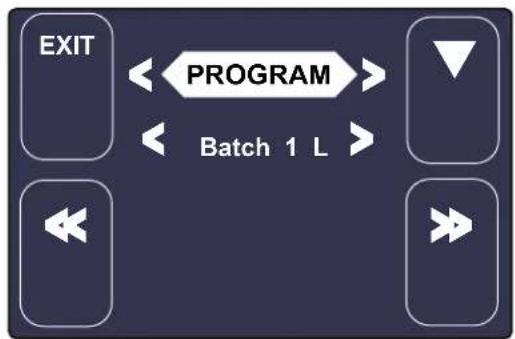
flowchart
graph LR
    A["EXIT"] <--> B["PROGRAM"]
    B --> C["Batch 1 L"]
    C --> D["↓"]
    C --> E["←"]
    C --> F["←"]
    C --> G["→"]
Programming screen
-START→
PROGRAM
GENERAL
INPUTS
OUTPUTS
OTHER
Screen shows the "PROGRAM" Icon
In the position shown, the unit will access and display the recipe for batch Left-1 (the top touch screen pennant) By touching the right double arrows, the PROGRAM icon will scroll through the other control icons
PROGRAM...GENERAL...INPUTS... OUTPUTS...OTHER...... continued scrolling returns to "PROGRAM".
Operator Training
Review the operating procedures for the brewer.
Pay particular attention to the following areas:
- Always have an empty dispenser under the brewbasket
- Don't remove the brew basket from a brewer until it has stopped dripping.
- Make sure the dispenser is empty before brewing into it.
- Show how to attach covers, close, and/or secure the dispensers for transporting.
- Show the location and operation of the water shut off valve as well as the circuit breaker for the brewer.
- Steam from the tank will form condensation in the vent tubes. This condensation will drip into and then out of the brew baskets. Up to 1/2 cup/118cc discharging overnight is possible. Place an appropriate container under the brew basket when not in use.
- We recommend leaving the power to the brewer on overnight. The water tank is well insulated and very little electricity is used to keep the tank hot. Leaving the brewer in the "ON" position will also avoid delays at the beginning of shifts for the brewer to reach operating temperature.
Cleaning & Maintenance
After Each Brew:
- Dispose of used filter and rinse brew basket.
- Never strike a brewbasket or hit it against a hard surface.
This will damage the brew cone, and may damage the brewbasket support rails - Rinse dispensers before reuse.
Every Day:
- Wash brew basket with hot sudsy water.
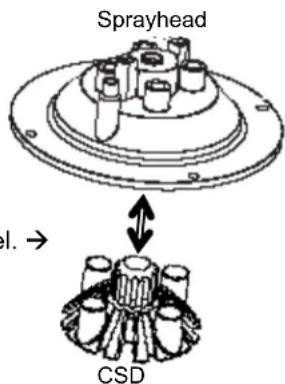
- Pull CSD from the spray head, it is magnetically attached. Use gloves or a heavy towel. → Wash off any film and reattach. Use vinegar if limescale filming is present.
- Clean dispensers with hot suds water and a brush, rinse and air dry.
- Use only a soft cloth and hot suds on the outside surfaces to avoid scratches. Never use abrasives, which will scratch surface.
Weekly
- Use a commercial coffee dispenser cleaner such as URNEX™, TABZ™, DIP-IT™ or Squeak 'n Clean™.
- Carefully Follow the instructions supplied with the cleaning product
- Never use spray cleaners, solvent, solvent based cleaner or petroleum based polish anywhere on dispensers
Safety notes
- Professional installation is required. This appliance is manufactured and approved for commercial use only.
- Operation requirements and maintenance for commercial cooking appliances differ from household appliances.
- Operators must be trained for this equipment and must understand the use, maintenance and hazards.
- Do not attempt to move hot beverage equipment once it is filled. IMPORTANT: Drain equipment before moving. TBS-2121 Iced Tea brewers prepare 3-5 gallons/11.4-19 liters of tea in a single batch using very hot water. For safety, do not attempt to remove brew basket until the brew-dilution sequence is complete.
Warning
- Turn off power before any cleaning procedure, including wiping the exterior for appearance reasons.
- Dry the exterior, especially the face panel, before turning on power.
- Do not apply any type of spray cleaner on the face panel of this equipment.
- Never use solvent or solvent-based cleaner or petroleum based polish anywhere on this equipment.
- Dry the face of the touch pad before turning on power
- Do not electrically energize this equipment or attempt operation without all covers in place and all screws fastened.
- Unplug machine before disassembly or servicing.
Operating Instructions
Quick brewer setup
NOTES
| 1) Install plumbing and electrical utilities. | -See Installation Section in this guide |
| 2) Turn rear power switch “ON”. | -Located on back, lower right side |
| 3) Brewer hot water tank will fill in 4-8 minutes. | -Ready screen will display “■FILLING” |
| 4) Heater(s) activate when tank is full | -Ready screen will display “■HEATING” |
| 5) Initial heating will be 15-30 minutes | -Place dispenser(s) under brewbasket to collect any overflow and condensate |
| 6) Tank displays “▪ READY” when filled & 200°F/93°C is reached | |
| 7) Brewer is ready to brew when “▪ READY” is displayed | -Best results if brewer remains “ON” |
Brewing
→To brew a single 3 gallon batch of iced tea, using default recipe
NOTES
| FETCO TBS-2121 series equipment is factory calibrated and preloaded with nine recipes and is ready to brew. | |
| 1) Place paper filter in brew basket | -FETCO 15" X 5 1⁄2 "product # F001 |
| 2) Add tea leaves (approximately 3oz per single 3 gallon brew batch) | -Weights given are only suggested |
| 3) Insert loaded brewbasket into brewer rails and position handle | -Brewbasket(s) must be in place |
| 4) Position brewbasket handle to the right | -Left, Center and Right hand position |
| 5) Have empty dispenser under brewbasket | -Use the convenient locator guide |
| 6) Tap “▪ READY” screen to enter the batch selection menu | -A long duration “TAP” with fingertip |
| 7) Touch a top batch key for “R1” | -Touch batch pennant with fingertip |
| 8) Brewer will brew and display the icon for the function step it is in | -Icon may be toggled for information |
| 9) Note there is a pause for dilution | |
| 10) Batch will complete brewing in 5 1⁄2 minutes | -Brew time: 4 minutes+11⁄2 min. drip out |
Touch the "Ready" screen anywhere briefly to activate
| TBS_2121 ■ | Ready |
| □ Heating | |
| FETCO | □ Filling |
| ©2013 all rights reserved | Touch screen to unlock |
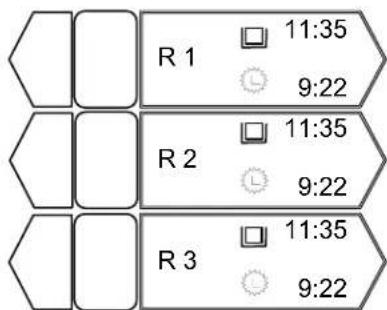
Touch and hold finger on selection pennant for about two seconds to start brew
1) TBS_2121 "READY" screen. This displays when in standby.2) TBS_2121 "MENU" screen—right side (brewbasket is oriented right) Tap or touch "READY" screen to display menu screen Touch and hold batch pennant for about two seconds to start brew
Brewing-shown by touchscreen
-The FETCO TBS 2121 has three brew basket positions with three-brew batch menu screen per position.
-Each menu screen has three recipes preprogrammed with basic settings.
-There are two permanent batches Left top (L1) and Right to (R2); any or all of the remaining seven may be withdrawn
-Settings are adjustable and the names can be changed. -Batch L1 and R1 cannot be disabled.
| Brewer screens displayed for brewing | |||||
| Illuminated touch screen-touch and hold finger for programmin | Brew has started | ||||
| TBS_2121 FETCO ©2013 all rights reserved | ■ Ready □ Heating □ Filling Touch screen to unlock | R1 1:35 9:22 F° 200 | STOP | ||
| TBS_2121 FETCO ©2013 all rights reserved | ■ Ready □ Heating □ Filling Touch screen to unlock | "READY SCREEN" Tap screen to display menus | Drip out mode If dilution and sweetener is not activated | ||
| R1 1:35 9:22 F° 200 | STOP | ||||
| R 1 | 11:35 9:22 | Unit displays three preprogramm ed batch buttons. Right side Shown | Drip out mode Dilution activated | ||
| R 2 | 11:35 9:22 | ||||
| R 3 | 11:35 9:22 | ||||
| R 1 | 11:35 9:22 | Select and hold one button for 2 seconds Illustration shows: Right Side, Button 1 | Drip out mode completed Dilution finishing | ||
| R 2 | 11:35 9:22 | ||||
| R 3 | 11:35 9:22 | ||||
| Brew at temperature enabled: brew will start when tank temperature reaches the set point | R1 11:35 9:22 F° 200 STOP | ||||
| INSERT BREW BASKET | Brew basket not in place. Note that there are three brewbasket positions: Left Center, and Right | ||||
Programming- operator access programming
| Accessing programming category screensTo enter: Turn unit “OFF”. After 10 second delay, turn unit “ON”,Home Screen willImmediately place finger on right side-(grey) of screen and “HOLD”PROGRAM Screen (first below) will appear.Use right/left and down arrows to travel through programming.“EXIT” saves settings |  | ReadyHeatingFillingTouchscreento unlock | ||||
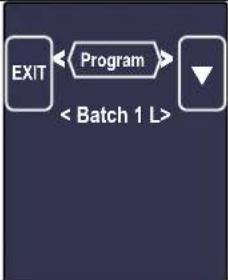
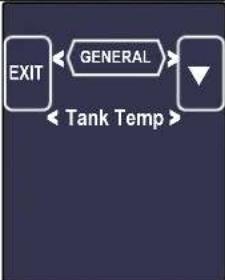
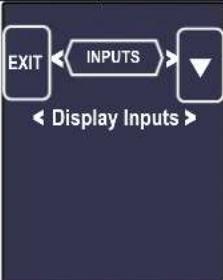
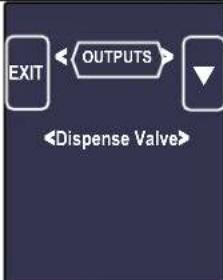
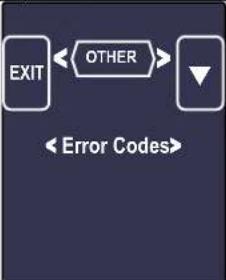
| Top line (PROGRAM) is programming category→Second line (Batch 1L) displays items for programming→Right and left hand arrows will scroll to the screens that display “Program, General, Inputs, Outputs and Other”.Down arrow enters the individual programming items shown below | 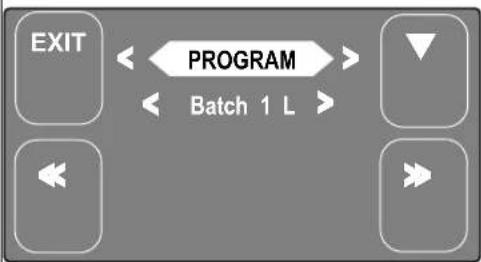 | 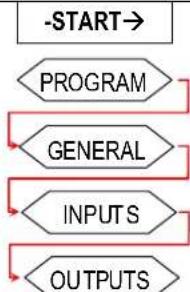 | ||||
 |  |  |  |  | ||
| Programming Category | Programming Category | Programming Category | Programming Category | Programming Category | ||
| PROGRAM | GENERAL | INPUTS | OUTPUTS | OTHER | ||
| Items for Programming | Items for Programming | Items for Programming | Items for Programming | Items for Programming | ||
| Batch 1 L | Tank Temp | Display Inputs | Dispense Valve | Error Codes | ||
| Batch 2 L Brew At Temp | Cal. Touch Screen | Left Dilution Copy Program | ||||
| Batch 3 L | Time/Date | R. Dilution | Upload Logo | |||
| Batch 1 C | Unit of Meas. | Sweetener | Reset to Fact. | |||
| Batch 2 C | Logo Timeout | Fill Valve | Counters | |||
| Batch 3 C | Service Tel | Heater | Firmware | |||
| Batch 1 R | Buzzer | |||||
| Batch 2 R | Screen | |||||
| Batch 3R | ||||||
| Batch Copy | ||||||
| PROGRAM | Programming Items | Factory set Default | Programming Range Notes | |
| Batch 1 L* | · Batch Summary | Display Summary | ||
| · Batch Name | L: 1 | Choose from list:L 1 | (Regular 1-16)-OR-Write: any name | |
| · Extract Vol. | 3.80 liter[0.40-11.35] | 3.80 liter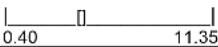 | Volume of HOT tea fordilution with cold [1:2] | |
| · Dill. Volume | 7.60 liter | 7.60 liter | Volume of COLD waterto add to hot brew | |
| · Dill. Sequence | After Brew | After Brew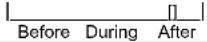 | To select when to addthe cold dilution water | |
| · Dill. Delay | 1:00 mm:ss | 1:00 mm:ss | Option to manually addingredients to hot brew[cane sugar, flavoring syrup] | |
| · Prewet Perc. | 0% | 0% | ||
| · Brew Time | 6:00 mm:ss | 6:00 mm:ss | ||
| · Nr Of Pulses | 4 | 4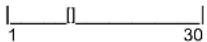 | ||
| · Drip Delay | 1:30 mm:ss | 1:30 mm:ss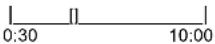 | ||
| Notice→ | *Batch 1-Left and Batch 1-Right are mandatory and are always permanently selectedBatch 1-Center and Batches 2-3 [Left, Cente  each be selectively hidden each be selectively hidden | |||
| Batch 2 L** | · Batch ON/OFF | ON | ON | |
| · Batch Summary | Display Summary | ACKK | ||
| · Batch Name | L: 1 | CWZW | (Regular 1-16)-OR-Write: any name | |
| · Extract Vol. | 3.80 liter[0.40-11.35] | 3.80 liter | Volume of HOT tea fordilution with cold [1:2] | |
| · Dill. Volume | 7.60 liter | 7.60 liter | Volume of COLD waterto add to hot brew | |
| · Dill. Sequence | After Brew | After Brew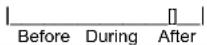 | To select when to addthe cold dilution water | |
| · Dill. Delay | 1:00 mm:ss | 1:00 mm:ss | Option to manually addingredients to hot brew[cane sugar, flavoring syrup] | |
| · Prewet Perc. | 0% | 0%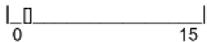 | ||
| · Brew Time | 6:00 mm:ss | 6:00 mm:ss | ||
| · Nr Of Pulses | 4 | 4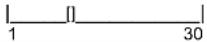 | ||
| · Drip Delay | 1:30 mm:ss | 1:30 mm:ss | ||
| Batch Copy | Copy From Batch L1 L1-L4;R1-R4 | |||
| Copy To Batch L1 L1-L4;R1-R4 | ||||
| Copy? | L1→L2? (example) |   | ||
| Batch 3 Left ** | (See Batch 2-L) | |||
| Batch 1 Center ** | (See Batch 2-L) | |||
| Batch 2 Center ** | (See Batch 2-L) | |||
| Batch 3 Center ** | (See Batch 2-L) | |||
| Batch 1 Right * | (See Batch 1-L) | |||
| Batch 2 Right ** | (See Batch 2-L) | |||
| Batch 3 Right ** | (See Batch 2-L) | |||
| *Batch 1L & 1R are mandatory for display and cannot be disabled. 13*Batch can be disabled ["hidden"], and removed from display | ||||
*Batch 1L & 1R are mandatory for display and cannot be disabled. 13*Batch can be disabled ["hidden"], and removed from display
Programming-category screens: Menu Tree
Menu Features: Batch Parameters
| GENERAL | Programming Items | Factory set Default | Programming Range (display) | Notes |
| Tank Temp. | 200°F | 200 °F180 207 | Correction for high altitude below | |
| Brew at Temp. | “OFF” allows brewing at any temperature. | AUTO | AUTOOFF ON AUTO | SEE NOTE BELOW! |
| Time/Date | Your current time and date | CST | Set time HH:MMSet date Y/mm/DD | |
| Units of Meas. | • Temperature | °F | °F1°F °C | |
| • Volume | Liters | Liters1 Gallons Liters | ||
| Logo Timeout | 1:00 | 1:00 mm:ssmm:ss0:00 5:00 | ||
| Service Tel. | Has FETCO # as default | Choose from list | Write:(800) 338-2699 | Can enter any number |
| INPUTS | Programming Items | Factory set Default | Programming Range (display) | Notes |
| Display Inputs | • Input Summary | (L) Brew Basket Sensor □(C) Brew Basket Sensor ■(R) Brew Basket Sensor □L.Level Sensor ■Temperature Probe □ | For verifying brewbasket sensor-Center position sensedWater probe in hot water tank and temperature probe | |
| Cal. Touch Scr | Calibrate | Calibrate YES NO | If Yes:Follow directions on the touch screen |
| Chart to correct for boiling point for altitude in tank water temperature. | ||
| Altitude (ft.) | Suggested Setting(°F) | Boiling point (°F) |
| 0 200 21 | 2.0 | |
| 500 200 | 211.1 | |
| 1000 200 | 210.2 | |
| 2000 200 | 208.4 | |
| 2500 200 | 207.5 | |
| 3000 200 | 206.6 | |
| 3500 197 | 205.7 | |
| 4000 195 | 204.8 | |
| 4500 194 | 203.9 | |
| 5000 194 | 203.0 | |
| 5500 193 | 202.0 | |
| 6000 192 | 201.1 | |
| 6500 191 | 200.2 | |
| 7000 190 | 199.3 | |
| 7500 188 | 198.3 | |
| 8000 187 | 197.4 | |
| BREW AT TEMPERATURE DEFINITIONS | |
| BREW AT TEMP: AUTO(DEFAULT: FACTORY PROGRAMMED INTO BREWER)This allows the “BREW START” to active. If the hot water tank is at the selected temperature—the brew will start.If the temperature is too low, the brewer will wait until the proper temperature is reached. A screen (example to the right) will display showing a thermometer icon and the tank temperature.IMPORTANT: ALWAYS have dispenser(s) under the brew baskets when in the BREW AT TEMP mode. | R111:359:22F° 200 STOP |
| BREW AT TEMP: ON USER SELECTABLE“BREW START” Batch Section Buttons will not be accessible until tank temperature is at set point.The “BREW START” screens with the Batch Section Buttons become accessible when hot water tank is at the selected temperature. The screen at right displays when the “BREW AT TEMP” is selected. | TBS_2121 □ Ready■ HeatingFETCO □ Filling©2013 all rights reserved Touch screen to unlock |
| BREW AT TEMP: OFF USER SELECTABLEAllows brewing at any temperature above 179°F/82°C. (Not recommended) | |
| OUTPUTS | Programming Items | Factory set Default | Programming Range (display) | Notes |
| Dispense Valve | • D. Valve Test (Press to test) | TESTPress To Test | Opens valve to verify flow. Have container under brewbasket! | |
| •Valve Calib.*See note | < OUTPUTS ><Valve Test>TEST | Scroll (left or right) fromposition to | See box below to readjust flow rate | |
| Left Dilution | • L. Dill. Test (Press to test) | TESTPress To Test | Runs left dilution to verify flow. Have container under brewbasket! | |
| Right Dilution | • R. Dill. Test (Press to test) | TESTPress To Test | Runs right dilution to verify flow. Have container under brewbasket! | |
| Sweetener | • Sweet Test (Press to test) | TESTPress To Test | Runs sweetener pump to verify flow. Have container under brewbasket! | |
| Fill Valve | • Fill Valve Test (Press to test) | TESTPress To Test | Operates fill valve. Have container under both brewbaskets! | |
| Buzzer | (Press to test) | TESTPress To Test | Sounds buzzer | |
| Heater | • Heater Test (Press to test) | TESTPress To Test | Energizes Heater(s) Use for servicing. | |
| Screen | • Screen Contrast Contrast | 81 10 | ||
| • S. Brightness | Brightness | 81 10 | ||
| *note The same TEST/CALIBRATION sequence is used for test and calibration all water handling system components Dispense Valve, Left Dilution, Right Dilution, Sweetener. Always obtain an accurate one minute Test Volume to calibrate | ||||
Test, Calibration and Flow Rate adjustment
| Calibration: Dispense Valve, Left Dilution, Right Dilution, Sweetener | |
| 1) Place measuring container under brewer | Use a container that will make careful measurements of volume.Pre-weigh (TARE) a dispenser (preferred) or use an accurate graduated pitcher |
| 2) Enter “Outputs” in “Programming” See page 12, Programming- operator access programming | |
| 3) Press and hold the “TEST” button.Do not remove finger!(This will stop testing). | The maximum dispense time cycle is only one minute for “TEST” button. .The test must run for entire one-minute dispensing cycle without interruption.Test will stop automatically. |
| 4) TEST icon will turn darkShows test is completed | IMPORTANT! Complete entire calibration dispense without stopping |
| 5) Note volume | Obtain volume dispensedMetric Units: milliliters if set for metric unitsGallons: Enter proportional volume of one gallon if set for gallon unitsTo obtain proportional volume Divide ounces delivered by 128 (EX: 32 oz/128=0.25) |
| 6) Enter Calibration screen | Scroll from dilution and valve test to Calibrate in Programming OUTPUTS Menu |
| 7) Enter Calibration calculator | Scroll down to CALIBRATE—sliding virtual volume icon will appear |
| 8) Enter volume from test | Enter volume in milliliters or gallons obtained from one minute “ON” testing |
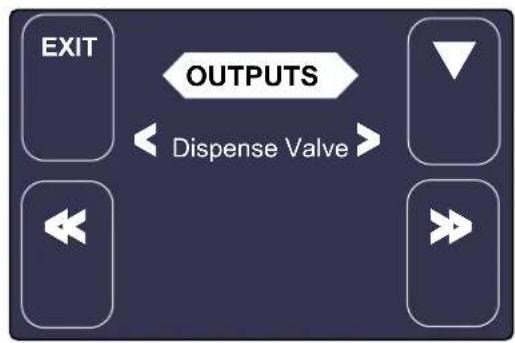
flowchart
graph TD
    A["EXIT"] --> B["OUTPUTS"]
    B --> C["Dispense Valve"]
    C --> D["Downward Arrow"]
    C --> E["Right Arrow"]
    C --> F["Left Arrow"]
EXAMPLE: Calibrate DISPENSE VALVE
Note: TBS-2121 default units are liters/ml.
Display may be changed by user to gallons units.
1) Enter Programming menu.
See page 12, Programming-
Operator Access Programming
Scroll to "Outputs" in "Programming"
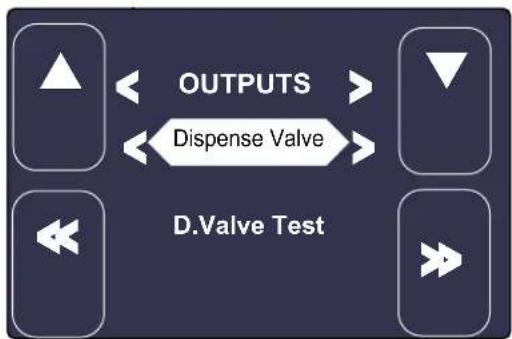
flowchart
graph LR
    A["▲"] --> B["OUTPUTS"]
    C["▼"] --> B
    D["◀"] --> E["Disperse Valve"]
    F["▶"] --> E
    G["D. Valve Test"] --> E
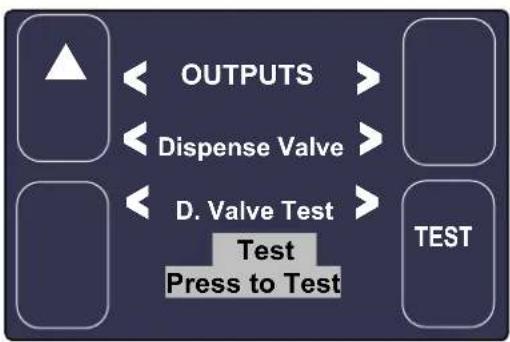
2) Scroll down to: "Dispense Valve"
(In this programming position, the following areas may also be programmed:
Dispense Valve, , Fill Valve, Buzzer, Heater, and Screen) To access these: with the 2^nd level highlighted as shown—scroll through the positions with the right and left arrows.
flowchart
graph TD
    A["▲"] --> B["OUTPUTS"]
    A --> C["Dispense Valve"]
    A --> D["D. Valve Test"]
    D --> E["Test Press to Test"]
    E --> F["TEST"]
Scroll down to: "D. Valve Test"
(In this programming position, the following areas may also be programmed: Dispense Valve Calibration)
3) Have a measuring container under brewer Press "TEST" icon and hold finger for one minute. Test will automatically stop. The "TEST" icon will turn dark, and become inactive when a correct one-minute test is made.
Carefully measure the volume of water dispensed NOTE: accurate flow rate can only be determined if test is made for the preset one minute cycle.
flowchart
graph LR
    A["▲"] --> B["OUTPUTS"]
    C["▼"] --> D["D. ValveCalib."]
    E["◀"] --> F["Calibrate"]
    G["▶"] --> F
    B <--> D
    D <--> F
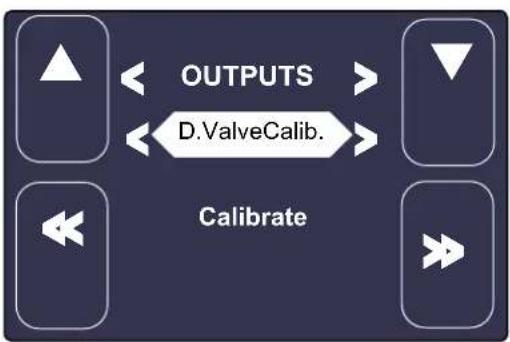
4) Scroll left or right in 2^nd position to “D. Valve Calib.” Scroll down to “Calibrate”
![OUTPUTS Dispense Valve D. Valve Calib. 860 ml pm [ ] 500 1100](/content/2026/05/996984/images/f8ec2a911f7cb8dd9bd3ec65efddb60330cb35b4d4440917b8713f41310307e1.jpg)
5) Using the + and - icons enter the volume of water dispensed in #3. Scroll up, Save, and Exit. [EXIT readjusts programming]
The TBS-2121 automatically readjusts the flow rate of the dispense valve (or Left Dilution, Right Dilution, Sweetener if selected)
| OTHER | Programming Items | Factory set Default | Programming Range (display) | Notes |
| Error Codes | • Display Errors (Codes) | 1:2:3: | Chart is below | |
| • Reset Errors | (Reset) | Reset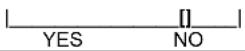 | !!Errors must be corrected and cleared!! | |
| Copy Program | • From SD to B. | SD→ Brewer | SD→ Brewer | Setup uploadPlease insert SD card with the setup data! |
| • From B to SD | Brewer→ SD | 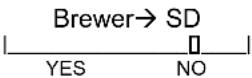 | Setup downloadPlease insert SD card with sufficient space (≥2GB) | |
| Upload Logo | Upload Logo | 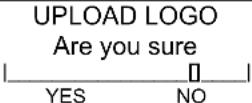 | Please insert SD card with logo file! | |
| Res to Factory | Reset to default | 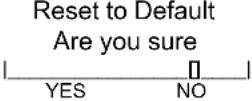 | Completely overwrites all user setup, incl. user logo. | |
| Counters | • Display Counters-OR-• Reset Counters | Counters Display Total Counters | All CountersL. Brews 0L. Brew Act. 0Left Brew [I.] 0Left Dilution Act. 0Left Dilution [I.] 0Right Brews 0Right Brew Act. 0Right Brews [I.] 0Right Dilution Act. 0Right Dilution [I.] 0Center Brews 0C.. Brew Act. 0C. Brew [I.] 0Sweetener Act. 0Fill valve Act.Fill Valve [I.]Heater Act.Heater “on” timeTouch To Return | Resetting will restart counter from zero |
| • Reset Counters | Reset All Counters | Reset All CountersAre you sureYES NO | ||
| Firmware | • Firmware Version-Software type | Firmware Version | SW ver. 1.0.2AHW verBL ver.1.0.1QP ver. 4.5.01 | Displays firmware version |
| • Update Firmware | UPDATE | UPDATE | Firmware uploadPlease insert SD card with the firmware file! | |
All Counters
| L. Brews | 0 |
| L. Brew Act. | 0 |
| Left Brew [l.] | 0 |
| Left Dilution Act. | 0 |
| Left Dilution [l.] | 0 |
| Right Brews | 0 |
| Right Brew Act. | 0 |
| Right Brews [l.] | 0 |
| Right Dilution Act. | 0 |
| Right Dilution [l.] | 0 |
| Center Brews | 0 |
| C.. Brew Act. | 0 |
| C. Brew [l.] | 0 |
| Sweetener Act. | 0 |
| Fill valve Act. | |
| Fill Valve [l.] | |
| Heater Act. | |
| Heater “on” time |
Touch To Return
| Reset All CountersAre you sure | |
| YES | NO |
SW ver. 1.0.2A
| HW ver |
| BL ver.1.0.1 |
| QP ver. 4.5.01 |
List of Error codes for TBS-2121:
| Code | Description Possible Cause Corrective | Action | How to Clear Error Codes | ||
| 050 | Shorted temperature probe Probe | failure. | Replace probe. Check tank | TO CLEAR FAULT, make repairs as requiredBelow is the only way to clear error codes1) Enter“PROGRAMMING”2)Scroll left to “OTHER”3)Scroll down to “ERROR CODES”4)Scroll down to “Display Errors”5)Scroll left to “Reset Errors”6)Scroll down to “Reset”7)Follow directions shown on screen.Toggling ON/OFF switchwill notclear error codes.Error codes must be cleared! | |
| 051 | Open temperature probe. | Bad probe connection, or probe failure. | Check all connections.[tank]Replace probe if necessary. | ||
| 100 | Initial Fill Error. Initial fill time was more than 4 minutes after power up. | Water supply flow rate is too low. | Watch for short potting during brew cycle.Investigate cause of low flow rate.(Clogged water filter...) | ||
| 101 | Error on refillTank did not refill within 1 minute. | Water supply flow rate is too low. | Watch for short potting during brew cycle.Investigate cause of low flow rate.(Clogged water filter...) | ||
| 102 | Unwanted fill; | Possible leak in tank, fitting, or valve. | Check inside of machine for leaks. | ||
| 103 | Liquid level probe fault | Probe fouled or shorts | Clean, check all connections. Replace probe if necessary. | ||
| 201 | Heater open, high limit thermostat, or Solid State Relay (SSR) fault-(if temperature does not rise at least 2 Celsius within 20 minutes - probably heater circuit is open) | SSR, High Limit, or heating element failure. | Check and replace heating elements if necessary. | ||
| 255 | Touch screen error | (if touch screen is pressed more than 2 minutes continuously) | |||
| 1 Internal error | - (problems with PCB, CRC of firmware or setup data, some software errors, assert, etc) | ||||
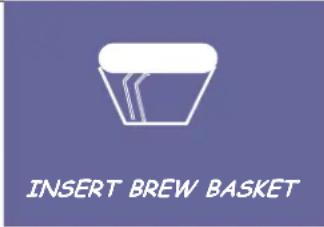 | Brewbasket must be in place | Insert brewbasket | |||
Designs, materials, specifications, physical dimensions, firmware and software protocol for equipment or replacement parts are subject to review and change by FETCO without notice
| FETCO ITD-2135 3 gallon Ice Tea Dispenser Product D-064 | ||||
| Instructions for use | ||||
| -Remove dispenser cover before brewing, replace cover after brew is complete-To prevent overflow, make sure the dispenser is completely empty before brewing into it.-Discard old tea often during the day and make a fresh batch-Never keep tea overnight in this or any dispenser.-Use only the handles to lift or carry the dispenser | ||||
| Cleaning Instructions | ||||
Do not use bleach or cleaners containing chlorides.Use any commercial beverage urn cleaner to clean the inside of the dispenser.Follow the cleaner manufacturer's instructions.Thoroughly rinse the dispenser after cleaning.Remove faucet body from shank by unscrewing plastic wing nut as shownDisassemble upper assembly and remove the faucet upper assembly as shownInspect the seat cup for wear. Clean or replace if necessary.Wash plastic parts with cleaning brush and dish detergent. Avoid abrasivesTo sanitize the dispenser before filling, brew a batch of water only (no tea) into the dispenser allow it to rest for 10 minutes-and drain. Repeat daily, or as needed.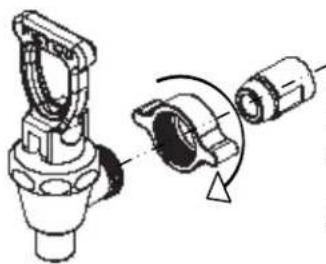 ← Faucet Shank-Unscrew and remove faucet body.-With cleaner or hot soapy water--use brush to clean faucet shank.-Do not allow sharp bush tip to contact the soft set cup.-Rinse and Dry ← Faucet Shank-Unscrew and remove faucet body.-With cleaner or hot soapy water--use brush to clean faucet shank.-Do not allow sharp bush tip to contact the soft set cup.-Rinse and Dry 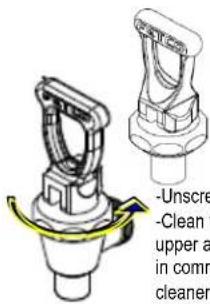 w and remove faucet body and assembly by soaking nercial dispenser or hot soapy water.-Rinse and Dry w and remove faucet body and assembly by soaking nercial dispenser or hot soapy water.-Rinse and Dry | ||||
| We recommend Urnex TabzTM Tea Clean for use on FETCO® tea brewing equipment | ||||
| -Specifically formulated for the removal of tea stains from tea brewing equipment.-Daily cleaning of Iced Tea Dispensers ensures fresh tasting iced tea and properly maintained equipment.-Cleans brew basket and serving vessel in one simple step-Sanitizes all types of tea ware for bright and sparkling flavor of brewed tea | ||||
INSTRUCTIONS FOR DAILY USE:Simple directions to use Urnex TabzTM1 2 3 4 5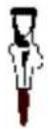  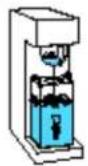 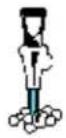 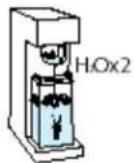 1 Drain all product from dispenser2. Place four tablets in center of brew basket3. Run brew cycle into server and hold.4. Discard solution and remove any residue.5. Rinse all parts with clean water. REPEAT 1 Drain all product from dispenser2. Place four tablets in center of brew basket3. Run brew cycle into server and hold.4. Discard solution and remove any residue.5. Rinse all parts with clean water. REPEAT |
Optional tea dispenser instructions and cleaning
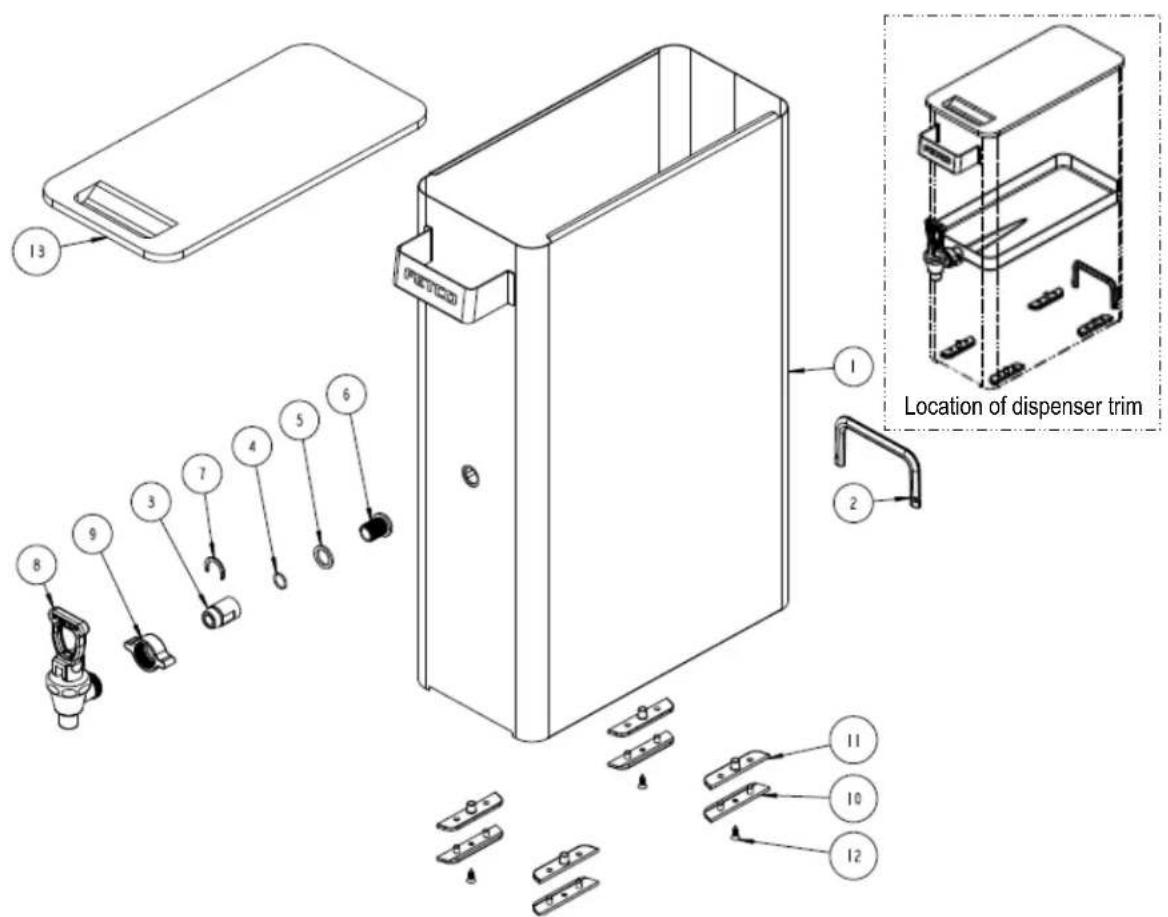
Drawing number1102.00193.00
| FETCO ITD-2135 3 gallon Ice Tea Dispenser Product D-064 | |||
| Ref. | QTY | PART NO DESCRIPTION | |
| 1 1 | 1111.00034.00 WELDMENT, | DISPENSER 3.5GAL, TBS-2121 | |
| 2 1 | 1023.00187.00 PROTECTOR, | BACK POCKET, TBS DISP. | |
| 3 1 | 1012.00005.00 SHANK, TEA | DISPENSER FAUCET | |
| 4 1 | 1024.00061.00 O_RING SHANK | 1/2 ID X 5/8 OD, TBS DISP. | |
| 5 1 | 1023.00186.00 GASKET, TEA | CONTAINER FAUCET SHANK | |
| 6 1 | 1013.00078.00 SCREW, SHANK | TEA DISPENSER | |
| 7 1 | 1071.00045.00 C - RING FOR | TEA FAUCET | |
| 8 1 | 1071.00047.00 FAUCET, TEA | DISPENSER | |
| 9 1 | 1071.00046.00 PLASTIC WING | NUT | |
| 10 4 | 1023.00175.00 BUMPER DISPENSER 2A | ||
| 11 4 | 1023.00174.00 BUMPER DISPENSER 2B | ||
| 12 4 | 1082.00075.00 SCREW, #8 X | 1/2", FLAT HD, PH, SHEET METAL | |
| 13 1 | 1023.00178.00 DISPENSER | COVER, TBS-21210 | |
| NOT SHOWN | 1 | 1074.00005.00 | CLEANING BRUSH--Ice Tea Dispenser |
| Designs, materials, specifications, physical dimensions, firmware and software protocol for equipment or replacement parts are subject to change by FETCO without notice | |||
FETCO® TBS-2121
Iced Tea Brewing System
With Sweetener Delivery
Complete Commercial Parts Listing
For FETCO® TBS-2121and FETCO® TBS-2121-s Model Range
NEW June 2013
Please see our website-www.fetco.com for the most up to date listings and additional parts and service information
Parts diagrams, bill of materials lists
Drawing 1101.00142.00 TBS-2121 Assembly-No Sweetener
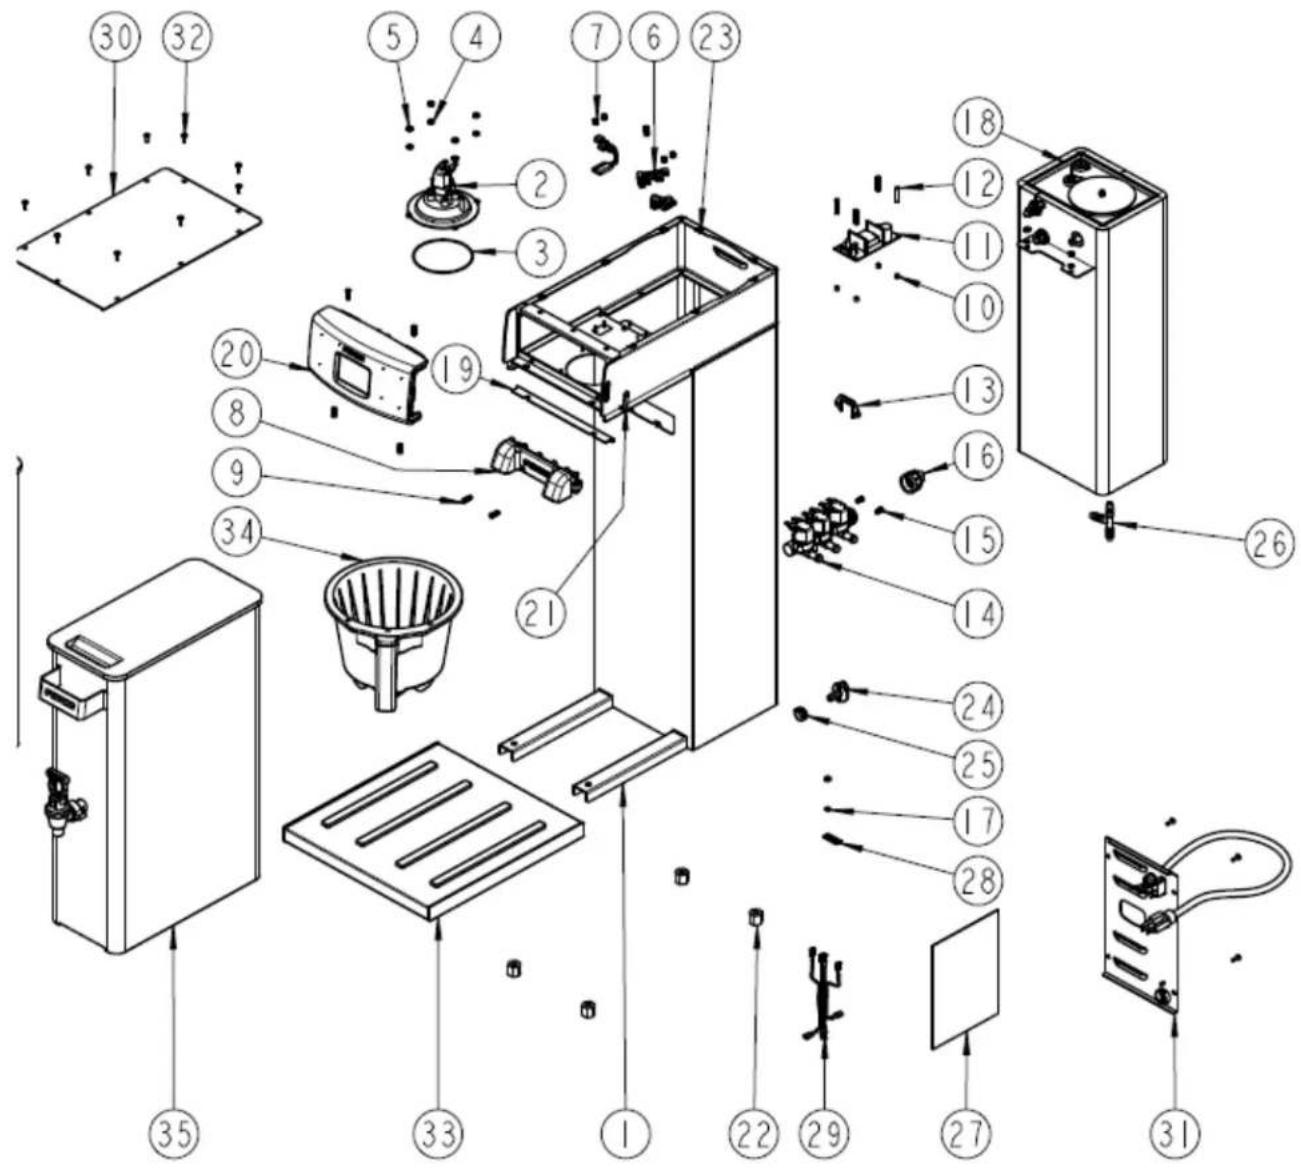
| Drawing 1101.00142.00 TBS-2121 ASSEMBLY, NO SWEETENER, 1680 kW/120VAC | ||||
| Ref# | Qty | Part number | Description | |
| 1 1 1 | 111.00 | 033.00 WELDMENT, BODY TBS-2121 | ||
| 2 1 1 | 102.00 | 203.00 ASSEMBLY, SPRAY HOUSING, TBS-2121 | ||
| 3 1 1 | 024.00 | 017.00 O'RING, 3.739" ID X 0.070" CS, 70 DURO, BUNA | ||
| 4 4 1 | 083.00 | 010.00 WASHER, #10 SCREW W/NEOPRENE-BONDED SEAL | ||
| 5 7 1 | 084.00 | 006.00 NUT, 8-32 18-8 HEX MACHINE SCREW | ||
| 6 3 1 | 102.00 | 113.00 SWITCH, REED, ASSEMBLY | ||
| 7 6 1 | 029.00 | 006.00 #4-40 NYLON FINGER NUT | ||
| 8 1 1 | 102.00 | 196.00 Faucet Dilution Assembly, TBS-2121 | ||
| 9 6 1 | 082.00 | 058.00 SCREW, # 8-32 X 5/8, FLAT HD, PH, 18-8 SS | ||
| 10 4 | 1081.0 | 0006.00 SPACER, 6MM OD x 3.2MM ID x 5MM LG, Z/P | ||
| 11 1 | 1052.0 | 0001.00 POWER SUPPLY, 90-264VAC/24VDC, 1.8A | ||
| 12 4 | 1029.0 | 0012.00 SPACER, .25" HEX X 1" LG, FEM #4-40 THREAD | ||
| 13 1 | 1074.0 | 0004.00 BRACKET FOR RPE VAVLE #1057.00048.00 | ||
| 14 1 | 1057.0 | 0048.00 VALVE, TRIPLE, RPE | ||
| 15 2 | 1082.0 | 0010.00 SCREW, M4x10 ZINC PLATED PAN PHILLIPS MACHINE | ||
| 16 | 1 | 1102.00243.00 | ADAPTER ASSY, 3/4" BSP X 3/8 SAE FLARE | |
| 17 3 | 1083.0 | 0011.00 WASHER, #8 SCREW SIZE, INTERNAL TOOTH LOCK | ||
| 18 1 | 1104.0 | 0049.00 TANK ASSEMBLY, 1680W/120VAC, TBS-2121 | ||
| 19 1 | 1024.0 | 0059.00 GASKET FRONT 4A | ||
| 20 1 | 1102.0 | 0201.00 ASSEMBLY, FRONT PANEL, TBS-2121 | ||
| 21 1 | 1024.0 | 0040.00 CARD PLUG, HWD-2100 | ||
| 22 4 | 1021.0 | 0018.00 LEG, TBS 2121 | ||
| 23 2 | 1084.0 | 0024.00 NUT, CLIP ON (J-NUT), #6-32, 18 -16 GA., BLACK- | ||
| 24 1 | 1023.0 | 0147.00 PLUG, TANK SERVICE DRAIN FOR 18GA AND UP BODY | ||
| 25 1 | 1086.0 | 0003.00 UNICLAMP, 15.9 HOSE OD CLAMP | ||
| 26 1 | 1029.0 | 0002.00 FITTING, HOSE BARB TEE, SIZE 3/8", NYLON | ||
| 27 1 | 1401.0 | 0047.00 WIRING, TBS-2121, L1, N+GND, 1 HEATER | ||
| 28 1 | 1044.0 | 0003.00 LABEL, GROUND | ||
| 29 1 | 1402.0 | 0036.00 ELECTRICAL HARNESS, TBS-2121 | ||
| 30 1 | 1001.0 | 0103.00 TOP COVER, TBS-2121 | ||
| 31 1 | 1102.0 | 0199.00 ASSEMBLY, BACK COVER TBS-2121 | ||
| 32 13 | 1082.0 | 0017.00 SCREW, # 6-32 X 1/2" TRUSS HD PHIL., MACHINE | ||
| 33 1 | 1102.0 | 0197.00 ASSEMBLY, BASE DISPENSER, TBS-2121 | ||
| 34 1 | B0130 | 00B2 BREW BASKET ASSEMBLY, TBS-2121, BLUE HANDLE | ||
| 35 2 | 1102.0 | 0193.00 ASSEMBLY, TEA DISPENSER 3.5 GAL | ||
| 1 10 | 25.00071.00 TUBE, 9/16"OD X 5/16"ID X 16.75"LG | |||
| 1 10 | 25.00070.00 TUBE, 9/16"OD X 5/16"ID X 8.25"LG | |||
| 2 10 | 25.00068.00 TUBE, 9/16"OD X 5/16"ID X 21.75"LG | |||
| 2 10 | 25.00067.00 TUBE, 9/16"OD X 5/16"ID X 1.25"LG | |||
| 1 10 | 25.00061.00 TUBE, 9/16"OD X 5/16"ID X 2.75"LG | |||
| 1 10 | 25.00051.00 TUBE, 5/8"OD X 3/8"ID X 6.44"LG | |||
| 1 10 | 25.00006.00 TUBE, VENT SUPPORT, 5/16"OD X 3/16"X 0.5"LG | |||
| 1000.00090.00 KIT LIQUID SWEETENER INFUSION PUMP, TBS-2121 | ||||
Drawing 1104.00049.00 TANK ASSY, 1680W/120VAC, TBS-2121
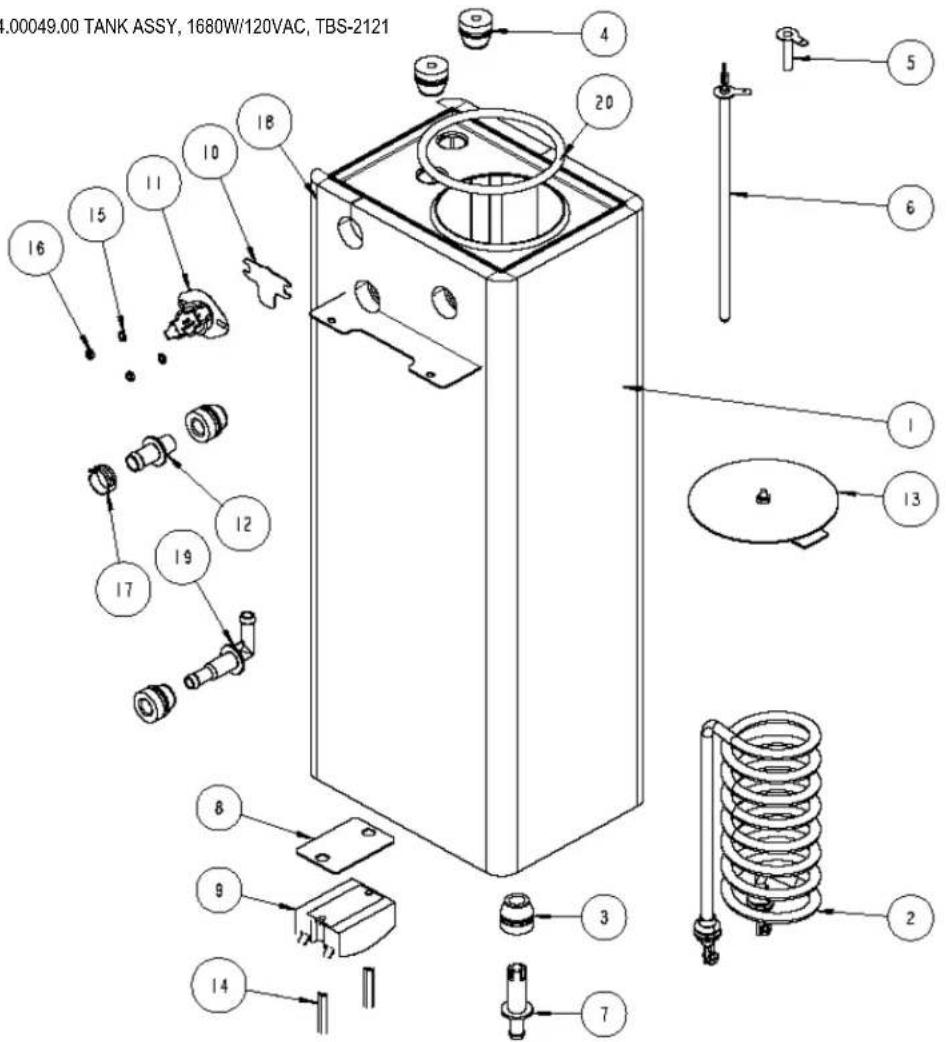
| Drawing 1104.00049.00 TANK ASSY, 1680W/120VAC, TBS-2121 | ||||
| Ref# | QTY | PART NO | DESCRIPTION | |
| 1 1 | 1114.00079.00 | WELDMENT, TANK, TBS-2121 | ||
| 2 1 | 1107.00023.00 | HEATER | ASSY, IMMERSION, 1680W/120VAC | |
| 2 1 | 1107.00017.00 | HEATER | ASSY, IMMERSION, 2300W/240VAC | |
| 3 3 | 1024.00050.00 | GROMMET, SILICONE, 11.4mm ID | ||
| 4 2 | 1024.00062.00 | GROMMET, SHORT, SILICONE, LEVEL AND TEMP PROBE | ||
| 5 1 | 1112.00202.00 | PROBE | WELDMENT, WATER LEVEL 1.188" LONG | |
| 6 1 | 1102.00161.00 | PROBE | ASSEMBLY, TEMP. AND LLC, HWD-2100 | |
| 7 1 | 1023.00166.00 | FITTING | COLD WATER INLET, GROMMET DESIGN | |
| 8 1 | 1003.00140.00 | ALUMINUM | BRACKET FOR SSR | |
| 9 1 | 1052.00014.00 | ASSEMBLY RELAY, SOLID STATE, 25A/230V | ||
| 10 1 | 1003.00005.00 | BRACKET, ONE SHOT THERMOSTAT | ||
| 11 1 | 1053.00004.00 | THERMOSTAT, SINGLE SHOT, 25A | ||
| 12 1 | 1023.00167.00 | FITTING, BREW, GROMMET DESIGN | ||
| 13 1 | 1102.00007.00 | TANK COVER ASSEMBLY | ||
| 14 2 | 1081.00042.00 | STANDOFF, 6-32 x1.25 LG.,1/4 HEX WIDTH | ||
| 15 2 | 1083.00009.00 | WASHER, #6 SCREW , INTL TOOTH LOCKWASHER | ||
| 16 2 | 1084.00010.00 | NUT, HEX, #6-32, UNDERSIZED, ZINC PLATED | ||
| 17 1 | 1086.00003.00 | UNICLAMP, 15.9 HOSE OD CLAMP | ||
| 18 1 | 1022.00060.00 | TANK INSULATION, TBS-2121 | ||
| 19 1 | 1023.00188.00 | FITTING, VENT, TBS-2121 | ||
| 20 1 | 1 1024.00007.00 | RING, DASH #344, TANK COVER | ||
1102.00203.00 Spray Housing Assembly, TBS-2121
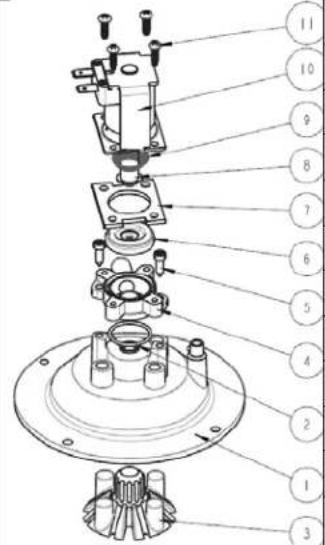
| Ref. | QTY | PART NO | DESCRIPTION |
| 1 1 | 1102.00020.00 | SPRAY HOUSING ASSY CSD DESIGN | |
| 2 1 | 1024.00002.00 | ORING, AS568A-019, BUNA-N | |
| 3 1 | 1102.00019.00 | ASSEMBLY, CASCADE SPRAY DOME | |
| 4 1 | 1023.00189.00 | ADAPTER, SPRAY HSG, DSV11 VALVE | |
| 5 2 | 1082.00068.00 | SCREW, M3.9x13, CHEESE PH., T/FORM, Z/P | |
| 6 1 | 1057.00038.00 | DIAPHRAGM, VALVE DSV-11 | |
| 7 1 | 1057.00050.00 | SPACER PLATE DSV11, -1 OPTION | |
| 8 1 | 1057.00040.00 | PLUNGER, DISPENSE VALVE 24VDC | |
| 9 1 | 1057.00051.00 | SPRING, DISPENSE VALVE 24VDC | |
| 10 1 | 1057.00022.00 | DSV11 COIL AND FRAME ASSEMBLY, 24VDC | |
| 11 4 | 1082.00076.00 | SCREW, #6-20 X 1/2", THRD FORM, P/H PHIL |
B013000BE2 TBS-2121 Iced Tea Brew Basket Assembly, 16"X6"(Three position)
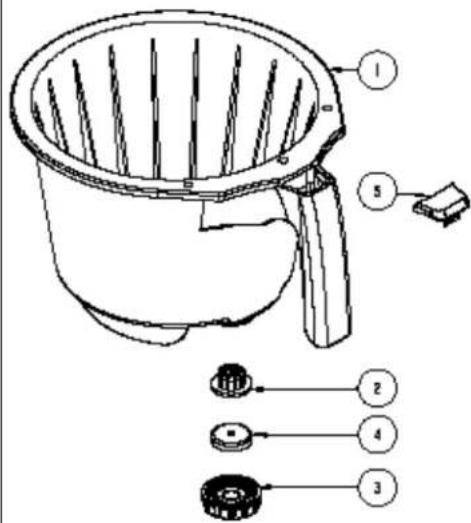
| Ref | Qty | Part # | DESCRIPTION |
| 1 | 1 | 1023.00182.00 | BREW BASKET, TBS-2121 |
| 2 | 1 | 1024.00060.00 | SILICONE STRAINER |
| 3 | 1 | 1023.00179.00 | NUT, BREW BASKET ORIFICE HOLDER |
| 4* | 1 | 1023.00185.00 | ORIFICE, SET OF 7, BREW BASKET TBS-2121* |
| 5 | 1 | 1023.00180.00 | BLUE, BREW BASKET HANDLE PLUG TBS-2121 |
| 5 | 1 | 1023.00190.00 | RED, BREW BASKET HANDLE PLUG TBS-2121 |
| 5 | 1 | 1023.00191.00 | GREEN, BREW BASKET HANDLE PLUG TBS-2121 |
| 5 | 1 | 1023.00192.00 | ORANGE BREWBASKET HANDLE PLUG TBS-2121 |
| B013000BE2 | COMPLETE TBS-2121 BREW BASKET—Blue Insert | ||

natural_image
Black hammer and sickle symbol crossed out by red X (no text or numbers present)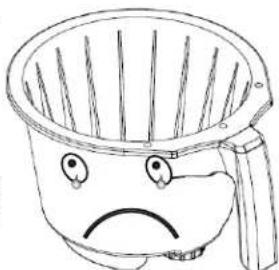
natural_image
Simple line drawing of a sad, broken cup with eyes and mouth, no text or symbols presentNever strike or hit a brewbasket against any hard surface
| * #4 orifice set Size | Drain time for 1 gallon hot water | |
| 0.094 | 12:30 | DEFAULT: Factory installed to brewbasket |
| 0.062 | 24:30 | On optional orifice selector (included) |
| 0.078 | 17.30 | On optional orifice selector (included) |
| 0.086 | 15:30 | On optional orifice selector (included) |
| 0.104 | 10:30 | On optional orifice selector (included) |
| 0.125 | 8:10 | On optional orifice selector (included) |
| 0.28 | 1:20 | On optional orifice selector (included) |
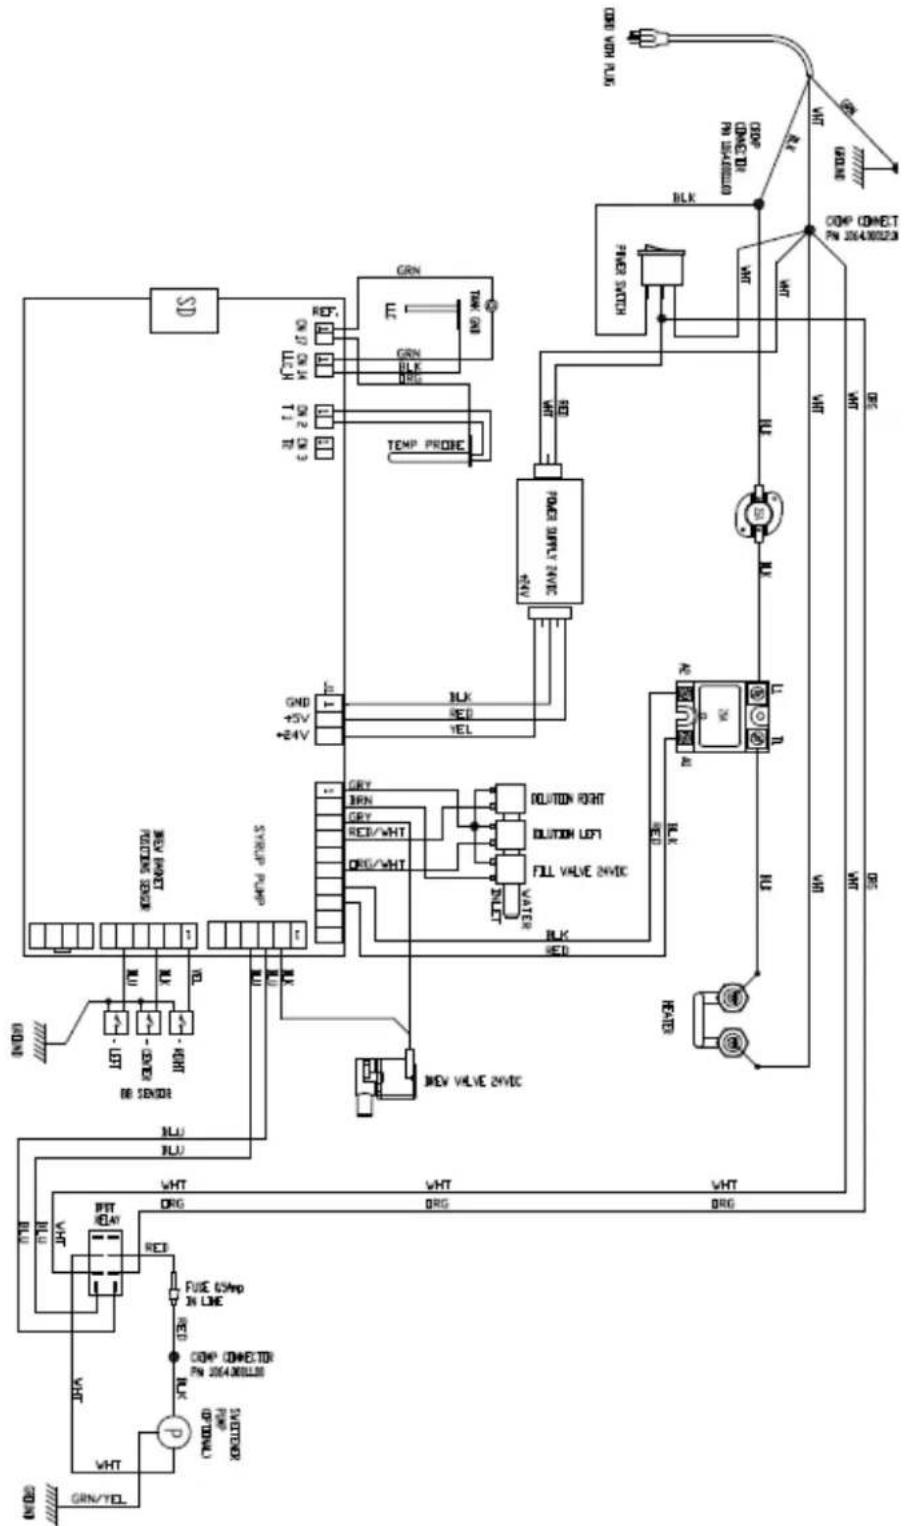
Wiring diagrams
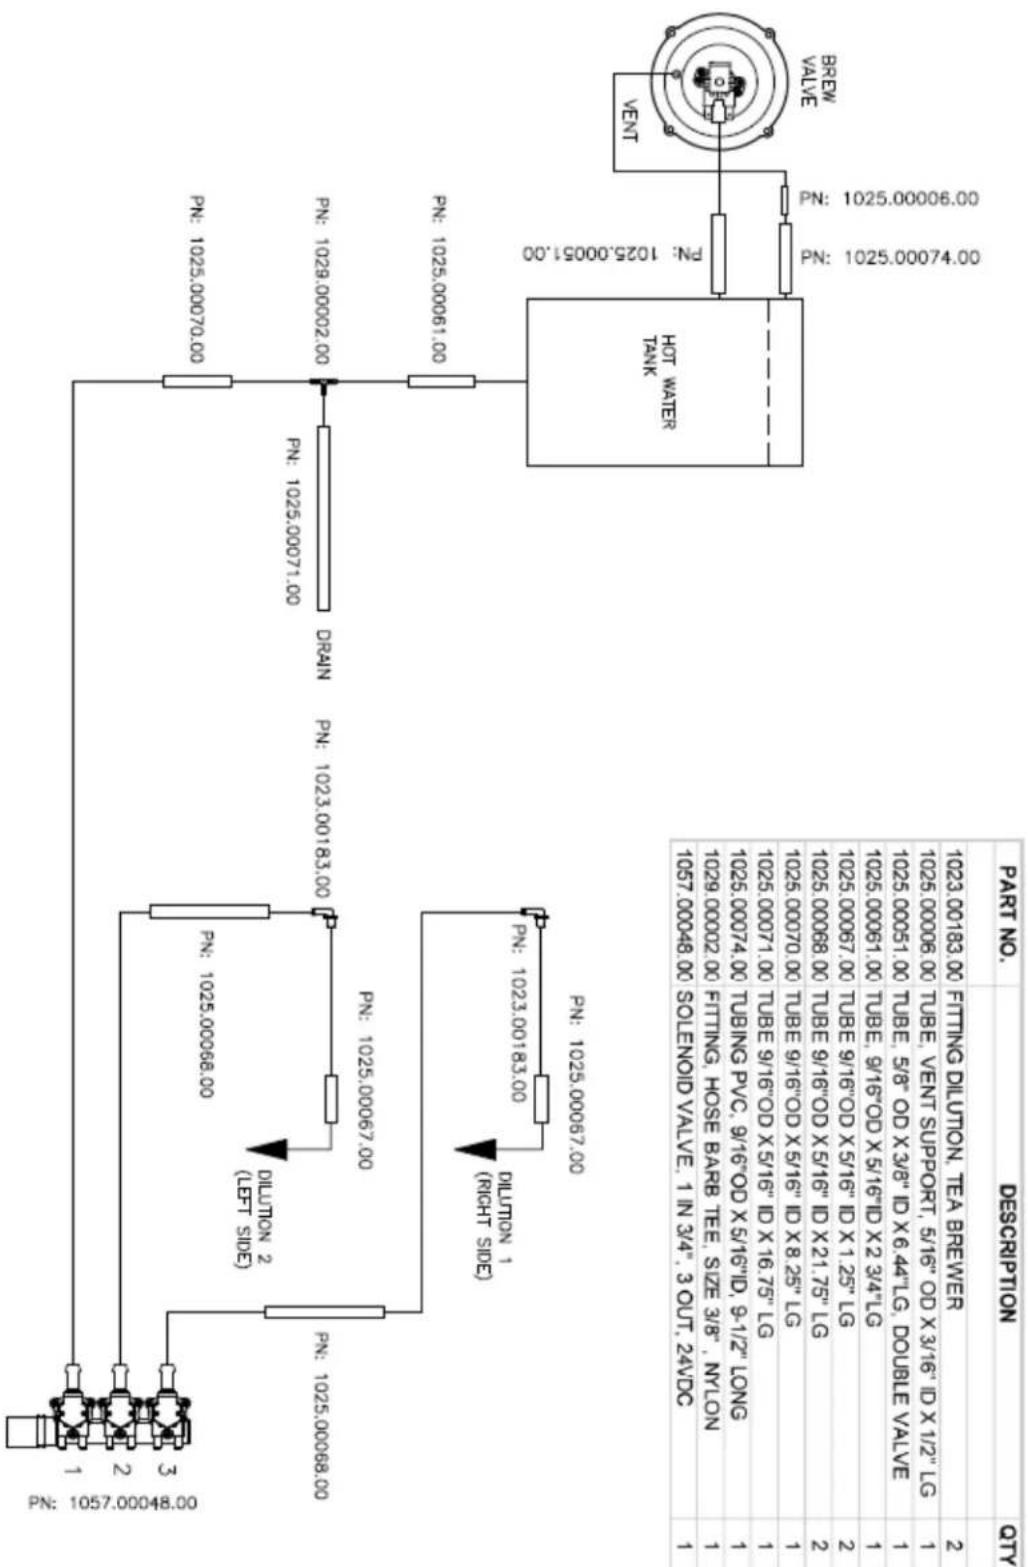
flowchart
graph TD
    A["1057.00048.00"] --> B["3"]
    B --> C["2"]
    C --> D["1"]
    D --> E["1057.00048.00"]
    F["1057.00048.00"] --> G["3"]
    G --> H["2"]
    H --> I["1057.00048.00"]
    J["1057.00048.00"] --> K["3"]
    K --> L["2"]
    L --> M["1057.00048.00"]
    N["1057.00048.00"] --> O["3"]
    P["1057.00048.00"] --> Q["2"]
    R["1057.00048.00"] --> S["1"]
    T["1057.00048.00"] --> U["3"]
    V["1057.00048.00"] --> W["2"]
    X["1057.00048.00"] --> Y["1"]
    Z["1057.00048.00"] --> AA["3"]
    AB["1057.00048.00"] --> AC["2"]
    AD["1057.00048.00"] --> AE["1"]
    AF["1057.00048.00"] --> AG["3"]
    AH["1057.00048.00"] --> AI["2"]
    AJ["1057.00048.00"] --> AK["1"]
    AL["1057.00048.00"] --> AM["3"]
    AN["1057.00048.00"] --> AO["2"]
    AP["1057.00048.00"] --> AQ["1"]
    AR["1057.00048.00"] --> AS["3"]
    AT["1057.00048.00"] --> AU["2"]
    AV["1057.00048.00"] --> AW["1"]
    AX["1057.00048.00"] --> AY["3"]
    AZ["1057.00048.00"] --> BA["2"]
    BB["1057.00048.00"] --> BC["1"]
    BD["1057.00048.00"] --> BE["3"]
    BF["1057.00048.00"] --> BG["2"]
    BH["1057.00048.00"] --> BH
    BI["1057.00048.00"] --> BJ["1"]
    BK["1057.00048.00"] --> BK
    BL["1057.00048.00"] --> BM["3"]
    BN["1057.00048.00"] --> BO["2"]
    BP["1057.00048.00"] --> BP
    BP --> BP
    BP --> BP
    BP --> BP
    BP --> BP
    BP --> BP
    BP --> BP
    BP --> BP
    BP --> BP
    BP --> BP
    BP --> BP
    BP --> BP
    BP --> BP
    BP --> BP
    BP --> BP
    BP --> BP
    BP --> BP
    BP --> BP
    BP --> BP
    BP --> BP
    BP --> BP
    BT["1967. 24VDC"] --> BU["SOLENOID VALVE, 1 IN 3/4", 3 OUT, 2A/DC"]
    BV["SOLENOID VALVE, 1 IN 3/4", 3 OUT, 2A/DC"] --> BW["SOLENOID VALVE, 1 IN 3/4", 3 OUT, 2A/DC"]
    BX["SOLENOID VALVE, 1 IN 3/4", 3 OUT, 2A/DC"] --> BY["SOLENOID VALVE, 1 IN 3/4", 3 OUT, 2A/DC"]
    CA["SOLENOID VALVE, 1 IN 3/4", 3 OUT, 2A/DC"] --> CB["SOLENOID VALVE, 1 IN 3/4", 3 OUT, 2A/DC"]
    CC["SOLENOID VALVE, 1 IN 3/4", 3 OUT, 2A/DC"] --> CE["SOLENOID VALVE, 1 IN 3/4", 3 OUT, 2A/DC"]
    CF["SOLENOID VALVE, 1 IN 3/4", 3 OUT, 2A/DC"] --> CG["SOLENOID VALVE, 1 IN 3/4", 3 OUT, 2A/DC"]
    CH["SOLENOID VALVE, 1 IN 3/4", 3 OUT, 2A/DC"] --> CI["SOLENOID VALVE, 1 IN 3/4", 3 OUT, 2A/DC"]
    CJ["SOLENOID VALVE, 1 IN 3/4", 3 OUT, 2A/DC"] --> CK["SOLENOID VALVE, 1 IN 3/4", 3 OUT, 2A/DC"]
    CL["SOLENOID VALVE, 1 IN 3/4", 3 OUT, 2A/DC"] --> CD["SOLENOID VALVE, 1 IN 3/4", 3 OUT, 2A/DC"]
    CE["SOLENOID VALVE, 1 IN 3/4", 3 OUT, 2A/DC"] --> CE
    CF["SOLENOID VALVE, 1 IN 3/4", 3 OUT, 2A/DC"] --> CE
    GD["SOLENOID VALVE, 1 IN 3/4", 3 OUT, 2A/DC"] --> DH["SOLENOID VALVE, 1 IN 3/4", 3 OUT, 2A/DC"]
    DI["SOLENOID VALVE, 1 IN 3/4", 3 OUT, 2A/DC"] --> DJ["SOLENOID VALVE, 1 IN 3/4", 3 OUT, 2A/DC"]
    DK["SOLENOID VALVE, 1 IN 3/4", 3 OUT, 2A/DC"] --> DL["SOLENOID VALVE, 1 IN 3/4", 3 OUT, 2A/DC"]
    DH["THEBWR"] --> DH
    DH["THEBWR"] --> DH
    DH["THEBWR"] --> DH
    DH["THEBWR"] --> DH
    DH["THEBWR"] --> DH
    DH["THEBWR"] --> DH
    DH["THEBWR"] --> DH
    DH["THEBWR"] --> DH
    DH["THEBWR"] --> DH
    DH["THEBWR"] --> DH
    DH["THEBWR"] --> DH
TBS-2121, PLUMBING LAYOU, NO SWEETENER PUMP OPTION PN: 1203.00002.00
- Table of Contents
- Contact Information
- Description & Features
- Features
- Specifications
- Requirements
- Weights Capacities and Measurements
- Electrical Configuration and Brewing Efficiency
- Dimensions & Utility Connections—Rough-in drawings
- Installation
- (For Qualified Service Technicians Only)
- Guide to A Successful Installation
- Electrical:
- Plumbing:
- General:
- Installation Instructions
- Brewer Setup
- Water Connection
- Electrical Connection
- Final Setup
- Three position brewbasket and touch screen display.
- Accessing batch and programming menu screens
- Batch selection and brew operation menu screens
- Programming menu screens
- To access programming
- Operator Training
- Pay particular attention to the following areas:
- Cleaning & Maintenance
- After Each Brew:
- Every Day:
- Weekly
- Safety notes
- Warning
- Operating Instructions
- Quick brewer setup
- NOTES
- Brewing
- →To brew a single 3 gallon batch of iced tea, using default recipe
- Brewing-shown by touchscreen
- Programming- operator access programming
- Programming-category screens: Menu Tree
- EXAMPLE: Calibrate DISPENSE VALVE
- FETCO® TBS-2121
- Iced Tea Brewing System
- Complete Commercial Parts Listing
- For FETCO® TBS-2121and FETCO® TBS-2121-s Model Range
- NEW June 2013
- Parts diagrams, bill of materials lists
Brand : Fetco
Model : TBS-2121XTS
Category : Teapot