
V-LCD50-HDI - Monitor MARSHALL - Free user manual and instructions
Find the device manual for free V-LCD50-HDI MARSHALL in PDF.


| Product Type | Monitor |
| Brand | Marshall |
| Model | V-LCD50-HDI |
| Screen Size | 50 inches |
| Resolution | 1920 x 1080 (Full HD) |
| Inputs | HDMI, VGA, Composite Video |
| Power Supply | AC 100-240V, 50/60Hz |
| Power Consumption | 120W (typical) |
| Dimensions (without stand) | 112.2 x 66.0 x 5.1 cm |
| Weight (without stand) | 15.0 kg |
| On-Screen Display (OSD) | Yes, with adjustable settings |
| Mounting Type | VESA 400 x 400 mm |
| Speaker | Built-in 5W x 2 |
| Cleaning Instructions | Use a soft, dry cloth; avoid liquids |
| Safety Precautions | Do not expose to moisture; ensure proper ventilation |
| Spare Parts Availability | Contact Marshall support for authorized parts |
| Repairability | Professional service required; no user-serviceable parts |
Frequently Asked Questions - V-LCD50-HDI MARSHALL
User questions about V-LCD50-HDI MARSHALL
0 question about this device. Answer the ones you know or ask your own.
Ask a new question about this device
Download the instructions for your Monitor in PDF format for free! Find your manual V-LCD50-HDI - MARSHALL and take your electronic device back in hand. On this page are published all the documents necessary for the use of your device. V-LCD50-HDI by MARSHALL.
USER MANUAL V-LCD50-HDI MARSHALL
Marshall Electronics
Model No.V-LCD50-HDI
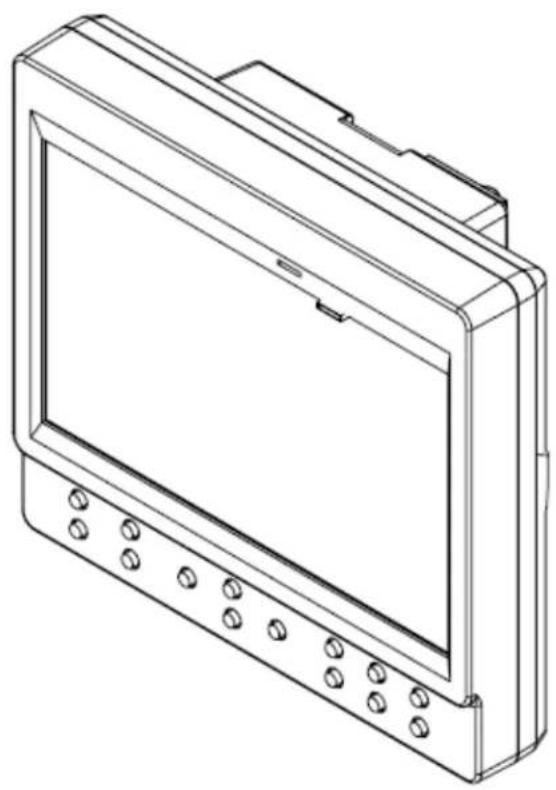
5" Portable Field / Camera-Top Monitor
natural_image
Line drawing of a rectangular electronic device with a central screen and multiple button indicators (no text or symbols)Operating Instructions
Product Overview 4
Features 4
Installation and Initial Setup .... 5
Front Monitor Features....6
Rear Monitor Features....7
Compatible Input Formats 8
On Screen Menu 9
MAIN MENU AND NAVIGATION....10
Specifications....19
Dimensions 20
Maintenance....24
Warranty 24
The V-LCD50-HDI 5" monitor is packed with features found in more expensive models. This compact LED-backlit confidence monitor offers amazing picture performance and excellent viewing angles for users simply looking for a portable, yet versatile monitoring solution. The V-LCD50-HDI offers standard features including a wide variety of formats and markers, 4 user-configurable front panel function buttons, RGB Check Field / Field Detect, RGB gain and bias control. Major features include Marshall's industry leading FALSE COLOR and PEAKING Filters, along with Image Flip, Freeze Frame, and HDMI Auto Color Space and Ratio detect.
The bottom 1/4"-20 mount allows this lightweight unit to be mounted to most DSLRs, cranes, and jibs.
This unit can be battery-powered in the field using four AA rechargeable or alkaline batteries or the included power supply.
Note: Under continuous operation, alkaline batteries will become hot to the touch. This is normal and does not indicate any material defect. Please keep batteries and other small objects away from children. Use of rechargeable batteries is highly recommended.
Features
■ 1.2 MegaPixel 5" Panel
The V-LCD50-HDI features an all-digital TFT-MegaPixel active matrix LCD system with 1.2 million pixels. The LCD panel features a brightness of 300 cd/m ^2 and a contrast ratio of 600:1 making the display ideal in a variety of environments and lighting conditions.
■ Image Flip
Vertical image flip allows for flexibility in mounting the monitor in many positions.
■ Multi-Format Compatibility
The V-LCD50-HDI accommodates digital video inputs and standard VESA formats. Acceptable formats range from 480P/576P to 1080i60.
■ End-to-End Digital Signal Processing
Video is scaled to fit on the screen in the highest possible resolution using a state-of-the-art LSI that incorporates precision gamma correction and our HyperProcess motion adaptive interpolation for interlaced images.
■ Focus-Assist, False Color Filter, and other Advanced Features
Focus-Assist, False Color filter, Aspect ratio settings, blue-only mode, and monochrome mode are a few of the advanced features which make the V-LCD50-HDI at home in any broadcast environment. Pixel-to-Pixel mode also allows native display of any incoming image format.
■ Flexible Screen Markers
A variety of screen markers in 4:3, 16:9, and full screen modes allow accurate monitoring of the different aspect ratios used in broadcast environments.
■ User-Definable Function Buttons
Four user-definable function buttons on the front-panel allow quick access to numerous settings and features including focus-assist, false color filter, aspect ratio, screen markers, monochrome mode, color temperature and more.
Installation and Initial Setup
■ Unpacking
Carefully unpack the V-LCD50-HDI monitor and verify that the following items are included:
• V-LCD50-HDI Monitor
• V-PA5V-2.0A-xx Power Supply
- Hot Shoe Adaptor
- Quick Start Guide
- Operating Instructions on CD
• 4 AA Alkaline Batteries
Inspect the unit for any physical damage that may have occurred during shipping. Should there be any damage, immediately call Marshall Electronics Customer Service at (800) 800-6608. If you are not located within the continental United States, call +1 (310) 333-0606.
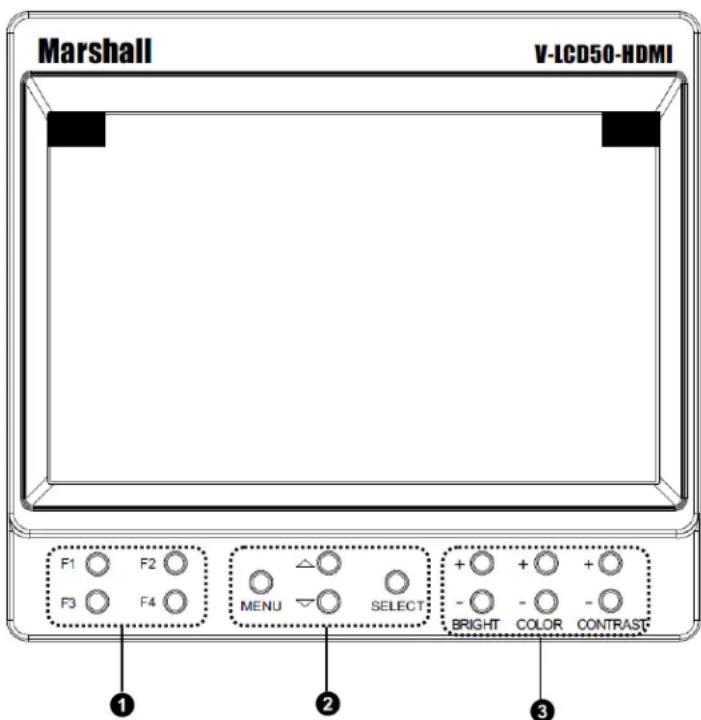
① User-Definable Function Buttons
Four user-definable function buttons can be used for direct access to various settings. Functions are assigned using the on-screen menu.
② Menu Navigation Buttons
Use the Menu, ▲, ▼, and Select buttons to display and navigate the on-screen menu.
③ Image Adjustment Buttons
Use the image adjustment buttons to adjust brightness, color saturation, and contrast of the image. The status of each image adjustment parameter is shown on the bottom left of the screen, with values ranging from 0 to 100. Default value is 50.
Rear Monitor Features
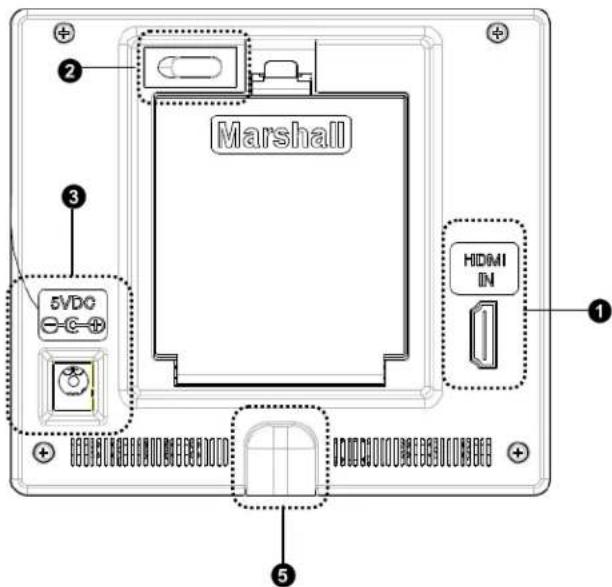
① HDMI Input
The V-LCD50-HDI has a single HDMI input. Signal formats and frame rates are automatically detected and displayed on the screen.
② Power Switch
Use the hard power switch to supply power to the monitor. The power switch draws power from either the 5 VDC input or the battery compartment. If both power inputs are live, the monitor will draw power from the 5 VDC input to preserve battery life. Battery life can also be preserved by setting this switch to the OFF position when the monitor is not in use.
③ Power Input
Connect 5VDC to the coax power input connector. Power can be supplied from the included power supply, or from a variety of DC sources supplying at least 1 Amp at 5 Volts.
IMPORTANT: If using a power source other than the included power supply, be sure that the polarity of the DC input is correct:
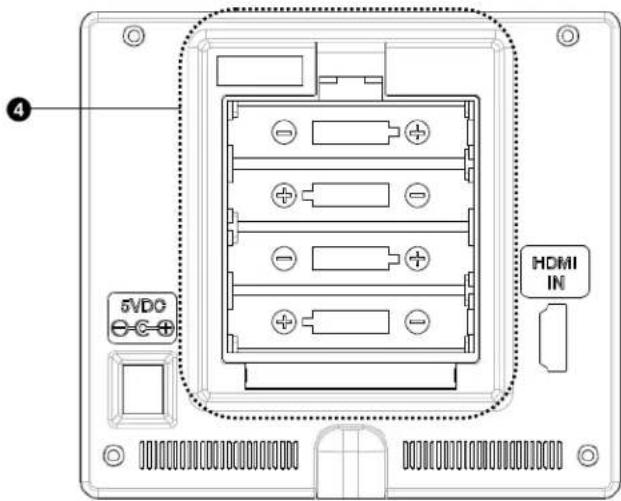

④ Battery Compartment
The V-LCD50-HDI can be powered with four (4) AA rechargeable or alkaline batteries. The orientation of the batteries should be as shown in the image above.
When batteries reach the end of their run time, video on the screen will begin to flash. This is normal operation and indicates that the batteries in use should be replaced.
Note: Under continuous operation, alkaline batteries will become hot to the touch. This is normal and does not indicate any material defect. Please keep batteries and small objects away from small children. Use of rechargeable batteries is highly recommended.
5 1/4-20 Mounting Hole
Use the 14 -20 mounting hole to attach the monitor to a camera or variety of mounting devices.
The following standards are supported by the V-LCD50-HDI monitors:
HDMI Video-
720p (60 / 59.94 / 50 / 30 / 29.97 / 25)
1080i (60 / 59.94 / 50)
1080p (30 / 29.97/ 25 / 24 / 24sF/ 23.98 / 23.98sF)
VESA -
640 x 480 (60 Hz / 72 Hz / 75 Hz)
800 x 600 (56 Hz / 60 Hz / 72 Hz / 75 Hz)
1024 x 768 (60 Hz / 75 Hz)
1280 x 1024 (60 Hz / 75 Hz)
On Screen Menu
| Color Temperature | D65, D55, Linear, User, D93 | |||
| RGB Bias and Gain | R, G, B Bias (0-100) / R, G, B Gain (0-100) | |||
| Video Configuration Check Field | Off, Mono, Blue, Green, Red | |||
| Ratio | Full Screen, 4:3, 16:9 | |||
| Pixel-to-Pixel | Off, On | |||
| Marker Enable | Off, On | |||
| Center Marker | Off, On | |||
| 16:9 Markers | Off, 4:3, 13:9, 14:9, 1.85:1, 2.35:1, 95% Safe, 93% Safe, 90%Safe, 88% Safe, 85% Safe, 80% Safe | |||
| Marker Configuration | Full Screen Markers | Off, 95% Safe, 93% Safe, 90% Safe, 88% Safe, 85% Safe, 80% Safe | ||
| Marker Background | 4:3 Markers | Off, 95% Safe, 93% Safe, 90% Safe, 88% Safe, 85% Safe, 80% Safe | ||
| 100%, 75%, 50%, 25%, 0% | ||||
| False Colors | Off, On | |||
| Filter Configuration Peaking Filter | Off, On | |||
| Mosquito Filter | Off, On | |||
| Curtrain Color | Input Format OSD | 5 sec, Off, On | ||
| Main | Blue, Black, Green | |||
| Menu Splash Screen | On, Off | |||
| System Configuration Contrast | Backlight | Contrast, Backlight | ||
| Freeze Input | Off, On | |||
| Image Flip | Off, On | |||
| Manufacturer Default | Select | |||
| HDMI Color Space | Auto, YCbCr, RGB | |||
| HDMI Aspect Ratio | Manual, Auto | |||
| Function Presets Function on F1 | Ratio, Check Field, Image Flip, Mosquito Filter, Peaking Filter, False Colors, Freeze Input, Aspect Markers, Center Marker, Marker Enable, Pixel-to-Pixel | |||
| Function on F2 | Ratio, Check Field, Image Flip, Mosquito Filter, Peaking Filter, False Colors, Freeze Input, Aspect Markers, Center Marker, Marker Enable, Pixel-to-Pixel | |||
| Function on F3 | Ratio, Check Field, Image Flip, Mosquito Filter, Peaking Filter, False Colors, Freeze Input, Aspect Markers, Center Marker, Marker Enable, Pixel-to-Pixel | |||
| Function on F4 | Ratio, Check Field, Image Flip, Mosquito Filter, Peaking Filter, False Colors, Freeze Input, Aspect Markers, Center Marker, Marker Enable, Pixel-to-Pixel | |||
| System Information System | VX.xx |
MAIN MENU AND NAVIGATION
Main Menu
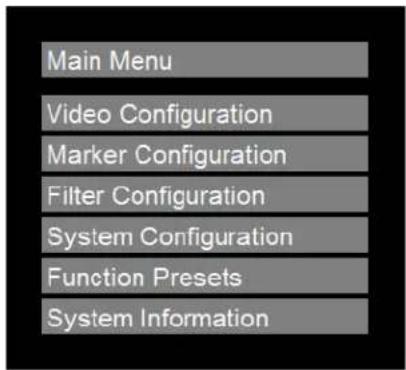
Access the main menu by pushing and holding the MENU button on the front panel of the monitor.
- Step through menu items using the ▲ and ▼ buttons.
- Choose a submenu or select a menu item by pressing SELECT.
- Return to the previous menu by pressing MENU.
- Exit the main menu by pressing MENU. The menu will automatically time out after 15 seconds.
Use this setting to choose one of three color temperature presets:
• D55 (5500K)
• D65 (6500K)
• D93 (9300K)
- USER (Adjustable Color Bias and Gain)
• Linear (No processing is applied to the panel)
■ RGB Bias and Gain
Select this submenu to fine-tune the monitor's color balance (R, G, B). This should only be done by someone experienced with video engineering, as this will alter the overall color shading of the screen. The purpose is to allow color matching to other types of monitors and/or displays. Note: The Color Temperature preset will automatically switch to USER when Color Bias settings are adjusted. It is normal for color bias adjustments to be very subtle.
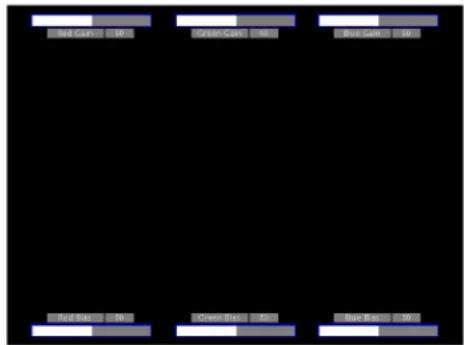
When selecting the RGB Bias and Gain submenu, gain adjustment indicators will appear at the top of the screen, and bias adjustment indicators will appear at the bottom of the screen:
RGB Bias and Gain
Use the ▲ and ▼ buttons to select each individual bias or gain control. Press SELECT to begin adjusting the control. Use the ▲ and ▼ buttons to increase or decrease the value.
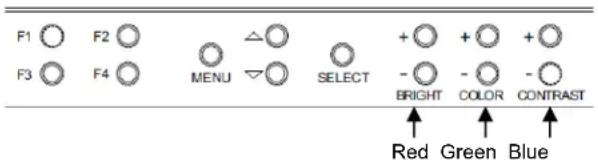
Alternately, the image adjustment buttons (Brightness, Color, Contrast) can be used to easily adjust the bias and gain settings as shown below. The buttons affect whichever row of controls (gain or bias) is currently selected.
Use the check field modes for monitor calibration or to analyze individual color components of an image. In Monochrome mode, all color is disabled and only a grayscale image is shown. In Blue, Green, and Red check field modes, only the selected color will be shown.
Use the following procedure when calibrating the monitor to SMPTE color bars with the following procedure:
- Allow the monitor to warm up for at least 5-10 minutes.
- Display SMPTE split-field color bars on the monitor using an external source.
- Enable Monochrome mode.
- Locate the pluge pattern (super black, black, and gray bars) at the lower-right corner of the screen. Adjust the Brightness knob until there is no visible difference between the super black and black bars, but the gray bar is still visible.
-
Adjust the Contrast knob until an even grayscale appears along the top bars.
-
Disable Monochrome mode.
- Enable Blue Check Field mode and adjust the Color knob so that the outermost bars (white and blue) appear to match in brightness.
- Disable Blue Check Field mode.
■ Ratio
Use to switch between Full Screen, 4:3 and 16:9 aspect ratios.
As the V-LCD50-HDI monitor has a native resolution of 800 x 480 RGB pixels, incoming images are automatically scaled to fit the screen:
- In Full Screen mode, images are scaled to fill the entire screen (800 x 480).
- In 4:3 mode, images are scaled to fill the center 4:3 portion of the screen (640 x 480). With a 16:9 source, images will be centered with a black letter-box added on the left and right sides.
- In 16:9 mode, images are scaled to a 16:9 portion of the screen (800 x 450), with a black letter-box added top and bottom.
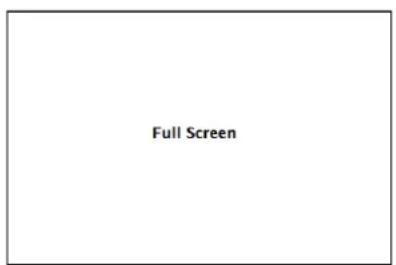
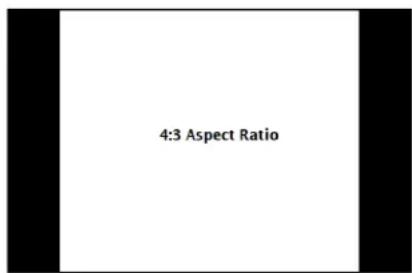
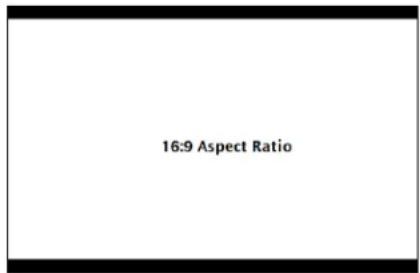
Note: The aspect ratio setting is ignored when Pixel-to-Pixel mode is enabled.
■ Pixel-to-Pixel Mode
Use this setting to enable Pixel-to-Pixel mode. You have the option of viewing the center 800 x 480 (Centered Pixel-to-Pixel mode) or selecting any 800 x 480 area on the screen (User Pixel-to-Pixel mode). The User Pixel-to-Pixel option is not available when the incoming image is 800 x 480 or lower - only the Centered Pixel-to-Pixel mode can be used in this case.
This Pixel-to-Pixel mode bypasses the monitor's internal scaling function and displays incoming images in their native resolution and aspect ratio, with a one-to-one mapping:
- For incoming formats smaller than the native resolution of the LCD panel (800 x 480), the image will be displayed in the center of the screen using only the necessary LCD pixels. For example, NTSC images will occupy exactly 720 x 480 pixels. The surrounding pixels will be black.
- For incoming formats exceeding 800 x 480 pixels, only the center 800 x 480 of the incoming image will displayed occupying the whole screen, with the remainder of the picture cropped. For example, 1080i formats will both be cropped to 800 x 480 and displayed full-screen.
MARKER CONFIGURATION SUBMENU
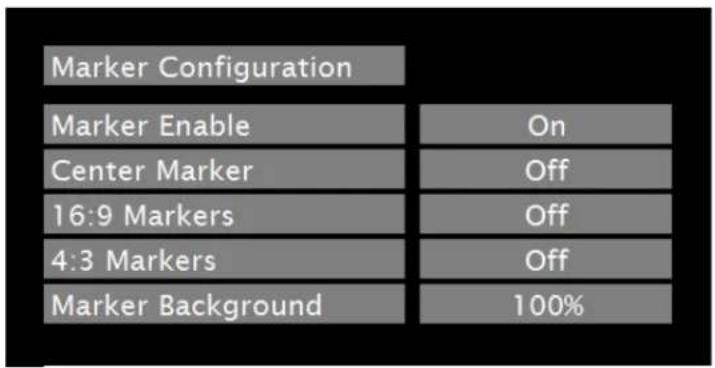
Marker Configuration Submenu
■ Markers
Use this setting to enable or disable all on-screen markers. This setting affects the center marker, full screen markers, 16:9 markers and 4:3 markers.
Center Marker
Use this setting to display a center marker on the screen.
■ 16:9 Markers
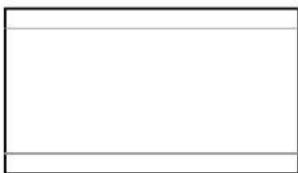
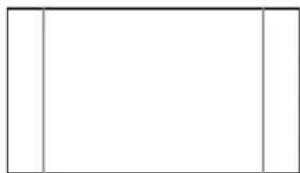
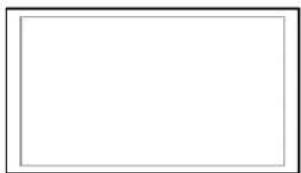
Use these settings to superimpose one of 12 markers on the screen when in 16:9 mode. This setting is disabled when the aspect ratio is in Full Screen or 4:3 mode.
• 4:3
• 13:9
• 14:9
• 1.85:1
• 2.35:1
- 95% Safe
- 93% Safe
- 90%Safe
- 88% Safe
- 85% Safe
- 80% Safe
16:9 Marker Examples:
natural_image
Empty white rectangle with black border (no text or symbols)OFF (No Marker)
natural_image
Blank white rectangle with thin black border (no text or symbols)2.35:1 Aspect Ratio
natural_image
Empty rectangular frame with no text, numbers, or symbols4:3 Aspect Ratio Marker
natural_image
Empty rectangular frame with no text, symbols, or markings90% Safe Area
■ Full Screen Markers
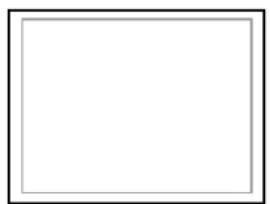
Use this setting to superimpose one of 7 markers on the screen when in Full Screen mode. This setting is disabled when the aspect ratio is set to 16:9 or 4:3.
- 95% Safe Area
- 93% Safe Area
- 90% Safe Area
- 88% Safe Area
- 85% Safe Area
- 80% Safe Area
Full Screen Marker Examples:
natural_image
Empty white rectangle with black border (no text or symbols)OFF (No Marker)
natural_image
Empty white rectangle with a thin gray border (no text or symbols)90% Safe Area
■ 4:3 Markers
Use this setting to superimpose one of 7 markers on the screen when in 4:3 mode. As with the other modes, this setting is disabled when the aspect ratio is set to Full Screen or 16:9, or when Pixel-to-Pixel.
- 95% Safe Area
- 93% Safe Area
- 90% Safe Area
- 88% Safe Area
- 85% Safe Area
- 80% Safe Area
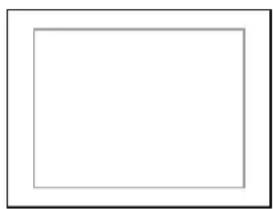
■ Marker Background
Use this setting to choose how selected markers are displayed on the screen. :
• 100% The marker is superimposed on the complete image.
- 75% Image area beyond the marker is shown at 75% intensity.
- 50% Image area beyond the marker is shown at 50% intensity.
• 25% Image area beyond the marker is shown at 25% intensity.
• 0% Image area beyond the marker is shown at 0% intensity (black).
Example (80% Marker in 4:3 Mode):
natural_image
Empty rectangular frame with no text, numbers, or symbols100% Background 0% Background

natural_image
Empty white rectangle with black border (no text or symbols)■ False Colors
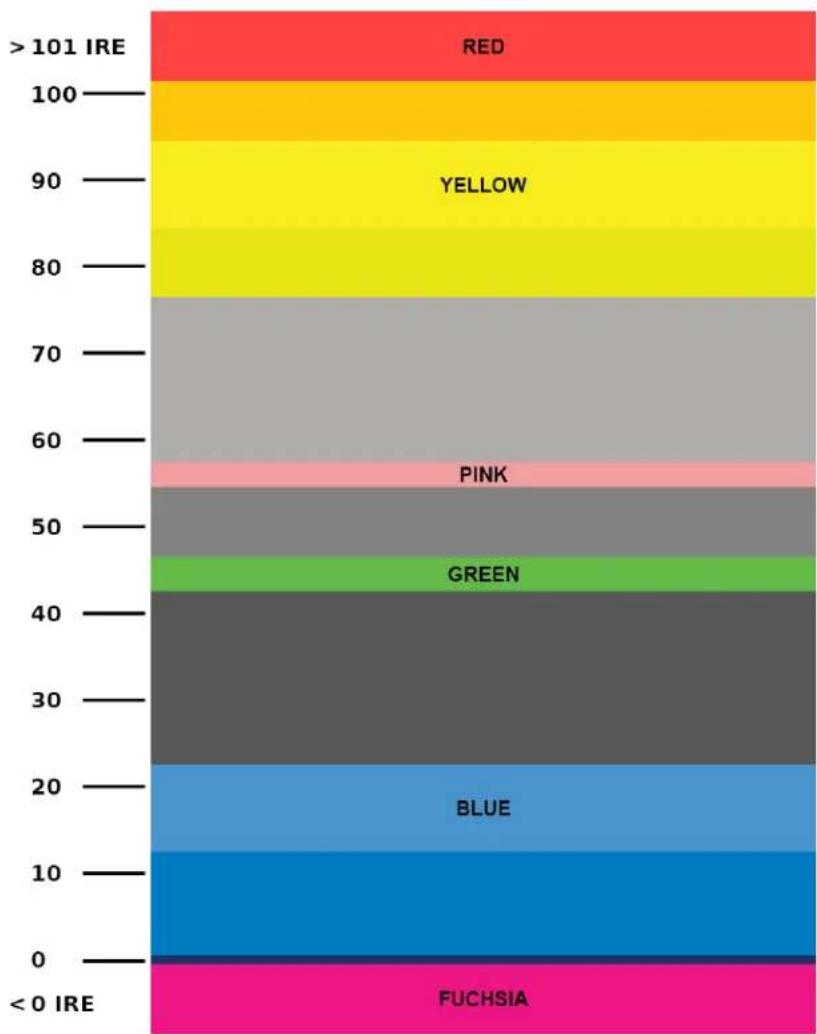
The V-LCD50-HDI has a false color filter to aid in the setting of camera exposure. As the camera Iris is adjusted, elements of the image will change color based on the luminance or brightness values. This enables proper exposure to be achieved without the use of costly, complicated external equipment. To best utilize this feature, you must understand the color chart below and have a basic understanding of camera exposure. Normally, when shooting subjects like people, it is common practice to set exposure of faces to the equivalent of approximately 56 IRE. The false color filter will show this area as the color PINK on the monitor. Therefore, as you increase exposure (open the IRIS), your subject will change color as indicated on the chart: PINK, then GREY, then a few shades of YELLOW. Over exposed subjects (above 101 IRE) on the monitor will be shown as RED. In addition, underexposed subjects will show as DEEP-BLUE to DARK-BLUE, with clipped-blacks indicated with a FUCHSIA-like color. Lastly, the color GREEN is used to indicate elements of the image that are approximately 45 IRE. This represents a 'neutral' or 'mid-level' exposure commonly used for objects (not people).
bar_stacked
| Category | Value | |---|---| | RED | 101 | | YELLOW | 101 | | PINK | 101 | | GREEN | 101 | | BLUE | 101 | | FUCHSIA | 101 | | > 101 IRE | 101 | | < 0 IRE | 101 |False Color Key
■ Peaking Filter (Focus assist)
The Peaking Filter is used to aid the camera operator in obtaining the sharpest possible picture. When activated, all color will be removed from the display and a black-and-white image will remain. The internal processor will display RED color on the screen where sharp edges appear. When the camera operator adjusts (racks) the focus control (on the camera lens), different parts of the image will have RED colored edges. This indicates that the portion of the image is sharp – or in focus. Final focus is achieved by racking the camera lens focus control back and forth until the desired portion of the image has RED colored edges. Please note that this feature is most effective when the subject is properly exposed and contains enough contrast to be processed.
■ Mosquito Filter
Use this setting to filter out “Mosquito Noise” – an artifact that appears as specs around edges of objects. This artifact is the result of video that has been compressed at some point. Video sources from DVD-Players, PDA’s, Digital Cable Boxes, Camcorders, etc. often have this artifact.
Use this option to enable on-screen display of input/format status in the upper-left corner of the screen.
■ Curtain Color
Use this option to change the curtain color on the monitor. This curtain color is what you see when there is no signal input to the monitor.
■ Splash Screen
Use this option to enable or disable the Marshall Electronics Inc. splash screen seen when the monitor is first powered on.
■ Contrast / Backlight
Use this feature to choose between controlling the Contrast of the image or the intensity of the panel's Backlight with the CONTRAST knob on your monitor. Note: While the Contrast control moves up and down at intervals of 1, the Backlight control will move up and down at intervals of 2, from 0-100.
■ Freeze Input
Use the Freeze function to "freeze" the current image on the screen. Select this menu item again (Unfreeze) to return to the real-time video input.
■ Image Flip
Use the Image Flip function to turn the monitor's display 180°. Note: Both the image and all menus and On Screen Display text will be flipped.
■ Manufacturer Default
Select this menu item to reset all adjustments and menu settings to the factory default configuration.
■ HDMI Color Space
Use this setting to automatically detect (Auto) or select the color space (RGB or YCrCb) of incoming HDMI video. This should match the color space of the video output settings on your playback device. Note that this option is disabled when viewing VESA (Computer) formats.
■ HDMI Aspect Ratio
Use this setting to automatically detect (Auto) the proper Aspect Ratio settings of incoming HDMI video. Most HD signals will display in the 16:9 aspect ratio. SD signals (480P/576P) will display in the 4:3 aspect ratio.
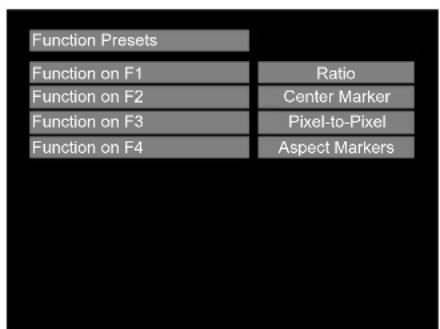
FUNCTION PRESETS SUBMENU
■ User-Definable Function Buttons
Use the Function on F1, F2, F3 and F4 menu items to define each function button on the front panel of the monitor. The following options are available for each button:
- Ratio
- Check Field
- Image Flip
- Mosquito Filter
- Peaking Filter
- False Colors
- Freeze Input
- Aspect Markers
- Center Marker
- Marker Enable
- Pixel-to-Pixel
SYSTEM INFORMATION SUBMENU
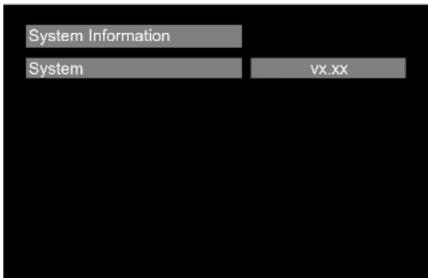
■ System
This shows the System firmware version of your monitor.
■ PANEL
Screen Size 5.0" Diagonal
Display Area (h x v) 108.0 x 64.8 mm
Native Aspect Ratio 15:9
Pixels 800 x 480
Viewing Angle (h x v) 85° x 85°
Brightness 300 cd/m ^2
Contrast Ratio 600:1
Coaxial Power Connector
Outer Diamater / Inner Diameter: 5.5 x 2.5 mm
ELECTRICAL
Power Consumption 1.25 Amp @ 5VDC (6.25W Max)
Voltage Requirement 5 DC (5V DC-12V DC)
V-PA5V-2.0A-xx:
Input 100V-240V, 0.3A, 50-60Hz
Output 5VDC, 2.0A, 10W Max
■ BATTERY COMPARTMENT
Uses Four AA Batteries (Alkaline Included)
*Use of Rechargeable batteries is highly recommended
MECHANICAL
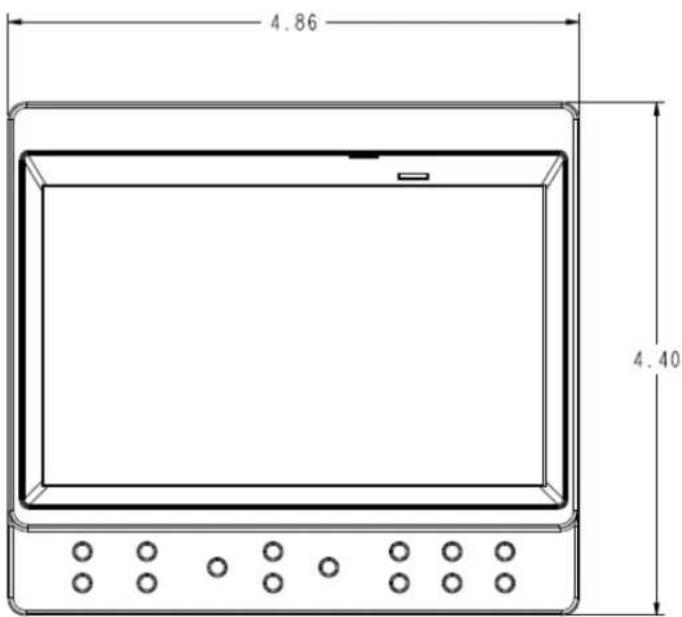
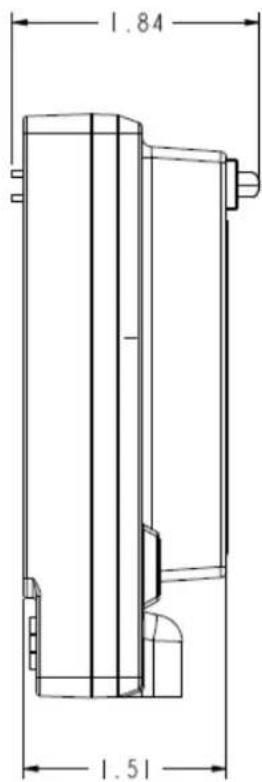
Dimensions (w x h x d): 4.86" x 4.40" x 1.84"
Additional Mounting: 14 "-20 Mounting Bracket
Weight (Monitor Only): .52 lbs (Without Batteries)
Operating Temperature 32°F to 104°F (0°C to 40°C)
Storage Temperature -14^ F to 140^ F ( -10^ C to 60^ C)
RoHs Do not dispose. Return to
Manufacturer or Authorized
Recycle Facility
Note: Under continuous operation, alkaline batteries will become hot to the touch. This is normal and does not indicate any material defect. Please keep batteries and other small objects away from children.
Use of rechargeable batteries is highly recommended.
■ Screen Cleaning
Periodically clean the screen surface using ammonia-free cleaning wipes (Marshall Part No. V-HWP-K). A clean microfiber cloth can also be used using only non-abrasive and ammonia-free cleaning agents. Do not use paper towels. Paper towel fibers are coarse and may scratch the surface of the polycarbonate faceplate or leave streaks on the surface. Antistatic and fingerprint resistant cleaning agents are recommended. Do not apply excessive pressure to the screen to avoid damaging the LCD.
■ Faceplate Dusting
Dust the unit with a soft, damp cloth or chamois. Dry or abrasive cloths may cause electrostatic charge on the surface, attracting dust particles. Neutralize static electricity effects by using the recommended cleaning and polishing practice.
Warranty
Marshall Electronics warranties to the first consumer that this V-LCD50-HDI series LCD monitor will, under normal use, be free from defects in workmanship and materials, when received in its original container, for a period of one year from the purchase date. This warranty is extended to the first consumer only, and proof of purchase is necessary to honor the warranty. If there is no proof of purchase provided with a warranty claim, Marshall Electronics reserves the right not to honor the warranty set forth above. Therefore, labor and parts may be charged to the consumer. This warranty does not apply to the product exterior or cosmetics. Misuse, abnormal handling, alterations or modifications in design or construction void this warranty. It is considered normal for a minimal amount of pixels, not to exceed three, to fail on the periphery of the display active viewing area. Marshall Electronics reserves the option to refuse service for display pixel failure if deemed unobtrusive to effective use of the monitor by our technicians. No sales personnel of the seller or any other person is authorized to make any warranties other than those described above, or to extend the duration of any warranties on behalf of Marshall Electronics, beyond the time period described above. Due to constant effort to improve products and product features, specifications may change without notice.
Marshall Electronics, Inc.
1910 East Maple Ave.
www.LCDRacks.com • sales@lcdracks.com
2010-1008r3
- Marshall Electronics
- Features
- ■ 1.2 MegaPixel 5" Panel
- ■ Image Flip
- ■ Multi-Format Compatibility
- ■ End-to-End Digital Signal Processing
- ■ Focus-Assist, False Color Filter, and other Advanced Features
- ■ Flexible Screen Markers
- ■ User-Definable Function Buttons
- Installation and Initial Setup
- ■ Unpacking
- ① User-Definable Function Buttons
- ② Menu Navigation Buttons
- ③ Image Adjustment Buttons
- Rear Monitor Features
- ① HDMI Input
- ② Power Switch
- ③ Power Input
- ④ Battery Compartment
- 1/4-20 Mounting Hole
- On Screen Menu
- MAIN MENU AND NAVIGATION
- ■ RGB Bias and Gain
- ■ Ratio
- ■ Pixel-to-Pixel Mode
- MARKER CONFIGURATION SUBMENU
- ■ Markers
- Center Marker
- ■ 16:9 Markers
- 16:9 Marker Examples:
- ■ Full Screen Markers
- ■ 4:3 Markers
- ■ Marker Background
- ■ False Colors
- ■ Peaking Filter (Focus assist)
- ■ Mosquito Filter
- ■ Curtain Color
- ■ Splash Screen
- ■ Contrast / Backlight
- ■ Freeze Input
- ■ Manufacturer Default
- ■ HDMI Color Space
- ■ HDMI Aspect Ratio
- FUNCTION PRESETS SUBMENU
- SYSTEM INFORMATION SUBMENU
- ■ System
- ■ PANEL
- ELECTRICAL
- ■ BATTERY COMPARTMENT
- MECHANICAL
- ■ Screen Cleaning
- ■ Faceplate Dusting
- Warranty
- Marshall Electronics, Inc.
Brand : MARSHALL
Model : V-LCD50-HDI
Category : Monitor