
NK1U - Uncategorized CLARION - Free user manual and instructions
Find the device manual for free NK1U CLARION in PDF.


| Type | Car Stereo |
| Dimensions (W x H x D) | 178 x 50 x 100 mm |
| Weight | 1.2 kg |
| Power Supply | 12V DC (Negative Ground) |
| Maximum Power Output | 50 W x 4 channels |
| RMS Power Output | 22 W x 4 channels @ 4 ohms |
| Display | LCD with white backlight |
| Supported Audio Formats | MP3, WMA, WAV, FLAC |
| Bluetooth | Yes, hands-free calling and audio streaming |
| USB Port | Front USB for media playback and charging |
| Auxiliary Input | 3.5 mm front auxiliary input |
| Radio Tuner | FM/AM with RDS |
| Equalizer | 3-band equalizer (Bass, Mid, Treble) |
| Remote Control | Included wired remote |
| Steering Wheel Control Compatible | Yes (requires adapter, sold separately) |
| Mounting Type | Single DIN (fits standard 2" x 7" opening) |
| Maintenance | Clean with soft dry cloth; avoid liquids |
| Safety Features | Reverse polarity protection, short circuit protection |
| Spare Parts Availability | Contact Clarion authorized service centers |
| General Information | Compatible with most vehicles; ISO connect |
Frequently Asked Questions - NK1U CLARION
User questions about NK1U CLARION
0 question about this device. Answer the ones you know or ask your own.
Ask a new question about this device
Download the instructions for your Uncategorized in PDF format for free! Find your manual NK1U - CLARION and take your electronic device back in hand. On this page are published all the documents necessary for the use of your device. NK1U by CLARION.
USER MANUAL NK1U CLARION
Installation and wire connection manual
NK1U
ClarionMiND In-Car Docking Station
CLARION PRODUCT REGISTRATION INFORMATION
For USA and Canada only
www.clarion.com
Dear Customer:
Congratulations on your purchase of a Clarion mobile electronic products. We are confident that you'll enjoy your Clarion experience.
There are many benefits to registering your product. We invite you to visit our website at www.clarion.com to register your Clarion product.
We have made product registration simple with our easy to use website. The registration form is short and easy to complete. Once you're registered, we can keep you informed of important product information.
Register at www.clarion.com - it's easy to keep your Clarion product up to date.
INFORMATIONS DE L'ENREGISTREMENT DE PRODUITS CLARION
Due to the complexity of the vehicle's wiring and components, it is recommended an authorized Clarion dealer perform the installation. For the location of nearest authorized Clarion dealer, please visit: www.clarion.com
For your safety, this manual should be read thoroughly to familiarize yourself with controls and functionality.
Contents
Safety Precautions....3
Package Contents ....5
Installing the Car Dock ....6
Installing 6
Installing the I/F (Interface) BOX....7
Installing 7
Installing the RDS-TMC Antenna 7
Installing 7
Wire Connection....8
Connecting the Car Dock and I/F (Interface) BOX 8
Attaching and Removing the ClarionMiND .....9
Attaching 9
Removing 9
Using the ClarionMiND while Attached to the Car Dock .9
Car Mode....9
Receiving Traffic Information (RDS-TMC)....10
Auto Switching between the Daytime Screen and Nighttime Screen 10
Outputting ClarionMiND Sound from the Vehicle's Speakers .....10
Navigation Audio Interrupt....11
Troubleshooting....12
Specifications....12
Safety Precautions
Symbol Identification
This manual uses symbols and icons to indicate safety precautions and concerns during the installation procedure. Be sure to carefully read and understand each precaution prior to beginning the installation.

WARNING
This symbol is intended to alert the user to the presence of important operating instructions. Failure to heed the instructions may result in severe injury or death.

CAUTION
This symbol is intended to alert the user to the presence of important operating instructions. Failure to heed the instructions can result in injury or material damage.
Before Use
WARNING
- Confirm the battery voltage of the vehicle to be installed. This unit is designed only for vehicles with a DC 12V power supply.
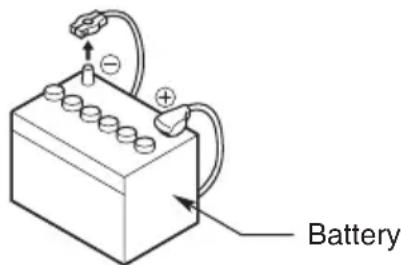
- Disconnect the negative terminal of the battery before connecting wires, otherwise an electric shock, injury by short circuit may occur.
WARNING
- When installing the unit to a vehicle with an airbag system, never install it in a place where it may affect the operation of the airbag.
- Do not install this unit in the following locations:
A location interfering with the driver's visual range or operation.
A location that hinders the gear shift. A location where passengers are at risk. An unstable location, or where the system may fall.
CAUTION
- Do not install this unit in a location exposed to rain or dust. Doing so creates the risk of a fire, accident, and electric shock.
- Do not install this unit in a place exposed to direct sunlight, heat or a place where the vent holes or heat radiation holes are covered.
Installation Notes
WARNING
Please note the position of pipes, tanks and electrical wirings before installing the unit into the vehicle; failure in avoiding these may cause a fire or malfunction.
CAUTION
• Use only the supplied parts.
- If unspecified parts are used, they may cause damage.
- Any holes made in the body of the vehicle should be sealed with a silicon adhesive.
- If exhaust fumes or water penetrates into the vehicle, this may cause an accident.
- Fasten the bolts securely when installing the unit. Loose bolts create the risk of an accident or malfunction.
WARNING
- Loom all cables according to the instruction manual, so as not to hinder operation.
- Wire the connecting cords/cables away from high temperature areas. If the coatings of the cables melt, it could cause an accident/fire by a short circuit. Take care when wiring in the engine compartment.
- When installing the unit to a vehicle with an airbag system, never install it in a place where it may affect the operation of the airbag.
- An airbag not operating correctly in an emergency may cause increased injury.
CAUTION
- Connect cables appropriately. If a wrong connection is made, this may cause a fire or accident.
- When passing cables through the body of the vehicle, use non-conductive grommets.
- If the coatings of the cables are worn out by rubbing, this may cause an accident, fire or a short circuit.
- After wiring cables, fix them with insulation tape.
- Be sure to switch off the vehicle when connecting or disconnecting cords to/from the unit, otherwise an electric shock, injury or accident may occur.
natural_image
Line drawing of a bundled cable with connectors (no text or symbols)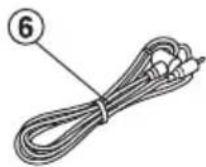



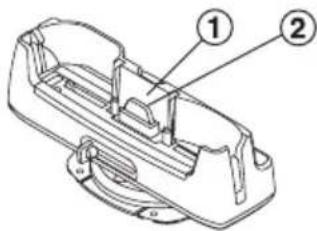
① Car Dock .... 1
② Plug cover 1
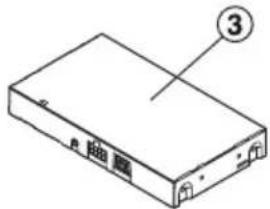
③ I/F BOX (Interface BOX) ..... 1
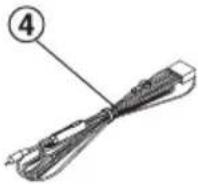
④ Power cord .... 1
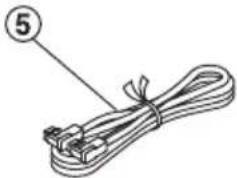
⑤ Connection cable....1
⑥ Audio cable 1
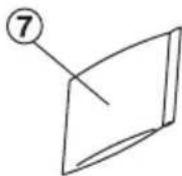
⑦ Parts bag A. 1
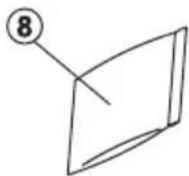
⑧ Parts bag B. 1
⑨ Parts bag C. 1
⑩ Installation and wire connection manual .... 1
⑪ Warranty card .... 1
Parts Bag A Contents ⑦
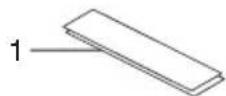

Parts Bag B Contents ⑧

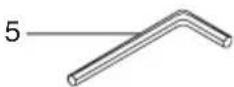
Parts Bag C Contents ⑨

- Hook-and-loop fastener (male).....2
- Hook-and-loop fastener (female) ..... 2
-
Cord holder .... 3
-
Tapping screw 4
-
Hex wrench 1
-
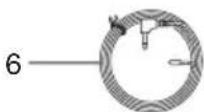
RDS-TMC antenna ..... 1
-
Cord holder .... 5
Installing the Car Dock
Note:
- Install the Car Dock in a location where it does not interfere with vehicle operation.
• Install the Car Dock in a location where it does not interfere with airbags and other safety devices.
Installing
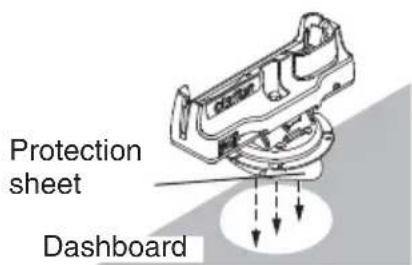
- There is tape affixed to the bottom of the Car Dock, which is covered by a protection sheet. Without removing the protection sheet, place the Car Dock on the dashboard of the vehicle to determine the best installation position.
Note:
Select a location where the ClarionMiND can be attached to and removed from the Car Dock without hitting the windshield of the vehicle. For information about attaching and removing the ClarionMiND, see Attaching and Removing the ClarionMiND (P. 9).
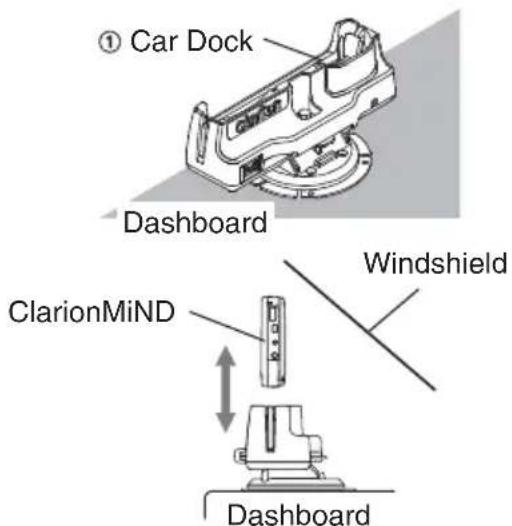
- Remove the protection sheet from the bottom of the Car Dock and then affix the Car Dock to the dashboard of the vehicle.
Note:
- Use a dry cloth to wipe the installation location free of dust and oil.
- It takes about 24 hours for the adhesive tape to achieve full adhesion.
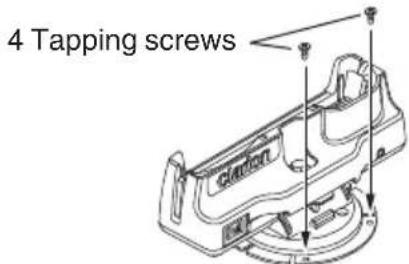
- Use the supplied tapping screws to secure the two locations at the back of the Car Dock to the dashboard.
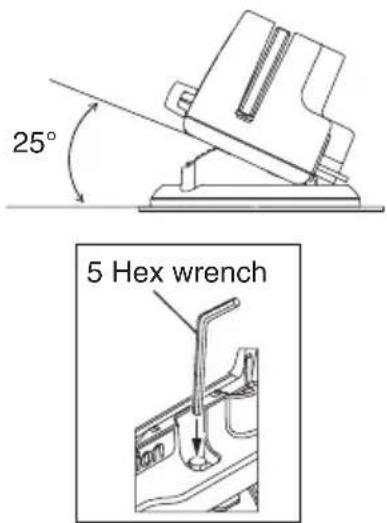
- Use the hex wrench to loosen the Car Dock's hex head screw to the point of maximum tilt.
Note:
- If the Car Dock does not tilt, you will not be able to tighten the tapping screws with a screwdriver.
- Fully loosen the hex screws until the Car Dock is fully tilted. However, note that loosening the hex screw too much can cause the hex screw to come out.
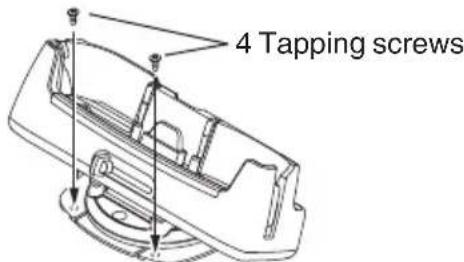
- Use the supplied tapping screws to secure the two locations at the front of the Car Dock to the dashboard.
- Adjust the tilt of the Car Dock to the desired angle and then tighten the hex screw to secure it.
* Hex screw tightening torque: Use a range of 4 N·m to 5 N·m (Approximately 0.4 kgf·m to 0.5 kgf·m) as a general guide.
Note:
You can adjust the tilt angle of the Car Dock within a range of 10 degrees forward, 25 degrees back, and 5 degrees horizontally.
Installing the I/F (Interface) BOX
Note:
• Install the I/F BOX in a cool location, as far away as possible from magnetic items.
- Do not stack the I/F BOX with other units. Heat and other influences can create the risk of I/F BOX malfunction.
Installing
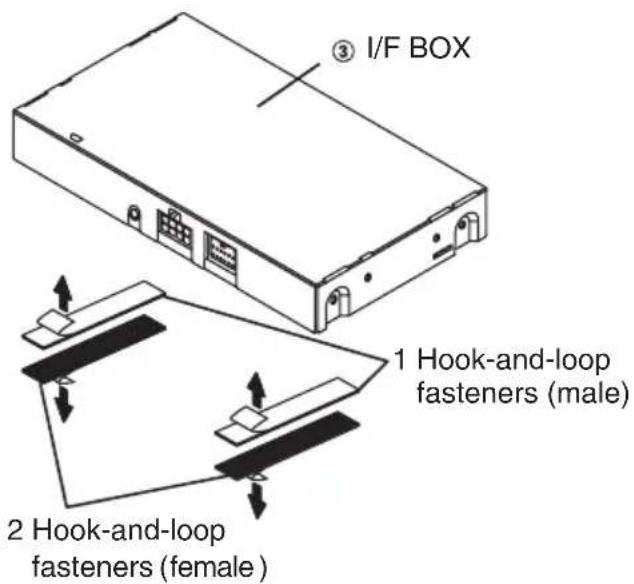
- Affix male hook-and-loop fasteners to the bottom of the I/F BOX and female hook-and-loop fasteners to the installation location in the vehicle.
- Affix the male and female hook-and-loop fasteners so they align with each other and secure the I/F BOX in place.
Note:
Use a dry cloth to wipe the hook-and-loop fastener installation locations free of dust and oil.
Installing the RDS-TMC Antenna
WARNING
- Run cables to avoid any hindrance of the driver's view.
- Secure cords with tape or by other means to ensure they do not interfere with driver operations.
Installing
- Determine the attaching position of the RDS-TMC antenna.
Note:
- Please set up the RDS-TMC antenna to become the best reception.
- Keep the RDS-TMC antenna cord fairly straight (not curled or bent) for best reception.
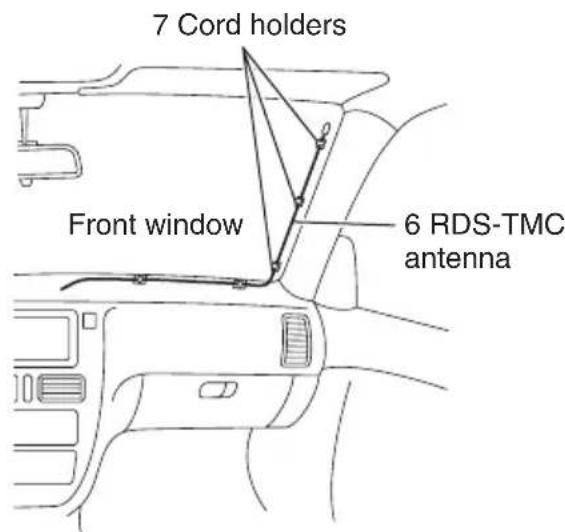
- Attach the RDS-TMC antenna in an area within 15 mm to 25 mm (0.59" to 0.98") from the front pillar where it does not interfere with vehicle operation.
-
For installation location of the antenna, follow the local rules and regulations.
-
Use the cord holders to secure the antenna cable.
Note:
- Use a dry cloth to wipe the installation location free of dust and oil.
-
It takes about 24 hours for the adhesive tape to achieve full adhesion.
-
Connect the RDS-TMS antenna to the RDS-TMC input terminal on the Car Dock (see Wire Connection (P. 8).).
WARNING
- Be sure to read the “Safety Precautions” section of this manual before installing the Car Dock or performing wiring.
- Disconnect the negative terminal of the battery before connecting wires. Failure to do so creates the risk of electric shock and personal injury due to short circuiting. Short circuiting also can result in damage to internal components.
Connecting the Car Dock and I/F (Interface) BOX
Note:
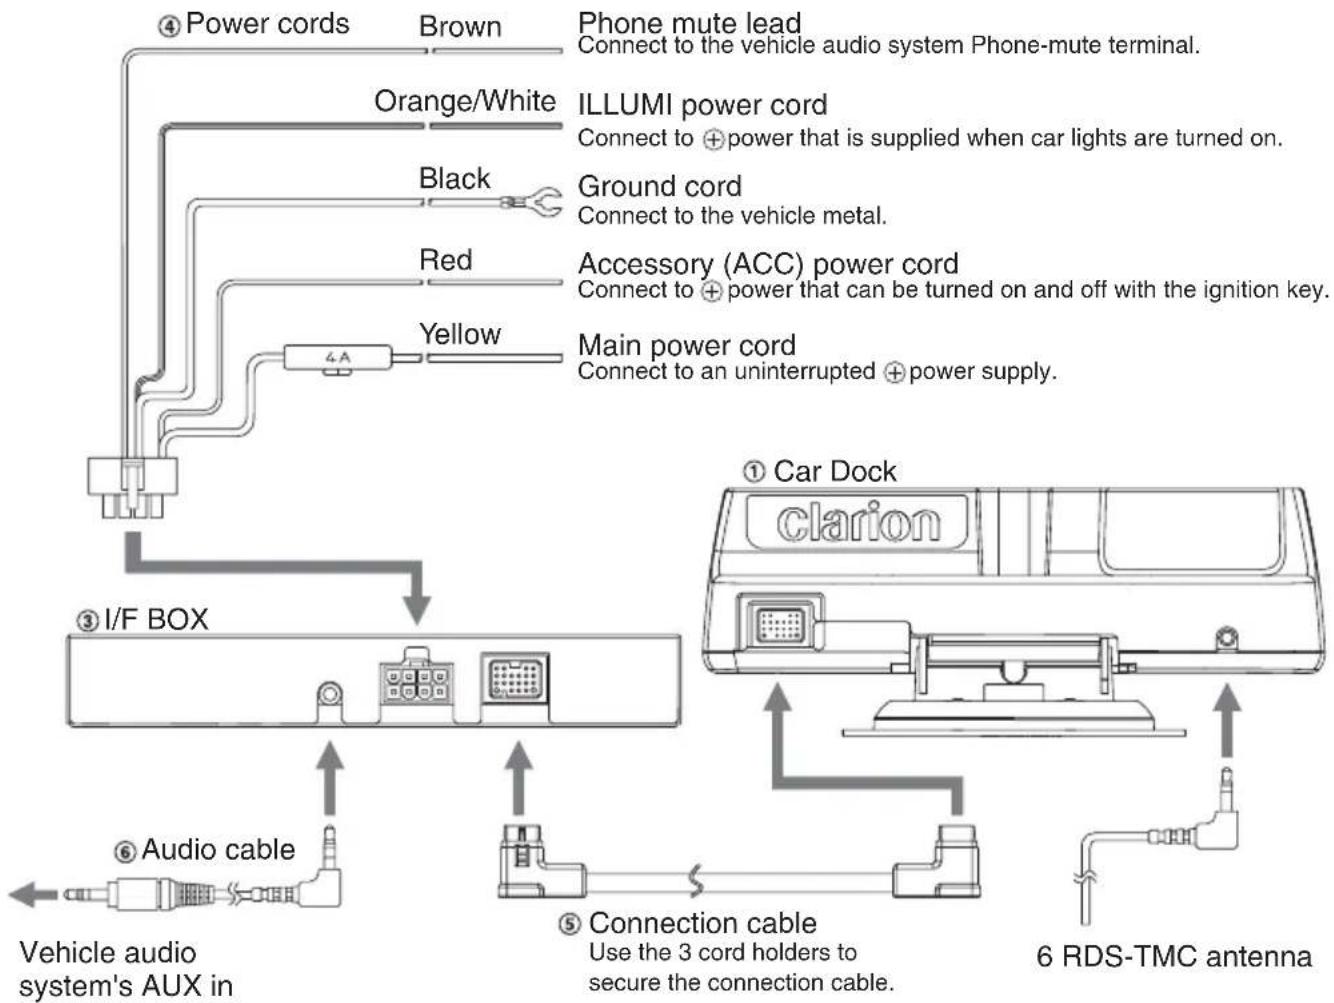
- To output ClarionMiND sound through the vehicle speakers, use the supplied audio cable to connect the I/F BOX to the vehicle audio system's AUX in terminal.
- Navigation interrupt can be enabled by connecting the power cord's phone mute lead to a vehicle audio system that supports phone muting. To use this function, you need to configure TEL-mute function settings on the vehicle audio system. For details, see the user documentation that comes with the vehicle audio system.
- The first part of the navigation voice may be broken depending on your audio system. If this happens, do not connect the phone mute lead. Set the audio system in AUX mode or set the ClarionMiND built-in speaker to output the voice guidance.
flowchart
graph TD
    A["④ Power cords"] --> B["Brown"]
    B --> C["Phone mute lead"]
    C --> D["Connect to the vehicle audio system Phone-mute terminal."]
    E["Orange/White"] --> F["Black"]
    F --> G["Ground cord"]
    G --> H["Connect to the vehicle metal."]
    I["Red"] --> J["Yellow"]
    J --> K["Accessory (ACC) power cord"]
    K --> L["Connect to +power that is supplied when car lights are turned on."]
    M["Main power cord"] --> N["Connect to an uninterrupted +power supply."]
    O["③ I/F BOX"] --> P["Car Dock"]
    P --> Q["Clarion"]
    Q --> R["6 RDS-TMC antenna"]
    S["⑥ Audio cable"] --> T["Vehicle audio system's AUX in"]
    U["⑤ Connection cable"] --> V["Use the 3 cord holders to secure the connection cable."]
Attaching and Removing the ClarionMiND
Note:
- Before attaching the ClarionMiND, check to make sure that the Car Dock is correctly installed and connected.
- Before attaching the ClarionMiND, first remove the supplied plug cover from the Car Dock. When the ClarionMiND is not connected to the Car Dock, be sure to install the plug cover to protect the connectors.
Attaching
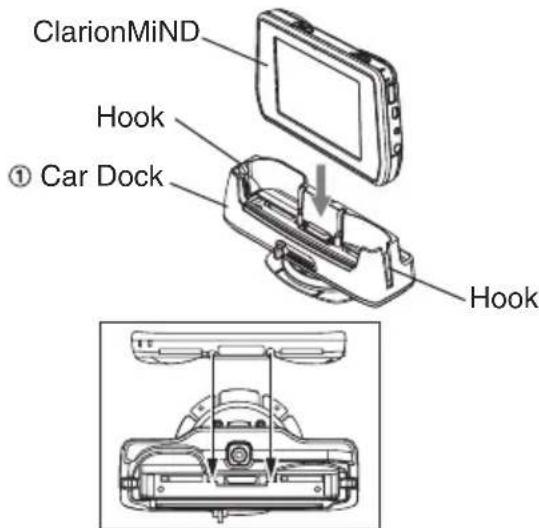
- Checking the connector locations of the Car Dock, plug the ClarionMiND into the connectors.
Note:
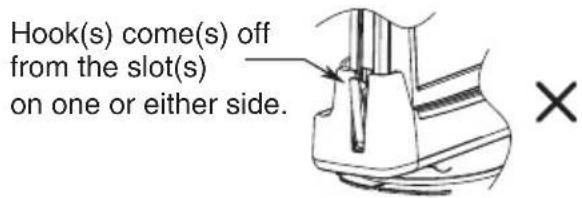
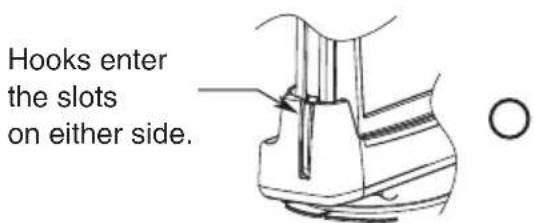
- Make sure the hooks of the Car Dock enter the slots on either side of the ClarionMiND.
- Charging starts when the ClarionMiND is attached to Car Dock.
- Do not use the car adapter that comes with the ClarionMiND for charging while the ClarionMiND is attached to the Car Dock.
Removing
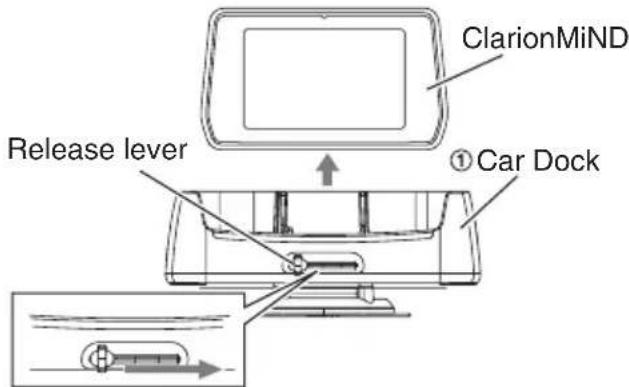
- Pull the release lever on the front of the Car Dock to the right and hold it there as you remove the ClarionMiND.
Note:
- When attaching the ClarionMiND, make sure the Car Dock is pointed straight up and is not tilted. Trying to force attachment of the ClarionMiND while the Car Dock is at an angle can result in faulty connector contact.
- Do not leave the ClarionMiND on the Car Dock after pulling the release lever to the right. The hooks no longer will be engaged, which creates the risk of the ClarionMiND falling off of the Car Dock.
- Before attaching the ClarionMiND, make sure the release lever is returned to the left. It may not be returned to the left due to the operating condition.
Using the ClarionMiND while Attached to the Car Dock
This section explains what you can do with the ClarionMiND while it is attached to the Car Dock.
Car Mode
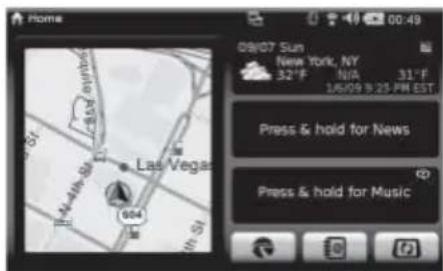
- Connect the ClarionMiND to the Car Dock. Navigation will start up automatically and the Car mode Home screen will appear. For details about the Car mode and Navigation, see the ClarionMiND Owner's manual.
Receiving Traffic Information (RDS-TMC)
Traffic information can be received in real time from an RDS-TMC traffic information service. In addition to traffic information being displayed the Car mode navigation screen, traffic conditions are indicated by highlighting on map displays and output as voice guidance.
For information about setting for the reception of the traffic information, see "Configuring Navigation Settings" in the ClarionMiND Owner's manual.
Auto Switching between the Daytime Screen and Nighttime Screen
The ClarionMiND switches to the nighttime screen automatically whenever the vehicle's car lights are turned on.
-
Press the control key.
-
On the control bar, tap

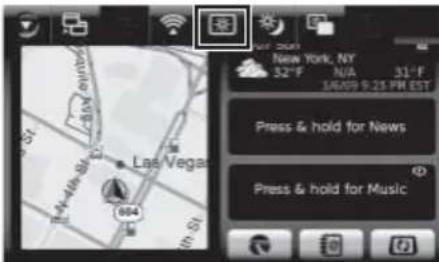
- Tap the "Mode select by" [Car Illumi.] key.
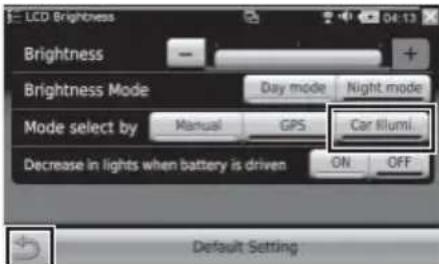
- Tap to apply the setting.
Outputting ClarionMiND Sound from the Vehicle's Speakers
You can use the procedure below to output ClarionMiND sound from the vehicle's speakers.
Note:
Select the AUX mode on the vehicle's audio system to output the sound of a ClarionMiND from the vehicle's speakers.
-
Press the control key.
-
On the control bar, tap and then [Control Panel].
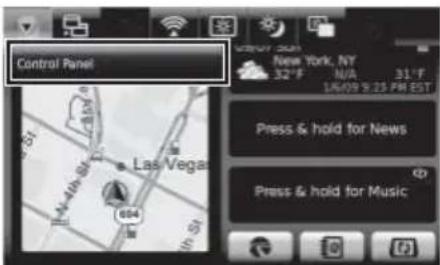
Note:
The Control Panel can be selected while the Car mode Home screen is displayed.
- Tap the [Sound] key.
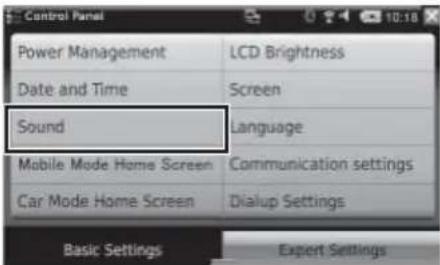
- Next to "Sound from car speaker using "Car Dock"', tap the [ON] key.
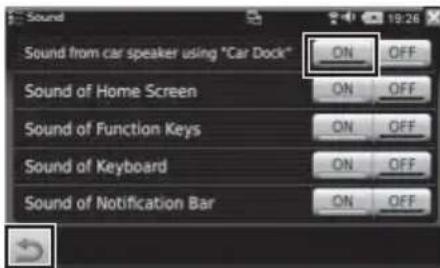
- Tap to apply the setting.
This feature gives priority to navigation voice guidance while playing back audio of a ClarionMiND connected to the Car Dock through the vehicle's speakers. The volume of the original audio being played back is reduced during voice guidance.
-
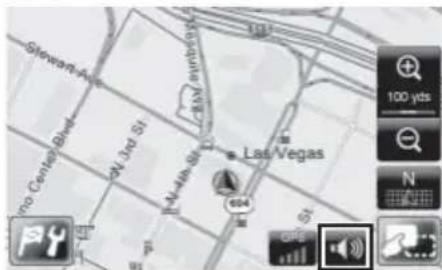
On the Car mode Home screen, tap the navigation screen. This expands the Navigation application to the full-screen view.
-
Switch to the Navigation map screen.
-
Tap .
- Tap .
- Tap the [ON] key next to "Voice command via docking station" and then tap [Left] or [Right] next to "Voice command in vehicle".
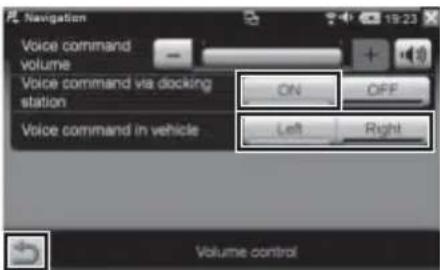
- Tap to apply the setting.
Note:
Note that auto interrupt is not supported with an audio device that does not accept connection of a phone mute lead. Also, with some vehicle audio systems, audio output during playback may not be possible and navigation guidance also may be muted (no output).
If this happens, change the "Voice command via docking station" setting in step 5 to [OFF].
The symptoms described below may not indicate malfunction.
Try taking the recommended action before requesting servicing.
| Problem Recommended | died Action |
| No sound is produced from the vehicle's speakers. | Turn off Acc, remove the ClarionMiND from the Car Dock, and then re-attach it. |
| The ClarionMiND does not turn on or the battery pack does not charge when attached to the Car Dock. | The Car Dock's fuse may be blown. If it is, replace it with one of the same capacity. |
| The ClarionMiND may not turn on if its protection circuit is activated.Turn power off and then back on again. |
Specifications
RDS-TMC Tuner
• Reception frequency range: 87.9 to 107.9 MHz
Output
• Audio Output: 600 ± 120 mVrms (at ClarionMiND volume MAX setting)
General
• Power supply voltage: 13.4 V (10.8 to 15.6 V)
• Ground: Negative
- Rated current during ClarionMiND charging: 3.7 A
- Fuse: 4 A
- Operating temperature range: 0 to +60 degrees Celsius
Car Dock
- Dimensions: 188.4 (Width) x 74.8 (Height) x 105.9 (Depth) [mm] [7.41" (W) x 2.94" (H) x 4.17" (D)]
• Weight: 300 g (10.58 oz.)
I/F BOX
- Dimensions: 178 (Width) x 25 (Height) x 100 (Depth) [mm]
[7" (W) x 0.98" (H) x 3.94" (D)]
• Weight: 460 g (16.22 oz.)
Clarion Co., Ltd.
All Rights Reserved. Copyright © 2009: Clarion Co., Ltd.
- NK1U
- CLARION PRODUCT REGISTRATION INFORMATION
- INFORMATIONS DE L'ENREGISTREMENT DE PRODUITS CLARION
- Contents
- Safety Precautions
- Symbol Identification
- WARNING
- CAUTION
- Before Use
- Parts Bag A Contents ⑦
- Parts Bag B Contents ⑧
- Parts Bag C Contents ⑨
- Installing the Car Dock
- Note:
- Installing
- Installing the I/F (Interface) BOX
- Installing the RDS-TMC Antenna
- Connecting the Car Dock and I/F (Interface) BOX
- Attaching and Removing the ClarionMiND
- Attaching
- Removing
- Using the ClarionMiND while Attached to the Car Dock
- Car Mode
- Receiving Traffic Information (RDS-TMC)
- Auto Switching between the Daytime Screen and Nighttime Screen
- Outputting ClarionMiND Sound from the Vehicle's Speakers
- Specifications
- RDS-TMC Tuner
- Output
- General
- Car Dock
- I/F BOX
- Clarion Co., Ltd.
Brand : CLARION
Model : NK1U
Category : Uncategorized