ACJ-600 - Juicer Aroma - Free user manual and instructions
Find the device manual for free ACJ-600 Aroma in PDF.


| Product Type | Masticating Slow Juicer |
| Brand | Aroma |
| Model | ACJ-600 |
| Dimensions (L x W x H) | 40 x 15 x 30 cm |
| Weight | 4.5 kg |
| Power Consumption | 150 W |
| Motor Speed | 80 RPM |
| Juice Container Capacity | 0.8 L |
| Pulp Container Capacity | 1.0 L |
| Feeding Chute Diameter | 4.5 cm |
| Material | BPA-free Plastic, Stainless Steel Auger |
| Safety Features | Safety Lock Arm, Overload Protection, Non-Slip Feet |
| Reverse Function | Yes |
| Cleaning & Maintenance | Dishwasher-Safe Parts, Cleaning Brush Included |
| Warranty | 1 Year Limited |
| Included Accessories | Juice Cup, Pulp Container, Cleaning Brush, Recipe Book |
Frequently Asked Questions - ACJ-600 Aroma
User questions about ACJ-600 Aroma
0 question about this device. Answer the ones you know or ask your own.
Ask a new question about this device
Download the instructions for your Juicer in PDF format for free! Find your manual ACJ-600 - Aroma and take your electronic device back in hand. On this page are published all the documents necessary for the use of your device. ACJ-600 by Aroma.
USER MANUAL ACJ-600 Aroma
natural_image
White Aroma coffee maker with black filter and orange handle, no visible text or symbols on the device itself.instruction manual
ACJ-600/ACJ-600G
Cold Press Juicer

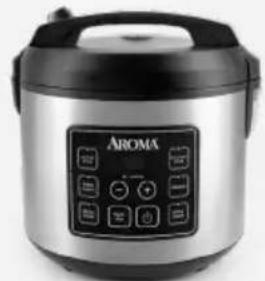
natural_image
A silver rice cooker with black control panel and 'AROMA' branding (no visible text beyond label)Digital Rice & Grain Multicookers
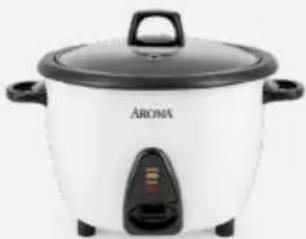
natural_image
White Aroma rice cooker with black lid and side handles (no visible text or symbols)Rice & Grain Cookers
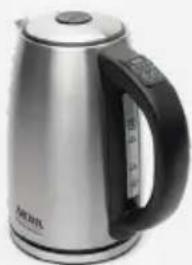
natural_image
Exterior view of a modern stainless steel water heater with black handle (no visible text or symbols)Electric Kettles
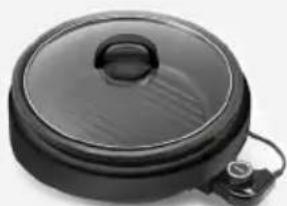
natural_image
Black circular appliance with lid and side clip, no visible text or symbolsIndoor Grills
natural_image
Black ceramic wok with lid and side handles, no visible text or symbols...and More!
AROMA®
To Enhance and Enrich Lives.
Here at Aroma we strive to make a difference —to design and distribute products that enhance and enrich people's lives.
Aroma offers an array of exceptional products to make cooking simple and satisfying. Discover other countertop appliances and cookware from our current product lineup to complement your kitchen.
REGISTER YOUR PRODUCT

Registration is quick and easy.
Be notified of:
- new product releases
- new test kitchen recipes
• sales and promotions ...and more!
SCAN TO REGISTER
AromaCo.com/registration

/AromaHousewares
Basic safety precautions should always be followed when using electrical appliances, including the following:
-
Important: Read all instructions carefully before first use.
-
To protect against fire, electric shock, and injury to persons, do not immerse the power cord, plug or appliance in water or any other liquid. See instructions for cleaning.
-
This appliance is not intended to be used by children. Close supervision is required when the appliance is used near children.
-
Do not operate any appliance with a damaged power cord or after the appliance malfunctions or has been damaged. Contact Aroma® customer service for examination, repair or adjustments. Do not disassemble.
-
Use only with a 120V AC power outlet.
-
Unplug from outlet when not in use and before cleaning. Allow the unit to cool before assembling, disassembling, or cleaning.
-
To disconnect, first power off the unit, then remove the plug from the wall outlet.
-
Use only on a level, dry and heat-resistant surface.
-
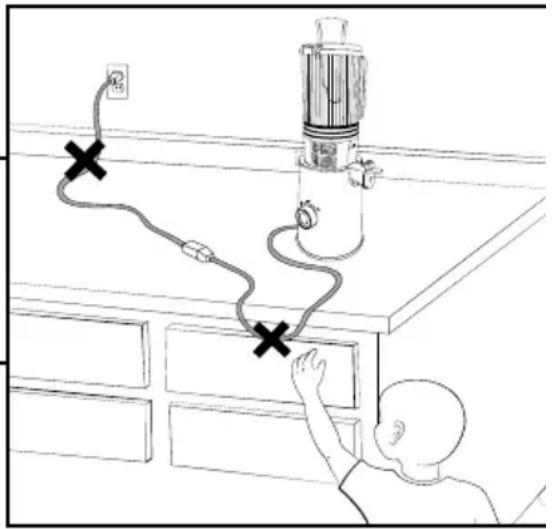
Do not let cord touch hot surfaces or hang over the edge of a counter or table.
-
Always unplug the power cord from the plug gripping area. Never pull on the cord.
-
Before powering ON ensure all detachable parts are correctly installed and container lid is securely tightened to prevent leakage during operation.
-
This product includes an intelligent protection feature. If the product stops due to overload, allow it to rest for 1 minute before restarting. This pause helps extend the product's lifespan.
-
WARNING: Keep hands and other objects out of the feed chute to prevent injury and damage to the juicer. Only use the provided pusher.
-
If the product stops due to blockage or overload, it will attempt an automatic restart. If blockage persists, clear the feeding chamber before continuing.
-
Cut food into small pieces before adding to the feeding tube. Remove hard seeds, thick skins, and shells before juicing.
-
Avoid juicing hard or fibrous ingredients like ice, coconut, or sugarcane, as these may cause clogging or damage components, reducing product lifespan.
-
Gently push ingredients into the feed chute; avoid excessive force to allow the machine to cut ingredients appropriately.
-
Do not place any parts of this product in the microwave, as this may cause heat damage or deformation.
-
Do not use steel wool, abrasive cleaners, or corrosive liquids (such as gasoline or acetone) to clean the product.
-
Do not use the appliance for other than its intended use.
-
CAUTION: Do not immerse the main unit in water or any liquid, and avoid rinsing it directly under running water. Components should not be exposed to temperatures over 60°C during cleaning.
-
WARNING: Do not place your face or eyes close to the feed chute during operation to avoid accidents.
-
CAUTION: For countertop use only.
-
Do not place any parts of this product in the dishwasher.
-
Do not use outdoors. This appliance is for household use only.
-
This product's components do not heat.
-
The use of accessory attachments not recommended by Aroma Housewares may result in fire, electrical shock or injury.
-
Do not place on or near a hot gas or electric burner or in a heated oven.
-
The appliance should be operated on a separate electrical circuit from other operating appliances. If the electrical circuit is overloaded with other appliances, the appliance may not operate properly.
Short Cord Instructions
- A short power-supply cord is provided to reduce the risks resulting from it being grabbed by children, and becoming entangled in or tripping over a longer cord.
- Longer extension cords are available and may be used if care is exercised in their use.
- If a longer extension cord is used:
a.) The marked electrical rating of the extension cord should be at least as great as the electrical rating of the appliance.
b.) The longer cord should be arranged so that it will not drape over the countertop or tabletop where it can be pulled by children or tripped over unintentionally.
DO NOT DRAPE CORD!
KEEP AWAY FROM CHILDREN!
Polarized Plug
This appliance has a polarized plug (one blade is wider than the other); follow the instructions below:
To reduce the risk of electric shock, this plug is intended to fit into a polarized outlet only one way. If it still does not fit, contact a qualified electrician. Do not attempt to modify the plug in any way.
If the supply cord is damaged, it must be replaced by the manufacturer, its service agent or a similarly qualified person in order to avoid a hazard.
THIS APPLIANCE IS FOR HOUSEHOLD USE ONLY.
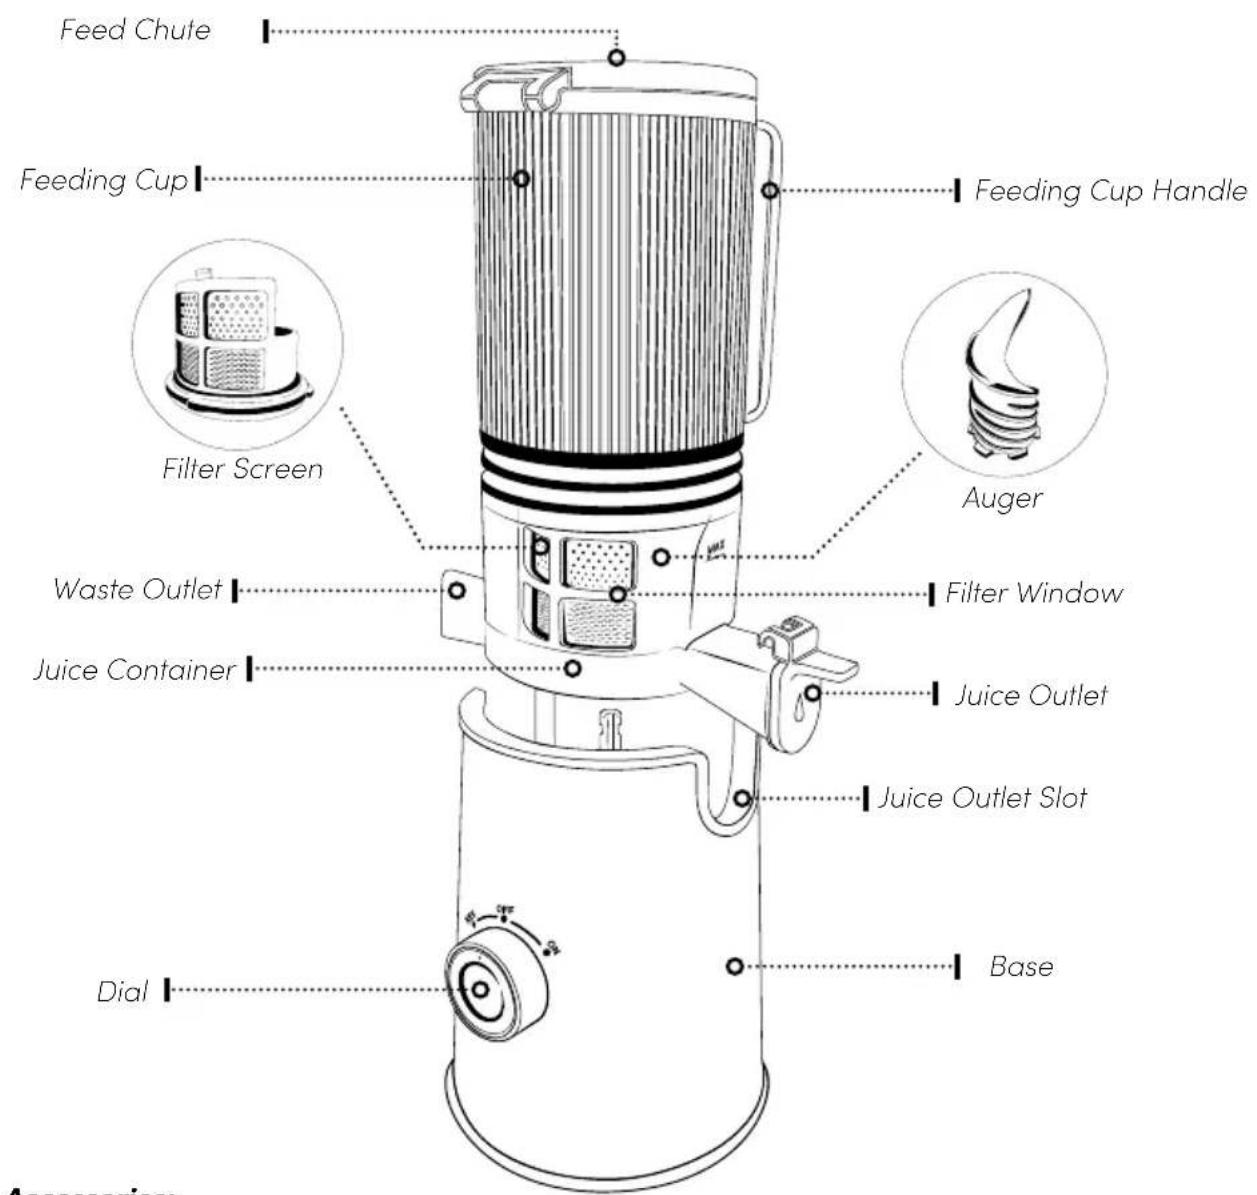
Parts Identification
Accessories:
natural_image
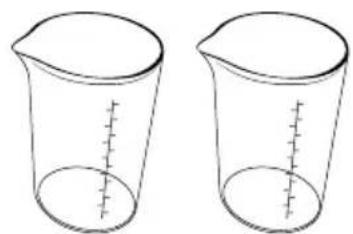
Two identical beakers with measurement markings, no text or symbols presentCollection Cup (x2)
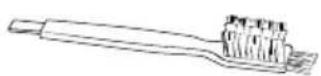
Cleaning Brush
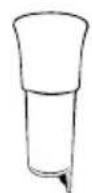
Pusher
Controls
ON
Powers the unit on.
OFF
Powers the unit off.
REV (Reverse)
Engages reverse mode to clear clogs or jams.
BEFORE FIRST USE

- Read all instructions and important safeguards.
- Remove all packaging materials and check that all items have been received in good condition.
- Tear up all plastic bags and dispose of them properly as they can pose a risk to children.
- Wipe the unit's exterior clean with a damp cloth.
- Remove detachable components and wash in warm, soapy water. For dismounting instructions, please refer to page 12-13.
- Rinse and dry thoroughly before replacing them back onto the base.
How To Clean
- Before cleaning, hold the REV position for a couple seconds and then turn to OFF.
- Remove detachable components and wash in warm, soapy water. For dismounting instructions, please refer to page 12-13.
- Use a dry paper towel or damp cloth to wipe any food residue.
- Rinse and dry thoroughly before replacing them back onto the base.
- Make sure appliance is clean and dry before using.
How To Clean Feeding Cup
- Remove feeding cup by following instructions on page 12-13.
- Using cleaning brush, remove any food that may be stuck in the filter screen cavities.
- Use a dry paper towel or damp cloth to wipe any food residue.
- If necessary, remove the filter screen. Wash it and install it back to feeding cup.
- Rinse and dry thoroughly before replacing them back onto the base.
- Make sure appliance is clean and dry before using.

Caution:
Do not submerge base in water or any other liquid.
Do not operate the switch with wet hands, as it may cause electric shock or fire.
Do not wash with hot or boiling water, a steel scrubber, abrasive material, sink solvents, or sharp cleaning tools. Do not put it in a dishwasher or dish dryer.
Note:
- If the unit is not cleaned immediately after use, residue may dry and stick to the unit. This will make assembling and cleaning difficult and lead to performance degradation.
HOW TO CLEAN JUICE CONTAINER
- Remove juice container by following instructions on page 12-13.
-
Open the juice outlet and use the cleaning brush to remove any obstructions. Clean the waste outlet thoroughly with the cleaning brush as well.
-
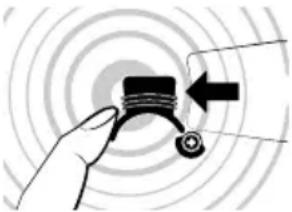
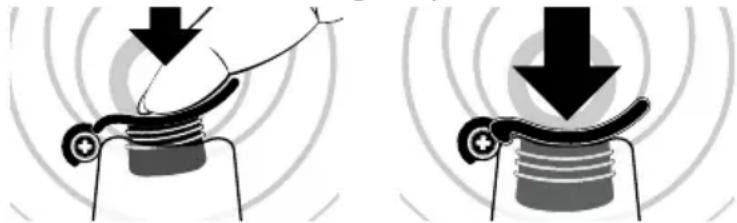
If there is still residue in the mouth of the spout, turn the juicer container over, open the silicone pressure valve, and rinse thoroughly with water.
natural_image
Hand interacting with a sensor or probe icon, surrounded by concentric circles and a black arrow pointing to the pointer (no text or symbols)- Once cleaned, securely reattach the Silicone Pressure Valve to its original position.
natural_image
Two diagrams showing a mechanical component with downward force arrows, no text or symbols present-
Use a dry paper towel or damp cloth to wipe any food residue from the base and exterior. Rinse and dry thoroughly before reassembling the appliance.
-
Ensure the appliance is clean and completely dry before using it again.
TROUBLESHOOTING
The cold press juicer dial is not working.
- Ensure the power cord is plugged in securely.
- Check that the Feed Chute Cover is properly closed and latched onto the Feeding Cup.
· Verify that the Feeding Cup and Juice Container are correctly assembled. - If the problem persists, unplug the unit, wait 20-30 minutes, and try again.
There is a smell from the motor.
- It is normal for a new motor to emit a scent during the first use.
- If after several uses the scent persists, contact Customer Service.
The juicer stops working half way.
- Too much fruit or vegetables in the feed chute may cause overload.
- Decrease the amount of food added at a time and gently use pusher.
Note:
- If the machine overheats, it will turn off automatically. Turn the ON/OFF Switch to OFF and wait 10 minutes, then turn the machine on again.
· Any other servicing should be performed by Aroma® Housewares.
- Not satisfied with your Aroma® purchase? Our product experts can help! Before returning, please contact Customer Service at 1-800-276-6286 for product support, helpful tips and more!
Helpful Hints:
Clean appliance regularly to retain quality and extend your product's life.
For your safety, this appliance operates only when correctly assembled with the feeding cup in place.
How To Assemble
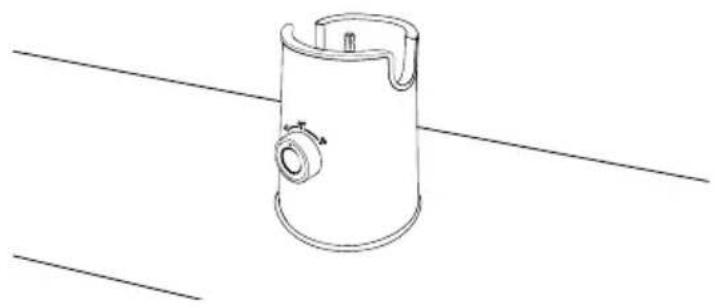
- Unplug the power cord and place the unit on a sturdy, level and dry surface.
natural_image
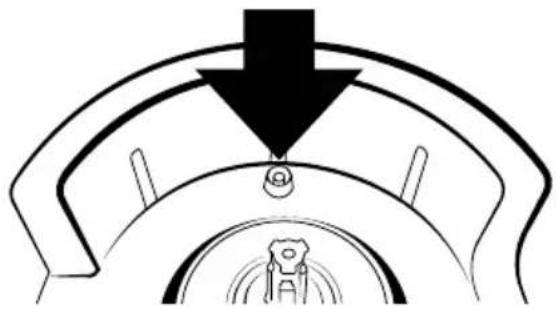
Line drawing of a cylindrical mechanical component with a side outlet and internal features, placed on a horizontal line (no text or symbols)- Find the pin located near the back wall of the base.
natural_image
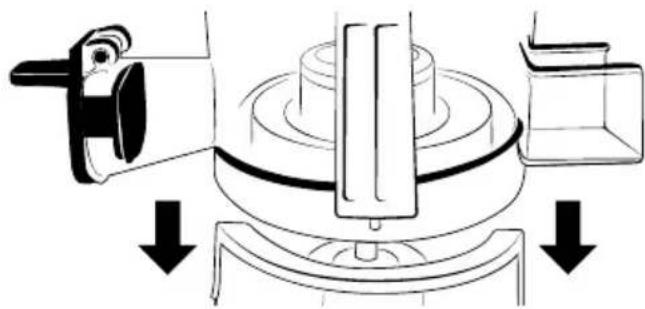
Diagram of a mechanical component with a downward arrow and central circular feature (no text or symbols)- Align the white tab on the back of the juice container with the pin on the base, then insert the container into base.
natural_image
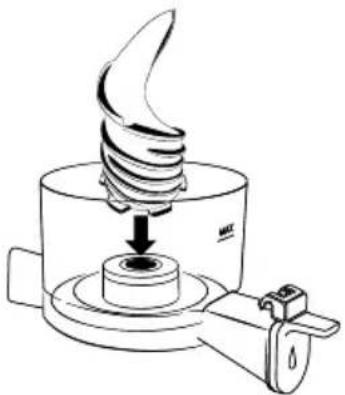
Diagram of a mechanical device with directional arrows indicating movement or force (no text or symbols present)- Insert the auger into the center of the juice container. Turn it clockwise while pushing down until it is fully seated at the bottom.
natural_image
Technical line drawing of a mechanical component with a spiral-shaped top and base, showing a downward arrow indicating motion (no text or symbols)Note:
- For your safety, this appliance operates only when correctly assembled with the feeding cup in place.
Helpful Hints:
Scan QR code for an instructional video on how to properly assemble unit.

How To Assemble
(CONTINUED)
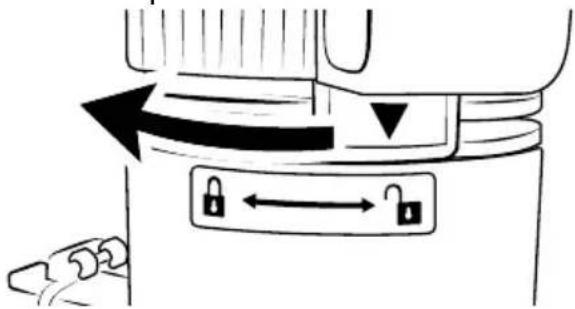
- Align the arrow on the feeding cup handle with the unlock icon on the juice container, then twist to the lock position.
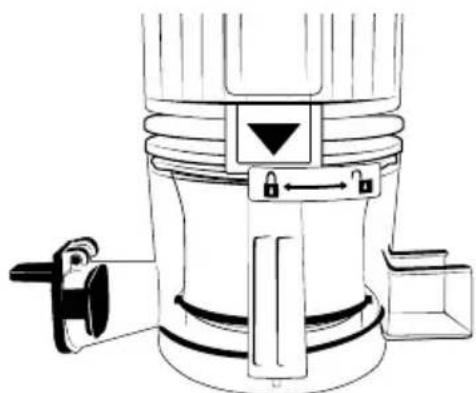
- Ensure the arrow on the feeding cup is aligned with the lock icon on the juice container for proper operation.
natural_image
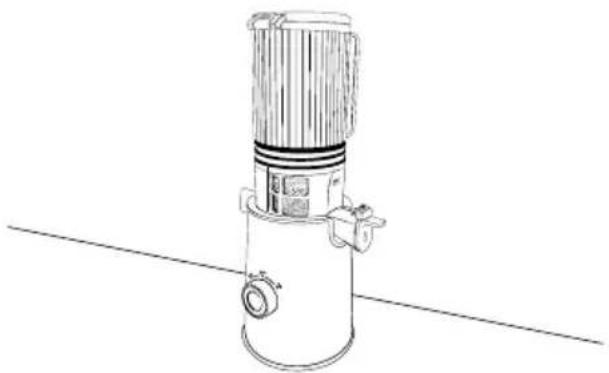
Technical line drawing of a mechanical device with no visible text or symbols- Ensure all components are securely assembled. The unit is now ready for operation.
natural_image
Line drawing of a mechanical device with a cylindrical body and flange, mounted on a flat surface (no text or symbols)How to find a taste ingredients
Preparation Table
| Fruit/Vegetable How to Prepare | |
| Apples, Pears | Remove core and seeds, then cut into 1-inch cubes for better results. |
| Carrots, Beets, Celery, Cucumber | Rinse thoroughly, peel if desired, and cut into smaller chunks if too large for the chute. |
| Citrus (Orange, Lemons, Limes, Grapefruits) | Peel if desired, remove seeds, and cut into segments. |
| Pineapple, Mango, Melons | Remove skin and core/pit, then cut into chunks that fit the chute. |
| Spinach, Kale, Leafy Greens | Wash thoroughly, use leaves only, and bundle for easier juicing. |
| Tomatoes | Rinse, remove stems, and cut into quarters. |
| Berries (Strawberries, Blueberries) | Wash and remove any stems or leaves. No cutting required. |
| Ginger, Turmeric | Peel if desired and cut into small chunks to avoid clogging. |

Caution:
Remove hard pits, seeds, and peels before pressing to prevent potential damage to the Auger. Always remove the peel and pits/seeds from fruits such as oranges, lemons, grapefruits, and melons before use.
Ensure ingredients are cut to a size that fits comfortably in the hopper chute.
Note:
- Begin with softer ingredients and follow with firmer ones for the best extraction results.
- Starchy fruits and vegetables, such as sugarcane, avocado, banana, fig, mango, papaya, dragon fruit, kiwi, and grapes, are not suitable for juicing as they easily clog the Sieve.
- Fruits and vegetables should be cut into pieces 1–1.5" long before juicing for the best results.
- Remove seeds and pits from fruits like citrus and melon before processing to avoid damage or clogging.
- Very seedy fruits like strawberries and raspberries may clog the Sieve. Process these types of fruits slowly.
MAKING JUICE
- Properly assemble unit by following instructions on page 8-9.
- Plug the power cord into an available 120V AC wall outlet.
- Prep chosen ingredients according to "How to Prepare Ingredients" on page 10.
- Place one collection cup below juice outlet and one collection cup below waste outlet.
- Put ingredients in and close the top cover securely until it latches on to feeding cup.
- Open the juice outlet, then turn the switch ON.
- If desired, additional ingredients can be added in from the feed chute anytime during operation.
- If cold press juicer slags or stalls, turn dial to REV and hold for a couple seconds and turn back to ON to go back to normal work.
- Turn the dial to OFF when the food is processed, and no more juice flows from the juice outlet.
- When finished, safely unplug the power cord.

Caution:
Do not use the appliance for more than 30 minutes continuously. It may cause a failure due to motor overhealing. Stop for 5 minutes every 30 minutes to allow the motor to cool down before resuming operation.
Do not operate the switch with wet hands, as it may cause electric shock or fire.
Do not insert fingers or any foreign objects into the opening while the machine is in use.
Note:
- For your safety, this appliance operates only when correctly assembled with the feeding cup in place.
How To Dismount
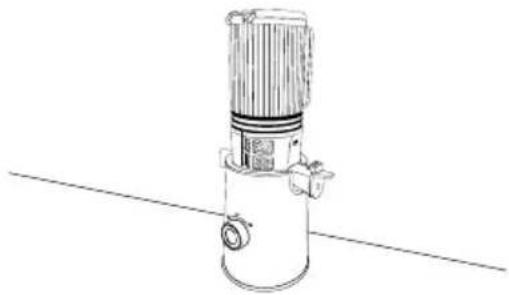
- Unplug the power cord and place the unit on a sturdy, level and dry surface.
natural_image
Line drawing of a cylindrical industrial pump or filter unit with no visible text or symbols- Turn arrow underneath the feeding cup handle to the unlock position.
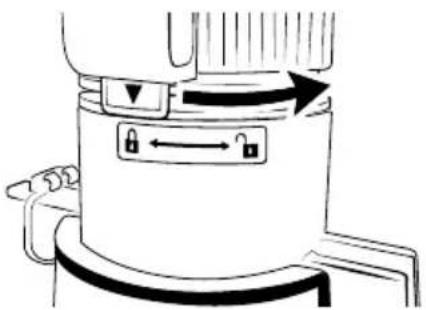
natural_image
Diagram of a mechanical device with directional arrows and lock symbols (no text or labels)- Hold feeding cup firmly and grab filter screen by its tabs and pull in downward direction.
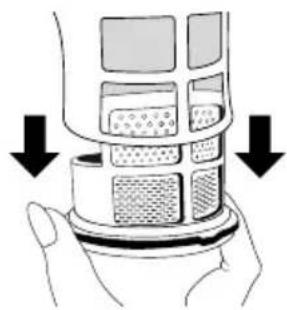
natural_image
Illustration of a hand holding a multi-layered device with arrows indicating downward movement (no text or symbols)- Turn auger slightly in a clockwise direction to unlock juice container.
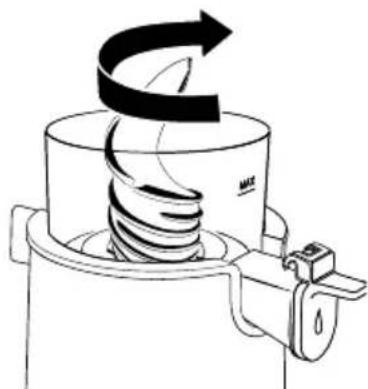
natural_image
Diagram of a mechanical device with a coiled spring and directional arrow (no text or symbols)
Caution:
When using the ON or REV button, ensure the auger is completely stopped before pressing either button.
For safety, allow the machine to come to a complete stop. Press the REV button for about 10 seconds to loosen up pulp and allow for easier disassembly.
Note:
- For your safety, this appliance operates only when correctly assembled with the feeding cup in place.
Helpful Hints:
Scan QR code for an instructional video on how to properly dismount unit.

How To Dismount
(CONTINUED)
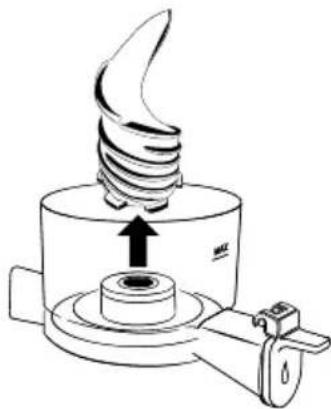
- Once unlocked, lift juice container and remove from base.
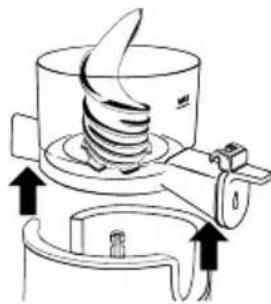
natural_image
Diagram of a mechanical device with arrows indicating motion or force, no text or symbols present- Firmly hold auger and pull in upward direction to remove from juice container.
natural_image
Technical line drawing of a mechanical component with a spiral top and central shaft (no text or symbols)- Ensure all parts are properly disassembled. The unit is now ready for cleaning. Once all components are clean and completely dry, reassemble (refer to page 8-9) and store in a dry place.
NOTES
LIMITED WARRANTY
Aroma Housewares Company warrants its products against defects in material and workmanship for one year from the provable date of purchase in the United States.
Within this warranty period, Aroma Housewares Company will repair or replace, at its discretion, defective parts at no charge. Proof of the date of purchase, such as the original dated sales receipt, will be required with any request for warranty repair or replacement. All liability is limited to the amount of the purchase price.
This warranty does not apply if the warranty period expired; the product has been modified by any unauthorized service center or personnel; the defect was subject to abuse, improper use not conforming to product manual instructions, or environmental conditions more severe than those specified in the manual and specification, neglect of the owner or improper installation; the defect was subject to Force Majeure such as flood, fire, lightning, earthquake, other natural calamities, war. The warranty excludes accessories and replacement parts. This warranty is void if the product is used for other than single-family household use or subjected to any voltage and waveform other than as specified on the rating label (e.g., 120V \~ 60Hz).
Aroma's sole obligation under the warranty shall be to replace the defective product with a working one or a similar model of equivalent value, if the same model is not available, in the occurrence of any failure or defect covered under the warranty during the warranty period. Refurbished items or items not purchased through an authorized retailer are not eligible for warranty claims. Transportation charges on parts, or products in whole, submitted for repair or replacement, under this warranty, must be borne by the purchaser.
This warranty gives you specific legal rights, which may vary from state to state, and does not cover areas outside the United States.
SERVICE & SUPPORT
In the event of a warranty claim, or if service is required for this product, please contact Aroma ^® customer service toll-free at:
1-800-276-6286 | CustomerService@AromaCo.com
M-F, 8:30am-4:30pm, Pacific Time
www.AromaCo.com
Aroma Housewares Company
6469 Flanders Drive, San Diego, CA 92121, U.S.A.
Note:
- Proof of purchase is required for all warranty claims.
- Failure to register your product will not diminish your warranty rights.
- Not satisfied with your Aroma® purchase? Our product experts can help! Before returning, please contact
Customer Service at 1-800-276-6286 for product support, helpful tips and more!
natural_image
White and black beverage brush with a rotary knob (no visible text or symbols)To Enhance and Enrich Lives.

natural_image
Line drawing of multiple fork shapes arranged in two rows (no text or symbols)www.AromaCo.com
- instruction manual
- AROMA®
- REGISTER YOUR PRODUCT
- Registration is quick and easy.
- Short Cord Instructions
- DO NOT DRAPE CORD!
- KEEP AWAY FROM CHILDREN!
- Polarized Plug
- THIS APPLIANCE IS FOR HOUSEHOLD USE ONLY.
- Parts Identification
- Controls
- ON
- OFF
- REV (Reverse)
- BEFORE FIRST USE
- How To Clean
- How To Clean Feeding Cup
- Caution:
- Note:
- HOW TO CLEAN JUICE CONTAINER
- TROUBLESHOOTING
- The cold press juicer dial is not working.
- There is a smell from the motor.
- The juicer stops working half way.
- Helpful Hints:
- How To Assemble
- How to find a taste ingredients
- Preparation Table
- MAKING JUICE
- How To Dismount
- (CONTINUED)
- NOTES
- LIMITED WARRANTY
- SERVICE & SUPPORT
Brand : Aroma
Model : ACJ-600
Category : Juicer