IB-350FP - Blender Imarflex - Free user manual and instructions
Find the device manual for free IB-350FP Imarflex in PDF.


| Product Type | Blender |
| Brand | Imarflex |
| Model | IB-350FP |
| Power | 350 W |
| Capacity | 1.5 L |
| Material | Stainless steel blades, plastic jug |
| Speed Settings | 2 speeds + pulse |
| Dimensions | 20 x 18 x 40 cm |
| Weight | 1.8 kg |
| Power Supply | 220-240 V, 50/60 Hz |
| Safety Features | Overload protection, non-slip feet |
| Cleaning | Removable parts dishwasher safe |
| Accessories | Measuring cup, recipe booklet |
| Warranty | 1 year |
Frequently Asked Questions - IB-350FP Imarflex
User questions about IB-350FP Imarflex
0 question about this device. Answer the ones you know or ask your own.
Ask a new question about this device
Download the instructions for your Blender in PDF format for free! Find your manual IB-350FP - Imarflex and take your electronic device back in hand. On this page are published all the documents necessary for the use of your device. IB-350FP by Imarflex.
USER MANUAL IB-350FP Imarflex
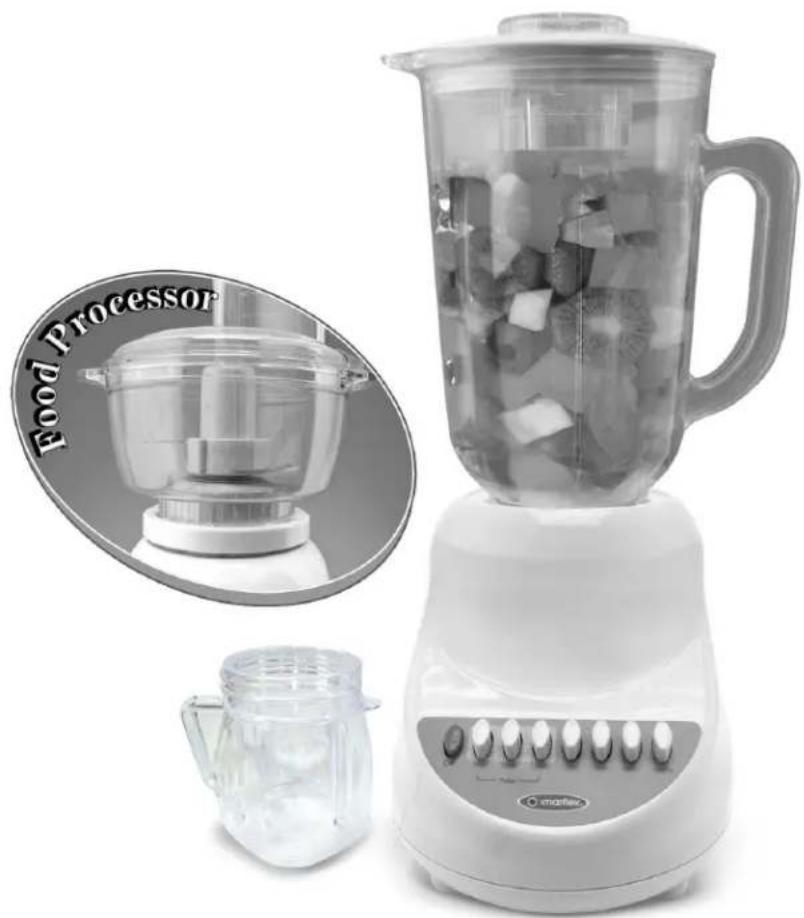
3in1 BLENDER
Food Processor with Coffee Grinder
natural_image
White blender with a food processor and plastic blender nearby, no visible text or symbols on the main objects.
imarflex®
In Every Home.
www.imarflex.com
IB-350FP
SPECIFICATION
MODEL NO. : IB-350FP
RATED VOLTAGE : 230Va.c. 60Hz
POWER CONSUMPTION : 350 Watts
IMPORTANT SAFEGUARDS
When using electrical appliances, basic safety precautions should always be followed, including the following:
- Read all instructions carefully.
- Before using the unit, check if the voltage indicated corresponds with the convenience outlet (230Va.c.).
-
Do not use two-way socket with other appliance.
-
Do not use any appliance with a damaged cord or plug. If the cord is damaged it should be replaced with the same type and size or bring the unit to the nearest lmarflex Authorized Service Center.
-
Do not place the unit near gas stove, electric stove or in a heated oven.
-
Put the unit on flat stable surface; keep it away from the edge of counter to avoid accident.
-
Children should be supervise to ensure that they do not play with the appliance.
-
This appliance is not intended for use by persons (including children) with reduced physical, sensory or mental capabilities, or lack of experience and knowledge, unless they have been given supervision or instruction concerning use of the appliances by a person responsible for their safety.
-
To protect against electric shock, do not immerse the base in water.
-
Blade is sharp, handle it carefully.
-
Do not put the blade assembly on the base without the glass jar.
-
Do not use the blender if the glass jar has a crack.
-
Do not use the unit for outdoor use.
-
Do not use this unit other than its intended use.
-
For household use only; not intended for any business purposes
-
Save this instruction manual for future reference.
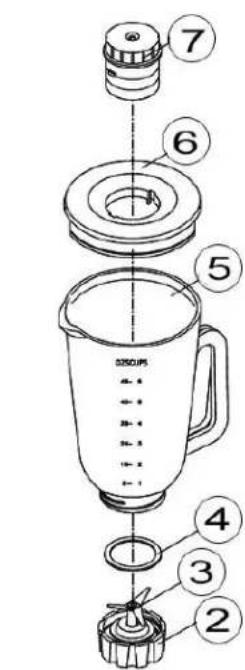
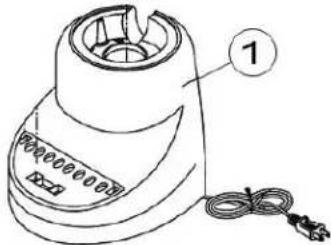
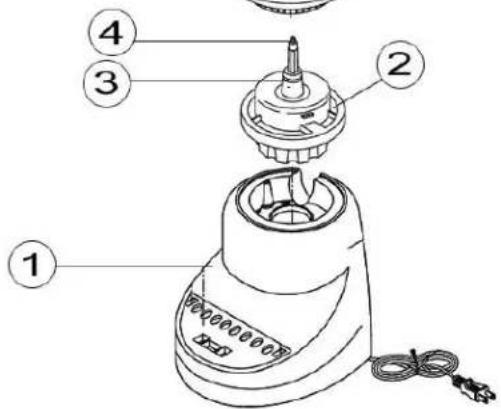
Blender Assembly
- Motor Base
- Jar Support
- Blade Assembly
- Rubber Packing
- Blender Jar
- Lid
- Center Lid
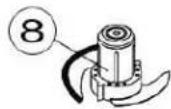
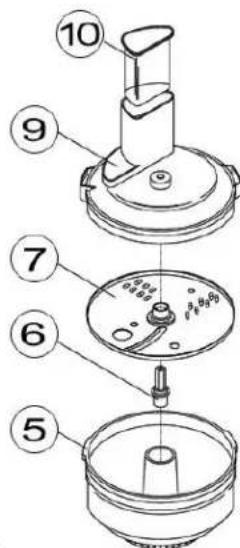
Food Processor Assembly
- Motor Base
- Centrifugal Assembly
- Cover Washer
- Rubber Washer
- Container
- Adapter
- Grater/Slicer
- Chopper
- Lid
- Food Pusher
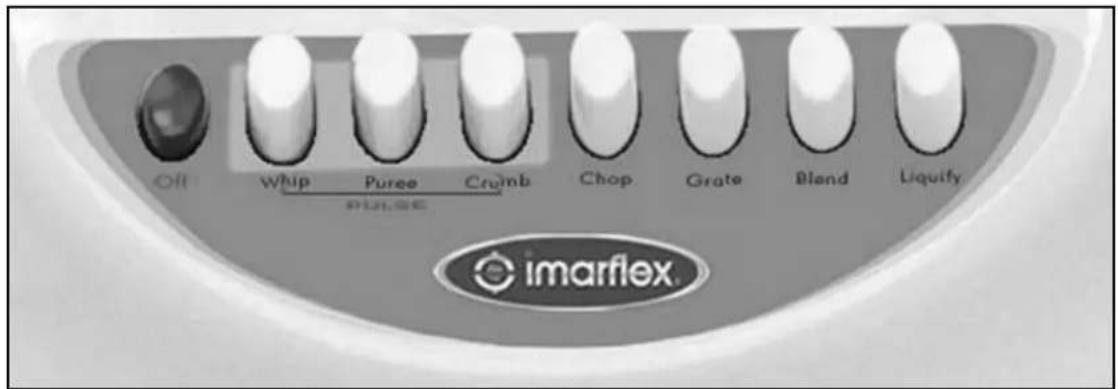
Control Panel
HOW TO ASSEMBLE
BLENDER
IMPORTANT: Your blender jar and blades are subject to wear during normal use. Always inspect the jar for nicks, chips or cracks. Always inspect blades for broken, bent or loose blades. Avoid using the jar or blades if damaged.
Contact the Imarflex Authorized Service Center to obtain evaluation and repair.
Make sure that the blender is unplugged. Place blender base on clean, dry surface to keep foreign particles from being pulled up into motor during operation.
- Place the Rubber Packing into the Blade Assembly. Put the assembly into the Jar Support. (see pic. 1 & 2)
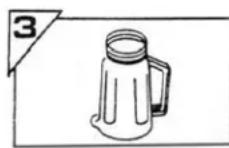
- Assemble the Jar Support Assembly with the Glass Jar. (see pic.3)
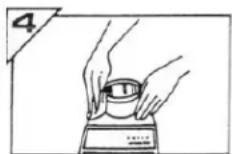
- Put the Glass Jar Assembly on the Motor Base and press down until securely engaged. (see pic. 4)
- Put the Center Lid on the Lid.
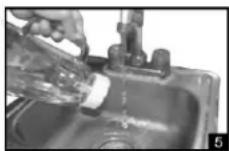
- Secure the Lid into the Glass Jar and press down. (see pic.5)
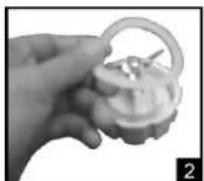
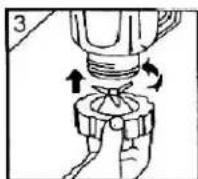
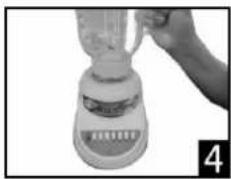
natural_image
Close-up of a hand using a blender to press or install a plastic cup (no visible text or symbols)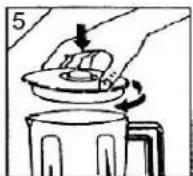
FOOD PROCESSOR
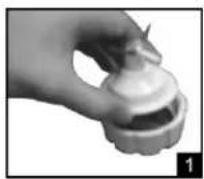
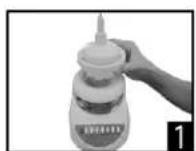
- Fit the Centrifugal Assembly on the Motor Base. (see pic. 1)
- Put the Cover Washer (3) and the Rubber Washer on the Centrifugal Assembly
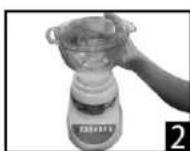
- Put the Container on top of Centrifugal Assembly, align the slots and slightly turn it clockwise until it locks. (see pic.2)
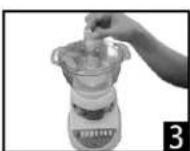
- Insert the Adaptor on the Container's hole. (see pic.3)
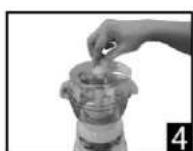
- Put the Grater/Slicer (see pic.4)
NOTE: If Chopper has to be used, do not use the Adaptor. - Put the Cover, align the slots and slightly turn it clockwise to lock. (see pic.5)
- Put the Food Pusher into the food chute. (see pic.6)
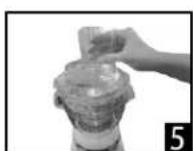
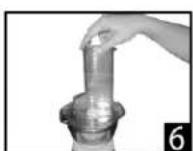
HOW TO USE
BLENDER
- For initial use, wash plastic jar with blade assembly thoroughly. "Please refer to cleaning and maintenance method #2". Wipe it dry.
- Put the plastic jar with blade assembly on the motor base.
- Plug the unit into the convenience outlet.
- Be sure to remove the seeds of the fruits/vegetables if needed.
- Put the desired mixture.
- Put the lid on the plastic jar and close securely. Place the center lid into the hole of the lid and push down to lock.
- Plug the unit into the convenience outlet.
- Press the pulse button to crack the ice cube or ice tube.
- Select the desired speed and function.
- Additional ingredients can be added through opening in the lid.
- Turn OFF and unplug the unit after every use.
FOOD PROCESSOR
- Place the centrifugal assembly with the container into the base. (please refer to How to Assemble)
- Put the desired attachment;
a. Chopper- for chopping vegetables and fruits. In processing meat remove the bone and skin
b. Grater/ Slicer- for grating and slicing different types of food.
i.e. vegetables, cheese
NOTE: The side that facing the top will function.
- Put the Cover, align the slots and slightly turn it clockwise to lock. Make it sure that it is properly fitted.
- Plug the unit into the convenience outlet.
- Press the desired speed.
- Insert the food on the chute one by one.
- Press down the food with the Food Pusher. Do not press the food pusher forcibly.
- Turn OFF and unplug the unit after every use.
COFFEE GRINDER
- Place the coffee beans or the food to be grinded on the container.
- Remove the blender blade from the jar and simply attach it on the container.
- Place the container on the base and select the desired speed.
- Transfer the grounded food into a bowl or separate container.
- Turn OFF and unplug the unit after every use.
NOTE:
- Some electric smell may be observed on first use.
• Maximum continuous operation time is 1 minute. - THE UNIT IS EQUIPPED WITH OVERLOAD PROTECTION. IT WILL AUTOMATICALLY STOP WHEN MOTOR REACH THE TEMPERATURE LIMIT. UNPLUG THE UNIT THEN LET IT COOL.
CAUTION:
- When using cube ice or tube ice, use the pulse speed first before setting to desired speed.
USEFUL TIPS
- To achieve the best results when pureeing solid ingredients, place small portions through the opening in the lid one by one.
- When mixing solid ingredients, start with a small amount of liquid. Gradually add more liquid through the opening in the lid.
- For stirring solid or very thick liquid ingredients, we recommend that you use the blender in pulse mode to prevent the blades from being stuck.
CLEANING AND MAINTENANCE
BLENDER
Motor Base
- Unplug the unit from the convenience outlet.
- Wipe or clean the outside surface with a damp or soft cloth.
NEVER IMMERSE MOTOR BASE IN WATER OR OTHER LIQUID.
-
Thoroughly clean Speed Selector Switch so that it works freely. It will become sticky when in use. Use a damp cloth or sponge to flush and clean the groove around the water shielded switch. You may also lightly spray the surface around the switch with an all-purpose cleaner and work the switch back and forth a few times to loosen any dried residue under switch. (see pic.4)
-
Polish with a soft cloth.
-
Always be sure to wring excess water out of cloth or sponge when cleaning around the controls or any electrical part.
Lid/Center Lid
- Wash in warm soapy water. Rinse under clean running water and dry. Reassemble before use.
Container and Blade Assembly
Method #1
- After use, add warm water and a splash of vinegar to blender jar. Turn ON and let the blender work the liquid for about a minute. Pour out, rinse the blender jar well.
Method #2
- Fill the blender jar half way with warm water, add a small amount of liquid dish detergent and turn the unit ON for about 30 seconds. Repeat if needed. Rinse well.
Method #3
-
If blender was left sitting until there is dried, crusty food bits inside: fill with warm, soapy water (or vinegar water) and let sit for about 30 to 60 seconds. Empty water to about half and then blend for 30 second intervals until clean.
-
Turn OFF the unit and wait for the blade and motor to stop.
- Always unplug the unit after every use.
- Remove the blade assembly by turning it counter-clockwise. (see pic.2)
- Wash the rubber packing and jar support with soap and water.
- Turn the plastic jar upside down to remove excess water. (see pic.3)
- Wipe the plastic jar and blade with soft cloth to dry. Make sure to reassemble the unit properly before storing it.
- Never leave food inside the blender jar for a long period of time.
- Store the blender on a dry cool place.
NEVER ALLOW THE BOTTOM OF THE BLADE TO GET WET. (see pic.5)
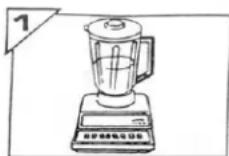
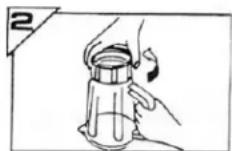
FOOD PROCESSOR
- Turn OFF and unplug the unit.
- Remove the food pusher from the food chute.
- Turn the cover counter clockwise to unlock.
- Carefully remove the grater/slicer (adapter) or the chopper.
- Turn the container counter clockwise to remove.
- Detach the centrifugal assembly from the base.
- Wash the container, cover, food pusher, adapter, grater/slicer and chopper with soap and water.
CAUTION: Blade and grater/slicer are sharp, pay attention must observe. Be sure not to lose the rubber and cover washer.
- Dry all parts before the next use and before storing the unit.
COFFEE GRINDER
- Turn OFF and unplug the unit.
- Turn the coffee grinder upside down.
- Turn the blade assembly counter clockwise to remove.
- Wash the container with soap and water then wipe it dry.
- Wipe the blade assembly with soft cloth. Use soft brush to remove remaining ground coffee.
TROUBLE SHOOTING
| PROBLEM | CAUSE | SOLUTION |
| Motor not working | 1. Convenience outlet is not working.2. Damage on the unit | 1. Check the outlet where the unit is plug in if it is working.2. Check for any damage.3. Bring the unit to the nearest Authorized Imarflex Service Center |
| Motor stop during operation | 1. Overload protection activated | 1. Unplug and let the unit rest for at least 1 minute |
| Smoke and burnt smell occurred | 1. Unit is use for the first time | 1. Its normal for the first use |
| Leak on the bottom of the jar | 1. Rubber packing is not properly install2. Rubber was damaged | 1. Turn OFF the unit.Remove the jar and check the rubber.Reassemble the unit.2. Replace the rubber with the new one.3. Bring the unit to the nearest Authorized Imarflex Service Center. |
| Attachment not functioning | 1. Not properly install | 1. Turn off the unit and check the assembly |
REMINDER: Please do not forget to fill up and send the warranty card
- 3in1 BLENDER
- SPECIFICATION
- IMPORTANT SAFEGUARDS
- Blender Assembly
- Food Processor Assembly
- HOW TO ASSEMBLE
- BLENDER
- FOOD PROCESSOR
- HOW TO USE
- COFFEE GRINDER
- NOTE:
- CAUTION:
- USEFUL TIPS
- CLEANING AND MAINTENANCE
- Motor Base
- NEVER IMMERSE MOTOR BASE IN WATER OR OTHER LIQUID.
- Lid/Center Lid
- Container and Blade Assembly
- Method #1
- Method #2
- Method #3
- NEVER ALLOW THE BOTTOM OF THE BLADE TO GET WET. (see pic.5)
Brand : Imarflex
Model : IB-350FP
Category : Blender