HERO-REC - Hi-Fi System Vocopro - Free user manual and instructions
Find the device manual for free HERO-REC Vocopro in PDF.


| Product Type | Portable PA System with Digital Recorder |
| Brand | VocoPro |
| Model | HERO-REC |
| Power Output | 120W (Stereo 4-speaker system) |
| Built-in Speakers | 4 speakers (full-range) |
| External Speaker Output | Yes, 8 ohms impedance |
| Microphone/Line Inputs | 4 channels (XLR/1/4" combo) with independent gain, tone, and effect controls |
| Additional Audio Inputs | RCA AV (front and rear), 1/8" MP3/Laptop input |
| Media Playback | DVD/CD, USB flash drive, SD card, AM/FM tuner |
| Recording | SD card recording in MP3 format (128kbps) |
| Digital Signal Processing (DSP) | Echo delay, echo repeat, reverb volume, hiss filter, digital key control (6 steps up/down) |
| Equalizer | 7-band graphic EQ with on/off switch |
| Video Outputs | Component (Y/Pb/Pr), S-Video, Composite RCA (2 outputs) |
| Audio Outputs | RCA stereo (FL/FR), XLR balanced, coaxial/optical digital audio |
| Wireless Microphone Support | 2 expansion slots for optional wireless modules (channels 1-2 and 3-4) |
| Remote Control | Included (full function) |
| Power Supply | 120V/240V selectable, AC power outlet (200W max pass-through) |
| Accessories Included | Remote control, RCA cable, 1/8" audio cable, AM/FM antennas, power cable |
| Additional Features | Vocal cancel/partner, programmable track order, file navigation menu, PAL/NTSC selectable |
Frequently Asked Questions - HERO-REC Vocopro
User questions about HERO-REC Vocopro
0 question about this device. Answer the ones you know or ask your own.
Ask a new question about this device
Download the instructions for your Hi-Fi System in PDF format for free! Find your manual HERO-REC - Vocopro and take your electronic device back in hand. On this page are published all the documents necessary for the use of your device. HERO-REC by Vocopro.
USER MANUAL HERO-REC Vocopro
HERO-REC
120W 4-Channel Multi-Format Portable P.A. System with Digital Recorder
Table of Contents
Important Safety Instructions 4
Listening for a Lifetime....5
Welcome 6
Features....7
Getting Started 8
Getting Connected....9-15
Descriptions and Functions
Front Panel....16-19
Rear Panel 20
Remote Control 21-22
Basic Operations....23-26
Setup Menu 27-28
Troubleshooting 29
Notes....30-31
Important Safety Instructions
CAUTION
RISK OF SHOCK

CAUTION: To reduce the risk of electric shock, do not remove cover (or back). No user-serviceable parts inside. Only refer servicing to qualified service personnel.
Explanation of Graphical Symbols
The lightning flash & arrowhead symbol, within an equilateral triangle, is intended to alert you to the presence of danger.

The exclamation point within an equilateral triangle is intended to alert you to the presence of important operating and servicing instructions.
WARNING
To reduce the risk of fire or electric shock, do not expose this unit to rain or moisture.
Read these instructions.
Keep these instructions.
Heed all warnings.
Follow all instructions.
Do not use this apparatus near water.
Clean only with dry cloth.
Do not block any ventilation openings. Install in accordance with the manufacture's instructions.
Do not install near any heat sources such as radiators, heat registers, stoves, or other apparatus (including amplifiers) that produce heat.
Do not defeat the safety purpose of the polarized or grounding plug. A polarized plug has two blades with one wider than the other. A grounding plug has two blades and a third grounding prong. The wide blade or the third prong is provided for your safety. If the provided plug does not fit into your outlet, consult an electrician for replacement of the obsolete outlet.
Protect the power cord from being walked on or pinched particularly at the plugs, convenience receptacles, and at the point where they exit from the apparatus.
Only use attachments/accessories specified or provided by the manufacturer (such as the exclusive supply adapter, battery etc).
natural_image
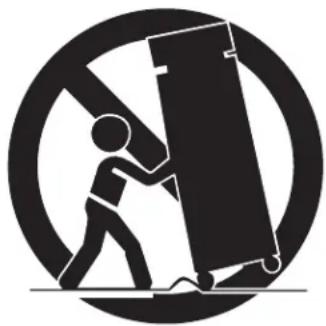
Symbolic icon of a person pushing a large object through a circular frame (no text or symbols)Use only with the cart, stand, tripod, bracket, or table specified by the manufacturer, or sold with the apparatus. When a cart or rack is used, use caution when moving the cart/apparatus combination to avoid injury from tip-over.
Unplug the apparatus during lightning storms or when unused for long periods of time.
Refer all servicing to qualified personnel. Servicing is required when the apparatus has been damaged in any way, such as power supply cord or plug is damaged, liquid has been spilled or objects have fallen into the apparatus has been exposed to rain or moisture, does not operate normally, or has been dropped.
Please keep the unit in a good ventilation environment.
Note:
To CATV system installer's (U.S.A.): This reminder is provided to call the CATV system installer's attention to Article 820-40 of the NEC that provides guidelines for proper grounding and, in particular, specifies that the cable ground shall be connected as close to the point of cable entry as practical.
Listening for a Lifetime
Selecting fine audio equipment such as the unit you've just purchased is only the start of your musical enjoyment. Now it's time to consider how you can maximize the fun and excitement your equipment offers. VocoPro and the Electronic Industries Association's Consumer Electronics Group want you to get the most out of your equipment by playing it at a safe level. One that lets the sound come through loud and clear without annoying blaring or distortion and, most importantly, without affecting your sensitive hearing.
Sound can be deceiving. Over time your hearing “comfort level” adapts to a higher volume of sound. So what sounds “normal” can actually be loud and harmful to your hearing. Guard against this by setting your equipment at a safe level BEFORE your hearing adapts.
To establish a safe level:
- Start your volume control at a low setting.
- Slowly increase the sound until you can hear it comfortably and clearly, and without distortion.
Once you have established a comfortable sound level:
- Set the dial and leave it there.
- Pay attention to the different levels in various recordings.
Taking a minute to do this now will help to prevent hearing damage or loss in the future. After all, we want you listening for a lifetime.
Used wisely, your new sound equipment will provide a lifetime of fun and enjoyment. Since hearing damage from loud noise is often undetectable until it is too late, this manufacturer and the Electronic Industries Association's Consumer Electronics Group recommend you avoid prolonged exposure to excessive noise. This list of sound levels is included for your protection.
Some common decibel ranges:
| Level | Example |
| 30 | Quiet library, Soft whispers |
| 40 | Living room, Refrigerator, Bedroom away from traffic |
| 50 | Light traffic, Normal Conversation |
| 60 | Air Conditioner at 20 ft., Sewing machine |
| 70 | Vacuum cleaner, Hair dryer, Noisy Restaurant |
| 80 | Average city traffic, Garbage disposals, Alarm clock at 2 ft. |
The following noises can be dangerous under constant exposure:
| Level | Example |
| 90 | Subway, Motorcycle, Truck traffic, Lawn Mower |
| 100 | Garbage truck, Chainsaw, Pneumatics drill |
| 120 | Rock band concert in front of speakers |
| 140 | Gunshot blast, Jet plane |
| 180 | Rocket launching pad |
-Information courtesy of the Deafness Research Foundation
Welcome
And thank you for purchasing the HERO-REC from VocoPro, your ultimate choice in Karaoke entertainment! With years of experience in the music entertainment business, VocoPro is a leading manufacturer of Karaoke equipment, and has been providing patrons of bars, churches, schools, clubs and individual consumers the opportunity to sound like a star with full-scale club models, in-home systems and mobile units. All our products offer solid performance and sound reliability, and to reinforce our commitment to customer satisfaction, we have customer service and technical support professionals ready to assist you with your needs. We have provided some contact information for you below.
VocoPro
1728 Curtiss Court
La Verne, CA 91750
Toll Free: 800-678-5348
TEL: 909-593-8893
FAX: 909-593-8890
VocoPro Company Email Directory
Customer Service & General Information
info@vocopro.com
Tech Support
techsupport@vocopro.com
Remember Our Website
Be sure to visit the VocoPro website www.vocopro.com for the latest information on new products, packages and promos. And while you're there don't forget to check out our Club VocoPro for Karaoke news and events, chat rooms, club directories and even a KJ Service directory!
We look forward to hearing you sound like a PRO, with VocoPro, the singer's ultimate choice.
FOR YOUR RECORDS
Please record the model number and serial number below, for easy reference, in case of loss or theft. These numbers are located on the rear panel of the unit. Space is also provided for other relevant information
Model Number
Serial Number
Date of Purchase
Features
A Compact All-In-One System for the Ultimate Entertainment Experience.
Whether you like to jam along to your favorite music, or seek an awesome sound system to take on the go, VocoPro has the perfect audio solution for you, the HERO-REC professional sound system.
It's a powerful 120W 4-speaker stereo system with 7-band EQ that hosts pro-level features such as a 4-channel mic/line mixer, DSP Reverb & hiss filter. The SD card slot is not only an MP3 player; it is also a digital recorder. The digital recordings are high quality and can be easily ported to a computer for cataloging and creating demo discs.
The HERO-REC is also compact and mobile, so you can easily take your sound anywhere: both at play and at work. For playtime, take it to a backyard party to play movies and music, or connect a gaming console for quick fun. For work time, the HERO-REC makes a great P.A. for the office or classroom. You can also easily connect your laptop to boost your presentation with big sound.
So leave the complicated sound system for your home's media center, and take the handy HERO-REC and experience the sound quality and convenience of an all-in-one professional sound system.
- Multi-Format Disc Player & USB Port/SD Card Slot for Easy Access to Digital Media Files
- Optional Dual Channel VHF Wireless Microphone Module and Two Wireless Mics
- DSP Reverb, Echo Effects and Hiss Filter for the Ultimate in Vocal Effects & Sound Quality
- 7-Band Equalizer with On/Off Switch for Great Sounding Music All the Time
• 120W Stereo 4-Speaker System with External Speaker Jacks for Increased Sound Field - Two Wireless Receiver Slots on Rear Panel Support up to 2 Wireless Modules for a Total of 4 Wireless Microphones*
*Additional wireless microphone module and wireless microphones sold separately.
Getting Started
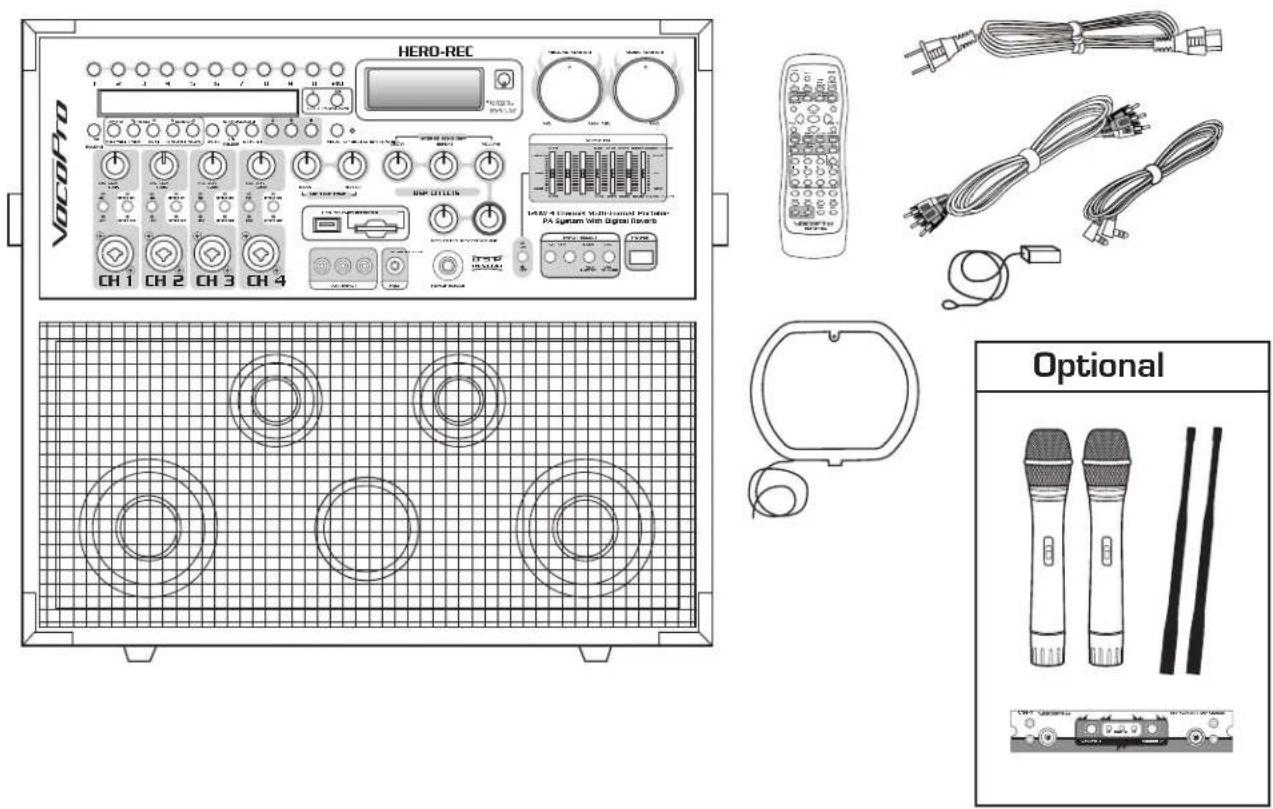
Thank you for purchasing the HERO-REC. Take a few moments to look through this manual. Before setting up, please make sure the following items are included.
- HERO-REC
- Remote Control
- RCA Cable
• 1/8" Stereo Audio Cable
• AM Antenna - FM Antenna
- Power Cable
Returns and Warranty
In the unlikely event that the HERO-REC would need to be shipped for repair, it is recommended that you keep all the product packaging and receipt. For detailed warranty information, please visit www.vocopro.com/warranty_extended.html. To find a VocoPro Authorized Service Center near you, please visit www.vocopro.com/servicecenter.html
Getting Connected
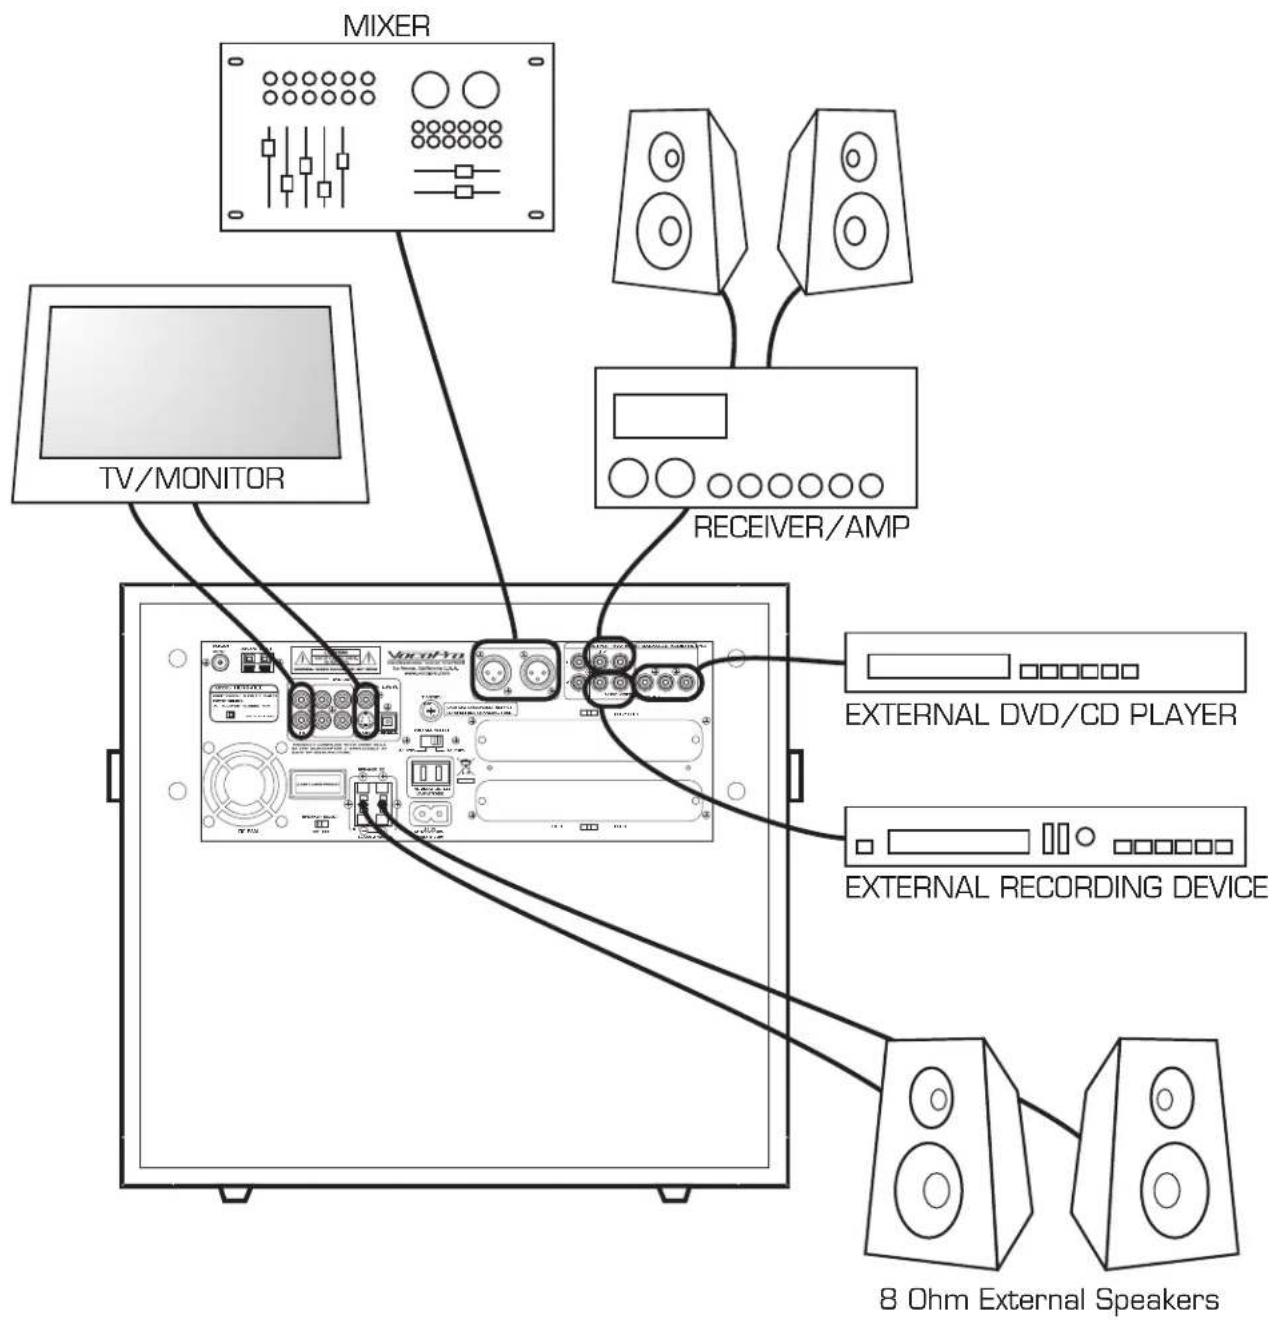
The HERO-REC is an all-in-one unit, but has plenty of connections to incorporate it into any setup. The diagram below shows some optional connections.
flowchart
graph TD
    A["TV/MONITOR"] --> B["MIXER"]
    B --> C["RECEIVER/AMP"]
    C --> D["EXTERNAL DVD/CD PLAYER"]
    C --> E["EXTERNAL RECORDING DEVICE"]
    D --> F["8 Ohm External Speakers"]
    E --> F
Getting Connected
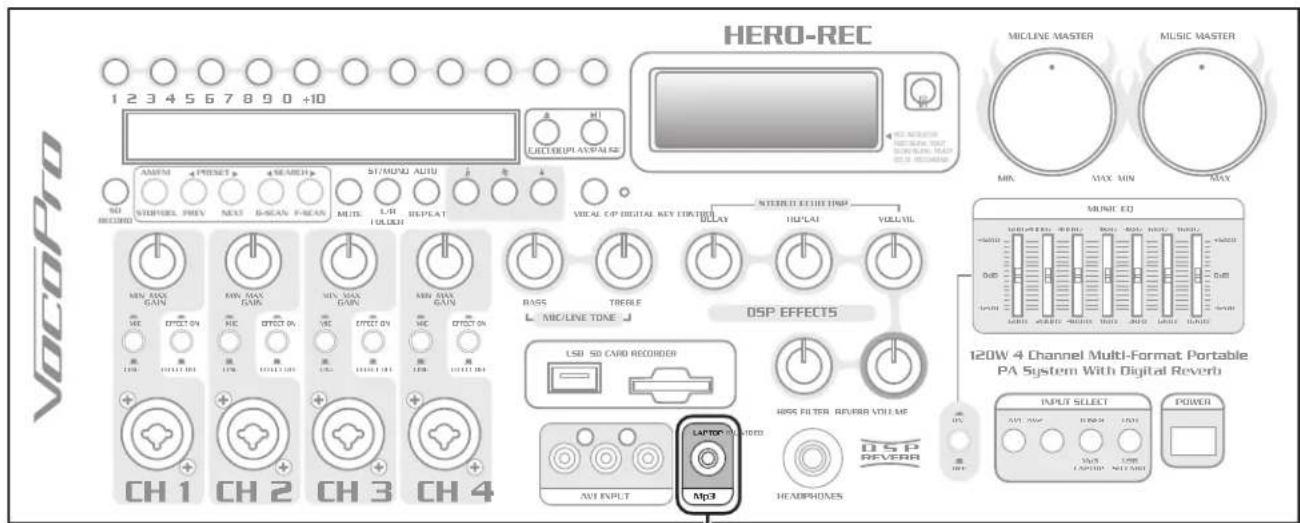
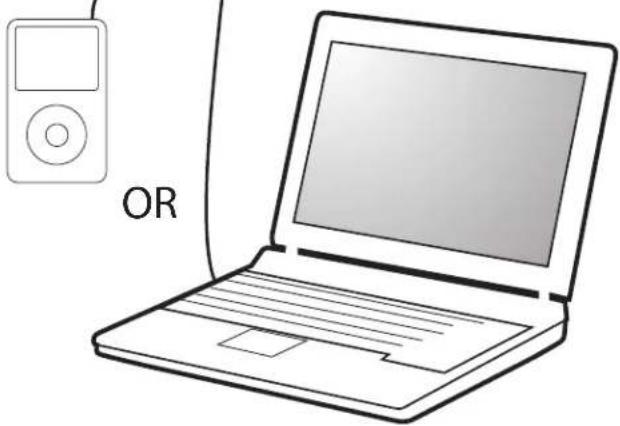
The HERO-REC can be connected to an Mp3 player or computer using the 1/8" input on the front panel. To connect a Laptop/Mp3 player, see your Laptop/Mp3 player instructions on connecting to a 1/8" input. To connect a computer, use a 1/8" to 1/8" inch cable to connect the computer line out to the HERO-REC 1/8" input.
CABLE USED
1/8" to 1/8" Audio Cable

natural_image
Line drawing of a laptop with an open iPod device labeled 'OR' beside it (no text or symbols on the device itself)Getting Connected
AV INPUT CONNECTIONS
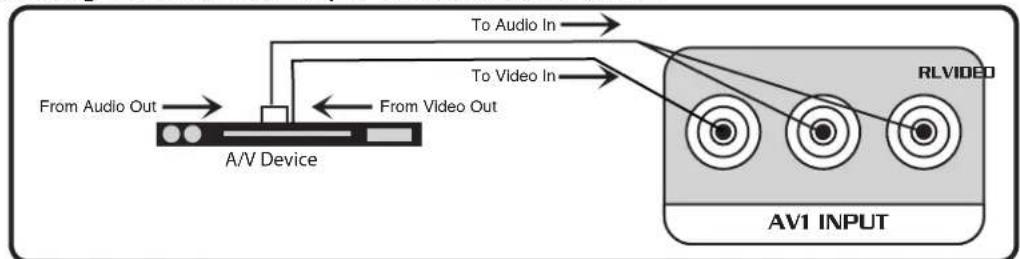
To connect an external AV device such as a mixer or player, use RCA-type AV cables for all connections.
For AUDIO, connect the L and R AUDIO OUTPUT jacks from the source player to the L (white) and R (red) AUDIO INPUT jacks on the HERO-REC using one of the two AV channels of your choice.
For VIDEO, connect the VIDEO OUTPUT jack on the source player to the yellow VIDEO INPUT jack on the HERO-REC, using the same channel you connected the audio to.
flowchart
graph LR
    A["From Audio Out"] --> B["A/V Device"]
    C["From Video Out"] --> B
    B --> D["To Audio In"]
    B --> E["To Video In"]
    D --> F["RLVIDEO"]
    E --> F
    F --> G["AV1 INPUT"]
AUDIO OUTPUT CONNECTIONS
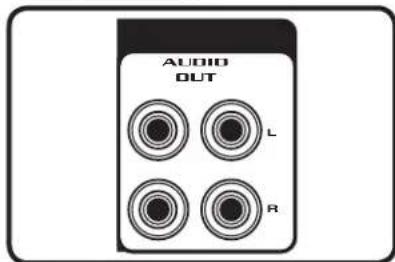
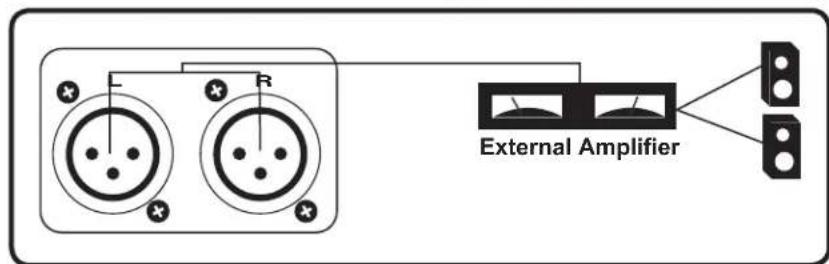
To output audio to external devices, there are three available jacks: AUDIO OUTPUT 1 & 2 (RCA) and BALANCED AUDIO OUTPUT (XLR). All three outputs can be connected simultaneously
For AUDIO OUTPUT 1 & 2, using an RCA-type audio cable, connect the left and right AUDIO/LINE/AUX INPUT jacks on the external device to the left and right AUDIO OUTPUT 1 or 2 jacks on the HERO-REC.
For BALANCED AUDIO OUTPUT, using two XLR-type audio cables, connect the left and right AUDIO/LINE IN jacks on the external device to the left and right BALANCED AUDIO OUTPUT jacks on the HERO-REC's rear panel.
VIDEO OUTPUT CONNECTIONS
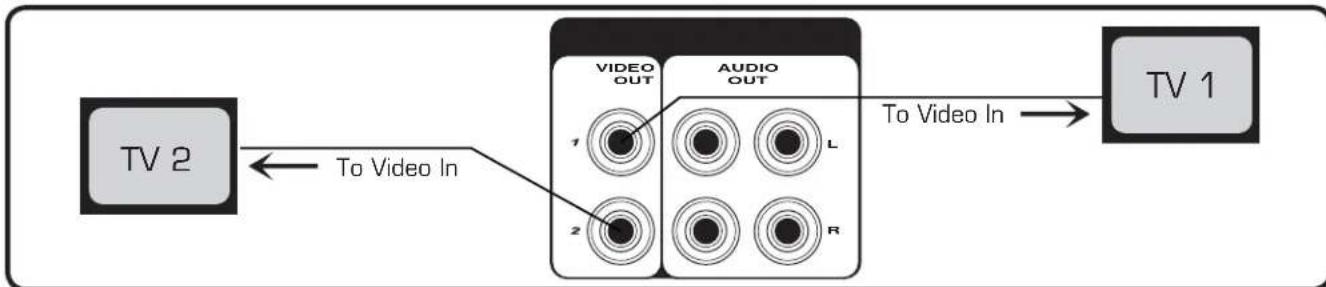
The HERO-REC has two RCA-type VIDEO OUTPUT jacks for connecting to TVs or monitor devices.
Connecting to a TV with an RCA Connection
Using either the yellow RCA plug from the included RCA patch cable or a separate RCA patch cable, connect one end to the RCA VIDEO OUTPUT jack on the HERO-REC and connect the other end to the VIDEO INPUT jack on our TV or monitor device. Both VIDEO OUTPUTS can be connected simultaneously.
flowchart
graph LR
    TV2["TV 2"] -->|To Video In| A["VIDEO OUT"]
    A --> B["1"]
    A --> C["2"]
    A --> D["AUDIO OUT"]
    D --> E["1"]
    D --> F["2"]
    D --> G["3"]
    D --> H["4"]
    D --> I["5"]
    D --> J["6"]
    D --> K["7"]
    D --> L["8"]
    D --> M["9"]
    D --> N["10"]
    D --> O["11"]
    D --> P["12"]
    D --> Q["13"]
    D --> R["14"]
    D --> S["15"]
    D --> T["16"]
    D --> U["17"]
    D --> V["18"]
    D --> W["19"]
    D --> X["20"]
    D --> Y["21"]
    D --> Z["22"]
    D --> AA["23"]
    D --> AB["24"]
    D --> AC["25"]
    D --> AD["26"]
    D --> AE["27"]
    D --> AF["28"]
    D --> AG["29"]
    D --> AH["30"]
    D --> AI["31"]
    D --> AJ["32"]
    D --> AK["33"]
    D --> AL["34"]
    D --> AM["35"]
    D --> AN["36"]
    D --> AO["37"]
    D --> AP["38"]
    D --> AQ["39"]
    D --> AR["40"]
    D --> AS["41"]
    D --> AT["42"]
    D --> AU["43"]
    D --> AV["44"]
    D --> AW["45"]
    D --> AX["46"]
    D --> AY["47"]
    D --> AZ["48"]
    D --> BA["49"]
    D --> BB["50"]
    D --> BC["51"]
    D --> BD["52"]
    D --> BE["53"]
    D --> BF["54"]
    D --> BG["55"]
    D --> BH["56"]
    D --> BI["57"]
    D --> BJ["58"]
    D --> BK["59"]
    D --> BL["60"]
    D --> BM["61"]
    D --> BN["62"]
    D --> BO["63"]
    D --> BP["64"]
    D --> BQ["65"]
    D --> BR["66"]
    D --> BS["67"]
    D --> BT["68"]
    D --> BU["69"]
    D --> BV["70"]
    D --> BW["71"]
    D --> BX["72"]
    D --> BY["73"]
    D --> BZ["74"]
    D --> CA["75"]
    D --> CB["76"]
    D --> CC["77"]
    D --> CD["78"]
    D --> CE["79"]
    D --> CF["80"]
    D --> CG["81"]
    D --> CH["82"]
    D --> CI["83"]
    D --> CJ["84"]
    D --> CK["85"]
    D --> CR["86"]
    D --> CS["87"]
    D --> CT["88"]
    D --> CU["89"]
    D --> CV["90"]
    D --> CW["91"]
    D --> CX["92"]
    D --> CY["93"]
    D --> CZ["94"]
    D --> DA["95"]
    D --> DB["96"]
    D --> DC["97"]
    D --> DD["98"]
    D --> DE["99"]
Getting Connected
Connecting to a TV with Component Video
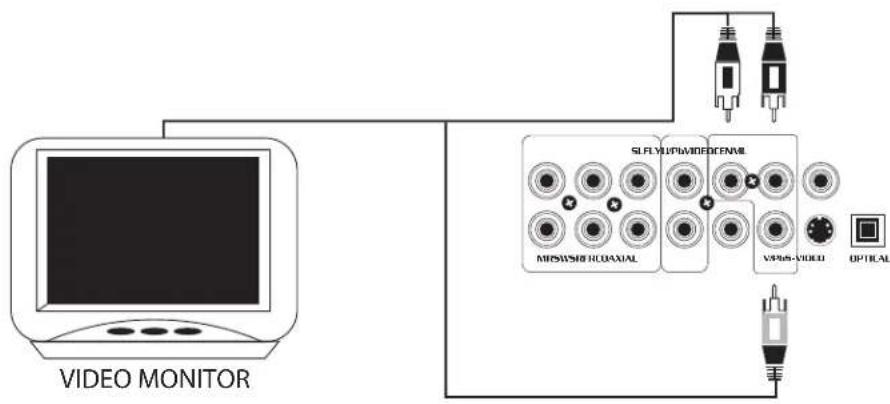
Using 3 appropriate Component Video cables (usually color coded red, blue and green), connect a set of plugs to the COMPONENT VIDEO OUT jacks (Y-U/Pb-V/Pr) on the HERO-REC and plug the other set of plugs to the COMPONENT VIDEO IN jacks (Y-U/Pb-V/Pr) on your television. On some TVs, the component video input jacks may be labeled differently (i.e. Pr/Pb/Y or Cr/Cb/Y or R-Y/B-Y/Y etc.). You will need to press the MODE button on the remote control to toggle between YUV for Component Video, RGB for Composite Video and S-Video. You can only use the MODE button when there is no disc inserted in the disc tray.
flowchart
graph TD
    A["VIDEO MONITOR"] --> B["Camera Module"]
    B --> C["Optical Connector"]
    B --> D["VR/VR/VR/VR/VR/VR/VR/VR/VR/VR/VR/VR/VR/VR/VR/VR/VR/VR/VR/VR/VR/VR/VR/VR/VR/VR/VR/VR/VR/VR/VR/VR/VR/VR/VR/VR/VR/VR/VR/VR/VR/VR/VR/VR/VR/VR/VR/VR/VR/VR/VR"]
    B --> E["MR/SNR/BUX/AUX"]
    B --> F["SL/FY/PW/PWD/CN/AUX"]
    B --> G["VIR/SV/RVD"]
    B --> H["OPTICAL"]
Getting Connected
Connecting to a DTS Receiver/Decoder
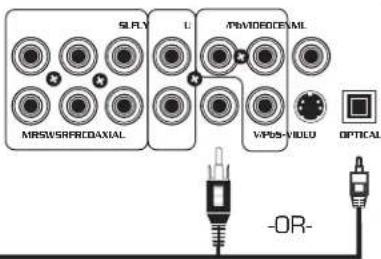
Using either an RCA-ended COAXIAL cable suited for digital audio use or an OPTICAL cable, connect one end to the appropriate jack on the HERO-REC (COAXIAL or OPTICAL) and the other end to the appropriate jack on the DTS receiver (COAXIAL or OPTICAL).
If you have both coaxial and optical inputs on your DTS decoder/receiver, it is recommended to use an optical connection as those cables eliminate the possibility of EMI (electromagnetic interference).
If your receiver does not have a built-in DTS decoder, and has 5.1 or 7.1 channel RCA inputs, you can use the 5.1 or 7.1 channel output jacks on the HERO-REC. Either method will provide for DTS decoding.
DTS DECODER/RECEIVER
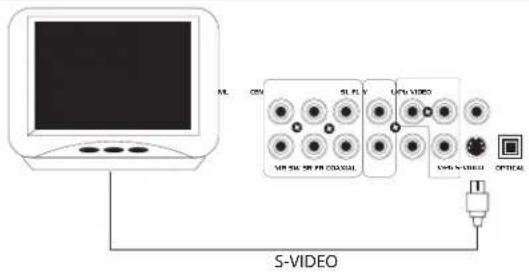
Connecting to a TV or monitor with S-Video.
Using an S-Video cable, connect one end to the HERO-REC's S-VIDEO OUTPUT jack and connect the other end to the S-VIDEO IN jack on your television.
Getting Connected
MICROPHONE/INSTRUMENT INPUT CONNECTION
After completing your main system connections, it is time to get your microphones and instruments connected and ready for performing. Before you get started with your connections we recommend that you take the following tips into consideration:
- When connecting instruments, refrain from using low quality or worn cables as they can cause significant noise and loud pops, posing a threat to the system's speakers.
- Use caution when connecting a chain of multiple effects pedals, as the output voltage may change and possibly overload the HERO-REC's input channel.
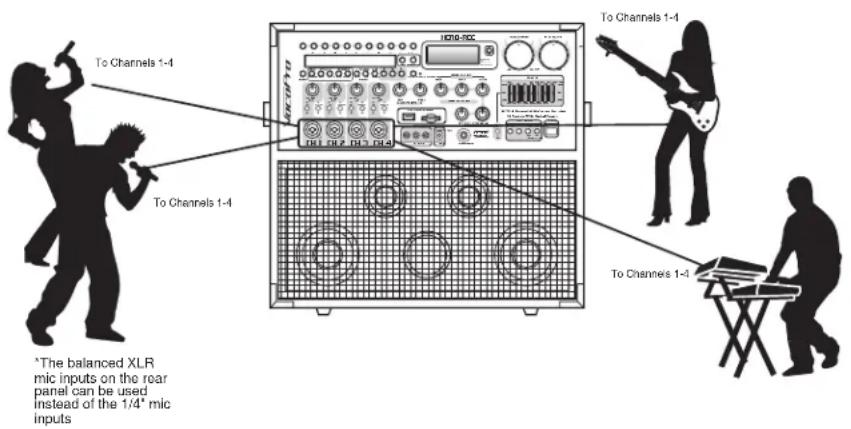
The HERO-REC has four mic/line inputs ( 14 " XLR).
To connect MICROPHONES via 14 " mic cables, connect the XLR-end of the cable into the MICROPHONE until it locks into place and connect the 14 " plug into the 14 " jack on channels 1-4 on the HERO-REC.
To connect MICROPHONES via XLR mic cables, attach the XLR "female" end of the cable into the "male" three prong jack located at the base of your handheld MICROPHONE until it locks into place. Then connect the XLR "male" jack at the other end of the cable into channels 1-4 XLR jacks on the HERO-REC. It should be obvious which sides of your XLR cable are male and female as there is only one possible connection.
To connect a GUITAR, connect a 14 " instrument cable from the GUITAR's 14 " output to one of the HERO-RECs 14 " inputs.
To connect a KEYBOARD, connect a 14 " instrument cable from the KEYBOARD's 14 " output to one of the HERO-REC's 14 " inputs.
Getting Connected
AC DEVICE CONNECTIONS
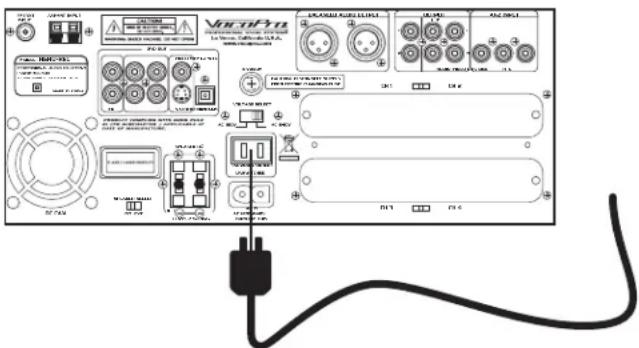
The HERO-REC has an AC power outlet on the rear panel to provide power to a connecting device.
NOTE: A device with a power consumption rating over 200W should not be connected as that exceeds the allowable power feed. Doing so may cause serious damage to both devices and may void your warranty.
CONNECTING EXTERNAL SPEAKERS
The HERO-REC has a set of speaker connectors for connection to external speakers. Remember that only speakers with an impedance rating of 8 ohms should be connected.
To connect speakers, first unlock the plastic fasteners on each speaker connector by pushing downward on them. Then strip approximately a 1/2" of insulation from the speaker wire ends and twist the strands so that they can easily slide through the holes. Once a wire is inserted, lock them in place with the fasteners by pushing upward on them. It is easy to over-insert a wire into a speaker connector so that the insulation is inserted as well. To ensure this doesn't happen, only insert the wires to the point where you can still see the edge of the insulation.
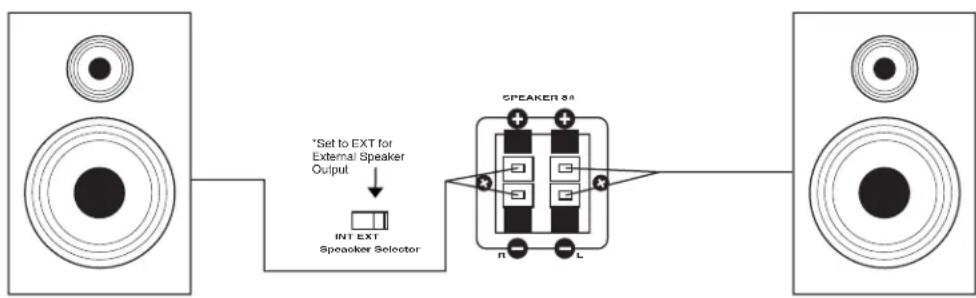
flowchart
graph LR
    A["Speaker 1"] --> B["Speaker 86"]
    C["Speaker 2"] --> B
    B --> D["Speaker 86"]
    E["INT EXT Speaker Selector"] --> F["Set to EXT for External Speaker Output"]
    F --> G["Speaker 86"]
    style B fill:#f9f,stroke:#333
    style D fill:#ccf,stroke:#333
Descriptions and Functions
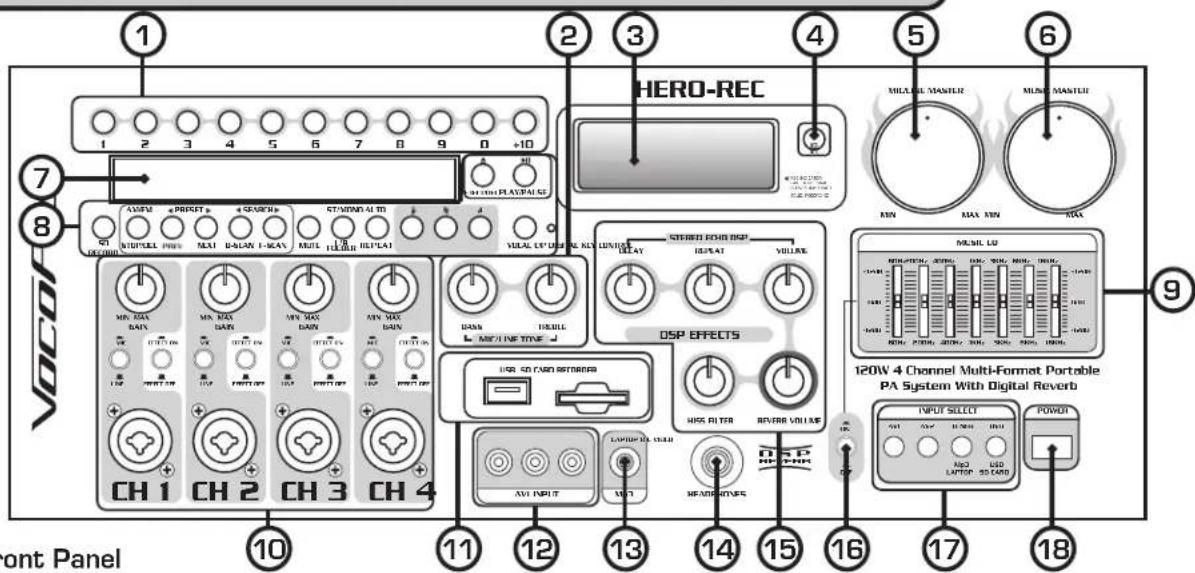
Front Panel
- Direct Track Access Buttons - In playback mode, use these buttons to jump directly to a track for playback. In radio mode, these buttons set and select radio presets. (See Basic Operations section for more information)
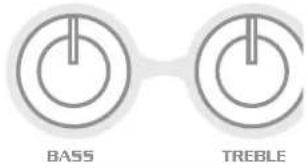
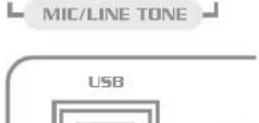
- Mic/Line Tone, Bass/Treble Controls - Use these controls to boost or reduce the amount of bass and treble in the Mic/Line audio. Bass affects the boominess of music, while treble affects the higher pitched clarity. These effects can be switched on and off each input individually using the EFFECT ON/OFF buttons on the Mic/Line channels.
- Display - This screen displays system information such as track time, current input, track number, and rewording.
- Remote Control Infrared Receiver - This lens receives signals from the remote control.
- Mic/Line Master Level Control - Use this knob to increase or decrease the master volume of the Mic/Line channels.
- Music Master Level Control - This control adjusts the levels for all Mic/Line channels at once.
- Disc Tray - Insert discs here for playback.
- Disc/USB/SD Recorder Control Buttons - See page 24-26 for more details.
- Graphic Equalizer - This GRAPHIC EQ is used to BOOST and/or CUT particular frequencies. Each slide fader processes a particular frequency range indicated by the number below it. Frequencies from 60Hz - 250Hz constitute the very low to low range. Frequencies from 250Hz to 1kHz are the mid-range and frequencies from 1kHz to 16kHz make up the high to very high range. To adjust, slide the fader up to boost the frequency presence and down to cut the frequency presence.
- Mic/Line Inputs and Controls - See page 19 for more details.
- USB and SD CARD ports - Plug in a USB jumpdrive for playback or an SD card for playback or recording. (See Basic Operations for more information)
- Front Panel AV Input - Use this input to attach an external player to the HERO-REC.
- 1/8" Mp3 Player/Laptop Input - Use this jack to attach a Mp3 player, laptop or other media device with a 1/8" connector.
- ¼" Headphone Jack - Use this jack to attach headphones to the HERO-REC. Note: Plugging in headphones will switch off the on-board speakers.
- DSP Effects - See page 20 for more details.
- Graphic EQ ON/OFF Switch - Use the switch to enable/disable the Graphic EQ.
- Input Selector Buttons - Use these buttons to select the music input/source. Press AV1 to select the RCA input on the front panel, and AV2 to select the RCA input on the back panel. Press TUNER to toggle between the AM/FM radio and the 1/8" input on the front panel. Press DVD to toggle between the disc player, USB jumpdrive reader and SD card reader.
- Power Switch - Use this button to power the HERO-REC on and off.
Descriptions and Functions cont.
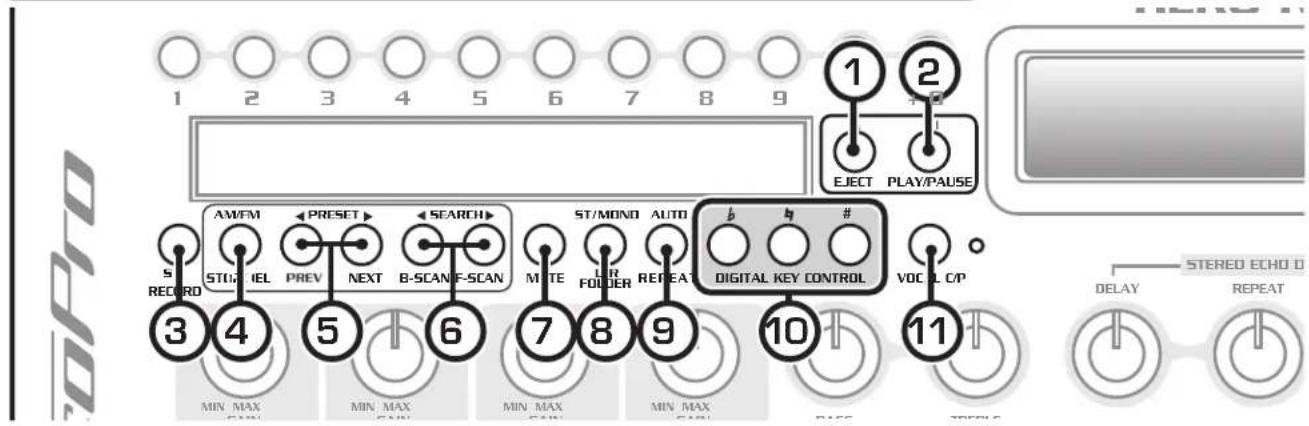
Disc Player Control Buttons
-
Eject/Del. Button - In disc mode, this button is used to open and close the disc tray. In SD playback mode, press this button simultaneously with the 'AM/FM-Stop/Del' Button to delete a file from the SD card (see SD Recording in the Operations section).
-
Play/Pause Button - Press this button to play a track that is stopped or paused, and pause a track that is playing.
-
SD Record Button - Use this button to enter record mode, and to start and stop a recording (see SD Recording in the Operations section).
-
AM/FM - Stop/Del. Button - In radio mode, use this button to toggle between AM and FM radio. In disc/USB/SD playback mode, use this button to stop playback. In SD playback mode, press this button simultaneously with the 'Eject/Del Button' to delete a file from the SD card (see SD Recording in the Operations section).
-
Prev/Next/Preset Buttons - In playback mode, press Prev to jump to the previous track, and Next to jump to the next track. In radio mode, use these buttons to jump to the next and previous radio station presets.
-
B-Scan/F-Scan/Search Buttons - In playback mode, press B-scan to scan backwards through the current track, and F-scan to scan forward through the current track. In radio mode, use these buttons to scan through radio stations.
-
Mute Button - This button will silence the audio from the playback source, but not the microphone audio.
-
ST/Mono-L/R Folder Button - In playback mode, this button toggles between left channel, right channel and stereo outputs. Selecting L will place the left channel on the left and right channel outputs, and selecting R will place the right channel on the left and right channel outputs. In radio mode, this button switches between stereo and mono output. The folder function is used to change folders on an SD card. See page 25 for further information.
-
Repeat/Auto Button - In playback mode, this button will cycle through the available repeat options for the current audio media. In radio mode, this button will scan to the next strong radio station signal.
-
Digital Key Control - These buttons adjust the key of the disc audio.
b (flat): will lower the key of the music.
b (natural): will return the key to normal.
# [sharp]: will raise the key of the music.
- Vocal Cancel/Partner - This button will remove the vocal track from multiplexed discs.
The Vocal Cancel Feature removes vocals from multiplex formatted discs. Press the button one time to enable this function. When Vocal Cancel is enabled, the LED will be lit.
The Vocal Partner Feature temporarily removes vocals from multiplex formatted discs only when singing into a connected microphone. When the singing stops, the vocal track is automatically resumed. Press the button two times to enable this function. When Vocal Partner is enabled, the LED will be blinking.
Descriptions and Functions cont.

CH 1
CH 2
CH 3 CH 4
AV1 INPUT
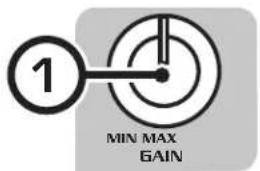
Channel Controls
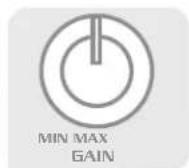
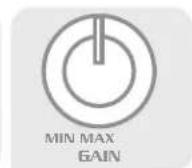
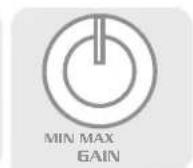
- Gain Control - This dial controls the volume on this mic/line channel. Turn the dial clockwise to increase the volume, and counter-clockwise to decrease.
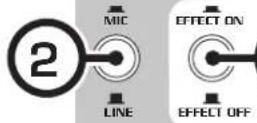
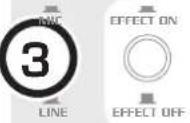
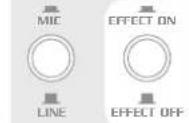
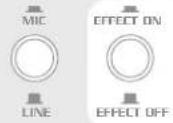
- Mic/Line Button - Use this button to switch between high and low level devices. When using a microphone, guitar or keyboard use the MIC setting to boost the signal. When attaching a self amplifying device like an amplifying mixer or player, set the button to LINE.
- Effect On/Effect Off Button - Press this button in to apply the DSP effects to this channel. Press the button again to turn off the effects on this channel. The effects that are applied to these channels are controlled using the DSP EFFECT controls, and MIC/LINE TONE controls.
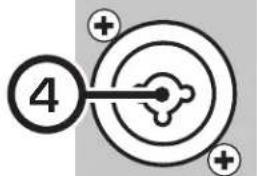
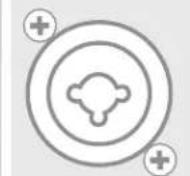
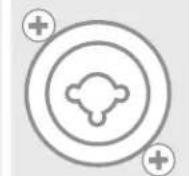
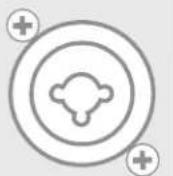
- XLR/1/4" Combo Jack - Use this combination jack to plug in a microphone or instrument using a 1/4" jack or an XLR jack.
NOTE: Plugging a cable into a channel that is being used by a wireless mic will switch off that wireless mic. If you want to use the wireless mics and wired mics or instruments, make sure you plug the cables into unused channels. The wireless mic module in the top expansion slot uses channel 1 and 2. The bottom expansion slot uses channel 3 and 4.
Descriptions and Functions cont.
flowchart
graph TD
    A["1: DELAY"] --> B["2: EQ ECHO DSP"]
    B --> C["3: VOLUME"]
    C --> D["4: HISS FILTER"]
    D --> E["5: REVERB VOLUME"]
    style A fill:#f9f,stroke:#333
    style B fill:#ccf,stroke:#333
    style C fill:#cfc,stroke:#333
    style D fill:#fcc,stroke:#333
    style E fill:#cff,stroke:#333
    subgraph DSP EFFECTS
        direction LR
        A -->|BASS| B -->|TREBLE| C
        B -->|MIC/LINE TONE| D -->|USB 50 CARD RECORDER| E
    end
    subgraph Multi-Formal PA System With Digital
        direction LR
        A -->|MIN| B -->|MAX MIN| C -->|MIN| D -->|+12dB 60Hz 200Hz 400Hz 1KHz 3KHz 6KHz 6KHz 6KHz 6KHz 6KHz 6KHz 6KHz 6KHz 6KHz 6KHz 6KHz 6KHz 6KHz 6KHz 6KHz 6KHz 6KHz 6KHz 6KHz 6KHz 6KHz 6KHz 6KHz 6KHz 6KHz 5KHz 5KHz 5KHz 5KHz 5KHz 5KHz 5KHz 5KHz 5KHz 5KHz 5KHz 5KHz 5KHz 5KHz 5KHz 5KHz 5KHz 5KHz 5KHz 5KHz 5KHz 5KHz 5KHz 5KHz 5KHz 6KHz 6KHz 6KHz 6KHz 6KHz 6KHz 6KHz 6KHz 6KHz 6KHz 6KHz 6KHz 6KHz 6KHz 6KHz 6KHz 6KHz 6KHz 6KHz 6KHz 6KHz 6KHz 6KHz 6KHz 7KHz 7KHz 7KHz 7KHz 7KHz 7KHz 7KHz 7KHz 7KHz 7KHz 7KHz 7KHz 7KHz 7KHz 7KHz 7KHz 7KHz 7KHz 7KHz 7KHz 7KHz 7KHz 7KHz 7KHz 7KHz 8KHz 8KHz 8KHz 8KHz 8KHz 8KHz 8KHz 8KHz 8KHz 8KHz 8KHz 8KHz 8KHz 8KHz 8KHz 8KHz 8KHz 8KHz 8KHz 8KHz 8KHz 8KHz 8KHz 8KHz 8KHz 9KHz 9KHz 9KHz 9KHz 9KHz 9KHz 9KHz 9KHz 9KHz 9KHz 9KHz 9KHz 9KHz 9KHz 9KHz 9KHz 9KHz 9KHz 9KHz 9KHz 9KHz 9KHz 9KHz
DSP Effects
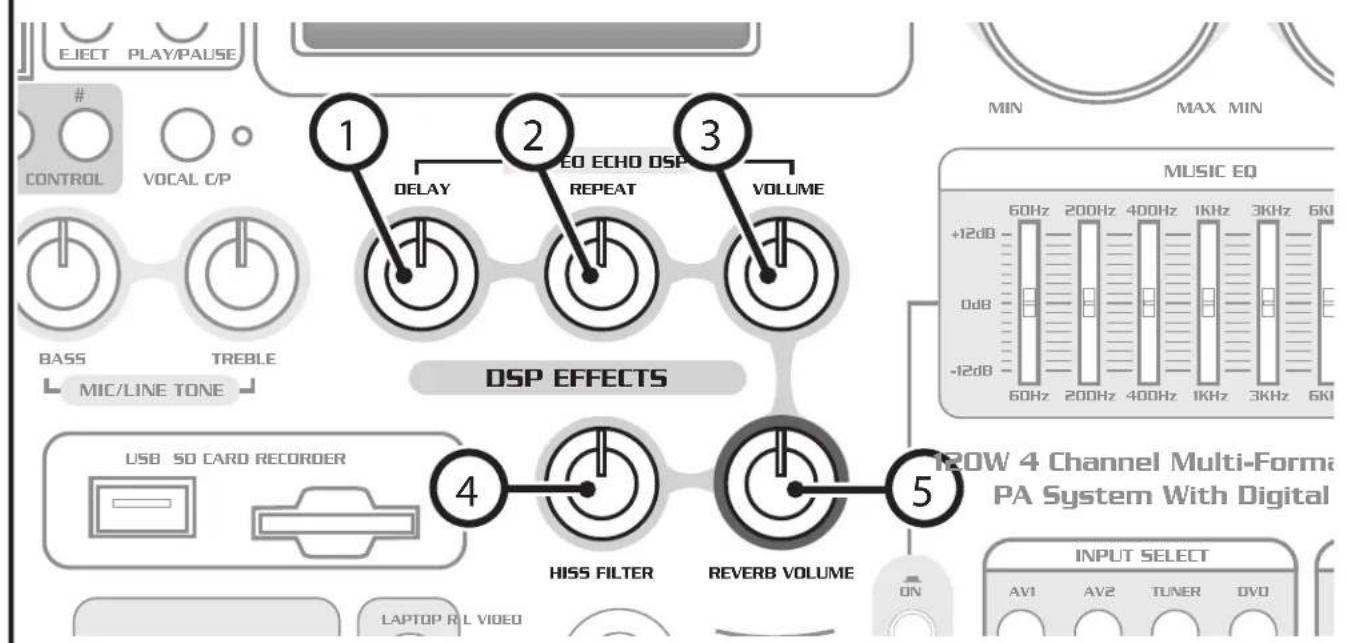
- Echo Delay Control - This dial controls the amount of time between the echo repetitions. Turn this dial clockwise to increase the delay, and counter-clockwise to decrease.
- Echo Repeat Control - This dial controls the amount of repetitions in the echo. Turn this dial clockwise to increase the amount of echos, and counter-clockwise to decrease.
- Echo Volume Control - This dial controls the volume of the echo effect. Turn this dial clockwise to increase the volume of the echos, and counter-clockwise to decrease.
- Hiss Filter - This dial controls the amount of hiss filter that is applied to the mic/line channels.
- Reverb Volume Control - This dial controls the volume of the reverb effect. Turn this dial clockwise to increase the volume of the reverb effect, and counter-clockwise to decrease.
Descriptions and Functions cont.
Rear Panel
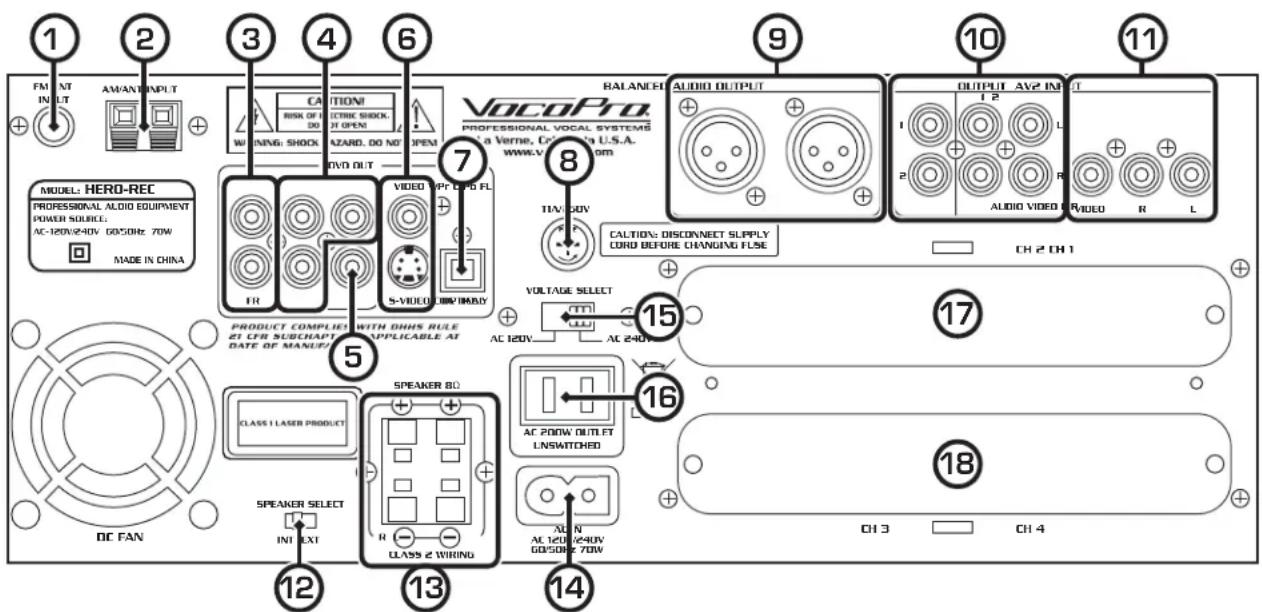
- FM Antenna Input - Attach the FM antenna here to recieve FM radio.
- AM Antenna Input - Attach the AM antenna here to receive AM radio.
- FL/FR Audio Output - Left and Right stereo audio output. Note that microphone audio will not be present on this output. The graphic EQ does not adjust this output.
- Component (Y/Pb/Pr) Video Output - Use this output to connect to a TV or monitor with Component (Y/Pb/Pr) inputs.
- Coaxial Digital Audio Output - Use this audio output to connect to a digital receiver. Note that microphone audio will not be present on this output. The graphic EQ does not adjust this output.
- RCA and S-Video Video Outputs - Use these video outputs to connect to a TV or monitor that has RCA inputs or S-Video inputs.
- Optical Digital Audio Output - Use this audio output to connect to a digital receiver. Note that microphone audio will not be present on this output. The graphic EQ does not adjust this output.
- Fuse Cover - Remove to access the fuse. Note: Replace only with type listed on back panel.
- L/R XLR Balanced Audio Output - Use these outputs to connect the HERO-REC to an external system, such as an in-house system at a club.
-
RCA A/V Outputs - Use this output to connect to additional TVs, monitors, recorders, or other devices.
-
RCA A/V Inputs - Use this input to connect an external player.
-
Speaker Selection Switch - Use this switch to select the onboard speakers, or to select external speakers. Selecting external speakers will switch off the onboard speakers.
-
External Speaker Output - Connect optional external speakers here.
-
AC Power Input - Connect the power cable here.
-
Volatage Selector Switch - Use this to select the voltage. 120V for United States, 240V for Europe.
-
Power Output - Use this output to power another device up to 200W.
-
CH1/2 Wireless Microphone Module Port - Receives signal from wireless microphones. Use the dials to adjust the volume of the wireless microphone audio. Houses the wireless module for channels 1-2 **Available only on HERO-REC 3, 4, 5, & 6 Models** (See Basic Operations for more information)
-
CH3/4 Wireless Microphone Module Port - Use this port to install the channel 3-4 optional wireless microphone module (sold separately). Houses the wireless module for channels 3-4. **Available only on HERO-REC 3, 4, 5, & 6** (See Basic Operations for more information)
Descriptions and Functions cont.
Remote Control
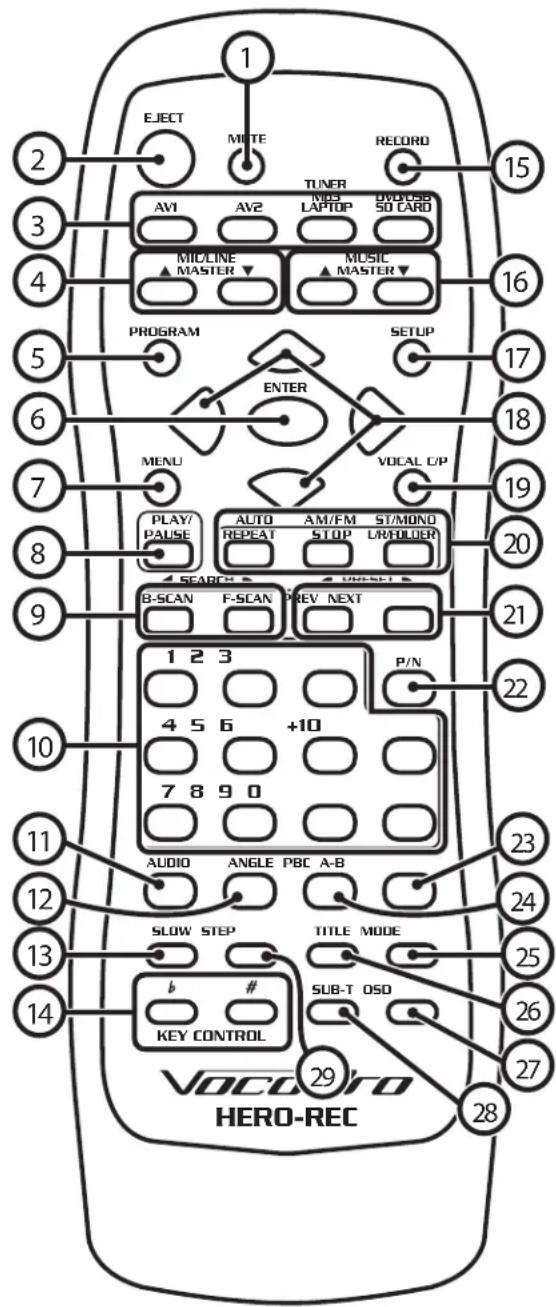
- Mute Button - This button will silence the audio from the playback source, but not the microphone audio.
-
Eject Button - Use this button to open/close the disc tray.
-
Input Select Buttons - Use these buttons to select the music input/source. Press AV1 to select the RCA input on the front panel, and AV2 to select the RCA input on the back panel. Press TUNER to toggle between the AM/FM radio and the 1/8" input on the front panel. Press DVD to toggle between the disc player, USB jumpdrive reader and SD card reader.
-
Mic/Line Master Volume Buttons - Use this button to adjust the master volume of the mic/line inputs.
-
Program Button - Use this button to enter program mode. (See Basic Operations for more information)
-
Enter Button - Use this button to activate a selected menu item in an on-screen menu.
-
Menu Button - Use this button to access a disc menu.
-
Play/Pause Button - Plays a paused or stopped track, and pauses a playing track.
-
B-Scan/F-Scan Buttons - In playback mode, press B-scan to scan backwards through the current track, and F-scan to scan forward through the current track. In radio mode, use these buttons to scan through radio stations.
-
Number Buttons - In playback mode, use these buttons to jump directly to a track for playback. In radio mode, these buttons jump to radio presets.
-
Audio Button - Will switch between alternate audio tracks on a DVD. Note: Not all DVDs have alternate audio tracks available.
-
Angle Button - Use this button to select viewing angles on a DVD. Note: Not all DVDs have alternate viewing angles available.
-
Slow Button - Use this button to view DVD video in slow motion.
-
Digital Key Control Button - These buttons adjust the key of the disc audio.
b (flat): will lower the key of the music.
(sharp): will raise the key of the music.
-
Record - Use this button to record to SD card. Press once to put the HERO-REC in record mode. Press again to begin recording once the "REC" indicator starts blinking slowly. Press again to finish recording. See the recording section for more details.
-
Music Master Volume Buttons - Use this button to increase/decrease the master volume.
-
Setup Button - Use this button to access the HERO-REC setup menu.
-
Arrow Buttons - Use these buttons to navigate on-screen menus.
Descriptions and Functions cont.
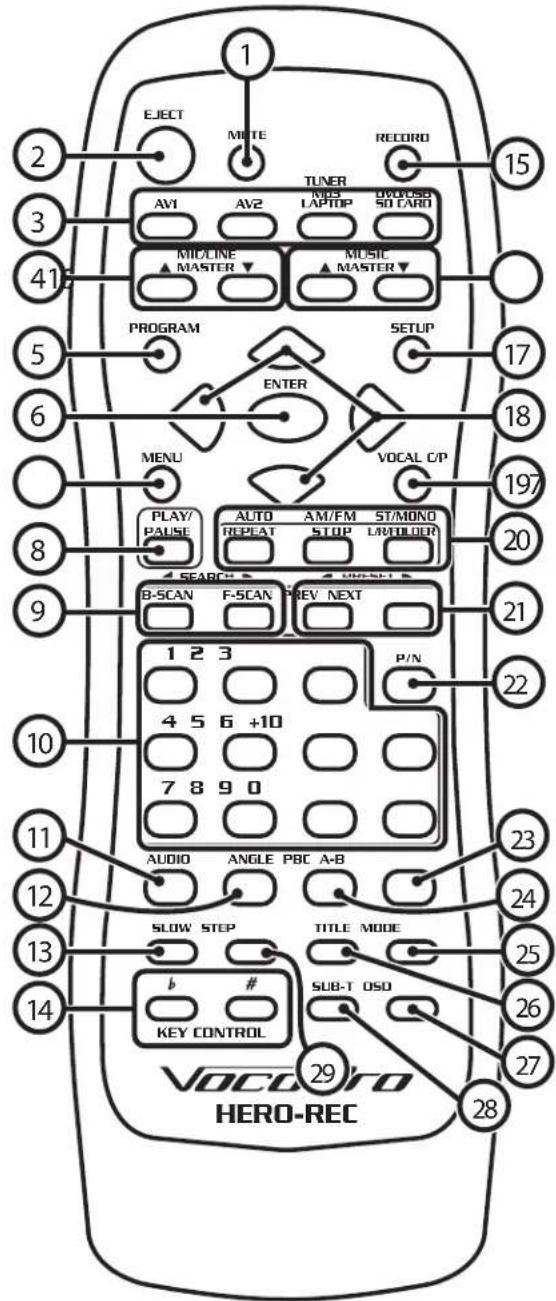
- Vocal Cancel/Partner Button - This button will remove the vocal track from multiplexed discs.
- Multi-Function Buttons:
AUTO/REPEAT - In playback mode, this button will cycle through the available repeat options for the current audio media. In radio mode, this button will scan to the next strong radio station signal.
AM/FM/STOP - In playback mode, this button will stop a track that is playing. In radio mode, this button toggles between AM and FM radio.
ST/MONO - L/R FOLDER - In playback mode, this button toggles between left channel, right channel and stereo outputs. Selecting L will place the left channel on the left and right channel outputs, and selecting R will place the right channel on the left and right channel outputs. In radio mode, this button switches between stereo and mono output. The folder function is used to change folders on an SD card. See page 25 for further information.
- Prev/Next Buttons - In playback mode, press Prev to jump to the previous track, and Next to jump to the next track. In radio mode, use these buttons to jump to the next and previous radio station presets.
- P/N Button - Use this button to switch between PAL and NTSC. Use NTSC for United States and PAL for Europe.
- A-B Button - Use this button to loop a section of a track. Press once to set the start point, again to set the end point, the track will then loop. Press the button again to exit the loop.
- PBC Button - This button activates menu navigation on VCD Discs.
- Mode Button - Use this button to change the picture mode.
- Title Button - Use this button to go to the title screen of a DVD disc.
- OSD Button - Use this button to show/hide the on-screen display, and cycle through the time display modes.
- Subtitle Button - Use this button to switch between available subtitles on a DVD. Note: Not all DVDs have subtitles available.
- Step Button - Use this button to advance forward one frame at a time on a DVD.
Basic Operations
SD Recording
You can record music and microphones/instruments to SD card. SD recording is quick, efficient, and sounds great. Follow the steps below to get started.
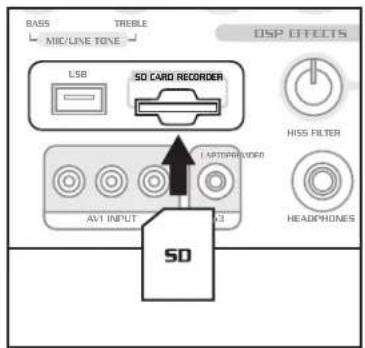
- Insert SD card into the SD card slot as shown.
Note: Make sure the SD card's lock tab is NOT set to lock. This will prevent files from being recorded to the SD card.
- Press the SD RECORD button
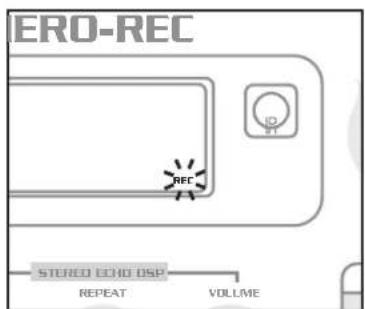
This will place the unit into 'record standby mode' indicated by the REC icon blinking in the bottom right on the display.
There are two blink speeds for the REC icon:
Fast blink: The SD card is being prepared for recording
Slow blink: The SD recorder is ready to record
NOTE: Larger capacity SD cards take longer to prepare for recording
-
Use the INPUT SELECT buttons to select your music source. If you are just recording a microphone or instrument signal (with no music) select SD card as the source.
-
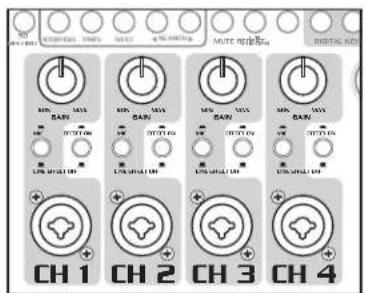
Adjust microphone, instrument and/or music levels to achieve an ideal mix.
Basic Operations
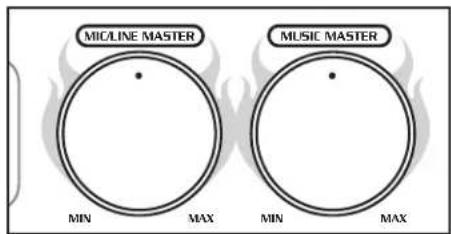
- Once the channels are mixed, use the master level controls to increase or decrease the overall recording level. Note: If you are doing late night recording or find that the speaker output is too loud while recording, you can connect headphones to mute the speaker output.
- Press the SD RECORD button to start recording.
NOTE: During recording, the REC icon will be display solid.
- Press SD RECORD to stop the recording and create a file on the SD card.
The recordings are stored on the SD card in the following folder:
ROOT/REC/LINE_IN. The files are .mp3 format 128kbps.
SD Card Playback
- Insert SD card into the SD card slot as shown. When you insert an SD card with multiple folders, playback will start from the first file in the first folder and continue to play back all files in all folders. If you want to play a file from another folder, use the FOLDER button (below).
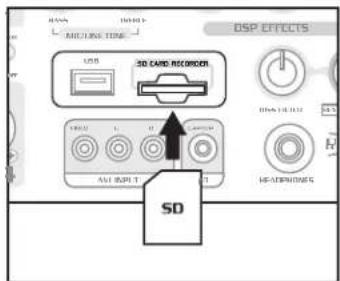
NOTE: SD playback will automatically begin. Make sure the SD card's lock tab is not set to lock. This will prevent playback from the SD card.
- Use the same playback controls (PREV/NEXT/STOP/PAUSE/etc) used to control disc playback to control SD card playback.
Switching Folders on the SD Card
It is not recommended to insert SD cards with nested folders (folder inside a folder). The only nested folder on the SD card should be the folder used for recording (automatically created by the SD recorder).
To switch folders:
- Press the FOLDER button to enter FOLDER mode. You will see the FOLDER icon appear in the display
NOTE: In folder mode, the PREV/NEXT buttons are used to navigate folders, not tracks.
-
Use the PREV/NEXT buttons to navigate the folders on the card.
-
Press FOLDER again to exit FOLDER mode.
Deleting a File
-
In SD card mode go to the file you want to delete by first playing it.
-
Simultaneously press the AM/FM-Stop/Del. and Eject/Del. buttons to delete the file.
-
DEL will momentarily appear in the display. When it disappears the deletion is complete.
NOTE: Make sure your SD card lock tab is not set to LOCK.
Basic Operations
Using the Disc Player
To play a disc:
- Use the Input select buttons to select the DVD player.
- Press eject to open the disc tray.
- Place one disc in the tray, label side up.
- Press eject again to close the tray. Do not try to manually force the tray closed.
- The disc will automatically begin to play. (Disc will not automatically begin to play if autoplay is turned off. See the setup menu section for more details.)
Selecting the Input Source
To select the input source, use the input select buttons on the front panel or remote control.
• AV1: The RCA input on the front panel.
• AV2: The RCA input on the rear panel.
- TUNER - Mp3/LAPTOP: Switches between the 1/8" jack on the front panel and the AM/FM Tuner.
- DVD - USB - SD CARD: Switches between the internal disc player, USB and SD card reader.
Playing from USB Jumpdrive or SD Card
To play songs, videos and other files from a USB jumpdrive or SD card:
- Plug a USB jumpdrive or SD card into the reader slots on the front panel of the HERO-REC.
- Use the input select buttons to switch to either the USB or SD port.
- The first readable file on the card or drive will begin to play automatically.
Using DSP Effects
The DSP effects can add a stylized feel to vocals and instruments. The DSP Effects include: Delay, Repeat, Hiss Filter and Reverb. To use DSP effects:
- Connect a microphone or instrument to one of the input channels on the front panel.
- Press in the effects button on that channel to enable effects for that channel.
- Adjust the DSP effects dials while speaking into the microphone until you are satisfied with the sound.
Note: Although MIC/LINE TONE treble and bass are not DSP Effects, they will be enabled/disabled by the EFFECT ON/OFF buttons.
Using Digital Key Control
If a song's natural musical key is either too high, or too low to be sung comfortably, use the DIGITAL KEY CONTROL feature to bring the musical key into range.
- Press the #(sharp) button to raise the key
- Press the b (flat) button to lower the key
- Press the (natural) button to return the key to its natural position
There is a maximum of 6 steps in either direction (UP/DOWN.) The current setting is displayed in the on-screen display when the key is changed.
Programming a Custom track order
A custom track order can contain up to 16 tracks. To program a custom track order:
- Insert a disc in the disc player.
- Press the program button on the remote control to enter the program menu.
- Use the arrow keys to highlight the first open track slot.
- Use the number keys to enter the number of the track.
- Repeat steps 3 and 4 until the desired track order is finished.
- Use the arrow buttons to highlight "PLAY" in the menu, and press enter to begin playback, or press play on the remote control.
To exit the programmed track order playback, press stop on the remote control or front panel.
Using the File Navigation Menu (USB or Disc Only)
The file navigation menu will be displayed when a USB drive or disc containing files is selected for playback. Use the arrow keys to navigate the menu. To play a track or file, highlight the track or file, then press enter on the remote control.
Using the Optional Wireless Microphones
To use the wireless mics:
- Attach the included antennas to the wireless module.
- Insert a battery into the mic.
- Switch the mic ON.
- When the mic is ON, the RF light on the rear panel will turn on.
- Use the volume control on the rear panel module, the channel volume control, and the master mic volume control to adjust the volume the desired level.
- Repeat these steps for additional mics.
Basic Operations
Using the AM/FM Tuner
To use the AM/FM Tuner:
- Connect the AM and/or FM antenna to the rear panel of the HERO-REC.
- Power on the HERO-REC.
- Select Tuner using the Input Select Buttons. The display screen should display "Tuner".
- Select AM or FM using the AM/FM button on the front panel or remote control.
- Use the search buttons or preset buttons to tune to a radio station, and adjust volume to the desired level.
There are 20 station presets available.
To set radio station presets:
- Use the search or auto buttons to tune to a radio station.
- Press and hold one of the preset number buttons on the front panel for 2 seconds. The tuned radio station will now be set to this preset number.
- Repeat the process for additional station presets.
To set radio station presets above the number 10:
- Tune to the desired station.
- Press the +10 button and then hold one of the preset numbers for 2 seconds.
For example, to program preset 14: press +10 then hold number 4 for 2 seconds.
To set preset 20: Press +10 then hold number 0 for 2 seconds.
To use radio station presets:
- Press any of the number buttons on the front panel to jump to a preset radio station.
- For presets above number 10, press the +10 button, then the preset number.
For example, to jump to preset 14: Press +10 then number 4.
To jump to preset 20: Press +10 then number 0.
Removing an Optional Wireless Module
The Wireless modules are designed to be easily removed and installed in case it requires service.
To remove a wireless module:
- Turn the HERO-REC OFF, and unplug the power cable.
- Remove the two screws that hold the module in place.
- Carefully slide the module out.
- Carefully detach the connector cable.
NOTE: Make sure the cable does not fall back into the unit. It may be necessary to temporarily secure the cable to the unit with tape while there is no module in the slot.
Installing an Optional Wireless Module
The Wireless modules are designed to be easily removed and installed in case it requires service.
To install a wireless module:
- Turn the HERO-REC OFF, and unplug the power cable.
- (If the slot cover is already removed, skip to step 4) Remove the two screws that hold the slot cover in place.
- Carefully detach the connector cable from the slot cover.
NOTE: Make sure the cable does not fall back into the unit. It may be necessary to temporarily secure the cable to the unit with tape while there is no module in the slot. - Carefully connect the connector cable to the module. The cable plug is designed to fit only one way, if it does not fit correctly, flip the plug over and try again.
- Carefully slide the module into the slot.
- Secure the module with the two screws.
Setup Menu
Setup Menu
Press the setup button on the remote control to enter the setup menu. Press the setup button on the remote control while in the setup menu to exit.
System Setup
TV System: NTSC, PAL60, PAL, AUTO
NTSC: Use this setting for North America.
PAL60: Use this setting for regions that use PAL at 60Hz.
PAL: Use this setting for Europe.
AUTO: The unit will attempt to auto detect the video system.
Auto Play: ON, OFF
On: Will play a disc as soon as it is put in.
Off: Will wait for the play button to be pushed before playing a disc.
Video: INTERLACE-YUV, TV-RGB, P-SCAN YPBPR, S-VIDEO
Use these settings to change the video output of the Component (Y/Pb/Pr) outputs.
TV Type: 4:3PS, 4:3LB, 16:9
4:3PS: Use this setting for viewing a standard movie on a standard TV.
4:3LB: Use this setting for viewing a widescreen movie on a standard TV.
16:9: Use this setting for a widescreen TV.
Password: ----
Use this setting to lock/unlock the ratings. The default password is 0000. To set the password, first unlock the password, then enter a new password and press enter.
Rating: G, PG, PG13, R, NC-17
This setting controls what rating of DVD movie can be watched on the HERO-REC. To change this setting, the password must be set to unlocked.
Default: RESTORE
Restore: Will return all settings to factory default.
Resume: ON, OFF
On: Will continue playback from the last point when the unit was turned off.
Off: Will playback from the beginning of the disc when the unit is turned back on.
Language Setup
OSD Language: English, Chinese, German, Spanish, French, Portuguese
Select what language will appear on the on-screen display.
Audio Lanuage: Chinese, English, Japanese, French, Spanish, Portuguese, Latin, German
Select a preferred audio language for DVDs. Note that not all DVDs have every language available.
Subtitle Language: Chinese, English, Japanese, French, Spanish, Portuguese, German, Off
Select a language for the DVD subtitles. Note that not all DVDs have multiple languages available.
Menu Language: Chinese, English, Japanese, French, Spanish, Portuguese, German, Latin
Select a language for the DVD menu. Note that not all DVDs have multiple languages available.
Setup Menu
Audio Setup
Audio Out: SPDIF/OFF, SPDIF/RAW, SPDIF/PCM
SPDIF/OFF: Select to disable SPDIF output.
SPDIF/RAW: Select when connecting to a 5.1 channel digital amplifier (DTS/Dolby Movie.).
SPDIF/PCM: Select when connecting to a 2-channel digital amplifier [Audio CD.].
Key: -6 to +6
This menu item functions the same as the Digital Key Control buttons on the front panel.
Video Setup
Brightness:
Set the brightness of the image with this setting. A lower value will make the image darker.
Contrast:
Set the contrast of the image with this setting. A higher value will make the light colors lighter and the dark colors darker. A lower value will make the light and dark colors less vibrant.
Hue:
Set the hue or color of the image with this setting.
Saturation:
Set the Saturation of the image with this setting. Saturation makes the colors in an image more intense.
Sharpness:
Set the sharpness of the image with this setting.
Speaker Setup
Downmix: LT/RT, STEREO, VSS
LT/RT: Select when connecting to a Dolby Digital amplifier.
STEREO: Select when connecting to a 2-channel stereo amplifier/mixer.
VSS: Virtual surround sound. Select when using the 5.1 channel outputs on the rear panel.
Digital Setup
OP MODE: LINE OUT, RF REMOD
LINE OUT: This sets the output level to normal.
RF REMOD: This will slightly increase the output level.
Dynamic Range: FULL, 6/8, 4/8, 2/8, OFF
Use this control to adjust the dynamic range.
Dual Mono: STEREO, MONO L, MONO R, MIX MONO
Stereo: Select for standard L/R audio output.
Mono L: Select for mono audio output with the left channel on both sides.
Mono R: Select for mono audio output with the right channel on both sides.
Mix mono: Select for mono audio output to both sides.
Troubleshooting
A disc or file is playing, but no sound is coming from the speakers.
Make sure the external/internal speaker switch is set to internal speakers.
Make sure the music master volume is turned up.
If you are playing a VOB file from an SD card or jumpdrive, it may not function as VOB file playback is not supported.
The disc player will not play a particular disc.
Make sure the input select is set to DVD.
Make sure the disc is not scratched or dirty.
Some types of recorded discs may not be compatible with the HERO-REC.
The Graphic EQ has no effect on the music.
Make sure the EQ ON/OFF button is set to ON.
Microphone audio is not present in the speakers.
Make sure the mic is switched on.
Make sure the MIC/LINE button on the mic channel is set to MIC.
Make sure the mic channel and master mic volume are turned up.
An instrument such as a guitar or keyboard that is plugged into the MIC/LINE channels cannot be heard via speakers.
Make sure the MIC/LINE button on the input channel is set to MIC.
Make sure the channel and master mic volume are turned up.
No microphone audio is present in the FR/FL, or digital audio outputs.
This is not a malfunction. Microphone audio is not output through these channels.
No Wireless microphone audio is present.
Make sure the wireless mics are switched on.
Make sure the volume is turned up on the wireless mic module.
Make sure the mic channel and mic master volume are turned up.
Make sure the microphone battery is charged and installed correctly.
If there is a wired mic or instrument plugged into the same channel as the wireless mic, it will switch off the wireless mic, make sure that cables are only plugged into unused channels.
A USB Jumpdrive or SD card is not playing.
Make sure the input selector is set to USB or SD.
Make sure the card or drive is formatted with FAT or FAT32. NTFS format cannot be read by the HERO-REC.
If you are playing a VOB file from an SD card or jumpdrive, it may not function as VOB file playback is not supported.
Make sure the SD card lock tab is not set to LOCK.
The remote control is not working.
Make sure the HERO-REC is powered on.
Make sure you are within 23 feet of the HERO-REC.
Make sure the remote control batteries are not dead.
Cannot record to SD card
Make sure the SD card lock tab is not set to LOCK.
Make sure you have sufficient space on the SD card to record
Make sure the SD card is ready for recording (indicated by a slow blinking REC icon)
Recording level is too low
Increase the channel gain controls
Increase the master music and/or master mic levels
No Video
This unit will not display VGA video output from DVDs with copy protection. This is not a manufacturing defect. It is due to the anti-piracy coding used to protect the DVD from VGA video copying. If you use VGA for video output, please check the DVD packaging to make sure it is not copy-protected prior to viewing.
Notes
Notes
VocoPro®
PROFESSIONAL VOCAL SYSTEMS ^TM
- HERO-REC
- Table of Contents
- Important Safety Instructions
- CAUTION
- RISK OF SHOCK
- Explanation of Graphical Symbols
- WARNING
- Note:
- Listening for a Lifetime
- Welcome
- VocoPro
- FOR YOUR RECORDS
- Features
- Getting Started
- Returns and Warranty
- Getting Connected
- AV INPUT CONNECTIONS
- AUDIO OUTPUT CONNECTIONS
- VIDEO OUTPUT CONNECTIONS
- Connecting to a DTS Receiver/Decoder
- MICROPHONE/INSTRUMENT INPUT CONNECTION
- AC DEVICE CONNECTIONS
- CONNECTING EXTERNAL SPEAKERS
- Descriptions and Functions
- Front Panel
- Descriptions and Functions cont.
- Disc Player Control Buttons
- Channel Controls
- DSP Effects
- Rear Panel
- Remote Control
- (sharp): will raise the key of the music.
- Basic Operations
- SD Recording
- SD Card Playback
- Switching Folders on the SD Card
- Deleting a File
- Using the Disc Player
- To play a disc:
- Selecting the Input Source
- Playing from USB Jumpdrive or SD Card
- Using DSP Effects
- Using Digital Key Control
- Programming a Custom track order
- Using the File Navigation Menu (USB or Disc Only)
- Using the Optional Wireless Microphones
- Using the AM/FM Tuner
- Removing an Optional Wireless Module
- Installing an Optional Wireless Module
- Setup Menu
- System Setup
- Language Setup
- Audio Setup
- Video Setup
- Speaker Setup
- Digital Setup
- Troubleshooting
- A disc or file is playing, but no sound is coming from the speakers.
- The disc player will not play a particular disc.
- The Graphic EQ has no effect on the music.
- Microphone audio is not present in the speakers.
- An instrument such as a guitar or keyboard that is plugged into the MIC/LINE channels cannot be heard via speakers.
- No microphone audio is present in the FR/FL, or digital audio outputs.
- No Wireless microphone audio is present.
- A USB Jumpdrive or SD card is not playing.
- The remote control is not working.
- Cannot record to SD card
- Recording level is too low
- No Video
- Notes
- VocoPro®
- PROFESSIONAL VOCAL SYSTEMS TM
Brand : Vocopro
Model : HERO-REC
Category : Hi-Fi System