
JE-1013 - Coffee maker Salton - Free user manual and instructions
Find the device manual for free JE-1013 Salton in PDF.


| Type | Drip coffee maker |
| Capacity | 1.5 L (10-12 cups) |
| Power | 1000 W |
| Voltage | 120 V / 60 Hz |
| Dimensions (L x W x H) | 25 x 20 x 35 cm |
| Weight | 1.5 kg |
| Water reservoir | Removable with transparent level indicator |
| Filter type | Permanent reusable basket (paper filters optional) |
| Carafe | Glass carafe with non-drip spout and handle |
| Heating plate | Auto shut-off after 2 hours |
| Control | On/off switch with indicator light |
| Brewing time | Approximately 10 minutes for full carafe |
| Cord length | 80 cm |
| Material | Plastic housing with stainless steel heating element |
| Safety features | Overheat protection, boil-dry prevention |
| Cleaning | Removable filter basket and carafe for easy washing |
| Descaling | Recommended every 2-3 months with vinegar or descaling solution |
| Spare parts availability | Carafe, filter basket, heating plate available from manufacturer |
Frequently Asked Questions - JE-1013 Salton
User questions about JE-1013 Salton
0 question about this device. Answer the ones you know or ask your own.
Ask a new question about this device
Download the instructions for your Coffee maker in PDF format for free! Find your manual JE-1013 - Salton and take your electronic device back in hand. On this page are published all the documents necessary for the use of your device. JE-1013 by Salton.
USER MANUAL JE-1013 Salton
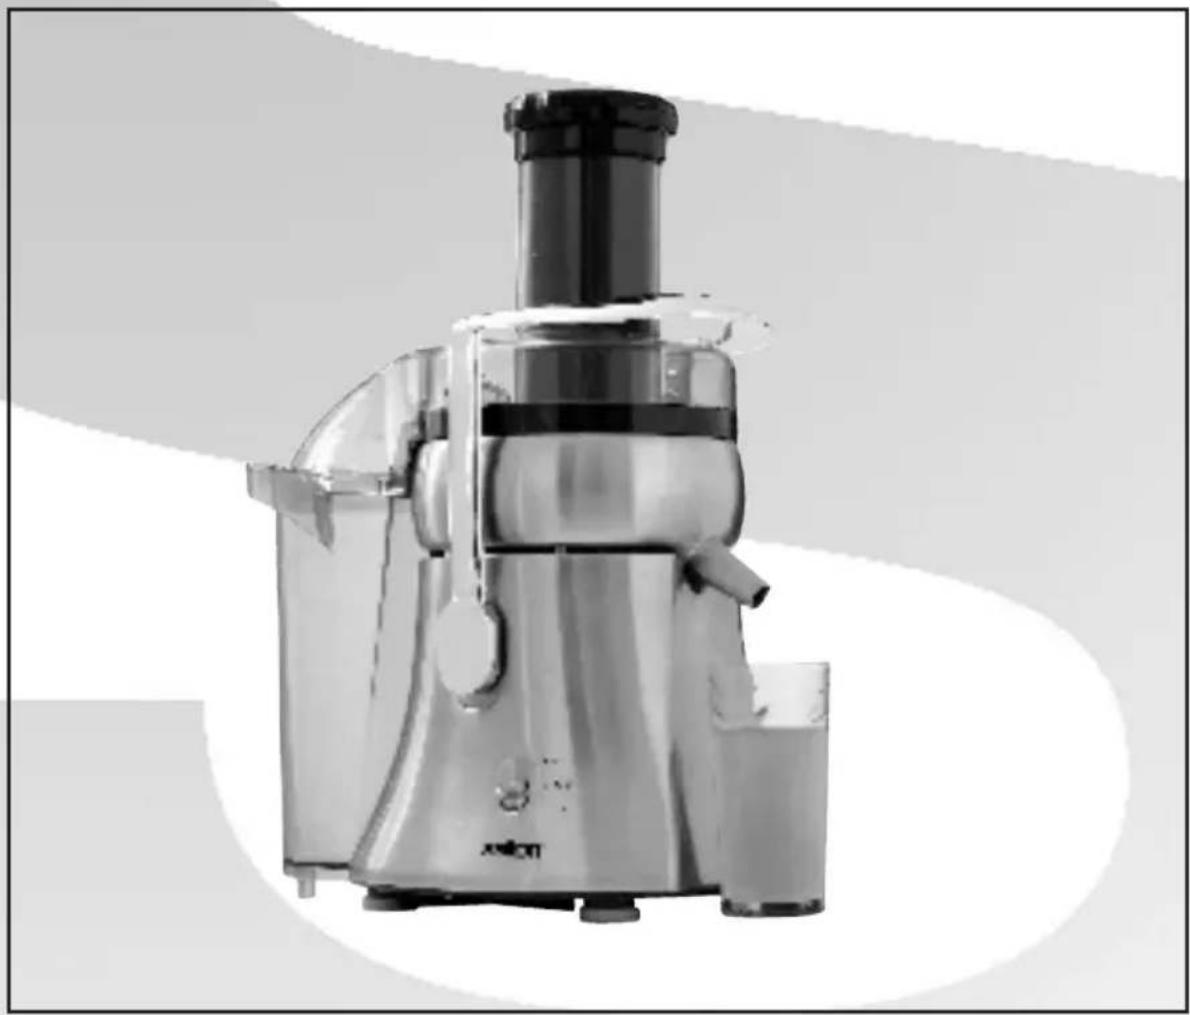
Professional juice extractor
natural_image
Exterior view of a modern stainless steel juice<|im_start|> Japan advertisement (no signage or text visible)Instruction Booklet
Model: JE-1013
IMPORTANT SAFEGUARDS
When using electrical appliances, basic safety precautions should always be followed including the following:
- Read all instructions.
- Always use this appliance on a dry, level surface.
- To protect against risk of electric shock, do not immerse cord, plugs, or the appliance in water or other liquid.
- Children should not be allowed to operate this appliances and close supervision is necessary when this appliance is used around children.
- This appliance is not intended for use by infirm persons, without supervision.
- Unplug from outlet when not in use before putting on or taking off parts and before cleaning.
- Do not operate any appliance with a damaged cord or plug or after the appliance malfunctions, or is dropped or damaged in any manner. Return appliance to Salton for examination, repair or electrical or mechanical adjustment. See Warranty.
- The use of accessories or attachments not recommended or sold by Salton may cause fire, electric shock or injury.
- Do not use outdoors.
- Do not let cord hang over edge of table or counter, or touch hot surfaces.
- Extreme caution must be used when moving an appliance containing hot liquids.
- This appliance is for Household Use Only. Do not use appliance for other than intended use.
- Do not leave unit unattended while in use.
- Always turn the appliance off and unplug from the outlet when left unattended or finished using.
- Check to be sure that the switch is in the OFF position after each use. Make sure the motor is stopped before disassembling.
- Avoid contacting moving parts.
-
The cutting blades in the strainer basket are sharp. Handle with care.
-
Always make sure the juicer is fully assembled and the juicer cover is locked securely in position before the motor is turned on.
Do not attempt to remove parts when the juicer is in operation. - Do not attempt to override the safety features.
- Do not use this appliance if the strainer basket is damaged.
- Do not put your fingers or other objects into the feed tube while it is operating. Always use the food pusher provided. If food becomes lodged in the feed tube use the food pusher or another piece of fruit or vegetable with the food pusher to push it down. If this is not possible, turn the motor off and unplug the unit from the wall outlet and disassemble the unit to remove the stuck food.
- Do not place on or near a hot gas or electric burner, or in a heated oven.
- Always attach plug to appliance first, then plug cord into the wall outlet. To disconnect, turn any control to 'OFF', then remove plug from wall outlet.
SAVE THESE INSTRUCTIONS
HOUSEHOLD USE ONLY
GROUNDED PLUG
To reduce the risk of electric shock this appliance has a grounded plug. (2 blades and 1 pin) If the plug does not fit fully into the electrical outlet contact a qualified electrician. Do not modify the plug in any way or use an adaptor.
BEFORE FIRST USE
- Read the instructions carefully and keep for future reference
- Remove all packaging.
- Disassemble the juicer (see the Care and Cleaning section). Wash all removable parts to remove any residue left over from the manufacturing process.
DESCRIPTION OF PARTS
- Motor Housing
- Electronic Control
A - Hi speed
B - Off
C - Lo speed
- Locking handle
- 1.5 litre/quart pulp container
- Pulp Container Safety Foot (Not Shown)
- Pulp Chute/Juicer Cover
- Feed Tube
- Food Pusher
- Stainless Steel Juice Collector
- Stainless Steel Strainer Basket/Cutting Blades
- Spout
- Juice Jug
- Froth Separator (inside jug)
- Rubber feet

HOW TO ASSEMBLE THE JUICER
- Place the Stainless Steel Juice collector on the motor housing with the spout facing the direction of the Locking Handle. Swivel until it locks into place. (See Ill. 1)
- Place the Stainless Steel Strainer Basket inside the Juice Collector. Twist the Strainer Basket and gently push down until it is seated in the Juice Collector. (See III. 2)
NOTE: The top edge of the Strainer Basket should not be higher than the edge of the Juice Collector when properly installed.
-
Place the Pulp Chute/Juicer Cover on the top so that the opening of the Pulp Chute is on the side opposite the spout. (See Ill. 3)
-
Lock the Pulp Chute/Juicer Cover into position by raising the Locking Bar until it clicks into the grooves located on both side of the Pulp Chute/Juicer Cover. (See Ill. 4)
NOTE: Push the Locking Bar until it is fully upright otherwise the Juicer will not operate.
-
Align the groove in the Food Pusher with the small protrusion on the inside of the Feed Tube.
-
Slide the Pulp Container into position under the Pulp Chute. Ensure that the Safety Foot on the Pulp Container is fully inserted in the slot in the Motor Housing otherwise the Juicer will not operate.
-
If the Froth Separator is not in the Juice Jug, slide between the tabs inside the Juice Jug. If you prefer to have juice with froth then the Froth Separator is not required.
-
Place the Juice Jug or a glass under the spout.

natural_image
Line drawing of a portable electric shaver with a downward arrow indicating compression (no text or symbols)III.1

natural_image
Line drawing of a hand sanitizer with a downward arrow indicating compression (no text or symbols)III. 2

natural_image
Line drawing of a coffee maker with a downward arrow indicating compression or lifting (no text or symbols)III. 3

natural_image
Line drawing of a blender with a handle and spout, showing no text or symbolsIII. 4
HOW TO PREPARE FRUIT AND VEGETABLES FOR JUICING
- Wash fruits and vegetables.
- Peel fruits that have inedible skins such as citrus fruits, pineapple, melons, papaya, etc.
- Pit all fruits with hard seeds or stones such as peaches, nectarines, cherries, etc.
- Most fruits and vegetables such as apples, carrots and cucumbers will not need to be cut. If the pieces are too big for the Feed Tube, slice the fruit or vegetables before starting to juice.
HOW TO JUICE
- Assemble the Juicer. The Juice Jug or a glass can be placed below the pout to collect juice.
- Plug the power cord into a 120 V power outlet.
- Choose either 'Hi' or 'Lo' speed on the Electronic Control depending on the type of fruit or vegetable that is being juiced. Never put any fruit or vegetables in the juicer until power is turned on. Soft fruit or vegetables, such as berries, melons, cucumber, tomatoes, etc. should be juiced on Lo speed. Harder fruit and vegetables such as apples, celery, carrots, etc. should be juiced at 'Hi' speed.
- With the motor running, place food into the Feed Tube. Using the Food Pusher, gently guide food down the Feed Tube. To Extract the maximum amount of juice, always push the Food Pusher down slowly.
IMPORTANT: DO NOT PLACE HANDS OR FOREIGN OBJECTS DOWN THE FEED TUBE. ALWAYS USE THE FOOD PUSHER
-
If the Pulp Container is full it can be emptied during juicing. Turn the Juicer Off and remove the Pulp Container by holding onto the Feed Tub and tilting the juicer slightly to disengage the Safety Foot on the Pulp Container. Empty the Pulp Container. Replace by sliding the Pulp Container into position under the Pulp Chute. Ensure that the Safety Foot on the Pulp Container is engaged in the slot in the Motor Housing.
-
The froth separator in the Juice Jug will eliminate froth being poured into the glass. If you prefer to have juice with froth, simply remove the froth separator attachment from the Juice Jug before juicing
IMPORTANT: When juicing on 'Hi' Speed do not run the Juicer for longer than 5 minutes then allow to rest for 2 minutes before you resume juicing.
HELPFUL HINTS
- A small amount of lemon juice can be added to apple juice to prevent browning.
- Do not use bananas or avocados as they do not contain juice and will clog the juicer.
- Allow the juicer to run for one minute before turning 'Off' to allow any excess juice to be extracted from the pulp.
- A plastic bag can be put in the pulp container for easy clean-up.
- Disassemble the Juicer and rinse off the pulp immediately after juicing. The Strainer Basket/Cutting Blades can be soaked in water to loosen the pulp. Then wash in warm soapy water.
- Wash parts immediately after use to avoid discolouration of the plastic parts which may occur with some fruits and vegetables.
- If juicing herbs or leafy green vegetables process in combination with other fruits or vegetables to yield more juice.
CARE AND CLEANING
How to Disassemble the Juicer
IMPORTANT: Before disassembling the Juicer make sure that the Electronic Control is in the Off position, the plug has been removed from the wall outlet and the motor has stopped completely.
- Remove the Food Pusher from the Feed Tube.
- Remove the Pulp Container by holding onto the Feed Tube and tilting the juicer slightly to disengage the Safety Foot on the Pulp Container.
- Remove the Juice Jug.
- Hold the Pulp Chute/Juicer Cover and disengage the Locking Bar from the grooves on the side of the Pulp Chute/Juicer Cover. (See Ill. 1)
- Lift and remove the Pulp Chute/Juicer Cover. (See III. 2)
- Remove the Stainless Steel Juice Collector and Strainer Basket by placing one hand under the spout and the other under the black plastic edge opposite the spout and lifting upwards. The Stainless Steel Strainer Basket can be removed from the Juice Collector by pushing it up through the hole in the bottom of the Juice Collector.
NOTE: Be careful when handling the Strainer Basket as the cutting blades are very sharp.

natural_image
Line drawing of a kitchen grater with a handle and side arm, showing no text or symbolsIII.1

natural_image
Line drawing of a coffee maker with a lid and handle, showing a lever mechanism (no text or symbols)III. 2
How to Clean
- Move the Control Switch to the Off position and wait for the motor to stop completely.
- Unplug from the wall outlet.
- Disassemble the Juicer (see directions on page 8)
- Clean the Pulp Container, Pulp Chute/Juicer Cover, Food Pusher, Stainless Steel Juice Collector, Juice Jug and Froth Separator in warm, soapy water. A mild detergent is recommended. Rinse well and dry thoroughly.
NOTE: Care must be taken when cleaning or storing the Pulp Container with Safety Foot. - Hold the Stainless Steel Strainer Basket/Cutting Blades under clean running water. Use the cleaning brush included with the Juicer to gently clean away pulp from the filter and cutting blades. Rinse under running water. Hold the Strainer Basket/Cutting Blades up to the light to ensure that the fine mesh holes are not blocked. If the holes are blocked, soak the Strainer Basket/Cutting Blades in hot water to loosen the pulp and clean with the nylon brush again. Allow to dry on a cloth or paper towel before reassembling the juicer.
CAUTION: THE CUTTING BLADES ARE VERY SHARP.
- Wipe the Motor Housing with a soft cloth moistened in warm soapy water. NEVER IMMERSE MOTOR HOUSING WATER OR ANY OTHER LIQUID.
TROUBLESHOOTING
| Problem Solution | |
| Juicer will not operate when switched on. | ●The safety locking arm may not be correctly engaged into the 2 grooves on either side of the Pulp Chute/Juicer Cover.●The safety foot is not fully inserted in the slot in the Motor Housing. |
| Motor stalls when juicing ●Push the | Food Pusher down slowly so that wet pulp does not build up under the Pulp Chute/Juicer Cover.●Choose Hi speed instead of Lo speed. |
| Excess pulp building up in filter ●Alternate soft and hard fruit and vegetables | |
| Pulp too wet ●Use Lo speed. | ●Check to be sure that the holes in the mesh filter are not blocked. If they are blocked follow #5 in the How to Clean section. |
| Juice leaks between the rim of the Juicer and Pulp Chute/Juicer Cover | ●Use Lo speed. Fruits and vegetables with a high water content should be juiced on Lo speed. |
JUICE RECIPES
Below are a few juice recipes for your convenience. Additional recipes are available on the internet. Recipe books are also available at your local bookstore.
Apple Strawberry
5 apples
1 cup strawberries
Alternate juicing apples and strawberries. Serve immediately.
Apple Veggie Juice
2 apples
3 carrots
1 stalk celery
Alternate juicing apples, carrots and celery. Serve immediately.
Vegetable Juice
4 carrots
2 ozs. (100 g) spinach
1 Small handful of flat leaf parsley
2 stalks celery
Alternate juicing above ingredients. Serve immediately.
Fruit & Vegetable Cocktail
1/2 pineapple, peeled
1 carrot
1 apple
1 stalk celery
Process through juicer and serve immediately.
Peach, Pear and Apple Juice
1 apple
2 peaches, seed removed
1 pear
Process ingredients through juicer and serve immediately.
A short supply cord is provided to reduce the hazards of becoming entangled in or tripping over a long cord. Extension cords may be used if care is exercised in their use. If an extension cord is used, the marked electrical rating of the detachable power-supply cord or extension cord should be at least as great as the electrical rating of the appliance. If the appliance is of the grounded type, the extension cord should be of a grounded 3-wire cord. The extension cord should be arranged so that it will not drape over the counter top or table top, where it can be pulled on by children or tripped over.
LIMITED WARRANTY
Toastess International warrants that this appliance shall be free from defects in material and workmanship for a period of one year from the date of purchase. During this 'in-warranty' period, defective products will be repaired or replaced at the discretion of the retailer and/or Toastess International. A defective product should be returned to the original place of purchase within the retailer's stipulated return/exchange period*. If you are unable to have a defective product replaced under warranty by the retailer, Toastess International will repair or replace the defective product without charge. You may contact us for assistance by mail, e-mail, fax or telephone as listed below.
This warranty covers normal domestic usage and does not cover damage which occurs in shipment or failure which results from alteration, accident, misuse, abuse, glass breakage, neglect, commercial use or improper maintenance.
To ensure prompt 'in-warranty' service be sure you have an original proof of purchase. You may be asked to return the product to us along with a description of the defect and your address, zip/postal code.
For repairs not covered by the warranty, please contact us for assistance.
salton®
SALTON CANADA
Customer Service Department
81A Brunswick
Dollard-des-Ormeaux
Quebec, Canada H9B 2J5
Website: www.salton.com
E-mail: service@salton.com
Fax: 514-685-8300
Tel: 514-685-3660
* Return/exchange policies at each retailer vary and may differ from the Salton Canada 1 year limited warranty period.
- Professional juice extractor
- IMPORTANT SAFEGUARDS
- SAVE THESE INSTRUCTIONS
- HOUSEHOLD USE ONLY
- GROUNDED PLUG
- BEFORE FIRST USE
- DESCRIPTION OF PARTS
- HOW TO ASSEMBLE THE JUICER
- HOW TO PREPARE FRUIT AND VEGETABLES FOR JUICING
- HOW TO JUICE
- IMPORTANT: DO NOT PLACE HANDS OR FOREIGN OBJECTS DOWN THE FEED TUBE. ALWAYS USE THE FOOD PUSHER
- IMPORTANT: When juicing on 'Hi' Speed do not run the Juicer for longer than 5 minutes then allow to rest for 2 minutes before you resume juicing.
- HELPFUL HINTS
- CARE AND CLEANING
- How to Disassemble the Juicer
- How to Clean
- TROUBLESHOOTING
- JUICE RECIPES
- Apple Strawberry
- Apple Veggie Juice
- Vegetable Juice
- Fruit & Vegetable Cocktail
- Peach, Pear and Apple Juice
- LIMITED WARRANTY
- salton®
- SALTON CANADA
Brand : Salton
Model : JE-1013
Category : Coffee maker