
HDFY80H - Tumble dryer HISENSE - Free user manual and instructions
Find the device manual for free HDFY80H HISENSE in PDF.
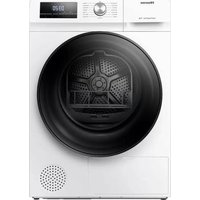


| Product Type | Tumble Dryer |
| Brand | Hisense |
| Model | HDFY80H |
| Capacity | 8 kg |
| Type | Heat Pump Condenser |
| Energy Class | A++ |
| Annual Energy Consumption | 235 kWh |
| Dimensions (H x W x D) | 850 x 600 x 600 mm |
| Weight | 47 kg |
| Power Supply | 220-240 V, 50 Hz |
| Total Power | 2000 W |
| Drum Volume | 112 L |
| Noise Level (Drying) | 68 dB(A) |
| Drying Programs | Cotton, Synthetics, Delicates, Mix, Quick 40', Wool, Bedding, Shirts, Jeans, Refresh |
| Additional Functions | Anti-Crease, Child Lock, Delay Start, End Time |
| Condenser Cleaning Indicator | Yes |
| Lint Filter Cleaning Reminder | Yes |
| Drum Material | Stainless Steel |
| Door Hinge Position | Left (reversible) |
| Included Accessories | Condenser cleaning brush, Drain hose |
Frequently Asked Questions - HDFY80H HISENSE
User questions about HDFY80H HISENSE
0 question about this device. Answer the ones you know or ask your own.
Ask a new question about this device
Download the instructions for your Tumble dryer in PDF format for free! Find your manual HDFY80H - HISENSE and take your electronic device back in hand. On this page are published all the documents necessary for the use of your device. HDFY80H by HISENSE.
USER MANUAL HDFY80H HISENSE
Please read these instructions carefully.
Please keep these instructions properly for future reference.
Thank you very much for choosing our products.
■ Please install and use this product correctly. ■ The pictures in the manual are schematic diagrams, and the appearance and printing shall be subject to the actual products. ■ The product subject to technical changes without prior notice for overall performance improvement. This dryer is intended solely for household use. Please do not use it to dry clothes that are not suitable for machine wash.
The symbols used in this manual are as follows:

Warning
It is used for matters related to safety and may cause personal injury.

Warning
Risk of fire /Flammable materials

Read the instructions.
Contents
- Safety information Safety information.... 02
- Product and Accessories Name of parts....11 Attached accessories....11
- Installation Method Precautions before installation.... 12 Adjustable foot.... 12 Installation of the drain pipe.... 13 Drying rack.... 13 Power supply connection.... 14 Stacked installation.... 14
- Drying Instructions Tips for clothes drying.... 16 Preparation before clothes drying.... 16 Sorting the clothes.... 17
- Method of Use Control panel and functions....18 Program guide....20
- Maintenance Exterior of the dryer....22 Door seal....22 Cleaning of lint and debris filter screen....22 Cleaning of water box....23 Cleaning of heat exchanger....23
- Troubleshooting Troubleshooting.... 25 Information codes.... 27
- Disposal Disposal....28
- Machine parameters Machine parameters....29
1. Safety information
Carefully read the instructions for use before using the dryer. Do not use the dryer without reading and understanding these instructions first. These instructions for use of a dryer are supplied with different types or models of dryers. Therefore, they may include descriptions of settings or equipment that are not available in your dryer. Failure to observe the instructions for use or inappropriate use of the dryer may result in damage to the laundry or the appliance, or injury to the user. Keep the instruction manual handy, near the dryer. Your dryer is intended solely for household use. If the dryer is used for professional, for-profit purpose or purpose exceeding normal use in a household, or if the dryer is used by a person who is not a consumer, the warranty period shall be equal to the shortest warranty period required by relevant legislation. The dryer is made in compliance with all relevant safety standards.

WARNING:
To reduce the risk of explosion, fire, death, electric shock, injury or scalding to persons when using this product, follow basic precautions, including the following.
Installation
- Follow the instructions for correct installation of the Hisense dryer and connection to the power mains.
- For appliances with ventilation openings in the base, a carpet must not obstruct the openings.
- The appliance must not be installed behind a lockable door, a sliding door or a door with a hinge on the opposite side to that of the tumble dryer, in such a way that a full opening of the tumble dryer door is restricted.
- All and any repairs or maintenance tasks on the dryer should only be done by trained experts. Unprofessional repair may result in an accident or major malfunction.
- To avoid danger, a damaged power cord may only be replaced by the manufacturer, a service technician, or an authorized person.
- After installation, the dryer should stand still for two hours before it is connected to the power mains.
- At least two persons are required to install the tumble dryer on top of a washing machine. Install the dryer in a room with adequate ventilation and a temperature between 10°C and 25°C. Always use the ducts or hoses supplied with the dryer.
- Place the dryer on a level and stable solid (concrete) base.
- Do not place the dryer behind lockable or sliding door, or door with a hinge on the opposite side of the dryer door hinge. Install the dryer in such way that the door can always be freely opened.
- Never block the air exhaust (evacuation opening).
- Do not place the dryer on a carpet with long fibres as this may impede air circulation.
- Air in the dryer environment should not contain dust particles. The air where the dryer is installed should be thoroughly ventilated to prevent reverse flow of gases released from the gas appliances with open fire.
- The appliance may not be in contact with a wall or adjacent furniture.
- This appliance must not be stored or used in any outdoor location.
Electrical safety
- If the supply cord is damaged, it must be replaced by the manufacturer, its service agent or similarly qualified persons in order to avoid a hazard.
- The dryer may not be connected to the power mains using an extension cord.
- Do not connect the tumble dryer to an electrical outlet intended for an electric shaver or a hair dryer.
- The dryer is protected with an automatic switch-off system in case of overheating. This system will switch off the dryer if the temperature is too high.
- If the net filter is clogged, the overheating automatic switch-off system may be activated. Clean the filter, wait for the dryer to cool down, and try running it again. If the dryer still fails to start, call a service technician.
- Do not use multiple outlet sockets, an extension power cable or double adapter with this appliance.
- This appliance must be earthed via the power cord. In the event of malfunction or breakdown, grounding will reduce the risk of electric shock by providing a path of least resistance for electric current.
- Improper connection of the equipment-grounding conductor can result in risk of electric shock. Check with a qualified electrician or service personnel if you are in doubt as to whether the appliance is properly grounded.
- This appliance is equipped with a power cord having an equipment-grounding earthing pin and a grounding power plug. The power plug must be plugged into an appropriate outlet socket that is installed and grounded in accordance with all local codes and ordinances.
- Never unplug the appliance by pulling on the power cable. Always grip the power plug firmly and pull straight out from the outlet socket.
- Do not spray water inside or outside the appliance to clean it.

WARNING:
The appliance must not be supplied through an external switching device, such as a timer, or connected to a circuit that is regularly switched on and off by a utility.
Children safety
- This appliance is not intended for use by persons (including children) with reduced physical, sensory or mental capabilities, or lack of experience and knowledge, unless they have been given supervision or instruction concerning use of the appliance by a person responsible for their safety.
- Children should be supervised to ensure that they do not play with the appliance.
- This appliance can be used by children aged from 8 years and above and persons with reduced physical, sensory or mental capabilities or lack of experience and knowledge if they have been given supervision or instruction concerning use of the appliance in a safe way and understand the hazards involved. Children shall not play with the appliance. Cleaning and user maintenance shall not be made by children without supervision.
- Children of less than 3 years should be kept away unless continuously supervised.
- Prevent your children and pets from entering the dryer drum.
- Before closing the dryer door and running the programme, make sure there is nothing except laundry in the drum (e.g. if a child climbed into the dryer drum and closed the door from the inside).
- Do not leave the appliance door open. Children may hang on the door or crawl inside the appliance, causing damage or injury.
Use
- The tumble dryer is not to be used if industrial chemicals have been used for cleaning.
- The lint trap has to be cleaned frequently.
- Do not dry unwashed items in the tumble dryer.
- Items that have been soiled with substances such as cooking oil, acetone, alcohol, petrol, kerosene, spot removers, turpentine, waxes and wax removers should be washed in hot water with an extra amount of detergent before being dried in the tumble dryer.
- Items such as foam rubber (latex foam), shower caps, waterproof textiles, rubber backed articles and clothes or pillows fitted with foam rubber pads should not be dried in the tumble dryer.
- Fabric softeners, or similar products, should be used as specified by the fabric softener instructions.
- Remove all objects from pockets such as lighters and matches.
- Oil-affected items can ignite spontaneously, especially when exposed to heat sources such as in a tumble dryer. The items become warm, causing an oxidation reaction in the oil. Oxidation creates heat. If the heat cannot escape, the items can become hot enough to catch fire. Piling, stacking or storing oil-affected items can prevent heat from escaping and so create a fire hazard.
- If it is unavoidable that fabrics that contain vegetable or cooking oil or have been contaminated by hair care products be placed in a tumble dryer they should first be washed in hot water with extra detergent - this will reduce, but not eliminate, the hazard.
- In case of a defect, only use approved spare parts by authorized manufacturers.
- If the condensate tube is blocked or clogged, then tumble dryer operation is stopped.
- Before moving the dryer or before storing it in a non-heated room during the winter, the condensate tank has to be emptied.
- Clean the dryer filters after each drying cycle. If you have removed the filters, replace them before the next drying cycle.
- Do not use any solvents or cleaning agents that could damage the dryer (please observe the recommendations and warnings provided by the manufacturers of the cleaning agents).
- Never add chemicals or fragrances into the condensate tank. • After the drying process, unplug the dryer power cord from the power outlet.
- The dryer uses a heat pump system to heat the air.
- The system consists of a compressor and a heat exchanger. When the dryer is started, compressor operation (the sound of flowing liquid) or flow of refrigerant may be louder as long as the compressor operates. This is not a sign of malfunction and it will not affect useful life of the dryer. In time and with use of the dryer this noise will become quieter.
- Do not drink or prepare food with the condensed water/distilled water. It can cause health problems to people and pets.
- Remove clothes from the product immediately when drying is complete or the power is turned off during the drying process. Leaving clothes that has been dried in the appliance unattended could result in fire. Clothes not removed from the appliance after drying could result in fire. Remove clothes immediately after drying, and then hang or lay the clothes flat to cool.
- Never attempt to operate the appliance if it is damaged, malfunctioning, partially disassembled, or has missing or broken parts, including a damaged cord or plug.
- Do not attempt to separate any panels or disassemble the appliance. Do not apply any sharp objects to the control panel in order to operate the appliance.
- Never reach into the appliance while it is operating. Wait until the drum has completely stopped.
- In case of flood, disconnect the power plug and contact the After-sales Service Center.
- Do not push down on the door, when the appliance door is open.
- Do not touch the power plug or the appliance controls with wet hands.
- Do not bend the power cable excessively or place a heavy object on it.
- Make sure the fibres do not accumulate around the dryer.
- Keep the area underneath and around the appliance free of combustible materials such as fibres, paper, rags, chemicals, etc.

WARNING:
Never stop a tumble dryer before the end of the drying cycle unless all items are quickly removed and spread out so that the heat is dissipated.
Maximum Capacity
The maximum capacity of dry textile material to be used in the appliance is:
| HDFY80H HDFY90H | |
| 8kg 9kg | |
Danger of hot surface
- At higher drying temperatures, the door glass will heat up. Be careful to avoid burns. Make sure children do not play near the door glass.
- The back of the dryer may get very hot during operation. Wait for the dryer to cool down completely before touching its back side.
- If you open the dryer door during the drying process, the clothes may be very hot and there is a risk of burning.
Service
- In case of incorrect dryer connection, incorrect use, or servicing by an unauthorized person, the user shall bear the cost of any damage as such damage shall not be covered by warranty.
- The warranty does not cover consumables, minor deviations in colour, increased noise that results from appliance age and which does not affect the functionality of the dryer, and aesthetic defects on components, which do not affect the dryer's functionality and safety.
2. Product and Accessories
Name of parts
Attached accessories Instructions × 1
Drying rack × 1
Drain pipe × 1
Footing cap × 4
Stacking kit × 2
Screw × 6
NOTE
- The included accessories vary depending on the model you purchased.
3. Installation Method
The clothes dryer must be properly installed by qualified professionals to ensure use safety. The user shall be responsible for the service caused by poor and incorrect installation.
1). Precautions before installation
Installation environment
◇ If it is installed in an embedded space, please reserve the minimum installation clearance for the dryer;
25 mm at the top, 20 mm at the left and right sides and 50 mm at the back.
Installation requirements
Please install the dryer in a dry and well ventilated place with flat and solid ground. Do not place it on carpet, cardboard, or place with direct sunlight. The working environment temperature of the dryer is 5°C-35°C. Do not place it below 0°C or at a high temperature. The appliance performs best at a room temperature of 23 °C. During handling, the inclination angle of the dryer shall not exceed 45°; after handling, it needs to stand for more than 2 hours. The dryer shall not be placed next to the oven, stove and other high-temperature equipment, nor next to the refrigeration equipment. The back of the dryer must be well ventilated. It is recommended that the clothes dryer and washing machine be placed close to each other to facilitate clothes dehydration after washing dehydration. ◇ Install the appliance on a flat hard floor. Allowable slope under the appliance is 1 degree.
2). Adjustable foot
Press the diagonal on the top of the dryer to confirm whether the dryer is in a stable state. If the dryer shakes, rotate the four adjustable feet at the bottom to adjust them to the appropriate height to ensure that the dryer is in a stable state. Never try to correct any unevenness in the floor with pieces of wood, cardboard or similar materials under the appliance.


3). Installation of the drain pipe
Usually, the condensate water after drying is stored in the water box, and the water box needs to be emptied after each program. If the installation position of the dryer is close to the sewer, or the clothes dryer is stacked on the washing machine, the attached drain pipe can be installed to discharge the water directly to the sewer.
Remove the connecting pipe at the rear of the water box, and install the drain pipe among the attached accessories to this position (as shown in the figure). Please confirm that the installation connector is firmly connected.


Please insert the other end of the drain pipe into the floor drain without twisting or flattening. If the pipe is too long, please cut off the excess part. The drain pipe shall not be higher than the dryer, otherwise the water cannot be drained. Do not place the drain in accumulated water, which may cause backsuction. After the drain pipe is installed in place, the condensate water can be discharged directly without emptying the water box after each use.
4). Drying rack
When drying shoes and plush toys, etc., or selecting rack dry, the drying rack can be used. When drying clothes, please take out the drying rack. Installation of drying rack: Please tilt the drying rack to a certain angle with the lower end clamped in the two holes of the filter screen and the upper end hooked in the slot of the front support.

5). Power supply connection
- Ensure that the power supply is consistent with the power requirements of the dryer.
- The dryer must be grounded reliably. Do not use a power strip or multi-purpose socket for secondary connection.
NOTE
• Always unplug the appliance after use.
6). Stacked installation
The dryer can be stacked with a Hisense washing machine with 486mm side plate of the box. When stacking, it shall be fixed with accessories for stacking. Please contact qualified service personnel for installation. Without stacking accessories, the dryer and washing machine must not be stacked to avoid safety accidents. For safety reasons, two or more people need to work together to install. The weight of the appliance and the height of the installation makes the installation procedure too risky for one person. The surface on which the appliance is placed should be clean and level.
NOTE
- Some models are not sold with all of the available accessories, you may need to purchase the stacking kit first if it was not provided with your model. Please contact Hisense After-sales Department for purchase.
Stacking kit
(1) Unscrew the four adjustable feet of the clothes dryer, put them into the foot caps respectively, and then install them back on the clothes dryer. (2) Lift the dryer onto the washing machine and place it in alignment with the washing machine. Do not place the washing machine on the dryer or install it in a staggered manner.


dryer washing machine
(3) Remove one screw connecting the lower rear cover plate and the side plate of the dryer on each side. (4) Align the stacking kit holes and the rear cover holes in a line.


(5) Screw on the removed screw and the same screw in the accessory box to fix the front of the stacking kit on one side. (6) Use the 2 special screws in the accessory box to assemble the washing machine rear cover and stacking kit.

(7) Fix the stacking kit on the other side in the same way.
Stacking bracket (optional accessories)
The clothes dryer and washing machine can also be fixed with a stacking bracket. For the installation method, please refer to the installation instructions attached to the accessories. Please purchase the optional accessories from the After-sales Department.
4. Drying Instructions
1). Tips for clothes drying
Clothes must be dehydrated before being put into the dryer. In order to save energy, please increase the dehydration speed of washing machine to above 1000 rpm. Please shake the dehydrated clothes up before putting them into the dryer. In order to achieve ideal drying effect, please classify the clothes by types and select the appropriate drying program. Each program has its maximum load requirements, and do not overload. After drying clothes, clean the lint and debris filter screen in time. When drying a small amount of clothes, it is recommended to use a timer program. Do not dry the starched clothes, because the hardening of the starch layer will reduce the drying effect. Clothes that are easy to fade should be dried separately. A mixed fabric load can cause the drying time to be extended and the time remaining in the display to pause during active drying. The remaining time will then continue when it is the actual time that remains.
2). Preparation before clothes drying
Before drying, please check the clothing tab to confirm whether it is suitable for drying. Empty your pockets and take out coins, pins, keys and other items to avoid clothing damage. Zip up the zipper, button up the buttons and tighten the belt. In order to avoid the sound of zippers and buttons during drying, please turn the clothes over before putting them into the dryer. Check whether the water box is drained off and whether the lint and debris filter has been cleaned and installed in place.
NOTE
- The drying time of clothes will be automatically adjusted according to the following factors: type of clothes, load of clothes, water content after dehydration, and ambient temperature.
- Please be sure to check the clothing tag to ensure that the clothes can be dried to avoid damage to the clothes.
- Drying clothes with different textures and thicknesses at the same time will have different drying effects.
3). Sorting the Clothes
Clothes have their own fabric care labels, so drying according to the fabric care label is recommended. Sort the clothes into size and type of fabric and then prepare the clothes according to the symbols on the fabric care labels.
| Symbol | Description |
| Dry | |
| Tumble Dry | |
| Permanent Press / Crease Resistant | |
| Gentle / Delicate | |
| Do not Tumble Dry | |
| Do not Dry | |
| High Heating | |
| Medium Heating | |
| Low Heating | |
| No Heating / Air | |
| No Heating / Air | |
| Line Dry / Hang to dry | |
| Drip Dry | |
| Dry Flat | |
| In the Shade |
5. Method of Use
1). Control panel and functions

(1). Knob
It is used to turn the power on/off. In case of shut down during operation, rotate the knob to "OFF". - The dry will automatically shut down after the program ends. If there is no operation within 2 minutes in the standby mode, the dryer will shut down automatically. It is used for program selection. Please refer to [Program guide] for program introduction.
(2). Start Pause
- Press the "Start Pause" key to pause or start the program.
When the program is suspended, the set functions cannot be changed. In case of changing the settings, shut down the dryer and restart for re-selection.
(3. More Time)
Before the program starts, this function can add drying time of the program. Press continuously to cycle through the set tap positions. Different programs have different tap position settings.
(4. Less Time)
Before the program starts, this function can reduce the drying time of the program. Press continuously to cycle through the set tap positions. Different programs have different tap position settings.
(5). Anti-crease
- If the clothes cannot be taken out in time after drying, select the anti-crease program. At this time, the inner drum rotates intermittently to prevent clothes from creasing.
- Touch any key or open the door to exit the anti-crease mode. If there is no operation, the longest execution will end automatically after 12 hours by default.
(6). Dry level
- For selection of drying effect. The default option is [ ], and press the dry level key to select.
【☀️】 means the clothes can be stored after drying. 【2】 means the clothes have a small amount of water and can be ironed. 【】 means the clothes can be worn immediately after drying.
(7). Delay End
This function can delay the end time of the program. - Make an appointment after selecting programs and functions. Press the appointment button to add or reduce the appointment time. The time changes by 1 hour for each press, and the maximum optional time is 24 hours. - The appointment time is the end time of the program, including the running time of the whole program, so the appointment time must be longer than the running time of the program. - During the appointment process, the appointment icon is lit up. After the appointment process ends, the appointment text goes out. - Before the program starts, the selected appointment can be canceled by selecting other programs or function keys. - After the program is started, in case of canceling the appointment, shut down and restart the dryer.
(8). Child Lock
In order to avoid children's misoperation and protect children's safety, this dryer is equipped with child lock.
After the program is started, press and hold "More Time+Less Time" simultaneously, the child lock will be enabled and the child lock icon will be lit up. The child lock can be released by the same operation. - After the child lock function is set, other function keys are locked. In case of program ends or restart after power-off, the child lock function set remains. - After the child lock function is enabled: Press the "Start Pause" key to cancel the prompt in case of prompt for lint and debris cleaning. During running in anti-crease mode, the child lock needs to be released manually, and the anti-crease function ends automatically.
(9). Mute
It is used to turn on/off the beep, except the alarm tone. - After standby or startup, press and hold "Less Time+Anti Crease" key to turn on/off the mute function. The mute function will not be released automatically in case of end of program or power-off.
(10). Display
It is used to display the remaining time, appointment time, fault code, and other program information. The time displayed by the program may differ from the actual running time. Due to the influence of clothing type, load size, residual moisture after spinning, and ambient temperature, the actual drying time will be automatically adjusted. When the program ends, "End" will be displayed.
Icon description
| Appointment icon. When the icon is lit up, it indicates that the appointment function is enabled. | |
| Anti crease icon. When the icon is lit up, it indicates that the anti crease function is enabled. | |
| Lint and debris cleaning icon. The flashing icon indicates that the lint and debris needs to be cleaned. | |
| Water box cleaning icon. The flashing icon indicates that the water box needs to be emptied. |
(11) Other functions
Drum light
This dryer is equipped with a drum light. In standby, operation (when the knob is turned, any key is pressed, or the door is opened), pause, and program end states, the drum light will automatically illuminate for 1 minute and then turn off automatically, allowing the drum interior to be seen.
Stop when clothes are dry
This dryer stops when the clothes are dry. When the load is small, it is possible that the program is not completed but the clothes are already dry; in this case, the program will end automatically to save energy.
2) Program guide
NOTE
Users can choose the appropriate program according to their habits. If the clothes are not completely dried, additional drying using the timer program can be selected. When drying large fabrics such as bed sheets and quilt covers, due to the large load, they may become wrapped into clusters, affecting the drying effect. Please take them out and
shake them up before putting them back into the dryer to continue drying.
When drying down clothing, please turn the inner side of the clothes out before drying.
Sensor dry programs
| Programs | Type of clothes | Maximum capacity (kg) | |
| HDFY80H | HDFY90H | ||
| cotton | For drying cotton and linen fabrics.· Energy efficiency test program: cotton, Dry level (press once) | 8 | 9 |
| synthetics | For drying chemical fibers clothes. | 4 | 4.5 |
| Delicates | For drying underwear. | 1 | |
| Towels | For drying towels. | 4 | |
| Bedding | For drying bedclothes. | 2.5 | |
| Downwear | For drying machine washable down clothes. | 2 | |
| Sportswear | For drying sportswear. | 2 | |
| Auto Dry | For drying mixed clothes of different materials. | 4 | 4.5 |
| Baby Care | For drying children's clothes. | 2 | |
| Allergy Care | For removing allergens such as mites. | 2 | |
Manual and special dry programs
| Programs | Type of clothes | Maximum capacity (kg) | |
| HDFY80H | HDFY90H | ||
| Refresh | For refreshing and deodorizing a small amount of dry clothes. | / | |
| Wool | For drying wool clothes. | 1 | |
| Quick 30' | For quick drying of light and thin clothes. | 0.5 | |
| Rack Dry | For drying with a drying rack. | / | |
| Time Dry | For drying clothes with timing. | / | |
6. Maintenance
Regular maintenance can prolong the service life of the dryer. Be sure to cut off the power supply before maintenance.
1). Exterior of the dryer
◇ Clean with a soft wet cloth and wipe the body surface with a non-corrosive household cleaner.
◇ Then, dry it with a soft dry cloth.
2). Door seal
◇ Check the door seal regularly and clean it with wet cloth if necessary.
◇ After use, open the door slightly for ventilation and drying.
3). Clean the lint and debris filter screen
Excessive fluff accumulated on the filter screen will affect the drying effect. Please clean the filter screen after each use.
◇ After cleaning, be sure to reinstall the filter screen in place before use.
1. Open the door and take out the filter screen from the front support.
2. Open the filter screen and clean the fluff of the two-layer filter screen with a wet towel or flowing water.
3. After drying the filter screen, reassemble it.
4. Install the filter screen to the front support.
Notes:
There is a temperature sensor at the bottom of the front support. After the lint and debris filter screen is taken out, please be careful not to touch it to avoid scratching. When reinstalling the filter screen, install it in the correct direction and at the correct position. Do not use this dryer when the filter screen is not installed correctly.
4). Cleaning of water box
If the drain pipe is not installed, the condensate water after drying is stored in the water box. Please drain it off in time after the program ends. During running, if the water box is full, the display flashes as a prompt, please empty the water box immediately. ◇ The condensate water is not edible.

- Take out the water box horizontally to avoid spillover of condensate water.

- Dump the condensate water and reinstall the water box in place.
5). Cleaning of heat exchanger
Please clean the heat exchanger regularly, otherwise the performance of the dryer will be affected.

- Press the buckle of the heat exchanger door cover at the lower left to open the door cover.

- Turn the locking knob of the base filter cover to the unlock position.

- Remove the base filter cover and take out the base filter.
After several times of use, clean the dust on the base filter with a wet cloth or flowing water. After using for a period of time, if there is dust on the heat exchanger, please remove the dust with tools. Do not touch the heat exchanger directly with your hands to avoid injury.

- Install the cleaned filter and filter cover back to their original positions, lock the knob, and close the heat exchanger door cover.
7. Troubleshooting
When the machine fails to operate normally, it may not be a fault. Please refer to the following methods for troubleshooting. If the fault still exists after self-handling according to the recommended method, please unplug the power supply and contact us for after-sales service.
All consequences caused by maintenance by the user himself or by hiring non-professional after-sales personnel will be borne by the user.
| Fault phenomenon | Recommended handling method |
| The dryer cannot be started | ◇ Check the power connection;◇ Confirm the "Start Pause" key is pressed down;◇ Confirm the door is closed properly;◇ House fuse is blown, circuit breaker has tripped, or power outage has occurred. |
| The dryer cannot be started and displays "End" | ◇ Check whether the program setting is correct;◇ Confirm there are clothes in the drum; |
| Excessive drying time | ◇ Check whether the program setting is correct;◇ Confirm whether there are too many clothes wrapping into clusters;◇ Check whether the filter screen is cleaned;◇ There will be air supply for cooling after drying in some programs; |
| Poor drying effect | ◇ Confirm that the clothes have been dehydrated;◇ Check whether the program setting is correct;◇ Confirm that there are too many clothes;◇ Load is not properly sorted. Whether clothes that are not easy to dry are mixed with clothes that are easy to dry;◇ Large load of heavy fabrics.◇ Check whether the filter screen is cleaned; |
| The remaining time of the display stops or jumps | ◇ The remaining time varies with clothing type, load, dehydration and ambient temperature, which is a normal phenomenon; |
| Clothes are wrinkled. | ◇ Clothes have dried too long. Try a shorter drying time.◇ Clothes have been left in the appliance for too long after cycle ends. |
| The dryer is too loud. | ◇ Look for coins, loose buttons, nails, and other objects and remove them immediately.◇ Check the lint filter. Remove any items stuck inside the lint filter.◇ Make sure the dryer is level and standing firmly on the floor.◇ The dryer may hum due to air moving through the drum and fan. This is normal. |
| Clothes are shrinking. | ◇ Garment care instructions are not being followed. Use a low or no heat setting. |
| Lint is left on clothes. | ◇ Lint filler has not been cleaned properly.◇ Clothes have not been sorted properly.◇ Some fabrics cause more lint and should be dried separately from fabrics that lint attaches easily.◇ Tissue, paper, etc., has been left in pockets. |
| The appliance has an odour. | ◇ The smell is caused by rubber material that is attached to the appliance inside. This kind of smell is a rubber's own smell and disappears automatically after using the appliance several times.◇ When washing the clothes, use the detergent in accordance with the manufacturers recommendations. If you use the detergent excessively not according to the recommendations, undissolved detergent may accumulate on the clothes and cause an odour.◇ You can smell odours from the clothes if the clothes were left in the appliance after drying or in the washing machine after washing. Unload the clothes promptly at the end of the drying or washing cycle.◇ Ensure you can smell same odour in the washing machine. If so, clean the tub of the washing machine referring to the washing machine user manual.◇ Always take care of both lint filters clean. If any residues were left in the lint filter after drying, it may cause odours. And also dry the lint filter completely after cleaning. |
Information codes
| Code | Interpretation | Recommended handling method |
| F40 | Compressor protection | ◇ Rotate the knob to "Off" to shut down the dryer, and restart it after the compressor cools down.◇ If the abnormality is not removed, please contact after-sales service. |
| F41 | Abnormal drain pump or float switch | ◇ Check whether the drain pipe is frozen, knotted or blocked.◇ Check whether the drain pump is blocked.◇ If the abnormality is not removed, please contact after-sales service. |
| F50/F51 | Abnormal sensor | ◇ Please contact after-sales service. |
| F21 | Abnormal display panel and the power board | ◇ Rotate the knob to "Off" to shut down the dryer, and restart it after 10 seconds.◇ If the abnormality is not removed, please contact after-sales service. |
8. Disposal

Packaging is made of environmentally friendly materials that can be recycled, disposed of, or destroyed without any hazard to the environment. To this end, packaging materials are labelled appropriately.
The symbol on the product or its packaging indicates that the product should not be treated as normal household waste. Take the product to an authorized collection centre for waste electric and electronic equipment processing.
When disposing of the dryer at the end of its useful life, remove all power cords, and destroy the door latch and switch to prevent the door from locking or latching (child safety).
Correct disposal of the product will help prevent any negative effects on the environment and health of people, which could occur in case of incorrect product removal. For detailed information on removal and processing of the product, please contact the relevant municipal body in charge of waste management, your waste disposal service, or the store where you bought the product.
9. Machine parameters
| Product Model Parameter | HDFY80H HDFY90H | |
| Appearance color | White | White |
| Power | 220-240V~ 50Hz | 220-240V~ 50Hz |
| Rated capacity | 8.0kg | 9.0kg |
| Rated power | 800W | 700W |
| Overall dimension (W × D × H) | 595x685x845(mm) | 595x685x845(mm) |
| Net weight | 54kg | 54kg |
| Refrigerant | R134a | R134a |
| Charge | 300g | 355g |
- CONTENTS
- SAFETY INFORMATION
- WARNING
- INSTALLATION
- ELECTRICAL SAFETY
- CHILDREN SAFETY
- USE
- MAXIMUM CAPACITY
- DANGER OF HOT SURFACE
- SERVICE
- PRODUCT AND ACCESSORIES
- NOTE
- INSTALLATION METHOD
- ). PRECAUTIONS BEFORE INSTALLATION
- INSTALLATION ENVIRONMENT
- INSTALLATION REQUIREMENTS
- ). ADJUSTABLE FOOT
- ). INSTALLATION OF THE DRAIN PIPE
- ). DRYING RACK
- ). POWER SUPPLY CONNECTION
- ). STACKED INSTALLATION
- STACKING KIT
- STACKING BRACKET (OPTIONAL ACCESSORIES)
- DRYING INSTRUCTIONS
- ). TIPS FOR CLOTHES DRYING
- ). PREPARATION BEFORE CLOTHES DRYING
- ). SORTING THE CLOTHES
- METHOD OF USE
- ). CONTROL PANEL AND FUNCTIONS
- (1). KNOB
- (2). START PAUSE
- (3. MORE TIME)
- (4. LESS TIME)
- (5). ANTI-CREASE
- (6). DRY LEVEL
- (7). DELAY END
- (8). CHILD LOCK
- (9). MUTE
- (10). DISPLAY
- OTHER FUNCTIONS
- DRUM LIGHT
- STOP WHEN CLOTHES ARE DRY
- PROGRAM GUIDE
- MAINTENANCE
- ). EXTERIOR OF THE DRYER
- ). DOOR SEAL
- ). CLEAN THE LINT AND DEBRIS FILTER SCREEN
- NOTES
- ). CLEANING OF WATER BOX
- ). CLEANING OF HEAT EXCHANGER
- TROUBLESHOOTING
- DISPOSAL
- MACHINE PARAMETERS
Brand : HISENSE
Model : HDFY80H
Category : Tumble dryer