
Realme 2 Pro - Phone OPPO - Free user manual and instructions
Find the device manual for free Realme 2 Pro OPPO in PDF.


| Product Type | Smartphone |
| Brand | OPPO (Realme) |
| Model | Realme 2 Pro |
| Dimensions | 156.7 x 74 x 8.5 mm |
| Weight | 174 g |
| Display Size | 6.3 inches |
| Display Type | IPS LCD, 1080 x 2340 pixels |
| Processor | Qualcomm Snapdragon 660 |
| RAM | 4/6/8 GB |
| Internal Storage | 64/128 GB |
| Rear Camera | 16 MP (f/1.7) + 2 MP depth sensor |
| Front Camera | 16 MP (f/2.0) |
| Battery Capacity | 3500 mAh, non-removable |
| Operating System | Android 8.1 (Oreo), upgradable to ColorOS 6 |
| Connectivity | Wi-Fi 802.11 a/b/g/n/ac, Bluetooth 5.0, GPS, MicroUSB 2.0, 3.5mm jack |
| Sensors | Fingerprint (rear-mounted), accelerometer, proximity, compass |
| Charging Port | MicroUSB |
| Headphone Jack | Yes |
| Colours | Black, Blue, Red, White |
| Release Date | October 2018 |
| Care and Cleaning | Wipe with soft dry cloth; avoid liquids and abrasives |
| Safety | Use original charger; avoid extreme temperatures; do not disassemble |
| Spare Parts and Repairability | Battery and screen replaceable by authorized service centres |
| General Information | Dual SIM (Nano-SIM), dual stand-by; hybrid slot |
Frequently Asked Questions - Realme 2 Pro OPPO
User questions about Realme 2 Pro OPPO
0 question about this device. Answer the ones you know or ask your own.
Ask a new question about this device
Download the instructions for your Phone in PDF format for free! Find your manual Realme 2 Pro - OPPO and take your electronic device back in hand. On this page are published all the documents necessary for the use of your device. Realme 2 Pro by OPPO.
USER MANUAL Realme 2 Pro OPPO
OPPO Smartphone ColorOS 5.2 User Guide
Content
- Welcome to ColorOS 5.2....6
- Safety Information....6
- Get started 9
3.1. Quick look....9
3.1.1.ColorOS 5.2 Features....9
3.1.2. Sleep/Wake buon 14
3.1.3. Menu, Home and Return buttons....16
3.1.4. Volume buons....19
3.1.5. Micro-USB port....21
3.1.6. Headset jack....21
3.1.7. SIM and SD cards....21
3.1.8. Accessories came with OPPO phone....23
3.1.9. Charging the battery 25
3.1.10. Gesture & Moon 25
3.1.11. Key combinaons....29
3.1.12. Status Icons .... 31
3.2. Conguraon Setngs....33
3.2.1. Fingerprint, Face and Passcode 33
3.2.4. Date and Time....51
3.2.5. Language and Region 52
3.2.6. Connect to the Internet....54
- What's new in ColorOS 5.2....54
4.1. Smart Sidebar....54
4.2 Smart Scan....59
4.3 New features of Smart Assistant....66
4.4 Google Lens....73
4.6 ORoaming....79
4.7 Auto-sync photos on OPPO Cloud....84
4.8 New Features of video 93
4.9 Smart Driving....96
4.10 Game Space....102
4.11 Customizing mer for Clock app....109
4.12 Scanning names to save on Contacts 113
4.13 Save more baery with Smart Power Saver....120
4.14 Say hello to Talia, your TouchPal assistant 125
5 Basics....128
5.1 Use apps....128
5.2 Share from apps....131
5.3 One-click cleanup....132
5.4 Lock the running background apps....133
5.5 View, zoom in and out....134
5.6 Smart & Convenient Operaon....135
5.6.1. Navigation Keys....135
5.6.2. Assisve Ball....141
5.7. Change the screen orientaon....142
5.8. Split-screen....144
5.9. Take and edit a screenshot....147
5.10. Control Center, Nocaon, and Status Bar 150
5.11. Search....154
5.12. Test 154
5.12.1. Add or change keyboard languages ....154
5.12.2. Type, edit, and delete text ..... 156
5.12.3. Predicon....159
5.12.4. Voice typing....161
5.12.5. TouchPal for OPPO ....162
5.13. Sound, Vibraon, and System Feedback....164
5.14. Charge and monitor the battery 166
5.15. Locaon Service 168
5.16. Use the phone internaonally ....170
5.17. Power Saver....170
- Personalize your OPPO phone....176
6.1. ColorOS 5.2 device name .....176
6.2. Personalize the Home screen....177
6.2.1. Organize the Home screen....177
6.2.2. Home screen widgets & Transion Eects....180
6.3. Change the wallpaper 182
6.4. Lock screen magazine....184
6.5 Adjust the screen brightness and color temperature 186
6.6. Change auto-lock time .....187
6.7. Change the font size....188
6.8. Keyboard and input method ....188
6.8.2. Customize the look of the keyboard 188
6.8.3. Keyboard Layout....189
6.8.4. Trends....192
6.8.5. Keyboard general seings....192
6.9. Set up Startup Manager....194
6.10. Clone Apps ....195
6.11. Manage Default App ....196
6.12. Gesture & Moon 196
6.13. Preset device on/o me or Automac on/off....200
6.14. App display in Full-screen....201
- Apps 202
7.1. Phone 202
7.1.1 Make and Answer Phone Calls....202
7.1.2. Conference calls ...... 208
7.1.3. Block calls....209
7.1.4. Emergency calls....210
7.1.5. Carrier's Call Settings....211
7.6. Message 212
7.6.2. Send and receive messages....212
7.6.3. Customize message sengs....215
7.7. Contacts....217
7.7.2. Add a contact 217
7.7.3. Edit and delete a contact....224
7.7.4. Import and export contacts....226
7.7.5. SIM contacts....228
7.7.6. Manage contacts....230
7.7.7. Back up your contacts 232
7.7.8. VIP Contacts 233
7.8. Phone Manager....234
7.8.2. Scan and opmize the phone....234
7.8.3. Clean Storage 235
7.8.4. Privacy Permissions....237
7.8.5. Virus Scan....239
7.8.6. Payment protecon....240
7.8.7. Frequently Used Funcons....241
7.8.8. Common Problems Detecon 243
7.8.9. WeChat Cleaner....245
7.8.10. Startup Manager 247
7.9. Weather....249
7.10. Camera 251
7.10.2. Take photos 251
7.10.3. Take a sele....256
7.10.4. Shoot video 261
7.10.5. Camera sengs....263
7.11. Photos 263
7.11.2. Photos overview....263
7.11.3. Albums 264
7.11.4. Stories / Memories....268
7.11.5. People....270
7.11.6. View and use photos and videos....273
7.11.7. Edit photos and videos....276
7.12. Music....282
7.12.2. Music....282
7.12.3. Change sort mode....284
7.12.4. Scan local songs....285
7.13. Videos....287
7.14. Theme Store....289
7.14.2. Online phone theme 289
7.14.3. Online wallpaper 289
7.14.4. Manage your downloads....290
7.15. Clock....292
7.15.2. Set Alarm Clocks....292
7.15.3. Add and view clocks for locaons around the world .....294
7.15.4. Use the stopwatch....295
7.15.5. Set the mer .....295
7.16. Files 301
7.16.2. Opmized File management....301
7.16.3. Fast le browsing....303
7.16.4. View and manage les ....304
7.16.5. Clean Storage 306
7.16.6. Remotely Manage Phone Files....307
7.16.7. Private Safe....308
Start Using Private Safe....308
7.17. Calculator 310
7.18. Sound Recording 315
7.18.2. Recorder....315
7.18.3. Manage recordings....316
7.19. Compass....317
7.20. Chrome....319
7.20.2. Search the web....319
7.20.3. Browse the web....321
7.20.4. Quick accesses....324
8. Safety & Privacy....327
8.1. Device security....327
8.1.1. Lock screen password ....327
8.1.2. Smart Lock....328
8.1.3. Payment protecon....329
8.1.4. Set up a SIM card lock 331
8.1.5. Virus Scan....332
8.1.6. Pseudo Base Staon Blocking....333
8.1.7. Protect Personal Informaon 334
8.2. Device administraon 335
8.2.1. Allow and install apps from unknown sources....335
8.2.2. App permissions....337
8.2.3. Hide Home screen icon 337
8.2.4. Kids Space....339
8.2.5. Block unwanted calls and messages 340
8.2.6. Find my device....342
8.3. Privacy....345
8.3.1. Locaon Service 345
8.3.2. Join User Experience Project....347
8.3.3. Privacy Protecng and Security Warning....348
8.4. Advanced....349
8.4.1. Screen pinning....349
8.5. App Lock....350
- Share Internet conneccon and les....355
9.1.1. Tether your phone's Internet conneccon....355
9.2. Share Files 359
9.2.1. Wireless le sharing 359
9.2.2. Wired le sharing....363
9.2.3. Share from apps 365
- Restart, update, back up, and restore....365
10.1. Restart the phone....365
10.2. Update ColorOS soware....366
10.3. Back up and restore the phone....368
10.3.1. Back up your phone 368
10.3.2. Restore data on your phone....370
10.3.3. Reset the phone 373
- Barrier-free....374
11.1. TalkBack....374
11.2. Magnicaon Gestures 376
11.3. Press Power Button to End Call....378
- Safety, handling, and support 378
12.1. Health & Safety 378
12.1.1. Using Environment....378
12.1.2. Baery Safety 379
12.1.3. Charger Usage Notes....380
12.1.4. Trac Safety 381
12.2. Maintenance and Repair 382
12.2.1. Phone Cases 382
12.2.2. Screen Protector....382
12.2.3. Maximize baery life and lifespan 382
12.2.4. Keep Clean....383
12.2.5. Keep dry and solve water damage 384
12.2.6. Use connectors, ports, and buttons....384
12.2.7. Other informaon 385
12.3. FCC Compliance Statement....386
1. Welcome to ColorOS 5.2

natural_image
Abstract geometric logo design with interlocking rings and shapes on black background (no text or symbols)2. Safety Information
Read through the following information carefully. Failure to follow these safety precautions could result in danger or illegal activities.

Safe Startup
Do not switch on the device when phone use is prohibited or when it may cause
interference or danger.

Traffic Safety First
Traffic safety is always of first importance. Use of phones and headphones while driving a vehicle or riding a bicycle is not recommended and is illegal in some areas. Obey and follow all related local laws.

Switching off Device at Gas Stations
Turn off your phone when in any area with a potentially explosive atmosphere, such as gas stations or any other fueling area. Sparks in such areas could cause an explosion or fire, resulting in serious injury or even death.

Switching off Device When On Board an Airplane
Wireless devices might be prohibited while in the air in some countries or regions. Obey all related local laws and turn off your phone or switch to airplane mode.

Switching off Device near Medical Equipment
Hospitals or healthcare facilities might use radio-frequency-sensitive equipment. Obey the relevant rules and regulations.

Switching off Device at Blasting Areas
To avoid interfering with blasting operations, turn off your phone when in a "blasting area" or in areas posted "Turn off two-way radio." Obey all signs and instructions.

Radiation
Nearly every electronic device gives off radiation. Mobile phone use does not increase the risk of getting brain cancer or other head tumors. Its effect in humans is negligible.

Interference
Nearly every electronic device is susceptible to interference for external sources if inadequately shielded or designed. As a result, your phone may cause interference with other devices.

Temperature
Operate your phone in a place where the temperature is always between 10°C to 45°C. Using or storing your phone in a too hot or too cold environment might damage the battery, or even cause your phone to short-circuit or burn.

Proper Usage
Use your phone appropriately. Do not touch the antenna area unnecessarily when the phone is turned on. Do not drop, disassemble, crush, bend, deform, puncture, incinerate, or insert foreign objects into your phone.

Qualified Maintenance and Service
Never attempt to repair or modify the phone yourself. If your phone has any hardware or software failure, do not use it until you take it to an authorized service provider. Do not disassemble or root your phone yourself, otherwise the warranty service will be terminated immediately.

Batteries, Chargers and other Accessories
Do not dismantle the built-in lithium-ion battery of your device. Use only the batteries, chargers and other accessories authorized by OPPO, for third-party accessories might cause damage or danger.

Waterproofness
Your device is not waterproof. Do not use your device in rain, or other wet locations.

Avoiding Hearing Damage
Permanent hearing loss may occur if the receiver, speakerphone, headphones, or earpieces are used at high volume. You can adapt over time to a higher volume of sound that may sound normal but can be damaging to your hearing. Set the volume to a safe level to protect your hearing.

Avoiding Eyestrain
Your device's screen color and brightness might have a different degree of
stimulation to your eyesight. Long-term viewing of your phone in normal or darker environments will damage your eyesight. When watching video or reading text on your phone, avoid prolonged use, take breaks and turn on eye protection mode to prevent eyestrain.

Glass Parts
The outside cover of your phone's screen, front/rear camera and flash is made of glass. This glass could break if your phone is dropped on a hard surface or receives a substantial impact. Do not attempt to touch or clean the broken glass. Stop using your phone until the glass is replaced by an authorized service provider.

Connecting to Other Devices
Before connecting to other devices, carefully read the user manual for more detailed, accurate and safety instructions. Do not connect to incompatible products.

Being Aware of Laser Safety
If your phone supports laser focusing, carefully read the user manual before using it. Failure to follow instructions might lead to harmful radiation exposure. To prevent direct exposure to laser beam, do not attempt to open your phone's outer shell, or avoid keeping close contact with laser light.
3. Get started
3.1. Quick look
3.1.1.ColorOS 5.2 Features
ColorOS 5.2 aims your phone to be true to its name, a Smart one. New features are clever and convenient. In this quick pace life, we wanted your device to get ahead and do things for you so you can focus on other things while your phone will do the rest. Smart Sidebar has been added for smart multitasking. There's also Smart Scan that makes translation cool, fun, and easy. Smart Driving to make you focus on the road. Save more battery with Smart Power Saver and have Talia as a reliable assistant when you're typing message. With all these and more features, ColorOS 5.2 still tightens its take on security and privacy.
Exciting user interface
The new ColorOS 5.2 makes use of the screen more. Quick functions just got more quicker. One touch on the side bar and you'll have shortcuts to your favorite apps and tools. One scan and you'll have translation and personal information that can directly be saved on your contacts. ColorOS 5.2 goes beyond convenience and efficiency. It is simply smart.
Smart Sidebar
It's multitasking at its best, where you'll have quick access with your favorite apps and tools. This enables to switch between apps, transfer files, reply messages, or take screenshots when playing a game or watching a video.
Smart snaps with Smart Scan
There are more things you can do with your camera apart from taking pictures and selfies. One snap and have languages translated in an instant. Scan business cards and have all information saved on your contacts.
New clever features of Smart Assistant
Smart assistant maximizes the use of your camera. Just one snap and you'll get tons of information just by mere clicking the camera button. It's now a lot easier and smarter to Scan documents, Scan & translate images and texts, Scan namecard to be saved on your contacts, and translate photos to make travel and life more convenient.
Google Lens
Google has just recently introduced Google Lens which will analyze what you see and will give you results in real time. It will tell you what the image is or give you links to understand it better.
ORoaming
To stay connected with loved ones and to still check business and work from time to time, we need data. It is now a necessity and we know it and we would want to make things easier for you. ORoaming makes you purchase international data package without the need of buying a SIM card. It supports 62 countries/regions. Now you can truly enjoy your trip.
Auto Sync Photos on OPPO Cloud
Save those precious pictures and selfies on OPPO Cloud automatically. No need to manually save it and no need to worry about it if something happens to your phone. OPPO Cloud got it covered.
Be a master video editor
Impress your social media followers and friends with your videos. You can now add close-up and pulsation on the videos you have taken to make it more fun and artsy.
Smart Driving
A small distraction when driving can cause accident. Even if we really don't want to answer a phone call or have glimpse about who messaged us or what the notification is for, but the urge to check it is so strong and our focus on the road is diverted. It has been said that checking the phone is one of the biggest reasons for senseless accidents on the road and we wanted to avoid that and save lives instead.
Game Space
Game space will definitely make each gamer happy. Imagine putting all your favorite games in one place. This will make it a lot easier to find the game that you would want to play. They will be gathered in one application which serves as a hub so it wouldn't be scattered around your home screen. Now let's enter game space.
Customizing the timer
You can now set a timer or countdown for activities that you usually do. You don't need to manually set it each time you'll do something. You can simply save it on the timer and click start when you are ready.
Scanning names to save on Contacts
Save new contact information in a snap. You just need a name card or business card. Fast and convenient. No need of typing each information on your phone.
Save more battery with Smart Power Saver
Optimize the power of your battery and manage those apps and settings that used up the most power. Know how to save more power so you can use it especially when it is most needed.
Say hello to Talia, your new TouchPal assistant
Optimize the power of your battery and manage those apps and settings that used up the most power. Know how to save more power so you can use it especially when it is most needed.
ColorOS 5.2 is compatible with these devices
Model
R17, R17 Pro, RX17 Pro, R17 Neo, AX5s / A5s, AX7, F7, A3s, Find X
Buttons and components
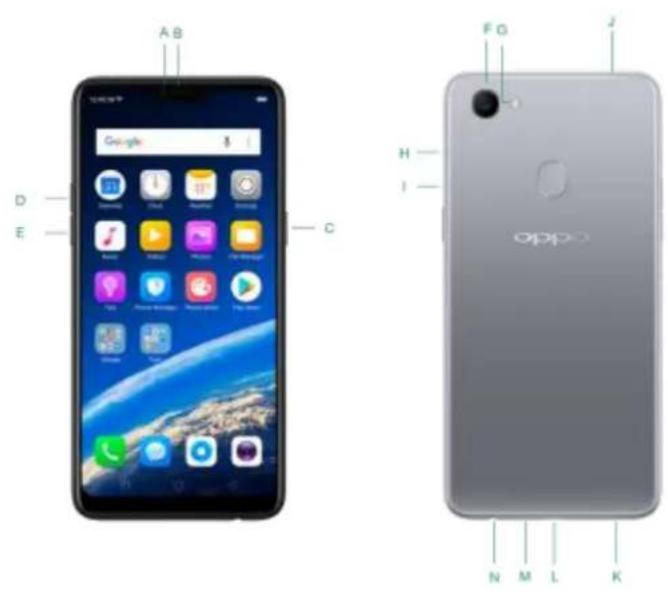
Features
A. Front camera
B. Receiver
C. Sleep/Wake button
D. Volume up button
| E. | Volume down button |
| F. | Rear camera |
| G. | Flash |
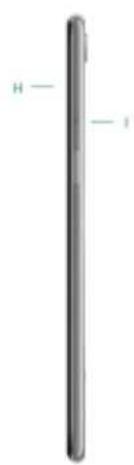
| H. | SIM card tray |
| I. | SIM tray hole |
| J. | Noise cancelling microphone |
| K. | Speaker |
| L. | Micro-USB port |
| M. | Microphone |
| N. | Headset jack |
Functions for buttons and combination keys
To learn more features, see Quick Look at OPPO phone.
3.1.2. Sleep/Wake button
The Wake/Sleep button on the right side of your phone has a number of different uses.
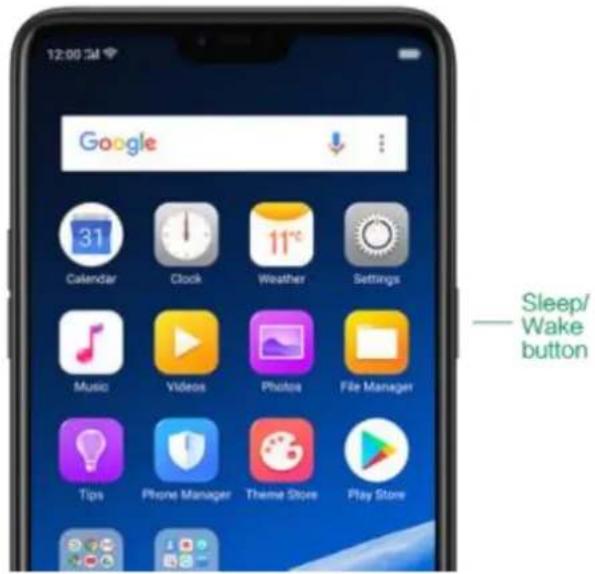
When the phone is on
Wake or lock the screen: With the phone is powered on, press the Wake/Sleep button once and it will wake the phone up to the point that you can see the lock screen, like the clock and any notifications that are setup to display there. When the phone screen is awakened, pressing this button will blacken the screen and lock the phone.
Take a screenshot: Press and hold the Sleep/Wake and Volume Down buttons at the same time and your phone will take a picture of whatever is displayed on the screen. Click the screenshot, and then choose to a take a long screenshot, send, edit or delete the screenshot. If you save the screenshot, you can view it on Photos.
End a call: Go to [Settings] > [Additional Settings] > [Accessibility] and turn on [Power Button Ends Call], then you can press the Sleep/Wake button to end phone calls.
Turn off the phone: Press and hold the Sleep/Wake button for a few seconds, whether the phone is on the lock screen or home screen, it will ask you to slide down to power off the device.
Force restart the phone: Press and hold the Sleep/Wake and Volume Up buttons for about 10 to 12 seconds until your device is turned on. View force restart your phone.
When the phone is off
Turn on the phone: Press and hold the Sleep/Wake button for a few seconds until you see the OPPO logo.
Force Restart the phone: Press and hold the Sleep/Wake and Volume Up buttons until your device is turned on. View force restart your phone.
Enter Recovery Mode: Press and hold the Sleep/Wake and Volume Down buttons at the same time to enter Recovery Mode.
3.1.3. Menu, Home and Return buttons
The traditional hardware buttons have been replaced with on-screen virtual navigation keys which also offers fast and fluid gestures to operate your phone. You can change the order of the virtual keys, and set them to appear only when needed to free space on the screen.
Enable virtual navigation keys. Virtual navigation keys are default on. If you want to enable them manually, go to [Settings] > [Smart & Convenient] > [Navigation Keys] and click Virtual Key Navigation.
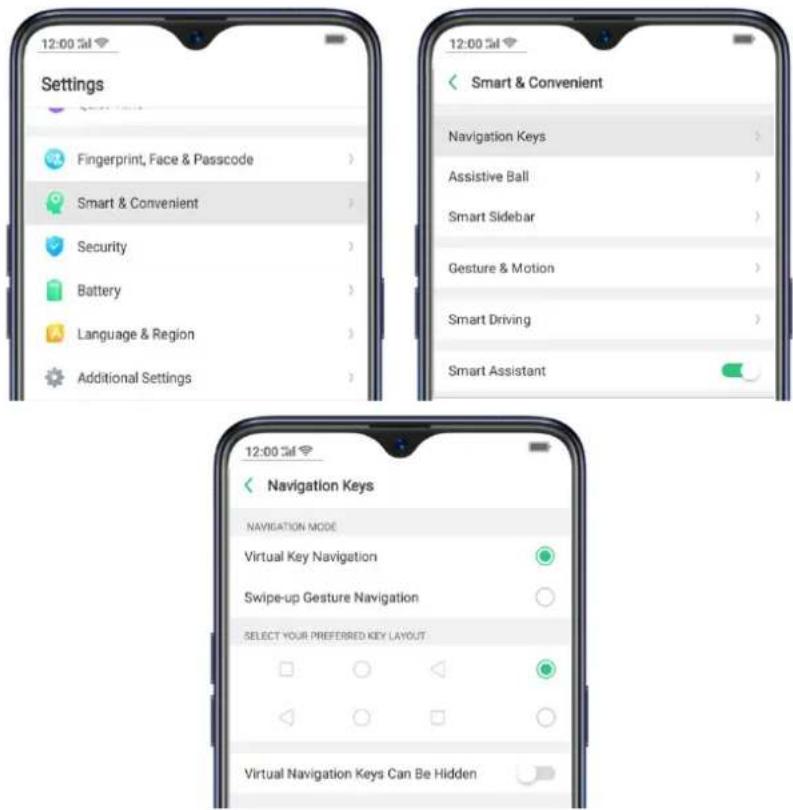
Change the order of virtual navigation keys. The keys follow the typical order for OPPO: Menu, Home, and Return from left to right. If you are left-handed, you can change them to the return-home-recent order.
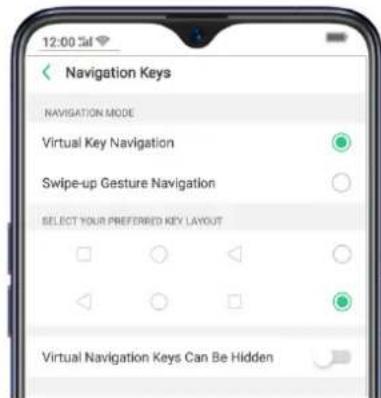
Hide the virtual navigation keys. When you launch a full-screen app, the keys will automatically hide, and can be brought back with a simple swipe:
- When in portrait mode, swipe up from the bottom.
- When in landscape mode, swipe from the bottom to the left.
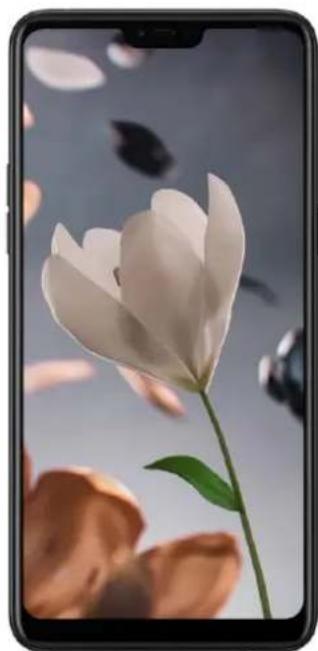
natural_image
Close-up of a white tulip with green stem and leaves against a blurred background of scattered petals (no text or symbols visible)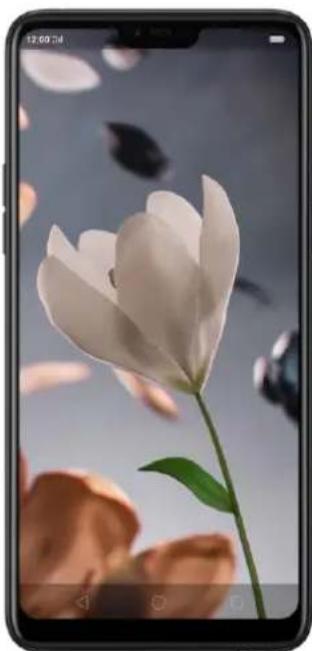
natural_image
Smartphone displaying a white tulip against a soft sky background with floating petals (no text or symbols visible)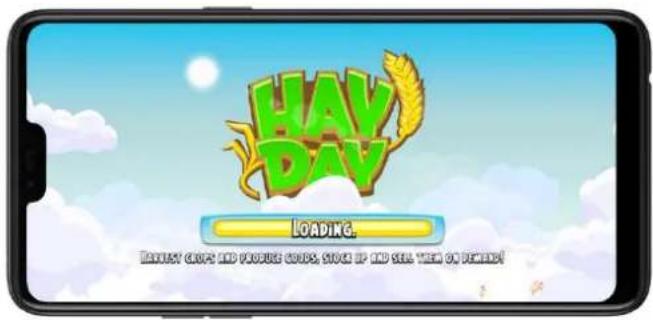

Manually hide the virtual navigation keys. To set the keys to appear only when needed, go to [Settings] > [Smart & Convenient] > [Navigation Keys] and
enable Virtual Navigation Keys Can Be Hidden. Then you can click on the left-lower corner of the screen to hide the keys, and swipe from the bottom to reveal them.
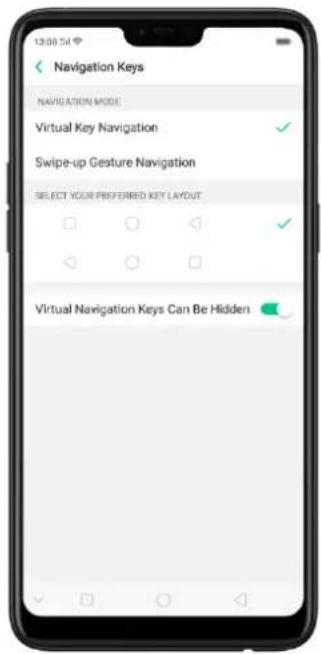
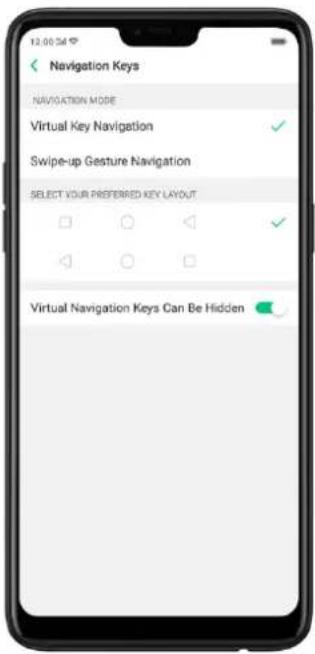
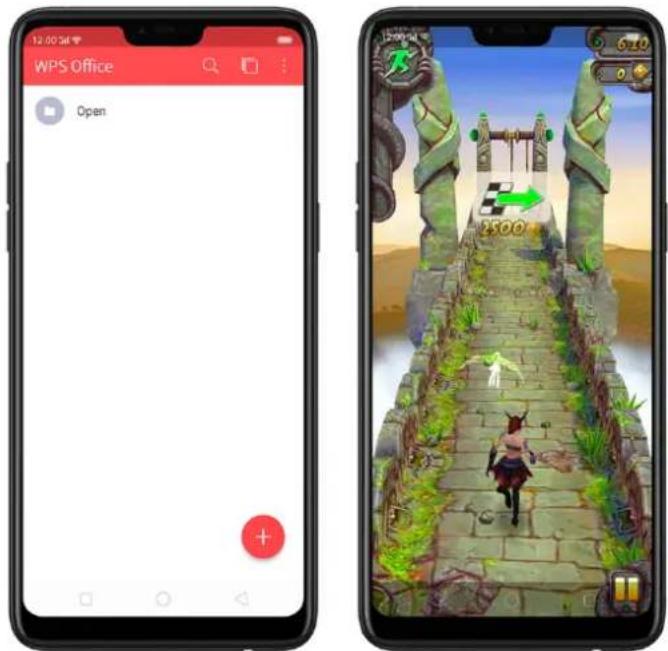
Immersive navigation background. The system set multiple colors for the navigation background to match the color scheme of the popular apps. The background color is default white, and it will become translucent or immersive when you open some of the third-party apps.
3.1.4. Volume buttons
Volume buttons give you easy access to adapt over time to a proper volume of sound. It refers not simply ringer or media, the phone also keeps track of the volume level separately in headphone, microphone, and speaker.
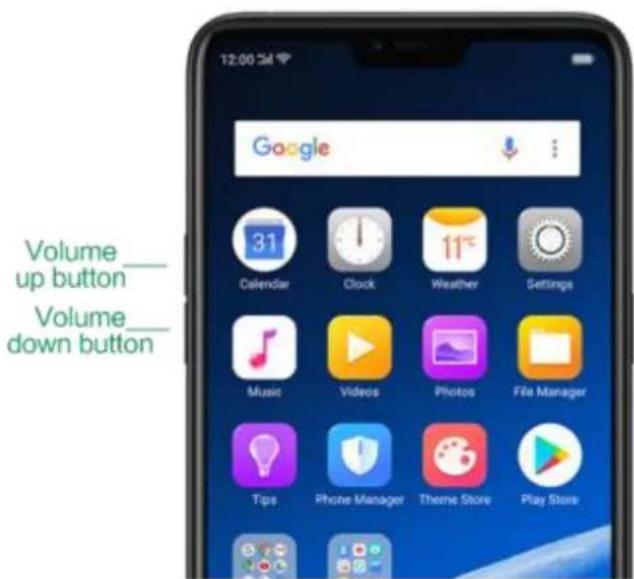
Media volume: When listening to music, videos and phone calls, use the buttons on the side of the phone to adjust the volume. For information about avoiding hearing loss, see Security Information.
Ringer volume: Use the Volume buttons to control the volume for the ringer and alerts. When you press and hold the volume down button, your phone will switch to silent mode.
Alarm volume: Use the Volume buttons to set the volume for alarm. The alarm still plays a sound when the phone is in silent mode.
Call volume: When making or receiving phone calls, use the volume buttons to adjust the volume of the call.
* You can also adjust the volume (except call volume) in [Settings] > [Sound & Vibration].
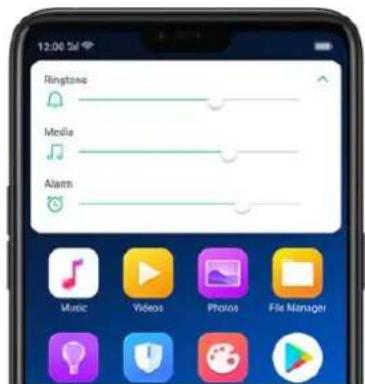
Controlling the camera: Volume buttons can also be used to control your camera. Go to [Settings] > [Camera] > [Volume Button] and set up the volume buttons for Shutter or Zoom.
3.1.5. Micro-USB port
Micro-USB port is the connector on the bottom of your device where your battery charger connects. It also doubles as the data port, which lets you transfer data to and from a personal computer or other USB devices. Plug the cable in the port to charge or transfer data.
Notice:
- Repeated connecting and disconnecting of your cable can cause the port to wear out, resulting in a poor connection to your cable.
- Never force a connector into the port, for that might cause damage.
3.1.6. Headset jack
The headset jack is an audio socket that accepts a 3.5mm audio plug. Plug your headset in the jack to listen to music, videos and phone calls. Do not force a mismatched headset into the jack for that might cause damage.
3.1.7. SIM and SD cards
SIM card
* Insert the SIM card before turning on your phone. If you hold a new SIM card, you might need to wait until it is activated by the carrier before you can use it.
A SIM card is provided by your carrier and is used to activate your phone's mobile network. Because it has a small amount of memory, the SIM card not only enables communications between two persons but stores information such as phone numbers, security data and more. When using the mobile network, you need to pay charges. To avoid high charges, you can shop data plans with your carrier, or shop international data roaming plans when traveling abroad.
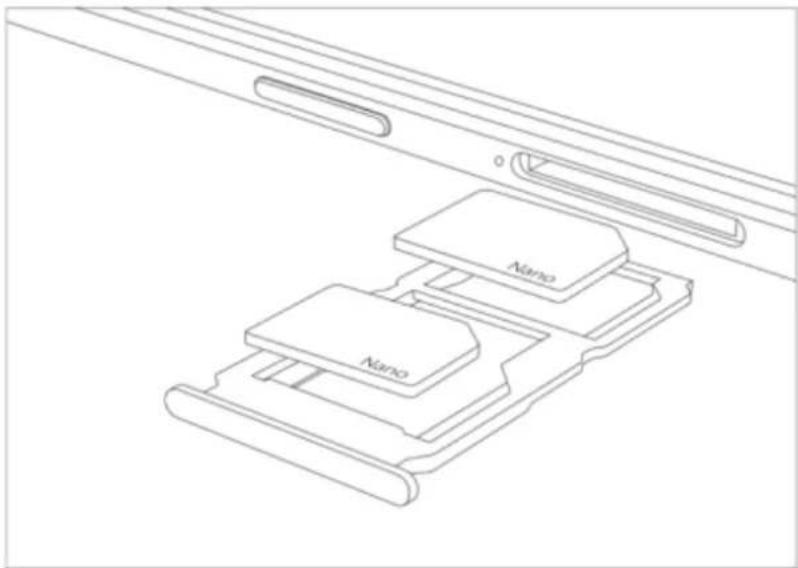
Insert the SIM card: Most OPPO Smartphones support Dual SIM. You can choose to insert one or two.
- Insert the card needle into the hole outside the card tray to pop it open.
- Pull out the card tray and place SIM card(s) on it.
- Put the card tray back in as the same orientation that you removed it.
natural_image
Technical line drawing of a device with two labeled components (Nano) and a handle, no text or symbols present.Remove the SIM card: Remove the card(s) in the same way that you insert it(them).
SD card
The SD card is a way to store and transfer images, music, video, and other data. You can insert a SD card in your phone to expand phone's memory.
SIM1, SIM2 and SD cards share the same card tray. Insert your SD card in the same way that you insert the SIM card(s).
3.1.8. Accessories came with OPPO phone
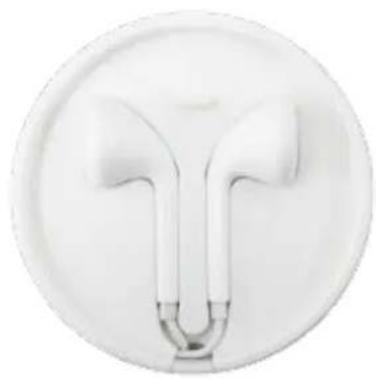
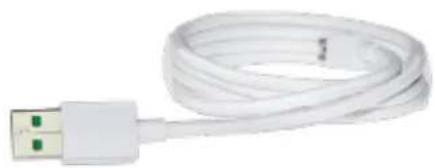
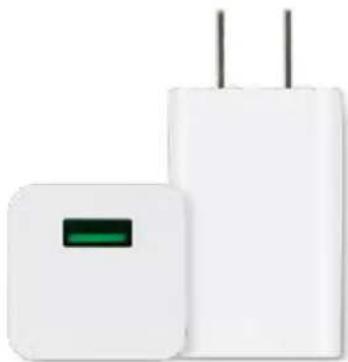
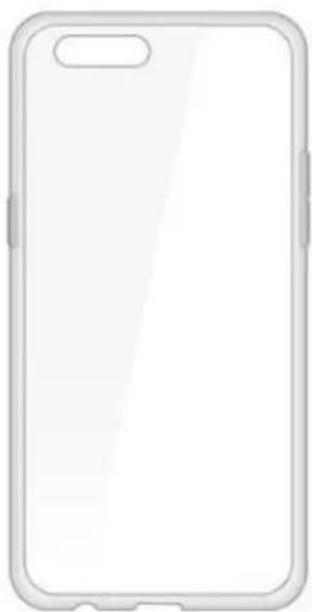
Along with the handset, the accessories came with are headset, USB Connecting cable, Power adapter, SIM card tool, and Phone case.
Notice : All photos shown are for illustration zpurpose ONLY. Actual products may vary due to product enhancement.
Headset: A standard headset with 3.5 mm headset plug. Use to listen to music, videos, and phone calls. Use the built-in microphone to talk. When playing the music or videos, click the button once to pause or play a song or video.
natural_image
Close-up of a white circular object with abstract curved shapes, resembling a stylized biological or mechanical component (no text or symbols visible)USB Connecting cable: Use the cable to connect your phone to the computer to charge and transfer files, or use it with the power adapter to charge.
natural_image
Coiled white USB cable with green connectors (no text or symbols visible)Power adapter: Connect the power adapter to your phone using the included cable, then plug it into a standard power outlet to charge the phone.
natural_image
Two white electronic devices with two leads, one larger and one smaller, both without any visible text or symbols.SIM card tool: Use to pop out the SIM card tray.

natural_image
Simple grayscale illustration of a magnifying glass with a handle (no text or symbols)Phone Case: Use to protect against drops and shock damage on the corners and rear of your phone.
natural_image
Blank white smartphone case with rounded corners and a small rectangular top (no text or symbols)3.1.9. Charging the battery
How to charge the battery:
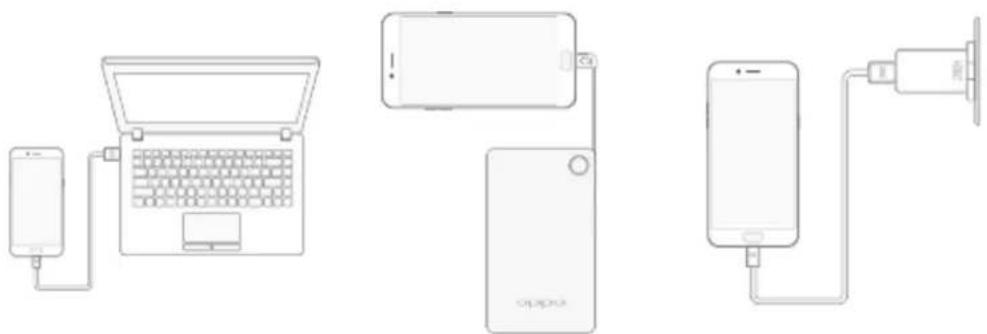
Notice : All photos shown are for illustration purpose ONLY. Actual products may vary due to product enhancement.
Charge with the jack: Connect adapter to your phone using the USB cable, then plug it into a standard power outlet to charge the phone.
Connect to a computer to charge: Use the cable to connect your phone to the computer to charge. Your phone will charge slowly if you connect it to the computer.
Charge with Power Bank: Connect Power Bank to your phone, and your phone will be charged wherever you go. It is an absolute necessity if you are a frequent traveler.
Charging Notice:
- Charge the phone with the original charging accessories (including adapter, cable and power bank).
- It is recommended to charge your phone in a place where the temperature is between 15^ C to 40^ C. Extreme ambient temperatures will affect flash charging system.
OPPO smartphone is designed to understand gestures. You can use gestures such as tap, swipe, drag and spread to operate your phone.

natural_image
Four hand icons showing a blue square with finger pressing, followed by a white arrow indicating rotation (no text or symbols)To set up complex gestures for specific functions, go to [Settings] > [Smart & Convenient] > [Gesture & Motion].
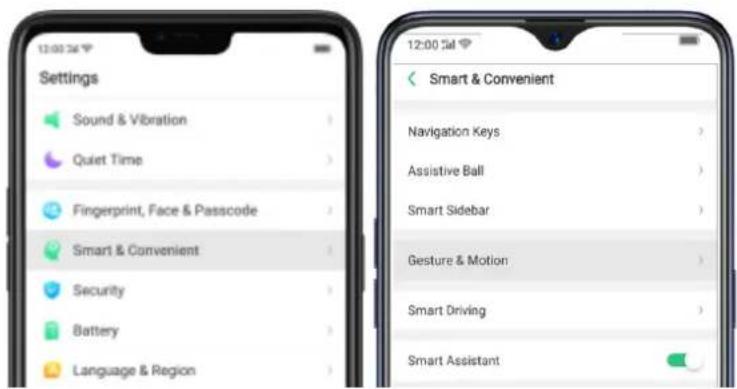
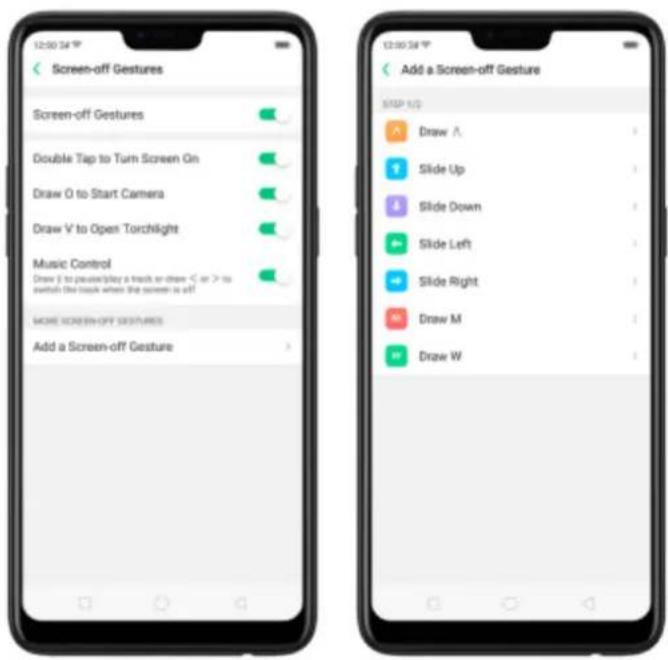
Screen-off Gestures
To set up screen-off gestures, you need to turn it on first.
Double tap to turn screen on: Turn it on to wake up your locked screen with a double-click on the screen.
Draw O to start camera: When turn it on, you can draw O on the locked screen to open Camera app.
Draw V to open torchlight: When turn it on, you can draw V on the locked screen to open the torchlight.
Music control: When turn it on, you can draw || to pause/play a track, or draw < or > to switch the track when the screen is off.
Add more screen-off gestures: OPPO smartphone of ColorOS 5.0 gives you 7 options, which are Draw ^, Slide up, Slide down, Slide left, Slide right, Draw M and Draw W. Choose one to unlock the phone, call someone or start an app.
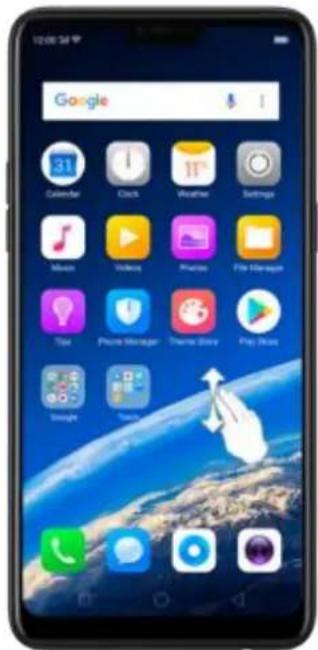
3-Finger Gesture
Take a screenshot. Swipe down the screen with three fingers.
Use Split-screen. Under the interface of an app, swipe ups the screen with three fingers to enter split-screen mode.
Motion
The motion-sensing technology is used in OPPO smartphone. Use it to let your phone response to motion.
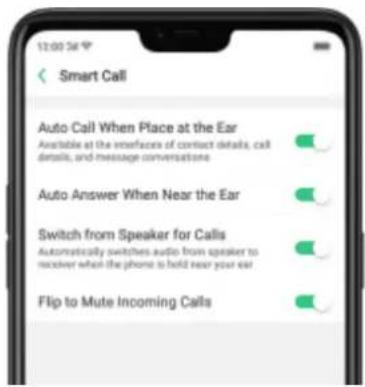
Smart call
Auto call when place at the ear: Before you can use auto call, you need to set the default SIM card for calling. Go to a contact detail, call detail, message conversation or info interface, put the phone near your ear and your phone will automatically call that specific person.
Auto answer when near the ear. This function lets your phone to answer any incoming calls automatically when putting the phone near your ear.
Switch from speaker for calls: Use it to automatically switch from speaker to receiver when you put the phone near your ear during phone calls.
Flip to mute incoming calls: Use it to silence the ringer by turning the phone over on a table or other flat surfaces.
Mistouch Prevention Mode
Turn it on to prevent incorrect operations if the lock screen is covered.
Take selfies
Open Camera app and switch to the front camera. Click >Gesture on the top of the screen. Pose the same hand gesture towards the camera, once the camera captures that, it will take a photo automatically after two seconds. You can change your pose and expression within this two seconds.
3.1.11.Key combinations
Generally, you can use two buttons of your phone to generate a specific result. The common key combinations include:
When phone is on
Press and hold the Power and Volume Down buttons: Your phone will take a screenshot for the current page. To take a long screenshot, click the screenshot, then click Longshot.
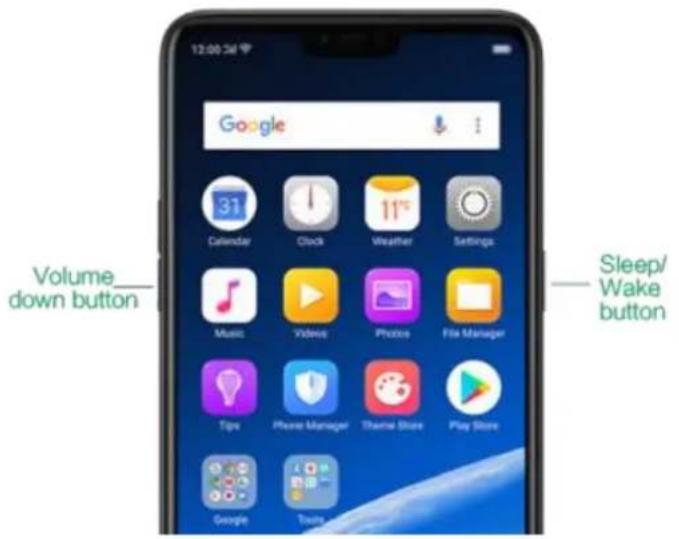
Press and hold the Power and Volume Up buttons: If the phone isn't responding, press and hold the button combination for at least eight seconds to force restart your phone.
When phone is off
Press and hold the Power and Volume Down buttons: Phone will enter Recovery Mode, which does help to update the system, wipe data, check disk and more.
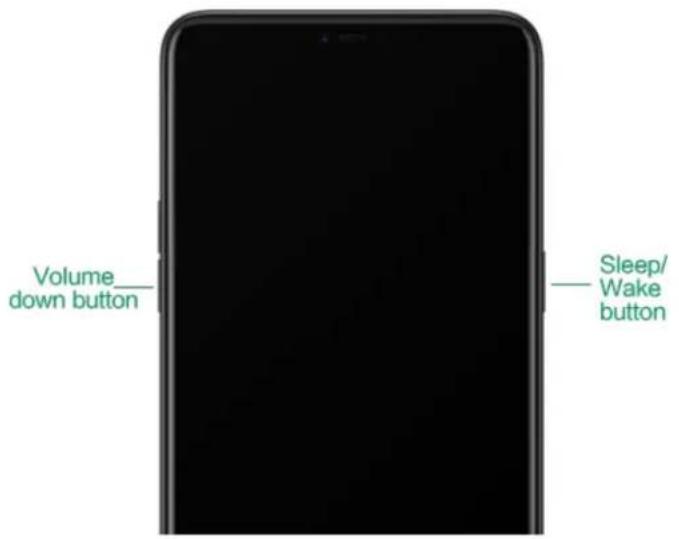
Press and hold the Power and Volume Up buttons: Phone will be force restarted. Press and hold the two buttons until your phone is turned on.
3.1.12.Status Icons
The icons in the status bar at the top of the screen give information about your OPPO smartphone:
| Status icon | What it means | |
| ..|| | Mobile network signal | Shows whether you're in range of operator's network and can make and receive calls. The more bars, the stronger the signal. |
| ↑ | Airplane Mode | Shows that airplane mode is on. Phone's wireless communication abilities are disabled. |
| 4G/4G+ | LTE/LTE-A | 4G network is available, including LTE and LTE-A. Your phone can connect to the Internet over that network. |
| 3G/H+ | UMTS/WCDMA | 3G UMTS network is available. Your phone can connect to the Internet over that network. |
E


| EDGE/GSM | EDGE (GSM) network is available. Your phone can connect to the Internet over that network. |
| Wi-Fi | Shows that your phone is connected to a Wi-Fi network. The more bars, the stronger the signal. See Connect to Wi-Fi. |
| Call Forwarding | Call forwarding is turned on. |
| VPN | You're connected to a network using VPN. |
| Quiet Time | Quiet Time is turned on. |
| Portrait orientation lock | Phone screen is locked in portrait orientation. |
| Alarm | An alarm is set up on your phone. |
| Bluetooth | Bluetooth is on, or your phone is connected to a Bluetooth device. |
| Bluetooth | Bluetooth Tethering is on. |
| Silent | Silent Mode is on. |
| Vibrate when silent | Phone vibrates when Silent mode is on. |
| HD Voice | Your phone is on a voice call over VoLTE. |
| Wireless Display | Wireless projector is connected. |
| Location Service | Location Service is on. |
| No service | Your phone has no signal. |
| Power Saving | Power Saving Mode is on. |
| LOGG-ING | Get a log for testing |
| Message | Message notification | |
| VoLTE | Voice over LTE | Your operator's VoLTE service is available. HD Voice works to make your calls. |
| Game acceleration | Optimize the game display configuration to fully utilize hardware resource | |
| International Roaming | Your phone is using International Data Roaming. | |
| Kids space | Addiction prevention | |
| Payment protection | Payment environment detection |
3.2. Configuration Settings
3.2.1. Fingerprint, Face and Passcode
Setting a lockscreen passcode, privacy passcode, and face ID on your device are security measures that all users should take. Follow these steps to set a passcode that will be needed to unlock your phone and access the information stored on it.
Use a Lockscreen passcode on your OPPO phone
Set the Lockscreen Passcode
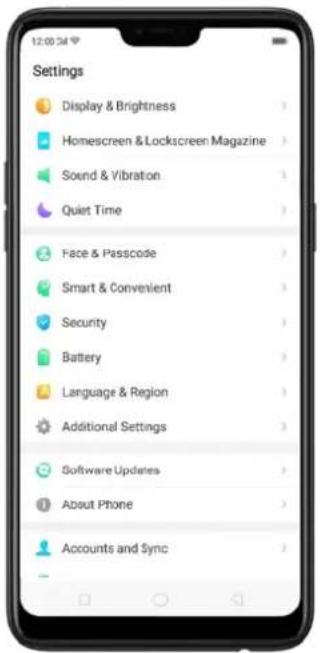
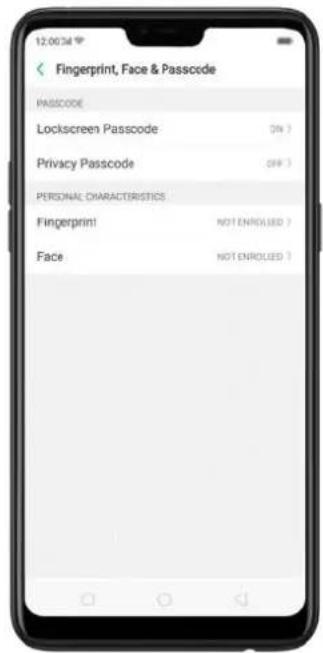
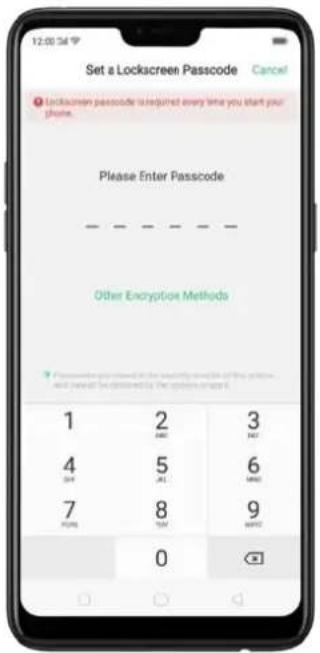
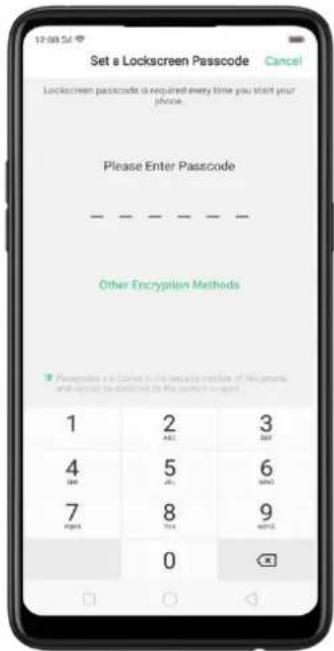
- Go to [Settings] > [Fingerprint, Face & Passcode], enter [Lockscreen Passcode], click [Turn on Passcode].
- You'll be prompted to enter a 6-digit numeric code. If you want to use other passcode types, ClickOther Encryption Methods.
-
Choose from four types of passcodes:
-
Pattern Code: Allows you to draw a pattern with at least four dots connected.
- 4-Digit Numeric Passcode: Allows you to set a numbers-only passcode that contains four characters.
- 4-16 Digit Numeric Passcode: Allows you to set a numbers-only passcode that contains four to sixteen characters.
- 4-16 Digit Alphanumeric Passcode: Allows you to set a passcode that contains four to sixteen numbers and/or letters as your preference.
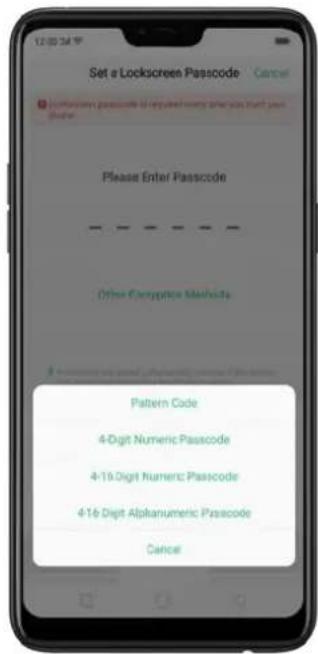
- Draw your pattern or enter your passcode.
- Re-draw or re-enter your pattern or passcode to confirm it and activate it.
Change the passcode
- Go to [Settings] > [Face & Passcode], click [Modify Passcode].
- Draw or enter your current pattern or passcode.
Draw or enter your new pattern or passcode. If you want to use other passcode types, click Other Encryption Methods, at the bottom of the screen.
Re-draw or re-enter your pattern or passcode to confirm it and activate it.
Turn off the passcode
- Go to [Settings] > [Face & Passcode], click [Turn off Passcode].
- Draw or enter your current pattern or passcode to confirm.
View more details in Set and use a passcode with your OPPO smartphone.
Privacy Passcode
When this is turned on, the validation will be used for all privacy features such as App Encryption and Private Safe.
- Manage Privacy Passcode: Go to [Settings] > [Fingerprint, Face & Passcode] > [Privacy Passcode] create an encryption code, then set or customize a security question, then click Done.
Note: The security question can be used to reset the passcode.
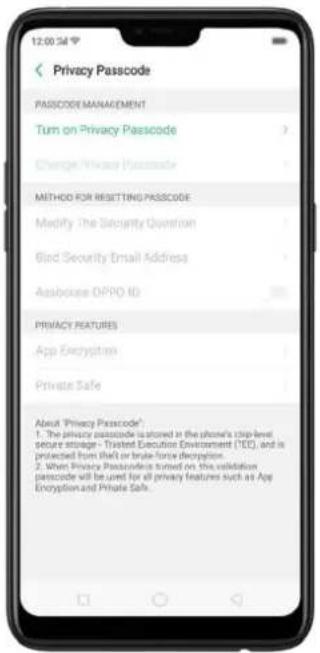
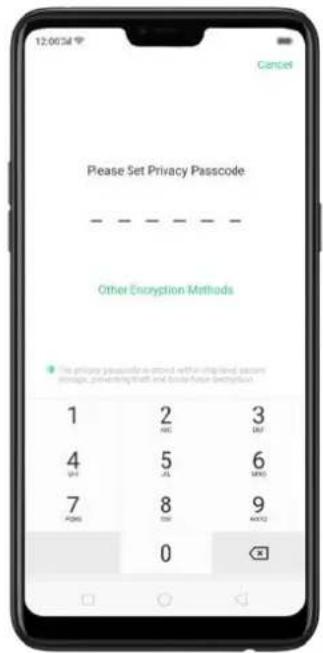
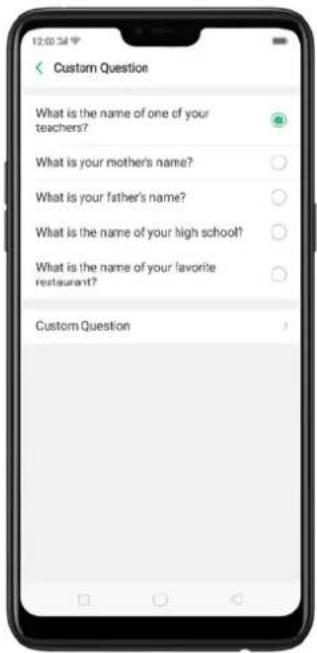
- Change or turn off privacy passcodes: Go to [Settings] > [Fingerprint, Face & Passcode] > [Privacy Passcode] enter the encryption code then click [Turn off Privacy Passcode] or [Change Privacy Passcode].
- Modify the security questions: Go to [Settings] > [Fingerprint, Face & Passcode] > [Privacy Passcode] enter the encryption code click [Modify the Security Questions] enter the encryption code again then set or customize a new security question, click Done.
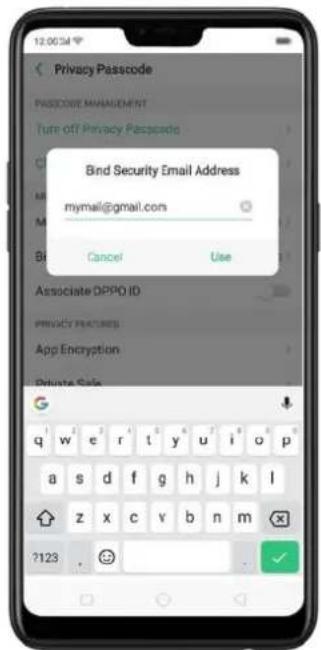
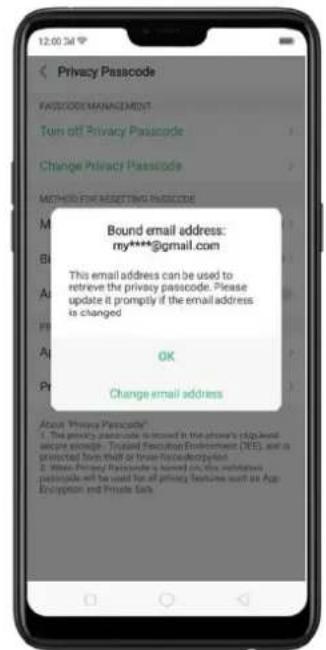
- Bind security email address: The email used will be able to retrieve the privacy passcode: Go to [Settings] > [Fingerprint, Face & Passcode] > [Privacy Passcode] enter the encryption code click [Bind Security Email Address] enter the encryption code again then enter email address, click Use.
- Update bind security email address: Go to [Settings] > [Fingerprint, Face & Passcode] > [Fingerprint, Face & Passcode] enter the encryption code click [Bind Security Email Address] click Change Email Address then enter the encryption code again, enter the new email address, click Use.
Associate OPPO ID
- Go to [Settings] > [Fingerprint, Face & Passcode] > [Privacy Passcode] enter the encryption code toggle [Associate OPPO ID] Register or Sign in with your OPPO ID credentials.
- App Encryption: Go to [Settings] > [Fingerprint, Face & Passcode] > [Privacy Passcode] enter the encryption code click [App Encryption] select the apps to be encrypted then press Enable Encryption. Once it is encrypted, you will see a padlock symbol on the app that has been encrypted. Also, see App Lock.
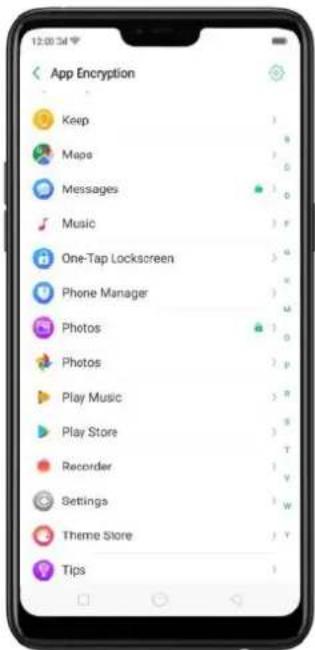
Note: You have to enter an encrypted passcode and a security question before you can use the other functions on Privacy Passcode.
Use a fingerprint on your OPPO phone
Before you can add a fingerprint, you need to create a passcode for your OPPO phone. You can use fingerprints for:
Unlocking the phone from the lock screen.
- Go to [Settings] > [Fingerprint, Face & Passcode], click [Add a Fingerprint].
- Follow the on-screen instructions, placing your finger gently on the Home button until your fingerprint is recorded.
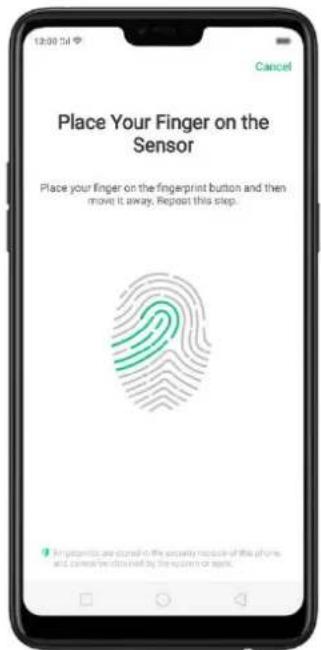
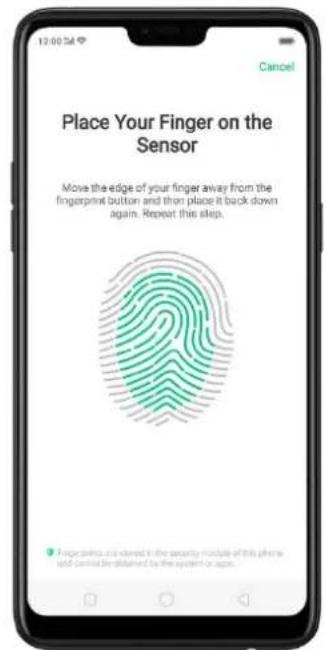
Repeat step 1 and 2 for as many fingers as you like.
Delete or Rename a fingerprint
- Go to [Settings] > [Fingerprint, Face & Passcode], click the fingerprint you've added.
2, Enter a name for your fingerprint or click [Delete Fingerprint].
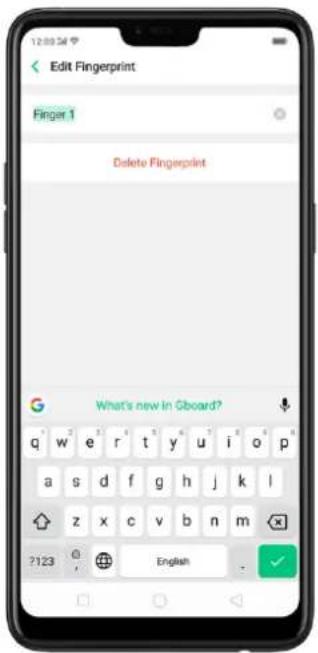
Reset Passcode methods
Use fingerprint to reset passcode
Before you can use the reset feature, you must add at least one fingerprint to your phone and enabled Fingerprint Unlock.
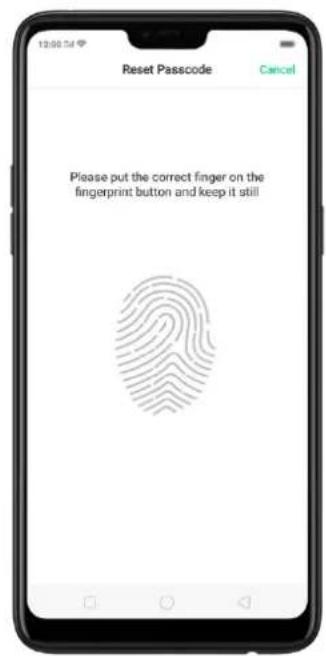
- Just click on Forgot Passcode at anytime, and put the correct finger on the fingerprint button.
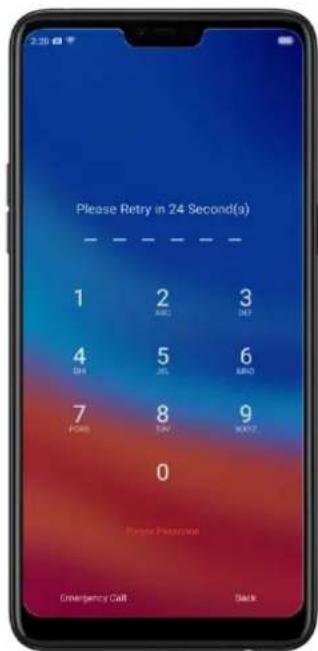
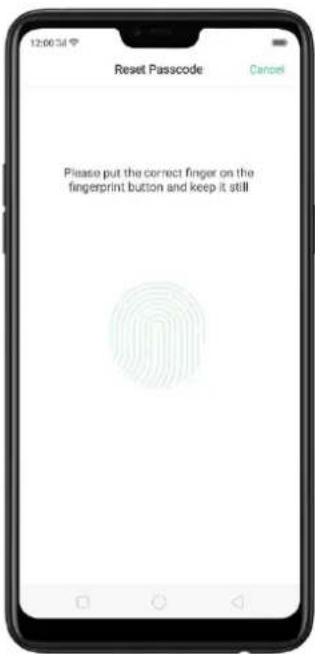
Reset passcode with fingerprint when the phone is unlocked.
When your phone is unlocked, you can change the lock screen password directly from the Settings page.
-
Go to [Settings] > [Fingerprint, Face & Passcode], enter the wrong password five times, then your phone will temporarily restrict you from entering the passcode again and ask you to wait 30 seconds.
-
When the waiting period is up, click Tap to reset passcode.
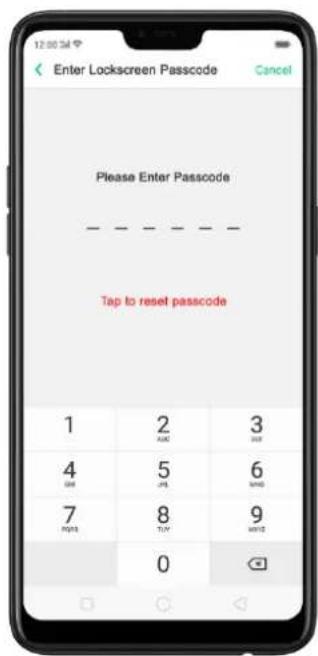
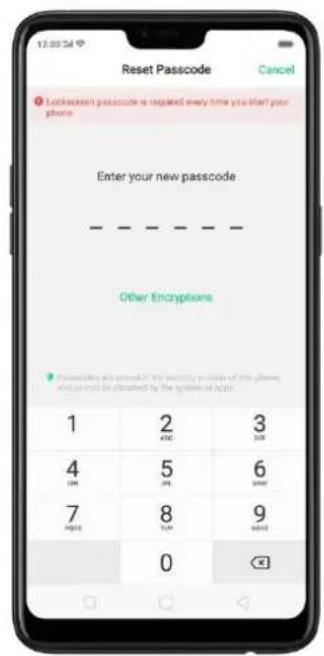
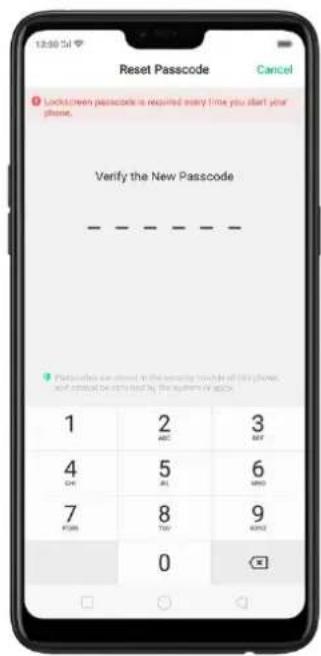
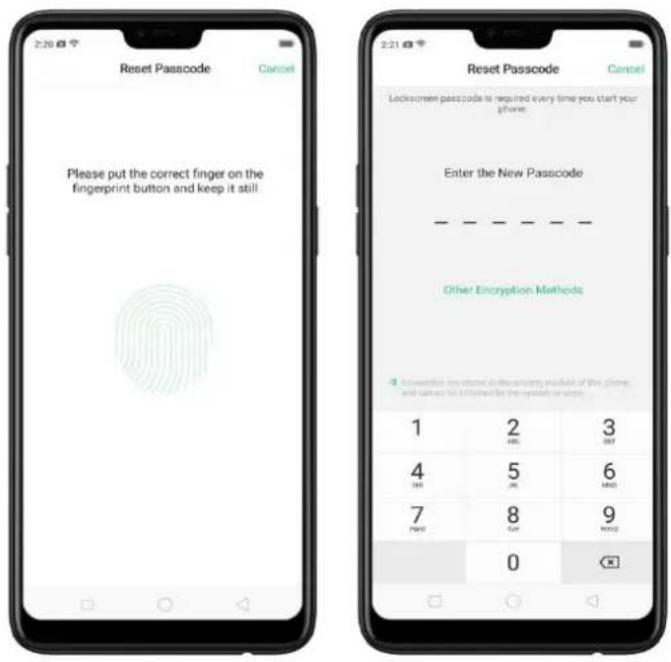
- Place your finger on the fingerprint sensor, then enter your new passcode and confirm it.
Reset password via Fingerprint or via Email
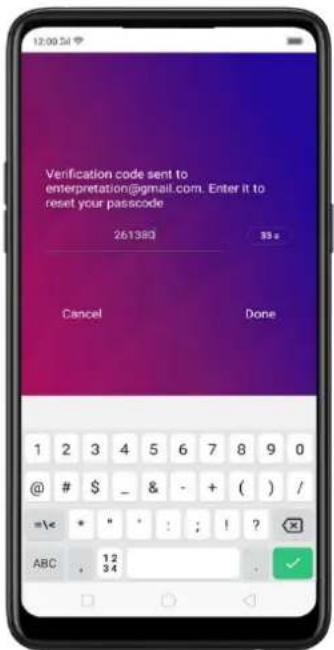
- Enter the wrong password five times, then your phone will temporarily restrict you from entering the passcode again and ask you to wait 30 seconds then click Forgot Password. You will given options to either reset using fingerprint or thru the email that you have bounded on the phone.
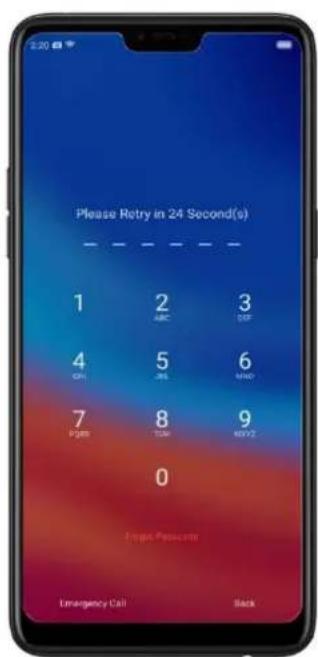
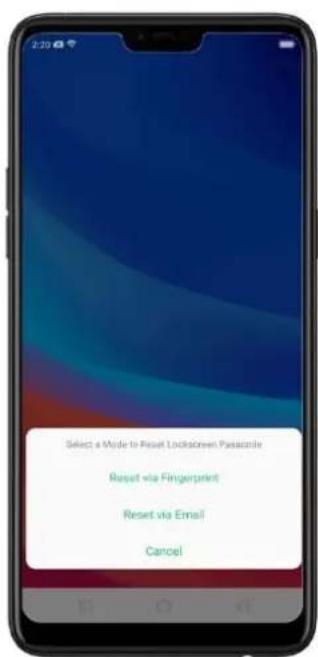
Reset password via fingerprint
Place your finger on the fingerprint sensor, then enter your new passcode and confirm it.
Reset password with bind security email address
When you have forgotten your lockscreen passcode and you also haven't enrolled face recognition or for some reason, it did not work, you can still reset the password as long as you have bounded your security email address at the initial phase of password creation. See bind security email address.
How to reset password using bind email:
- Enter the email address that you have bounded on the phone, then enter the verification code that was sent thru your email, click Done. Now you can set a new lockscreen passcode for your phone.
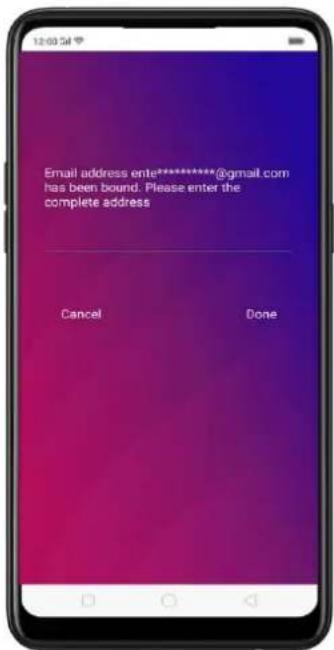
Enroll a Face on your OPPO phone
Before you can add a face you need to create a passcode for your OPPO phone.
You can use face for:
- Unlocking the phone from the lock screen.
- Encrypting apps
- Protecting files
Enroll a face
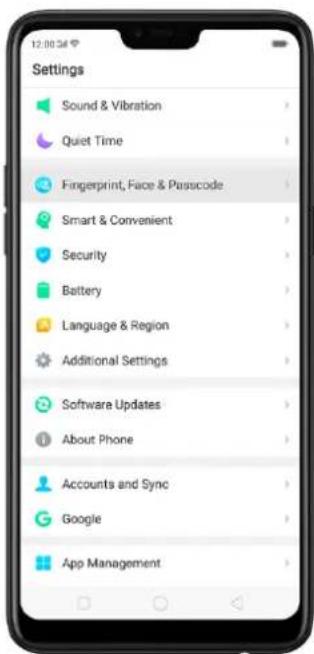
- Go to [Settings] > [Fingerprint, Face & Passcode], click [Enroll Face].
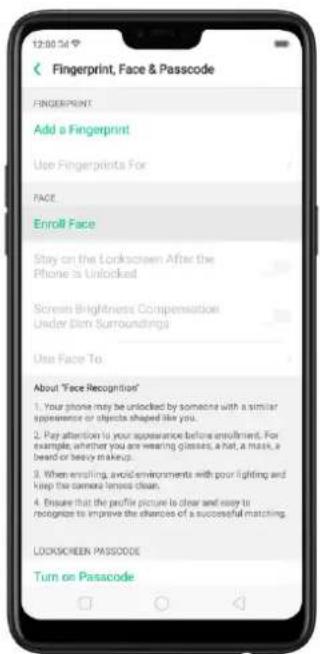
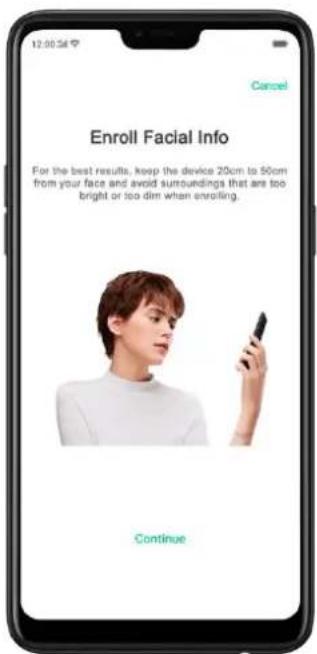
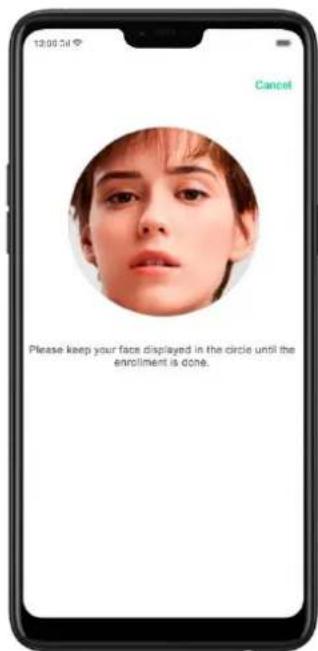
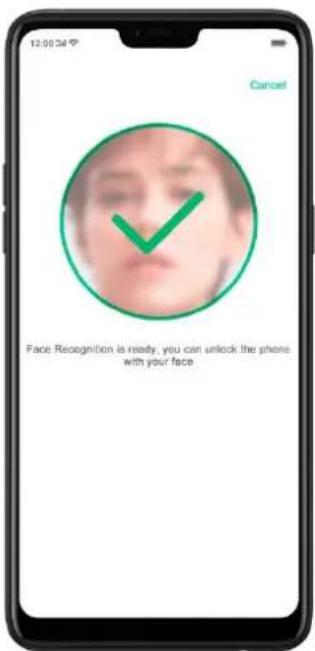
- Follow the on-screen instructions. To get the ideal effect, keep the phone 20-50cm away from your face and position your whole face in the circle until the enrollment is done. Avoid very bright or dim environment when enrolling your face.
Delete Enrolled Faces
Go to [Settings] > [Fingerprint, Face & Passcode], click [Delete Enrolled Faces]. Use Face for screen unlocking, App Lock and File Safe. Go to [Settings] > [Fingerprint, Face & Passcode] > [Use Face to], then turn on the features you want to use.
View more details in Add and use a fingerprint on your OPPO Smartphone.
Note: Not all phone's running on ColorOS 5.1 supports fingerprint. It still depends on the design of the phone.
3.2.2. Set up other mail and calendar accounts
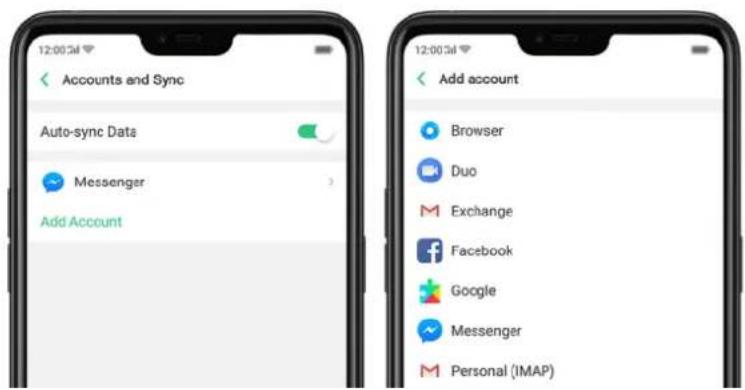
In addition to the apps that come with your phone, if you want to use other mail and calendar apps, add the accounts to your phone to let the apps associated with those accounts sync with your phone.
Set up an account. Go to [Settings] > [Accounts and Sync], then click [Add Account].
Repeat the steps for as many accounts as you like.
3.2.3. Transfer data from the old phone to OPPO smartphone
You can transfer over all of your data - with no risk or loss of quality, using Clone Phone. With Clone Phone, you don't need to leave any of your data behind with your previous device. Take it all with you in three easy steps:
From an iPhone to an OPPO Phone
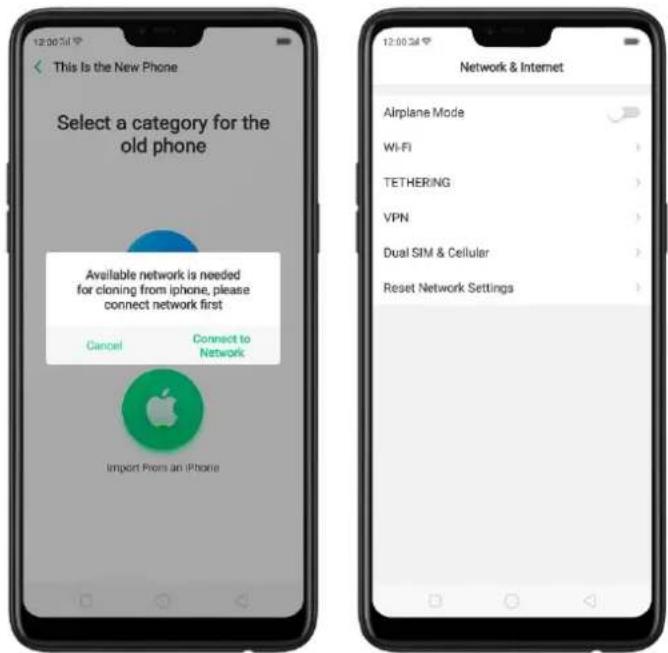
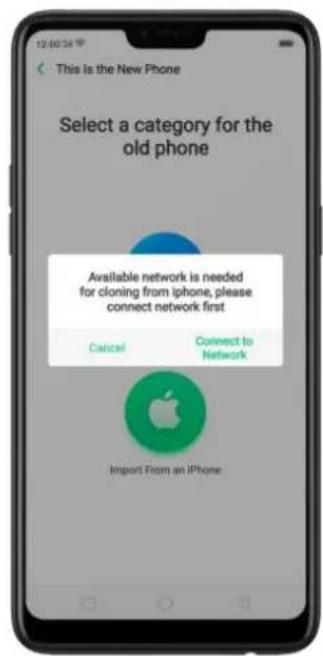
- On your OPPO Phone, go to [Tools] > [Clone Phone], then select "This is the new phone" and "Import From an iPhone". Connect your phone to the Internet when promoted.
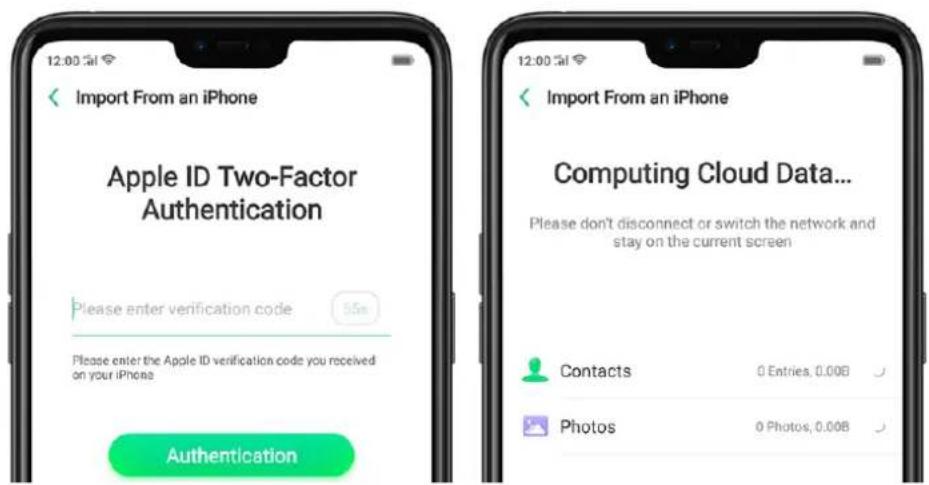
- Sign in the iCloud account of your old iPhone. Enter the Apple ID verification code you received on your iPhone or in the SMS and start computing cloud data.
From an Android Phone to an OPPO Phone
-
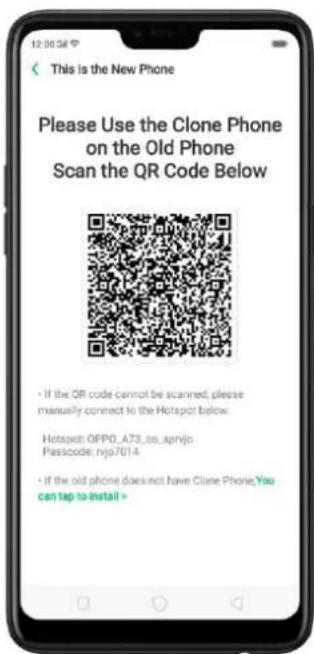
On your OPPO phone, go to [Tools] > [Clone Phone], then select "This is the new phone" and "Import from an Android Phone".
-
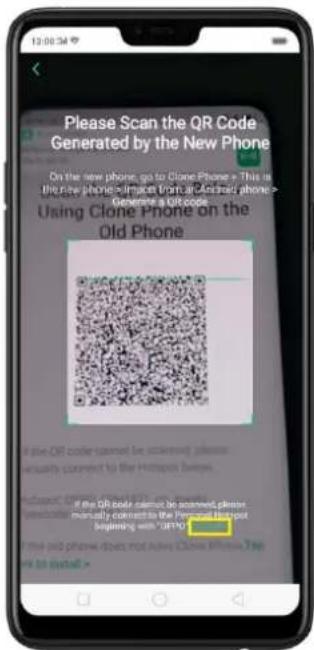
On your old phone, click [Clone Phone] from the Home screen, select "This is the old phone" and scan the QR Code generated by the new phone to start cloning.
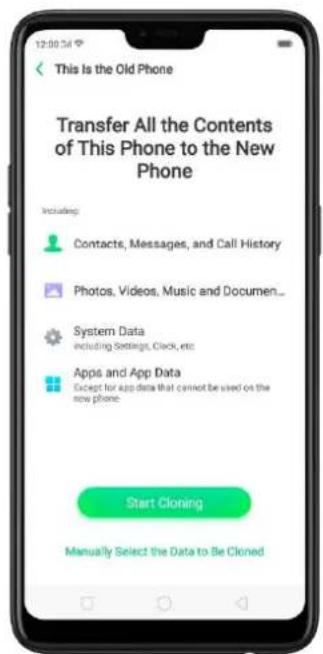
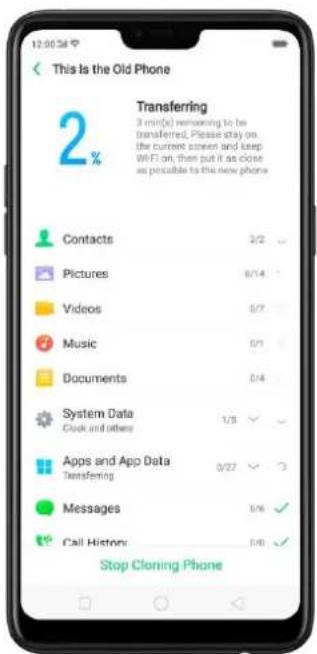
You can also select the data (Personal Data, System Data, Applications, Storage Data) to be cloned by clicking "Manually Select the Data to be Cloned."
- Enter the lock screen password to continue.
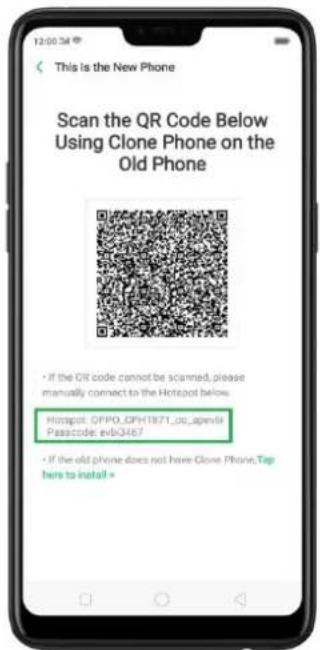
If the QR code cannot be scanned
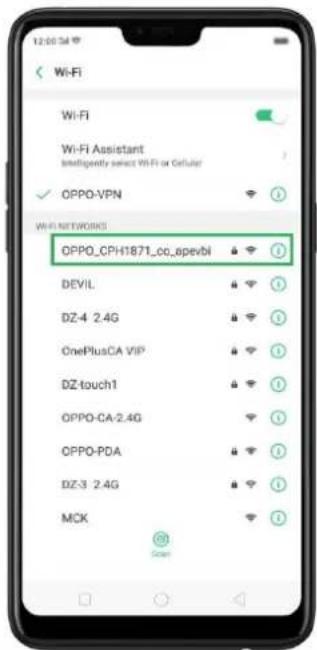
If scanning QR won't work, you may manually connect to a hotspot and transfer data still. To do this, open Clone Phone app on both phones then click "Connect", you'll notice that a pop-up will SAY "Personal Hotspot Activated", click on it and find the Hotspot name on the Wi-Fi setting and enter the password then you can start transferring files.
If old phone doesn't have a Clone phone
- Click You can tap to install> and it will direct you to a web browser or open a browser from your phone and go to the
website: i.clonephone.coloros.com/download. (Note: this only works when you open it using your mobile phone. This will not open on your computer).
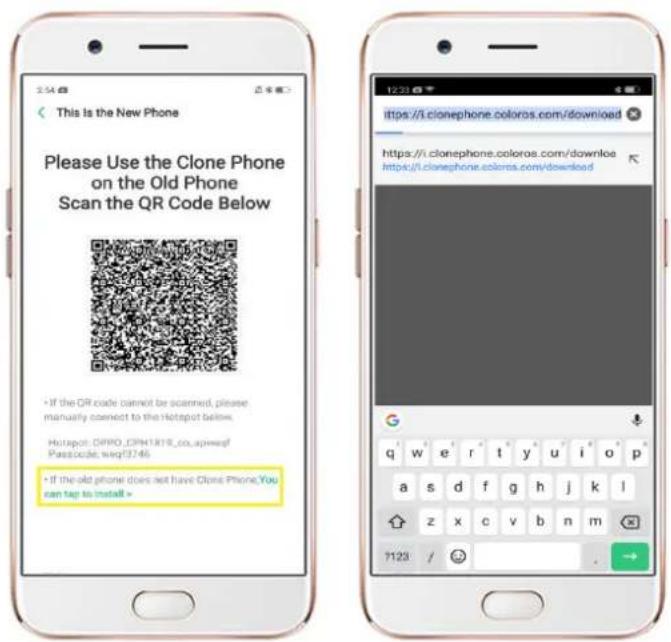
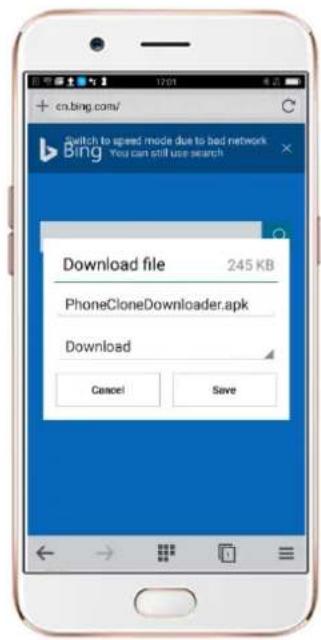
- Once you have entered the link above, it will prompt you to download the Clone Phone downloader APK file under the Download folder. You may change the folder path if you wish just click "Change the directory" then Click "Save".
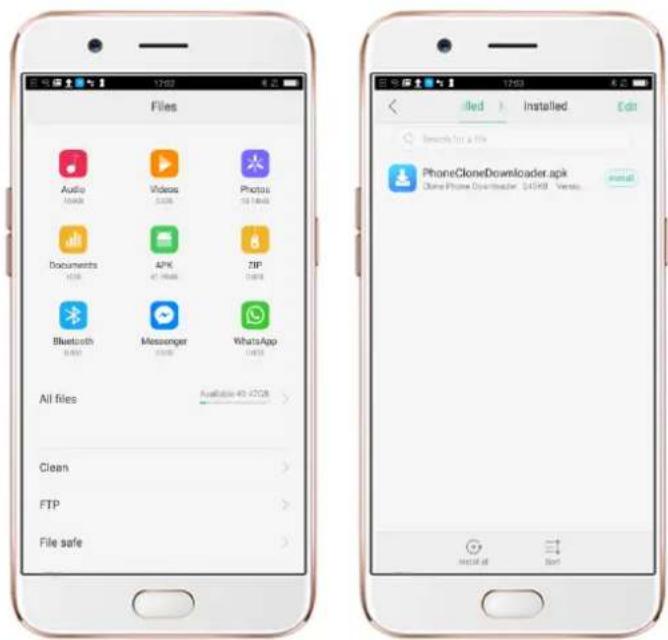
- Once download is done. On your home screen, go to the notification panel for the downloaded file or go to Files/File Manager and click "APK" folder or whichever folder you chose to save the file. Tap on "PhoneCloneDownloaded.apk" file then click on "Install".
- After installation has been completed, click "Done" and you can now start to transfer files.
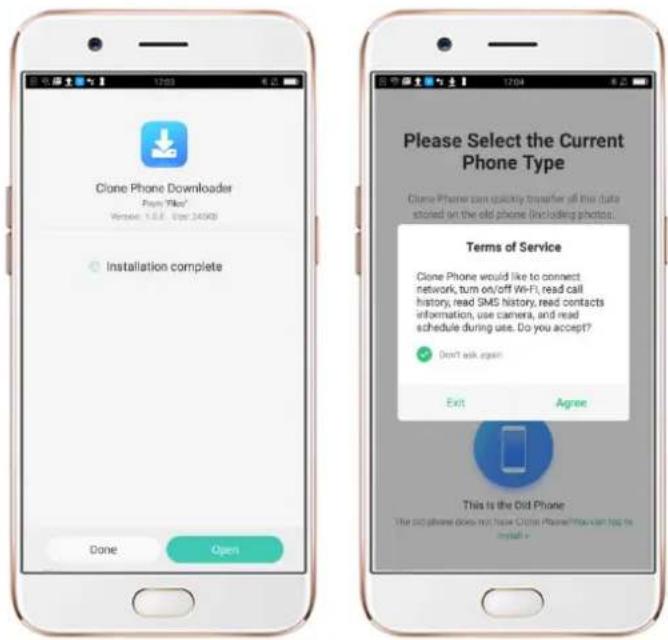
Note: The duration of the Clone Phone process depends on how big the data you are going to transfer. Please patiently wait before it is completely transferred.
3.2.4. Date and Time
Knowing the time and date is crucial to keeping on schedule. If you want to set the date and time display on your OPPO phone, or if you're out of synch or need a time update, just start with step 1 as below.
- Go to [Settings] > [Additional Settings] > [Date & Time], click it.
- 24-Hour Format. Switch from 12-hour or a 24-hour format optionally.
- Automatically Set Date and Time. Enable [Automatically Set Date and Time] if you want to use the data given by your network provider or your GPS, or you can set the time yourself if you prefer. See step 4.
- Set Manually. You can manually set the time and date. To do so, disable [Automatically Set Date and Time], and then:
- Select your time zone. Click [Time Zone] and select the location you would like to adjust your time to.
- Change the date and time. You will see the date and time appear under the current time zone. Drag your finger across each column to change the date and time. Scroll wheels will appear to allow you to change the date and time simultaneously.
View more details in Set up date and time on your OPPO smartphone.
3.2.5. Language and Region
OPPO smartphone offers you an easy access to configure it to display information in another language. If you want to change its language to yours, or if you've relocated to a new country, you can change language and region by following a few easy steps.
- Go to [Settings] > [Language & Region], click it.
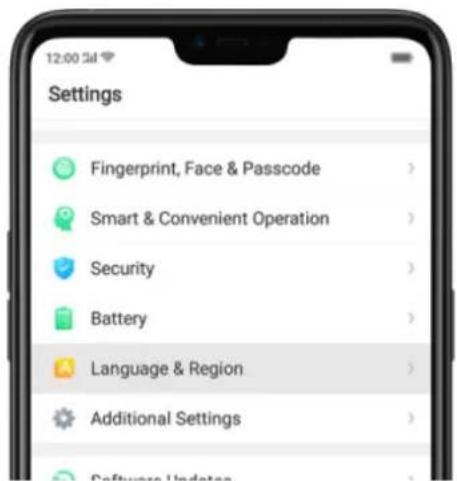
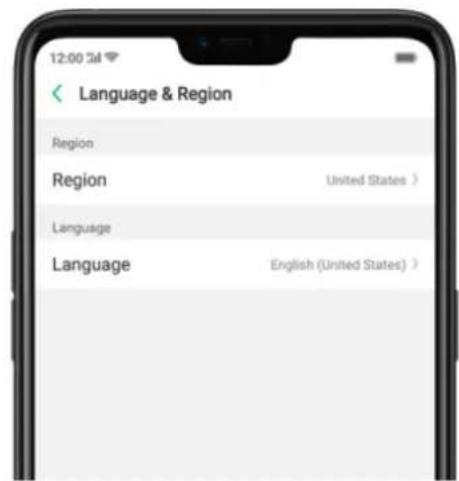
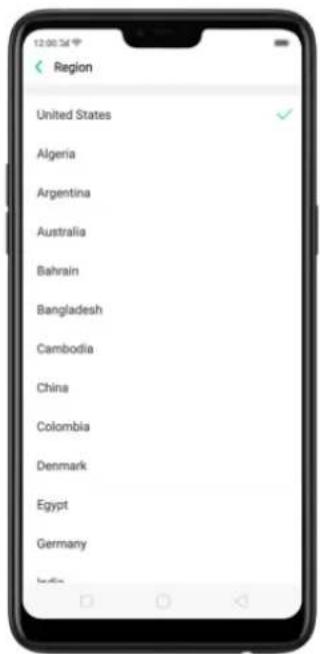
- Find your desired region. Click Region and change the region you want to use.
-
Find your desired language.
-
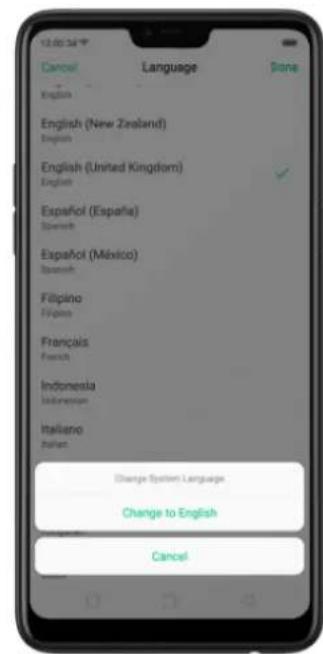
Click [Language], you will see a list of languages. Scroll down to find the language you wish to use.
- Select your desired language and click "Done." A confirmation message will appear at the bottom of your screen. Confirm the change by clicking "Change to ____." Then your OPPO phone will be in the new desired language.
3.2.6. Connect to the Internet
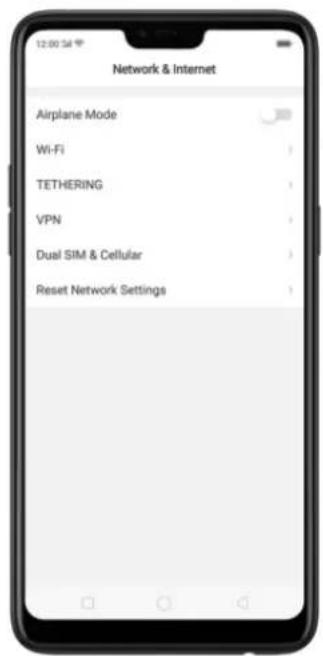
OPPO smartphone connects to the Internet whenever necessary, using a Wi-Fi connection or mobile network.
Wi-Fi connection
- Go to [Settings] > [Wi-Fi], or swipe down from the top of your screen to open
Control Center, then tap 📤. The detected Wi-Fi networks will be displayed. - Tap the Wi-Fi network you want to connect to.
- Fill in the password if required.
Mobile data connection
Go to [Settings] > [Dual SIM & Cellular] and enable [Mobile Data], or swipe down
from the top of your screen to open Control Center, then tap
Notice: Enabling the mobile networks connection may result in extra cost. Check with your mobile network service carrier.
4. What's new in ColorOS 5.2
4.1. Smart Sidebar
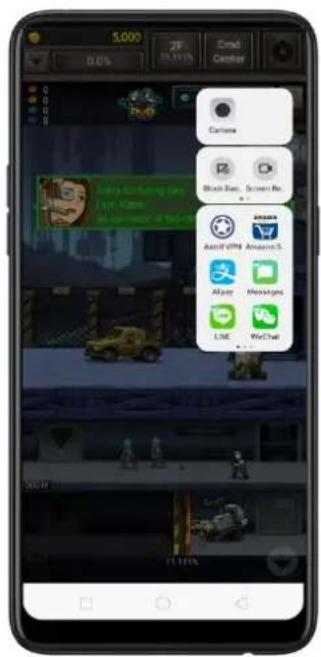
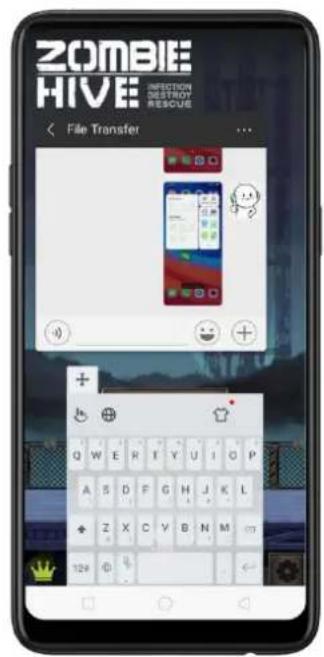
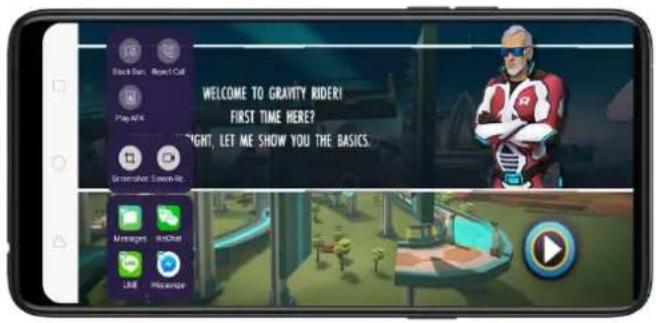
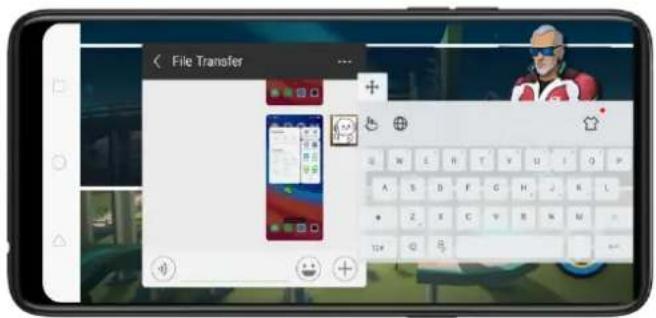
The new It's multitasking at its best, where you'll have quick access with your favorite apps and tools. This enables to switch between apps, transfer files, reply messages, or take screenshots when playing a game or watching a video.
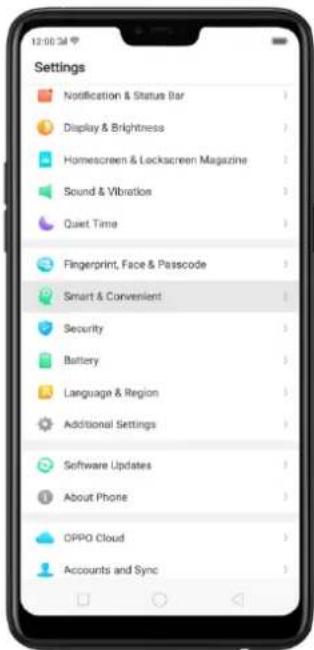
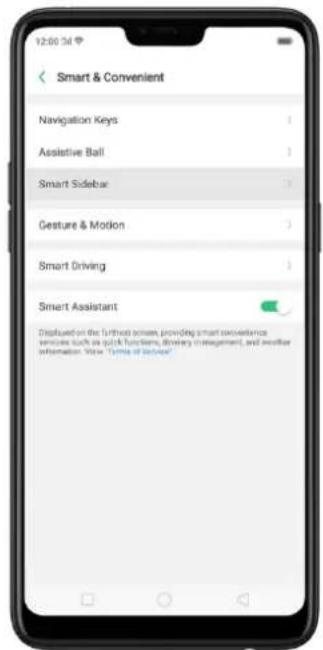
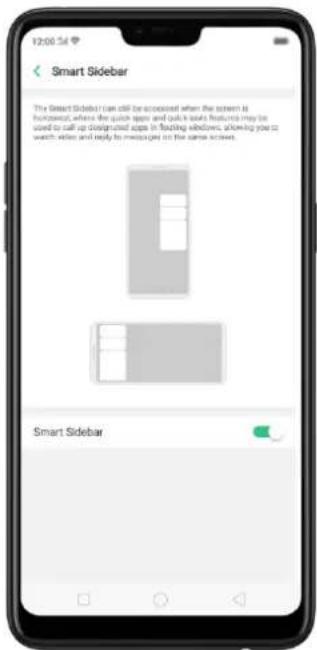
To enable Smart Sidebar, go to [Settings] > [Smart & Convenient] > [Smart Sidebar] > toggle [Smart Sidebar] to green to enable.
Once enabled, you'll be able to see a white vertical line on the side right side of your phone. Slightly swipe it to the left and the Smart Sidebar will show.
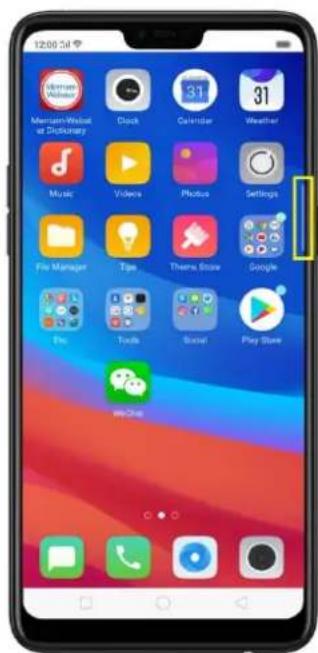
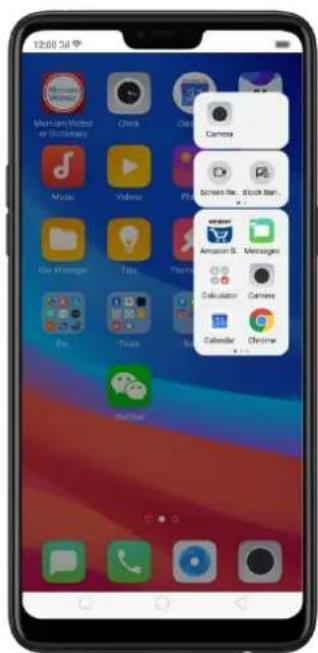
Once enabled, you'll be able to see a white vertical line on the side right side of your phone. Slightly swipe it to the left and the Smart Sidebar will show.
Managing Smart Sidebar
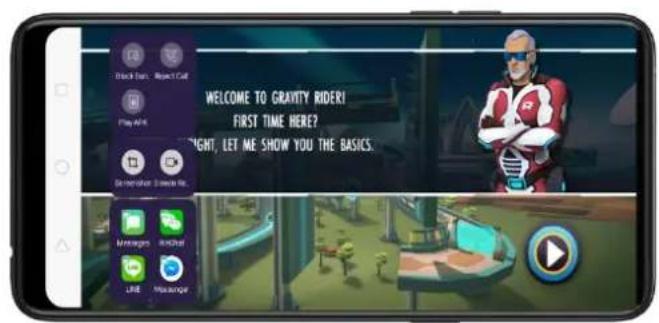
- If the Smart Sidebar is full, long press the Quick tools or the Quick Apps area for you to be able to manage or edit what will show on your Smart Sidebar. (Note: Long pressing the camera area will not work since you can't add anything here)
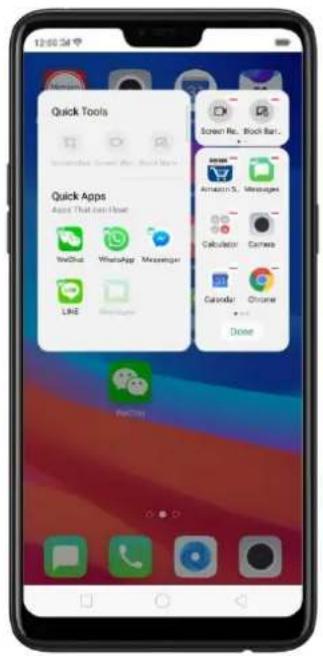
- If the Smart Sidebar is not full, click on + to add tools or apps then click each one of them. You can click Done or just click anywhere on the home screen for changes to be made.
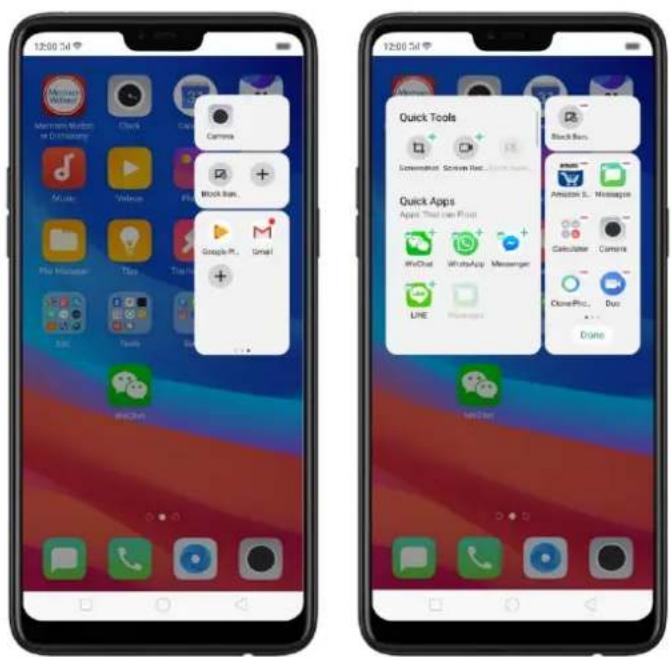
The tools and apps available for Smart Sidebar
-
Quick tools. There are 3 available slots and tools to choose from. You can add them all or just choose the one you like to show.
-
Screenshot
- Screen Recording
- Block Banners
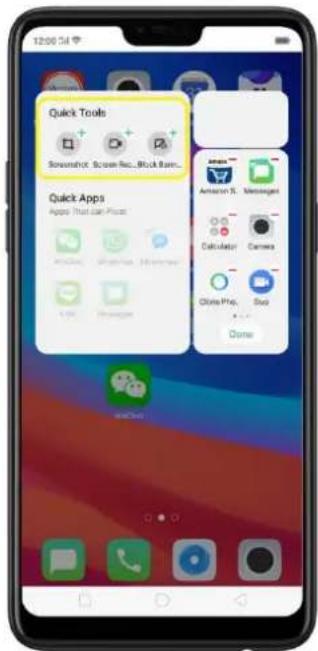
- Quick Apps. Quick apps has been divided into two: Apps that can float and other apps. As long as the app supports the floating feature then it will show on the floating apps. Other apps will show all apps that are on your phone. However, you can only add 18 apps on the Smart Sidebar. You will be notified "Adding limit reached" if Quick Apps slot is full. Choose the one that you frequently use.
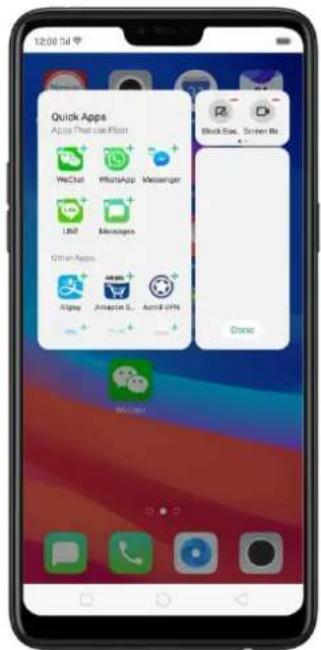
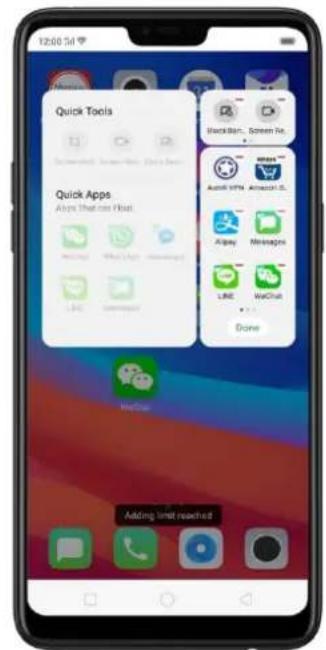
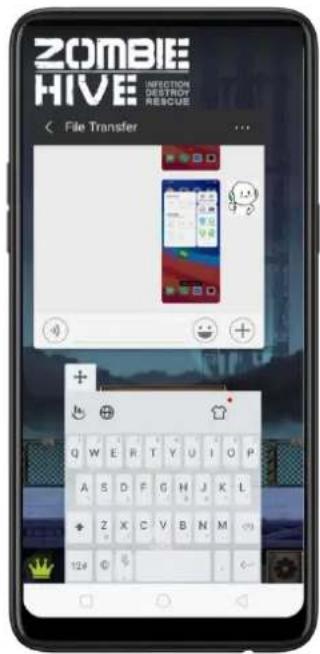
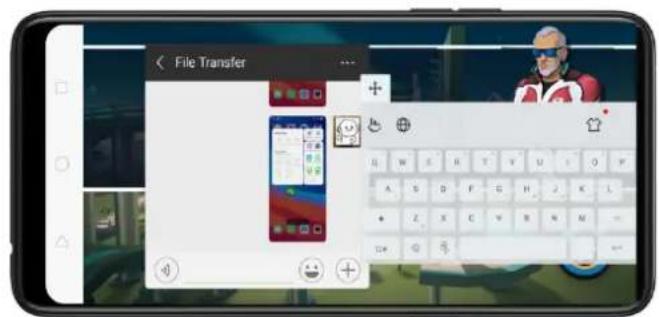
Smart game sidebar. Enjoy your games and at the same time check and reply messages or posts on your social media. Never be left behind even when enjoying your games.
4.2 Smart Scan
There are more things you can do with your camera apart from taking pictures and selfies. One snap and have languages translated in an instant. Scan business cards and have all information saved on your contacts.
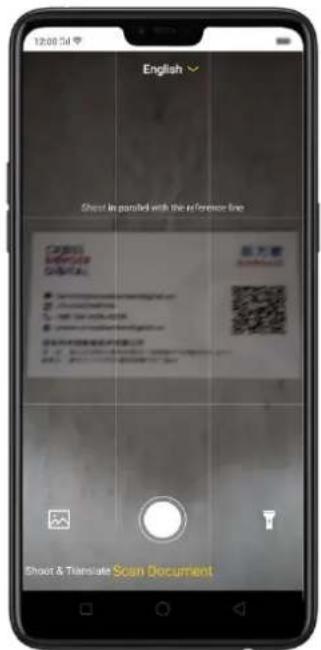
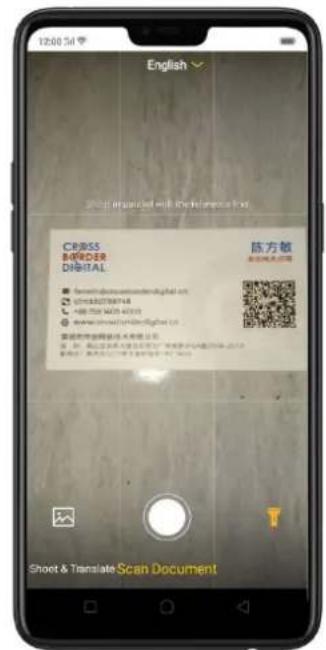
You can quickly use the Smart Scan by going to the [home screen] and click on [Smart Scan] to launch the app.
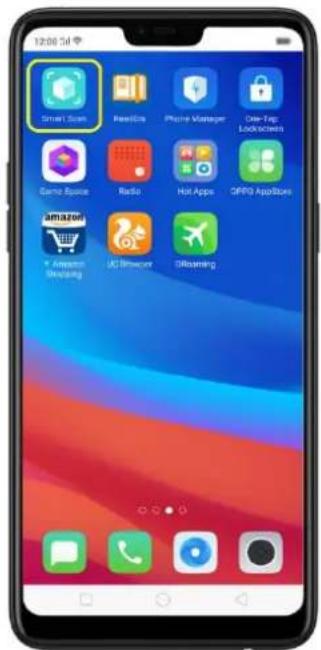
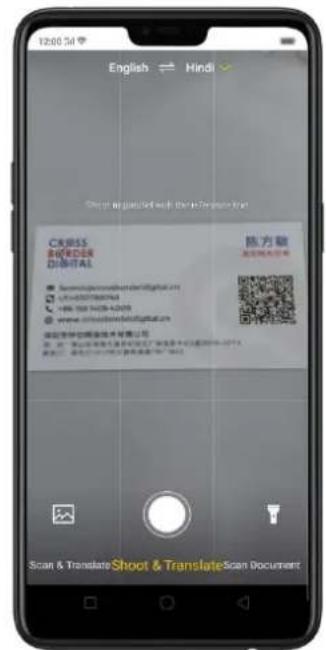
Main features of Smart Scan
- Scan & Translate – This only available for English to Hindi and vice versa. Pan your finger at the bottom and choose "Scan & Translate". You can translate each word or phrases as long as it will fit on the frame that's provided. You can listen to the pronunciation by clicking 📋.
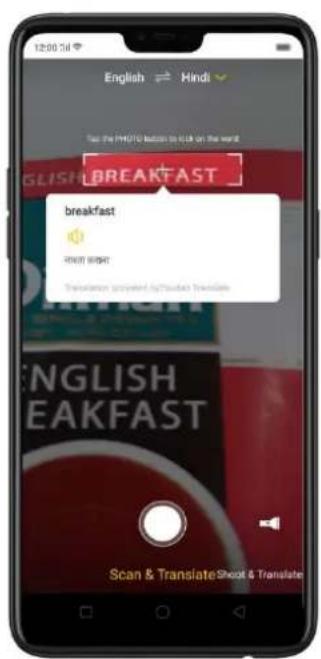
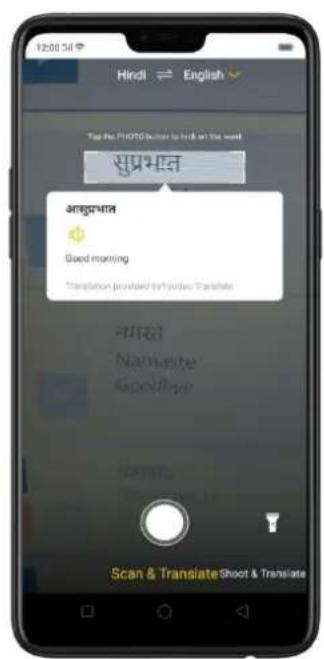
You can also lock the word so it won't read other words/phrases. Click ☐ and you will be able to lock and unlock word or phrases. You will see a padlock in the center of the frame once a word is locked.
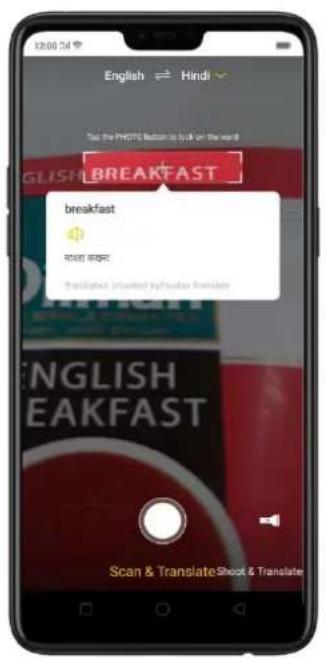
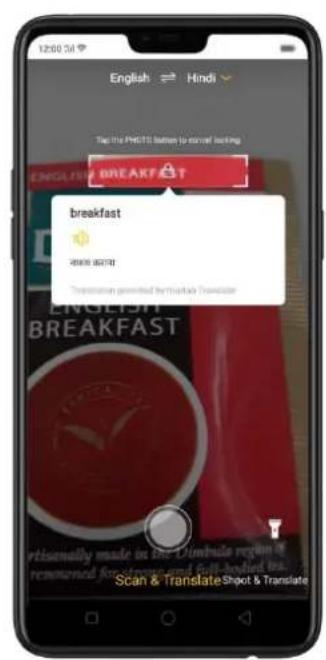
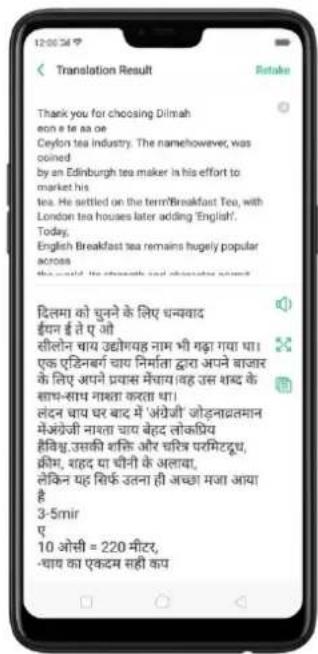
- Shoot & Translate – This only available for English to Hindi and vice versa. Pan your finger at the bottom and choose "Shoot & Translate". Aim at anything that you would like to translate then click 📄 and Smart Scan will start to recognize the texts. You can either Retake or see the Translation Results.
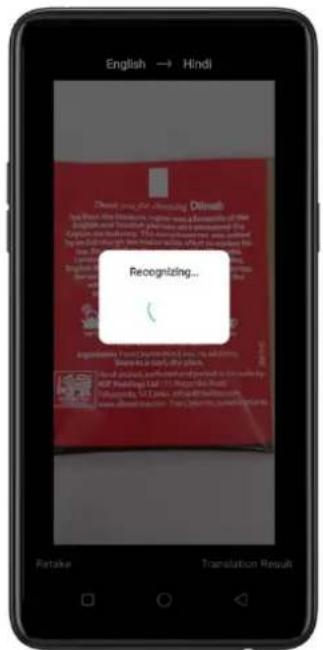
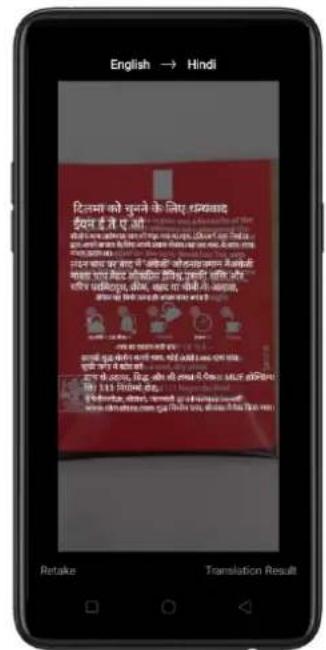
Once translation has been made, you can Retake, Listen (播放), maximize the page (播放), or copy the text (播放) if you want to.
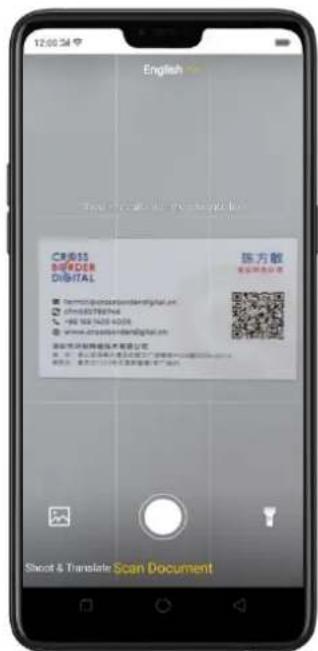
- Scan document. This can translate English, Japanese, Korean, French, Spanish, Italian, German, Hindi, and Chinese languages. Pan your finger at the
bottom and choose "Scan Document". Choose the Language you want. Aim at anything that you would like to scan then click 🔓 to start the process.
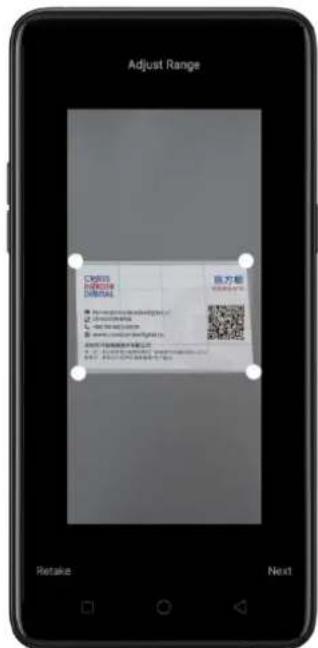
Once scanning is done you can do the following to the image:
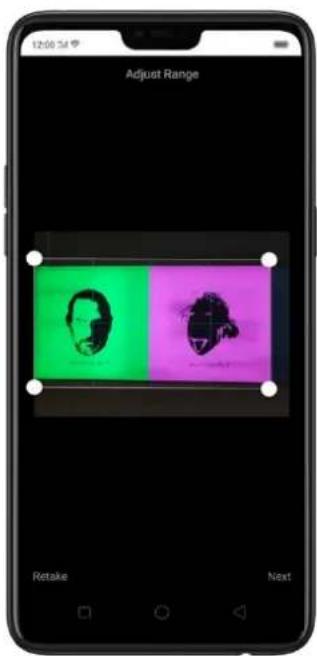
Adjust the range. Using your finger/s, move the four circles on the side of the image.
Optimized Image. You can choose from Auto, Enhanced, Mono, or the Original
Picture you've taken. Once done, click Save Picture.
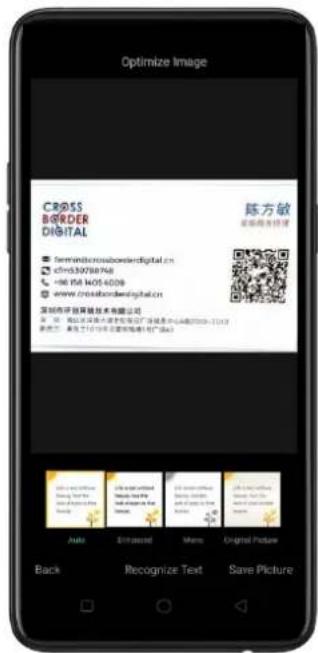
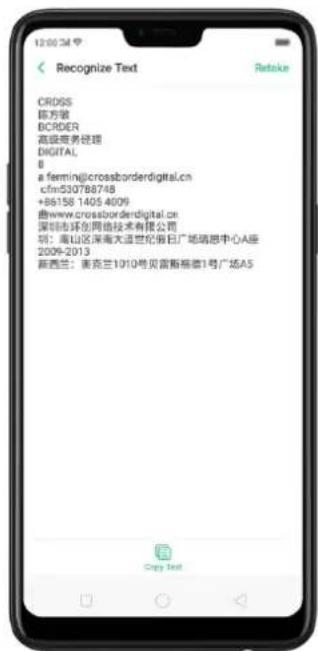
You may also Click Recognize Text if you want it translated. Click Retake if you want to scan again and click Copy Text if you want to paste the text someplace else.
Other features of Smart Scan
- Smart scanning pictures on your phone. You can do all the main features of Smart Scan on the photos that are already saved on your phone. Here's what you can do:
- Pan your finger at the bottom and choose if you want to Shoot & Translate or Scan Document. (Note: This feature is unavailable for Scan & Translate).
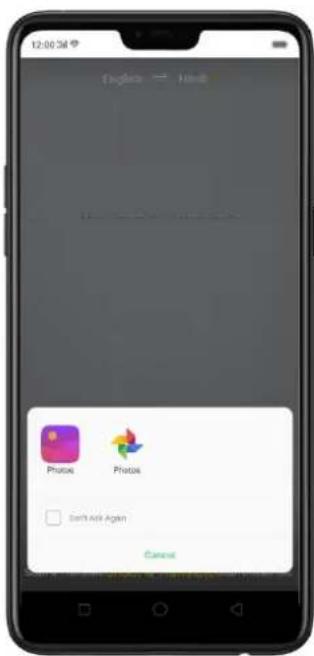
- Choose the language prior to opening the Photo apps.
- Click 📋 and choose the Photo app you want to use.
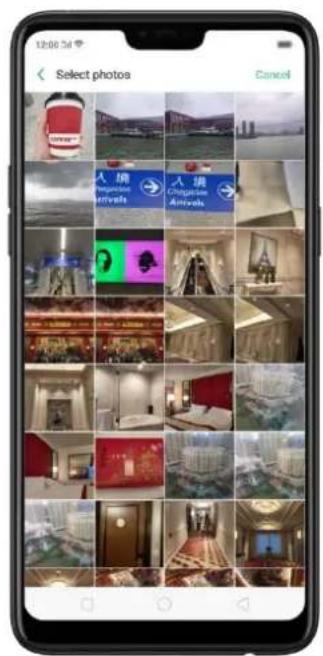
- Choose an image you want to Shoot & Translate or Scan Document.
- Flashlight. When the area you are taking a picture or scanning a document is too dark, or dimly lit or you just want a clearer view of the image.
Click 📋 to open flashlight and enjoy a better shot of the image or document you want to scan. Once flashlight is on, flashlight icon will turn into this 📋.
4.3 New features of Smart Assistant
Smart assistant maximizes the use of your camera. Just one snap and you'll get tons of information just by mere clicking the camera button or the Optical character recognition (OCR). It's now a lot easier and smarter to Scan documents, Scan & translate images and texts, Scan namecard to be saved on your contacts, and translate photos to make travel and life more convenient.
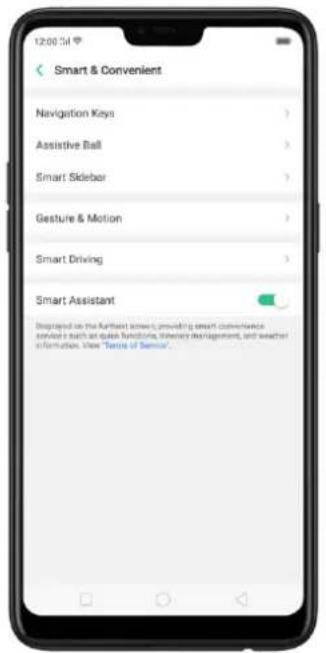
Open Smart Assistant. Go to [Settings] > [Smart & Convenient] and turn on [Smart Assistant]. Or swipe right from the left edge of the home screen, then click Turn on Smart Assistant.
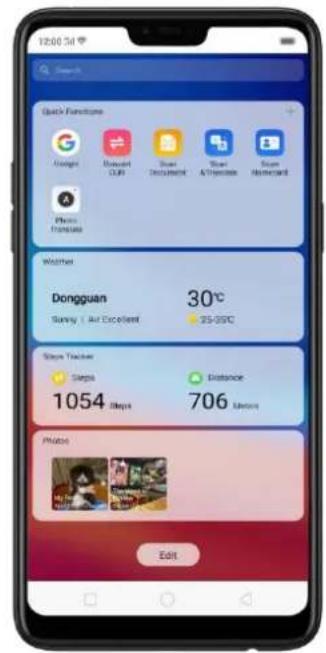

- Scan Document. Click Document to launch Smart Scan app and open this feature directly. This can translate English, Japanese, Korean, French, Spanish, Italian, German, Hindi, and Chinese languages. Choose the Language you want. Aim at the document that you would like to scan then click to start the process.
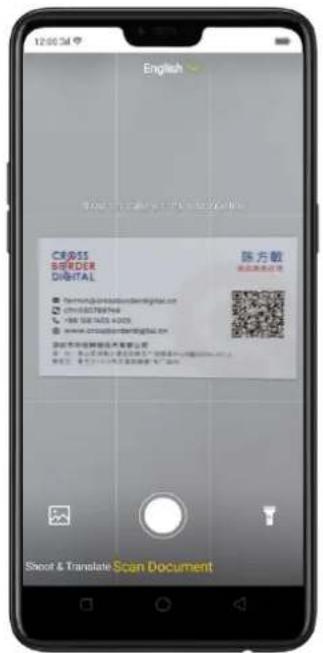
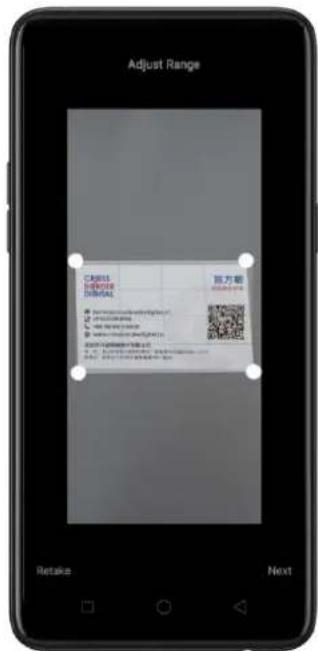
Once scanning is done you can do the following to the image:
Adjust the range. Using your finger/s, move the four circles on the side of the image.
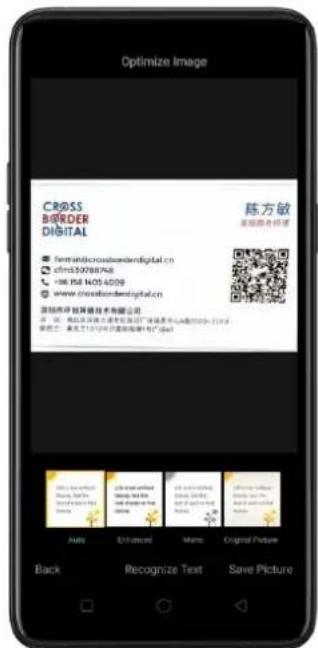
Optimized Image. You can choose from Auto, Enhanced, Mono, or the Original Picture you've taken. Once done, click Save Picture.
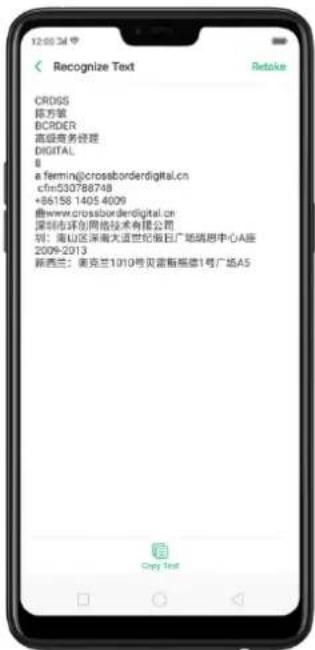
You may also Click Recognize Text if you want it translated. Click Retake if you want to scan again and click Copy Text if you want to paste the text someplace else.
- Scan & Translate. Click Scan &Translate to launch Smart Scan app and open this feature directly. This only available for English to Hindi and vice versa. You can translate each word or phrases as long as it will fit on the frame that's provided. You can listen to the pronunciation by clicking 📋.
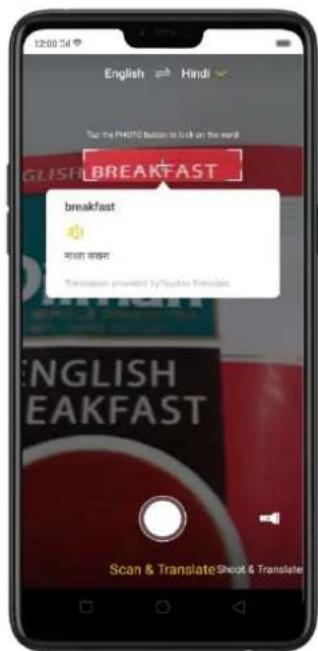
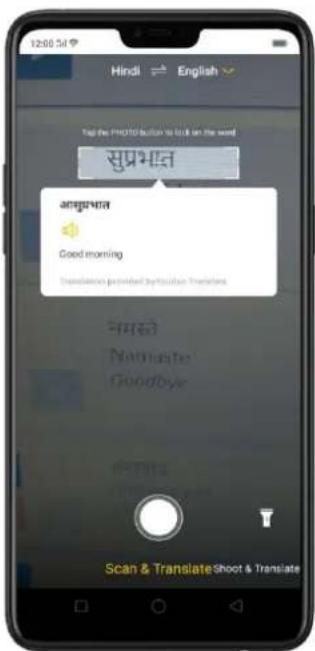
You can also lock the word so it won't read other words/phrases. Click ☐ and you will be able to lock and unlock word or phrases. You will see a padlock in the center of the frame once a word is locked.
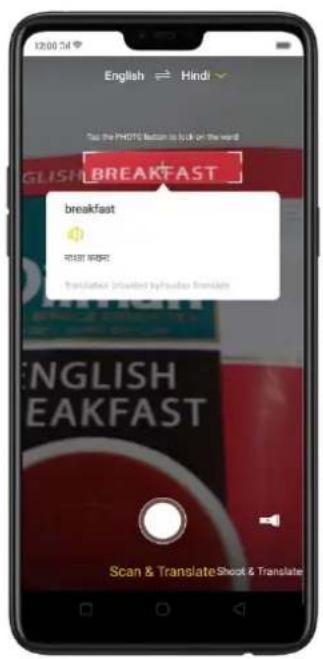
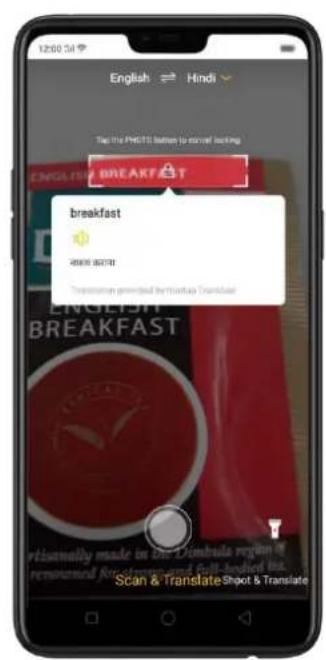
See: Smart Scan

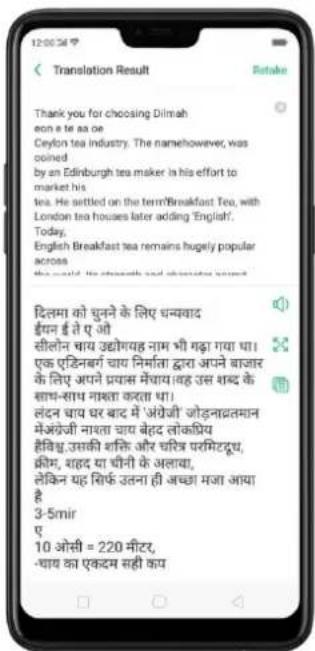
- Photo Translate. This is also called Shoot & Translate. Click Photo Translate to launch Smart Scan app and open this feature directly. This only available for English to Hindi and vice versa. Aim at anything that you would like to translate then click 📄 and Smart Scan will start to recognize the texts. You can either Retake or see the Translation Results.
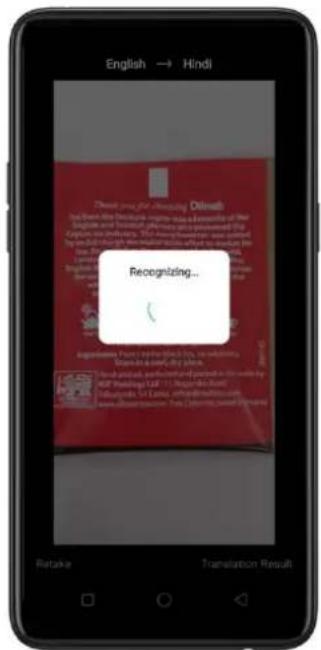
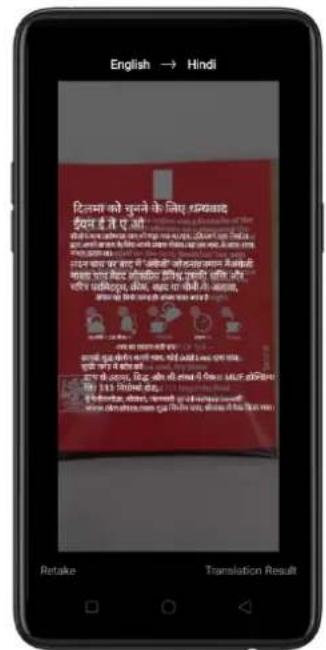
Once translation has been made, you can Retake, Listen (播放), maximize the page (播放), or copy the text (播放) if you want to.
See: Smart Scan

- Scan namecard. Click Scan to launch Contacts app and open this feature directly. Before scanning the business card or namecard, click A for the namecard recognition language. Make sure to fit the namecard or business card on the frame.
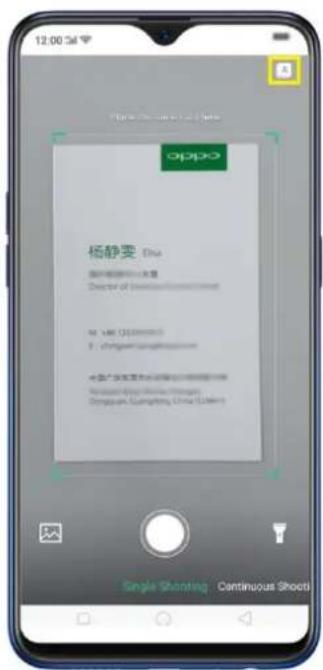
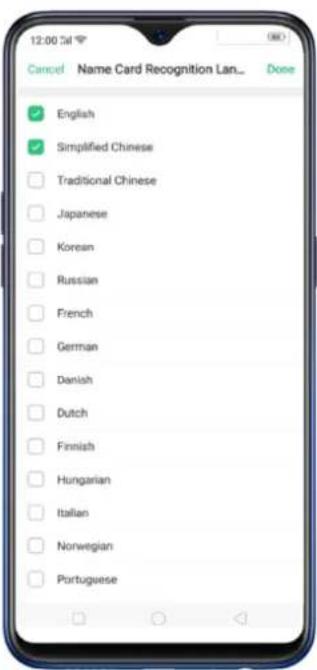
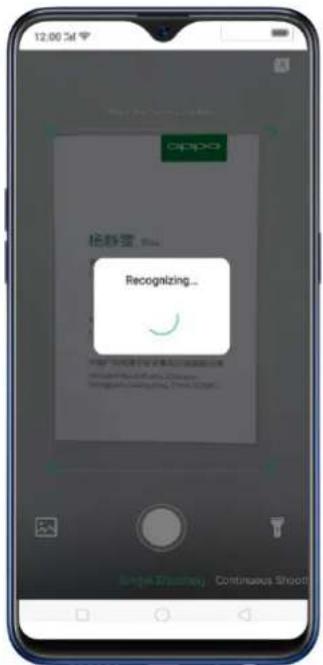
Click ☐ to start recognizing the namecard or business card and all information will directly be stored on your Contacts app then click Save.
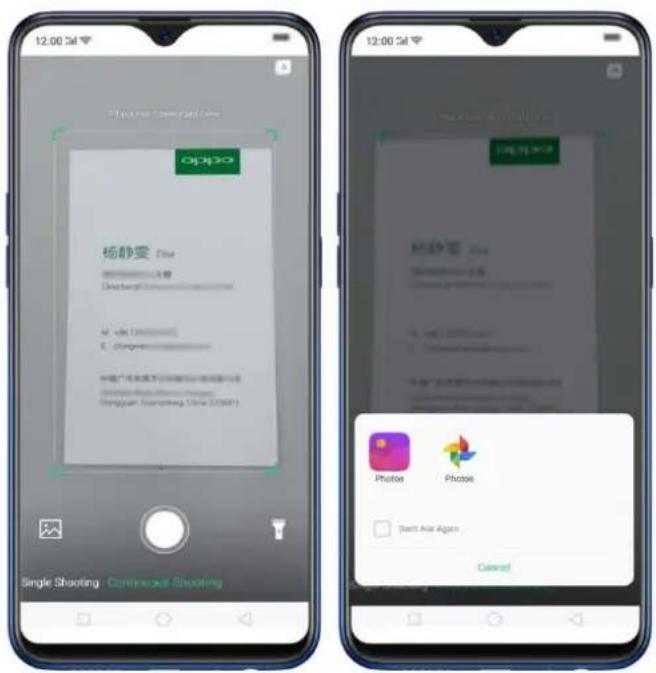
You also have an option to do Continuous Shooting, open Photos app if a namecard or business card is saved there, or use the flashlight if area to scan is dimly lit.
See: Contacts
4.4 Google Lens
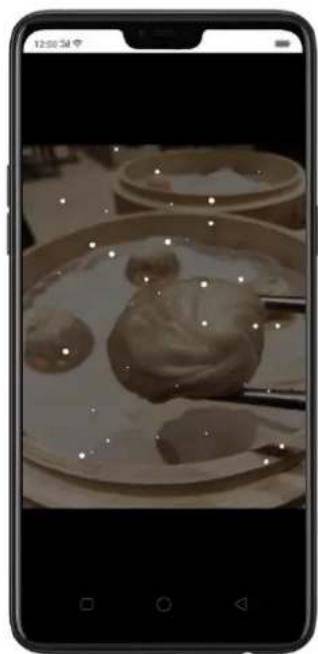
Google has just recently introduced Google Lens which will analyze what you see and will give you results in real time. It will tell you what the image is or give you links to understand it better.
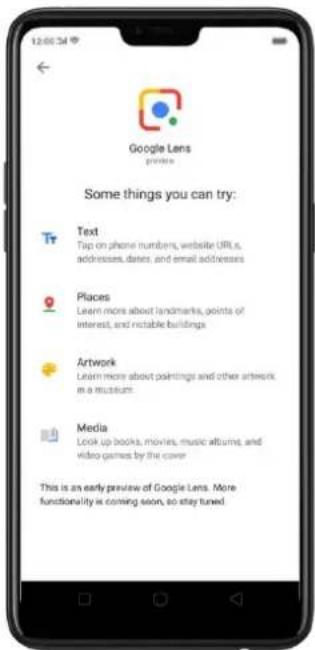
There are two ways you can enjoy Google Lens.
- Through the camera app. Open the camera app, then click on the Google
Lens Icon 📄, focus on the image that you like and let Google Lens analyze the photo for a few seconds, then it will give you results. Your image can be anything as long as Google Lens can analyze it then it will give you results. Note: This only works on Photo mode.
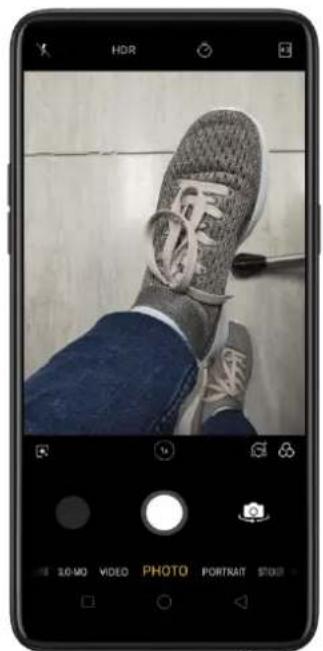
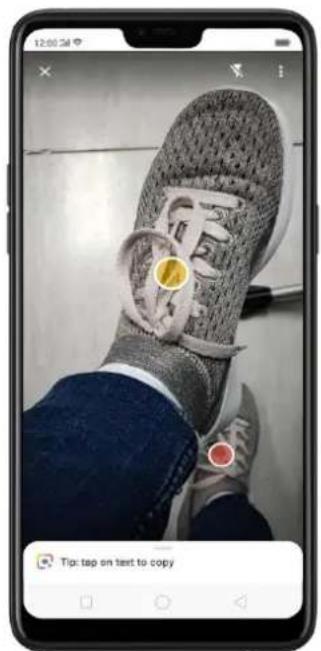
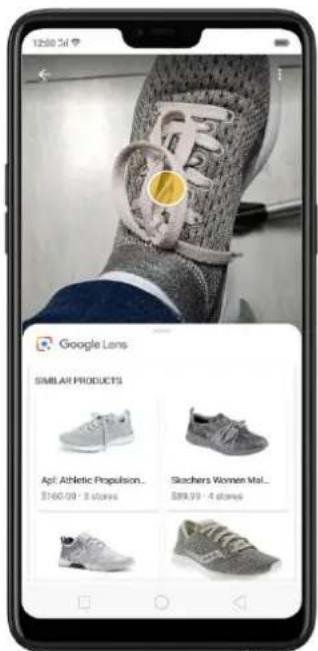
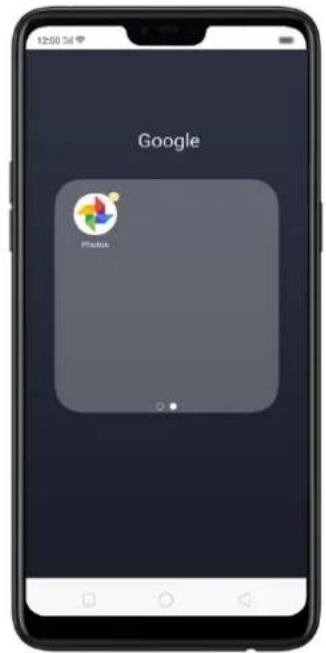
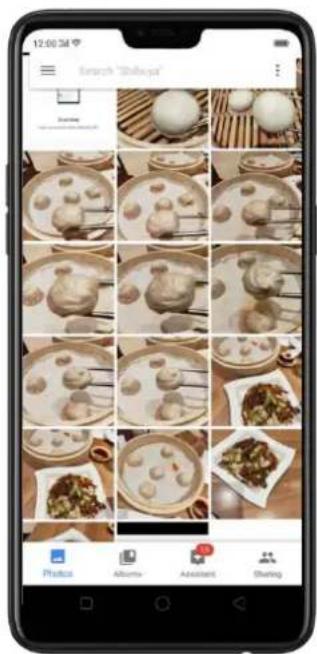
- Through Google Photos app. On the home screen, click Google Photos, select any photo on the Gallery then click the Google Lens icon and let Google Lens analyze the photo for a few seconds, then it will give you results. Your image can be anything as long as Google Lens is enable to analyze it then it will give you results.
natural_image
Mobile phone screenshot showing a grid of food photos with bowls, dumplings, and dishes (no visible text or symbols)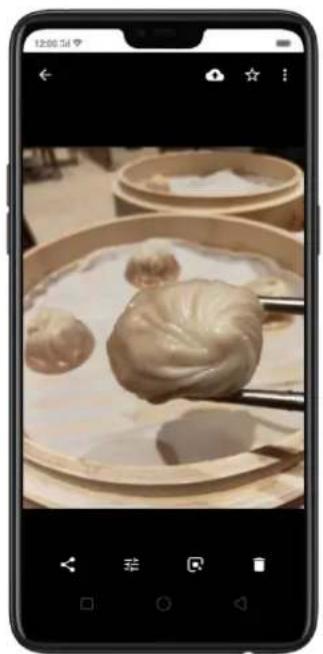
natural_image
Mobile phone screenshot showing steamed dumplings in a bamboo steamer (no visible text or symbols)3
natural_image
Mobile phone screenshot showing a steaming dumpling in a bowl, with chopsticks and a spoon nearby (no visible text or symbols)This technology will allow you to do the following (as stated on Google
PlayStore page and works for images on your Google Photos):
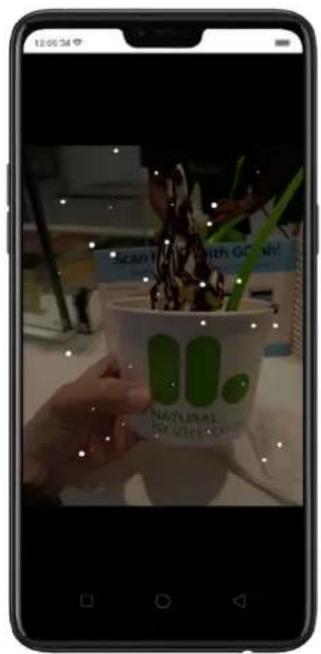
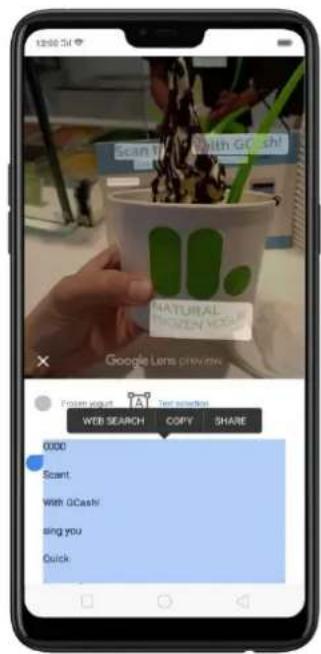
- Take action on text. Google Lens will intelligent check the texts available on the image. It will look up a dish right from the menu, add events to your calendar, get directions, call a number, translate words, search the web, and more. Or just copy and paste to save some time. Click 📄 to start analyzing the image.
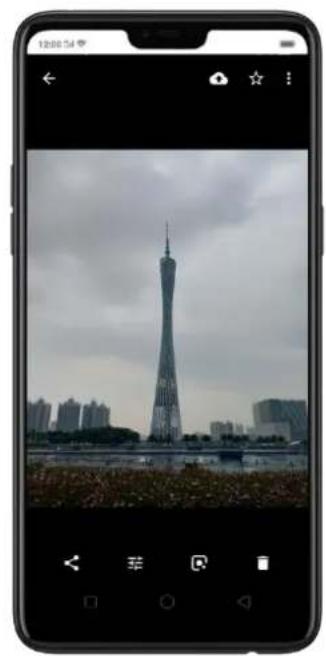
- Learn more about the world. Explore popular landmarks. See ratings, hours of operation, historical facts and more. Click 🔒 to start analyzing the image.
natural_image
Exterior view of a modern skyscraper with a distinctive tower under cloudy sky (no signage or text visible)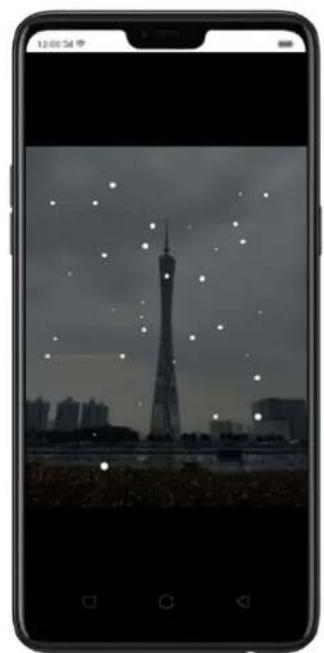
natural_image
Smartphone displaying a city skyline at dusk with a prominent tower and starry night sky (no visible text or symbols)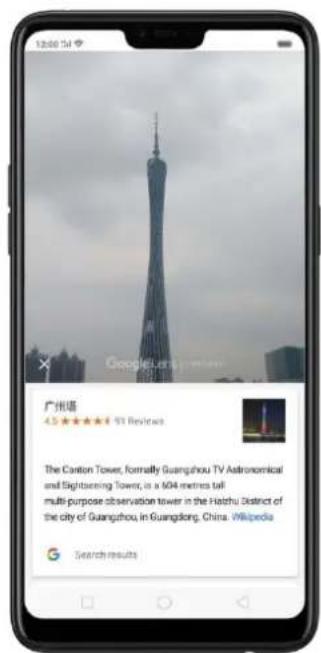
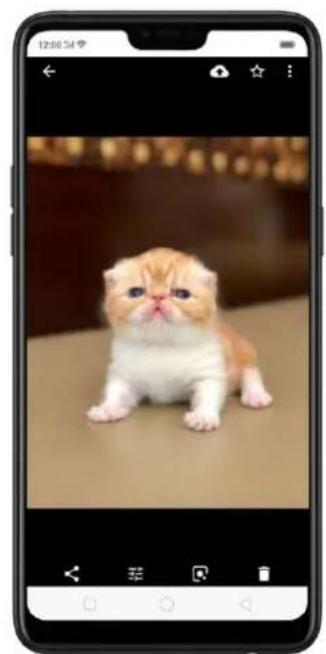
- Identify plants and animals. Find out what that plant is in your friend's apartment, or what kind of dog you saw in the park. Click to start analyzing the image.
natural_image
Black-and-white photo of a fluffy orange and white cat sitting on a surface, displayed on a smartphone screen (no text or symbols visible)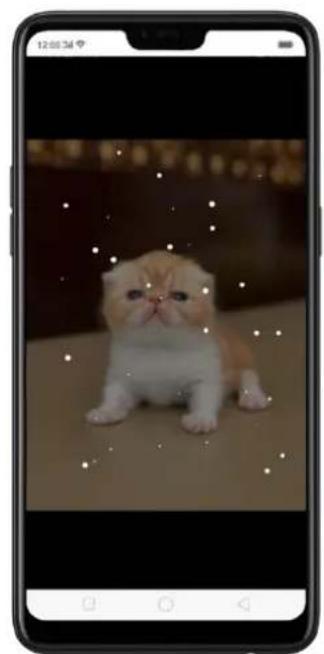
natural_image
Smartphone displaying a photo of a fluffy kitten sitting on a surface (no text or symbols visible)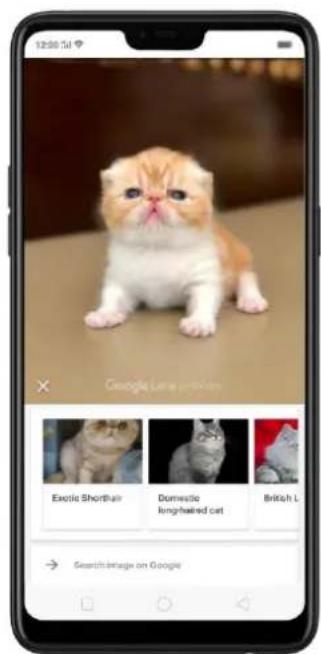
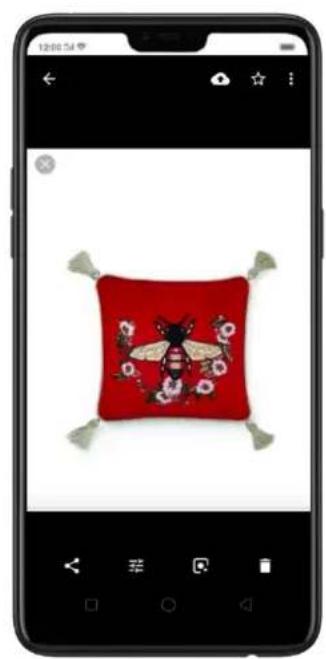
- Find a look you like. See an outfit that catches your eye? Or a chair that's perfect for your living room? Find similar clothes, furniture, and home decor—without having to describe what you're looking for in a search box. Click 📄 to start analyzing the image.
natural_image
Red embroidered pillow with a bee design, displayed on a smartphone screen (no text or symbols visible)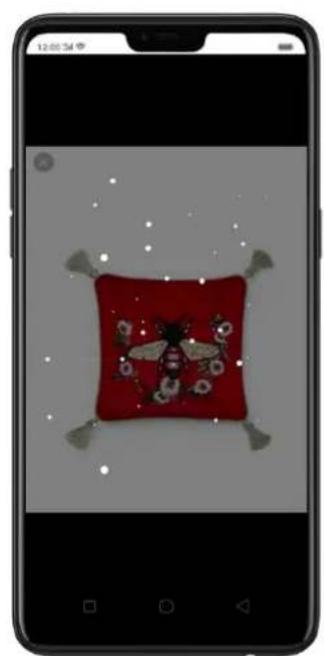
natural_image
Smartphone displaying a red cushion with a small insect design, surrounded by stars and snowflakes (no text or symbols visible)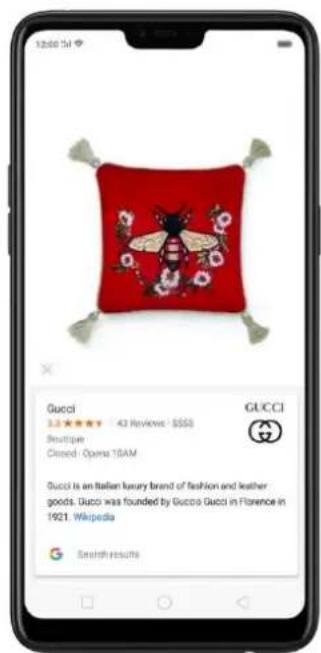
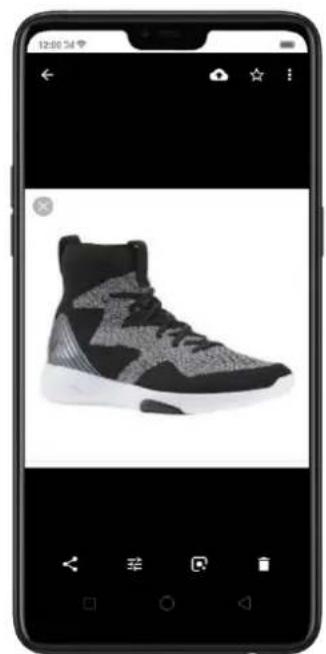
- Shop Smarter. Apart from identifying the image, the tool will also direct you to links where you can buy the things that you want. Click 🔒 to start analyzing the image.
natural_image
Smartphone screenshot displaying a black and white high-top sneaker (no text or symbols visible on the shoe itself)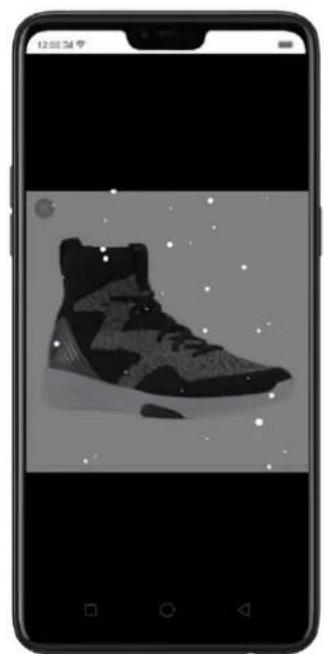
natural_image
Smartphone displaying a black and white high-top sneaker against a starry background (no text or symbols visible)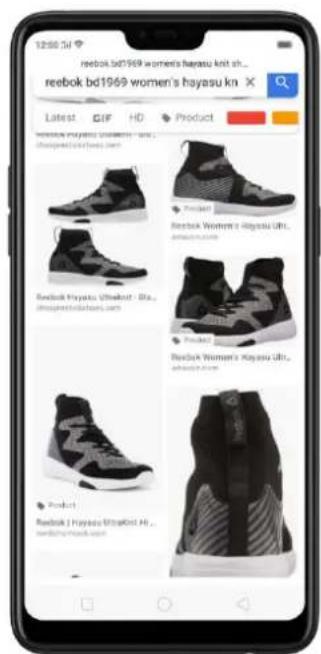
Note: This will need network connection to work.
4.6 ORoaming
To stay connected with loved ones and to still check business and work from time to time, we need data. It is now a necessity and we know it and we would want to make things easier for you. ORoaming makes you purchase international data package without the need of buying a SIM card. It supports 60+ countries/regions. Now you can truly enjoy your trip.
- To purchase ORoaming, go to [Settings] > [SIM Card & Cellular] > [ORoaming]. You can also open the ORoaming app on your home screen.
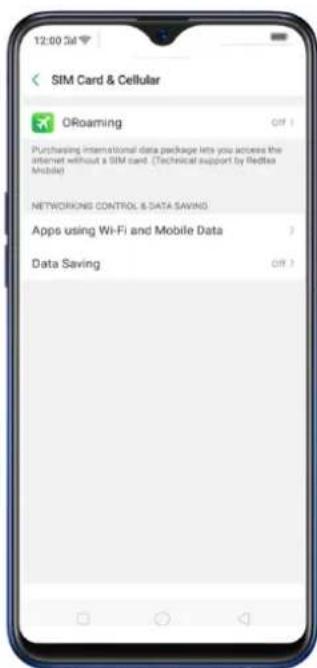
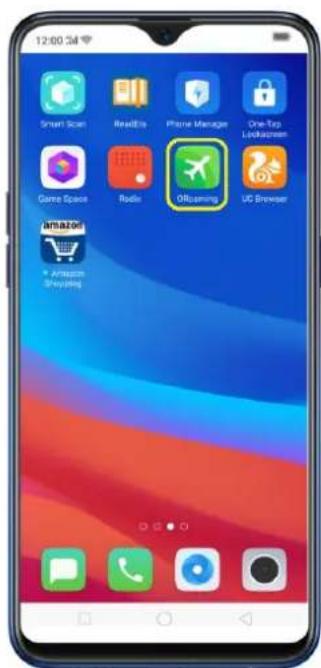
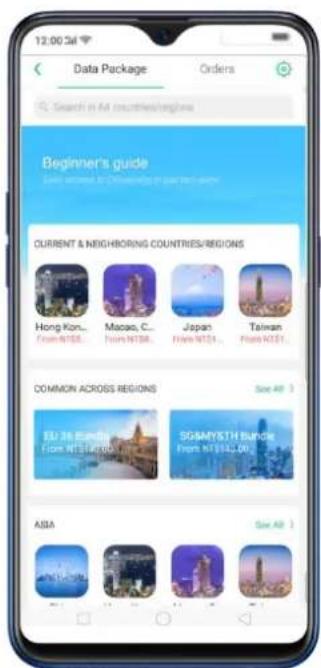
- Click on Beginner's guide for steps needed and common FAQs before using this feature.
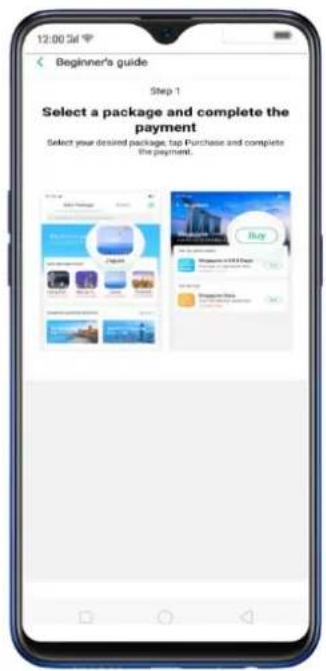
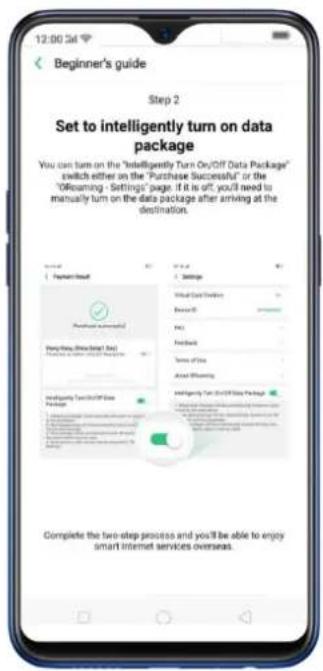
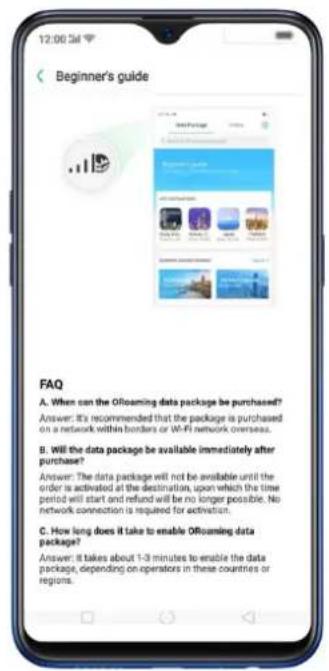
- Click Data Package or use the search field for the country that you plan to visit. You will be given options to choose from, click Buy, then choose your mode of payment, click Pay Now and the Amount. (Note: Only supports MasterCard and Visa credit cards).
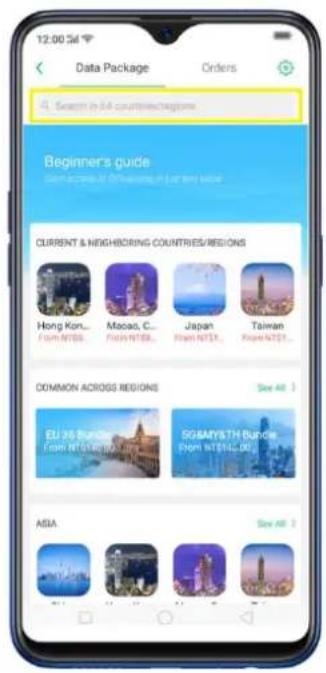
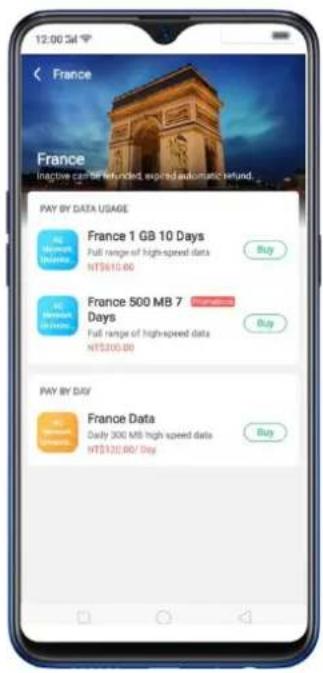
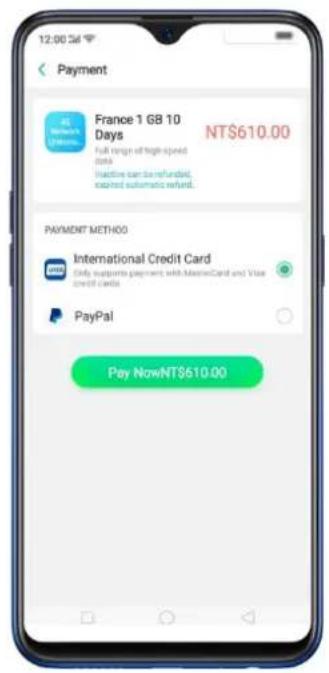
- Orders will show what you have just purchased, click Previous Order to show those you've previously ordered.
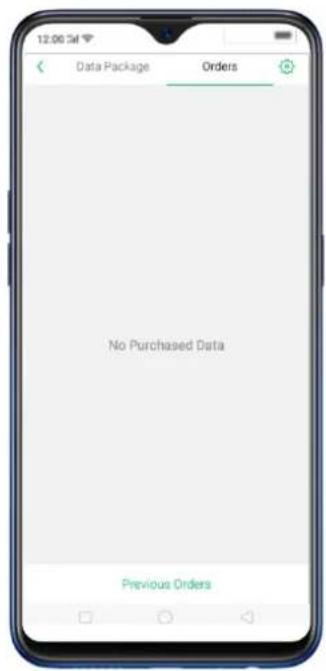
Settings of ORoaming
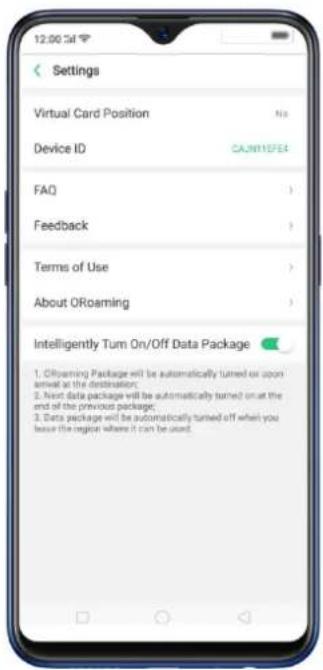
Click 🙏 on the top-right corner of the phone to manage the settings of ORoaming and to read more FAQs about the app.
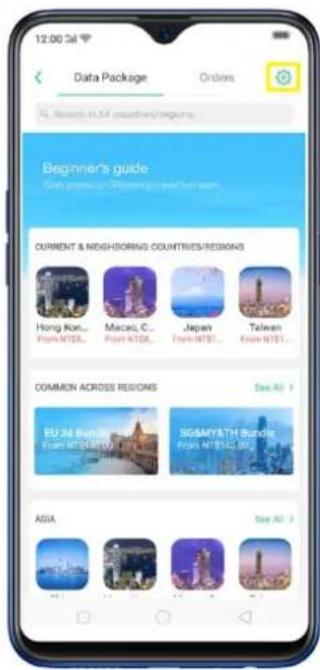
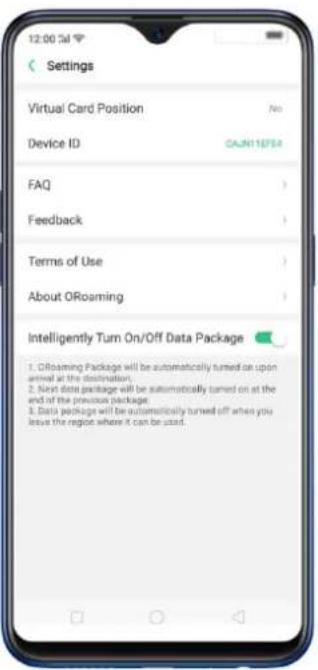
ORoaming settings contain:
- Virtual Card Position – This serves as your virtual SIM card since you won't be needing one when using ORoaming feature.
- Device ID – the special identification that is connected to the device that you are using.
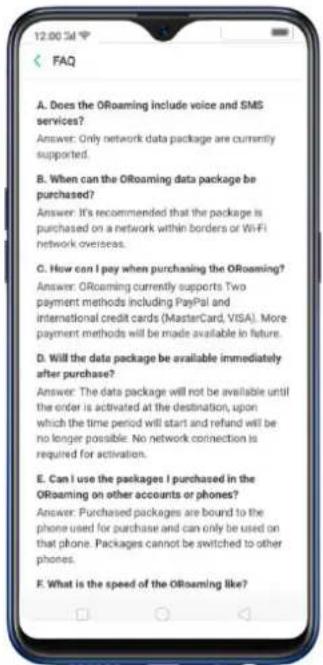
- FAQ – if you have more questions about ORoaming.
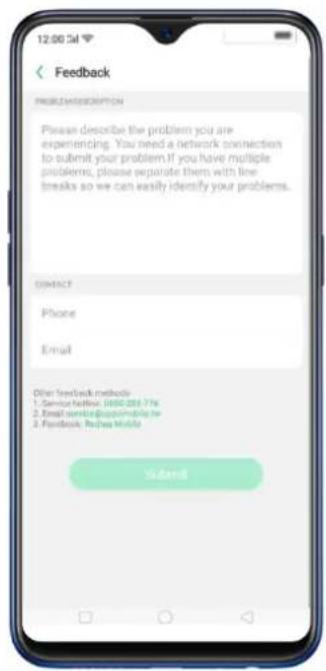
- Feedback – if you have some issues and concern and would want to let them know. Just give the Problem Description and input either your phone or QQ username and click Submit.
The Service hotline and Customer service for WeChat is also available if you are more comfortable communicating with them in these methods.
- Terms of Use– You may read and browse through the Terms of Use before purchasing anything on ORoaming.
- About ORoaming – to learn more about the application.
- Intelligently Turn On/Off Data Package – Toggle to green to enable. Once enabled: Will automatically turn on upon arrival at the destination, next data package will automatically turn on at the end of the previous one, and data package will automatically turn off when you will leave the place where the data roaming can only be used.
4.7 Auto-sync photos on OPPO Cloud
Save those precious pictures and selfies on OPPO Cloud automatically. No need to manually save it and no need to worry about it if something happens to your phone. OPPO Cloud got it covered. One thing is for sure, even when you lose your device your photos and contacts will always be available.
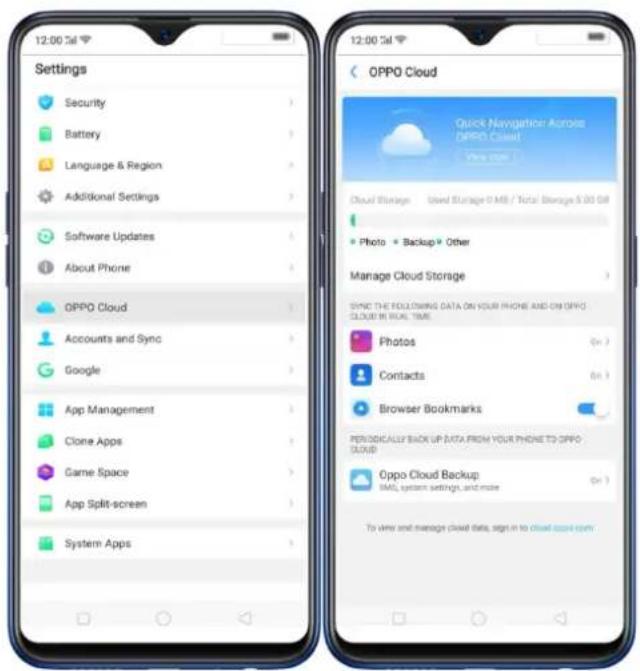
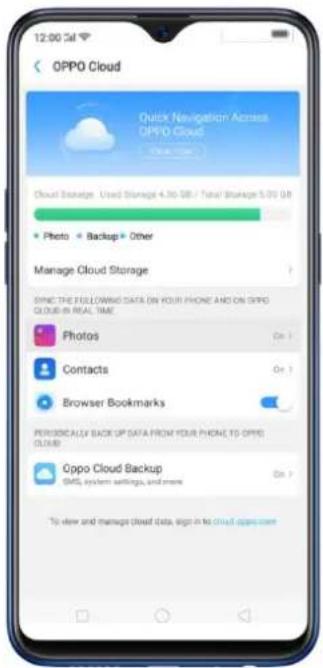
To check OPPO Cloud, go to [Settings] > [OPPO Cloud] and you'll be given 5GB of free storage which can be change with OPPO Cloud's Purchase Plan.
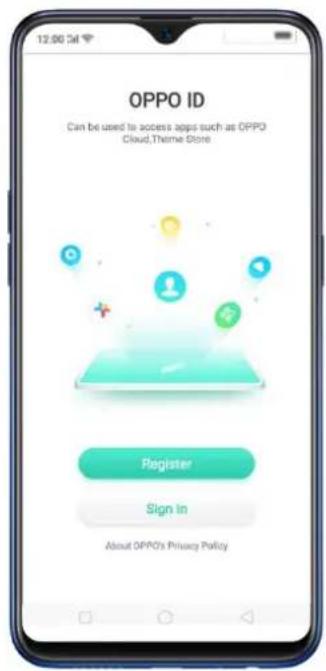
Note: Before you can fully enjoy the benefits of OPPO Cloud, you must first have an OPPO ID. It's so easy to register if you still don't have one. See OPPO ID
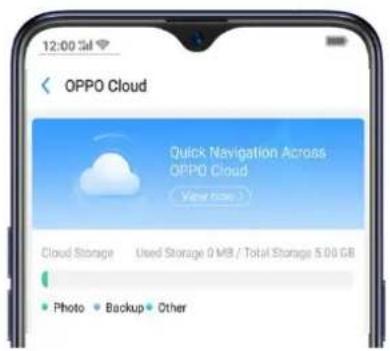
Quick navigation across OPPO Cloud. If you want to have a quick overview of OPPO Cloud and to get some tips on how to use it, click on View now.
• Data protection everywhere and easy data transfer.
• Data security and privacy protection
• Cloud Sync of Photos
- Optimize phone storage
• Cloud back-up of phone
• OPPO Cloud storage
- Easy management of your cloud data anytime, anywhere by visiting cloud.oppo.com
• 3 easy steps to activate OPPO Cloud
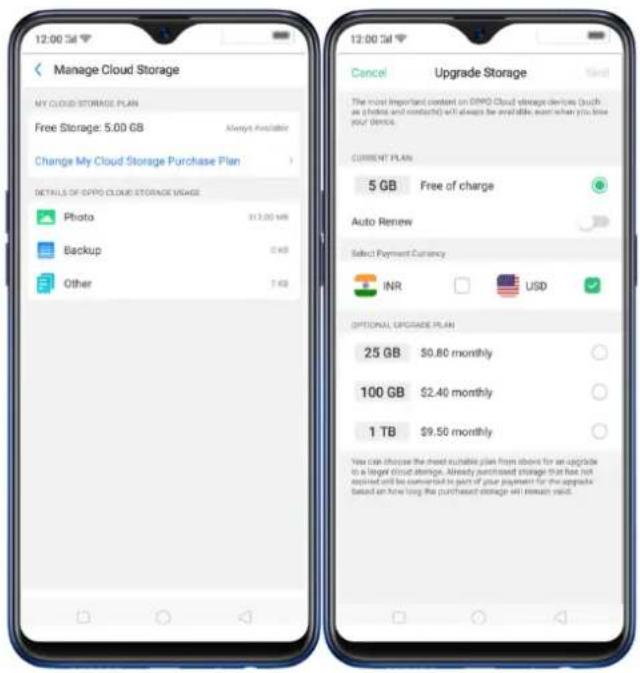
Manage Cloud storage. This will show your Cloud Storage plan and details of the storage usage. This is also where you can purchase Cloud storage plan to increase storage capacity.
Purchase Cloud storage plan.
- On the OPPO Cloud setting and click Manage Cloud Storage. In a quick glance, you will know which files are getting more of the space. Photo is green, Backup is blue, and Other is sky blue.
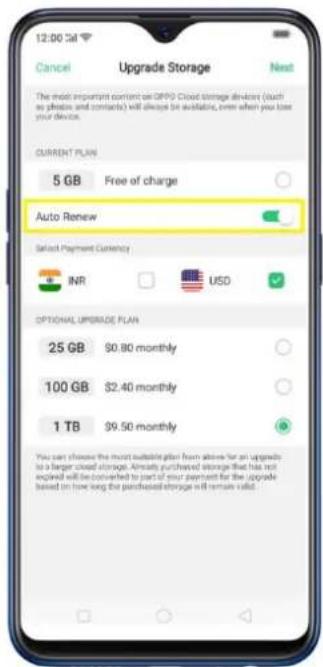
- Click Change my Cloud Storage Purchase Plan then choose the Plan you would want. It is available in 25GB, 100GB, and 1TB with its corresponding price and payment currency options.
- Click the plan that you have chosen, the payment currency you want to use, and toggle to green Auto renew if you want it then click Next. (Note if you choose Indian Rupee as a payment currency, Auto Renew is not available).
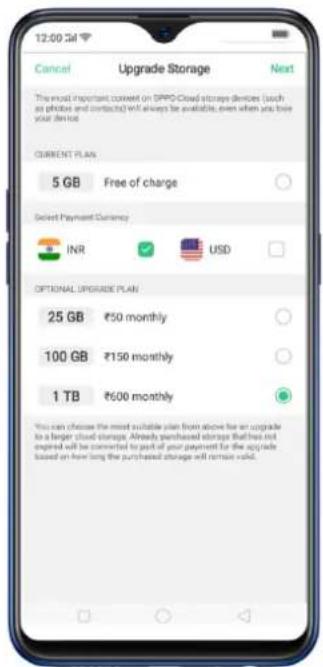
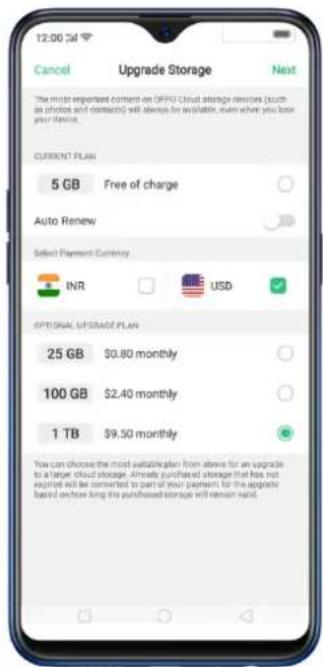
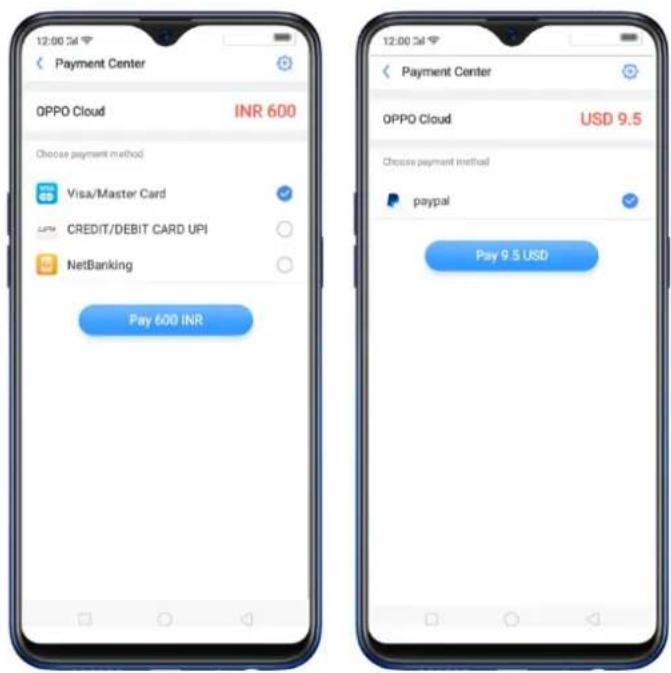
- Payment methods vary depending on the payment currency you have
chosen. For Indian Rupee, there are various methods you can use while US only uses PayPal method, then click Pay.
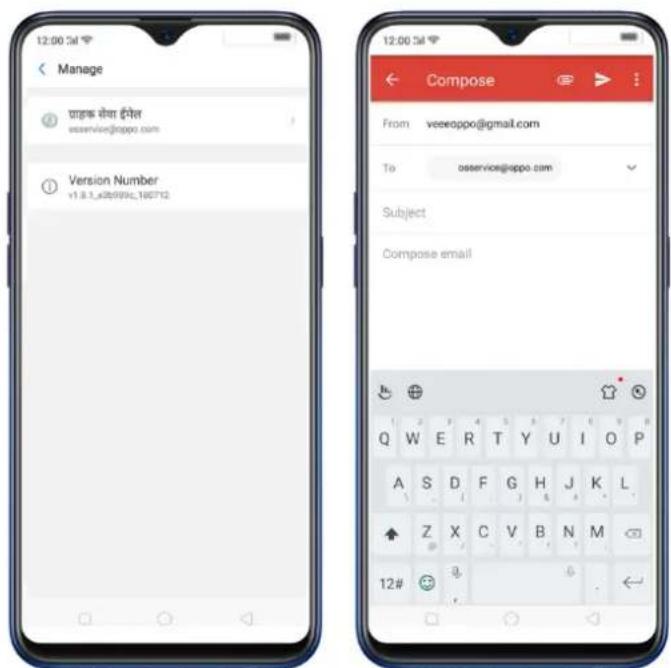
- Click 🔒 at the top right corner of the payment center page to contact customer service if you have some inquiries or feedback. This will also show you the version number of OPPO Cloud.
Files you can sync on OPPO Cloud
- Photos. To auto Sync Photos, click Photos, then click Auto Photo Sync. You can choose to auto sync photos using Under Wi-Fi or Cellular Data, Only Under Wi-Fi, or to Close. (Note: Photos will only be synced on OPPO Cloud which means if you delete photos from your phone, the photos that has been synced to OPPO Cloud will also be deleted).
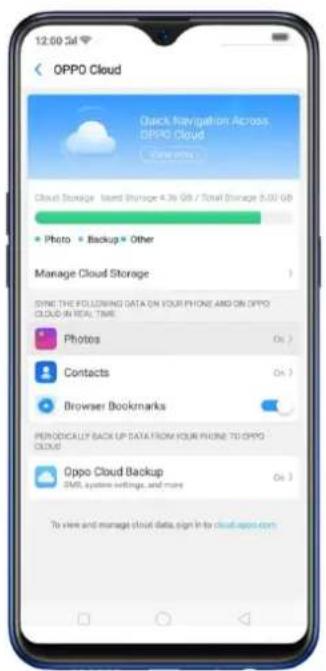
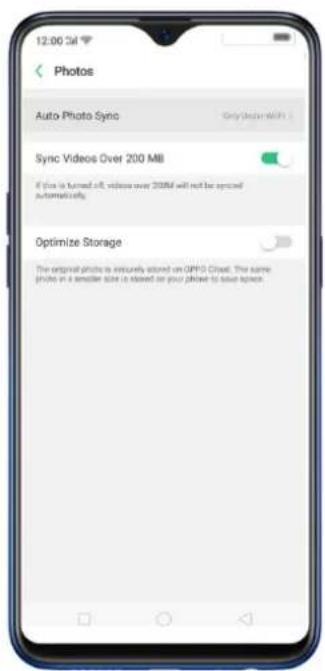
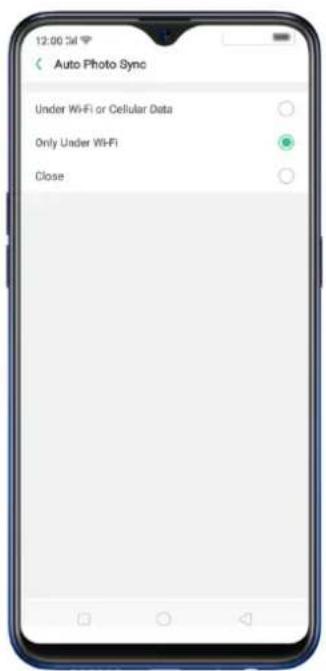
You can also choose if you want to Sync videos over 200MB or optimize storage, just toggle to green to enable.
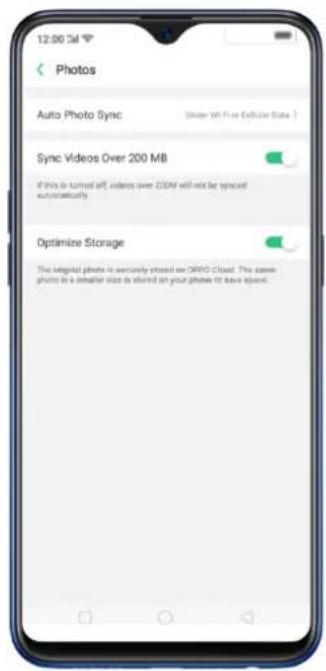
(Note: Optimizing storage will make the photos saved on your phone have a smaller size to save space. The one saved on the OPPO Cloud will have the original size).
- Contacts. To auto Sync contacts, click Contacts, then toggle Auto-sync Contacts to blue. Once enabled, any changes will be synced to OPPO Cloud in real time. You may also click Restore Contacts which will generate a history of contacts on the same day.
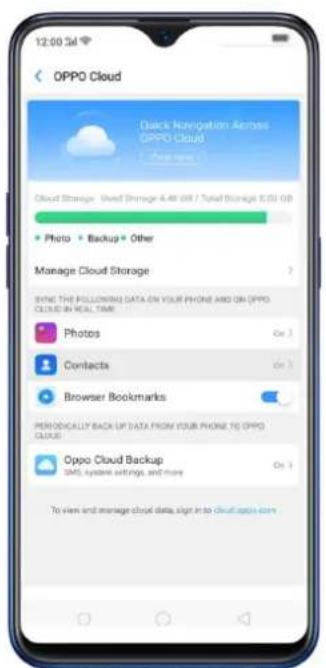
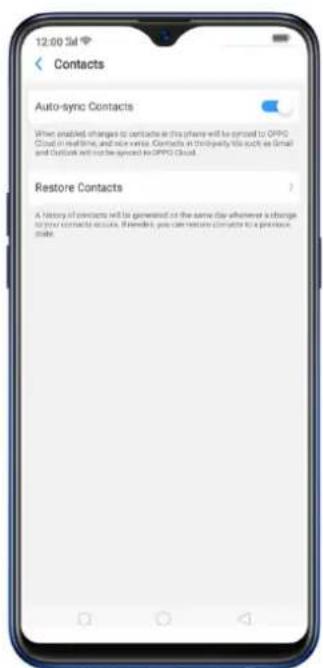
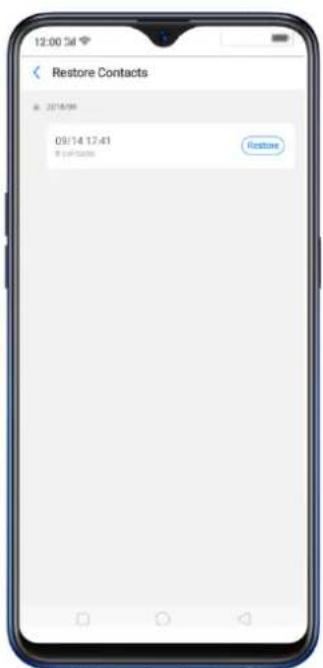
Note: Contacts from 3 ^rd party such Gmail and Outlook will not be synced to OPPO
Cloud.
- Browser Bookmarks. To auto save browser bookmarks toggle Browser Bookmarks to blue.
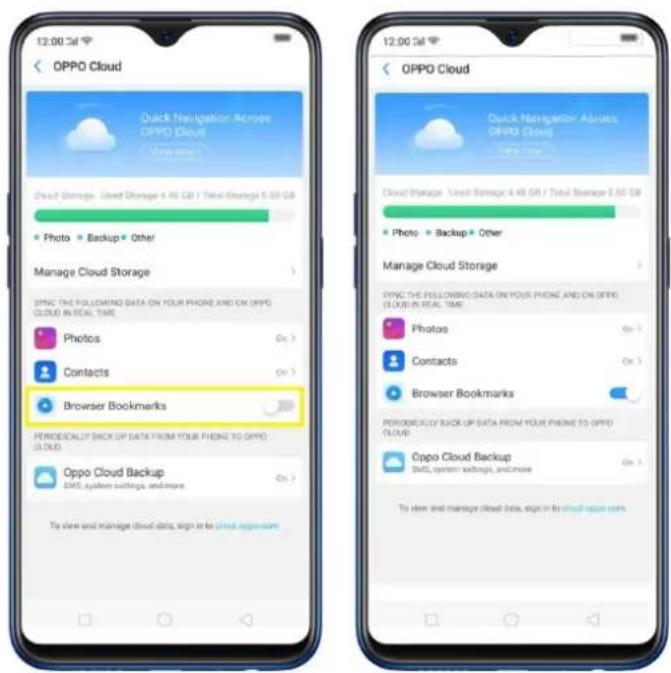
Back up data from your phone to OPPO Cloud.
OPPO Cloud Backup. You can periodically back up data such SMS, system settings, and more to OPPO Cloud. (Note: Photos can only be synced real time but OPPO Cloud backup is unable).
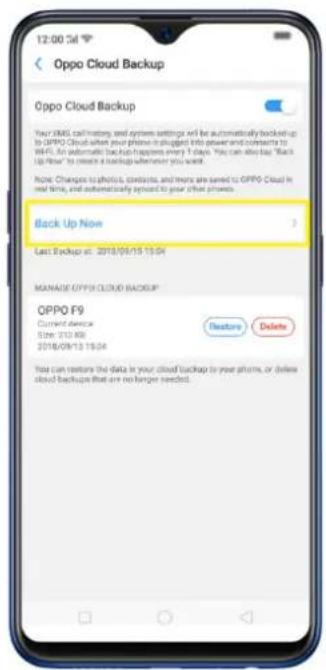
To enable OPPO Cloud Backup, toggle OPPO Cloud Backup to blue. Your data will automatically back up to OPPO Cloud when plugged into power and is connected to Wi-Fi. (Note: Automatic backup happens once daily).
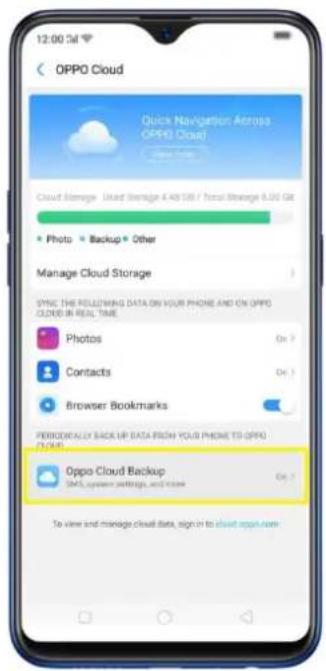
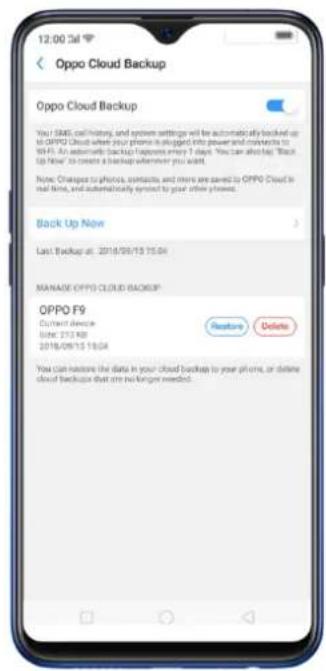
You can also tap Back Up Now to create a backup whenever you want. You may also Restore data on your Cloud backup or Delete if no longer needed.
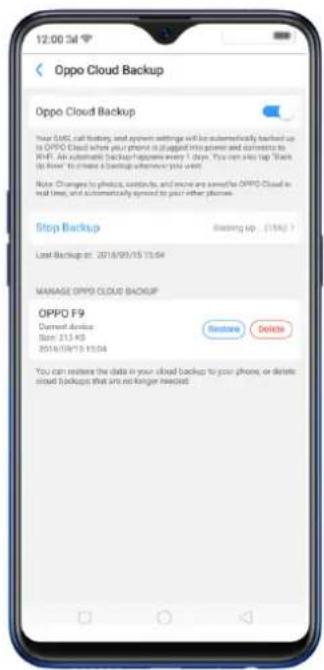
To view and manage cloud data, sign in to cloud.oppo.com.
4.8 New Features of video
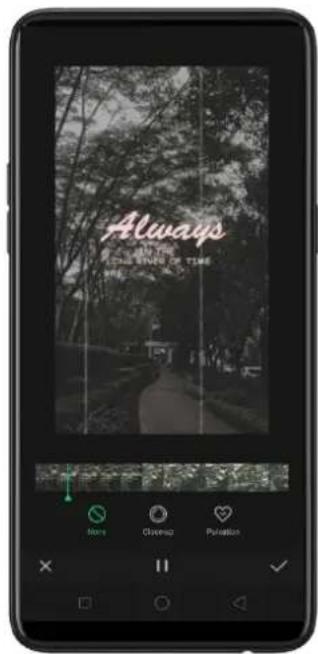
Impress your social media followers and friends with your videos. You can now add close-up and pulsation on the videos you have taken to make it more fun and artsy.
Speed of the video
- Record a video first. Open your camera app, choose Video then click the Record button, or press either volume button, to start and stop recording. You can choose between 720p and 1080p.
- Once you are done with the recording, go to [Photos app] > [Albums] > [Video Folder] then choose the video that you want to edit.
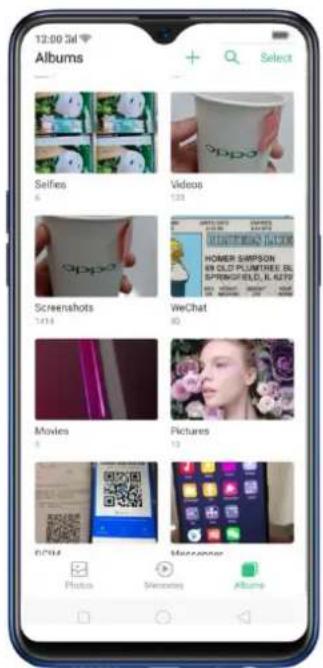
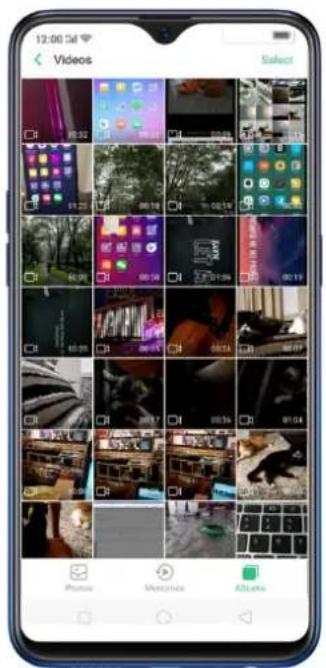
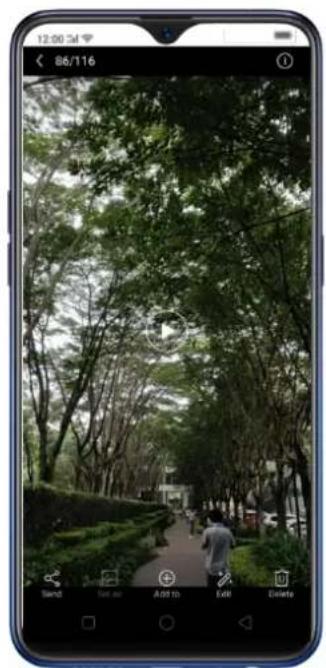
natural_image
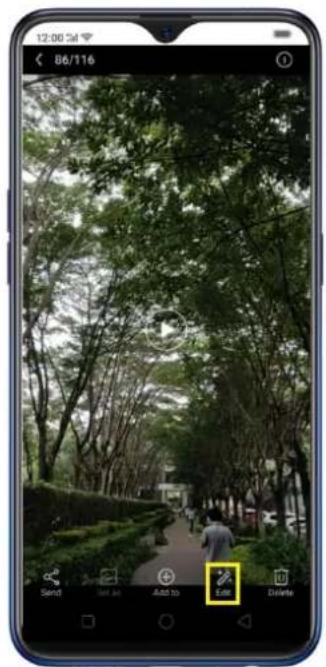
Smartphone screenshot showing a park pathway lined with trees and a person walking, captured in a smartphone interface (no readable text or symbols on the scene itself)- Click Edit and you will be asked what speed you would like the video to play. The slowest is 0.25X and fastest is at 2X. The normal one is 1X. Once done choosing the speed, click Next.
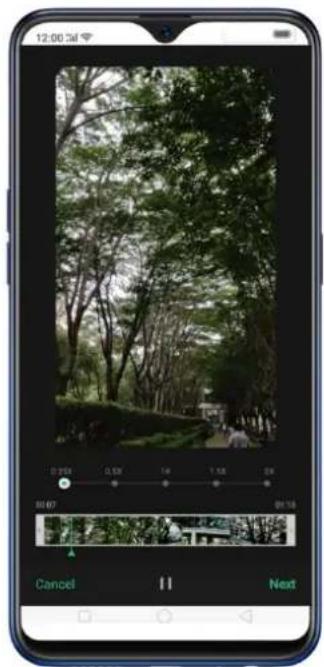
natural_image
Smartphone displaying a photo of a forested park with trees and a paved path, showing editing controls (no readable text or symbols on the image itself)Theme of the video
- To choose a theme for your video, click [Edit] > [Choose the Speed] > [Next] >
[Themes]. You can choose from None, Old Days, Lens, Memory, Tasty Food/Delicacy, Joy, Travel, and Simplicity.
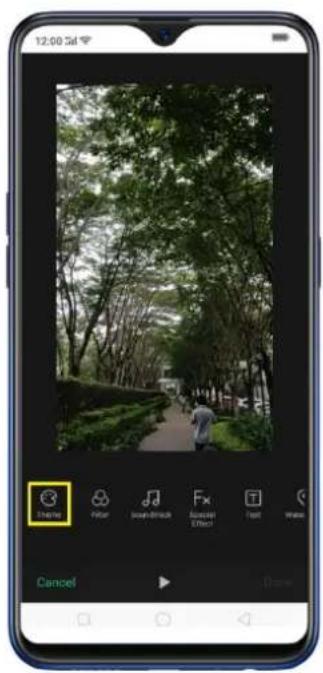
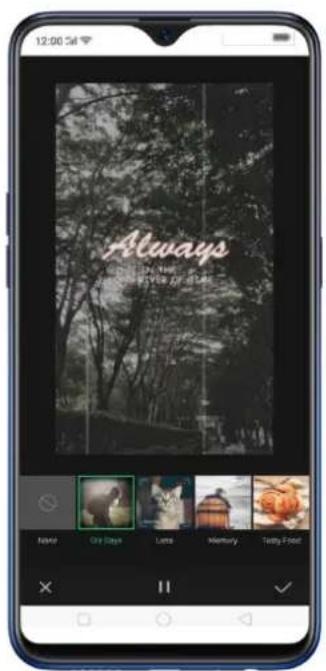
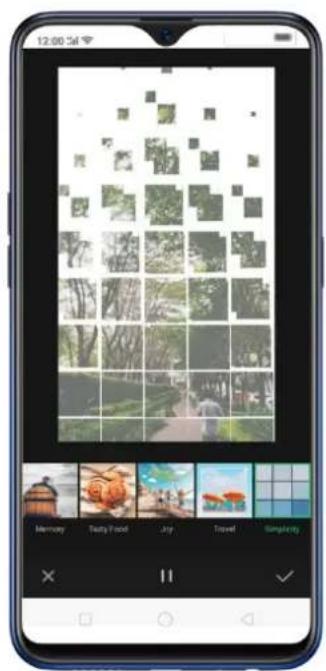
- Click ▶ / ✗ to play and pause the preview and click √ when you have chosen a theme, then click Done. Click ✗ to exit Theme and click Cancel if you don't want to add a theme to your video.
Add Special Effect to the Video
- To choose a special effect for your video, click [Edit] > [Choose the Speed] > [Next] > [Fx Special Effect]. You can choose from None, Close-up, and Pulsation.
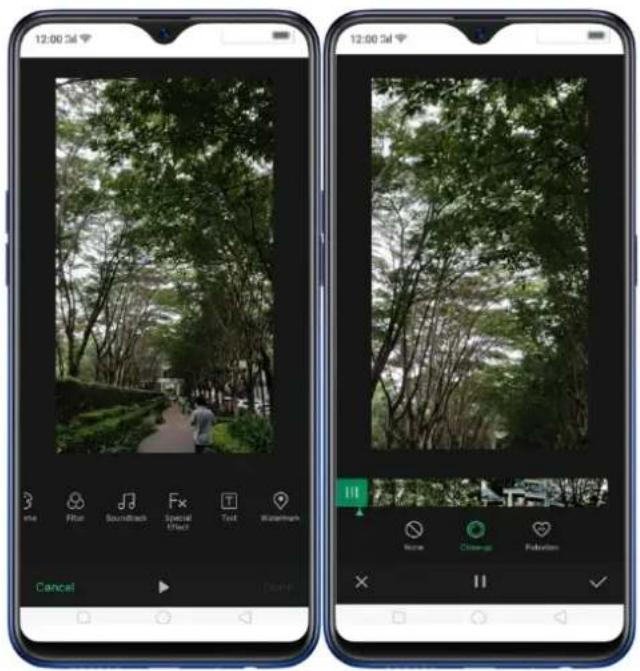
- Click ▶ / ✗ to play and pause the preview and click √ when you have chosen a special effect, then click Done. Click ✗ to exit Fx Special Effect and click Cancel if you don't want to add any special effect to your video.
4.9 Smart Driving
A small distraction when driving can cause accident. Even if we really don't want to answer a phone call or have glimpse about who messaged us or what the notification is for, but the urge to check it is so strong and our focus on the road is diverted. It has been said that checking the phone is one of the biggest reasons for senseless accidents on the road and we wanted to avoid that and save lives instead.
The features of Smart Driving:
- Blocks notifications and reminders to reduce disturbance.
-
Announce incoming calls and messages.
• Answer or end calls via voice control. -
To enable Smart Driving, go to [Settings] > [Smart & Convenient] > [Smart Driving] toggle [Turn On Smart Driving] to green to enable. Once enabled you will
see 📄 on the top-right corner of your phone and also you will receive a notification that smart driving is on.
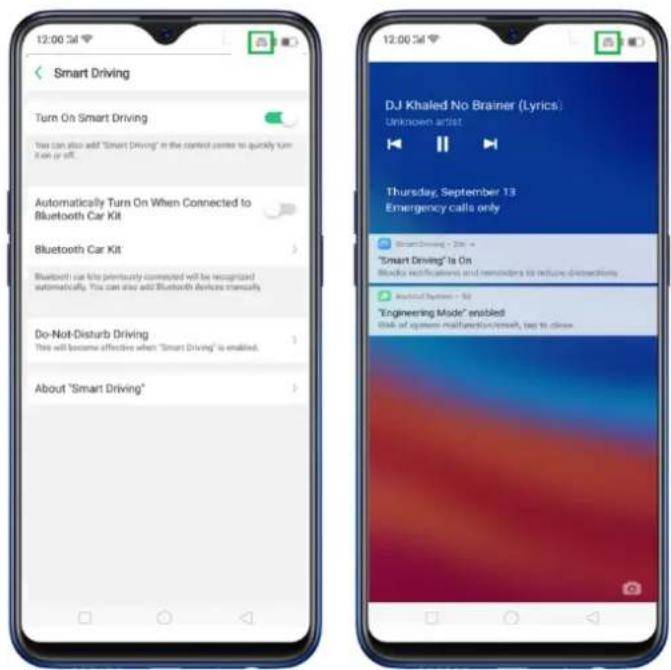
You can also quickly launch Smart Driving on the Control Center, just swipe down from the very top of any screen then click 📄 to enable it.
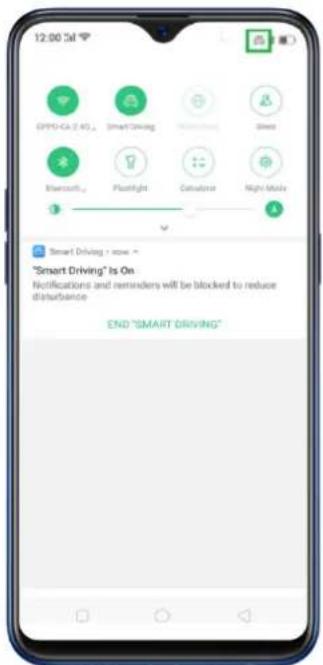
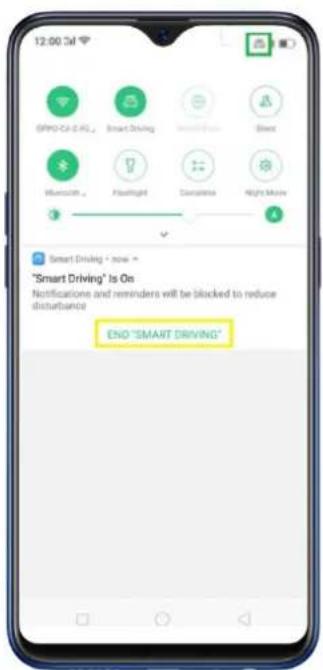
To turn off/end Smart Driving:
- From the Control Center, just swipe down from the very top of any screen then click to end it.
- From the settings, go to [Settings] > [Smart & Convenient] > [Smart Driving] > [Turn On Smart Driving] toggle to end Smart Driving.
• From the notification that you received, just click END "SMART DRIVING"
- You can automatically connect to a Bluetooth car kit and those that have been previously paired. To enable this, go to [Settings] > [Smart & Convenient] > [Smart Driving] > then toggle [Automatically Turn On When Connected to Bluetooth Car Kit] to green to enable.
To add a Bluetooth Car Kit, just click [Bluetooth Car Kit] > [Add Bluetooth Devices Manually] > Scan for Devices then Pair.
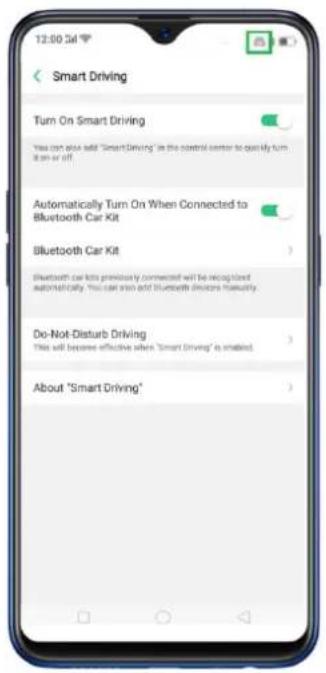
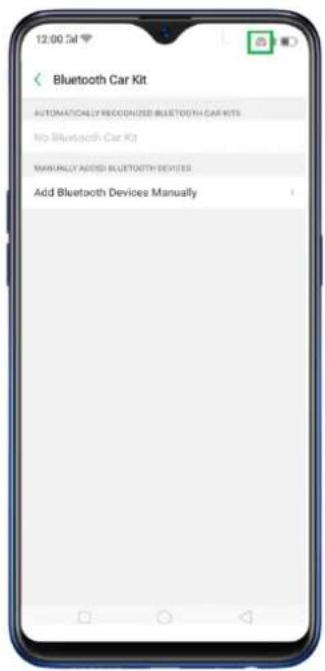
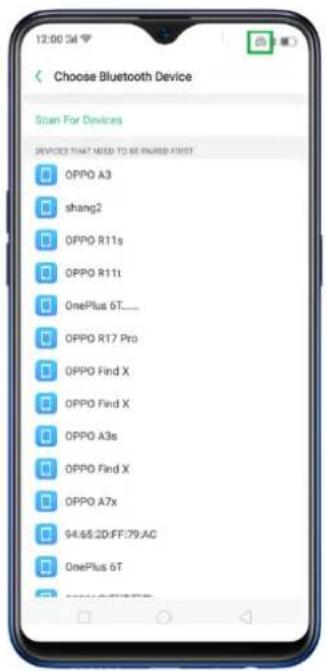
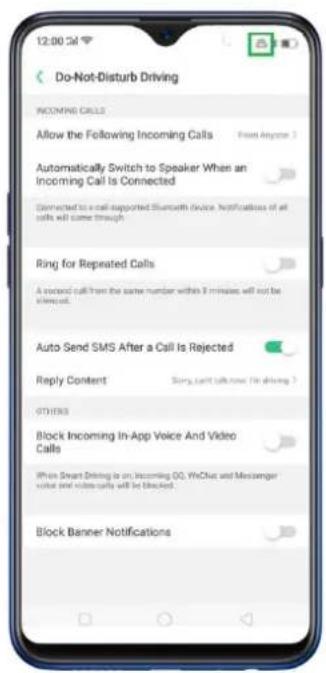
- You can manage the calls and messages so you won't be disturbed while you are driving. Go to [Settings] > [Smart & Convenient] > [Smart Driving] > [Do-Not-Disturb Driving] and manage the following features:
- Allow the Following Incoming Calls – you can either decline all or allow calls from anyone. You can allow certain calls and your favorite contacts as well. Click [Allow the following Incoming Calls] then manage the calls.
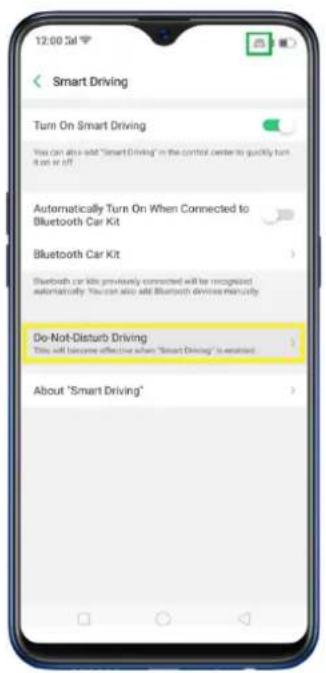
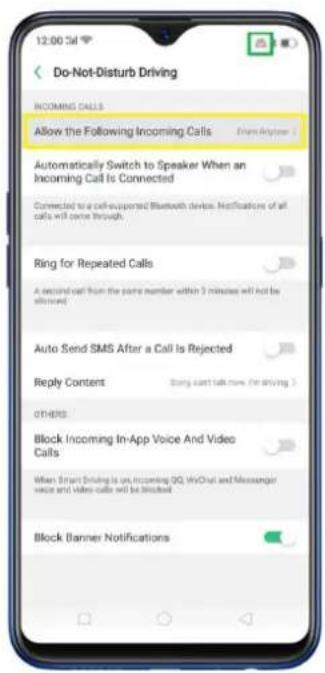
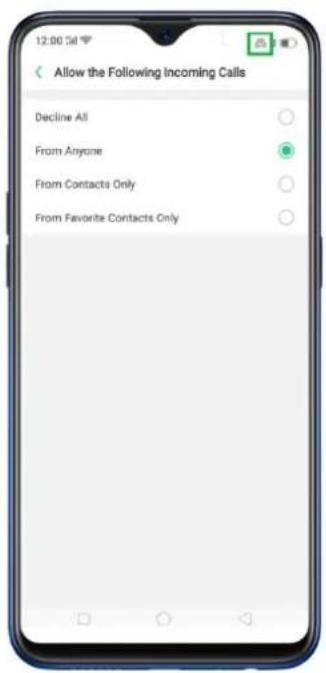
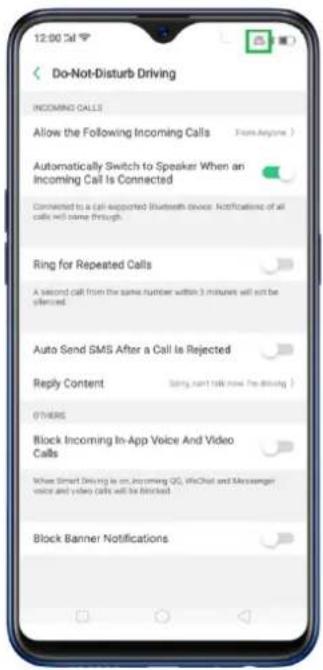
• Automatically Switch To Speaker When an Incoming Call Is Connected-
so you can keep your hands on the wheel and eyes on the road. Toggle to green to enable.
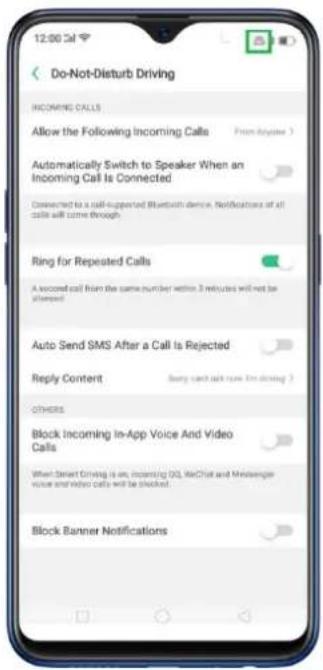
- Ring for Repeated Calls – A second call from the same number within 3 minutes will keep ringing. Toggle to green to enable.
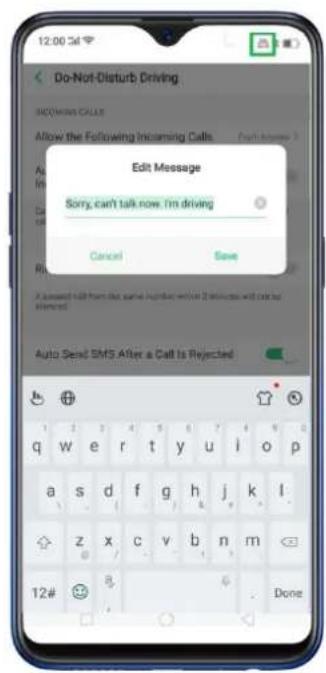
- Auto Send SMS After a Call is Rejected – For courtesy and for the other person on the line would know why the call got rejected. Toggle to green to enable.
You can even customize the SMS that will be sent. Just click [Reply Content] and you can personalized that SMS that will be sent after a call has been rejected.
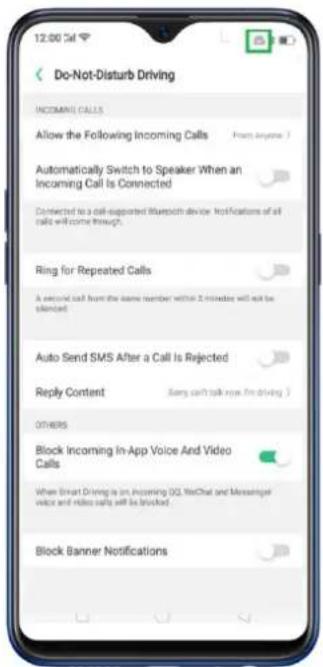
- Block Incoming In-App Voice And Video Calls – when this is enabled video calls from QQ and WeChat will be blocked. Toggle to green to enable.
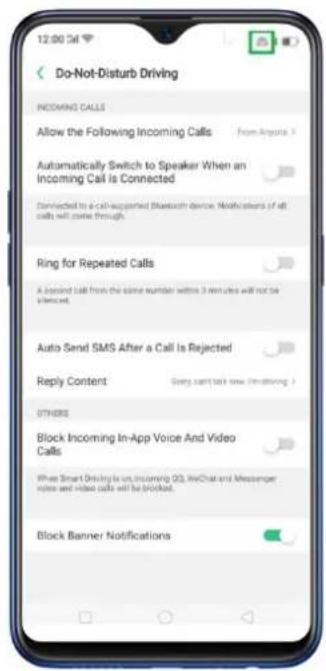
- Block Banner Notifications –So you won't be distracted by the sound of the notifications while driving. Toggle to green to enable.
Note: You need a network connection for this to work.
4.10 Game Space
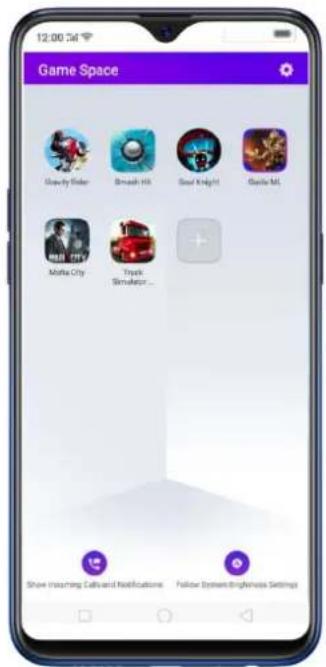
Game space will definitely make each gamer happy. Imagine putting all your favorite games in one place. Making it easy to find game that you would want to play. They will be gathered in one application which serves as a hub so it wouldn't be scattered around your home screen. Now let's enter game space.
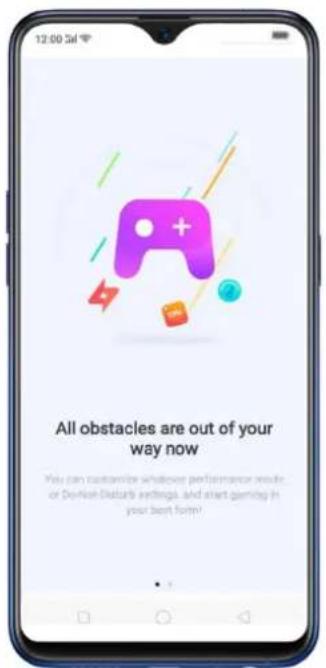
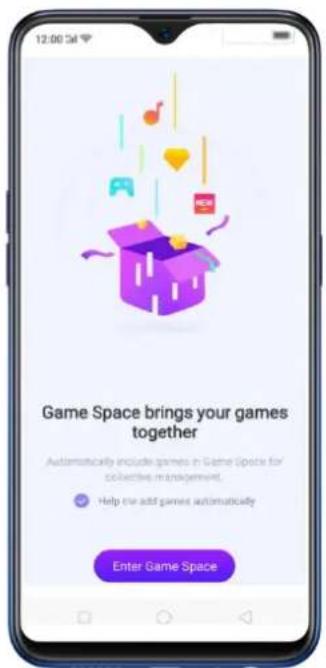
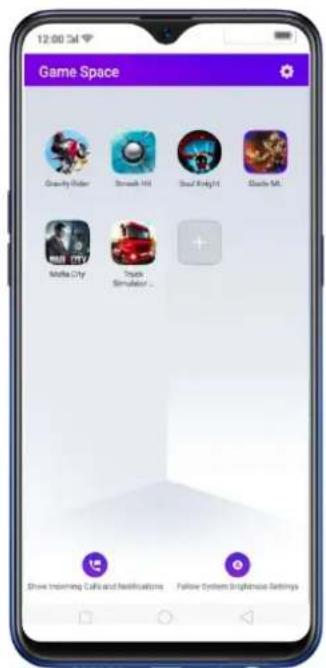
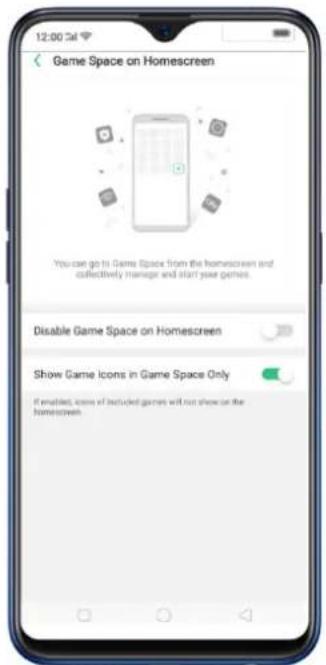
To enjoy Game Space, Go to [Settings] > [Game Space] > [Game Space on Homescreen] and switch [Show Game Icons in Game Space only] to green to show on the home screen. (Note: Disabling Game space on the home screen means Game Space app will not show any more on the home screen).
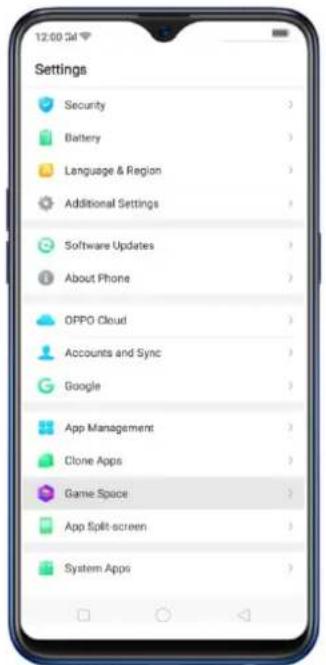
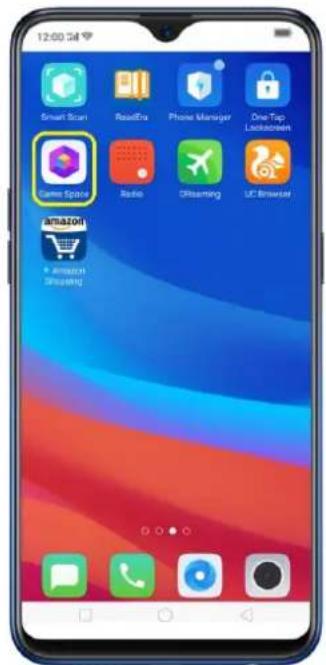
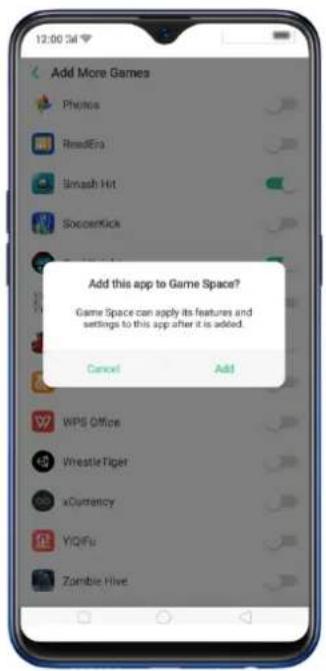
When you want to quickly add games that you have already downloaded but scattered around your home screen, go to the Game Space App on the home screen, click + to add games that you've downloaded then toggle to green the game that you want to transfer to Game Space.
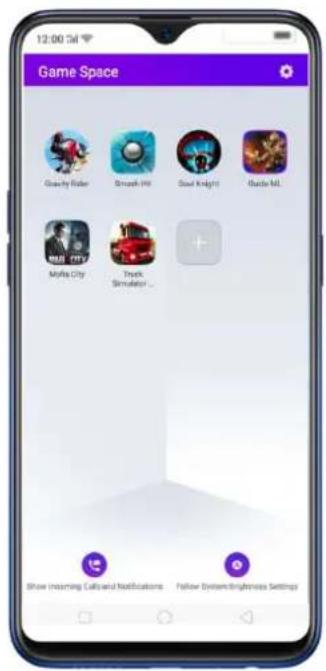
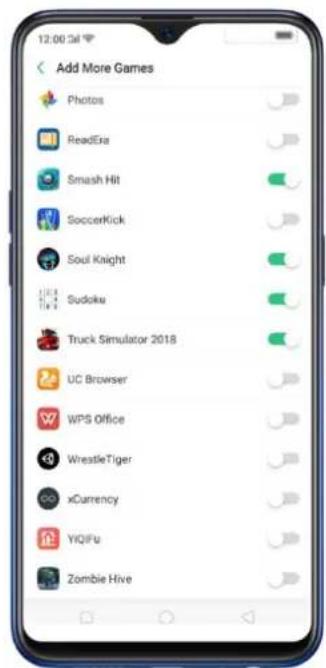
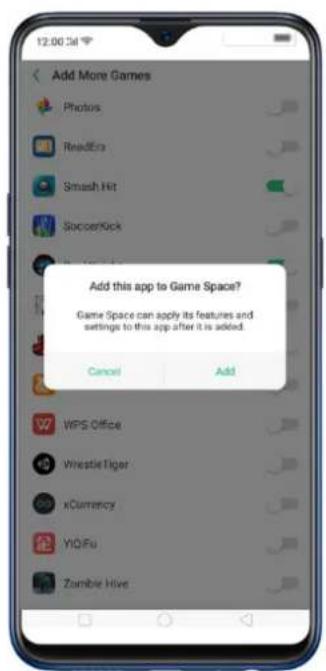
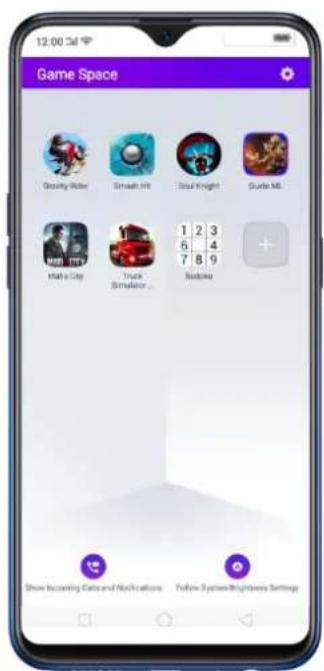
To remove Games, press and hold the game that you want to be deleted and choose Remove From Games if you are sure to delete it, click REMOVE. You can only remove games one at a time when doing on the Game Space app.
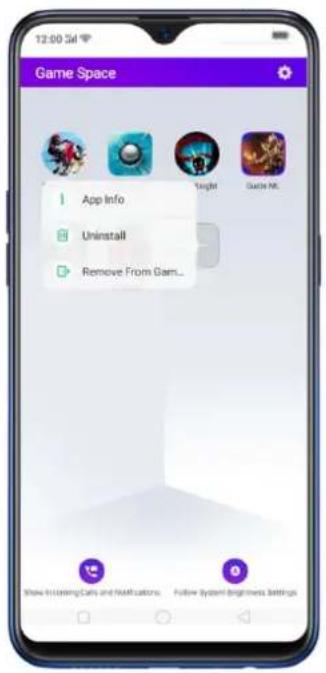
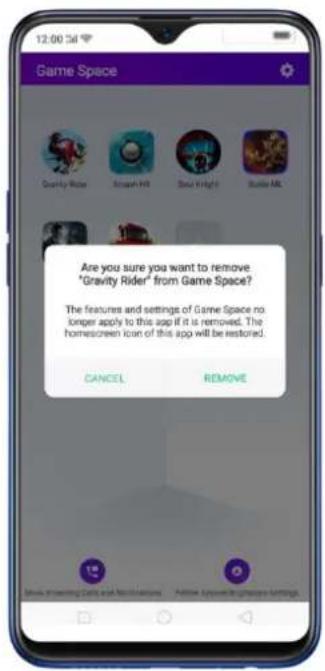
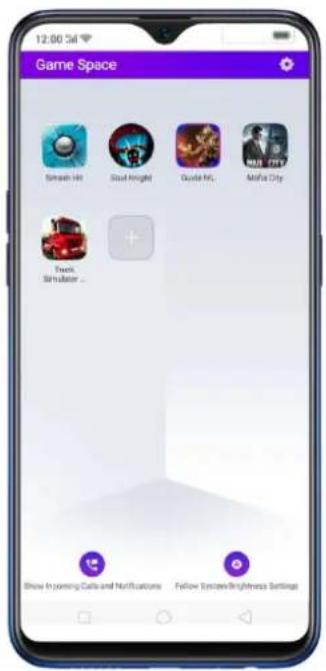
You can also go to [Settings] > [Game Space] > [Manage my game] > [Add More Games] then toggle the game that you want to be removed on Game Space. You can remove as many games as you want when doing it on the settings.
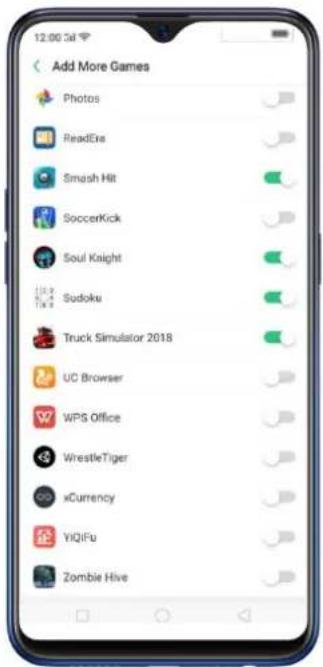
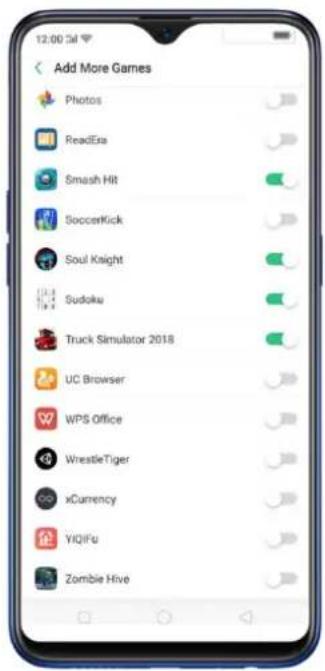
You can also go to [Settings] > [Game Space] > [Manage my games] > [Add More Games] then toggle to green the game that you want to transfer to Game Space.
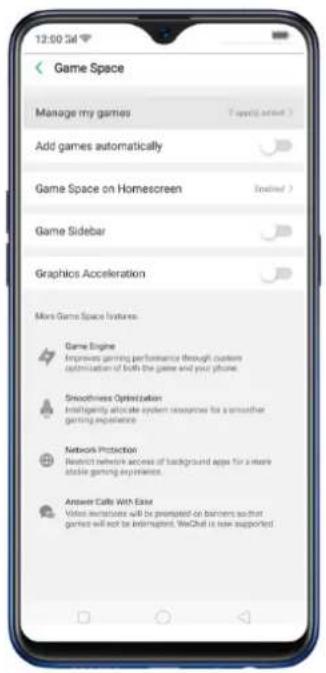
For quick shortcut to Game Space settings, click 🙏 on the top-right corner of the Game Space app.
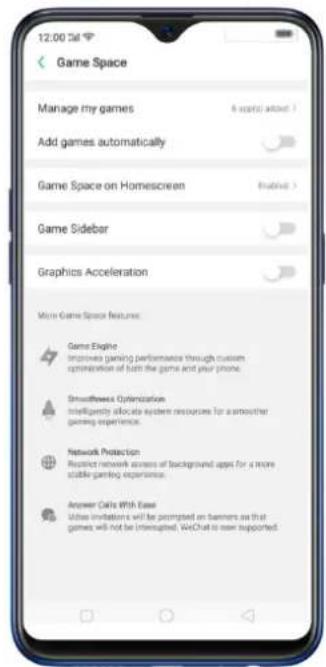
Game Space Settings
- Add games automatically. For games to be added to Game Space automatically, click [Settings] > [Game Space] and toggle [Add games automatically] to green to enable.
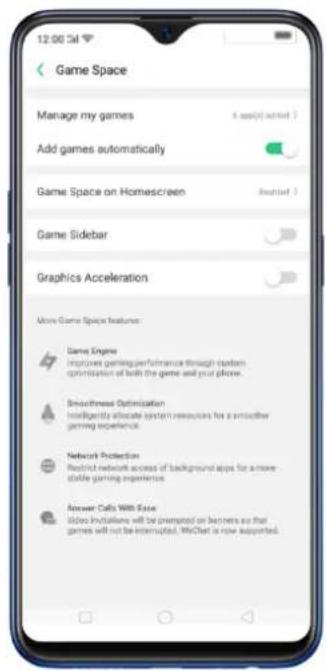
- Game Space on Homescreen. Go to [Settings] > [Game Space] > [Game Space on Homescreen] and switch [Show Game Icons in Game Space only] to green to show on the home screen. (Note: Disabling Game space on the home screen means Game Space app will not show any more on the home screen).
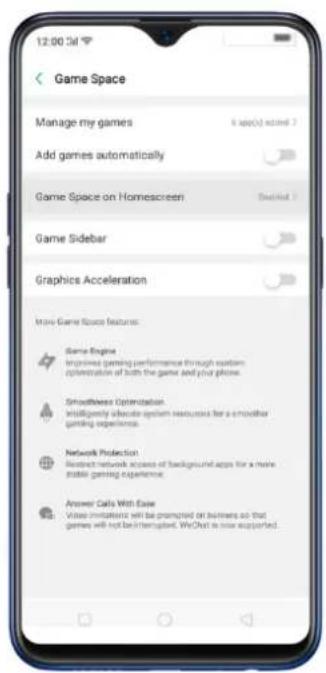
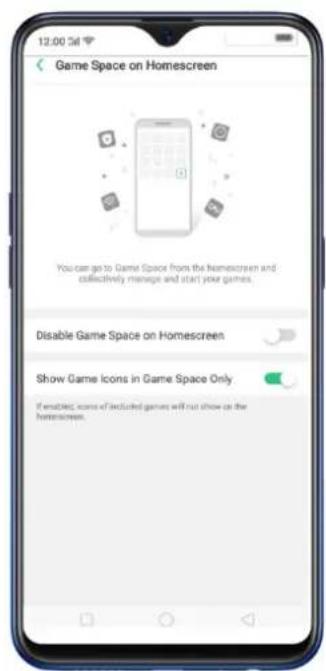
• Game Space Sidebar. This will enable Smart Sidebar to show on the side
when you are playing games. To enable, go to [Settings] > [Game Space] > and toggle [Game Sidebar] to green to enable.
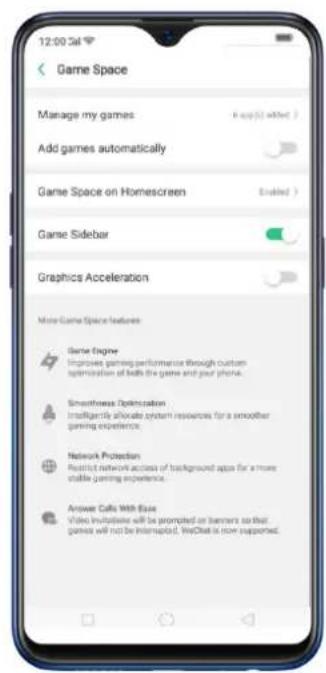
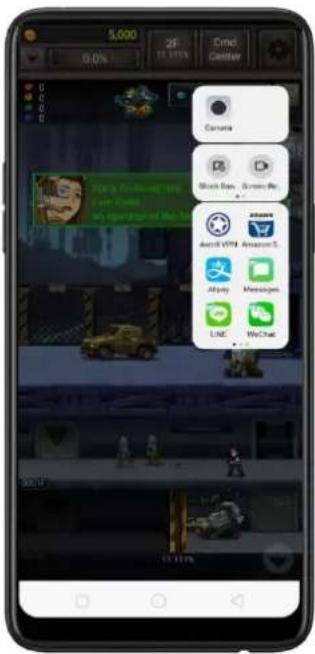
- Graphics Acceleraon. This will enable vivid graphics when you play games. To enable, go to [Sengs] > [Game Space] > and toggle [Graphics Acceleraon] to green to enable.
4.11 Customizing timer for Clock app
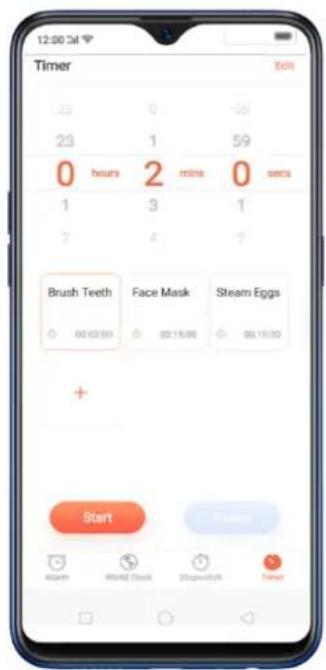
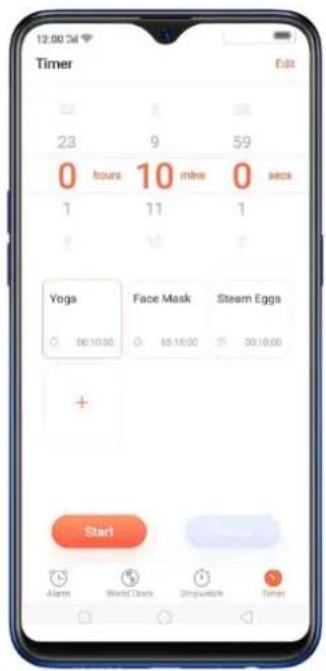
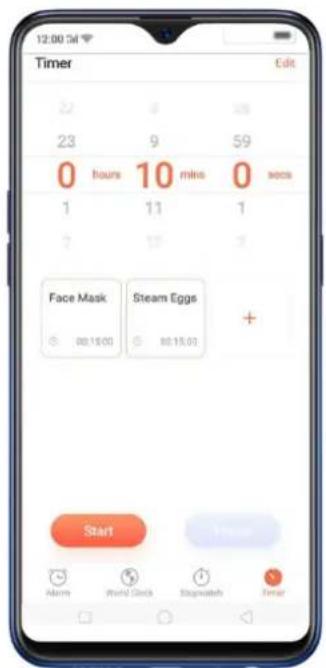
You can now set a timer or countdown for activities that you usually do. You don't need to manually set it each time you'll do something. You can simply save it on the timer and click start when you are ready.
Customizing timer
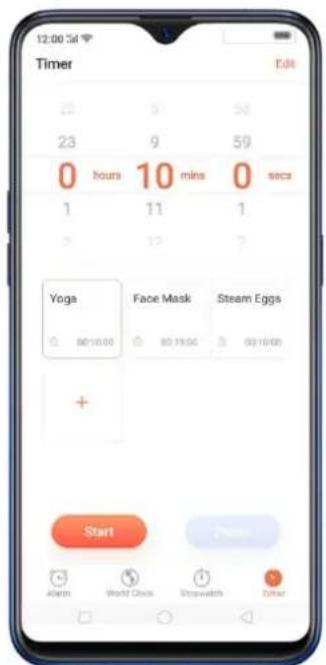
- On your home screen, click on the Clock app and then click Timer.
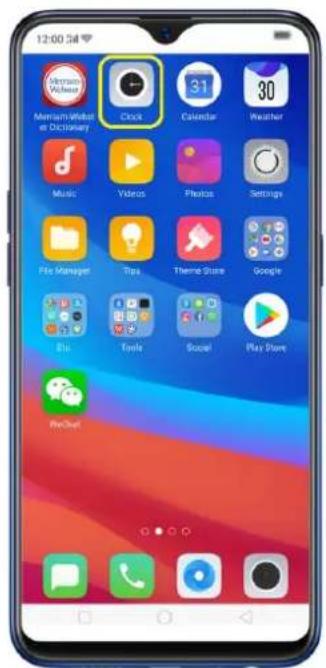
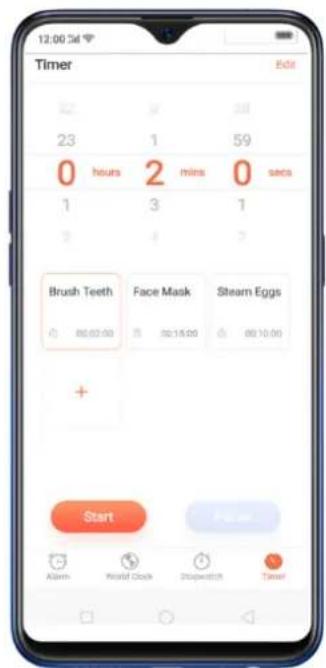
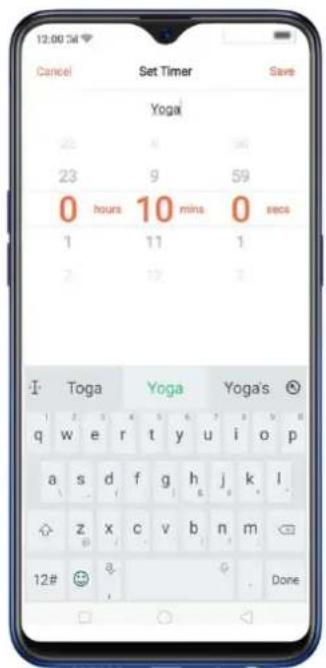
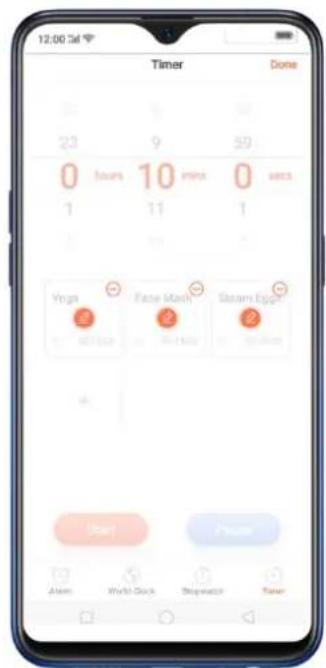
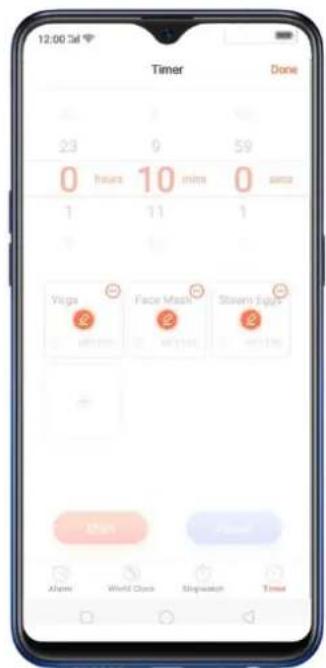
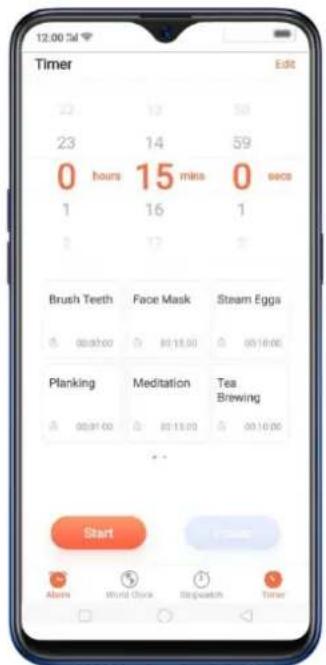
- There are 3 available activities by default. To change it, choose the activity you want to change then click Edit at the top-right portion.
- Click 🔒 to edit the activity, then change the name and time. Click Save, then click Done.
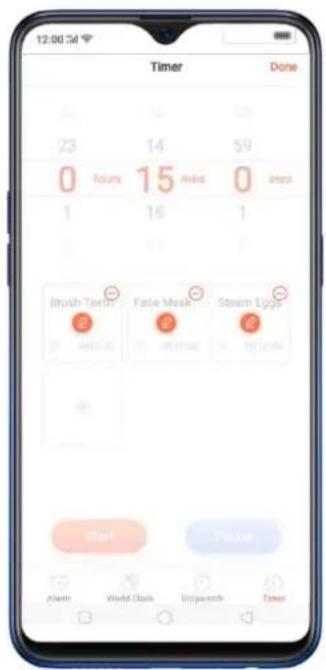
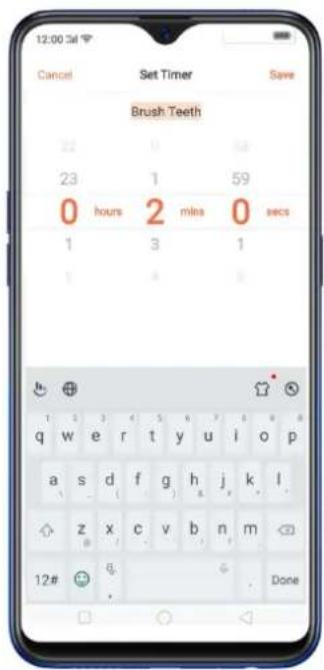
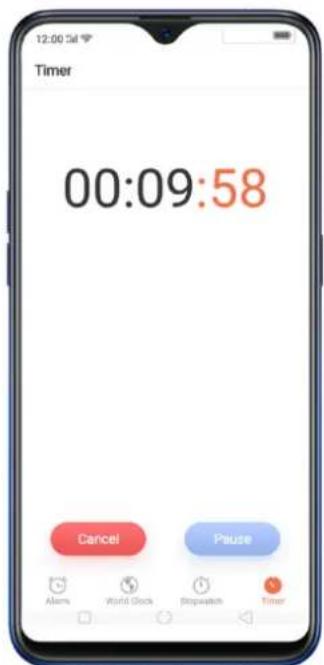
- Click Start so timer starts and choose to either Pause or Cancel the timer.
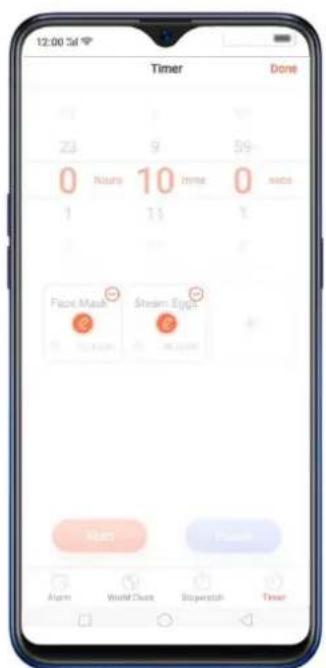
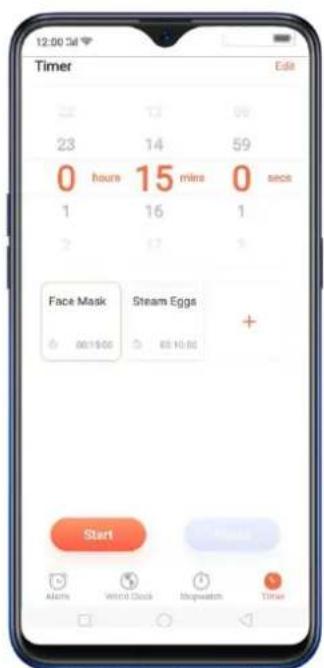
Delete an activity
To delete an activity, click Edit then click ☉, choose the activity you want to delete and click Done.
Add an activity
To add an activity on the timer, click + , type the timer name and the time, then click Save.
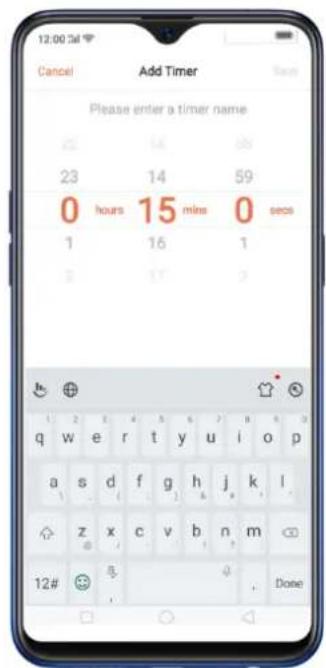
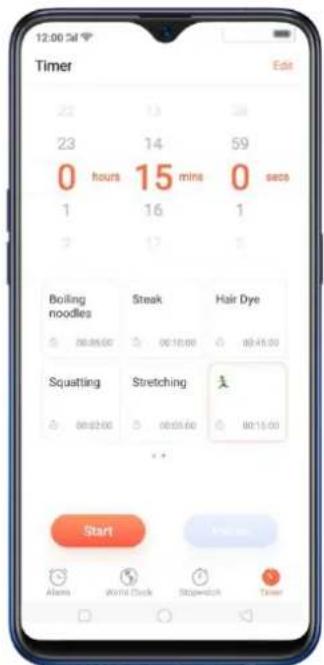
You can add up to 12 activities on the timer and you can timer name to emoji's as well.
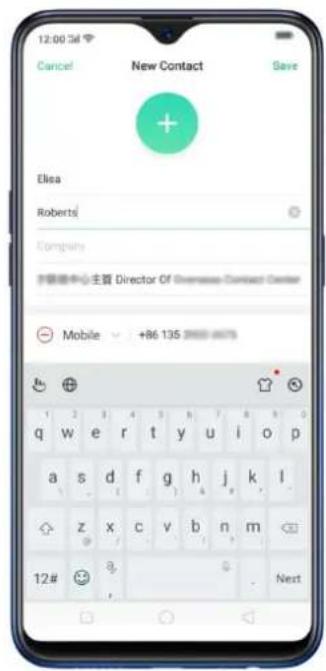
4.12 Scanning names to save on Contacts
Save new contact information in a snap. You just need a name card or business card. Before scanning the business card or name card, click ☐ for the name card
recognition language. Make sure to fit the name card or business card on the frame.
There are three ways you can add contacts in a snap using the Scan Name card feature.
- Through the Contacts app. On your home screen, click [Contacts app] >
[Contacts] then click 📋 on the top-right corner of the screen.
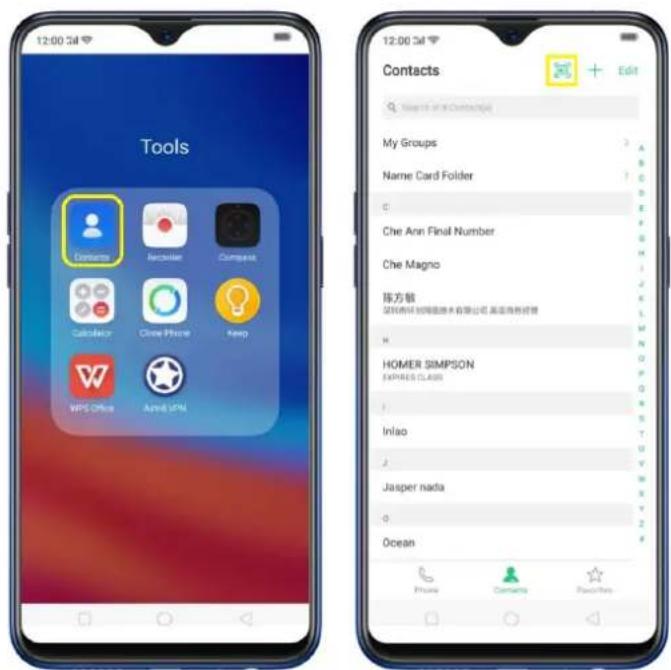
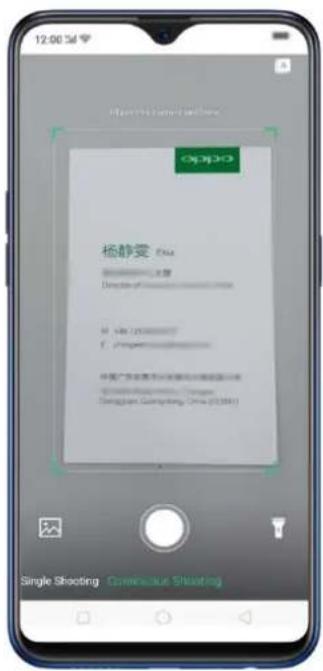
Then click ☐ for the name card recognition language. Make sure to fit the name card or business card on the frame.
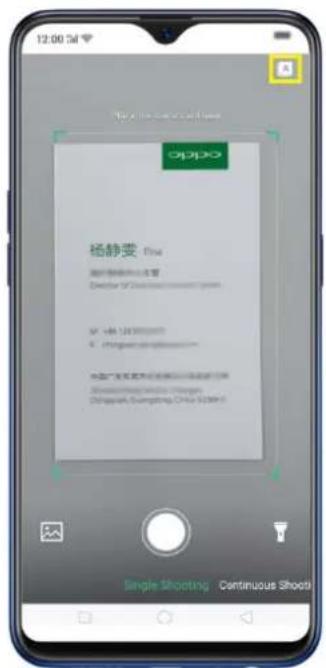
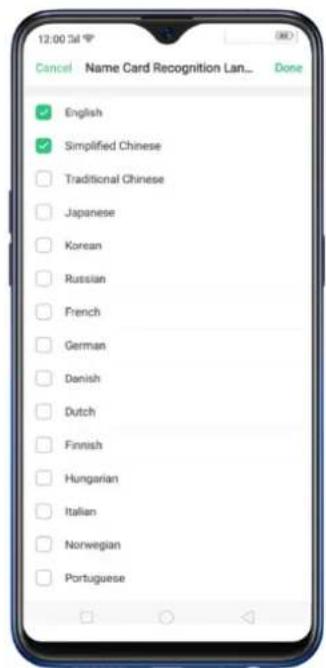
Click ☐ to start recognizing the name card or business card and all information will directly be inputted on your Contacts app then click Save.
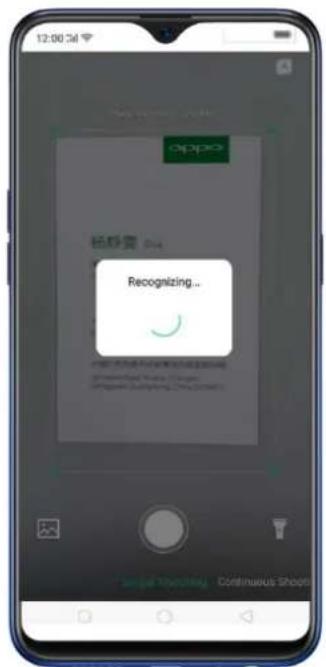
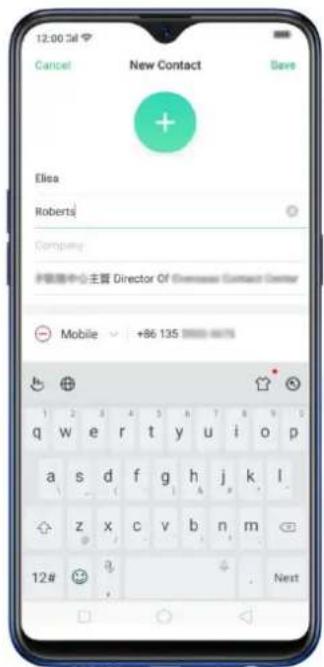
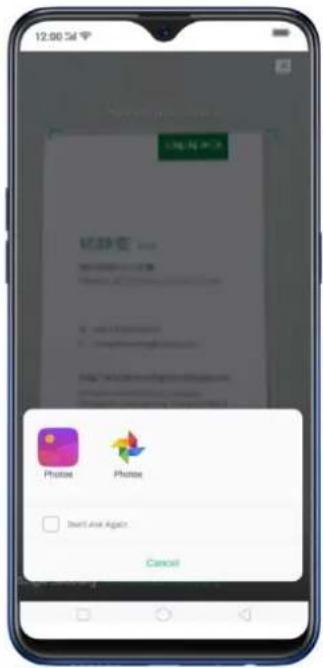
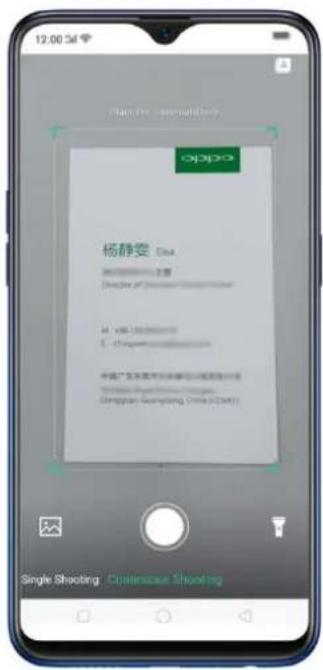
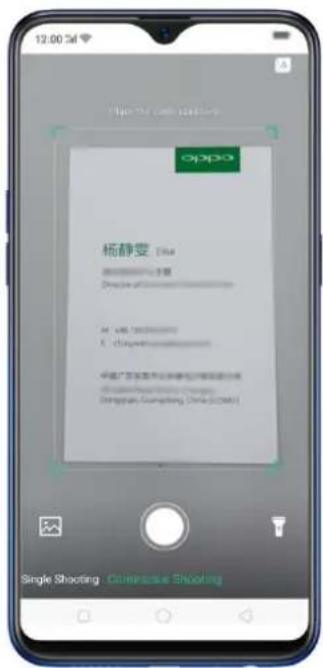
You also have an option to do Continuous Shooting, open Photos app if a name
card or business card is saved there, or use the flashlight if area to scan is dimly lit.
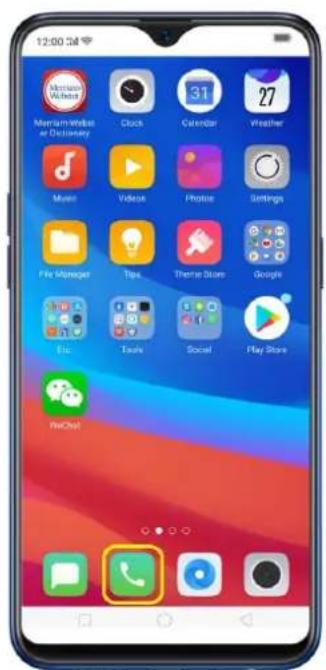
- Through the Phone App. On your home screen, click [Phone app] > [Contacts] then click 📋 on the top-right corner of the screen.
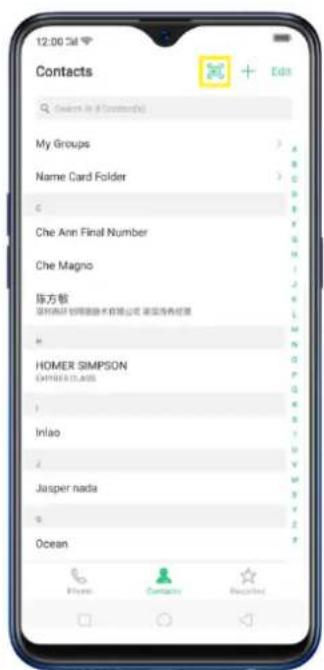
Then click ☐ for the name card recognition language. Make sure to fit the name
card or business card on the frame.
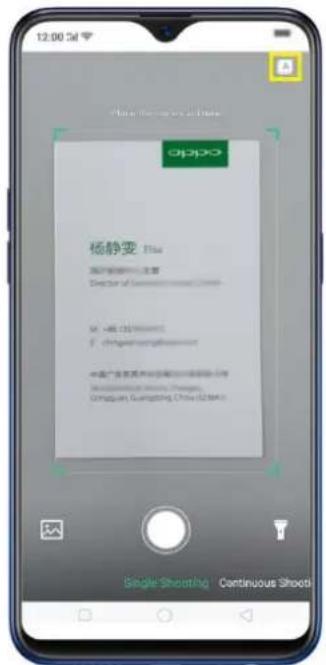
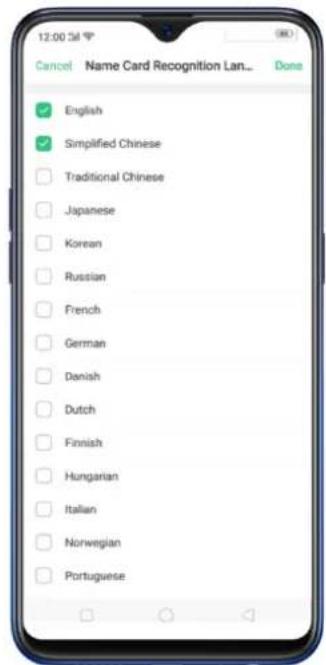
Click ☐ to start recognizing the name card or business card and all information will directly be inputted on your Contacts app then click Save.
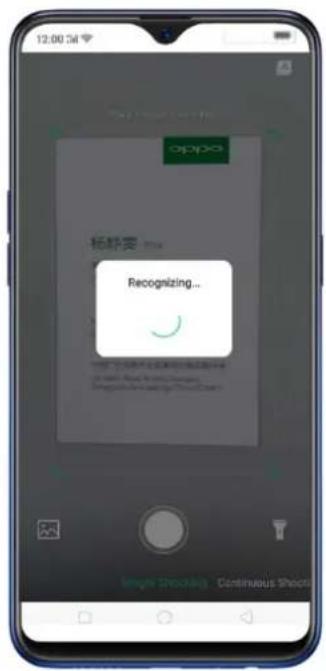
You also have an option to do Continuous Shooting, open Photos app if a namecard or business card is saved there, or use the flashlight if area to scan is dimly lit.
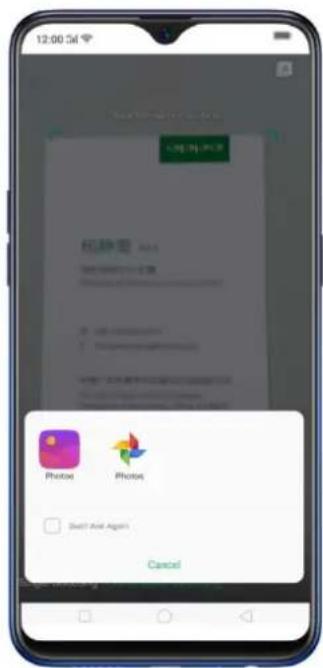
- On Smart Assistant, Click Scan Namecard to launch Contacts app and open this feature directly. Before scanning the business card or namecard, click A for the
namecard recognition language. Make sure to fit the namecard or business card on the frame.
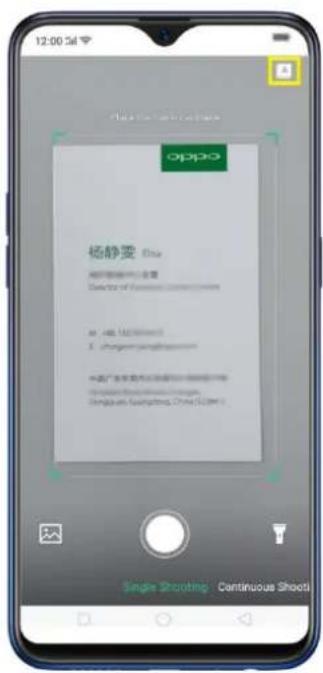
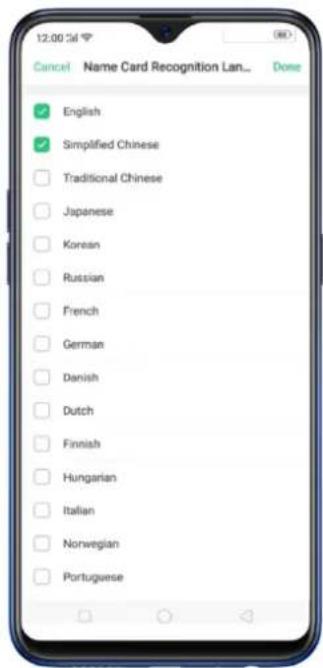
Click ☐ to start recognizing the namecard or business card and all information will directly be stored on your Contacts app then click Save.
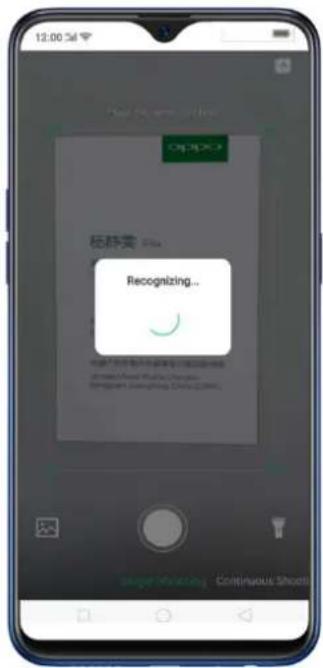
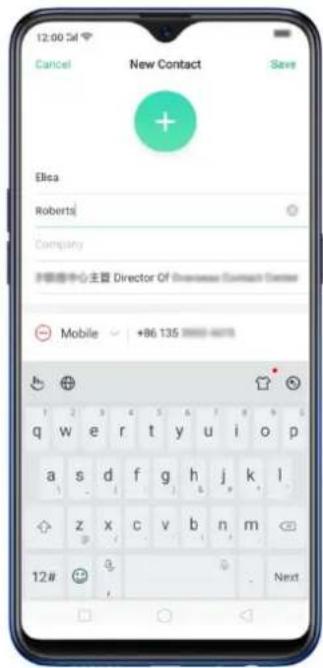
You also have an option to do Continuous Shooting, open Photos app if a namecard or business card is saved there, or use the flashlight if area to scan is dimly lit.
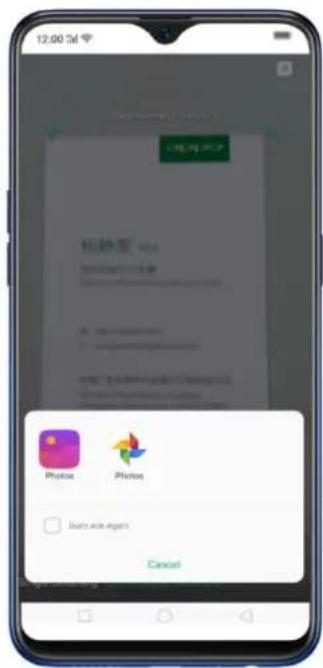
4.13 Save more battery with Smart Power Saver
Optimize the power of your battery and manage those apps and settings that used up the most power. Know how to save more power so you can use it especially when it is most needed.
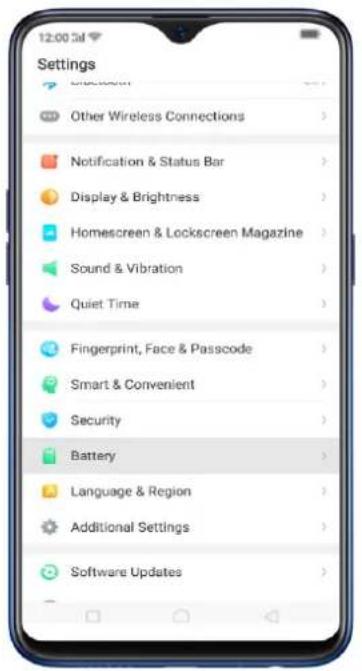
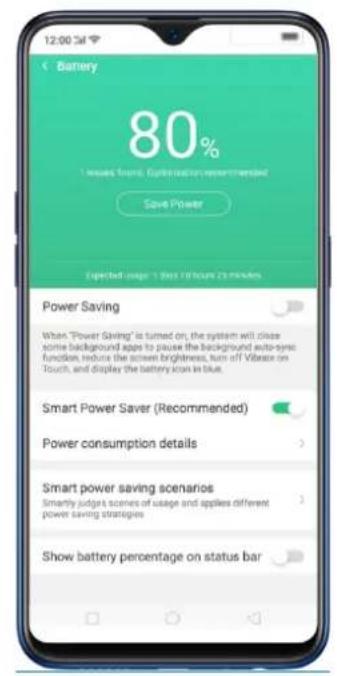
To enable Smart Power Saver, go to [Settings] > [Battery] > toggle [Smart Power Saver (Recommended)] to green to enable.
When Optimization is needed
When issue or issues are found, then it will prompt you that optimization is recommended. Just click on Save Power and check those that needed optimization, click Lengthen Battery Life, and then click Done when finished. (Note: Expected usage will be shown but this still depends on the usage and running apps on the background).
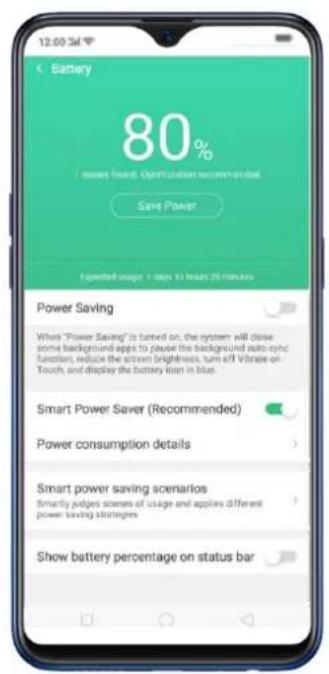
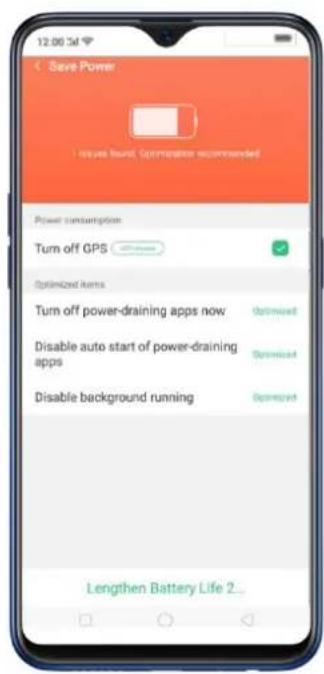
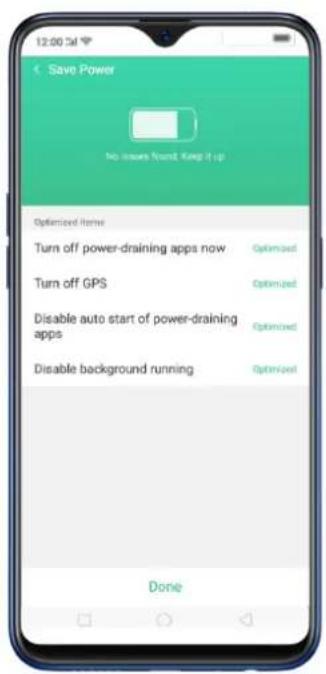
Other Power Saving features
- Power Saving. When this is enabled, the system will close some background apps to pause functions such as auto-sync. It will also reduce screen brightness, turn off vibrate, and would be displaying the battery icon in blue. To enable, just toggle [Power Saving] to green.
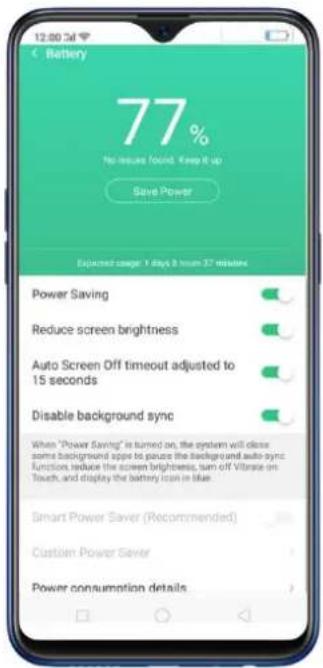
- Smart Power Saver (Recommended). This will intelligently identify the running status of Apps when enabled. Just toggle [Smart Power Saver (Recommended)] to green to enable.
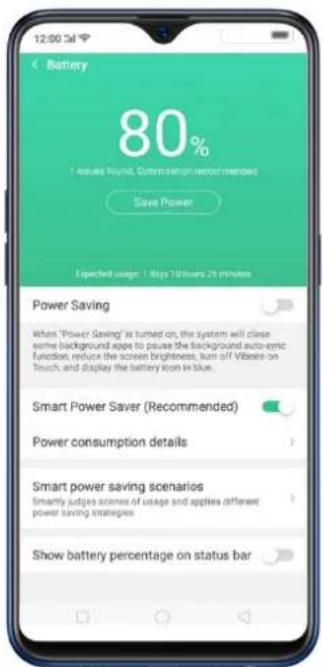
- Custom Power Saver. You can customize apps that will intelligently
identify the running status of Apps when enabled. Just click on Custom Power Saver, choose an app then click Intelligently Restrict Background Running (Recommended).
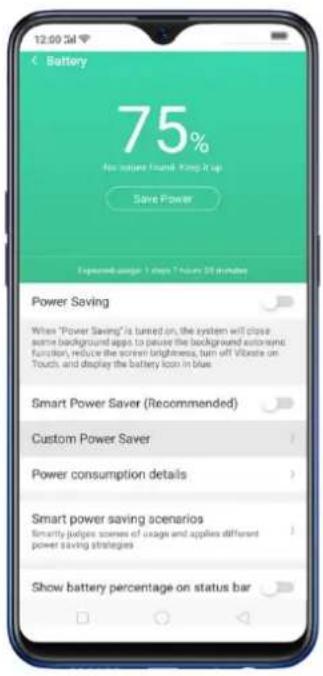
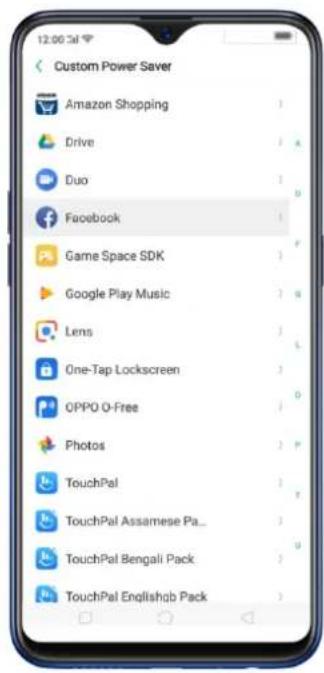
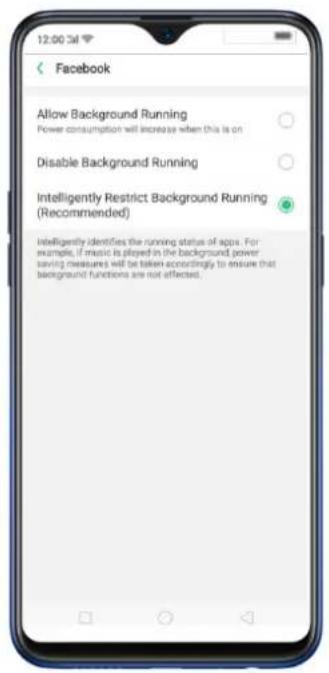
- Power Consumption Details. This will show you the apps, settings, or features that consumed the most power. You can check Today, Yesterday, and 2 Days ago for consumption details.
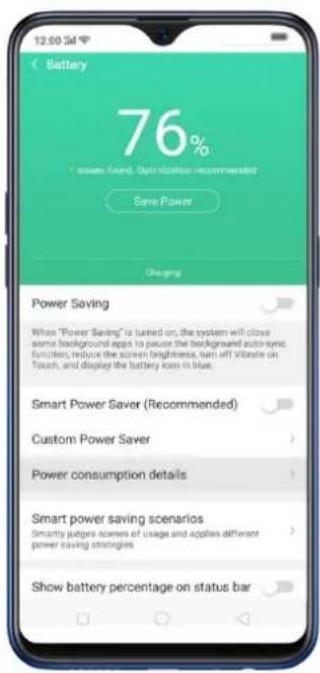
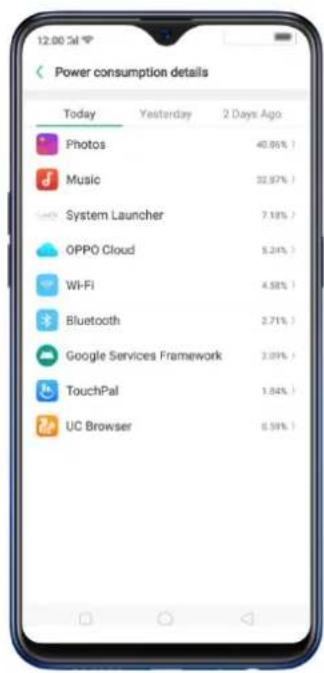
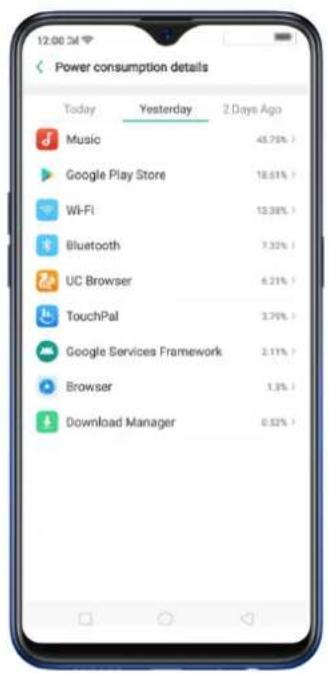
- Smart power saving scenarios. This will smartly judge scenes of usage and applies different power saving strategies like sensing when you might be sleeping. Click Smart power saving scenarios, the toggle Sleeping Mode to green.
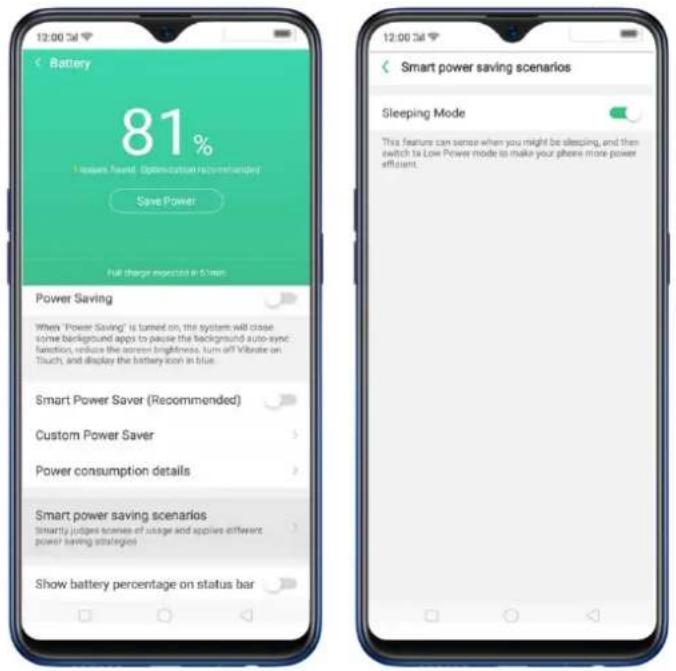
- Show battery percentage on the status bar. If you want to see how much battery is left just enable this feature by toggling [Show battery percentage on the status bar] to green to enable.
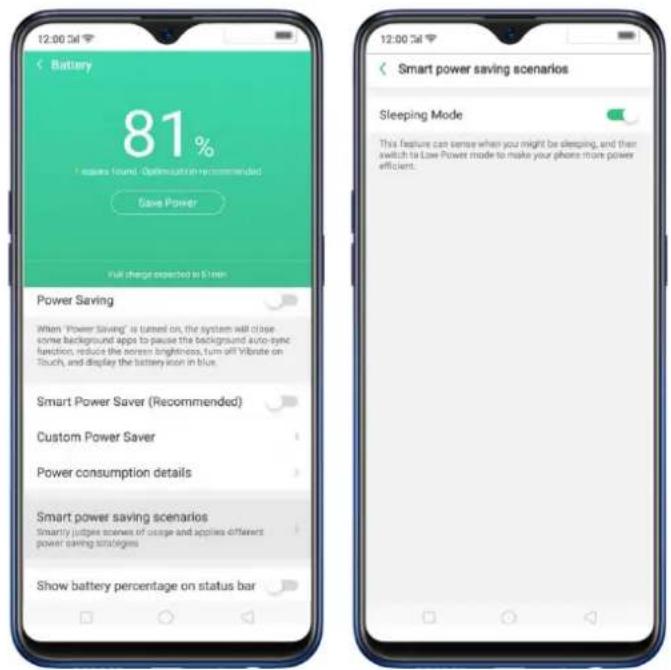
4.14 Say hello to Talia, your TouchPal assistant
Talia will be your new pro-active TouchPal assistant when typing stuff and rest assured that she will never left side. Talia makes it a point that you don't need to go to other apps when checking for the weather or just want to add or multiply some numbers. She will make sending message faster, efficient, and a whole lot of fun.
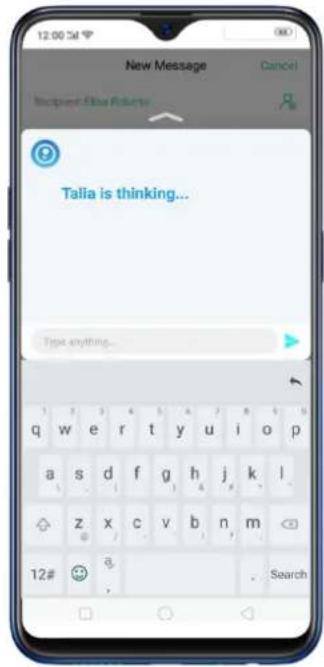
To enable Talia, go to [Settings] > [Additional Settings] > [Accessibility] > [TouchPal] > Toggle [TouchPal] to green to enable. Open your message app on the home screen and enjoy Talia's great service.
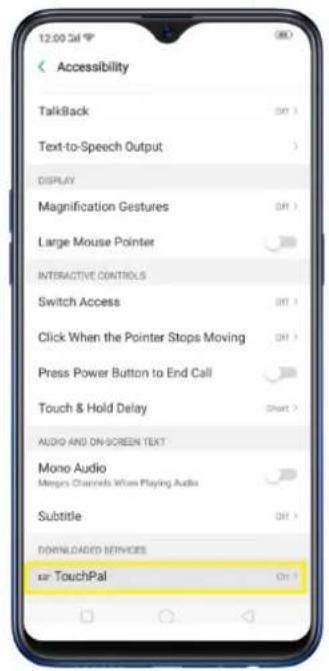
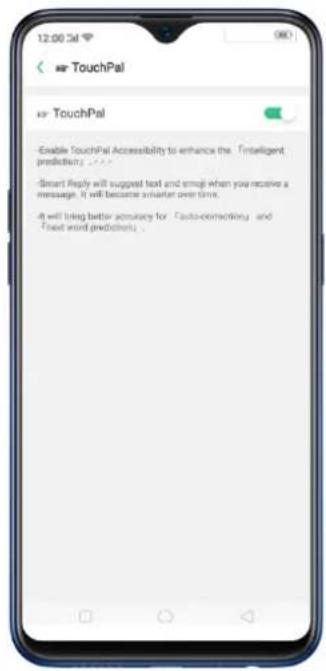
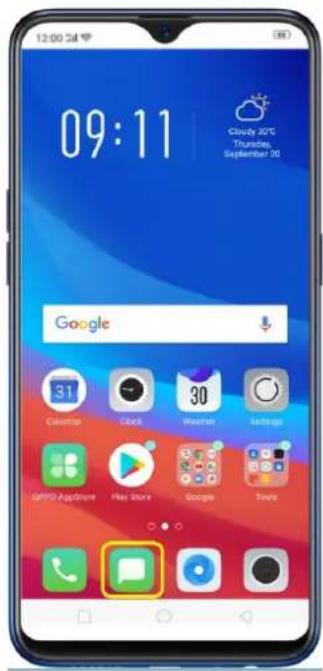
Smart and fun features of Talia
- Check the weather at all times. Talia will automatically think what the weather is in your current location. You can also manually type it to ask and then click ☉ so that Talia will start thinking and recognizing what you've typed. (Note: It doesn't work when you need to know other weather of other places or locations. See Weather).
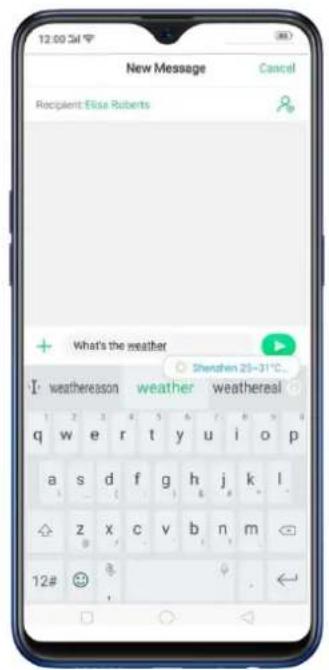
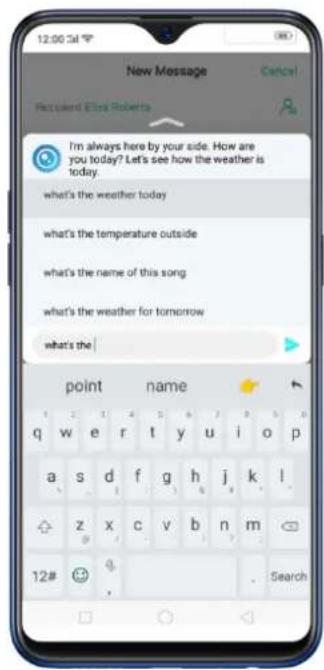
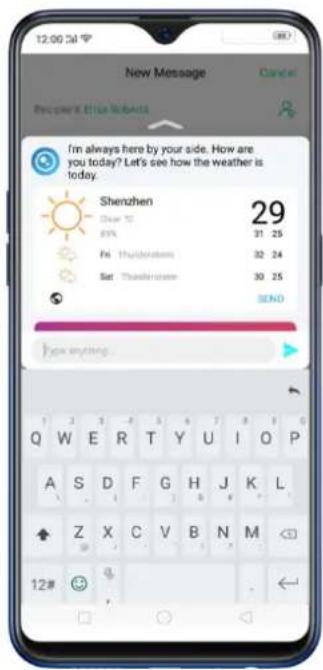
• Smart Reply. Give response suggestions.
- Swift paste. Get useful information such as emails, links, and phone numbers our of clipboard.
- Quick Fill. Talia will remember people's names, phone numbers, and addresses for you.
• Currency conversions. Get live currency exchange rates.
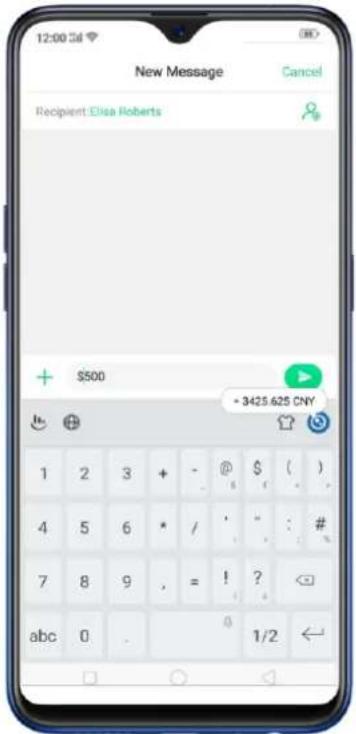
- Calculations. Talia will automatically calculate basic math operations. Don't forget to put = so it will start calculating.
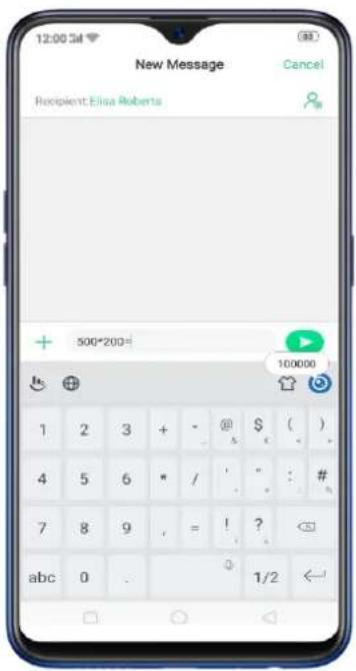
Note: Some features may not be available to other regions
5 Basics
5.1 Use apps
Open apps
The Home screen shows all the apps on your phone. Click any application icon to get started.
Apps will show the number of messages pending to be read in red on their Home screen icon.
If you're using swipe gestures, see Navigation Gestures.
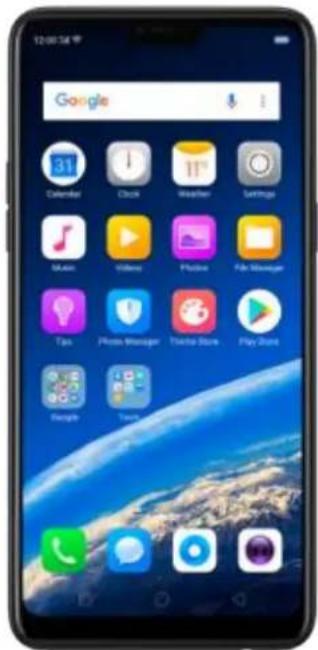
Quick Actions
Press and hold an app icon to bring up "Quick Actions," which offers shortcuts to specific features within that app. When the menu appears, click the shortcut you would like to use, then the app will open directly to that feature. For example, go to your Home screen and press and hold on the icon for the Camera app, you'll see a mini menu that lets you jump straight to a beauty selfie, a sticker selfie, a video, or the app info page.
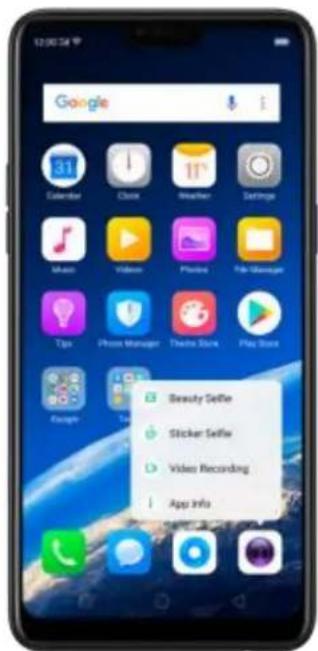
Switch between apps
Clicking Menu button on the bottom left would bring up a menu for apps that you were in. Swipe left or right to see more. To switch to another app, click it.
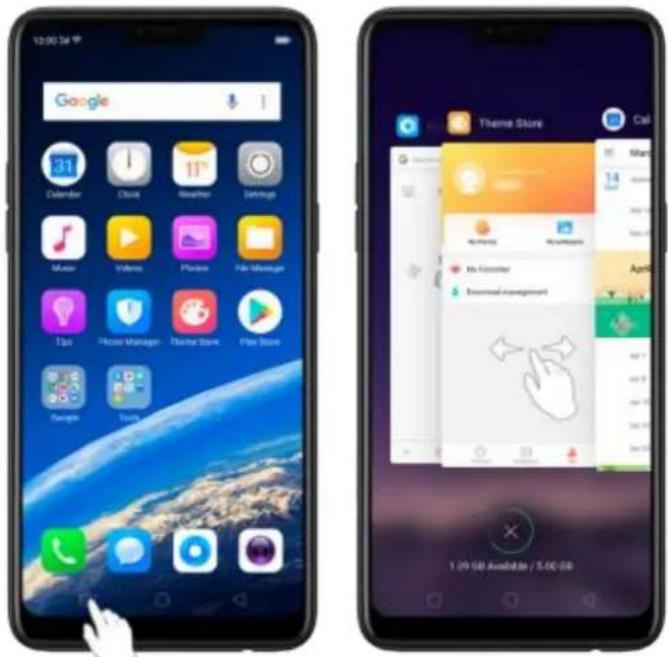
Close apps
Click Menu button on the bottom left, and then:
- Close an app: Swipe the app up to the top edge of the screen.
- Close all apps: Click ✗ to clean up the list.
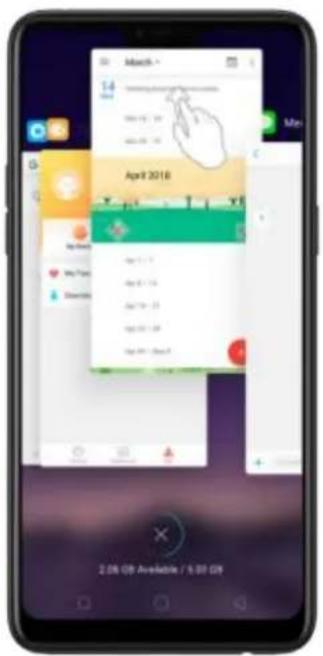
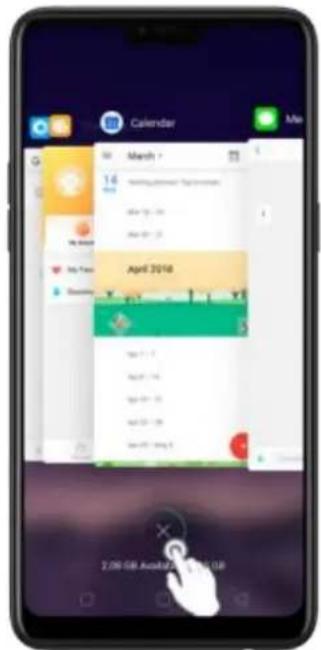
5.2 Share from apps
In addition to sharing your information from the Files app, you can also share from many other apps on your OPPO smartphone.
Share from apps. In many apps, you can click Send or ↗ to choose how to share your information. The choices vary depending on the app you're using. Additional options may appear if you've downloaded apps with multiple sharing options.
Take the Photos app as an example, click ↑ and you'll see all the sharing options.
natural_image
Smartphone screenshot displaying a photo of a woman with floral background, no visible text or symbols on the image itself.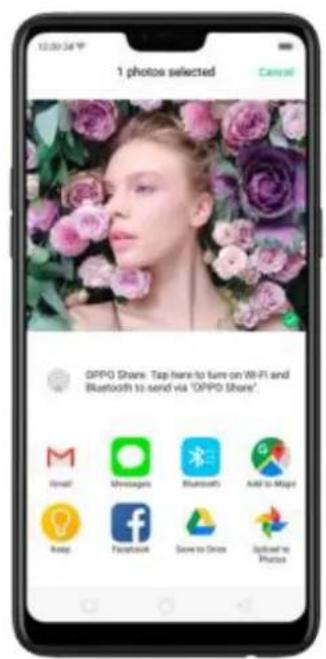
5.3 One-click cleanup
One-click cleanup option helps you to make your phone perform steadily and faster.
Stop background apps. Click Menu button > ✗ to close all active apps. If you want to close a specific app, swipe it up.
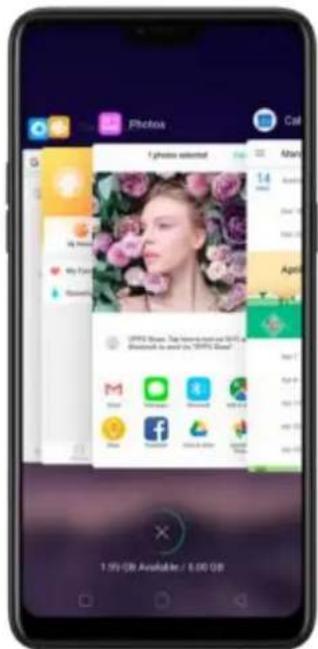
Clean-up & Accelerate. Click Phone Manager on the Home screen, then click [Clean Storage]. Scan and delete all kinds of junk files. You can also delete the app data and other unnecessary files, such as photos, audio, videos, and documents.
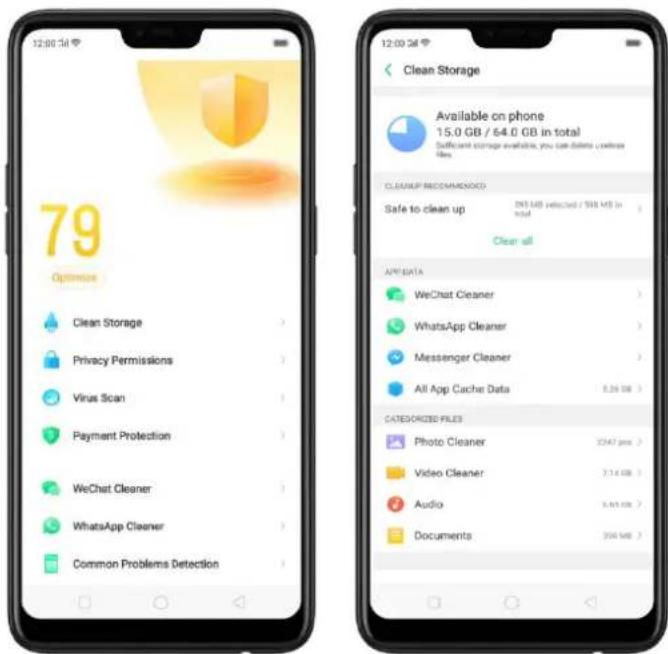
5.4 Lock the running background apps
You may close the running background apps frequently to make your phone perform steadily and faster. If you want some apps to be always connected and reachable, do the following:
Lock an app. Click Menu button to reveal your open apps, then swipe an app down to the bottom edge of the screen. Notice that a lock appears on the upper-left corner of the app.
Repeat the action for other apps.
5.5 View, zoom in and out
Use the touchscreen to interact directly with what is displayed on your phone's screen.
View items. Drag up or down to scroll. You can also drag some screens in any direction, such as webpages. Flick to scroll quickly. You can wait for the scrolling to come to a stop, or touch anywhere on the screen to stop it immediately.
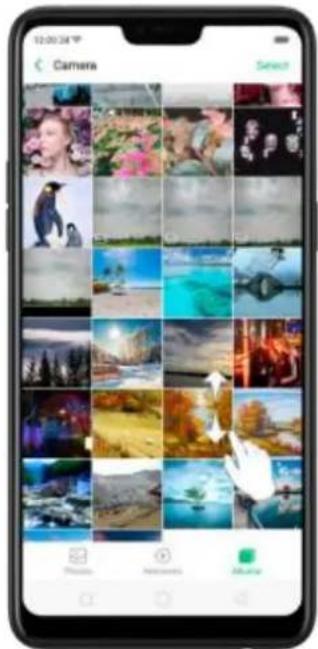
On some screens such as Settings and Contacts page, double-click the status bar to quickly scroll to the top.
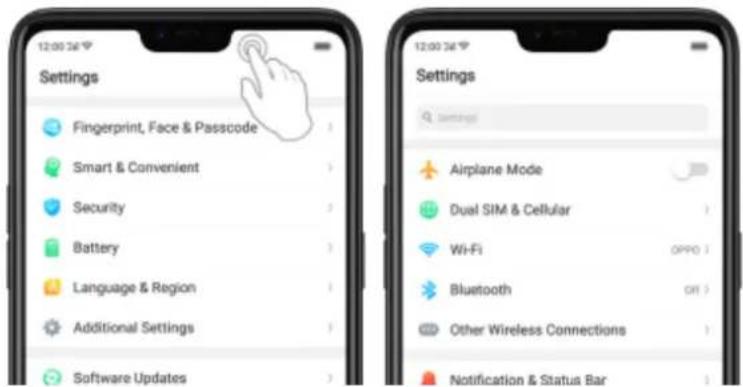
Zoom in and out. When viewing photos, maps, or web pages, you can zoom in and out. Pinch your fingers together or apart. For photos and web pages, you can double-click to zoom in, then double-click again to zoom out. For maps, double-click to zoom in and click once with two fingers to zoom out.
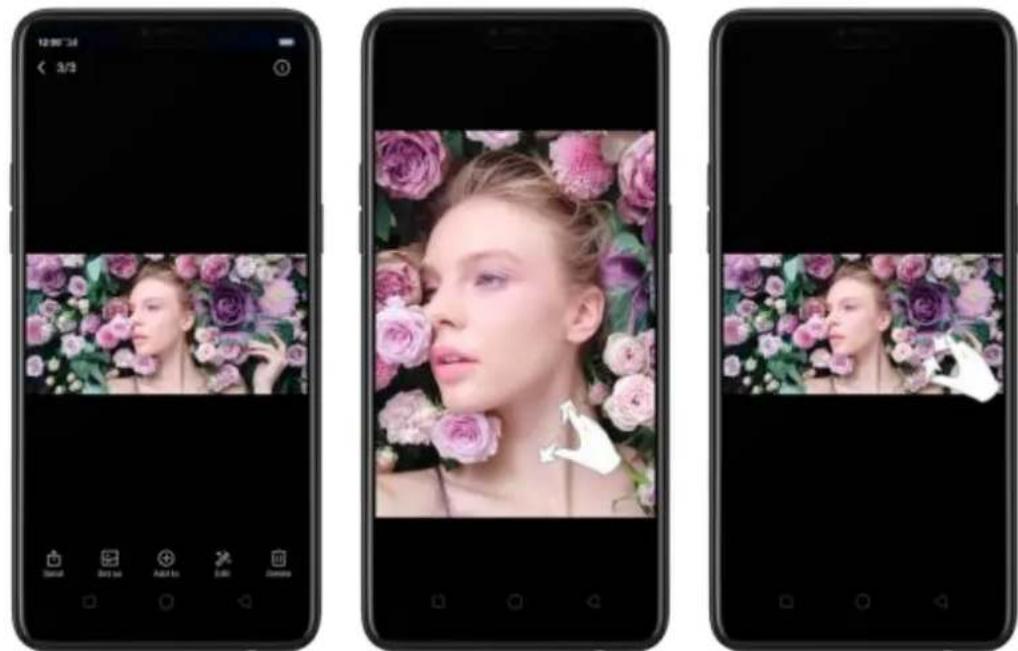
natural_image
Three smartphone screens displaying a woman's face with floral background, each with a close-up photo of her face (no text or symbols visible)Note: Memories and Stories are terms that can be interchangeably used and doesn't affect the full functionality of the phone.
5.6 Smart & Convenient Operation
5.6.1. Navigation Keys
With ColorOS 5.0, all navigation is handled with the on-screen virtual keys and gestures. The three virtual navigation keys appear at the bottom of every screen and
can be hidden when not in use. You can also arrange the order of "Back" and "Recent" depending on your preference. Besides, if you are in love with gesture navigation control, you can use a gesture-based system to navigate around the phone instead of the traditional navigation key.
To switch between navigation keys and gestures, go to [Settings] > [Smart & Convenient] > [Navigation Keys].
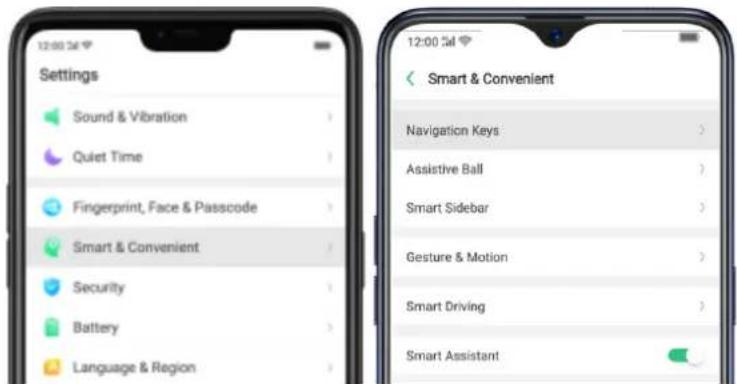
Virtual Key Navigation
Enable virtual key navigation. Virtual key navigation the default setting. If you want to enable it manually, click Virtual Key Navigation.
Change the order of virtual navigation keys. The keys follow the typical order for OPPO: Menu, Home, and Return from left to right. If you are left-handed, you can change them to the Return-Home Menu order.
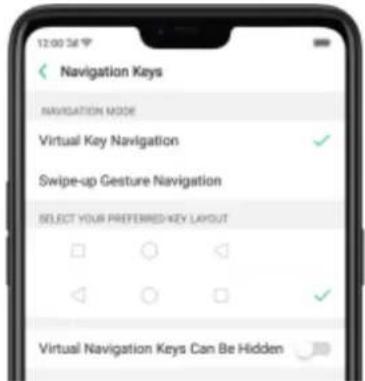
Hide the virtual navigation keys. When you launch a full-screen app, the keys will automatically hide, and can be brought back with a simple swipe:
- When in portrait mode, swipe up from the bottom.
- When in landscape mode, swipe from the bottom to the left.
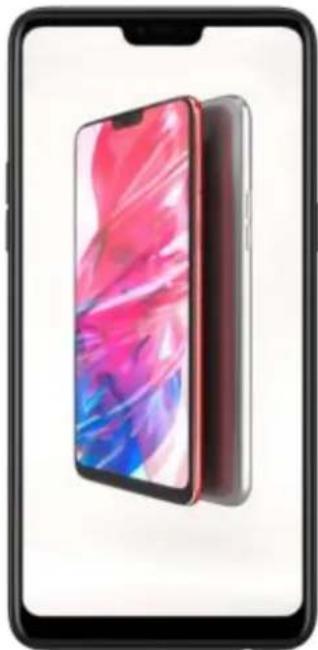
natural_image
Front view of a foldable smartphone showing its colorful wallpaper and screen (no text or symbols visible)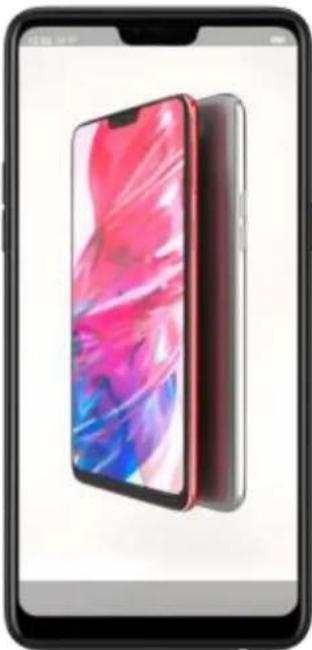
natural_image
Front view of a smartphone displaying a colorful flip screen (no visible text or symbols)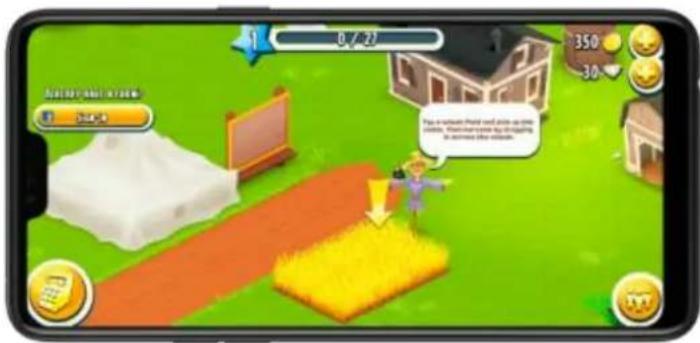
Manually hide the virtual navigation keys. To set the keys to appear only when needed, turn on Virtual Navigation Keys Can Be Hidden. Then you can click on the left-lower corner of the screen to hide the keys, and swipe from the bottom to reveal them.
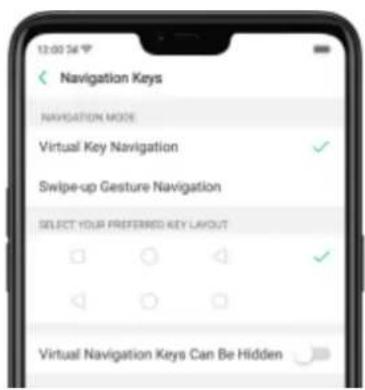
Swipe-up Gesture Navigation
Four kinds of new swipe-up navigation gestures are added to your phone, and you can choose one that suits you most.
Use swipe-up navigation gestures. Go to [Settings] > [Smart & Convenient] > [Navigation Keys] and click [Swipe-up Gesture Navigation].
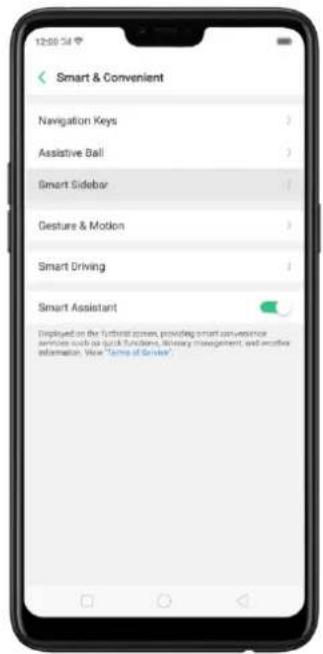
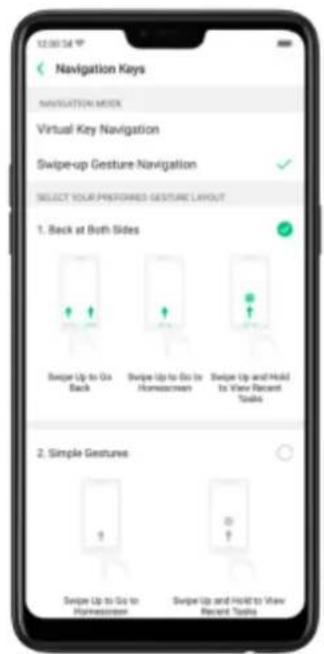
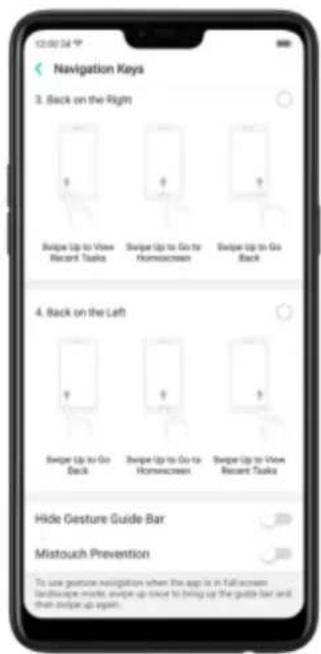
Back at both sides. Swipe up from the left or right bottom to return to upper page, swipe up from the middle bottom to get to the Home screen, and swipe up from the middle bottom and pause 1 second to view recent tasks.
1. Back at Both Sides
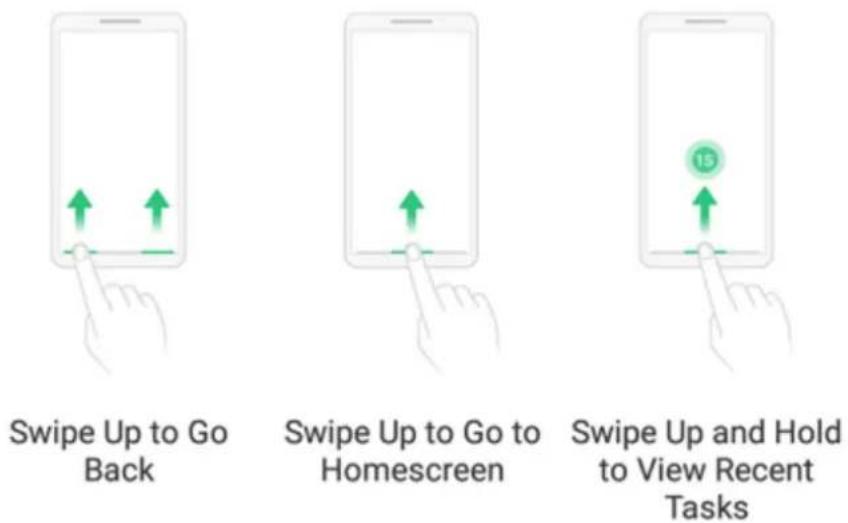
Simple gestures. Swipe up from the middle bottom to get to the Home screen, and swipe up from the middle bottom and pause 1 second to view recent tasks.
2. Simple Gestures
natural_image
Illustration of a hand pressing on a tablet with an upward arrow (no text or symbols)Swipe Up to Go to Homescreen
natural_image
Illustration of a hand pressing on a smartphone with an ID symbol (no text or numbers present)Swipe Up and Hold to View Recent Tasks
Back on the right. Swipe up from the left bottom to view recent tasks, swipe up from the middle bottom to get to the Home screen, and swipe up from the right bottom to return to upper page.
3. Back on the Right
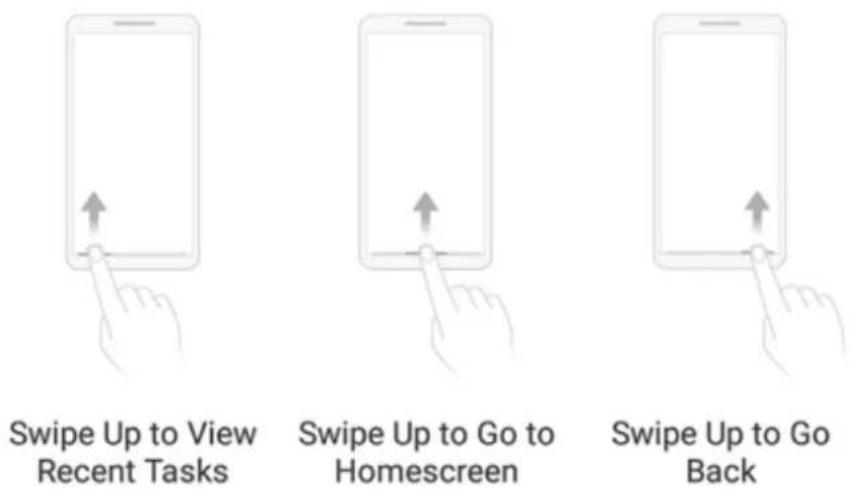
Back on the left. Swipe up from the left bottom to return to upper page, swipe up from the middle bottom to get to the Home screen, and swipe up from the right bottom to view recent tasks.
4. Back on the Left
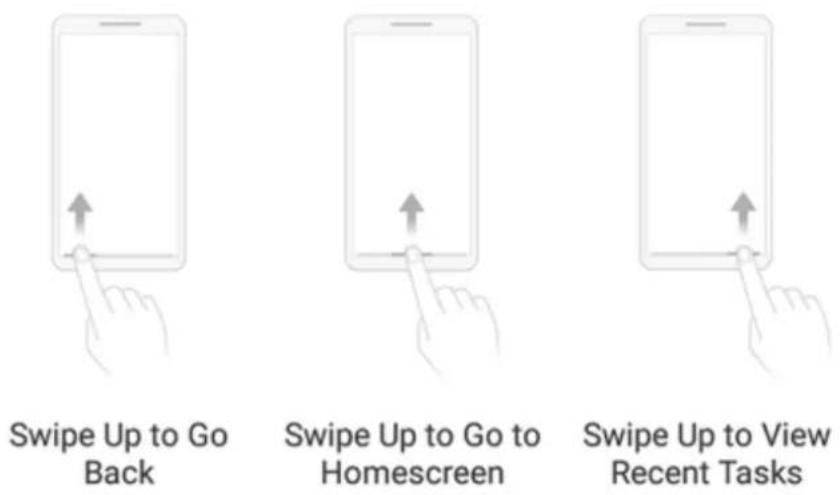
Hide Gesture Guide Bar. Gesture Guide Bar is the translucent line at the bottom of the screen, which allows you to quickly distinguish the left, middle, and right swipe-up regions. To hide the guide bar, turn on [Hide Gesture Guide Bar].
Prevent mistakenly touching. Turn on [Mistouch Prevention]. To use gesture navigation when the app is in Landscape Mode, you need to swipe up to bring up
the guide bar first, then swipe up again in the same area.
5.6.2. Assistive Ball
Applying the Assistive Ball feature provides options to access several regular phone features through the touchscreen, rather than the tactile buttons. It enables you to use the virtual navigation keys with just one finger, and also open the notification center, take a screenshot, and more. When you perform gestures that are difficult for you, Assistive Ball can help.
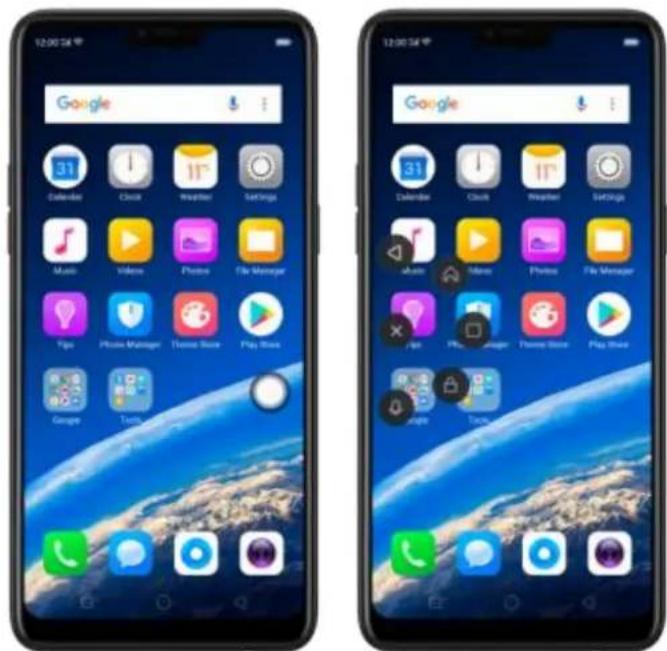
Assistive Ball lets you perform a wide range of features:
• Return to upper page
- Go to the Home screen
• View recent tasks
• Open Notification Center
- Lock the screen
• Enter One-hand Mode
• Take a screenshot
To configure the Assistive Ball menu, go to [Settings] > [Smart & Convenient] > [Assistive Ball], then choose one operation mode:
Gesture Operations. Below Gesture Operations, you can assign different actions to a single tap, double tap, or long press. For example, assign "Home" to "Touch and
hold", then you can long press the Assistive Ball to go to the Home screen.
Tap Menu. There are five shortcuts for enabling different features in Tap Menu. Click a shortcut and change the option to the one you preferred. On any screen, click the Assistive Ball to pop up the shortcut menu.
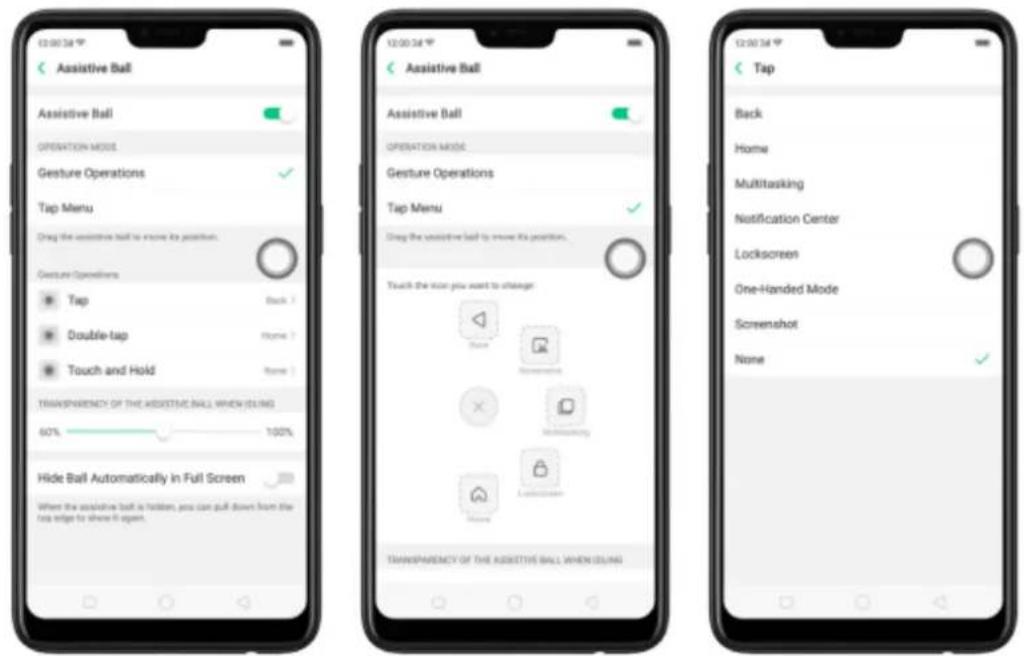
When Assistive Ball is on, you can hold the floating button and pull it around the screen to any location to get it out of the way or make it more accessible.
Adjust the transparency of the Assistive Ball when not in use. Go to [Settings] > [Smart & Convenient] > [Assistive Ball], then drag the slider.
Hide the Assistive Ball automatically in full screen. Go to [Settings] > [Smart & Convenient] > [Assistive Ball] and turn on [Hide Ball Automatically in Full screen]. To reveal the Assistive Ball, swipe down from the top of the screen.
5.7. Change the screen orientation
OPPO smartphone supports portrait and landscape screen orientations. Every time you shift your hands, the screen rotates.
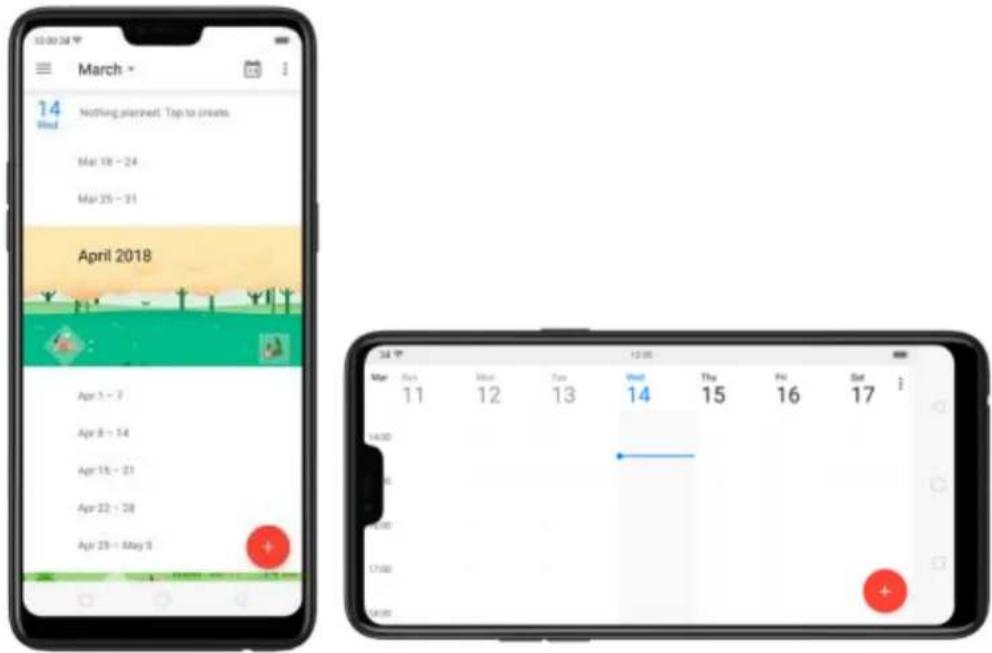
To lock the screen in portrait orientation, swipe down from the top of the screen to open Control Center, then click 📷. Or go to [Settings] > [Display & Brightness]
and toggle the [Portrait Orientation Lock] slider to green. Notice that appears in the status bar.
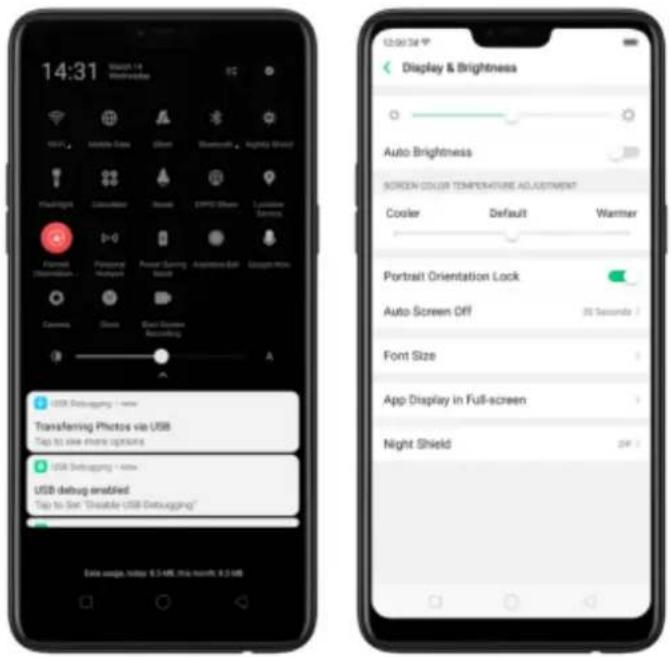
5.8. Split-screen
ColorOS 5.0 lets you set multiple modes to fulfill your personal needs. The split-screen mode allows you to divide the screen into two areas, with each area showing a different scene at the same time. Now you can watch a movie and chat with friends at the same screen.
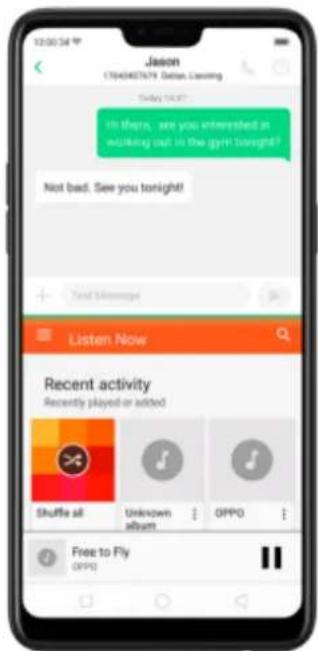
Use Split-screen. Go to [Settings] > [Split-screen], then turn on [App Split-screen] and [Swipe up with 3 Fingers for Split-screen]. There are four methods to enter Split-screen mode:
Note: Both apps need to support Split-screen function. Your phone will alert you if the app doesn't support that.
- Under the interface of an app, swipe up the screen with three fingers to enter split-screen mode.

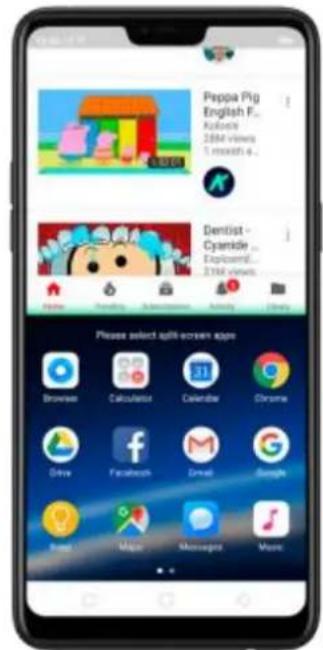
- Under the interface of an app, press and hold the Multitask button to enter split-screen mode.

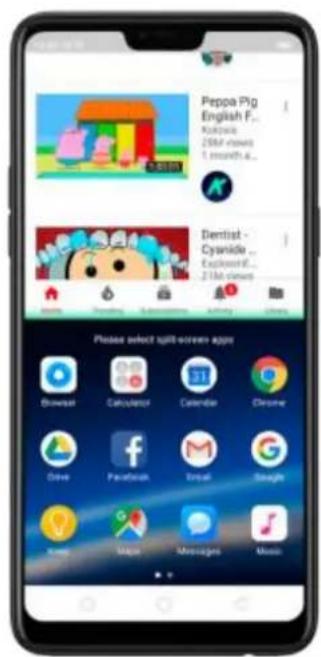
- In recent tasks screen, swipe down a task card, then click the "Spilt-screen" button to enter split-screen mode.
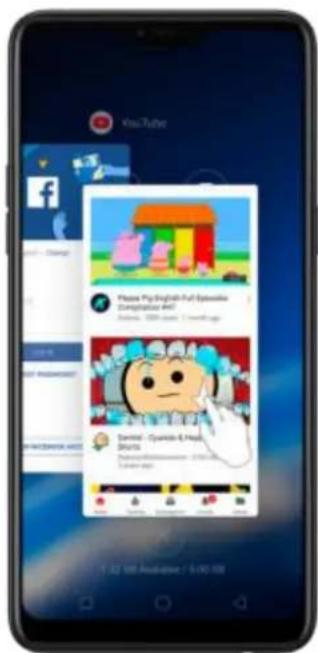
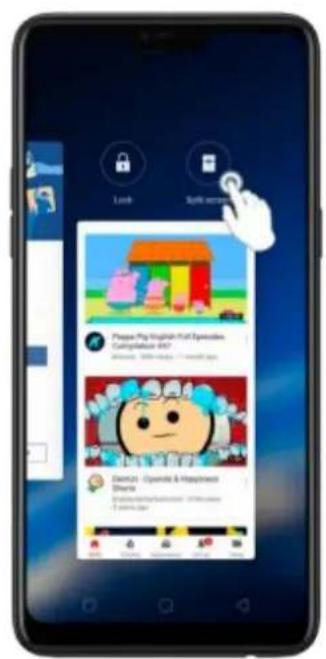
- When you use an app in landscape mode and receive a message from other apps, click "Split-screen Reply" to enter split-screen mode.
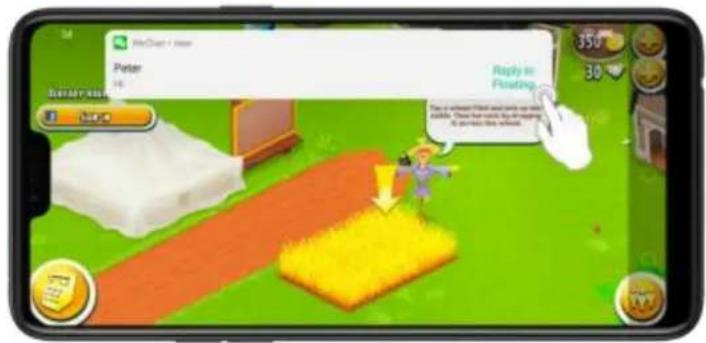
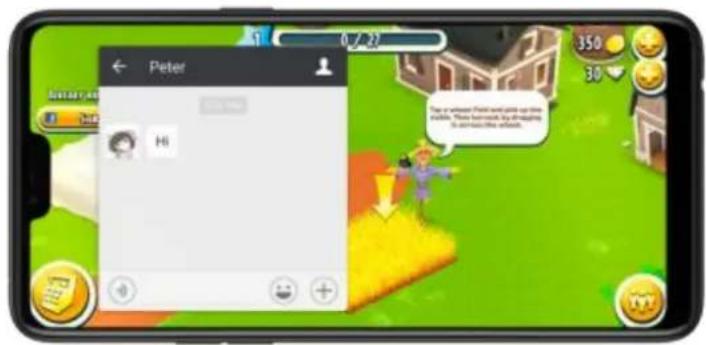
5.9. Take and edit a screenshot
You can capture the screen on your OPPO smartphone using the following ways:
Capture the current page
- Press and hold the Power and Volume Down buttons for about 2 seconds, the screen will briefly flash white, and you'll hear a shutter sound if your phone's sound is on.
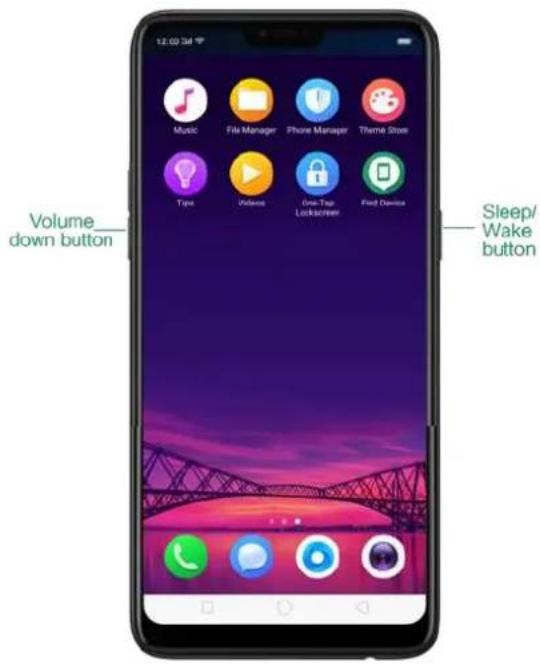
- >Gesture Screenshot: Go to [Settings]> [Smart& Convenient] [Gesture & Motion] and turn on [3-Finger Screenshot]. Then swipe down the screen with three fingers to take a screenshot.
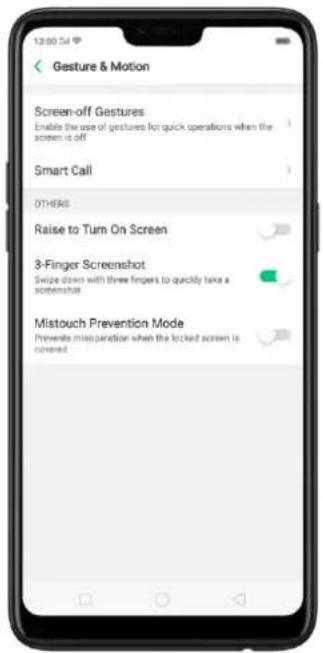
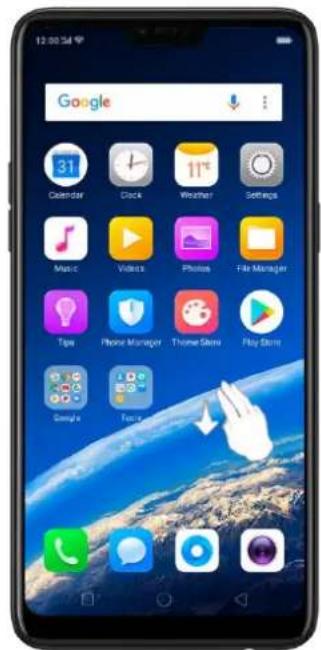
Capture a long screenshot
With OPPO smartphone, you can easily take longer and scrolling screenshot with simple clicks. Long screenshot allows you to take scrolling screenshot of your conversations on messaging apps or a full webpage.
To capture long screenshots:
- Press and hold the Power and Volume Up buttons for about 2 seconds, or swipe down the screen with three fingers to take a screenshot of the current page.
- Click the screenshot, click Long Screenshot, then scroll the page up or down and stop whenever you want to.
- Click Done to generate a long screenshot. The image is saved in the Photos app.
Edit a screenshot
After you've taken a screenshot, click it, then click Edit. You can use the fancy new markup features to optimize it instantly, such as adding text, light, filters, and more. Click Done to save your changes.
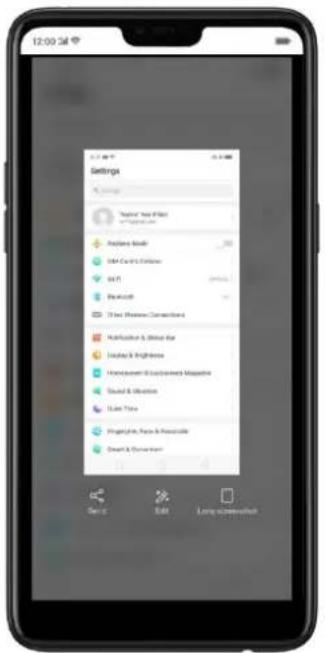
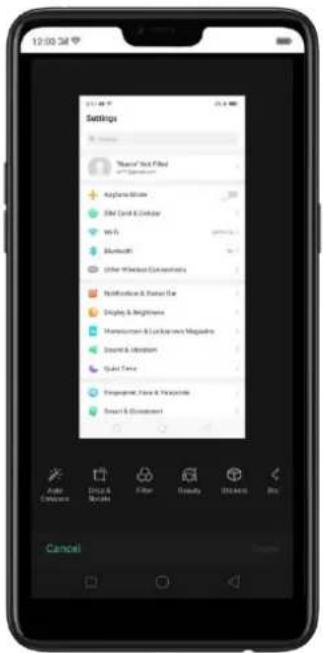
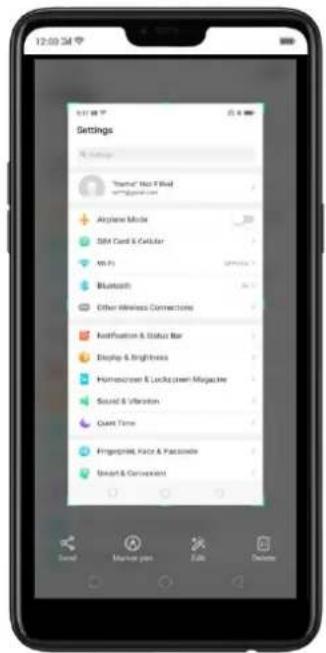
Use a Marker Pen
After you've taken a screenshot, click it, then click Marker Pen. You can highlight a word or write a note on the image. Click Done to save your changes. (Note: Marker pen is only available in red color).
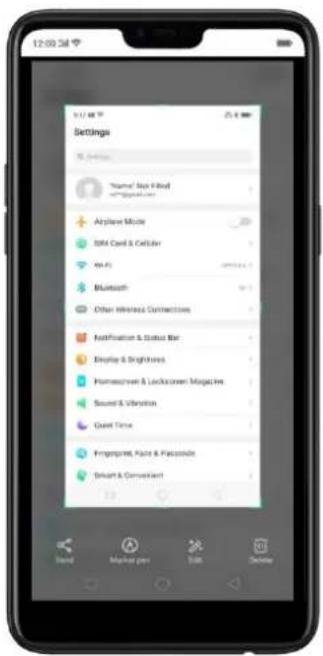
5.10. Control Center, Notification, and Status Bar
Control Center
Control Center gives you instant access to the most frequently used features and allows you to view recent and earlier notifications with just a swipe. You can open Control Center from anywhere on your phone from any app or screen, even from the lock screen.
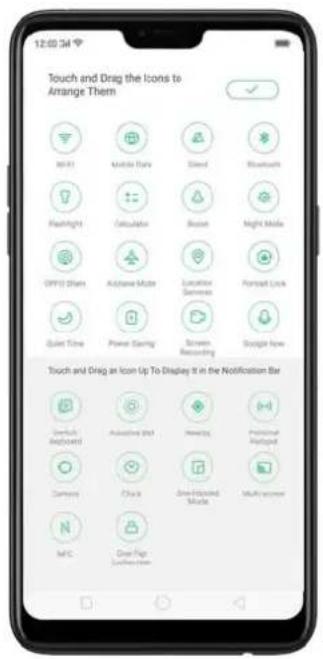
Open Control Center. Swipe down from the very top of any screen (except the notch at the top center of the display). You'll see the shortcuts listed on top, and notifications below.
Customize the shortcuts. By default, the phone will list ten shortcuts when you open Control Center. Click ▼ or swipe down the screen to show other shortcuts.
To change or rearrange the shortcuts, click on the top , then hold down and drag an icon to your preferred position. To save your changes, click √.
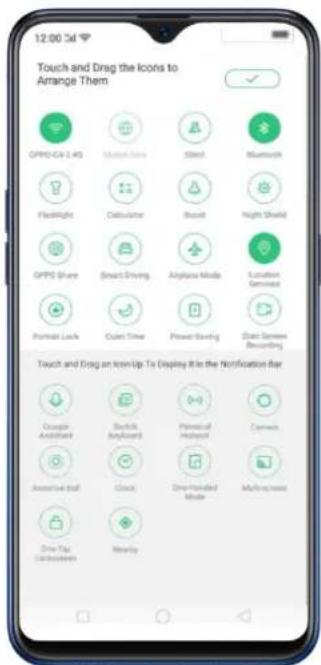
Control the brightness. Drag the slider to adjust the brightness of the screen. When you drag the slider, other parts of Control Center will be temporarily hidden.
Notifications
View all notifications. Swipe down from the very top to view recent notifications.
Open the app to respond. Click a notification to go to the related app.
When phone screen is locked, swipe the notification to the right. You may need to enter your passcode.
Dismiss notifications. Swipe the notification to the left, then click Delete. To dismiss all notifications, Click ✗.
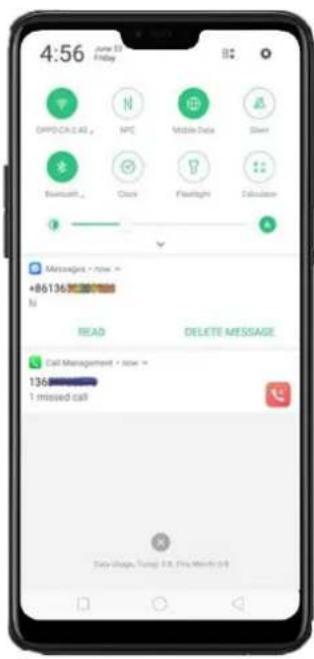
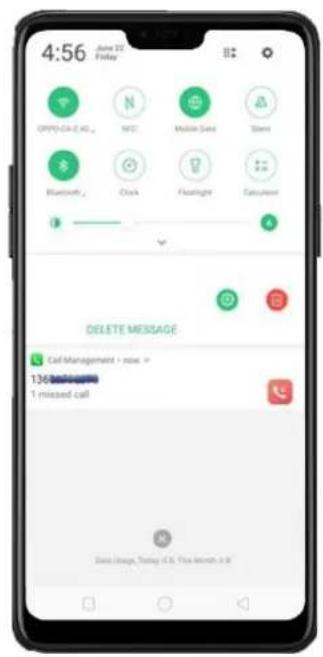
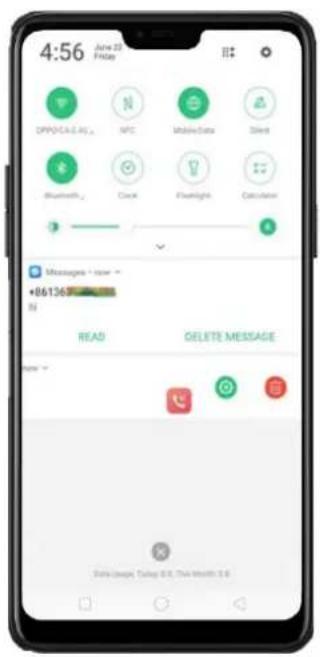
Manage your notification settings. Swipe the notification to the left, click Settings, or go to [Settings] > [Notification & Status Bar] > [Manage notifications].
Select an app from the list to customize whether new notifications from that app appear on the lock screen or notification bar, display a banner, play a sound or vibrate, or whether show icon badges on the Home screen. You can also allow ringing for notifications when Do Not Disturb is on.
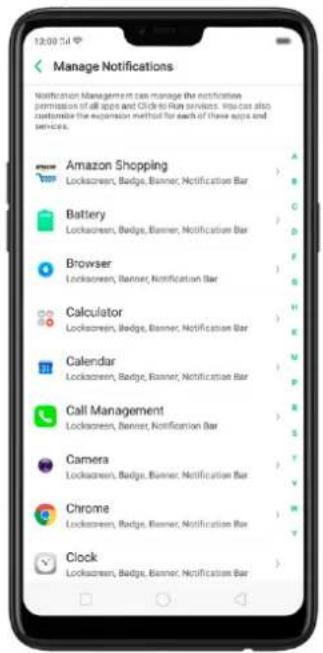
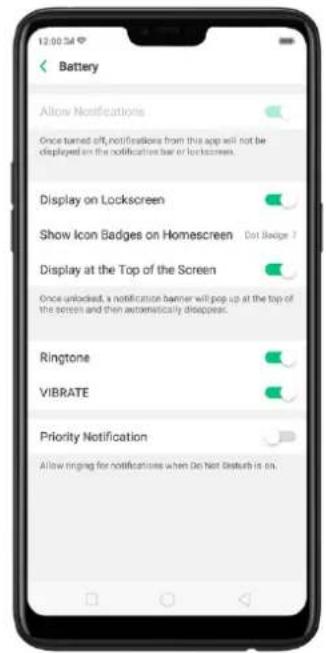
- Show data usage at the bottom. Go to [Settings] > [Notification & Status Bar] and turn its slider to green. Your daily and monthly data usage will display at the bottom of the notification bar.
- Turn on screen for notifications. Go to [Settings] > [Notification & Status Bar] and turn its slider to green.
Status Bar
Status icons are displayed on the status bar, indicating, for instance, wireless connectivity, the battery status and time.
Display or hide battery percentage and network speed. Go to [Settings] > [Notification & Status Bar], and switch the sliders to green/white.
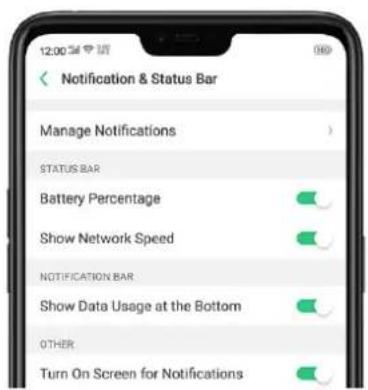
5.11. Search
Use the OPPO smartphone's Search feature to find specific apps, contacts, messages, or quickly search the Internet.
Search with OPPO phone. Swipe down on any page of the Home screen. Do not start swiping at the very top of the screen - that will open the Notification Center instead. Type in your search query, then click a search result on the list to open it.
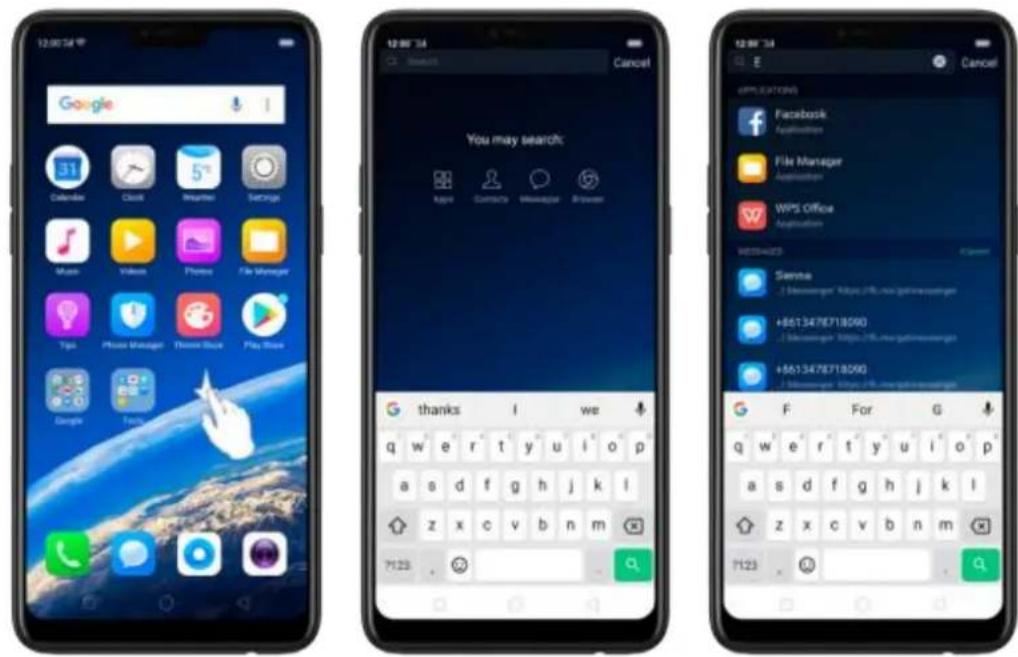
Close Search. You can either Click "Cancel", press the Return button, or swipe up the "Back" gesture that you have set.
5.12. Test
5.12.1. Add or change keyboard languages
If you need to type in a foreign language on your OPPO phone, you can do so by adding and changing the input language:
Add installed languages. Go to [Settings] > [Additional Settings] > [Keyboard & Input Method] > [TouchPal for OPPO] > [Languages], then tick the languages to use.
You can also add languages as you type. Click Ⓗ > [Add language] and tick the languages to use.
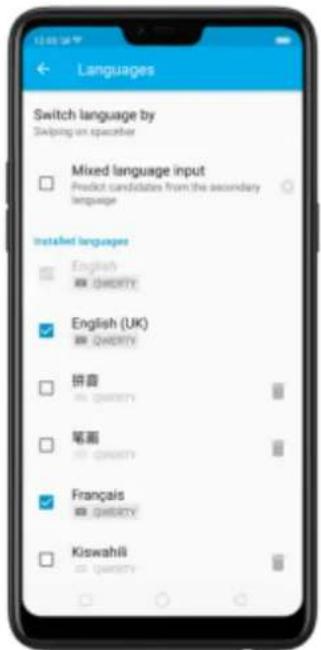
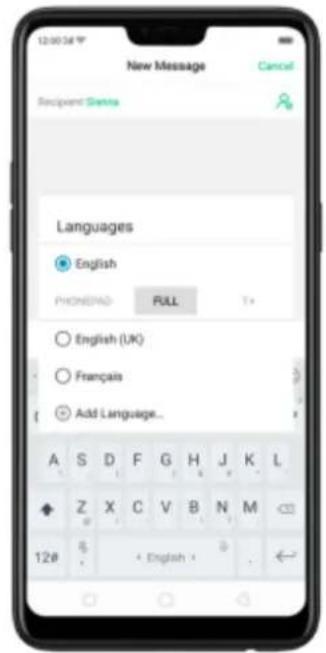
Download available languages. Click to download the language pack. You'll see the language in Installed languages list when the download is completed.
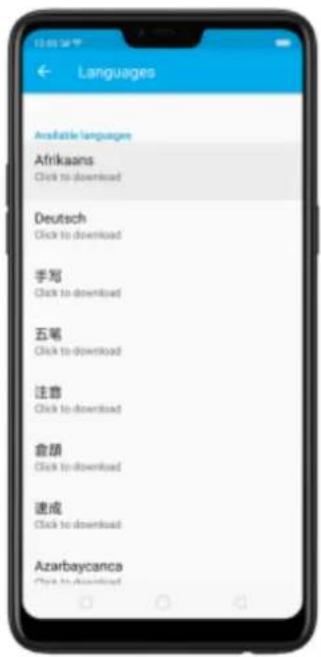
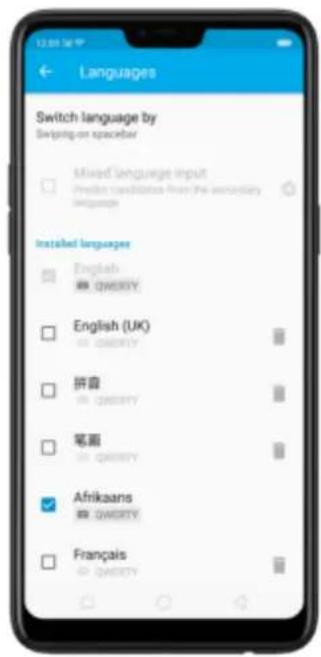
Change Keyboard languages. As you type, switch language by clicking EN or swiping on spacebar.
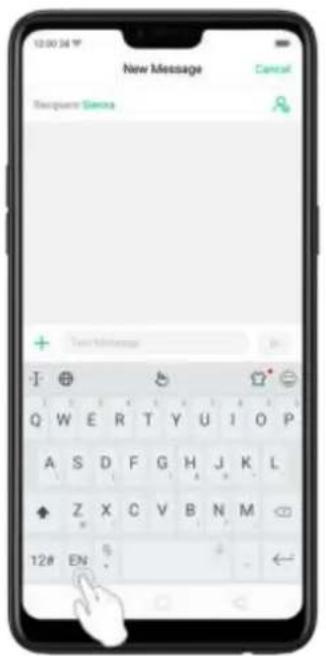
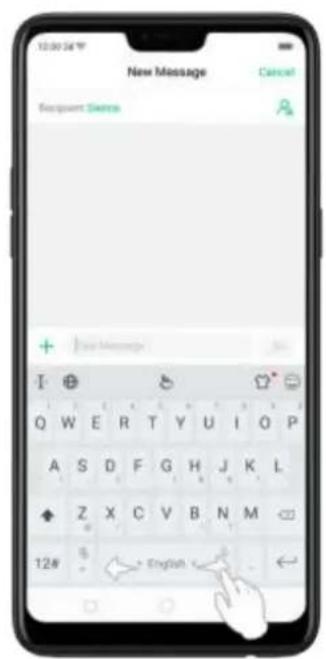
5.12.2.Type, edit, and delete text
Type text
Click a text field to pop up the keyboard, then click the letter to type.
Type capital letters. OPPO smartphone is auto-capitalizing the first letter of a sentence, or you can click ↑ to type capital letters.
Turn on Caps Lock. Double-click ↑. A line will appear under the arrow if you have done this correctly.
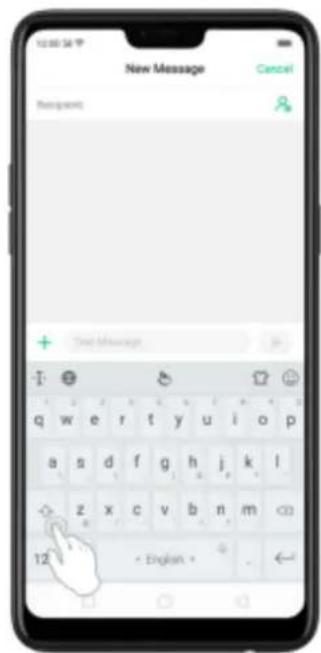
Enter numbers, punctuation, or symbols. Click 12#. To type alternate characters, touch and hold a key, then slide to choose one of the options.
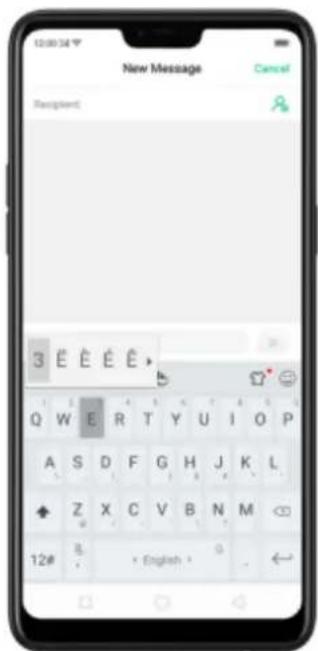
Switch language. Go to [Settings] > [Additional Settings] > [Keyboard & Input Method] > [TouchPal for OPPO] > [Languages].
Tick the languages to use, then switch language by clicking EN or swiping on spacebar.
Revise text. Click on your text to move the cursor to the insertion point.
Edit text
Select text. Touch and hold the target text, or double-click the target text to select. Drag the control points on either side of the highlighted word to select more or less text, or click [Select all] to highlight all of the text.
You can cut, copy, paste or share your text then.
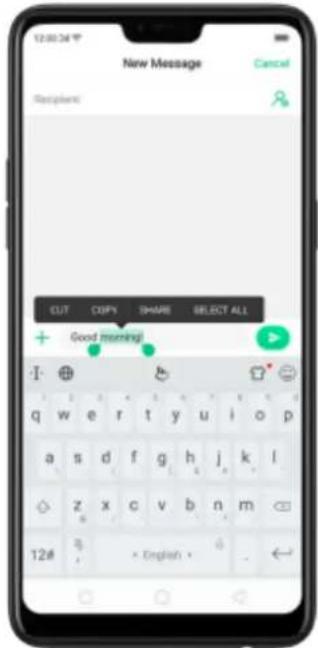
Delete text
Click

to delete the selected text or characters before the cursor.
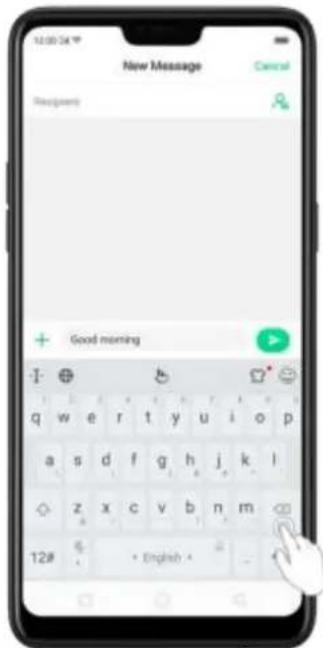
5.12.3.Prediction
Prediction feature lets you to enter text with ease and without errors.
Go to [Settings] > [Additional Settings] > [Keyboard & Input Method] > [TouchPal for OPPO] > [Prediction].
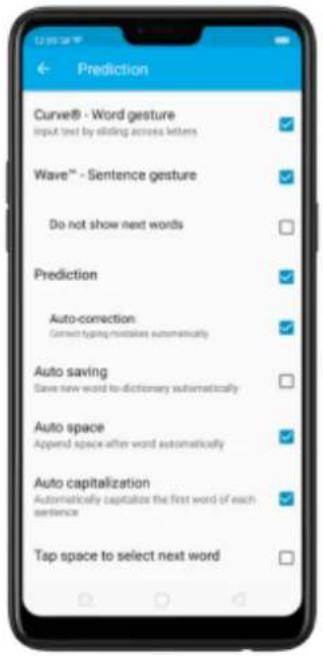
Use TouchPal Curve to input text simply by swiping across the keyboard, from one letter to another.
Use Wave – Sentence gesture to input commonly used phrases/sentences.
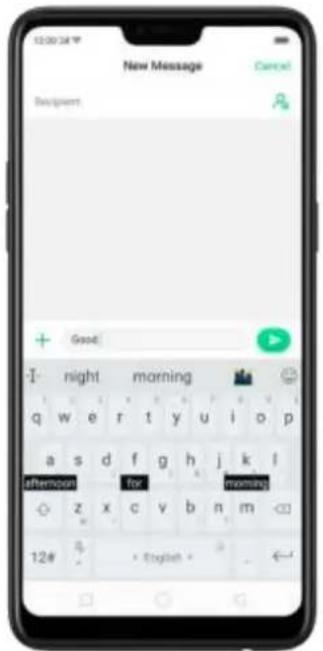
Predict text. While you type, the keyboard predicts your next word, and offer suggestions for likely words before you finish typing. Click the word or the spacebar to select
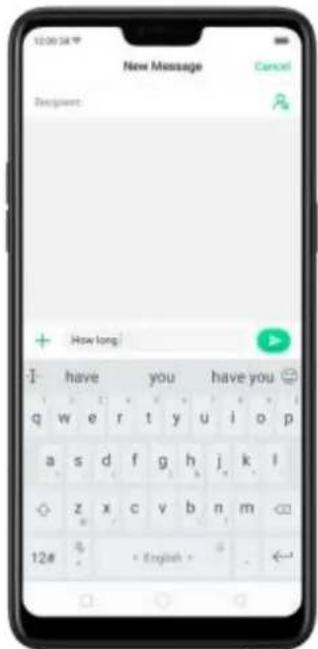
Correct spelling automatically. The keyboard will automatically check and correct the spelling of the text.
Auto-saving new words, adding space, and capitalizing. As you type, the keyboard will also automatically save new words to the dictionary, add space after a word and capitalize the first word of each sentence.
Predict Emojis. As you type, the keyboard predicts what emoji comes next.
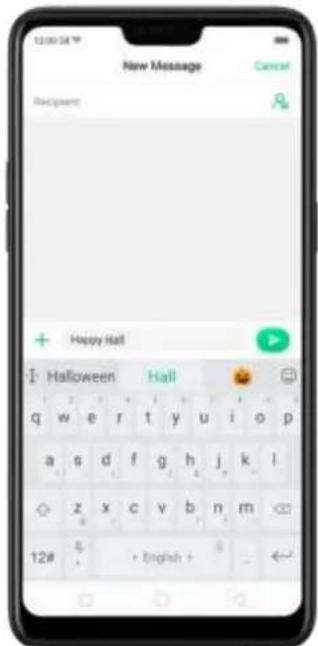
Contextual prediction. The keyboard will suggest what it thinks are the most likely words based on what you're typing.
Import contact names. The names of your contacts will be added to user dictionary. Learn from messages. Let the keyboard learn from your conversations and predict words you use most.
User dictionary. Click Edit user words, then add your own words into the dictionary so that they appear in the word prediction fields when typing. You can also back up or restore your dictionary to or from the SD card, or rebuild, or clear your dictionary.
5.12.4.Voice typing
When you're connected to the Internet, you can use the built-in microphone to speak the text instead of typing it.
Start voice typing. Touch and hold the space bar on the bottom of the screen, or click 🤨 > [Voice], then speak.
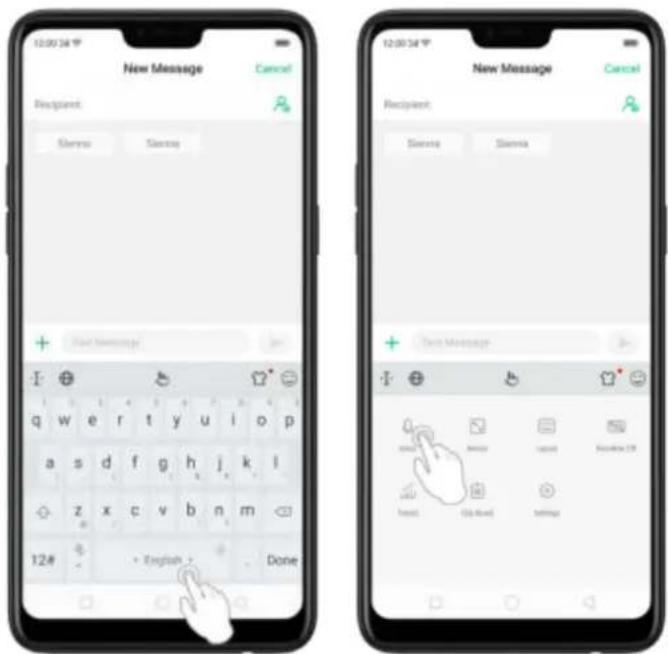
Pause voice typing. Click the microphone icon to pause/continue dictating the words. Click ✗ to quit voice typing.
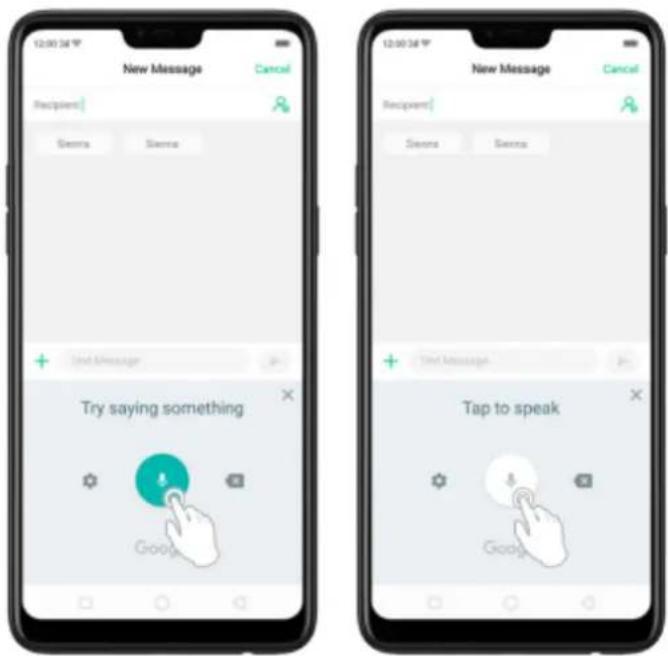
Select input languages. Click 🎨 on the panel, or go to [Settings] > [Additional
Settings] > [Keyboard & Input Method] > [Google voice typing] > [Languages].
Select your preferred languages. To select a primary language, touch and hold the language.
Insert and delete text. To insert or delete text, click to place the insertion point first.
Click ✗ to the right of the microphone icon to delete text.
To enable voice input while offline: Click 🎨 on the panel to manage [Offline speech recognition].
5.12.5.TouchPal for OPPO
TouchPal Keyboard is the default keyboard on OPPO smartphones. You can use it to enter text by tapping on the keys or swiping across the keyboard, from one letter to another. Besides its basic typing features, TouchPal has introduced some innovations.
Click 🤒 on the on-screen keyboard to get more information.
Multiple themes available. You can dress up the keyboard with various themes or customize the keyboard by yourself.
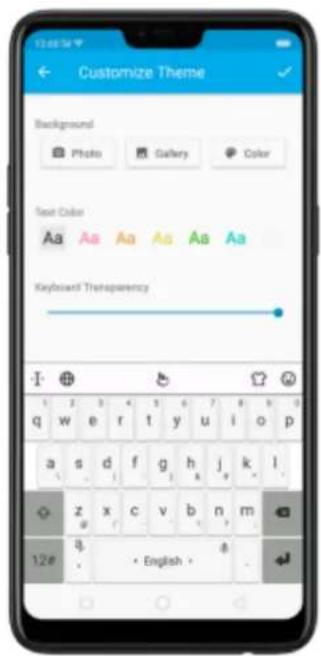
Emojis and stickers. TouchPal has multiple emojis and stickers and can predict what emoji comes next.
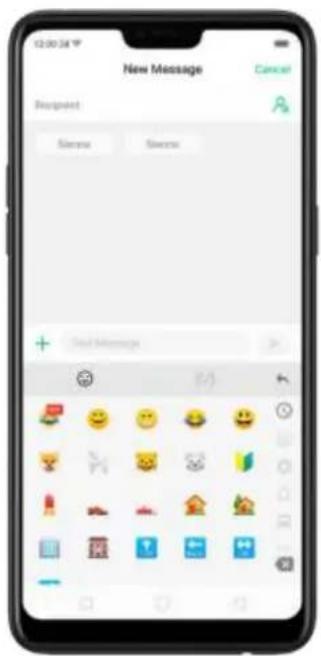
Intelligent input. With TouchPal Curve ^® , you can type by sliding from letter to letter instead of tapping. Advanced technologies such as Contextual Prediction, Autocorrection, and User Dictionary also make typing faster. See Prediction.
Different on-screen keyboard styles. In addition to the default keyboard style, the undocked, one-handed, and split keyboard on the screen makes typing with both thumbs a breeze. You can use "Undock" feature to position the keyboard anywhere on screen, or narrow the keyboard with one-handed mode, or split the keyboard in half.
Clip board. It allows you to type a long string of text by entering a shorter string. Create a keyboard shortcut for a word, phrase, or sentence. Whenever you type a specific shortcut, it will replace those letters with a predefined piece of text.
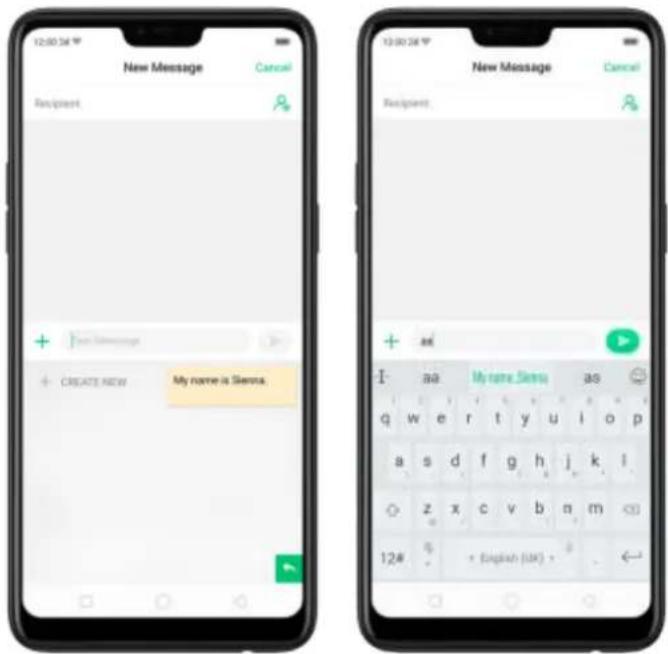
5.13. Sound, Vibration, and System Feedback
You can set an OPPO smartphone to sound or vibrate for incoming calls, messages, and other notifications, and let your phone send sound or haptic feedbacks on key clicks.
Set your phone to vibrate. Go to [Settings] > [Sound & Vibration]. Separate controls let you set your phone to vibrate in ring mode, silent mode, or both.
Turn ringing on or off. Toggle the [Silent] slider to green or white. You can also
swipe down from the top of the screen to open the Control Center, then click to turn on Silent mode.
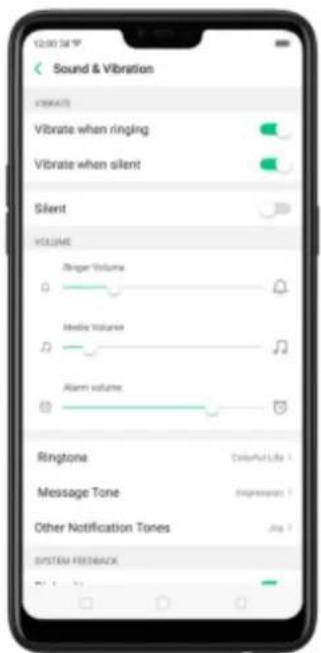
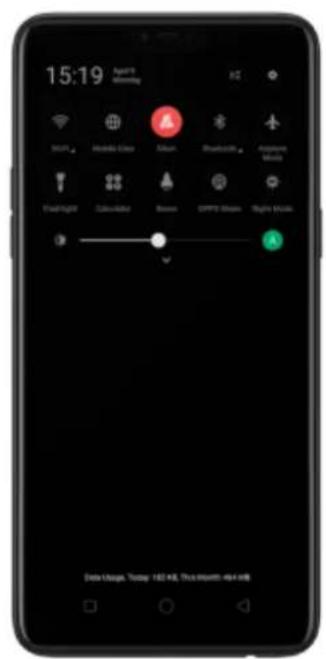
Adjust the ringer, media and alarm volume. Drag the control point left or right. Change ringtones for incoming calls, messages, and other notifications. In addition to the default ringtones, you can create ringtones using your own audio files.
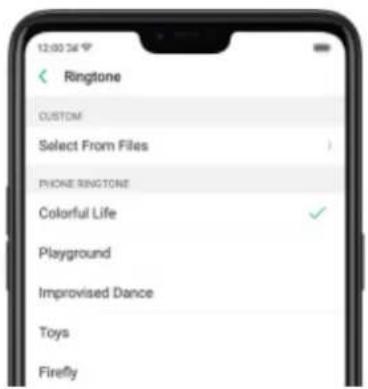
Turn system feedback on or off. Toggle the sliders to green or white. When turn Vibrate on Touch on, your phone vibrates when you touch the Menu, Home, and Return buttons.
To temporarily silence incoming calls and alerts (without vibrations), see Quite Time.
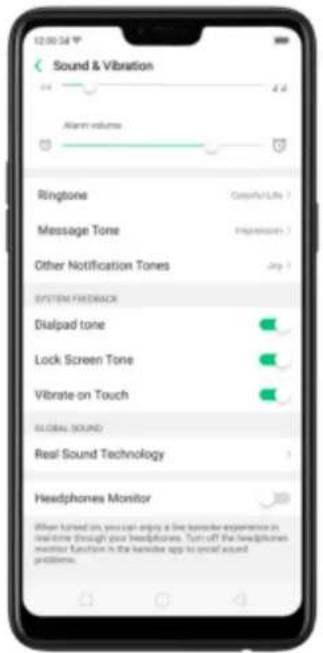
Real Sound Technology. Real Original Sound Technology is jointly developed by Dirac Research AB and OPPO. It delivers original sound in full fidelity and creates a spatial three-dimensional sound arena to provide you with a listening experience that's just like being at a live performance. Plug in the headphones then select a scene you want the sound to change to.
Headphones Monitor. When turned on, you can enjoy a live karaoke experience in real-time through your headphones.
Turn off the default headphones monitor function in the karaoke app to avoid sound problems.
5.14. Charge and monitor the battery
OPPO smartphones are equipped with a non-removable, lithium-ion rechargeable battery. Do not attempt to open your phone. Charge the phone using the cable and USB power adapter that's included when you purchased it.
Charge the battery. Connect your phone to a standard power outlet or a Power Bank.
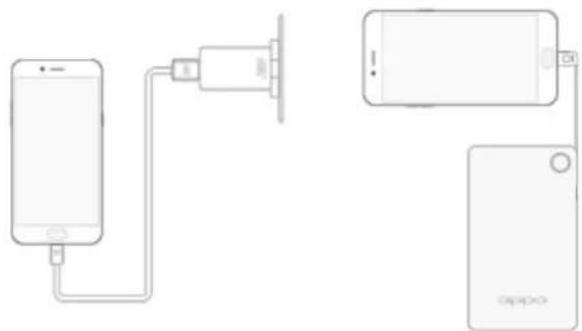
Charge the battery and transfer files. Connect your phone to a computer.
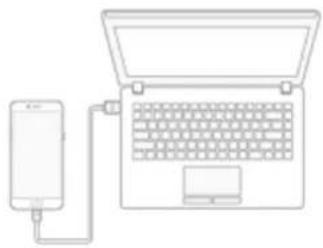
natural_image
Line drawing of a laptop connected to a smartphone via a cable (no text or symbols)Note:
* All photos shown are for illustration purpose ONLY. Actual products may vary.
* Rechargeable batteries have a limited number of charge cycles and may eventually need to be replaced. The OPPO smartphone battery is not user replaceable; it can only be replaced by an authorized service provider. Removing the battery yourself will void your warranty and might cause damage to your phone.
Show percentage of battery in the status bar. Go to [Settings] > [Notification & Status Bar] and turn on [Battery Percentage]. Or go to [Settings] > [Battery] and turn on [Show battery percentage on status bar].
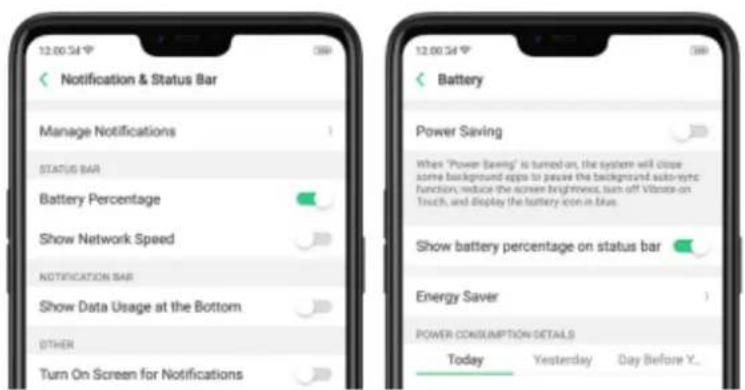
View detailed battery info listed for each app. Go to [Settings] > [Battery].
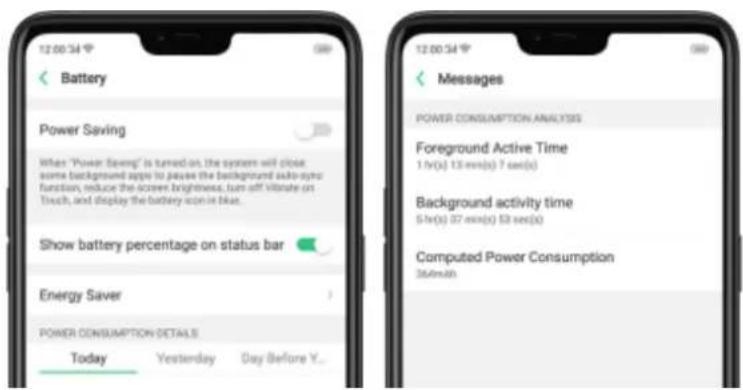
Use USB OTG. Go to [Settings] > [Additional Settings] and enable [OTG Connection]. Connect the OTG cable to your phone, then attach the USB Flash Drive. Once connected, you can directly view and transfer files between the USB Flash Drive and your phone without requiring a PC. You can also connect a gaming controller, an external hard drive, printer, and much more to your phone with the help of this feature.
5.15. Location Service
Apps like Maps, Weather, and Compass must know your exact position before it can provide accurate services and results.
Turn on Location Service. Swipe down from the top of the screen to open Control Center, then click . You can also go to [Settings] > [Google] > [Location] and toggle the slider to green.
like Maps, Weather and Compass must know your exact position before it can provide accurate services and results.
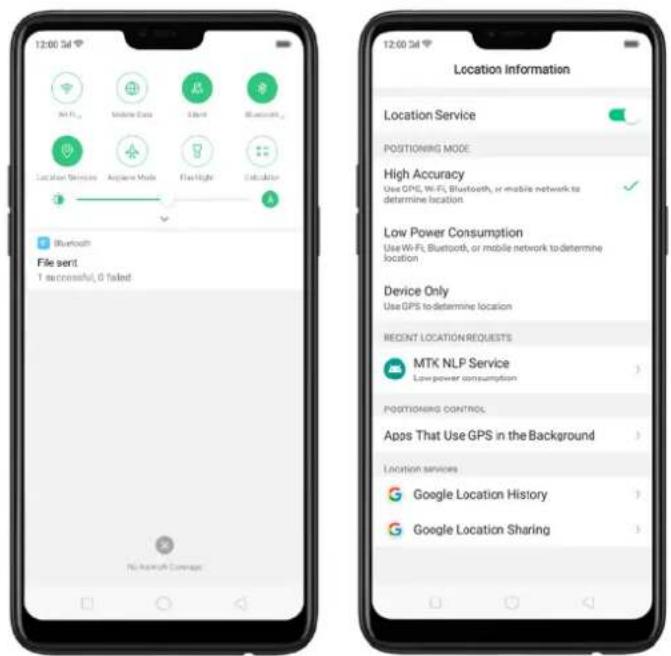
You can choose from three types of positioning modes, which differ in accuracy and battery drain:
- High accuracy (GPS, Wi-Fi, Bluetooth, and mobile network).
- Battery saving (Wi-Fi, Bluetooth and mobile network).
- Device only (GPS).
A history of recent location requests. You'll see a list of apps that have requested location. Click an app to enter the App info page that allows you to manage the app directly.
Apps that use GPS in the background. Turn the slider to green if you allow the app to use GPS in the background. Keeping background GPS of the apps active may drain the battery significantly.
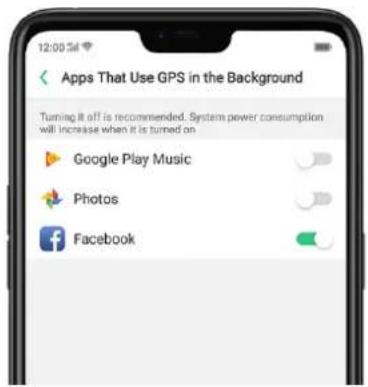
Google Location service
Use Google Location History to retrace your steps. Google Location History will customize search results for location and search history.
Use Google Location Sharing to share your locations with friends and contacts in real time.
5.16. Use the phone internationally
When you travel overseas, do the following steps to make sure you stay connected to friends and family while traveling - without paying more than you have to.
Unlock your phone. Call your wireless operator and ask if your phone needs to be unlocked. In order to prevent selling beyond agreed areas, you need to call the Customer Service Center to get the unlock code.
Shop international data roaming plans with your operator. Consult your operator or visit online websites to check for roaming plans and fees that are mostly used in the country or region that you will visit.
Buy or rent local Nano SIM cards. You can buy or rent SIM cards for most of the countries and regions. Learn more from travel guides and websites related to the country or region.
Use Wi-Fi. Turn off global roaming on your phone and head to a Wi-Fi hotspot, such as a hotel lobby, or local cafes.
5.17. Power Saver
Power Saver helps increase battery life by turning off or limiting certain features, for example, turning off some background apps to pause background syncing, turning off Vibrate on Touch, and dimming the screen. Using Power Saver can give you at least extra 30 minutes to use the phone.
Turn on Power Saving. The phone will let you know when your battery level goes down to 20%, and again at 10%, and will ask you to turn on Power Saving. The
battery indicator in on the top right corner will turn blue while Power Saving is enabled.
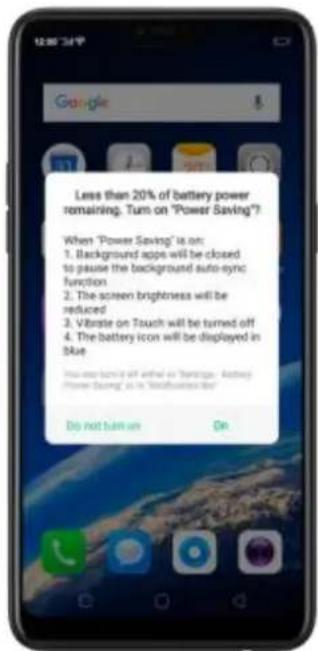
To manually turn on or off Power Saving Mode at any time, swipe down from the top
of your screen to open Control Center, then click 📋. You can also go to [Settings] > [Battery] and enable Power Saving.
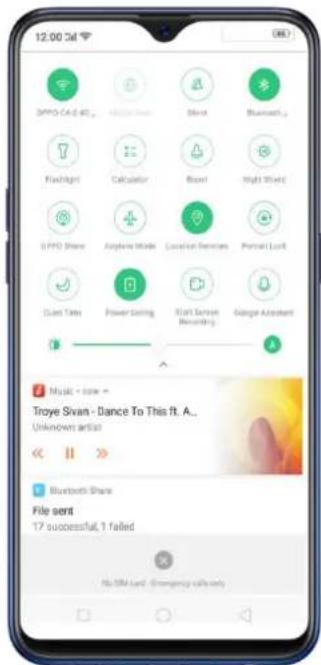
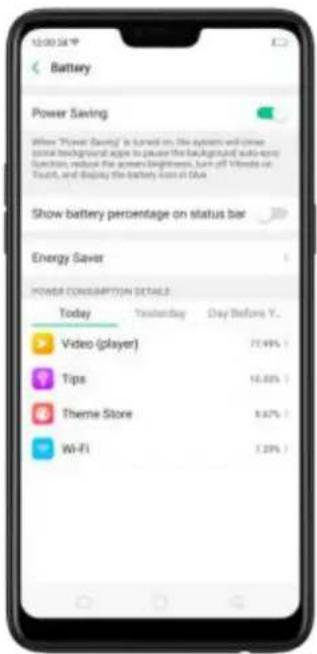
Note: Your phone will automatically disable Power Saving when you charge it up to 80%. Power Saving is always temporary and only lasts until the next proper charge.
Optimize the power of your battery and manage those apps and settings that used up the most power. Know how to save more power so you can use it especially when it is most needed.
To enable Smart Power Saver, go to [Settings] > [Battery] > toggle [Smart Power Saver (Recommended)] to green to enable.
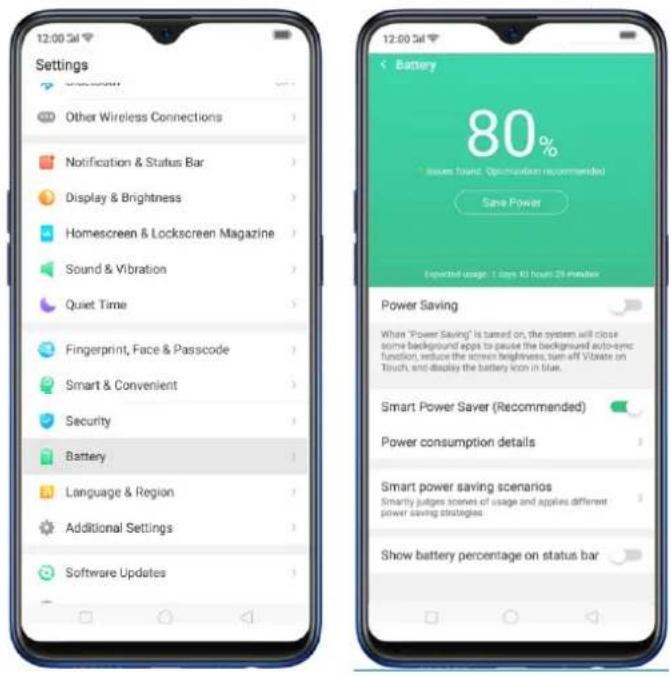
When Optimization is needed
When issue or issues are found, then it will prompt you that optimization is recommended. Just click on Save Power and check those that needed optimization, click Lengthen Battery Life, and then click Done when finished. (Note: Expected usage will be shown but this still depends on the usage and running apps on the background).
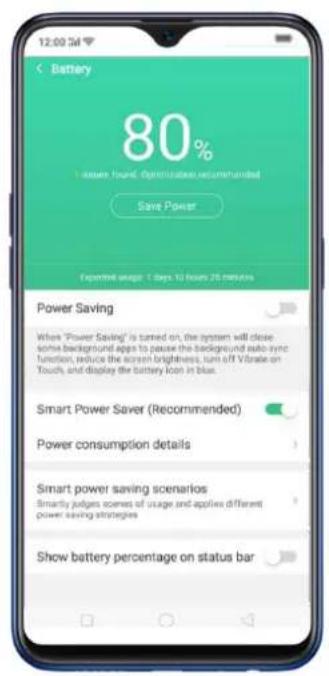
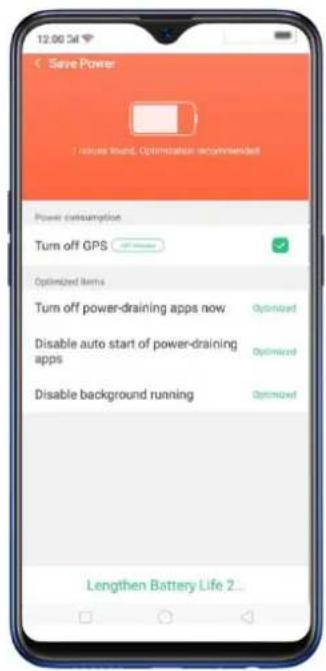
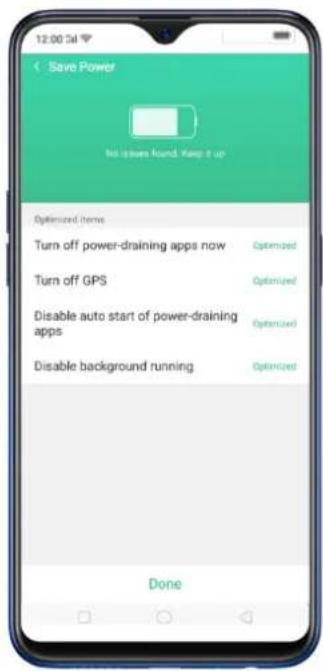
Other Power Saving features
- Power Saving. When this is enabled, the system will close some background apps to pause functions such as auto-sync. It will also reduce screen brightness, turn off vibrate, and would be displaying the battery icon in blue. To enable, just toggle [Power Saving] to green.
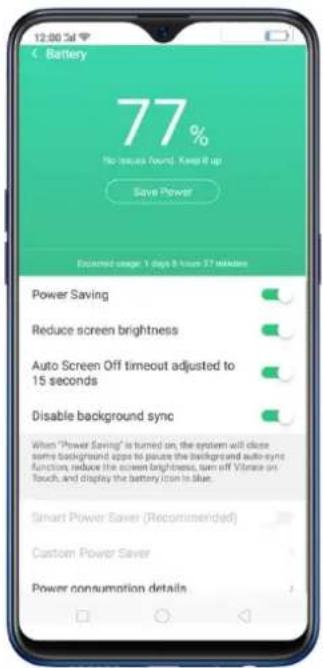
- Smart Power Saver (Recommended). This will intelligently identify the running status of Apps when enabled. Just toggle [Smart Power Saver
(Recommended)] to green to enable.
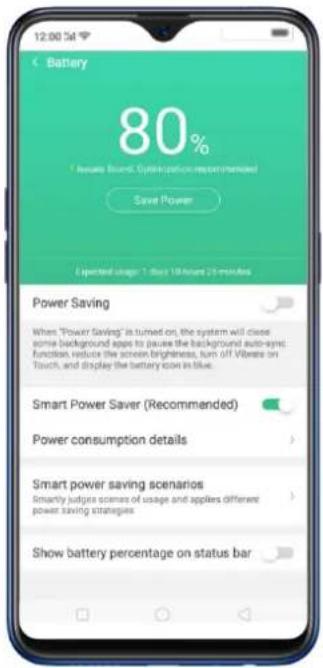
- Custom Power Saver. You can customize apps that will intelligently identify the running status of Apps when enabled. Just click on Custom Power Saver, choose an app then click Intelligently Restrict Background Running (Recommended).
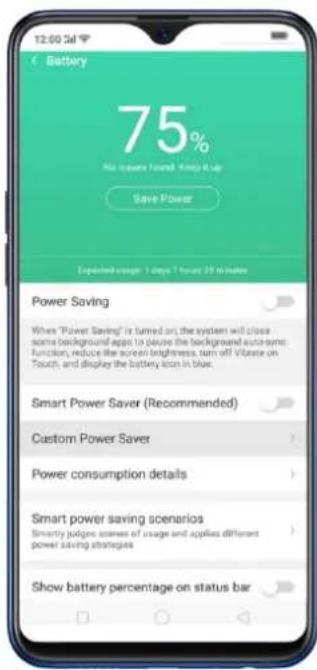
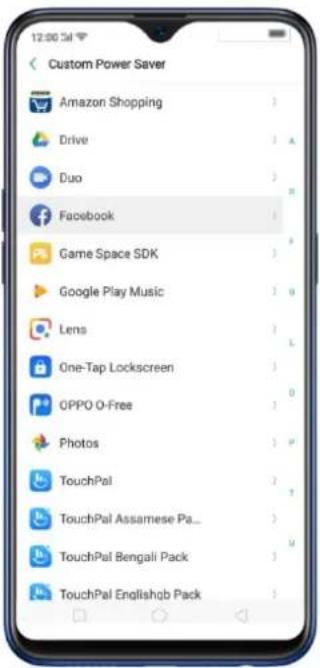
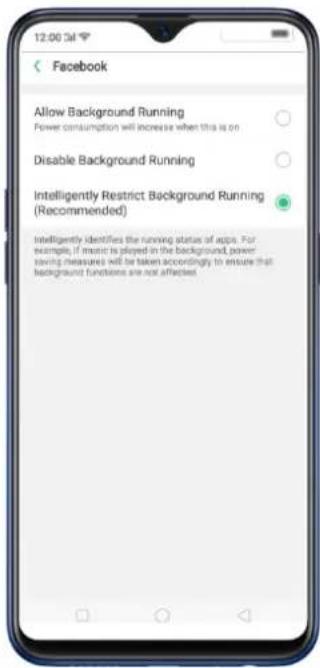
- Power Consumption Details. This will show you the apps, settings, or features that consumed the most power. You can check Today, Yesterday,
and 2 Days ago for consumption details.
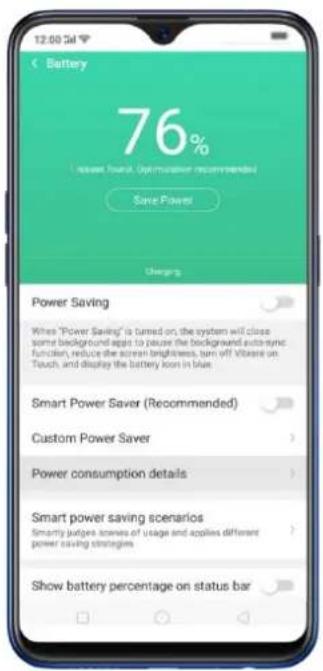
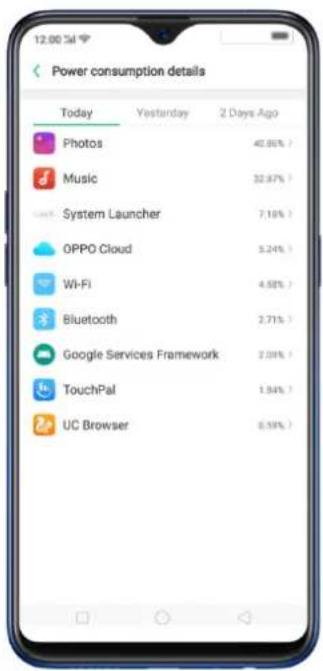
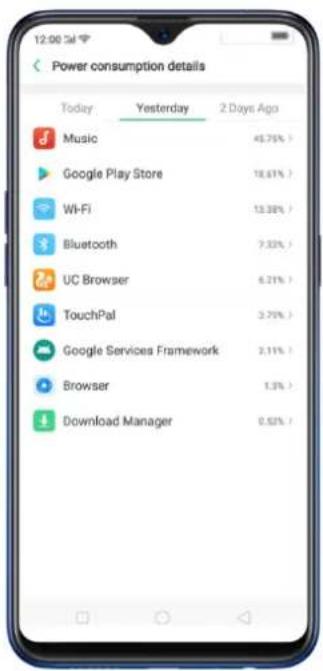
- Smart power saving scenarios. This will smartly judge scenes of usage and applies different power saving strategies like sensing when you might be sleeping. Click Smart power saving scenarios, the toggle Sleeping Mode to green.
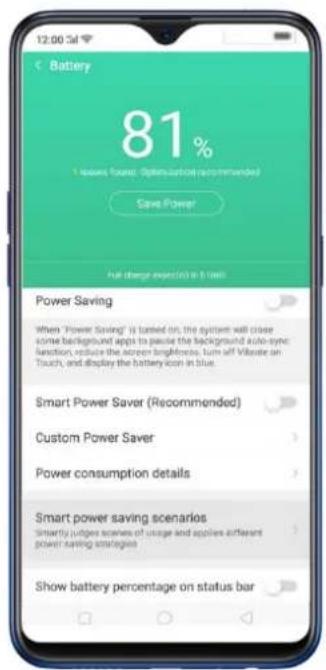
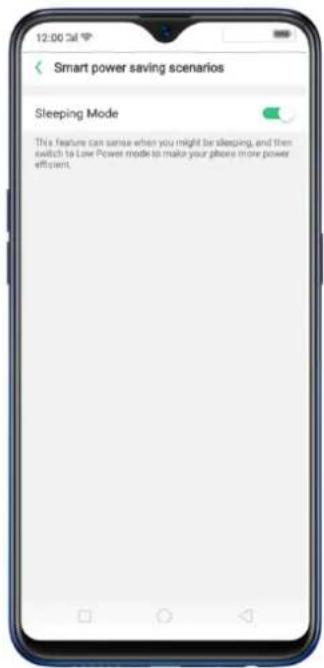
- Show battery percentage on the status bar. If you want to see how much battery is left just enable this feature by toggling [Show battery percentage on the status bar] to green to enable.
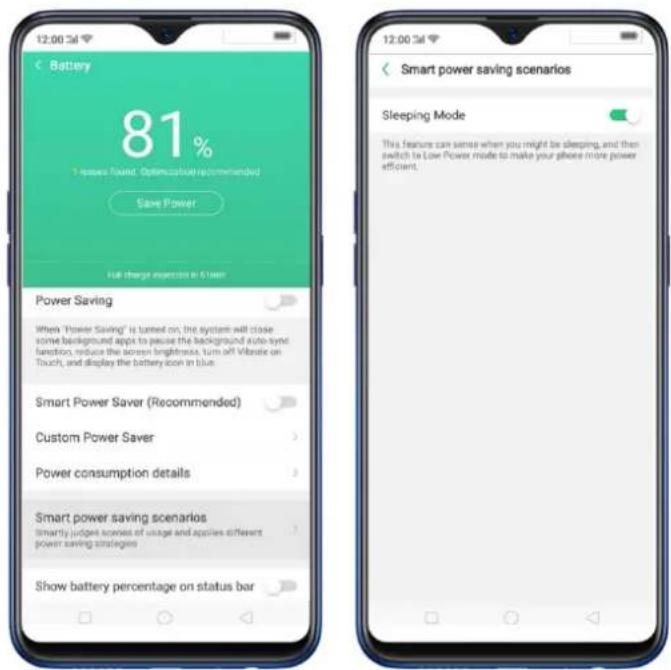
6. Personalize your OPPO phone
6.1.ColorOS 5.2 device name
If you scan for a Wi-Fi Direct or Bluetooth connection with your OPPO phone, your device name will display on the target devices.
Change device name for Wi-Fi and Bluetooth. Go to [Settings] > [About Phone]. You can also change the device name when you enable Bluetooth or Wi-Fi Direct.
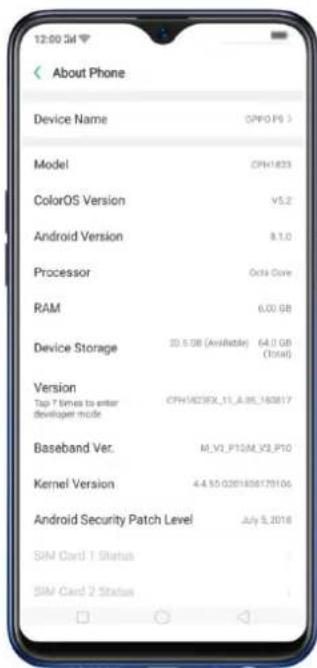
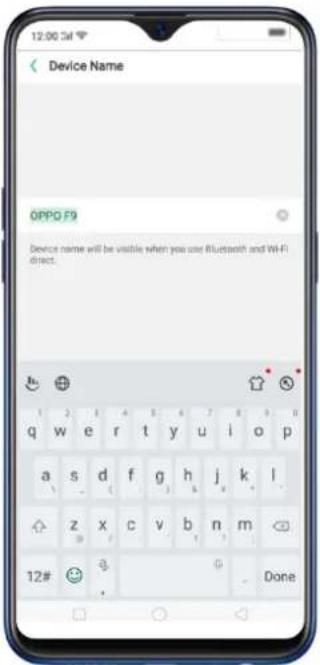
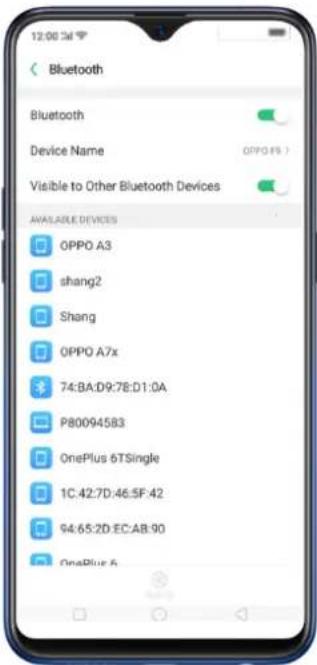
6.2.Personalize the Home screen
6.2.1. Organize the Home screen
From the Home screen, you can access all your apps and widgets. To keep everything in order, you can organize your home screen to make it more manageable and keep it looking neat.
Add or Remove a Home screen page
Add a Home screen page. Swipe to the rightmost screen and drag an app or widget off the screen to the right.
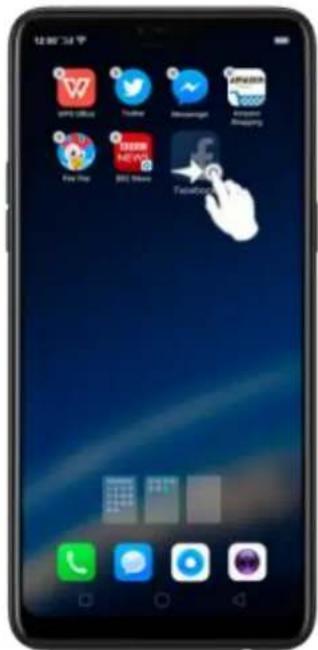
Remove a Home screen page. Drag all the apps and widgets on a Home screen page to another page. The empty Home screen page will be automatically deleted.
Group Apps
You can put apps in folders, which can keep your home screen neat or help to organize similar apps.
Create a folder. Tap and hold an app until the icons start wiggling. Drag one of the apps into the other, and lift your finger when the first app seems to merge into the second one. Add more apps by dragging them in.
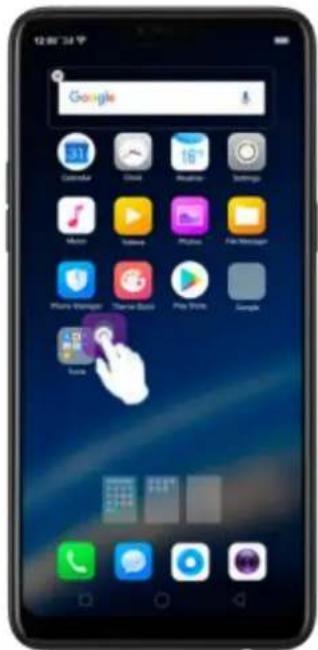
Edit the folder's name. When you first create a folder, your phone assigns a suggested name to it. To edit the name, tap on the text.
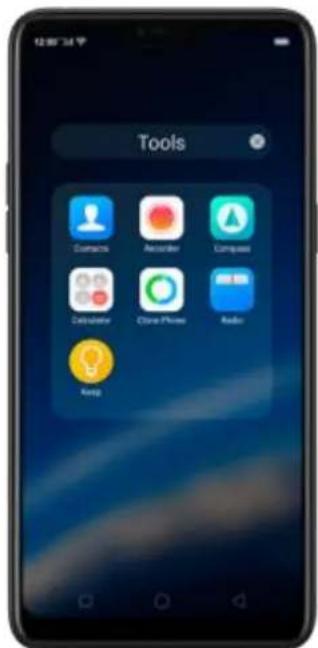
Rearrange apps and folders
OPPO smartphone has set a default arrangement for users, but you can still
rearrange the apps and folders to fit how you use your phone.
Remove apps from a folder. Tap the folder, then tap and hold-an app until the icons start wiggling. Drag the app out of the folder and into the home screen.
Delete a folder. Drag all the apps out of the folder and into the home screen, and the folder will disappear.
Rearrange apps. Tap and hold on an app until the icons start wiggling. Drag and drop the app icon to a new location. To save your changes, press the Home or Return button.
Note: Icons will be aligned to the left automatically.
Move the icon to a new screen. Drag the icon of the screen to the right and let it go when the new page appears.
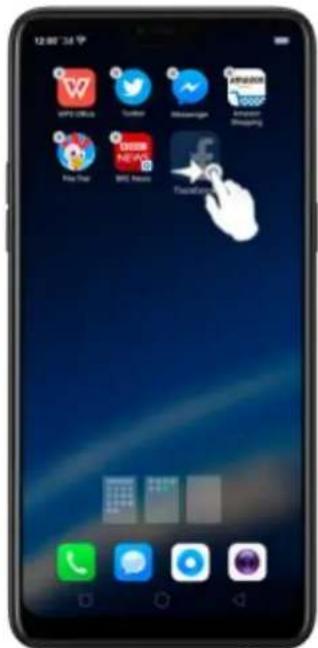
Add or remove Home screen widgets. See Home screen widgets.
6.2.2. Home screen widgets & Transition Effects
You can give yourself a fancy home screen with a highly-detailed set of widgets, for example, clock, weather, battery or mail widgets. You can also use them to tweak notifications, alarms and other options. In other words, there's considerably more here than just widgets. You can also change the transition effect on your phone, which is the style in which you slide the home screen right or left.
Manage widgets
Add a widget. Pinch your fingers together, then click [Widgets]. You'll see all available widgets. Touch, hold and drag one widget to the screen. Make sure there is enough space for that widget.
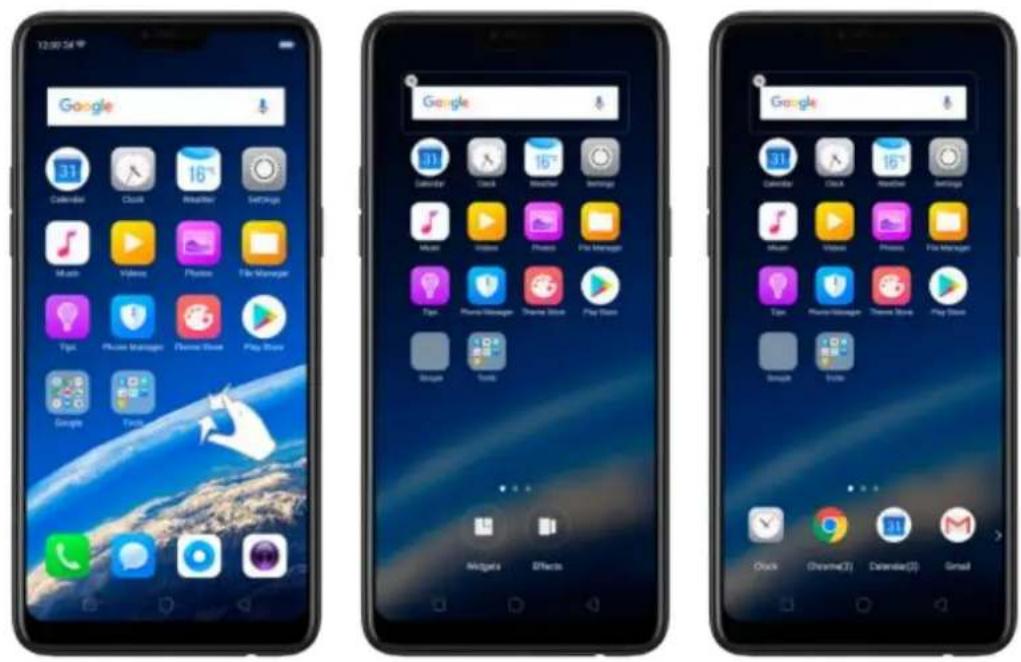
Move a widget. Touch and hold a widget for about 2 seconds, then drag it around.
Delete a widget. Click ✗ in the upper left corner of the widget.
Customize transition effect
Set up transition effect. Pinch your fingers together, then click [Effects].
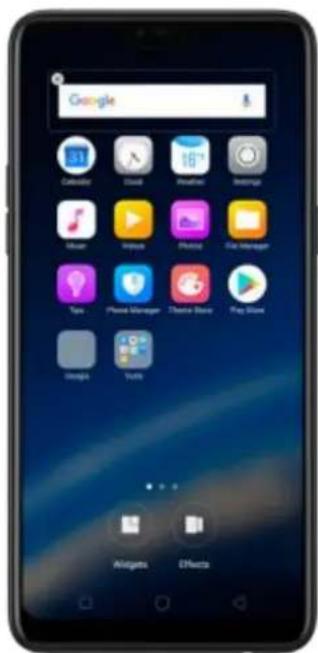
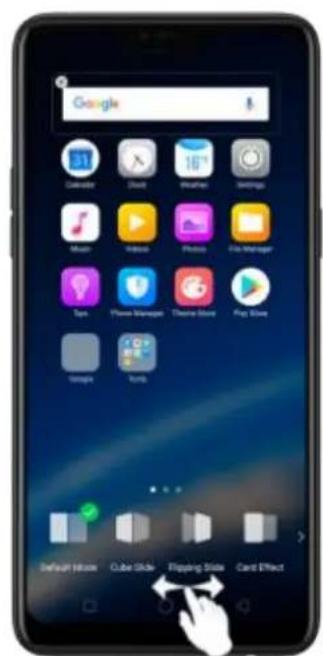
Preview and choose an effect. Click a transition effect and it will show the preview effect. You can choose one from the five options:
- Default Mode
- Cube Slide
- Flipping Slider
- Card Effect
- Tilting Mode
6.3.Change the wallpaper
You see a wallpaper background picture when you unlock your OPPO phone. You can select one of the images that came with the phone, or use a photo from your photo gallery, or get some more wallpapers online.
Change the wallpaper. Go to [Settings] > [Homescreen & Lockscreen Magazine]. Scroll to the end of the page, then click [Set wallpaper].
Tip: When setting the wallpaper as your Home screen or Lock screen, you can drag to move the image, or pinch to zoom in and out, so the image fits the screen.
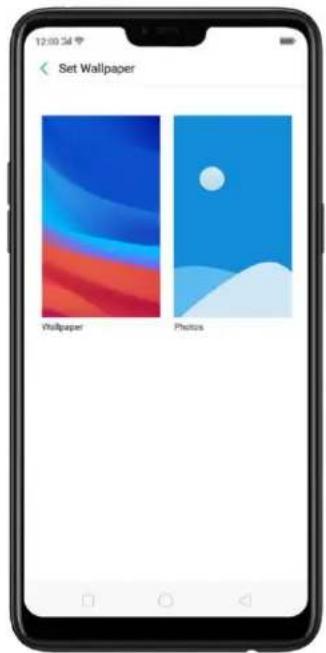
Download online wallpapers. Click Wallpaper, then click Download more. You can also click Theme Store on the Home screen directly to find more.
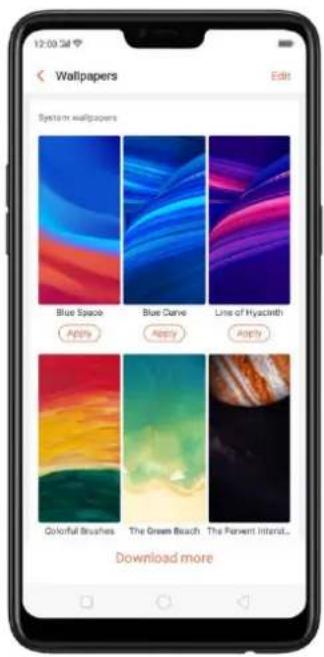
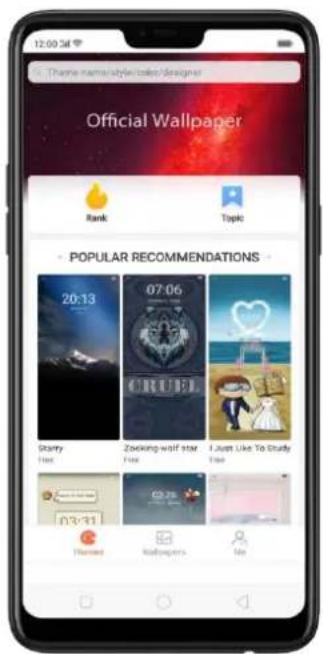
Use your own photos. Click Photos, then select your favorite image from the photo gallery.
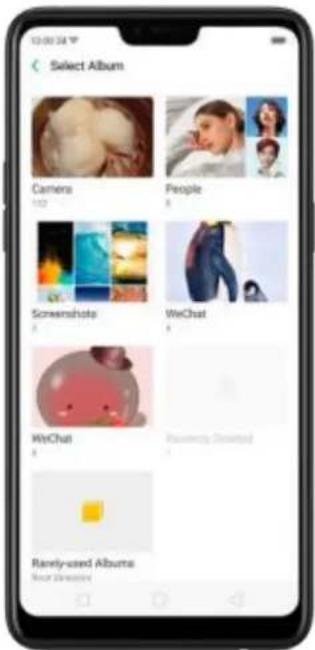
View more details in Change the wallpaper and theme on your OPPO smartphone.
6.4.Lock screen magazine
You can let your lock screen's wallpaper to switch to a new picture every time you wake up your phone, lessening the likelihood of you getting bored with the same look.
Turn on Lock screen magazine. Go to [Settings] > [Homescreen & Lockscreen Magazine] and turn on [Lockscreen magazine].
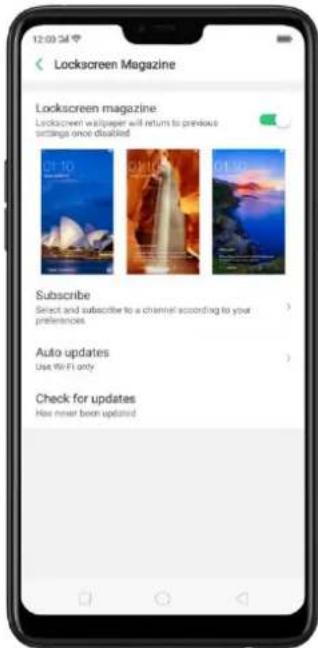
Add your local pictures to Lock screen magazine. Click My added photos, click 📄, then select your preferred pictures.
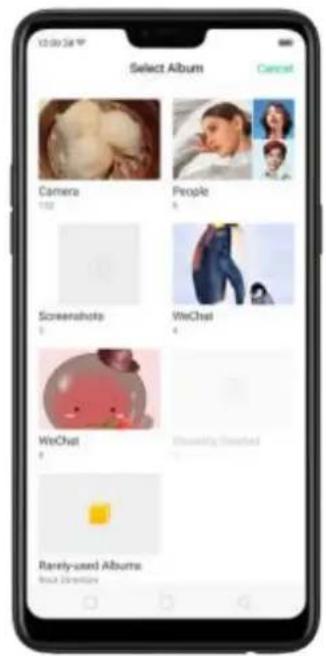
Add online pictures to Lock screen magazine. Click Subscribe and select your preferred channels, then go back and click Check for updates. You can also set the lock screen magazine to update automatically.
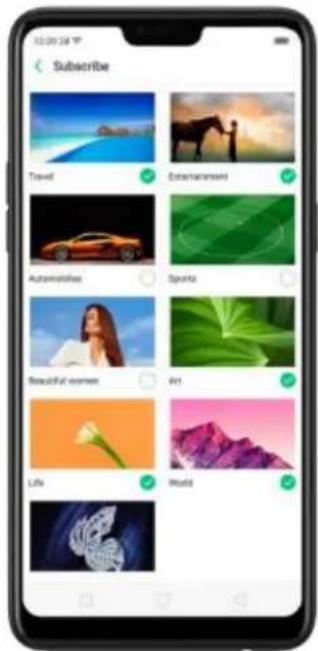
6.5 Adjust the screen brightness and color temperature
Adjusting the brightness on your OPPO phone tailors visibility to suit your environment. You can manually dim the screen when reading in bed, for example, or make it brighter when you're in a direct sunlight situation. Or use Auto-Brightness, which can automatically change screen brightness depending on the level of ambient light. Reducing screen brightness can also help to conserve battery life.
Adjust the screen brightness. Swipe up from the bottom of the screen to
open Control Center, then drag 🙏. Or go to [Settings] > [Display & Brightness], then drag the slider.
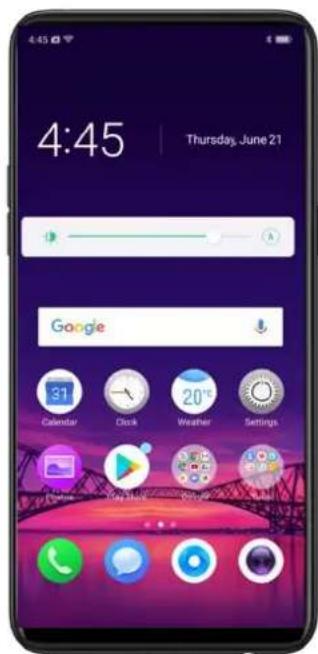
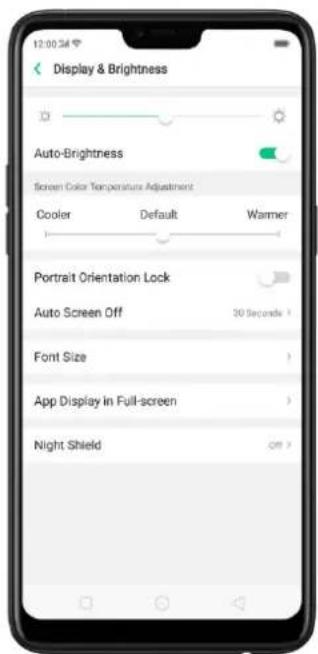
Set OPPO phone to adjust screen brightness automatically. Open Control
Center, then click A. Or go to[Settings] > [Display & Brightness], then toggle the Auto-Brightness slider to green. If Auto-Brightness is on, your phone adjusts the screen brightness for current light conditions using the built-in ambient light sensor.
7. Use Night Shield. Go to [Settings] > [Display & Brightness] > [Night
Shield]. Drag the control point to adjust color temperature. The warmer you set your screen, the less blue light will be emitted from the display. When you use the OPPO phone at night, you can turn on Night Shield to cut down on eye strain and sleeplessness you might get.
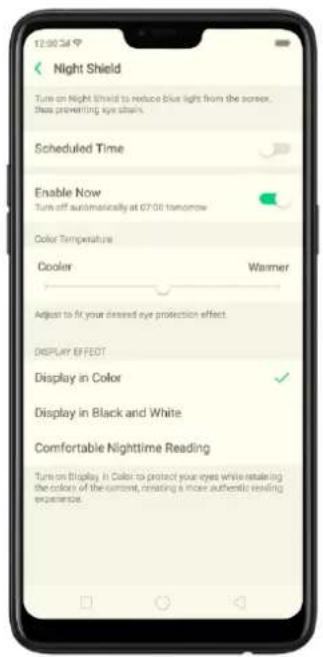
6.6. Change auto-lock time
By default, your OPPO smartphone locks automatically after 30 seconds. To modify this, alter the amount of time yourself.
Change auto-lock time. Go to [Settings] > [Display & Brightness] > [Auto Screen off]. Options range from 15 seconds to 30 minutes.
Tip: The longer your display, the more the battery drains.
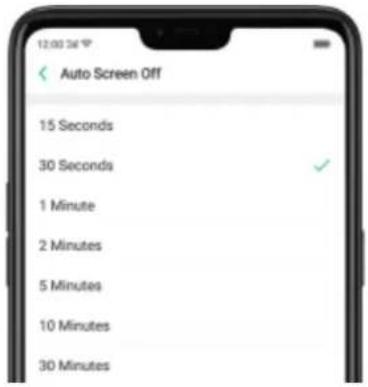
6.7. Change the font size
OPPO smartphone lets you change the font size to-that of your eyesight needs.
Change the font size. Go to [Settings] > [Display & Brightness] > [Font Size]. Drag the slider to the left or right to shrink or enlarge sample text, then you'll see your new text size immediately applied to the menu text in the upper-left corner of the screen. Tip: This will not affect the size of your icon text.
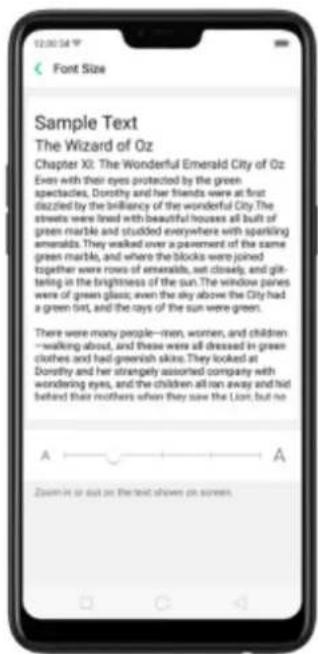
6.8. Keyboard and input method
6.8.2. Customize the look of the keyboard
Make your own keyboard by customizing the font and appearance.
Go to [Settings] > [Additional Settings] > [Keyboard & Input Method] > [TouchPal for OPPO] > [Look & Feel].
Adjust the size of candidate words. Click [Candidate Size], then drag the control point to change font size to small, normal or large.
Customize keyboard appearance. Click [Candidate Size], or click 🤒 on the
on-screen keyboard > [Resize], then drag the control arrow to adjust keyboard height, width, and position.
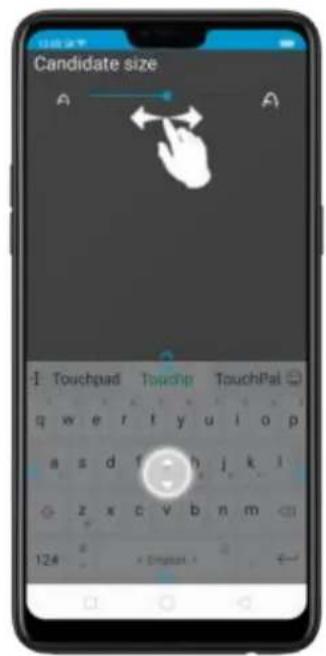
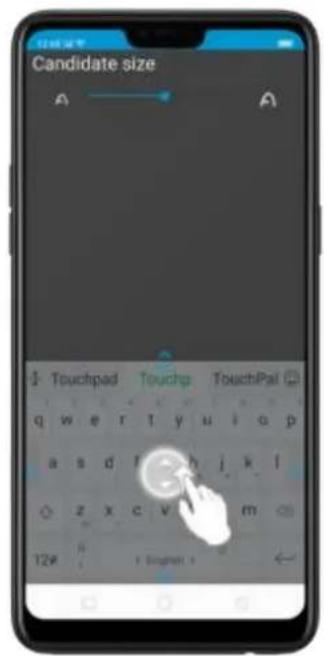
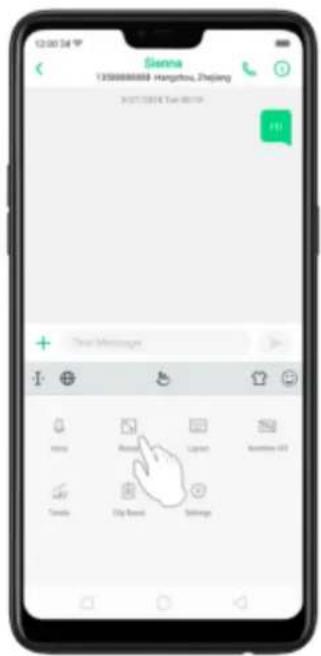
6.8.3. Keyboard Layout
In addition to the default keyboard style, the undocked, one-handed, and split keyboard on the screen makes typing with both thumbs a breeze. You can use "Undock" feature to position the keyboard anywhere on screen, or narrow the keyboard with one-handed mode, or split the keyboard in half.
To change the keyboard layout, click 🤒 on the on-screen keyboard, then click Layout.
• Normal keyboard. The default keyboard layout on your phone.
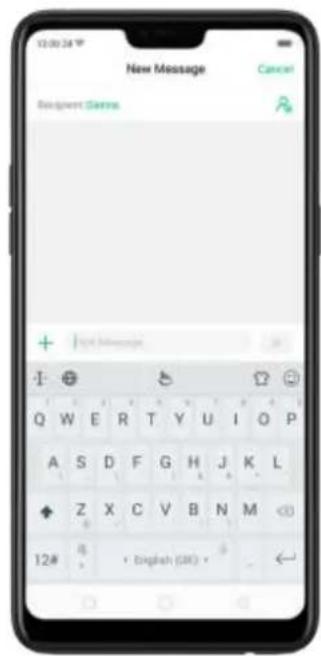
- Undocked keyboard. The keyboard becomes suspended and can be moved around on the screen. Click 🔍 to drag the keyboard to wherever on the screen that is most comfortable or convenient to you.
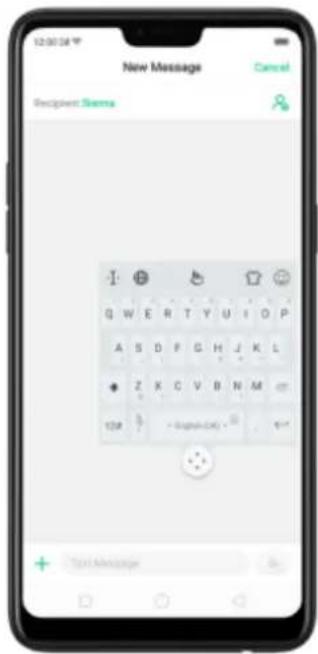
• One-handed keyboard. Shrink the keyboard so you can type with one hand
easily. Click ☐ or ☐ to adjust the keyboard left or right, depending on your preferred hand usage.
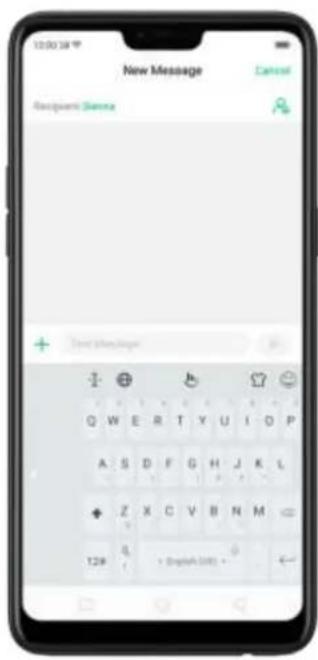
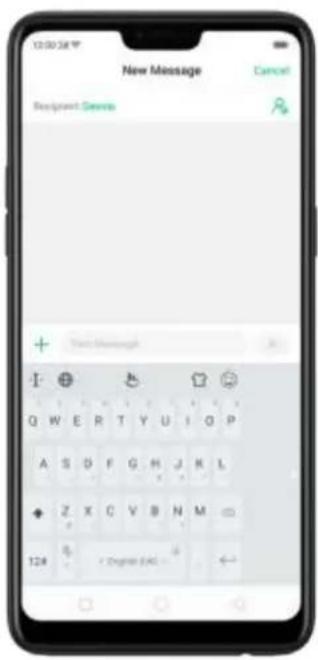
- Split keyboard. The keyboard will divide into two sections for easy thumb typing.
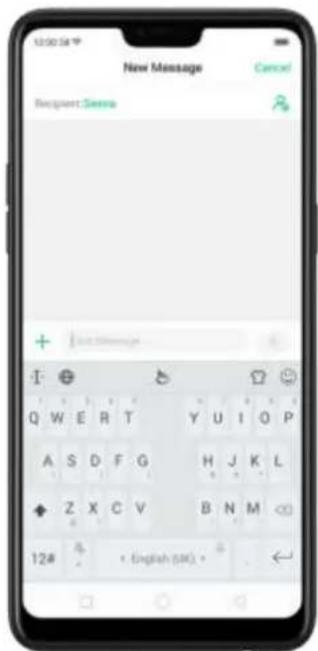
6.8.4. Trends
With TouchPal's Trends feature, you can download the buzzwords, change the keyboard theme and font, and get the latest headlines and games.
Get the latest trends. Click 📁 on the on-screen keyboard, then click Trends.
![12:00:34 New Message Cancel Recipient: Geneva + 2nd Messages [En] Boston [En] Chicago [En] Houston [En] Los Angeles](/content/2026/05/993082/images/43d2b28adfaa55eb8ae1aaf754dd9c37d6972fe44e89714036b4070af82555d2.jpg)
6.8.5. Keyboard general settings
OPPO smartphones come preloaded with TouchPal Keyboard. You can change the keyboard settings directly on your phone. click 🤨 on the on-screen keyboard, then click [Settings] > [Look & Feel].
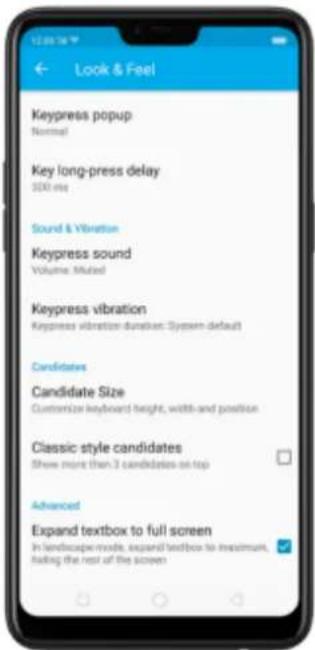
| Setting | Effect |
| Keypress popup | A popup bubble displays when you click a key. |
| Key long-press delay | Adjust the long-press delay time ranging from 200ms to 1000ms. |
| Keypress sound | Adjust the key press sound, or use the system volume. |
| Keypress vibration | Adjust the key press vibration duration, or use the system default setting. |
| Candidate Size | Change the size of candidate words, and adjust keyboard height, width, and position. See Customize the look of the keyboard. |
| Classic style candidate | Show more than three candidate words on top. |
| Expand textbox to full screen | Keyboard opens as full screen in landscape mode. |
| Expand textbox to full screen | Keyboard opens as full screen in landscape mode. |
6.9. Set up Startup Manager
Startup Manager helps you to manage system startup entries. You can choose what apps to start first when your phone boots to meet your using habits.
* Too many self-starting apps may cause a low startup or operating speed.
Set up Startup Manager. Click Phone Manager on the Home screen, then click [Privacy Permissions] > [Startup Manager]. Toggle the sliders to white if you don't want to start apps when phone boots or in background.
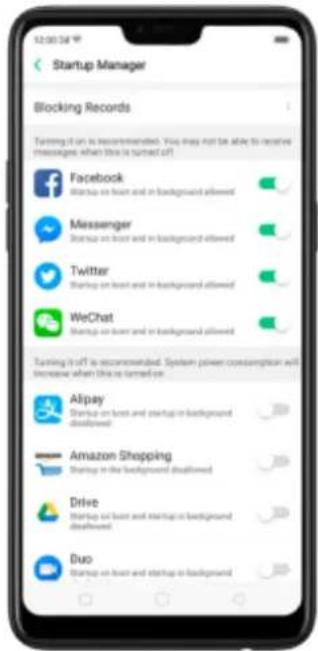
Tip: For apps that receive real-time messages, such as Facebook, Messenger, WhatsApp, and Twitter, it is best to allow them running in the background without their being suspended.
View the apps that had been blocked from starting in the background. Click Blocking Records.
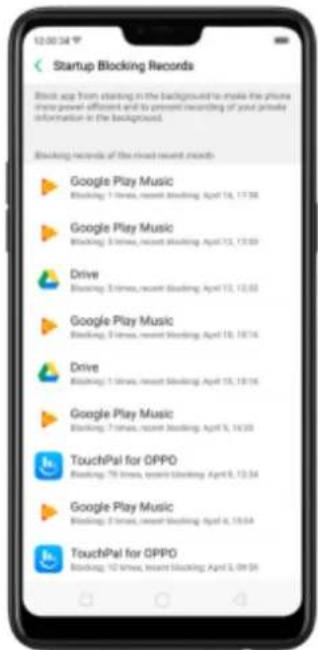
6.10. Clone Apps
Clone Apps allows an app to run two accounts on a single phone.
To turn on [Clone Apps], go to [Settings] > [Clone Apps], choose an app and turn on [Enable App Cloning]. A new copy of this app will be generated on the homescreen after Clone Apps is enabled. This copy and its original app can run simultaneously without affecting each other.
- "Clone Apps" works only if both the app itself and the phone supports it. If a cloned app does not work properly, it means that the function or operation is not supported by the app or phone.
- "Clone Apps" currently does not support data transfer between a cloned app and a computer.
- "Clone Apps" currently does not support to run more than two app clones simultaneously.
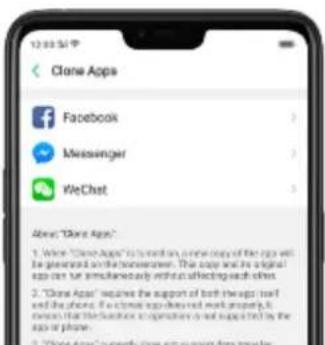
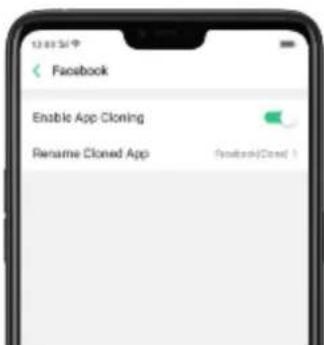
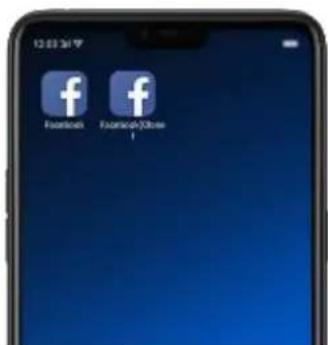
6.11.Manage Default App
What is Default App: If you've installed two different applications that essentially do the same thing, for example, Google Chrome and Firefox Web Browser, you'll likely be presented with a pop-up menu when trying to open a web page, asking you which application you'd like to complete the action with. You can manage your default app and never be bothered when performing that action again.
Manage Default App. Go to [Settings] > [App Management] and click [Default App Management].
Take [Browser] as an example, there are three apps and you can choose one of them to be the default one. You are suggested to use the original apps to get the best performance.
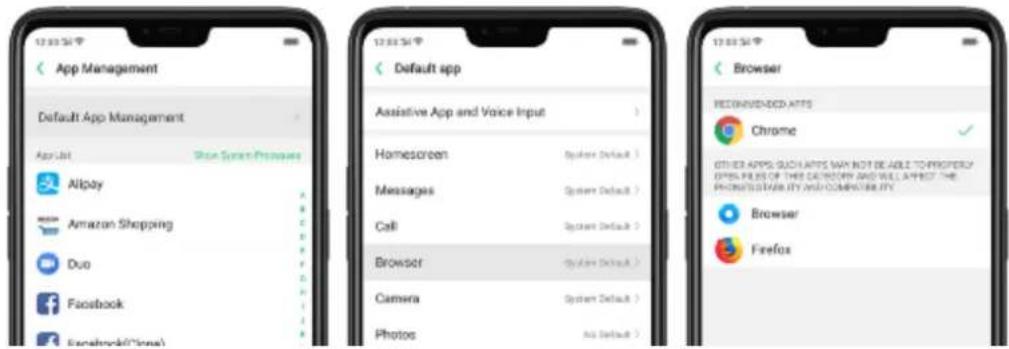
6.12. Gesture & Motion
Gestures
OPPO smartphone is designed to understand gestures. You can use gestures such as tap, swipe, drag, and spread to operate your phone.

natural_image
Four hand icons showing a blue square button with finger pressing, followed by a white arrow indicating rotation (no text or symbols)To set up complex gestures for specific functions, go to [Settings] > [Smart & Convenient] > [Gesture & Motion].
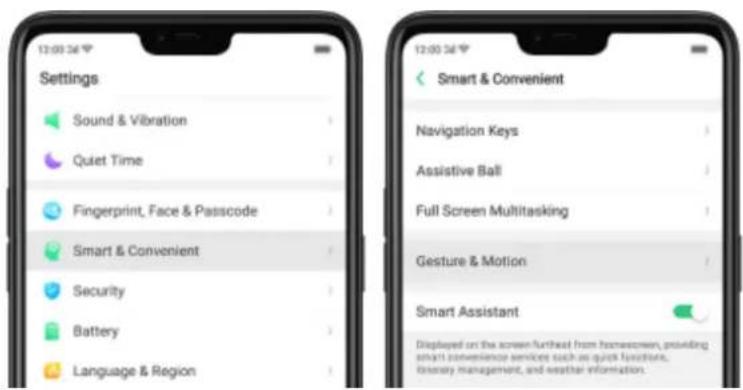
Screen-off Gestures
To set up screen-off gestures, you need to turn it on first.
Double tap to turn screen on: Turn it on to wake up your locked screen with a double-click on the screen.
Draw O to start camera: When on lock or sleep mode, you can draw O on the locked screen to open Camera app.
Draw V to open torchlight: When on lock or sleep mode, you can draw V on the locked screen to open the torchlight.
Music control: When on lock or sleep mode, you can draw || to pause/play a track, or draw < or > to switch the track when the screen is off.
Add more screen-off gestures: OPPO smartphone of ColorOS 5.0 gives you 7 options, which are Draw ^, Slide up, Slide down, Slide left, Slide right, Draw M and Draw W. Choose one to unlock the phone, call someone or start an app.
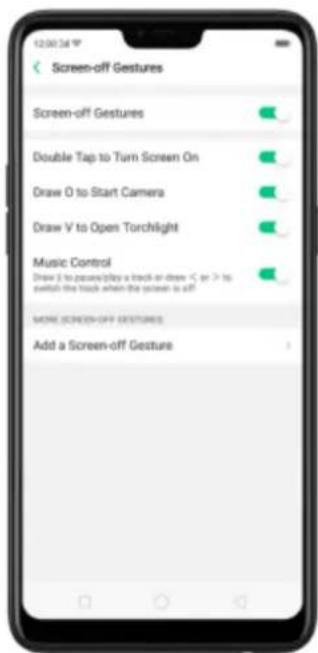
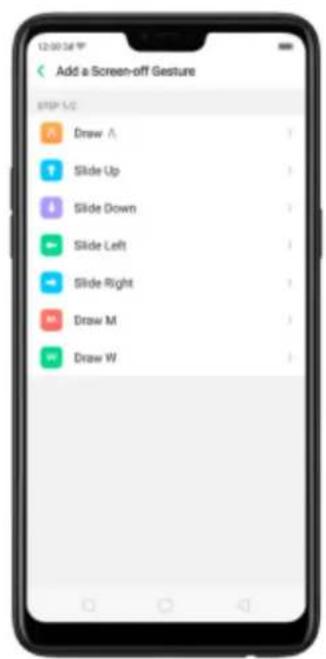
3-Finger Gesture
Take a screenshot. Swipe down the screen with three fingers.
Use Split-screen. Under the interface of an app, swipe up the screen with three fingers to enter split-screen mode.
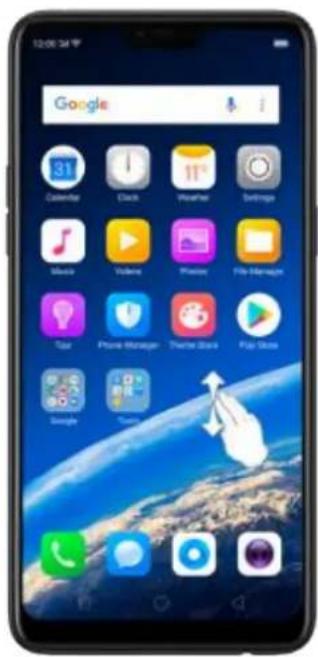
Motion
The motion-sensing technology is used in OPPO smartphone. Use it to let your phone response to motion.
Smart call
Auto call when place at the ear: Before you can use auto call, you need to set the default SIM card for calling. Go to a contact detail, call detail, message conversation or info interface, put the phone near your ear and your phone will automatically call that specific person.
Auto answer when near the ear. This function lets your phone to answer any incoming calls automatically when putting the phone near your ear.
Switch from speaker for calls: Use it to automatically switch from speaker to receiver when you put the phone near your ear during phone calls.
Flip to mute incoming calls: Use it to silence the ringer by turning the phone over on the table or other flat surfaces.
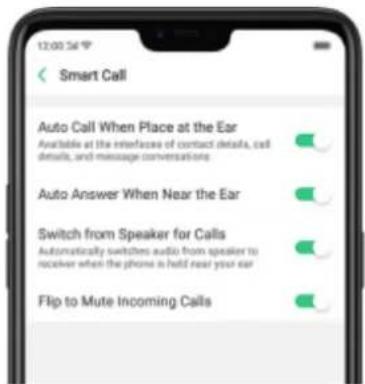
Mistouch Prevention Mode
Turn it on to prevent incorrect operations if the lock screen is covered.
Take selfies
Open Camera app and switch to the front camera. Click >Gesture on the top of the screen. Pose the same hand gesture towards the camera, once the camera
captures that, it will take a photo automatically after two seconds. You can change your pose and expression within this two seconds.
6.13. Preset device on/off time or Automatic on/off
The feature helps you to automatically turn on or off your OPPO smartphone at the scheduled time you specify – for example, you can fall asleep while listening to your favorite music without having to worry about turning off your phone. It also gives you different ways to schedule the events for your needs, such as daily, weekly and only once.
Turn on Device ON/OFF Preset. Go to [Settings] > [Additional Settings] > [Device ON/OFF Preset], then toggle the sliders to green as needed.
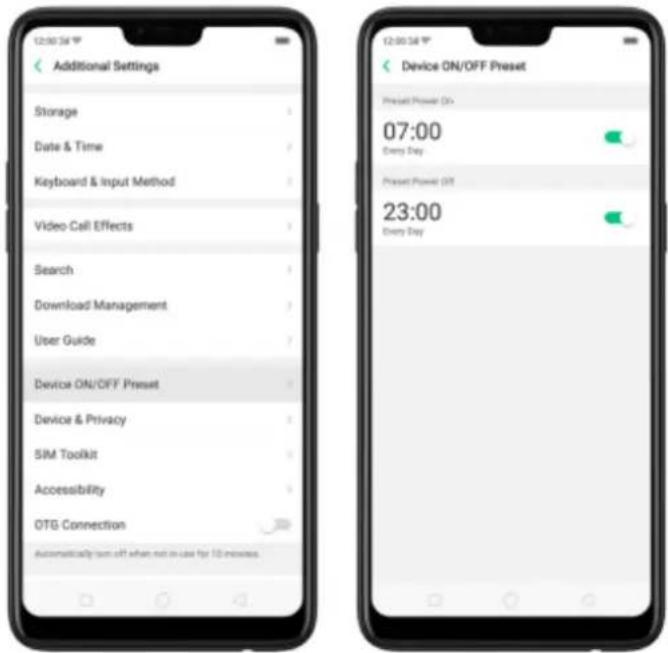
Set when to turn on or off the phone automatically. Click the time, drag your finger across each column to change the time, then click Save.
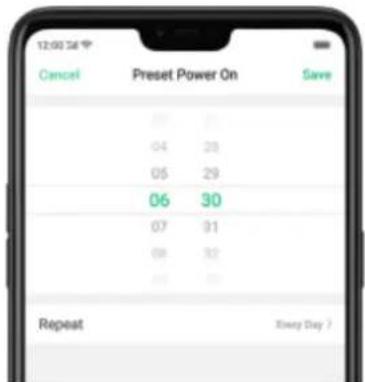
Repeat the event on certain days. Click the time, click Repeat, then choose the days.
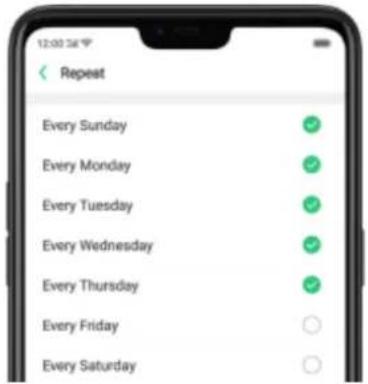
6.14. App display in Full-screen
ColorOS 5.0 device features a new display format with an aspect ratio of 19:9, and most of the apps are supposed to adapt their size automatically to the new screen size. If some apps are not suitable for full-screen mode, they will display at the 16:9 ratio by default, but you can let the phone to make changes in your app to accommodate the new screen's size and rounded corners.
Adjust your app layouts. Go to [Settings] > [Display & Brightness] > [App Display in Full-screen] and you will see a list of apps that doesn't support the 19:9 aspect ratio. Toggle the sliders to green if you want the apps to display in full-screen. Or you can open an app, then click "Tap full-screen display." App will restart when you turn on this feature.
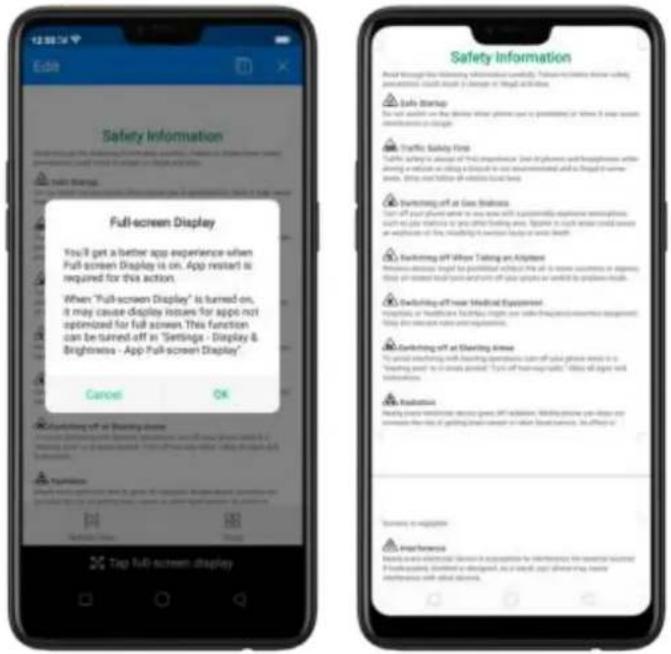
Control the display of notch area. When app content is obscured by the notch area, click [Notch Area Display Control] and toggle the slider to white, then your app content will be positioned below the status bar. App will restart when you turn on this feature.
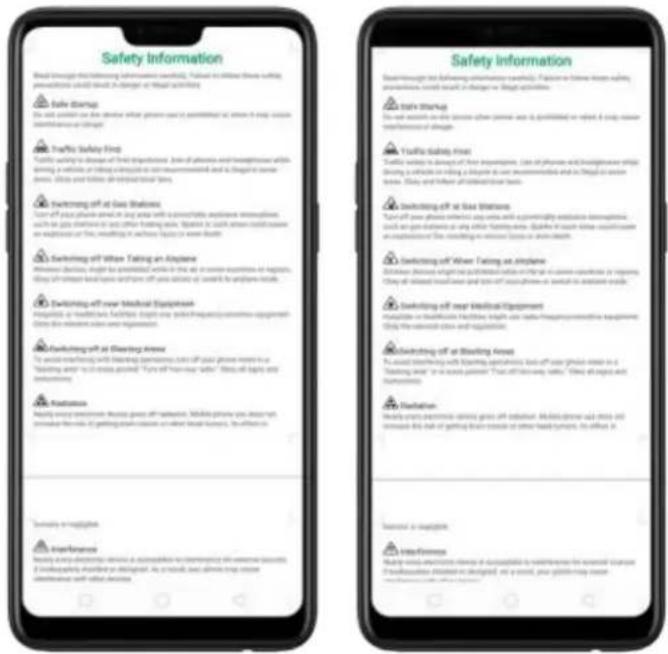
Note: Turning on "Full-screen display" will improve your experience, but it may cause display issues due to incompatibility or other reasons.
7. Apps
7.1. Phone
7.1.1 Make and Answer Phone Calls
Make a call
To make a call and talk to your friends, you can manually enter a phone number on the dialer, choose a number on your Contacts or Favorites, or click one of the recent calls.
Note: The signal indicator at the upper-left corner of the screen shows whether you're in range of your operator's network and can make and receive calls. The more bars, the stronger the signal.
Dial the number you want to call. Click Phone, click the keypad to enter the number, then click 📋. Click ✕ if you make a mistake. You can also copy a phone number and open the keypad, then click the number to paste it to the keypad.
Besides, if you're not sure what the exact phone number is, you can quickly search the contact by dialing the numbers that contain the contact's name or initial letters on the keypad. For example, if you want to call Sienna, click "743" and you'll see the contact.
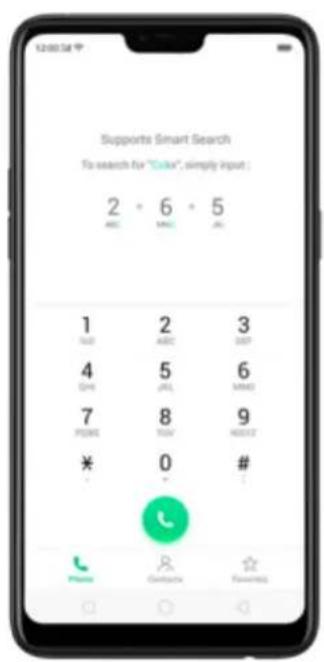
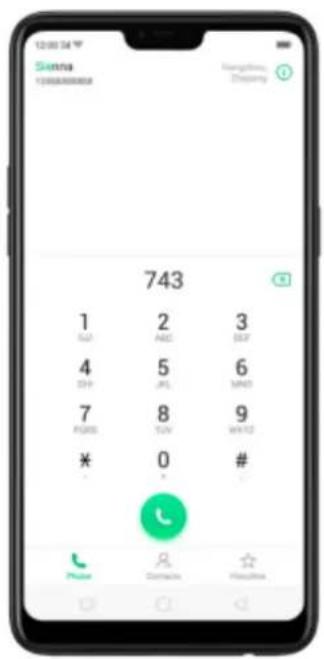
Call someone on your contacts list. Click Contacts and choose a contact, then click the phone number to make a call. You can also use Search feature to find a contact, see Search.
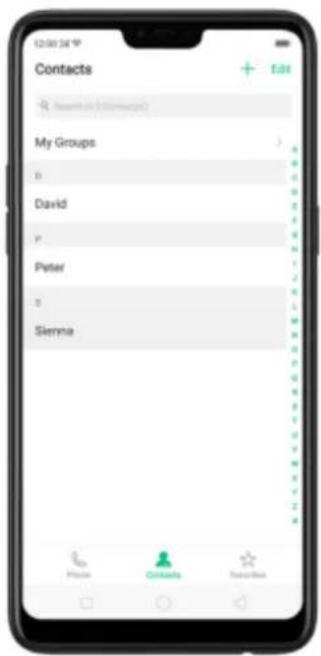
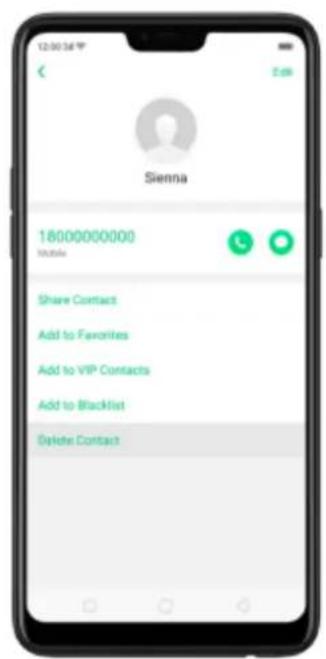
Call someone on your favorites list. Click Favorites and choose a contact. To add favorites, click +.
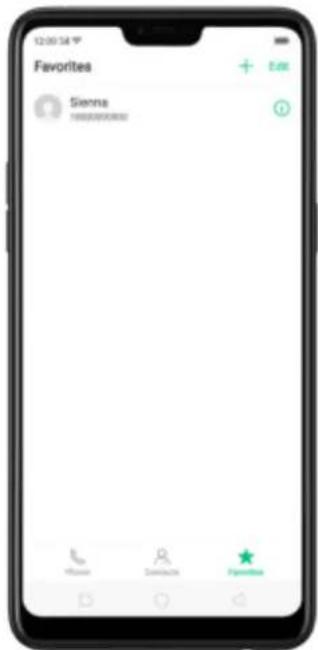
Call someone you've recently called or who has recently called you. Click
Phone, and you'll see the recent calls. Click a number to make the call. Click ⓘ to
get more info about the call, or the caller. Click "All" to see all, only missed, or only blocked calls.
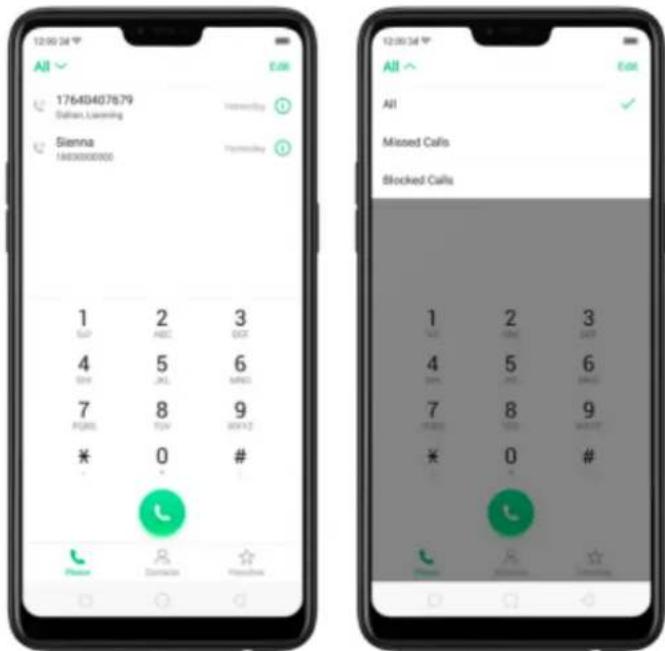
Answer or reject a call
When someone calls you, the OPPO smartphone rings and displays the caller's information, if available.
Answer a call. Click Answer. If the phone is locked, click Slide up to answer.
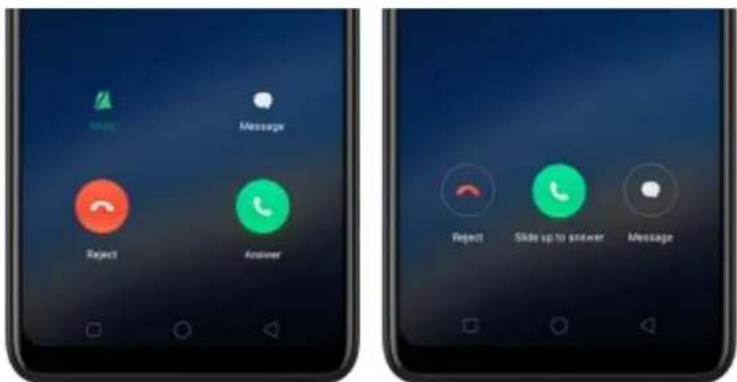
- If you're listening through the headset, you can click the mic button to answer.
Silence a call. Click Mute, or press the Sleep/Wake button or either of the volume buttons once to stop the phone from ringing or vibrating.
Reject a call. Click Reject, or press the Sleep/Wake button twice quickly.
Respond with a text message instead of answering. Click Message, then choose
a reply or click Customize to reply with your own words. To create your own default replies, go to [Settings] > [Call] > [Respond with SMS]. Click a reply and edit the message.
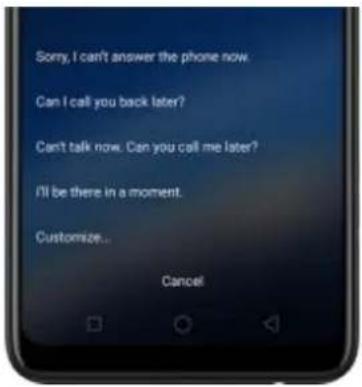
While you're on a call
While on a call, call options will show up on your screen.
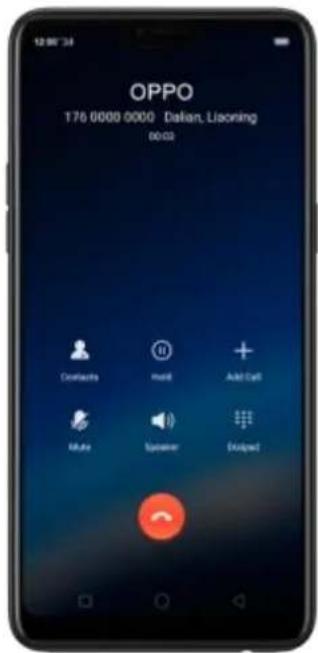
To
Get contact info.
Put a call on hold.
Mute the microphone.
Do this
Click Contacts.
Click Hold.
Click Mute. The caller can't hear you when you are on mute, but you can still hear the caller. Click Mute again to cancel it.
Activate Speakerphone.
Click Speaker.
Use the dial pad to enter information.
Click Dialpad.
Make a second call during a call.
Click Add call and make a second call. The first call will be put on hold. Click the phone number to switch back to the first call and put the second call on hold. Click Merge calls to merge the two calls, so all three of you can talk and hear each other. See Conference calls.
Respond to a second call, do one of the following:
• To reject the call, click Reject.
• To hold the first call and answer the new call, click Answer.
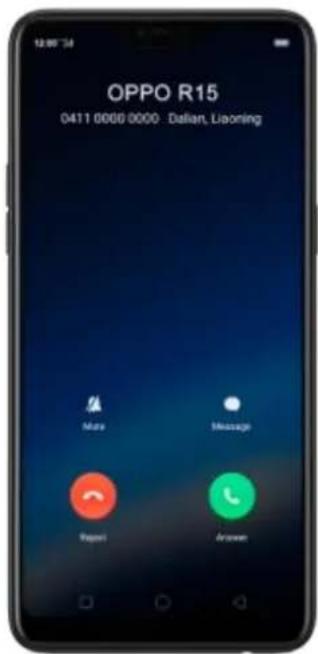
Use other features while on a call. Click the Home button or swipe up the middle bottom to return home. Click the green status bar on the top of the screen to return the call.
7.1.2. Conference calls
A conference call lets you talk to more than one person at a time. You can merge up to six calls including the host for a phone conference.
Notice: You might need to contact your network operator to activate conferencing services first.
Make a conference call. Do the following:
- Make a call.
- Tap Add Call and make another call. The first call will be put on hold.
- Tap Merge calls. The calls are merged onto one line and everyone can hear each other.
- Repeat the second and third steps to add more calls to the conference.
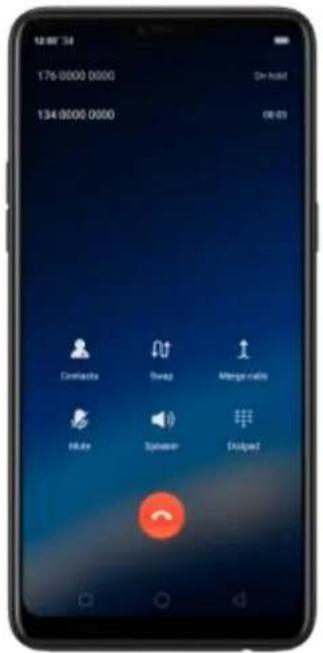
7.1.3. Block calls
Block feature does help to prevent unwanted phone calls. You can also add numbers to blacklist to block specific phone numbers from calling.
Block calls. Go to [Settings] > [Call] > [Block], or go to [Settings] > [Security] > [Anti-harassment/Fraud]. Click [Block Calls], you'll see several options available for blocking incoming calls:
• Block one-ring incoming calls
• Block calls from hidden numbers
• Block all unknown incoming calls (Do not block repeated incoming calls)
• Block all incoming calls
Note: The unknown number refers to an unsaved real phone number, and your phone is able to show its number and location; while the hidden number means the caller's number or location is not accessible. which usually is a harassing call.
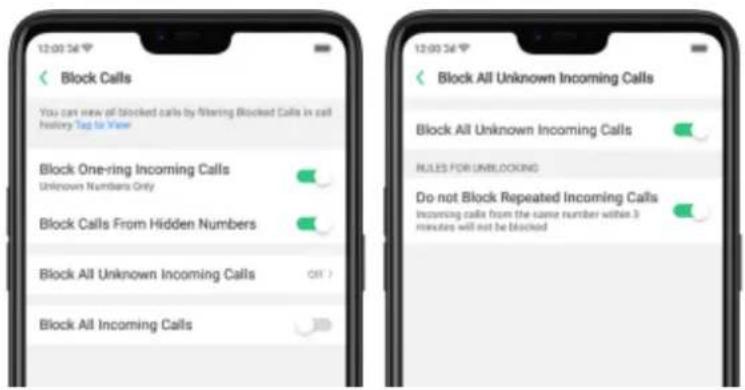
Add a contact or a phone number to the blacklist. Click Phone, then click Contacts. Choose a contact, then click Add to Blacklist. You can also go to [Settings] > [Call] > [Block], or go to [Settings] > [Security] > [Block], click [Blacklist], click + Add, then enter the number or choose your contacts.
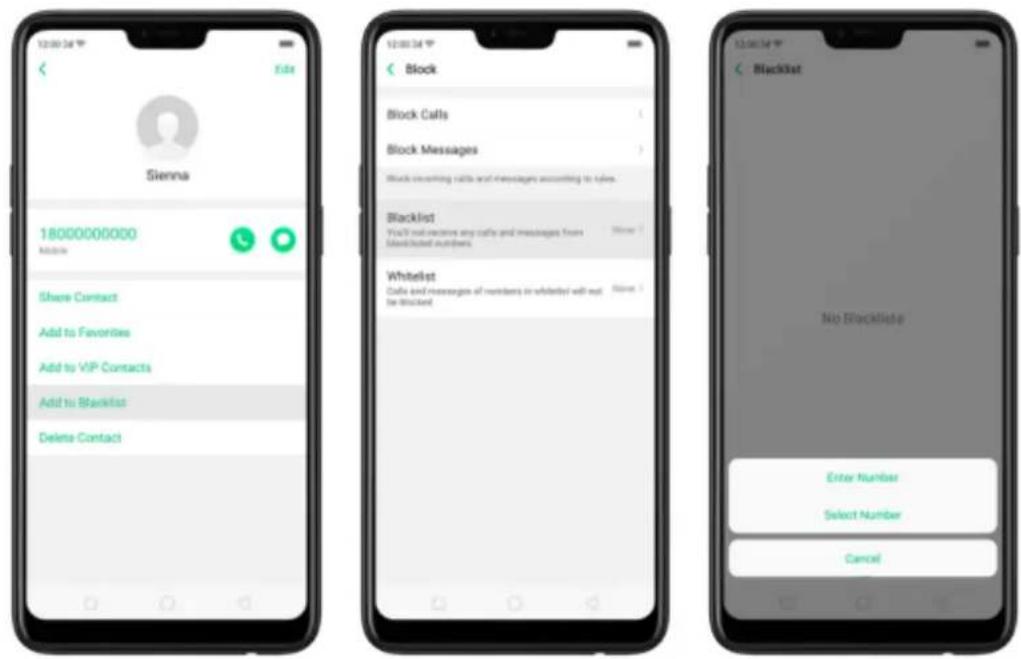
You can also add contacts or phone numbers to the whitelist, which calls and messages from these numbers will not be blocked.
7.1.4. Emergency calls
What is emergency Number?
Emergency numbers are numbers of emergency services which provide immediate help during Medical emergency, Threat to life, Fire, Accidents.
In many countries, the public telephone network has a single emergency telephone number (sometimes known as the universal emergency telephone number or occasionally the emergency services number) that allows a caller to contact local emergency services for assistance.
You can make an emergency call even if you do not have a SIM card installed on your OPPO smartphone.
Make an emergency call. Click Phone, click keypad and dial the number, then click

. Or if your phone is locked with a passcode, click Emergency Call, then dial the
emergency number.
7.1.5. Carrier's Call Settings
OPPO smartphone includes several calling features such as Call Forwarding, Call Waiting, Voicemail, and more.
Set up calling features. Go to [Settings] > [Call] > [Carrier's Call Settings].
- Voicemail: When you're away or can't get to the phone, your Voicemail does the answering for you. Callers can leave recorded audio messages to you, and you can view, listen to, and manage the messages.
- Fixed Dialing Numbers: Add numbers to the FDN list, and when activated, FDN restricts outgoing calls to only those numbers listed, or to numbers with certain prefixes.
• Call Forwarding: An incoming call will be redirected to another telephone
number where the desired called party is able to answer. Notice that appears on the status bar.

- Call Barring: Certain types of outgoing calls (such as international calls) and/or incoming calls will be restricted.
- Call Waiting: You'll hear short beeps if someone calls you while you're on a call.
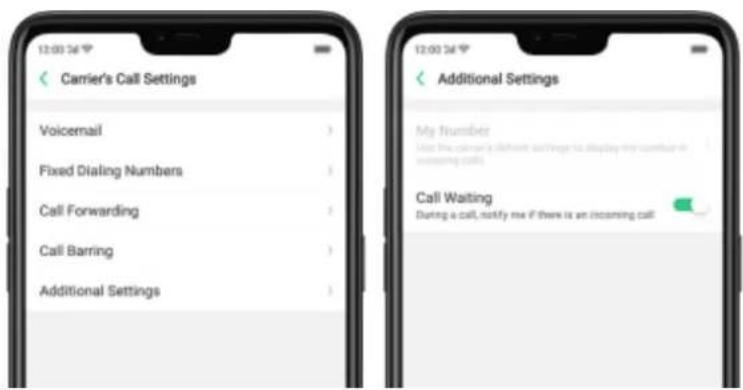
7.6. Message
7.6.2. Send and receive messages
You can send and receive text messages anytime you're in range of the cell network. Depending on your phone plan, you may be charged for messages you send or receive.
Send a new message. Click +, then enter a phone number or name. Contacts matching what you've typed appear below. Or click 🌿 and choose a contact from your contacts list. Type a message and click ▶.
Tip: As you type, click + next to the text field to add an attachment.
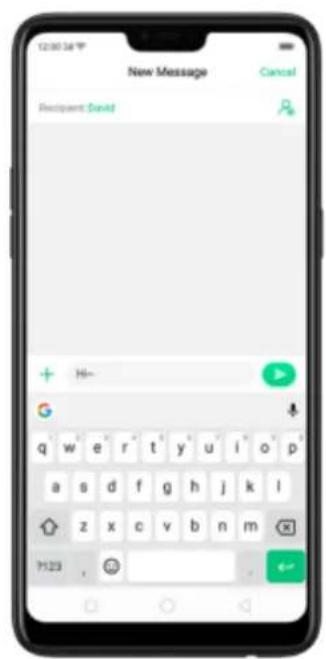
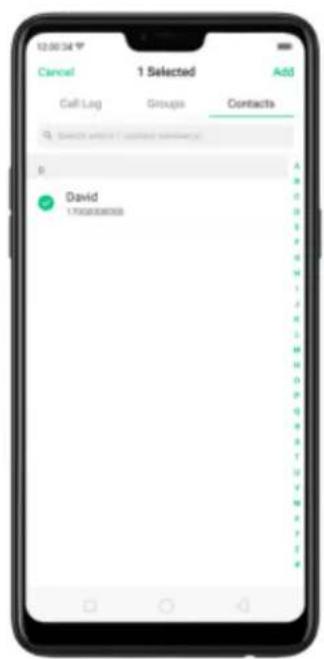
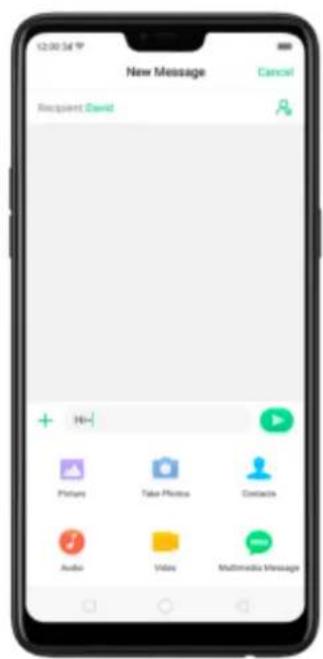
Send a message to multiple people. Click +, then enter multiple recipients, or click 🔍 and tick all contacts you wish to include in the group message, then click Add.
Read and reply to a new message. Click the notification on the top of your screen, or click 📋. When phone screen is locked, swipe the notification right. Type your message and click ▶.
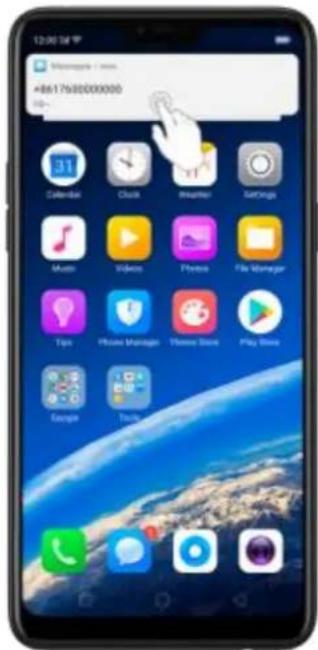
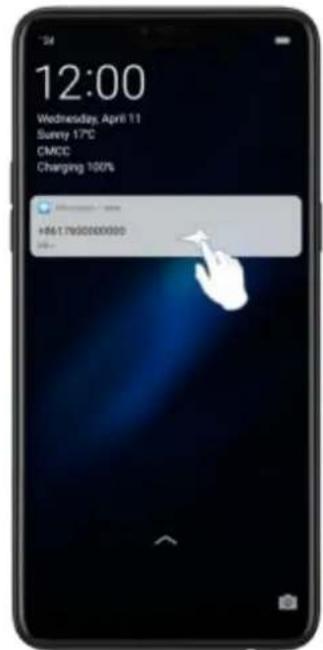
Tip: The Messages icon on the Home screen shows the total number of unread text messages you have.
Delete conversations from the Messages list. Click Edit, tick the conversations and click Delete. You can also delete a conversation by swiping left over a conversation and clicking Delete.
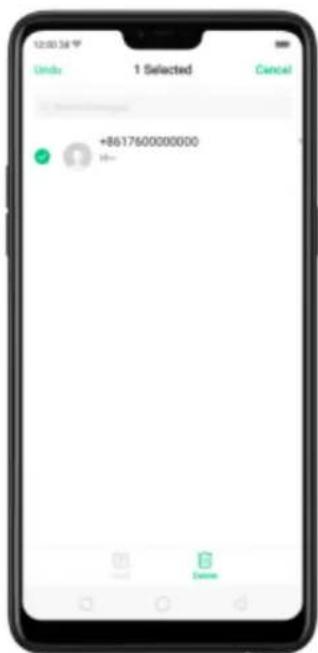
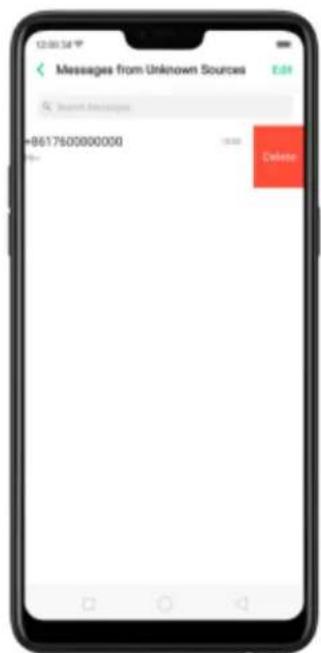
7.6.3. Customize message settings
The Messages settings menu lets you control options for your text and MMS messages including message limits, displays, notifications, and more. Go to [Settings] > [Messages].
Block messages. Click [Block] > [Block Messages]. Enter the keywords for spam messages. To block all unknown messages, toggle the slider to green.
Note: When Block all unknown messages is turned on, you might miss important verification text messages, as well as messages from people who you know, but are not on your contact list.
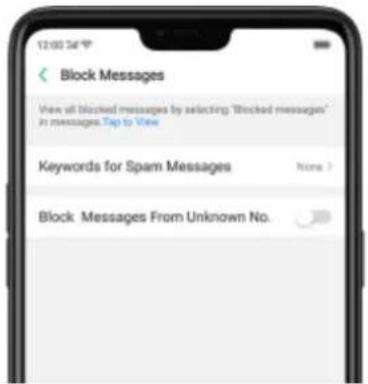
Manage Messages settings. To display notifications of new messages, turn on [Allow Notifications]. You can customize whether new notifications from Messages appear on the lock screen or notification bar, display a banner, play a sound or vibrate, or whether show icon badges on the Home screen. You can also allow ringing for notifications when Do Not Disturb is on.
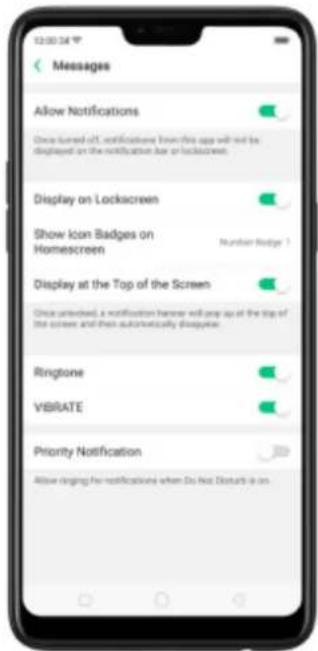
Display received messages in pop-up window. The phone will automatically pop up a window with the content of the message. You can close the window or reply to the message directly.
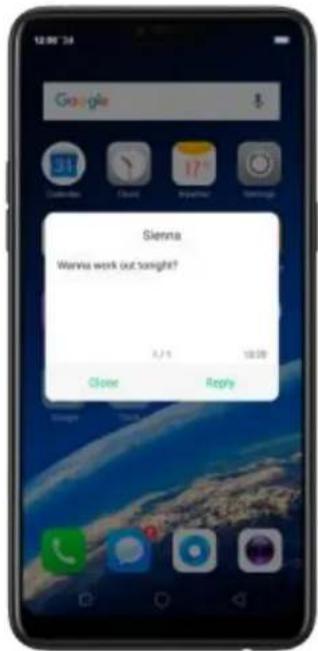
Receive instant SMS messages. Toggle the slider to green if you want to receive life-related messages pushed by your operator during a call.
Display recent contacts when sending a message and show contact's portrait in the Message list. Toggle the sliders to green.
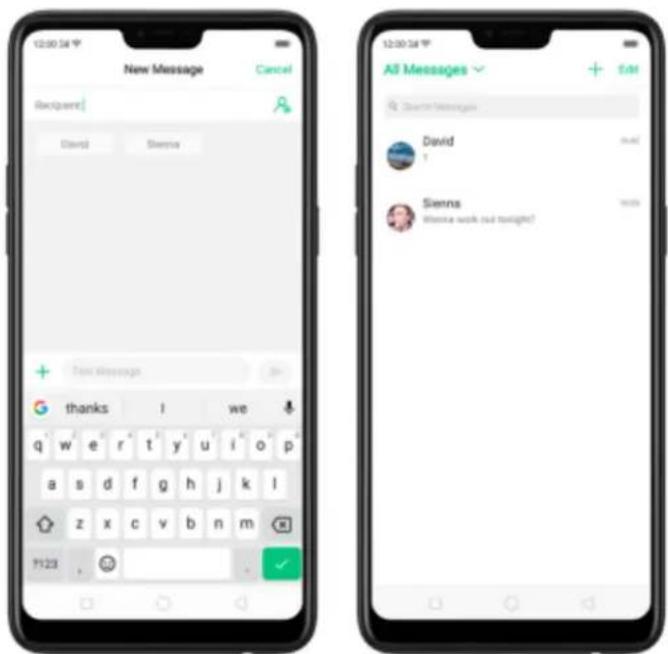
Customize advanced settings. Click [More Message Settings], then set up more
SMS, MMS, system, and emergency alert related settings.
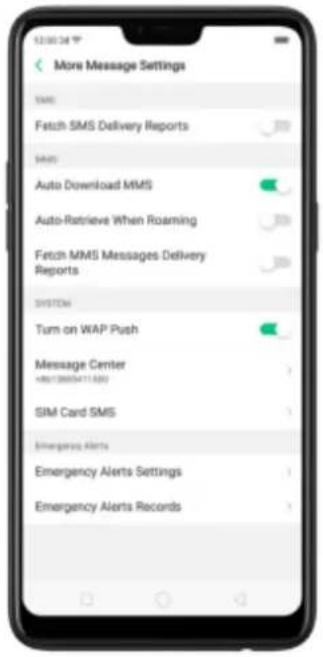
7.7. Contacts
7.7.2. Add a contact
Save new contact information in a snap. You just need a name card or business card.
There are three ways you can add contacts in a snap using the Scan Name card feature.
- Through the Contacts app. On your home screen, click [Contacts app] >
[Contacts] then click 📋 on the top-right corner of the screen.
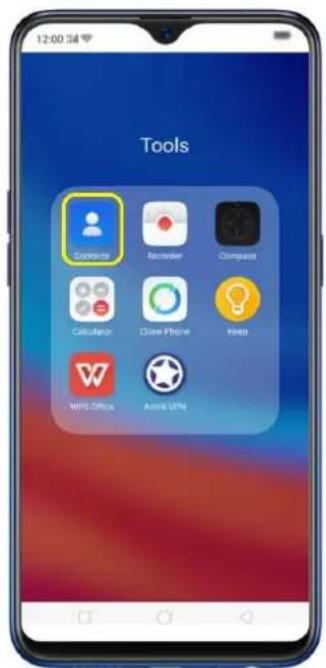
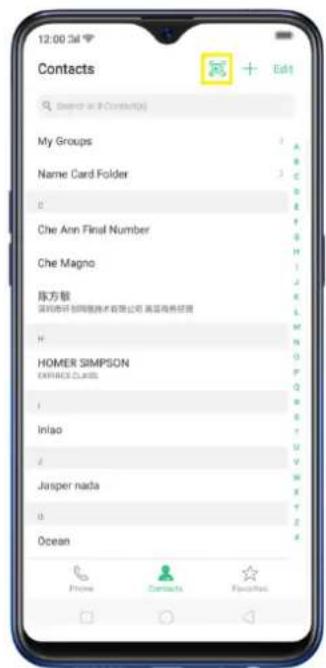
Then click ☐ for the name card recognition language. Make sure to fit the name card or business card on the frame.
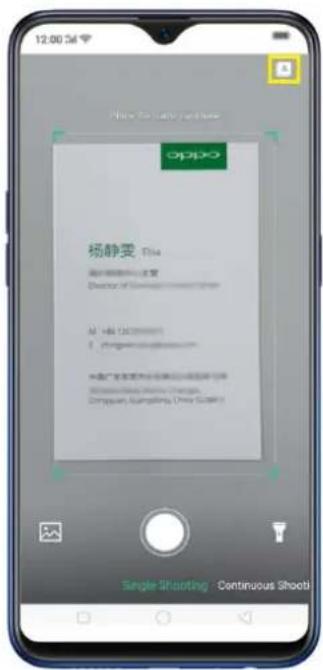
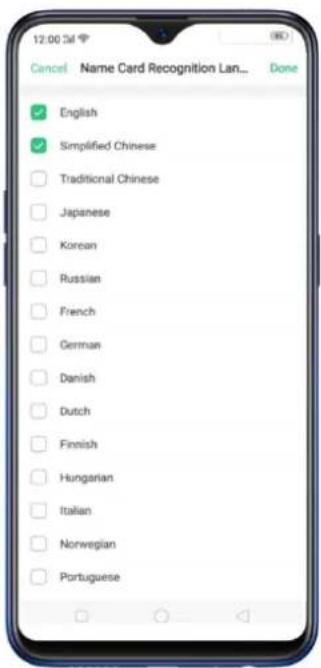
Click ☐ to start recognizing the name card or business card and all information will directly be inputted on your Contacts app then click Save.
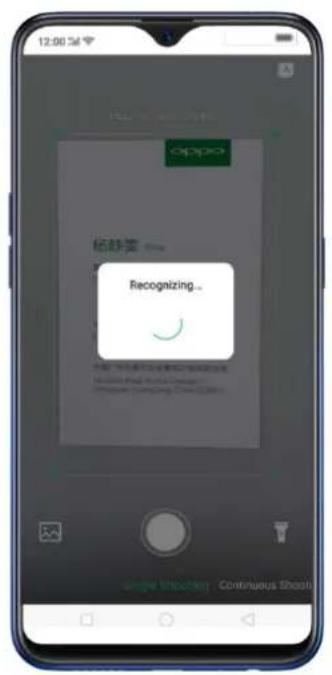
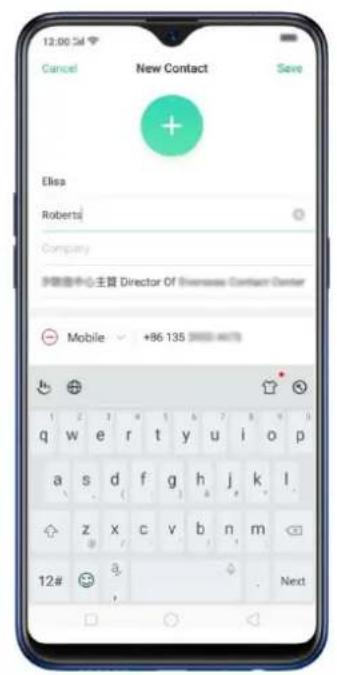
You also have an option to do Continuous Shooting, open Photos app if a name card or business card is saved there, or use the flashlight if area to scan is dimly lit.
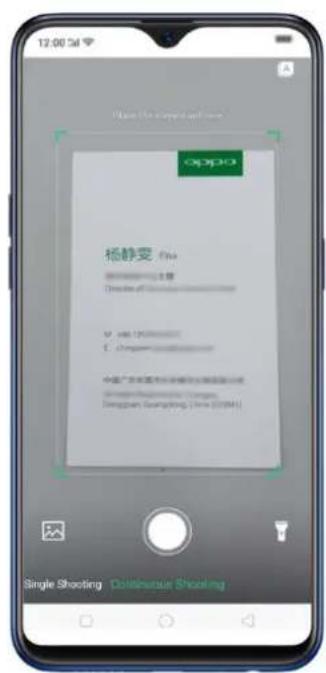
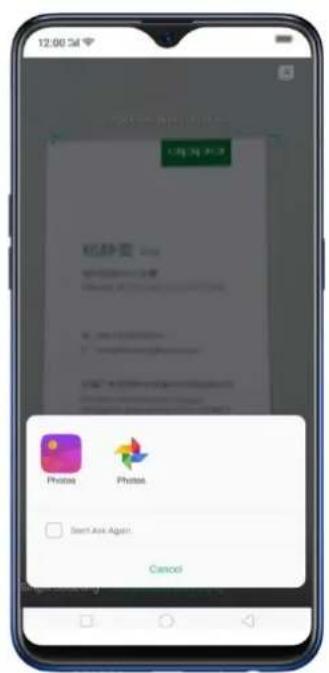
- Through the Phone App. On your home screen, click [Phone app] >
[Contacts] then click 📋 on the top-right corner of the screen.
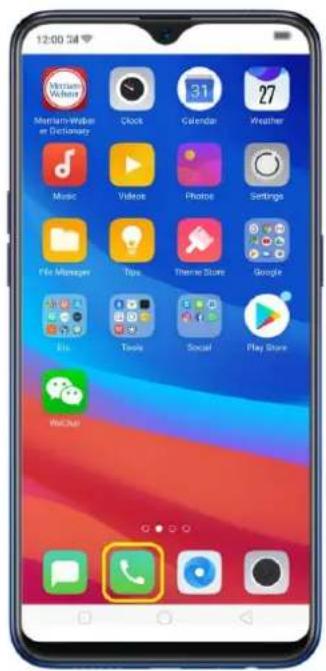
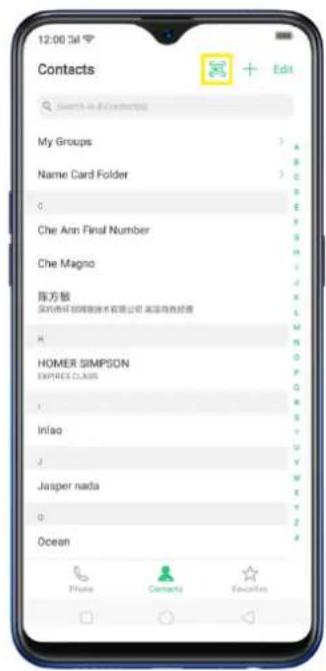
Then click ☐ for the name card recognition language. Make sure to fit the name card or business card on the frame.
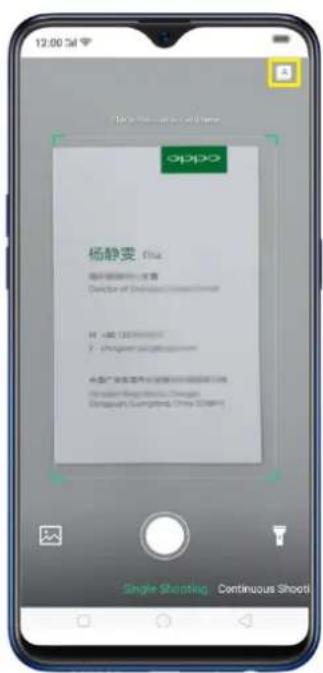
Click ☐ to start recognizing the name card or business card and all information
will directly be inputted on your Contacts app then click Save.
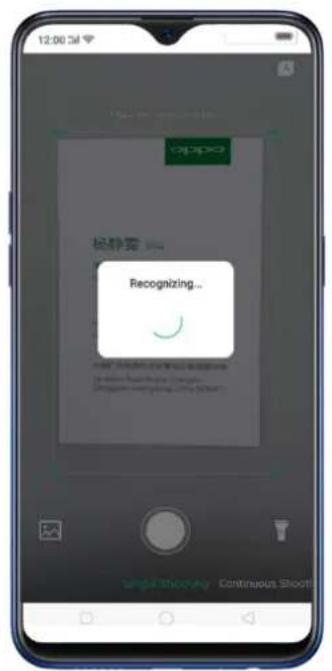
You also have an option to do Continuous Shooting, open Photos app if a namecard or business card is saved there, or use the flashlight if area to scan is dimly lit.
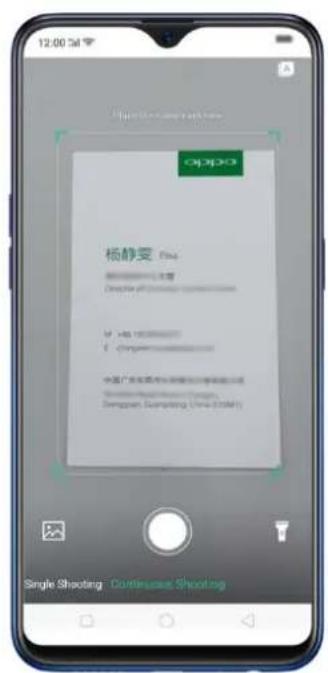
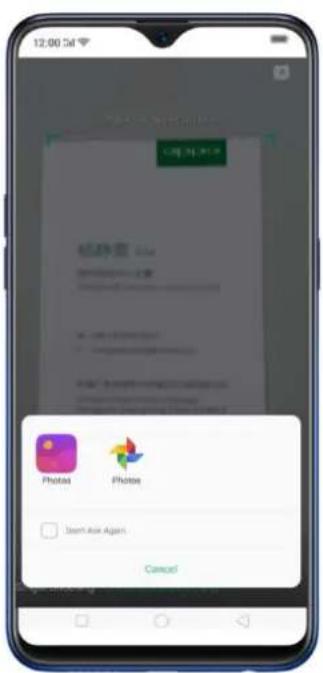

- On Smart Assistant, Click Scan Namecard to launch Contacts app and open this
feature directly. Before scanning the business card or namecard, click for the namecard recognition language. Make sure to fit the namecard or business card on the frame.
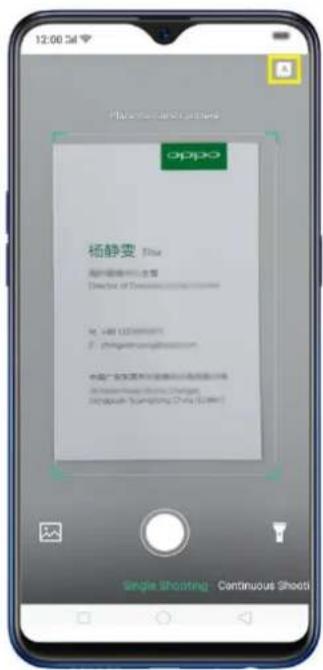
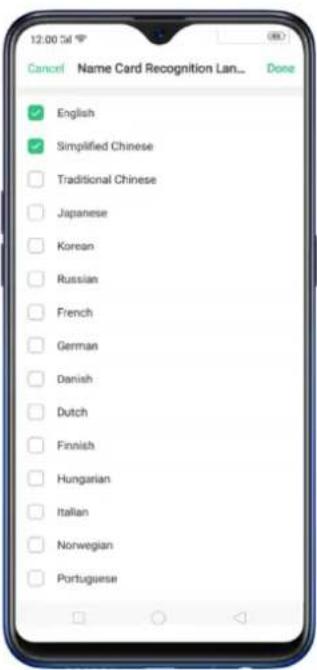
Click ☐ to start recognizing the namecard or business card and all information will directly be stored on your Contacts app then click Save.
![12:00 5m OPPO 松静变 Recognizing... [ Recognition] [ Recognition] [ Recognition] [ Recognition] [ Recognition] [ Recognition]](/content/2026/05/993082/images/389825a3fe90fc98455e1da1e6492e51b9f205c10c997a652b56a115572a95f3.jpg)
You also have an option to do Continuous Shooting, open Photos app if a namecard or business card is saved there, or use the flashlight if area to scan is dimly lit.
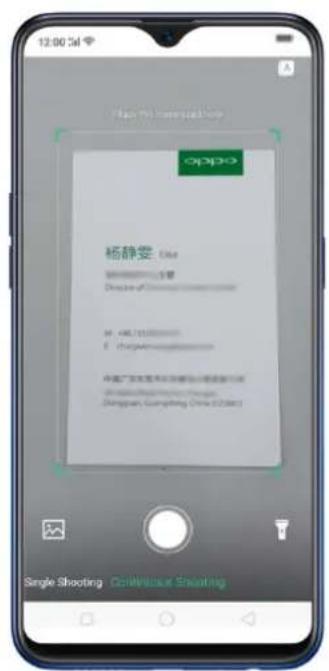
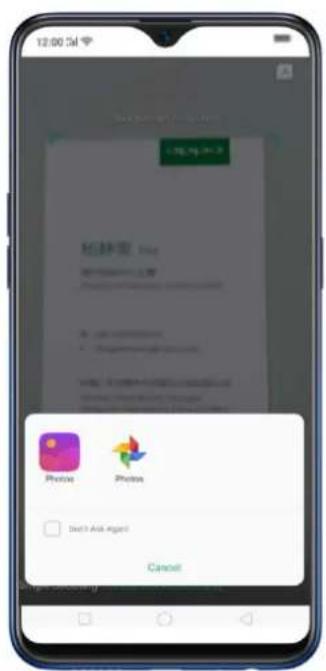
Add a new contact the old way. Click Contacts, click +, then enter the contact information.
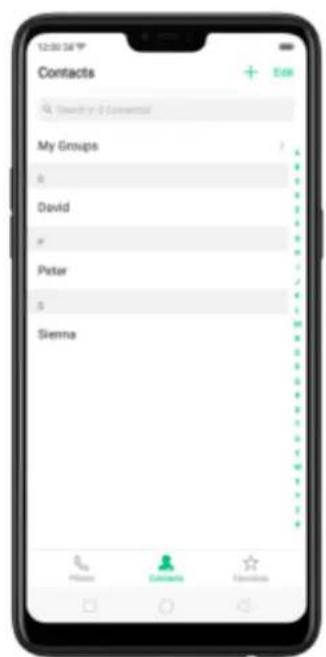
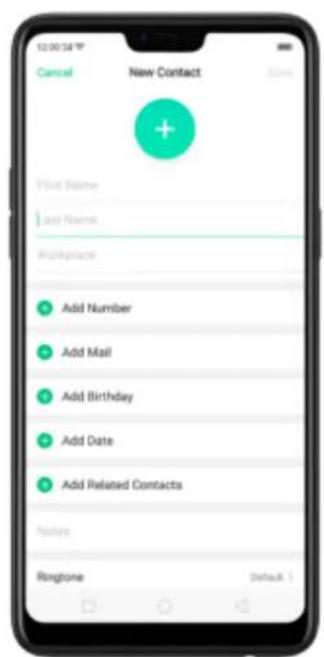
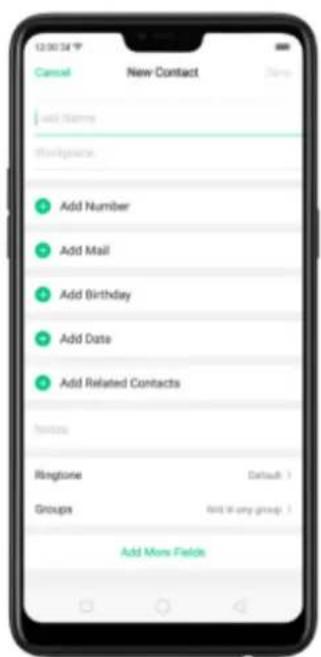
Add a contact from a number entered using the keypad. Click Phone and enter a number, then click Create New Contact and enter the contact information, or click Add to Existing Contact and choose a contact.
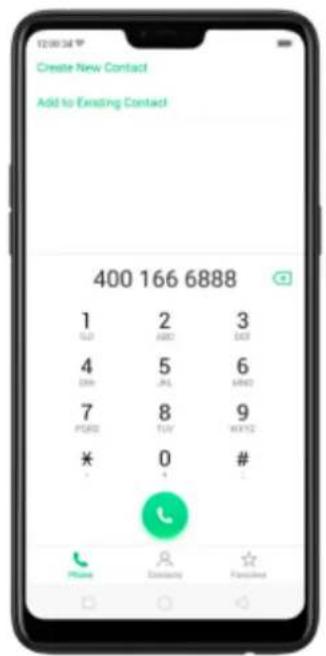
Add a recent caller's information to your contacts. Click Phone, and you'll see the recent calls. Click ⓘ, then click Create New Contact or Add to Existing Contact.
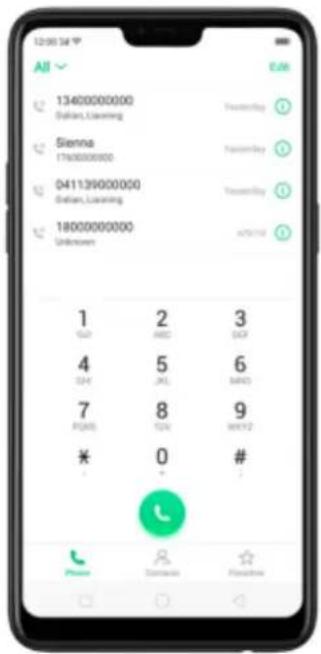
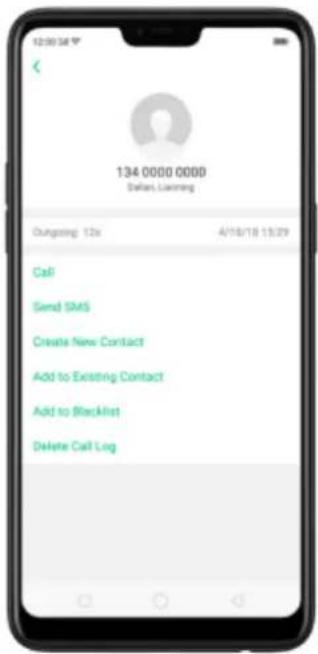
7.7.3. Edit and delete a contact
You can make changes to your contacts directly on your OPPO smartphone. Edit a contact's phone number, address, and other information. Click Contacts and choose a contact, then tap Edit.
- To add an item - such as an Email address or phone number, click + next to the item.
• To delete an item, click — next to it.
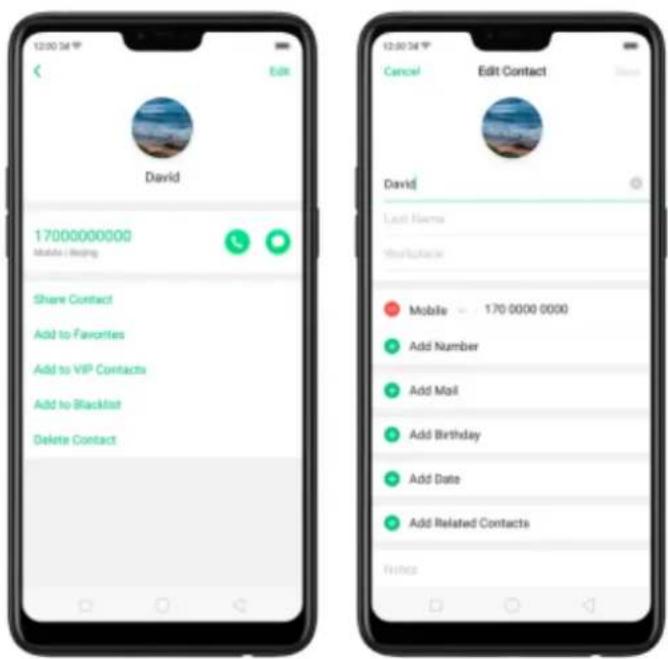
Assign a photo to a contact or change a contact's photo.
- Click + , or click the existing photo.
- Click Take Photo to use the camera to take a picture, or click Select a Photo and select an existing photo, or click Delete Photo to delete the photo.
- Drag to region to crop the photo, then click Done.
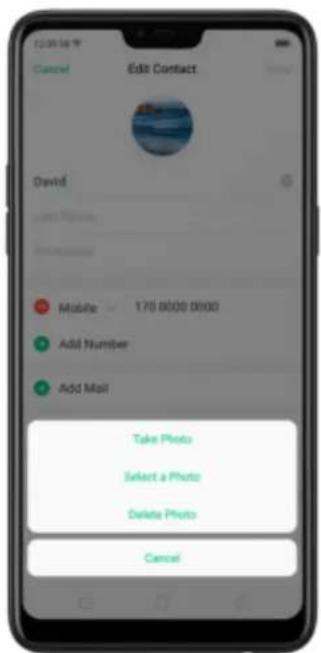
Delete a contact. Click Delete Contact on the Contact Details page or Scroll to the bottom of the contact information and click Delete Contact.
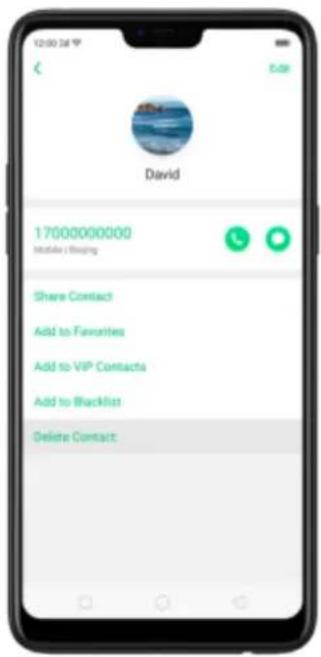
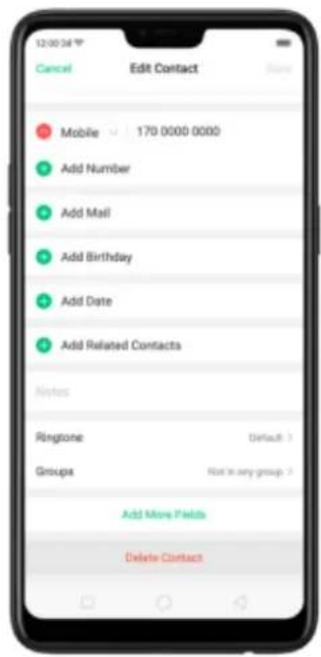
7.7.4. Import and export contacts
You can import/export contacts from/to the phone storage or your SIM card. If you have contacts stored on your old phone, you can transfer them through Bluetooth from that phone. If there are repeat contacts, the phone will automatically merge them when you import contacts.
Import contacts. Go to [Settings] > [Contacts] > [Import/Export Contacts].
- Import from storage device. Save the imported contacts to your phone.
- Import from other phones. Import the contacts stored on other phones to your OPPO phone through Bluetooth.
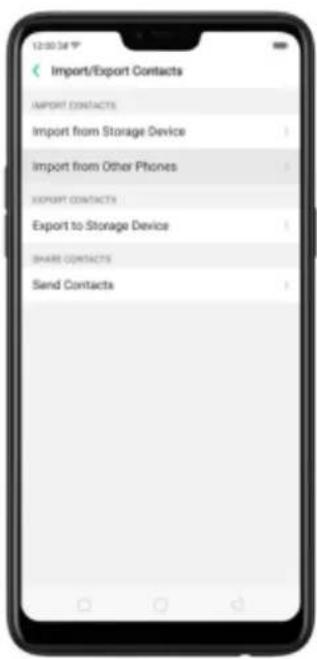
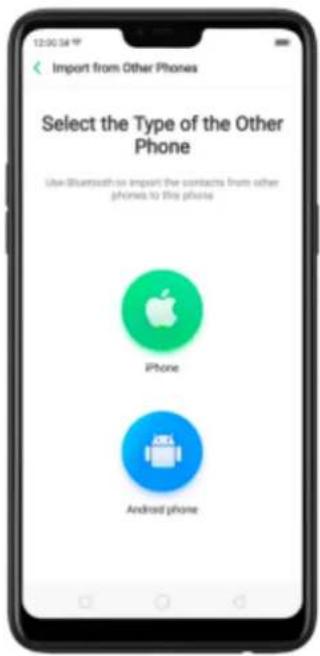
Export Contacts. Export your contacts to the phone storage. Contacts you export are saved as .vcf file.
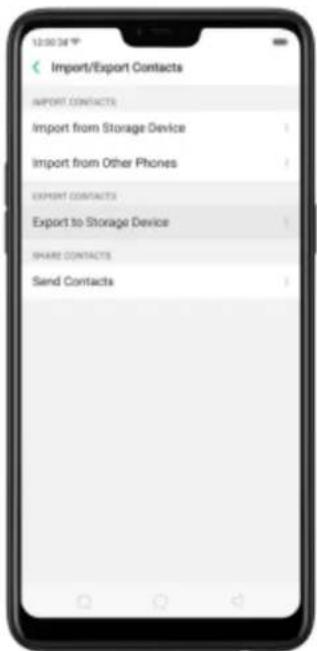
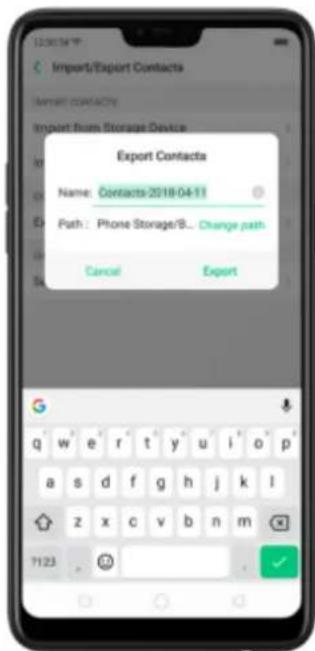
Import/export SIM card contacts. Go to [Settings] > [Contacts] > [SIM Card
Contacts], click Import or Export, then tick the contacts and move them to either SIM or phone.
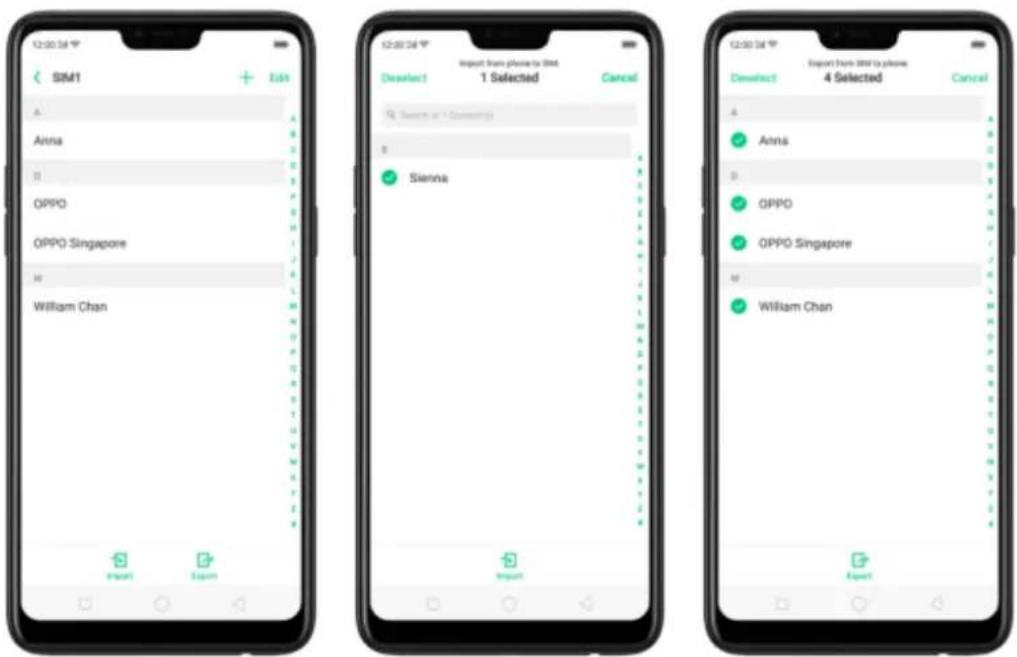
View more details in Import and export contacts on your OPPO smartphone.
7.7.5. SIM contacts
You can add, edit, delete, import, and export SIM contacts directly on your OPPO smartphone. Go to [Settings] > [Contacts] > [SIM card Contacts].
Add a SIM contact. Click +, then enter the contact information and click Save.
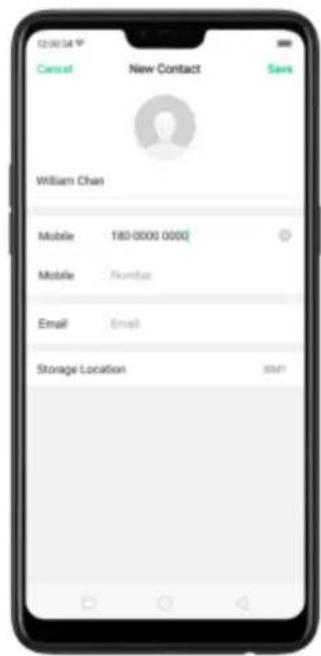
Edit and delete a SIM contact. Click a contact, then click Edit. Click Delete Contact to delete the contact.
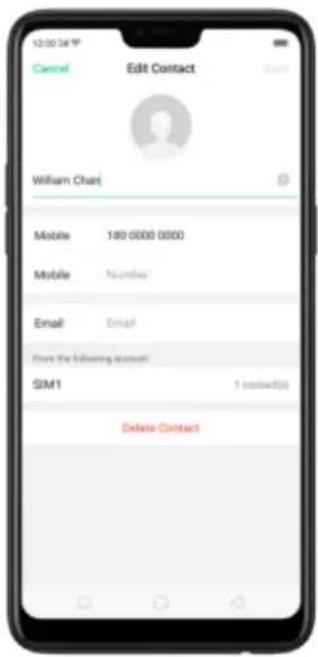
Delete SIM contacts at a time. Click Edit in the upper-right corner, tick the contacts and click Delete.
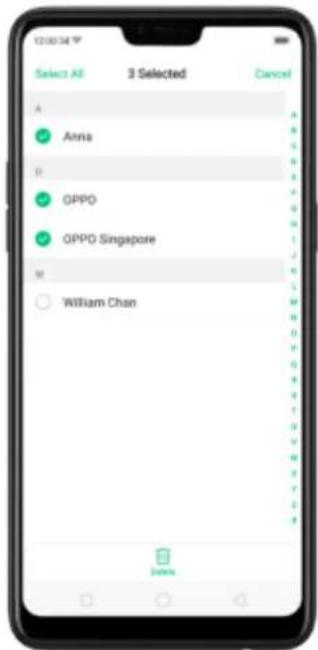
Display SIM contacts on the Contacts list. You need to import SIM contacts to your phone. See Import and export contacts.
7.7.6. Manage contacts
Contacts allows you to easily save and edit contact information, including names, numbers, addresses, and more. To make your contacts more organized and available, do the following:
Add a new contact. Click Phone on the Home screen, click Contacts, then click + . The contact will be saved to your phone storage.
Modify existing contacts. If you want to add details to an existing account, click the account then edit.
Import or export contacts. Go to [Settings] > [Contacts], then select the import/export path. View Import and export contacts on your OPPO smartphone.
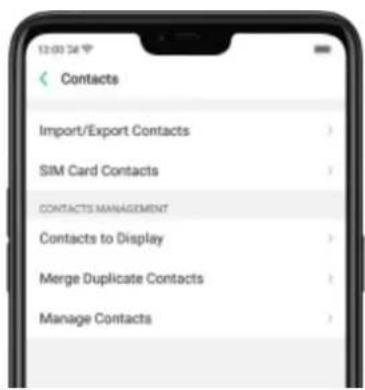
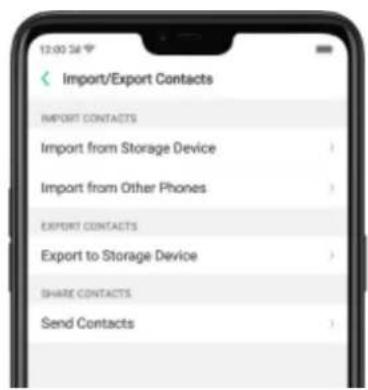
Contacts to Display. Go to [Settings] > [Contacts] then click Contacts to Display. To only show contacts with numbers, toggle the slider to green. You can also click a category of contacts that you want to display. Click Customize to select contacts by group.
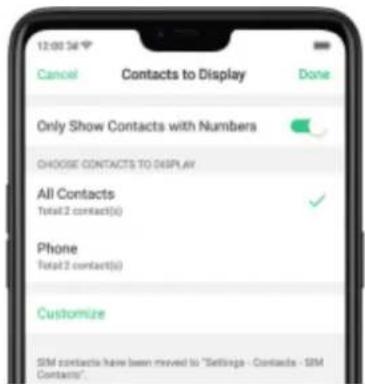
Merge duplicate contacts. Click Merge duplicate contacts. The phone will automatically merge contacts with the same name.
Manage contacts. To manage contacts without name or number, or quickly remove invalid numbers, click [Manage Contacts].
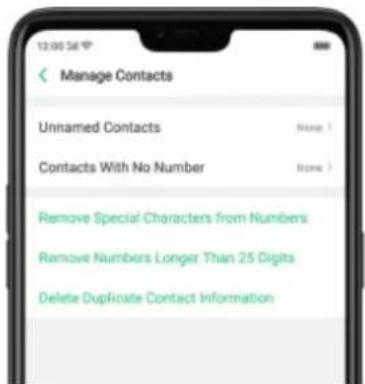
Send Contacts. Go to [Settings] > [Contacts] > [Import/Export Contacts] > [Send Contacts]. All contacts stored on your phone will be shared.
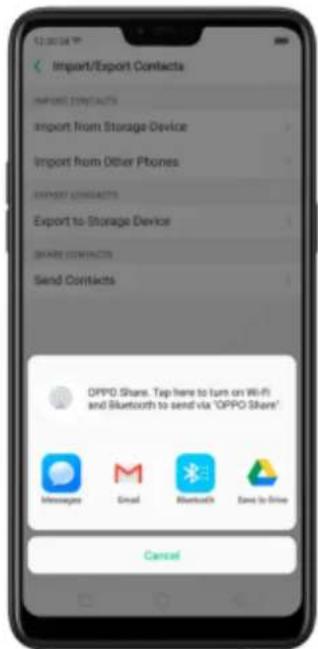
Backup your contacts. Go to [Settings] > [Additional Settings] > [Back up & reset] > [Backup & Restore] > [Create New Backup]. View Back up your OPPO smartphone.
7.7.7. Back up your contacts
If you use your OPPO smartphone on a regular basis, it is necessary to back up the contacts so that you can easily restore them or use them on another device.
Use the built-in backup tool. Go to [Settings] > [Additional Settings] > [Back up and reset], then click [Backup and Restore]. Back up your contacts. You need to make a copy of the existing backup file and move it to another storage device.
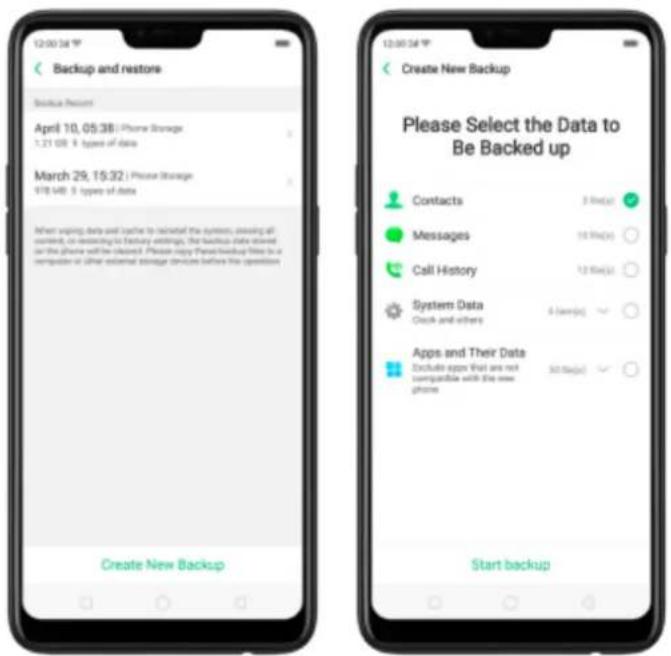
Export contacts. Export your contacts to your SIM card or a folder on your phone. See Import and export contacts.
7.7.8. VIP Contacts
When you put the phone into Silent mode, or when you set the phone to block calls and nocaons using Quiet Time, Game Acceleraon, or Anti-harassment, you can add certain contacts to VIP Contacts, which will allow them to override the phone sengs and have their calls come through and ring.
Add contacts to VIP Contacts. Go to Contacts, select a contact, and then click Add to VIP Contacts.
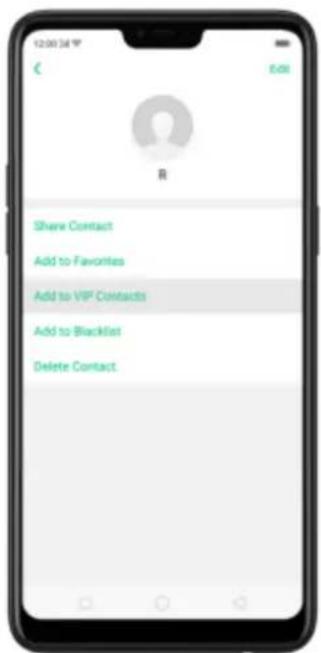
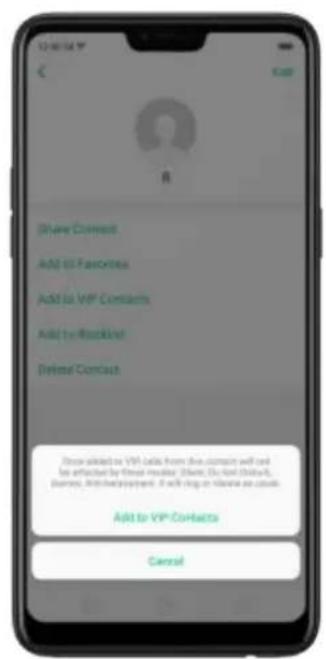
7.8. Phone Manager
7.8.2. Scan and optimize the phone
Regularly optimizing your OPPO smartphone can make it perform steadily and faster.
Automatic optimization items. Go to [Phone Manager], the system will start scanning your phone automatically. After the scan is over, click [Optimize], then click [One Touch Optimization]. You can also select the items that you want to optimize optionally.
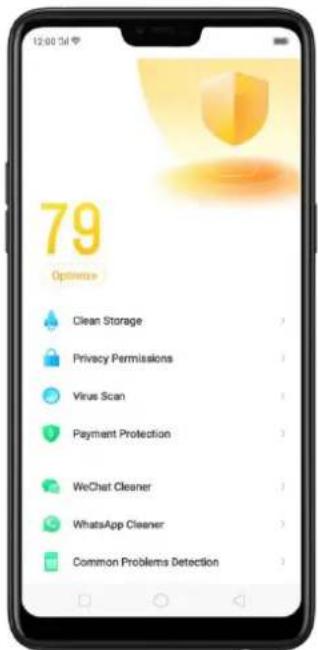
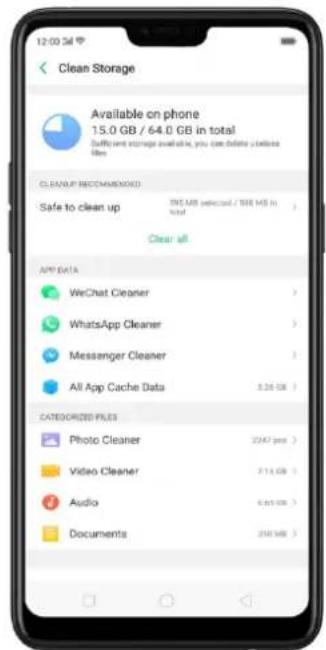
Manual optimization items. Click the green button on the right side of each item, respectively, then do as the phone prompts.
7.8.3. Clean Storage
Use Clean Storage to quickly detect and remove hidden temp (temporary folders or files), cookie and cache files generated by inner calculations and data exchanges to free up more storage space. You can also quickly browse and delete unnecessary user files.
Delete junk files. Click Phone Manager, then click Clean storage. Click End all to delete all kinds of junk files. You can also choose files to be deleted.
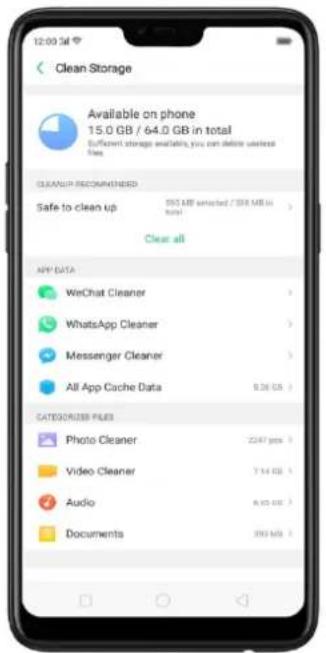
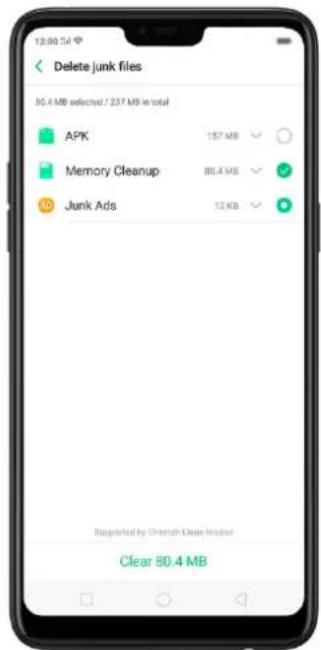
Delete app data. Click All app cache data, select the apps that has caches, then click Delete. The action cannot be undone.
For some commonly used instant-messaging apps like WeChat and WhatsApp, the Phone Manager provides separate entries for you to clean up their files.
See Frequently Used Functions.
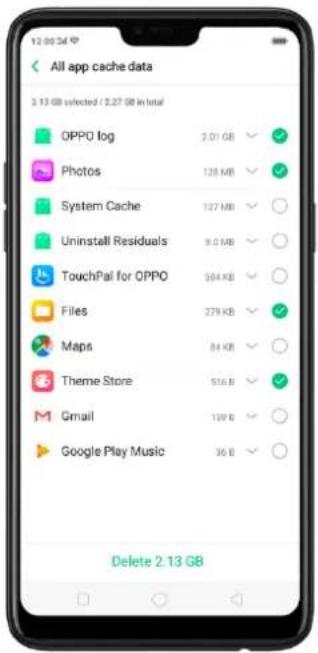
Free up more storage space. You can delete your unnecessary files on the phone, including photos, audio, videos, and documents.
7.8.4. Privacy Permissions
Use Privacy permissions feature to manage app permissions, protect your privacy, and manage apps that start when phone boots up.-Click Phone Manager, then click Privacy Permissions.
Manage the app permissions. Open Phone Manager, then click Privacy Permissions. You can go through each permission or app on your phone and, with full control, accept, decline or limit each permission of apps according to your requirements.
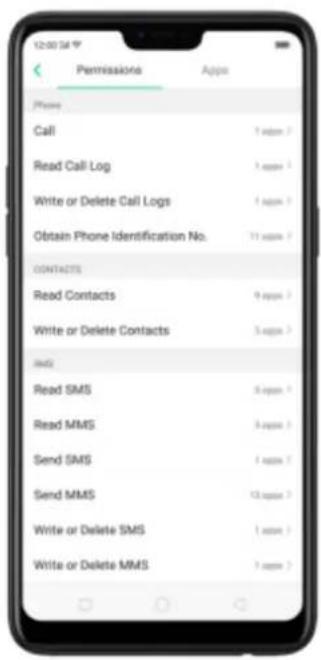
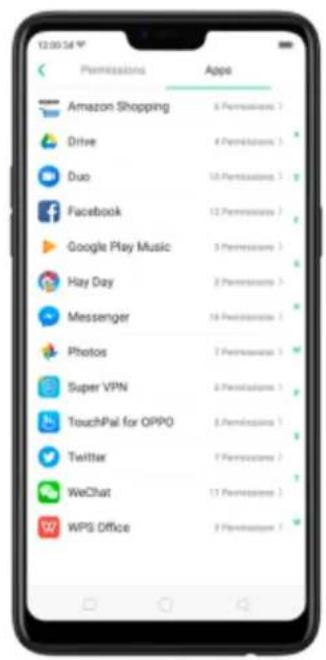
Click [Set Individual Permission] to view and set more detailed permissions.
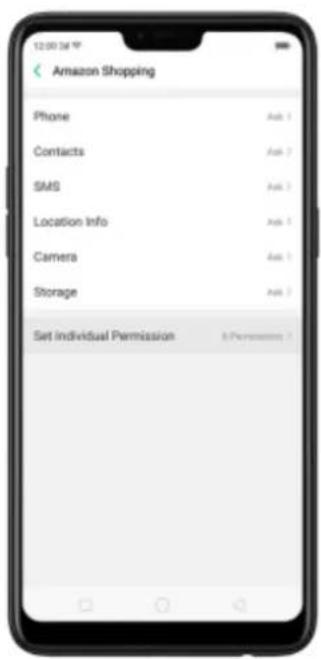
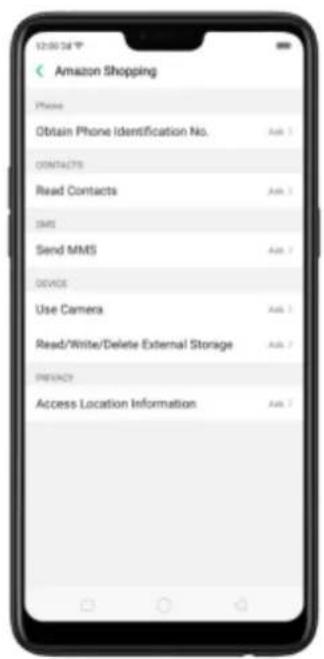
Allow apps to start when phone boots or in background. Click Startup Manager.
Toggle the app sliders to green. See Set up Startup Manager.
To view the apps that had been blocked from starting in the background, click Blocking Records.
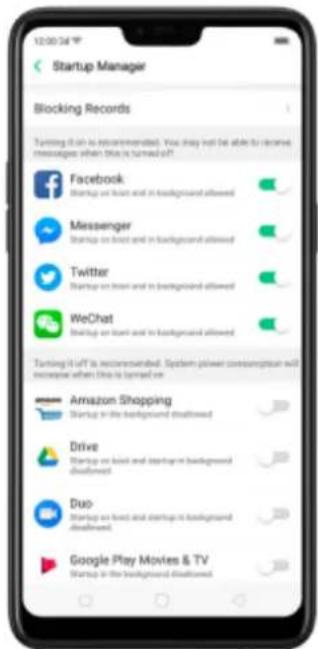
Enable floating windows. Toggle the app slider to green. Your app message will be displayed in the floating window for easy viewing and use. (Only for apps which can support Floating window feature.)
View more details in Use Phone Manager on your OPPO smartphone.
7.8.5. Virus Scan
For better security, you can regularly scan and remove potential and actual threats to your phone.
Scan for virus. Click Phone Manager, then click Virus Scan. Wait for the scan to complete. If threats were found, remove them; if not, you will see a message that says your phone is in a good state.
7.8.6. Payment protection
While you shop online, your OPPO phone will provide protection for the mobile transactions, such as detecting the security of system, captcha, and the app itself. Set up payment protection for apps. Open Phone Manager, then click Payment Protection. You can also go to [Settings] > [Security] and click [Payment Protection].
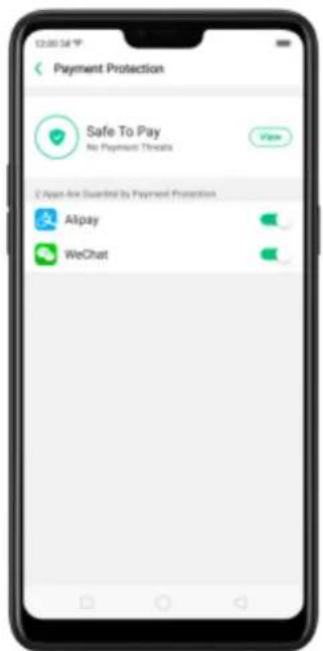
7.8.7. Frequently Used Functions
In Phone Manager, you can quickly clear your downloads and junk files of the apps which are used frequently, such as WeChat, WhatsApp, and more.
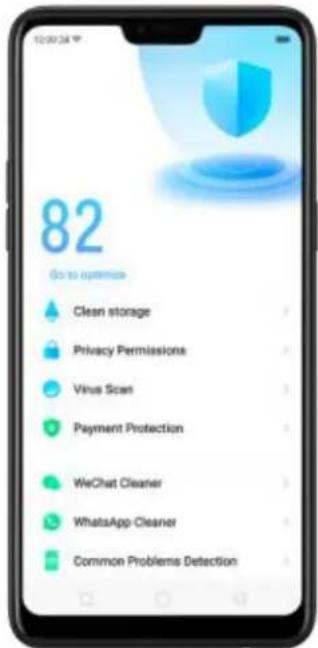
WhatsApp Cleaner
Clear cache and junk files. Click [Clear Now] button to clear the cache files generated when the app was in use.
Clear other app files. You can delete the app files to free up the phone storage, including pictures, videos, audio, voice messages, and files. Select an option, click Select to select the files, then click Delete.
WeChat Cleaner
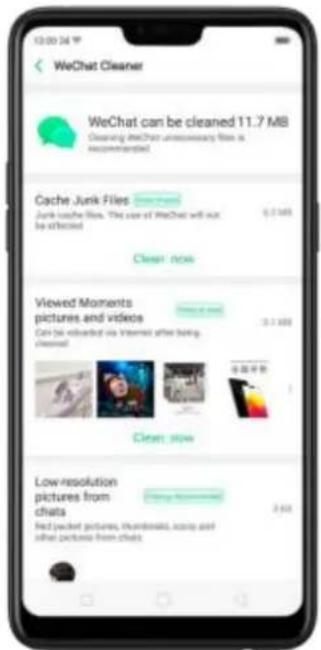
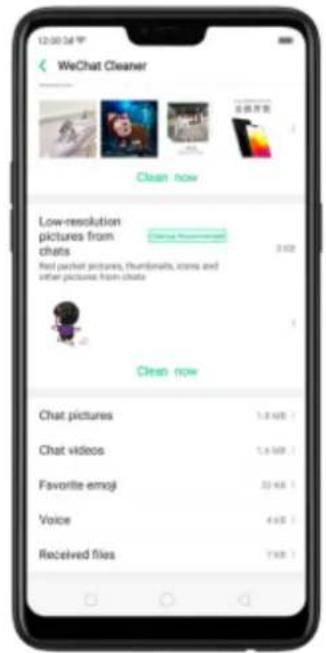
Clear junk files. Click [Clear Now] button to clear the cache files generated when the app was in use.
Clear view history. Click [Clear Now] button to clear all the viewed pictures and videos. When The next time you view the post, the photos and videos can be downloaded from the internet again.
To delete part of the view history, click [Viewed moments, pictures and videos], choose the pictures and videos you want to delete, then click Delete.
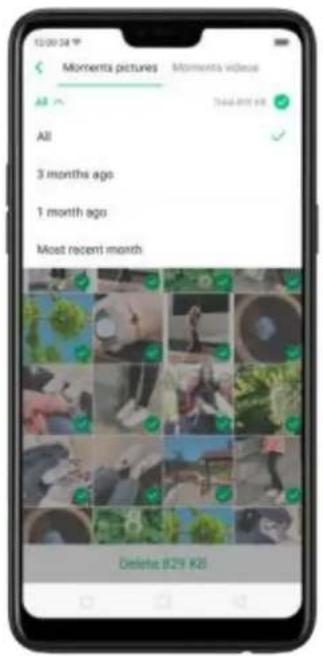
Clear low-resolution pictures from chats. Click [Clear Now] button to clear the red packet pictures, thumbnails, icons, and other pictures.
Clear files received or sent through chat. You can delete the app files to free up the phone storage, including chat pictures and videos, emojis, voice files, and received files. Select an option, click ○ to select the files, then click Delete.
Note: These kinds of files cannot be recovered after cleaning.
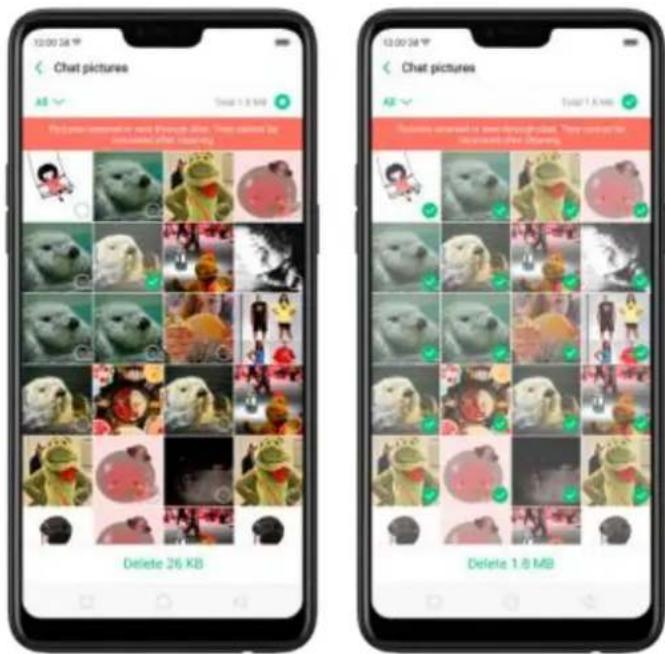
7.8.8. Common Problems Detection
Phone Manager allows you to diagnose common phone problems and find solutions to quickly deal with them.
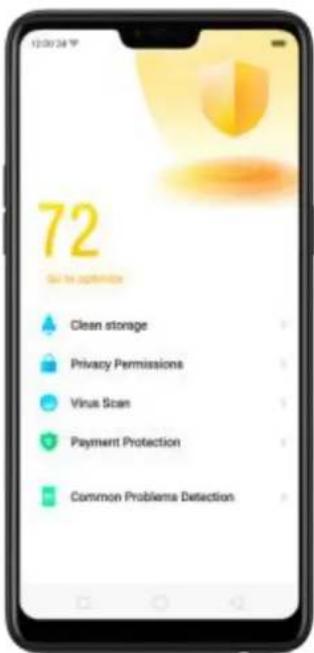
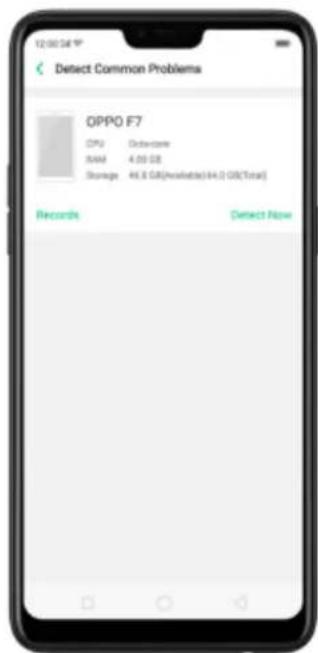
Detect common phone problems. Click [Phone Manager] > [Common Problems Detection], select the items you want to detect, then click [Start Detection].
- Auto-detection items: including phone memory, SIM card(s), and system version. The phone will automatically complete the detection.
- Manual detection items: including sensors, connections, battery and charging, physical keys, screen, camera, audio, and vibration. During the detection, you need to operate the phone as per the onscreen instructions.
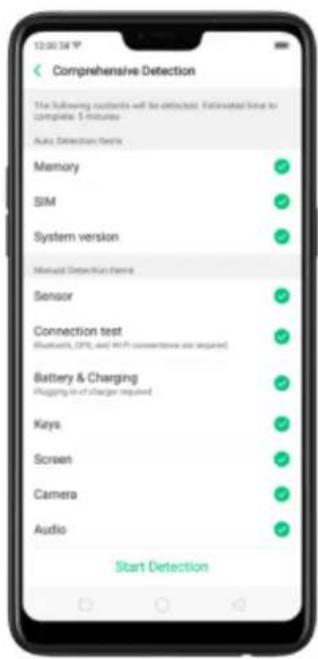
The phone will list all the test results of the system and intuitively display the abnormal items. Click the abnormal item to view the solution your phone offers.
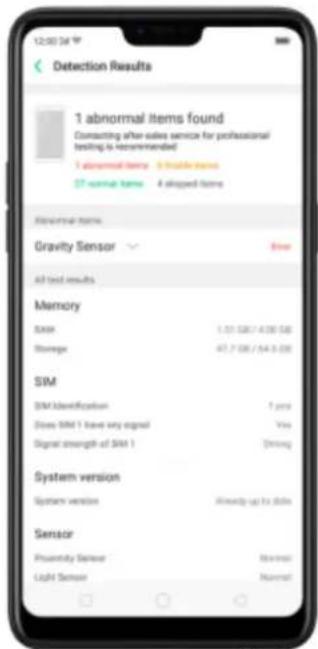
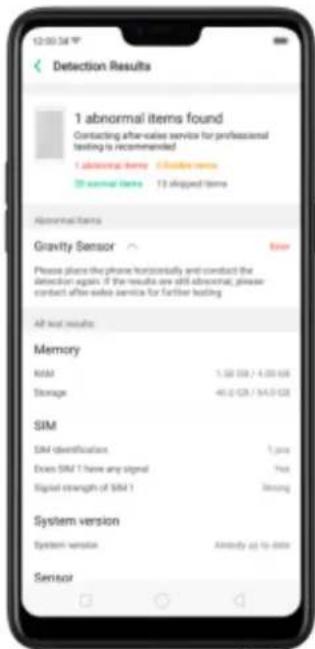
Detection records. Click [Records] and you can view all the detection records.
7.8.9. WeChat Cleaner
In Phone Manager, you can use WeChat Cleaner to selectively delete any photo, video, voice recording, or any other data sent or received through WeChat to reclaim more space on your phone.
* You can also click File Manager, click Clean Storage, then click WeChat Cleaner.
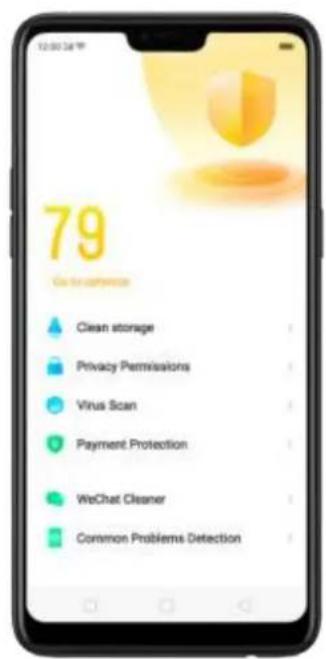
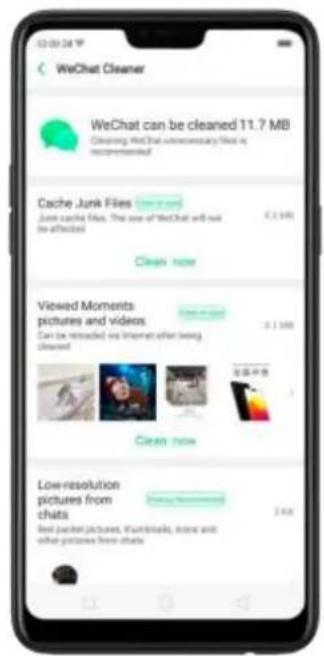
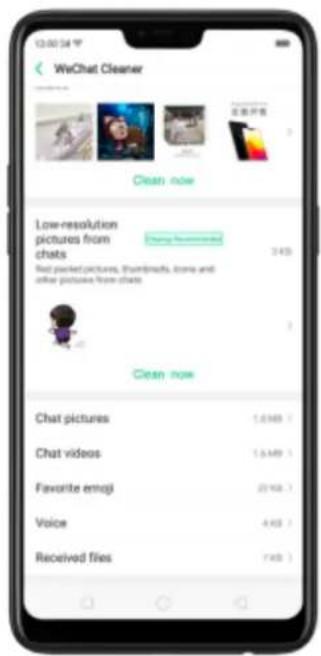
Clear junk files. Click [Clear Now] button to clear the cache files generated when the app was in use.
Clear view history. Click [Clear Now] button to clear all the viewed pictures and videos. The next time you view the post, the photos and videos can be downloaded from the internet again.
To delete part of the view history, click [Viewed moments, pictures and videos], choose the pictures and videos you want to delete, then click Delete. You can also click All, then choose a period of time.
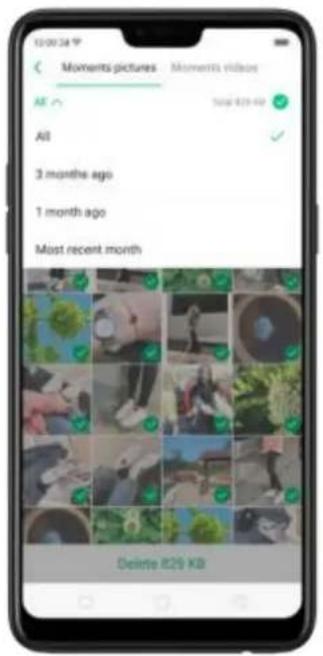
Clear low-resolution pictures from chats. Click [Clear Now] button to clear the red packet pictures, thumbnails, icons and other pictures.
Clear files received or sent through chat. You can delete the app files to free up the phone storage, including chat pictures and videos, emojis, voice files and received files. Select an option, click ○ to select the files, then click Delete.
Note: These kinds of files cannot be recovered after cleaning.
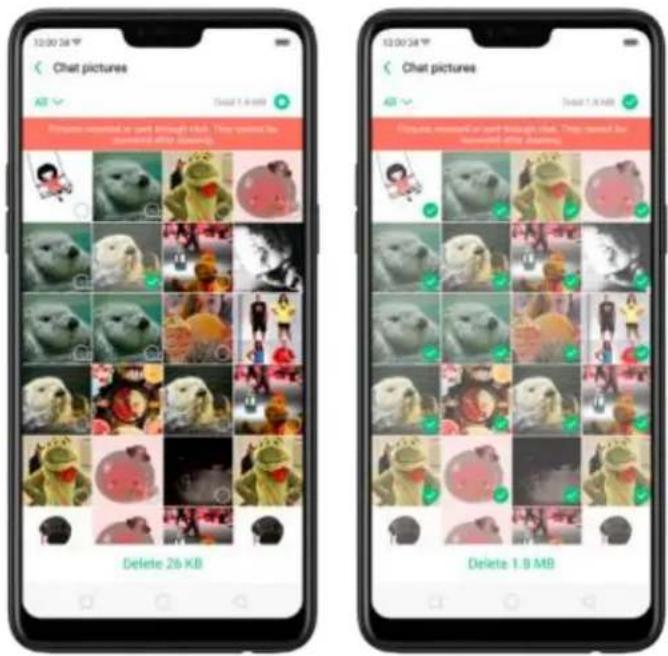
Startup manager makes you choose what apps that will auto-start in the background. To open Startup Manager, click Phone Manager, then click Privacy Permissions.
Manage Startup Manager. Open Phone Manager then click Privacy Permissions. You can go through each app and toggle to green if you want the chosen apps to run on the background.
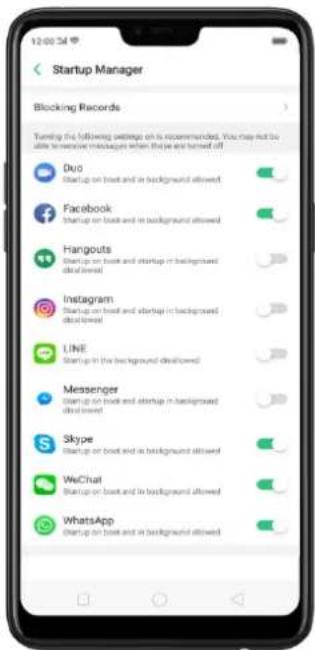
Blocking records. Open Phone Manager, click Privacy Permissions and click Blocking Record then you will see blocking records of the recent month.
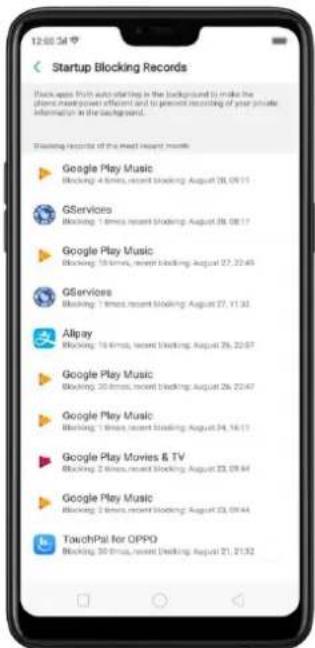
Note: Blocking apps from running in the background can save more power and can prevent recording private information. Although you may not receive messages when these are turned off.
7.9. Weather
Click Weather from the Home screen to see the latest weather conditions and forecasts for the city of your choice, including the current temperature, hourly forecasts for the next 24 hours, and up to 15-days of forecast information. You can store multiple cities for quick access.
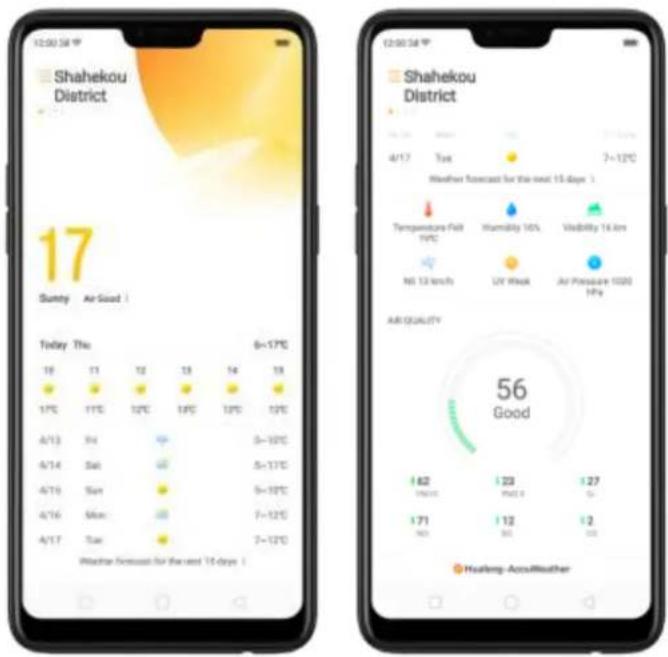
Look at your local weather. Open Weather and your phone will find your current location using the Location Services. Scroll down to see more details, including humidity, visibility, and more.
View the hourly forecast. Swipe the hourly display left or right. It also provides you the time of sunrise and sunset.
Get daily forecast for 15 days. The phone shows the forecast information for the upcoming five days. Click View weather forecast for the next 15 days to get extended forecasts on your browser.
Add a city. Click ≡, then click + Add . Enter a city name, then click Search.
Switch to another city. Swipe left or right. The number of dots below the city name shows how many cities are stored. You can also click ☐, then choose a city from the list.
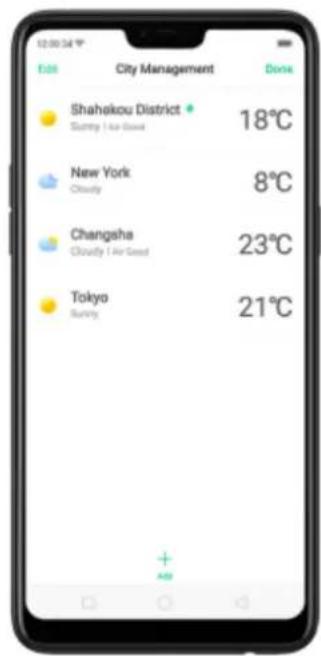
Delete a city. Click ☐, swipe left on the city, then click Delete, or click Edit, click

next to a city, then click Delete.
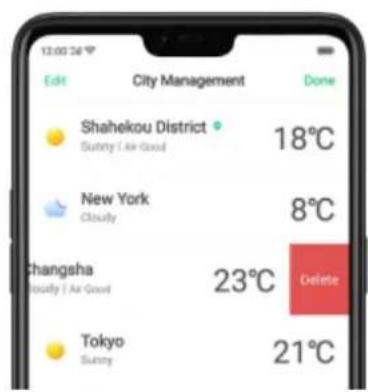
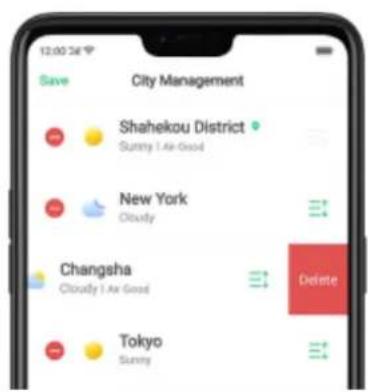
Reorder cities. Click ⋮, click Edit, then drag ↩ next to a city up or down in the list.
Turn on Disaster warning. Go to [Settings] > [Weather] and toggle the slider to green.
Choose Fahrenheit or Celsius. Go to [Settings] > [Weather] > [Temperature unit].
7.10. Camera
7.10.2.Take photos
You can use the cameras to take pictures and videos.
Open camera. Click Camera icon. To quickly get to the camera, touch Camera icon on the Lock screen and swipe up.
Choose a photo mode. Click ☐, then choose to shoot standard, square-format, or full-screen photos.
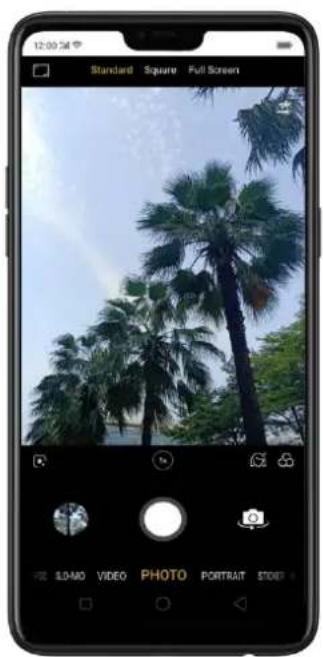
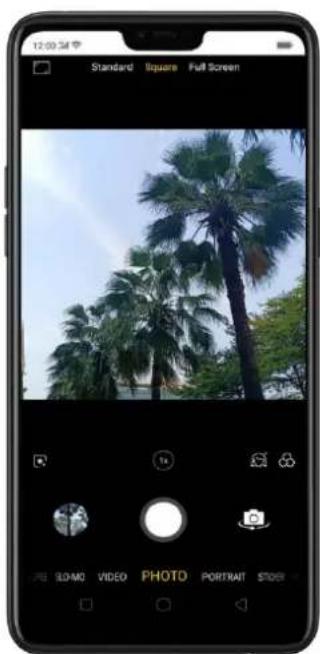
natural_image
Smartphone displaying a photo of palm trees in an outdoor setting under a clear sky (no text or symbols visible on the image itself)Switch the cameras. Click
Take a photo. Aim your camera at the subject and click 📄.
Zoom in or out. The camera captures full-resolution video and stills at 1x and 2x zoom. To quickly switch, toggle 1x or 2x. You can also pinch the screen to zoom in and out.
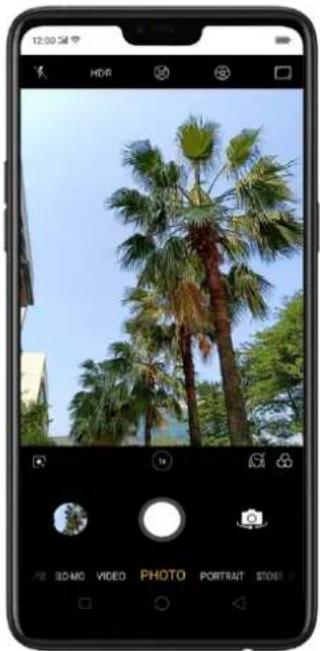
natural_image
Smartphone displaying a photo of palm trees against a clear blue sky, with no visible text or symbols on the image itself.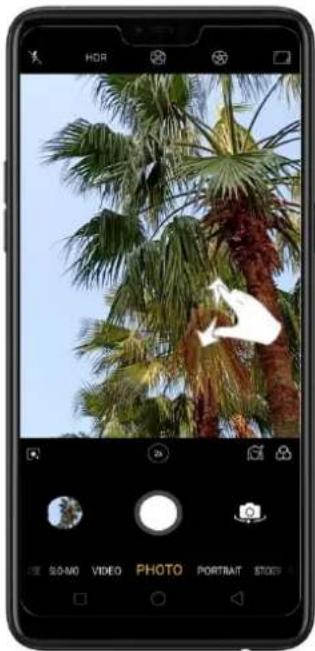
natural_image
Smartphone screenshot showing a photo of a white bird perched on a palm tree against a clear sky (no text or symbols visible)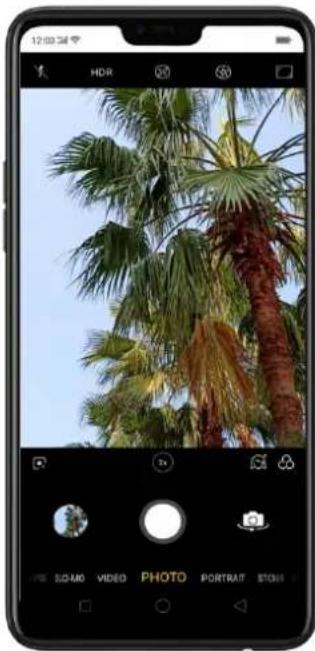
natural_image
Smartphone displaying a photo of palm trees against a clear blue sky, with no visible text or symbols on the image itself.Turn the flash on or off. Click 📄, then click On or Off. When you click Auto, your phone will automatically detect lighting conditions and determine if flash is necessary. When you click Fill Light, your phone will use the built-in flash as the fill light.
Turn HDR on or off. Click HDR, then click On, Off or Auto. When HDR (high dynamic range) is on, photos take multiple exposures of the same scene and then combine them to create a better looking, more detailed image.
Turn on super vivid mode. Click 📋. The camera will set color enhancement to vivid and make colors of your photo more striking.
Use the capture timer. Capture timer gives you time to get in the picture. Click 📂, then click 3s or 10s. Click Tap if you want to take photos by tapping on the screen.
Use Beauty Mode. Click 📄. The built-in beauty filter will automatically adjust the skin tone, enhance facial features, and make other minor changes to your appearance. The camera offers six beauty levels.
Add a filter. You can apply a filter before you take a photo. Click 📋 > click FILTER, then you'll see a serious of filter options, with each one showing a preview of what it will look like when applied to your photo. Click the filter you want to use. Switch to ORIGINAL to remove the filter.
Add an AR sticker. Use stickers to decorate your photo. Choose STICKER, click 📄, then choose an AR sticker.
Take a panorama photo. Choose PANO.
Use Google Lens. Click ☐ so Google Lens will start recognizing the image. See Google Lens
With the rear cameras, click the Shutter button, then move the phone slowly and steadily across the subject you want to capture. Click the button again when you've got your full photo.
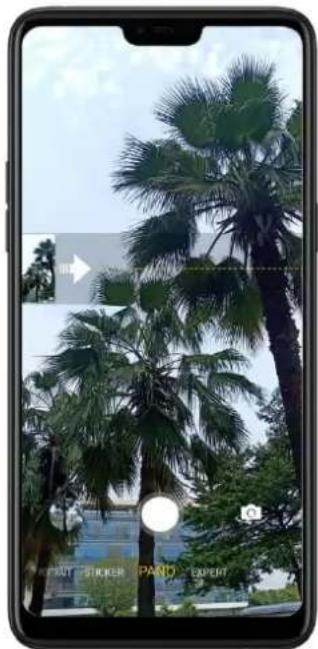
With the front camera, click the Shutter button and you'll hear a "Ding" sound. Rotate the phone left or right until the phone sounds again. The photo will be taken automatically.
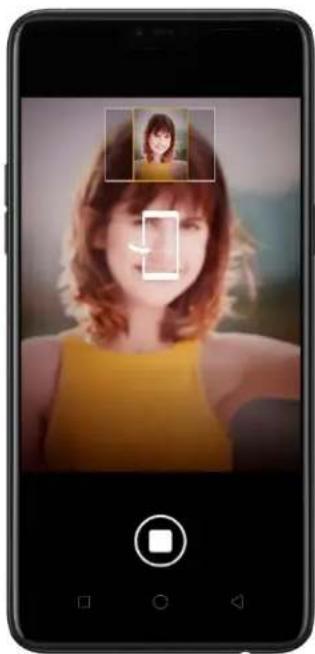
natural_image
Smartphone displaying a portrait of a woman in a yellow top, with a close-up inset showing her face (no text or symbols visible)Make your portrait feel like a movie. Click 📄 and shoot in landscape mode so you would have an image that looks like in a movie.
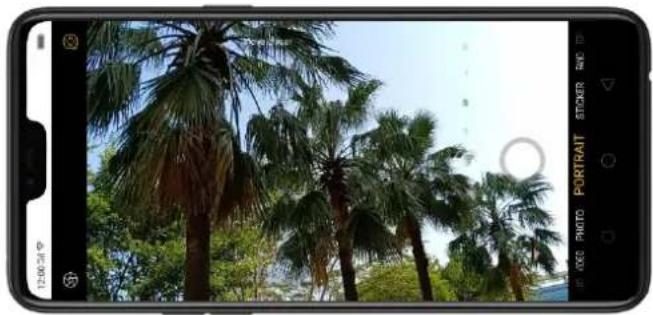
natural_image
Smartphone displaying a photo of palm trees in a tropical savanna setting (no text or symbols visible on the image itself)Use Expert mode. Expert Mode allows you to take more professional-looking photos. Choose EXPERT, then you can adjust camera's white balance, exposure compensation, ISO, shutter speed, and more.
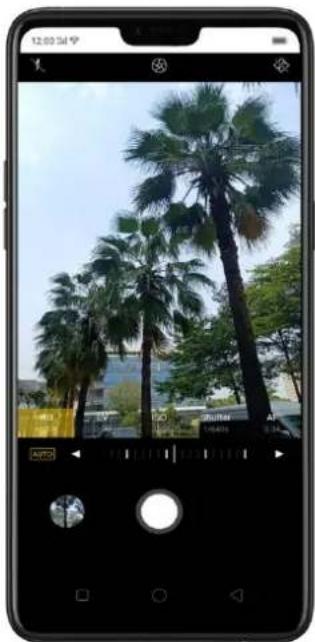
natural_image
Smartphone displaying a photo of palm trees in an outdoor setting (no visible text or symbols)Take Burst shots. Choose Photo, touch and hold the Shutter button, and you'll see an onscreen count rapidly rise, which shows the number of photos you're taking. Lift your finger to stop. To select the photos you want to keep, click Gallery, click 📄, select the photos, then click Done.
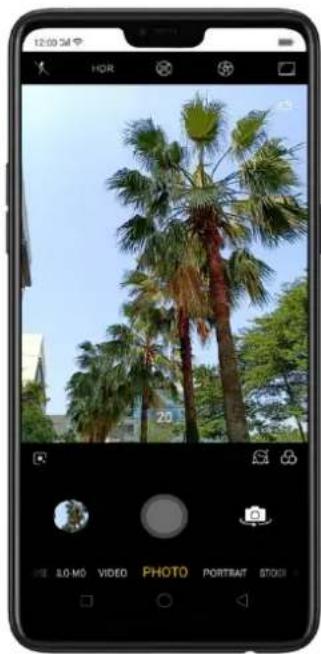
natural_image
Smartphone displaying a palm tree in a clear sky, captured via smartphone interface (no text or symbols on the image itself)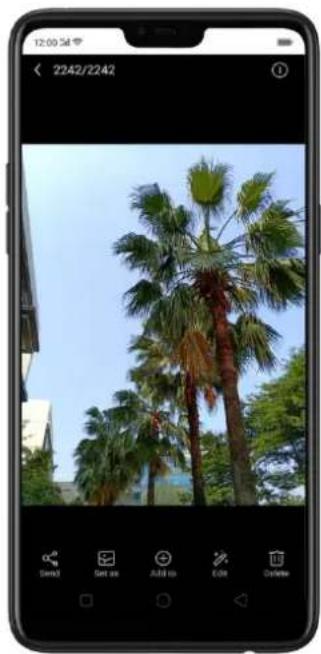
natural_image
Smartphone displaying a photo of palm trees in an urban setting (no text or symbols visible on the image itself)7.10.3.Take a selfie
To switch to the front-facing camera, click in the lower-right corner of the screen.
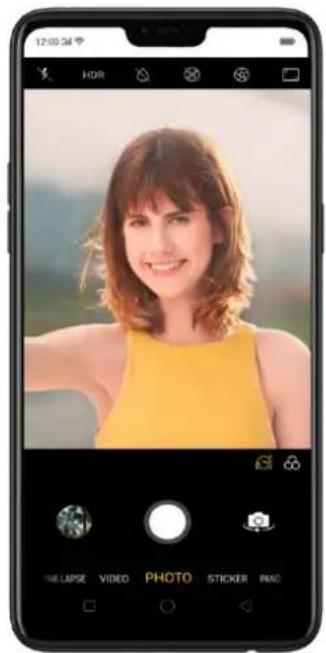
Turn the flash on. Click 📄, then click On. A white screen at full brightness is used as front-facing flash.
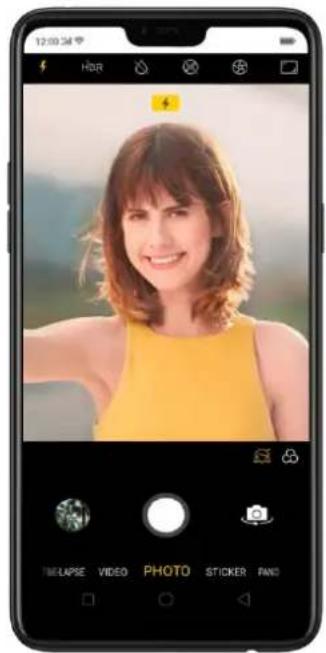
Turn Front 3-HDR on or off. Click HDR, then click Off, On or Auto. When capturing images in bright sunlight or shade, front 3-HDR helps you to adjust the ratio of light to dark in the photo and make your subject look better.
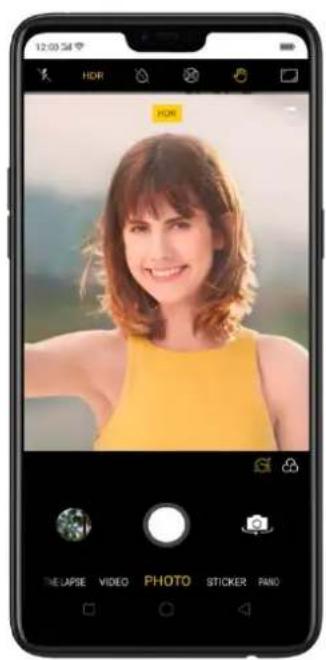
Use the capture timer. Capture timer gives you time to get in the picture. Click 📄, then click 3s or 10s. Click Tap if you want to take photos by tapping on the screen.
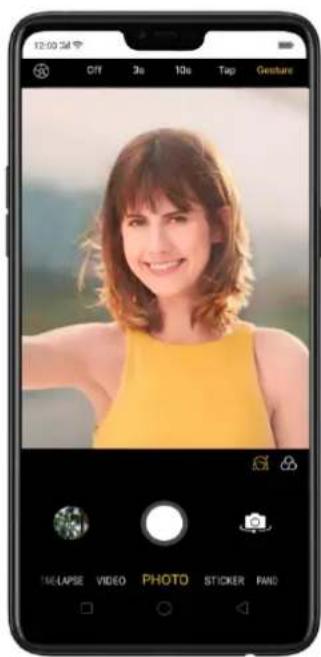
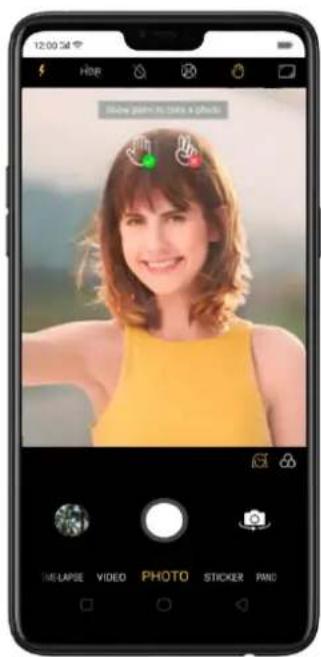
Choose a photo mode. Click ☐, then choose to shoot standard, square-format, or full screen photos.
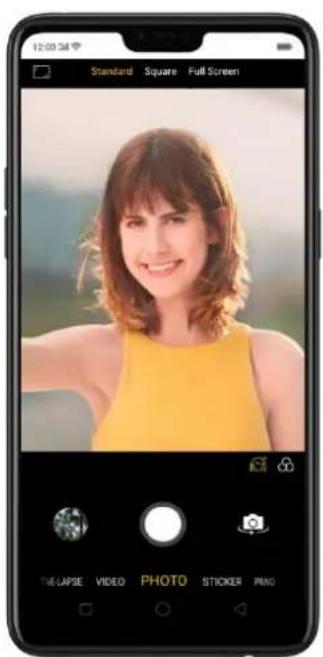
Add a filter. You can apply a filter before you take a photo. Click 🔒, click FILTER, then you'll see a serious of filter options, with each one showing a preview of what it will look like when applied to your photo. Click the filter you want to use. Switch to ORIGINAL to remove the filter.
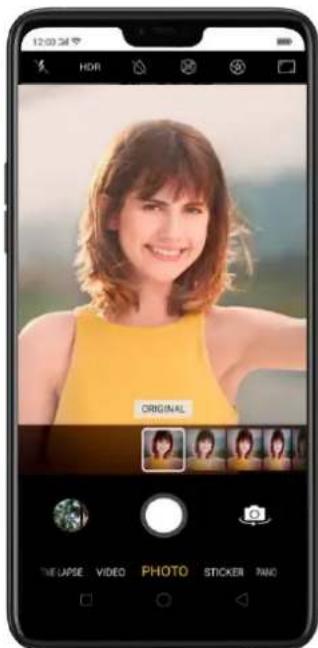
Use Beauty Mode. Click 📄. The built-in beauty filter will automatically adjust the skin tone, enhance facial features, and make other minor changes to your appearance.
Use AI beauty: Click AI. Personalized AI Beauty provides functionality for precise recognition and delicate beautification of each individual facial feature. Everyone is unique in the camera.
Choose a beauty level: Add the same beautifying effect for all the people in the photo. The camera offers six beauty levels.
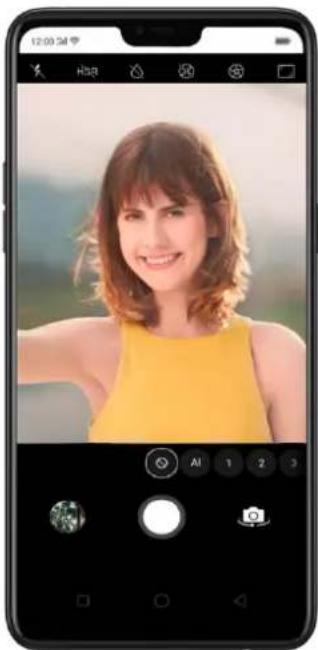
natural_image
Smartphone screenshot displaying a portrait of a smiling woman in a yellow top, with no visible text or symbols on the photo itself.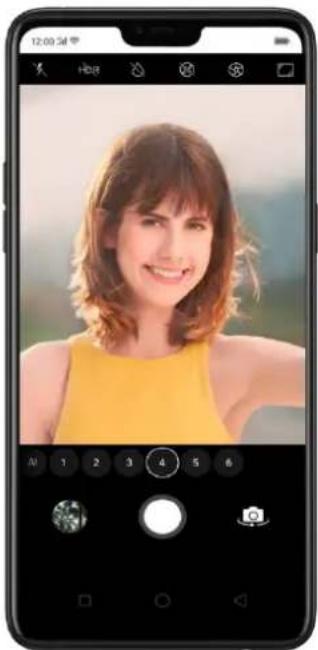
natural_image
Smartphone screenshot displaying a portrait of a smiling woman in a yellow top, with no visible text or symbols on the photo itself.Add an AR sticker. Use stickers to decorate your photo. Choose STICKER, click 📄, then choose an AR sticker.
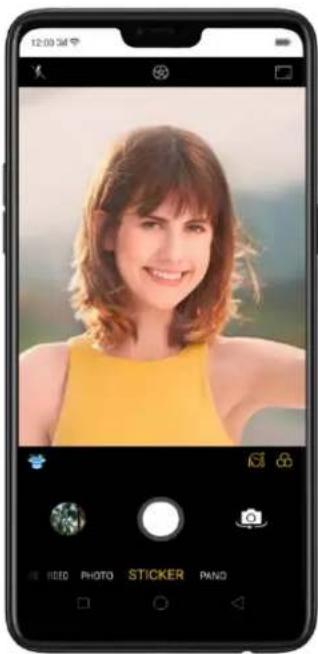
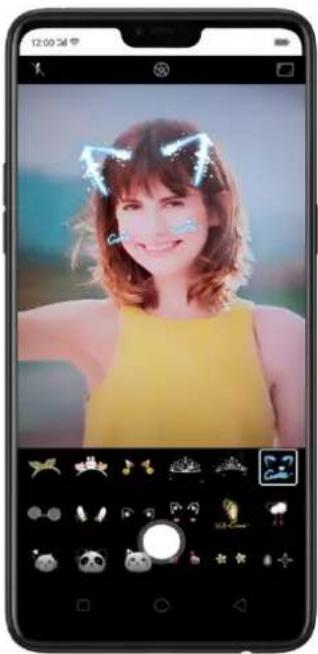
Take a panorama photo. Choose PANO. Click the Shutter button and you'll hear a "Ding" sound. Rotate the phone left or right until the phone sounds again. The photo will be taken automatically.
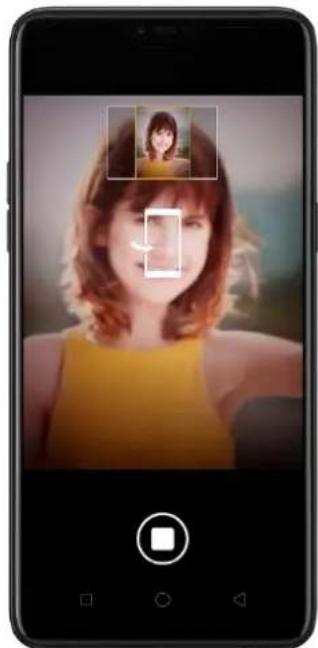
natural_image
Smartphone displaying a portrait of a woman with an inset photo of a person (no text or symbols visible)7.10.4.Shoot video
With Camera you can shoot video, including time-lapse and 10s short videos.
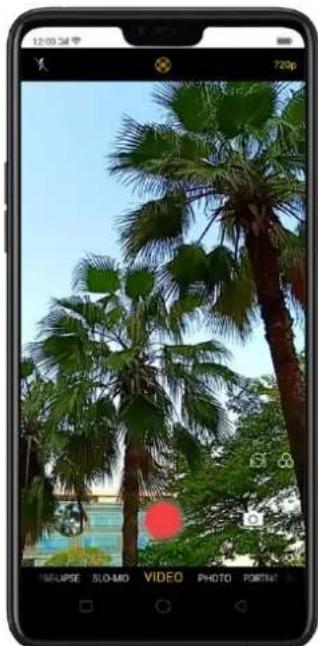
natural_image
Smartphone displaying a photo frame with palm trees and a red circular object, no readable text or symbols on the image itself.Record a video. Choose Video, then click the Record button, or press either volume button, to start and stop recording. You can choose between 720p and 1080P video.
Zoom in or out when shooting video. (rear camera) Toggle 1 or 2. You can also pinch the screen to zoom in and out.
Turn the flash on or off. Click 🎯 to turn on the flash. Click ⚙️ to turn off the flash.
Super vivid mode. Super vivid mode is automatic when you choose 720p. You can just click 📋 to manage to turn it on/off.
Capture time-lapse video. Choose Time-Lapse. It records a scene or object that has a slow state-of-change and turns it into a video that plays back in high speed.
Take photos when shooting a video. Click the Shutter button in the lower-left corner of the screen.
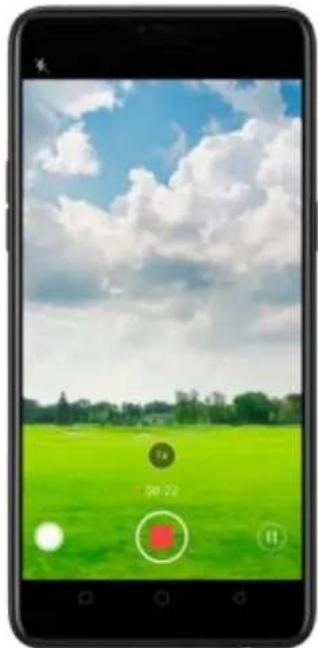
natural_image
Smartphone displaying a photo frame over a green field under a cloudy sky (no readable text or symbols)Use Beauty Mode. Click 📄. The built-in beauty filter will automatically adjust the skin tone, enhance facial features, and make other minor changes to your appearance. The camera offers six beauty levels.
Add a filter. You can apply a filter before you take a photo. Click 🔒, click FILTER, then you'll see a serious of filter options, with each one showing a preview of what it will look like when applied to your photo. Click the filter you want to use. Switch to ORIGINAL to remove the filter.
7.10.5. Camera settings
Camera settings are special options that help you to take pictures or record videos easier. Go to [Settings] > [Camera].
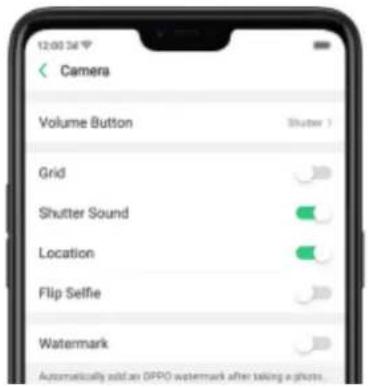
Volume button: Set the Volume buttons to function as a volume or zoom controls, or the shutter release.
Grid: Display grid lines to ensure the camera is leveled.
Shutter sound: Make or mute camera shutter sound when capturing photos.
Location: Tag your photos with geo-locations.
Flip selfie: Mirror flips your front-facing camera photos.
Watermark: Automatically add an OPPO watermark after taking a photo.
7.11. Photos
7.11.2. Photos overview
The Photos app is where you store your photos and videos, including those you've taken with the built-in camera, saved from an app or a webpage, copied from optional storage devices, and more. You can view, share, and edit your photos and videos directly on your phone.
View Photos. You can view the roll of photos in either Camera or Photos. All photos are sorted by the dates and times-they were taken. In Photos, select Year or Month view in timeline to quickly lock the look-up scope. Click an album to view the photos or videos on that album.
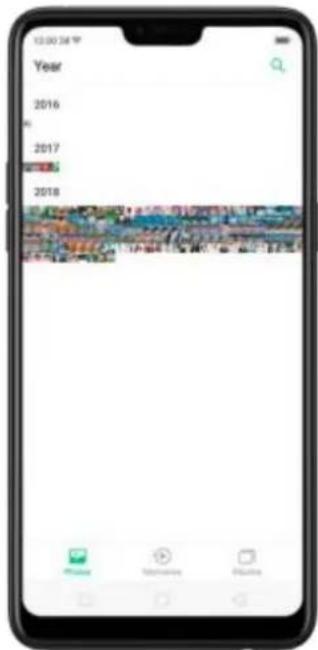
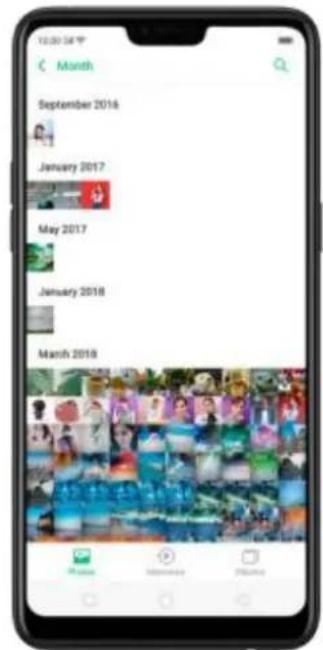
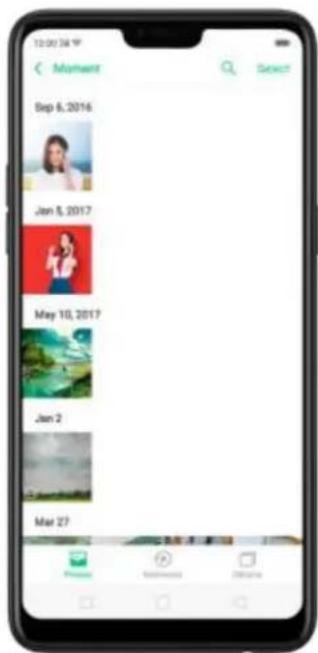
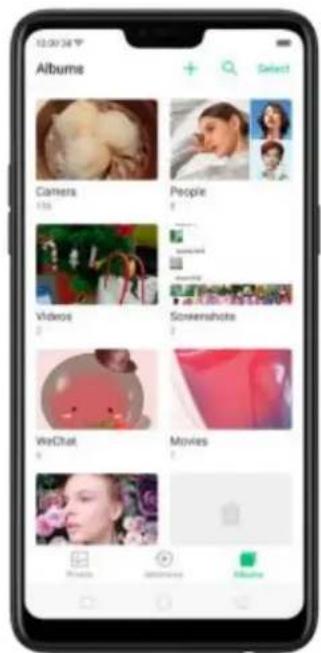
Note: Memories and Stories are terms that can be interchangeably used and doesn't affect the full functionality of the phone.
7.11.3.Albums
Each time you take a new photo, by default, it gets stored in the Photos album. Within the Photos app, there are a number of default albums into which your photos get automatically organized. In addition to these, you can also create your own albums into which you can organize photos further.
You can see your photo albums by clicking Albums at the bottom right of the Photos app.
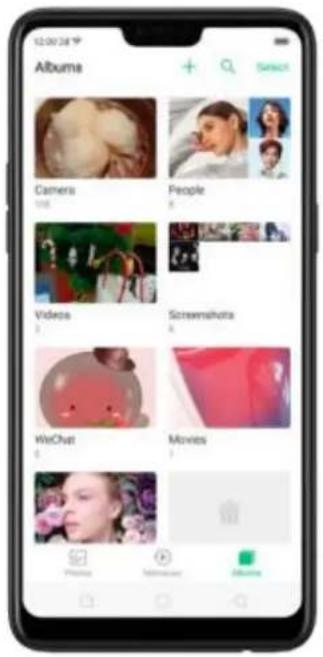
Create a new album. Click +, enter a name, then click Save. Select photos and videos, then click Done.
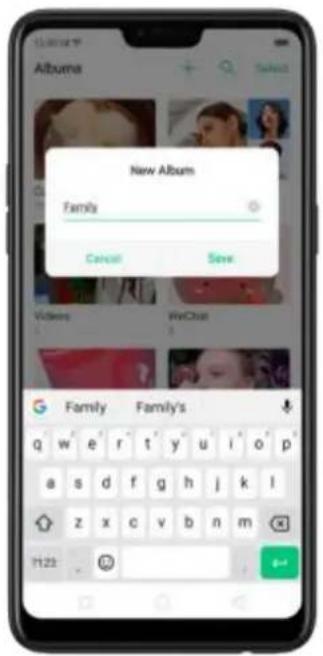
Add items to an existing album. While viewing photos, click Select, select items, click Add to, click Albums, then select an album.
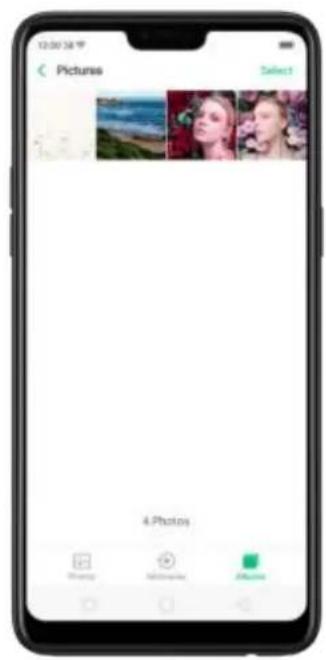
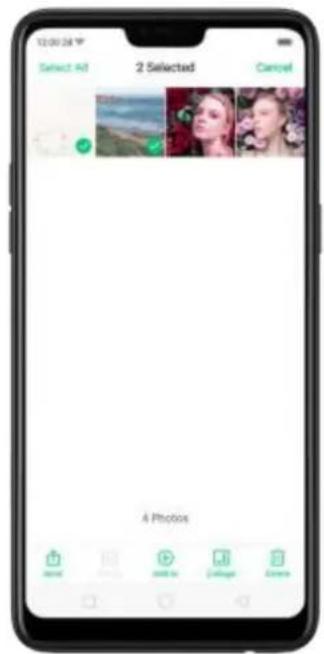
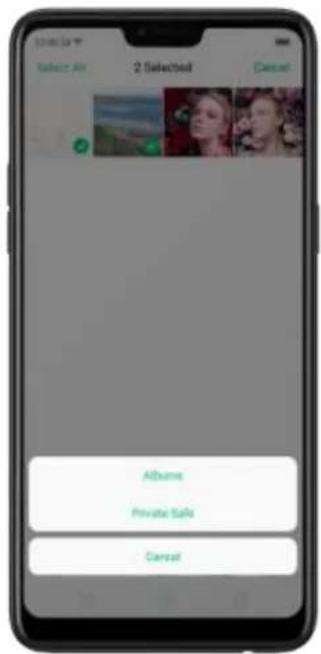
Remove items from an album. From the album screen, click Select, select items, click Delete, then click Delete photo.
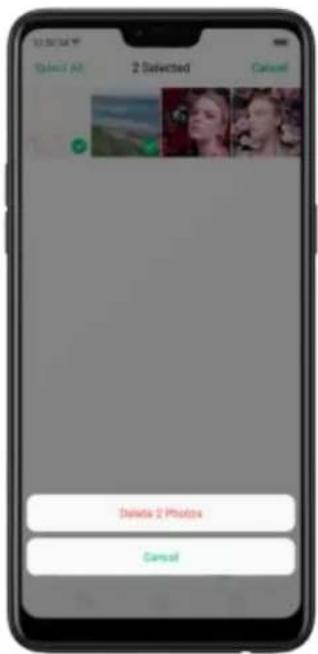
Delete an album. From the Albums screen, click Select, click the album, then click Delete Album. Default photo albums cannot be deleted.
Delete a photo or video from Photos. Click a photo or video, then click Delete Photo, or click Select, select the photos or videos to be deleted, then click Delete. Deleted photos and videos are kept in the Recently Deleted album for 30 days before they're permanently removed.
Restore a deleted photo or video. In the Recently Deleted album, click the photo or video, click Restore, then click Restore Photo or Restore Video to move the item back to the Photos. Or from the Recently Deleted album, click Select, select the photos and videos you want to restore, then click Restore.
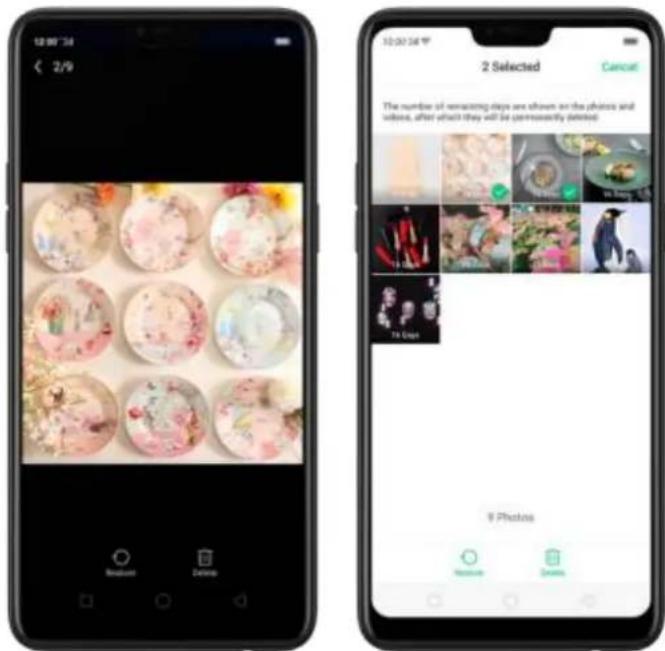
Smart album search and cleanup. You can search your photo library depending on the date, location, people, and content of the photos on your device. In Phone Manager, you can also clean up photos in batches such as similar and blurry photos. See Smart album search and cleanup.
Optimized album management.
- In addition to the frequently used social apps, images downloaded from third-party apps will be saved in Rarely-used Album. You can put other albums into Rarely-used Album by clicking Select > Set as rarely-used.
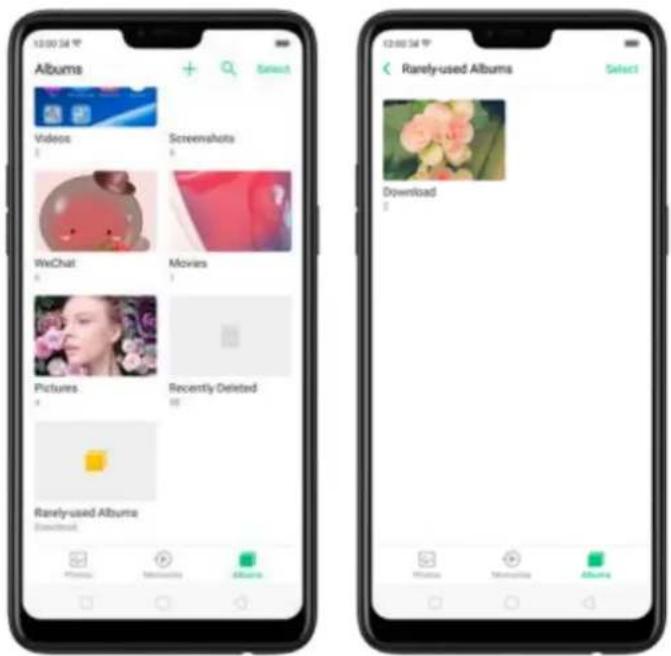
- Your photos will be put into sequential order by modification time. In other words, once an old photo or video has been modified, it will be saved as the latest photo or video.
- Photos downloaded from spam applications will be controlled by phone's blacklist and will not be displayed in albums.
Note: Memories and Stories are terms that can be interchangeably used and doesn't affect the full functionality of the phone.
7.11.4.Stories / Memories
Using the on-device facial recognition and AI detection of what's on your images, your phone can combine photos into themed mini-movies complete with transitions and a soundtrack. For instance, ColorOS is going to put together an album about your last vacation in Europe, or an album of your kids growing up. You can also edit them and share them with others.
Play a Memory movie. Open Photos, click Memories, click a Memory movie, then click ☑. The movie will play in landscape mode by default. To pause, click the movie then click II.
Note: Your phone categorizes your photos weekly while your phone is plugged and locked.
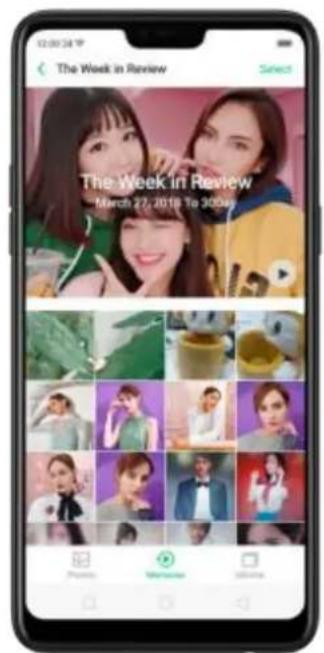
Customize a Memory movie. Click a Memory movie while it's playing, then click Edit to do the following:
- Change the theme: Click Theme, then click a theme or swipe the themes left or right to pick a new one, such as Joyful, Cozy, and more. For each theme, there is a music of the Memory movie.
- Choose different music: Click Music, then swipe the music left or right to pick a new one. You can also use your local and saved music.
- Choose a cover: Click Cover, then click the photo you want to use.
• Edit the title: Click Title, edit the title, then click Save.
- Choose or delete photos: Click Photos, click +, then select the photos you
want in the movie. Click 📊 to remove the photos from the movie.
- Change the movie length: Click Length, then scroll the wheels to change the length.
Share a Memory movie. Click a Memory movie while it's playing, then click Send.
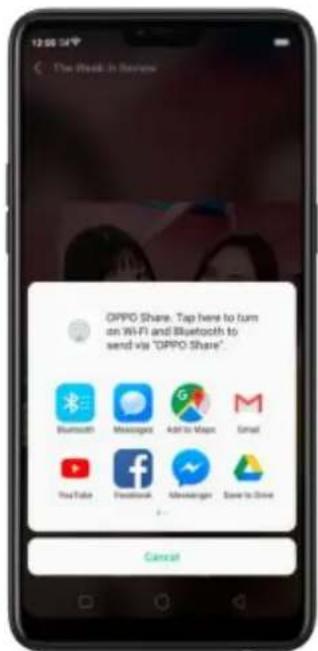
Note: Memories and Stories are terms that can be interchangeably used and doesn't affect the full functionality of the phone.
7.11.5.People
In the Photos app, there's an album called "People." It uses facial technology to identify the people in the pictures or those with combine identifications, then group pictures of the same people together. You can name or rename a People album, hide People albums, merge People albums into one, and more.
*Your phone generates People album while your phone is plugged and locked.
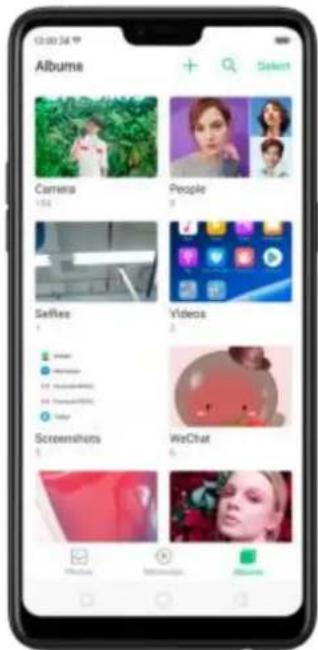
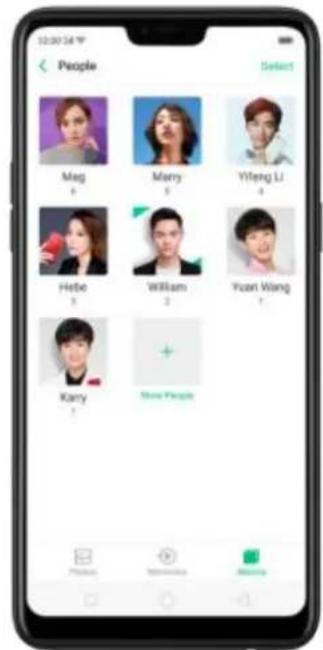
Name or rename a People album
If a profile is unnamed, click the People album, click "+ Add Name", then type in the name you want to use and click Save.
If a profile has a wrong name, click the People album, click the name, then type in the name you want to use and click Save.
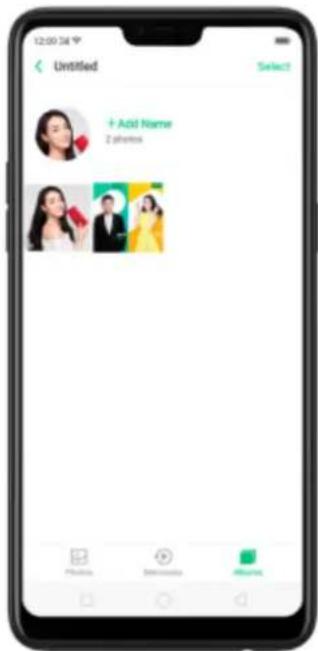
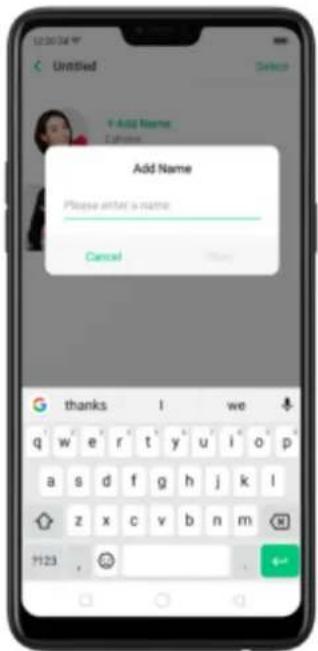
Hide, display, and merge People albums
Hide People albums. Click Select, select the People albums, then click Hide. The hidden albums are collected in More People.
Display People albums. To display the hidden albums, click More People, select the People albums, then click Display.
Merge People albums into one. Click Select, select at least two People albums, then click Merge.
Remove misidentified photos from an album
Click a People album you want to remove photos from, click Select, select the misidentified photos, then click Wrong Person. The photos will be moved to More People.
Set a cover of the People album
Click a person's album, click the portrait, then choose the photo you want as the cover.
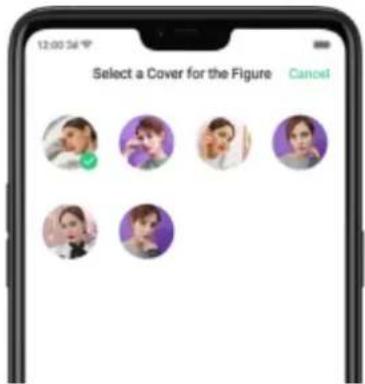
Add photos to a People album
-
Click a People album, click Select, select the photos you want to add to the other album, and then click Wrong Person. The photos will be collected in an album in More People.
-
In More People, click Select, select the album, and then click Display.
-
Go to the People albums' screen, click Select, select both the album and the one you want to add the photos to, and then click Merge.
Note: Memories and Stories are terms that can be interchangeably used and doesn't affect the full functionality of the phone.
7.11.6.View and use photos and videos
View your photos and videos. Click Photos, and then click a photo or video. Click to play a video. Or click Camera, and then click the thumbnail on the lower-left corner of the screen.
View a photo at full screen. Click a photo, and then click the screen to hide the controls.
View the next or previous photo. Flick left or right.
View a photo in landscape orientation. On Control center, turn [Portrait Orientation] off, then rotate your phone sideways. The photo automatically reorients and, if it's in landscape format, expands to fit the screen.
Zoom in or out. Double-click or pinch a photo to open or closed. Drag to see other parts of the photo.
See photo and video details. Click a photo or video, and then click Ⓤ.
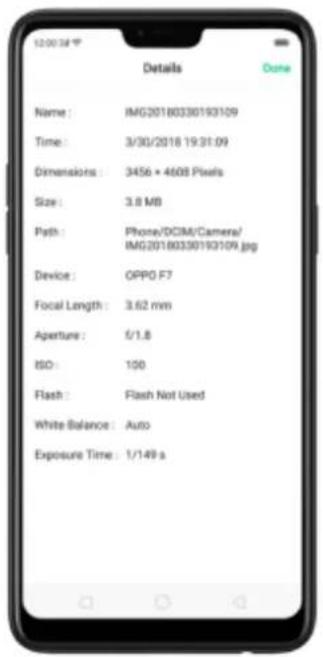
Send a photo or video. Click Send, and then choose where to send your photo or video.
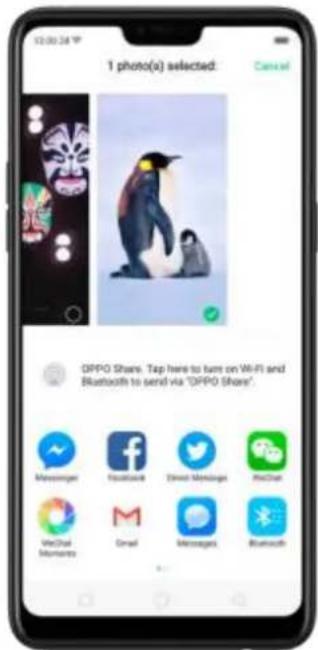
Use a photo as wallpaper. Click a photo, click Set as, and then click Set as wallpaper. Drag the photo to pan, or pinch the photo to zoom in or out, until it looks the way you want. Then click Set as to set the wallpaper as your Home screen or Lock screen.
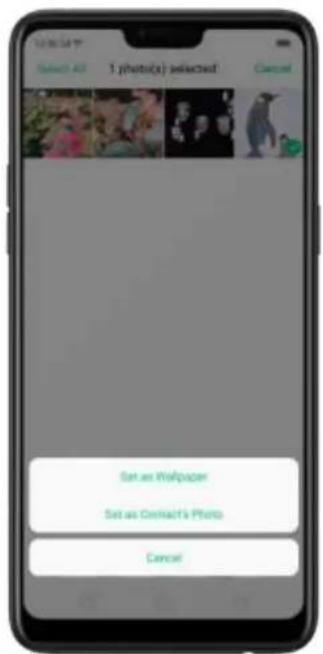
Assign a photo to a contact. Click a photo, click Set as, click Set as contact's photo, select a contact, crop the photo, and then click Done.
natural_image
Two penguins, one adult and one child, sitting side by side on a smartphone screen (no text or symbols visible on the image itself)Add a photo or video to an existing album. Click Add to, and then select the album.
Edit the photo. Click Edit. You can edit your photos using a set of professional editing tools, including cropping, adding text and filters, and more. See Edit photos and videos.
natural_image
Smartphone displaying a photo of two penguins on snowy ground, with no visible text or symbols on the image itself.Delete a photo or video. Click Delete.
Combine the photos. From the Photos screen, click Select, select the photos, then click Collage.
Choose a collage template, then click Done.
natural_image
Mobile phone screenshot showing a penguin perched on a branch, with a close-up of its head and foliage (no text or symbols visible)7.11.7.Edit photos and videos
You can edit your photos and videos on the Photos app directly using a set of professional editing tools, including cropping, adding text and filters, and more.
Edit a photo. Open the Photos app and view the photo full screen, click Edit, then click a tool. Click Compare to view changes. When you're finished, click Done.
- Auto Enhance: Enhances the photo's light levels, contrast, saturation, color temperature, and other qualities to make the photo more visually balanced.
- Crop and rotate: To crop the photo, click and drag a corner or side of the photo, or click Ratio and apply a preset aspect ratio to the photo, such as 1:1 or 9:16. To rotate the photo, move the wheel to your desired angle, or click Rotate to rotate the photo 90 degrees. Click Undo to reset these changes.
• Filter: Add a color filter to the photo, such as Matcha, Autumn, and Lime.
- Beauty: Click One-tap to Beautify to automatically improve both the appearance and the shape of your face. You can choose from 6 beauty levels. To beautify part of the face, choose a tool and make adjustments to the face, such as whiten skin, remove unwanted blemishes, enlarge eyes, and more.
- Doodle: Write or draw on the photo. You can adjust colors and thickness of your handwriting.
- Text: Click the photo to add the text. You can adjust colors and thickness of your text. Click and drag the text to move its position; click and drag ⏰ to adjust
the font size; click and drag ⏻ to rotate the text; click ✗ to delete the text.
- Adjust: Manually adjust the photo's brightness, contrast, saturation, and color temperature.
- Mosaic: Pixelate part of the photo. You can change the pattern and thickness of the mosaic.
- Blur: Set the blur effect over the photo with circle or straight lines. The area within the circle or lines represents the non-blur part. Click the screen and drag the circle or the lines to select where to blur. Drag the slider to left or right to adjust the blur Intensity.
- Eraser pen: Erase people, watermarks, and any unwanted objects that's on your photo.
Edit a video. Open the Photos app, click the video, click Edit, then click a tool. When you're finished, click Done.
natural_image
Smartphone displaying a foldable smartphone with colorful wallpaper, shown in a black smartphone (no visible text or symbols on device)- Crop: Drag either end of the bar to cut out the parts of the video you don't want to save. You can only save continuous segments of the video.
• Filter: Add a color filter to the photo, such as Sunlight, Midsummer, and Polaroid. - Soundtrack: Add a soundtrack to the video. You can also use your local and saved music. Click 📋 to turn off the original sound of the video.
- Text: Click 📄 to add overlay text on the video. Click and drag the text to move its position. Drag the frame viewer to control when the text showed up.
• Watermark: Add a watermark with the location and date of the video. If the video
doesn't contain the details of location and date, you cannot add the watermark.
New Features of video editor
With ColorOS 5.2, impress your social media followers and friends with your videos. You can now add close-up and pulsation on the videos you have taken to make it more fun and artsy.
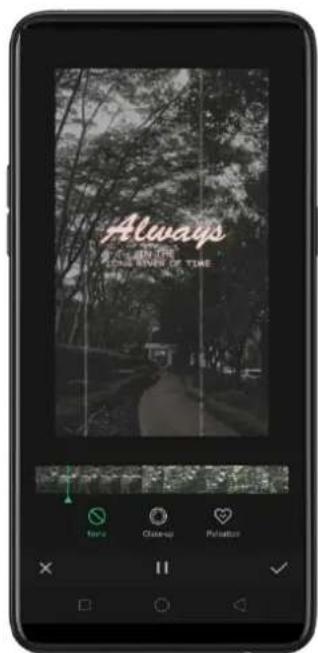
Speed of the video
-
Record a video first. Open your camera app, choose Video then click the Record button, or press either volume button, to start and stop recording. You can choose between 720p and 1080p.
-
Once you are done with the recording, go to [Photos app] > [Albums] > [Video Folder] then choose the video that you want to edit.
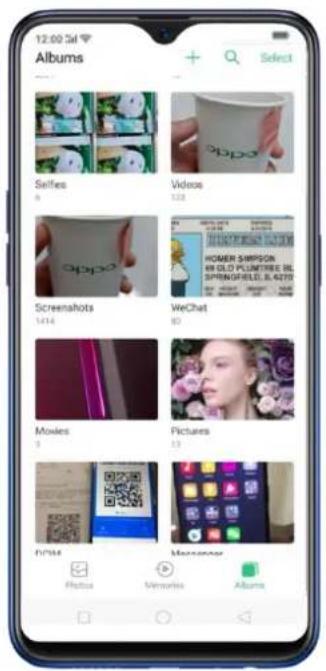
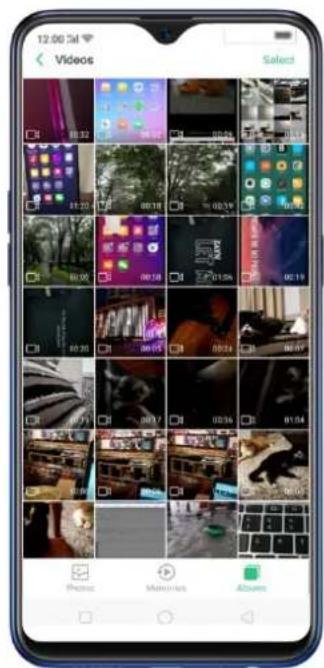
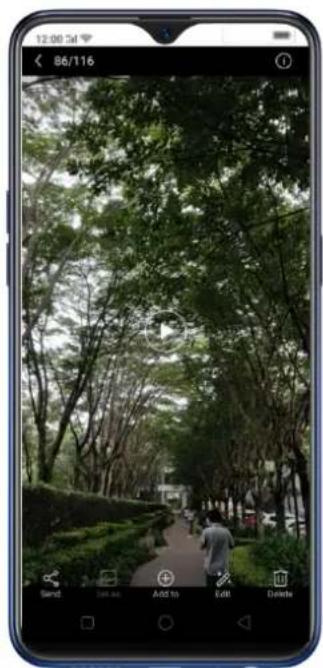
natural_image
Smartphone screenshot showing a park scene with trees, a paved path, and a person walking (no visible text or symbols)- Click Edit and you will be asked what speed you would like the video to play. The slowest is 0.25X and fastest is at 2X. The normal one is 1X. Once done choosing the speed, click Next.
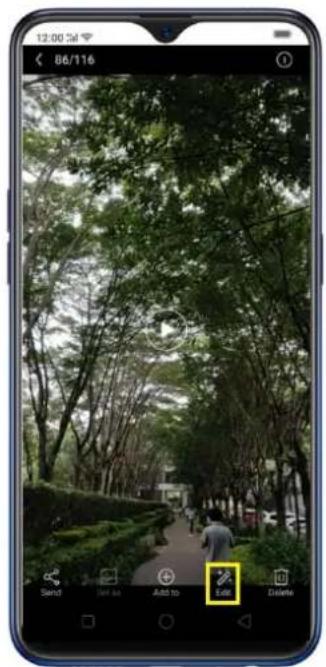
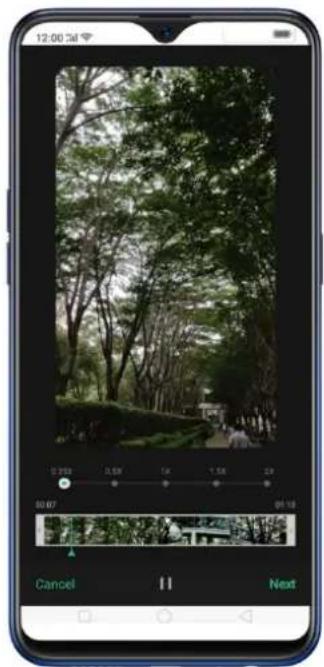
natural_image
Smartphone displaying a forest scene with trees and a park, showing a close-up of the scene (no visible text or symbols on the image itself)Theme of the video
To choose a theme for your video, click [Edit] > [Choose the Speed] > [Next] > [Themes]. You can choose from None, Old Days, Lens, Memory, Tasty Food/Delicacy, Joy, Travel, and Simplicity.
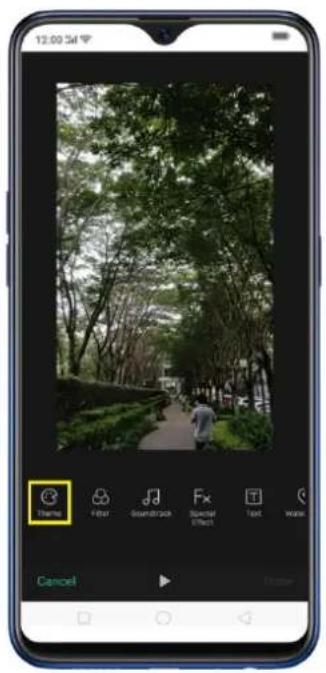
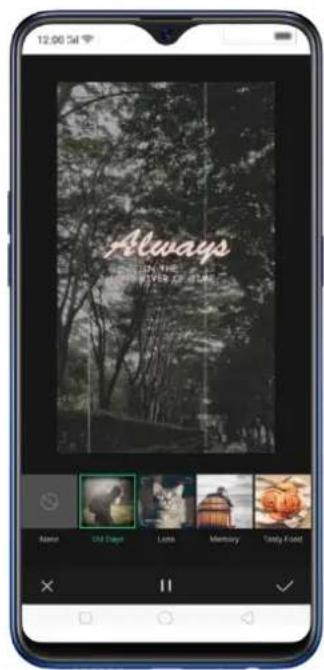
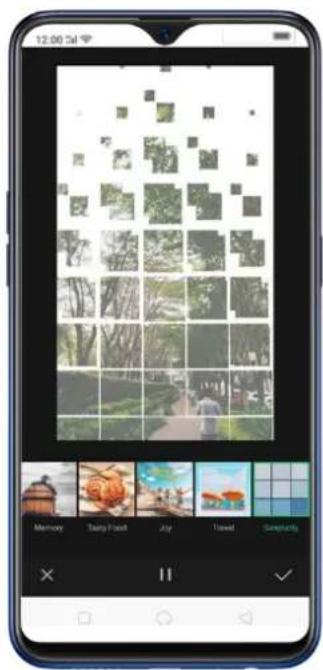
Click ▶ / ✗ to play and pause the preview and click √ when you have chosen a theme, then click Done. Click ✗ to exit Theme and click Cancel if you don't want to add a theme to your video.
Add Special Effect to the Video
To choose a special effect for your video, click [Edit] > [Choose the Speed] > [Next] > [Fx Special Effect]. You can choose from None, Close-up, and Pulsation.
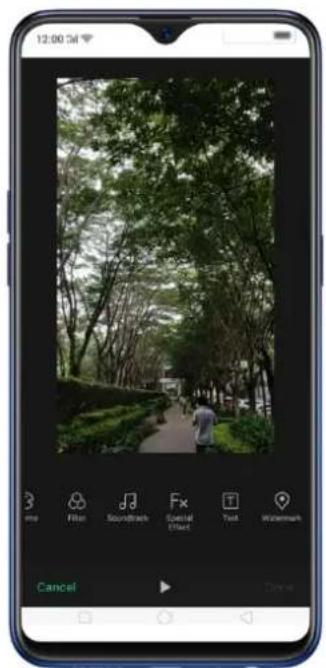
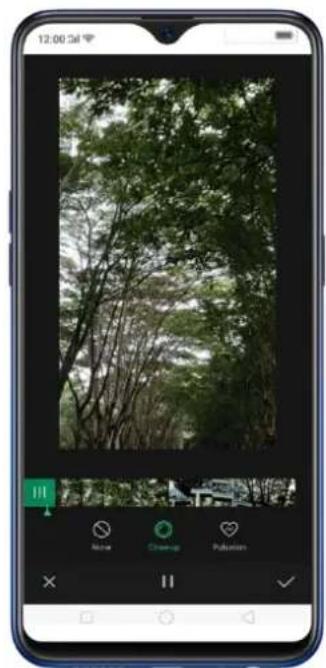
natural_image
Smartphone screenshot displaying a forest photo with green trees and a small building, no visible text or symbols on the image itself.- Click ▶ / ✗ to play and pause the preview and click √ when you have chosen a special effect, then click Done. Click ✗ to exit Fx Special Effect and click Cancel if you don't want to add any special effect to your video.
7.12. Music
7.12.2.Music
Use the Music app to enjoy music stored on your phone. You can also create playlists, set songs as ringtones for incoming calls, and more.
To see what you can do with your music, click to the right side of the song name.
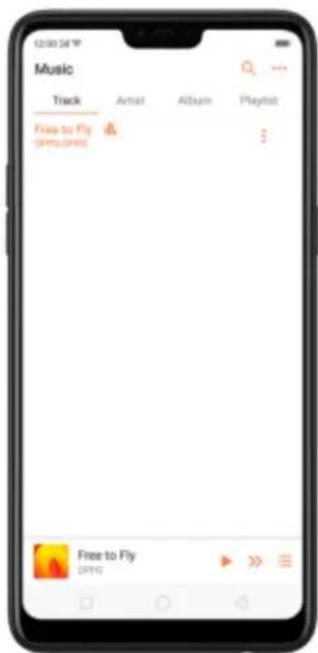
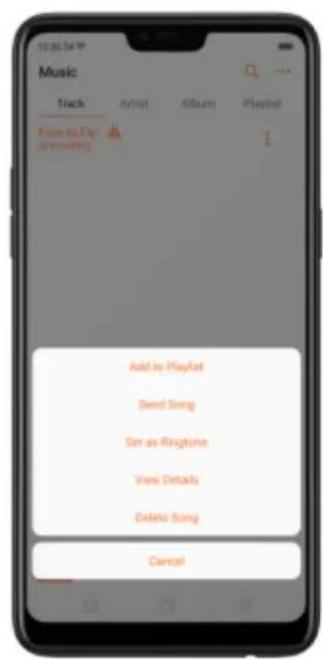
Add to playlist. Add a song to an existing playlist. You can also create a new playlist.
Send song. You can share a song with your friends using multiple ways.
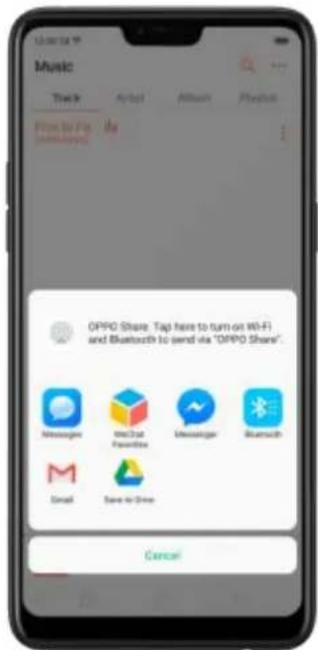
Set as ringtone. You can set a song as a ringtone for all incoming calls and messages, or for a contact. You can also set a song as an alarm tone.
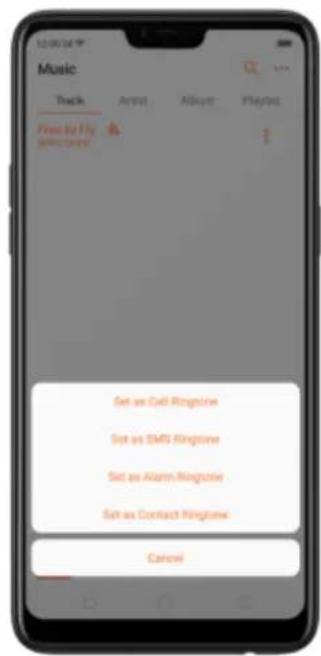
View details. Click to view the name, artist, album, format, size, and storage location of a song.
Delete song. Remove the song from the playlists and your phone storage.
7.12.3.Change sort mode
By sorting your playlist, you can easily order the songs on your phone.
Change the order of your songs. From the Music screen, click Track, click •••• in the upper-right corner of the screen, and then click Select Sort Mode. Your songs can be sorted alphabetically, by time when the song is added, or by folders the songs are in.
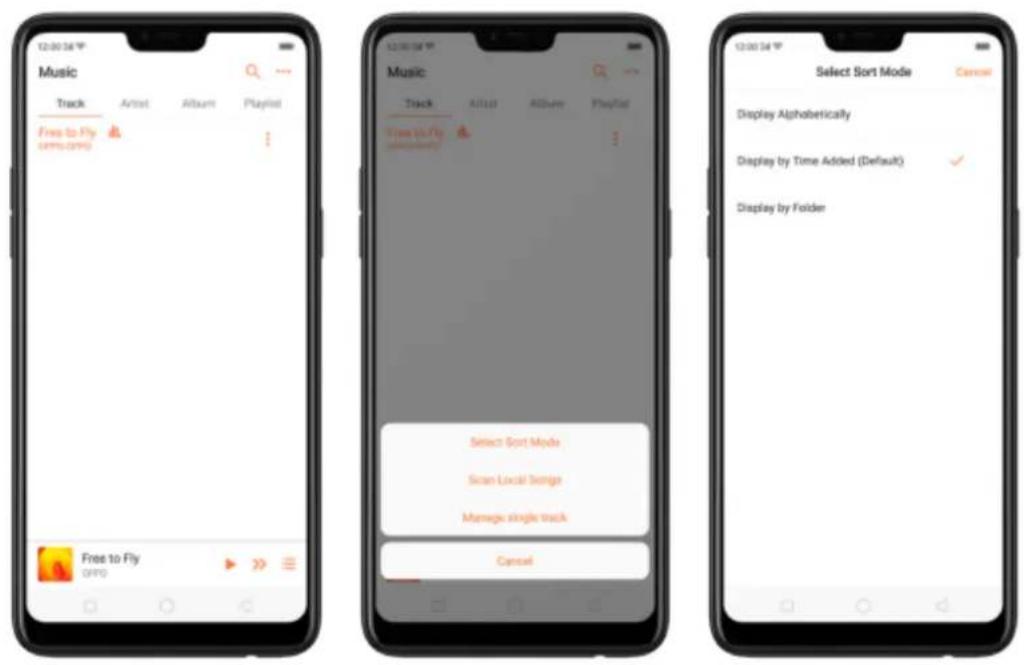
7.12.4.Scan local songs
The Music app contains all music-related materials on your phone storage. To manually scan for local songs, or choose which songs can be displayed on your list, do the following:
Scan all local songs. Click •••• on the upper-right corner of the Music screen, then click Scan Local Songs. Your phone will automatically start scanning.
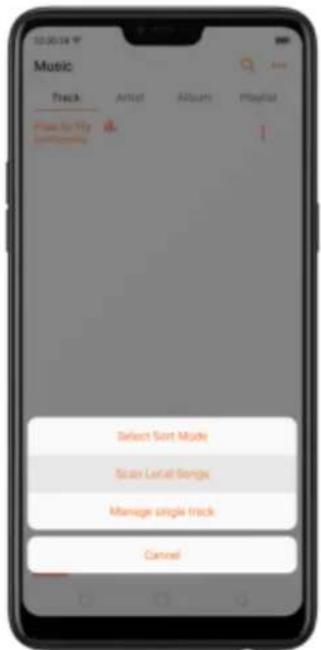
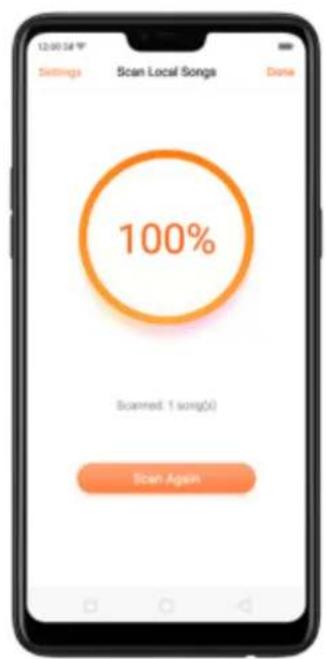
Scan specific folders. Click Settings, click Scan specific folders, and then choose the folders you want the phone to scan for. Go back to the Scan Local Songs screen, and then click Scan again.
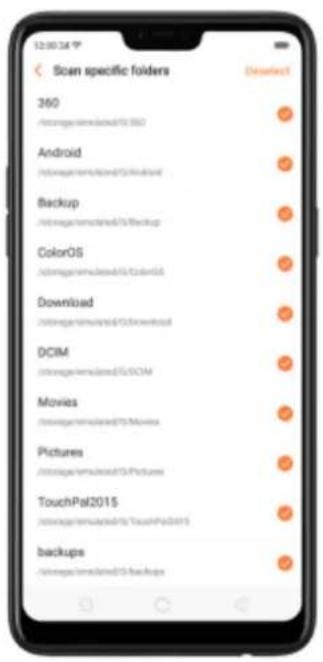
Filter audio files. To filter tracks that are too short (under 60 seconds) and too small (under 100KB), toggle the sliders to orange.
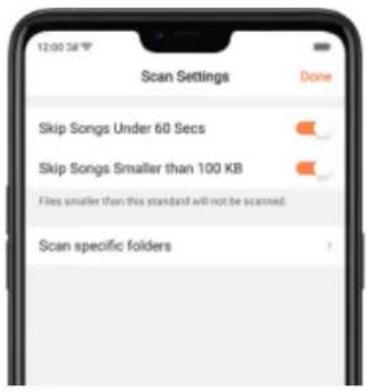
7.13. Videos
Use Videos to watch videos you've downloaded or taken with the built-in camera.
Play a video. Click Videos on the Home screen, then click the video.
Control video playback. Click the screen to show or hide the controls.
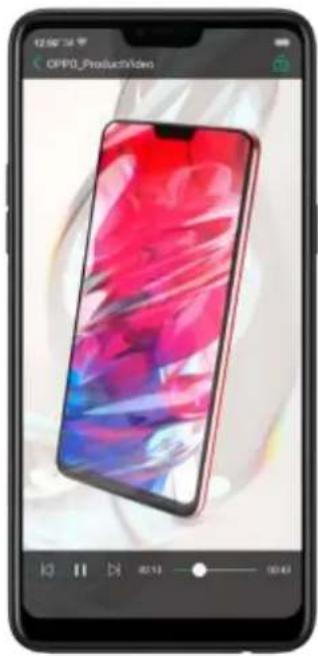
natural_image
Smartphone displaying a colorful abstract screen with red and blue patterns (no visible text or symbols on screen)TO
Play or pause a video
DO THIS
Click ▶ or ll.
| Raise or lower the volume | Click the volume buttons on the side of the phone, or swipe your finger up or down on the right side of the screen. |
| Increase or dim the brightness | Swipe your finger up or down on the left side of the screen. |
| Skip to the next or previous video | Click ▶ or ▶. |
| Rewind or fast-forward | Swipe your finger left or right on the screen. |
| Start a video over | Click ▶ twice quickly. |
| Skip to any point in the video | Drag the play head left or right. |
| Lock the screen rotation and disable bottom keys | Click ▶. |
Sort videos. From the video screen, click → and choose to sort by name, added date, or duration.
Send videos. From the Videos screen, click Select, choose videos, click Send, then choose an option for sending the video (for example, Messages, Gmail, third-party apps, and so on).
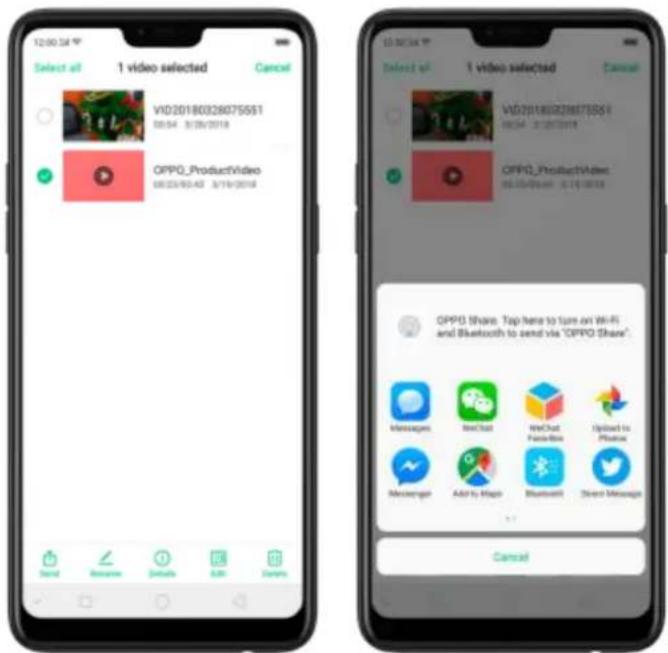
Rename a video. Click Select, choose a video, and then click Rename. Enter the name, then click Save.
See details about a video. Click Select, choose a video, and then click Details.
Edit a video. Click Select, choose a video, and then click Edit. See Edit photos and videos.
Delete videos. Click Select, choose videos, click Delete, and then click Delete videos.
7.14. Theme Store
7.14.2. Online phone theme
A phone theme refers to the general look and feel of the phone's user interface. It changes color schemes for background images, icons, and more. The entire phone's functions will not be affected.
Change the phone theme. Click Theme Store on the Home screen, then click Themes. Click your desired theme, then click Download. Choose to apply the theme you've downloaded to the Home screen, Lock screen, or Home screen icons, then click Apply and wait a few seconds for the changes to apply.
Tip: Your phone will suggest similar themes based on the ones you've viewed or downloaded.
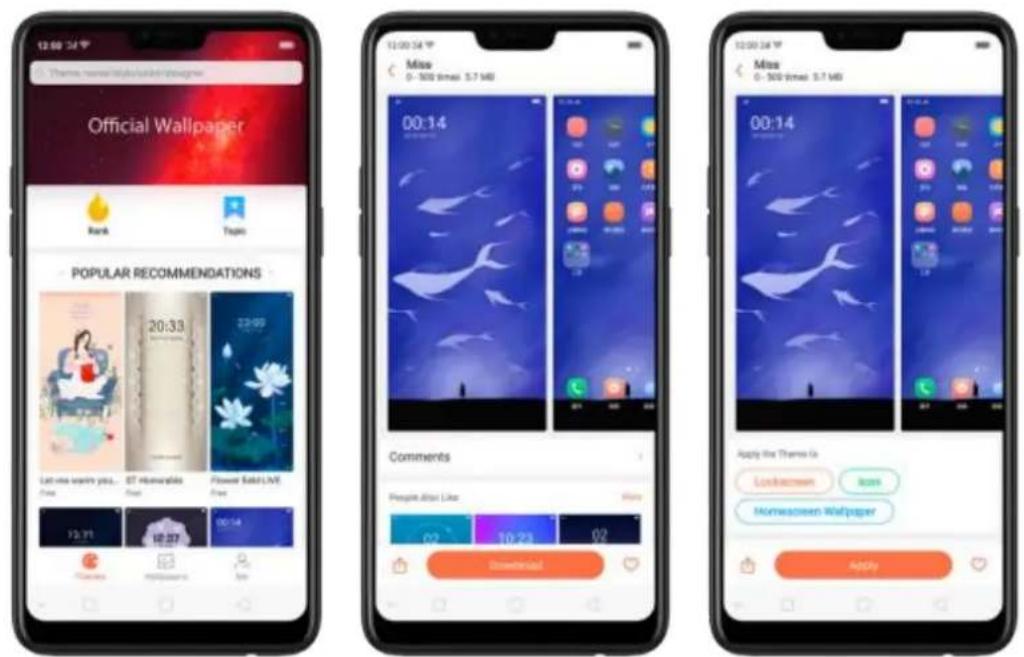
Search a theme. Click the search bar on the top of the screen, enter the theme name, then click Search.
7.14.3. Online wallpaper
In addition to using your photos as wallpaper, you can get some more wallpaper online from
Theme Store.
Change the wallpaper. Click Theme Store on the Home screen, then click Wallpapers.
Click your desired wallpaper, click Download, and then click Apply.
Drag to move the image. Or pinch to zoom in and out, so the image fits the screen. Click Set as to set the wallpaper as your Home screen or Lock screen.
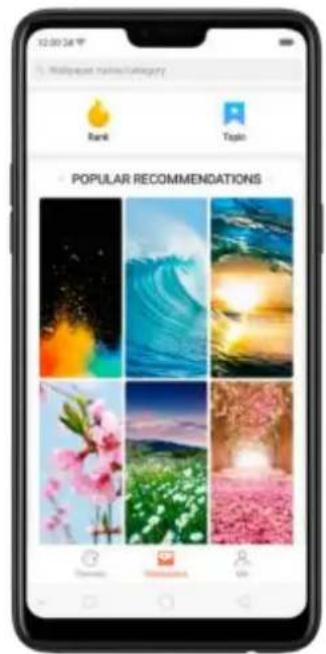
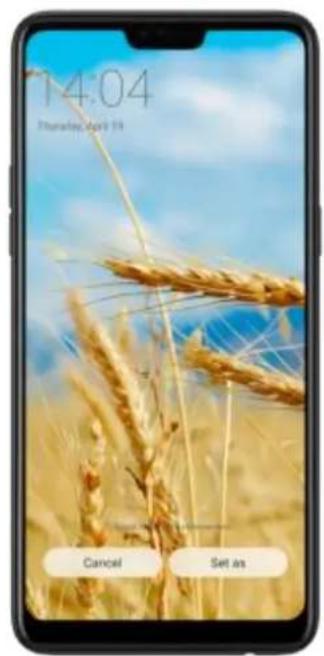
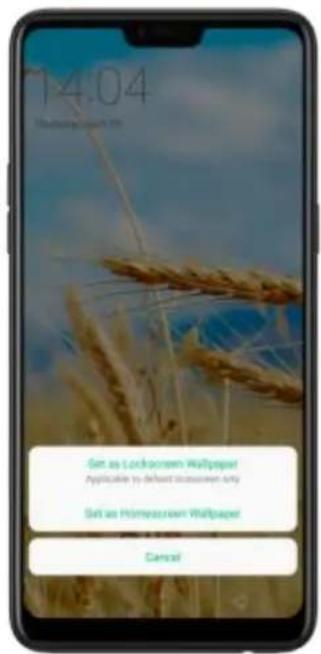
Search a wallpaper. Click the search bar on the top of the screen, enter the wallpaper name, and then click Search.
7.14.4.Manage your downloads
You can view and delete your downloaded themes and wallpapers.
View download history. Click Theme Store, click Me, then click Download Management. You'll see all your downloads on the phone. Click Clear History to clear all download histories. Click View Download History, sign in your OPPO ID, then you can see your download histories within two years that are stored on the cloud.
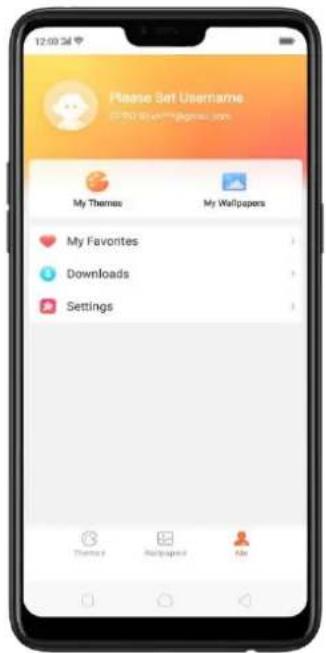
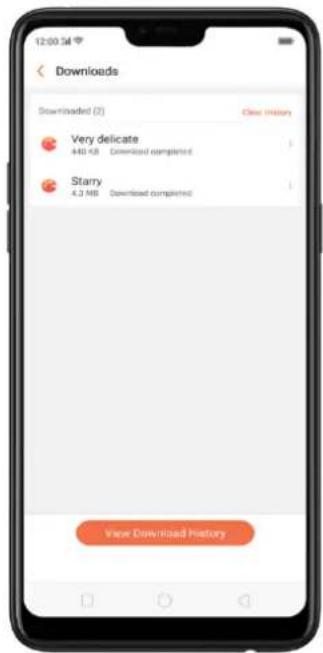
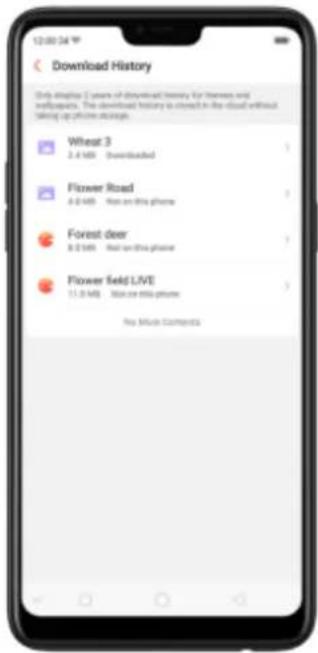
Change phone themes and wallpapers. Under Download Management screen, click a theme or wallpaper, and then click Apply. See Change the wallpaper and theme on your OPPO smartphone.
Delete downloaded themes and wallpapers. Click Me, then click My Themes or My Wallpapers. Click Edit, select the themes and wallpapers you want to delete, then click Delete.
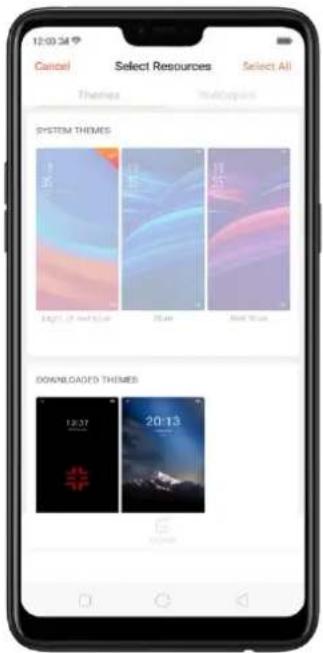
7.15. Clock
7.15.2.Set Alarm Clocks
With the Clock app, you can set an alarm that plays a sound at a specific time, so you will be reminded to do things in time and your doze won't go overtime. You can also set multiple alarms, set each alarm to repeat on days you specify or to sound only once.
Set an alarm. Click Alarm and click +, scroll wheels to change the time, then adjust any of the following settings:
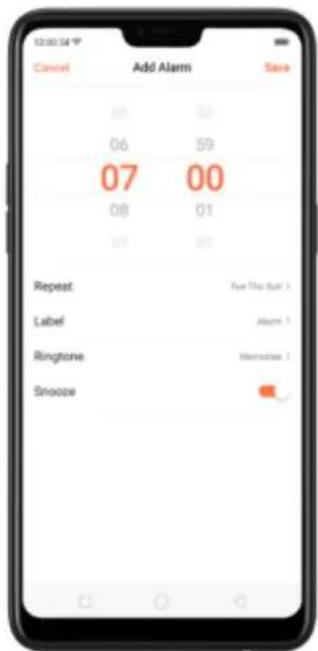
• To set the alarm to repeat on certain days, click Repeat and choose the days.
- To give the alarm a description, click Label. Your phone displays the label when the alarm sounds.
• To choose the ringtone that sounds when the alarm goes off, click Ringtone.
• To set whether the alarm gives you the option to hit snooze, turn Snooze on or off.
If Snooze is on and you click Snooze when the alarm sounds, the alarm stops and then sounds again in five minutes.
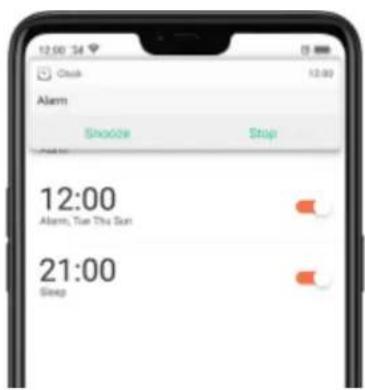
Turn an alarm on or off. Toggle the slider to orange or white. If at least one alarm is set and turned on, 📋 appears on the status bar at the top of the screen.
Tip: The alarm still works even if your phone is turned off.
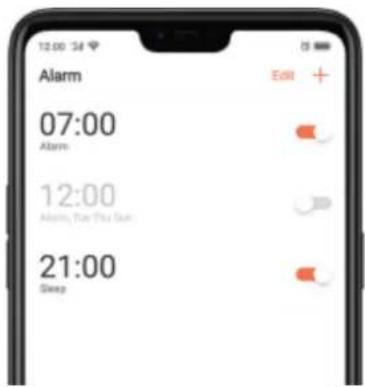
Change settings for an alarm. Click the alarm.
Delete an alarm. Click Edit, then click next to an alarm and click Delete. Or swipe left on the alarm, then click Delete.
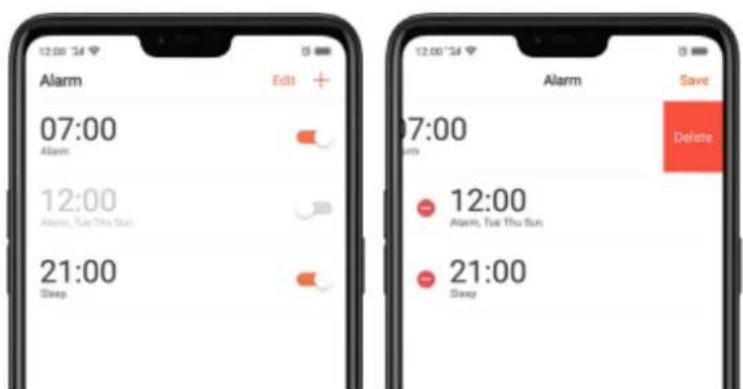
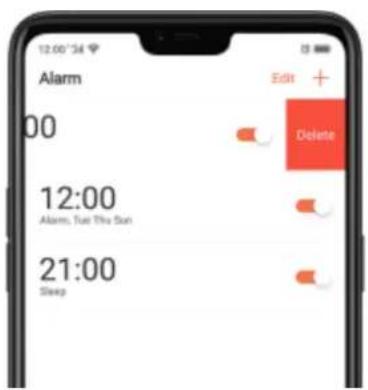
7.15.3.Add and view clocks for locations around the world
You can add multiple clocks to show the time in major cities around the world.
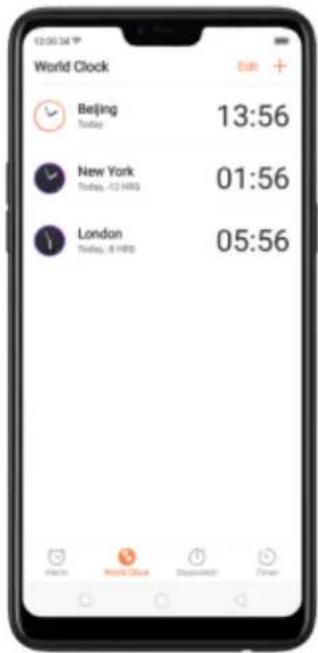
View clocks. Click World Clock. If the clock face is white, it's daytime in that city. If it's black, it's nighttime.
Add a clock. Click + and type the name of a city. Cities matching what you've typed appear below. Click a city to add a clock for that city.
Delete a clock. Swipe left on the clock, then click Delete. Or click Edit, then click next to a
clock and click Delete.
Rearrange clocks. Click Edit, then drag next to a clock to a new place in the list.
7.15.4.Use the stopwatch
You can measure the duration of an event with the stopwatch.
Use the stopwatch to measure time. Click Stopwatch. Click Start to start the stopwatch. To record lap times, click Lap after each lap. Click Stop to pause the stopwatch. Then click Start to resume, or click Reset to reset the stopwatch to zero.
If you start the stopwatch and go to another application, the stopwatch continues running in the background.
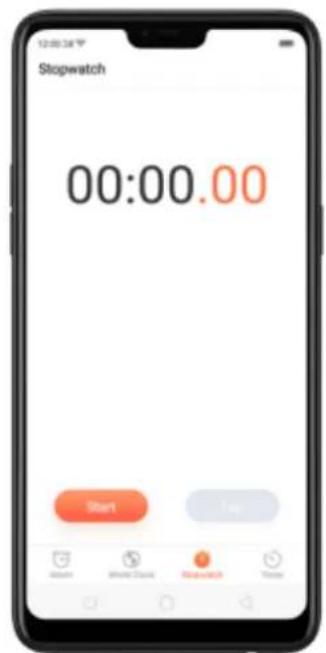
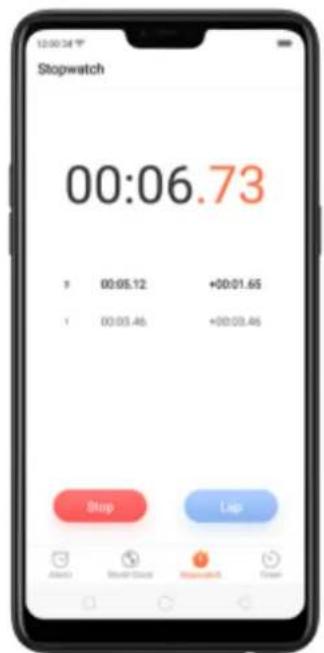
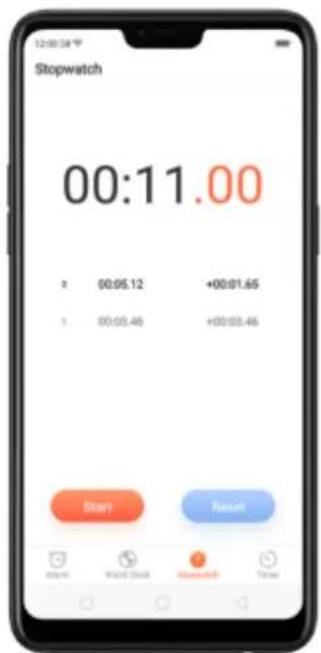
7.15.5.Set the timer
In the Clock app, you can count down from a specified time with the timer.
Set and start the timer. Click Timer, scroll the wheels to set the duration of time, then click Start.
If you start the timer and go to another application, the timer continues running in the background. You can cancel or pause the timer at any time before it ends. When the timer ends, your phone sounds and vibrates to prompt you that it is already time to stop the timer.
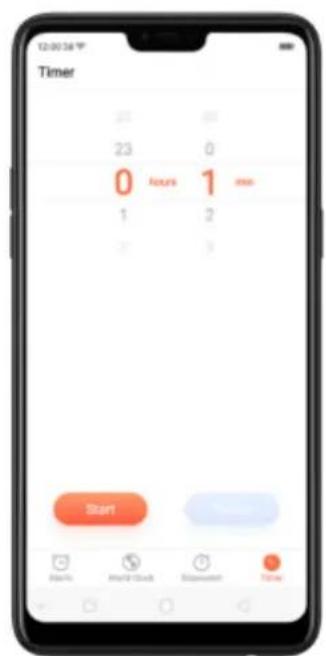
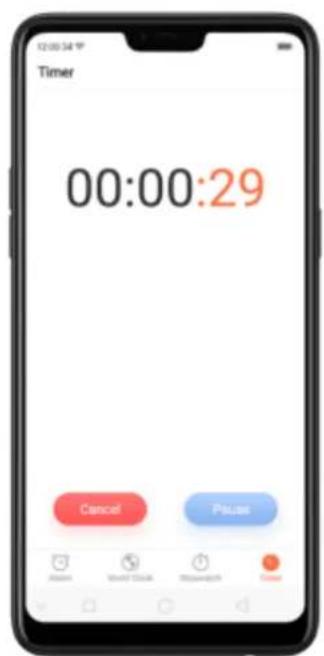
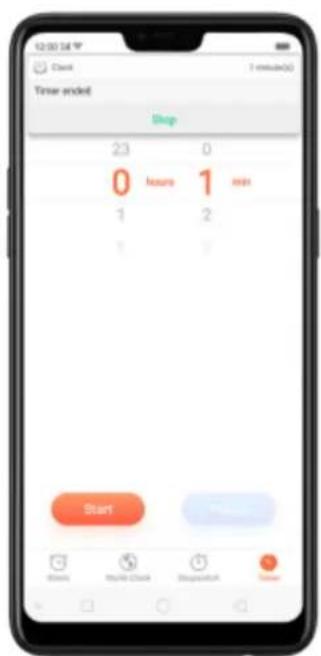
Customizing Timer
You can now set a timer or countdown for activities that you usually do. You don't need to manually set it each time you'll do something. You can simply save it on the timer and click start when you are ready.
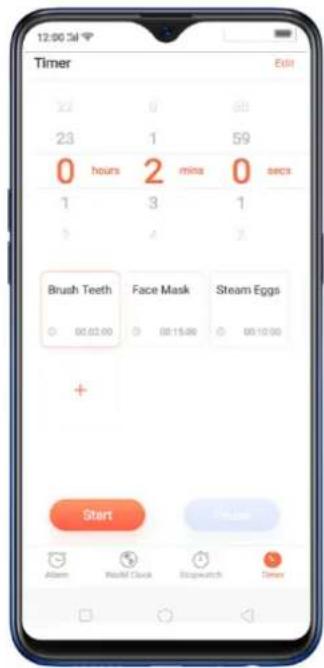
Customizing timer
- On your home screen, click on the Clock app and then click Timer.
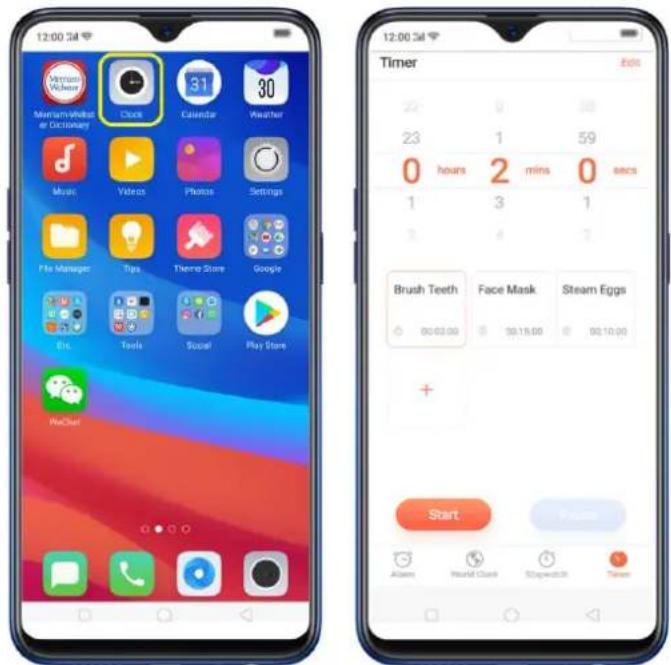
- There are 3 available activities by default. To change it, choose the activity you want to change then click Edit at the top-right portion.
- Click 🔒 to edit the activity, then change the name and time. Click Save, then click Done.
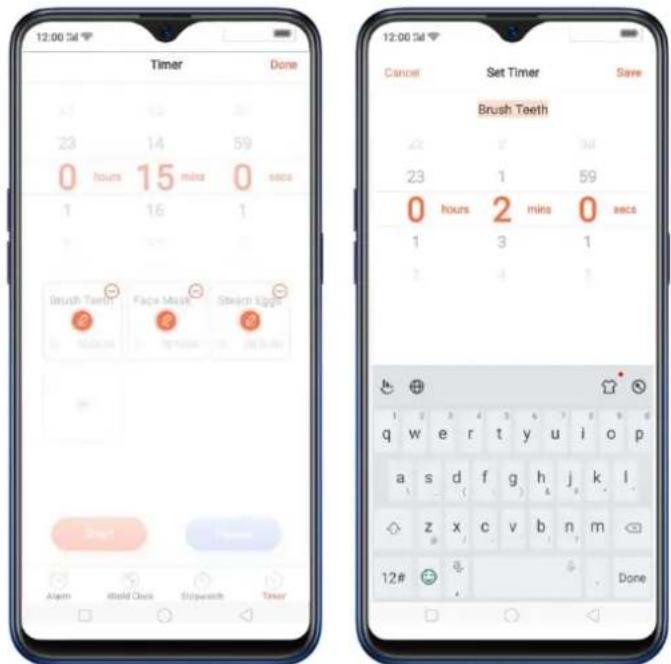
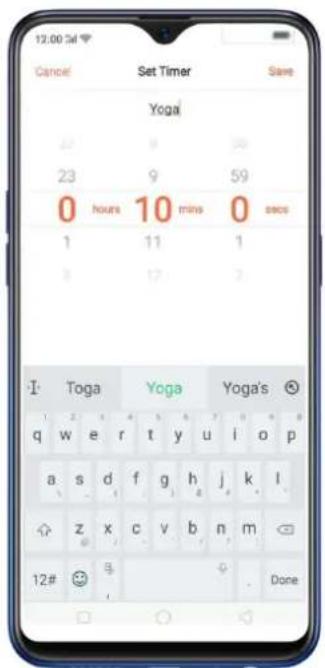
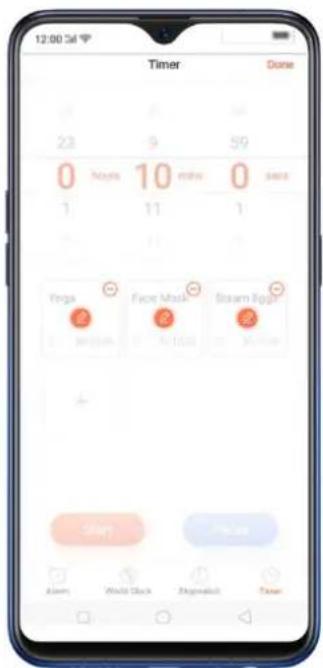
- Click Start so timer starts and choose to either Pause or Cancel the timer.
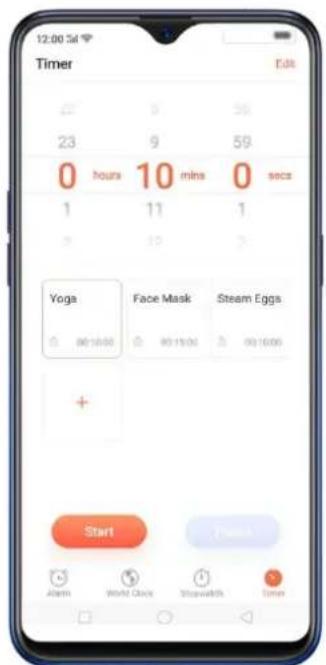
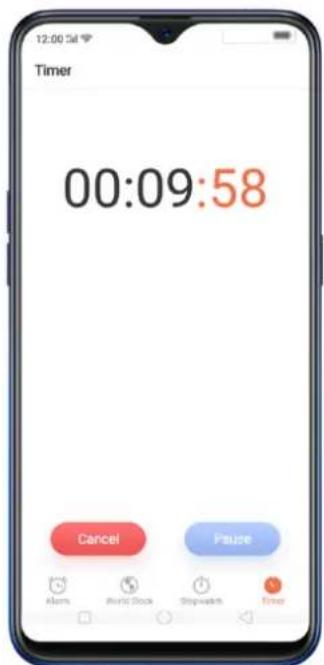
Delete an activity
To delete an activity, click Edit then click ☉, choose the activity you want to delete and click Done.
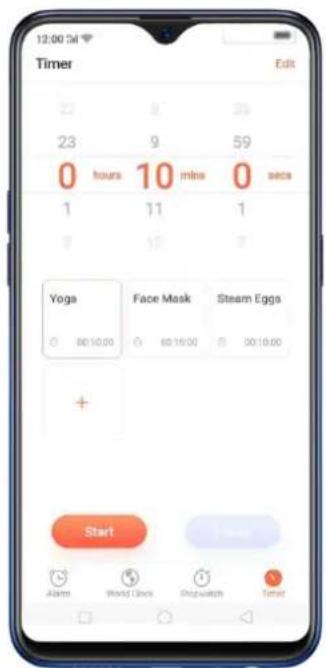
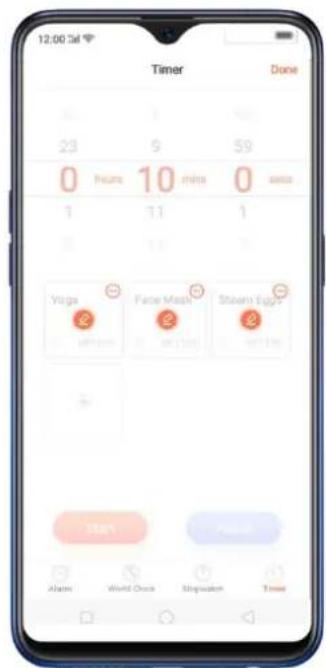
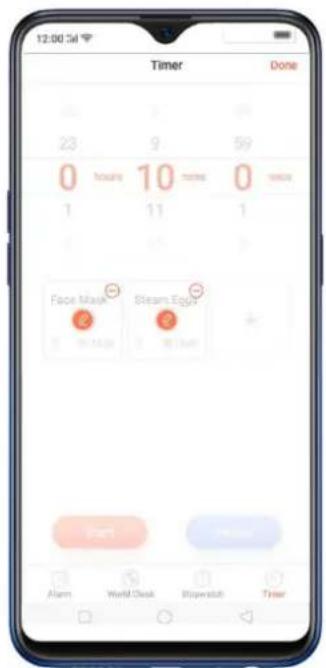
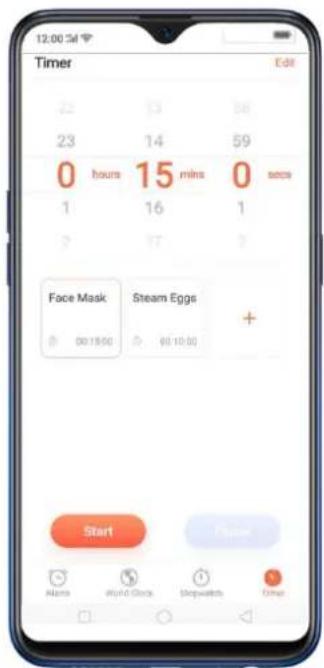
Add an activity
To add an activity on the timer, click + , type the timer name and the time, then click Save.
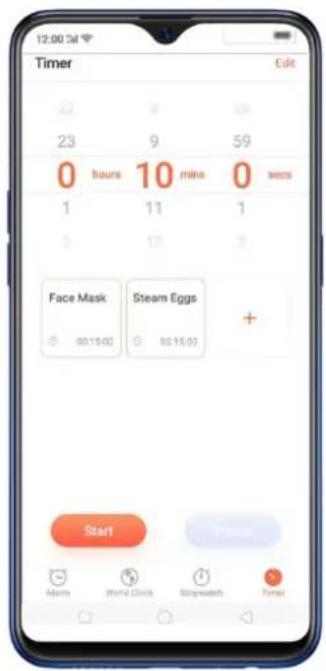
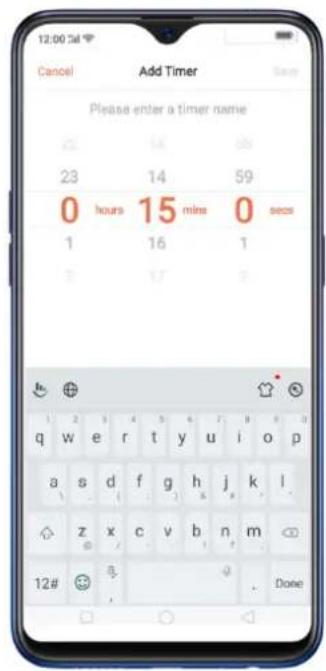
You can add up to 12 activities on the timer and you can timer name to emoji's as well.
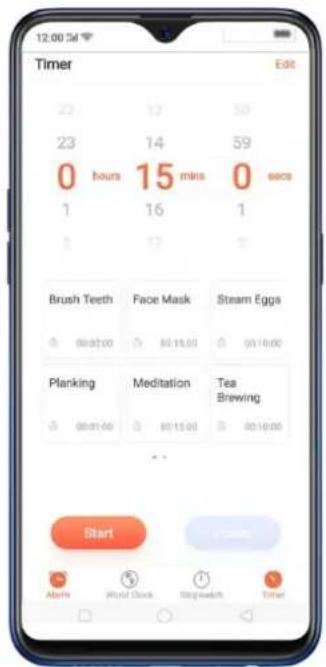
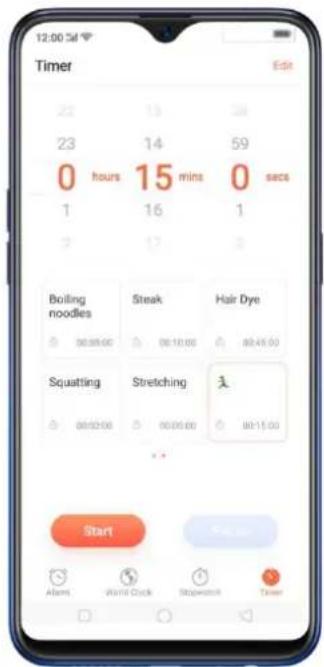
7.16.Files
7.16.2.Optimized File management
The optimized File Manager provides you a more convenient way to work with the file system and perform various operations on files and folders such as search, create, edit, rename, copy, delete, compress, batch process etc.
Optimized search capability. You can search for a file under the root directory, or on a specific folder if you know its general location. This will make the search more specific and faster.
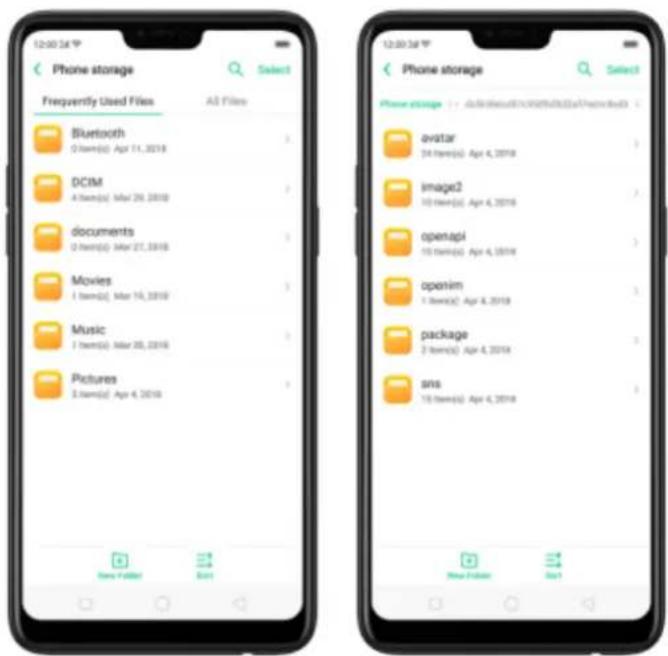
File classification
- The Files app automatically categorizes your files based on their extensions so you can browse them more clearly and conveniently. Options vary by apps you've downloaded. For example, if you download Messenger, Messenger becomes another option for classification.
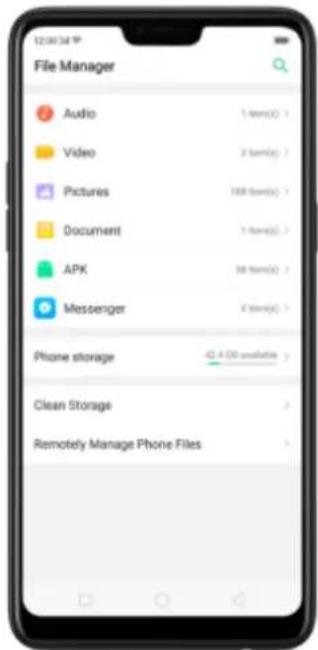
- Under Phone storage, your frequently used files will be listed separately so that you can quickly look up to them later.
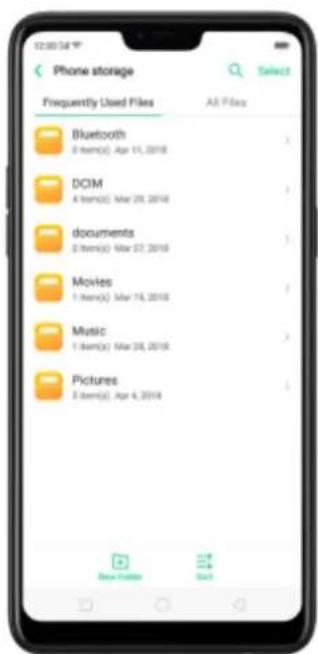
- In [Phone storage] > [All Files] > [Android] > [data], select an app folder, you can see that app files and the files you downloaded from the app are saved in different folders, so you can quickly find the files you need.
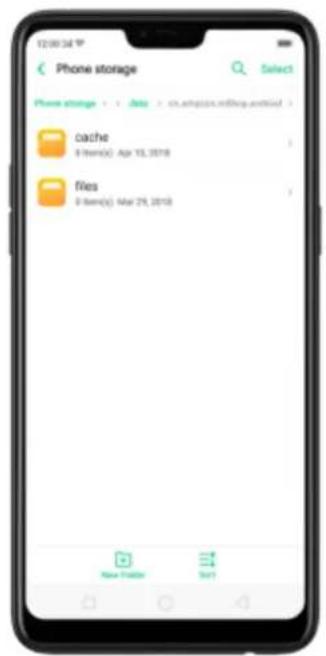
Select All feature. Select All feature is added in Files, so you can process the files in batches.
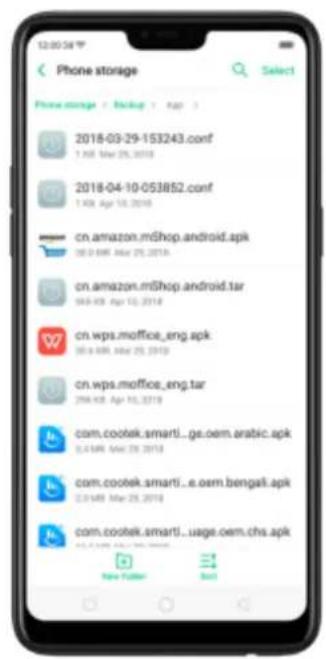
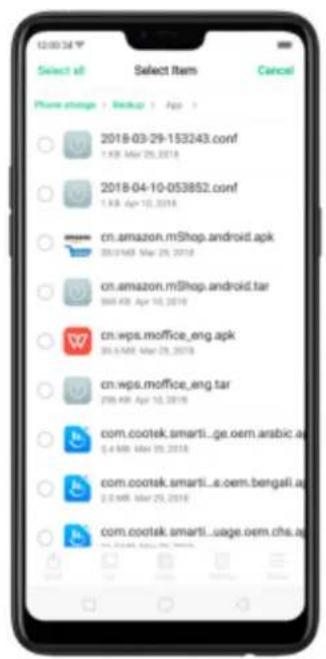
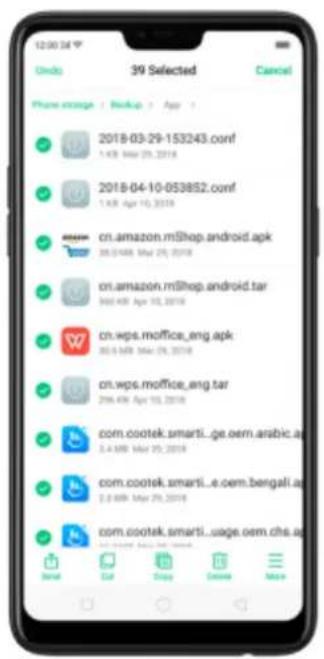
7.16.3.Fast file browsing
File Manager automatically categorizes your files based on their extensions so you can browse them more clearly and conveniently.
Fast file browsing. Click Files, then you'll see all five categories, including Audio, Video, Pictures, Document, and APK. Options vary by apps you've downloaded. For example, if you download Messenger, Messenger becomes another option for classification. Click a category to browse and manage files.
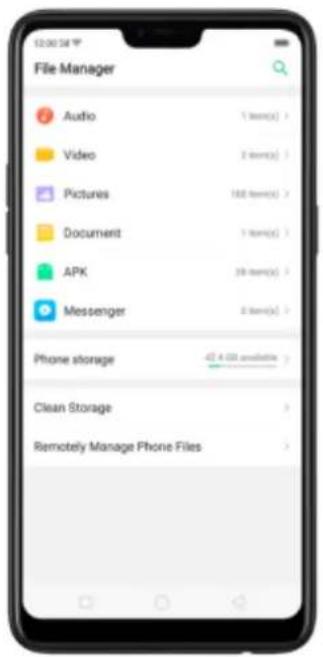
7.16.4.View and manage files
File Manager provides you various ways to manage your files and folders.
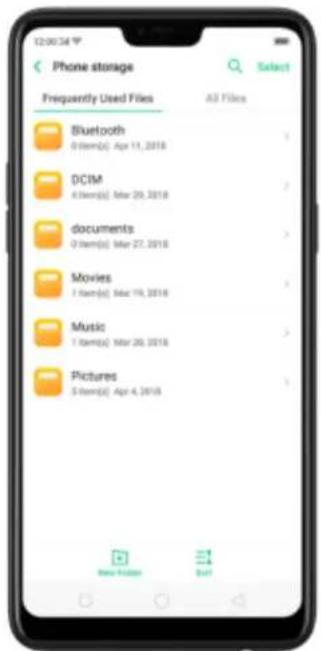
Frequently Used Files. You can view the folders which files are commonly used. Click any one to enter and choose the file to manage.
Search a document or folder. Click Phone Storage, click All Files, click the search icon, then enter the name of a document or folder.
Create a new folder. Click New Folder. Enter the folder name, then click Save.
Sort files and folders. Click Sort, then choose to sort your files and folders by name, size, type or the time they were generated.
Send, cut, copy, delete, compress, show details, rename a document or a folder. Click Select, choose the document or folder, then choose an option.
Move documents to Private Safe. Click Select, choose the documents, click More, then click Add to Private Safe. Folders cannot be moved to Safe. See Private Safe.
Select all. In any page when you click Select, you can quickly choose all by clicking Select all in on the top left corner.
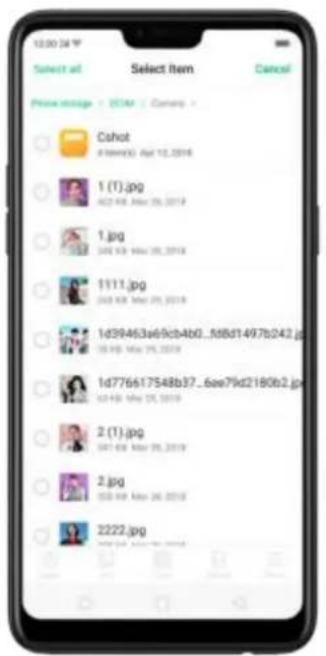
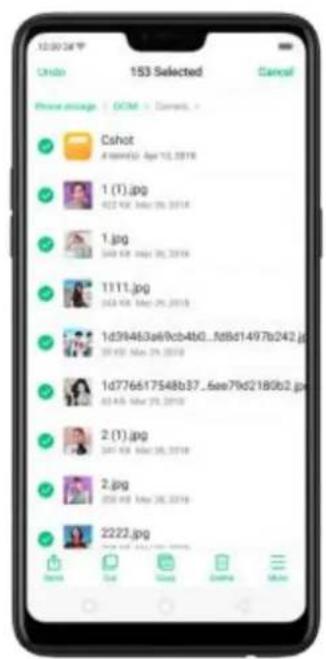
7.16.5.Clean Storage
In File Manager, click Clean Storage will let you use the cleanup feature in Phone Manager directly.
Delete junk files. Click Phone Manager, then click Clean storage. Click End all to delete all kinds of junk files. You can also choose files to be deleted.
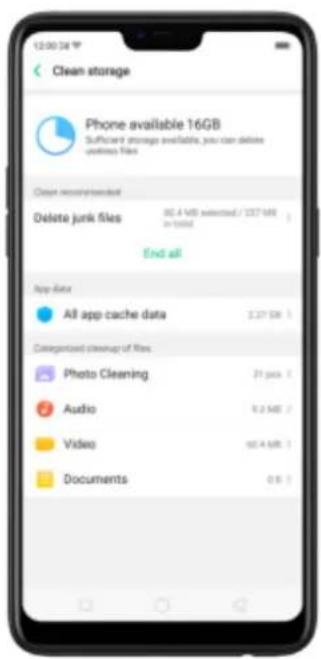
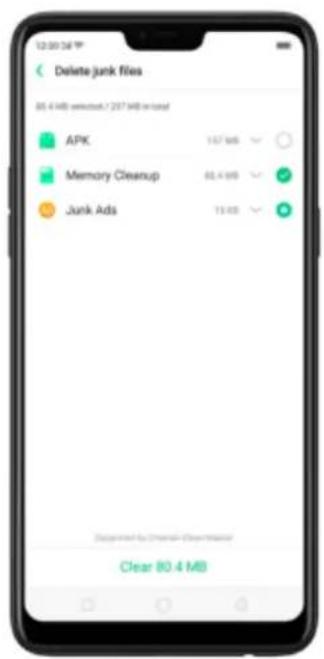
Delete app data. Click All app cache data, select the apps that has caches, then click Delete. The action cannot be undone.
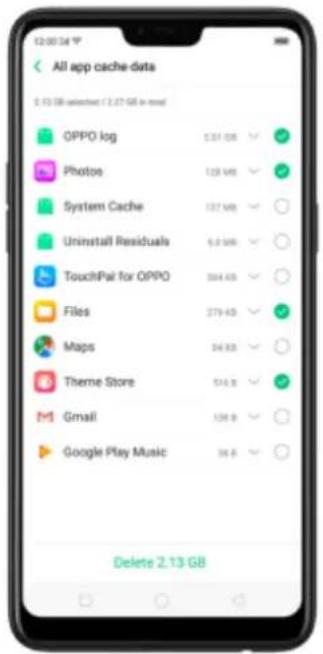
Free up more storage space. You can delete your unnecessary files on the phone, including photos, audio, videos, and documents.
7.16.6.Remotely Manage Phone Files
Remote Management can turn your phone into an FTP server so you can view and download files stored on your phone remotely from your computer.
Remotely view and download files. Click File Manager, then click Remotely Manage Phone Files. Connect to a Wi-Fi network, then click Start Service. Search the URL displayed on your phone screen with your computer, then you can view your phone's file system and download files directly to your computer.
Note: Make sure that your phone and computer are connected to the same Wi-Fi network.
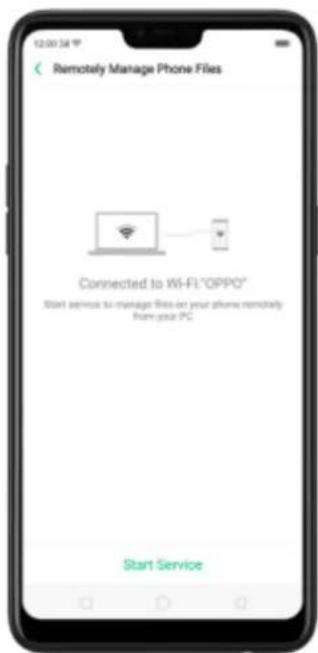
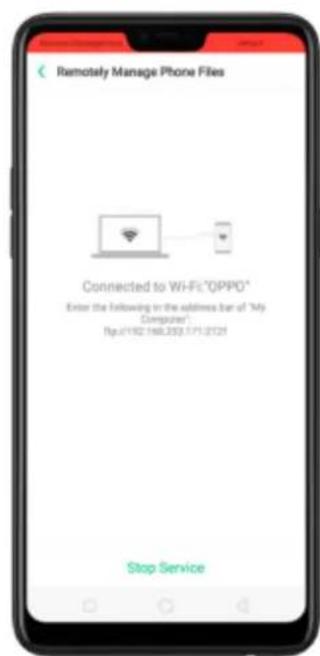
7.16.7.Private Safe
Start Using Private Safe.
- Please set the Privacy passcode first before using this application. Go to [Settings] > [Fingerprint, Face, & Passcode] > [Lockscreen passcode] and enter your desired encryption method. You can also click SET PASSCODE and enter your desired encryption method. You will also be asked for a security question as an added layer of security for your privacy.
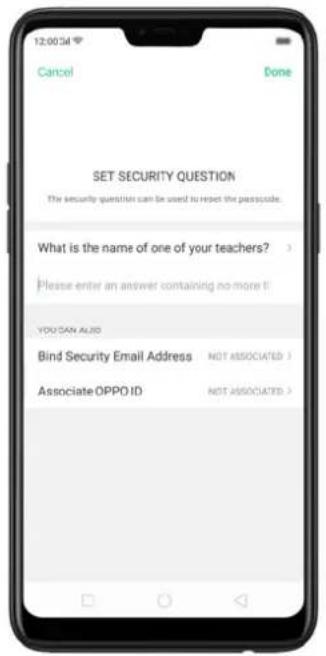
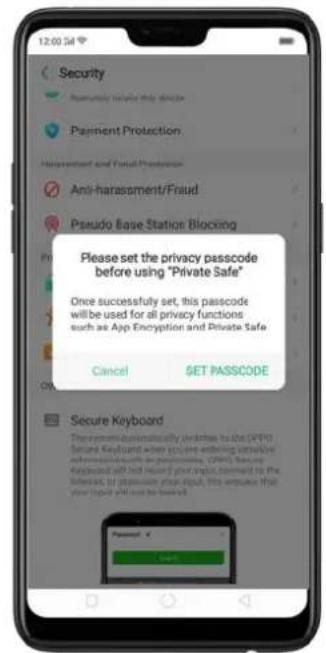
- Manage files on Private Safe: Go to [Settings] > [Security] enter the passcode that you have set, and then manage files that you want to be kept private.
Files that can be added in Private safe are Photos, Audio, Documents, and other Files that are supported by the app.
You can also create a shortcut on your home screen for easy access.
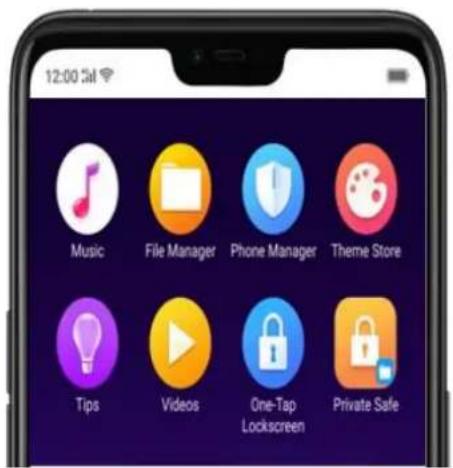
7.17. Calculator
The new Calculator app not only combines the standard and scientific calculators but added useful functions which will come handy in time.
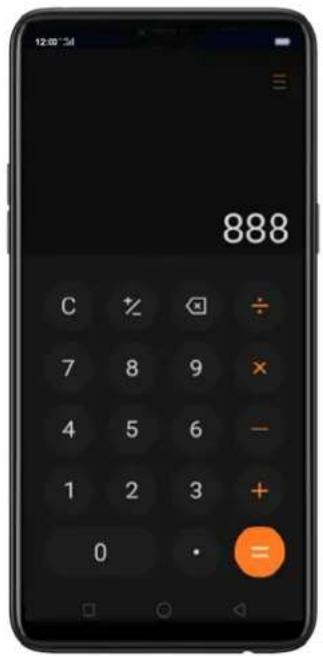
Delete the last digit. Click
Clear the calculation results. Click C.
Hide or show the keypad. Click in the middle of the screen to hide the keypad. Click Calculate or the calculation formula to resume.
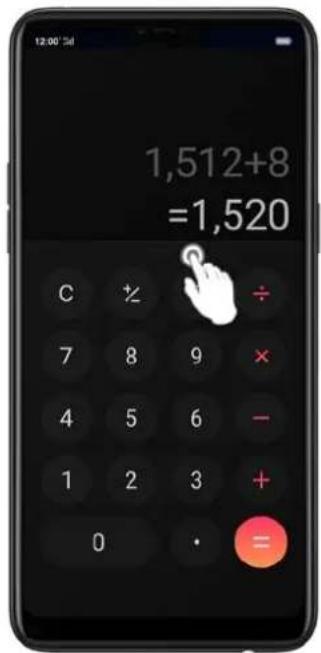
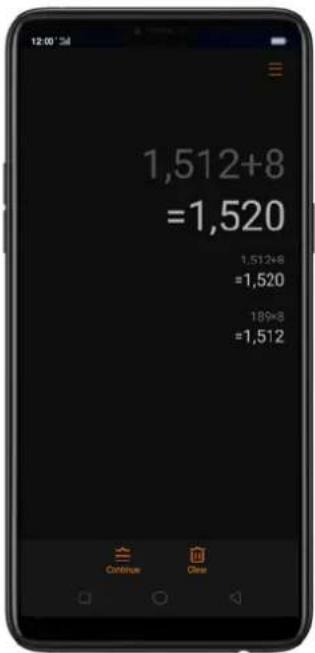
Copy a calculation result to clipboard. Long press the results and it will be
copied to the clipboard. You can click Continue to continue calculating or click Clear if you want to clear everything and start a new one.
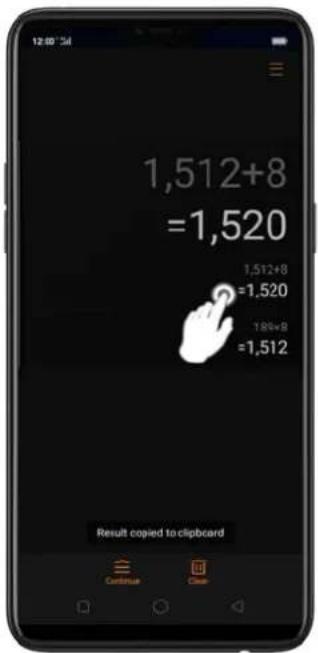
Use the scientific calculator. Rotate your phone to landscape orientation.
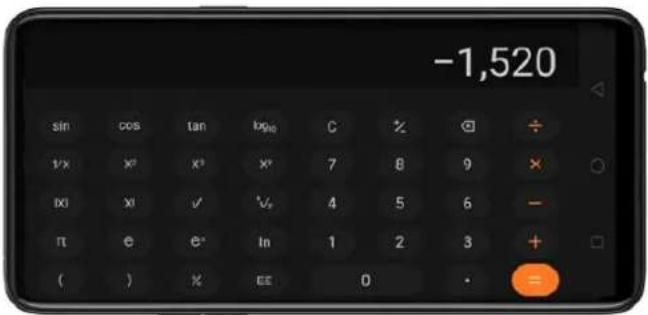
New functions in Calculator. There are a lot of important functions that has been added. Click ☐ at the top right portion of your calculator then select a function that you would like to use.
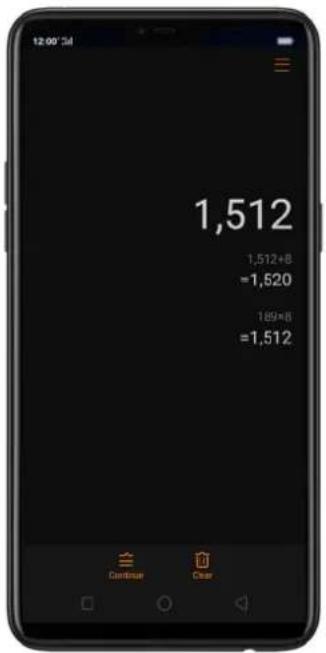
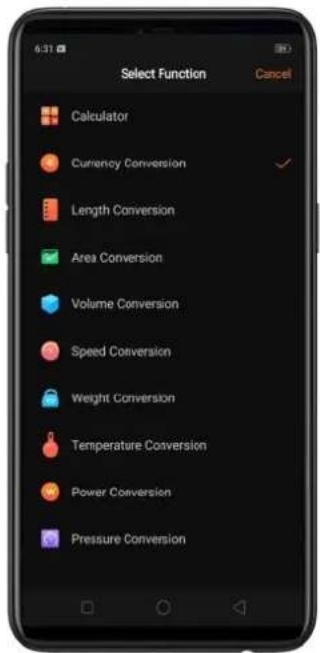
The New Functions
Currency Conversion – if you want to know what are the current real-time
conversions. Click ➤ to select the currencies you would like to convert. It is on
alphabetical order with their national flags beside them. You can also click 🔒 to
search for the country or currency that you would like to convert. Click ✕ to delete
the last digit and click AC to clear results. Long press the result and it will be copied to the clipboard
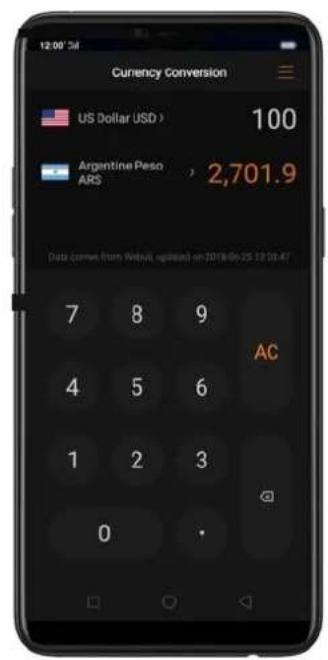
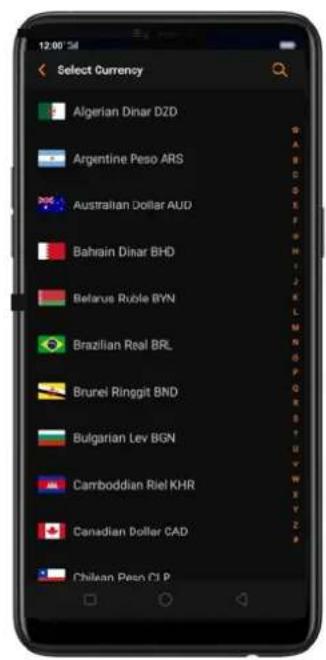
Note: Given that the exchange rates are volatile and change every second, you need to have an internet connection for this to function and to get the real-time conversions.
- Length, Area, Volume, Speed, Weight, Temperature, Power, and Pressure Conversions – Click ➤ to select the unit you want to convert. Click ➕ to delete the last digit and click AC to clear results. Long press the result and it will be copied to the clipboard.
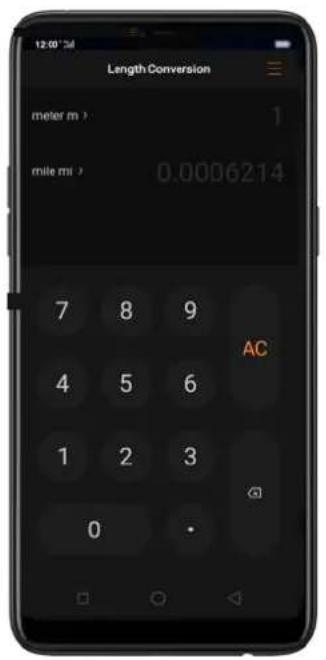
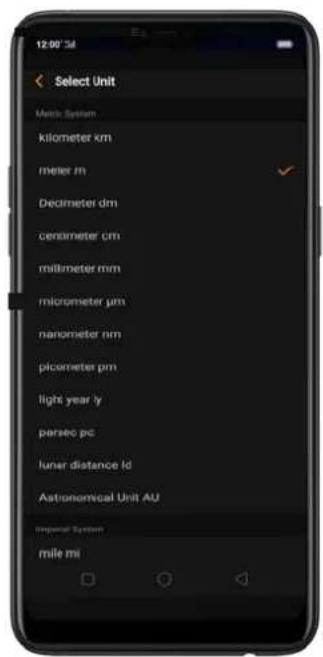
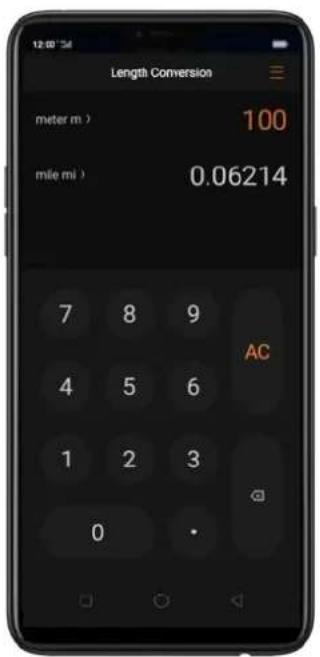
7.18. Sound Recording
7.18.2.Recorder
With the Recorder app, you can use your phone's built-in microphone to record sounds when you need it.
Make a sound recording. Open Recorder, click 📄 to start recording. Click 📄 to pause or
continue. Click √ to stop and save the recording.
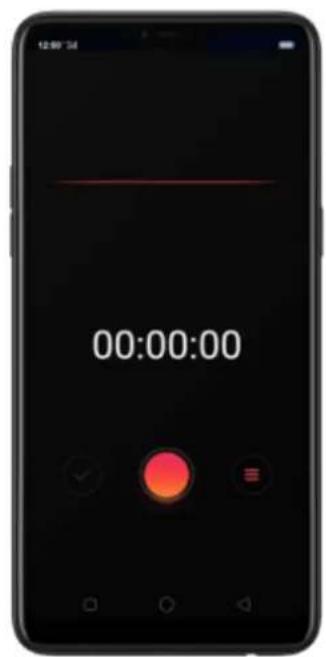
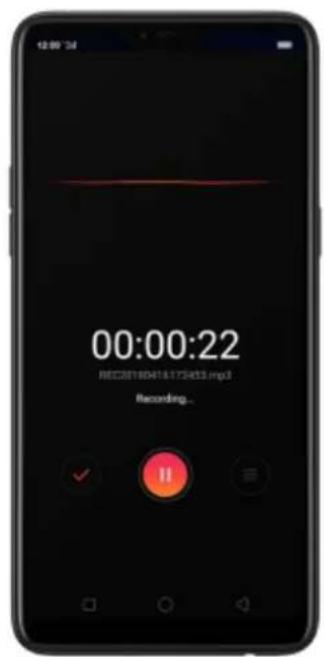
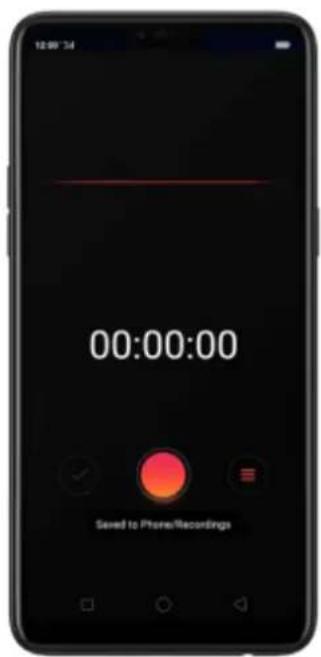
If you start the sound recorder and go to another application, the sound recorder continues running in the background. To return to Sound Recorder, click the red bar at the top of the screen.
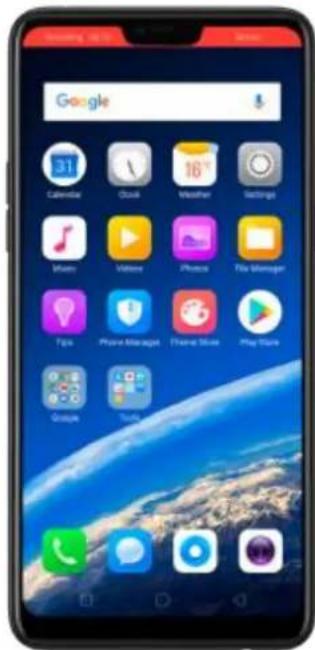
7.18.3.Manage recordings
Play the sound back. Open Recorder, then click 📄 . You'll see all the recordings on your phone including general recordings and call recordings. Click a recording to play it back.
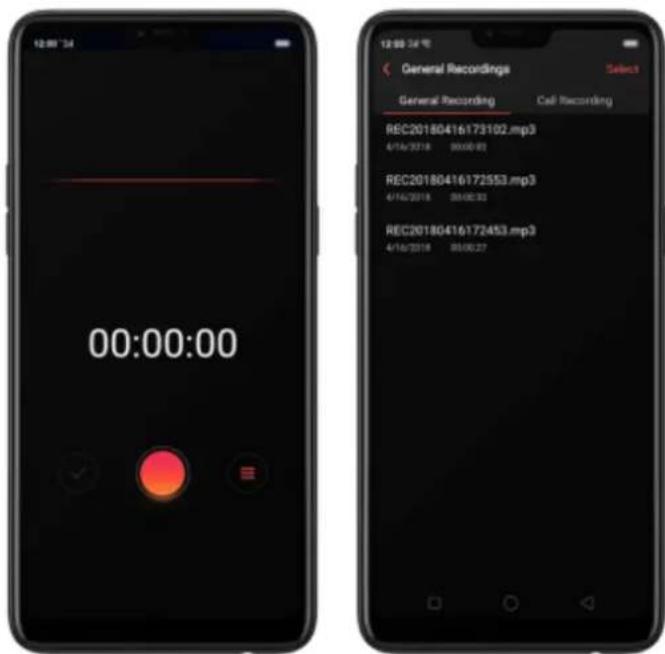
Send, rename or delete a recording. Click Select, choose the recording, then choose an option.
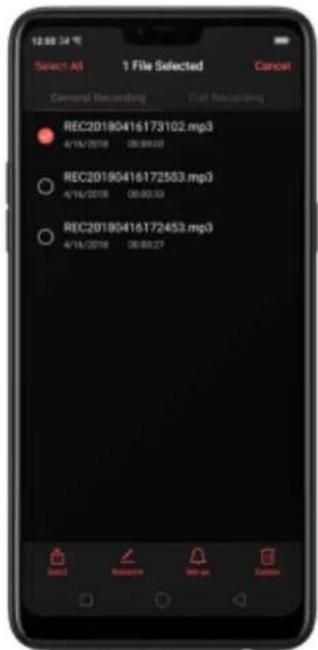
Set the recording as ringtones. Click Select, choose the recording, click Set as Ringtone, then set the recording as the call, SMS, alarm or contact ringtone.
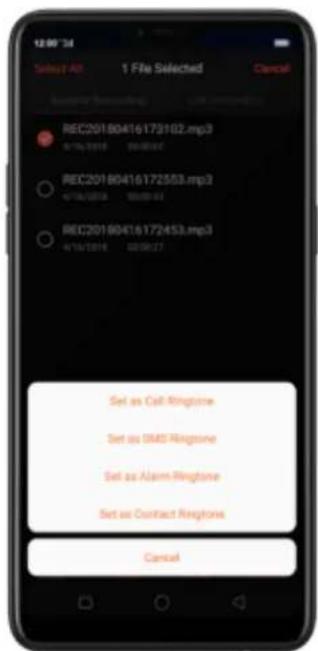
7.19. Compass
You can use the compass app to quickly find the direction you're facing.
Calibrate the compass when prompted. Move away from the interference and spin your phone in the pattern of an infinity symbol.
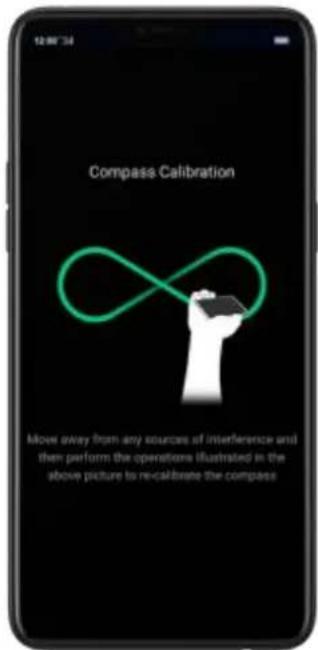
Find your direction. Turn on Location Service first, then click Tools folder on the Home screen, click Compass, and you can quickly find your direction, see your latitude and longitude.
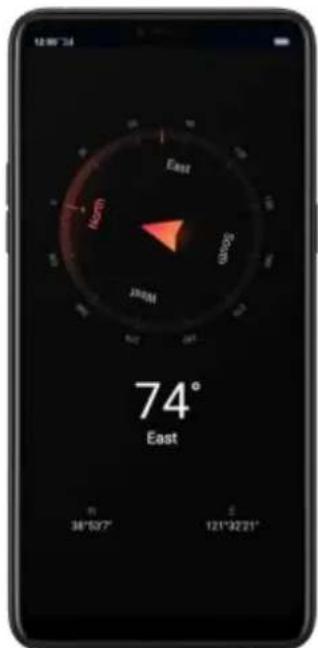
7.20. Chrome
7.20.2.Search the web
The Browser lets you see webpages just as they were designed to be seen in computer-based browsers. Pinch the screen to zoom in and out; rotate the phone sideways for a wider view. You can also add page icons and bookmarks for quick accesses.
Search the web. Click the icon on the left side of the search bar to change the search engine or website. Click 🔒 and say whatever you want to search for, or click the search bar, type the content or web address, then click a matching result under the search bar, or click 🔒, or click Go on the lower-right corner of the keyboard.
As you type, any web address on your bookmarks or history list that contains those letters appears below. Click a web address to visit its webpage.
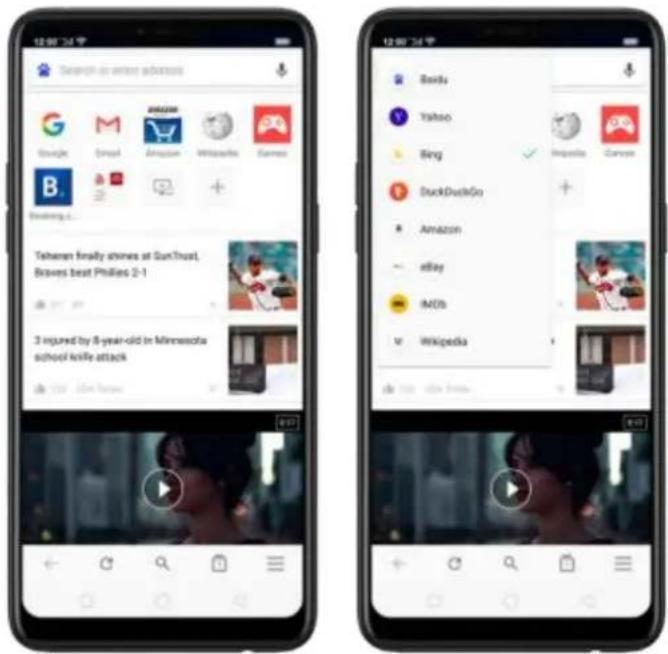
You can also click the Google search bar on the Home screen, then type or say whatever you want to search for.
Erase all the text on the address field. Click the address field, then click ✗. Open a suggested article. The browser will suggest several hot topic articles that you might be interested in on its home page. Click an article to view it. To delete articles that you dislike, click ✗. Scroll to the top of the home page and pull down
to refresh the articles.
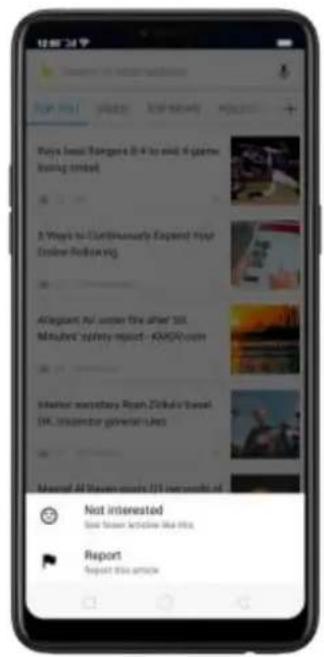
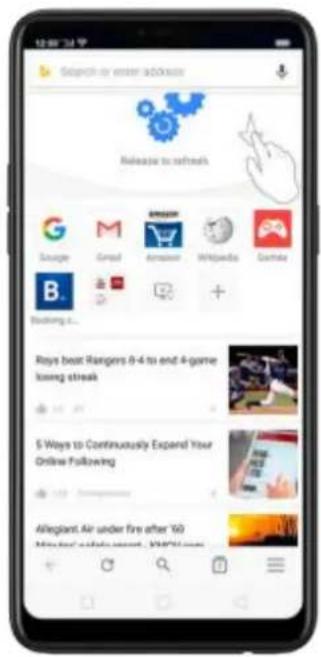
7.20.3.Browse the web
View a webpage in widescreen orientation. Swipe up from the bottom of the screen to open Control Center, then turn off [Portrait Orientation Lock]. Rotate the phone sideways. The Browser automatically reorients and expands the page.
![Wiki This article is about the type of website. For other uses, see Wiki (easertigustion). "WikiMode" webcuts here. For WikiMode of Wikipedia, see WikiMode WikiMode. For the app for the Apple iPad, see WikiMode. Play media Interview with Wind-Gurinington, insentor of the wiki A wiki ("wiki/ (e listen) wiki-ed) is a website on which users collaboratively modify content and structure directly from the web browser. In a typical wiki, text is written using a simplified markup language and often edited with the help of a rich-text editor.[21]. A wiki is not using wiki software, otherwise](/content/2026/05/993082/images/59e0ce40e75ed8753d0c89b39240b1d6da6a38f69239c837e3380ed204426e24.jpg)
Zoom in or out. Pinch to zoom in or out. When you browse a website which has a mobile-specific view that prevents you from pinching in to zoom, you can use the
Force enable zoom feature to override the site's demands. Click ≡, click [Settings], then turn on [Force enable zoom]. You can now pinch to zoom wherever you want, whether the website technically supports it or not.
Scroll around the page. Drag up, down, or sideways. When scrolling, you can touch and drag anywhere on the page without activating any links.
Follow a link on a webpage. Click the link. Many images also have links. A link can take you to another place on the web, open another app, call a phone number, and more.
Return to the previous or next webpage. Click ← or → at the bottom of the screen.
Return to the Home page. Click ↗.
Reload a webpage. Click C.
Share a webpage. Click :, click Share, then choose how to send your webpage.
Translate a webpage. When at the foreign language website, click ↓, click Translate, then the browser automatically translates the language to your default language. Translating the webpage takes time, so be patient.
To set your default language, click ≡, click [Settings], then click [Country and language].
Find in page. Click :, click Find in Page, enter the text, then the browser will find text matches on the current webpage.
![Play media Interview with Ward Cursingham, inspector of the wiki A wiki (/wiki/ (we listen) not-eq) is a website on which users collaboratively modify content and structure directly from the web browser. In a typical wiki, text is written using a simplified makeup language and often edited with the help of a rich-text editor [1] A wiki is run using wiki software, otherwise known as a wiki engine. A wiki engine is a type of content management system, but it often first and often work systems. 12# 8. mm • English (UK) Search](/content/2026/05/993082/images/decf1255f6d0d2e99056e7ffa7e1de7f78b4528f4b87103120eb34fa41f6d54c.jpg)
Open a new tab. Click ☐, then click + to open a new tab.
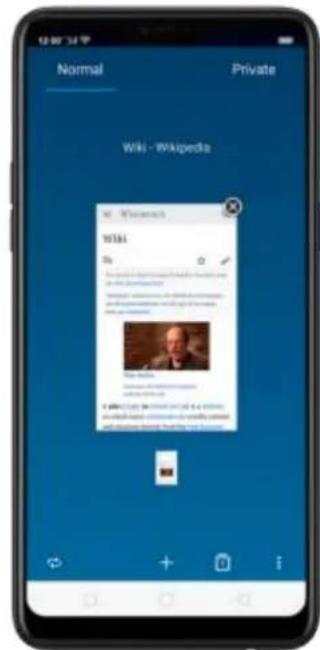
View all open tabs. If you open three tabs, for example, click ☐, then swipe left or right. To go to another tab that's open, swipe to the tab, then click it. To close a tab, swipe up on the tap, or click ✗. To reopen the last page you've visited or close all taps, click ☐ and choose an option.
Tip: The Browser won't save the browsing history of your private tabs.
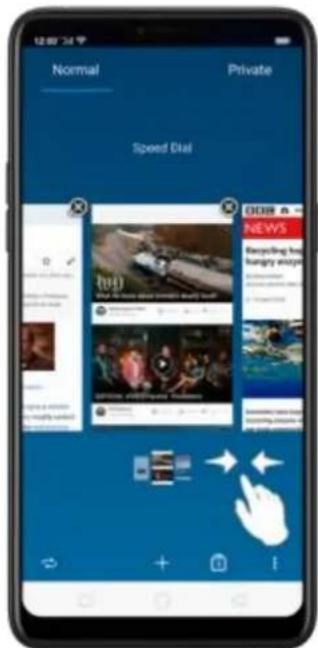
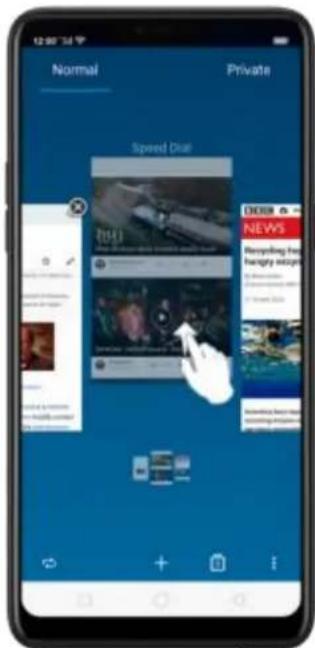
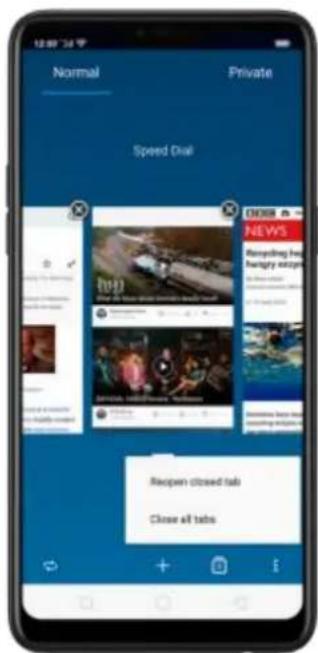
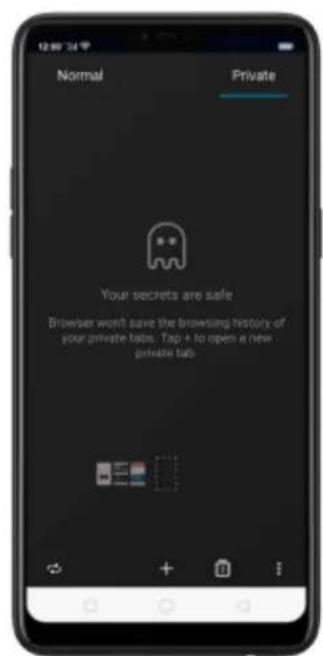
Request desktop site. To see webpages just as they were designed to be seen in computer browsers, click ☐, then enable Desktop site.
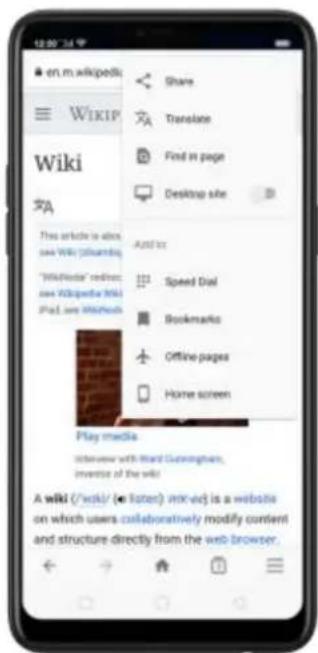
7.20.4. Quick accesses
You can add webpages to Bookmarks so that you can quickly return to them at any time without having to type the address. You can also add page icons to the Home screen for quick access, and download the webpages to view them offline.
Add a webpage to Speed Dial. Open the Home page of the Browser, click Speed
Dial, then click +. Enter the webpage name and address, then click √. You can also open the page and click :. Then click Speed Dial.
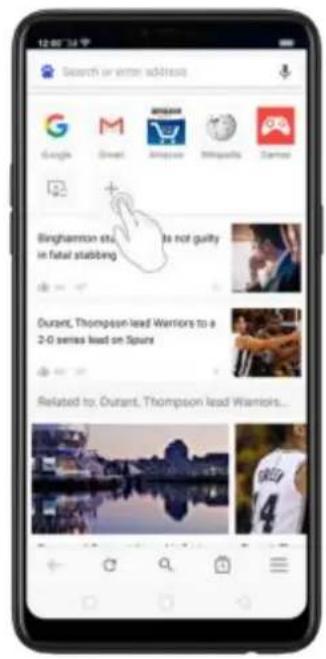
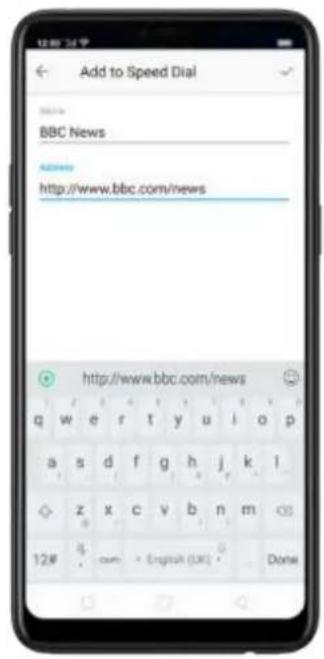
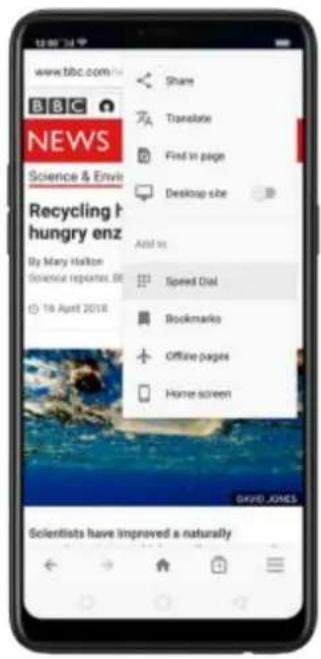
Bookmark a webpage. Open the page, click ☐, then click Bookmarks, edit its title or choose where to save it, then click OK.
* To manage your bookmarks and folders, click ≡ from the webpage screen, then click Bookmarks.
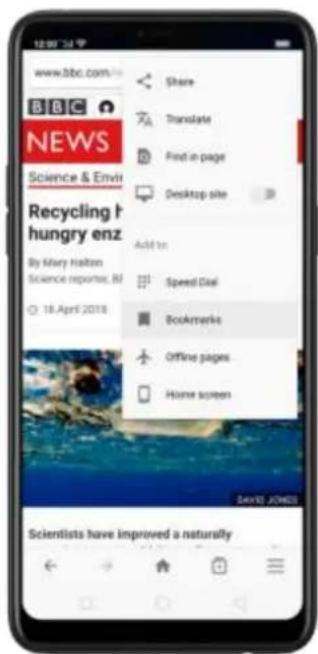
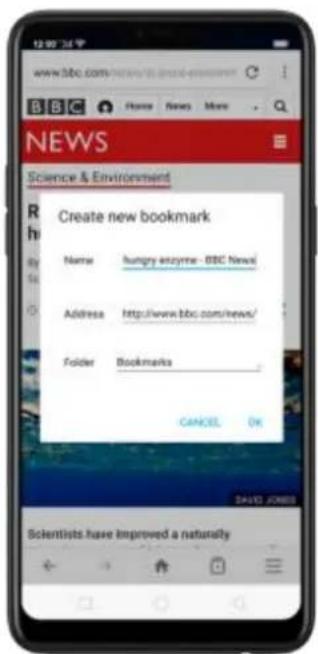
Save a webpage for offline reading. Open the page, click :, then click Offline
pages. To open an offline page, click ≡, click Offline pages, then click a page.
Add an icon for the current page to your Home screen. Open the page, click ↓, then click Home screen, edit its title, then click Add.
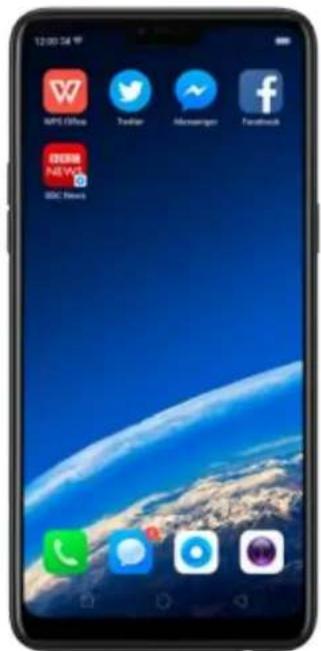
8. Safety & Privacy
8.1. Device security
8.1.1. Lock screen password
Security on your OPPO smartphone begins at the lock screen. You can set a passcode that will be needed to unlock your phone.
Set, change, or turn off the passcode. Go to [Settings] > [Fingerprint, Face & Passcode]. You can draw a pattern, use a 4-Digit, 6-Digit, or 4-16 Digit Numeric Code or 4-16 Character Alphanumeric Code.
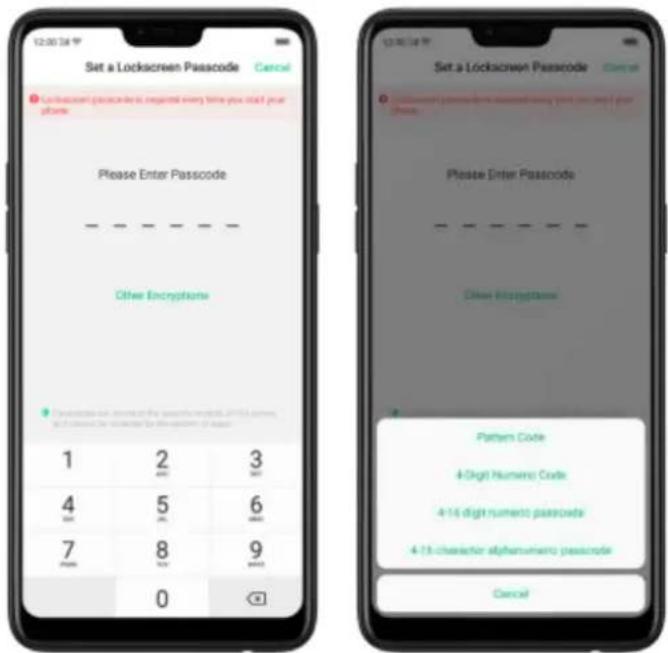
Add a fingerprint. Before you can add a fingerprint, you need to create a passcode. You can use the fingerprint to unlock the phone. You can add up to 5 different fingerprints on your phone.
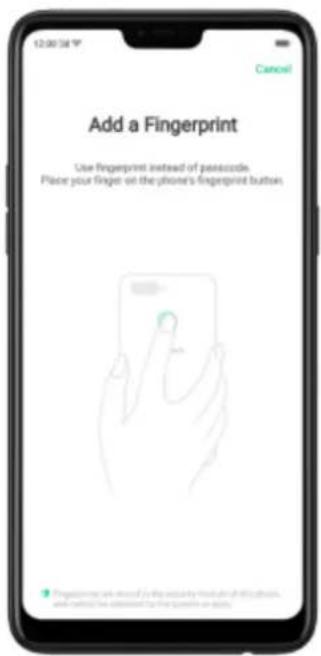
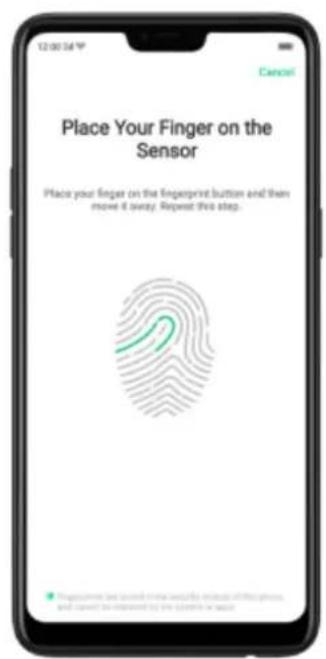
Enroll face. Before you can enroll a face, you need to create a passcode. You can use the face to unlock the phone instead of the fingerprints or passcode. You can enroll only one face on your phone.
View more about setting a passcode, face ID and fingerprint on your OPPO phone, see Fingerprint, Face and Passcode.
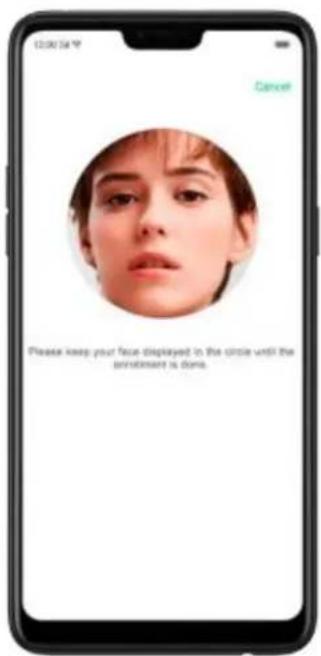
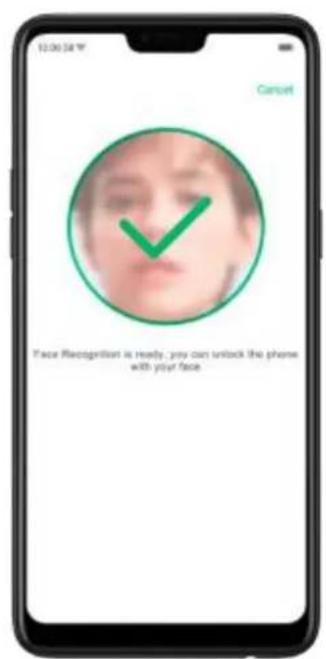
8.1.2. Smart Lock
Smart lock is an easy and handy way to gain access to your phone.
Turn on Smart Lock options. Go to [Settings] > [Additional Settings] > [Device & Privacy] > [Smart Lock], then enter your phone passcode.
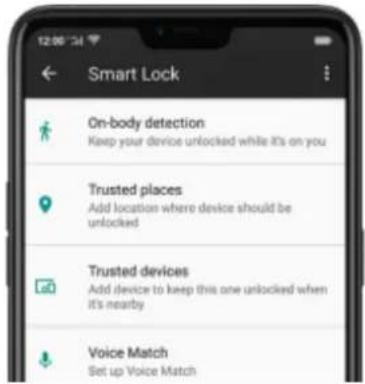
- On-body detection. Once enabled, your device will be kept unlocked while it's with you, like when you are holding it or carrying it. Your device will lock when it detects that it's been set down, like putting it on the table or is away from your body.
- Trusted places. If you have added trusted places, your device will be kept unlocked when it's nearby those areas. For example, if you have added your home as a trusted place and you're 80m away from your house the device will be kept in unlocked mode.
- Trusted devices. If you have added trusted devices, for example, your Bluetooth watch, your car's Bluetooth system, when they are connected, your device will be kept in unlock mode. (Note: Bluetooth connections have a range of up to 100 meters.)
- Trusted voice. Say "OK Google" and save it on your Google account. When you say "OK Google" the next time, your device will be unlocked once it recognizes your voice.
Note: When Smart Lock is on, your phone will remain unlocked if you're carrying the phone, which will quickly drain your phone's battery. This will also lead to accidental commands if you put the phone in your pocket. Therefore, if you want to use Smart Lock, use it wisely and properly.
8.1.3. Payment protection
While you shop online, your OPPO phone will provide protection for the mobile transactions, such as detecting the system, captcha and, app security. You can see the detected information of the current payment environment on the upper-right corner of the screen.
Set up payment protection for apps. Go to [Settings] > [Security] > [Payment Protection]. Your phone alerts you if risks exist, or it will say "Safe to Pay". Click View and do as what the phone prompts to remove the risks.
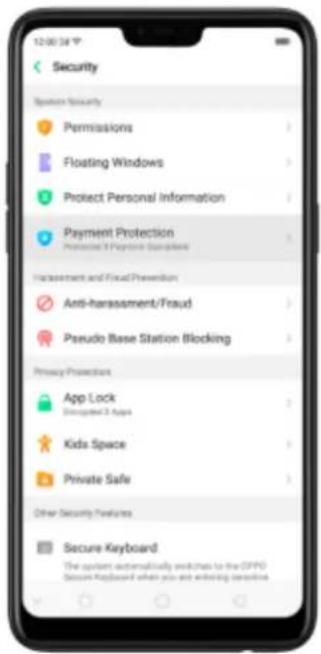
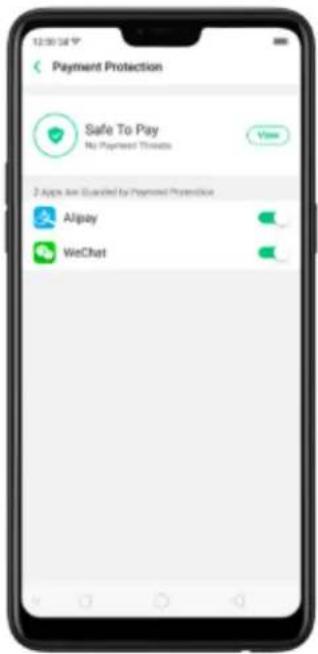
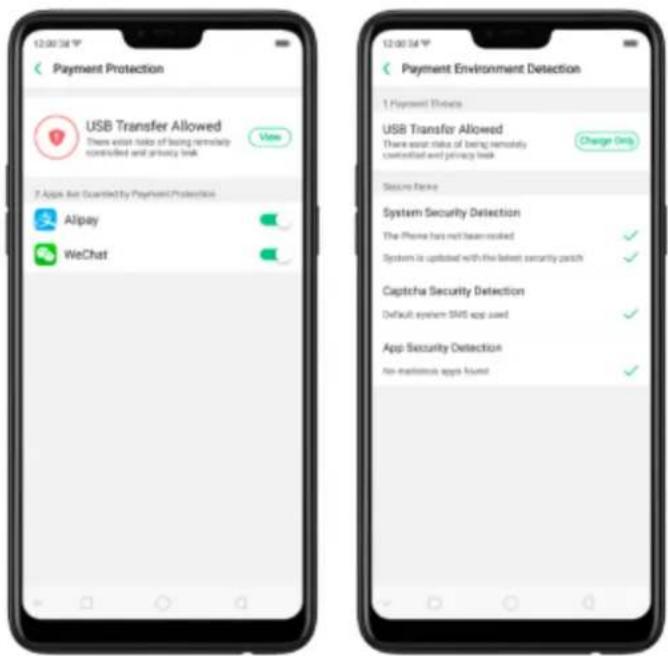
8.1.4. Set up a SIM card lock
For better security, you can set up a SIM card lock. The SIM lock will make sure that only those who know the password can use the phone.
Set up a SIM card lock. Go to [Settings] > [Additional Settings] > [Device & Privacy] > [Set up SIM card lock]. Click the slider next to Lock Sim Card, type in the PIN code and then click OK.
Note: If the wrong PIN is entered more than three times, both your SIM card and phone will be locked. You can enter the PUK code to unlock them. See About SIM card PIN & PUK code.
Change the SIM card PIN code. Click Change SIM PIN, type in the current PIN code, click OK. Then you can type in the new PIN code, click OK, retype your new PIN code when prompted, then click OK.
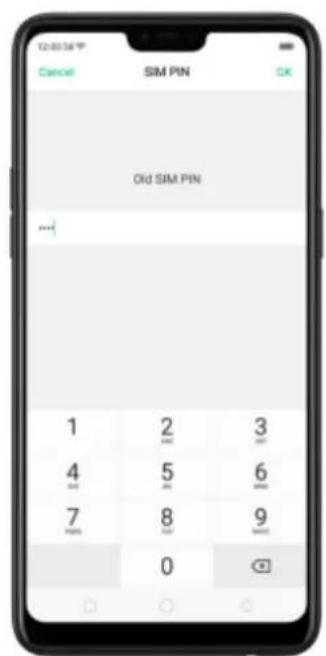
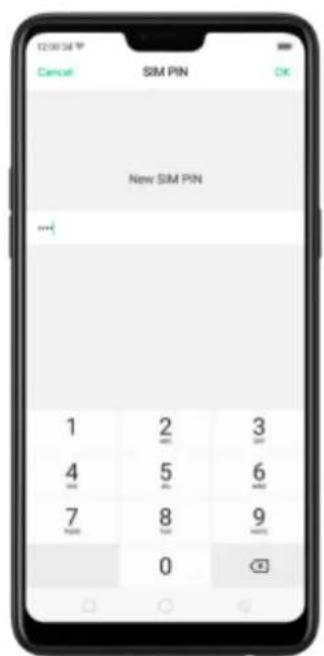
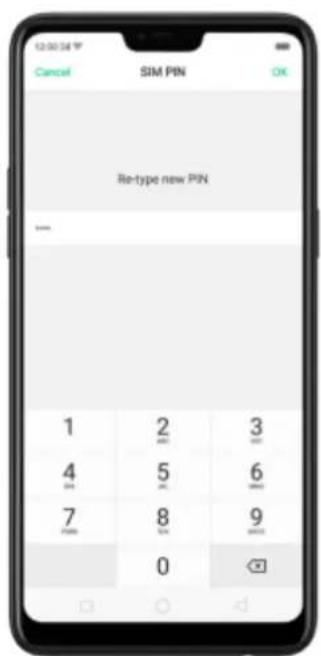
8.1.5. Virus Scan
For better security, you should regularly scan and remove potential and actual threats to your phone.
Scan for virus. Click Phone Manager, then click Virus Scan. Wait for the scan to complete. If threats were found, remove them; if not, you will see a message that says your phone is in a good state.
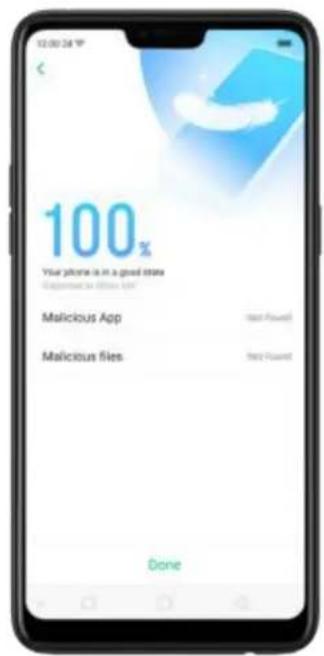
8.1.6. Pseudo Base Station Blocking
Your phone might receive many spam messages (including investment advice, promotional messages, and more), or be infected by mobile viruses sent from the pseudo base stations. When these stations are identified, your phone will automatically block the information sent by them, thus safeguarding your property and securing your information.
Block pseudo base stations. Go to [Settings] > [Security] > [Pseudo Base
Station Blocking] and you will see a list of pseudo base stations if they are identified and blocked by the phone.
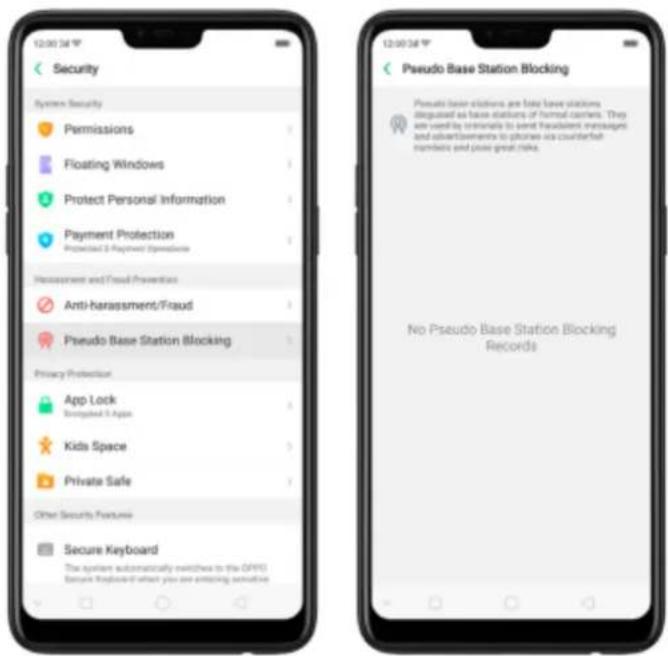
8.1.7. Protect Personal Information
Apps automatically read your personal information to access restricted functions, while most of these information are sensitive, such as call history, contacts, messages, and calendar events; some apps will probably engage in malicious activities like uploading or exposing your private data and monitoring your activities. By using this feature, when an app tries to read information that it needs, your phone will provide empty information instead of what you really have, which helps you protect your privacy.
Protect your call history, contacts, messages, and events. Go to [Settings] > [Security] > [Protect Personal Information], then choose an option. You will see a list of apps that require the certain information. If you don't want to give an app your real information, switch the app slider to green, then click [Turn on feature]. Your phone will then provide empty information.
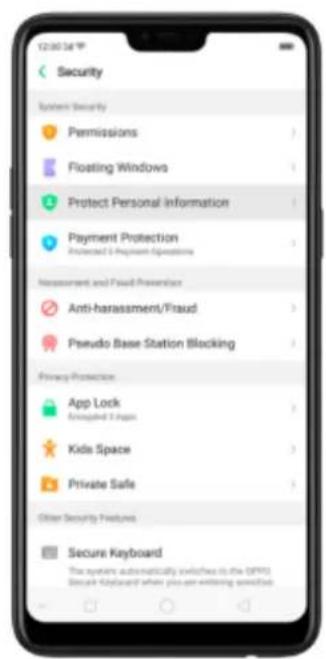
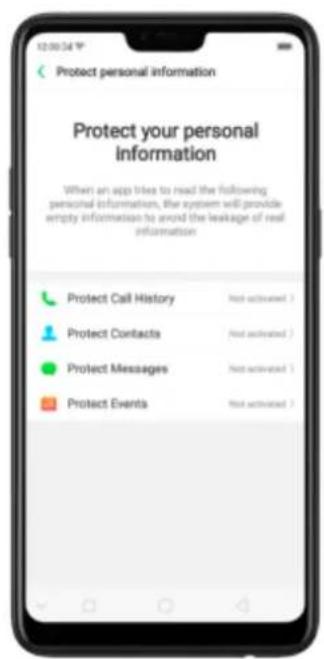
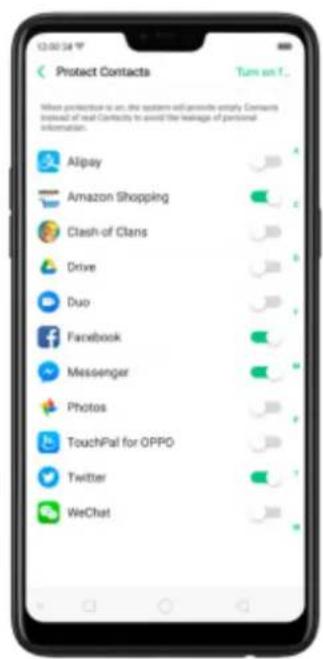
8.2. Device administration
8.2.1. Allow and install apps from unknown sources
By default, you are not allowed to install apps outside the official Play Store on your OPPO phone - unless you have allowed your phone to do that.
If you run an APK on your phone without first enabling the feature, you will see the following on your screen.
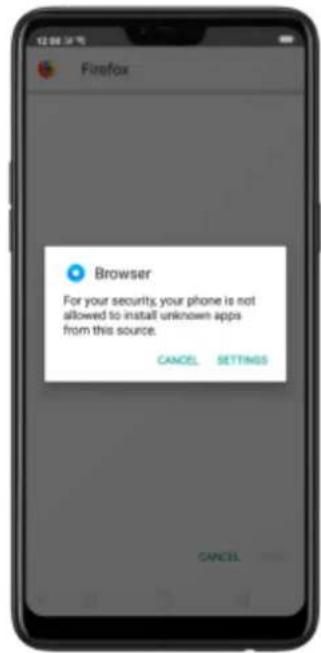
Install apps from unknown sources. Go to [Settings] > [Additional Settings] > [Device & Privacy] and click [Apps Installed from Unknown Sources]. Here are sources you can download or receive apps other than Google Play Store to your phone.
Switch the sliders to green if you want to install apps from these sources. For example, if you want to install apps downloaded from your browser, then enable Browser.
Note: Installing apps from unknown sources means that you are now responsible for your phone's safety. Don't ever install any apps unless you are absolutely sure that it is not a malware.
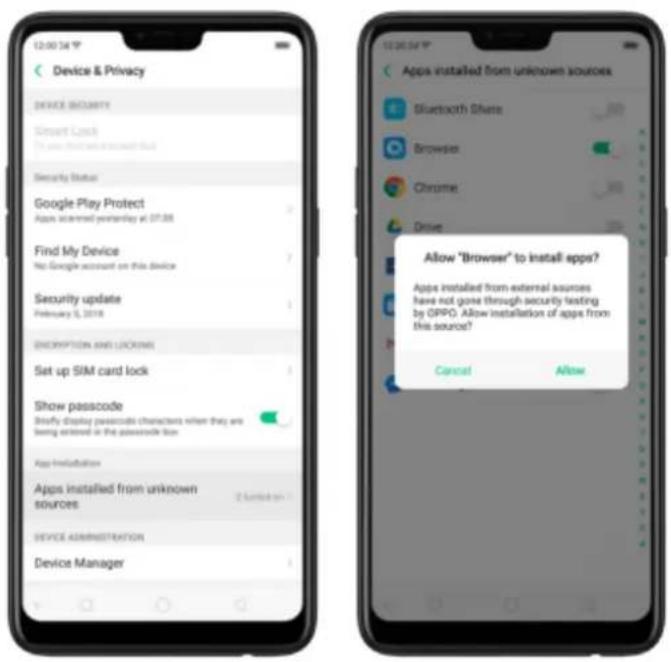
8.2.2. App permissions
Every application installed on your OPPO smartphone may require certain data or access to your phone's other features (mic, camera, etc.). To check and manage what an app is trying to access, do the following:
Check all permission details. Go to [Settings] > [Security] > [Permissions]. You will find all the permission categories on your phone. Click "Apps" to view apps installed on your phone and the permission groups an app has.
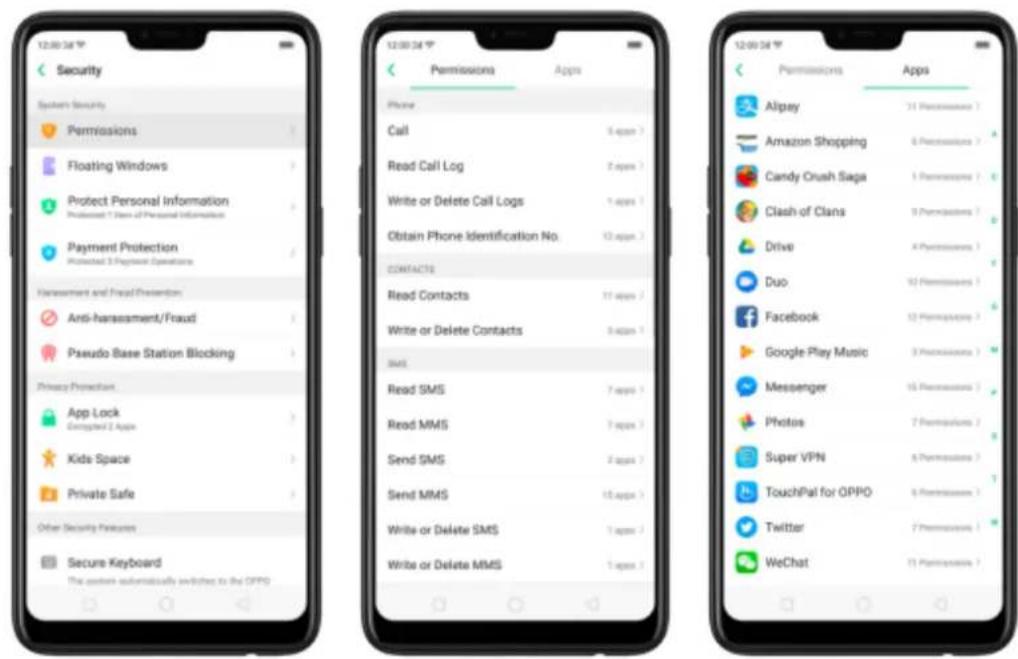
Change the permission. You can go through each permission or app on your phone and, with full control, allow, forbid or limit each permission according to your requirements.
- Allow: Always allow the app to use the required permissions.
- Forbid: Disable the required permissions completely for the app.
- Ask: Every time you start the app, it asks you to grant the permissions that are required.
8.2.3. Hide Home screen icon
Without deleting the app from your phone, you can simply hide the app icons from view if you want to quickly hand in your phone to someone else and don't want them having access to the personal data contained within some apps.
Before you can hide Home screen icons, you must encrypt the apps first.
Hide Home screen icon. After encrypting the apps, do the following:
- Go to [Settings] > [Security] > [App Lock], then enter the verification passcode
to enter the App Encryption screen.
- Click an app, turn on [Start Passcode Verification], then turn on [Hide Home screen icon].
- A pop-up message will display on the screen to ask you to set an access number. You can open the hidden applications by dialing the number. This message will only pop up when you use the hidden feature for the first time. Click Set Access Number.
- Set a number that starts and ends with “#” and contains one to sixteen characters, then click Done.
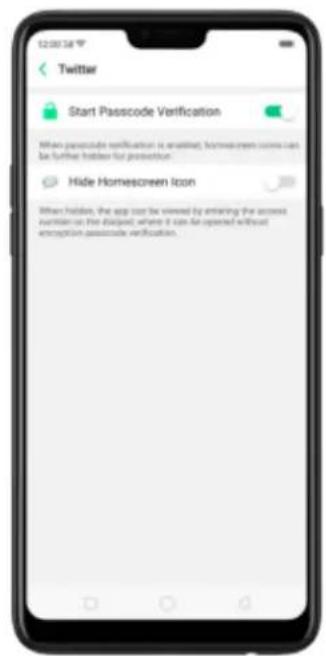
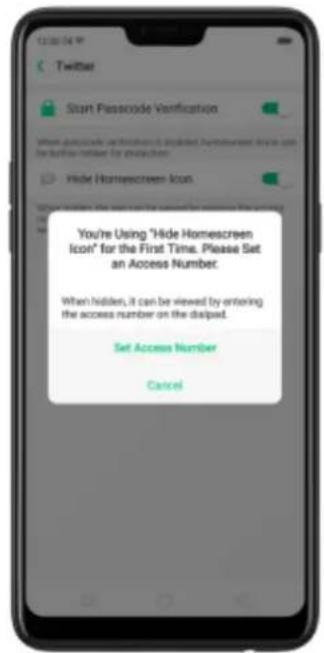
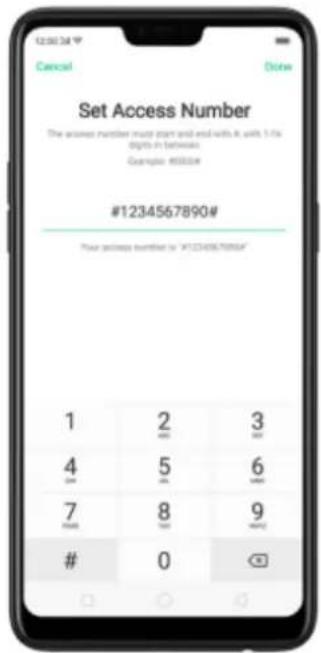
- You can also set the hidden app not to display in Recent Tasks, or disable its notifications.
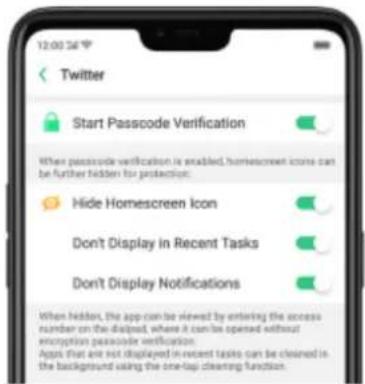
Open hidden apps. Click Phone, click the keypad to enter your access number, then the Hidden Apps folder will pop-up.
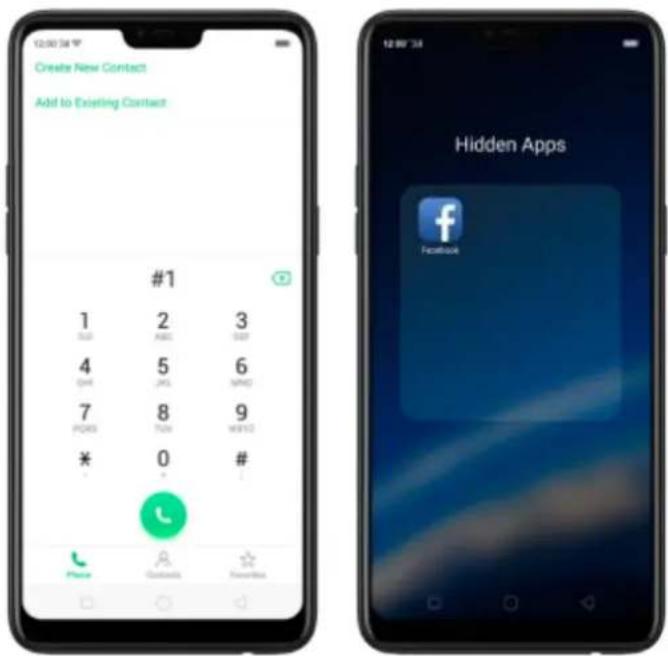
Note:
- You can override encryption passcode and open hidden apps directly by dialing the access number.
- Apps that aren't displayed in Recent Tasks can be closed using the one-tap cleanup function.
- Access number can be set only once when you use the hidden feature for the first time. If you forgot the number, reset the phone to its factory settings to reset the number.
8.2.4. Kids Space
With Kids Space, parents can set limits especially for the children's use of the phone, such as setting up phone usage time and apps that are allowed to be accessed. It does a good job in charge prevention, system modification, and addiction prevention when your kids use the phone.
Set up Kids Space. Go to [Settings] > [Security] > [Kids Space]. Select the apps your kids can access, set how long they can use the phone, and choose whether to use cellular data, then click Enter Kids Space.
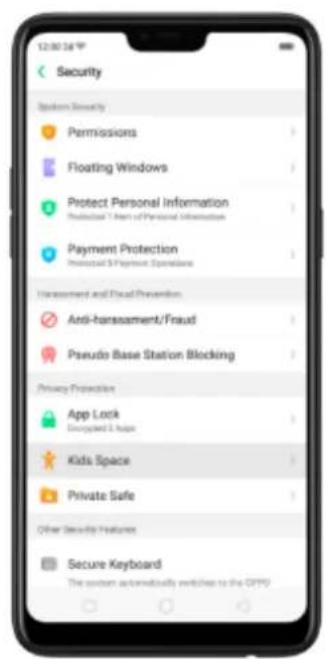
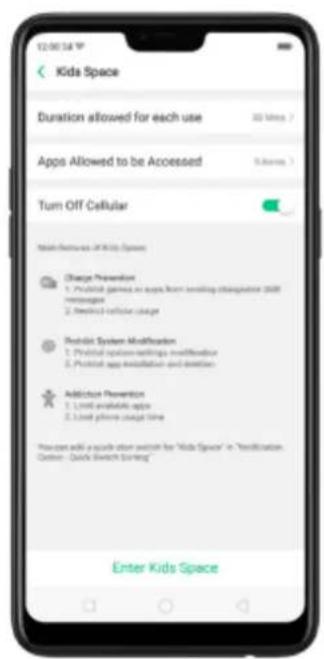
Quit Kids Space. When the duration of time you set ends, your phone will alert you and lock the screen after 30 seconds, or you can quit Kids Space at any time by clicking Quit Kids Space at the bottom of the screen. Input your fingerprint or lock screen passcode to return to the normal mode.
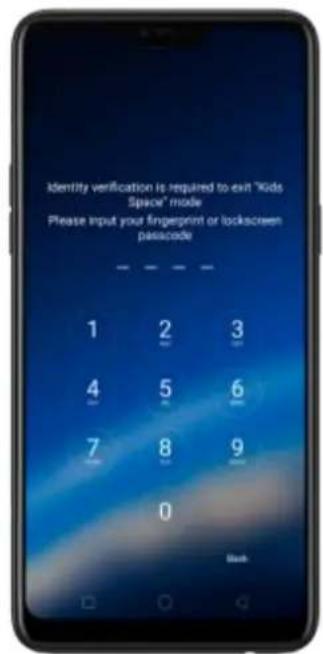
8.2.5. Block unwanted calls and messages
Block feature helps you to prevent unwanted phone calls and messages from reaching you. You can also add numbers to blacklist or to block specific phone
numbers, or add numbers to whitelist to allow their calls to come through all the time.
Block calls and messages. Go to [Settings] > [Security] > [Anti-harassment/Fraud], or go to [Settings] > [Call] > [Block], or go to [Settings] > [Messages] > [Block].
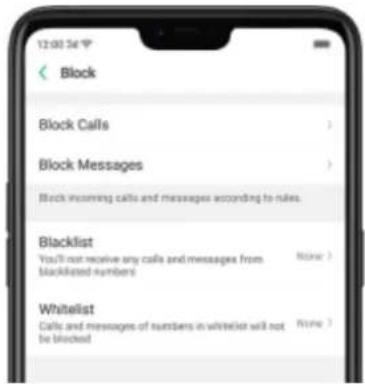
- Block Calls: Choose the options available for blocking incoming calls. See Block calls.
- Block Messages: You can block all unknown messages, or block specific spam messages by entering the keywords.
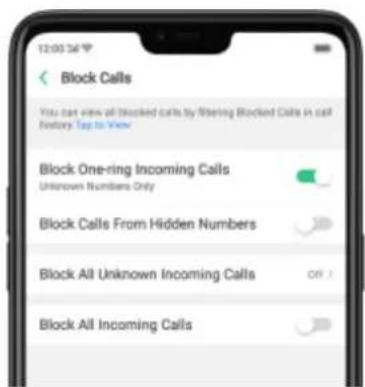
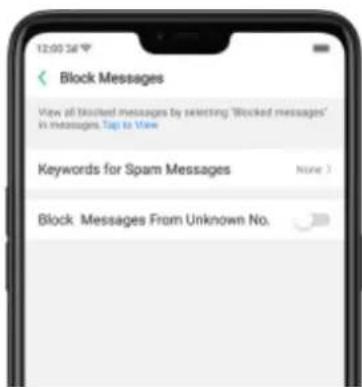
Add a contact or a phone number to the blacklist. Click Blacklist, click Add, then enter the number or choose your contacts. Or open a caller's contact card in Contacts, then click Add to Blacklist.

Add, then
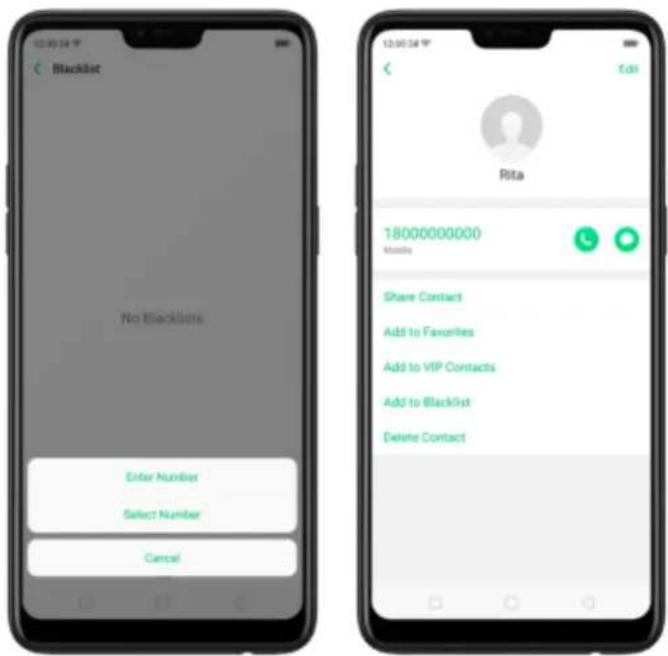
Add a contact or a phone number to the whitelist. Click Whitelist, click Add, then enter the number or choose your contacts. Calls and messages from these numbers will not be blocked.
8.2.6. Find my device
If for some reason you left, lost and forgotten your phone or was stolen, Google Find My Device will help you locate your device remotely. In order for it to work, you need to sign in your Google account and turn on Location Service on your phone.
Activate and use Find my Device.
There are three ways you can do this on your phone.
- Go to [Settings] > [Security] > and click Find My Device. Switch the slider to blue.
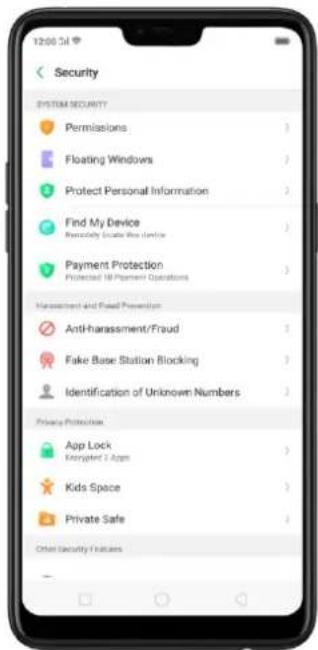
- Go to [Settings] > [Additional Settings] > [Device and Privacy] and click Find My Device. Switch the slider to blue.
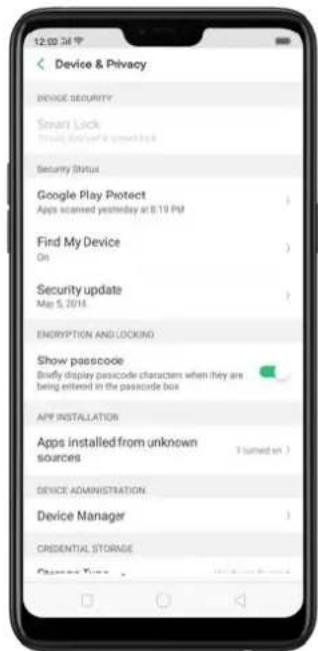
- Go to [Settings] > [Google] > [Security] and click Find My Device. Switch the slider to blue.
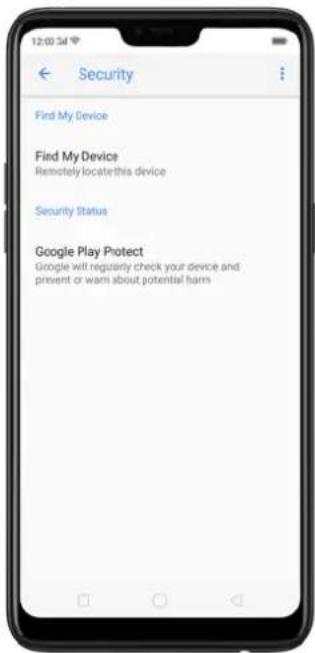
Note: You can choose from any the options above to activate Find My Device.
On the Find My Device page, it will show you ways on how to locate the phone using any android devices.
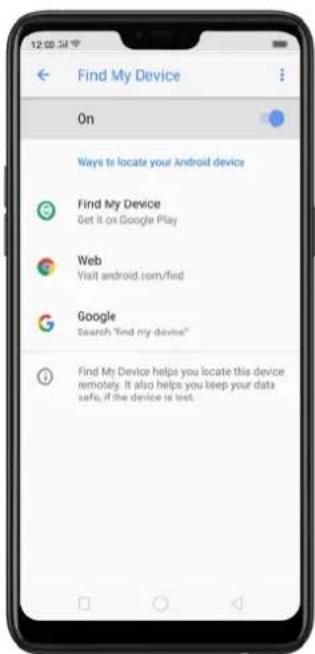
- Click Find My Device to download or open the app
- Click Web to direct you to android.com/find
- Click Google to direct you to "Find my device" page
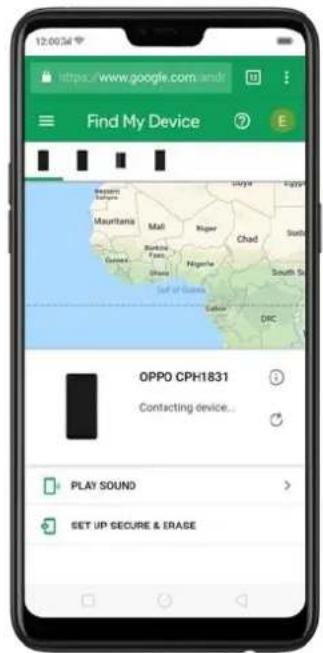
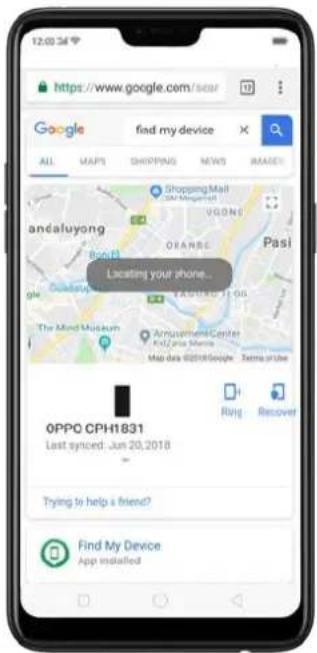
8.3. Privacy
8.3.1. Location Service
Apps like Maps, Weather and Compass must know your exact position before it can provide accurate services and results.
Turn on Location Service. Swipe down from the top of the screen to open Control
Center, then click 📋. You can also go to [Settings] > [Google] > [Location] and toggle the slider to green.
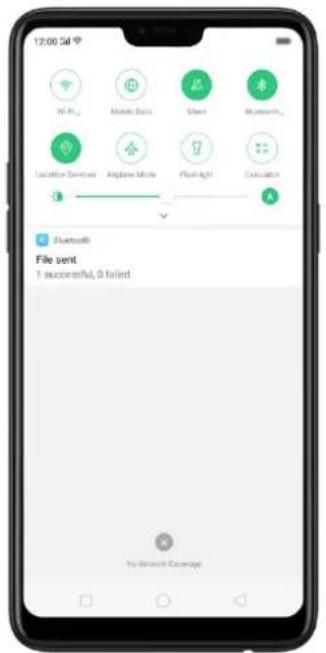
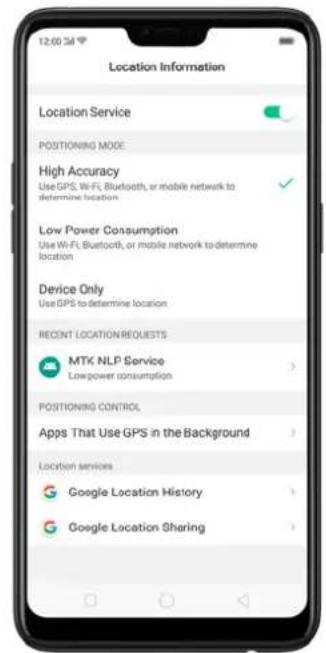
You can choose from three types of positioning modes, which differ in accuracy and battery drain:
- High accuracy (GPS, Wi-Fi, Bluetooth, and mobile network).
- Battery saving (Wi-Fi, Bluetooth and mobile network).
- Device only (GPS).
A history of recent location requests. You'll see a list of apps that have requested location. Click an app to enter the App info page that allows you to manage the app directly.
Apps that use GPS in the background. Turn the slider to green if you allow the app to use GPS in the background. Keeping background GPS of the apps active may drain the battery significantly.
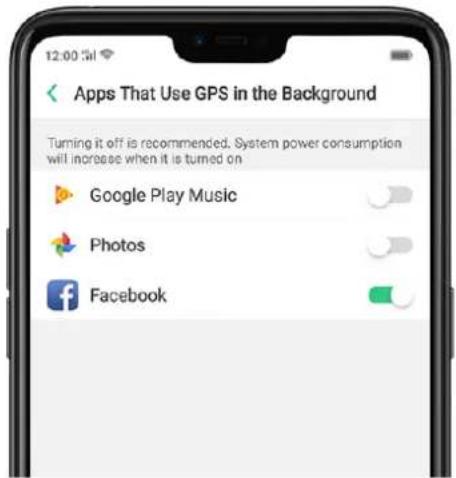
Google Location service
- Use Google Location History to retrace your steps. Google Location History will customize search results for location and search history.
- Use Google Location Sharing to share your locations with friends and contacts in real time.
8.3.2. Join User Experience Project
"User Experience Project" is a continuous plan to improve OPPO products, features, and services. You are free to decide whether to join the project or not. If you agree to join, we will collect the related data of your usage to OPPO products, features, and services, then conduct research and analysis of these information to provide you a better user experience. We will not collect any of your private information in this process.
Join User Experience Project. The first time you switch your OPPO phone on, it will prompt you to join User Experience Project, or you can go to [Settings] > [Additional Settings] > [Device & Privacy] and switch [Join "User Experience Project"] slider to green.
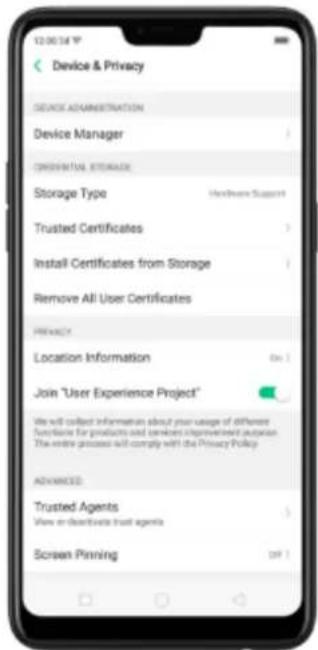
8.3.3. Privacy Protecting and Security Warning
The phone provides several measures in place to protect your privacy and security.
Privacy protecting
When you're typing with Secure Keyboard, viewing Private Safe, or using other privacy-related features, you will not be able to capture or record the screen. If you try to capture the screen, the phone will alert you "Cannot capture screenshot. The page contains personal information." If you try to record the screen, you will only record a black screen.
Security warning
Some Android malware can spy on your activities in the background and can take pictures or make recordings without notifying you, resulting in leaking of the information. With Security Warning function, your phone will remind you every time the malware performs these activities.
Prevent apps from taking pictures in the background. A warning window will pop up on your phone screen.
Prevent apps from making recordings in the background. If any app starts the sound recorder, the status bar turns red.
8.4. Advanced
8.4.1. Screen pinning
Screen Pinning temporally restricts the user from leaving the task or being interrupted by notifications. Once your app activates Screen Spinning, your phone is restricted to only display interface of this app, you cannot see notifications, access other apps, or return to the Home screen, until your app exits this mode.
Activate screen pinning
Go to [Settings] > [Additional Settings] > [Device & Privacy], scroll to the bottom of the screen and turn on [Screen Pinning].
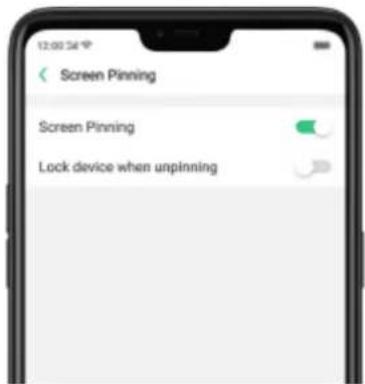
Open the app you want to pin and click the Overview/Menu button ☐ to access the multitasking tray. You can find the pushpin icon on the app preview interface. Click the icon to pin this app to your phone screen.
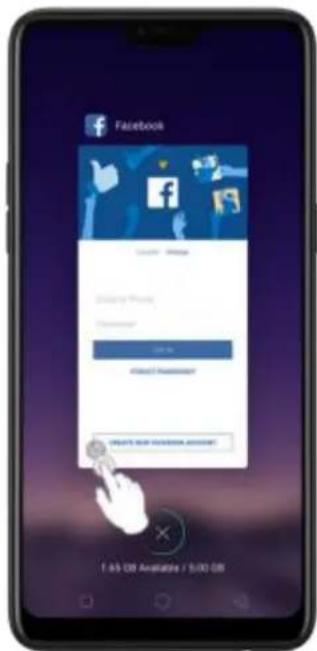
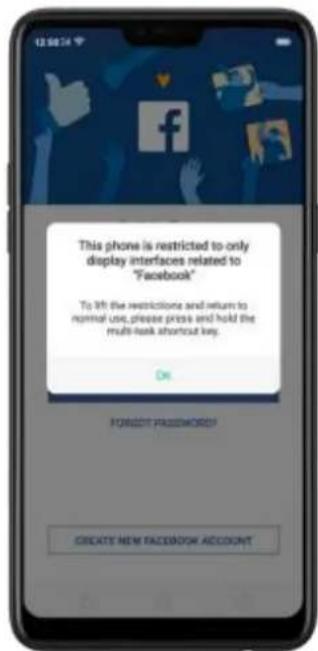
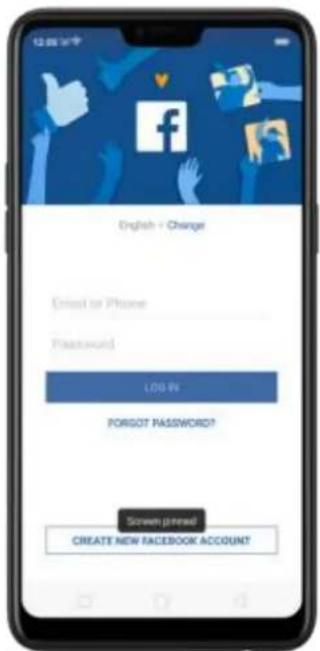
Unpin the screen. Touch and hold the Overview/Menu button until you see "Screen unpinned".
If you want to lock the phone screen directly when unpinning the screen, switch the [Lock device when unpinning] slider to green.
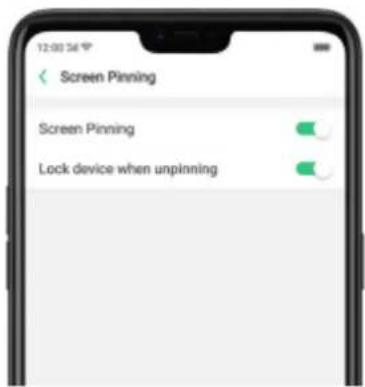
8.5. App Lock
If you want to fully secure your personal apps it is always best to encrypt them. This is to prevent theft of private data.
How to encrypt apps
Go to [Settings] > [Security] > [App Lock] then select the apps that you would like to be encrypted, then click Enable Encryption.
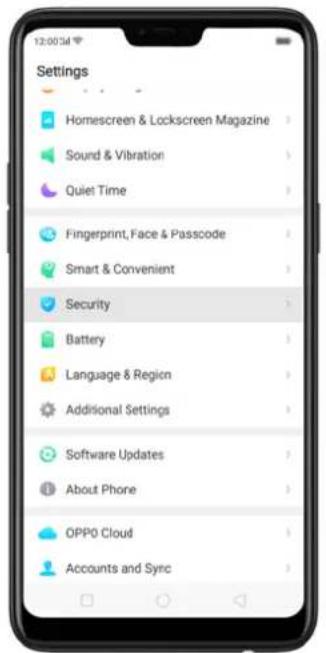
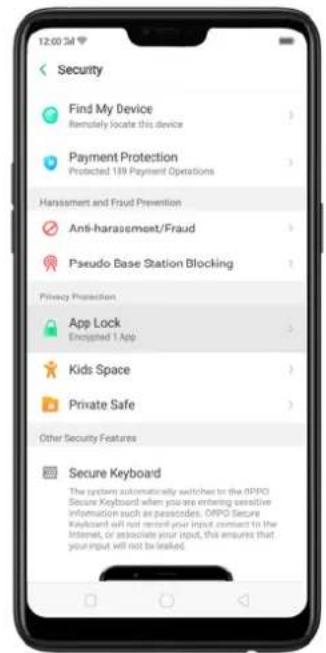
You will be asked to set a passcode. Apart from the 4 numerical method, you can also choose from Pattern Passcode and Custom Alphanumeric Passcode. Just click Other Methods to be given this option.
After successfully setting a passcode, you will be asked to set a security question. This can you help you reset the passcode when you forget it. You can also customize a question, then click Done.
If you want to use fingerprint to encrypt apps, go to [Settings] > [Fingerprint, Face &Passcode] > [Use fingerprints for] then choose App Lock.
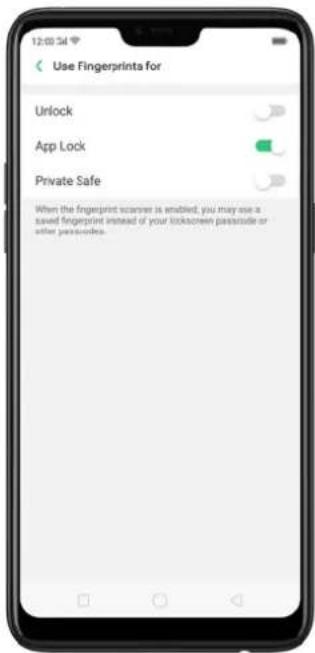
You will see a padlock on apps that you have encrypted.
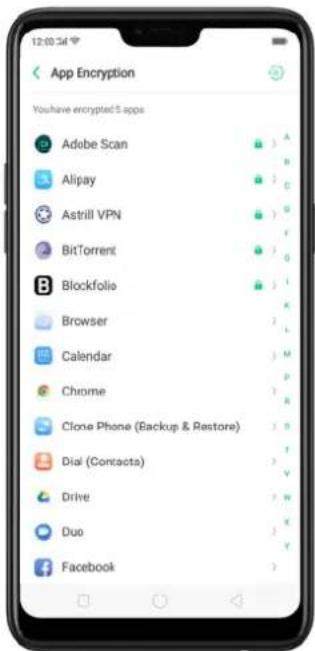
Hide Apps from the homescreen
You can also hide the app on the homescreen and can only be viewed when entering the access number on the dial pad. It can be opened without encryption passcode verification.
To enable hiding apps from the homescreen, go to [Settings] > [Security] > [App Lock] click on the App you would want to hide from the homescreen, toggle [Hide Homescreen] to green to enable.
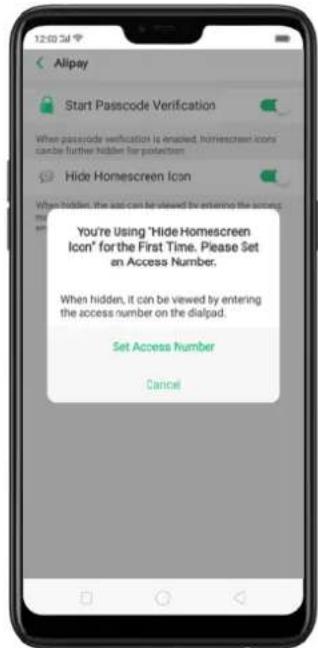
You will be asked to set an access number that starts and ends with #, with 1-16 digits in between then click Done. Example: #0000#
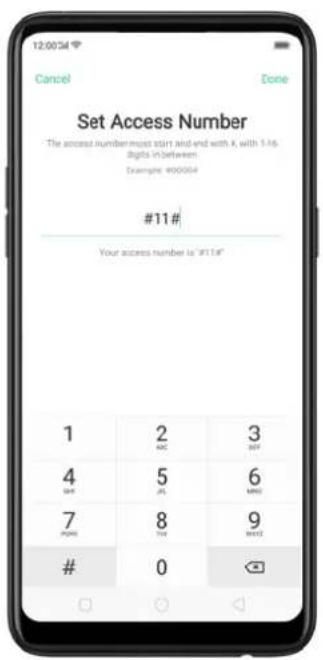
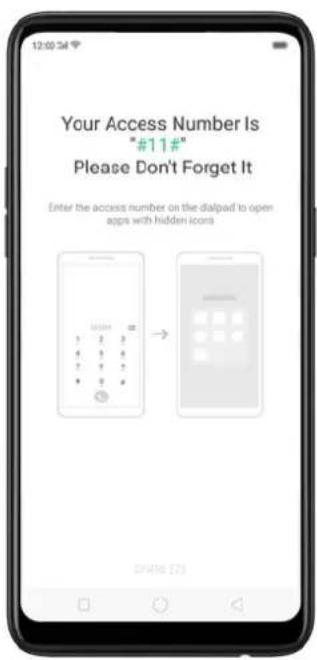
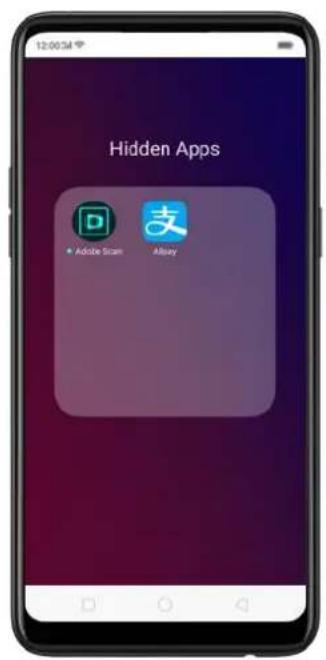
Managing encrypted apps
Go to [Settings] > [Security] > [App Lock] then click 📋 on the right top corner of the screen. You will be given options to manage the following:
• Change verification passcode
- Modify the security question
• Change access number
You can also enable the following:
• Use fingerprint for app encryption
- Stop authentication for short exits
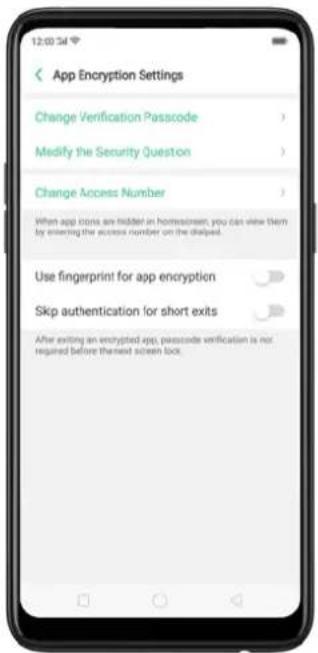
9. Share Internet connection and files
9.1.1. Tether your phone's Internet connection
Using tethering can make you share your phone's Internet connection with several devices, such as your computer, tablet or other gadgets. Tethering works when your phone is connected to the Internet via mobile data or Wi-Fi network.
Turn your phone into a personal hotspot.
- Go to [Settings] > [Other Wireless Connections] > [Personal Hotspot], then switch the slider to green.
- Set the hotspot name and password.
- On another device, choose your hotspot from the list of available Wi-Fi networks.
Note: When a device is connected, a blue band appears at the top of the phone screen.
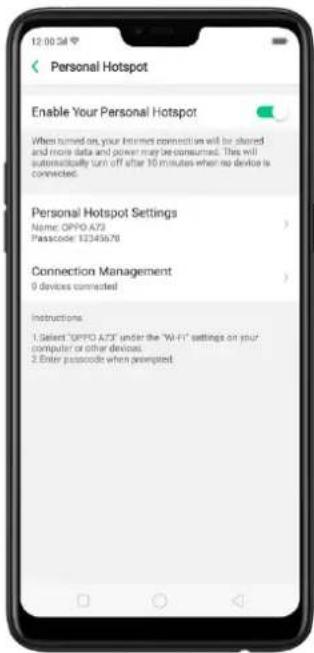
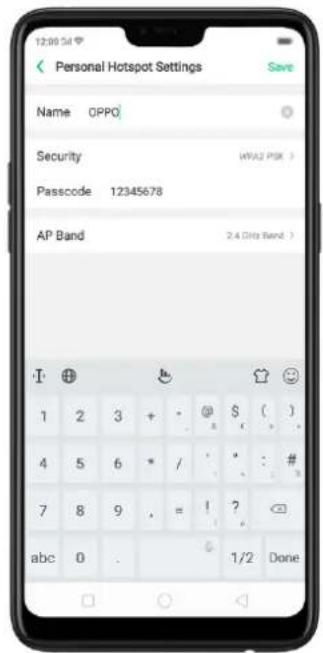
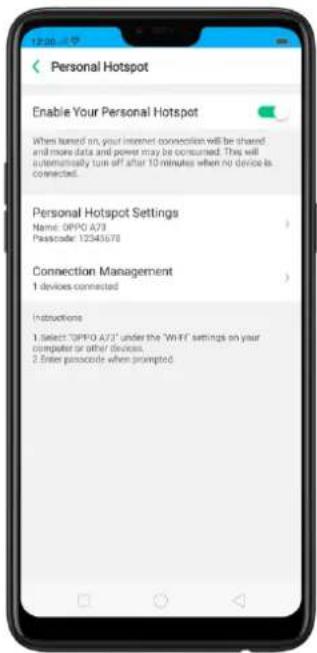
Use Wi-Fi Tethering
This makes your phone as a Wi-Fi router which basically has the same functionality to that of a traditional router which enables the sharing of internet to other Wi-Fi devices. See Tether your phone's internet connection.
Use Wi-Fi Tethering
- Go to [Settings] > [Other Wireless Connections] > and enable [Wi-Fi Tethering].
- In [Wi-Fi Tethering Settings] you can change the name, manage security, and input passcode.
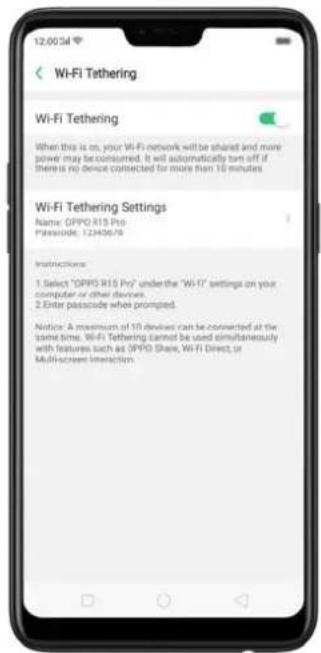
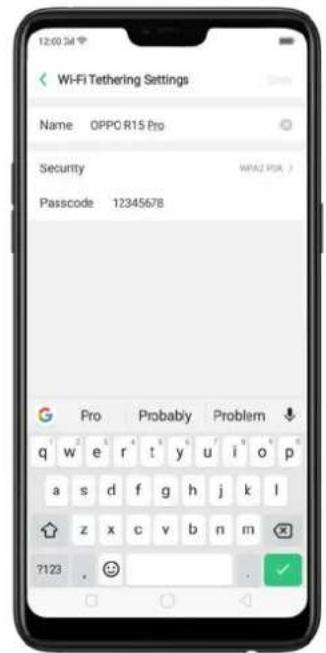
Note: Wi-Fi Tethering will automatically turn off if no device is connected for more than 10 minutes. This is to save energy. A maximum of 10 devices can be connected but cannot be used simultaneously with features such as OPPO Share, Wi-Fi Direct, or Multi-screen Interaction.
Use USB Tethering.
- Connect your phone to your computer using the cable that came with it.
- Go to [Settings] > [Other Wireless Connections] > [USB Tethering], then switch the slider to green.
- In your computer's Network preferences, choose your OPPO phone, then configure the network settings.
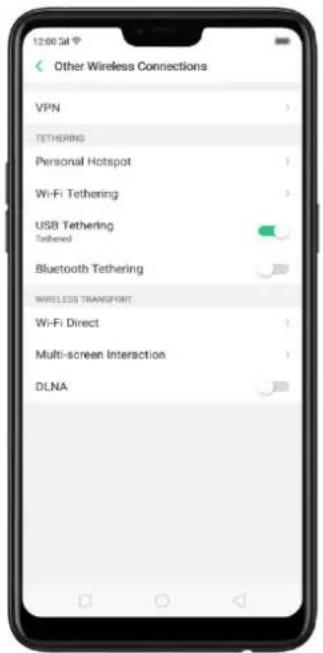
Tether via Bluetooth.
- Go to [Settings] > [Other Wireless Connections] and enable [Bluetooth Tethering].
- In [Settings] > [Bluetooth], pair and connect your phone with your Bluetooth device.
- Click ⓘ next to the device's name, then click [Internet Connection Sharing].
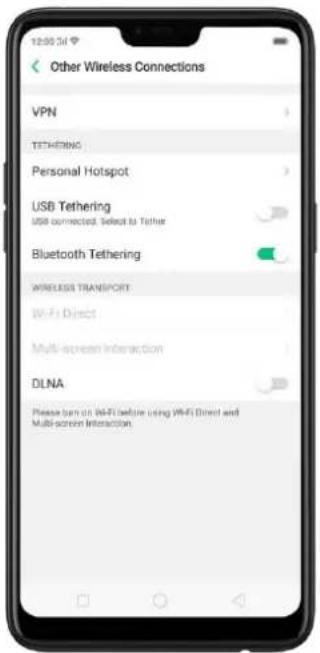
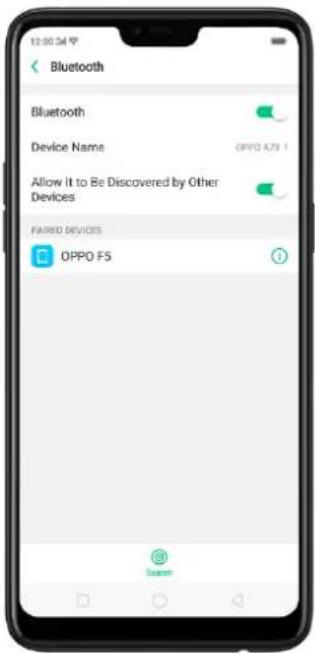
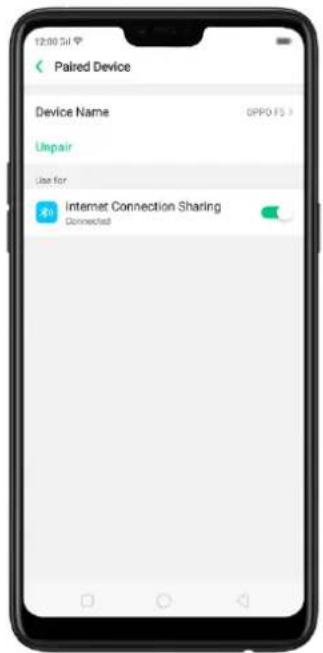
Monitor your mobile data network usage. Go to [Settings] > [Dual SIM & Cellular Data].
9.2. Share Files
9.2.1. Wireless file sharing
You can share files wirelessly between wireless devices.
Use OPPO share. Share files between OPPO smartphones.
- Open Control Center, then turn on OPPO Share on both OPPO phones.
- Select the files to be shared and the device to share with, click Send, then click the detected OPPO phone.
- Click Receive on the other device and start sharing.
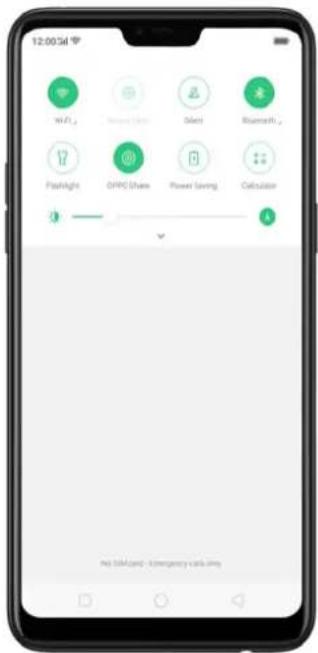
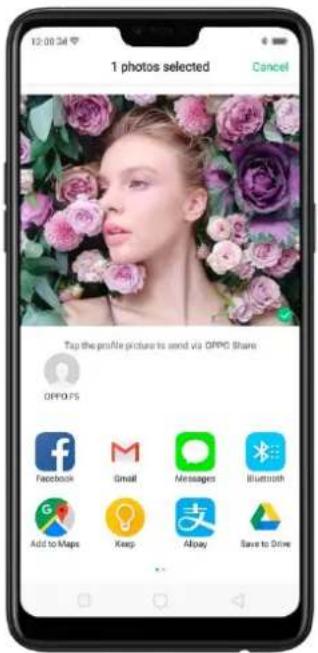
Share via Bluetooth.
- Go to [Settings] > [Bluetooth] and enable Bluetooth. Then pair and connect your phone with your Bluetooth device.
- Select the files to be shared, click Send, then click Bluetooth.
- Click Accept on your Bluetooth device and start sharing.
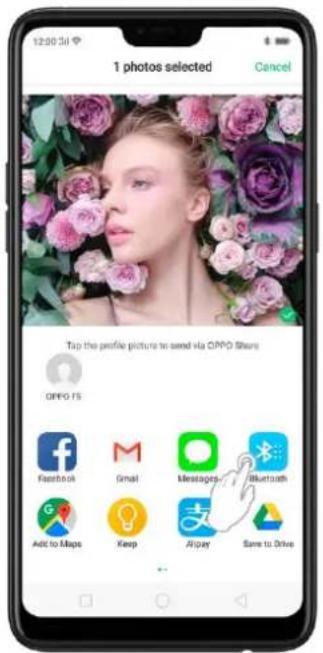
Use Remote Management to view and download files.
- Connect your phone and laptop to the same Wi-Fi network.
- Click Files, click Remotely Manage Phone Files, then click Start Service. Search the URL displayed on your phone screen with your computer, then you can view your phone's file system and download files directly to your computer. See Remotely Manage Phone Files.
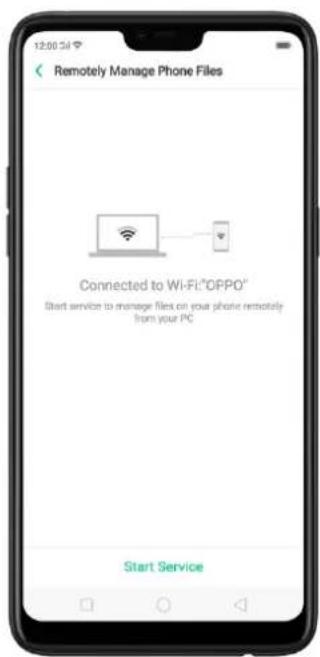
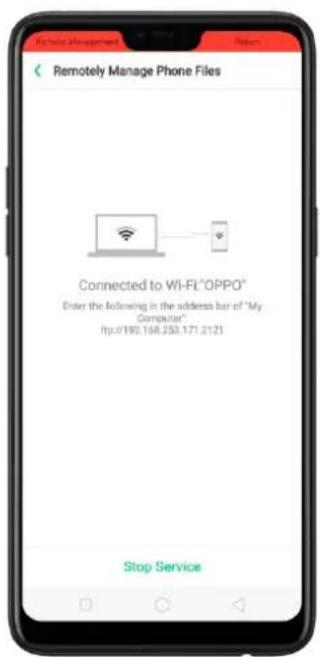
Wi-Fi Direct. Wi-Fi Direct allows devices to connect to each other directly through Wi-Fi, without the need of a Wi-Fi network or hotspot, and without having to set up the connection. You can also use Wi-Fi Direct to share files with the help of third-party apps, such as ZAPYA.
-
Go to [Settings] > [Wi-Fi] and enable Wi-Fi.
-
Go to [Settings] > [Other Wireless Connections] > [Wi-Fi Direct].
-
Click Search to start scanning for nearby Wi-Fi Direct devices. After the scan, select a device, then follow the prompts to pair the devices.
Multi-screen Interaction. You can stream your phone screen to TV sets, TV Boxes, or computers which is certified with Wi-Fi Miracast technology.
Stream to computer
Notice:
-
Connect your OPPO smartphone and computer to the same Wi-Fi network.
-
The function is only supported by Win 10. For Win 8 system, you can install additional software and apps like AirServer to support.
Computer Setting
- Go to [Settings] > [System] > [Project onto the computer].
- Allow projection on all locations and every time when a request comes.
- Enable the PIN code and remember your computer name.
OPPO smartphone Setting
- Go to [Settings] > [Other Wireless Connections] > [Multi-screen Interaction], switch [Multi-screen Interaction] to green to start searching devices.
- Select your computer name from the list and match it to your smartphone. You will see the shared screen on computer once it's connected successfully.
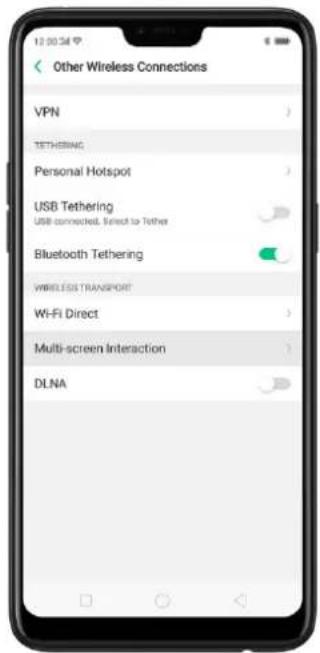
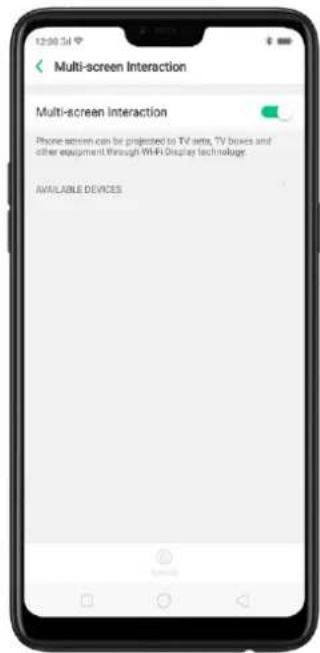
Stream to TV
- Connect your OPPO smartphone and TV to the same Wi-Fi network.
- Select your TV name from the list and match it to your smartphone. You will see the shared screen on TV once it's connected successfully.
- If you want to stream the video playing on your smartphone to your TV, you can install additional apps like IQIYI to support.
9.2.2. Wired file sharing
Transfer files between your phone and a computer.
- Connect your phone to your computer using the cable that came with it.
- Click phone's notification, then click File Transfer.
- On the computer, click your phone name, click Internal shared storage, then you can copy phone files to the computer.
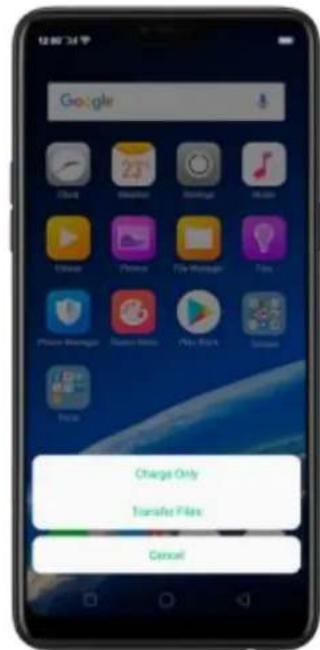
Transfer files with USB OTG. You can connect and add additional storage devices or USB flash drives directly to your phone using USB OTG cable.
- Go to [Settings] > [Additional Settings] and enable [OTG Connection].
- Connect a storage device to your phone using USB OTG cable. You can directly access data on the external storage device and play movies or music without having to store them on your device.
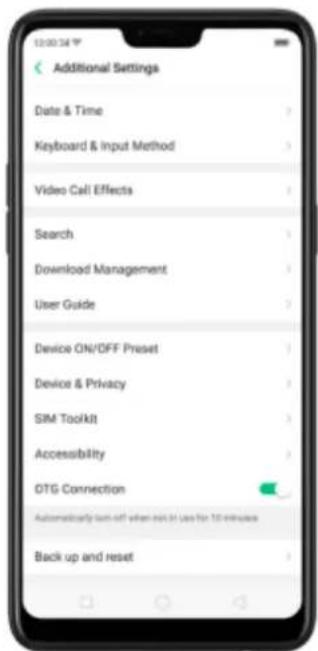
9.2.3. Share from apps
In addition to sharing your information from the Files app, you can also share from many other apps on your OPPO smartphone.
Share from apps. In many apps, you can click Send or 📋 to choose how to share your information. The choices vary depending on the app you're using. Additional options may appear if you've downloaded apps with sharing options.
Take the Photos app as an example, click 📋 and you'll see all the sharing options.
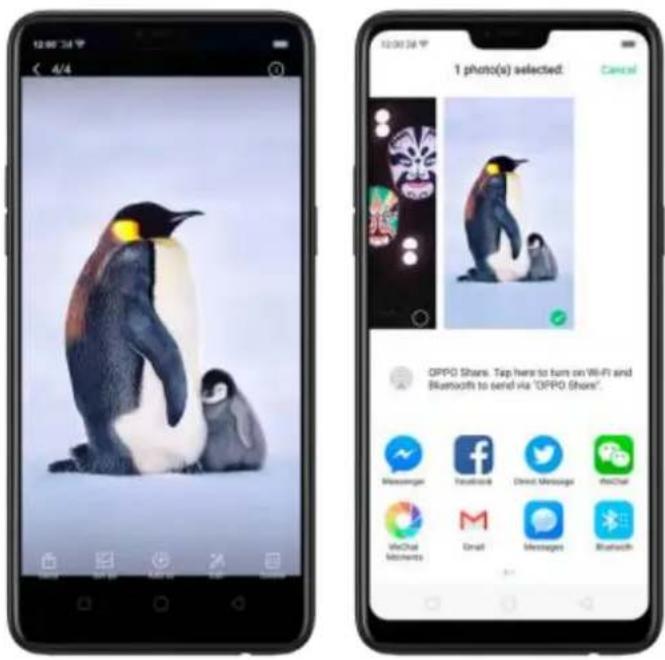
10. Restart, update, back up, and restore
10.1. Restart the phone
If something isn't working right, try restarting the phone.
Restart OPPO phone. Press and hold the Sleep/Wake button until the Slide down to power off message appears. Drag the power icon down to turn off the phone. To turn the phone back on, press and hold the Sleep/Wake button until you see the OPPO logo.
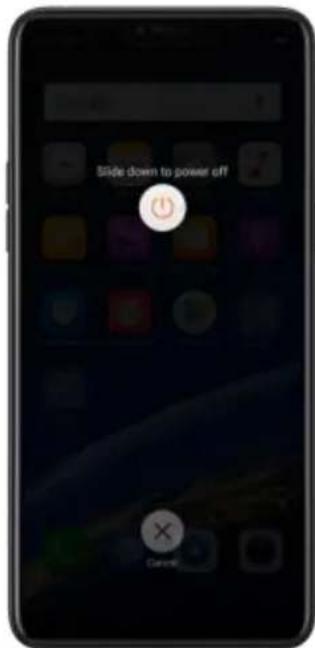
Force restart OPPO phone. If the phone is not responding, press and hold the Sleep/Wake and Volume Up buttons for at least 8 seconds until you see the OPPO logo.
10.2. Update ColorOS software
There are three ways to update your device.
Notice before doing the update.
• Plug your OPPO phone into power, or keep the battery level over 40%.
- The update process takes some time. Do not operate or power off your device during the process.
- DO NOT root the phone yourself, for that might cause damage to your system, and the warranty service will be terminated immediately.
Update your OPPO phone wirelessly
- Connect to a working Wi-Fi or Mobile network. The system will automatically show new update if any. You can see a notification on the "System updates" icon, otherwise, it will show "It is already the latest version".
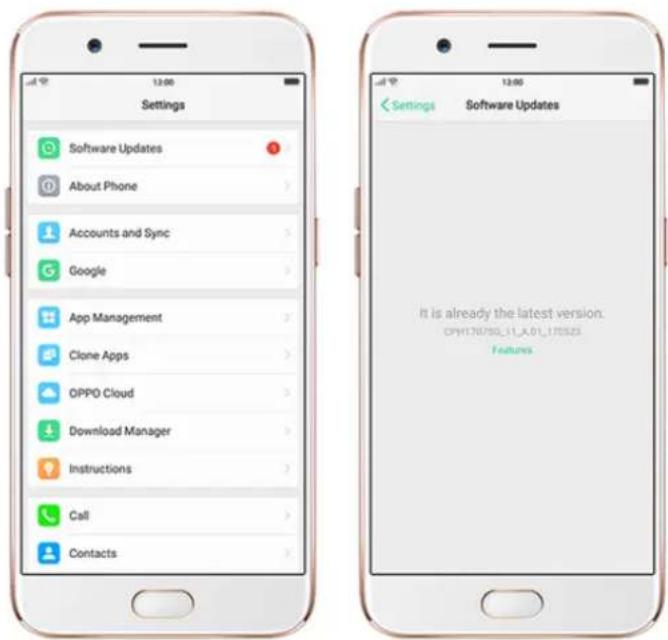
- Download the firmware. Download under a Wi-Fi network to avoid mobile consumption.
- Click [System Updates]. Your device will reboot and start updating, which will take a few minutes.
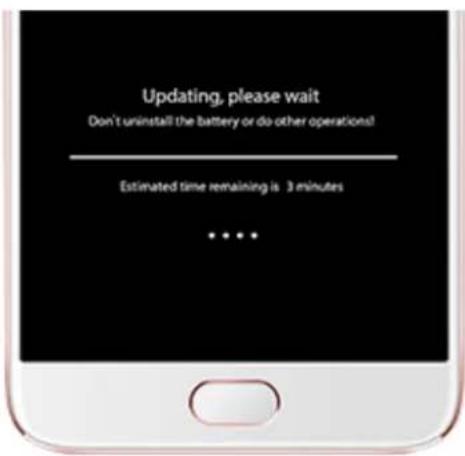
10.3. Back up and restore the phone
10.3.1. Back up your phone
If you use your OPPO phone on a regular basis, having a reliable backup is essential in case something goes wrong.
Use the built-in backup tool. Go to [Settings] > [Additional Settings] > [Back up and reset] and click[Backup & Restore]. All your personal data, system data, and applications will be backed up to phone storage.
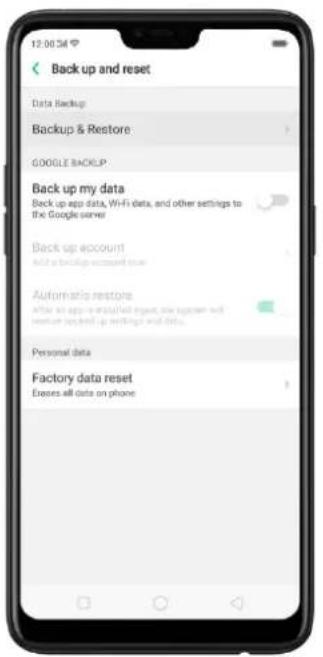
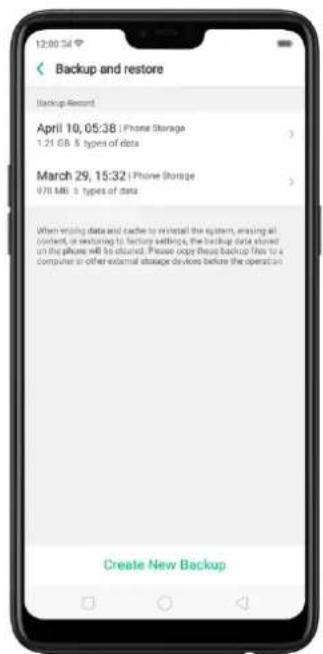
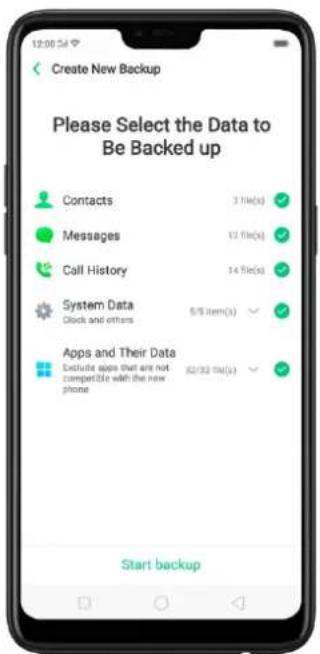
Back up to Google. Go to [Settings] > [Additional Settings] > [Back up and reset] and turn on [Back up my data]. You can back up your app data, Wi-Fi data, and other settings to the Google server.
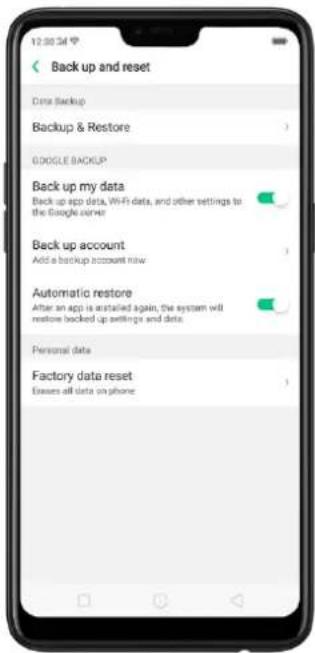
Use OPPO Cloud. OPPO Cloud allows you to back up the Contacts and SMS to the cloud drive. You need to register or sign in OPPO account first.
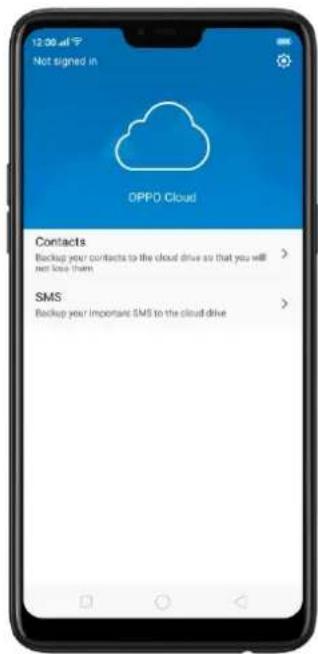
Connect your phone to a computer to create a backup on it. This is a common way to back up all your data. Don't disconnect your phone during the copy backup process.
View Back up your OPPO smartphone for more details.
10.3.2.Restore data on your phone
There are various methods to restore data on OPPO smartphone. Select the corresponding restoration method according to the way you have made the backup.
Restore your OPPO smartphone from Local backup
Before you start, make sure that you have copied and saved the data on OPPO smartphone via Local backup.
- Go to [Settings] > [Additional Settings] > [Back up and reset] and click [Backup & Restore]. You can find the data you want to restore according to its backup time.
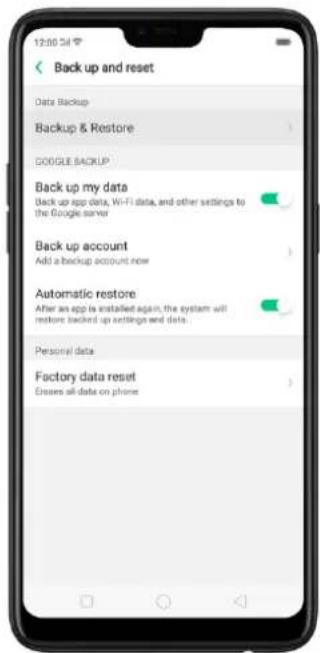
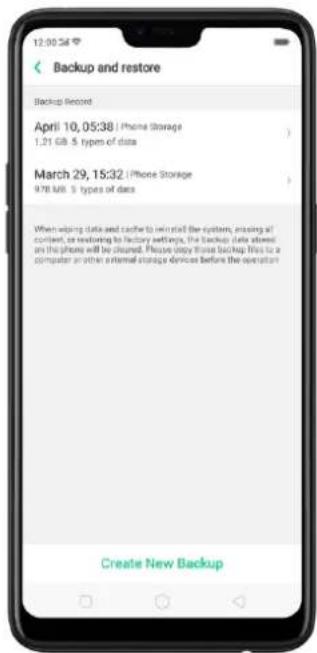
- Select data to be restored, including Contacts, Messages, Call history, system data and Apps and their data. Then start the restoration.
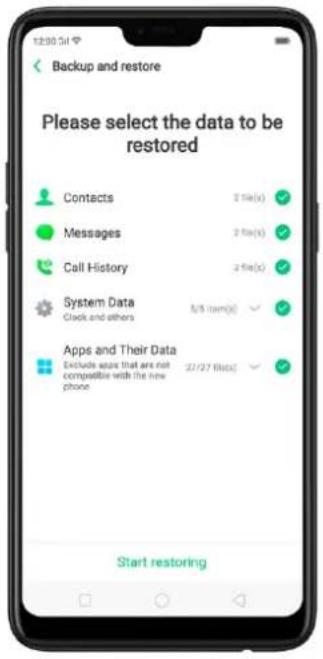
- OPPO smartphone will display the progress and details till the restoration is done. You can click Stop Restoring at any time during the process.
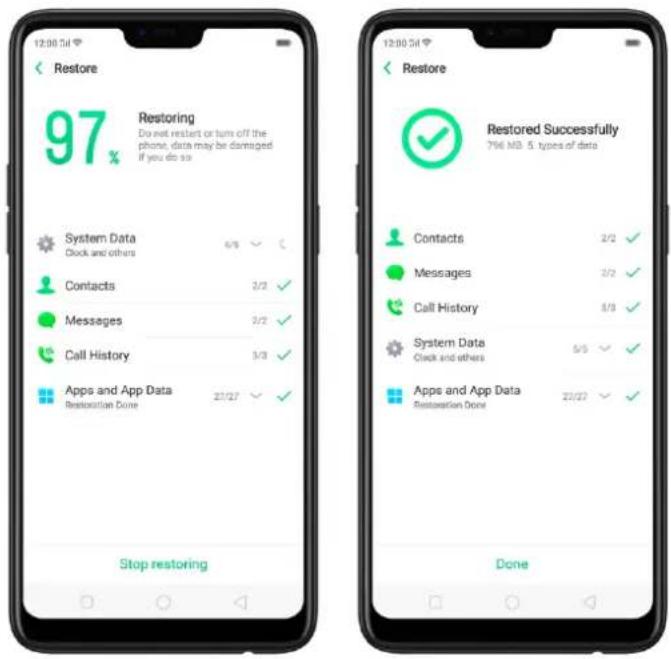
* DO NOT turn off or restart your phone during the restoration process, otherwise, data may be damaged or lost.
* After restoration has succeeded, you can delete data that are no longer needed.
Restore your OPPO smartphone via computer
If your backup files are stored on external storage such as SD card, removable hard drive, etc., copy these files to your OPPO smartphone to complete data restoration.
Restore Contacts and SMS on OPPO smartphone from OPPO Cloud
If you have backed up your Contacts and SMS to OPPO Cloud, you can restore them after signing in to your OPPO account.
* Network connection is required when you back up or restore data with OPPO Cloud.
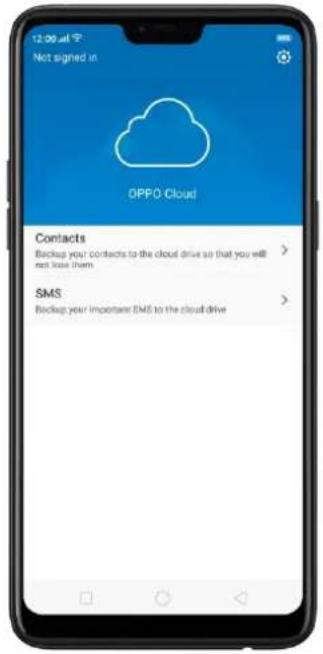
Transfer your data with Clone Phone
If you have switched to a new OPPO phone, you can transfer your data from old phone to your new OPPO phone through Clone Phone.
Restore your OPPO smartphone data from third-party Apps
OPPO does not recommend you back up, transfer or restore data via third-party APPs, for they may be in conflict with OPPO system, leak personal information, or cause other safety problems.
10.3.3.Reset the phone
Resetting your OPPO phone will reset the phone back to its original factory settings, and will permanently erase all your personal data. You can do Factory data reset if your phone starts to lag or there's a delay in navigating, has too much junk files and caches, or has issues with system or applications.
Before you do factory reset, back up all the needed data.
Reset your phone to factory settings
Go to [Settings] > [Additional settings] > [Back up and reset] > [Factory data reset], choose an option available for factory data reset.
* Any reset option cannot be revoked once it is operated.
Reset System Settings
This option will reset all system settings without deleting any data or media files.
Erase All App Data and Deletable Apps
This option will delete all third-party apps and app data. But the data saved by the user will be kept such as photos, music, and videos.
Erase All Content and Settings
Through this option, all data of OPPO smartphone will be cleared including contents, settings, photos, and music. OPPO smartphone will reset to its inactivated initial state, which is the factory state.
Erase Contacts and Call Logs
By choosing this option, all the contacts and call history on the phone will be erased. Only the contacts on the SIM card will be preserved. Other data on OPPO smartphone will not be affected.
Erase All SMS and MMS
By choosing this option, all the SMS and MMS messages on the phone will be erased. Only the SMS messages on the SIM card will be preserved. Other data on OPPO smartphone will not be affected.
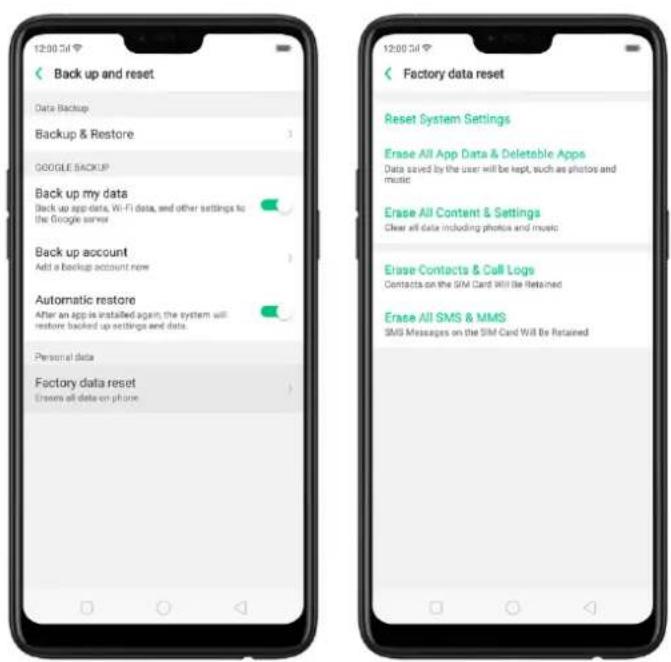
11. Barrier-free
11.1. TalkBack
TalkBack helps blind and vision-impaired users to interact with the phones more easily. It uses spoken word, vibration, and other audible feedback to let you know what's on your screen, what you're touching, and what you can do with it.
Turn TalkBack on. Go to [Settings] > [Additional Settings] > [Accessibility] and enable TalkBack.
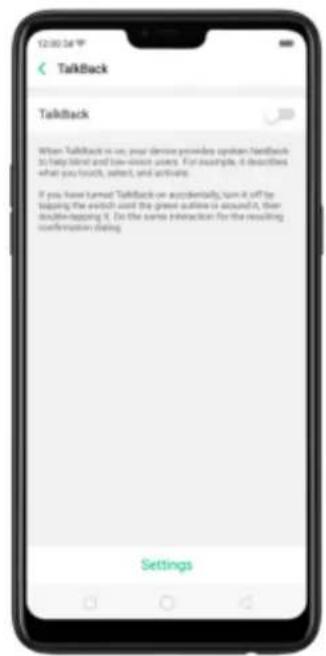
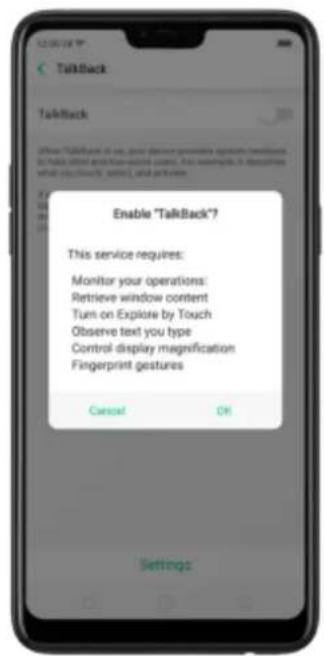
When TalkBack is on:
Your device provides spoken feedback to help blind and low-vision users. For example, it describes what you touch, select, and activate.
- To select an option: Click the option to show the green border, then double-click to activate it.
• To scroll the screen: Swipe upward or downward with two fingers.
Turn Talkback off. Go to [Settings] > [Additional Settings] > [Accessibility] >
[TalkBack], switch the slider to white, then click Off.
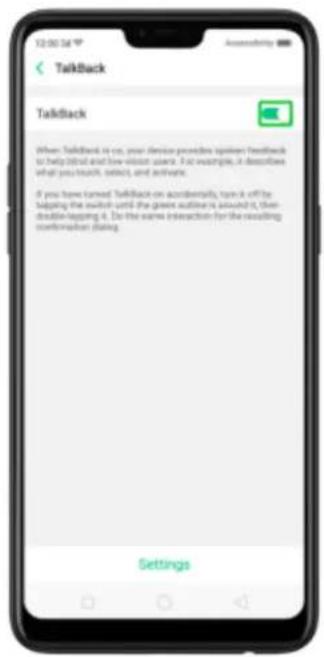
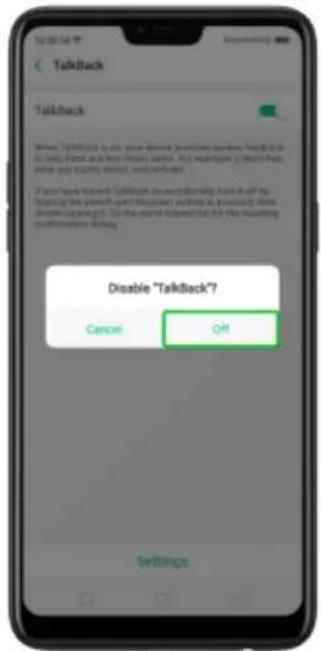
11.2. Magnification Gestures
Magnification gestures work similarly to the full-screen magnifiers, which allows users to zoom in and pan the whole screen to get a closer look at screen content.
Enable magnification gestures. Go to [Settings] > [Additional Settings] > [Accessibility] and enable [Magnification Gestures].
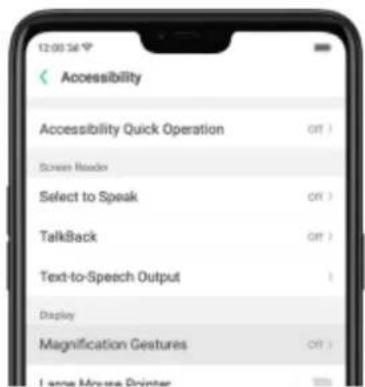
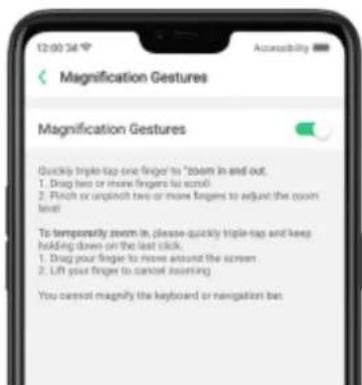
- Quickly triple-tap the screen to zoom in and out. The triple-tapping does not work well on the keyboard or on the navigation bar - if you have the magnifier running while the keyboard is shown, only the area above the keyboard will be magnified.
- Drag two or more fingers across the screen to pan across the screen.
- Pinch your fingers together or apart to adjust the zoom level.
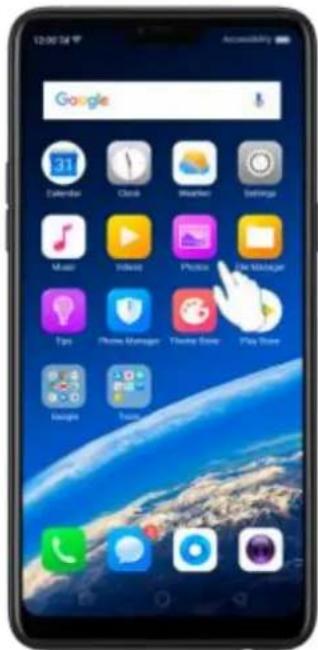
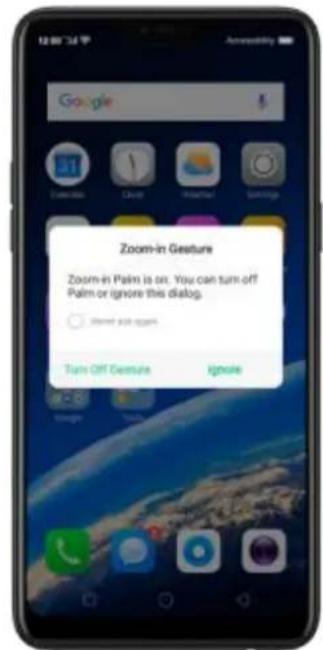
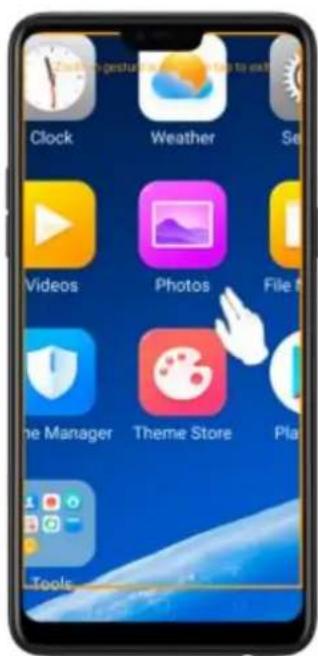
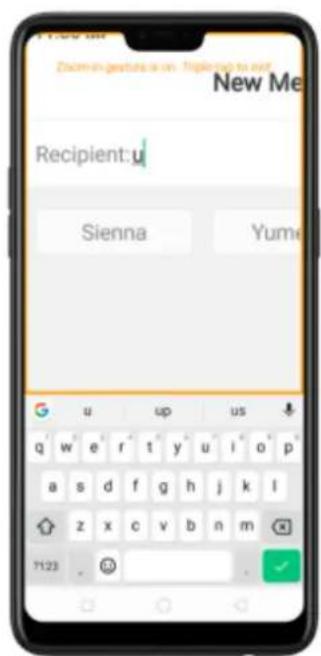
Turn the magnifier on temporarily. Triple-tap the screen and hold the third click.
• Drag one finger around the screen to move the view.
• Lift the finger to cancel zooming.
• Quickly triple-tap to exit.
11.3. Press Power Button to End Call
- In addition to end calls by clicking 🔍, you can make the Power button do this function.
- End Calls with the Power button. Go to [Settings] > [Additional Settings] > [Accessibility] and turn on [Press Power Button to End Call]. Then you can end calls by clicking Decline or pressing the Power button.
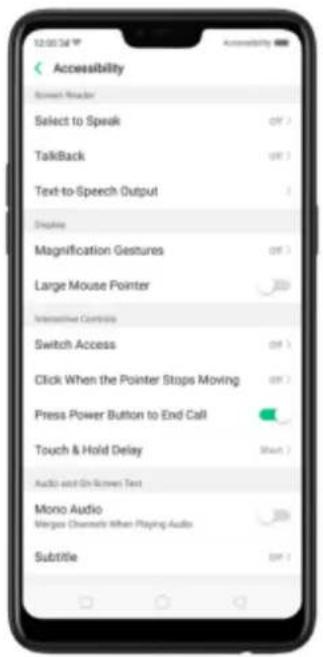
12. Safety, handling, and support
12.1. Health & Safety
12.1.1.Using Environment
Keep in mind the following rules. Switch off your phone when it is prohibited, or might cause disturbance or danger.
-
The ideal phone working temperature is 0^ C to 35^ C and 35% to 85% humidity. A too high or too low temperature might affect the performance or cause damages. The ideal phone storage temperature is -20^ C to 45^ C.
-
Your phone might interfere with electronic and medical equipment. Obey the
related rules and switch off your phone in these places.
-
Try not to use your phone in weak signal areas or near high-precision electronic devices. Radio interference might lead to malfunction or other issues in electronic devices, especially pay attention when near the following devices: hearing aids, pacemakers and other medical devices, fire detectors, automatic doors and other automatic control devices.
-
In rare cases, the phone might interfere with the electronic systems in certain cars, such as the ABS anti-lock brakes and the air bag. Consult your network operator or car manufacturer before connecting the phone.
-
Before connecting to other devices, carefully read the user manual for more detailed, accurate, and safety instructions. Do not connect to incompatible products.
-
Do not use your phone in rain, or near washbasins or other wet locations.
12.1.2.Battery Safety
Battery Precautions
- Do not disassemble the built-in lithium polymer battery yourself, otherwise, it might cause battery leakage, overheat, explosion, and fire. Go to an OPPO designated after-sales service center if battery replacement is needed.
- Do not puncture or pierce the battery with hard objects (e.g., needles and tacks) to avoid battery leakage.
- Liquid in the battery is harmful to your skin. If liquid can be seen leaking from the battery, do not attempt to touch it. If the liquid contacts with the skin and eyes rinse immediately with water and go to a doctor if needed.
- Do not expose the battery to extreme ambient temperatures, fire, wet locations, and direct sunlight.
- If the battery sends out strange smell, turn off your phone immediately, and send it to an authorized service provider for battery replacement. Do not attempt to disassemble or replace the battery yourself.
- Do not continuously charge the battery over 12 hours.
Battery Life Tips
- Use OPPO original accessories. Use OPPO original charger (power adapter and USB cable) that matches your phone model. Charging with third-party or
counterfeit charger accessories might impact battery lifespan or even cause security incidents.
-
Charge at a suitable temperature. The ideal charging temperature is 5^ C to 40^ C. Battery life might temporarily shorten in low-temperature conditions, or irreversibly damage when temperature is too high. The battery should be charged within the ideal temperature range to avoid decreased battery performance and standby time.
-
Turn off phone features when not in use. Using features such as Bluetooth, Wi-Fi, and GPS or keeping them active in the background may drain the battery significantly. Turn them off when not in use to save the battery. Dimming your screen and reducing the screen timeout setting can also preserve the battery life.
-
Do not use when charging. Your phone might quickly get warm or even cause damage if you use it a lot during charging.
-
Do not fully drain your phone's battery. Charge your phone when your battery level goes down to 10%. If phone's battery is fully drain, the battery could fall into a deep empty/drain state, which will cause it to be slightly damaged.
-
Store the phone long term. If you plan to store the phone for a long time, charge it to 60% or above every month.
-
External environment. Avoid exposing your phone battery to high or low temperature, humid environment or sun exposure.
12.1.3. Charger Usage Notes
- Only use the charger specified by OPPO.
- Charging voltage should be consistent with that specified on the charger. Using mismatched voltage might cause leakage, fire, and damages.
- Do not use a power socket that is incompatible with the charger. Make sure the charger is plugged in firmly to avoid any fire hazard.
- Do not charge your phone with a partially damaged charger, for that could result in electric shock, fire or other damages.
- Do not charge your phone near washbasins or other water containers, or in wet locations such as bathrooms. Take caution to not spill any food or liquid on your phone or charger. Do not touch chargers, cables or power sockets with wet
hands. In case the charger gets wet, unplug all cables, allow it to dry thoroughly before charging again.
- Do not disassemble or modify the charger or cables yourself.
- Do not place heavy objects on the charger, for that might cause electric shock and fire.
- Before cleaning the charger, unplug all cables (hold and pull the plug instead of pulling the cable, otherwise the cable will be ripped off).
- Do not charge your phone when there is lightening or thunderstorm. Do not make phone calls while charging.
- Avoid exposing your charger to following conditions: exposing to direct sunlight, temperatures lower than 5°C or higher than 40°C, damp and dusty places or that with excessive vibrations (might cause breakdowns), places near electrical appliances such as TV and radio sets (might cause interference to images and sound).
12.1.4. Traffic Safety
Use both hands when driving, and give full attention to driving and on the road. If you decide to use your phone while driving or riding a bicycle, keep in mind the following conditions:
▶ Safety should always come first while driving or riding a bicycle. Make sure to follow the related regulations in the area or country.
- Keep your eyes on the road. If you get an incoming call at an inconvenient time, let your voicemail answer it for you, or answer with a Bluetooth headset.
▶ An air bag in your vehicle inflates with great force. Do not store your phone or any of its accessories in the area over the air bag or in the air bag deployment area.
- Do not rely solely on the map on your phone when searching for locations, buildings, directions, and distances. Map routes and compass change as information provided by the service provider changes, so the map might be incorrect, incomplete or unsupported.
- Do not ship the phone, with its components or accessories in the same compartment with flammable liquids, gases or explosives
12.2. Maintenance and Repair
12.2.1. Phone Cases
Keeping your phone protected from damage should be pretty important to you. The phone case that come along with your phone can effectively mitigate your concerns.
OPPO original phone case is made of TPU material, which is lightweight and soft and helps keep the original 'feel' of the phone since the case is a tight-fitting overlay. It does a good job of protecting against drops and shock damage on the corners and rear of your phone, also can reduce the damage caused by extreme temperature, liquid and dust invasion, etc.
12.2.2. Screen Protector
OPPO provides you with an original HD clear screen protector made of PET material, which is a thin piece of electro-conductive film that self-adheres to your screen. It protects your screen from cracking, also does offer resistance to scratches, finger prints, and abrasions. Besides, OPPO screen protector ensures high-definition and sensitiveness of the screen, which will not affect the screen display quality.
12.2.3. Maximize battery life and lifespan
Note: Rechargeable batteries have a limited number of charge cycles and may eventually need to be replaced. It is normal for the battery to lose its capacity over time, but you can do the following to maximize its life and lifespan.
Use OPPO original accessories. Charge the phone with OPPO original power
adapter and USB cable. Charging with third-party charger accessories might impact battery lifespan or even cause security incidents.
Use at a suitable temperature. OPPO smartphone battery is designed to have a
good performance in a wide range of ambient temperatures, with 16^ C to 25^ C as the ideal comfort zone. When temperature is higher than 45^ C, battery capacity will damage irreversibly, and phone might even short-circuit and burn.
Do not use when charging. Programs such as long-time calls, games or online videos will make phone get warm quickly.
Do not fully discharge your phone's battery. Charge your phone when your battery level goes down to 10%. If phone's battery is fully discharged, the battery could fall into a deep discharge state, which will cause it to be slightly damaged.
Store the phone long term. If you plan to store the phone for a long-term, charge it to 60% or above every month.
External environment. Avoid exposing your phone battery to humid environment or sun exposure.
Keep a good using habit. Using features such as Bluetooth, Wi-Fi, and GPS or keeping them active in the background may drain the battery significantly. Turn them off when not in use to save the battery. Dimming your screen and reducing the screen timeout setting can also preserve the battery life.
Do not charge with a portable power bank frequently. If a power bank supplies current which is above your phone battery's capacity, then it will cause damage to your battery gradually. Make sure the power bank you buy is of good quality and has power ratings which are suitable for your phone, basically match the current to the wall charger you use.
12.2.4. Keep Clean
Your mobile phone could be a hotspot for bacteria, so clean your phone is of great importance. Follow these steps:
- To clean your phone, unplug all cables and turn it off first.
- Dip the included cleaning cloth or a soft, slightly damp, lint-free cloth in distilled water or low concentration alcohol, and shake or squeeze to remove any excess liquid.
- Slightly wipe across your phone. Avoid getting moisture in openings.
- Gently wipe the screen with the dry part of the microfiber cloth, but don't try to pick up all the excess water if it means pressing hard.
Do not attempt to dry your phone with an external heat source, such as a hair dryer. If impurities cannot be cleaned up, contact OPPO Service Center for professional assistances.
12.2.5. Keep dry and solve water damage
Do not use your phone in rain, or near washbasins or other wet locations. Take care not to spill any food or liquid on your phone. In case your phone gets wet, follow these emergency measures:
- Take your phone out of the liquid immediately, unplug all cables and turn off your phone.
- If your phone has a removable battery, remove it.
- Use a tissue or soft cloth to thoroughly adsorb water stains or liquids on the surface of your phone, and gently shake the phone in the opposite direction of liquid inflow.
- Let your phone dry thoroughly before turning it on again. Avoid drying your phone with an external heat source, such as a hot air hair dryer.
If your phone has a serious water damage, take your phone, warranty card and proof of purchase to a nearby OPPO Customer Center for repairs at once.
12.2.6. Use connectors, ports, and buttons.
Never force a connector into a port for that might cause damage, which is not covered by warranty service. Check for obstructions on the port. If the connector and port don't join with reasonable ease, they probably don't match. Make sure that the connector matches the port and that you have positioned the connector correctly in relation to the port.
12.2.7. Other information
Mobile phones are perishable items, use with care. The following instructions might help to protect your phone:
- Do not drop your phone or let it receive a substantial impact.
- Do not place your phone in a microwave oven or other high voltage equipment, otherwise, it might cause damages, fire or explosion.
- Do not leave the phone in hot, humid, or dusty environments. This may cause the phone to malfunction.
- Your phone contains small parts, which may present a choking hazard to small children. Keep your phone and its accessories away from small children.
- Do not paint your phone. Paint will block the sensors and lead to phone disoperation.
- Dirty sockets might cause poor contact or electrical leakage. Regularly clean the power socket.
- Do not take out the SIM or SD card when transmitting or saving information, otherwise, some important information might be lost.
- Use only the supplied or approved antenna for replacement. Modified accessories might damage the phone or violate administer regulations of radio devices.
Note:
Read all safety information carefully before using the phone to ensure personal safety and proper use. Consumable parts (such as the battery and earphone) possess different warranty periods from your phone. Check with your warranty receipt for details.
12.3. FCC Compliance Statement
FCC Statement
This device complies with part 15 of the FCC rules. Operation is subject to the following two conditions: (1) This device may not cause harmful interference, and (2) this device must accept any interference received, including interference that may cause undesired operation.
Note
The manufacturer is not responsible for any radio interference caused by unauthorized modifications to this product. Such modifications could negate the user's authority to operate the product.
This product has been tested and found to comply with the limits for a Class B digital device, pursuant to part 15 of the FCC Rules. These limits are designed to provide reasonable protection against harmful interference in a residential installation. Using this product can radiate radio frequency energy and, if not installed and used in accordance with the instructions, it may cause harmful interference to radio communications. However, there is no guarantee that interference will not occur in some conditions. If this product does cause harmful interference to radio or television reception itself, follow one or more of these measures to correct that:
- Reorient or relocate the receiving antenna.
- Keep a longer distance between the product and receiver.
- Plug the product and receiver into outlets of different circuits.
- Consult the dealer or an experienced radio/TV technician for help.
FCC Caution
- Any changes or modifications not expressly approved by the party responsible for compliance could void the user's authority to use the product.
The antenna(s) used for this transmitter must not be co-located or operated in conjunction with any other antenna or transmitter.
The country code selection is for non-US model only and is not available to all US models. Per FCC regulation, all Wi-Fi products marketed in US must fixed to US operation channels only.
▶ Operations in the 5.15-5.25 GHz band are restricted to indoor usage only.
- OPPO Smartphone ColorOS 5.2 User Guide
- Content
- Message 212
- Contacts....217
- Phone Manager....234
- Weather....249
- Camera 251
- Photos 263
- Music....282
- Videos....287
- Theme Store....289
- Clock....292
- Files 301
- Start Using Private Safe....308
- Calculator 310
- Sound Recording 315
- Compass....317
- Chrome....319
- Safety & Privacy....327
- Device security....327
- Device administraon 335
- Privacy....345
- Locaon Service 345
- Welcome to ColorOS 5.2
- Safety Information
- Safe Startup
- Traffic Safety First
- Switching off Device at Gas Stations
- Switching off Device When On Board an Airplane
- Switching off Device near Medical Equipment
- Switching off Device at Blasting Areas
- Radiation
- Interference
- Temperature
- Proper Usage
- Qualified Maintenance and Service
- Batteries, Chargers and other Accessories
- Waterproofness
- Avoiding Hearing Damage
- Avoiding Eyestrain
- Glass Parts
- Connecting to Other Devices
- Being Aware of Laser Safety
- Get started
- Quick look
- 3.1.1.ColorOS 5.2 Features
- Exciting user interface
- Smart Sidebar
- Smart snaps with Smart Scan
- New clever features of Smart Assistant
- Google Lens
- ORoaming
- Auto Sync Photos on OPPO Cloud
- Be a master video editor
- Smart Driving
- Game Space
- Customizing the timer
- Scanning names to save on Contacts
- Save more battery with Smart Power Saver
- Say hello to Talia, your new TouchPal assistant
- ColorOS 5.2 is compatible with these devices
- Model
- Buttons and components
- Features
- Functions for buttons and combination keys
- Sleep/Wake button
- When the phone is on
- When the phone is off
- Menu, Home and Return buttons
- Volume buttons
- Micro-USB port
- Notice:
- Headset jack
- SIM and SD cards
- SIM card
- SD card
- Accessories came with OPPO phone
- Charging the battery
- How to charge the battery:
- Charging Notice:
- Screen-off Gestures
- 3-Finger Gesture
- Motion
- Smart call
- Mistouch Prevention Mode
- Take selfies
- 3.1.11.Key combinations
- When phone is on
- When phone is off
- 3.1.12.Status Icons
- E
- Configuration Settings
- Fingerprint, Face and Passcode
- Set the Lockscreen Passcode
- Change the passcode
- Turn off the passcode
- Privacy Passcode
- Associate OPPO ID
- Use a fingerprint on your OPPO phone
- Unlocking the phone from the lock screen.
- Reset Passcode methods
- Use fingerprint to reset passcode
- Reset passcode with fingerprint when the phone is unlocked.
- Reset password via Fingerprint or via Email
- Reset password with bind security email address
- Enroll a Face on your OPPO phone
- Enroll a face
- Delete Enrolled Faces
- Set up other mail and calendar accounts
- Transfer data from the old phone to OPPO smartphone
- From an iPhone to an OPPO Phone
- From an Android Phone to an OPPO Phone
- If the QR code cannot be scanned
- If old phone doesn't have a Clone phone
- Date and Time
- Language and Region
- Connect to the Internet
- Wi-Fi connection
- Mobile data connection
- What's new in ColorOS 5.2
- Smart Sidebar
- Managing Smart Sidebar
- Smart Scan
- Main features of Smart Scan
- Other features of Smart Scan
- New features of Smart Assistant
- Google Lens
- There are two ways you can enjoy Google Lens.
- PlayStore page and works for images on your Google Photos):
- ORoaming
- Settings of ORoaming
- Auto-sync photos on OPPO Cloud
- Files you can sync on OPPO Cloud
- Back up data from your phone to OPPO Cloud.
- New Features of video
- Speed of the video
- Theme of the video
- Smart Driving
- Game Space
- Game Space Settings
- Customizing timer for Clock app
- Customizing timer
- Scanning names to save on Contacts
- Single Shooting Continuous Shoals
- Save more battery with Smart Power Saver
- When Optimization is needed
- issues found. Optimization recommended
- Say hello to Talia, your TouchPal assistant
- Smart and fun features of Talia
- Basics
- Use apps
- Open apps
- Quick Actions
- Switch between apps
- Close apps
- Share from apps
- One-click cleanup
- Lock the running background apps
- View, zoom in and out
- Smart & Convenient Operation
- Navigation Keys
- Virtual Key Navigation
- Swipe-up Gesture Navigation
- Back at Both Sides
- Simple Gestures
- Back on the Right
- Back on the Left
- Assistive Ball
- Change the screen orientation
- Split-screen
- Take and edit a screenshot
- Capture the current page
- Capture a long screenshot
- To capture long screenshots:
- Edit a screenshot
- Use a Marker Pen
- Control Center, Notification, and Status Bar
- Control Center
- Notifications
- Status Bar
- Search
- Test
- Add or change keyboard languages
- 5.12.2.Type, edit, and delete text
- Type text
- Edit text
- Delete text
- 5.12.3.Prediction
- 5.12.4.Voice typing
- 5.12.5.TouchPal for OPPO
- Sound, Vibration, and System Feedback
- Charge and monitor the battery
- Note:
- Location Service
- Google Location service
- Use the phone internationally
- Power Saver
- Other Power Saving features
- Personalize your OPPO phone
- 6.1.ColorOS 5.2 device name
- 6.2.Personalize the Home screen
- Organize the Home screen
- Add or Remove a Home screen page
- Group Apps
- Rearrange apps and folders
- Home screen widgets & Transition Effects
- Manage widgets
- Customize transition effect
- 6.3.Change the wallpaper
- 6.4.Lock screen magazine
- Adjust the screen brightness and color temperature
- Use Night Shield. Go to [Settings] > [Display & Brightness] > [Night
- Change auto-lock time
- Change the font size
- Keyboard and input method
- Customize the look of the keyboard
- Keyboard Layout
- Trends
- Keyboard general settings
- Set up Startup Manager
- Clone Apps
- 6.11.Manage Default App
- Gesture & Motion
- Gestures
- Preset device on/off time or Automatic on/off
- App display in Full-screen
- Apps
- Phone
- Make and Answer Phone Calls
- Make a call
- Answer or reject a call
- While you're on a call
- To
- Do this
- Conference calls
- Block calls
- Emergency calls
- Carrier's Call Settings
- Message
- Send and receive messages
- Customize message settings
- Contacts
- Add a contact
- Edit and delete a contact
- Assign a photo to a contact or change a contact's photo.
- Import and export contacts
- SIM contacts
- Manage contacts
- Back up your contacts
- VIP Contacts
- Phone Manager
- Scan and optimize the phone
- Clean Storage
- Privacy Permissions
- Virus Scan
- Payment protection
- Frequently Used Functions
- WhatsApp Cleaner
- WeChat Cleaner
- Common Problems Detection
- WeChat Cleaner
- Weather
- Camera
- 7.10.2.Take photos
- Switch the cameras. Click
- 7.10.3.Take a selfie
- 7.10.4.Shoot video
- Camera settings
- Photos
- Photos overview
- 7.11.3.Albums
- Optimized album management.
- 7.11.4.Stories / Memories
- 7.11.5.People
- Name or rename a People album
- Hide, display, and merge People albums
- Remove misidentified photos from an album
- Set a cover of the People album
- Add photos to a People album
- 7.11.6.View and use photos and videos
- 7.11.7.Edit photos and videos
- New Features of video editor
- Add Special Effect to the Video
- Music
- 7.12.2.Music
- 7.12.3.Change sort mode
- 7.12.4.Scan local songs
- Videos
- Theme Store
- Online phone theme
- Online wallpaper
- 7.14.4.Manage your downloads
- Clock
- 7.15.2.Set Alarm Clocks
- 7.15.3.Add and view clocks for locations around the world
- 7.15.4.Use the stopwatch
- 7.15.5.Set the timer
- Delete an activity
- Add an activity
- 7.16.Files
- 7.16.2.Optimized File management
- File classification
- 7.16.3.Fast file browsing
- 7.16.4.View and manage files
- 7.16.5.Clean Storage
- 7.16.6.Remotely Manage Phone Files
- 7.16.7.Private Safe
- Start Using Private Safe.
- Calculator
- The New Functions
- Sound Recording
- 7.18.2.Recorder
- 7.18.3.Manage recordings
- Compass
- Chrome
- 7.20.2.Search the web
- 7.20.3.Browse the web
- Quick accesses
- Safety & Privacy
- Device security
- Lock screen password
- Smart Lock
- Payment protection
- Set up a SIM card lock
- Virus Scan
- Pseudo Base Station Blocking
- Protect Personal Information
- Device administration
- Allow and install apps from unknown sources
- App permissions
- Hide Home screen icon
- Kids Space
- Block unwanted calls and messages
- Find my device
- Activate and use Find my Device.
- Privacy
- Location Service
- Join User Experience Project
- Privacy Protecting and Security Warning
- Privacy protecting
- Security warning
- Advanced
- Screen pinning
- Activate screen pinning
- App Lock
- How to encrypt apps
- Managing encrypted apps
- Share Internet connection and files
- Tether your phone's Internet connection
- Turn your phone into a personal hotspot.
- Use Wi-Fi Tethering
- Use USB Tethering.
- Tether via Bluetooth.
- Share Files
- Wireless file sharing
- Share via Bluetooth.
- Use Remote Management to view and download files.
- Stream to computer
- Stream to TV
- Wired file sharing
- Transfer files between your phone and a computer.
- Share from apps
- Restart, update, back up, and restore
- Restart the phone
- Update ColorOS software
- Notice before doing the update.
- Update your OPPO phone wirelessly
- Back up and restore the phone
- Back up your phone
- 10.3.2.Restore data on your phone
- Restore your OPPO smartphone from Local backup
- Restore your OPPO smartphone via computer
- Restore Contacts and SMS on OPPO smartphone from OPPO Cloud
- Transfer your data with Clone Phone
- Restore your OPPO smartphone data from third-party Apps
- 10.3.3.Reset the phone
- Reset your phone to factory settings
- Reset System Settings
- Erase All App Data and Deletable Apps
- Erase All Content and Settings
- Erase Contacts and Call Logs
- Erase All SMS and MMS
- Barrier-free
- TalkBack
- When TalkBack is on:
- Magnification Gestures
- Press Power Button to End Call
- Safety, handling, and support
- Health & Safety
- 12.1.1.Using Environment
- 12.1.2.Battery Safety
- Battery Precautions
- Battery Life Tips
- Charger Usage Notes
- Traffic Safety
- Maintenance and Repair
- Phone Cases
- Screen Protector
- Maximize battery life and lifespan
- Keep Clean
- Keep dry and solve water damage
- Use connectors, ports, and buttons.
- Other information
- FCC Compliance Statement
- FCC Statement
- Note
- FCC Caution
Brand : OPPO
Model : Realme 2 Pro
Category : Phone