
SCD 605X - Range hood SCHNEIDER - Free user manual and instructions
Find the device manual for free SCD 605X SCHNEIDER in PDF.


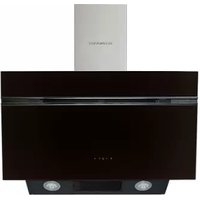
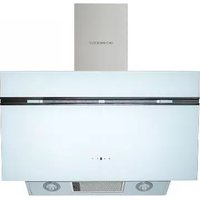
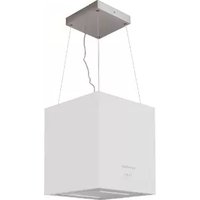
| Product Type | Range Hood |
| Brand | Schneider |
| Model | SCD 605X |
| Width | 60 cm |
| Height | 70-85 cm (adjustable) |
| Depth | 50 cm |
| Weight | 12 kg |
| Power Supply | 220-240 V, 50 Hz |
| Max Airflow | 750 m³/h |
| Noise Level (max) | 68 dB |
| Lighting | 2 x LED, 3 W each |
| Controls | Touch panel with 3 speeds + boost |
| Grease Filter | Aluminum, washable |
| Charcoal Filter | Optional for recirculation mode |
| Installation Type | Wall-mounted, ducted or recirculation |
| Duct Diameter | 150 mm |
| Energy Efficiency Class | B |
| Annual Energy Consumption | 65 kWh |
| Safety Features | Motor overload protection, auto shut-off |
| Spare Parts Availability | Filters, bulbs, motor available from Schneider service |
Frequently Asked Questions - SCD 605X SCHNEIDER
User questions about SCD 605X SCHNEIDER
0 question about this device. Answer the ones you know or ask your own.
Ask a new question about this device
Download the instructions for your Range hood in PDF format for free! Find your manual SCD 605X - SCHNEIDER and take your electronic device back in hand. On this page are published all the documents necessary for the use of your device. SCD 605X by SCHNEIDER.
USER MANUAL SCD 605X SCHNEIDER
natural_image
Pure technical line drawing of a trapezoidal structure with base and top views (no text or symbols)natural_image
Technical line drawing of a mechanical component with a drill bit and base plate (no text or symbols)INSTALLATION
natural_image
Line drawing of a metal canopy with a chimney and chimney stack, no text or symbols presentnatural_image
Technical line drawing of a mechanical component with concentric cylindrical layers and a central tab (no text or symbols)Fig. 2

natural_image
3D rendering of a bent pipe with threaded ends, no text or symbols presentFig. 3
natural_image
Diagram of two intersecting curved pipes with a diagonal black X mark (no text or symbols)USO Y MANTENIMIENTO
PANEL DE CONTROL:


natural_image
Technical line drawing of a mechanical fan assembly with rotating components (no text or symbols)USO Y MANTENIMIENTO
natural_image
Line drawing showing a hand pressing a button into a device panel, then rotating around a device casing (no text or symbols)CAMBIAR LAS LÁMPARAS:
Lámparas tipo LED
natural_image
Technical line drawing of a kitchen fan with a mounted tool and component (no text or symbols)Technical services 06
Thank you very much for your preference for products. Our objective is to ensure that you enjoy this product, manufactured environmentally-friendly with a total sense of quality in a precise working environment at our modern facilities, most efficiently.
We recommend you to read the instruction manual carefully and keep it handy before you use this chimney hood so that it maintains its quality just like the first day you bought it and serves you most efficiently
Our devices are designed for domestic use. They are not for professional use.
Install "MAX 6 A" fuse for the extractor fan.
CE
THIS PRODUCT CONFORMS WITH EU REGULATIONS
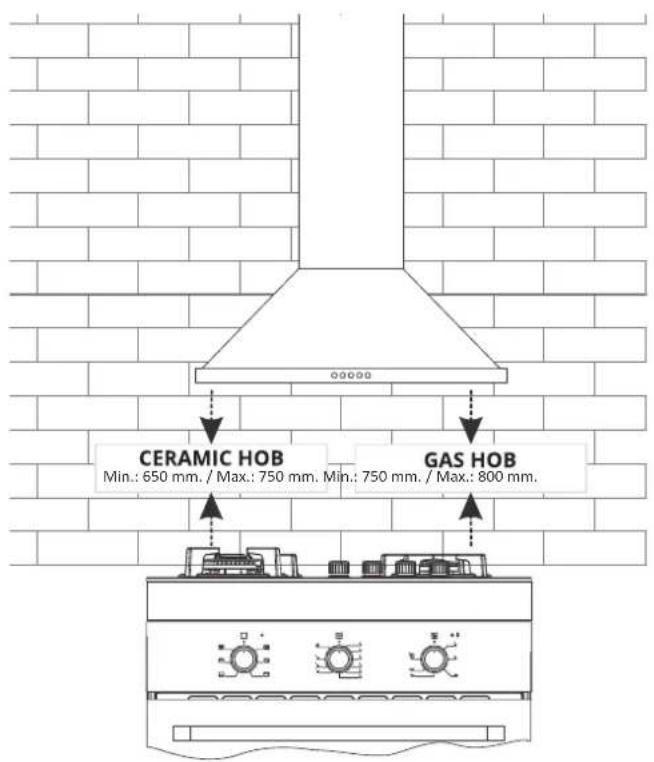
HOOD DIMENSIONS
HOOD PARTS

| PART | POSITION |
| Control panel | 1 |
| Chimmeney | 2 |
| Filters | 3 |
| Lamps | 4 |

SECURITY ADVISE
Product Voltage is 220-240 Volts 50Hz..
Power cord of your product is fitted with grounded plug. This cord must be plugged into a grounding socket.
All electrical installation must be done by a qualified electrician. Installation by unqualified persons may lead the product run with lower performance, be damaged or cause accidents.
Power supply cord should not be jammed or crushed. Power cord should not be close to hobs, etc, otherwise it may melt and cause fire.
Do not plug in the product into a socket before the installation is complete.
Make sure the mains switch is easily accessible in order to cut the power of the product in case of any danger.
Do not touch the bulbs of your product if used for a long period of time. The bulbs will be hot and may burn your hands.
Kitchen hoods are designed for domestic use. If used for other purposes, it may lead to a failure and not be covered under the warranty.
Follow the local regulations regarding the air outlet to the outside.
Food that may burst into flames should not be cooked under the device.
Turn on the product only after you place pots, pans, etc on the hobs. Otherwise excess heat may cause deformation of some parts of your product. Turn off the hobs before you remove pots, pans, etc.
Do not leave hot oil on the hobs. Pans with hot oil inside may cause selfignition.
When cooking i.e. deep frying, hot oil may burst into flames. Be careful on your curtains and cloths..
Make sure you replace the filters at the recommended intervals. Filters not replaced on time carry fire risk due to increase of grease on them.
If the cleaning is not done periodically, your product may carry fire risk.
Do not use non-fire-resistant materials instead of filters.
Keep the potentially dangerous packaging materials away from children.
Do not use your product without a filter, do not remove filters when the product is operating.
In case of start of flames, cut off the power of the chimney fan and cooker. (Cut off the power by unplugging the device)
Cut off the power supply before any maintenance work. (Cut off the power by unplugging the device)
For duct-out chimney hoods, use pipes with a diameter of 150mm or 120mm. You should minimize the ducting distance with minimum bends
INSTALLATION
INSTALLATION DIAGRAM
2 drywall (8mm) anchors are nailed into the holes drilled according to installation template

natural_image
Pure technical line drawing of a trapezoidal structure with base and top views (no text or symbols)The hood is fixed into the wall by screws as shown in below diagram:

natural_image
Technical line drawing of a mechanical component with a drill bit and cylindrical housing (no text or symbols)INSTALLATION
DUCT PIPE:
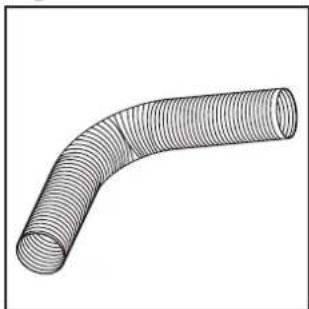
Place the aluminium pipe on the plastic duct. Place the other end of the pipe into the air outlet in the kitchen.
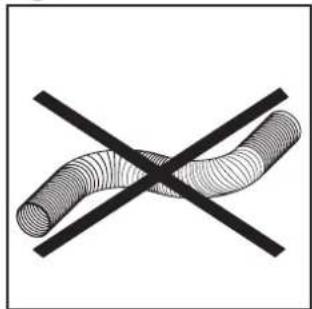
Twists and bends on the aluminium pipe may cause minimizing the air suction so avoid unnecessary bends and twists as much as possible.
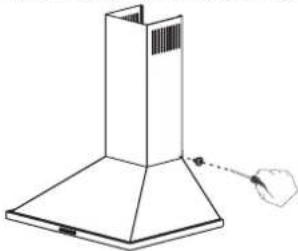
Place the inner duct and outer duct carefully on the product. Fix the inner duct to inner duct connection plate with 2 screws.
natural_image
Line drawing of a metal canopy with a handle and chimney, no text or symbols presentPut the outer duct on the chimney hood and fix to it by 2 screws. 2 fixing holes are drilled on the wall with ∅6mm electric drill at a suitable height and place to fix the inner duct hanger plate onto the wall. 6mm drywall anchors are nailed into those holes and inner duct mounting brackets are pinned down
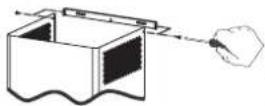
At the last step of chimney hood installation, the inner duct is screwed on the inner duct mounting brackets
Fig. 1

natural_image
Technical line drawing of a mechanical component with concentric layers and a central tab (no text or symbols)Fig. 2
natural_image
3D rendering of a bent pipe with threaded ends, no text or symbols presentFig. 3

natural_image
Diagram of two intersecting curved pipes with a diagonal line crossing through them (no text or symbols)USAGE & MAINTEDANCE
CONTROL PANEL:


Pressing the buttons will enable different functions. In order to disable them, press the button OFF.:
Stops the motor, except for the lighting system.
Minimum power
Medium power
Maximum power
Lights ON/OFF.
Extractor hood is used in ducted and non-ducted kitchens.
In ducted use, extractor fan should be connected to an air outlet to send the air out. In order to use your extractor hood efficiently, make sure length of the pipe system between the extractor hood and the air outlet should be short.
Your product has been manufactured suitable for ducted and non-ducted use.
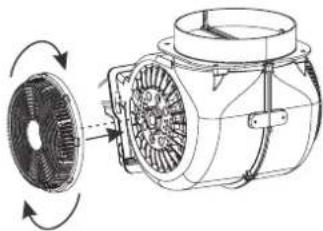
In kitchens with no duct, a round charcoal filter should be re-introduced the clean air into the kitchen. You can obtain the round filter from your service or dealer.
Regardless of use of charcoal filters or not, grease filters should be installed on the product. Do not use your product without grease filter. Use of charcoal filter is as follows:
Cut off the device power before replacing charcoal filter. Charcoal filter is used in the kitchens with no duct therefore should be replaced in every 3-5 months depending on the frequency of use.
Charcoal filter should never be washed.
natural_image
Technical line drawing of an electric motor with fan blades and rotor assembly (no text or symbols)USAGE & MAINTEDANCE
Aluminium cartridge filter holds dust and grease in the air. Extractor hood should never be used without aluminium cartridge filter.

natural_image
Line drawing showing a hand pressing a button into a device panel, then moving to a closed unit with a door and screw base (no text or symbols)REPLACING THE BULB:
LED Bulb
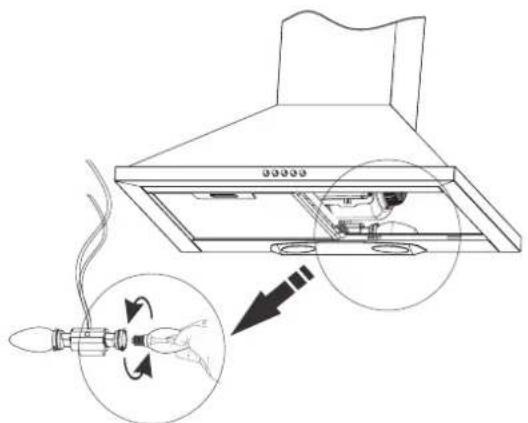
Always switch off the electrical supply before carrying out any operation.
- If the LED bulb does not operate you can remove it as shown below:

- A new bulb to be supplied from service points is replaced with the same reoperation
- Cables are designed with sockets. The plug in should be made according to previous connection.
Halogen Bulb
Unplug the hood before any maintenance.
- If the bulb does not operate you can remove it as shown in the next page diagram:
USAGE & MAINTEDANCE
natural_image
Diagram of a kitchen chimney with an LED and light bulb, showing internal components and airflow direction (no text or symbols)- A new bulb with the same features is replaced with removed bulb
CLEANING:
Device should be unplugged or switch should be turned off before cleaning and maintenance procedures.
Metal filter should be cleaned once a month with hot soapy water or in the dishwasher, if possible. (60 °C)
Remove the aluminium cartridge filter by pressing on the spring catches on the side. Do not refit before drying after wash.
Outer surface of the extractor hood should be wiped with a damp cloth soaked with soapy water.
Make sure electronic parts do not contact with water or similar materials
For inox products, using inox cleaning and maintenance products available in the market will provide longer usage life for your device.
Aluminium filters can be washed in dishwasher. After several washes, aluminium filters may change colour. This is normal and filters do not need to be replaced.
NOTA:
When used with devices which use fuel (heaters working with gas, diesel fuel, coal or firewood, water heaters, etc) and the air in the environment; should be used cautiously. The chimney hood sending the air out in the environment may affect the burning adversely.
This warning is not applicable to non-ducted use.
FOR OPTIMAL PERFORMANCE:
When dense suction power is not required, use the product in medium setting..
For right ventilation, the windows in the kitchen leading to the outside should be kept closed.
TECHNICAL SERVICE
Before contacting the service, make sure the product is plugged and the fuse in the electrical installation is working. Do not do anything that may harm the product.
Check your chimney hood against the table below. If problem persists, find your local authorized service point at:
www.schneiderespana.es
Never try to repair the product yourself. Trust professionals.
| Check the mains, plugs and cable | Check the start button | Check the light button | Check the aluminium filter | Check the lamps | Check the air outlet | Check the carbon filters | |
| The motor does not start | |||||||
| Light does not work | |||||||
| Weak suction | |||||||
| Air is not being recirculated |

This symbol on the product or its packaging indicate that this product must not be disposed of with the regular household waste. The user has to return the product to a collection point for the recycling of electric and electronic equipment. The disposal must comply with the local regulations on place
Schneider España de I, S.A. C/Verano 18-20, Torrejón de Ardoz, Madrid: www.schneiderespana.es All information contained in this user manual (images included) might be affected by misprints or other kind of mistakes, making it differ from the real product. Made in Turkey.
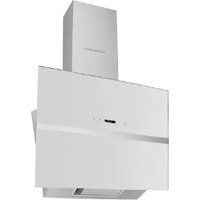
Brand : SCHNEIDER
Model : SCD 605X
Category : Range hood