
PT-H99 - Smartphone AIWA - Free user manual and instructions
Find the device manual for free PT-H99 AIWA in PDF.


| Product Type | Smartphone |
| Brand | Aiwa |
| Model | PT-H99 |
| Dimensions (H x W x D) | 145 x 72 x 9 mm |
| Weight | 150 g |
| Display | 5.0 inch IPS LCD, 480 x 854 pixels |
| Processor | Quad-core 1.3 GHz |
| RAM | 1 GB |
| Internal Storage | 8 GB, expandable via microSD |
| Rear Camera | 5 MP with LED flash |
| Front Camera | 2 MP |
| Battery | Li-Ion 2000 mAh, removable |
| Operating System | Android 6.0 Marshmallow |
| Connectivity | Wi-Fi 802.11 b/g/n, Bluetooth 4.0, GPS, 3G |
| SIM Card | Dual SIM (Micro-SIM) |
| Audio Jack | 3.5 mm |
| Charging Port | Micro USB |
| Power Supply | AC adapter 5V/1A |
| Maintenance | Clean with a soft, dry cloth; avoid moisture and extreme temperatures |
| Safety | Do not expose to water; use only approved chargers; keep away from children |
| Spare Parts & Repairability | Battery, display, charging port available; repair by qualified technician |
| General Information | Released in 2017; available in black and white |
Frequently Asked Questions - PT-H99 AIWA
User questions about PT-H99 AIWA
0 question about this device. Answer the ones you know or ask your own.
Ask a new question about this device
Download the instructions for your Smartphone in PDF format for free! Find your manual PT-H99 - AIWA and take your electronic device back in hand. On this page are published all the documents necessary for the use of your device. PT-H99 by AIWA.
USER MANUAL PT-H99 AIWA
Personal Communication Telephone
PT-H99
Than you for choosing Aiwa PT-H99. This operating manual contains the information you need to get the most of your new telephone. Please read it carefully, and save it for future reference.
AIWA CO.,LTD.

http://www.aiwa.co.jp
8Z-PD3-905-01
000908ATN-OX

*PT-H99(AH)_00E.cover 01:10.11, 9:08 PM2-3

able of Contents
T
Safety Information 4
Introduction 9
Chapter 1: Before using PT-H99
Names of parts and functions ..... 12
How to see the PT-H99 display.... 14
Charging the battery 16 Setting the language 18
Setting the language .... 18 Setting the calendar and time signal.... 19
Setting the calendar and time signal .... 15 When you need your phone number
and help 20
Chapter 2: Basic operations
Making a call 22
Answering a call 24
Adjusting the volume.... 25
Holding the call 26 Looking the boys 26
Locking the keys 26 Radiating a previous phone number 27
Reducing a previous phone number .... 27 Setting to vibration mode.... 28
Selecting the ringer style.... 29
Chapter 3: Using electronic phone book
Entering text 32
Using the accessory keyboard 35
Registering in the Phone Book ...... 38 Searching phone number ...... 41
Searching a phone number.... 41 Edition and deletion Phone Back:
Editing and deleting Phone Book data 43
Enabling the Black List/White List ..... 45
Using the voice label 46
Chapter 4: Recording voice messages and Auto answer
Recording voice memo or communication 50
Enabling the auto answer function ..... 52
Recording an original answer message 54
Setting time to start auto answer message 56
Chapter 5: Useful features
Using the alarm 58
Using the scheduler 60 Entering a text memo 62
Entering a text memo 65 Protecting your phone from an unauthorized use 65
Turning on/off the operate tone 68
Conserving the battery power during standby 69
Turning on/off the display
illumination 70
Making an original melody as the ringer 71
Changing the display to show image and clock 74
One-touch dialing 78
Turning on the subaddress dialing ..... 79
Using location report function 80 Using RT H99 for data
using PT-H99 for data communication 84
Displaying/storing/restoring current settings 86
Resetting a function to the factory setting 90
Chapter 6: Sending and receiving a short mail (S-mail)
Sending an S-mail....92
Receiving an S-mail 95
Returning an S-mail to the sender ..... 96
Using preset message 97
Setting automatic display 101 Setting the Continue mode 102
Setting the Continue mode .... 103 Sending an S-mail in incoming/outgoing
using an S-mail in incoming/outgoing message history 104
Deleting the S-mail.... 105
Chapter 8: Using PT-H99 as a cordless phone and transceiver
Before using PT-H99 as a cordless
phone 126
Setting a mode for cordless phone .... 128
Using PT-H99 as a cordless phone ... 129 Using PT-H99 as a transceivers ... 130
Using PT-H99 as a transceiver ..... T3C
Appendix
Troubleshooting 134
PT-H99 Specifications 136




Safety Information
Always follow correct procedures to operate your phone safely. Improper use may lead to fire, electric shock, or injury. To avoid such problems, take care to read and heed the following kinds of warnings.
Warning text is labeled differently according to the severity of problem that could occur through failure to follow the operating instructions.
DANGER
Failure to head these warnings is likely to result in death or serious injury.
WARNING
Failure to head these warnings could result in death or serious injury.
CAUTION
Failure to head those warnings could result in injury or damage to property.
WARNING
Have the telephone repaired
Using a damaged or malfunctioning telephone can result in fire, electric shock, or injury.
If:
- the telephone emits an unusual noise, smell, or smoke;
- water or other foreign matter gets inside the phone;
• the telephone is dropped or damaged;
• the phone does not operate normally; - the AC adaptor gets unusually hot (it's normal for the AC adaptor to be warm while in use);

then unplug the AC adaptor from the outlet, and return the phone to your dealer for repairs.
The accessory AC adaptor is for use in Thailand
The accessory AC adaptor is designed to be connected to a 220 V household outlet. Plugging it into a different power supply voltage may result fire or electric shock.
Do not open the case
Opening the case may result in electric shock.
Don not use the phone where it could get wet
Getting wet could cause the battery to overheat, resulting in burns. Take particular care when using the phone outside when it is raining or snowing.
Do not use the phone while driving a car
Using the phone while driving could result in an accident.
Turn off the power in airplanes,
hospitals, and other places where portable phone are not allowed
Your PCT may interfere with aircraft electronic equipment or medical equipment in hospitals, and result in an accident. Do not use your phone in aircraft or near medical equipment in hospitals (in operating rooms, treatment rooms, etc.).
Do not unplug the AC adaptor or charger with wet hands
Touching these devices with wet hands could result in electric shock.
4
5

*PT-H99(AH)_00E.TocIntro 01.10.11, 9:10 PM4-5


Safety Information
CAUTION
Do not place the phone in areas where there is high humidity or dust, oil smoke or steam, near heaters or in direct sunlight.
These conditions can result in fire or electric shock.
Do not leave the phone in an
automobile with the windows closed
The interior of tightly closed automobiles can reach 100°C. This can cause the phone to be damaged or result in fire.
Pay attention to traffic when walking
Concentrating on a phone conversation to the exclusion of your surroundings while walking could result in an accident.
Be careful of the antenna
Take care not to poke an eye with the antenna. Be especially careful with little children.
Use the AC adaptor correctly
To avoid fire or electric shock, always use the AC adaptor according to the following guidelines:
- Do not use the AC adaptor with any device other than the phone for which it was designed.
- Do not cover or wrap the AC adaptor with cloth or bedding.
- When unplugging the AC adaptor, do not pull on the cord; grasp the plug and the AC adaptor instead.
- Do not place the AC adaptor near hot items.
Use the battery charger correctly
To avoid fire or electric shock, always use the battery charger according to the following guidelines:
- Do not use the battery charger with any battery other than the phone for which it was designed.
- Do not cover or wrap the battery charger with cloth or bedding.
- Do not place the battery charger near hot items.
Safety guidelines for lithium ion batteries
Please follow these guidelines to prevent accidents through leakage, overheating, or damage of the lithium ion battery.
DANGER
- Do not charge the battery with anything other than the designated charger.
- Do not use the battery with anything other than the telephone for which it was designed.
- Do not expose the battery to fire, water, or excessive heat.
- Do not short the battery terminals, Do not carry or store the battery with small metal objects, such as ballpoint pens, necklaces, coins, decorative pins, etc.
- Do not modify, disassemble, remobel or directly solder the terminal.
- Do not use, place, or charge the battery near fire, in direct sunlight, or in similarly hot places. Exposure to excessive heat can damage the battery's protection circuitry.
- Do not deform the battery (as by hitting it with a hammer). Do not disassemble or modify the battery.
WARNING
- Do not place the battery in a microwave oven or clothes dryer.
- Stop using the battery if you notice leakage, change in shape, change in color, or any other irregularity.
- If the battery leaks or emits an unusual odor, keep it away from open flame. The leaking liquid could catch fire, spontaneously combust, or explode.
If the battery leaks
If the leaking electrolytic solution contacts skin or clothing, flush with large amounts or water. If the liquid comes in contact with an eye, immediately wash with clean water and quickly seek medical attention.

Safety Information
Correct usage
To properly utilize your Aiwa PCT, please observe the following guidelines:
- Your phone cannot be used in tunnels, mountain valleys, and inside buildings where radio signals don't reach.
- Telephone calls cannot be placed or received outside a PCT cell station's service area.
- Your PCT telephone uses digital transmission, which makes it difficult for eavesdroppers to listen in on your conversation. However, it is not impossible to decode and eavesdrop on PCT transmissions using receivers that are on the market, so use appropriate caution.
• Take care not to annoy other people when using the phone in crowded or quiet surroundings. - Heed usage restriction posted in theaters, restaurant, libraries, hotel lobbies, etc.
• Using the phone near television sets or radios may interfere with reception. - Using the phone near metallic objects may interfere with operation. If you need to place the phone on a metal surface, such as a steel desk, stand the phone in its charger if possible.
Introduction
PT-H99's features
Easy Shuttle - Simple, one-handed operation
Simply use the Easy Shuttle, located on the side of the phone, to display a desired item, then press the F/SELECT button to activate it. Almost all operations, except for text entry, can be performed easily with one hand.
Digital - Clear, crisp, sound, secure transmissions
Your Alwa PCT uses digital transmissions that are perfectly suited to multimedia. The digital transmission method provides high sound quality, and at the same time makes it difficult for eavesdroppers to listen in on your private conversation.
Vibration mode - vibrates rather than rings when calls come in
You can use the vibration mode in situations where a ringing phone would disturb others.
Electronic Phonebook - store up to 300 entries
You don't have your address book handy, and you don't remember the number. What do you do? With your Aiwa PCT's Electronic Phonebook feature, this problem is a thing of the past. Just enter the person's name to search for the number and display it on the screen.
Accessory Keyboard - handy, cordless keyboard for text entry
A compact accessory keyboard is available. It uses infrared rays for transmission of data so you can use it whenever and wherever you enter bulk text.
Accessories
Make sure you have all your phone's accessories.

Chapter 1: Before using PT-H99
Names of parts and functions ..... 12 How to see the PT-H99 display..... 14 Charging the battery ..... 16 Setting the language ..... 18 Setting the calendar and time signal ..... 19 When you need your phone number and help ..... 20
Names of parts and functions
Names of parts
Easy Shuttle

0
0
0
©
Functions
①Enable you to hear the voice of the party you are talking with.
②Used in almost all operations: displays redial numbers and Phone Book entries back and forth, displays selection items back and forth, and shifts the input column in text entry.
③Used when you select a setting function.
④Allow you to make and receive calls, and cancel an operation to return to the previous or communication display during communication.
⑤ Allow you to turn on/off the power by pressing and holding for one second and longer, end a call, and cancel an operation to return to the previous or standby display.
⑥Hold a call, and clear input.
⑦Pick up your voice.
⑧Before using your phone, pull it up.
⑨Flash when a call comes in, and lights up when the battery is on charge.
@Guide you when you use PT-H99 by displaying the status of the phone, dialed number, etc.
⑪ Allow you to enter phone numbers and characters.
12 Enable you to use an optional earphone/microphone (ø2.5) by connecting here.
⑬ Enable you to connect a data terminal.




How to see the PT-H99 display
According to the setting of your phone, some items of the following display appear.
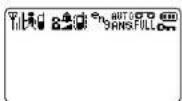
① Power and signal strength
② Standby Mode
Appear when your phone is in the service range. If it disappears, your phone is out of the service range.
Show the strength of the signal. If it disappears, the signal is faint.
Public mode: you can use PT-H99 as an ordinary portable telephone.
Private mode: you can use PT-H99 as a cordless phone.
Transceiver: you can use PT-H99 as a transceiver.
8 Appear when the PCT is in standby mode.
8 Appear when the phone line is connected.
③ Calling method
Ringing. The lower icon shows the volume level.
If the ringer volume is set to off, this item appears instead of ringing one.
Vibration
④ Text input mode
During text input mode, either of following icons appears.
1h9 Thal*
eng English*
Accessory keyboard is in effect.
Thal (Caps locked)**
ENG English (Caps locked)**
Characters entered on the accessory keyboard are ready to be sent to your PCT.
* When you select an input type where every pressing a key on the keyboard enters a corresponding character, the language icon changes to the one with an underline. (See page 37.)
** Appear only when the accessory keyboard is in effect.
14
*PT-H99(AH)_01E 01.10.11, 9:12 PM14-15
⑤ Auto answer
AUTO ANS Appear when Auto answer is in effect.
⑥ Battery level and other
Indicate the approximate remaining power in 3 levels.
On Appear when security lock is in effect.
00 Appear when the provided memories FULL for recording are used up.
DATA Appear when a cable is connected to the data terminal connector on PCT.
15

Charging the battery
Charge the battery before using PT-H99 for the first time.
Warning:
- Be sure to power off PT-H99 before removing the rechargeable battery pack. Removing
the battery pack while the phone is powered on may result in loss of stored data. - Grasp the power connector and unplug the battery pack or the AC power adaptor. Do not pull the cable or code.
1 Mounting the battery pack.
① Remove the battery cover.

natural_image
Diagram of a mobile phone showing a device interacting with a screen (no text or symbols visible)②Connect the battery pack's connector and the PT-H99's connector.

Orient the connector as shown.
Reroute the battery cable inside the telephone case as shown.
battery pack
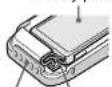
telephone battery cable
③ Replace the battery cover

natural_image
Diagram of a car interior showing a vehicle with a highlighted component (no text or symbols present)2 Connect the charger to the AC adaptor. Plug in the AC adaptor.
Use only the supplied AC adaptor (AC-D905T).

16
*PT-H99(AH)_01E 01.10.11, 9:12 PM16-17
3 Place the phone in the charger, then push the phone backwards to lock it.

The display shows the following, even if the power is turned off.
Display Reception lamp
While charging CHARGING On
When fully charged CHARGED OFF
You can leave the phone in the charger after it is fully charged.
Note:
Insert the phone into the charger so that the front of the phone is facing the front of the charger. The battery will not charge if the phone is inserted backwards.
Warning:
It is normal for the AC adaptor to get warm when in use. If it becomes extremely hot, unplug it from the outlet.
Locating the charger:
Place the charger on a flat, stable surface.
Charging with the phone powered on Simply insert the phone into the charge
The phone will ring when an incoming call arrives, even if it is in the vibration mode.
Removing the phone from the charger Pull the top of the phone forward slightly and lift it up.
Hints:
- Recharge the phone before the battery level gets extremely low. Battery capacity will not be diminished by frequent recharging.
- Remove the battery pack from the phone if you don't use it for a long period of time.
- If the phone is left unused for long in the low battery state, it may become impossible to recharge the battery.




Setting the language
Your PT-H99 supports Thai and English. The default setting is Thai. You can change the language as follows.
1 Press and hold 📄 for one second or longer to turn on the power.
The power is turned on, and the following display appears.
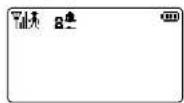
Hint: In step 3, you can also use the numeric button. 1: Thai 3: English You do not need to press F/SELECT in step 4.
2 Press and successively.

3 Turn the Easy Shuttle to select a language icon.
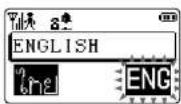
4 Press CHANGED TO ENGLISH
The normal display returns after a few seconds.
Setting the calendar and time signal
Date and time are not set at the factory. You need to set them when you use your PCT for the first time.
You can also set the time signal so that your PT-H99 beeps every hour. However, PT-H99 does not beep when it is powered off or when you are dialing, talking, or doing a setting operation.
To set date and time:
1 In standby mode, press ⓐ, and Ⓤ successively.

2 Key in the date and time with the numeric buttons.
blinks to prompt your input. You can also use the Easy Shuttle to move the input cursor.

3 Press to end the setting.
The normal display returns after a few seconds.
To set the time signal:
1 In standby mode, press ⚠️, and ⚙️ successively.

2 Turn the Easy Shuttle to select "ON".

3 Press


The normal display returns after a few seconds.
Hint:
ep 2, you can also use the numeric n.
1: On 3: Off You do not need to press F/SELECT in step 3.
18
19

*PT-H99(AH)_01E 01.10.11, 9:12 PM18-19


When you need your phone number and help
When you forget your phone number, you can display it. You can also display the explanation of functions and operation when you need it.
To display your phone number:
1 Either during standby mode or communication, press FSELECT and 0 successively.

2 Press during standby mode or press during communication. The normal display returns.
To display help:
1 In standby mode, press and successively.

2 Turn the Easy Shuttle to display the information you need.
3 Press to return to the normal display.
Hint: When the message is too long and does not fit within display area, press ◀ or ▷ to scroll it.


Chapter 2: Basic operations


Making a call 22
Answering a call 24
Adjusting the volume.... 25
Holding the call 26
Locking the keys 26
Redialing a previous phone number .... 27
Setting to vibration mode 28
Selecting the ringer style.... 29

*PT-H99(AH)_02E 01.10.11, 9:13 PM21





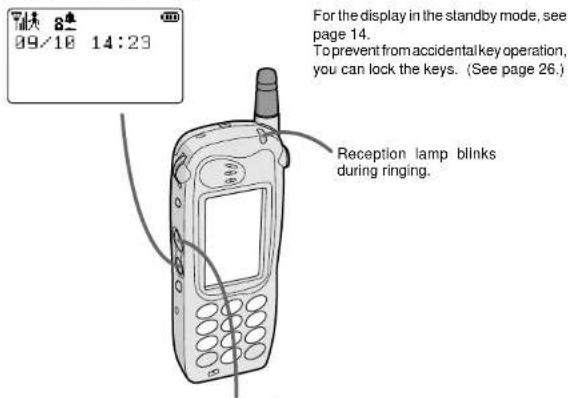
Answering a call
1 Press and hold for one second or longer to power on and enter the standby mode.
The following display appears.
2 When your phone rings, press
You can talk with the calling party.
You can also press other numeric keys.
The number of the calling party is displayed.
If the calling party's telephone number is registered in the phone book, the name is displayed.
To end the call:
Press
The PT-H99 displays the elapsed time of the communication, and returns to the standby mode.

To turn the power off:
Press and hold for one second or longer.
Adjusting the volume
You can adjust both the ringer volume and the receiver volume.
To adjust the ringer volume:
1 In standby mode, press
3 ^2 and ① successively.
The current ringer volume level is displayed.

OFF: No sound
Volume 1: Quiet (
Volume 2: Normal (
Volume 3: Loud (

To adjust the receiver volume:
During communication, turn the
Easy Shuttle.
Upward: Increases the volume.
Downward: Decreases the volume.

1: Lowest
2: Normal (Default)
3: Higher
4: Highest
The normal display returns after a few seconds.
2 Turn the Easy Shuttle.
Upward: Increases the volume.
Downward: Decreases the volume.
After the adjustment, the phone rings at the level you selected.
3 Press
The normal display returns after a few seconds.
24
25

Redialing a previous phone number
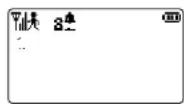
Your PT-H99 memorizes the phone numbers of the last 20 calls you made and answered. You can search these phone numbers and dial them. If the searched phone number is registered in the phone book, the name is displayed.
1 In standby mode, turn the Easy Shuttle upward once.
The phone number you dialed last or the phone number of the call you answered last is displayed.
Setting to vibration mode
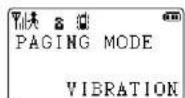
PT-H99 has three modes, ringing, ringing and vibration, or vibration, to notify you of an incoming call.
1 In standby mode, or during communication, press 3 ^25 , and successively.

BELL: Ringling only (default) VIBRATION: Vibration only VIB & BELL: Ringing and vibration
2 Turn the Easy Shuttle to select a mode icon, then press Your PT-H99 vibrates for a few seconds when you select "VIBRATION" or "VIB & BELL". The normal display returns after a few seconds.
Hint: In step 2, you can also use the numeric button. 1: BELL 2: VIBRATION 3: VIB & BELL
Display after your selection:
When you select "BELL":

When you select "VIBRATION":
When you select "VIB & BELL":

Selecting the ringer style
You can set the ringer style to one of the 15 patterns for each public call with or without number notification, private call, S-mail call, P-mail DX call, and data call. The following procedure shows an example to set the ringer style for the private calls to pattern 05.
1 In standby mode, press 360, and successively. The ringer style setting display for the public call with number notification is displayed.
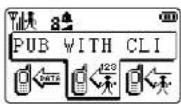
2 Turn the Easy Shuttle for the call category you want to set. Turn the Easy Shuttle downword twice in this example, and the following display will appear.
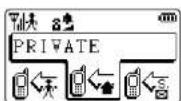
3 Press to enter the setting mode.

4 Turn the Easy Shuttle to select the tone pattern you want. Each time you turn it, the selected tone pattern will sound.
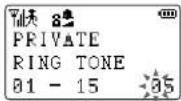
5 Press
The normal display returns after a few seconds.
Hints:
- In step 2, you can also use the numeric button.
1: PUB WITH CLI
2: PUB NON CLI
3: PRIVATE
4·S-MAIL
5: P-MAIL DX
6: DATA MODE
You do not need to press F/SELECT in
step 3
• In step 4, you can also use the numeric buttons.
Press 0 and 5 buttons successively in this example, and the tone pattern 05 will sound.
Factory settings:
When purchased, the PT-H99 ringer style is set as follows:
• Public call with number 01 notification
• Public call without number 02
notification
• Private call 03
• S-mail call 04
• P-mail DX call 05
- Data call 08


Chapter 3: Using electronic phone book


Entering text 32
Using the accessory keyboard 35
Registering in the Phone Book ..... 38
Searching a phone number.... 41
Editing and deleting Phone Book
data....43
Enabling the Black List/White List ..... 45
Using the voice label 46

*PT-H99(AH)_00E 01.10.11, 9:13 PM31

Entering text
You need to enter text such as when you register in the Phone Book and send mails.
Your PT-H99 supports Thai and English languages, and you can switch to either language.
Text input is made by pressing a numeric key, pressing the key a number of times to get the target character, and repeating these actions. Every time you press a numeric key, the character changes as follows
In Thai input mode:
①→1→n→2→n→3→4→5→6
2-2-y-a-a-a-a-a-a
3→3→ m → n → n → n → n → n
A^2 -4-6-u-u-l-w-n-w
5-5→4→3→2→1→5→7
6-6-7-8-9-10-11-12-13
①→7→x→-∩→∩→-→-→
6-8-..-..-1-11-1-1-1
9→9→4→7→1→2→3→4→5
0 ^17 - 0 - - [ - \ - ] - ^ - (- | - ) - ∞
In English input mode:
⑦ -1→@→…→_→:→;→?→1→"→'→
2→2→A→B→C→a→b→c
320-3-D-E-F-d-e-f
^2 -4-G-H-I-g-h-i
5→5→J→K→L→j→k→1
-6-M-N-O-m-n-o
-7-P-Q-R-S-p-q-r-s
-8-T-U-V-t-u-v
q^(n) -9→V→X→Y→Z→w→x→y→z
0 ^11 → 0 → → (→) → * → + → — → / → < → = → > → # → \$ → % → &
Entering text
Example: to input "Terry" on the Phone Book
1 During text input mode in the Phone Book, press Ⓞ to change the language.
See page 38 for how to use the Phone Book.
Language Indicator


2 Press 2 times.

3 Press 6 times.

4 Press 8 times.

5 Turn the Easy Shuttle once.
To use the same key, you need to move the input cursor to the next column.

6 Press 8 times.
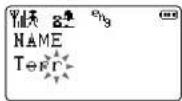
7 Press 8 times.
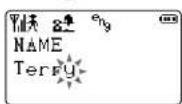
Hint: If you pressed a wrong key, press INT/CLR/HOLD to delete the character. Pressing and holding INT/CLR/HOLD for one second or longer to delete all the characters when they are defined.
Using the accessory keyboard
You can use the accessory keyboard when you enter long text.
To insert the batteries:
Before using the accessory keyboard, insert two R03 (size AAA) batteries (supplied) as illustrated below.
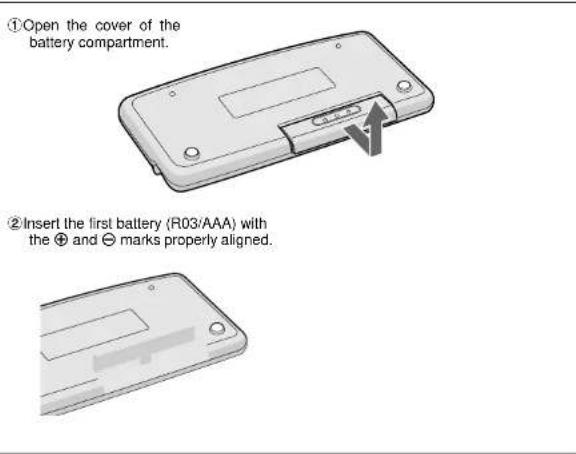
Using the accessory keyboard
To set the accessory keyboard:
Open the Keyboard cover, and place PT-H99 as illustrated. Be sure the infrared sensors (a, b) are lined up behind each other.

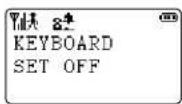
To enable the keyboard:
1 In standby mode, press and hold 📋 for one second or longer to show 📃 icon.
![KEYBOARD SET ON PLEASE PRESS [START] BUTTON FOR 1Sec](/content/2026/05/991560/images/5530abf97d41c85bf1309d882fdede9b58327286c522862e5278d6328dbc915e.jpg)
2 Press and hold STAO on the keyboard for one second or longer.

You can enter characters with the keyboard.
To disable the keyboard:
1 In standby mode, press and hold ⏻ for one second or longer.
Hint:
The following keys on the keyboard function as the same as the buttons on PT-H99:
| Keys on keyboard | Buttons on PCT |
| Easy Shuttle upward | |
| Easy Shuttle downward | |
| Changes the language between Thai and English when keying in. | |
| Changes the input type:a Every pressing a key on the keyboard enters a corresponding character.The input cursor appears at the end of the input line.The language icon has an underline while in this mode.b Select a desired character by pressing a numeric key twice or more continuously, as you do on your PCT.The input cursor appears only when you use theorkeyon the keyboard. | |
| Switches the caps lock between on and off.While the caps lock is on, the language icon displayed looks as follows.orENG |
Registering in the Phone Book
You can register up to 300 names and/or phone numbers in the Phone Book.
You can start registration in 4 ways:
- Using the button
- Entering a phone number
- Displaying a redial number
- Displaying P-mail DX call history data
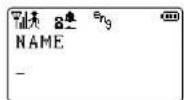
To start by the F/SELECT button
In standby mode, press 2 ^th , and ⑧ successively.
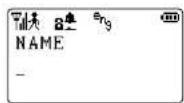
Your PT-H99 prompts you to enter the name.
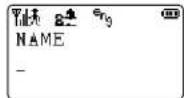
To start by a redial number:
1 In standby mode, turn the Easy Shuttle upward to display the redial number you want to register.
2 Press twice successively.
To start by a phone number:
1 In standby mode, key in a phone number.
You must enter the full number (area code, local code, and phone number).
2 Turn the Easy Shuttle once.
Your PT-H99 prompts you to enter the name.
To start by P-mail DX call history data:
1 In standby mode, display the P-mail DX call history data. See page 112 for how to display the P-mail DX call history data.
2 Display the number you want to register.
See page 120. The number can be "To" or "From".
3 Press twice.

Each of 300 entries can include name, phone number, group, E-mail address, memo, ringer style, voice label, and Black/White list entry.
If you record a voice label, you have to enable the function first. (For details, see "Using the voice label" on page 46).
To register in the Phone Book:
1 Key in the name.
See page 32 for how to enter text. You can enter up to 10 characters.
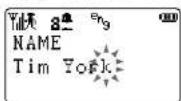
2 Press and key in the phone number.
You can enter up to 32 digits.

3 Press and turn the Easy Shuttle to select a group.
You can select "NONE", "PCT", "PDC/GSM", "HOME", "OFFICE", "FAX", or "PAGER".

4 Press and repeat steps 2 and 3.
You can register up to 3 phone numbers with the same name.
You can skip this by pressing before entering the phone number.
5 Press and key in the E-mail address.
You can enter up to 80 alphabets.

6 Press and key in a memo.
You can enter up to 20 characters.
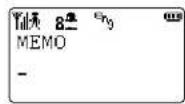
Hint: If the voice label is enabled, the display prompts you to add voice label after step 6. See page 46.
38
39
Registering in the Phone Book
7 Press and turn the Easy Shuttle to select a ringer style among the 15 patterns.
Each time you turn it, the selected ringer style will sound.

While registering, you can go back to previous step with pressing ☑ You can also use to go back to the previous step in steps 7 through 9.
8 Press or, and turn the Easy Shuttle to select "BLACK LIST", "WHITE LIST" or "NONE".
NONE: All the calls are answered. BLACK LIST: Calls from the registered phone number are rejected.
WHITE LIST: Only calls from the registered phone numbers are answered.

If you want to enable the Black List/ White List, you have to set the function to "ON" after registering a data. See page 45.
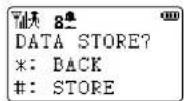
9 Press

, and confirm
the registration.
40
*PT-H99(AH)_03E 01.10.11, 9:13 PM40-41
10 Press or to store the data.

The display on step 1 appears after a few seconds.
11 Repeat from step 1 to register the other data.
12 Press to return to the normal display.
Searching a phone number
You can search a phone number in 3 ways.
- Sequentially through the Phone Book
- By group
- By name
In either way, phone numbers are searched in order of symbols, numerals, alphabet, and Thai.
To search sequentially:
1 In standby mode, turn the Easy Shuttle downward once. Or, during communication, press and hold ○ for one second or longer.
The first entry In the Phone Book is displayed like the following.

2 Turn the Easy Shuttle upward or downward until you get the target data.
After you find it, pressing connects you to the phone number.
Hint:
You can turn and hold the Easy Shuttle to speed up the searching.
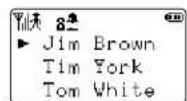
When you release the Easy Shuttle, the data pointed by the arrow is displayed.
To search by group:
1 While displaying Phone Book Data, press Ⓞ.
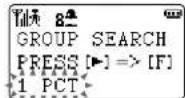
2 Turn the Easy Shuttle downward, or press a group number, so the target group blinks.
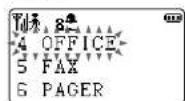
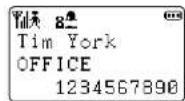
3 Press ○ INSELECT
The first data belonging to the selected group is displayed.
Searching a phone number
To search by name:
1 While displaying Phone Book Data, press ○ twice.
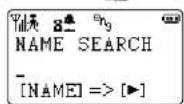
2 Key in the name.

3 Turn the Easy Shuttle upward or downward.
The first data having the name is displayed.
You can turn the Easy Shuttle to display the entries forward and backward.

42
*PT-H99(AH)_00E 01.10.11, 9:13 PM42-43
Editing and deleting Phone Book data
You can edit the data in the Phone Book by repeating the registration sequence. You can also delete Phone Book entries.
To edit Phone Book data:
1 In standby mode, turn the Easy Shuttle downward once. The first entry in the Phone Book is displayed like the following.

2 Turn the Easy Shuttle upward or downward until you get the target data.
3 Press FSELECT
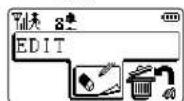
4 Press FSELECT
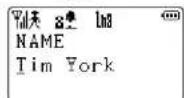
5 Follow the steps to register a phone number in the Phone Book.
See page 39. You can press for the data you don't have to change.
To delete Phone Book entry:
1 In standby mode, turn the Easy Shuttle downward once. The first entry in the Phone Book is displayed like the following.

2 Turn the Easy Shuttle upward or downward until you get the target data.
If you have more than one entries for a name, each of which has a different phone number registered, deleting one of these entries causes to all the entry for the name to be deleted. If you want to keep any of them, use the edit mode.
3 Press and turn the Easy Shuttle to select "DELETE".

4 Press to enter the delete mode.

43
Enabling the Black List/White List
This function enables the Black List or White List for the phone numbers you registered in the Phone Book. Thereby:
- BLACK LIST: Calls from the registered phone numbers are rejected.
- WHITE LIST: Only calls from the registered phone numbers are answered. (The other calls are refused.)
To enable the Black List:
1 In standby mode, press 5%, and successively.


2 Turn the Easy Shuttle to select "BLACK LIST" or "WHITE LIST". This example enables the Black List.

Using the voice label
You can add a voice label (such as a name or others) to a phone number registered in the Phone Book, and play it when you search the phone number. A maximum of 10 voice labels can be recorded in the Phone Book. To do this, first enable the voice label function, then register a phone number in the Phone Book.
To enable the voice label:
1 In standby mode, press 1^st , and successively.
2 Turn the Easy Shuttle to select "On".

3 Press


The normal display returns after a few seconds.
Hints:
- To cancel the voice label, select "Off" in step 2.
- You can also use the numeric button in step 2.
1: On
2: Off
You do not need to press F/SELECT in step 3.
To register in the Phone Book with voice label:
1 Follow the steps on page 38 and steps 1 to 6 on page 39 to register a name, phone number, group, E-mail address, and memo.
2 Press and turn the Easy Shuttle to select "RECORD".

3 Press and record a voice label within 3 seconds.
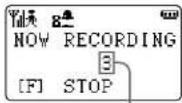
Remaining time of recording
The voice label is replayed after recording.
4 Press
Hints:
- While recording or replaying voice label, you can stop it by pressing F/SELECT.
- When you want to record the voice label again, turn the Easy Shuttle to select "RECORD", and press F/SELECT after step 3.
- You can also use the numeric button in step 2.
1: RECORD
3: END
After pressing the 1 button, recording starts.


Chapter 4: Recording voice messages and Auto answer


Recording voice memo or communication 50
Enabling the auto answer function ..... 52
Recording an original answer message 54
Setting time to start auto answer message 56

*PT-H99(AH)_04E 01.10.11, 9:14 PM49

Recording voice memo or communication
When you perform the following steps, you can record your voice memo or communication. The operation is the same: communication is recorded when you do this while you are talking with the other party, and voice memo is recorded when you do this in the standby mode. You can record a maximum of 30 seconds voice data.
To record voice memo or communication:
1 In standby mode, or during communication, press FSELECT, 1", and 0" successively to start recording.

To play back/delete the recording:
1 In standby mode, or during communication, press ①, and ② successively.

2 Turn the Easy Shuttle to select the target recording, then press to play back.
2 Press or to-end recording.
Recorded memo or communication is played back automatically.
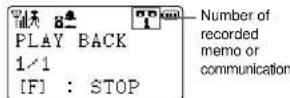
After playback, the normal display returns.


Hints:
• In step 1, recording automatically ends when 30 seconds elapsed.
- In step 2, you can stop playback by pressing F/SELECT.
- While recording communication, you can use the Easy Shuttle to adjust the receiving volume level.
3 Press to delete, or turn the Easy Shuttle to select "NOT DELETE" and press to leave. The normal display returns after a few seconds. If the other recording remains, the display on step 1 returns.
Hints:
- Recorded date and time appears on the display only when date and time are set (See page 19).
- In step 2, you can stop playback by pressing F/SELECT.
- In step 3, you can also use the numeric button.
1:DATA DELETE
3:NOT DELETE
Enabling the auto answer function
When you are at the wrong time, you can enable this function so that the answer message is played and record the calling party's message. You can also record your own answer message instead of the fixed answer message (See page 54), and set the time to play the answer message after an incoming call arriving (See page 56).
To enable the auto answer function:
1 In standby mode, or during communication, press 5, and successively.
2 Turn the Easy Shuttle to select "ANSWER ON".

3 Press and turn the Easy Shuttle to select the answer message type.
This step is skipped unless the original message is not recorded.

DEFAULT MSG: Default message ORIGINAL MSG: Original message
4 Press and turn the Easy Shuttle to select the speaker setting. If you select "ON", you can hear the answer message when an incoming call arrives.
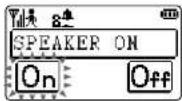
5 Press, and confirm your setting.
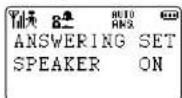
The normal display returns after a few seconds.
Shortcut for enabling/disabling the auto answer function:
There is a simple method to enable/disable the auto answer function:
- Just press and hold for one second or longer in the standby mode, or when an incoming call arrives and PT-H99 starts ringing.
- Pressing and holding again to disable the function.
Hints:
- To disable the auto answer function, select "ANSWER OFF" in step 2 and press F/SELECT.
• In step 2. you can also use the numeric button
1: ANSWER ON
3: ANSWER OFF
You do not need to press F/SELECT in step 3.
- In step 3, you can also use the numeric button.
1: DEFAULT MSG
3: ORIGINAL MSG You do not need to press F/SELECT in step 4.
- In step 4, you can also use the numeric button.
1: SPEAKER ON
3: SPEAKER OFF
You do not need to press F/SELECT in step 5.


Recording an original answer message
You can record your own message to answer calls.
To record original answer message:
1 In standby mode, press 1 ^st , and successively.

2 Press and record an answer message within 10 seconds.
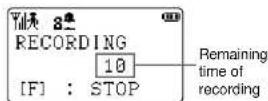
3 Press or to end recording. Recorded message is played back automatically.

4 Press twice to return to the normal display.
Hints:
- In step 3, you can stop playback with pressing F/SELECT.
- If you want to record the message again, repeat steps 2 through 3 after step 3.
54
To playback or delete answer message:
1 In standby mode, press ①, and ② successively.

2 Turn the Easy Shuttle to select "PLAYBACKMSG" or "DELETE MSG".
This example deletes the answer message.

3 Press and turn the Easy Shuttle to select "DELETE".

4 Press ○ FSELECT
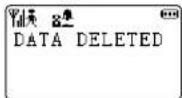
The normal display returns after a few seconds.
Hints:
• The voice memory holds voice data of a total of 70 seconds. This 70 seconds of voice data includes voice memo and answer message.
- You can check the available time of recording by pressing F/SELECT, 1, and 3. Press 📋vice to return to the normal display.
- In step 2, you can also use the numeric button.
2: PLAYBACK MSG
3: DELETE MSG
You do not need to press F/SELECT in step 3.
• In step 3. you can also use the numeric button.
1 : DELETE
3:CANCEL
You do not need to press F/SELECT in step 4.




Setting time to start auto answer message
Your PT-H99 waits 15 seconds from when an incoming call arrives and PT-H99 starts ringing to when the auto answer message starts to play. You can change this time period.
1 In standby mode, press 5%, and successively.
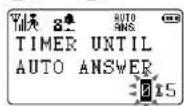
2 Key in the time (000 - 099 seconds) you want to set, and press FSELECT.
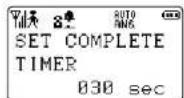
The normal display returns after a few seconds.


Chapter 5: Useful features


Using the alarm 58
Using the scheduler 60
Entering a text memo 63
Protecting your phone from an
unauthorized use 65
Turning on/off the operate tone 68
Conserving the battery power during
standby 69
Turning on/off the display
illumination 70
Making an original melody as
the ringer 71
Changing the display to show image
and clock 74
One-touch dialing 78
Turning on the subaddress dialing ..... 79
Using location report function 80
Using PT-H99 for data
communication 84
Displaying/storing/restoring current
settings 86
Resetting a function to the factory
setting 90

*PT-H99(AH)_05E/01 01.10.11, 9:14 PM57

Using the alarm
To set the everyday alarm:
1 Set the clock correctly. (See page 19.)
2 In standby mode, press 3, and successively.
3 Turn the Easy Shuttle to select "APPOINT".

4 Press
The alarm sounds and/or vibrates according to the time (See page 58), the volume level (See page 25), the ringer style (See page 29) you set for one minute. However, PT-H99 doesn't alarm you when it is powered off or when you are dialing, talking, or doing a setting operation.
To stop the alarm:
Pressing any button stops the alarm.
To cancel the alarm setting:
1 Press and 5% successively.
2 Turn the Easy Shuttle to select "CANCEL".

3 Press
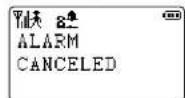
The normal display returns after a few seconds.
Hint: In step 2, you can also use the 3 button. You do not need to press F/SELECT in step 3.
To stop the alarm
Pressing any button stops the alarm.
Hints:
- When the editing message is too long and not fit within the display area, you can also keep turning Easy Shuttle upward or downward to scroll the message.
- If the same date and time is set for the scheduler and the alarm, the setting for the scheduler has priority over the setting for the alarm.
- In step 1, you can also use the 1 button. You do not need to press F/SELECT in step 2.
- In step 5, you can also use the numeric button.
1: ALARM ON
3: ALARM OFF
You do not need to press F/SELECT in step 6.
To confirm/change a schedule:
1 In standby mode or during communication, press PSELECT, 2, and successively.
2 Turn the Easy Shuttle to select "CONFIRM".
Using the scheduler
To delete a schedule:
1 In standby mode or during communication, press FSELECT, 2, and successively.
2 Turn the Easy Shuttle to select "CONFIRM".

3 Press and turn the Easy Shuttle to display the schedule you want to delete.
4 Press and turn the Easy Shuttle to select "DELETE".

5 Press and turn the Easy Shuttle to select "DELETE".

6 Press to delete the schedule.

The normal display returns after a few seconds.
Hints:
- In step 2, you can also use the 3 button. You do not need to press F/SELECT in step 3.
- In step 4, you can also use the 3 button. You do not need to press F/SELECT in step 5.
- In steps 5 and 6, you can also use the numeric button.
1: DELETE 2: CANCEL
Entering a text memo
You can enter up to 50 text memos.
To enter a text memo:
1 In standby mode, press 2^nd , and successively.
E相

2 Turn the Easy Shuttle to select a memo number, and press FSELECT.

3 Enter a text memo, and press to store.
See page 32 for the text input.
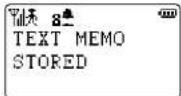
The normal display returns after a few seconds.
To check, edit, or delete a text memo:
1 In standby mode, press 2^th , and .
EFFECT
2 Turn the Easy Shuttle to select a memo number. If you just check the text memo, press to return to the normal display.
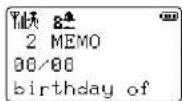
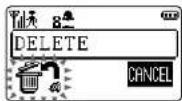
3 Press, and turn the Easy Shuttle to select "EDIT" or "DELETE".
This example deletes Memo 2.

4 Press
Protecting your phone from an unauthorized use
You can set the security lock for call origination only, Phone Book only, or all operations. You need the security code for the security lock. If the security lock is set, you'll have to enter a security code before using your PT-H99.
To set the security lock:
1 In standby mode, press
bri, and successively.
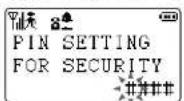
2 Key in your security code.
The security code is a 4-digit number, and should be the one you easily remember.
3 Press after you key in the new security code.

4 Turn the Easy Shuttle to select a security function: "MAKE A CALL", "PHONE BOOK" or "ALL OPERATION".
In this example, the security lock is set for the PHONE BOOK.

5 Prees and turn the Easy Shuttle to select "LOCK".

6 Press and key in your security code.
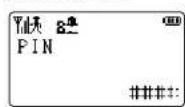


Protecting your phone from an unauthorized use
Hints:
- In step 4, you can also use the numeric button.
1: MAKE A CALL
2: PHONE BOOK
3: ALL OPERATION
You do not need to press F/SELECT in step 5. - In step 5, you can also use the 1 button. You do not need to press F/SELECT in step 6.
To reset the security lock:
1 In standby mode, press ○
bio, and successively.
2 Turn the Easy Shuttle to select the security locked function to reset.
In this example, the security lock is reset for the PHONE BOOK.

3 Press and turn the Easy Shuttle to select "UNLOCK".

4 Press and key in your security code.

The normal display returns after a few seconds.
Hint: In step 3, you can also use the 3 button. You do not need to press F/SELECT in step 4.
66
*PT-H99(AH)_05E/01 01.10.11, 9:14 PM66.67
To change a security code:
1 In standby mode, press ①, and ② successively.
2 Turn the Easy Shuttle to select "PIN EDIT".
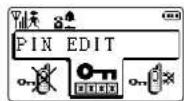
3 Press to enter the security code mode.

4 Key in your current security code and the new one as prompted.

5 Press after you key in the new security code. The normal display returns after a few seconds.
Hint: In step 2, you can also use the 4 button. You do not need to press F/SELECT in step 3.
67

Turning on/off the operate tone
You can turn on or off the operate tone. When you turn it off, no sound will be made even when you touch a button, make an error, and end an operation.
To turn on the operate tone:
1 In standby mode or during communication, press ○, 3°, and ② successively.
2 Turn the Easy Shuttle to select "On".

3 Press SELECT OPERATE TONE ON
The normal display returns after a few seconds.
To turn off the operate tone:
1 In standby mode or during communication, press FSELECT, 3, and successively.
2 Turn the Easy Shuttle to select "Off".
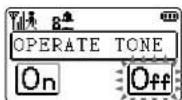
3 Press SELECT OPERATE TONE OFF
The normal display returns after a few seconds.
Hint: In step 2, you can also use the numeric button. 1 : On 3 : Off You do not need to press F/SELECT in step 3.
Conserving the battery power during standby
While in the power save mode, your PT-H99 displays only a group of icons located at the top of the display. If any event happens, such as any button is pressed, a call has arrived, or the alarm sounds, the PT-H99 restores the normal display.
To set the power save mode:
1 In standby mode, press 4, and successively.
2 Turn the Easy Shuttle to select "On".

3 Press SELECT BATTERY SAVING ON
The PCT enters to the power save mode after a few seconds.
To reset the power save mode:
1 In standby mode, press A_i^2 , and successively.
2 Turn the Easy Shuttle to select "Off".

3 Press BATTERY SAVING OFF
The normal display returns after a few seconds.
Hint: In step 2, you can also use the numeric button. 1 : On 3 : Off You do not need to press F/SELECT in step 3.




Turning on/off the display illumination
You can select "ON," "OFF," or "AUTO" for the display illumination. When you set the display illumination to "ON", your PT-H99 illuminates for 10 seconds after you touch a button or start communication, and during call origination and call termination. When you select "AUTO", your PT-H99 illuminates but only when it is dark.
1 In standby mode or during communication, press F/OELECT, and 2 successively.
The current setting blinks.
2 Turn the Easy Shuttle to select an illumination setting.
In this example, the display illumination is set to "Auto".
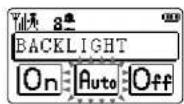
3 Press FSELECT
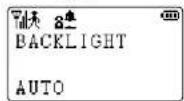
The normal display returns after a few seconds.
Hints:
- In step 2, you can also use the numeric button.
1: On
2: Auto
3: Off
You do not need to press F/SELECT in step 3. - Even if the Backlight is set to "Off", you can illuminate the display manually. Press during standby mode, or press during communication.
70

*PT-H99(AH)_05E/01 01.10.11, 9:14 PM70

Making an original melody as the ringer
You can make your own melody and set it as the ringer style. You can make up to 5 original melodies on melody numbers 11 to 15, specifying notes and tempo for each.
To make an original melody:
1 In standby mode, press 3, and successively.
2 Turn the Easy Shuttle to select a melody number.

3 Press and turn the Easy Shuttle to select "EDIT".

4 Press and use or to set the tempo.
Faster +/-: Slower
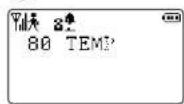
Making an original melody as the ringer
6 Press repeatedly to set the length of the note.
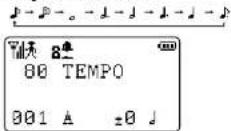
When you set a rest in step 5, press repeatedly to set the length of the rest.
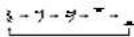
7 Turn the Easy Shuttle to set the next note.
8 Repeat steps 5 to 7 to make a melody.
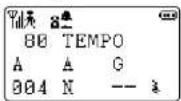
9 Press to register the melody.

10 Press to return to the normal display.
Hints:
- Pressing INT/CLR/HOLD deletes the current note, and pressing and holding it deletes all the notes you entered.
- On the editing screen, you can press to give an audition of melody.
- You can correct your melody after audition. To edit your melody, follow steps 1 to 3 and press F/SELECT, then delete the note that you wish to correct by pressing INT/CLR/HOLD after selecting it using the Easy Shuttle, and then enter a correct note.
- In step 3, you can also use the 1 button. You do not need to press F/SELECT in step 4.
To delete a created melody:
1 In standby mode, press 3, and successively.
2 Turn the Easy Shuttle to select a melody number.

3 Press and turn the Easy Shuttle to select "DELETE".

4 Press to enter the delete mode.

5 Press to delete the melody.

The normal display returns after a few seconds.
Hints:
- In step 3, you can also use the 3 button. You do not need to press F/SELECT in step 4.
• In step 5, you can also use the 1 button.
72
73
Changing the display to show image and clock
You can set your PT-H99 so it displays a bitmap image (wall paper) or the digital clock in the standby mode. You can also set a bitmap image for the opening (when the power is turned on) and ending (when the power is turned off) displays. However, if a message is on the display in the standby mode, it remains displayed regardless of your setting.
To display the image in standby:
1 In standby mode, press FIELECT, and successively.
2 Turn the Easy Shuttle to select "STANDBY".

3 Press and turn the Easy Shuttle to select "WALLPAPER".
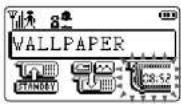
4 Press and turn the Easy Shuttle to select "BMP IMAGE" or "TEXT IMAGE".
This example selects "BMP IMAGE".
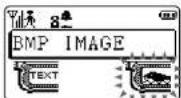
When you select "TEXT IMAGE" and press the display prompts you to input text. After inputting text, press to enter it.
5 Press and turn the Easy Shuttle to select an image.

Pressing ◦ displays the selected image. Press ◦ again to return to the setting mode.
6 Press ○ FIELECT


or
(No.3)

Hint:
If you set a bitmap image or text for the standby display, it appears after the normal display lasts for 5 seconds when you press 📄
To display the digital clock in standby:
1 Set the date and time correctly. See page 19.
2 In standby mode, press , and successively.
3 Turn the Easy Shuttle to select "STANDBY".

4 Press and turn the Easy Shuttle to select "CLOCK SELECT".

5 Press and turn the Easy Shuttle to select 12- or 24-hour indication.
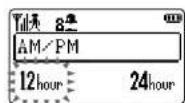
6 Press ○ FSELECT
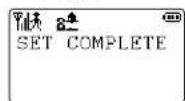
The normal display returns after a few seconds.


74
75
Changing the display to show image and clock
Hints:
- If you set a digital clock for the standby display, it appears after the normal display lasts for 5 seconds when you press 📞
- When recovering from displaying digital clock in the standby mode, select "NORMAL" at step 3.
- In step 2, you can also use the 3 button. You do not need to press F/SELECT in step 3.
- In step 3, you can also use the 3 button. You do not need to press F/SELECT in step 4.
- In step 4, you can also use the numeric button.
1: AM/PM
3:24 HOUR
You do not need to press F/SELECT in step 5.
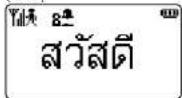
To display an image in the opening/ending display:
1 In standby mode, press Ⓞ, and ⚫ successively.
2 Turn the Easy Shuttle to select "OPENING" or "ENDING". This example shows the image that appears in the opening display.
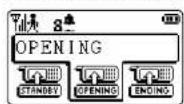
3 Press and turn the Easy Shuttle to select an image.
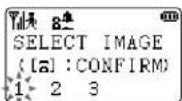
Pressing 📄 displays the selected image. Press 📍 again to return to the setting mode.
4 Press ☐ FSELECT


(No.1)

(No.2)


(No.3)

Hint:
In step 2, you can also use the numeric button.
1: OPENING
2: ENDING
You do not need to press F/SELECT in step 3.
To delete an image:
This function is available only for the images received from other PCTs. The default Images (1 to 3) that originally come with your PCT are protected from deletion.
1 In standby mode, press
^① , and ^② successively.

2 Turn the Easy Shuttle to select "OPENING", "STANDBY" or "ENDING".

3 Press and turn the Easy Shuttle to select an image to delete.
You cannot delete image 1 because it is the default image.

4 Press and hold for one second or longer, and turn the Easy Shuttle to select "DATA DELETE".

5 Press to delete the image.

The normal display returns after a few seconds.
Hints:
- In step 2, you can also use the numeric button.
1: OPENING
2: ENDING
3: STANDBY
You do not need to press F/SELECT in step 3.
In step 4, you can also use the 1 button. You do not need to press F/SELECT in step 5.
Turning on the subaddress dialing
When you turn on the subaddress dialing, you can dial a subaddress together with a phone number. In this case, the digits after the phone number and asterisk (*) are recognized as a subaddress.
1 In standby mode, press 5%, and successively.

To rename location data: (Procedure for being monitored)
1 In standby mode, press 6 ^2 and ⑧ successively.

2 Turn the Easy Shuttle to select the location to rename.

3 Press and turn the Easy Shuttle to select "RENAME".

4 Press to enter the edit mode.
5 Press to delete a character, then enter the name. You can move the cursor by turning the Easy Shuttle.
6 Press to register a location data.

Using location report function
To delete location data: (Procedure for being monitored)
1 In standby mode, press ○ bio, and successively.
2 Turn the Easy Shuttle to select the location to delete.

6 Repeat steps 2 to 5 to delete other data.
7 Press to return to the normal display.
Hint: In step 3, you can also use the 3 button. You do not need to press F/SELECT in step 4.
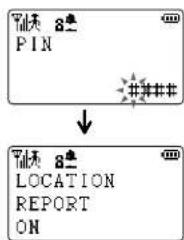
The normal display returns after a few seconds.
4 Press to connect to the monitored PCT.
5 Press to disconnect. Your PT-H99 receives a call from the monitored phone, rings once, and disconnects.
3 Press and turn the Easy Shuttle to select "DELETE".

4 Press and turn the Easy Shuttle to select "DATA DELETE".


Hint: In step 2, you can also use the numeric button. 1 : On 3 : Off You do not need to press F/SELECT in step 3.




Using PT-H99 for data communication
You can connect a personal computer to your PT-H99 for digital data communication. To do this, you need an optional data cable or an optional PCT data communication card.
To connect PT-H99 and PC:

When connected to a personal computer, the display appears in the standby mode.

Depending on the type of personal computer, the above display may not appear at once.
To start data communication:
See the manual attached to the other equipment for how to send/receive data.

Hints:
- The phone number dialed for communication is not memorized as a redial number.
- Communication may be disconnected when you use PT-H99 where the signal is faint or where you are moving.
• Leaving the PCT data communication card connected to PT-H99 consumes the battery power. Disconnect the cable when you finish data communication.
• Even when the display shows data being terminated, PT-H99 cannot answer. Use the personal computer for answering.
• The PT-H99 speaker does not function during data communication. - Do not use the Transceiver mode for data communication. If the communication isn't good in the Public and Private mode or Public and Transceiver mode, try with the Public mode.
84
85

*PT-H99(AH)_05E/02 01.10.11, 9:15 PM84-85

Displaying/storing/restoring current settings
You can check the current settings of your PT-H99, and store those settings so that you can restore to the stored conditions after making changes.
To check the current settings:
1 In standby mode, press FSELECT 7 ^### , and 0 ^## successively.
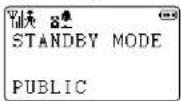
3 Press and turn the Easy Shuttle to select "STATE 1", "STATE 2" or "DEFAULT". Refer to the next page for the settings of "STATE 1", "STATE 2" and "DEFAULT".
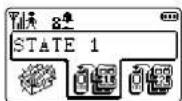
2 Turn the Easy Shuttle to check the another settings.
3 After you check, press 🔒 to return to the normal display.
To restore to the stored state:
1 In standby mode, press ☐ Tion, and 1° successively.
2 Turn the Easy Shuttle to select "SELECT STATE".

4 Press INSELECT STATE 1
The normal display returns after a few seconds.
Hints: • In step 2, you can also use the 1 button. You do not need to press F/SELECT in step 3. • In step 3, you can also use the numeric button. 1: STATE 1 2: STATE 2 3: DEFAULT You do not need to press F/SELECT in step 4.
The default settings of "STATE 1", "STATE 2" and "DEFAULT" are as follows:
STATE 1 STATE 2 DEFAULT
| RINGER LEVEL OFF Volume 2 Volume 2 | ||
| PAGING MODE VIBRATION VIB & BELL BELL | ||
| RINGER TONE Initial settings Initial settings Initial settings | ||
| BACK LIGHT AUTO ON | ON | |
| OPERATE TONE OFF ON | ON | |
| AUTO ANSWER | OFF ON | OFF |
| SUBADDRESS | OFF OFF OFF | |
86
87
*PT-H99(AH)_05E/02
06-07
01.10.11, 9:15 PM
Displaying/storing/restoring current settings
To check the stored settings:
1 In standby mode, press Tio, and successively.
2 Turn the Easy Shuttle to select "CONFIRM".
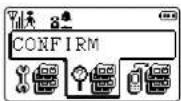

To store the current settings:
1 In standby mode, press ☐
T###, and ① successively.
2 Turn the Easy Shuttle to select "RENEW STATE".


3 Press and turn the Easy Shuttle to select "STATE 1", "STATE 2" or "DEFAULT".

3 Press and turn the Easy Shuttle to select "STATE 1" or "STATE 2". You cannot select "DEFAULT".
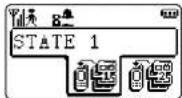


5 Turn the Easy Shuttle to check the another settings.
6 After you check, press at least one second to return to the normal display.
Press shortly to back to the previous step.
5 Press to store the settings to the selected state.

The normal display returns after a few seconds.
Hints:
- In step 2, you can also use the numeric button.
2: CONFIRM
3: RENEW STATE
You do not need to press F/SELECT in step 3. - In step 3, you can also use the numeric button.
1: STATE 1
2: STATE 2
3: DEFAULT (check only)
You do not need to press F/SELECT in step 4. - In step 5 of "To store the current settings", you can also use the 1 button.




Resetting a function to the factory setting
You can reset each PT-H99 function to the factory setting.
1 In standby mode, press and successively.


2 Turn the Easy Shuttle to select a function to reset.
Turning the Easy Shuttle downward changes the display as follows:

flowchart
graph TD
    A["PHONE BOOK"] --> B["REDIAL"]
    B --> C["S - MAIL"]
    C --> D["P - MAIL DX"]
    D --> E["VOICE DATA"]
    E --> F["TEXT MEMO"]
    F --> G["SCHEDULE"]
    G --> H["LOC. DATA"]
    H --> I["RING SOUND"]
    I --> J["ALL DATA"]
    J --> K["FUNC. RESET"]
3 Press


4 Press to reset.
This example resets the Phone Book.

The normal display returns after a few seconds.
Hints:
• In step 4, you can also use the 1 button.
- Note that if you reset the VOICE DATA, the voice labels, voice memo, and auto answer message recorded on the memory are deleted consequently. The voice label and the auto answer functions are also disabled by resetting the voice data.


Chapter 6: Sending and receiving a short mail (S-mail)


Sending an S-mail....92
Receiving an S-mail 95
Returning an S-mail to the sender ..... 96
Using preset message 97
Setting automatic display 101
Setting the Continue mode 103
Sending an S-mail in incoming/outgoing
message history 104
Deleting the S-mail.... 105

*PT-H99(AH)_08E 01.10.11, 9:16 PM91

Sending an S-mail
You can send a short mail consisting of up to 20 characters. For short mails, you cannot enter text in Thai.
To send an S-mail:
1 In standby mode, press and successively.
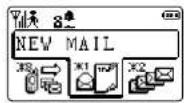
2 Press Ⓞ FSELECT

3 Enter text.
See page 32 for text input.
4 When you complete entering a mail, press ○ or Ⓤ

5 Dial a phone number, and press
You can turn the Easy Shuttle to use a redial number or Phone Book.

Hints:
- You can talk with the other party after an S-mail is sent if you set the Continue mode to "On". (See page 103 to set the Continue mode.)
• In step 2, you can also use the 1 button.
If you enable the Succession mode, you can send an S-mail up to 100 characters, where the mail is divided into 20-character blocks to be sent.
To send an S-mail over 20 characters:
1 In standby mode, press and successively.
2 Turn the Easy Shuttle to select "SUCCESSION".
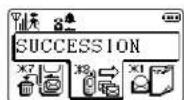
3 Press and turn the Easy Shuttle to select "On".

4 Press to set the Succession mode.

The normal display returns after a few seconds.
5 Enter text.
See steps 1 to 4 of "To send an S-mail" on page 92.
6 Dial a phone number, and press to enter a pause (P), then key in your PCT number code.

7 Press
PT-H99 beeps each time 20 characters of mail are sent.
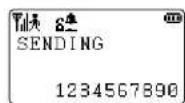
Hints:
- Because a mail is sent in 20-character blocks, the last block might reach first at the receiving side.
• Each 20-character block is counted as one call. So, If you send 30 characters of mail, you will be charged by 2 calls.
• In step 2, you can also use the 8 button. You do not need to press F/SELECT in step 3. - In step 3, you can also use the numeric button.
1: On
3: Off
You do not need to press F/SELECT in step 4.
Sending an S-mail
To check the outgoing message history:
1 In standby mode, press and successively.
2 Turn the Easy Shuttle to select "CONFIRM MAIL".

3 Press and turn the Easy Shuttle to select "SENT MAIL".
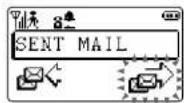
4 Press and turn the Easy Shuttle to display the desired mail.
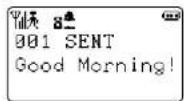
5 Press at least one second to return to the normal display.
Hint: In step 2, you can also use the 2 button. You do not need to press F/SELECT in step 3.
Receiving an S-mail
When an incoming S-mail arrives, and indication is made in the standby-mode display.
When an incoming S-mail arrives
The following display appears and the ringer sounds twice.

Press Ⓞ The content of received S-mail appears.

3 Press and turn the Easy Shuttle to select "RECEIVED MAIL".

4 Press and turn the Easy Shuttle to display a received mail.

5 Press at least one second to return to the normal display.
Hint: In step 2, you can also use the 2 button. You do not need to press F/SELECT in step 3.
To check an incoming S-mail history:
1 In standby mode, press and successively.
2 Turn the Easy Shuttle to select "CONFIRM MAIL".

94
95
Returning an S-mail to the sender
1 Display the incoming mail you reply to.
See "To check an incoming S-mail history" on page 95.
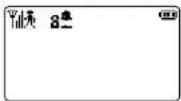
Using preset message
Your PT-H99 has 20 fixed messages for use in entering mail. You can newly register up to 50 messages, each consisting of up to 20 characters, that you think you'll use frequently in sending mails.
Contents of fixed messages
To insert a fixed message while entering a mail
1 While entering an S-mail, press and turn the Easy Shuttle to select "FIXED MSG".

2 Press and turn the Easy Shuttle to select the fixed message you want to use.
| Message number | Message |
| 11 | :-) |
| 12 | :-) |
| 13 | :-O |
| 14 | :-) |
| 15 | m(_)m |
| 16 | (* *) |
| 17 | (- -) |
| 18 | {? ?} |
| 19 | (> <) |
| 20 | (+ -) |
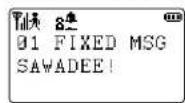
You cannot change the contents of these phrases.
3 Press to Insert a message into an S-mail.
4 Continue entering S-mail. See page 92 to send an S-mail.
Hint: In step 2, if you know the message number to select, you can also button in the number instead of using the Easy Shuttle.
Using preset message
To register a preset message
1 In standby mode, press and successively.
2 Turn the Easy Shuttle to select "FIXED MSG".

3 Press and turn the Easy Shuttle to select a number to register.
You cannot select the number less than 20.

4 Press and key in a preset message.
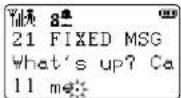
5 Press to register a message.

6 Reconfirm the registered number and message. Registered content appears after a few seconds.

7 Press at least one second to return to the normal display.
Hints:
- In step 2, you can also use the 3 button. You do not need to press F/SELECT in step 3.
- In step 3, if you know the message number to register, you can also button in the number instead of using the Easy Shuttle.
To store an S-mail as a preset message:
1 While displaying a mail, press FSELECT, and turn the Easy Shuttle to select "FIXED MSG".
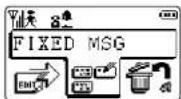
2 Press and turn the Easy Shuttle to select a number to store.
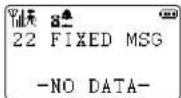
3 Press FSELECT

4 Press to store a mail.

The normal display returns after a few seconds.
To delete a preset message:
1 In standby mode, press and successively.
2 Turn the Easy Shuttle to select "FIXED MSG".

3 Press and turn the Easy Shuttle to select a number to delete.
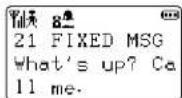
4 Press, and turn the Easy Shuttle to select "DELETE".
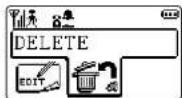
5 Press FSELECT


Using preset message
6 Press

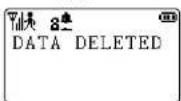
The normal display returns after a few seconds.
Hint:
In step 2, you can also use the 3 button. You do not need to press F/SELECT in step 3.
Setting automatic display
When you set this function, not an indication but the S-mail itself is automatically displayed when it arrives.
To set automatic display:
1 In standby mode, press and

2 Turn the Easy Shuttle to select "AUTO DISPLAY".

When an incoming S-mail arrives
The following display appears and the ringer sounds twice.

3 Press and turn the Easy Shuttle to select "On".
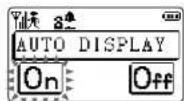
Press and hold for one second to return to the normal display.
4 Press to set the function.

The normal display returns after a few seconds.
Hint:
In step 2, you can also use the 5 button. You do not need to press F/SELECT in step 3.
101100

*PT-H99(AH)_06E 01.10.11, 9:16 PM100-101

Setting automatic display
To cancel automatic display
1 In standby mode, press and successively.
2 Turn the Easy Shuttle to select "AUTO DISPLAY".

3 Press and turn the Easy Shuttle to select "Off".

4 Press to cancel the function.

The normal display returns after a few seconds.
Hint: In step 2, you can also use the 5 button. You do not need to press F/SELECT in step 3.
Setting the Continue mode
When you set the Continue mode, the line is not disconnected after an S-mail is sent, and you can talk with the other party. However, the number of characters sent as one S-mail is 18 in this mode.
To set the Continue mode:
1 In standby mode, press and successively.
2 Turn the Easy Shuttle to select "CONT. MODE".
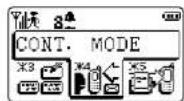
3 Press
Sending an S-mail in incoming/outgoing message history
You can send a displayed S-mail as it is or after changing the contents and/or phone number.
1 Display an incoming or outgoing mail to send. See page 95 for how to display the incoming mail. See page 94 for how to display the outgoing mail.
6 If necessary, press and hold ○ for one second or longer to delete a phone number, and enter a phone number.
2 Press

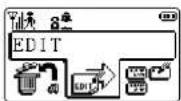
7 Press ④ to send a mail.
3 Press


4 If necessary, turn the Easy Shuttle to move to the column to edit, then press Ⓞ to delete a character and enter text.
5 Press
When the incoming mail is selected in step 1, the phone number of the other party appears.

Deleting the S-mail
Each incoming/outgoing history holds 100 messages. When it is full, the newest message is stored with the oldest one deleted. You can delete the S-mail in the incoming or outgoing history.
To delete an S-mail:
1 In standby mode, press and successively.
2 Turn the Easy Shuttle to select "CONFIRM MAIL".

3 Press and turn the Easy Shuttle to select "SENT MAIL" or "RECEIVED MAIL".

or

4 Press and turn the Easy Shuttle to select the S-mail to delete.
5 Press and turn the Easy Shuttle to select "DELETE".

6 Press ○ SELECT

7 Press to delete.

The normal display returns after a few seconds.
Hint:
In step 2, you can also use the 2 button. You do not need to press F/SELECT in step 3.
105104




Deleting the S-mail
To delete all S-mails in the incoming or outgoing history
1 In standby mode, press and successively.
2 Turn the Easy Shuttle to select "DEL ALL SENT" or "DEL ALL RCV".
DEL ALL SENT: Deleting the outgoing message(s) DEL ALL RCV: Deleting the incoming message(s)
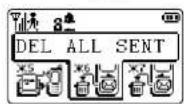
or

4 Press FSELECT
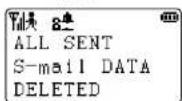
or
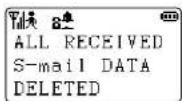
The normal display returns after a few seconds.
Hint: In step 2, you can also use the numeric button. 6: DEL ALL SENT 7: DEL ALL RCV You do not need to press F/SELECT in step 3.
3 Press


Setting mail rejection
When you receive a non-caller ID direct mail, you can reject the reception.
1 In standby mode, press and w successively.

2 Turn the Easy Shuttle to select "FUNCTION SET".

3 Press and turn the Easy Shuttle to select "MAIL REFUSE".

4 Press and turn the Easy Shuttle to select "On".

5 Press to set the function.

The normal display returns after a few seconds.
Hints:
- In step 2, you can also use the 4 button. You do not need to press F/SELECT in step 3.
- In step 3, you can also use the 4 button. You do not need to press F/SELECT in step 4.
- In step 4, you can also use the numeric button.
1: On
3: Off
You do not need to press F/SELECT in step 5.


Chapter 8: Using PT-H99 as a cordless phone and transceiver


Before using PT-H99 as a cordless phone .... 126 Setting a mode for cordless phone .... 128 Using PT-H99 as a cordless phone .... 129 Using PT-H99 as a transceiver .... 130

*PT-H99(AH)_00E 01.10.11, 9:17 PM125

Before using PT-H99 as a cordless phone
Before using your PT-H99 as a cordless phone, you have to:
- Register your PT-H99 in the Home Base Unit (HBU).
- Select the HBU's number, because your PT-H99 can be registered in 5 HBUs.
- Set the PT-H99's mode to PUBLIC & PRIVATE. (See page 128.)
To register your phone in HBU:
1 During power off, press and hold ⚫, and 📋
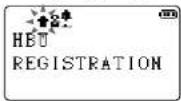
2 Enter a cordless phone number, and press 🔥.
A cordless phone number should be within 3-digit number.

Cordless phone number
If you entered an incorrect number, press to delete it.
3 Enter the security code, and press 📋.
The security code is a 4-digit number.
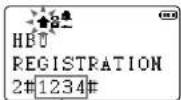
Security code
This security code is different from the one used in security lock. Refer to the operating manual of HBU.
4 Enter a group number (1 - 8), and press ☐.
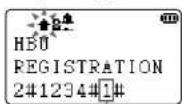
Group number
For the group number, refer to the operating manual of HBU.
5 Enter HBU number (1 - 5), and press 🔒.


Hint:
To cancel the registration of HBU, press and hold F/SELECT and sharing power off. Then press and hold INT/CLR/HOLD until "HBU REGISTRATION ERASED" appears.
To select HBU to connect:
1 In standby mode, press 5%, and successively.
2 Turn the Easy Shuttle to select HBU.

3 Press FSELECT

The normal display returns after a few seconds.
Setting a mode for cordless phone
To use your PT-H99 as a cordless phone, you have to change the mode to "PUB&PRIVATE". You can use PT-H99 as an ordinary PCT and cordless phone.
To set "PUB&PRIVATE" mode:
1 In standby mode, press 5, and ○ F/SELECT
Using PT-H99 as a cordless phone
For calling, refer to the operating manual of HBU.
Using PT-H99 as a transceiver
You can communicate between PCTs that are both registered in the same Home Base Unit (HBU). However, the communication should be within 3 minutes.
Before using your PT-H99 as a transceiver, you have to:
- Register your PT-H99 in the Home Base Unit (HBU). (See page 126.)
- Select the HBU's number, because your PT-H99 can be registered in 5 HBUs. (See page 127.)
- Set the PT-H99's mode to "PUB&TRANS" or "TRANSCEIVER". (See below.)
- PUB & TRANS: to use PT-H99 as an ordinary PCT and transceiver
• TRANSCEIVER: to use PT-H99 as a transceiver
The following example assumes PCT 1 (yours) calls PCT 2 (receiver).
To set the transceiver mode:
1 In standby mode, press ○ ⑤, and ○ FSELECT


Appendix

Troubleshooting .... 134 PT-H99 Specifications.... 136

*PT-H99(AH)_App. 01.10.11, 9:18 PM133

Troubleshooting
| If... Possible causes Solution | ||
| Power won't turn on | Battery connector is not attached. | Connect the battery pack properly. |
| Battery is exhausted. Charge the battery. | ||
| Phone does not ring | Ringer volume is turned off. | Adjust the ringer volume. (See page 25.) |
| Phone is in the vibration mode. | Set the phone to "BELL" or "VIB&BELL" mode. (See page 28.) | |
| You entered a phone number, but cannot place a call | Outside the service area, or the signal is weak. | Change location until icon appears on the display. |
| Phone is in the transceiver mode. | Set the phone to the public mode. (See page 128.) | |
| Security lock is enabled. | Disable the security lock mode. (See page 66.) | |
| Cell stations' circuits are busy. | Wait a while, and try again. | |
| Phone call is cut off | Outside the service area, or the signal is weak. | Change location until icon appears on the display. |
| Phone is moving too fast. | Slow down to a walking pace or stop. | |
| You can't hear the other party well | Conversation volume is low due to conditions with the phone lines or the other party's phone. | Turn the Easy Shuttle to increase the volume. |
| Display goes blank during use | Battery save mode is disabled. | Disable the battery save mode. (See page 69.) |
| Battery power is running low. | Charge the battery. (See page 16.) | |
| You placed the phone in the charger, but "CHARGING" does not appear on the display | Charger terminals are dirty. | Wipe the terminals with a cloth wetted with a thin solution of mild cleaner, then wipe them with a dry cloth. |
| AC adaptor is not properly connected properly. | ||
If... Possible causes Solution
| You set the phone to the "PUB&PRIVATE" mode near HBU, but ↑ icon does not appear on the display | • Phone is not registered in HBU. | Register the phone in HBU. (See page 126.) |
| • You pressed an incorrect number of HBU. | Select the correct number of HBU. | |
| You set the phone to the "PUB&TRANS" or "TRANSCEIVER" mode near HBU, but □ icon does not appear on the display | • Phone is not registered in HBU. | Register the phone in HBU. (See page 126.) |
| • You pressed an incorrect number of HBU. | Select the correct number of HBU. | |
| Key input takes longer time. | It takes time to access the internal memory. | It is not a malfunction.The larger the size of the data stored on your PCT becomes, the longer it takes to process it. |


PT-H99 Specifications
Standby modes 4 modes: Public, Public & Private, Public & Transceiver, Transceiver
Ringer volume 4 levels: OFF, Volume 1, Volume 2, Volume 3
Receiver volume 4 levels: Volume 1, Volume 2, Volume 3, Volume 4
Ringer type 3 types: Ringing only, Vibration only, Ringing and vibration
Ringer style 15 types
Redial storage 20 calls (shared with incoming call log)
Electric phonebook 300 entries (each entry consisting of 1 name, 3 phone
numbers, E-mail address, memo, voice label; 10 characters
for name, 32 digits for phone number, 80 characters for E-
mall address, 20 characters for memo; max. 10 voice labels
for 300 entries)
Text memos 50 entries (30 characters per entry)
Home Base Units (HBUs) Registered up to 5 HBUs
Other functions Alarm, Help, Security lock, Scheduler, One-touch dialing,
Key lock, Back light, Battery save, Clock, Composition for
a ringer, Location report, Auto answering, Voice memo
Communication protocol Digital TDMA-TDD
Transmission format G1D, G1C, G1E, G1F, G1W, G1X
Transmission frequency 1,900 MHz band
Transmission power 10 mW (average)
Power source 3.8 V DC (proprietary lithium ion battery pack)
Continuous talk time Approx. 5 hours
Continuous standby time Approx. 500 hours
Dimension 42 · 106 · 18.5 mm (width · height · depth)
Weight 76 g (including battery pack)
Accessories Charger, Rechargeable battery pack, AC adaptor,
Keyboard, Batteries (R03/size AAA) (2)
- Design and specifications are subject to change without prior notice.
- The above specification for continuous talk time is for use in the Public mode within a cell station service area. Switching to different cell stations within a service area consumes more power and reduces available talk time. Continuous talk time may also vary with signal conditions.
- The above specification for continuous standby time is for use in battery save mode within a cell station service area. Switching to different cell stations within a service area consumes more power and reduces available standby time. Continuous standby time may also vary with signal conditions.
- Aiwa is not responsible for loss or damage due to inability to place or receive phone calls as a result of phone breakdown or malfunction.

*PT-H99(AH)_App.
136-137
01.10.11, 9:18 PM

- PT-H99
- able of Contents
- T
- Chapter 1: Before using PT-H99
- Chapter 2: Basic operations
- Chapter 3: Using electronic phone book
- Chapter 4: Recording voice messages and Auto answer
- Chapter 5: Useful features
- Chapter 6: Sending and receiving a short mail (S-mail)
- Chapter 8: Using PT-H99 as a cordless phone and transceiver
- Appendix
- Safety Information
- DANGER
- WARNING
- CAUTION
- Safety guidelines for lithium ion batteries
- Correct usage
- Introduction
- PT-H99's features
- Easy Shuttle - Simple, one-handed operation
- Digital - Clear, crisp, sound, secure transmissions
- Vibration mode - vibrates rather than rings when calls come in
- Electronic Phonebook - store up to 300 entries
- Accessory Keyboard - handy, cordless keyboard for text entry
- Accessories
- Names of parts and functions
- Names of parts
- Functions
- How to see the PT-H99 display
- ① Power and signal strength
- ② Standby Mode
- ③ Calling method
- ④ Text input mode
- ⑤ Auto answer
- ⑥ Battery level and other
- Charging the battery
- Warning:
- Note:
- Locating the charger:
- Hints:
- Setting the language
- Setting the calendar and time signal
- To set date and time:
- To set the time signal:
- When you need your phone number and help
- To display your phone number:
- To display help:
- Answering a call
- To end the call:
- To turn the power off:
- Adjusting the volume
- To adjust the ringer volume:
- To adjust the receiver volume:
- Redialing a previous phone number
- In standby mode, turn the Easy Shuttle upward once.
- Setting to vibration mode
- Display after your selection:
- Selecting the ringer style
- Factory settings:
- Entering text
- In Thai input mode:
- In English input mode:
- Example: to input "Terry" on the Phone Book
- During text input mode in the Phone Book, press Ⓞ to change the language.
- Press 2 times.
- Press 6 times.
- Press 8 times.
- Turn the Easy Shuttle once.
- Press 8 times.
- Press 8 times.
- Using the accessory keyboard
- To insert the batteries:
- To set the accessory keyboard:
- To enable the keyboard:
- To disable the keyboard:
- Hint:
- Registering in the Phone Book
- To start by the F/SELECT button
- To start by a redial number:
- To start by a phone number:
- To start by P-mail DX call history data:
- To register in the Phone Book:
- Searching a phone number
- To search sequentially:
- To search by group:
- To search by name:
- Editing and deleting Phone Book data
- To edit Phone Book data:
- To delete Phone Book entry:
- Enabling the Black List/White List
- To enable the Black List:
- Using the voice label
- To enable the voice label:
- To register in the Phone Book with voice label:
- Recording voice memo or communication
- To record voice memo or communication:
- To play back/delete the recording:
- Enabling the auto answer function
- To enable the auto answer function:
- Shortcut for enabling/disabling the auto answer function:
- Recording an original answer message
- To record original answer message:
- To playback or delete answer message:
- Setting time to start auto answer message
- Using the alarm
- To set the everyday alarm:
- To stop the alarm:
- To cancel the alarm setting:
- To stop the alarm
- To confirm/change a schedule:
- Using the scheduler
- To delete a schedule:
- Entering a text memo
- To enter a text memo:
- To check, edit, or delete a text memo:
- Protecting your phone from an unauthorized use
- To set the security lock:
- To reset the security lock:
- To change a security code:
- Turning on/off the operate tone
- To turn on the operate tone:
- To turn off the operate tone:
- Conserving the battery power during standby
- To set the power save mode:
- To reset the power save mode:
- Turning on/off the display illumination
- Making an original melody as the ringer
- To make an original melody:
- To delete a created melody:
- Changing the display to show image and clock
- To display the image in standby:
- To display the digital clock in standby:
- To display an image in the opening/ending display:
- To delete an image:
- Turning on the subaddress dialing
- To rename location data: (Procedure for being monitored)
- Using location report function
- Using PT-H99 for data communication
- To start data communication:
- Displaying/storing/restoring current settings
- To check the current settings:
- To restore to the stored state:
- To check the stored settings:
- To store the current settings:
- Resetting a function to the factory setting
- Sending an S-mail
- To send an S-mail:
- To send an S-mail over 20 characters:
- Receiving an S-mail
- When an incoming S-mail arrives
- Returning an S-mail to the sender
- Display the incoming mail you reply to.
- Using preset message
- Contents of fixed messages
- To insert a fixed message while entering a mail
- To register a preset message
- To delete a preset message:
- Setting automatic display
- To set automatic display:
- To cancel automatic display
- Setting the Continue mode
- To set the Continue mode:
- Sending an S-mail in incoming/outgoing message history
- Deleting the S-mail
- To delete an S-mail:
- Setting mail rejection
- Before using PT-H99 as a cordless phone
- To register your phone in HBU:
- To select HBU to connect:
- Setting a mode for cordless phone
- Using PT-H99 as a cordless phone
- Using PT-H99 as a transceiver
- PT-H99 Specifications
Brand : AIWA
Model : PT-H99
Category : Smartphone