
ICR-XPS01 - Uncategorized SANYO - Free user manual and instructions
Find the device manual for free ICR-XPS01 SANYO in PDF.


| Product Type | Digital Voice Recorder |
| Microphone | Built-in omni-directional |
| Recording Format | MP3 / WAV |
| Internal Memory | Up to 8 GB (estimated) |
| External Memory | microSD card slot (up to 32 GB) |
| Battery Type | 2 x AAA alkaline (not included) |
| Battery Life | Approximately 15 hours (MP3 128 kbps) |
| Dimensions (W x H x D) | 40 x 100 x 15 mm |
| Weight | Approximately 50 g (with batteries) |
| Display | LCD with backlight |
| Recording Modes | Standard HQ, SP, LP |
| Playback Features | Variable speed, repeat, A-B loop |
| Connectivity | USB 2.0, 3.5 mm headphone jack |
| Maintenance | Clean with soft dry cloth; keep away from moisture |
| Safety Cautions | Do not disassemble; avoid extreme temperatures |
| Spare Parts / Repair | Contact Sanyo authorized service center |
| General Information | User manual included (PDF download available) |
Frequently Asked Questions - ICR-XPS01 SANYO
User questions about ICR-XPS01 SANYO
0 question about this device. Answer the ones you know or ask your own.
Ask a new question about this device
Download the instructions for your Uncategorized in PDF format for free! Find your manual ICR-XPS01 - SANYO and take your electronic device back in hand. On this page are published all the documents necessary for the use of your device. ICR-XPS01 by SANYO.
USER MANUAL ICR-XPS01 SANYO
natural_image
Line drawing of a mobile phone with control panel and display screen (no text or symbols)
Sample music is stored in the MUSIC (M) folder.
1AJ6P1P0093--
Contents
Precautions 20
Before using the unit ..... 21
Checking the accessories .... 21
Controls 22
Main unit 22
LCD display 23
About backlight of buttons/touch panel..... 24
About the "OPERATION" screen 25
About the operation mode and basic screen of the unit 26
About files/folders.... 27
Folders for recording 27
Name of recorded file 28
MUSIC folder.... 29
Other folders 30
Switching operation mode/folder ..... 31
Using the list screen 33
Displaying a list.... 33
Using the list screen 34
Preparation 35
Inserting the battery.... 35
Turning on/off the power 36
Remaining battery power 37
Resume function 37
Charging the lithium-ion battery.... 38
Using the unit in the AC operation mode (multi-cradle) (ICR-XPS01MF only) ... 38
Preventing accidentally pressing a button (hold function) 40
Inserting/removing a microSD card ... 41 microSD cards that can be used on the unit .... 42
Where to use the unit (in FM RADIO mode).... 44
Using the multi-cradle (ICR-XPS01MF only) 45
Placing the multi-cradle 45
Setting the unit to the multi-cradle.... 46
Using the multi-cradle to charge the unit ... 47
Listening to audio from the multi-cradle ... 47
Using the multi-cradle to record from an external device 48
Outputting sound from an external device to the multi-cradle 48
Using the multi-cradle with the unit's battery 48
Setting the calendar (date & time)..... 49
Display 51
Switching information display...... 51
Recording 52
Information you want to know before recording 52
About wind noise 52
About the possible recording time 52
About the external recording mode (external input/microphone) 53
Using the scene select function...... 54
Selecting a recording scene 56
Recording 58
Setting recording EQ 62
About the preset recording EQ 62
Selecting a preset recording EQ mode..... 63
Setting your favorite recording EQ mode (only when USER is selected) 64
Recording from an external device ... 67
Using the auto divide function 68
Playback....71
Playing a file 71
To fast forward 73
To rewind 73
To skip to the next or previous file 73
To skip forward or backward by specified time interval 73
Playback functions and settings.... 74
Changing the playback speed ..... 76
Performing phrase playback 77
Performing A-B repeat playback (segment repeat playback) 78
Performing time search for playback... 79
About playback in the MUSIC mode ... 80
Folder skip function 81
Editing 82
Setting or erasing an index mark ..... 82
Setting an index mark 82
Skipping to the next/previous index mark... 82
Erasing index marks 83
Dividing a file.... 85
Using the playlists
(in MUSIC folder only)...... 88
Registering a file or folder in a playlist (MYLIST) 88
Changing the play order of files in a playlist.... 89
De-registering a file from a playlist (MYLIST) 90
De-registering all files from a playlist (MYLIST) 91
Using FM radio 92
Listening to FM radio 92
About selecting FM station 94
Selecting from registered stations (preset station selection) 95
Manually selecting a station (manual tuning).... 96
Adding or deleting a station 97
Adding a station 97
Deleting a station 99
Initializing presets.... 100
Recording FM radio 102
About the recording mode during FM radio recording 103
Using the timer 104
Setting up the timer 104
Timer playback/recording common settings 105
Settings for timer playback 107
Settings for timer recording.... 109
Completing timer setting 111
Using the sleep timer 112
Erasing files 114
About the recycle bin function ..... 114
About the RECYCLE folder display when the recycle bin function is turned on ..... 115
About name of file when moved to the RECYCLE folder 115
Recovering a file from the RECYCLE folder .... 116 Emptying the RECYCLE folder .... 117
Erasing a file 118
Erasing all files in a folder ..... 120
Formatting a microSD card.... 122
About the menus 124
How to use the menus.... 124
Menu list 126
Using the recording menu
(REC MENU).... 132
REC MODE 132
MIC SENS. 133
MIC ALC 134
MIC MODE 135
LOW CUT FILTER 136
PEAK LIMITER.... 136
Contents
SELF TIMER 136
VAS.... 137
EXT INPUT 138
Using the playback menu
(▶PLAY MENU) 140
REPEAT.... 140
PHRASE PLAY 141
TIME SKIP.... 141
SOUND EQ 142
Changing the recording scene select
setting.... 144
Customizing a recording scene 145
Restoring a recording scene to its default 147
Using the FM radio menu
(M setting) 148
AUTO PRESET.... 148
OUTPUT 148
STEREO/MONO 149
Using the common menu
(COMMON MENU) 150
BEEP SOUND 150
LED SETTING 150
SENSOR SENS. 150
AUTO POWER OFF 151
BACKLIGHT 151
CONTRAST 151
LED NAV 152
RECYCLE BIN 152
INIT MENU 152
ID3 LANGUAGE 152
VERSION 153
Before using the unit with
your PC 154
Checking the operating
environment 154
Operating environment 154
What can you do from your PC? ... 156
Connecting/disconnecting
your PC 157
Connecting your PC.... 157
Disconnecting your PC 158
Using your PC to charge the
battery 159
Connecting to your PC 159
Viewing the unit's folders and files from
your PC 161
Troubleshooting 162
Check to see that the unit is correctly
recognized by your PC. 162
If Device Manager does not display the
information correctly 163
Additional information ..... 164
Error messages 164
Before contacting
your local dealer 168
Frequently asked questions ..... 174
Cleaning.... 175
Main specifications 176
Digital Sound Recorder main unit specification .... 176
Supplied Cradle Active Speaker specification (ICR-XPS01MF ONLY)..... 179
Supplied lithium-ion battery specification .... 179
Index 180
Note:
This handling description is printed prior to product development. When a part of the product specification must be changed to improve operability or other functions, priority is given to the product specification itself. In such instances, the instruction manual may not entirely match all the functions of the actual product. Therefore, the actual product and packaging, as well as the name and illustration, may differ from the manual. The screen/LCD display shown as an example in this manual may be different from the actual screen/LCD display.
Please read this manual before use.
Keep the manual in a safe place for future reference.
SANYO takes no responsibility for damages or lost profits caused by the use/failure of the unit, or claims or expenses from a third party for any use.
FOR AMERICAN USERS
The following advisory is included in accordance with the laws of the State of California (USA):
WARNING:
This product contains chemicals, including lead, known to the State of California to cause cancer, birth defects or other reproductive harm. Wash hands after handling.
FOR CANADIAN USERS
This class B digital apparatus complies with Canadian ICES-003.
Declaration of Conformity
Model Number: ICR-XPS01MF
ICR-XPS01M
Trade Name: SANYO
Responsible Party: SANYO North America Corporation
Address: 21605 Plummer Street
Chatsworth, California 91311
Telephone No.: (818) 998-7322
- This device complies with Part 15 of the FCC Rules.Operation is subject to the following two conditions:
(1) this device may not cause harmful interference, and
(2) this device must accept any interference received, including interference that may cause undesired operation.
FOR EU USERS
The symbol mark and recycling systems described below apply to EU countries and do not apply to countries in other areas of the world.
Your SANYO product is designed and manufactured with high quality materials and components which can be recycled and/or reused.
The symbol mark means that electrical and electronic equipment, batteries and accumulators, at their end-of-life, should be disposed of separately from your household waste.
Note:
If a chemical symbol is printed beneath the symbol mark, this chemical symbol means that the battery or accumulator contains a heavy metal at a certain concentration. This will be indicated as follows: Hg: mercury, Cd: cadmium, Pb: lead
In the European Union there are separate collection systems for used electrical and electronic equipment, batteries and accumulators.
Please, dispose of them correctly at your local community waste collection/recycling centre.
Please, help us to conserve the environment we live in!
CAUTION
- It is forbidden to copy this manual, whole or in part, without prior written permission.
- All images and illustrations given in this manual are for explanation purposes and may differ slightly from that of the actual product. Also, actual specifications are subject to change without prior notice and therefore may differ from the contents of this manual.
Sanyo cannot be held responsible for damage caused by improper use or modifications to the device, or data that is lost or destroyed.
SANYO Sales & Marketing Europe GmbH
Stahlgruberring 4, D-81829 München, Germany
SANYO Electric Co., Ltd.
1-1, Sanyo-cho, Daito City, Osaka 574-8534, Japan
CAUTIONS CONCERNING BOTH UNIT AND ACCESSORIES
WARNING
If a device makes a strange noise, emits a strange odor, or if smoke comes out from it, immediately turn off the power and proceed as follows
- If a device is used under these conditions, it may cause a fire or electric shock.
① Turn off the device.
② When using the multi-cradle, unplug the power cord from the power outlet.
③ Remove the battery. - After completing these actions, wait to make sure no more smoke comes from the device. Then take it to the dealer for service. Do not try to repair or open the device yourself.
■ Do not use during a storm
- To avoid the risk of being struck by lightning, do not use the devices during a thunderstorm. In particular, if used in an open field, you have an increased chance of being struck by lightning. Quickly seek refuge in a place that will protect you from lightning.
- Keep the devices out of the reach of children
- They may swallow the battery or other small parts. In such a case, consult a physician immediately.
■ Do not disassemble or modify
- It is dangerous to touch the inside of the devices. Doing so may cause a fire or electric shock.
- Any internal check, setting, or repair should be performed by the dealer.
- Do not use the AC adaptor as a direct current generator.
CAUTIONS CONCERNING THE UNIT
WARNING
■ Do not use while driving
- Do not use earphones or headphones, perform button operations, or view the screen while driving an automobile, motorcycle, bicycle, or any other vehicle. Doing so may cause an accident.
- In addition, do not use near railway or street crossings, train platforms, construction sites, or any location where an inability to hear surrounding noise may be hazardous.
■ Be aware of your surroundings when using the unit
- Pay close attention to your surroundings when using the unit. Failure to do so may lead to an accident or injury.
- When using the unit while walking, be very careful of your surroundings and especially the traffic to avoid accidents.
- Do not use the unit inside an airplane or elsewhere where its use may be restricted. Doing so may cause an accident.
■ Do not get the unit wet
- This unit is not water-resistant. Do not allow it to get wet, as doing so may cause a fire or electric shock.
- Do not use the unit in a bathroom.
- If the unit gets wet, immediately turn it off and remove the battery pack. Then take it to a dealer for repair. Using the unit after it has been become wet may cause a fire, electric shock, or other accident.
■ Do not place on an unstable surface
- The unit may fall, resulting in damage to the unit or injury.
- If the unit has fallen and its body is damaged, turn it off, remove the battery pack, and take it to the dealer for repair. Using the unit after its body has been damaged may cause a fire or electric shock.
■ Do not use earphones or headphones at high volumes for extended periods
- Listening to the earphones or headphones at high volumes for extended periods of time may damage your ears and impair hearing. As sudden increases in volume may also damage your ears, start at low volumes and increase gradually.
■ Do not use where there is risk of explosion
- Do not use the unit in a location where there is explosive gas, or any other flammable material in the air. Doing so may cause a fire or an explosion.
CAUTION
■ If the unit is not going to be used for a long period of time
- For safety's sake, remove the battery pack from the unit. This will prevent any possible excess heat or leakage of battery fluid that may result in injuries or damage to nearby objects.
■ Cautions during storage
- Do not place in locations with excessive humidity or dust, or expose to steam or exhaust. Doing so may cause a fire or electric shock. Do not leave in completely closed vehicles, or any location subject to direct sunlight or high temperatures. Doing so may cause a fire or damage.
■ Do not use in extreme temperatures
- Condensation and moisture may cause a fire or electric shock.
- The operating temperature is 5 to 35 °C (41 to 95 °F).
- Do not use in locations with excessive humidity. When carrying on your person, moisture from perspiration may cause damage.
- If moisture or humidity is determined to be the cause of damage, the repair warranty will be void.
■ Do not hold the hot part for a long time
- The unit may become warm during use. A low temperature burn may result if you hold the hot part for a long time.
■ Do not cover or wrap the unit in a cloth or blanket
- It may generate heat and cause the casing to warp or cause a fire.
■ Do not carry in trouser pockets
- Doing so may cause damage when you sit down or make other movements that may apply force.
CAUTIONS CONCERNING THE MULTI-CRADLE AND AC ADAPTOR
DANGER
■ Do not recharge a battery pack other than the specified battery pack
- Recharging a lithium-ion battery other than the one supplied may cause excess heat, combustion, or leakage, and cause a fire, injuries, burns, or damage to nearby objects.
■ Concerning the power cord
- The voltage rating for the power cord supplied with this unit conforms to the standards of the country in which the unit was sold.
■ Do not get the multi-cradle or AC adaptor wet
- Make sure they do not get wet, as doing so may cause a fire or electric shock.
- Do not use them in a bathroom.
- If the multi-cradle or AC adaptor gets wet, immediately unplug it from the power outlet and remove the battery pack. Then contact the place of purchase. If used while wet, it may cause a fire, electric shock, or an accident.
WARNING
■ Cautions when plugging in the power cord
- Securely plug the power cord all the way into the power outlet. If the multi-cradle or AC adaptor is used with the power cord not fully plugged in, heat may be generated and cause a fire.
- If the power plug is loose even when it is inserted all the way into a power outlet, do not use that power outlet. The power plug may generate heat, resulting in fire.
- Do not use if the power cord is damaged or cannot be correctly plugged into the power outlet. Using in this condition may cause a fire or electric shock.
- Do not allow dust, etc., to build up on the power cord or power outlet. A build-up of dust may cause a short circuit or generate heat and cause a fire. Use a dry cloth to remove dust or dirt build-up after unplugging the cord from the power outlet.
- When unplugging the power cord, be sure to hold the plug part and slowly pull it out of the power outlet. Pulling the cord portion may damage the power cord and cause a fire or electric shock.
■ Do not damage the power cord
- Do not place heavy objects on the power cord. Do not place the power cord near a heat source. Do not excessively bend the power cord, modify it, or secure it with staples. Doing so may damage the power cord and cause a fire or electric shock.
- If the power cord is damaged, or if it does not plug properly into the multi-cradle, AC adaptor or wall outlet, contact the place of purchase.
■ Cautions concerning the power cord
- Do not leave the power cord of the supplied AC adaptor plugged into an electrical outlet while the other end is not plugged into the multi-cradle. The loose end can cause electrocution if touched with wet hands or if handled by children.
- Use only the supplied power cord. If a different power cord is used, it may be rated for a different current load, and that may cause a fire.
- The supplied power cord is for exclusive use with the multi-cradle. Do not use it with other devices, as doing so may cause a fire or electric shock.
- Do not use a bundled power cord, as the heat generated may cause a fire.
■ Do not touch the power cord plug with wet hands
- Doing so may cause an electric shock.
CAUTION
■ Do not place on an unstable surface
• It may fall, resulting in damage or injury.
- If it falls and the body is damaged, remove the unit and contact the place of purchase. If used while damaged, it may cause a fire, electric shock, or other damage.
■ Do not place credit cards near the speaker
- As the supplied multi-cradle uses magnetic speakers, do not place watches, credit cards, videotapes, televisions, monitors, or other objects affected by magnetic fields near the multi-cradle. Doing so may damage data or cause discoloration on displays.
■ Other cautions
- Use only the supplied multi-cradle and AC adaptor with your unit.
- If a multi-cradle or AC adaptor other than the ones supplied is used, it may damage the unit and cause a fire or electric shock.
Use the supplied multi-cradle and AC adaptor only with the specified unit. Do not connect to other units, as doing so may result in damage.
■ Cautions during use and storage
- Do not use or store close to a heat source (close to a stove or heater) or leave it exposed to direct sunlight, as doing so may result in defective operation or damage.
- Condensation and moisture may cause a fire or electric shock.
- The operating temperature is 5 to 35 °C (41 to 95 °F).
- Do not use in locations with excessive humidity. When carrying on your person, moisture from perspiration may cause damage.
- If moisture or humidity is determined to be the cause of damage, the repair warranty will be void.
- Do not place in locations with excessive humidity or dust, or expose to steam or exhaust. Doing so may cause a fire or electric shock.
Do not leave in completely closed vehicles, or any location subject to direct sunlight or high temperatures. Doing so may cause a fire or damage. - To avoid the danger of possible fire, be sure to remove the power cord from the power outlet before leaving home for a trip or if otherwise the devices will not be used for a long time.
CAUTIONS CONCERNING THE microSD CARD
CAUTION
■ Cautions concerning the microSD card
- Immediately after use, the microSD card will be very hot. Before removing the microSD card, turn off the unit and wait for the temperature to cool down.
- Keep out of the reach of children. Young children may put the microSD card in their mouth and choke or cause some other unexpected injury or accident.
■ Cautions when handling the microSD cards
- The microSD cards are precision devices. Do not bend, drop, or subject them to strong forces or shocks.
- Avoid using or storing the microSD cards in places with extremely high or low temperatures, subject to direct sunlight, in a completely closed vehicle, near air conditioners or heaters, or in humid or dusty locations.
- Avoid using or storing the microSD cards in locations where strong static electrical charges or electrical noise can be easily generated.
-
Do not allow the edges of the microSD cards to become contaminated with foreign materials. Gently wipe away any contamination with a soft, dry cloth.
-
Do not carry the microSD cards in trouser pockets, as the microSD cards may become damaged when you sit down or make other movements that may apply force.
- Before using a new microSD card or a microSD card that was used in other equipment, be sure to format it using the unit. Please see the Instruction Manual for information regarding how to format the microSD card.
- When buying commercially available products, carefully read the instructions and warnings that come with the microSD card.
- The microSD card may pop out to cause injury or to be lost somewhere. Therefore, use your fingers to hold the microSD card while gently removing it.
CAUTIONS CONCERNING THE BATTERY
| SAFETY PRECAUTIONS | Danger level |
| Rechargeable Li-ion battery pack | |
| ■ Use only batteries manufactured by SANYODo not use batteries other than the specified model numbers from SANYO. Especially for safety purposes, do not use imitation products. If batteries other than the type specified are used, the batteries may generate heat, rupture, or leak and result in fire, injury, burns or damage to surroundings. | DANGER |
| ■ If there is leaking, discoloration, change of shape, damaged exterior, strange odor or any other abnormal condition, immediately discontinue use and remove the battery from the unit, taking care to keep it well away from fireContinuing to use the battery under any of these conditions may result in fire, injury, explosion or other serious damage.If battery fluid is leaking, placing the battery in close proximity to a fire or other heat source may ignite the battery fluid and result in fire, damage, eruption of battery fluid, or smoke fumes. | DANGER |
| ■ Do not transform, take apart, or modifyAny modification, by transforming, disassembling, or directly soldering to the battery, etc., will possibly cause the battery to catch fire, explode, or leak or spew battery fluid. | DANGER |
| ■ Do not connect the and terminals with a wire or other metal implement. Do not carry loose or keep with necklaces, hairpins, etc.Doing so may result in a short circuit, high voltage flow, fire, explosion, leaking or spewing battery fluid, or heat generation. Metal such as a wire or necklace, etc. may cause heat to be generated. | DANGER |
| ■ Do not throw the battery in the fire or subject it to heat• Doing so may cause the insulation to melt, damage the gas discharge valve and safety mechanisms, or ignite the battery fluid, resulting in fire or explosion. | DANGER |
| ■ Do not drop, hit, or submit the battery to strong shocks• If the safety mechanisms and protective devices are broken, an abnormal chemical reaction may occur inside the battery, or cause the battery to catch fire, explode, leak or spew battery fluid, or generate heat. | DANGER |
| ■ Do not allow the battery to come into contact with fresh or salt water, or allow the terminals to become wet• If the safety mechanisms and protective devices are damaged by corrosion, an abnormal chemical reaction may occur inside the battery, or cause the battery to catch fire, explode, leak or spew battery fluid, or generate heat. | DANGER |
| ■ Use only the supplied multi-cradle to recharge the battery• If a charger other than the supplied multi-cradle is used, the battery pack may be overcharged, or recharged with an abnormal voltage, causing an abnormal chemical reaction to occur, or cause the battery pack to catch fire, explode, leak or spew battery fluid, or generate heat. | DANGER |
| ■ Use the battery pack only in the specified device• If the battery pack is used in a device other than that specified, it may cause an abnormal voltage flow, or cause the battery pack to catch fire, explode, leak or spew battery fluid, or generate heat. | DANGER |
| ■ Do not peel or damage the outer casing• Damaging the outer case, inserting nails, hitting with a hammer, stepping on the battery pack, etc., may cause a short circuit inside the battery or cause the battery pack to catch fire, explode, leak or spew battery fluid, or generate heat. | DANGER |
| ■ If the battery is leaking and the battery fluid gets on your skin or clothing, immediately rinse with clean water• If the battery fluid gets into your eyes, you risk losing your eyesight. Do not scratch your eyes. Instead, rinse them immediately with clean, running water, and seek medical attention right away. Any battery fluid that comes into contact with your skin or clothing may harm your skin. Immediately rinse the area with clean, running water. | DANGER |
| ■ Insert the battery correctly, as indicated• When installing the battery, pay attention to the indicated polarity (⊕ and ⊙) and insert it correctly.• If the battery pack is installed with the wrong orientation, it may cause an abnormal chemical reaction while charging, an abnormal voltage flow when it is used, or cause the battery to catch fire, explode, leak or spew battery fluid, or generate heat. | DANGER |
| ■ Always stop the recharging after the prescribed recharge time, even if the battery pack is not fully charged• If you continue to recharge the battery pack, it may cause the battery pack to catch fire, explode, leak or spew battery fluid, or generate heat. | WARNING |
| ■ Charge the battery pack before using it• Always recharge the battery pack before using it for the first time, or when using it after it has been kept in storage for a long time. During recharging, the battery pack may be warm. This is normal and does not indicate a malfunction. | CAUTION |
| ■ Note concerning the battery after use• When removing the battery, turn off the unit and allow the battery to cool down before removing it. | CAUTION |
| ■ Disposal of and recycling the battery• When disposing of used batteries, please consult the laws and regulations in your area for proper battery disposal.• To conserve the environment and for efficient use of natural resources, please discharge the used battery, cover the ⊕ and⊖ terminals with tape and recycle the insulated battery. | CAUTION |
■ Cautions concerning use and storage of the rechargeable Li-ion battery pack
- Do not use the battery with the outer covering or label removed, as doing so may result in malfunction.
• Temperature when using: 5 to 35°C (41 to 95°F)
• Temperature when charging: 5 to 35°C (41 to 95°F) - Do not use the battery pack near fire or inside a car exposed to the hot sun, etc. (Locations in which the temperature reaches 60°C [140°F] or higher.)
- At high temperatures, the safety mechanisms and protective devices inside the battery pack may be damaged, causing an abnormal chemical reaction to occur, or causing the battery pack to catch fire, explode, leak or spew battery fluid, or generate heat. If the safety mechanisms and protective devices are damaged, the battery pack will become unusable.
An environment with extremely high or low temperatures will cause the battery capacity to deteriorate and shorten the usable time, and may even shorten the battery life.
- Avoid storing the battery pack with it near full charge. It is recommended to store the battery pack when it is near fully discharged.
- If the battery pack is completely discharged, it may become unable to be recharged again. To avoid this, charge the battery pack for at least five minutes every six months.
• Storage temperature: 5 to 35°C (41 to 95°F)
When not using the battery pack, remove it from the unit and store at 5 to 35°C (41 to 95°F) in a place with no condensation. Do not keep in a place where the temperature reaches 45°C (113°F) or higher.
• Humidity: 10 to 90% (no condensation)
- Depending on the usage environment, the Li-ion battery pack may expand as it nears the end of its battery life. This is a characteristic of Li-ion batteries and does not pose a hazard.
- Li-ion batteries are consumable products. As you continue to use and recharge the battery pack, the amount of time until the battery pack discharges will gradually shorten. When a fully charged battery pack discharges in less than half the time as at the time of purchase, the battery pack is nearing the end of its battery life. We recommend replacing the battery pack as soon as possible in such cases.
FOR CORRECT USE OF THE UNIT
■ Cautions when cleaning the unit
● Cleaning procedure
① Turn off the unit and remove the battery pack.
② Remove the dirt with a soft cloth.
CAUTION
- Do not use benzene or thinner products to clean the unit. Doing so may cause deformation, discoloration, or paint peeling. When using a chemically treated cloth, carefully read its instructions and warnings.
- Do not spray insecticides or volatile sprays on the unit. Do not let rubber or vinyl objects contact the unit for a long period. They may cause deformation, discoloration, or paint peeling.
■ Caution concerning the battery pack
- Periodically clean with a dry cloth the terminals (contacts) of the battery pack. Do not touch the battery terminals with your bare hands. Doing so will allow contaminants from your hands to adhere to the terminals and oxidize, increasing the contact resistance. If the contact resistance increases, the usable life of the batteries will diminish.
■ When not using the unit for a long period
- Remove the battery pack. However, when the battery pack is removed for a long time, the unit functions may begin to not work properly. Periodically reinstall the battery pack and check the unit functions.
- If the battery pack is left in the unit, a small amount of power is still used even if the unit is turned off. If a rechargeable battery pack is left in the unit for a long period, it may become completely discharged and lose its ability to be recharged again. To avoid this, charge the battery pack for at least five minutes every six months.
Precautions
- The apparatus shall not be exposed to dripping or splashing.
- Do not remove the battery during operating the unit.
- Do not drop the unit or subject it to strong shocks.
- Do not use where there are extremes of temperature (below 5^ (41 °F) or exceeding 35^ (95 °F)).
- Microsoft, Windows Media ^TM , and the Windows ^ logo are trademarks or registered trademarks of Microsoft Corporation in the United States and/or other countries.
- Windows Media ^TM Player is trademark or registered trademark of Microsoft Corporation.
• The microSDHC logo is a trademark.

- Other system and product names generally are the registered trademarks or trademarks of the respective development manufacturers. The symbols™ and ® are not shown in this manual.
- SANYO takes no responsibility for recording failure due to power cuts or damage to the unit.
- To avoid potential risk of data loss caused by accidental operation or malfunction of the unit, we recommend that you save a backup copy of your recorded messages on a PC, etc.
- Recording copyright material without permission of the copyright owners is usually an infringement. If you wish to re-record copyright material, permission from the copyright owner is necessary. SANYO does not approve of, and cannot be held responsible for, any unlawful use of this machine.
Before using the unit
Checking the accessories
Make sure the packing box contains the following items.
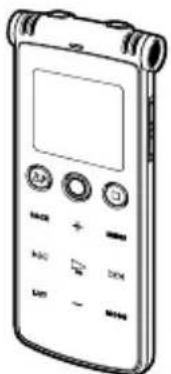
| Digital sound recorder Stereo Earphones* | 1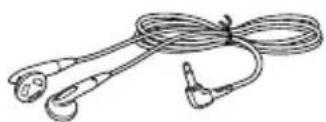 |
 | microUSB cable (micro USB connection cable)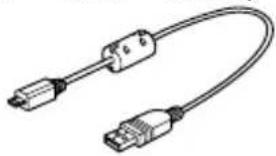 |
| Cradle Active Speaker (Multi-Cradle) (ASX-SP00X)*2 | Li-ion battery pack (DB-L80)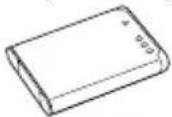 |
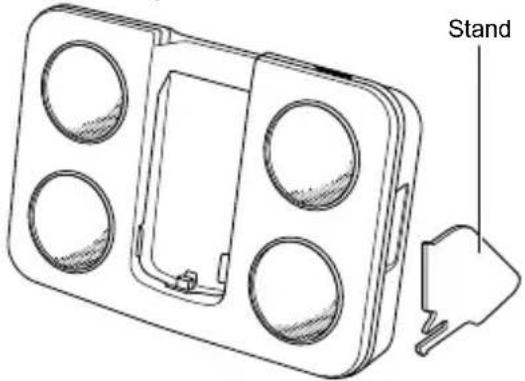 | AC adapter for Cradle Active Speaker*2 microSD card (2GB)This manual |
*1 4-pin stereo earphones such as those with remote control cannot be used with the unit.
*2 ICR-XPS01MF only
Controls
Main unit
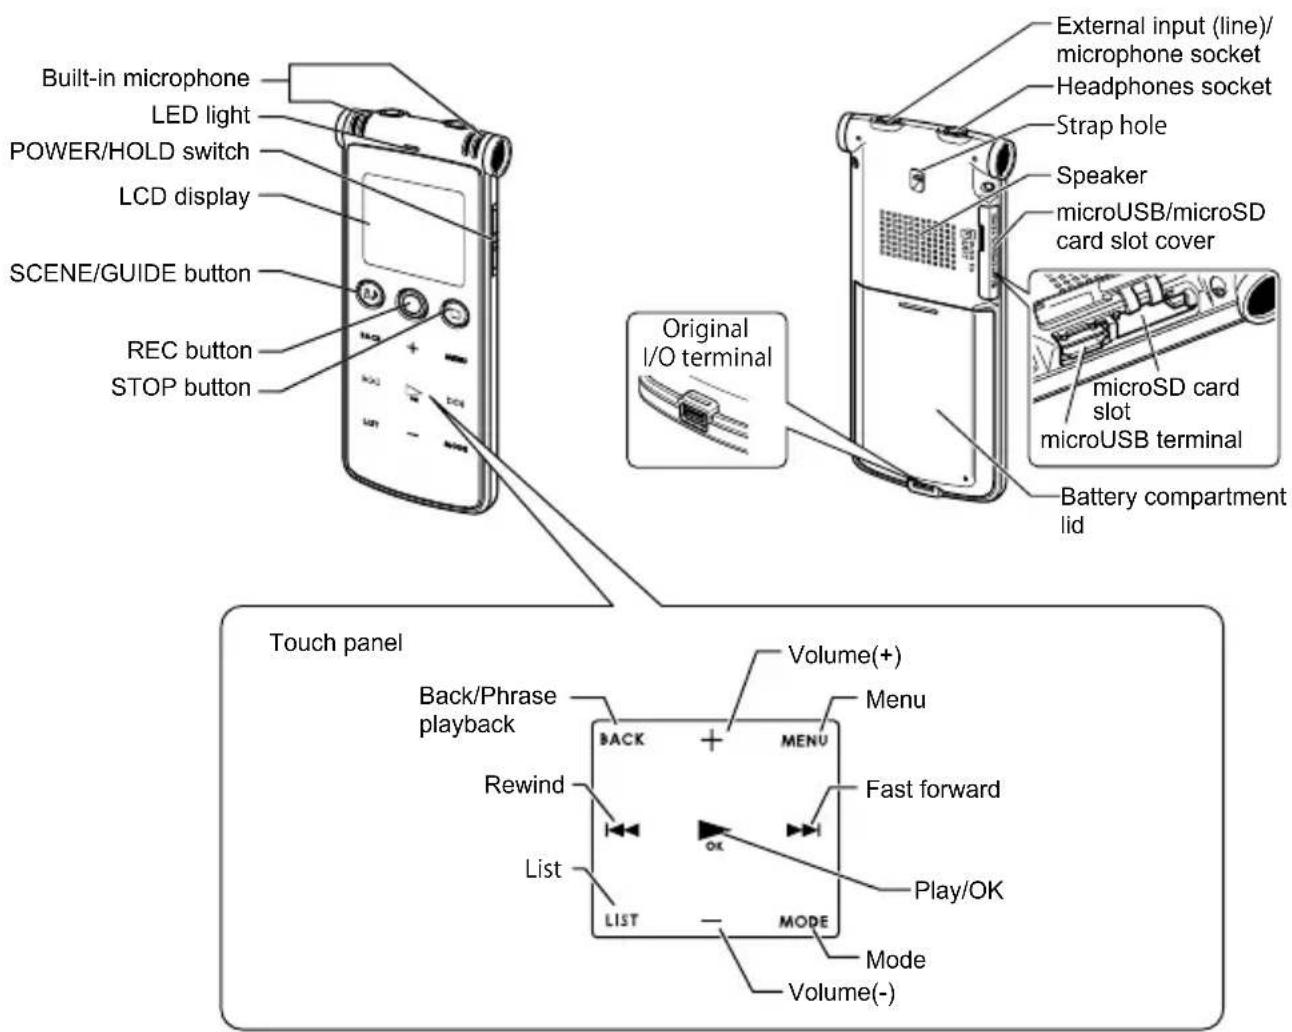
LCD display
■ Basic screen
It is not possible to display all screens at once.
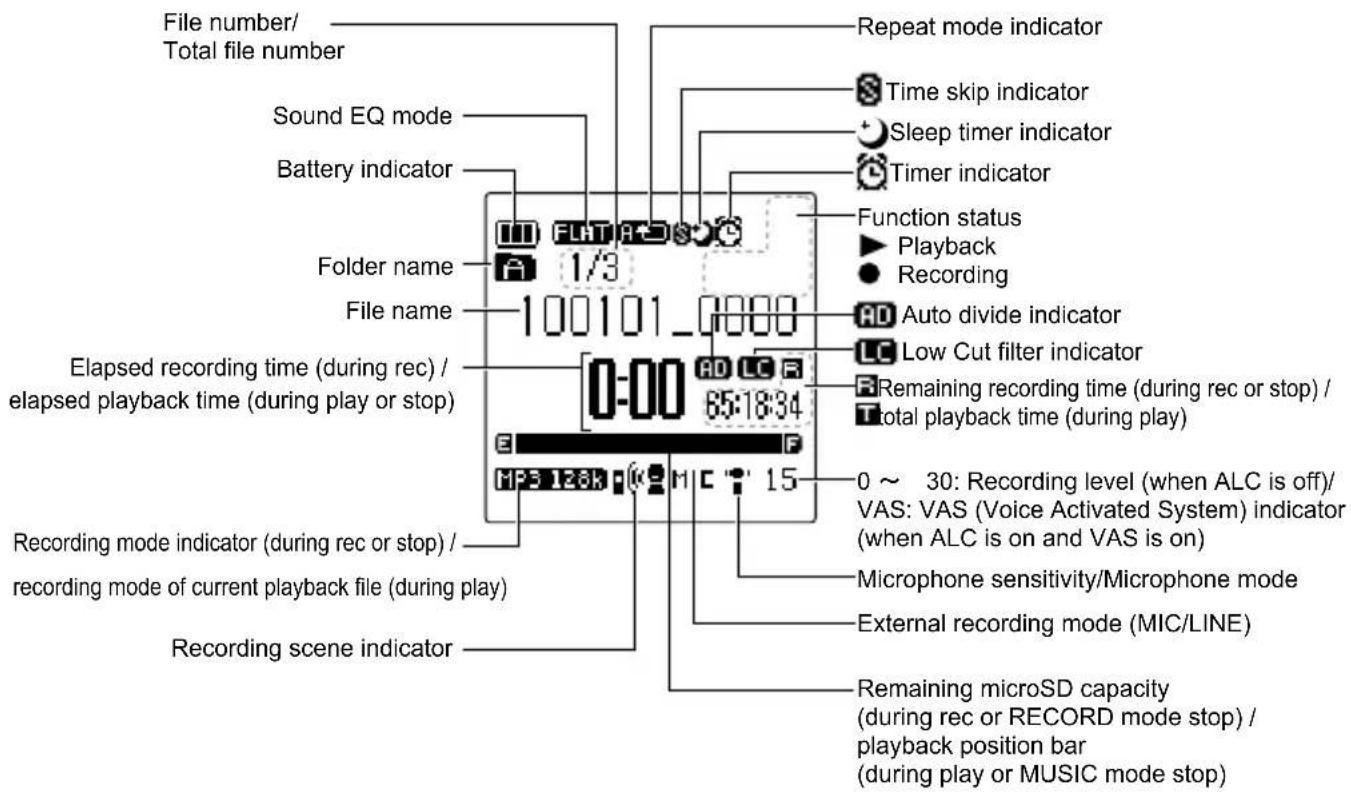
You can adjust the contrast of the LCD display.

CONTRAST (page 151)
About backlight of buttons/touch panel
If the “LED NAV” setting is “ON”, a backlight of buttons/touch panel turns on in response to the state of the unit such as recording, playback, or FM radio. Only the area that can be operated on lights up. When the backlight of a button turns on, press to use it. Similarly, when the backlight of an area on the touch panel turns on, gently tap the area to use it.

LED NAV (page 152)
(Example: Screen and buttons/touch panel during recording when MIC ALC is turned on)
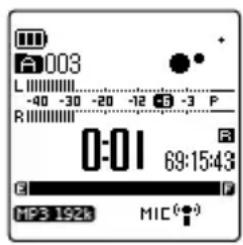
During recording when MIC ALC is turned on
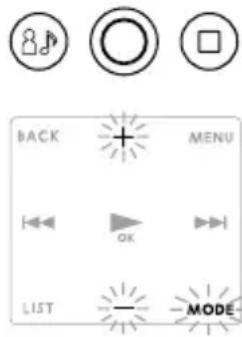
Backlight of buttons/ touch panel
Buttons or areas on touch panel that can be used light up
If the “BACKLIGHT” setting is changed, the LCD display and the touch panel’s backlight may go off after the setting. While the touch panel’s backlight is off, tapping the touch panel once turns it back on so that you can operate the touch panel again.
If the "BACKLIGHT" setting is "OFF", both the screen and the touch panel dim after 30 seconds. If you want to check the unit, tap the touch panel once.

BACKLIGHT (page 151)
About the "OPERATION" screen
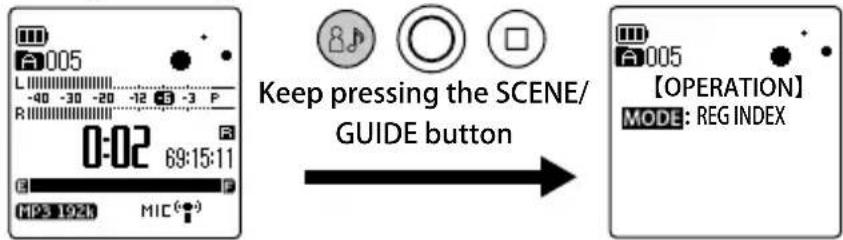
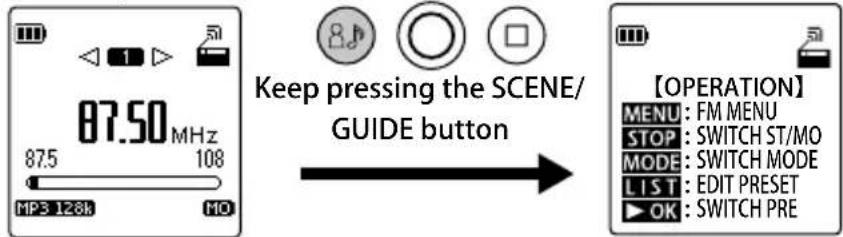
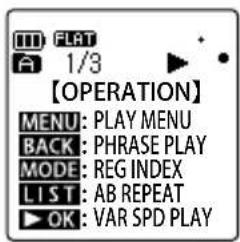
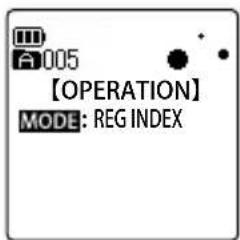
During recording, recording standby, or playback, while you keep pressing the SCENE/GUIDE button (the "OPERATION" screen appears. It shows you valid functions you can currently use and guides you on how to operate the touch panel.
Screen during playback
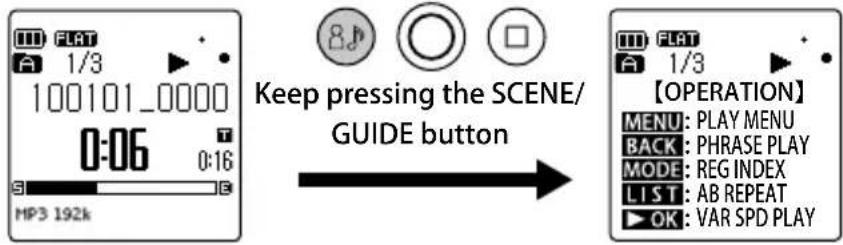
During recording
During FM radio reception
"OPERATION" screen
"OPERATION" screen
About the operation mode and basic screen of the unit
You can change this unit to one of the following three modes: FM RADIO mode, RECORD mode, and MUSIC mode.
Switching operation mode/folder (page 31)
■ FM RADIO mode
You can use this mode to listen to FM radio or record it on to the unit. To listen to FM radio on the unit, connect your headphones to the headphones socket.
Using FM radio (page 92)
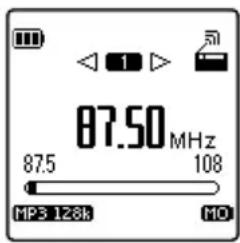
FM RADIO modeFM RADI
■ RECORD mode
You can record by using the built-in microphone, or connect a microphone or external device to the external input (line)/microphone socket.
Recording (page 52)
You can play back sound recorded on the unit.
Playback (page 71)
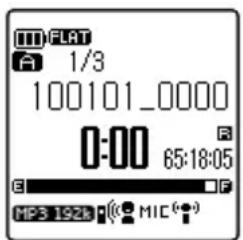
RECORD modeRECORD
■ MUSIC mode
You can transfer music etc from your PC to the unit and use the unit as a music player.
About playback in the MUSIC mode (page 80)
Also, you can register only your favorite songs and then play them in the desired order.
Using the playlists (in MUSIC folder only) (page 88)
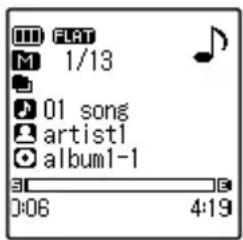
MUSIC modeMI
About files/folders
Folders for recording
The unit provides the following folders for storing recordings: MIC folders (A to D) for recordings made using the built-in microphone, LINE folder for line-in recordings made using an external device, and FM folder for audio files recorded from FM radio in the FM RADIO mode.
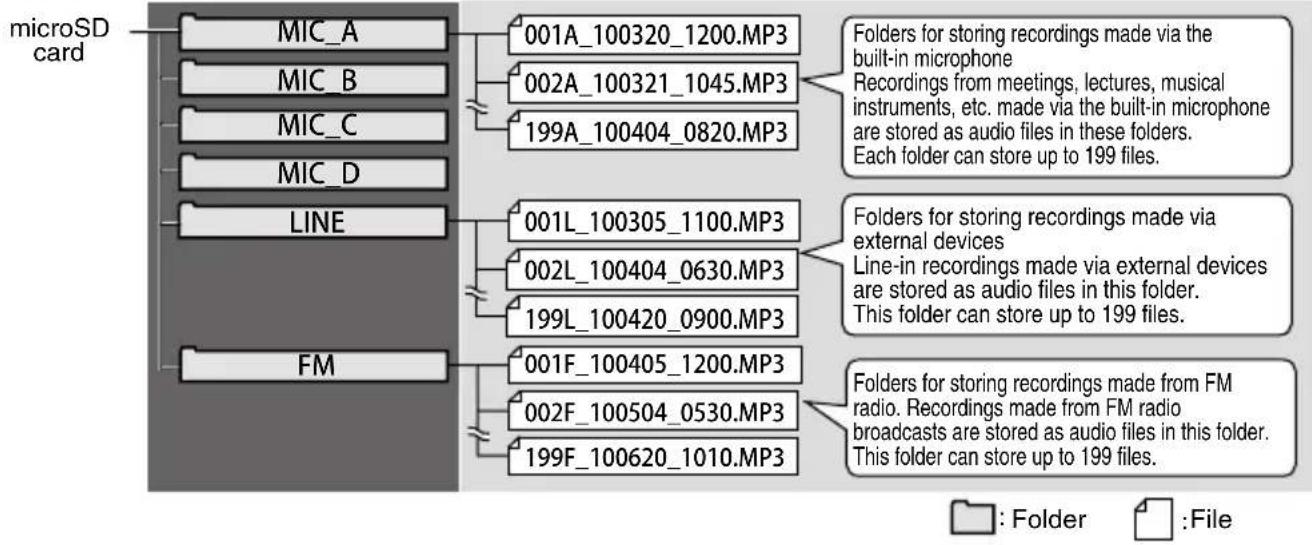
- A file with extension .INX contains index information. If you erase this file from your PC, then the index information will be gone.
Name of recorded file
The unit automatically assigns a file name for each recording.
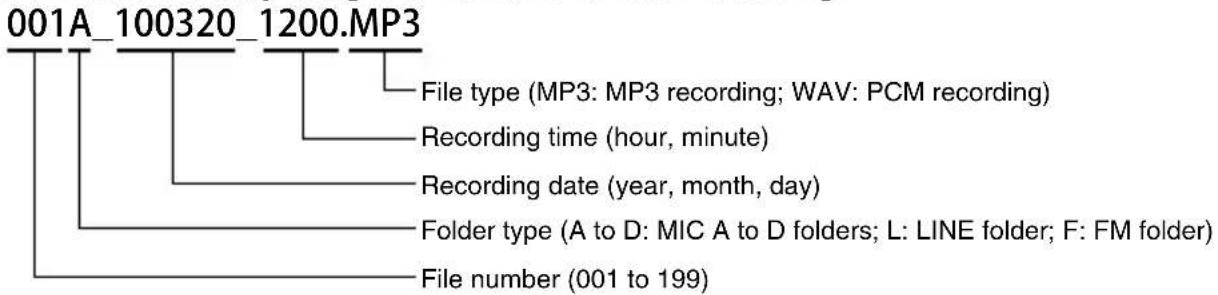
flowchart
graph TD
    A["001A_100320_1200.MP3"] --> B["File type (MP3: MP3 recording; WAV: PCM recording)"]
    A --> C["Recording time (hour, minute)"]
    A --> D["Recording date (year, month, day)"]
    A --> E["Folder type (A to D: MIC A to D folders; L: LINE folder; F: FM folder)"]
    A --> F["File number (001 to 199)"]
- The unit does not display file number and folder type. However, you can connect the unit to your PC and check this information from your PC.
- If you use your PC to change the name of a file recorded on this unit, the file can no longer be played from its original folder (MIC_A to MIC_D folders, LINE folder, or FM folder). Therefore, follow the naming rule described above when changing a file name, or move the file to the MUSIC (M) folder and then play the file from there.
MUSIC folder
The MUSIC folder stores files such as MP3 and WMA transferred from your PC. Playback of these files is possible. By transferring CD tracks from your PC to this folder, you can use the unit as a musical player.
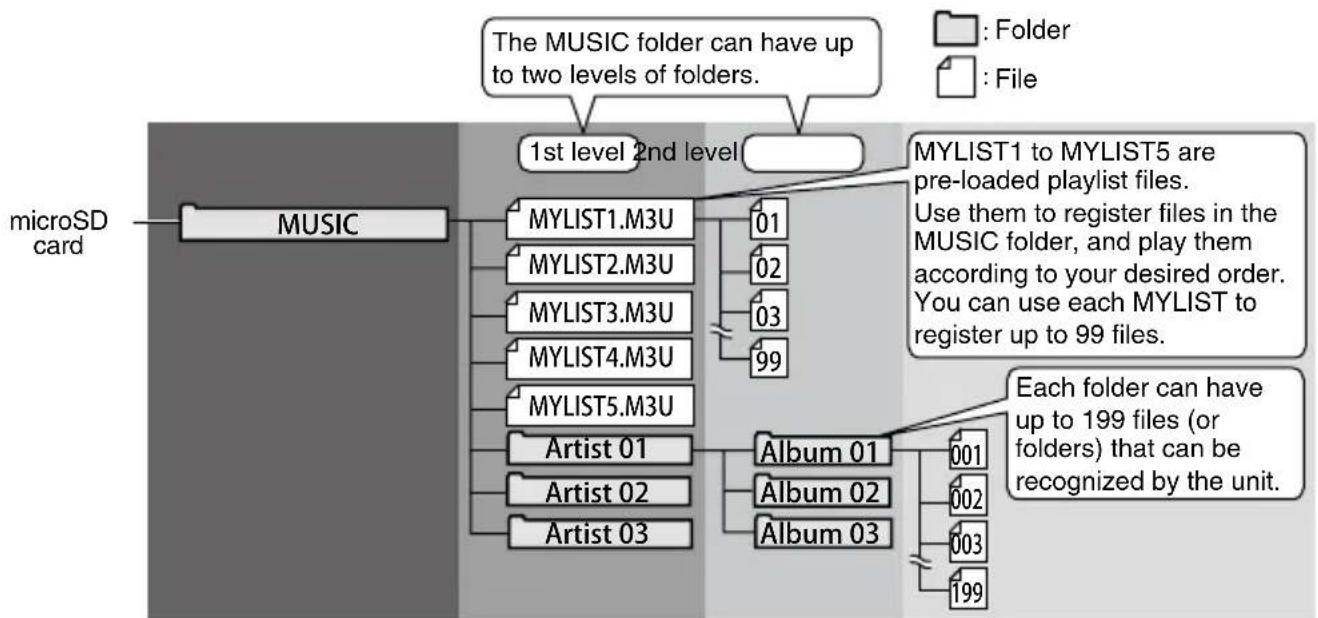
flowchart
graph TD
    A["microSD card"] --> B["MUSIC"]
    B --> C["MyLIST1.M3U"]
    B --> D["MYLIST2.M3U"]
    B --> E["MYLIST3.M3U"]
    B --> F["MYLIST4.M3U"]
    B --> G["MYLIST5.M3U"]
    B --> H["Artist 01"]
    B --> I["Artist 02"]
    B --> J["Artist 03"]
    C --> K["01"]
    D --> L["02"]
    E --> M["03"]
    F --> N["99"]
    G --> O["Album 01"]
    G --> P["Album 02"]
    G --> Q["Album 03"]
    K --> R["Folder"]
    L --> S["File"]
    N --> T["MYLIST1 to MYLIST5 are pre-loaded playlist files. Use them to register files in the MUSIC folder, and play them according to your desired order. You can use each MYLIST to register up to 99 files."]
    O --> U["Each folder can have up to 199 files (or folders) that can be recognized by the unit."]
    P --> V["001"]
    P --> W["002"]
    P --> X["003"]
    P --> Y["199"]
About playback in the MUSIC mode (page 80)
Note:
■ A sample music file is stored in the M folder.
The file will be deleted if you format the microSD card. Be sure to back up the folder (file) to your PC before formatting.
Note:
■ Folder of files transferred from your PC to the MUSIC folder
After you transfer a folder of files from your PC to the MUSIC folder, the list screen shows MYLIST1 to MYLIST5 and then the folder. Therefore, tap Vol (−) on the touch panel to make sure the folder has been transferred to the unit.
Displaying a list (page 33)
■ Display of number of files in the MUSIC folder
If there are more than 199 files in the MUSIC folder, the display will continue to show only 199 files until you have deleted files so that the number of files drops to 198.
■ Maximum number of files for the MUSIC folder
The maximum number of files that can be stored in the MUSIC (M) folder (199 files) includes sub folders and playlist files.
Other folders
● RECYCLE folder (1)
This is a recycle folder. If this recycle bin function is turned on, when you erase files from the unit, they are moved to this folder. This means that if you accidentally erase a file, you can recover it from this folder.
About the recycle bin function (page 114)
● DATA folder
This folder is not visible from the unit. You can see it only from your PC connecting to the unit. You can store files such as Word files or Excel files in this folder, and then access the folder by using the unit as a microSD card reader/writer (removable disk).
Functioning as microSD card reader/writer (page 156)
● MANUAL folder
This folder is not visible on the unit. You can see it only on your PC connected to the unit. This folder contains the PDF version of the instruction manual. Be sure to save the folder to your PC for backup.
Switching operation mode/folder
1 Turn on the power.
Turning on the power (page 36)
2 Tap MODE.
The "FOLDER/MEMORY" screen appears.
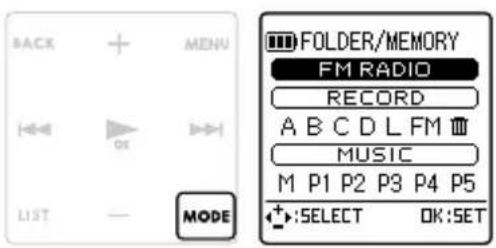
3 Tap +/- to select an operation mode. FM RADIO: FM RADIO mode RECORD: RECORD mode MUSIC: MUSIC mode
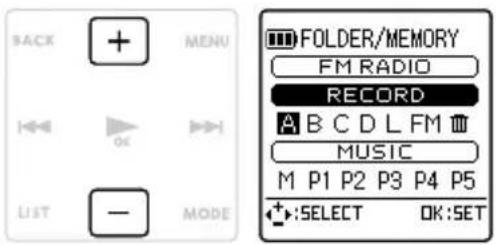
4 If you selected RECORD mode or MUSIC mode, tap ◀◀/▶ to select a folder. ●RECORD mode
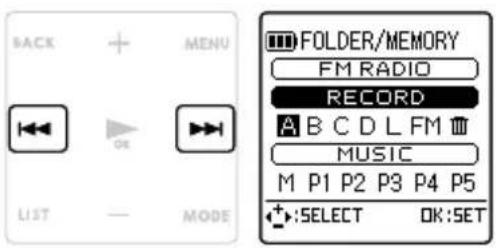
A to D: Folders containing files recorded from the built-in microphone L: Folder containing files created from line-in recording
FM: Folder containing files recorded from FM radio 📋 RECYCLE folder
●MUSIC mode
M: Folder containing music files transferred from your PC P1 to P5: Folders containing playlist files provided within the M folder

Tap ▶ok
The unit changes to the selected operation mode and folder.
- If the FM RADIO mode is selected, the unit changes to the FM radio screen to receive FM radio.
- If the RECORD mode is selected, the unit returns to the basic screen.
- If the MUSIC mode is selected, the unit changes to the list screen.
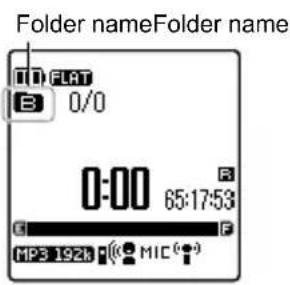
- You can also select a folder from the list screen.
Using the list screen
The list screen displays folders and files in a tree format. You can use this screen to quickly select a folder or file.
Displaying a list
When the basic screen appears in the RECORD mode or MUSIC mode, tapping LIST switches to the list screen. The list screen initially displays files selected from the basic screen. If you tap LIST again, the unit returns to the basic screen.
Basic screen (MIC_A folder)
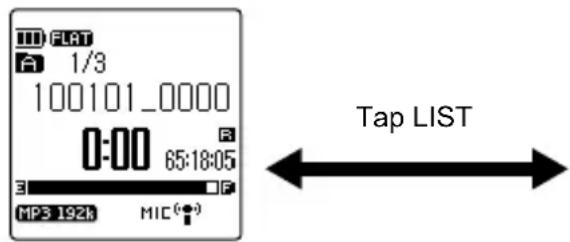
List screen (MIC_A folder)
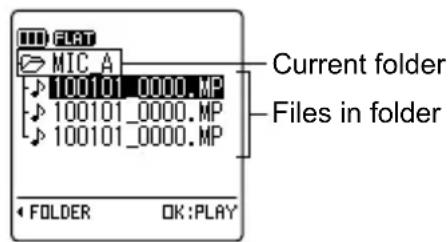
- During playback or recording, you cannot display the list screen. If you tap LIST during playback, AB repeat is set. Therefore, stop playback or recording first, and then switch to the list screen.
- If there are more files than the screen can display, just keep the highlight where it is. In a moment, the screen will start scrolling so that you can see more files.
Name of recorded file (page 28)
■ Icons displayed on the list screen
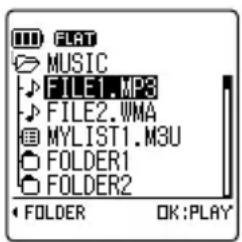
♪: File
目: Playlist file
: Folder
The above screen is an example.
If there is no file in a folder
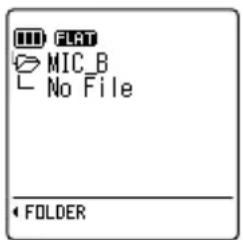
Using the list screen
To select a file or folder, you can simply tap +/- or //.
■ Functions of buttons and touch panel during list display
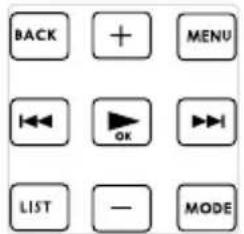 | + | Move the highlight up. |
| - | Move the highlight down. | |
| |←| | Move back up one level. | |
| ▶▶ | Open the selected folder. | |
| ▶OK(PLAY/OK) | Start playing the selected folder or file.If there is no file in the selected folder,"NO DATA" appears and the basic screen returns. | |
| MODE | Switch folder. | |
| LIST | Exit the list screen and return to the basic screen. | |
| BACK | Move back up one level. | |
| MENU | The playlist editing screen appears (when the MUSIC folder is selected). | |
 | REC button | Exit the list screen and start recording. |
| STOP button | Exit the list screen and return to the basic screen. |
Preparation
Inserting the battery
Insert the supplied lithium-ion battery in the unit.
Open the battery compartment lid.
Slide the battery compartment lid in the direction of the arrow.
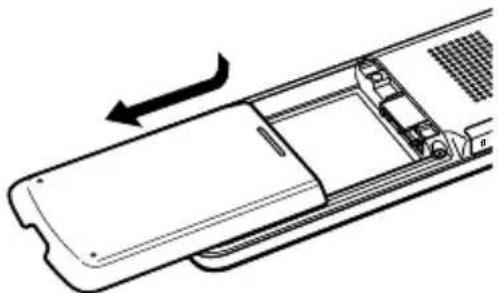
natural_image
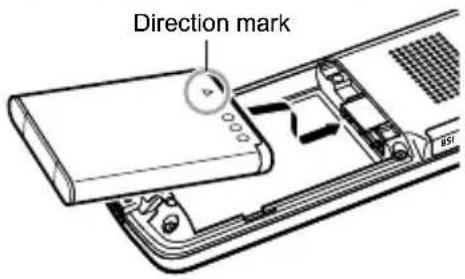
Diagram of a device interior showing a rectangular panel with internal compartments and a directional arrow indicating rotation (no text or symbols)2 Insert the lithium-ion battery in the direction of the arrow, and then close the battery compartment lid.
- Read the direction mark ( ) of the lithium-ion battery and then insert the battery accordingly.
- If you remove the lithium-ion battery for more than 5 minutes, the calendar settings may be lost. If this happens, re-set the calendar. However, recordings and alarm setting are not lost.
■ Removing the battery
Put your finger into the recessed area of the unit, and then remove the lithium-ion battery in the direction of the arrow.
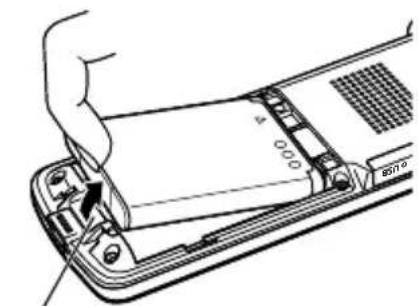
Recessed area
Turning on/off the power
■Turning on the power
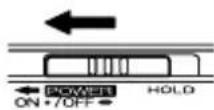
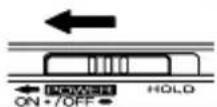
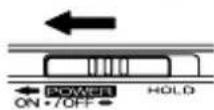
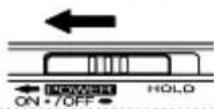
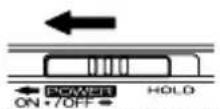
Slide the POWER/HOLD switch in the direction of the arrow.
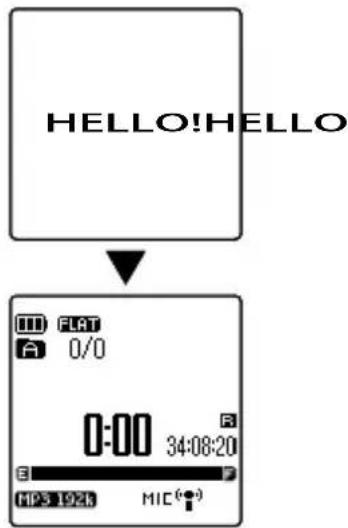
- When the power turns on, "HELLO!" appears on the screen. Then, the resume function operates to display the last operation mode selected before the power was turned off last time.
- If you were using the RECORD mode or the MUSIC mode when you turned off the unit, you can start your playback from where you left off (playback resume function).
• In the FM mode, the FM radio reception screen appears. - Depending on the number of files and the capacity of the microSD card, it may take a while to start.
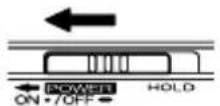
■Turning off the power
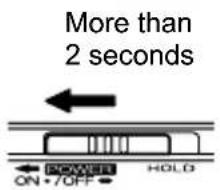
Slide the POWER/HOLD switch in the direction of the arrow for more than 2 seconds.
• After "SEE YOU!" appears, the power turns off.

Note:
■ When you turn on the power the first time
When you turn on the power the first time, remember to set up the calendar and your time zone.
Setting the calendar (date & time) (page 49)
■ About the auto power off function
When the auto power off function is enabled, if you do not operate the unit for a preset time, the power turns off automatically. (When shipped, the unit is set to "15min".)
AUTO POWER OFF (page 151)
Remaining battery power
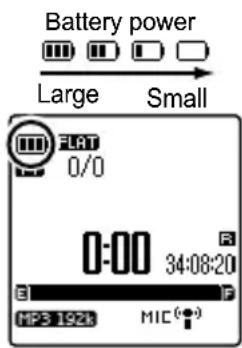
You can check the remaining battery power from the screen. When☐ appears, recharge the battery as soon as possible.
- When the battery is low, "LOW BATTERY PLS CHARGE THE BATTERY" appears and then the screen goes off.
- When the battery is low, if the "BEEP SOUND" setting is set to "ON", you can hear a beep sound.
- Depending on the ambient temperature and usage, the battery duration may change. Therefore, take the battery indicator as a rough guide.
Note:
- When there is almost no battery, if you turn off the power and then back on, the battery amount displayed may be more than the actual amount. In this case, if you perform recording or timer recording, the unit may stop middle of the operation and the power may turn off.
- Dispose a used battery in accordance with your local regulations.
Resume function
The resume function remembers the operation mode, file used, and playback position before the power was turned off last time. When you turn on the power again, the unit resumes with these settings. However, the resume function does not work in the following cases.
- If you switch the folder
- If the unit is connected to your PC
- If you remove the battery or a microSD card without turning off the power first
- If you insert a microSD card after the power is turned on
Charging the lithium-ion battery
The supplied lithium-ion battery can remain in the unit while being charged from your PC or the multi-cradle.
Using the multi-cradle to charge the unit (page 47)
Using your PC to charge the battery (page 159)
Using the unit in the AC operation mode (multi-cradle) (ICR-XPS01MF only)
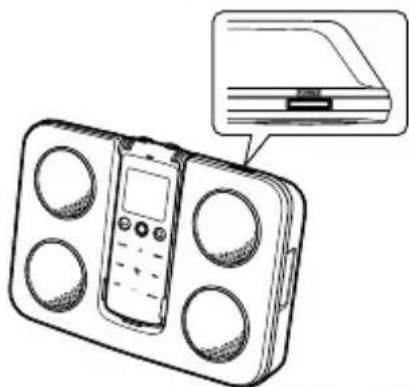
You can insert the unit into the supplied multi-cradle and operate it in the AC operation mode (external power source).
1 Turn off the power, and then insert the unit into the multi-cradle. Using the multi-cradle (page 45)
- Charging starts.

Turn on the power of the multi-cradle.
- In the AC operation mode, the battery indicator changes to ■.
- If you are using the unit to receive FM radio or play audio files, the sound will come out from the speakers of the multi-cradle.
natural_image
Line drawing of a portable electronic device with four circular buttons and a control panel, shown with an inset close-up of its screen (no text or symbols)Battery indicatorBattery indic.
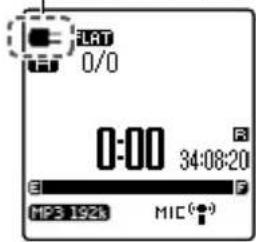
Before removing the unit from the multi-cradle, press the power button of the multi-cradle to turn off the unit first, and then remove it.
Note:
■ When using the unit in the AC operation mode (multi-cradle)
- In the AC operation mode, the maximum continuous recording timer per file is 24 hours. However, when the size of the recording file exceeds 2GB, recording stops at 2GB. A new file is created, and then recording starts again using the new file. No content is recorded during the interval (about 2 seconds) from the time recording stops to the time recording starts again.
- SANYO takes no responsibility for damages or lost profits caused by the use/failure of the unit, or claims or expenses from a third party for any use.
Preventing accidentally pressing a button (hold function)
When you put the unit in a bag or pocket, any movement may accidentally result in a button or switch being pressed and battery being consumed. To prevent this problem, we recommend that you turn on the hold function before putting the unit in a bag or pocket.
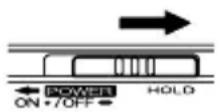
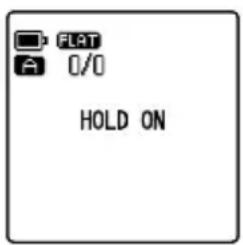
Slide the POWER/HOLD switch to the HOLD position.
"HOLD ON" appears and all buttons are disabled.
Slide the POWER/HOLD switch away from the HOLD position.
"HOLD OFF" appears and all buttons are enabled again.
Inserting/removing a microSD card
The unit uses a microSD card for recording and playback.
1
Turn off the power.
Turning off the power (page 36)
2
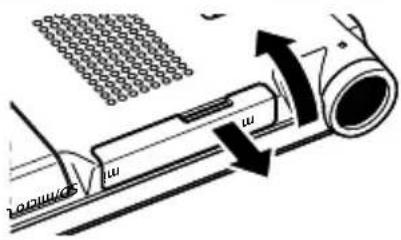
Open the micro USB/microSD card slot cover.
natural_image
Diagram of a car interior with directional arrows indicating movement or flow (no text or symbols)3
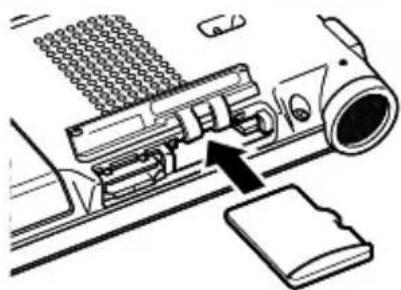
● To insert a microSD card Insert a microSD card straight into the microSD card slot, following the direction indicated in the diagram, until it clicks firmly into position.
- Check the slot, and then insert the microSD card straight into the slot.
- If the inserted microSD card is not recognized by the unit, remove the card and then insert it again.
natural_image
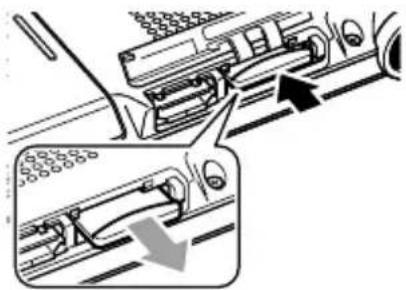
Diagram of a firearm internal mechanism with an arrow pointing to the button (no text or symbols present)● To remove the microSD card Slightly press the microSD card.
The microSD card comes out slightly. Gently remove the card.
- The microSD card may pop out to cause injury or to be lost somewhere. Therefore, use your fingers to hold the microSD card while gently removing it.

Close the micro USB/microSD card slot cover.
microSD cards that can be used on the unit
The unit can use 1GB to 2GB microSD cards, as well as 4GB to 8GB microSDHC cards (as of January, 2010).
- Depending on the manufacturer/type of a microSD card or microSDHC card, the card may not function properly on the unit.
■ Handling a microSD card
The supplied microSD card contains a PDF version of the instruction manual and sample music. The files will be deleted if you format the microSD card. Be sure to back up the files to your PC before formatting.
- Format a microSD card before using it on the unit. Be sure to always use the unit to format the card. You may not be able to use microSD cards formatted using your PC or other devices.
Formatting a microSD card (page 122)
- Be sure to insert a microSD card correctly in the unit. If the card is not inserted correctly, recording/playback cannot be performed on the microSD card.
- When inserting or removing a microSD card, do not apply unnecessary force; otherwise, your hand or fingers may be injured, or the microSD card and the card slot may become damaged.
- Do not touch the terminal surface of a microSD card. Keep the card away from water or dirt.
- Do not bend or fold a microSD card, and do not place a heavy object on it.
- Do not insert or remove a microSD card while the power is still turned on; otherwise, data on the microSD card may become damaged.
- Because the size of a microSD card is small, be careful when inserting or removing it.
- Do not use or store a microSD card at a location where static electricity or electrical noise can occur easily.
- Do not place a microSD card at a location where there are corrosive drugs, or where corrosive gas can occur; otherwise, malfunction or loss of data on the card may result.
- When you dispose a microSD card, you may be giving away sensitive data on the card as well. We recommend that you erase all data on the card first, and then physically damage the card before disposing it.
- If the insertion direction or top side/bottom side of a microSD card is wrong, this may result in damage to the card or the microSD card slot.
- Never leave a microSD card at a location where small children can reach with their hands; otherwise, the children may swallow the card by mistake.
- If the microSD card is not recognized by the unit when you turn on the power, turn off the power, re-insert the microSD card, and then turn on the power again.
Where to use the unit (in FM RADIO mode)
To listen to FM radio, try to be near a window to allow easier radio reception.
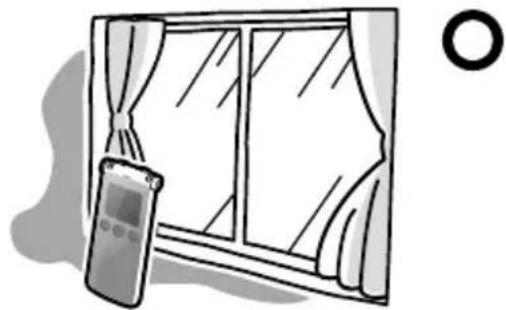
natural_image
Illustration of a window with curtains and a mobile phone, next to an empty ring (no text or symbols)- Avoid using the unit far away from a window in a room or inside a building, because radio reception is difficult.
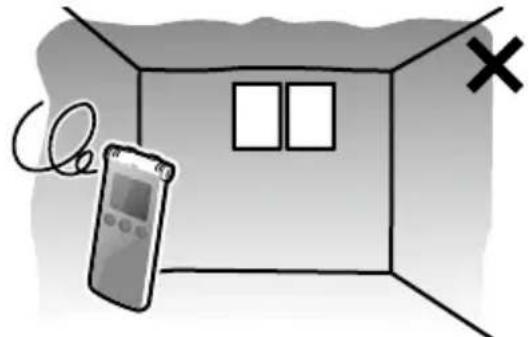
natural_image
Illustration of a box with a remote control and a cross symbol (no text or labels)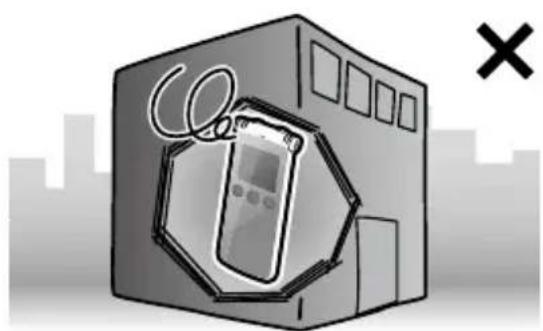
natural_image
Illustration of a device inside a building with a 'X' symbol, no text or symbols present- Do not place the unit near any electrical appliances such as TV or PC, because the noise will interfere with radio reception.
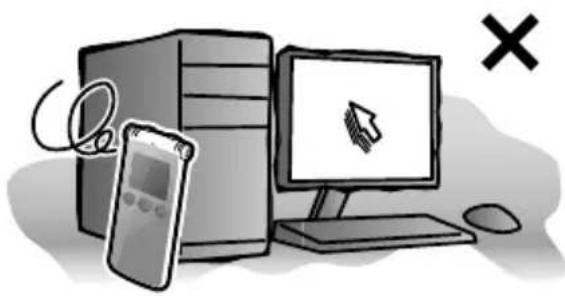
natural_image
Illustration of a desktop computer setup with monitor, tower, mouse, and remote (no text or symbols)
Using the multi-cradle (ICR-XPS01MF only)
If you insert the unit into the supplied multi-cradle, you can charge the unit or operate it using AC power. Also, you can output FM radio or audio files to the speakers of the multi-cradle.
Placing the multi-cradle
Connect the AC adapter to the multi-cradle, and then enable the multi-cradle so that it is ready to use.
- Place the multi-cradle on a stable and flat location.
- If you insert the unit into the multi-cradle and then want to listen to music or FM radio, remove your stereo earphones from the unit and then plug them into the headphones socket on the multi-cradle.
- If you do microphone recording with the unit still inserted in the cradle, you cannot hear the sound.
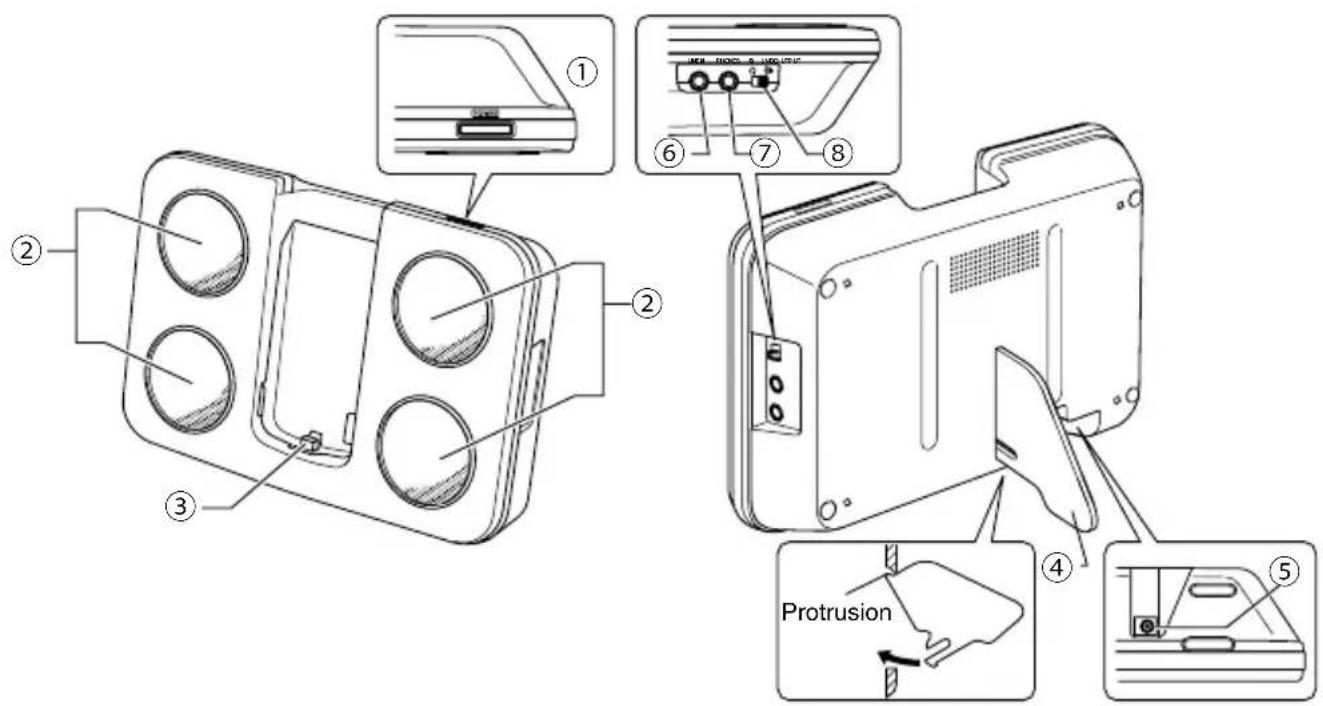
① Power button
Turn on or off the power of the unit.
② Speakers
Output sound from the unit.
③ Original I/O terminal
Connect it to the unit.
④ Stand
Insert to use.
⑤ AC adapter terminal
Connect the supplied AC adapter for multicradle to this terminal.
⑥ Line-in terminal
You can connect an external device to this terminal and then use the unit to record.
⑦ Headphones socket
Connect your headphones to the socket. When listening to FM radio, plug the supplied stereo earphones into this socket.
⑧ Output destination switch
Switch the unit's audio output to the headphones or the speakers.
Setting the unit to the multi-cradle
■ Inserting the unit into the multi-cradle
1 Turn off the power, and then insert the unit into the multi-cradle.
2 Press the power button of the multi-cradle.
The power of the unit turns on and "HELLO!" appears on the screen.
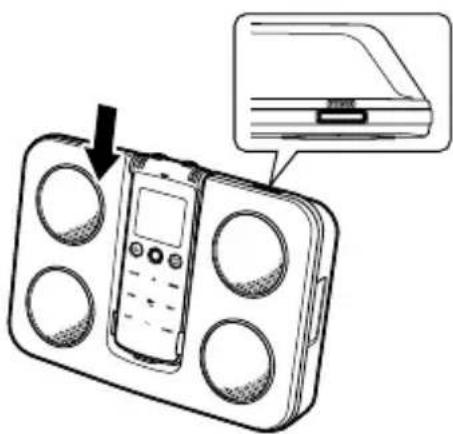
natural_image
Diagram of a portable electronic device with four circular buttons and a digital display, showing a close-up view of its internal components (no text or symbols present)■ Removing the unit from the multi-cradle
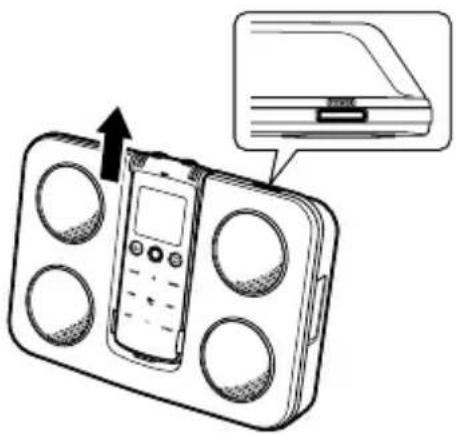
1 Press the power button of the multi-cradle.
After "SEE YOU!" appears on the screen, the power of the unit turns off.
- If the multi-cradle is connected to the AC adapter, the unit goes into the charging mode.
2 Remove the unit from the multi-cradle.
natural_image
Diagram of a mobile phone with four circular buttons and a display case, showing an open rear panel (no text or symbols present)Using the multi-cradle to charge the unit
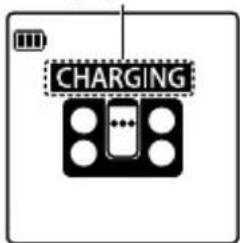
Turn off the power of the unit and then insert it into the multi-cradle. If the unit is already inserted in the multi-cradle, use the power button on the multi-cradle to turn off the power.
• The LED light goes on and charging starts.
- When charging is finished, the LED light goes off and the charging indication disappears.
Charging indicatorCharging inc
Listening to audio from the multi-cradle
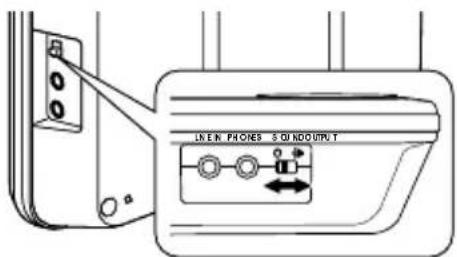
■ Using your headphones
Change the output destination switch on the multi-cradle to 🔒, and then plug your stereo earphones into the headphones socket on the multi-cradle.
■ Using the speakers
Change the output destination switch on the multi-cradle to
Using the multi-cradle to record from an external device
You can connect an external device to the external connection terminal of the multi-cradle, and then record from the external device.
- You can use the speakers of the multi-cradle to monitor the sound in recording.
Recording from an external device (page 67)
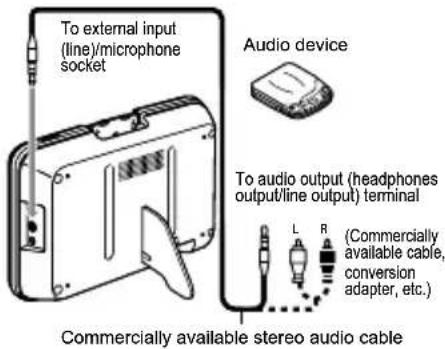
Outputting sound from an external device to the multi-cradle
You can connect an external device to the external connection terminal of the multi-cradle and then enter the recording standby state. This allows sound from the external device to be output to the speakers of the multi-cradle.
Recording from an external device (page 67)
Using the multi-cradle with the unit's battery
If you unplug the AC adapter from the multi-cradle and then insert the unit into the multi-cradle, the cradle's power will be supplied from the unit.
You can, for example, use the unit outdoors with the multi-cradle functioning as external speakers, which is quite handy.
- When the multi-cradle is not connected to the AC adapter, audio output from the speakers decreases. Also, the lithium-ion battery in the unit is consumed.
Battery duration (page 177)
Setting the calendar (date & time)
Once you set the calendar correctly, the correct recording date & time information is stored in each file (timestamp function). Also, because each file name makes use of the recording date & time information, we recommend that you set the calendar correctly.
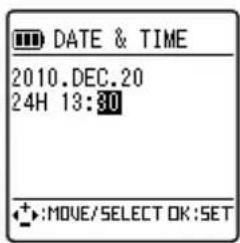
The following procedure describes how to set the calendar to "2010.DEC.20 24H 13:30".

Turn on the power.
Turning on the power (page 36)

Tap MENU.
The setting menu appears.
- In the FM mode, the screen display will be different.

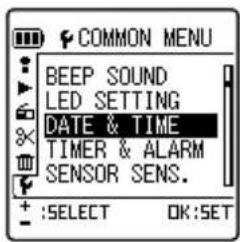
Tap +/- to select "COMMON MENU".

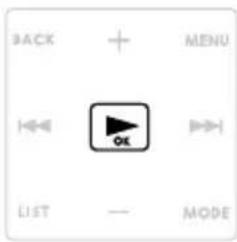
Tap OK
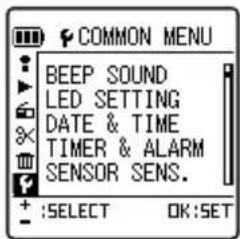
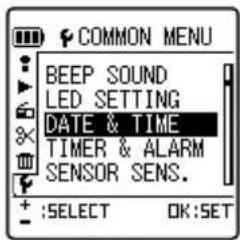
The "COMMON MENU" screen appears.
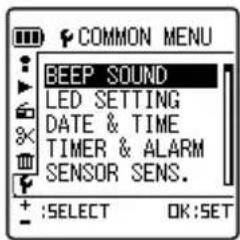
5 Tap +/- to select "DATE & TIME".
6 Tap The "DATE & TIME" screen appears.
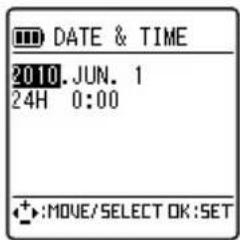
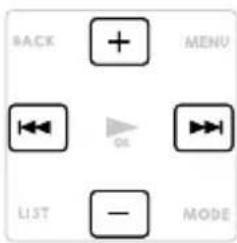
7 Set up the date and time. ① Tap ◀◀/▶ to select year, month, day, 24H/12H (AM/PM), hour, or minute. ② Tap +/- to change the value of the selected setting.
8 Tap ▶ The date and time are set and the unit returns to the "COMMON MENU" screen.
Tap MENU to exit the menu.
Switching information display
While the unit is stopping in the RECORD mode or MUSIC mode, pressing the STOP (☐) button displays the current time and file information. Pressing the button again returns to the original screen.
(Example: In the case of MIC_A folder)
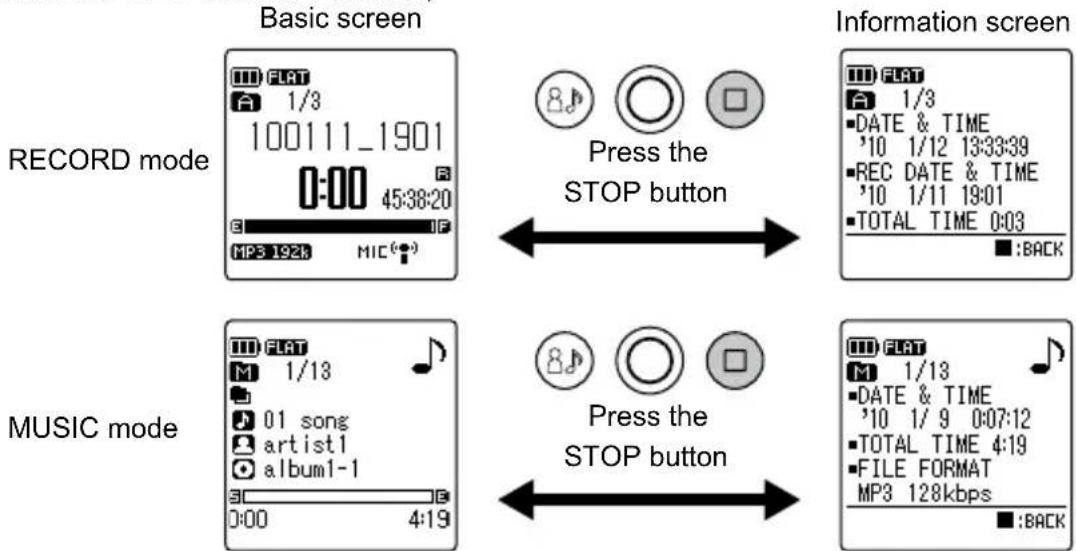
* Regarding the MUSIC folder, even if the folder contains a playback file, the recording date & time information is not displayed. Also, the remaining recording time is not displayed.
Information you want to know before recording
About wind noise
The unit comes with a high performance built-in microphone. Therefore, if wind or your own breath hits the microphone directly, the wind or breathing noise is also recorded. In this case, we recommend that you set the "LOW CUT FILTER" setting ( page 136) to "ON", and then start recording.
About the possible recording time
The possible recording time is the total time that can be achieved from the moment the unit starts recording to the moment it ends, assuming the unit is in its default state (shipped from factory with no recording data on the unit) and the recording mode is not changed during the operation.
Depending on the recording mode, the quality and possible recording time may change. When shipped, the unit is set to "MP3 192kbps", but you can change the recording mode according to your use.
Also, the possible recording time will vary depending on the condition of data on the SD/SDHC card, its card type, and manufacturer of the card.
REC MODE (page 132)
- In the AC operation mode, the maximum continuous recording timer per file is 24 hours. However, when the size of the recording file exceeds 2GB, recording stops at 2GB. A new file is created, and then recording starts again using the new file. No content is recorded during the interval (about 2 seconds) from the time recording stops to the time recording starts again.
About the external recording mode (external input/microphone)
Regarding the external input (line)/microphone socket on the unit, you can use the "EXT INPUT" menu to switch between "MIC" and "LINE" (HEAD PHONE, LINE IN:PORTABLE, LINE IN:COMPO).

EXT INPUT(page 138)
■ To use an external microphone
From the "EXT INPUT" menu, select "MIC". The screen displays "MIC". Connect the external input (line)/microphone socket of the unit with a stereo microphone (commercially available) for recording.
- When purchasing an external microphone, make sure the microphone meets the following recommended specification.
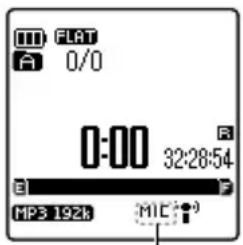
MIC indicatorMIC indica
Recommended specification:
- Type: Electret condenser/plug-in power system
- Impedance: 2 k Ω
• Power: Guaranteed to operate at 1.3 V - Plug: Mini-plug (3.5 )
- If you use one that is not on the recommended external microphone list, normal recording may not be possible.
■ To connect to other audio devices
From the "EXT INPUT" menu, select "HEAD PHONE", "LINE IN: PORTABLE", or "LINE IN:COMPO" according to the device to use. The screen display changes to "LINE".
| HEAD PHONE LINE | IN:PORTABLE LINE IN:COMPO | |
- By using recording scenes, you can set up the unit much easier (page 56).
- Recorded files are automatically stored in the LINE (L) folder.
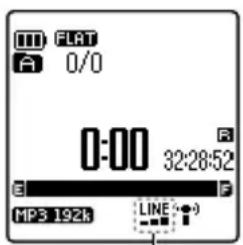
LINE indicatorLINE indic
Using the scene select function
A recording scene contains recording settings (recording mode, microphone sensitivity, etc) which are suitable for this particular scene. You can select from the three preset microphone recording scenes and three preset line-in recording scenes. The settings for each recording scene are listed below.
■ Settings for microphone recording
| Preset recording scene | INTERVIEW MEET | NG/LECTURE MUSIC | |
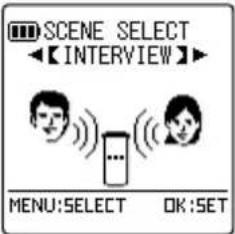 | 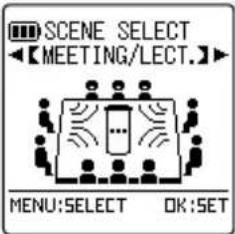 | 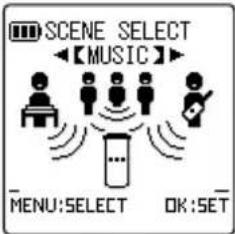 | |
| Most suitable for recording interviews and conversations | Most suitable for recording sound coming from all directions, such as in a meeting | Most suitable for recording high quality sound such as musical instruments and animal sounds | |
| REC MODE MP3: 64kbps | MP3: 192kbps PCM: 44.1 | kHz | |
| MIC SENS. LOW HIGH HIGH | |||
| MIC ALC ON ON OFF | |||
| MIC MODE STEREO STEREO STEREO | |||
| LOW CUT ON ON OFF | |||
| PEAK LIMITER OFF | OFF | OFF | |
| SELF TIMER | OFF | OFF | OFF |
| VAS | OFF | OFF | OFF |
| EXT INPUT | MIC | MIC | MIC |
| AUTO DIVIDE OFF | OFF | OFF |
■ Settings for line-in recording
| Preset recording scene | HEAD PHONE PORTABLE COMPO* | ||
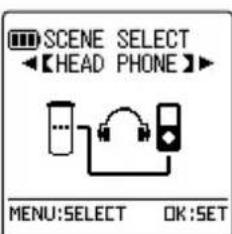 | 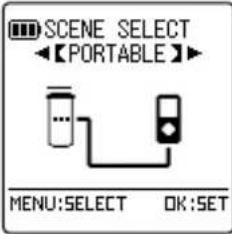 | 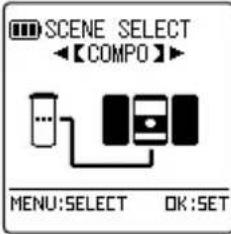 | |
| Use this setting when connecting to the headphones socket to perform recording. | Use this setting when connecting to the line-out terminal of a portable device to perform recording. | Use this setting when connecting to the line-out terminal of a component stereo system, AV amplifier, etc. | |
| REC MODE MP3: 192kbps | MP3: 192kbps MP3: 192kbps | ||
| MIC SENS. HIGH HIGH HIGH | |||
| MIC ALC ON ON ON | |||
| MIC MODE STEREO STEREO STEREO | |||
| LOW CUT OFF OFF OFF | |||
| PEAK LIMITER OFF OFF OFF | |||
| SELF TIMER | OFF OFF OFF | ||
| VAS | OFF OFF OFF | ||
| EXT INPUT | HEAD PHONE | LINE IN:PORTABLE | LINE IN:COMPO |
| AUTO DIVIDE OFF OFF OFF | |||
* Component Stereo System
• Each recording setting, such as recording mode and microphone sensitivity, can be changed from their menu. (page 124)
- After a recording scene is set up, if you use the menu to change an individual recording setting, all other settings for the scene remain unchanged. (For example, after the recording scene “INTERVIEW” is set up, if you use the menu to change the “MIC SENS.” setting to “HIGH”, all other settings in the “INTERVIEW” scene still remain unchanged.)
- You can change and register each preset setting to your liking. (page 144)
Selecting a recording scene
1 Turn on the power. → Turning on the power (page 36)
2 Switch to the RECORD mode. Switching operation mode/folder(page 31)
3 Press the SCENE/GUIDE button ( musical note) The current recording scene appears.
- When you bought the unit or when no recording scene is set, by default the recording scene is "INTERVIEW".
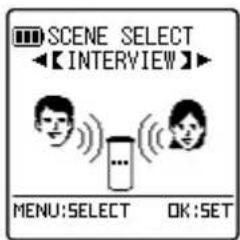
4 Tap to select a desired recording scene.
- While selecting a recording scene, you can tap MENU to check the recording settings of the selected scene.
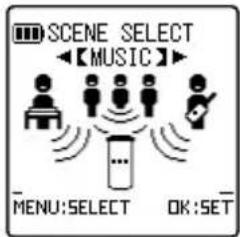

Tap ▶ OK
The selected recording scene is set and the unit returns to the basic screen.
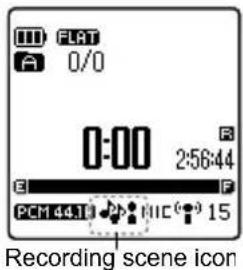
- The icon for the selected recording scene appears on the screen.
| OFF None | HEADPHONE |
| INTERVIEW PORTABLE | |
| MEETING/LECTURE | COMPO |
| MUSIC |
Recording
This section describes how to use the built-in microphone for recording.
If the "SCENE SELECT" setting is set to "MUSIC" or the "MIC ALC" setting is "OFF", you can manually adjust the recording level according to the content of recording or the sound level.
1 Turn on the power. → Turning on the power (page 36)
2 Select a folder for recordings. Switching operation mode/folder (page 31)
3 Select a recording scene. Selecting a recording scene (page 56)
- If the "SCENE SELECT" setting is set to "MUSIC" or the "MIC ALC" setting is "OFF", proceed to step 4 to adjust the recording level.
(If a number appears on the bottom right side of the screen, this indicates ALC is off.) - If the "SCENE SELECT" setting is not set to "MUSIC" or the "MIC ALC" setting is "ON", you don't need to adjust the recording level. Instead, skip to step 5.
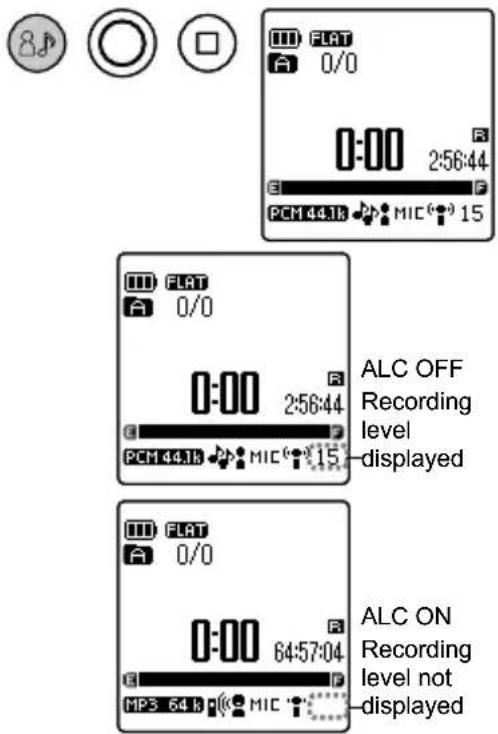
4 Adjust the recording level (only if the "SCENE SELECT" setting is set to "MUSIC" or the "MIC ALC" setting is "OFF").
Use the following procedure to adjust the recording level.
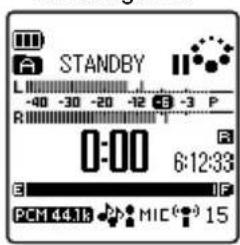
① Press the REC button (○).
The recording standby screen appears.
• In this state, recording has not started.
- You can use the stereo earphones to monitor the recording sound. Use (+/-) to adjust the sound volume.
② When recording musical instruments, etc., produce sound in the direction of the microphone.
The level meter extends to the right as the recording level increases. The further it extends to the right, the louder sound the microphone collects.


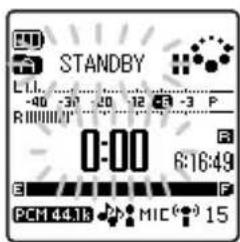
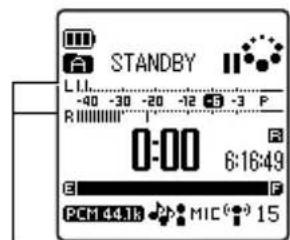
Level meterLevel meter
③ Tap to adjust the recording level.
- You can adjust the displayed recording level from 0 to 30. The recording level can be set for each microphone sensitivity. If the recording level is set to 0, no sound will be recorded.
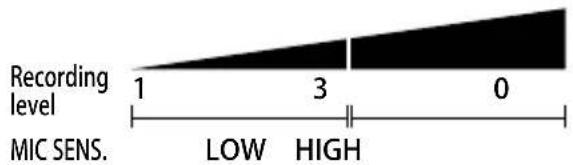
area
| MIC SENS. | Value | | --------- | ----- | | 1 | 1 | | 3 | 3 | | 0 | 0 |1
3
0
(to be continued on next page)
- In the range where the LED light does not come on quickly, try as much as possible to increase the recording level (level meters extending to the right) by tapping ▶▶▶ so that you can collect more sound.
- If the LED light flashes quickly, tap to slightly lower the recording level until the LED light goes off.
- If the LED still lights after you have dropped the recording level to 1, change the "MIC SENS." setting to "LOW".
If the level meter does not reach an appropriate recording level after you have increased the recording level to 30, change the "MIC SENS." setting to "HIGH".
MIC SENS. (page 133)
- An appropriate recording level is achieved when the level meters do not extend to the far right and the LED light does not flash quickly even after you increase the sound you want to record to its maximum. - Generally speaking, we recommend that you adjust the level to around -6. If the LED light flashes quickly, this indicates the input level is too high and distorted sound will be recorded.
* If the LED light menu is set to "OFF", the LED light does not come on.
LED SETTING (page 150)
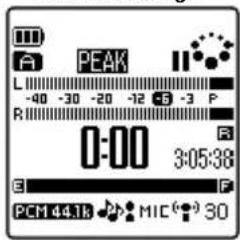
If the recording level is too low
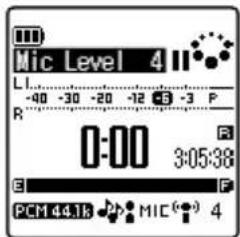
If the recording level is too high
LED lightLED light
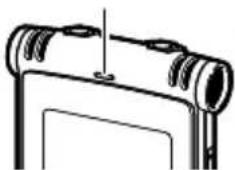
natural_image
Pure mechanical component diagram without any text, numbers, or symbolsAppropriate recording level

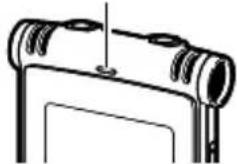
Press the REC button (○).
The LED light comes on and recording starts.
- During recording, do not touch or move the unit; otherwise any contact sound will be recorded.


Folder name /file number
LED lightLED light
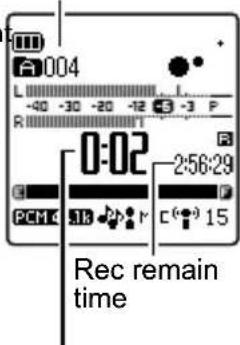
Elapsed recording time


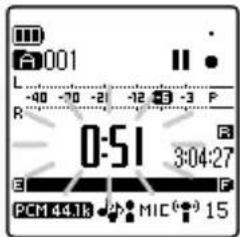
- During recording, you can press the REC button (O) to pause, and then press it again to resume recording.
- During recording, you can set an index mark. Setting an index mark (page 82)
- The recorded file is saved in the folder specified in step 2.

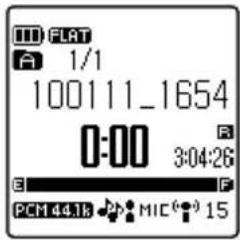
Press the STOP button (☐).
The LED light goes off and recording ends. The basic screen returns.


Setting recording EQ
With the recording EQ function, you can record using your desired sound quality, such as by emphasizing the bass range or middle range.
- Recording EQ can be set for microphone recording (using folders A to D).
- Recording EQ can only be set in the recording standby state. (The "SCENE SELECT" setting is set to "MUSIC" or "MIC ALC" setting is set to "OFF".)

Recording (page 58)
About the preset recording EQ
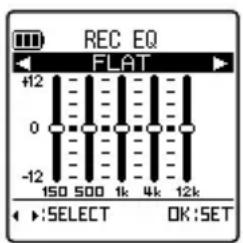
The unit comes with seven preset recording EQ modes: FLAT, SUPER BASS, BASS, MIDDLE, BASS & TREBLE, TREBLE, and SUPER TREBLE, plus a USER option that you can use to set up 5-band recording.
The seven preset recording EQ modes have the following features.
| FLAT | SUPER BASS | BASS MIDDLE | BASS&TREBLE | TREBLE | SUPER TREBLE | |
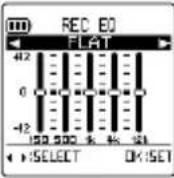 | 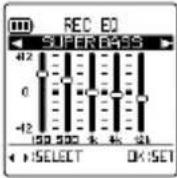 | 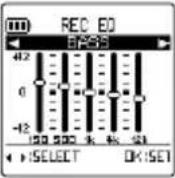 | 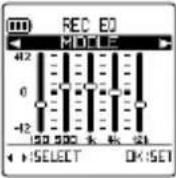 | 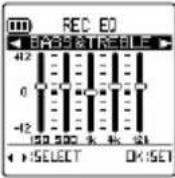 | 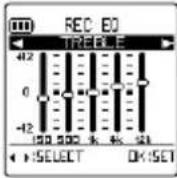 | 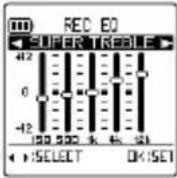 |
| Record with no particular sound range emphasized. | Record by emphasizing the bass range strongly. | Record by emphasizing the bass range slightly. | Record by emphasizing the middle range. | Record by emphasizing the bass and treble ranges slightly. | Record by emphasizing the treble range slightly. | Record by emphasizing the treble range strongly. |
- When the unit is shipped, the USER setting is same as FLAT.
- The seven preset recording EQ modes cannot be modified.
If you want to fine tune your recording EQ mode, select USER and then customize it.

Setting your favorite recording EQ mode (only when USER is selected) (page 64)
Selecting a preset recording EQ mode
1 Turn on the power. Turning on the power (page 36)
2 Switch to the RECORD mode. Switching operation mode/folder (page 31)
3 Change the “MIC ALC” setting to “OFF” or the “SCENE SELECT” setting to “MUSIC”. MIC ALC (page 134)
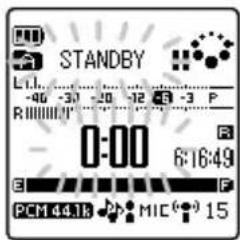
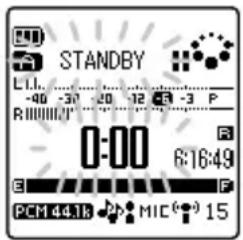
4 Press the REC button (○). The "STANDBY" screen appears.

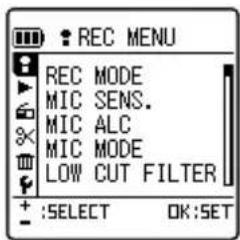
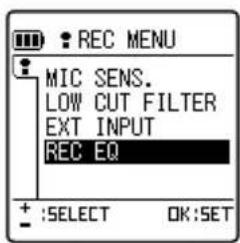
5 Tap MENU. The "REC MENU" screen appears.
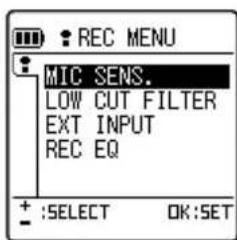
6 Tap +/- to select "REC EQ", and then tap OK.
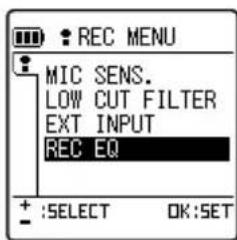

Tap /to select a recording EQ mode, and then tap ▶ OK.
The selected recording EQ is set and the “REC MENU” screen returns.
You can select one of the seven preset recording EQ modes, or the user-defined USER mode.
- If you select USER, see “Setting your favorite recording EQ mode (only when USER is selected)” (page 64) and set your favorite recording EQ mode.

Tap MENU.
The "STANDBY" screen returns.
- After adjusting the recording level, press the REC button (O) again to start recording.
- While setting a recording EQ mode, you can press the STOP button (☐) to cancel the operation and return to the previous state.
- The recording EQ setting is not lost when you turn off the power, or when you turn off the power and remove the battery power. However, if you remove the battery without first turning off the power, the setting will be lost.
Setting your favorite recording EQ mode (only when USER is selected)
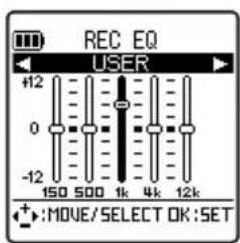
When you select USER as the recording EQ mode, you can customize this mode by changing each of the five bands of the recording EQ mode.

Change the recording EQ mode to "USER".
Selecting a preset recording EQ mode (page 63)

Tap -.
The 150Hz frequency band is highlighted and selected.
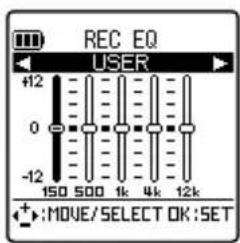

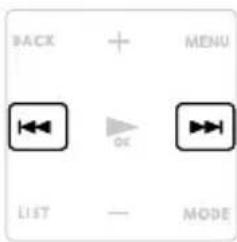
Tap /to select a frequency band you want to change.
The selected frequency band is highlighted.
- The following frequency bands are available: 150Hz, 500Hz, 1kHz, 4kHz, and 12kHz.
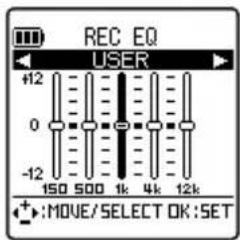

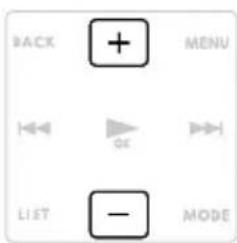
Tap +/- to change the level of the selected frequency band.
You can change the level from -12dB to 12dB (25 increments), with each increment being 1dB. The larger the dB number, the stronger it becomes.
- Tapping + increases the level.
- Tapping – decreases the level.
• To modify another frequency band, repeat steps 3 and 4. - While making changes, if you want to cancel the operation, press the STOP button (☐). The screen in step 1 returns.

Tap ▶ OK
The "USER" setting is finished and the unit returns to the "REC MENU" screen.

Tap MENU.
The unit returns to the "STANDBY" screen.
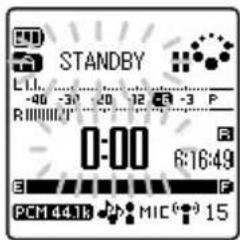
- During the operation, if you press the STOP button ( □) twice, the "STANDBY" screen returns.
- The USER mode you just set up is not lost when you turn off the power, or when you turn off the power and remove the battery power. However, if you remove the battery without first turning off the power, the setting will be lost.
Recording from an external device
1 Turn on the power.
Turning on the power (page 36)
2 Switch to the RECORD mode.
Switching operation mode/folder (page 31)
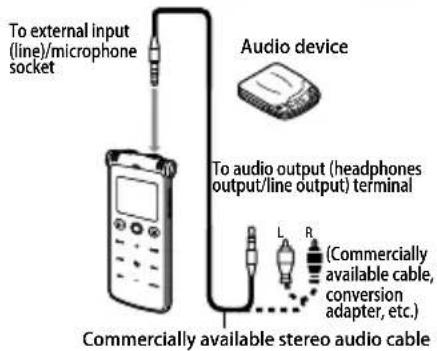
3 Use a commercially available stereo audio cable to connect the audio output terminal (headphones output/line output) of an external device to the external input (line)/microphone socket of the unit.
4 Change the recording scene to "COMPO", "PORTABLE", or "HEAD PHONE", according to the external device.
Selecting a recording scene (page 56)
- The selected recording scene's icon appears on the screen.
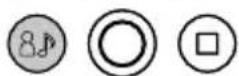
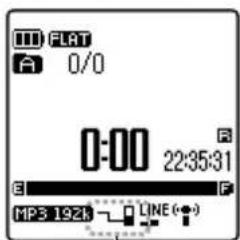
Recording scene iconRecording

Press the REC button (○).
- The “STANDBY” screen appears and the level meter extends to the left or right according to the input sound volume. When this screen appears, the actual recording has not started. Instead, you start playback on the external device, and then adjust its sound volume so that even when the volume of the sound you want to record increases to its maximum, the level meter still extends to the right from the center position* and PEAK does not appear.
* We recommend that you set the level meter to around “-6dB”.


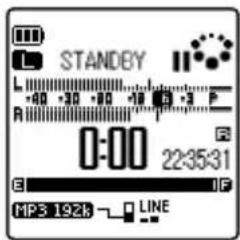

Press the REC button (○) again.
Recording starts.
- The recording will be stored in the LINE (L) folder automatically.


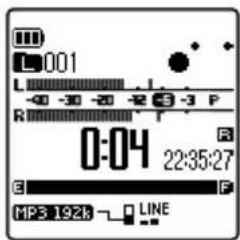

Stop playback on the external device, and then press the STOP button (☐) to stop recording.


Using the auto divide function
When you are performing line-in recording from a CD player, MD player, or another external device, you can use the auto divide function to automatically divide recorded data into files. If this function is turned on, when the unit detects a silence exceeding two seconds, it pauses recording and interprets the silence as a break between two sound tracks. It automatically divides the data as follows: file 1 for track 1, file 2 for track 2, etc.
- This function is valid only during line-in MP3 recording.
1 Turn on the power. Turning on the power (page 36)
2 Switch to the RECORD mode. Switching operation mode/folder (page 31)
3 Tap MENU. The menu appears.
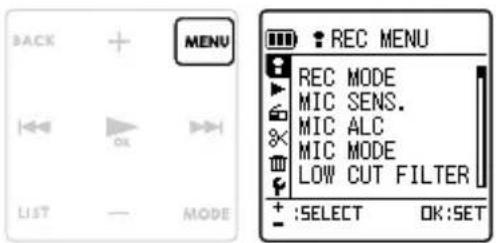
4 Tap +/- to select “REC MENU”, and then tap ▶. The “REC MENU” screen appears.
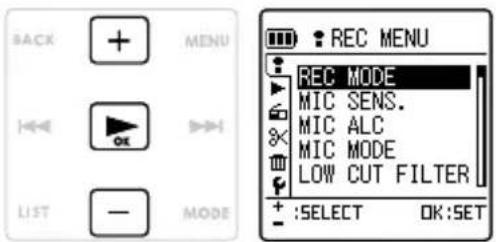
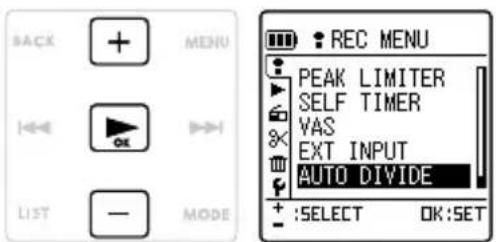
5 Tap +/- to select "AUTO DIVIDE", and then tap ▶. The "AUTO DIVIDE" setting screen appears.

Tap +/- to select "ON" or "OFF", and then tap ▶ OK.
OFF: Do not set up auto divide.
ON (Auto Stop):
The auto divide function activates when no sound is detected for two seconds.
When no sound is detected for more than two seconds, the unit pauses; when sound is detected again, recording resumes.
When there is no sound for more than 15 seconds, recording ends.
ON (Manual Stop):
The auto divide function activates when no sound is detected for two seconds.
When no sound is detected for more than two seconds, the unit pauses; when sound is detected again, recording resumes.
Even when there is no sound for more than 15 seconds, the unit still pauses; recording does not end until you press the STOP button (☐).
- ON (Auto Stop) is good for line-in recording from a CD. ON (Manual Stop) is good for line-in recording from a cassette tape; even if there is no sound for more than 15 seconds when you change the tape from side A to side B, the unit will pause.
- The auto divide function may not work in the following cases: CD live album where silence is less than 2 seconds, or where silence cannot be detected when recording from a cassette tape with intense noise or motor sound.
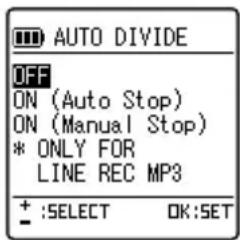
Tap MENU to exit the menu.
* When the auto divide function is "ON", appears on the screen.
Playback
Playing a file
Use the following procedure to play a music file or a file that you have recorded using the unit.
1 Turn on the power. → Turning on the power (page 36)
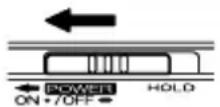
Select the folder containing the file you want to play.
A to D: Folders containing files recorded from the built-in microphone
L: Folder containing files created from line-in recording.
FM: Folder containing files with recorded FM radio.
M: Folder containing music files transferred from your PC
P1 to P5: Folder containing playlist files within the M folder
III: RECYCLE folder
Switching operation mode/folder (page 31)
- If the RECORD mode is used, proceed to step 3. If the MUSIC folder is used, proceed to step 4.
3 Tap LIST. The list screen appears.
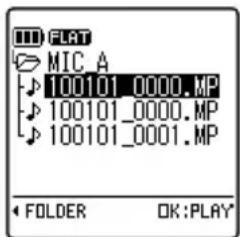
4 Tap +/- to select a file to play.
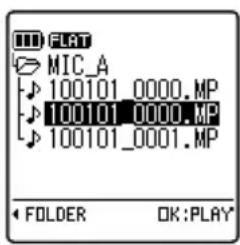

Tap OK
The basic screen returns and the file plays.
- Depending on the file, the elapsed playing time and the actual elapsed time may be different.
- Depending on the file, registered artist name, title name, etc. may not be displayed.
- During playback, any long file name will scroll off the screen.
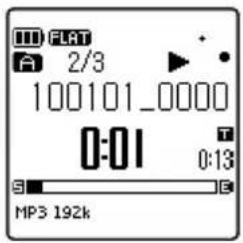
- MIC_A to MIC_D (A to D), LINE (L), FM
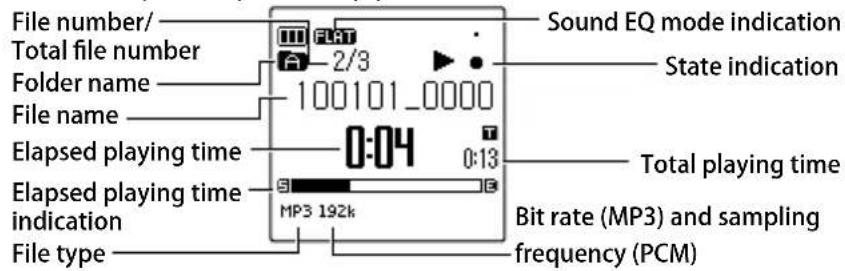
- MUSIC (M folder)
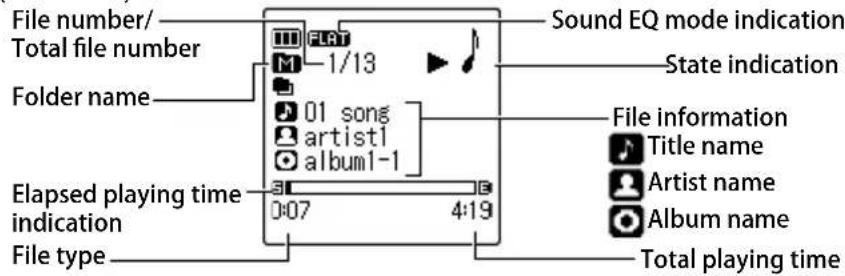

Press the STOP(□) button.
Playback stops and the basic screen returns.


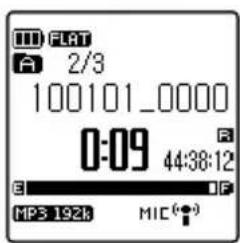
To fast forward
During playback, if you tap and then hold ▶for more than one second, fast forward starts. Once fast forward starts, it will continue even if you remove your finger from the button. If you want to return to the normal playback speed, tap ▶ok.
To rewind
During playback, if you tap and then hold for more than one second, rewind starts. Once rewind starts, it will continue even if you remove your finger from the button. If you want to return to the normal playback speed, tap OK.
To skip to the next or previous file
During playback* or stop, each tap of skips to the next file, and each tap of skips to the previous file. * When the "TIME SKIP" setting is turned on, the time skip function becomes active.
To skip forward or backward by specified time interval
If the "TIME SKIP" setting has been set to a time interval, during playback, tapping ◄▶◀◀◀◀◀◀◀◀◀◀◀◀◀◀◀◀◀◀◀◀◀◀◀◀◀◀◀◀◀◀◀◀◀◀◀◀◀◀◀◀◀◀◀◀◀◀◀◀◀◀◀◀◀◀◀◀◀◀◀◀◀◀◀◀◀◀◀◀◀◀◀◀◀◀◀◀◀◀◀◀◀◀◀◀◀◀◀◀◀◀◀◀◀◀◀◀◀◀◀◀▶▶▶▶▶▶▶▶▶▶▶▶▶▶▶▶▶▶▶▶▶▶▶▶▶▶▶▶▶▶▶▶▶▶▶▶▶▶▶▶▶▶▶▶▶▶▶▶▶▶▶▶▶▶▶▶▶▶▶▶▶▶▶▶▶▶▶▶▶▶▶▶▶▶▶▶▶▶▶▶▶▶▶▶▶▶▶▶▶▶▶▶▶▶▶▶▶▶▶▶>
TIME SKIP (page 141)
- If the file skip position or index mark position is closer than the time skip position, the unit will skip to that position.
- If the "TIME SKIP" setting is turned on, to skip to the next or previous file, stop the file playback first, and then tap ◀◀ or ▶once.
Playback functions and settings
The unit provides many functions to enable effective language learning or playback of recorded meetings. For details, see the following pages.
| Function Effect Setting | ||
| Fast playback/slow playback( page 76) | You can speed up or slow down playback. When you come to a section which is difficult to hear, you can slow down playback. If you want to move fast through a certain section, you can speed up playback. This is a convenient way to use playback to your liking.(This function does not work for PCM recordings.) | MP3: From 50 to 200%WMA: From 50 to 120% |
| Time search for playback( page 79) | You can specify a position in a file to skip to for playback. | - |
| A-B repeat playback( page 78) | During playback, you can specify a segment of the file (point A to point B) and then play that segment repeatedly. | - |
| Phrase playback( page 77) | This function allows you to rewind during playback by the specified number of seconds only. This is useful when you are listening to short phrases of music or you just missed an important part in your language study. You can return by using just one button. | 1 to 5 seconds |
| Time skip页面 (page 73 and 141) | During playback of a file, you can skip by the pre-determined amount of time. | OFF, 5 seconds, 10 seconds, 30 seconds, 1 minute, 5 minutes, 10 minutes, 15 minutes |
| Repeat mode页面 (page 140) | You can specify how to repeat files. | OFF, ONE REPEAT, FOLDER, FOLDER RANDOM, ALL REPEAT, ALL RANDOM |
| Sound EQ页面 (page 142) | You can select a desired sound quality for playback.The sound EQ is enabled only when stereo earphones are used during playback. | FLAT, BASS, POP, ROCK, JAZZ, CLEAR VOICE, USER |
| Index function页面 (page 82) | Once you set an index mark in a file, you can quickly jump to it when listening to the file later. (This function cannot be used in the MUSIC (M) / LINE (L) / RECYCLE (III) folder.) | - |
Changing the playback speed
When learning a language or musical instrument, you may want to slow down the playback speed. On the other hand, you may want to speed up the slow sections of a meeting. The unit allows you to adjust the playback speed as needed. The audio is digitally adjusted and is done automatically, and the musical interval does not change when you listen to it.
- For PCM recordings, you cannot change the playback speed.

During playback, tap ▶ The playback speed appears
- Pressing the STOP button ( □) returns the speed to 100%.
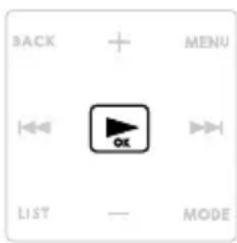
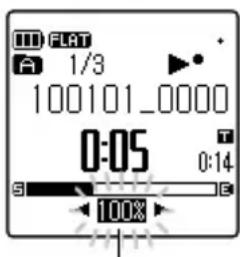
Playback speed indicatorPlayback spe

To speed up playback, tap ▶▶
Each tap of the button further increases the playback speed.
To slow down playback, tap .
Each tap of the button further decreases the playback speed.
- For SLOW playback, you can decrease the speed by 5% each time. For FAST playback, you can increase the speed by 10% each time.
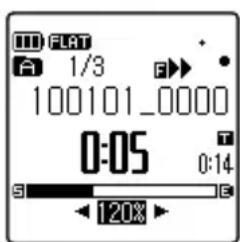
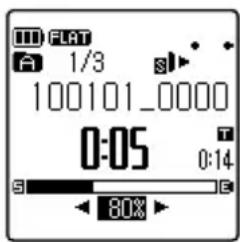
| NORMAL | SLOW FAST | F▶▶ | |
| MP3 100% | From 50% to 100%, at 5% interval From 100% to 200%, at 10% interval | ||
| WMA 100% | From 50% to 100%, at 5% interval From 100% to 120%, at 10% interval | ||

Tap OK
The unit returns to the playback screen.
- When you turn off the power, the unit returns to its normal playback speed.
Performing phrase playback
During playback, this function enables you to rewind by only the specified number of seconds. This is useful when you are listening to short phrases of music or just missed an important audio portion.
During playback, tap BACK.
The unit rewinds by the specified number of seconds and plays again.

PHRASE PLAY (page 141)
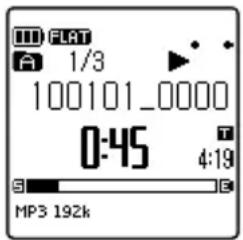
- You can press the BACK button again if you want to hear the "phrase" again.
- During A-B repeat playback, phrase playback will take place within the A-B segment.
- If the specified number of seconds is longer than the current playback position from the beginning of the file, then playback will start from the beginning of the file.
- Regardless of how large the specified number of seconds is, playback will only go as far back to the beginning of the file but not the previous file.
Performing A-B repeat playback (segment repeat playback)
During playback, you can specify a segment of the file (point A to point B) and then play that segment continuously.
1 Play the file you want to perform A-B repeat playback.
Playing a file (page 71)
2 Tap LIST at the position you want to start the segment for A-B repeat.
The start position indicator lights.
Start position indicator Start position
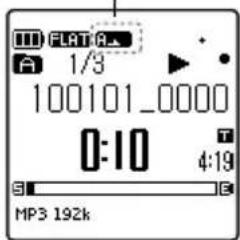
3 Tap LIST at the position you want to end the segment for A-B repeat.
This segment will play continuously until you release A-B repeat playback.
A-B repeat indicatorA-B repeat
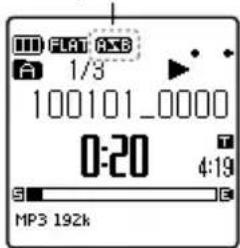
- During A-B repeat playback, performing any of the following operations releases A-B repeat playback.
- Tapping LIST again
- Pressing the STOP button (☐)
-
Tapping ◀◀/▶▶
-
Even during A-B repeat playback, you can change the playback speed (page 76), set index marks (page 82), or perform phrase playback (page 77).
- You cannot set up A-B repeat playback if point A and point B are too close.
• After setting up point A, if you do not set up point B, the end of the file will become point B. - Point A and point B must both be set within the same file.
Performing time search for playback
You can specify a position in a file for playback, using time.
1 Turn on the power. While in the RECORD mode or MUSIC mode, tap MENU.
- If you tapped MENU while the unit stopped, proceed to step 2. If you tapped MENU during playback, proceed to step 3.
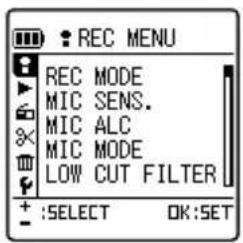
2 Tap +/- to select “PLAY MENU”, and then tap ▶.
The "PLAY MENU" screen appears.
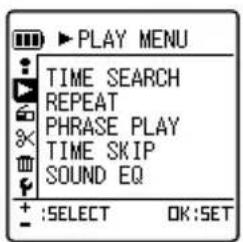
3 Tap +/- to select "TIME SEARCH", and then tap OK.
The "TIME SEARCH" screen appears.
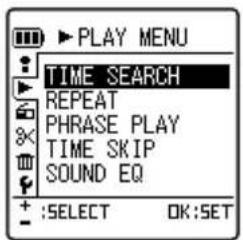
4 Enter the current time.
Tap ↗ to select hour (H), minute (M), or second (S).
Tap +/- to change each of the values.
00:00:00\~99:59:59
Hour Minute Second
![TIME SEARCH NOW 00:02:4] TTL 00:03:25 +:MOVE/SELECT OK:SET](/content/2026/05/991074/images/cb384e71ded74d163e38b2d189c2c3b78d194961f500e066e23e626e8064c932.jpg)

Tap OK
The unit skips to the specified time position and the file plays again.
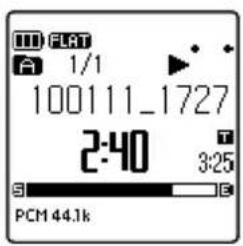
- Time search playback applies only to the currently selected file.
About playback in the MUSIC mode
The MUSIC (M) folder stores MP3 and WMA files transferred from your PC, as well as WAV file recorded on the unit. You can create sub folders within the MUSIC (M) folder to store and play files.
Using Windows Media Player to transfer music files (page 156)
■ About MYLIST1 to MYLIST5 files
- The MUSIC folder comes with five playlist files (MYLIST1 to MYLIST5) by default. You can register files in the MUSIC folder to each of MYLIST1 to MYLIST5 playlist and then play the files according to your favorite order.
Using the playlists (in MUSIC folder only) (page 88)
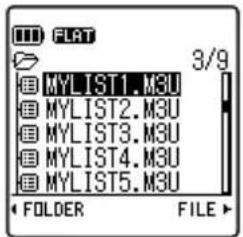
■ Sorting the MUSIC folder files
Within the MUSIC folder, files are sorted automatically by their names in ascending order. Sorting is based on the number that appears at the beginning of each file name.
If there are some files starting with 001, some with 01, and some with 1, then 001 takes priority over 01 and then 1.
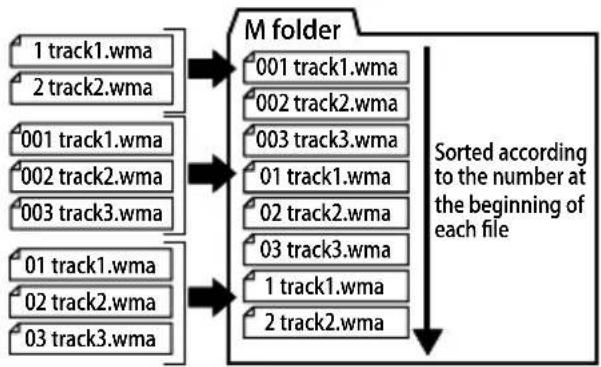
flowchart
graph TD
    A["1 track1.wma"] --> B["M folder"]
    C["2 track2.wma"] --> B
    D["001 track1.wma"] --> B
    E["002 track2.wma"] --> B
    F["003 track3.wma"] --> B
    G["01 track1.wma"] --> B
    H["02 track2.wma"] --> B
    I["03 track3.wma"] --> B
    J["1 track1.wma"] --> B
    K["2 track2.wma"] --> B
    B --> L["Sorted according to the number at the beginning of each file"]
Folder skip function
1 While playing a file in the MUSIC mode, press the SCENE button ( musical).
The folder skip mode is active.


Folder skip indicationF
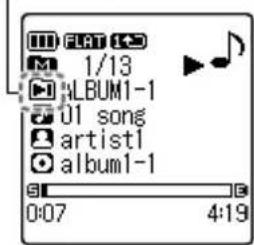
Tap /to select a folder to play.
Each tap skips to the first file of a folder.
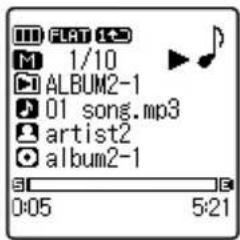
3 When you want to exit folder skip mode, tap the SCENE button ( ) or OK.
- Variable speed playback, A-B repeat playback, and menu operations are disabled during folder skip mode.
- You cannot skip over a folder that contains a playlist of over 3,000 songs.
Editing
Setting or erasing an index mark
When you set an index mark at a desired position in a file, you can quickly skip to that position during playback.
Skipping to the next/previous index mark (page 82)
Setting an index mark
- You cannot set index marks in files stored in the MUSIC (M) folder, LINE (L) folder, and RECYCLE folder (☐).
During recording, recording pause, or playback, tap MODE to set an index mark at the desired position.
"INDEX SETTING" appears and the index is set.
- After you set an index mark, recording or playback will continue and so you can use the same operation to set another index mark at a different position.
- Index marks in a file will disappear if you divide the file.
- You can set a maximum of 36 index marks.
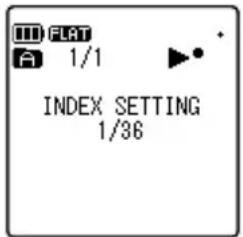
Skipping to the next/previous index mark
During playback ^*1 of a file with index marks set, tapping once skips to the next index. Similarly, tapping once skips to the previous index.
*1When the "TIME SKIP" setting is turned on, the time skip function becomes active.
To skip forward or backward by specified time interval (page 73)
TIME SKIP (page 141)
Erasing index marks
1 Turn on the power. → Turning on the power (page 36)
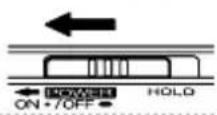
2 Select the folder containing the desired file for erasing index marks. Switching operation mode/folder (page 31)
3 Tap MENU. The menu appears.
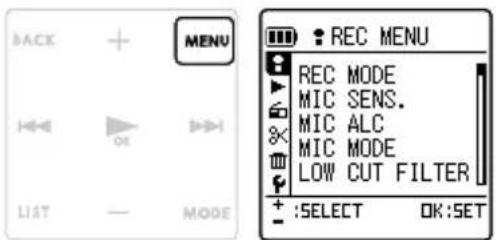
4 Tap +/- to select "MERASE", and then tap ▶. The "ERASE MENU" screen appears.
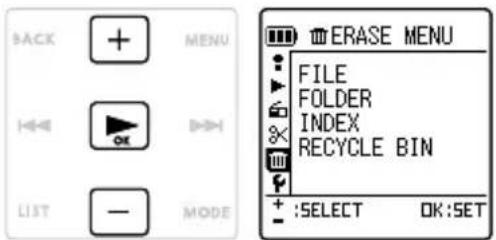
5 Tap +/- to select "INDEX", and then tap OK. The list screen appears.
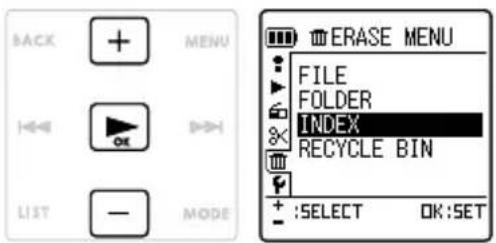
6 Tap +/- to select a file for erasing its index marks, and then tap ▶ OK.
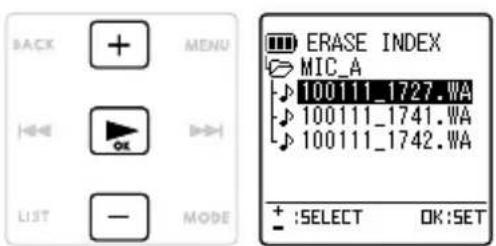
Tap / to select "YES".
- If you want to cancel the operation, select "NO".
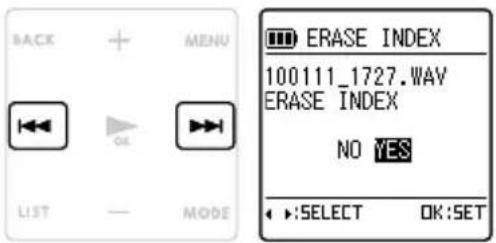
Tap OK
After “ERASING” appears, the index mark is erased and the unit returns to the basic screen.
- Erasing index marks from a file does not erase the audio part of the file.
- This function erases all index marks in a file. This means you cannot choose to erase just one index mark in the file.
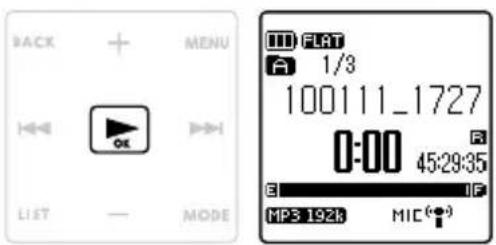
Dividing a file
You can use this function to divide a file into two, thus allowing you to get rid of unneeded parts or extract only those that are needed.
- Files stored in the MUSIC (M) folder and RECYCLE ( ) folder cannot be divided.
- To use this function, there must be empty space in the microSD card.
- This function cannot be used when a folder is full.
1 Play the file you want to divide. Playing a file (page 71)
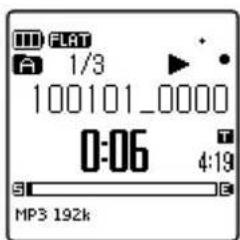
2 At the position you want to divide, press the STOP button (☐).
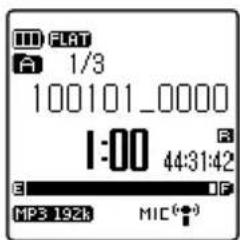
3 Tap MENU. The menu appears.
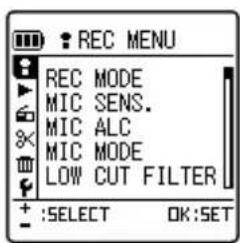
4 Tap +/- to select "EDIT MENU", and then tap OK.
The "EDIT MENU" screen appears.
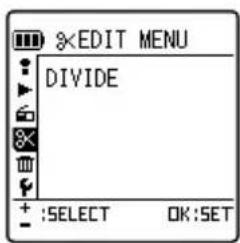
5 Tap +/- to select "DIVIDE", and then tap OK.
The "DIVIDE" screen appears.
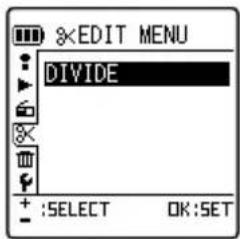
Tap /to select "YES".
- If you do not want to divide the file, select "NO" instead.
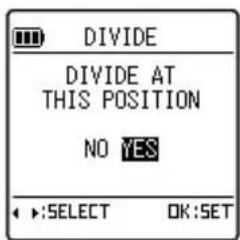
7 Tap OK
The message on the screen changes from "DIVIDING" to "DIVIDING COMPLETE!", indicating the file has been divided.
- While the file is being divided, the LED light flashes.
• After the file is divided, the number of files in the folder increases by one.
- If a file containing index marks is divided, the index marks will disappear after the file is divided.
- The file may not be divided exactly at the specified position. Instead, it may be divided slightly before or after the position.
- If there is no empty space in the microSD card, or if there is already a total of 199 files in the folder, you cannot use this function to divide a file.
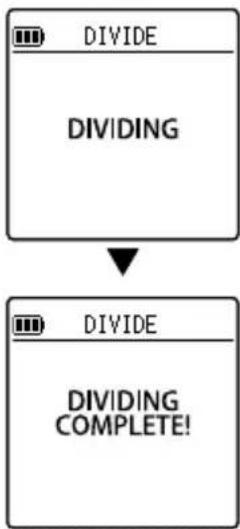
flowchart
graph TD
    A["DIVIDE"] --> B["DIVIDING"]
    B --> C["DIVIDE"]
    C --> D["DIVIDING COMPLETE!"]
■ How the file division function works and how file names are determined
Example: Dividing the 001A_100101_0000.MP3 file
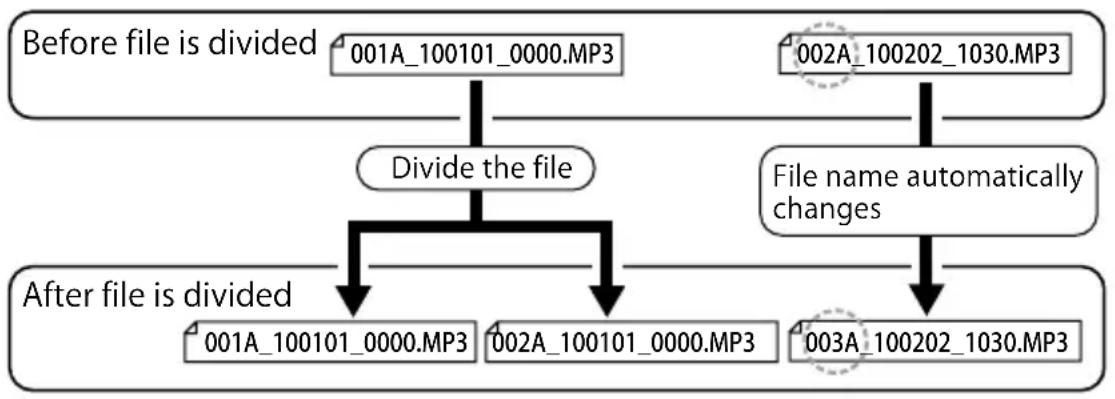
flowchart
graph TD
    A["Before file is divided"] --> B["001A_100101_0000.MP3"]
    C["002A_100202_1030.MP3"] --> D["File name automatically changes"]
    B --> E["Divide the file"]
    D --> F["After file is divided"]
    E --> G["001A_100101_0000.MP3"]
    E --> H["002A_100101_0000.MP3"]
    F --> I["003A_100202_1030.MP3"]
When you divide the file 001A_100101_0000.MP3, a new file 002A_100101_0000.MP3 is created. However, if a file with the same file number already exists in the folder, this file will give up its number to the new file created; instead, it will take on a new file number. In this example, when you divide 001A_100101_0000.MP3, this results in 001A_100101_0000.MP3 and 002A_100101_0000.MP3. In the same folder, the file 002A_100202_1030.MP3 becomes 003A_100202_1030.MP3 automatically.
- The divided parts of a file overlap slightly. The overlap time and recording time required for file division are listed below.
| Recording mode Overlap time File recording time | |||
| MP3 | 32kbps About | 8 seconds About 16 seconds or more | |
| 64kbps About | 4 seconds About 8 seconds or more | ||
| 128kbps About | 2 seconds About 4 seconds or more | ||
| 192kbps | About less than 1 second About | 2 seconds or more320kbps | |
| PCM 44 | 1kHz | ||
Using the playlists (in MUSIC folder only)
The unit provides five playlist files in the MUSIC (M) folder by default. You can edit the playlist files (MYLIST1.M3U to MYLIST5.M3U). This allows you to play your favorite songs in the MUSIC (M) folder in the desired order.
- You can register songs only to the playlist files stored in the MUSIC (M) folder.
- MYLIST1 to MYLIST5 cannot be erased.
- Do not edit MYLIST from your PC.
• Each MYLIST can have up to 99 files registered. - If you select English, French, German or Spanish in "ID3 LANGUAGE", you cannot register files with Russian file names in a playlist, and you cannot play back files registered in a playlist with Russian file names while Russian is selected.
If you select Russian in "ID3 LANGUAGE", you cannot register files with French, German or Spanish file names in a playlist, and you cannot play back files registered in a playlist with French, German or Spanish file names while one of these three languages is selected.
ID3 LANGUAGE (page 152)
Registering a file or folder in a playlist (MYLIST)
Select a MUSIC (M) folder.
Switching operation mode/folder (page 31)
2 Tap +/- or ↕ to select a file or folder to register to the playlist, and then tap MENU.
The "ADD TO MYLIST" screen appears.
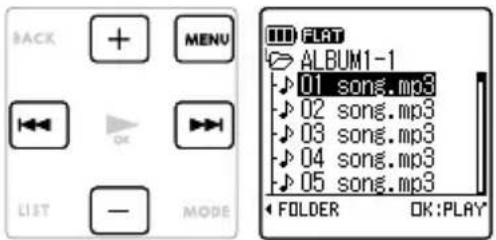
3 Tap ↓ to select a playlist (from MYLIST1 to MYLIST5), and then tap ▶ OK.
The file or folder is registered to the selected playlist.
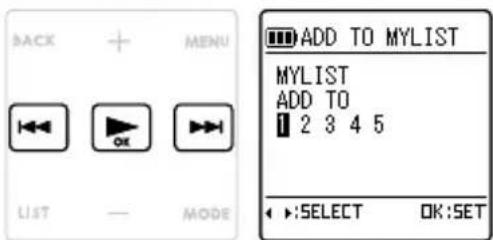
Changing the play order of files in a playlist
Use the following procedure to change the play order of files in a playlist.
1 Select a playlist (P1 to P5) you want to use to change its playback order. Switching operation mode/folder (page 31)
The selected playlist appears on the list screen.
2 Tap +/- to select a file you want to use to change its playback order, and then tap MENU.
The "EDIT MYLIST" screen appears.
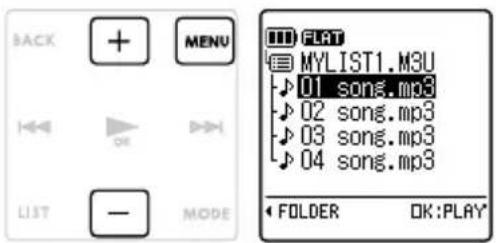
3 Tap +/- to select "CHANGE ORDER", and then tap ▶ OK.
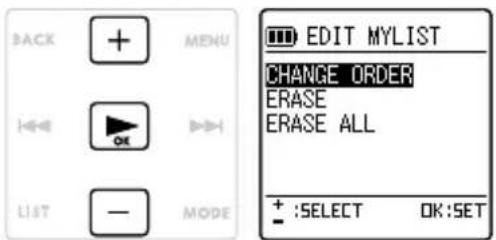
4 Tap +/- to move the selected file to a desired play position.
The icon of the selected file changes to →
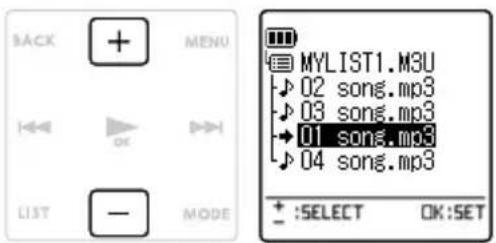
5 Tap OK
The playback order of the playlist is changed.
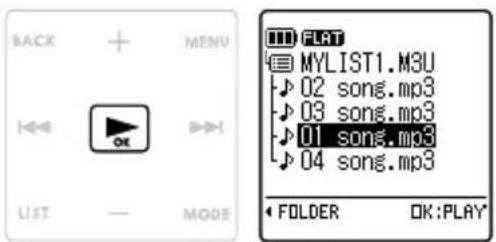
De-registering a file from a playlist (MYLIST)
Use the following procedure to de-register a file from a playlist.
- De-registering a file from a playlist does not erase the actual file.
1 Select a playlist (P1 to P5) you want to use to de-register a file. Switching operation mode/folder (page 31)
The selected playlist appears on the list screen.
2 Tap +/- to select a file you want to de-register, and then tap MENU.
- In this example, we want to de-register "04 song.mp3".
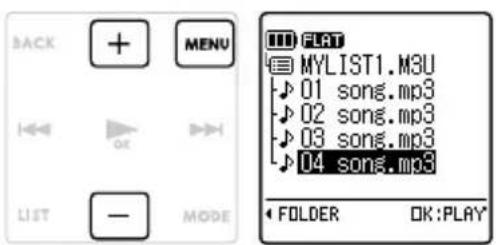
3 Tap +/- to select "ERASE", and then tap OK.
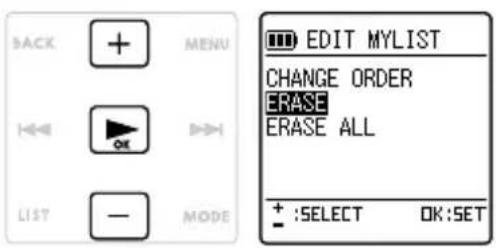
4 Tap ↓ to select "YES", and then tap OK.
The selected file is de-registered from the playlist.
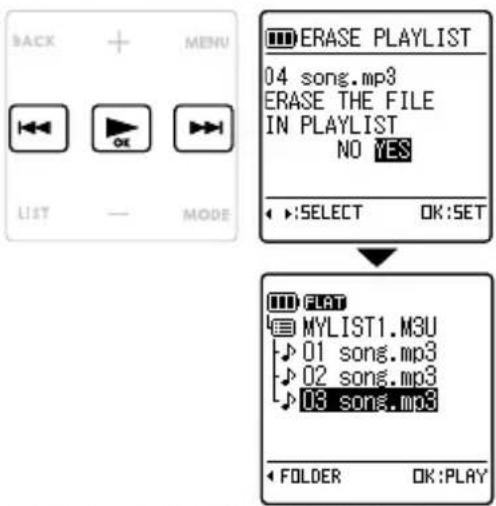
De-registering all files from a playlist (MYLIST)
Use the following procedure to de-register all files from a playlist.
- De-registering a file from a playlist does not erase the actual file.
1 Select a playlist (P1 to P5) you want to de-register all files from it. Switching operation mode/folder (page 31)
The selected playlist appears on the list screen.
Tap MENU.
The "EDIT MYLIST" screen appears.
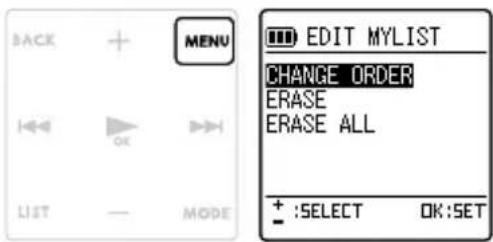
3 Tap +/- to select "ERASE ALL", and then tap ▶ OK.
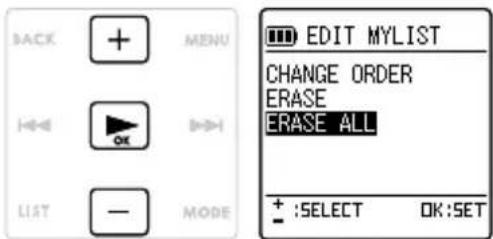
4 Tap ↓ to select "YES", and then tap OK.
All files are removed from the playlist, and "No File" appears on the screen.
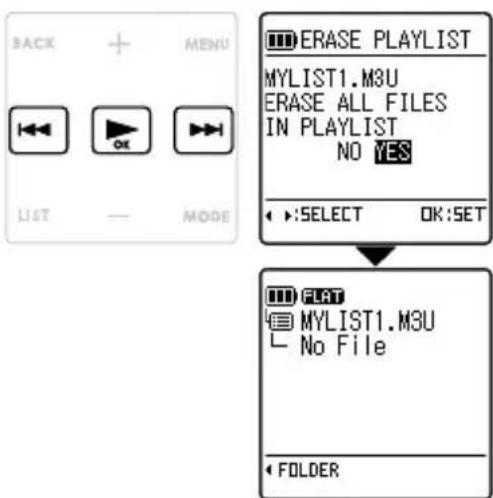
Using FM radio
Listening to FM radio
You can use the unit to listen to FM radio.

Turn on the power.
Turning on the power (page 36)

Plug the stereo earphones into the headphones socket.

Switch to the FM RADIO mode.
Switching operation mode/folder (page 31)

Tap /to select an FM station you want to listen to.
About selecting FM station (page 94)
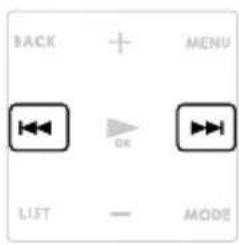
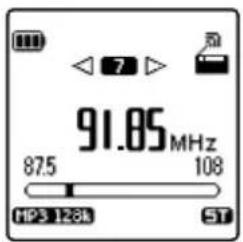
■ Specifying where to output radio broadcast
Radio broadcast can be output to the speakers even when your stereo earphones are connected.
OUTPUT (page 148)
Note:
■ About radio reception
- Because headphones also act as an antenna, be sure to plug the supplied stereo earphones into the headphones socket of the unit. Also, try as much as possible to straighten the cord of the stereo earphones during use. When using the multi-cradle, plug the stereo earphones into the headphones socket of the multi-cradle (ICR-XPS01MF only).
- If you are listening to radio broadcast near a TV, color distortion may occur on the TV or noise from the TV may enter the unit. Therefore, move away from the TV before listening to the radio.
• FM teletext is not supported. - When receiving FM radio, depending on the reception state, noise may make it difficult to listen to the radio. If this happens, change the radio setting's “STEREO/MONO” to “MONO”. Then, because you always get mono sound regardless of the reception state, you may find it easier to listen to the broadcast.

STEREO/MONO (page 149)
About selecting FM station
The unit allows you to select an FM station using one of the following methods.
- PRESET MODE
In this mode, you can select from stations registered in advance using the auto preset function.
AUTO PRESET (page 148)
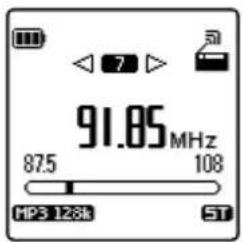
- FREQUENCY MODE
In this mode, you keep changing the frequency until you find an FM station you want to listen to.
Two station selection methods are available: auto station selection method which automatically selects stations with strong signal (AUTO SCAN), or manually selecting stations (MANUAL TUNING).
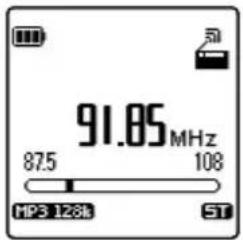
Selecting from registered stations (preset station selection)

Turn on the power.
Turning on the power (page 36)
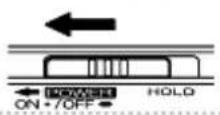

Switch to the FM RADIO mode.
Switching operation mode/folder (page 31)

Tap ▶ to switch to PRESET MODE.
- Tapping repeatedly switches between PRESET MODE and FREQUENCY MODE.
- When you switch to PRESET MODE, channels appear on the screen.
![BACK + MENU [<<] OK LIST — MODE](/content/2026/05/991074/images/10ada8598d4177ade6736c5bfb435db858c4079cdb9ec012b287b7273c56917b.jpg)
Channel indicationChannel ind
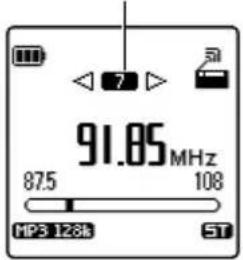

Tap /to change channel.
• Each tap switches the channels of currently registered stations (maximum 20 channels) in their order.
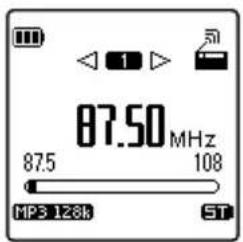
Manually selecting a station (manual tuning)
If there is a unregistered FM station you want to listen to, you can use this method to tune in to the station.

Turn on the power.
Turning on the power (page 36)
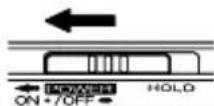

Switch to the FM RADIO mode.
Switching operation mode/folder (page 31)

Tap ▶ to switch to FREQUENCY MODE.
- Tapping repeatedly switches between PRESET MODE and FREQUENCY MODE.
- When you switch to FREQUENCY MODE, the channel display disappears from the screen.
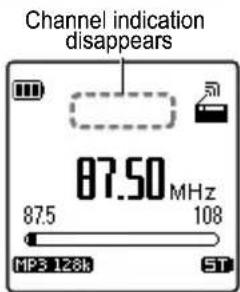

Tap / to select a frequency.
● Manual station selection
Each tap (single press) increases (or decreases) the frequency by 0.05 MHz.
● Automatic station selection
If you tap for more than 2 seconds, "SEARCHING..." appears on the screen and the frequency automatically increases (or decreases). When a broadcast station is received, the operation then stops automatically.
- If the signal is weak and reception is bad, the unit does not stop automatically.
- If there are interference signals nearby, the interference signals may be received and then the unit stops.
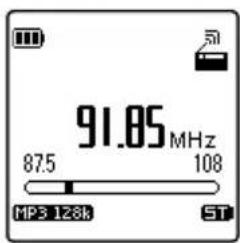
Adding or deleting a station
Adding a station
When broadcast from an FM station is received, you can register the station to a desired channel (maximum 20 channels). Later, you can select the registered channel in PRESET MODE.
Select a FM station you want to register.
Selecting from registered stations (preset station selection) (page 95)
Manually selecting a station (manual tuning) (page 96)
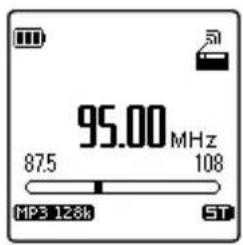
Tap LIST.
The "EDIT PRESET" screen appears.
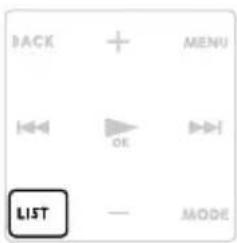
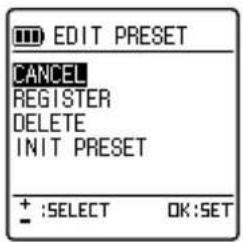
Tap +/- to select "REGISTER".
- If you want to cancel the operation, select "CANCEL".
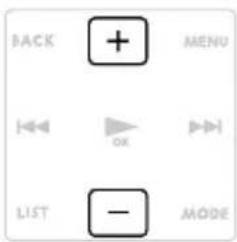
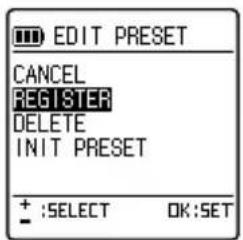


"REGISTER" flashes and channels appear.
Channel indicationChannel ind
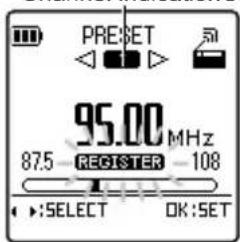

Tap ↗ to select a channel you want to use to register the station (channels 1 to 20).
If you want to cancel the registration, press the STOP button (☐).
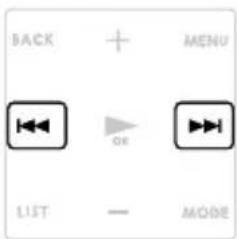
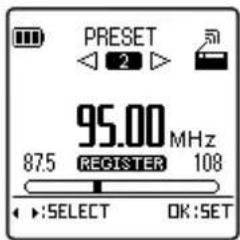


• The station is registered to the channel.
- Any station previously registered to the channel is overwritten.
![BACK + MENU [<<] OK >>> LIST — MODE](/content/2026/05/991074/images/2a2c38b9920df928454a8c7868db44b4fe87959d9033c98d93cdadf271f20cca.jpg)
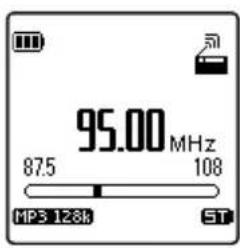
Deleting a station
1 In PRESET MODE, select a station you want to delete. Selecting from registered stations (preset station selection) (page 95)
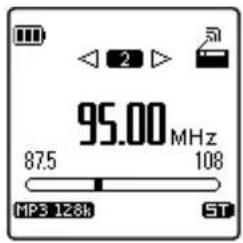
2 Tap LIST. The "EDIT PRESET" screen appears.
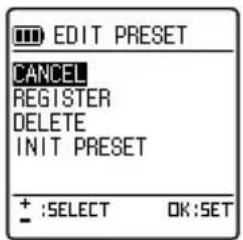
3 Tap +/- to select "DELETE". • If you want to cancel the operation, select "CANCEL".
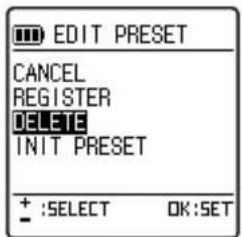
4 Tap ▶ "DELETE" flashes.
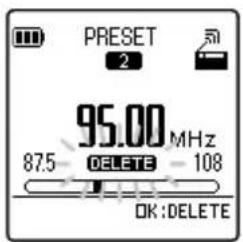

Tap OK
The selected station is deleted. The station following the deleted one is now received. (If the next station does not exist, then the unit returns to channel 1.)
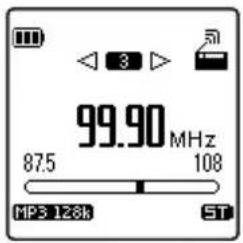
Initializing presets
You can cancel added or removed registrations and other changes to the preset channel settings, and return them to their default conditions.

Switch to the FM RADIO mode.
Switching operation mode/folder (page 31)

Tap LIST.
The "EDIT PRESET" screen appears.
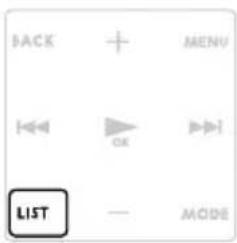
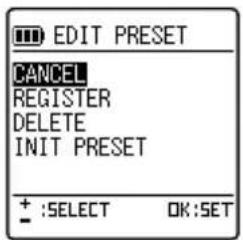

Tap +/- to select "INIT PRESET", and then tap ▶ OK.
The "INIT PRESET" screen appears.
- If you want to cancel the operation, select "NO".
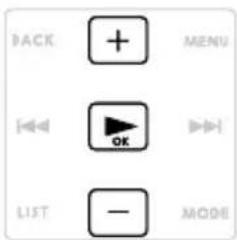
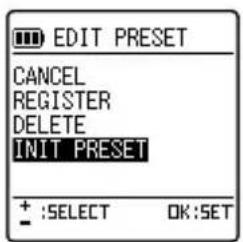
4 Tap /to select "YES".
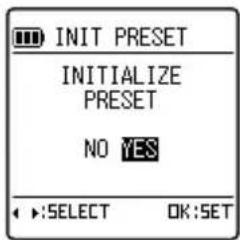
5 Tap ▶ The preset channel settings are returned to their default conditions.
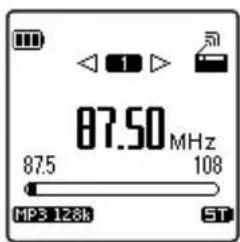
Recording FM radio
This section describes how to record FM radio on the unit to a microSD card.
1 Select a station you want to record.
Selecting from registered stations (preset station selection) (page 95)
Manually selecting a station (manual tuning) (page 96)
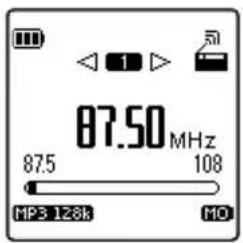
Press REC button (○).
The LED light comes on and recording of the current FM station starts.
- The broadcast is saved in the FM folder as a recorded file.
- During recording, you cannot change station.
- During recording, you can press the REC button (O) to pause recording. Pressing the button again resumes recording.
- During recording, you can tap MODE to set an index mark.
Setting an index mark (page 82)
- During recording, you can monitor recording by using your headphones or the speakers (which can be set from the "OUTPUT" menu). To adjust the sound volume, use VOL (+/-).
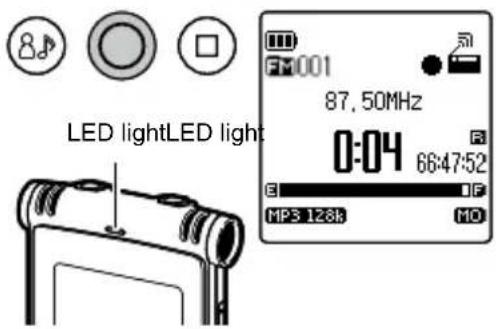
OUTPUT (page 148)

Press the STOP button (☐).
The LED light goes off and recording stops. The FM reception screen then returns.


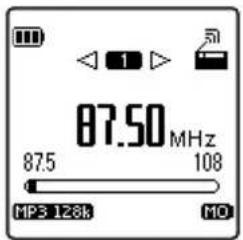
About the recording mode during FM radio recording
The sampling frequency automatically changes to avoid noise influence (to 32kHz, 44.1kHz, or 48kHz). However, the recording mode used during FM radio recording is fixed at MP3:128 kbps.
Note:
- If there is a lot of noise during FM radio recording, press the STOP button (☐) to change the "STEREO/MONO" setting to "MONO".
ST: STEREO
MO: MONO
Depending on the reception environment, noise may also be recorded together with FM radio. Also, in a location where radio is weak, even if you can hear good broadcast quality, recording may include noise. For this reason, test the location with trial recording. If the radio is weak and noise is recorded, move to a location which provides good recording, and then record at that location.
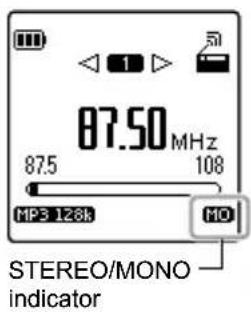

STEREO/MONO (page 149)
Using the timer
Setting up the timer
You can set the timer to record, play file, or activate the beep sound at a designated time. Also, you can set it to receive FM radio or perform recording. The procedures to set timer recording and timer playback are slightly different.
Make sure there is sufficient remaining battery power, and then set the calendar.
Remaining battery power (page 37)
Setting the calendar (date & time) (page 49)
See also "Note" on page 111 when setting up the timer or if the timer setting does not function correctly.
1 Turn on the power. → Turning on the power (page 36)
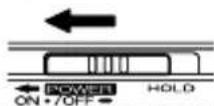
2 Switch to the RECORD mode or MUSIC mode. Switching operation mode/folder (page 31)
3 When the unit stops, tap MENU. The menu appears.
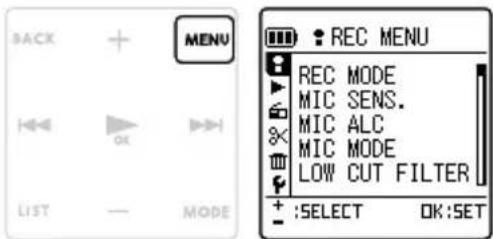
4 Tap +/- to select "COMMON MENU", and then tap ▶. The "COMMON MENU" screen appears.
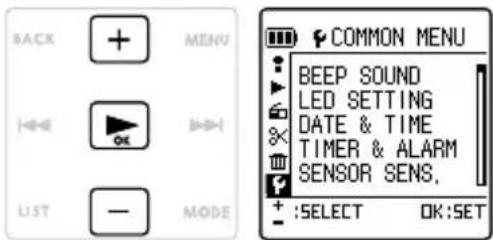
5 Tap +/- to select "TIMER & ALARM", and then tap ▶.
The "TIMER & ALARM" screen appears.
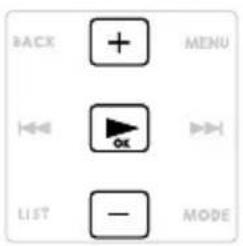
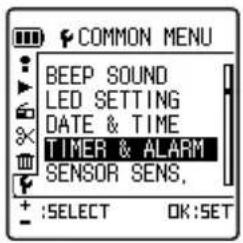
6 Tap +/- to select a setting, and then tap OK.
A screen for the selected setting appears. For information on how to change each setting, see pages 105 to 111.
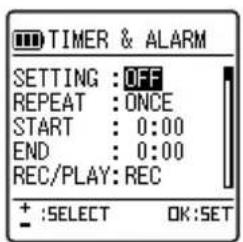
Timer playback/recording common settings
■Timer on/off
① Tap +/- to select "ON" or "OFF".
OFF: Turn off timer.
ON: Turn on timer.
② Tap ▶ok
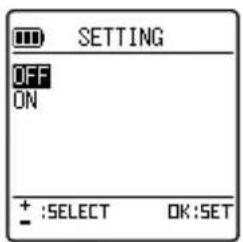
■ Repeat timer
① Tap +/- to select "ONCE", "DAILY", or "SELECT".
ONCE: Perform timer recording (or playback) only once, at the designated time.
DAILY: Perform timer recording (or playback) everyday, at the designated time.
SELECT: Perform timer recording (or playback) on the selected day of week, at the designated time.
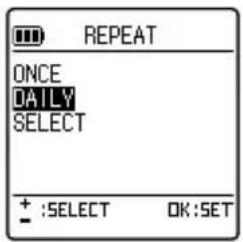
② Tap OK
■ If repeat timer is set to "SELECT"
① Tap +/- or ◀◀/▶ to highlight a desired day of week, and then tap ▶ to select it.
- You can specify multiple days of week.
• To clear a selection, tap ▶ again.
② Tap +/- or ▶ to select "OK", and then tap ▶ OK.
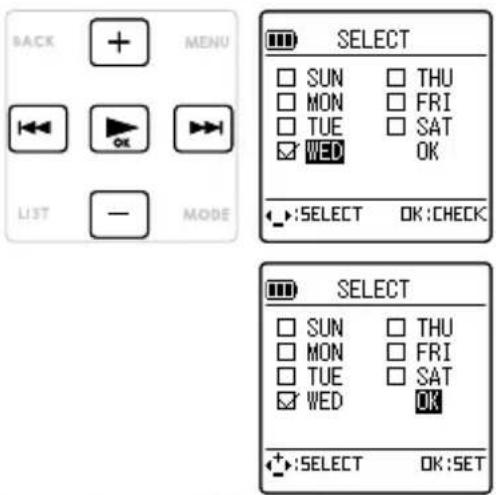
■ Timer start time
① Tap ◀◀/▶ to select hour or minute for the start time.
② Tap +/- to change its value.
• AM12:00 is midnight and PM12:00 is noon.
③ Tap ▶
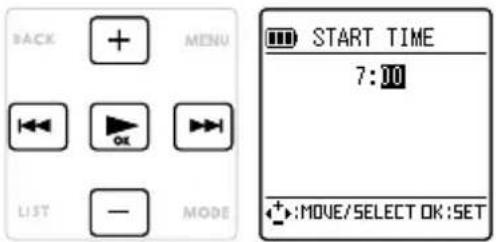
■ Timer end time
① Tap ◀◀/▶ to select hour or minute for the end time.
② Tap +/- to change its value.
• AM12:00 is midnight and PM12:00 is noon.
- The maximum interval between the start time and end time that you can set is 12 hours.
③ Tap ▶ OK.
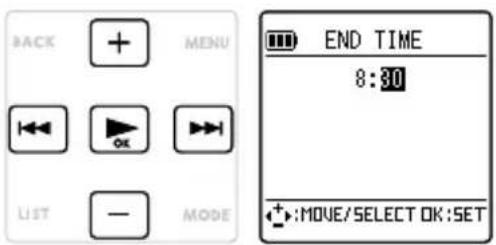
To perform timer playback, proceed to "Settings for timer playback".
Settings for timer playback (page 107)
To perform timer recording, proceed to "Settings for timer recording".
Settings for timer recording (page 109)
Settings for timer playback
What operation
c Tap +/- to select "PLAY".
d Tap ▶ok.
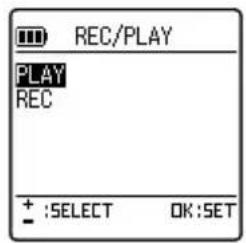
What to play
You can specify to give a beep sound, receive FM radio, or play a file at a time set by the timer.
BEEP: Give a beep sound.
FILE: Play the selected file.
FM: Receive FM radio.
The procedure will be different depending on the selection.
z To give a beep sound at a time set by the timer
c Tap +/- to select "BEEP".
d Tap ▶ok.
Proceed to "Completing timer setting".
Completing timer setting (page 111)
●To play a file at a time set by the timer
① Tap +/- to select "FILE", and then tap OK.
The list screen appears.
② Select a file to play.
- Do not select any file from the playlist.
Using the list screen (page 33)
③ Tap OK.
Proceed to "Completing timer setting".
Completing timer setting (page 111)
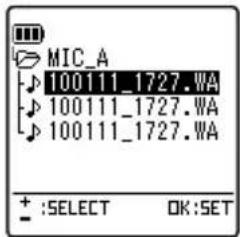
● To receive FM radio at a time set by the timer
① Tap +/- to select "FM", and then tap ▶ok.
② Tap +/- to select a preset channel or frequency for receiving FM radio.
③ Tap OK.
Proceed to "Completing timer setting".
Completing timer setting (page 111)
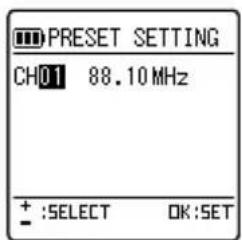
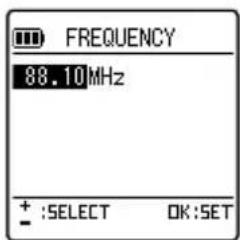
Settings for timer recording
■What operation
① Tap +/- to select "REC".
② Tap ▶ OK.
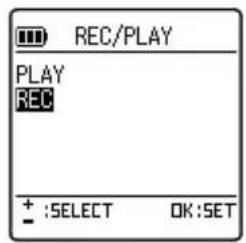
■ Recording source
① Tap +/- to select "MIC" or "FM".
MIC: Use the built-in microphone of the unit to record.
FM: Record FM radio.
② Tap OK
- If "FM" is selected, plug the stereo earphones into the headphones socket.

OUTPUT (page 148)
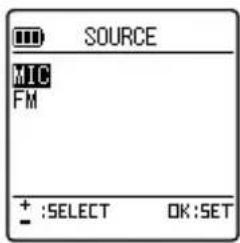
■Sound quality (only when recording source is set to "MIC")
① Tap +/- or ◀◀/▶ to select a recoding mode.
- Timer recording will use the sound quality specified here, regardless of the scene select setting (page 54) or recording mode (page 132).
- If the recording source is set to "FM", the sound quality is fixed at MP3:128kbps and cannot be changed.
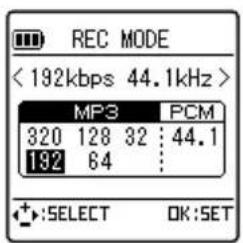
② Tapok.
■ Recording destination (only if the recording source is set to "MIC")
① Tap +/- to select a folder for recordings.
- Be sure to insert a microSD card into the unit in advance.
- If the recording source is set to "FM", the broadcast will be recorded to the FM folder.
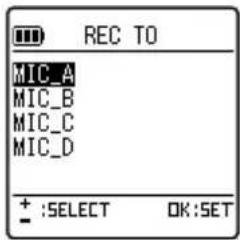
② Tapok.
■ Selecting a station (only if the recording source is set to "FM")
① Tap +/- to select a preset channel or frequency for FM radio.
② Tap ▶ OK.
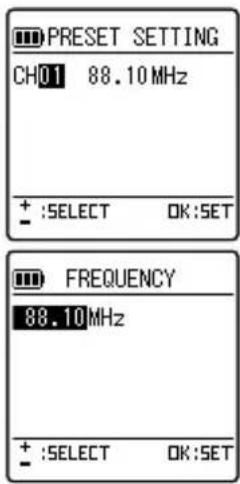
■ Output setting
① Tap +/- to select "ON" or "OFF".
ON: Output sound from the unit when the timer starts.
OFF: Do not output sound from the unit when the timer starts.
② Tap ▶ OK.
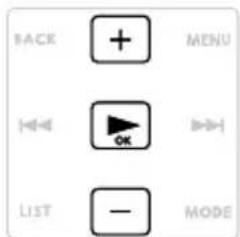
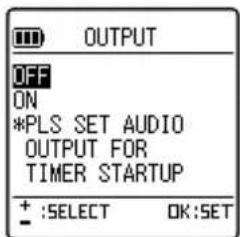
Completing timer setting
① Tap +/- to select "OK".
Always be sure to select "OK" and confirm it.
② Tap OK
- The registered timer setting is confirmed, and the unit returns to the “COMMON MENU” screen.
③ Tap MENU.
- The unit returns to the basic screen. If the timer setting is turned on, 📋 appears on the screen.
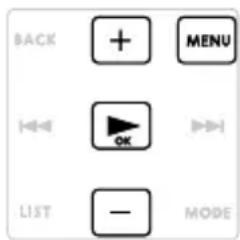
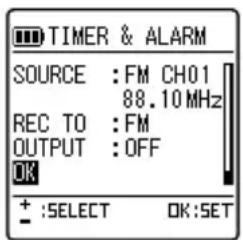
Note:
- When the calendar settings are initialized, timer recording is turned off.
- After you have set up the timer to play a file, if the selected file is erased, when the designated time arrives, the unit beeps for 30 seconds instead of playing the file.
- In the following cases, timer recording (or playback) may not function correctly.
- If the microSD card does not have enough memory for recording as specified by the timer
- If no microSD card is inserted
- If the number of recorded files has exceeded the limit
- If the unit is connected to your PC but has not started even when the time designated by the timer has arrived
- If the battery is low or the power is turned off during time recording (or playback)
- If the timer does not start due to a reason mentioned above, ☒ or ☒ as well as “CAN’T START TIMER OPERATION” appear.
☒: If the timer repeat setting is set to "ONCE" and timer recording fails, the timer then changes to "OFF".
☑: If the timer repeat setting is set to "DAILY" or "SELECT" and timer recording fails, the timer remains "ON".
Using the sleep timer
When you set up the sleep timer, the power automatically turns off after the specified time has elapsed.
1 Turn on the power, and then tap MENU. The menu appears.
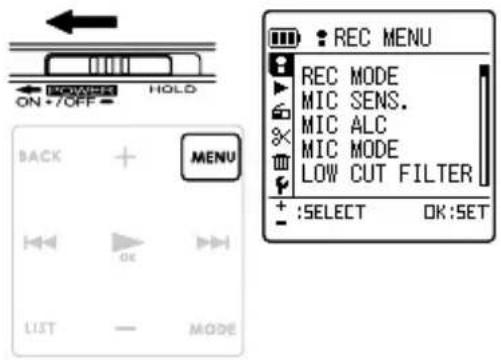
2 Tap +/- to select "COMMON MENU", and then tap OK.
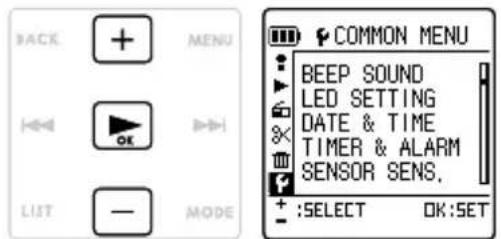
3 Tap +/- to select "SLEEP TIMER", and then tap OK.
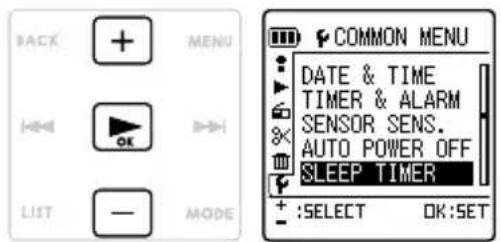

Tap /to specify when to activate the sleep timer, and then tap ▶ OK.
You can set the time from 10 to 120 minutes, in 10-minute intervals.
Setting it to 0 turns off the sleep timer.
- After setting up the sleep timer, you can go back to the "SLEEP TIMER" menu to check the remaining time.
- When the sleep timer is set up, 🤔 appears on the screen.
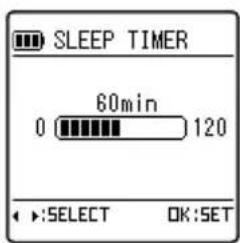
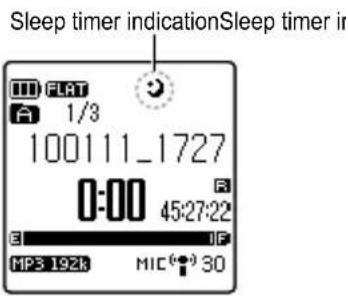
Tap the menu to exit the menu.
Erasing files
About the recycle bin function
If you turn on the recycle bin function, when you erase a file on the unit, it goes into the RECYCLE (☐) folder. Therefore, you can still recover the file from the RECYCLE ☐ folder later. This is very useful when you accidentally erase a file.
When shipped, the unit has its recycle bin function turned on. If you turn off the recycle bin function, when you erase a file or folder, the data is erased from the microSD card so that you can no longer recover it later. To avoid accidentally erasing data, we recommend that you turn on the recycle bin function. (page 152)
- The RECYCLE ( 🔊) folder can hold a maximum of 199 files. If there are already 199 files in the folder, you can no longer erase any file. When this happens, either empty the RECYCLE ( 🔊) folder or recover some of the files from the folder.
Recovering a file from the RECYCLE folder (page 116)
Emptying the RECYCLE folder (page 117) - Regardless of whether the recycle bin function is turned on or off, files stored in the M folder, when erased, do not go into the RECYCLE 📋 folder. Instead, they are completely erased from the unit.
- If there are a lot of files in the RECYCLE ( 🔒) folder, this may slow down the speed. Therefore, we recommend that you regularly empty the RECYCLE folder.
- If the recycle bin function is turned on, when you erase files, the remaining recording time displayed does not increase.
- When a file with index marks is moved to the RECYCLE ( folder, its corresponding index file is also moved to the RECYCLE folder. (However, the index function cannot be used within the RECYCLE folder.)
- When you format a microSD card, all files in the RECYCLE folder are also erased.
- When you turn off the recycle bin function, files already in the RECYCLE ( 🔑) folder are not erased.
- The RECYCLE ( 🔊) folder appears on the list screen as "RECYCLE".
- If there is not enough free memory on the microSD card, you may not be able to move files to the RECYCLE folder.
About the RECYCLE folder display when the recycle bin function is turned on
● When there is no file
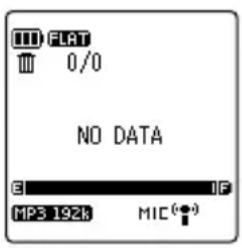
- When there is a file
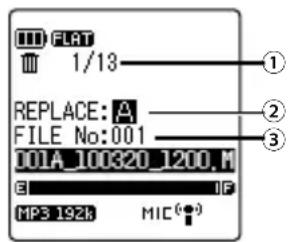
① File number of file in RECYCLE folder
② Folder of file before it is erased
③ File number of file before it is erased
About name of file when moved to the RECYCLE folder
When a file is moved to the RECYCLE folder, its name is changed automatically.
Example: A file 001A_100320_1200.MP3 in folder MIC_A is moved to the RECYCLE folder.
■001\_001 A\_100320\_1200.MP3
① A new file number* is added to the beginning of the file now stored in the RECYCLE folder. (A file number is determined in the sequence of 001, 002, 003, etc.)
② File number (original file number before the file was moved to the RECYCLE folder)
③ Folder where the file was stored before (A to D, L, F)
④ Date (date when the file was recorded)
⑤ Recording time (time when recording started)
⑥ File extension (This indicates the file type: MP3 for MP3 recording or WAV for PCM recording.)
* This information is not displayed on the unit. It appears only on your PC.
Recovering a file from the RECYCLE folder
1 Select the RECYCLE (folder.
Switching operation mode/folder (page 31)
2 Tap MENU. The menu appears.
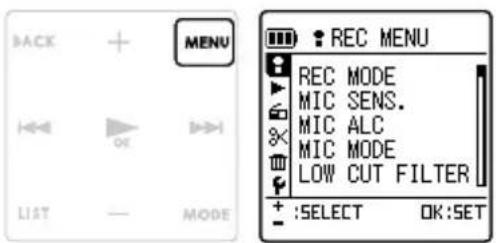
3 Tap +/- to select "ERASE MENU", and then tap OK. "ERASE MENU" appears.
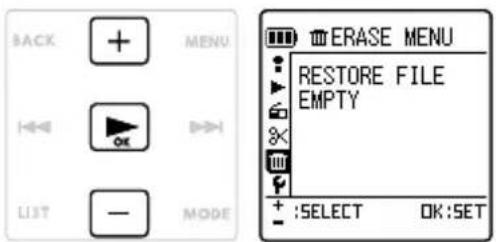
4 Tap +/- to select "RESTORE FILE", and then tap OK.
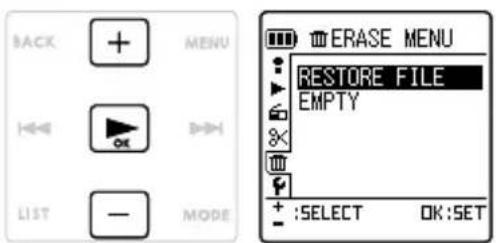
A list of files in the RECYCLE folder appears.
- If there is no file in the RECYCLE folder, menu selection is not possible.
5 Tap +/- to select a file you want to restore, and then tap ▶ OK.
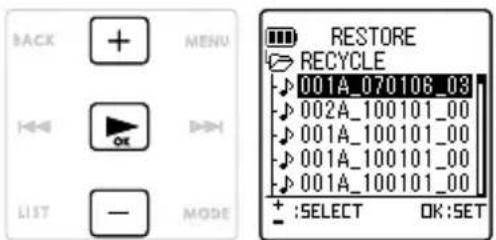

Tap / to select "YES", and then tap

After "RESTORING FILE FROM RECYCLE BIN..." appears, it is followed by "RESTORED TO BOTTOM OF *". (* indicates a folder name.) Tapping it again returns to the list display.
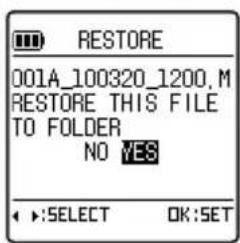
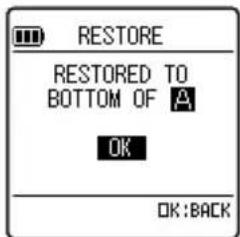
- When a file is recovered from the RECYCLE folder, its file name changes and it is placed at the end of the folder.
- In step 5, if “* FOLDER FULL CAN'T RESTORE” appears, this indicates that the number of files in the original folder has reached its limit. If this happens, erase some files in the folder to make more room. (* indicates a folder name.)
Emptying the RECYCLE folder
When you empty the RECYCLE folder, all files in the RECYCLE folder are completely erased from the microSD card. The files in the RECYCLE folder can no longer be recovered. For this reason, be sure to copy any necessary files to your PC or an external device before emptying the RECYCLE folder.

In step 4 on page 116, select "EMPTY", and then tap ▶ OK.
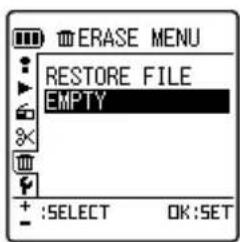
2 Tap ↓ to select "YES", and then tap OK.
"EMPTYING RECYCLE BIN..." appears and the RECYCLE folder is emptied.
You can press the STOP button (☐) to confirm that the RECYCLE folder is empty.
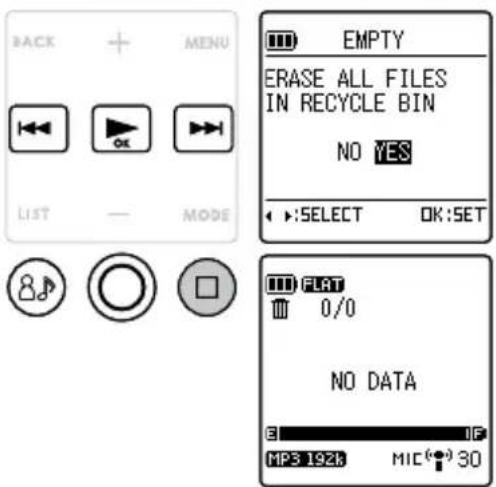
Erasing a file
You can select a file in a folder and then erase it.
- If the recycle bin function is turned off ( page 152), once you erase a file, it can no longer be recovered. Therefore, before erasing a file, always check the content of the file to make sure you really do not need it any more.
- Before this operation, check to make sure there is enough remaining battery power.
- Regardless of whether the recycle bin function is turned on or off, files in the M folder are not moved to the RECYCLE (☐) folder, but are completely erased from the unit.
- A sub folder in the M folder cannot be erased. Connect the unit to your PC and then erase the sub folder from your PC.
1 Turn on the power. Turning on the power (page 36)
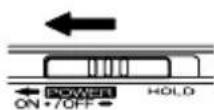
2 Switch to the folder containing the file you want to erase. Switching operation mode/folder (page 31)
3 Tap MENU. The menu appears.
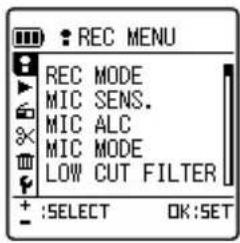
4 Tap +/- to select "ERASE MENU", and then tap ▶. The "ERASE MENU" screen appears.
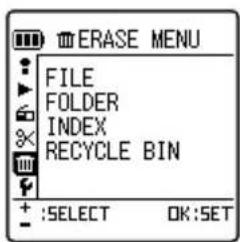
5 Tap +/- to select "FILE", and then tap ▶ A list of files in the selected folder appears.
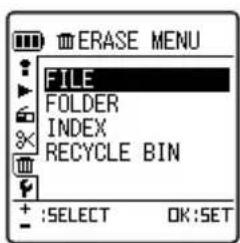
6 Tap +/- to select a file you want to erase, and then tap ▶ OK.
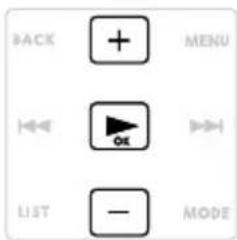
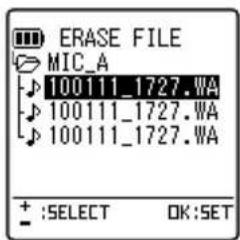
7 Tap ↓ to select "YES", and then tap OK.
- If you want to cancel the operation, select "NO".
- If the recycle bin function is turned on "ERASING" is displayed, and then followed by "FILE WAS MOVED TO RECYCLE BIN". The file is moved to the RECYCLE folder.
Tapping it again returns to the list display.
- The corresponding index file is also moved to the RECYCLE folder.
- If the recycle bin function is turned off or the M folder is used
After "ERASING" appears, the file is erased and the unit returns to the list display.
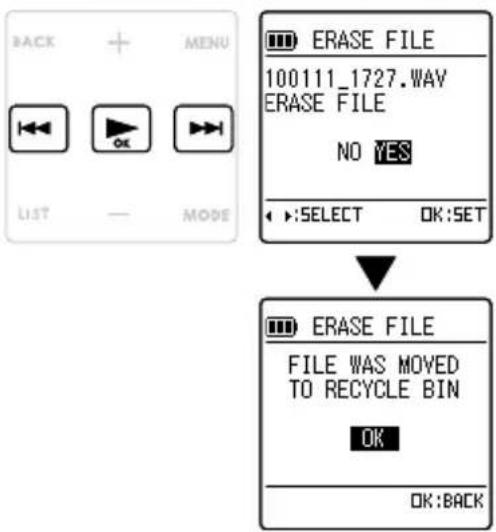
Erasing all files in a folder
You can use the following procedure to erase all files in a folder.
- If the recycle bin function is turned off ( page 152), once you erase a file, it can no longer be recovered. Therefore, before erasing a file, always check the content of the file to make sure you really do not need it any more.
- Before performing this operation, check to make sure there is enough remaining battery power.
- Regardless of whether the recycle bin function is turned on or off, files in the M folder are not moved to the RECYCLE (☐) folder, but are completely erased from the unit.
1 Turn on the power.
Turning on the power (page 36)
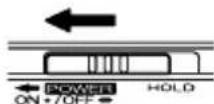
2 Switch to the RECORD mode or MUSIC mode.
Switching operation mode/folder (page 31)
3 Tap MENU. The menu appears.
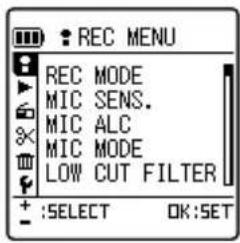
4 Tap +/- to select "MERASE MENU", and then tap OK.
The "ERASE MENU" screen appears.
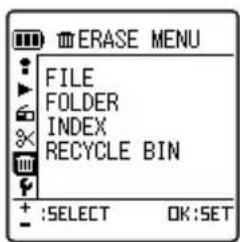
5 Tap +/- to select "FOLDER", and then tap OK.
A list of folders appears.
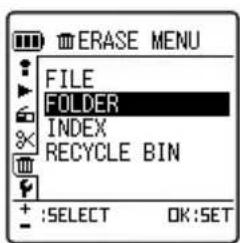
6 Tap +/- to select a folder containing all files you want to erase, and then tap ▶ok.
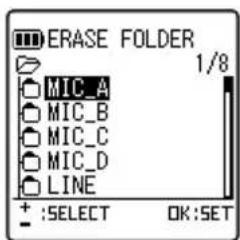
7 Tap ↓ to select "YES", and then tap OK.
- If you want to cancel the operation, select "NO".
- If the recycle bin function is turned on "ERASING" is displayed, and then followed by "FILE WAS MOVED TO RECYCLE BIN". The files are moved to the RECYCLE folder. Tapping it again returns to the list display.
- The corresponding index files are also moved to the RECYCLE folder.
- If the recycle bin function is turned off or the M folder is used
After "ERASING" appears, the files are erased and the unit returns to the list display.
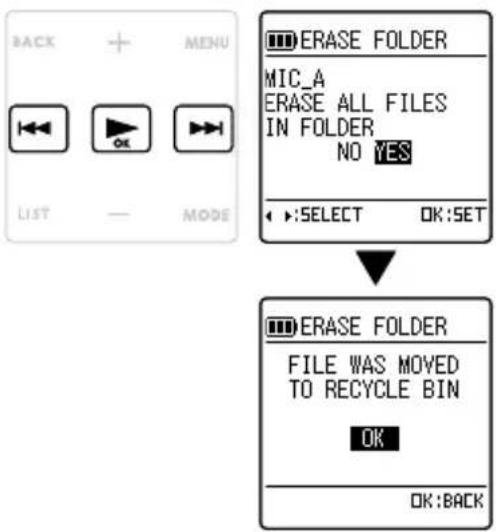
Formatting a microSD card
When you perform formatting, even if the recycle bin function is turned on, all files are completely erased (microSD card initialization). Once a file is erased, it cannot be recovered. Therefore, before formatting, check the contents of recorded files on the microSD card. If necessary, back up any required files to your PC or an external device before erasing all data. (page 174)
- Before performing this operation, check to make sure there is enough remaining battery power.
1 Turn on the power. Turning on the power (page 36)
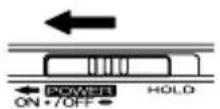
2 Tap MENU. The menu appears.
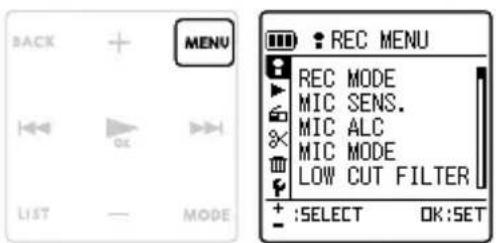
3 Tap +/- to select "COMMON MENU", and then tap ▶ OK.
The "COMMON MENU" screen appears.
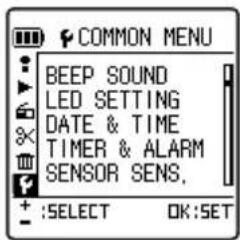
4 Tap +/- to select "FORMAT", and then tap OK.
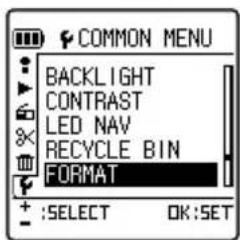
5 Tap ▶ to select "YES", and then tap OK.
"FORMATTING" is displayed, and then followed by "FORMATTING COMPLETE!". All data on the microSD card is erased.
- If you do not want to format the card, select "NO", and then tap OK.
- While formatting is in progress, you cannot cancel the operation.
- While formatting is in progress, do not remove the microSD card or the battery.
- While formatting is in progress, the LED light flashes.
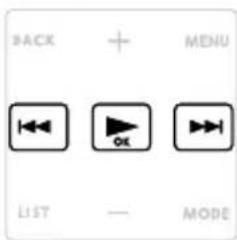
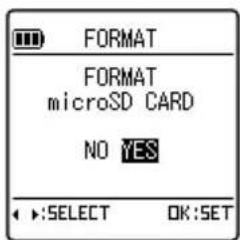
Tap MENU to exit the menu.
About the menus
How to use the menus
From the menu screen, you can change the settings of the unit and also use functions of the unit. This section describes the basics in using the menus.
Example: Changing the recording mode
1 Turn on the power, and then switch to the RECORD mode or MUSIC mode.
Turning on the power (page 36)
Switching operation mode/folder (page 31)
2 Tap MENU. The menu appears.
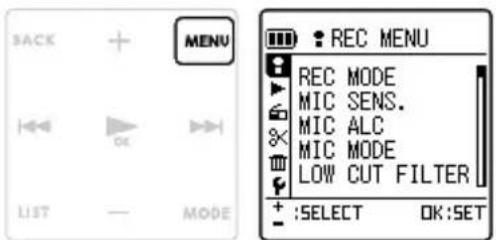
3 Select a menu. Tap +/- to select a menu, and then tap ▶ Here, “■ REC MENU” is selected.
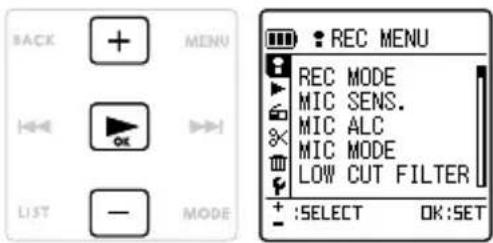
4 Select a setting to change. Tap +/- to select a setting, and then tap ▶ Here, the “REC MODE” setting is selected. The settings available change depending on the menu.
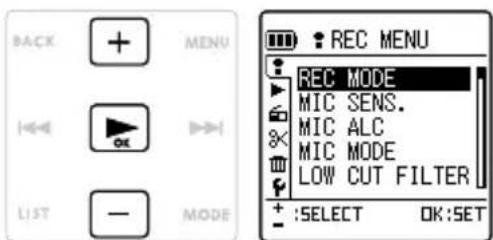

Change the value of the setting.
Tap / or + to select a value, and then tap OK. Here, the value "MP3:192kbps" is selected.
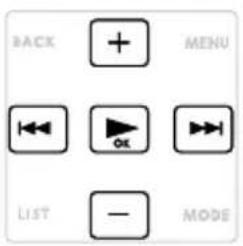
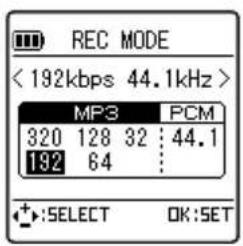

Tap MENU.
The menu operation is finished. The setting has been changed.
Menu list
■ Menus available when the unit stops
When the unit stops, tap MENU from the basic screen.
* Values displayed in bold are default values (when the unit is shipped from the factory)
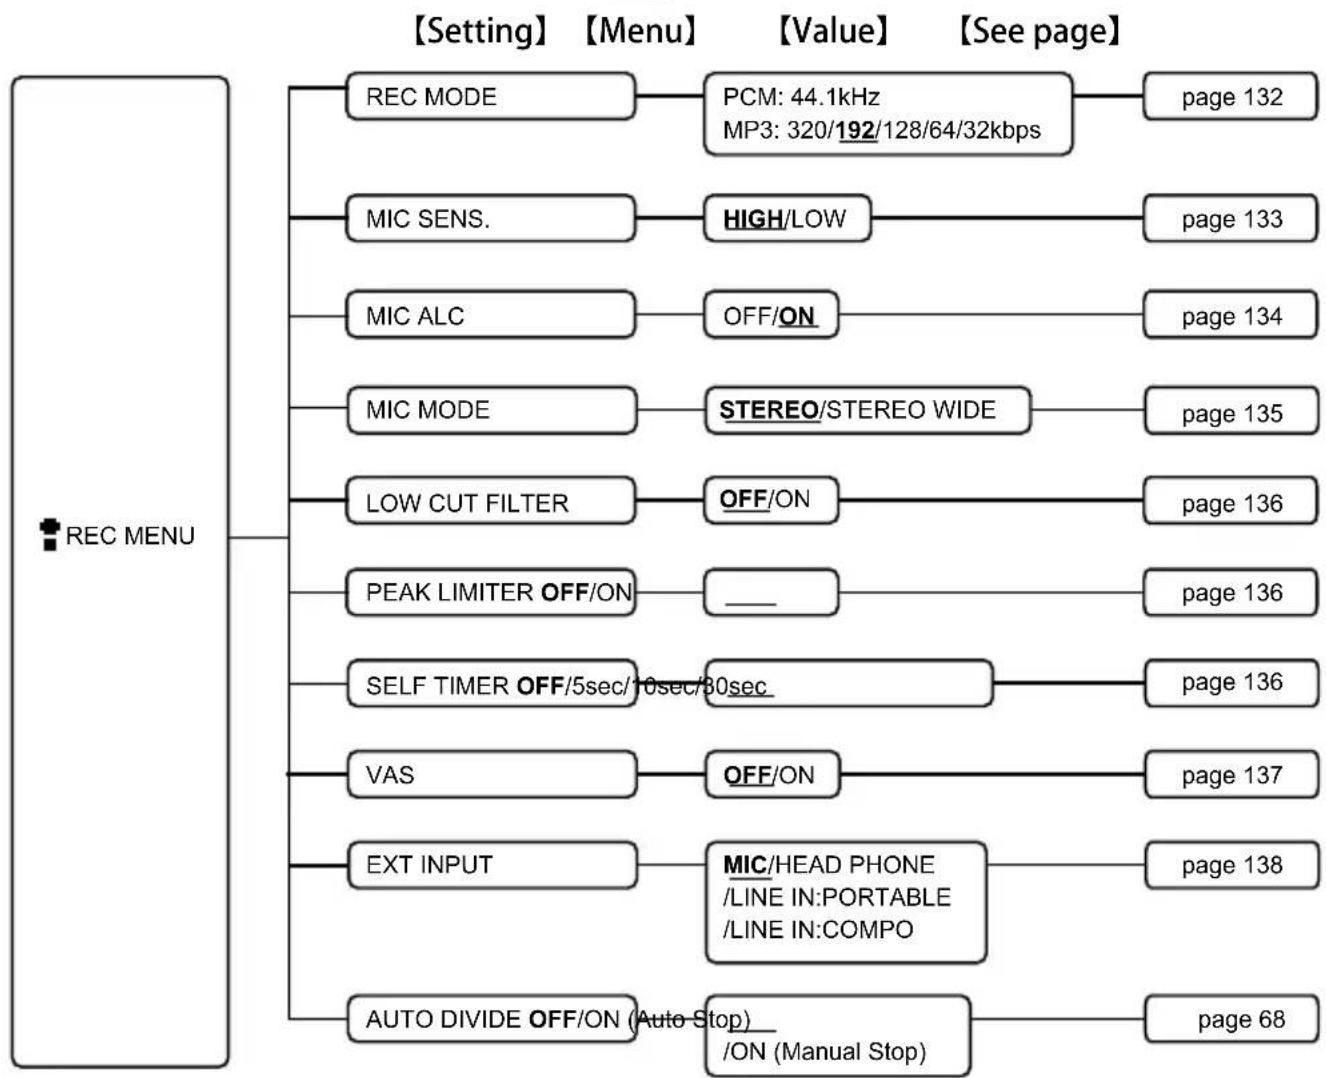
flowchart
graph TD
    A["REC MENU"] --> B["REC MODE"]
    A --> C["MIC SENS."]
    A --> D["MIC ALC"]
    A --> E["MIC MODE"]
    A --> F["LOW CUT FILTER"]
    A --> G["PEAK LIMITER OFF/ON"]
    A --> H["SELF TIMER OFF/5sec/10sec/80sec"]
    A --> I["VAS"]
    A --> J["EXT INPUT"]
    A --> K["AUTO DIVIDE OFF/ON (Auto-Stop)/ON (Manual Stop)"]

    B --> L["PCM: 44.1kHz\nMP3: 320/192/128/64/32kbps"]
    C --> M["HIGH/LOW"]
    D --> N["OFF/ON"]
    E --> O["STEREO/STEREO WIDE"]
    F --> P["OFF/ON"]
    G --> Q["______"]
    H --> R["page 136"]
    I --> S["OFF/ON"]
    J --> T["MIC/HEAD PHONE\n/LINE IN:PORTABLE\n/LINE IN:COMPO"]
    K --> U["page 68"]

    L --> V["section 132"]
    M --> W["section 133"]
    N --> X["section 134"]
    O --> Y["section 135"]
    P --> Z["section 136"]
    Q --> AA["section 136"]
    R --> AB["section 136"]
    S --> AC["section 137"]
    T --> AD["section 138"]
    U --> AE Page 68
* Values displayed in bold are default values (when the unit is shipped from the factory)
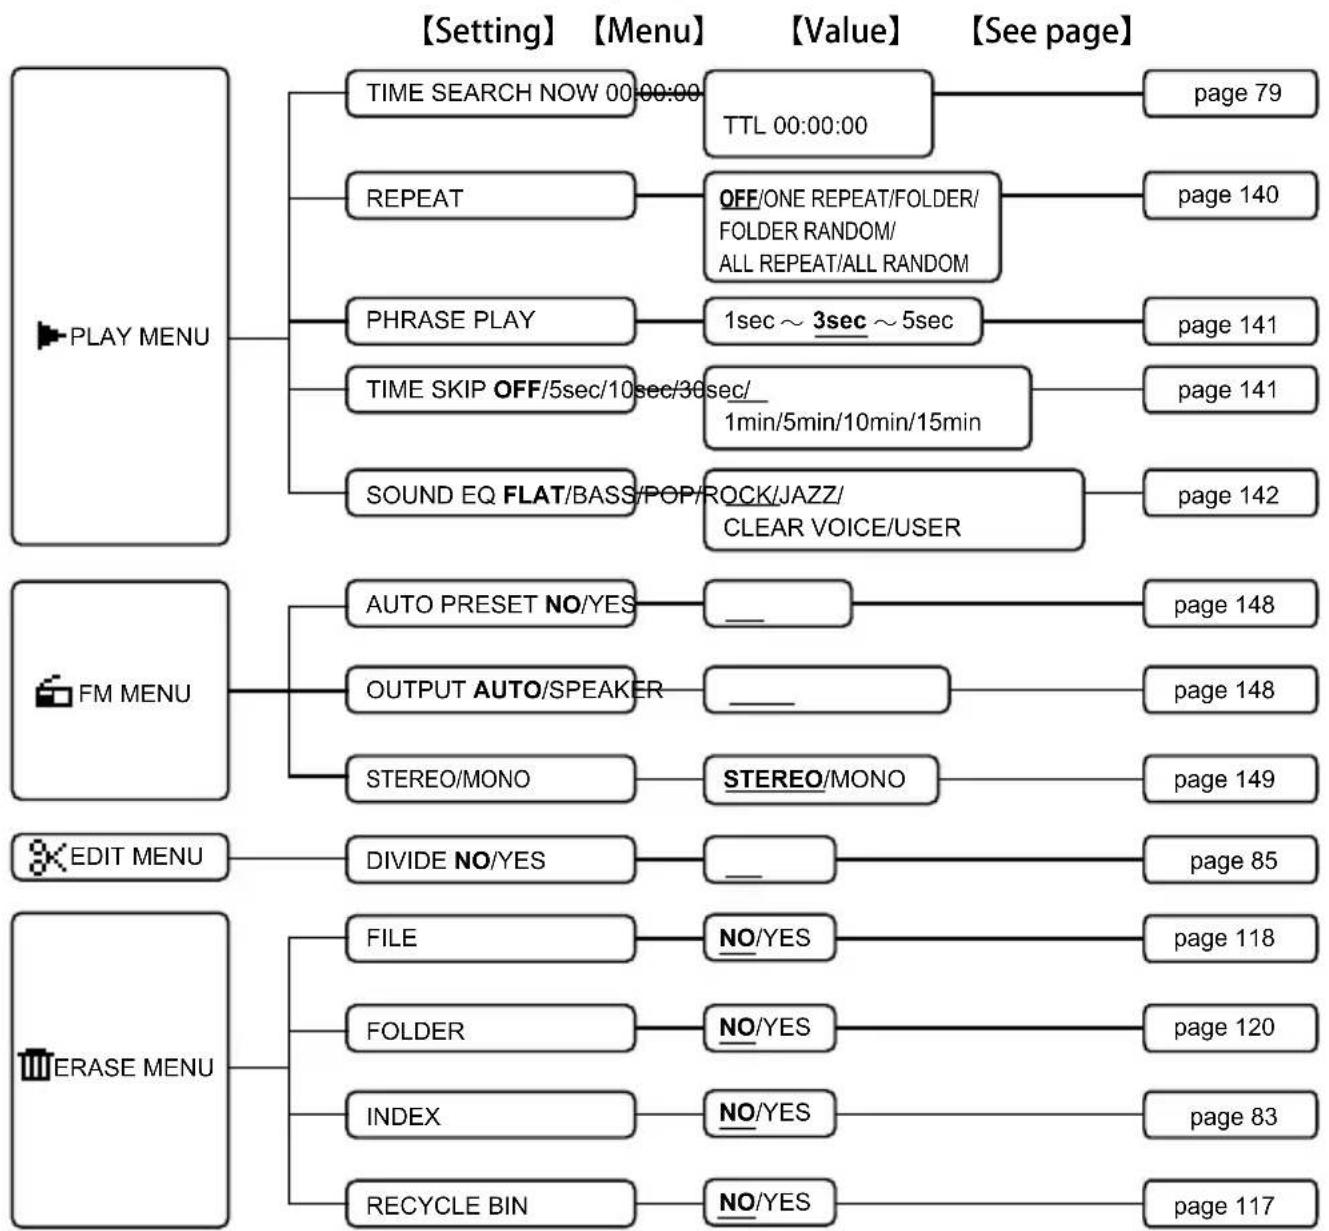
flowchart
graph TD
    A["PLAY MENU"] --> B["TIME SEARCH NOW 00:00:00"]
    A --> C["REPEAT"]
    A --> D["PHRASE PLAY"]
    A --> E["TIME SKIP OFF/5sec/10sec/36sec/1min/5min/10min/15min"]
    A --> F["SOUND EQ FLAT/BASS/POP/ROCK/JAZZ/CLEAR VOICE/USER"]
    B --> G["TTL 00:00:00"]
    C --> H["OFF/ONE REPEAT/FOLDER/FOLDER RANDOM/ALL REPEAT/ALL RANDOM"]
    D --> I["1sec ~ 3sec ~ 5sec"]
    E --> J["1min/5min/10min/15min"]
    F --> K["STEREO/MONO"]
    L["FM MENU"] --> M["AUTO PRESET NO/YES"]
    L --> N["OUTPUT AUTO/SPEAKER"]
    L --> O["STEREO/MONO"]
    M --> P["__"]
    N --> Q["__"]
    O --> R["STEREO/MONO"]
    S["EDIT MENU"] --> T["DIVIDE NO/YES"]
    S --> U["FILE"]
    S --> V["FOLDER"]
    S --> W["INDEX"]
    S --> X["RECYCLE BIN"]
    T --> Y["NO/YES"]
    U --> Z["NO/YES"]
    V --> AA["NO/YES"]
    W --> AB["NO/YES"]
    X --> AC["NO/YES"]
* Values displayed in bold are default values (when the unit is shipped from the factory
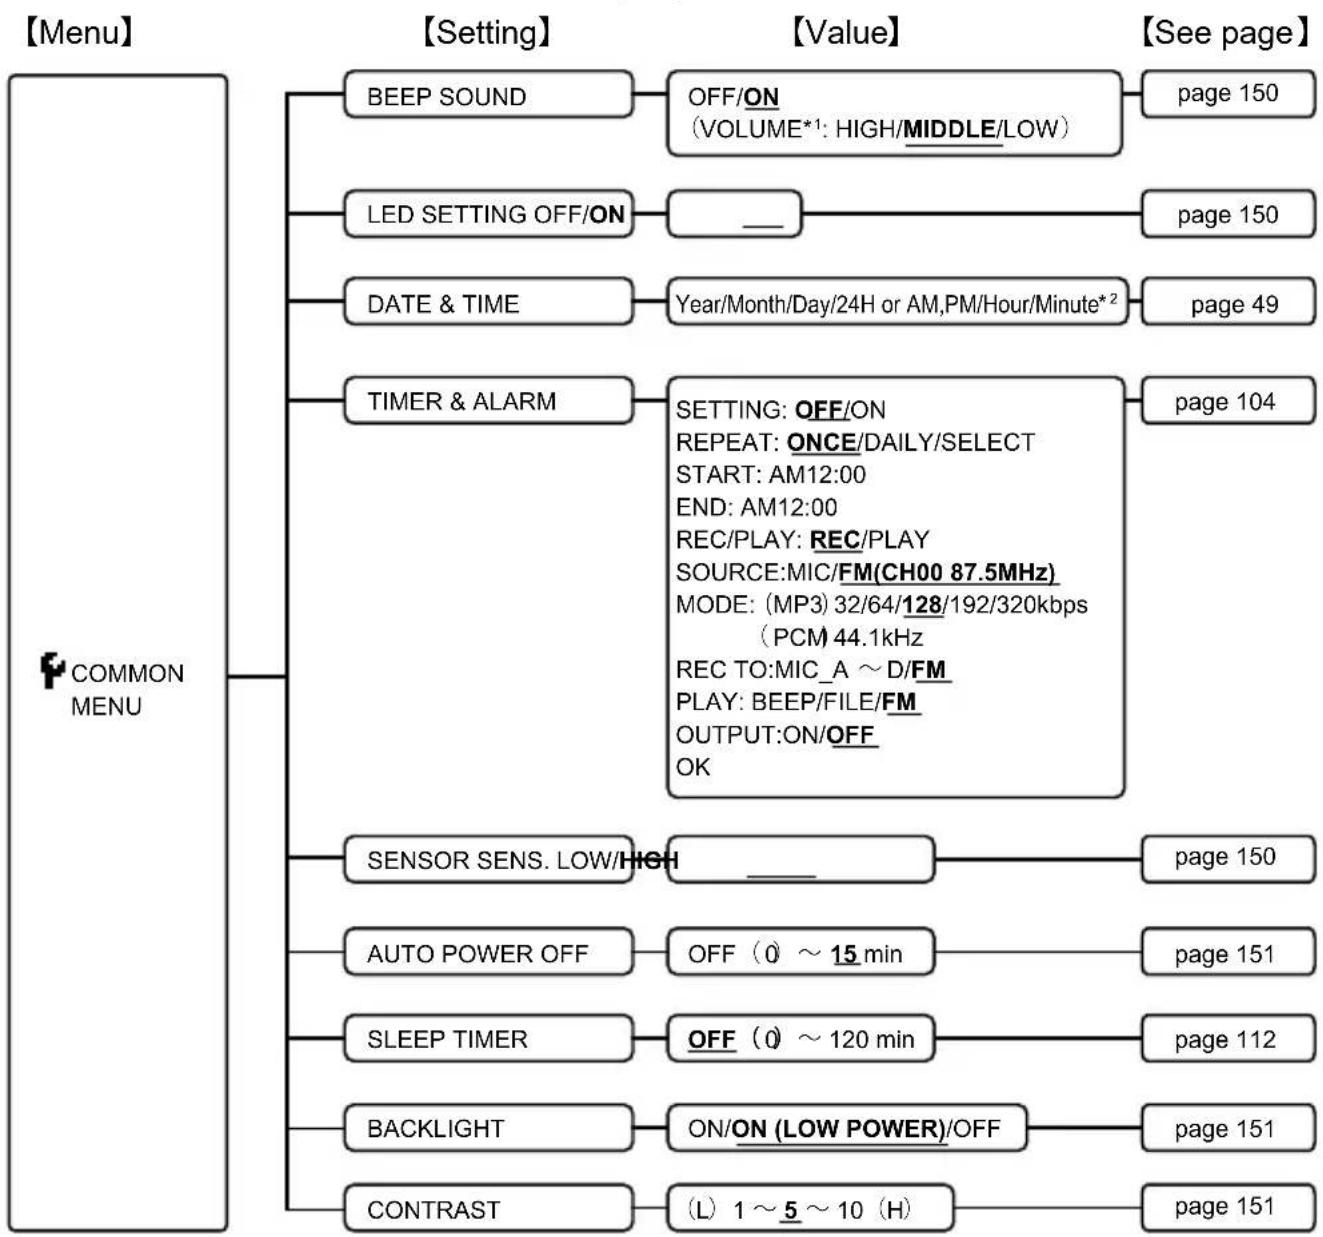
flowchart
graph TD
    A["F COMMON MENU"] --> B["BEEP SOUND"]
    A --> C["LED SETTING OFF/ON"]
    A --> D["DATE & TIME"]
    A --> E["TIMER & ALARM"]
    A --> F["SENSOR SENS. LOW/HIGH"]
    A --> G["AUTO POWER OFF"]
    A --> H["SLEEP TIMER"]
    A --> I["BACKLIGHT"]
    A --> J["CONTRAST"]

    B --> K["OFF/ON (VOLUME*1: HIGH/MIDDLE/LOW)"]
    C --> L["______"]
    D --> M["Year/Month/Day/24H or AM,PM/Hour/Minute*2"]
    E --> N["SETTING: OFF/ON REPEAT: ONCE/DAILY/SELECT START: AM12:00 END: AM12:00 REC/PLAY: REC/PLAY SOURCE:MIC/FM(CH00 87.5MHz) MODE: (MP3) 32/64/128/192/320kbps (PCM) 44.1kHz REC TO:MIC_A ~D/FM PLAY: BEEP/FILE/FM OUTPUT:ON/OFF OK"]

    F --> O["______"]
    G --> P["OFF (0 ~ 15 min)"]
    H --> Q["OFF (0 ~ 120 min)"]
    I --> R["ON/ON (LOW POWER)/OFF"]
    J --> S["(L) 1 ~ 5 ~ 10 (H)"]

    K --> T["page 150"]
    L --> U["page 150"]
    M --> V["page 49"]
    N --> W["page 104"]

    O --> X["page 150"]
    P --> Y["page 151"]
    Q --> Z["page 112"]
    R --> AA["page 151"]
    S --> AB["page 151"]
*1 You can adjust the sound volume only when the "BEEP SOUND" setting is "ON".
*2 When shipped, the unit is set to "2010.FEB.01 24H 00:00".
* Values displayed in bold are default values (when the unit is shipped from the factory)
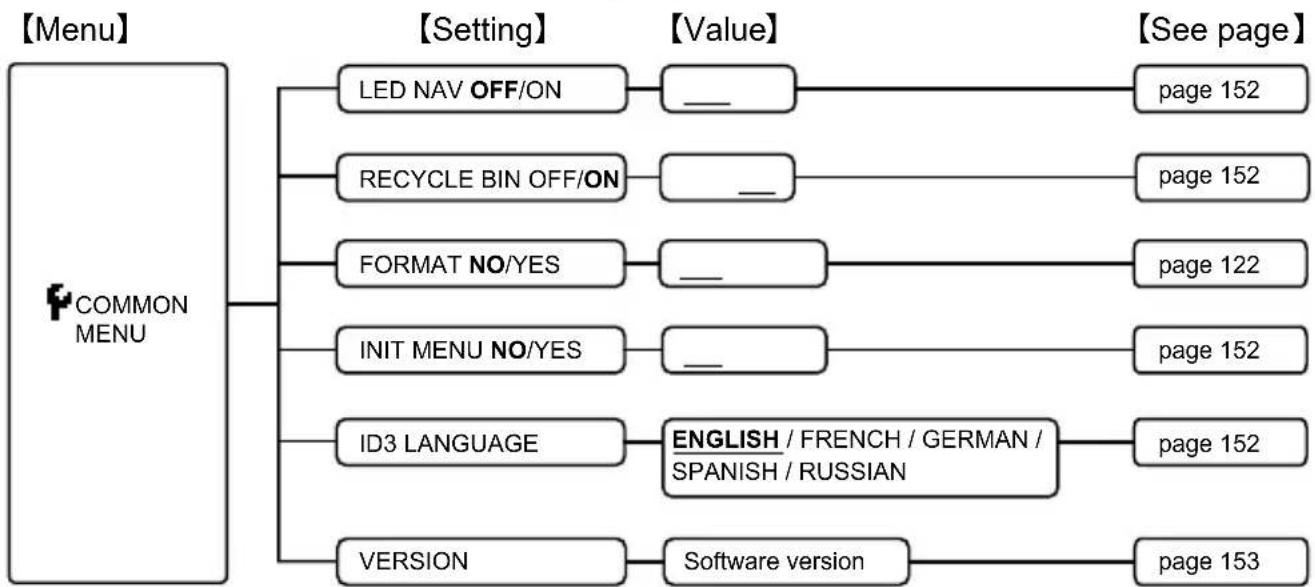
flowchart
graph TD
    A["COMMON MENU"] --> B["Setting"]
    A --> C["Value"]
    A --> D["See page"]

    B --> E["LED NAV OFF/ON"]
    B --> F["RECYCLE BIN OFF/ON"]
    B --> G["FORMAT NO/YES"]
    B --> H["INIT MENU NO/YES"]
    B --> I["ID3 LANGUAGE"]
    B --> J["VERSION"]

    E --> K["__"]
    F --> L["__"]
    G --> M["__"]
    H --> N["__"]
    I --> O["ENGLISH / FRENCH / GERMAN / SPANISH / RUSSIAN"]
    J --> P["Software version"]

    K --> Q["page 152"]
    L --> R["page 152"]
    M --> S["page 122"]
    N --> T["page 152"]
    O --> U["page 152"]
    P --> V["page 152"]
    Q --> W["page 152"]
    R --> X["page 153"]
    S --> Y["page 153"]
■ Playback menu
During playback, tap MENU.
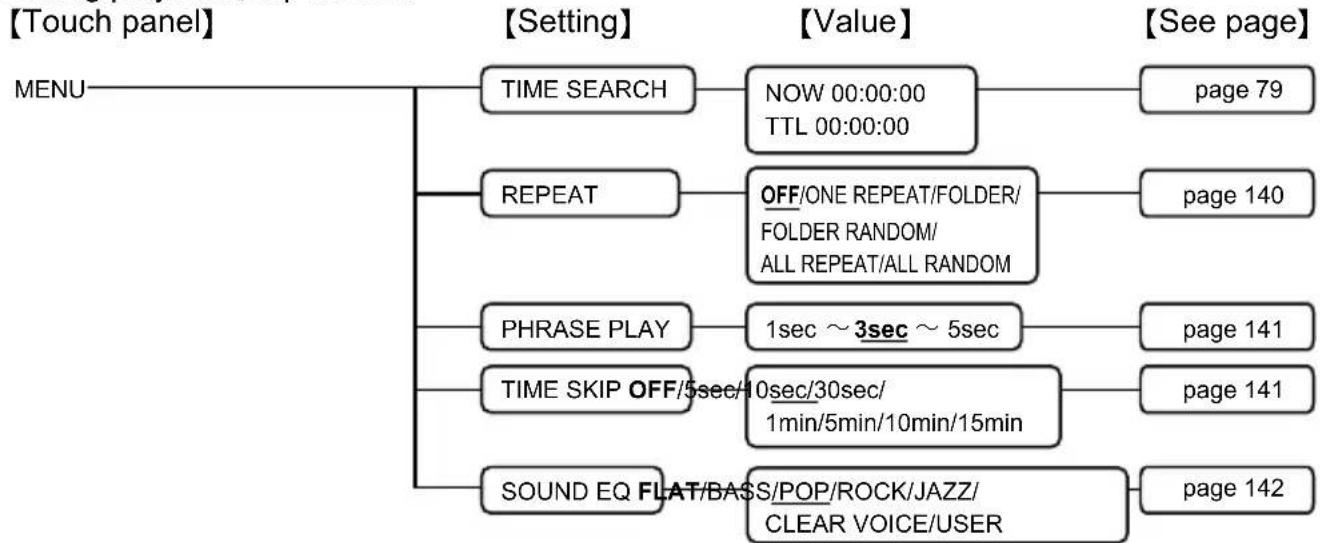
flowchart
graph TD
    A["MENU"] --> B["TIME SEARCH"]
    A --> C["REPEAT"]
    A --> D["PHRASE PLAY"]
    A --> E["TIME SKIP OFF"]
    A --> F["SOUND EQ FLAT/BASS/POP/ROCK/JAZZ/CLEAR VOICE/USER"]
    B --> G["NOW 00:00:00 TTL 00:00:00"]
    C --> H["OFF/ONE REPEAT/FOLDER/FOLDER RANDOM/ALL REPEAT/ALL RANDOM"]
    D --> I["1sec ~3sec ~5sec"]
    E --> J["10sec/30sec/1min/5min/10min/15min"]
    F --> K["Page 79"]
    F --> L["Page 140"]
    F --> M["Page 141"]
    F --> N["Page 141"]
    F --> O["Page 142"]
■ RECYCLE folder menu
While in the RECYCLE folder, select the "ERASE" menu.

flowchart
graph LR
    A["MENU"] --> B["RESTORE FILE"]
    A --> C["EMPTY"]
    B --> D["NO/YES"]
    C --> E["NO/YES"]
    D --> F["page 116"]
    E --> G["page 117"]
■ Playlist editing menu
During list display within the playlist (MYLIST), tap MENU.

flowchart
graph LR
    A["MENU"] --> B["CHANGE ORDER"]
    A --> C["ERASE NO/YES"]
    A --> D["ERASE ALL NO/YES"]
    B --> E["Page 89"]
    C --> F["Page 90"]
    D --> G["Page 91"]
    B --> H["Value"]
    C --> I["Value"]
    D --> J["Value"]
■ "EDIT PRESET" menu
In the FM RADIO mode, tap LIST.
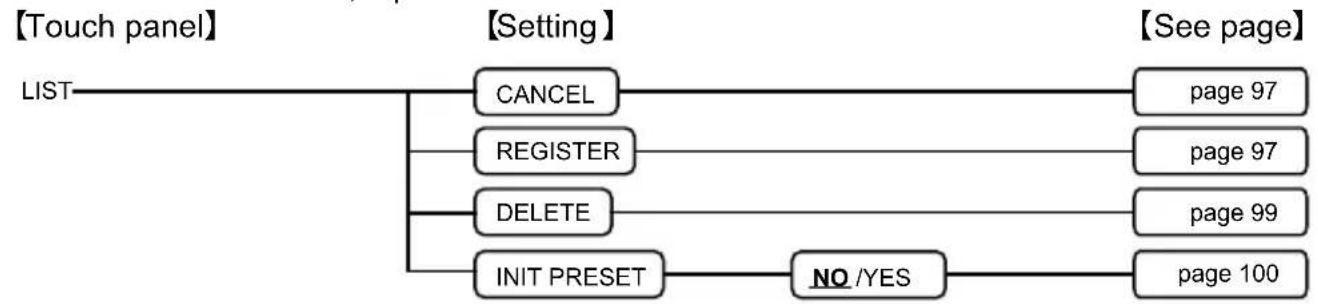
flowchart
graph TD
    A["LIST"] --> B["CANCEL"]
    A --> C["REGISTER"]
    A --> D["DELETE"]
    A --> E["INIT PRESET"]
    B --> F["page 97"]
    C --> G["page 97"]
    D --> H["page 99"]
    E --> I["page 100"]
    B --> J["NO/YES"]
    C --> J
    D --> J
    E --> J
■ Recording scene editing menu
From the recording scene select screen, tap MENU.
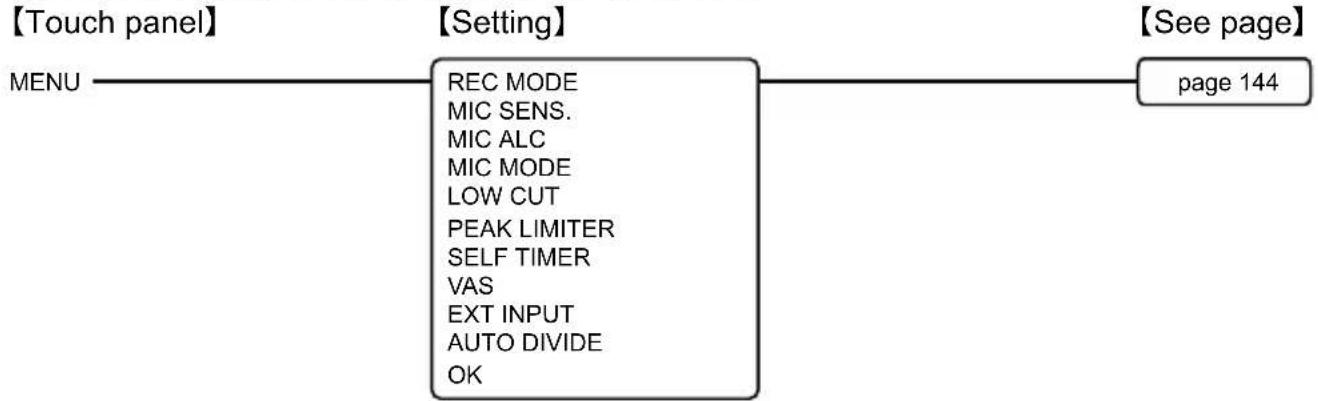
flowchart
graph LR
    A["MENU"] --> B["Setting"]
    B --> C["See page"]
    B --> D["REC MODE\nMIC SENS.\nMIC ALC\nMIC MODE\nLOW CUT\nPEAK LIMITER\nSELF TIMER\nVAS\nEXT INPUT\nAUTO DIVIDE\nOK"]
    B --> E["page 144"]
■ Recording standby menu
During recording standby, tap MENU.
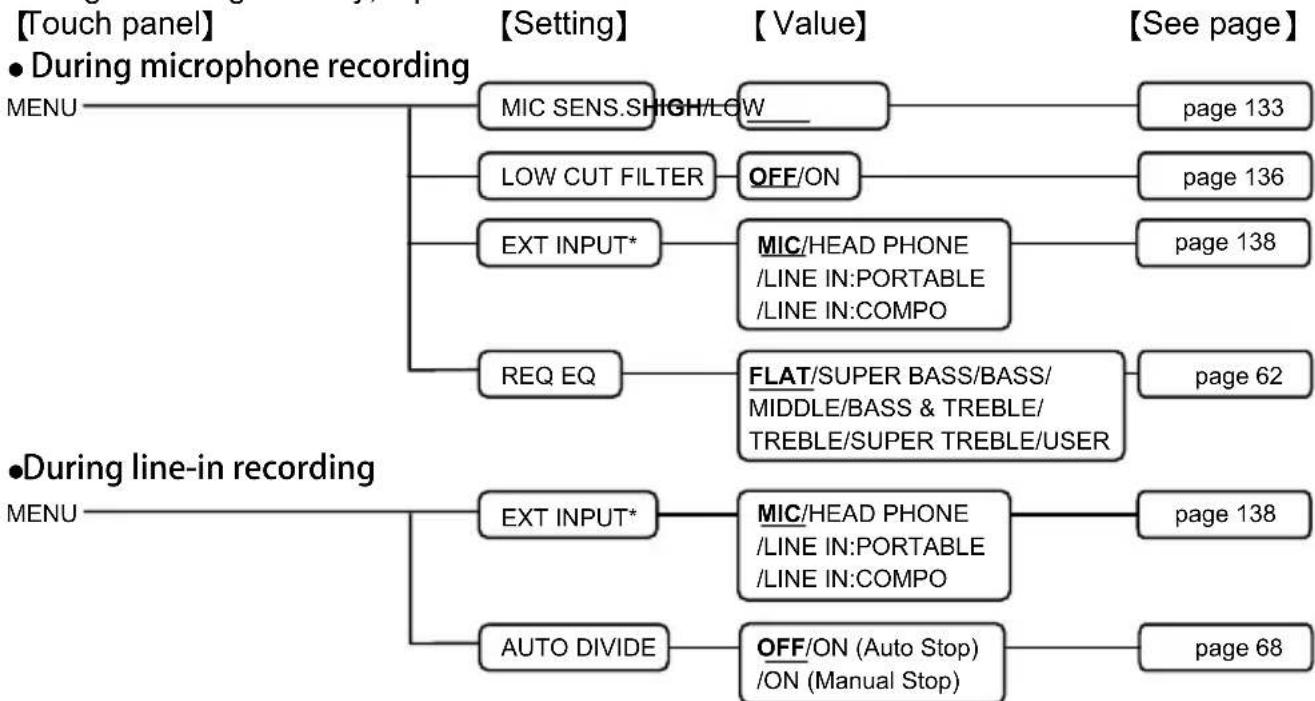
flowchart
graph TD
    A["【Touch panel】<br>• During microphone recording"] --> B["MENU"]
    B --> C["MIC SENS.SH HIGH/LOW"]
    C --> D["OFF/ON"]
    D --> E["page 133"]
    B --> F["LOW CUT FILTER"]
    F --> G["OFF/ON"]
    G --> H["page 136"]
    B --> I["EXT INPUT*"]
    I --> J["MIC/HEAD PHONE /LINE IN:PORTABLE /LINE IN:COMPO"]
    J --> K["page 138"]
    B --> L["REQ EQ"]
    L --> M["FLAT/SUPER BASS/BASS/MIDDLE/BASS & TREBLE/TREBLE/SUPER TREBLE/USER"]
    M --> N["page 62"]
    O["●During line-in recording"] --> P["MENU"]
    P --> Q["EXT INPUT*"]
    Q --> R["MIC/HEAD PHONE /LINE IN:PORTABLE /LINE IN:COMPO"]
    R --> S["page 138"]
    P --> T["AUTO DIVIDE"]
    T --> U["OFF/ON (Auto Stop) /ON (Manual Stop)"]
    U --> V["page 68"]
*During recording standby, if you use the "EXT INPUT" setting to change to "MIC" or "LINE" (HEAD PHONE/LINE IN:PORTABLE/LINE IN:COMPO), you must press the STOP button to remove recording standby; otherwise, the setting will not be active.
Using the recording menu ( ^* REC MENU)
REC MODE
You can change the sound quality for microphone recording or line-in recording. This allows you to provide the best sound quality for the particular purpose.
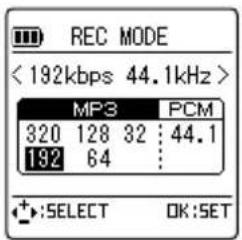
| PCM 44.1kHz | High quality recording ↓ | |
| MP3 | 320kbps | |
| 192kbps | ||
| 128kbps | Standard sound quality | |
| 64kbps | ↑Long recording | |
| 32kbps |
- PCM uses non-compression in recording of all audio data while MP3 uses compression in recording. If you increase the sound quality, this will also increase the data size, thus reducing the possible recording time. Therefore, consider whether sound quality or possible recording time should take priority, and then select the appropriate recording mode.
Recording mode and possible recording time (page 176)
- The selected recording mode appears on the screen.
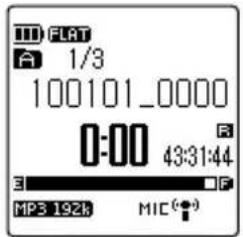
MIC SENS.
You can change the microphone sensitivity according to the recording situation. Change the microphone sensitivity if you find recorded sound too small or too large.
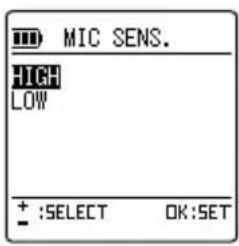
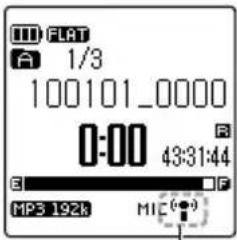
Microphone sensitivity
HIGH: Select this value if recorded sound is too small.
LOW: Select this value if recorded sound is too large.
- When the "MIC SENS." setting changes, its icon on the screen also changes.
| MIC SENS. $TEREO | STEREO WIDE | |
| HIGH | (●) | (●) |
| LOW | (●) | (●) |
- The "MIC SENS." setting is valid only during microphone recording.
MIC ALC
When recording meetings and talks, turn on the "MIC ALC" setting. When recording musical instruments or sound from the nature where you want to manually adjust the recording level, turn off this setting.
| “MIC ALC” setting ON OFF | ||
| Feature | A uniform recording level is maintained during recording by making loud sounds quieter and quiet sounds louder. Files recorded using this function can be played at a volume that is easy on the ears, without cracking sound or distortion. | Sound is recorded as it is without any change. Therefore, faithful recording of the sound source is obtained. |
| Main use | When recording meetings, business discussions, lectures, and interviews | When recording musical instruments, etc. |
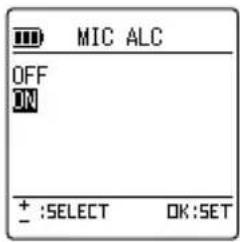
OFF: Turn off ALC.
ON: Turn on ALC
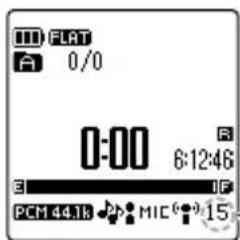
Recording level not displayed
MIC ALC is ON: ⚙️ MIC ALC is OFF: ⚡️ 15
Recording level displayed — Recording level indicator
- When the "MIC ALC" setting is "OFF", the current recording level appears on the right side of the microphone sensitivity icon. (When the "MIC ALC" setting is "ON", nothing appears.)
- The "MIC ALC" setting is valid only during microphone recording.
- If you record when the "MIC ALC" setting is "OFF", the recording standby screen appears and you can then manually adjust the recording level.
How to adjust recording level (page 59)
- If you change the "MIC ALC" setting to "OFF", while in the recording standby state, you can set "MIC SENS.", "LOW CUT FILTER", "EXT INPUT", and "REC EQ".
MIC MODE
The unit comes with a built-in omnidirectional stereo microphone. You can change the microphone mode to suit the recording scene.
| STEREO STEREO WIDE | ||||
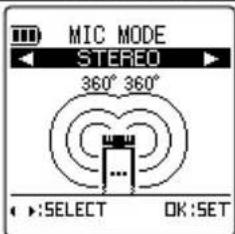 | 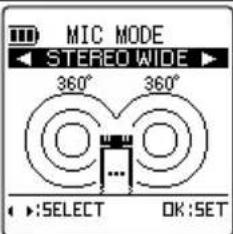 | |||
| Microphone type | Omnidirectional microphone | Omnidirectional microphone | ||
| Stereo wide function | OFF ON | |||
| Feature Enable well-b | balanced recording by picking up sound from all directions | Enable recording with strong emphasis on the stereo aspect | ||
| Usage | • Dictations• Small meetings | • Talks, interviews | ||
- When you change the microphone mode, its icon on the screen also changes.
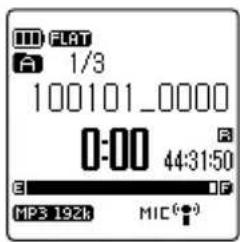
(●): STEREO
(●): STEREO WIDE
LOW CUT FILTER
The low cut filter reduces low frequency sound to enable you to obtain clear recording. This is helpful when you want to filter out unwanted sound, such as air conditioning, when recording a meeting.
Low cut filter indicator
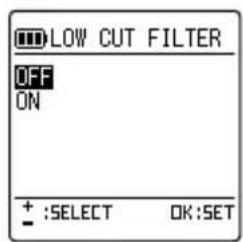
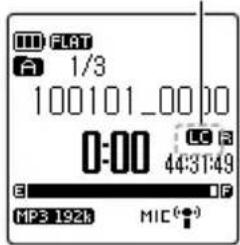
OFF: Do not use low cut filter.
ON: Use low cut filter.
- When you turn on the "LOW CUT FILTER" setting, its icon appears on the screen.
PEAK LIMITER
This setting automatically adjusts for any sudden, excessive input. This allows you to suppress any sound distortion while recording.
- This setting is valid only when the "MIC ALC" setting is "OFF".
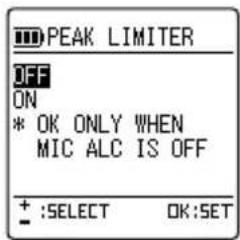
OFF: Do not use recording peak limiter.
ON: Use recording peak limiter.
SELF TIMER
During microphone recording, you can specify when recording will begin after you press the REC button (○). This function is very useful where you need time for preparation before recording should start – for example in musical instrument practice.
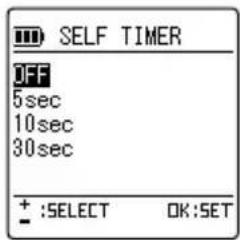
OFF: Do not use the self timer function.
5sec: Recording starts 5 seconds after you press the REC button (O).
10sec: Recording starts 10 seconds after you press the REC button (O).
30sec: Recording starts 30 seconds after you press the REC button (O).
- When you press the REC button (O), the self timer standby screen appears and
countdown begins. If the LED setting is "ON", the LED light flashes.
- If the recording scene select setting is MUSIC or ALC is "OFF", the recording standby mode becomes active. After adjusting the recording level (page 59), press the REC button (O) again. From the self timer standby screen, countdown for the specified time starts. When the specified time elapses, recording starts.
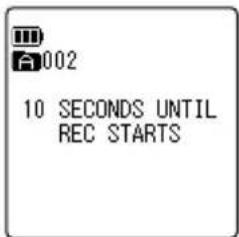
- Once you use self timer recording, the self timer value is saved until you change the "SELF TIMER" setting to "OFF" or initialize the menu settings.
INIT MENU (page 152)
- During countdown, you can press the STOP button (☐) to cancel self timer recording. After it is canceled, you can re-start countdown by pressing the REC button (○) again.
VAS
If the “VAS” (Voice Activated System) setting is “ON” and the unit is ready for recording, recording starts automatically when the unit detects sound. When the sound drops below a certain level, recording automatically pauses (recording standby).
- VAS recording is not possible when the "MIC ALC" setting is "OFF".
- If the “VAS” setting is “ON”, the auto power off function does not operate even when the unit pauses during recording (recording standby). However, if you press the REC button (O) (to pause) during VAS recording, this is same as the pause state in normal recording. (If the “AUTO POWER OFF” setting is “ON”, the power turns off after the specified time elapses.)
- You cannot change the "VAS" setting during line-in recording.
- Because small sound may not be recorded, turn off the VAS function for important recording.
- If the "LOW CUT FILTER" setting is "ON", low frequency sound may be cut out and recording may not activate. In this case, change the "LOW CUT FILTER" setting to "OFF".
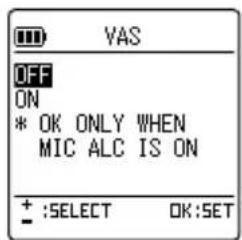
OFF:
Turn off VAS.
ON:
Turn on VAS.
- When you turn on the "VAS" setting, its icon appears on the screen.
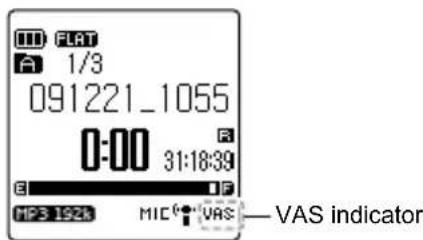
- After you press the REC button ( ○), the unit starts recording automatically when it detects sound. If it cannot detect sound, it pauses (recording standby); the elapsed time and the VAS indicator flash, and the unit pauses.
- Pressing the STOP button ( □) stops recording.
■ Adjusting the sound detection level
If the "VAS" setting is "ON", you can tap / during recording to adjust the sound detection level.
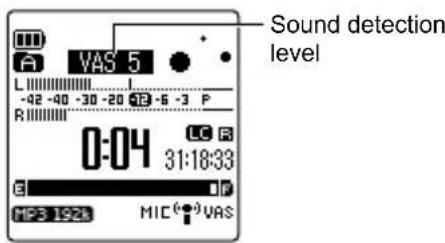
- You can adjust the sound detection level from 1 to 5. (When shipped, the unit is set to 3 in its sound detection level.)
- If the level is set to a larger number, small sound can be detected and so recording starts. In a place with a lot of noises, recording may not pause.
EXT INPUT
You can change the input level setting for an external device connected to the external input (line)/microphone socket.
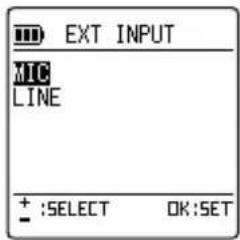
MIC: Connect to an external microphone. LINE: Connect to an external device.
If "LINE" is selected, depending on the device to connect, you can change the setting.
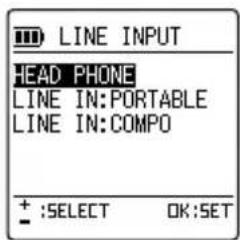
HEAD PHONE:
Connect to the headphones socket, etc of an external device.
LINE IN:PORTABLE:
Connect to the line-out terminal of a portable device
LINE IN:COMPO ^*1 :
Connect to the line-out terminal of a CD combo, AV amplifier, etc.
\*1 Component Stereo System
Using the playback menu (PLAY MENU)
REPEAT
You can play files repeatedly (repeat playback). This means you can just play a file repeatedly, or repeat playing files in a folder either in sequence or randomly.
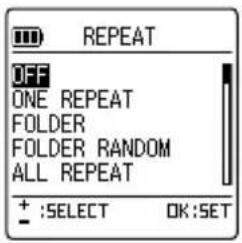
OFF:
Turn off playback repeat.
ONE REPEAT:
Repeat playback of the selected file.
FOLDER:
Repeat all files in the folder. (Playback across folders is not possible.)
FOLDER RANDOM:
Repeat all files in the folder randomly.
(Playback across folders is not possible.)
ALL REPEAT:
Repeat all files in the MUSIC folder.
ALL RANDOM:
Repeat all files in all folders within the MUSIC folder randomly.
- When you set the repeat mode, its icon appears on the screen.
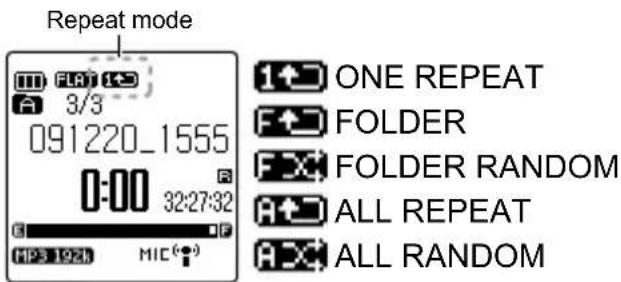
When you play files, playback will follow the repeat mode in determining how to play the files.
- To stop repeat playback, change the "REPEAT" setting to "OFF".
- The maximum number of songs that can be recognized by ALL REPEAT and ALL RANDOM is 3,000.
PHRASE PLAY
This function allows you to rewind during playback by the specified number of seconds only. This is useful when you are listening to short phrases of music or you just missed an important part in the audio file.
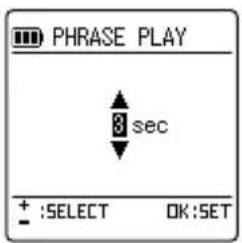
You can specify phrase playback time from 1 to 5 seconds, in 1-second intervals.

Performing phrase playback (page 77)
TIME SKIP
During playback, you can skip forward or backward by the time interval you have specified. This allows you to quickly move to a position for playback, or repeat playback of the short phrase in a file.
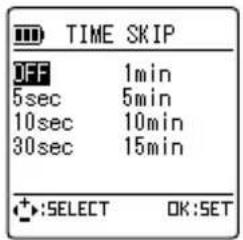
The skip interval can be OFF, 5 seconds, 10 seconds, 30 seconds, 1 minute, 5 minutes, 10 minutes, or 15 minutes.
If "OFF" is selected, the time skip function is turned off.

To skip forward or backward by specified time interval (page 73)
SOUND EQ
By setting the sound equalizer, you can enjoy music using your favorite sound quality.
- The sound equalizer function is valid only during playback using stereo earphones.
■ Selecting a sound equalizer mode
The unit comes with six preset sound equalizer modes: FLAT, BASS, POP, ROCK, JAZZ, and CLEAR VOICE, plus a USER mode that you can use to set up a 5-band sound level. The six preset sound equalizer modes have the following features.
| FLAT BAS | S POP ROCK | JAZZ | CLEAR VOICE | ||
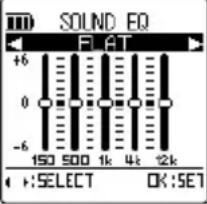 | 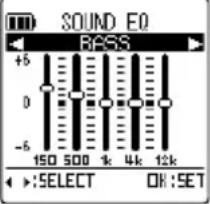 | 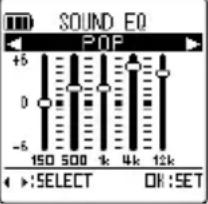 | 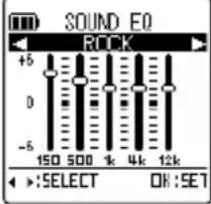 | 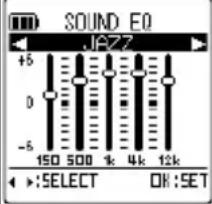 | 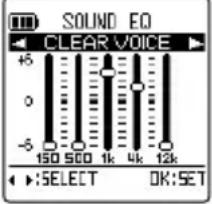 |
| The sound equalizer function is not used. You hear the original sound without any change. | Emphasize the bass range. | Emphasize the treble range strongly. | Emphasize the bass and treble ranges slightly. | Emphasize the middle range. | Reduce noise to make the sound easy to listen. |
- When the unit is shipped, USER is same as FLAT.
- The six preset sound equalizer modes cannot be modified (adjusted).
- If you want to fine tune a sound equalizer mode, select USER and then customize it instead.
Setting your favorite sound EQ mode (only when USER is selected) (page 143)
- The selected sound equalizer mode appears on the screen.
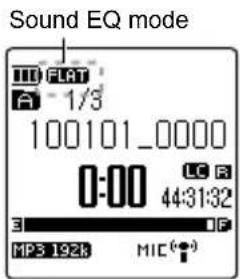
■ Setting your favorite sound EQ mode (only when USER is selected)
When you select USER as the sound EQ mode, you can customize this mode by changing each of the five bands of the sound EQ mode.
1 Change the "SOUND EQ" mode to "USER".
2 Tap –. The 150Hz frequency band is highlighted and selected.
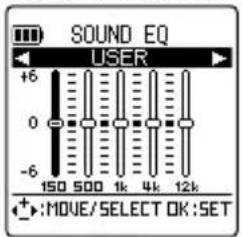
3 Tap /to select a frequency band you want to change.
The selected frequency band is highlighted.
- The following frequency bands are available: 150Hz, 500Hz, 1kHz, 4kHz, and 12kHz.
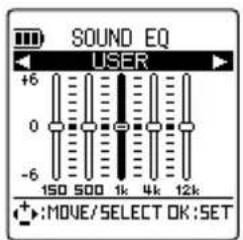
4 Tap +/- to change the level of the selected frequency band.
You can change the level from -6dB to 6dB (13 increments), with each increment being 1dB. The larger the dB number, the stronger it becomes.
• Tapping + increases the level.
• Tapping - decreases the level.
• To modify another frequency band, repeat steps 3 and 4.
- While making changes, if you want to cancel the operation, press the STOP button (☐). The screen in step 1 returns.
5 Tap OK
Tap MENU to exit the menu.
Changing the recording scene select setting
The unit provides preset recording scenes that you can edit to your liking. The following table lists the recording scenes as well as the settings you can change.
| Preset recording scene | Settings for microphone recording Settings for line-in recording | |||||
| INTERVIEW | MEETING/LECTURE | MUSIC | HEADPHONE | PORTABLE | COMPO | |
| REC MODE MP3: 64kbps MP3:192kbps PCM:44.1kHz MP3:192kbps MP3:192kbps MP3:192kbps | ||||||
| MIC SENS. LOW HIGH HIGH HIGH HIGH | ||||||
| MIC ALC ON ON OFF ON ON ON | ||||||
| MIC MODE STEREO STEREO STEREO STEREO STEREO | ||||||
| LOW CUT FILTER | ON ON OFF | OFF | OFF | OFF | OFF | |
| PEAK LIMITER | OFF | OFF | OFF | OFF | OFF | OFF |
| SELF TIMER | OFF | OFF | OFF | OFF | OFF | OFF |
| VAS | OFF | OFF | OFF | OFF | OFF | OFF |
| EXT INPUT | MIC | MIC | MIC | HP: HEADPHONE | PO: PORTABLE | CO: COMPO |
| AUTO DIVIDE | OFF | OFF | OFF | OFF | OFF | OFF |
Customizing a recording scene
You can customize the preset recording scenes. Changes made to a scene are saved.
1 Turn on the power, and then switch to the RECORD mode or MUSIC mode.
Turning on the power (page 36)
Switching operation mode/folder (page 31)
Press the SCENE button ( )
The current recording scene appears.
3 Tap 4 to select a recording scene you want to customize.
• Here, "INTERVIEW" is selected.
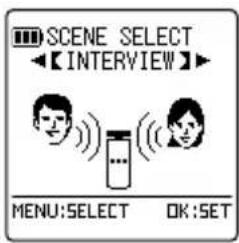
Tap MENU.
The recording scene setting screen appears.
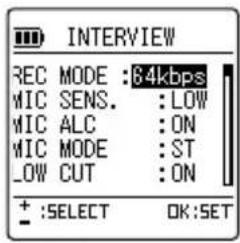
5 Tap +/- to select a setting to change.
- Here, the "REC MODE" setting is selected.
Tap OK
The setting screen for the selected setting appears.
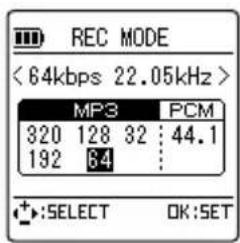

Change the value of the selected setting.
The method is different depending on what is selected in step 5. For a description of the methods, see the pages indicated below.
REC MODE (page 132)
MIC SENS. (page 133)
MIC ALC (page 134)
MIC MODE (page 135)
LOW CUT FILTER (page 136)
PEAK LIMITER (page 136)
SELF TIMER (page 136)
VAS (page 137)
EXT INPUT(page 138)
AUTO DIVIDE (page 68)
To continue and change another setting, repeat steps 5 to 7.

Tap +/- to select "OK", and then tap ▶ OK.
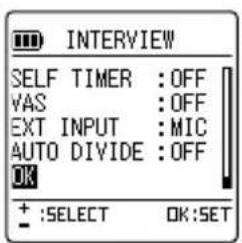
The recording scene is updated with the change, and the unit returns to the recording scene select screen.
- Be sure to always select "OK" and then tap OK; otherwise, the changes are not updated.
- If you do not register any setting but press the STOP button (☐) during the operation, "REGISTER SETTING?" appears. Tap ◀◀/▶◀ to select "NO" or "YES".
YES: Register the changes. NO: Do not register the changes.
Press the SCENE/GUIDE button ( musical note) to return to the basic screen.
Restoring a recording scene to its default
You can use the following procedure to restore (initialize) a recording scene to its default.
1 Turn on the power, and then switch to the RECORD mode or MUSIC mode.
Turning on the power (page 36) Switching operation mode/ folder (page 31)
2 Press and hold the SCENE button (💡) for more than 2 seconds.
The "INITIALIZE" screen appears.
3 Tap or to select a recording scene you want to restore, and then tap OK.
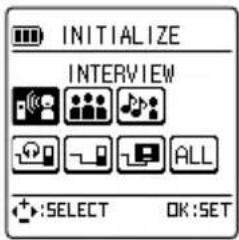
- If you want to restore all recording scenes to their defaults, select "ALL".
4 Tap ↙ to select "YES", and then tap ▶ OK.
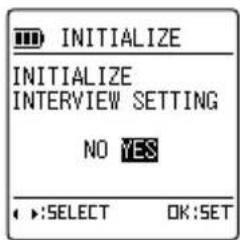
The selected recording scene is restored (initialized) to its default, and the unit returns to the basic screen.
Using the FM radio menu (©FM setting)
AUTO PRESET
With this function, stations with strong signals that you can now hear on the unit are received and then preset.
- By using the auto preset function, you can tap ◀◀/▶to select a preset station.
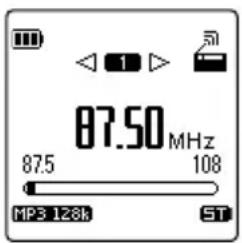
NO: Cancel auto preset.
YES: Use auto preset.
If you selected "YES", "AUTO PRESET.." appears and stations are automatically selected, starting from frequencies in the lower limit. Received stations are automatically preset.
- Auto preset ends when either 20 stations which can be received are registered, or when the frequency upper limit is reached. Then, broadcast from the station registered to channel 1 is received.
- If the signal is weak or the reception state is bad, auto preset may not be possible.
- If there is interference signal nearby, the interference signal may be received and preset. This is not a malfunction.
OUTPUT
During FM radio reception, you can output the broadcast to the speakers even when your headphones are plugged into the unit. Because your headphones also act as an antenna during FM radio reception, they must be plugged into the headphones socket of the unit. Usually, when you connect the headphones to the unit, audio is output only to the headphones. However, if the setting is changed to "SPEAKER", even when your headphones are connected to the unit, you can still hear the broadcast from the speakers.
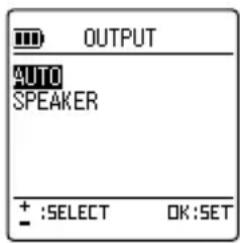
AUTO:
Broadcast is not output to the speakers when your headphones are connected to the unit.
SPEAKER:
Broadcast is also output to the speakers even when your headphones are connected to the unit.
- "SPEAKER" is only valid during FM radio reception. During file playback, if your headphones are connected to the unit, no sound is output to the speakers.
STEREO/MONO
When receiving FM radio, depending on the reception state, noise may make it difficult to listen to the radio. If this happens, change the setting to mono and you may find it easier to listen to the broadcast.
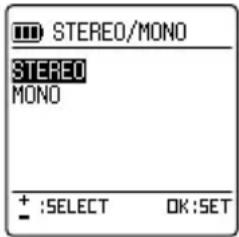
STEREO: Stereo reception
MONO: Always mono reception
Using the common menu (COMMON MENU)
BEEP SOUND
You can use this setting to determine the kind of sound to hear when buttons are pressed.
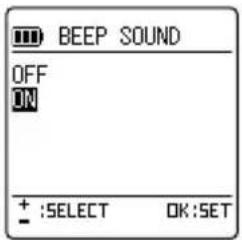
OFF: No sound accompanies the button operation.
ON: You hear only beep sound when buttons are pressed.
- If you selected "ON", tap +/- to select a desired sound volume, and then tap OK.
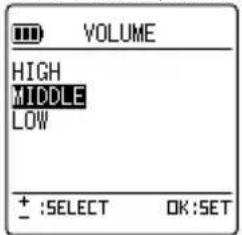
LED SETTING
You can change this setting so that the LED light does not come on during recording.
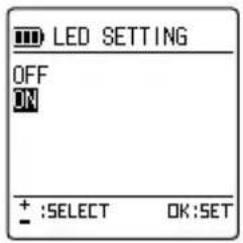
OFF: The LED light does not come on during recording.
ON: The LED light comes on during recording. Also, it follows the response during operation and comes on.
SENSOR SENS.
You can adjust the sensitivity of tapping on the touch panel.
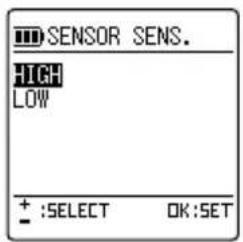
Sensitivity:HIGH
Sensitivity: LOW
AUTO POWER OFF
If you specify a time for this function, when the unit is not used for the specified time, the power turns off automatically (excluding recording, pause during VAS recording, as well as playback). This function helps you save battery when you forget to turn off the power.
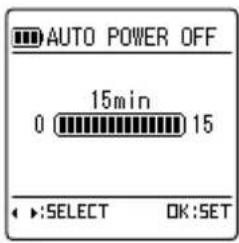
• You can set the time in 1-minute increments.
- If the "AUTO POWER OFF" setting is "OFF", the auto power off function is disabled.
BACKLIGHT
Use this function to change the backlight of the screen and touch panel.
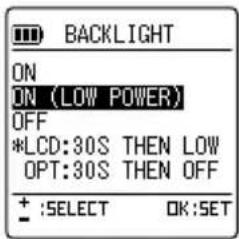
ON:
The screen goes into the low power mode after 30 seconds, but the touch panel's backlight is always on.
ON (LOW POWER):
The screen goes into the low power mode
after 30 seconds, and the touch panel's backlight turns off after 30 seconds.
OFF:
Backlight for both the screen and the touch panel turns off after 30 seconds.
- When shipped, the unit is set to "ON (LOW POWER)".
- If the battery is low, the backlight may not come on.
- If the backlight setting is "OFF", backlight for both the screen and the touch panel dim after 30 seconds. In this situation, if you want to check the unit, tap the touch panel once.
CONTRAST
Use this function to adjust the contrast of the screen. You can choose from 10 levels for the adjustment.
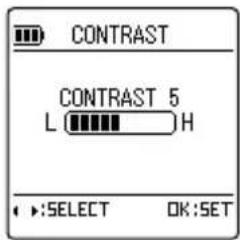
Contrast adjustment: 1 (L) to 10 (H)
LED NAV
You can turn the operation navigation function ON/OFF to select whether to light the LEDs for only the buttons or touch panel operations that can be operated.
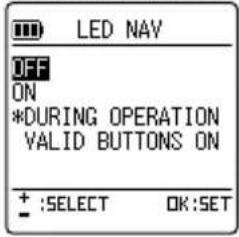
OFF: Disable the operation navigation function.
ON: Enable the operation navigation function.
RECYCLE BIN
If you turn off the recycle bin function, when you erase a file, it is completely erased so that you can no longer recover the file. To avoid accidentally erasing a file, we recommend that you turn on the recycle bin function.
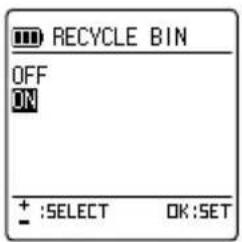
INIT MENU
When you initialize the unit's menu settings, all settings (except calendar settings) are restored to their defaults.
- Even when you initialize the menu settings, data on the microSD card is not erased.
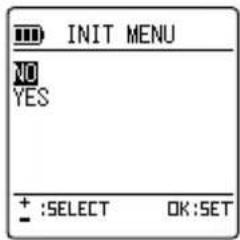
NO: Cancel menu settings initialization and return to the previous screen.
YES: Initialize the menu settings.
ID3 LANGUAGE
You can change the language that is displayed on the screen.
- If you select English, French, German or Spanish, you cannot register files with Russian file names in a playlist, and you cannot play back files registered in a playlist with Russian file names while Russian is selected. If you select Russian, you cannot register files with French, German or Spanish file names in a playlist, and you cannot play back files registered in a playlist with French, German or Spanish file names while one of these three languages is selected.
VERSION
You can check the version of firmware used by the unit.
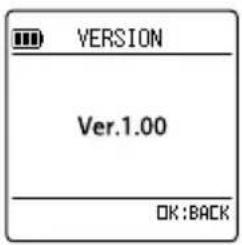
Before using the unit with your PC
Checking the operating environment
Operating environment
The unit works in the following PC environment.
| Hardware PC with Windows installed | |
| OS | Windows 7Windows VistaWindows XP |
| USB terminal One available for connection with the unit | |
| Others | Speaker or headphones requiredSound playback function available on PC |
● About Windows Media Player
Use the Windows Media Player appropriate for the OS of the PC, as follows:
| Windows Media Player 12 Windows 7 |
| Windows Media Player 11 Windows Vista / Windows XP |
| Windows Media Player 10 Windows XP |
* If you use a Windows Media Player not listed above, the operation will not be guaranteed.
* The operating environment described above is current as of January, 2010.
Obtain the latest Windows Media Player from the following URL.
http://www.microsoft.com/windows/windowsmedia/player/11/
- If you use a computer where Windows is not installed (e.g. Macintosh), the operation will not be guaranteed.
-
Operation in the following environments is not guaranteed.
-
Upgraded from Windows OS
- Windows 95, Windows NT, Windows 98, Windows 98SE, Windows ME, or Windows 2000
-
Dual boot environment with Windows OS
-
Guaranteed operation does not apply to all PCs in recommended environment.
- Depending on the operating environment, some modes such as standby and suspend* may not function correctly. If this happens, do not use these modes when operating your PC with the unit.
- When running Windows 7/Vista/XP, log on using an administrator account (Administrators).
* Suspend:
This is the state when the CPU, LCD, and HDD all stop, thus reducing the power consumption to its minimum. Suspend is different from sleep. In the suspend state, the CPU stops but power is still supplied to the ROM.
■ Notes on PC connection
- If you change from your PC names of MP3 files or WAV files recorded on the unit, playback of these files in their original folder becomes not possible. To solve this problem, you can rename the files following the naming rule, or move them to the MUSIC folder and then play them. ( page 28)
- Always format a microSD card from the unit. If you format the card from your PC, subsequent recording may not be correct.
-
If you have formatted the card from your PC, just format it again from the unit.
-
If a bus-powered USB hub or USB connection cable (not supplied cable) is used, the operation will not be guaranteed. Therefore, always use the supplied original USB connection cable for the connection.
- When the unit is connected to your PC, it can operate even if the battery is low.
What can you do from your PC?
You can perform the following operations from your PC.
■ Backing up recorded files to your PC
You can copy files recorded on the unit to your PC as backup.
■ Restoring audio files from your PC
You can restore audio files (backed up to your PC) to the unit. You can then listen to the files from the unit.
■ Copying audio files to CD-R/RW
You can use Windows Media Player to copy audio files (recorded on the unit) to a CD-R/RW disc.
■ Creating audio files (CD ripping)
You can use your PC to rip music CD or language CD into files (in a form which can be played on the unit) and then copy the files to the unit.
■ Using Windows Media Player to transfer music files
You can use Windows Media Player to transfer music files (created on the PC) to the unit.
■ Functioning as microSD card reader/writer
In addition to using the unit as a voice recorder, you can also use it as microSD card reader/writer.
Connecting/disconnecting your PC
Connecting your PC
1 Connect the micro USB connection cable to the micro USB terminal of the unit.
2 With the power turned off, connect the other end of the micro USB connection cable to your PC.
- If a bus-powered USB hub or USB connection cable (not supplied cable) is used, the operation will not be guaranteed. Therefore, always use the dedicated micro USB connection cable for the connection.
- When the unit is connected to your PC, it can operate even if the battery is low.
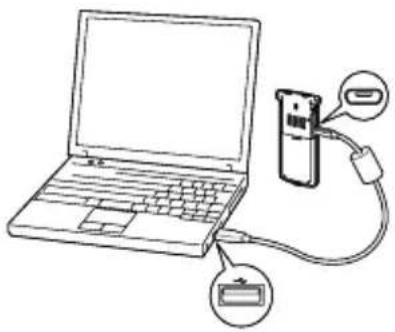
natural_image
Line drawing of a laptop connected to a test tube with an attached cable, showing no text or symbols.■ Screen display during connection with PC
During file transfer, do not disconnect the unit from your PC.
While the connection screen appears, all buttons and switches on the unit are disabled.
During connection During file transferDuring connection
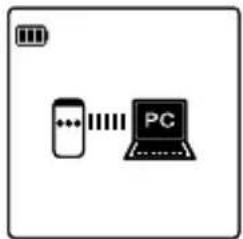
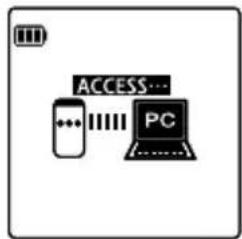
■ The first time you connect the unit to your PC
Because multiple "Found New Hardware" messages will appear, do not disconnect the unit from your PC until all messages disappear.
• If nothing appears on your PC
(page 162)
■ About the AutoPlay screen
If you are running Windows XP, Windows Vista or Windows 7 on your PC, the AutoPlay screen may appear.
From the AutoPlay screen, select "Open folder to view files" and then click "OK". Folders of the unit appear. Also, the options and descriptions on the AutoPlay screen change depending on your PC environment.
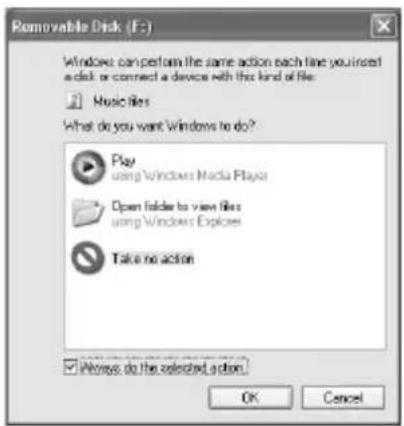
Disconnecting your PC
1 Click the Task Tray icon, and then click "Safely remove USB mass storage device".
- Depending on your PC environment, the drive letter that appears may be different. This is not a problem.
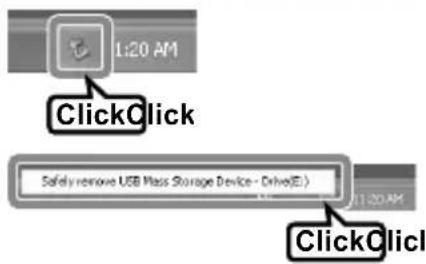
2 When the "Safe To Remove Hardware" message appears, disconnect the unit from your PC.
- If does not appear on the Task Tray, click to display hidden icons. If it still does not appear, turn off your PC and then disconnect the unit from your PC.
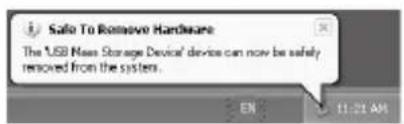
Using your PC to charge the battery
You can connect the unit to your PC to charge the lithium-ion battery (supplied).
Connecting to your PC
Connect the unit to your PC.
Connecting your PC (page 157)
Make sure the screen indicates the unit is connected to your PC.
The LED light comes on and charging starts.
- While the battery is being charged, the battery indicator on the screen changes as shown in the illustration.
- During the operation, if you want to stop charging, disconnect the unit from your PC.
Disconnecting your PC (page 158)
- When charging is finished, the LED light goes off.
- Charging takes about 150 minutes.
* The charging time is an approximate figure based on a completely discharged battery. It will vary, depending on the remaining battery power, ambient temperature, etc.
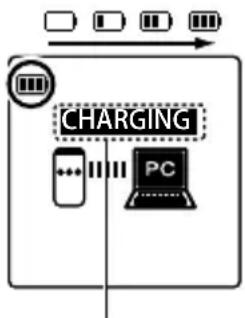
flowchart
graph TD
    A["Chamber"] --> B["Charging"]
    C["Switch"] --> B
    D["PC"] --> B
Charging display
When charging is finished, disconnect the unit from your PC.
Disconnecting your PC (page 158)
- You can also use the multi-cradle to charge the unit (ICR-XPS01MF only).
Using the multi-cradle to charge the unit (page 47)
- If the screen does not display a PC connection, disconnect the unit from your PC and then connect again.
Connecting your PC (page 157)
- Charging may not occur in the following cases.
- Your PC is in the suspend mode.
- You restart your PC.
- If the charging indication displays ✗, this means charging is not possible due to the following reasons.
- There is no battery in the unit.
- The temperature of the unit has risen.
(Disconnect the unit from your PC. Turn off the power of the unit, leave it for a while, and then connect it back to your PC.)
- During charging, the battery may become warm. This is not a malfunction.
- If the battery duration becomes significantly shorter even after a full charge, this indicates the battery life has come to an end. Purchase a new lithium-ion battery (original battery).
- During charging, always be sure the battery compartment lid is closed.
- You can charge the battery while transferring data. However, depending on the usage condition, the battery duration after a charge may become shorter.
- Charge the battery at an ambient temperature of 5 to 35^ (41 to 95^ ).
Viewing the unit's folders and files from your PC
This manual uses the screen of a microSD card (already formatted by the unit) inserted in the unit for explanation. In this case, "XPS01" appears.
1 Connect the unit to your PC.
Connecting your PC (page 157)
Open My Computer.
Click My Computer from the Start menu, or double-click the My Computer icon on the Desktop.
Open the XPS01.
Double-click "XPS01".
If XPS01 does not appear (page 162)
The unit's folders appear.
About files/folders (page 27)
- Drive name for the microSD card
If the microSD card is formatted by the unit, it appears as "XPS01". If no microSD card is inserted in the unit or the a microSD card not formatted by the unit is inserted, "removable disk" will appear.
- If you change from your PC names of MP3 files or WAV files recorded on the unit, playback of these files in their original folder becomes not possible. To solve this problem, you can rename the files following the naming rule, or move them to the MUSIC folder and then play them. (page 28)
Troubleshooting
Check to see that the unit is correctly recognized by your PC.
● Windows 7, Windows Vista
With the unit connected to your PC, perform the following operation.
From the Start menu, right-click the Computer icon and then select Properties from the displayed menu, and then open the System screen.
Click Device Manager. (If you are running Windows Vista and the user account control screen appears, click Continue.) The Device Manager screen appears.
If the devices indicated in the following diagrams are shown below "Disk drives" and "Universal Serial Bus controllers", the unit is connected to your PC correctly.
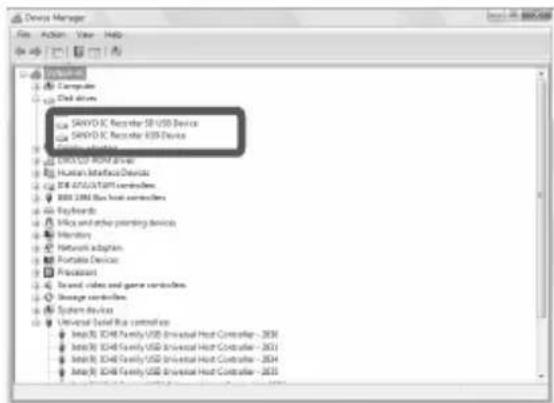
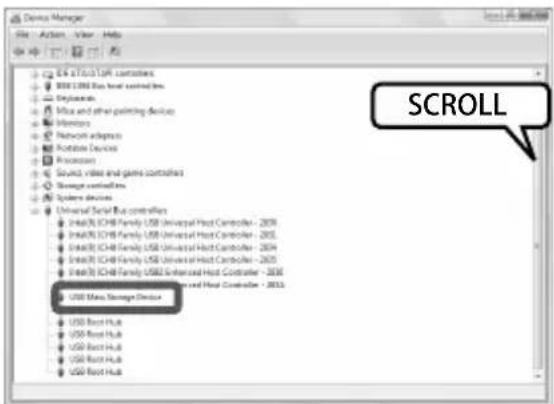
● Windows XP
With the unit connected to your PC, perform the following operation.
From the Start menu (or Desktop), right-click the My Computer icon and then select Properties from the displayed menu, and then open the System Properties screen.
Click Device Manager on the Hardware tab to open the Device Manager screen.
If the devices indicated in the following diagrams are shown below "Disk drives" and "USB (Universal Serial Bus) controllers", the unit is connected to your PC correctly.
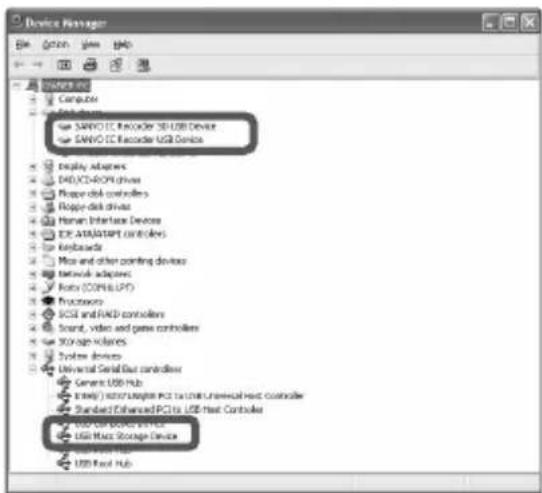
If Device Manager does not display the information correctly
Perform the following procedure.
① Close all applications that are still running.
② Unplug all other USB devices (excluding correctly functioning mouse/keyboard) and connect only the unit to your PC.
③ If there are multiple USB terminals on your PC (e.g. on the front or back), try to use another USB terminal to connect the unit to your PC.
④ If the unit is connected to your PC via a bus-powered USB hub (with multiple ports for plugging in USB devices), remove the hub and use the dedicated USB connection cable to connect the unit directly to a USB terminal on your PC.
- When using a USB cable for connection, always use the supplied micro USB connection cable.
Additional information
Error messages
Error messages may appear during operation of the unit. The following table describes the error messages.
| State of the unit (function) | Error message Description See page | ||
| Battery is low LOW BATTERYPLS CHARGETHE BATTERY | This error message appears when the battery is low. page 37 | ||
| Playback | NO DATA | This error message appears when there is no file in the folder and you tap OK. | page 71 |
| VARIABLE SPEED PLAYBACK NOT AVAILABLE | This error message appears when you change the playback speed during PCM recording/playback. | page 76 | |
| Recording | MEMORY FULL | This error message appears when you try to record but there is no free space left on the microSD card. | page 176 |
| FILE FULL | This error message appears when the number of files that can be recorded in a folder has exceeded its limit. | page 27page 29 | |
| Editing (index) | INDEX FULL | This error message appears when the number of index marks exceeds the maximum (36 per file). | page 82 |
| Editing (dividing file) | CAN'T CREATE ANYMORE FILES IN THIS FOLDER | This error message appears when you try to divide a file but the number of files you can play in the folder has already reached its maximum. | page 85 |
| CAN'T DIVIDE! MEMORY FULL | This error message appears when there is not enough free space on the microSD card for dividing file. | page 85 | |
| CAN'T DIVIDE! REC TIME TOO SHORT | This error message appears when you try to divide a file which has a time length shorter than the minimum time length required for recording. | page 85 | |
| CAN'T DIVIDE FILE AT THIS POSITION | This error message appears when you try to divide a file at a position that cannot be divided. | page 85 | |
| Editing (general) | CAN'T EDIT IN MUSIC FOLDER | This error message appears when you try to divide a file in the MUSIC folder. | page 29 page 85 |
| List display | NO DATA | This error message appears when there is no file in the folder that can be used for playback on the unit. | page 33 |
| RECYCLE folder | CAN'T EDIT IN RECYCLE BIN | This error message appears when you try to divide a file in the RECYCLE folder. | page 30 page 85 |
| PLS EMPTY RECYCLE BIN | If the “RECYCLE” setting is “ON”, this error message appears when you try to erase files but they cannot go to the RECYCLE folder because the RECYCLE folder is already full (199 files). | page 118 page 120 | |
| *FOLDER FULL CAN'T RESTORE | This error message appears when you try to restore a erased file from the RECYCLE folder but the original folder is already full. (* indicates name of original folder.) | page 116 | |
| CAN'T MOVE FILE EMPTY RECYCLE BIN | This error message appears when there is no more free space on the microSD card, so that you cannot erase file or folder. | page 114 | |
| microSD card-related | CAN'T IDENTIFY microSD CARD!PLS INSERT AGAIN | This error message appears when the unit cannot recognize the inserted microSD card or the microSD card is damaged. | page 41 |
| WRITING SPEED OF microSD CARD IS SLOW | This error message appears when write to microSD card during PCM recording cannot be performed correctly. | page 42 | |
| FM radio | SELECT & DELETE CHANNEL IN PRESET MODE | This error message appears when you try to delete a preset channel in the frequency selection mode. | page 99 |
| Playlist editing | CAN'T ADD FILES!PLAYLIST FULL | This error message appears when you try to register a file to a playlist (MYLIST1 to MYLIST5) which is already full (with 99 files). | page 88 |
| YOU CAN ONLY EDIT PLAYLISTS IN MUSIC FOLDER | This error message appears when you select a file located in a folder other than the MUSIC (M) folder and then try to register it to a playlist (MYLIST1 to MYLIST5). | page 88 | |
| CAN'T ADD ALL FILESTO PLAYLIST | This error message appears when you try to register more than 99 files to a playlist (MYLIST1 to MYLIST5). | page 88 | |
| CAN'T EDIT PLAYLIST!NO FILE | This error message appears when a file registered in a playlist is erased. page 88 | ||
| CAN'T SELECT PLAYLIST FILE | This error message appears when you select a playlist during list display and then tap MENU. | page 88 | |
| DURING PLAYBACK OF PLAYLIST FILEFOLDER SKIP NOT POSSIBLE | This error message appears when you try to skip folder during playback of a playlist (P1 to P5). | page 81 | |
| Playlist editing | UPDATING FILE NAME | If the power turns off while you are erasing a file or folder, when you turn on the power again or when you access the microSD card and the file name is updated, this error message appears. | |
| ALL mode FILE IS OUTSIDE PLAY RANGE OF ALL SONG MODE. CAN'T BE SELECTED (MAX 3000 SONGS) | This error message appears when more than 3,000 files are selected and you set the repeat mode to ALL REPEAT or ALL RANDOM. | ||
Before contacting your local dealer
Try the following solutions. If the problem still persists, contact your local dealer for assistance.
The unit does not start.
| Cause Battery is not inserted properly or is low. | |
| Solution Check to make sure the battery is inserted correctly.Remove the battery completely and then insert it back into the unit again, or charge the battery.See “Inserting the battery” on page 35. |
Buttons or switches do not respond.
| Cause The Hold function to prevent accidentally pressing a button is turned on. | |
| Solution Turn off the Hold function.See “Preventing accidentally pressing a button (hold function)” on page 40. | |
| Cause The unit is still connected to your PC with the microUSB connection cable. | |
| Solution Disconnect the unit from your PC.See “Disconnecting your PC” on page 158. | |
| Cause The tap sensor's sensitivity is low. | |
| Solution Adjust the sensitivity.See “SENSOR SENS.” on page 150. |
The microSD card is not recognized by the unit.
| Cause The microSD card is not inserted correctly. |
| Solution Turn off the power of the unit, and then insert the microSD card again. |
You cannot hear any sound.
| Cause The sound volume is too low. | |
| Solution Adjust the sound volume.See “Playing a file” on page 71. |
A file in the MIC_A to MIC_D, LINE, FM or RECYCLE folder cannot be played.
| Cause The name of the file has been changed. | |
| Solution If you have used your PC to change the name of a file in one of the folders mentioned, the file can no longer be played after it is returned to its original folder. However, if you move the file to the MUSIC (M) folder, playback of the file by the unit becomes possible. | |
| Cause The WAV-format audio file is not recorded by the unit. | |
| Solution You cannot play any WAV-format audio file which is not recorded by the unit. |
You cannot play a file in the MUSIC (M) folder, or the playback is not correct.
| Cause The file format is wrong. | |
| Solution Make sure the file is WMA or MP3 file for normal playback. | |
| Cause The WAV-format audio file is not recorded by the unit. | |
| Solution You cannot play any WAV-format audio file which is not recorded by the unit. | |
| Cause The file is moved to the wrong folder. | |
| Solution When you transfer a file from your PC to the unit, if you place it in a folder other than the MUSIC (M) folder, playback of the file by the unit is not possible. Therefore, make sure to transfer the file to the MUSIC (M) folder within XPS01. | |
| Cause The file cannot be played by the unit. | |
| Solution Try using a different encoder (MP3 or WMA conversion) software to convert the file. | |
| Cause A file registered in the playlist does not exist in the MUSIC (M) folder. | |
| Solution Erase the file name from the playlist, or transfer the file to the MUSIC (M) folder. | |
| Cause The wrong file transfer method is used. | |
| Solution | If you use Explorer to transfer files protected by copyright, playback on the unit is not possible. Instead, use Windows Media Player to transfer the files. |
| Cause The number of files in the folder has exceeded the limit. | |
| Solution Only | a maximum of 199 files from a folder can be played. If there are sub folders within the folder, the number of files that can be played is reduced by the number of sub folders. Store the extra files in another folder. |
You cannot divide a file.
| Cause There | is not enough free space on the microSD card. |
| Solution Erase unwanted files.See “Erasing a file” on page 118. | |
| Cause The recording length of the file is too short. | |
| Solution Use | a file with longer recording length.More than 2 seconds for PCM44.1, MP3:320, and MP3:192. More than 4 seconds for MP3:128. More than 8 seconds for MP3:64. More than 16 seconds for MP3:32. |
| Cause The number of files in the folder has exceeded its limit (199). | |
| Solution Erase unwanted files.See “Erasing a file” on page 118. | |
You cannot erase a file.
| Cause The file's attribute has been set to read-only. | |
| Solution Connect the unit to your PC and then change the attribute of the file or erase it. Or, format the microSD card.See “Formatting a microSD card” on page 122. |
XPS01M is not displayed when the unit is connected to your PC.
| Cause The unit is not correctly connected to your PC. | |
| Solution Check that the micro USB connection cable is used to correctly connect the unit to your PC. If necessary, do the connection again.See “Connecting your PC” on page 157. | |
| Cause The unit is connected to a Macintosh or PC running Windows 98, 98 SE, Me, 2000. | |
| Solution Macintosh and PC running Windows 98, 98 SE, Me or 2000 are not supported. | |
| Cause The power supply from your PC is not enough. | |
| Solution | If the unit is connected to your PC via a bus-powered USB hub, try to connect the unit directly to your PC. You can also use a self-powered type (with AC adapter) USB hub. Or, if your PC has several USB terminals, try to connect the unit to another USB terminal.See “Connecting your PC” on page 157. |
| Cause A network drive is assigned. | |
| Solution | If a network drive is assigned, this will conflict with the drive letter of the unit so that XPS01M may not be created. To solve the problem, change the assigned network drive and then connect the unit to your PC again.Contact your network administrator for information on network drive assignment. |
Recorded sound is distorted (cracking sound).
| Cause The microphone sensitivity is not appropriate. | |
| Solution | • Change the “MIC SENS.” setting to “LOW”. If you still hear cracking sound, change the “LOW CUT FILTER” setting to “ON”, “MIC ALC” setting to “OFF”, and adjust the recording level. Then, try to record again.See “MIC SENS.” on page 133.See “LOW CUT FILTER” on page 136. |
Sound skipping happens to recorded file.
| Cause | The microSD card has been formatted by another device (e.g. PC) instead of the unit.The memory is increasingly fragmented. |
| Solution Use | the unit to format the microSD card again.See “Formatting a microSD card” on page 122. |
When the unit is connected to your PC, the connection icon does not appear on the unit's screen.
Solution Depending on the PC, the PC may not recognize the unit, or the connection icon may not appear on the unit's screen. If this happens, disconnect the unit from the PC and then connect again.
The calendar is not displayed correctly.
Solution Set the date and time again. See “Setting the calendar (date and time)” on page 49.
Files are erased, but the free space does not increase.
Cause The "RECYCLE" setting is "ON".
Solution Empty the RECYCLE folder. See "Emptying the RECYCLE folder" on page 117.
The timer does not function correctly. (Timer recording is not ready.)
| Cause The calendar has not been set. | |
| Solution Set the calendar.See “Setting the calendar (date and time)” on page 49. | |
| Cause The folder for storing recordings is full. | |
| Solution Erase unwanted files.See “Erasing a file” on page 118.Use a different folder for storing recordings. | |
| Cause There is no remaining battery power. | |
| Solution Charge the battery.See “Remaining battery power” on page 37. | |
| Cause There is no free space on the microSD card. | |
| Solution Erase unwanted files.See “Erasing a file” on page 118. | |
| Cause No microSD card is inserted in the unit. | |
| Solution Insert a microSD card in the unit.See “Inserting/removing a microSD card” on page 41. |
You hear noise while recording.
| Cause The recording mode or microphone sensitivity (for microphone recording) is not appropriate. |
| Solution Change the “REC MODE” setting or “MIC SENS.” setting to obtain the most appropriate recording environment, and then try to record again.See “REC MODE” on page 132.See “MIC SENS.” on page 133. |
Frequently asked questions
Q: Why do I hear rustling noise in audio recorded from the microphone?
A: During microphone recording, if you move the unit or if the hand (or fingers) holding the unit moves, that noise is also recorded. Therefore, during microphone recording, try to avoid moving the unit.
Q: How can I save recordings to a tape or MD?
A: Use an audio cable to connect the headphones socket on the unit to the external input socket on the external recording device (tape/MD recorder).
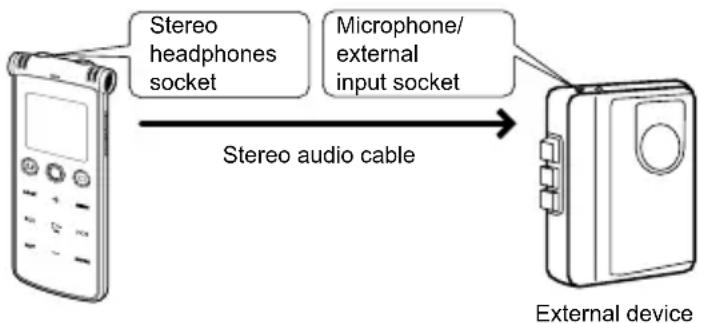
flowchart
graph LR
    A["External device"] -->|Stereo audio cable| B["Stereo headphones socket"]
    B --> C["Microphone/external input socket"]
Audio cable
Use the following cables based on the input socket type of the external recording device.
| On the external device A | Audio cable |
| Microphone input | Mini-plug:3.5 φ with resistance (commercially available) |
| Audio line input | Mini-plug:3.5 φ with no resistance (commercially available) |
- Use a stereo audio cable.
- Before the actual dubbing, first test the recording operation so that you can adjust the volume on the unit.
- You can also record on the unit using a tape recorder or MD player as the sound source.
page 67
Q: When I move a file from my PC back to the unit, it can no longer be played.
A: On your PC, have you changed the name of the file? If you have, even when this file is returned to its original folder (MIC_A to MIC_D or LINE folder), it can no longer be played. In this case, you can move the file to the MUSIC (M) folder and then play the file from there.
Cleaning
Use a soft cloth to wipe or polish the unit.
- Do not use benzene, alcohol, or thinner, because they will damage or discolor the finish of the surfaces. Also, do not apply any pesticide to the unit.
■ About rising temperature of the unit
If you use the unit for a long time, its temperature may rise. This is not malfunction.
Main specifications
Digital Sound Recorder main unit specification
Supported OS : Windows 7/Windows Vista/Windows XP
Supplied microSD card : 2GB
Supported media : microSD card, microSDHC card
Recording mode and possible recording time (microSD card/microSDHC card)
| Recording mode | Size of microSD card | |||
| 1GB 2GB 4GB 8GB | ||||
| PCM44.1kHz (STEREO) | Approx. 1 hour 20 minutes | Approx. 3 hours Approx. 6 hours Approx. 12 hours | ||
| MP3 320kbps (STEREO) | Approx. 7 hours | Approx. 13 hours 30 minutes | Approx. 27 hours Approx. 54 hours | |
| MP3 192kbps (STEREO) | Approx. 11 hours | Approx. 22 hours 30 minutes | Approx. 45 hours Approx. 90 hours | |
| MP3 128kbps (STEREO) | Approx. 16 hours 30 minutes | Approx. 34 hours Approx. 68 hours | Approx. 136 hours | |
| MP3 64kbps (STEREO) | Approx. 33 hours Approx. 68 hours | Approx. 136 hours 30 minutes | Approx. 272 hours | |
| MP3 32kbps (MONO) | Approx. 66 hours | Approx. 136 hours Approx. 273 hours Approx. 544 hours | ||
The above values apply when a microSD memory card from Toshiba is used.
- The indicated recording time is only an approximate figure and may be different depending on the microSD card manufacturer or specification.
- If there are multiple recorded files, their total recording time will be shorter than the figures.
- The possible recording time is the total time for all folders that can be achieved from the moment the unit starts recording to the moment it ends, assuming there is no recorded data on the microSD card before the operation and the recording mode is not changed during the operation.
* The maximum recording length of one file (continuous recording) is 2GB. However, continuous recording cannot exceed the battery duration.
: 40 to 21,000Hz (for PCM 44.1kHz 16bit)
Recording frequency
(During external microphone recording)
40 to 20,000Hz (for MP3 320kbps)
40 to 20,000Hz (for MP3 192kbps)
40 to 15,000Hz (for MP3 128kbps)
40 to 7,500Hz (for MP3 64kbps)
40 to 6,500Hz (for MP3 32kbps)
| (During built-in microphone recording) | : 60 to 20,000Hz (for PCM recording)* The frequency upper limit of MP3 recording follows each recording mode of external microphone recording. Also, the lower limit for each recording mode is 60 Hz. | |
| Format: MP3, PCM (WAV) | ||
| Playback format: MP3 (MPEG1 LAYER3, MPEG2 LAYER3, MPEG2.5 LAYER3), WMA, PCM (only files recoded on the unit) | ||
| Playback frequency: 20 to 21,000Hz (for 44.1kHz sampling frequency) | ||
| Sampling frequency: 16 to 44.1 kHz | ||
| Playback bitrate: 16 to 320 kbps (MP3) | ||
| 32 to 192 kbps (WMA)* Depending on the file, normal playback may not be possible. | ||
| Radio reception frequency: [FM] 87.5 to 108MHz | ||
| Input/output sockets: | micro USB, stereo headphones mini-plug 3.5 φ, stereo microphone (doubling as line input) mini-plug 3.5 φ, microSD card slot, Original I/O terminal | |
| Operating temperature: +5°C to +35°C | ||
| Rated output (headphones): 1.8mW + 1.8mW (when 16 Ω load, SOUND EQ:FLAT) | ||
| 10mW + 10mW (when 16Ω load, 10% THD) | ||
| (Speakers): 120mW (when 170 Ω load) | ||
| Power source | : Lithium-ion battery, AC power (USB, original I/O terminal) | |
| Charging time | : Approx. 150 minutes | |
| Battery duration (Recording time) | : [MP3] 32kbps Mono mode | Approx. 20 hours (power save mode) |
| Approx. 40 hours (light off mode) | ||
| [MP3] 64kbps Stereo mode | Approx. 19 hours (power save mode) | |
| Approx. 36 hours (light off mode) | ||
| [PCM] 44.1kHz 16bit | Approx. 14 hours (power save mode) | |
| Approx. 23 hours (light off mode) | ||
| (Radio recording time) | : [MP3] 128kbps | Approx. 12 hours (power save mode) |
| Approx. 16 hours (light off mode) | ||
| (Recording environment) | : (Power save mode) | |
| When backlight is ON (power save), LED setting OFF, no recording monitor, and ALC is ON | ||
| (Light off mode) | ||
| When backlight is OFF, LED setting ON, no recording monitor, and ALC is ON | ||
(Playback time/earphones) : [MP3] 32kbps Mono mode Approx. 21 hours (power save mode)
Approx. 52 hours (light off mode)
[MP3] 64kbps Stereo mode Approx. 20 hours (power save mode)
Approx. 46 hours (light off mode)
[PCM] 44.1kHz 16bit Approx. 15 hours (power save mode)
Approx. 26 hours (light off mode)
(Playback time/speakers) : [MP3] 32kbps Mono mode Approx. 16 hours (power save mode)
Approx. 32 hours (light off mode)
[MP3] 64kbps Stereo mode Approx. 16 hours (power save mode)
Approx. 30 hours (light off mode)
[PCM] 44.1kHz 16bit Approx. 13 hours (power save mode)
Approx. 21 hours (light off mode)
(Playback time/speakers on : [MP3] 32kbps Mono mode Approx. 13 hours (power save mode)
multi-cradle driven by lithium- Approx. 21 hours (light off mode)
ion battery in the unit) [MP3] 64kbps Stereo mode Approx. 13 hours (power save mode)
Approx. 20 hours (light off mode)
[PCM] 44.1kHz 16bit Approx. 10 hours (power save mode)
Approx. 15 hours (light off mode)
(Radio reception/earphones) : Approx. 14 hours (power save mode)
Approx. 24 hours (light off mode)
(Playback environment) : (Power save mode)
When backlight is ON (power save), LED setting OFF, and sound EQ is FLAT
(Light off mode)
When backlight is OFF and sound EQ is FLAT
- In the light off mode, both the screen and the touch panel dim after 30 seconds during recording or playback. If you want to check the unit, tap the touch panel once.
- The battery duration may change, depending on the storage state, usage condition, ambient temperature, and the microSD card in use. Therefore, the time indications above are approximate figures only and they are not guaranteed. Operation not using the supplied lithium-ion battery is not guaranteed.
Maximum dimensions : Approx. 38.8(W) × 96.3(H) × 9.4(D) mm
Weight : Approx. 46 g (including lithium-ion battery)
Accessories : Stereo earphones (1)
microUSB cable (micro USB connection cable) (1)
Li-ion battery pack (1)
Cradle Active Speaker(ASX-SP00X)(ICR-XPS01MF ONLY) (1)
AC adapter for Cradle Active Speaker (ICR-XPS01MF ONLY) (1)
microSD card (2GB) (1)
This manual (1)
Supplied Cradle Active Speaker specification (ICR-XPS01MF ONLY)
(Model: ASX-SP00X)
Maximum dimension : 162.9(W) x 113.8(H) x 40.0(D) mm
Weight : Approx. 263g
Input/output sockets : Stereo headphones 3.5ø mini, line input 3.5ø mini, original I/O terminal
Output : 1.0W+1.0W (during AC operation)
0.2W+0.2W
(when lithium-ion battery in Digital Sound Recorder main unit used)
Speakers : Full range 36mm 4 speakers
Power : AC adapter DC5V (AC100V-240V, 50/60Hz)
Digital Sound Recorder main unit's lithium-ion battery DC3.7V
Supplied lithium-ion battery specification
(Model: DB-L80)
Voltage : 3.7V
Capacity : 700mAh
Operating environment : (Temperature) 5 to 35°C (when unit is used)
-10 to 30°C (during storage)
(Humidity) 10 to 90% (Noncrystalline)
Maximum dimensions : Approx. 39.2(W) x 31.4(H) x 5.9(D) mm
Weight : Approx. 15g
* Specifications and external appearance subject to change without notice
Index
A
A-B repeat .....78
AC operation mode .....38
ALC
(Auto Level Control) ... 134
AUTO DIVIDE ......68
Auto Level Control ... 134
AUTO POWER OFF 151
AUTO PRESET...... 148
AUTO SCAN 94
B
BACKLIGHT 151
Basic screen .....26
Battery indicator .....37
BEEP SOUND ...... 150
C
Calendar settings .....49
Change playback speed 76
Charge ...... 38, 47, 159
CLEAR VOICE ..... 142
COMMON MENU..... 150
CONTRAST ...... 151
Cradle....45
D
Display 51
Divide file ....85
E
EDIT MENU ...... 127
Erase 114
Erase all files....91
Erase file 118
Erase folder ..... 120
Error message ...... 164
External devices ... 48, 67
F
Fast forward .....73
File 27
File naming rule .....28
FM RADIO mode ... 31, 92
FM setting 148
Folder 27
Folder layout ...... 27, 29
Folder selection .....31
Folder Skip ......81
Format 122
H
Headphones socket .....22
Hold function ....40
|
ID3 LANGUAGE ..... 152
Index mark......82
INIT MENU 152
Initialize
menu 152
microSD card...... 122
preset 100
recording scene..... 147
L
LCD display .....23
LED light ..... 22, 150
LED NAV 152
LED SETTING ..... 150
Line recording .....48
Line-in recording .....67
Switch 53
List screen ....33
Lithium-ion battery .....35
LOW CUT FILTER ... 136
M
Manual tuning .....96
Menu 124
MIC ALC 134
MIC MODE ...... 135
MIC SENS. 133
Microphone recording ...58
Switch 53
microSD card ..... 41, 42
microSDHC card .....42
microUSB terminal ... 157
Monitor 48,59
Monitor recording ... 48, 59
Multi-cradle .....45
MUSIC 29
MUSIC mode ..... 31, 80
MYLIST 88
O
Opeartion screen .....25
Operation mode .....31
Original I/O terminal 22,46
OUTPUT 148
P
PC 154
Connect to PC ..... 157
Save audio 156
PEAK LIMITER...... 136
PHRASE PLAY ..... 141
Phrase playback .....77
PLAY MENU 140
Playback ....71
Playback speed .....76
Playlist function......88
Possible recording time .... 52, 176
PRESET 97
Preset station selection 94
R
REC MENU ...... 132
REC MODE ...... 132
RECORD mode .....31
Recording .....52
Recording EQ ......62
Recording FM radio ... 102
Recording level ... 59, 134
Recording scene select .... 54, 144
RECYCLE ..... 30, 114
RECYCLE BIN ..... 152
Recycle bin function... 114
REPEAT.... 140
Resume function .....37
Rewind 73
S
Scene select ..... 54, 144
SELF TIMER ...... 136
SENSOR SENS. ..... 150
Skip....73
Sleep timer 112
SOUND EQ 142
STEREO 135
Stereo Earphones .....21
STEREO WIDE...... 135
STEREO/MONO ..... 149
T
Time search .....79
TIME SKIP...... 73, 141
TIMER 104
Touch panel .....22
Troubleshooting ..... 162
V
VAS.... 137
VERSION 153
W
Windows Media Player 154
SANYO
SANYO Electric Co., Ltd.
- Contents
- Before using the unit ..... 21
- Preparation 35
- Display 51
- Recording 52
- Playback....71
- Editing 82
- Using FM radio 92
- Using the timer 104
- Erasing files 114
- About the menus 124
- Note:
- Please read this manual before use.
- FOR AMERICAN USERS
- WARNING:
- FOR CANADIAN USERS
- FOR EU USERS
- CAUTION
- SANYO Sales & Marketing Europe GmbH
- SANYO Electric Co., Ltd.
- CAUTIONS CONCERNING BOTH UNIT AND ACCESSORIES
- WARNING
- CAUTIONS CONCERNING THE UNIT
- ■ Do not get the unit wet
- ■ Do not place on an unstable surface
- ■ Do not use earphones or headphones at high volumes for extended periods
- ■ Do not use where there is risk of explosion
- ■ If the unit is not going to be used for a long period of time
- ■ Cautions during storage
- ■ Do not use in extreme temperatures
- ■ Do not hold the hot part for a long time
- ■ Do not cover or wrap the unit in a cloth or blanket
- ■ Do not carry in trouser pockets
- CAUTIONS CONCERNING THE MULTI-CRADLE AND AC ADAPTOR
- DANGER
- ■ Do not recharge a battery pack other than the specified battery pack
- ■ Concerning the power cord
- ■ Do not get the multi-cradle or AC adaptor wet
- ■ Cautions when plugging in the power cord
- ■ Do not damage the power cord
- ■ Cautions concerning the power cord
- ■ Do not touch the power cord plug with wet hands
- ■ Do not place credit cards near the speaker
- ■ Other cautions
- ■ Cautions during use and storage
- CAUTIONS CONCERNING THE microSD CARD
- ■ Cautions concerning the microSD card
- ■ Cautions when handling the microSD cards
- FOR CORRECT USE OF THE UNIT
- ■ Cautions when cleaning the unit
- ● Cleaning procedure
- ■ Caution concerning the battery pack
- ■ When not using the unit for a long period
- Precautions
- Before using the unit
- Checking the accessories
- Controls
- Main unit
- LCD display
- ■ Basic screen
- About backlight of buttons/touch panel
- LED NAV (page 152)
- BACKLIGHT (page 151)
- About the "OPERATION" screen
- About the operation mode and basic screen of the unit
- ■ FM RADIO mode
- ■ RECORD mode
- ■ MUSIC mode
- About files/folders
- Folders for recording
- Name of recorded file
- MUSIC folder
- About playback in the MUSIC mode (page 80)
- ■ A sample music file is stored in the M folder.
- ■ Folder of files transferred from your PC to the MUSIC folder
- Displaying a list (page 33)
- ■ Display of number of files in the MUSIC folder
- ■ Maximum number of files for the MUSIC folder
- Other folders
- ● RECYCLE folder (1)
- About the recycle bin function (page 114)
- ● DATA folder
- Functioning as microSD card reader/writer (page 156)
- ● MANUAL folder
- Switching operation mode/folder
- Tap ▶ok
- Using the list screen
- Displaying a list
- ■ Icons displayed on the list screen
- Preparation
- Inserting the battery
- Open the battery compartment lid.
- Insert the lithium-ion battery in the direction of the arrow, and then close the battery compartment lid.
- ■ Removing the battery
- Turning on/off the power
- ■Turning on the power
- Slide the POWER/HOLD switch in the direction of the arrow.
- ■Turning off the power
- Slide the POWER/HOLD switch in the direction of the arrow for more than 2 seconds.
- ■ When you turn on the power the first time
- Setting the calendar (date & time) (page 49)
- ■ About the auto power off function
- AUTO POWER OFF (page 151)
- Remaining battery power
- Resume function
- Charging the lithium-ion battery
- Using the unit in the AC operation mode (multi-cradle) (ICR-XPS01MF only)
- Turn on the power of the multi-cradle.
- Before removing the unit from the multi-cradle, press the power button of the multi-cradle to turn off the unit first, and then remove it.
- ■ When using the unit in the AC operation mode (multi-cradle)
- Preventing accidentally pressing a button (hold function)
- Slide the POWER/HOLD switch to the HOLD position.
- Slide the POWER/HOLD switch away from the HOLD position.
- Inserting/removing a microSD card
- microSD cards that can be used on the unit
- ■ Handling a microSD card
- Formatting a microSD card (page 122)
- Where to use the unit (in FM RADIO mode)
- Using the multi-cradle (ICR-XPS01MF only)
- Placing the multi-cradle
- Setting the unit to the multi-cradle
- ■ Inserting the unit into the multi-cradle
- ■ Removing the unit from the multi-cradle
- Press the power button of the multi-cradle.
- Remove the unit from the multi-cradle.
- Using the multi-cradle to charge the unit
- Listening to audio from the multi-cradle
- ■ Using your headphones
- ■ Using the speakers
- Using the multi-cradle to record from an external device
- Outputting sound from an external device to the multi-cradle
- Using the multi-cradle with the unit's battery
- Setting the calendar (date & time)
- Tap +/- to select "DATE & TIME".
- Tap The "DATE & TIME" screen appears.
- Set up the date and time. ① Tap ◀◀/▶ to select year, month, day, 24H/12H (AM/PM), hour, or minute. ② Tap +/- to change the value of the selected setting.
- Tap ▶ The date and time are set and the unit returns to the "COMMON MENU" screen.
- Tap MENU to exit the menu.
- Switching information display
- Information you want to know before recording
- About wind noise
- About the possible recording time
- REC MODE (page 132)
- About the external recording mode (external input/microphone)
- ■ To use an external microphone
- ■ To connect to other audio devices
- Using the scene select function
- Selecting a recording scene
- Tap ▶ OK
- Recording
- Adjust the recording level (only if the "SCENE SELECT" setting is set to "MUSIC" or the "MIC ALC" setting is "OFF").
- MIC SENS. (page 133)
- LED SETTING (page 150)
- Press the REC button (○).
- Press the STOP button (☐).
- Setting recording EQ
- Recording (page 58)
- About the preset recording EQ
- Selecting a preset recording EQ mode
- Tap /to select a recording EQ mode, and then tap ▶ OK.
- Tap MENU.
- Setting your favorite recording EQ mode (only when USER is selected)
- Change the recording EQ mode to "USER".
- Tap -.
- Tap /to select a frequency band you want to change.
- Tap +/- to change the level of the selected frequency band.
- Recording from an external device
- Press the REC button (○) again.
- Using the auto divide function
- Tap +/- to select "ON" or "OFF", and then tap ▶ OK.
- Playback
- Playing a file
- Turn on the power. → Turning on the power (page 36)
- Select the folder containing the file you want to play.
- Switching operation mode/folder (page 31)
- Tap LIST. The list screen appears.
- Tap +/- to select a file to play.
- Tap OK
- Press the STOP(□) button.
- To fast forward
- To rewind
- To skip to the next or previous file
- To skip forward or backward by specified time interval
- TIME SKIP (page 141)
- Playback functions and settings
- Changing the playback speed
- Performing phrase playback
- During playback, tap BACK.
- Performing A-B repeat playback (segment repeat playback)
- Play the file you want to perform A-B repeat playback.
- Tap LIST at the position you want to start the segment for A-B repeat.
- Tap LIST at the position you want to end the segment for A-B repeat.
- Performing time search for playback
- Turn on the power. While in the RECORD mode or MUSIC mode, tap MENU.
- Tap +/- to select “PLAY MENU”, and then tap ▶.
- Tap +/- to select "TIME SEARCH", and then tap OK.
- Enter the current time.
- About playback in the MUSIC mode
- ■ About MYLIST1 to MYLIST5 files
- ■ Sorting the MUSIC folder files
- Folder skip function
- While playing a file in the MUSIC mode, press the SCENE button ( musical).
- Tap /to select a folder to play.
- When you want to exit folder skip mode, tap the SCENE button ( ) or OK.
- Editing
- Setting or erasing an index mark
- Setting an index mark
- During recording, recording pause, or playback, tap MODE to set an index mark at the desired position.
- Skipping to the next/previous index mark
- Erasing index marks
- Tap +/- to select a file for erasing its index marks, and then tap ▶ OK.
- Tap / to select "YES".
- Dividing a file
- Tap +/- to select "EDIT MENU", and then tap OK.
- Tap +/- to select "DIVIDE", and then tap OK.
- Tap /to select "YES".
- Tap OK
- ■ How the file division function works and how file names are determined
- Using the playlists (in MUSIC folder only)
- Registering a file or folder in a playlist (MYLIST)
- Select a MUSIC (M) folder.
- Tap +/- or ↕ to select a file or folder to register to the playlist, and then tap MENU.
- Tap ↓ to select a playlist (from MYLIST1 to MYLIST5), and then tap ▶ OK.
- Changing the play order of files in a playlist
- De-registering a file from a playlist (MYLIST)
- Select a playlist (P1 to P5) you want to use to de-register a file. Switching operation mode/folder (page 31)
- Tap +/- to select a file you want to de-register, and then tap MENU.
- Tap +/- to select "ERASE", and then tap OK.
- Tap ↓ to select "YES", and then tap OK.
- De-registering all files from a playlist (MYLIST)
- Select a playlist (P1 to P5) you want to de-register all files from it. Switching operation mode/folder (page 31)
- Tap +/- to select "ERASE ALL", and then tap ▶ OK.
- Using FM radio
- Listening to FM radio
- ■ Specifying where to output radio broadcast
- ■ About radio reception
- About selecting FM station
- - PRESET MODE
- - FREQUENCY MODE
- Selecting from registered stations (preset station selection)
- Manually selecting a station (manual tuning)
- Adding or deleting a station
- Adding a station
- Select a FM station you want to register.
- Tap LIST.
- Tap +/- to select "REGISTER".
- Tap ↗ to select a channel you want to use to register the station (channels 1 to 20).
- Deleting a station
- Initializing presets
- Switch to the FM RADIO mode.
- Tap +/- to select "INIT PRESET", and then tap ▶ OK.
- Tap /to select "YES".
- Tap ▶ The preset channel settings are returned to their default conditions.
- Recording FM radio
- Select a station you want to record.
- Press REC button (○).
- About the recording mode during FM radio recording
- Using the timer
- Setting up the timer
- Tap +/- to select "TIMER & ALARM", and then tap ▶.
- Tap +/- to select a setting, and then tap OK.
- Timer playback/recording common settings
- ■Timer on/off
- ② Tap ▶ok
- ■ Repeat timer
- ② Tap OK
- ■ If repeat timer is set to "SELECT"
- ■ Timer start time
- ■ Timer end time
- Settings for timer playback
- Settings for timer recording
- ■What operation
- ■ Recording source
- ■Sound quality (only when recording source is set to "MIC")
- ■ Recording destination (only if the recording source is set to "MIC")
- ■ Selecting a station (only if the recording source is set to "FM")
- ■ Output setting
- Completing timer setting
- Using the sleep timer
- Tap /to specify when to activate the sleep timer, and then tap ▶ OK.
- Erasing files
- About the recycle bin function
- About the RECYCLE folder display when the recycle bin function is turned on
- ● When there is no file
- - When there is a file
- About name of file when moved to the RECYCLE folder
- ■001\_001 A\_100320\_1200.MP3
- Recovering a file from the RECYCLE folder
- Tap / to select "YES", and then tap
- Emptying the RECYCLE folder
- Tap ↓ to select "YES", and then tap OK.
- Erasing a file
- Turn on the power. Turning on the power (page 36)
- Switch to the folder containing the file you want to erase. Switching operation mode/folder (page 31)
- Tap ↓ to select "YES", and then tap OK.
- Erasing all files in a folder
- Turn on the power.
- Switch to the RECORD mode or MUSIC mode.
- Formatting a microSD card
- Tap MENU. The menu appears.
- Tap +/- to select "COMMON MENU", and then tap ▶ OK.
- Tap +/- to select "FORMAT", and then tap OK.
- Tap ▶ to select "YES", and then tap OK.
- About the menus
- How to use the menus
- Turn on the power, and then switch to the RECORD mode or MUSIC mode.
- Select a menu. Tap +/- to select a menu, and then tap ▶ Here, “■ REC MENU” is selected.
- Select a setting to change. Tap +/- to select a setting, and then tap ▶ Here, the “REC MODE” setting is selected. The settings available change depending on the menu.
- Change the value of the setting.
- Menu list
- ■ Menus available when the unit stops
- ■ Playback menu
- ■ RECYCLE folder menu
- ■ Playlist editing menu
- ■ "EDIT PRESET" menu
- ■ Recording scene editing menu
- ■ Recording standby menu
- Using the recording menu ( * REC MENU)
- REC MODE
- Recording mode and possible recording time (page 176)
- MIC SENS.
- MIC ALC
- How to adjust recording level (page 59)
- MIC MODE
- LOW CUT FILTER
- PEAK LIMITER
- SELF TIMER
- INIT MENU (page 152)
- VAS
- ■ Adjusting the sound detection level
- EXT INPUT
- HEAD PHONE:
- LINE IN:PORTABLE:
- LINE IN:COMPO *1 :
- \*1 Component Stereo System
- Using the playback menu (PLAY MENU)
- REPEAT
- PHRASE PLAY
- TIME SKIP
- SOUND EQ
- ■ Selecting a sound equalizer mode
- ■ Setting your favorite sound EQ mode (only when USER is selected)
- Change the "SOUND EQ" mode to "USER".
- Tap /to select a frequency band you want to change.
- Tap +/- to change the level of the selected frequency band.
- Tap OK
- Changing the recording scene select setting
- Customizing a recording scene
- Press the SCENE button ( )
- Tap 4 to select a recording scene you want to customize.
- Tap +/- to select a setting to change.
- Change the value of the selected setting.
- Restoring a recording scene to its default
- Press and hold the SCENE button (💡) for more than 2 seconds.
- Tap or to select a recording scene you want to restore, and then tap OK.
- Tap ↙ to select "YES", and then tap ▶ OK.
- Using the FM radio menu (©FM setting)
- AUTO PRESET
- OUTPUT
- AUTO:
- SPEAKER:
- STEREO/MONO
- Using the common menu (COMMON MENU)
- BEEP SOUND
- LED SETTING
- SENSOR SENS.
- AUTO POWER OFF
- BACKLIGHT
- ON:
- ON (LOW POWER):
- OFF:
- CONTRAST
- LED NAV
- RECYCLE BIN
- INIT MENU
- ID3 LANGUAGE
- VERSION
- Before using the unit with your PC
- Checking the operating environment
- Operating environment
- ● About Windows Media Player
- ■ Notes on PC connection
- What can you do from your PC?
- ■ Backing up recorded files to your PC
- ■ Restoring audio files from your PC
- ■ Copying audio files to CD-R/RW
- ■ Creating audio files (CD ripping)
- ■ Using Windows Media Player to transfer music files
- ■ Functioning as microSD card reader/writer
- Connecting/disconnecting your PC
- Connecting your PC
- Connect the micro USB connection cable to the micro USB terminal of the unit.
- With the power turned off, connect the other end of the micro USB connection cable to your PC.
- ■ Screen display during connection with PC
- ■ The first time you connect the unit to your PC
- ■ About the AutoPlay screen
- Disconnecting your PC
- Click the Task Tray icon, and then click "Safely remove USB mass storage device".
- When the "Safe To Remove Hardware" message appears, disconnect the unit from your PC.
- Using your PC to charge the battery
- Connecting to your PC
- Connect the unit to your PC.
- Connecting your PC (page 157)
- Disconnecting your PC (page 158)
- When charging is finished, disconnect the unit from your PC.
- Using the multi-cradle to charge the unit (page 47)
- Viewing the unit's folders and files from your PC
- Connect the unit to your PC.
- Open My Computer.
- Open the XPS01.
- Troubleshooting
- Check to see that the unit is correctly recognized by your PC.
- ● Windows 7, Windows Vista
- ● Windows XP
- If Device Manager does not display the information correctly
- Additional information
- Error messages
- Before contacting your local dealer
- Frequently asked questions
- Q: Why do I hear rustling noise in audio recorded from the microphone?
- Q: How can I save recordings to a tape or MD?
- Audio cable
- Q: When I move a file from my PC back to the unit, it can no longer be played.
- Cleaning
- ■ About rising temperature of the unit
- Main specifications
- Digital Sound Recorder main unit specification
- Supplied Cradle Active Speaker specification (ICR-XPS01MF ONLY)
- Supplied lithium-ion battery specification
- Index
- A
- B
- C
- D
- E
- F
- H
- |
- L
- M
- O
- P
- R
- S
- T
- V
- W
Brand : SANYO
Model : ICR-XPS01
Category : Uncategorized