
375475 - Switch Extech - Free user manual and instructions
Find the device manual for free 375475 Extech in PDF.


| Product Type | Switch |
| Model | 375475 |
| Brand | Extech |
| Category | Commutateur (Switch) |
| Contact Configuration | SPDT |
| Voltage Rating | 120V AC |
| Current Rating | 15A |
| Mounting Type | Panel mount |
| Terminal Type | Screw terminals |
| Switch Function | On-Off |
| Actuator Type | Toggle |
| Illumination | None |
| Dimensions (approx) | 1.9 x 0.8 x 0.6 in |
| Weight | 0.1 lb |
| Operating Temperature | -20°C to 85°C |
| Compliance | UL, RoHS |
| Material | Plastic housing, metal contacts |
| Installation | Requires 0.5 in diameter hole |
| Spare Parts | Not available separately |
| Maintenance | Periodic cleaning with dry cloth |
| Safety | Use appropriate rated fuse; meets UL standards |
Frequently Asked Questions - 375475 Extech
User questions about 375475 Extech
0 question about this device. Answer the ones you know or ask your own.
Ask a new question about this device
Download the instructions for your Switch in PDF format for free! Find your manual 375475 - Extech and take your electronic device back in hand. On this page are published all the documents necessary for the use of your device. 375475 by Extech.
USER MANUAL 375475 Extech
7-Day Programmable Digital Timer
Model 375475
Introduction
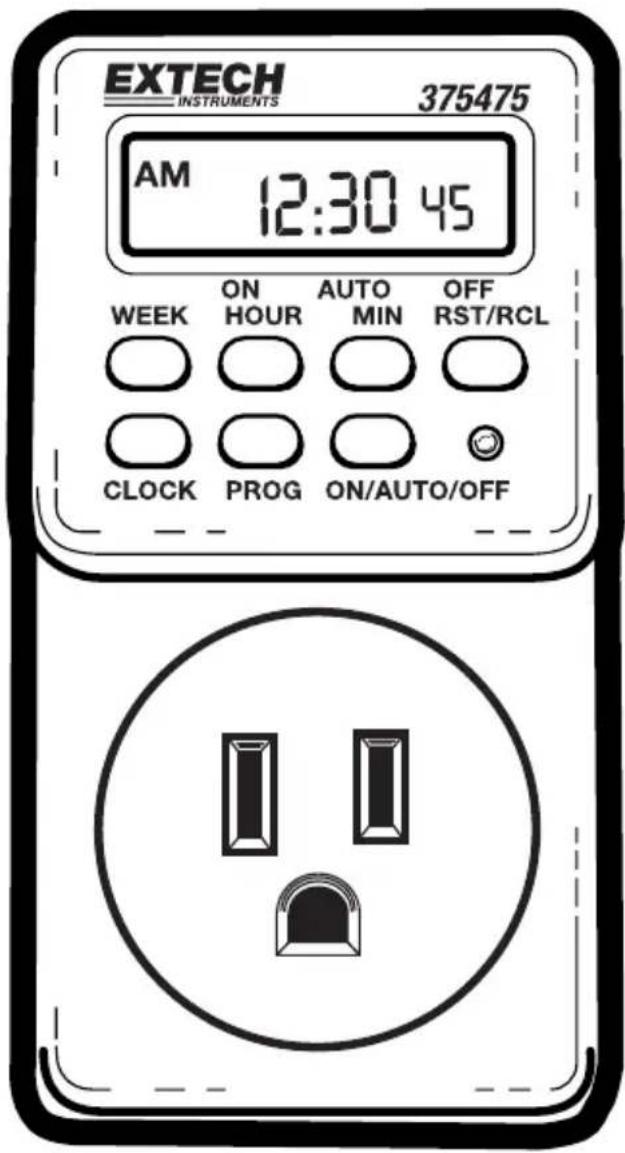
Congratulations on your purchase of the Extech 375475 Digital Timer. This device features individual or multi-day timer settings (up to 6 On/Off settings per day), easy-to-read LCD, and battery-backup for the real-time clock. Careful use of this timer will provide years of reliable service.
General Specifications
Input Line Voltage 120VAC (60Hz)
Switching Interval 1 minute minimum
Max Output Current 15A (resistive load); 8A (lighting load)
Max Resistive Load 1800W (15A x 120VAC)
Max Lighting Load 960W (8A x 120VAC)
Max Motor Load 1 Hp
Memory Backup One 1.5VDC Type N battery
Dimensions 4x2x2" (104x54x51mm)
Weight 5.25 oz. (150g)
Operation
Set the Real-Time Clock
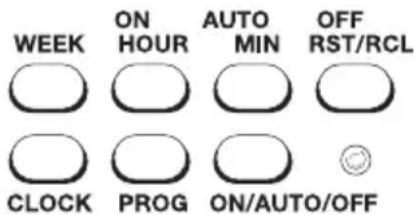
- Day Set: Hold down the CLOCK button and press the WEEK button until the correct day appears at the top of the display.
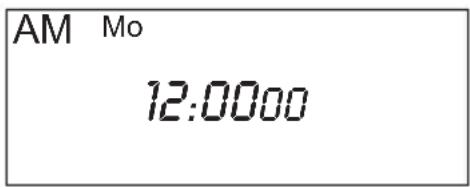
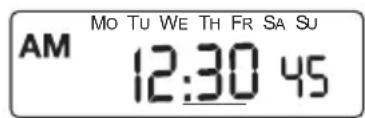
- Time Set: Hold down the CLOCK button and press the HOUR button until the display indicates the correct hour. You may have to cycle through the hours twice to obtain the proper AM or PM (on the left side of the display).
- Hold down the CLOCK button and press the MIN button until the display indicates the correct minutes. Seconds will automatically reset to zero.
Set the Power ON/OFF Timers
- Push the PROG button once. 1^ON will appear near the lower left corner of the display to indicate the first power-on time is ready to be programmed.
- Press the HOUR and MIN buttons to enter your first desired power-on time.

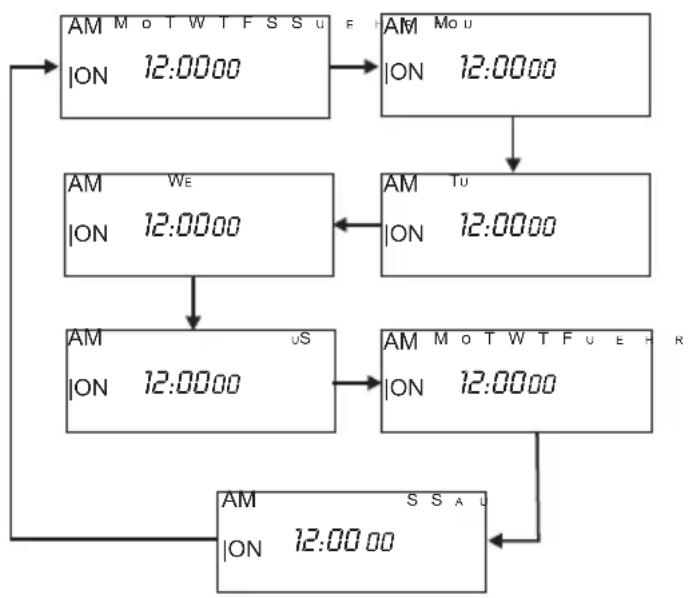
- Press the WEEK button to select the desired day. These days appear along the top of the display. If "Mo Tu We Th Fr Sa Su" all appear on the display, these days all have the same power-on time. You can select "Mo Tu We Th Fr" as a group, "Sa Su" as a group, or a single day.
flowchart
graph TD
    A["AM MO T W T F S S U E H"] --> B["AM MO U"]
    B --> C["AM TU"]
    C --> D["AM US"]
    D --> E["AM SS AU"]
    A -->|ON 12:0000| F["AM WE ON 12:0000"]
    B -->|ON 12:0000| G["AM TU ON 12:0000"]
    C -->|ON 12:0000| H["AM US ON 12:0000"]
    D -->|ON 12:0000| I["AM SS AU ON 12:0000"]
    E -->|ON 12:0000| J["AM SS AU ON 12:0000"]
- When you have your first desired power-on time and date entered, press the PROG button. 1_OFF now appears on the display to indicate that the first power-off time is ready to be programmed. Repeat steps 2 and 3 to enter your first desired power-off time.

- Press the PROG button again. 2 ^ON appears on the display to indicate that the second power-on time is ready to be programmed. Repeat the same procedure used in steps 2 through 4 to enter the rest of your power-on/power-off times (up to 6 on/off times maximum).

- Press the PROG button to step through the times you entered to make sure they are correct.
- Press the RST/RCL button to reset or recall any timer entries. When you reset a particular power-on/off entry, four dashes will appear instead of time. When you recall an entry, it will return the values that were set before you performed a reset.
- Press the CLOCK button to return to the real time clock display.
- Press the ON/AUTO/OFF button until the bar below the display is positioned above the OFF legend on the face of the timer.
Connecting an Appliance to the Timer
- Plug the Digital Timer into a standard AC outlet. If the power indicator light is on, press ON/AUTO/OFF button once or twice until the light goes out. NOTE: The bar below the display should be above the "OFF" legend.
- Plug the appliance cord you wish to control into the socket on the Digital Timer. Make sure any power switch on the appliance is set to on. (The appliance will not turn on because the Digital Timer is set to off).
- To manually turn the appliance on, press the ON/AUTO/OFF button until the power indicator lights and the bar below the display is above the "ON" legend on the timer's faceplate.
- To automatically control the appliance, press the ON/AUTO/OFF button until the bar below the display is above the "AUTO" legend on the faceplate.
Notes:
- Be sure to observe battery polarity when you insert it into the timer.
- Do not overload the timer. Be sure that the appliance that you wish to control does not exceed the maximum loads shown under "Specifications".
- Always set the real-time clock before entering your on/off times.
Warranty
EXTECH INSTRUMENTS CORPORATION warrants this instrument to be free of defects in parts and workmanship for one year from date of shipment (a six month limited warranty applies on sensors and cables). If it should become necessary to return the instrument for service during or beyond the warranty period, contact the Customer Service Department at (781) 890-7440 ext. 210 for authorization or visit our website at www.extech.com for contact information. A Return Authorization (RA) number must be issued before any product is returned to Extech. The sender is responsible for shipping charges, freight, insurance and proper packaging to prevent damage in transit. This warranty does not apply to defects resulting from action of the user such as misuse, improper wiring, operation outside of specification, improper maintenance or repair, or unauthorized modification. Extech specifically disclaims any implied warranties or merchantability or fitness for a specific purpose and will not be liable for any direct, indirect, incidental or consequential damages. Extech's total liability is limited to repair or replacement of the product. The warranty set forth above is inclusive and no other warranty, whether written or oral, is expressed or implied.

Support Hotline (781) 890-7440
Tech support: Ext. 200; Email: support@extech.com
Repair/Returns: Ext. 210; Email: repair@extech.com
Website: www.extech.com
Copyright © 2004 Extech Instruments Corporation
All rights reserved including the right of reproduction in whole or in part in any form.
Brand : Extech
Model : 375475
Category : Switch