ECM-D1280(BK) - Coffee maker Elba - Free user manual and instructions
Find the device manual for free ECM-D1280(BK) Elba in PDF.


| Product Type | Coffee Maker |
| Brand | Elba |
| Model | ECM-D1280(BK) |
| Colour | Black |
| Capacity | 1.2 L (approx. 10 cups) |
| Power Consumption | 1000 W |
| Voltage | 220–240 V, 50/60 Hz |
| Dimensions (W x D x H) | 25 x 20 x 30 cm |
| Weight | 1.5 kg |
| Water Tank | Removable, transparent with level markings |
| Filter Type | Basket filter (paper or permanent) |
| Warming Plate | Automatic keep-warm function |
| Drip-Stop | Pause & serve function |
| Auto Shut-Off | Yes, after 2 hours |
| Anti-Drip System | Yes, allows removing carafe mid-brew |
| Carafe | Glass carafe with handle and lid |
| Cleaning | Descaling recommended periodically |
| Safety Features | Overheat protection, auto shut-off |
| Repair & Spare Parts | Replaceable water tank, carafe, filter basket |
Frequently Asked Questions - ECM-D1280(BK) Elba
User questions about ECM-D1280(BK) Elba
0 question about this device. Answer the ones you know or ask your own.
Ask a new question about this device
Download the instructions for your Coffee maker in PDF format for free! Find your manual ECM-D1280(BK) - Elba and take your electronic device back in hand. On this page are published all the documents necessary for the use of your device. ECM-D1280(BK) by Elba.
USER MANUAL ECM-D1280(BK) Elba
natural_image
Line drawing of a coffee maker with lid and handle (no text or symbols)ELBA
COFFEE MAKER
MODEL: ECM-D1280(BK)
Owner's Manual
Please read this manual carefully before operating your set.
Retain it for future reference.
Record model number and serial number of the set.
See the label attached on the set and quote this information to your dealer when you require service.
For The Warranty Terms & Conditions, Please Refer To Warranty Certificate.
IMPORTANT SAFEGUARDS
When using this appliance, basic precautions should always be followed, including the following:
- Read all instructions before using.
- To protect against electric shock, do not immerse the appliance in water or any other liquids.
- Do not operate the appliance with damaged power cord or plug, after the appliance malfunction, or if it is dropped or damaged in any manner. Return the appliance to the nearest authorized dealer or after-sales service center for examination, repair, electrical or mechanical adjustment.
- Do not let the power cord hang over edge of table or counter or hot surface.
- To disconnect the plug from wall outlet, grasp the plug and not the cord.
- Do not leave the appliance unattended while it is operating.
- Do not use a cracked glass jug or a glass jug with loose handle. Use the glass jug provided only with this appliance. Be careful while handling the glass jug as it is fragile.
- Never leave the empty glass jug on the hotplate otherwise the glass jug is liable to crack.
- Never place the hot glass jug on a wet or cold surface.
- Never use this appliance without water fill up into the water tank.
- Do not let all of the liquid evaporate in the glass jug when the appliance is on.
- Always place the appliance on a flat and stable surface.
- Scalding may occur if the top cover is removed during the brewing process.
- This appliance is not intended for used by persons (including children) with reduced physical, sensory or mental capabilities, or lack of experience and knowledge, unless they have been given supervision or instruction concerning use of the appliances by a person responsible for their safety.
- Children should be supervised to ensure that they do not play with the appliance.
- Do not place the appliance on a hot surface and do not let the cord contact with hot surfaces.
- Never use any accessories or parts from other manufacturers or that ELBA does not specifically recommended. Using compatible parts can create hazard.
- Do not clean the water tank with cleaners, steel wool pads, or any other abrasive materials.
- Unplug the appliance before you clean it and if problem occur during brewing.
- Unplug the appliance from wall outlet when not in use and before cleaning. Allow appliance to cool completely before putting on or taking off the parts.
- Do not operate the appliance for other than its intended use.
- This appliance is for domestic use only.
- Do not use this appliance outdoors.
- Save these instructions for future reference.
PRODUCT DESCRIPTION
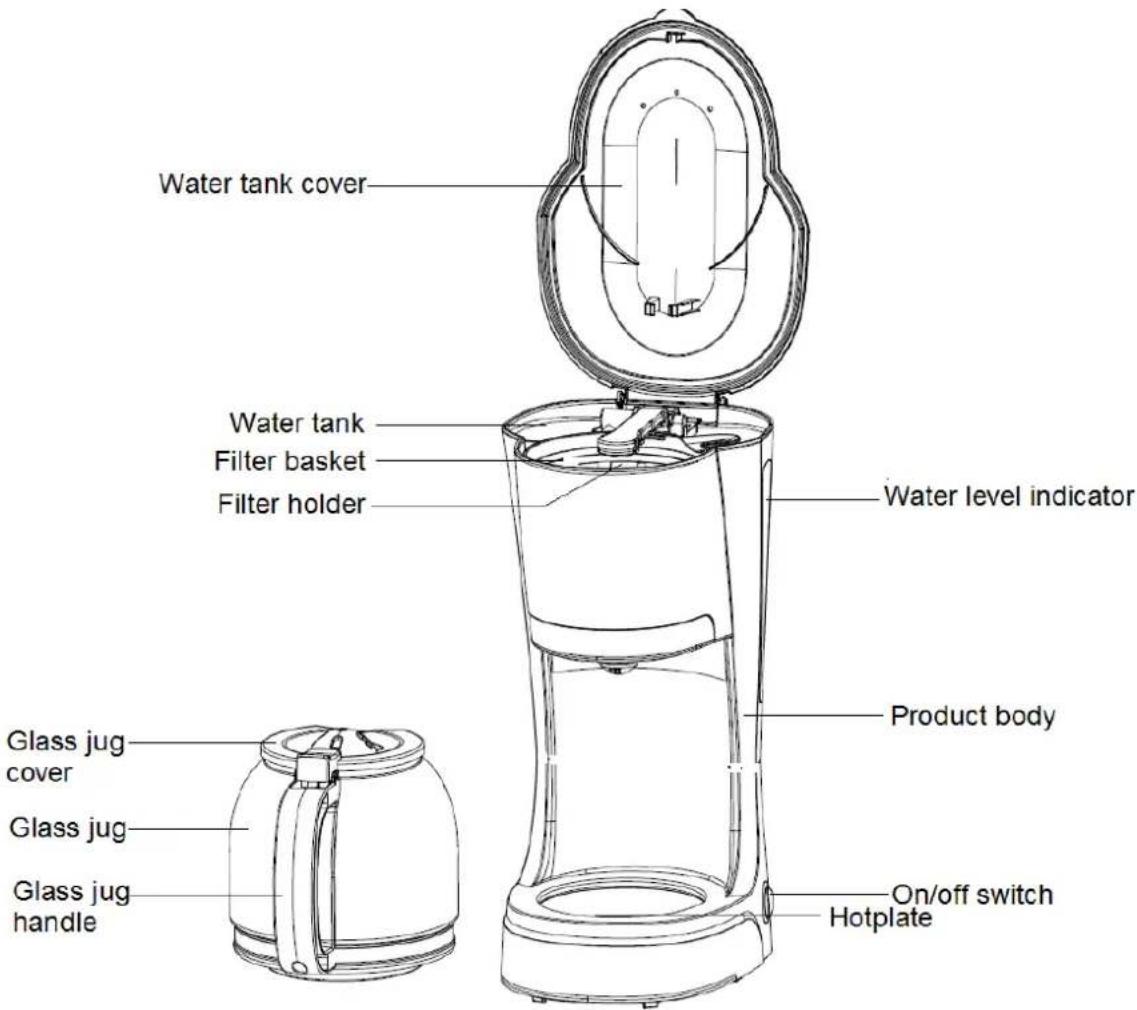
USING THE COFFEE MAKER FOR THE FIRST TIME
-
Remove all packaging materials and make sure the appliance is received in good condition. Tear up and discard all plastic bags as they pose a risk to children.
-
Clean the glass jug and filter thoroughly with clean water. Wipe body clean with damp cloth.
Note: Do not immerse the appliance, cord and plug in water or any others liquids.
-
Place the appliance on a flat and stable surface.
-
Connect the plug to the wall outlet.
Note: Make sure the cord is not contact with hot surfaces.
- Fill up the water tank with water up to the "MAX" marking (refer to the water level indicator), boil and discard the water for two times.
- Open the water tank cover. Fill water into the water tank until the level indicator shows desired level.
Note: Refer to the water level indicator for the maximum water level marking and never exceed the "MAX" mark.
- Make sure the filter basket is inside the filter holder. You may use filter provided or line it with a store-bought paper filter. Add coffee ground into the filter. The standard recipe is one spoon of coffee ground for each cup of water, however, the amount of coffee ground can be adjusted to your taste and is dependent upon type of coffee, fines of grounds and flavor of coffee desired. Close the water tank cover.
Note: Make sure that the filter basket is inserted properly onto the filter holder, otherwise the water tank cover cannot be closed securely.
- Place the glass jug on the hotplate and make sure the lid of glass jug is fitted and pointed to the dripping hole.
WARNING: Do not use a cracked glass jug or a glass jug with loose handle. Use the glass jug provided only with this appliance. Be careful while handling the glass jug as it is fragile.
-
Connect the plug into the wall outlet, press the on/off switch to the "I" position, the light indicator will be on. The appliance will start to operate.
-
The appliance will stop from operating if the on/off switch is pressed to the "0" position at any time. The appliance will continue to brew when the switch is pressed again to "I" position.
Note: The coffee will stop dripping when the glass jug is removed for pouring a cup of coffee before the entire brewing cycle is complete. Return the glass jug to the hotplate immediately after pouring to ensure proper function of the appliance.
- Do not open the water tank cover while the coffee is brewing.
WARNING: Scalding may occur when contacting this hot surfaces during the brewing process.
- The glass jug can be removed at anytime for serving when the brewing process is done (about one minute after the coffee stops from dripping out).
Note: The amount of coffee collected in the glass jug will be lesser than the water you add into the water tank, as some water is absorbed by the coffee ground. Do not contact the hotplate while the appliance is operating as it is very hot.
-
Do not move the appliance while in use or immediately after the brewing is complete.
-
For optimum coffee taste, serve it right after brewing. To keep coffee warm for serving later, let the appliance remain on after brewing. However, make sure to turn off the appliance when the glass jug becomes empty.
-
Do not reheat the coffee.
-
Do not reuse the coffee ground.
-
Always switch off and unplug the plug from the wall outlet when not in use.
Caution: Be careful when pouring out the coffee from the glass jug as the temperature is high right after brewing.
CLEANING AND MAINTENANCE
- Unplug the appliance from wall outlet.
- Allow the appliance to cool completely before cleaning.
- Remove and clean the filter and glass jug after each use. Wash in warm, soapy water. Rinse well and dry thoroughly before returning to appliance.
Caution: To protect against electric shock, do not immerse the appliance in water or any other liquids. - Wipe the exterior of the product with a soft, damp cloth to remove stains.
- Use a damp cloth and gently wipe the hotplate. Never use abrasive cleaner to clean it.
- Wipe body dry with a soft dish cloth.
CLEANING THE MINERAL DEPOSITS
Regular descaling can prolong the life of the appliance and maintain optimal brewing results with a constant brewing time.
- Fill the glass jug with 1/4 vinegar and 3/4 water. Pour the solution into water tank and turn on the appliance.
Note: Do not put filter and coffee ground. You can also use an appropriate liquid descaler. In this case, follow the instructions on the package of the descaler.
Note: Descaling takes approx. 30 to 60 minutes. - Allow solution to drip through into the glass jug.
- Empty the glass jug. Repeat this process 2-3 times with fresh vinegar or water solution each time.
- After the above steps, fill the water tank with water and run to remove any solution or descaler and scale residues. Repeat as necessary.
Note: Let the appliance cool down for approx. 3 minutes before each repeat.
ENVIRONMENT-FRIENDLY DISPOSAL
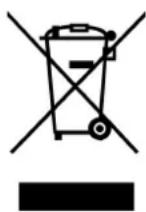
You can help to protect the environment!
Please remember to respect the local regulations: hand in the non-working electrical equipments to an appropriate waste disposal centre.
ELBA

Brand : Elba
Model : ECM-D1280(BK)
Category : Coffee maker