
PSTNDW15 - Speaker Stand Pyle - Free user manual and instructions
Find the device manual for free PSTNDW15 Pyle in PDF.


| Product Type | Speaker Stand |
| Brand | Pyle |
| Model | PSTNDW15 |
| Material | Heavy-duty steel |
| Weight Capacity | Up to 50 lbs (22.7 kg) per stand |
| Height Adjustable | Yes, 24 to 36 inches |
| Base Dimensions | 12 x 12 inches |
| Top Plate Dimensions | 4 x 4 inches |
| Mounting Type | Floor standing |
| Weight per Stand | Approx. 8 lbs (3.6 kg) |
| Color | Black |
| Cable Management | Yes, built-in |
| Non-Slip Pads | Yes, on base and top plate |
| Included Accessories | Pair of stands, mounting hardware |
| Assembly Required | Yes, easy with included tools |
Frequently Asked Questions - PSTNDW15 Pyle
User questions about PSTNDW15 Pyle
0 question about this device. Answer the ones you know or ask your own.
Ask a new question about this device
Download the instructions for your Speaker Stand in PDF format for free! Find your manual PSTNDW15 - Pyle and take your electronic device back in hand. On this page are published all the documents necessary for the use of your device. PSTNDW15 by Pyle.
USER MANUAL PSTNDW15 Pyle
natural_image
Abstract black-and-white logo with concentric curved lines and a central 'P' shape (no text or symbols)PYLE®
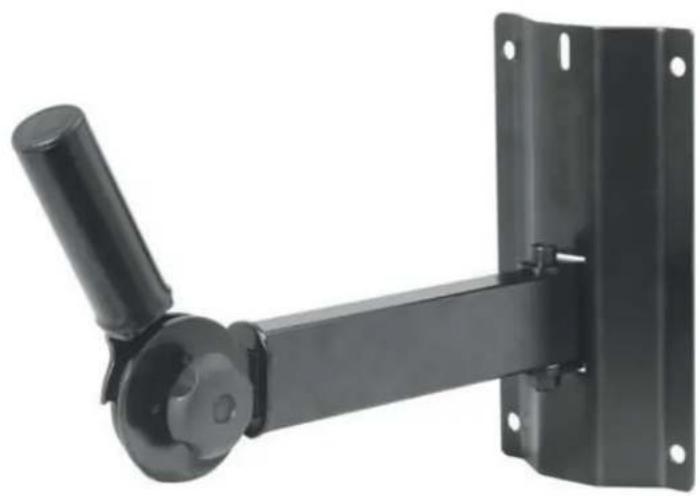
PSTNDW15 Adjustable Wall Mount Speaker Bracket
natural_image
Black metal mechanical lever arm mounted on a wall-mounted bracket (no text or symbols visible)User's Manual www.pyleaudio.com
Thank you for purchasing Pyle's PSTNDW15 Universal Wall Mount Speaker Bracket.
Specifications:
At upright 90° position, you can mount a 22" deep speaker cabinet.
At 30° tilt down position, you can mount a 30" deep speaker cabinet.

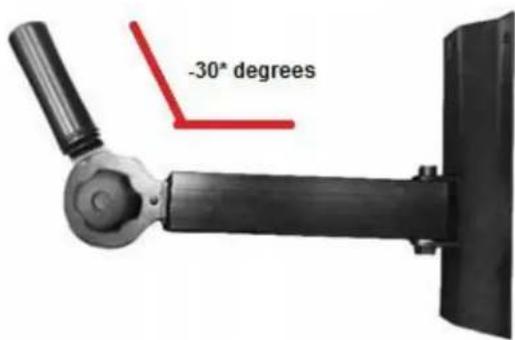
Adjustable tilt feature allows you to mount a 30" speaker cabinet
• Distance From Wall: 12.5"
• Weight Capacity: 80 lbs.
- Tilt Angle Adjustment: 90^ - 30^
- Swivel Angle Adjustment: ± 30^
- Standard 1 3/8" insert fits most speaker cabinets
- Added solid-steel pin serves as a safety-stop
- Construction: Steel
Installation Instructions:
- Required Tools: socket or hand wrench, drill, drill bit, stud finder, pencil, level, tape measure, (4) 3/8" x 4" lag bolts
Step #1: Remove brackets from box.
Step #2: Check for stud location with a stud finder and place speaker bracket in desired location.
Step # 3: Test that the bracket plate is level and mark the hole locations on the wall using the holes from bracket backer plate as a template.
Step #4: Drill proper mounting hole (smaller than outer thread diameter of your lag bolts) through wall into wood studs or concrete block. Hole depth should be properly drilled so that your lag bolt can go through the sheet rock and 2" into the stud.
Step # 5: Place speaker bracket on wall and install 3/8" lag bolts (recommended) in the upper location. Securing tightly until the head of the lag bolt is firmly against the bracket. Repeat for bottom location.
Step #6: Before placing the speaker cabinet on the bracket, test installation by confirming the bracket will hold the weight of your speaker. If desired, tilt the angle of the bracket downward to the desired angle and tighten the bolts to lock in place.

Step #7: Place the speaker on the cabinet by inserting the vertical sleeve into the speaker cabinet's internal adapter. Be sure the speaker is secure before releasing it. Test installation with speaker in vertical and tilted positions to be sure the bracket stays firmly against the wall.
Brand : Pyle
Model : PSTNDW15
Category : Speaker Stand