
CN-DV2000 - Gps PANASONIC - Free user manual and instructions
Find the device manual for free CN-DV2000 PANASONIC in PDF.


| Product Type | Car GPS Navigation System |
| Brand | Panasonic |
| Model | CN-DV2000 |
| Display Size | 5.8 inches (estimated) |
| Dimensions (approx.) | 5.5 x 3.2 x 0.8 inches (140 x 82 x 20 mm) |
| Weight (approx.) | 0.44 lbs (200 g) |
| Power Source | 12V car cigarette lighter adapter |
| Battery | Rechargeable lithium-ion (estimated capacity 1000 mAh) |
| Main Functions | GPS navigation, turn-by-turn directions, preloaded maps, points of interest (POI) |
| Map Coverage | United States and Canada (estimated for North America version) |
| Touchscreen | Yes, resistive touchscreen |
| Voice Guidance | Yes, text-to-speech for street names (estimated) |
| Traffic Support | Optional external traffic receiver (sold separately) |
| Memory Expansion | SD card slot for map updates and additional data |
| Connectivity | USB 2.0 for PC connection and charging |
| Mounting | Windshield suction cup mount and dash mount included |
| Care and Cleaning | Clean with a soft, dry cloth. Avoid liquids and abrasive cleaners. |
| Safety | Do not operate while driving. Mount securely to avoid obstruction. |
| Spare Parts and Repairability | Contact Panasonic service center for replacement parts. Not user-serviceable. |
| General Information | Released circa 2000s. User manual available in English (PDF, 90 pages). |
Frequently Asked Questions - CN-DV2000 PANASONIC
User questions about CN-DV2000 PANASONIC
0 question about this device. Answer the ones you know or ask your own.
Ask a new question about this device
Download the instructions for your Gps in PDF format for free! Find your manual CN-DV2000 - PANASONIC and take your electronic device back in hand. On this page are published all the documents necessary for the use of your device. CN-DV2000 by PANASONIC.
USER MANUAL CN-DV2000 PANASONIC
Panasonic welcomes you to our ever growing family of electronic product owners. We know that this product will bring you many hours of enjoyment. Our reputation is built on precise electronic and mechanical engineering, and our products are manufactured with carefully selected components and assembled by people who take pride in their work. Once you discover the quality, reliability, and value we have built into this product, you too will be proud to be a member of our family.
□ Features
Compatible with PAL DVD (Video CD) and NTSC DVD (Video CD)
This player can play discs recorded in either PAL or NTSC format. However, the player must be connected to a PAL TV which is capable of receiving PAL 525/60 system to play both PAL DVD (Video CD) and NTSC DVD (Video CD).
□ Use This Product Safety
When Driving
Keep the volume level low enough to be aware of road and traffic conditions.
When Car Washing
Do not expose the product to water or excessive moisture. This could cause electrical shorts, fire or other damage.
When Parked
Parking in direct sunlight can produce very high temperatures inside your vehicle. Give the interior a chance to cool down before starting playback.
Use the Proper Power Supply
This product is designed to operate with a 12 volt DC, negative ground battery system.
Protect the Disc Mechanism
Avoid inserting any foreign objects into the slot of this player.
Failure to observe this many cause malfunction due to the precise mechanism of this unit.
Use Authorized Servicenters
Do not attempt to disassemble or adjust this precision product. Please refer to the Servicenter list included with this product for service assistance.
For Installation
The unit should be installed in a horizontal position with the front end up at a convenient angle, but not more than 30^ .
Introduction
The CN-DV2000EN is a mobile navigation system with multimedia capabilities. It functions as a
• Mobile navigation system,
• Music CD player, and
• DVD* video and video CD player
* : A DVD (Digital Versatile Disc) is a storage media capable of storing 4.7 GB of data, which is about 7 times larger than the storage capacity of a CD-ROM.
Mobile Navigation System
This mobile navigation system utilizes GPS* satellite signals to track and display your vehicle's current position, and guide you from your starting point to your destination along a calculated route.
* : GPS (Global Positioning System) is a position detecting system utilizing the signals from GPS satellites deployed by the U.S. Defense Department.
The CN-DV2000EN Mobile Navigation System has the following special features:
• Detailed maps are used.
Selected destinations will be displayed for easy viewing.
• Desired places can be registered.
A destination can be set whenever you like from among the desired places and facilities registered.
• DVD video can be watched.
Notice to Customers
Map discs you may use are optionally available. For more information, contact the store where you purchased the product.
CAUTION!
Map Disc
This product supports the Navtech DVD-SDAL map disc format only. Panasonic cannot be responsible for accidents resulting from the use of map discs of other formats.
Contents
Features 2
Use This Product Safety 2
Introduction 3
precautions 6
warning 7
caution 7
Accessories and Documentation 8
Names and Functions of Remote Control
Buttons 9
Preparing the System for Initial Use ..... 10
Inserting Batteries into the Remote Control ... 10
Starting the Mobile Navigation System ..... 11
Map Displays 13
Pop up Menu 16
Wiring Check 17
Automatic Distance Correction Check ..... 18
Checking GPS Satellite Reception.... 20
Operating the System While Driving ..... 21
Destination Input and Route Search ..... 22
Character Input 23
Entering an Address as Destination 24
Entering an Intersection as Destination.... 27
Entering a POI as Destination 29
History 32
Entering a Destination from Your Destination
Marked Point 33
Entering a Destination Stored in your Marked
Map Display 34
Selecting a Destination Directly from the Map
Voice Guidance 35
Terminating Route Search 36
Previewing a Route 36
Canceling a Route 36
Detouring 37
Alternative Route 37
Detour xxkm 37
Avoid Streets 38
Via Point 38
Marked Point 40
Marking your Current Position 40
Marking Any Point on the Map 40
Changing a Marked Point Icon 41
Renaming a Marked Point 42
Deleting a Marked Point 43
Setup Menu 44
Basic Setup Menu Operations 44
Map 45
Route 47
System 49
Information 51
Simulation 51
Demonstration 51
Edit Marked Point 52
Vehicle Position 52
GPS 53
Map Matching 53
Intelligent Map Matching 54
Positioning Accuracy 54
Route Search 55
Route Guide 56
Playing Music CDs 57
operation....57
DVD Video/Video CD 58
DVD Video 58
Video CD 59
Disc Formats Supprted 60
Individual Property Rights 60
Names and Functions of Remote Control
Buttons 61
Disc Operation 62
Play 62
Stop 63
Rapid Advance/Rapid Reverse 63
Skip 63
Pause 64
Playing a Specified Title/Chapter/ Track ..... 64
On-Screen Display of Playback Information... 65
Changing the Subtitle Language 66
Changing the Audio Soundtrack Language ... 67
Changing the Viewing Angle 68
Setup Menu 69
Menu Language 69
Subtitle Language 69
Audio Language 70
TV Aspect 70
TV Mode 71
On-Screen Messages 72
Audio Output Level 72
Dynamic Range Compression 73
Display Type 73
Language Code List 74
Troubleshooting 75
Installation Guide 82
Cautions
When installing the unit with the L-Shaped
Brackets 83
Wiring Connection 86
Installation of GPS Antenna 88
Final Check 89
Specifications 90
Inhalt
Markmale 92
Read the operating instructions for the player and all other components of your Mobile Navigation System carefully before using the system. They contain instructions on how to use the system in a safe and effective manner. Panasonic assumes no responsibility for problems resulting from failure to observe the instructions given in this manual.
This manual uses pictographs to show you how to use the product safely and alert you to potential dangers resulting from improper connections and operations. The meanings of the pictographs are explained below. It is important that you fully understand their meanings in order to use this manual and the system properly.
AGREEMENT
PLEASE READ THIS AGREEMENT CAREFULLY BEFORE USING OUR PRODUCT
This software and data ("Software") is provided for your personal, non-commercial use only. Copyright and other lows protect it.
By using this Software you agree to the following terms and conditions.
You agree to use this Software for solely personal use or, if applicable, for use in your business' internal operations, and not for service bureau, time-sharing or other similar purposes. Except to save it on your hard drive, you may not copy or reproduce this Software, and may not distribute it in any form, for any purpose. You agree not to disassemble, decompile or otherwise reverse engineer the Software, except to the extent expressly permitted by mandatory laws.
Further Restrictions. You may not use this Software with: (i) any positioning devices, including without limitation, any GPS receivers, compasses, wheel sensors, or any other distance or direction sensors; or (ii) any products, systems or applications installed in or otherwise connected to or in communication with vehicles, or capable of vehicle navigation, positioning, dispatch, real time route guidance, fleet management or similar applications; or (iii) any hand-held computer devices, cell phones or similar mobile devices.
No warranty. This Software is provided to you "as is," and you agree to use it at your own risk. Panasonic and its suppliers and licencors maqke no guarantees, representations or warranties of any kind, express or implied, arising by law or otherwise, including but not limited to, content, quality, accuracy, completeness, effectiveness, reliability, fitness for a particular purpose, usefulness, use or results to be obtained from this Software will be uninterrupted or error-free.
Disclaimer of Warranty: Panasonic AND ITS SUPPLIERS AND LICENSORS DISCLAIM ANY WARRANTIES, EXPRESS OR IMPLIED, OF QUALITY, PERFORMANCE, MERCHANTABILITY, FITNESS FOR A PARTICULAR PURPOSE OR NON-INFRINGEMENT. Some States, Territories and Countries do not allow certain warranty exclusions, so to that extent the above exclusion may not apply to you.
Disclaimer of Liability: Panasonic AND ITS SUPPLIERS AND LICENSORS SHALL NOT BE LIABLE TO YOU: IN RESPECT OF ANY CLAIM, DEMAND OR ACTION, IRRESPECTIVE OF THE NATURE OF THE CAUSE OF THE CLAIM, DEMAND OR ACTION ALLEGING ANY LOSS, INJURY OR DAMAGES, DIRECT OR INDIRECT, WHICH MAY RESULT FROM THE USE OR POSSESSION OF THE SOFTWARE; OR FOR ANY LOSS OF PROFIT, REVENUE, CONTRACTS OR SAVINGS, OR ANY OTHER DIRECT, INDIRECT, INCIDENTAL, SPECIAL OR CONSEQUENTIAL DAMAGES ARISING OUT OF YOUR USE OF OR INABILITY TO USE THIS SOFTWARE, ANY DEFECT IN THE SOFTWARE, OR THE BREACH OF THESE TERMS OR CONDITIONS, WHETHER IN AN ACTION IN CONTRACT OR TORT OR BASED ON A WARRANTY, EVEN IF Panasonic OR ITS LICENSORS HAVE BEEN ADVISED OF THE POSSIBILITY OF SUCH DAMAGES. Some states, Territories and Countries do not allow certain liability exclusions or damages limitations, so to that extent the above may not apply to you.
Indemnily. You agree to indemnify and hold Panasonic and its suppliers and licensors harmless from any liability or loss of any kind arising out of or in connection with any use by you of this Software.
Export Control. You agree not to export from anywhere any part of the Software provided to you or any direct product thereof except in compliance with applicable export laws, rules and regulations.
Governing Law. The above terms and conditions shall be governed by the laws of the Netherlands, without giving effect to (i) its conflict of laws provisions, or (ii) the United Nations Convention for contracts for the international Sagle of Goods.
Warning

Warning
This label intends to alert the user to the presence of important operating instructions.
Failure to heed the instructions may result in severe injury or death.
Warning : DO NOT OPERATE THE SYSTEM NOR LOOK AT THE MONITOR SCREEN WHILE DRIVING.
Do not change settings and destination locations while driving the vehicle.
Minimize the amount of viewing the monitor screen and listen to the voice guidance while driving. Operating the system will distract the driver from looking ahead of the vehicle and cause accidents. Always stop the vehicle in a safe location before operating the system.
caution

Caution
This label intends to alert the user to the presence of important operating instructions.
Failure to heed the instructions may result in injury or material damage.
Cautions :
• COMPLY WITH LOCAL TRAFFIC REGULATIONS WHILE DRIVING
When using the navigation system, always comply with the local traffic regulations.
• DO NOT USE THE SYSTEM OUTSIDE THE VEHICLE
Do not use the system for purposes other than described in this manual. Failure to do so may result in electric shock or injury.
- STOP THE VEHICLE BEFORE CARRYING OUT ANY OPERATIONS THAT COULD INTERFERE WITH YOUR DRIVING
If loading or unloading a disc or raising or lowering the monitor could interfere with your driving (for example gear lever shifting), stop the vehicle in a safe location first, then operate the system.
How to abandon battery cells (Netherlands)
natural_image
Simple line drawing of a trash bin with an X mark and circular base (no text or symbols)This appliance contains a lithium battery for memory back-up. Please consult your dealer when the battery needs replacement. Do not throw away the battery. Instead, take it to the designated collection point and hand it in as hazardous waste.
Accessories and Documentation
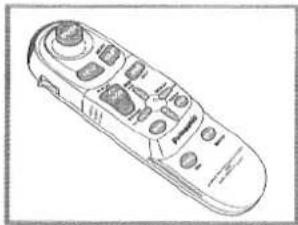
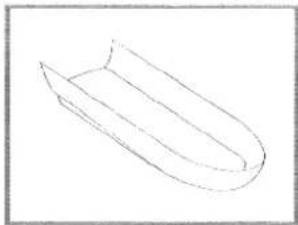
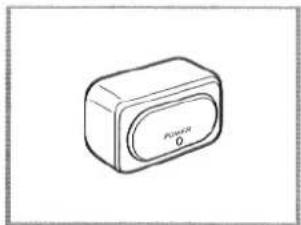
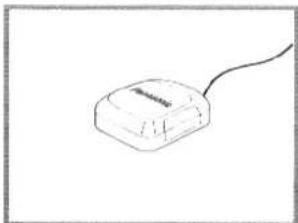
The mobile navigation system comes with the accessories shown below. Please make sure that all accessories are included. In the event that a part should be missing, please contact your dealer.
natural_image
Line drawing of a remote control device with buttons and dials (no text or symbols)Remote Control
Unit for remote controlling the operations of the mobile navigation system.
natural_image
Simple line drawing of a boat hull (no text or symbols)Remote Control Holder
Holder for the Remote Control. Mount it in a location where it does not obstruct your driving.
natural_image
Simple line drawing of a rectangular device with a label 'POWER' on its side (no other text or symbols)Infrared Receiver
Receives the signals from the Remote Control. Point the Remote Control at this receiver to remote control the system.
natural_image
Simple line drawing of a computer mouse with a cable (no text or symbols)GPS Antenna
Antenna for receiving GPS signals.
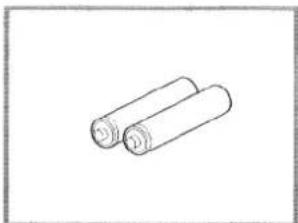
natural_image
Simple line drawing of two cylindrical batteries (no text or symbols)Two AA Batteries (R6PU)
Install these in the Remote Control Unit.
For other mounting kit refer to page 82.
Important Note:
• The map DVD-ROM is sold optionally.
DOCUMENTATION
Operating Instructions (this manual) 1
Wiring Connection....1
Warranty Card 1
Names and Functions of Remote Control Buttons
Joystick
Tilting the joystick up, down, to the right and left
- selects a highlighted item within menus and
- scrolls map displays.
Lock Switch
Up: NAV/VIDEO Mode Down: Key Lock Mode
LAST
Switches back to the previous screen.
ZOOM
- Changes the map scale (→ page 15).
- Scrolls the pages up or down of the list displayed.
MODE
Changes navigation screen mode between AV1 or AV2 screen or vice versa.
If the monitor is switched to external input while the navigation system is in operation, the screen background color may change to blue, but voice guidance remains unaffected. In this case, switch the mode to NAV.
VOICE
Initiates vocal guidance for next route maneuver (→ page 35).
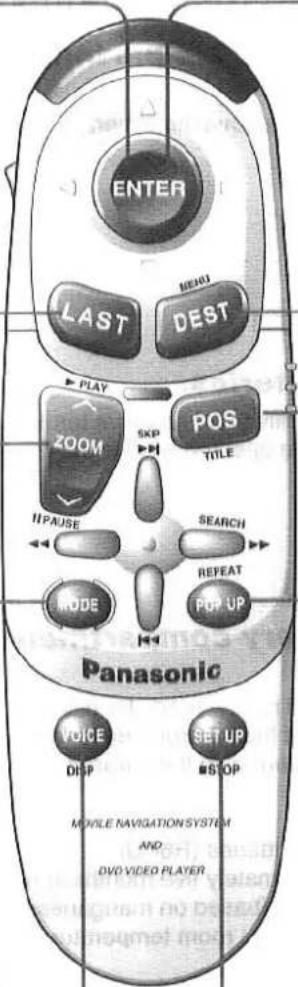
ENTER
Press to execute a highlighted item in a menu and apply settings.
DEST
Opens the [Select Destination] menu for destination input and route search (→ page 24 -).
POS
- Displays your current position.
- In route guidance, switches between Current Position Map and Guidance mode Map (→ page 13).
POP UP
Opens pop-up menus ( page 16).
SET UP
Opens the Setup Menu ( page 44).
Preparing the System for Initial Use
The system needs to be prepared for initial use as described below. Make sure to follow these instructions.
Inserting Batteries into the Remote Control
1 Open the battery compartment cover.
Lift up the tab ▼ to remove the cover.
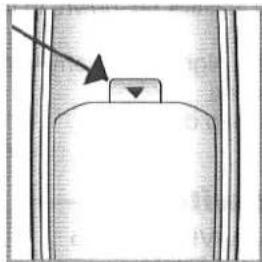
natural_image
Simple line drawing of a mechanical component with an arrow pointing to a square feature (no text or symbols)Insert new batteries.
Make sure that the positive and negative terminals of the batteries are oriented as shown.
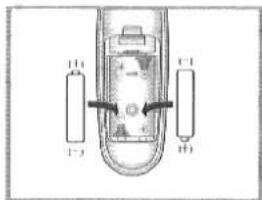
natural_image
Diagram of a remote control panel with two labeled terminals (l1 and l2), showing internal components without any text or symbols.3 Close the battery compartment cover.
→ The Remote Control is now ready for use. For remote control, point the infrared emitter on the top of the Remote Control to the infrared receiver.
Batteries: 2 AA batteries (R6PU)
Battery life: Approximately five months in normal use (based on manganese batteries at room temperature)
When to Replace Batteries
- Replace the batteries as soon as possible when the infrared receiver does not respond properly to remote control operations. Remote control does not work.
- When placing the Remote Control into the console box, make sure there is no pressure applied to any of the remote control buttons. Pressure on any of the buttons will drain the batteries.
Battery Removal
Open the battery compartment cover as described above, and remove the batteries.
Starting the Mobile Navigation System
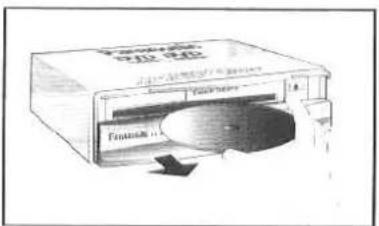
Insert the map DVD-ROM (sold optionally) into the player to start the Mobile Navigation System.
CAUTION!
Map Disc
This product supports the Navtech DVD-SDAL map disc format only. Panasonic cannot be responsible for accidents resulting from the use of map discs of other formats.
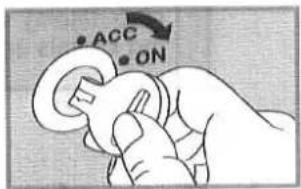
1 Turn the vehicle's ignition switch to the ON or ACC position.
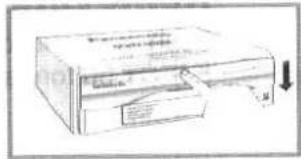
2 Slide down the front cover of the player.
3 Insert the map DVD-ROM with the printed side facing up, and close the front cover by pushing it up.
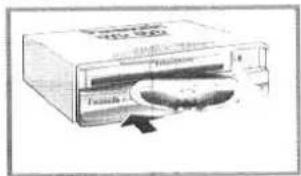
→ The opening screen appears, followed by the [CAUTION] screen.
* The map DVD-ROM is not included with the CN-DV2000EN.

flowchart
graph LR
    A["MOBILE NAVIGATION SYSTEM AND DVD VIDEO PLAYER"] --> B["NAVTECH ON BOARD"]
    B --> C["1993-2000 Navigation Technologies B.V. All rights reserved"]
    C --> D["Please do not operate while driving\nPlease obey local traffic restriction\nPlease do not watch DVD-video while driving\nPlease press enter to confirm"]
Opening screen
[CAUTION] screen
4 After reading the contents of the [CAUTION] screen, press ENTER. The screen remains unchanged till the button is pressed.

→ As the system starts up, the Current Position Map is displayed.
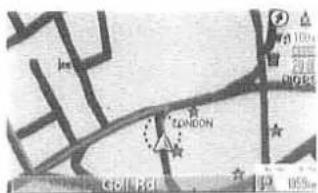
Current Position Map
Preparing the System for Initial Use
Important Notes:
- The map DVD-ROM cannot be inserted or ejected while the ignition switch is in the OFF position.
- Remember that the battery can run down if the ignition switch is kept in the ON or ACC position for a long time with the engine not running.
- To allow the system to stabilize, do not start driving until the opening screen closes.
- The map displayed when you first turn on the player will show a different area from where your vehicle is currently located. The map display will change to your current area once GPS positioning signals are received.
Removing the Map DVD-ROM
Push the front cover of the player all the way down. Press the EJECT button, and then remove the map DVD-ROM.
CAUTION!
The default display and audio language of the unit is English. To switch the display language to German, see page 50. To switch the audio language to German, see page 50.
Map Displays
Types of Map Displays
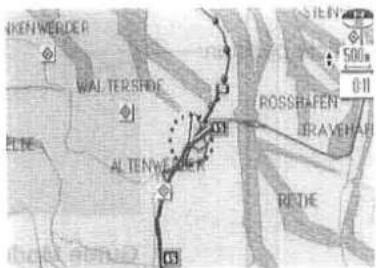
Current Position Map
Shows the current position of your vehicle on the selected magnification scale. Pressing POS on the Remote Control during route guidance switches to the Guide Mode Map.
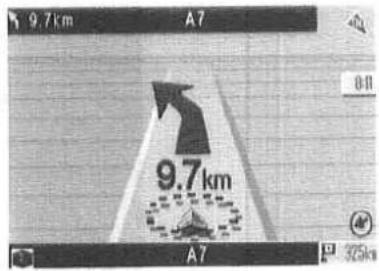
Guide Mode Map
Shows the road on which your vehicle is currently traveling on an enlarged scale. Pressing POS while the Current Position Map is displayed switches to this Guide Mode Map. Pressing POS again returns you to the Current Position Map.
If you deviate from the route in the guide mode after setting that route, guide mode is switched to 2D Mode Map.
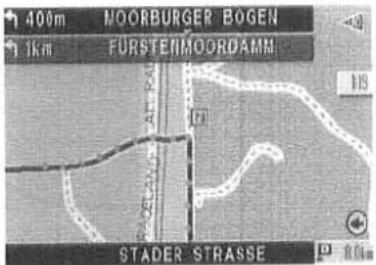
Intersection Zoom Map
As you approach an intersection, the upcoming junction is automatically enlarged. To use this feature, the necessary advance settings have to be made in the Setup Menu.(→ page 46)
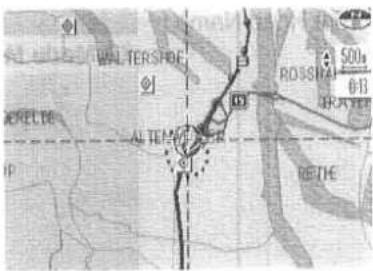
2D Mode Map
This is a scrollable map with a crosshairs cursor. Operating the joystick on the Current Position Map will automatically switch to this map display.
Note:
As you get close to your destination, a flag marked with a D appears on the Guide Mode Map. Note though that the place where the flag is displayed is not your destination.
Preparing the System for Initial Use
How to Read Map Displays
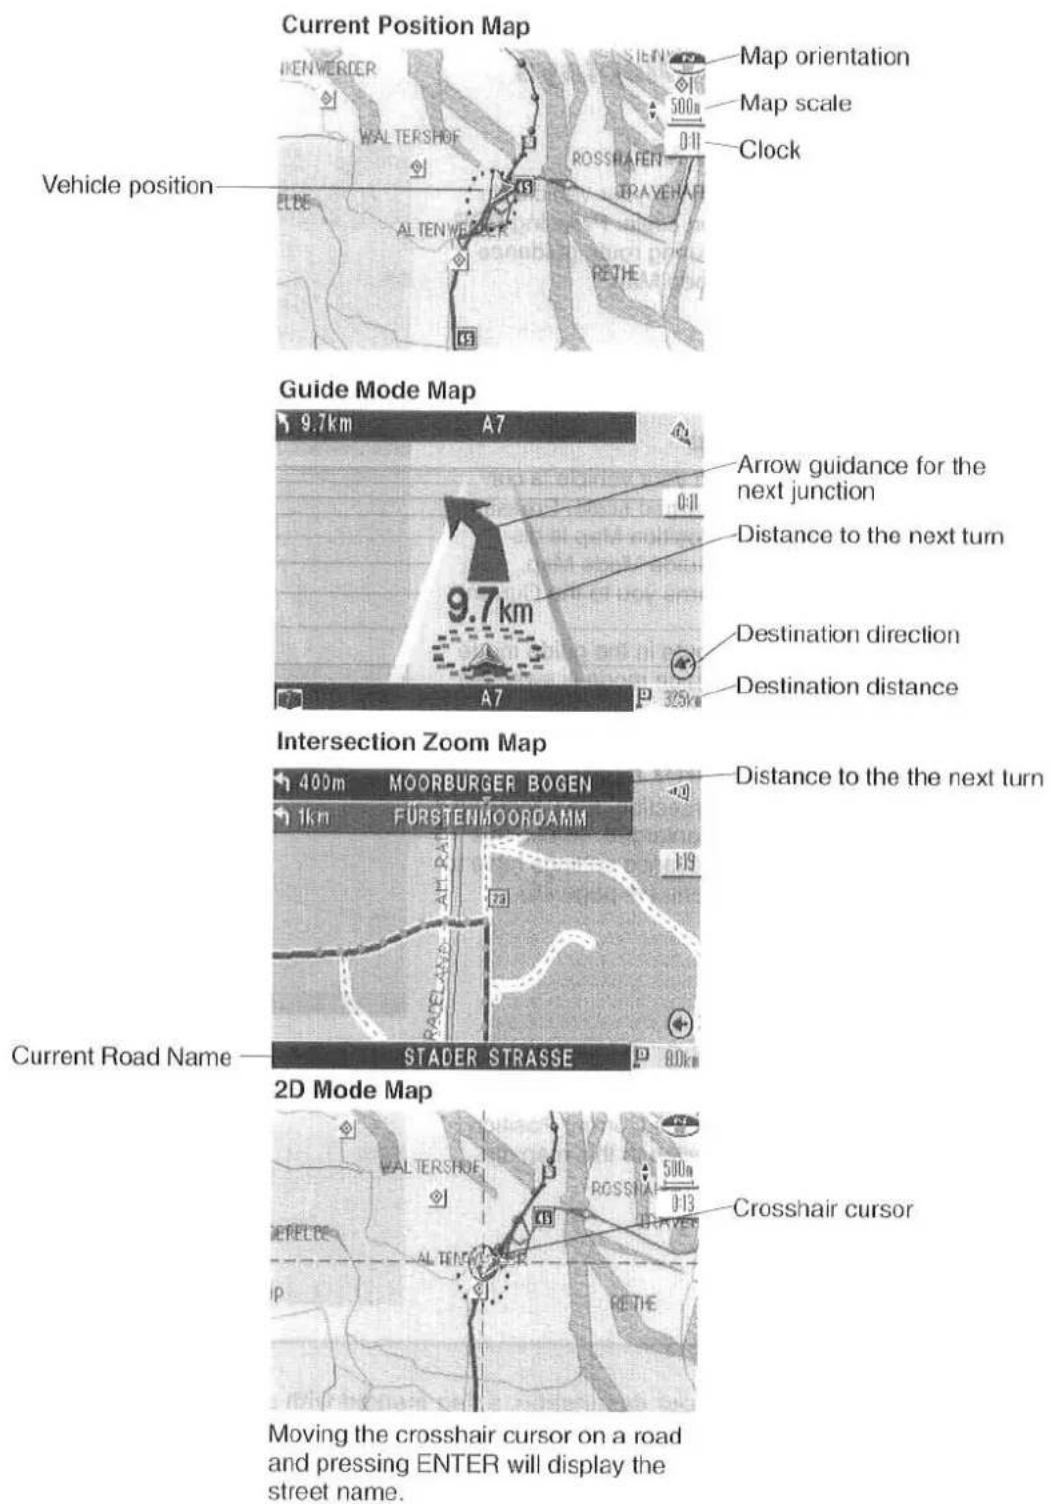
Moving the crosshair cursor on a road and pressing ENTER will display the street name.
Changing the Map Orientation
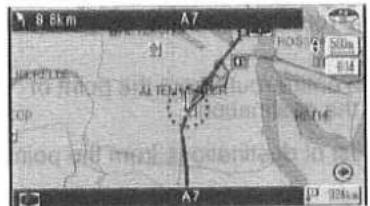
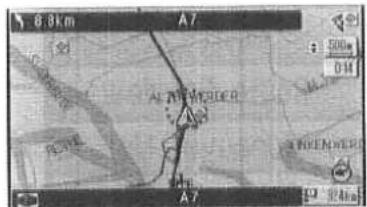
You can choose to have your maps displayed in "North Up" or "Head Up" direction.
North Up: The geographic north is always up on the map.
Head Up: The heading direction is always up on the map.
North Up

Select [North-Up] or [Head-Up] by moving the joystick.
→ The map is displayed in the selected orientation.
[North-Up]: North Up
[Head-Up]: Head Up
Changing the Map Scale
You can change the scale of the map display. 12 scales within the range of 1/10,000 to 1/25,000,000 are available.
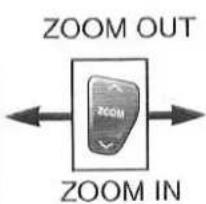
Press ZOOM.
ZOOM IN A: Reduces the map.
ZOOM OUT V: Enlarges the map.
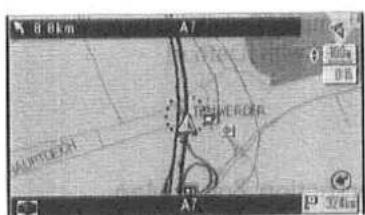
ZOOM IN
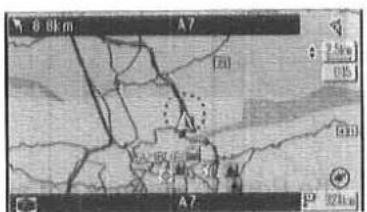
Preparing the System for Initial Use
Pop Up Menu
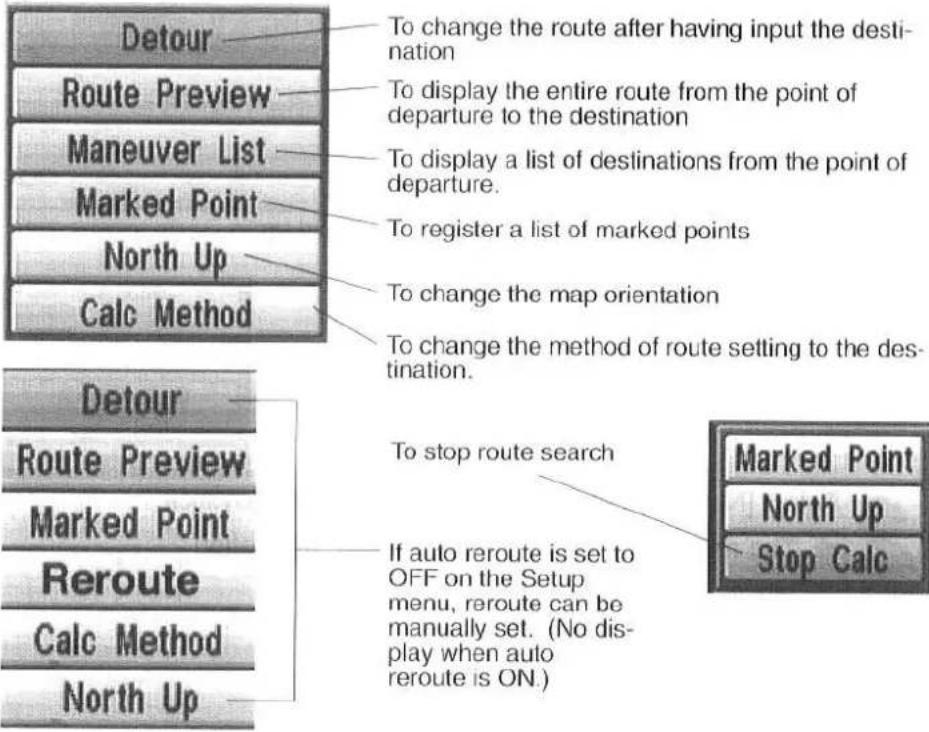
All basic operations of the mobile navigation system are accessed from the Pop Up menu shown below. Press POP UP to open the Pop Up menu. Use the joystick to highlight an item in the Pop Up menu, and press ENTER to execute it.
flowchart
graph TD
    A["Detour"] --> B["Route Preview"]
    B --> C["Maneuver List"]
    C --> D["Marked Point"]
    D --> E["North Up"]
    E --> F["Calc Method"]
    F --> G["Detour"]
    G --> H["Route Preview"]
    H --> I["Marked Point"]
    I --> J["Reroute"]
    J --> K["Calc Method"]
    K --> L["North Up"]

    M["To change the route after having input the destination"] --> N["To display the entire route from the point of departure to the destination"]
    N --> O["To display a list of destinations from the point of departure."]
    O --> P["To register a list of marked points"]
    P --> Q["To change the map orientation"]
    Q --> R["To change the method of route setting to the destination."]

    S["To stop route search"] --> T["Marked Point"]
    T --> U["North Up"]
    U --> V["Stop Calc"]

    W["If auto reroute is set to OFF on the Setup menu, reroute can be manually set. (No display when auto reroute is ON.)"]
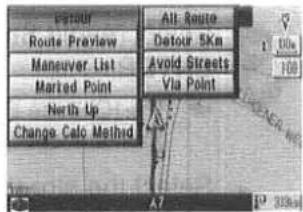
Some functions provide access to a submenu as shown below.
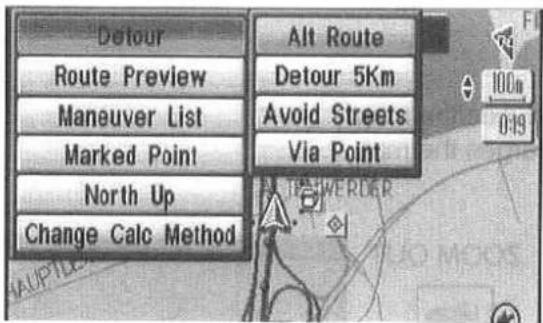
Example: Submenu associated with [Detour]
The Pop Up menu is not available on the Intersection Zoom Map.
Wiring Check
Check that the mobile navigation system is properly wired to the vehicle.
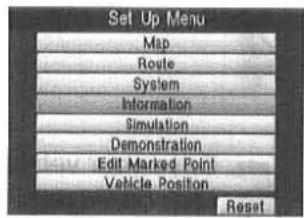
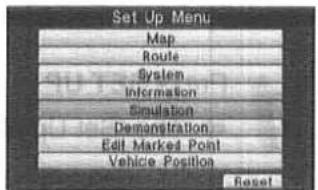
1 Press SET UP to open the [Set Up Menu]. On the [Set Up Menu], select [Information] by moving the joystick, and then press ENTER.
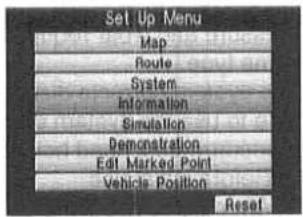
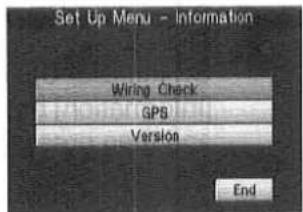
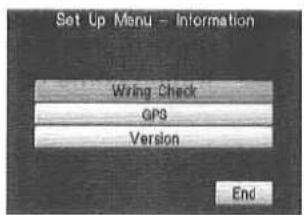
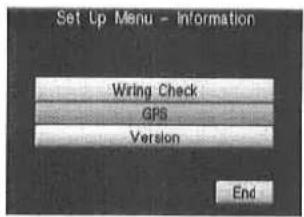
2 On the [Set Up Menu - Information] menu, select [Wiring Check], and press ENTER.
→ Check the wiring information.
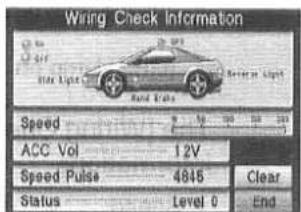
3 Perform the following operations and confirm that the 4 lights on the car illustration come on.
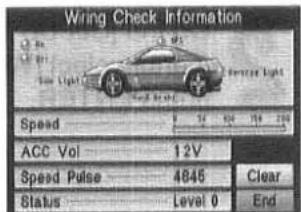

- Turn on the sidelights [Side Light] lamp on
• Pull the side brake → [Hand Brake] lamp on
• Pull the side brake and shift into reverse (R)
→ [Reverse Light] lamp on
• [GPS] lamp on
The [Wiring Check Information] menu also contains the following information:
• Speed: Shows the vehicle speed.
- ACC Vol: Shows the voltage of the car battery (11 V to 16 V).
• Speed Pulse: Shows the speed pulse emitted by the vehicle.
- Status: Shows the learning level of vehicle positioning accuracy.

Select [END], and press ENTER.
Preparing the System for Initial Use
Automatic Distance Correction Check
The mobile navigation system calculates and indicates the vehicle position on the map by multiplying the speed pulse emitted by the vehicle with a correction coefficient. The speed pulse emitted differs from the type of vehicle, and differences in tire pressure and wear require a different correction coefficient even for vehicles of the same type.
The system corrects distance deviations automatically based on GPS data. To be able to use the system effectively in the following cases, make sure to carry out the procedure described below.
- Before initial use
• After tire rotation
• After a tire change - When installing a navigation system previously installed in another vehicle
1 Press SET UP to open the [Set Up Menu]. On the [Set Up Menu], select [Information] by moving the joystick, and then press ENTER.
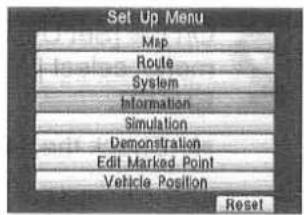

2 On the [Set Up Menu - Information] menu, select [Wiring Check], and then press ENTER.
3 Select [Clear], and press ENTER. → [Status] is reset to [Level 0].

Select [END], and press ENTER.

Drive your vehicle for about 30 minutes with the Current Position Map displayed.
As the distance correction coefficient becomes more accurate, any deviation between the actual vehicle position and that on the map is eliminated.
Important Notes:
- Do not start driving until the opening screen closes.
- Drive at an average speed of at least 20 km per hour in the open area is good.
- The mobile navigation system uses GPS data for distance correction. Make sure that GPS signals are being received (checking for GPS reception is described on the next page).
Depending on the Vehicle Model
- The vehicle position indicator may disappear temporarily after speed raises. This is a normal phenomenon indicating that the system is calculating for distance correction.
Preparing the System for Initial Use
Checking GPS Satellite Reception
1 Press SET UP to open the [Set Up Menu]. On the [Set Up Menu], select [Information] by moving the joystick, and then press ENTER.
2 On the [Set Up Menu - Information] menu, select [GPS], and press ENTER.
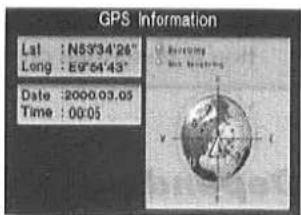
→ The [GPS Information] menu opens with the following information:
- Satellite number
• Latitude and longitude of the current position - Current date and time
Important Notes:
• After the system has been installed in the vehicle, it takes about 30 minutes until satisfactory GPS signal reception is established.
- Check GPS reception in open area location.
Operating the System While Driving
When you attempt to operate the system while driving, a warning prohibiting operation is displayed. You can inhibit this message if you wish. Note though that Panasonic cannot be responsible for any resulting accidents.
1 Any operation performed while driving, other than opening the Pop Up menu, will cause the message WARNING to be displayed.
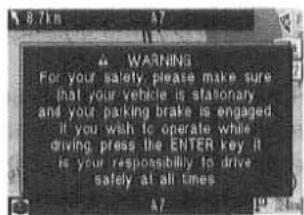
2 Press ENTER. → The warning can operate
→ The warning is inhibited, and you can operate the system.
* When the display returns to the Current Position Map after the operation, you will again be prompted to WARNING. Repeat the above procedure every time you want to operate the system while driving.

Mode
If the monitor is switched to external input while the navigation system is in operation, the screen background color may change to blue, but voice guidance remains unaffected. In this case, switch the mode to NAV.
Destination Input and Route Search
Once you have input your destination, the system will search the best route for you to reach the destination. Desired destinations can be selected among these 6 categories:
- Addresses
- Intersections
• POI (Point of Interest) categories (hotels, airport, etc.)
• History (Recent destinations) - Destinations stored in your point memory
- Destinations selected directly from the map display
To input a destination selected from addresses, intersections, you can search if by street name, city name, or postal code. Enter the necessary alphanumeric characters as described below.
The planned route may not always take you to your destination in the shortest time or avoid highways as it takes the road and traffic situation into account.
Character Input
Proceed as follows to enter alphanumeric characters.
Letter Input
This is how you enter a city name, for example.
1 Set the first letter of the desired street name in the slot by moving the joystick up and down.
2 Set the second letter of the street name in the slot by moving the joystick to the right.
* You can enter up to 6 letters.
Press ENTER.
→ A list of street names starting with the letters entered is displayed.
List
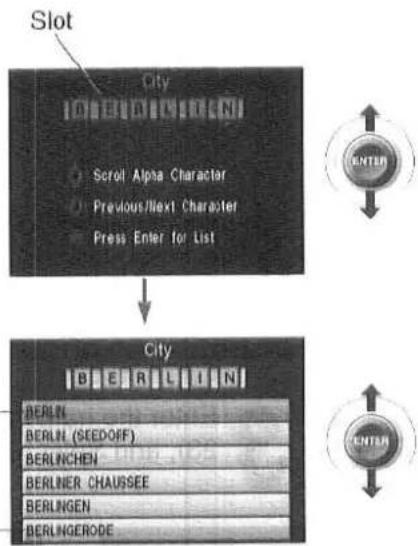
flowchart
graph TD
    A["Slot"] --> B["City"]
    B --> C["Enter"]
    B --> D["BERLIN"]
    B --> E["BERLIN (SEEDOFF)"]
    B --> F["BERLINCHEN"]
    B --> G["BERLINER CHAUSSEE"]
    B --> H["BERLINGEN"]
    B --> I["BERLINGERODE"]
Example: Entering a street name
4 Select the desired street name from the list, and press ENTER.
→ The street name is registered.
* If
* If the desired street name is not contained in the list, expand the search in item 2 by entering 3 letters or less.
Numeral Input
This is how you enter a postal code, for example.
1 Select numerals and letters by moving the joystick up, down, and from side to side on the screen, and then press ENTER.
* Select [SP] to enter a space, or [BS] to move the input cursor one space back.
2 Select [END], and press ENTER.
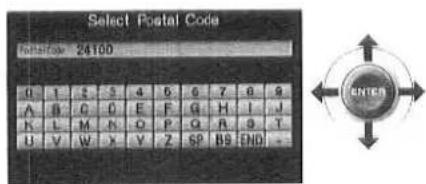
Example: Entering a postal code
Destination Input and Route Search
Entering an Address as Destination
This is how you specify your destination by entering a street name, city name or postal code.
Entering a Destination by Street Name
1 Press DEST to open the [Select Destination] menu. Select [Address] by moving the joystick, and press ENTER.
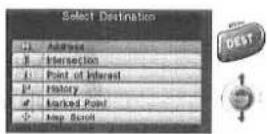
2 Select [Street], and press ENTER.
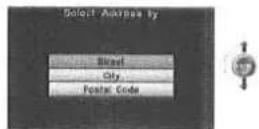
3 Enter the name of the street closest to your destination (→ page 23), and Select END.

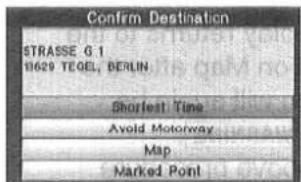
Select any of the following routing methods:
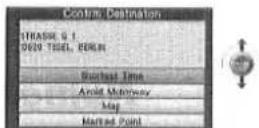
- Shortest Time: The route to reach the destination in the shortest time will be searched for.
- Avoid Motorway: Exclude motorways from route search.
• Map: The vicinal area of the selected street directly from map display.
(When you select [Map], a map of the vicinity of the selected street is displayed. Use the crosshairs cursor to select your destination.)
* Select [Marked Point] on the list if you want to register the point you have just searched for.
5 Press ENTER. → Route search starts.
Entering a Destination by City Name
1 Press DEST to open the [Select Destination] menu. Select [Address] by moving the joystick, and press ENTER.
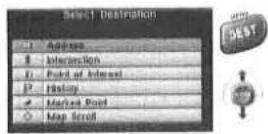
2 Select [City], and press ENTER.
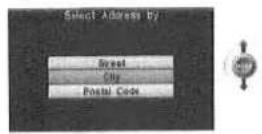
3 Enter the name of your destination city (→ page 23), and press ENTER.
The names of the streets in the city entered from the [Select Street menu] are displayed on a list. Select the street you want to go to, then press ENTER.

Select any of the following routing methods:
- Shortest Time: The route to reach the destination in the shortest time will be searched for.
- Avoid Motorway: Exclude motorways from route search.
• Map: The vicinal area of the selected street directly from map display.
(When you select [Map], a map of the vicinity of the selected street is displayed. Use the crosshairs cursor to select your destination.)
* Select [Marked Point] on the list if you want to register the point you have just searched for.
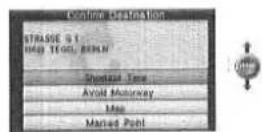
5 Press ENTER. → Route search starts.
Destination Input and Route Search
Entering a Destination by Postal Code
1 Press DEST to open the [Select Destination] menu. Select [Address] by moving the joystick, and press ENTER.
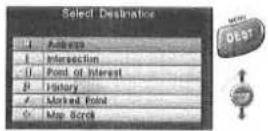
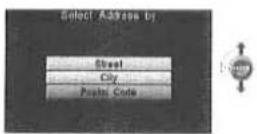
2 Select [Postal Code], and press ENTER.
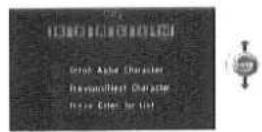
3 Enter the postal code of your destination (→ page 23), and press ENTER.
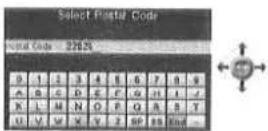
→ The [Select Street] menu opens with a list of street names for the postal code you entered.
4 Select the street closest to your destination, and press ENTER, and select END.

Select any of the following routing methods:
- Shortest Time: The route to reach the destination in the shortest time will be searched for.
- Avoid Motorway:
Exclude motorways from route search.
• Map: The vicinal area of the selected street directly from map display.
(When you select [Map], a map of the vicinity of the selected street is displayed. Use the crosshairs cursor to select your destination.)
* Select [Marked Point] on the list if you want to register the point you have just searched for.
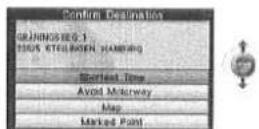
6 Press ENTER. → Route search starts.
Entering an Intersection as Destination
The destination will be specified by screening main streets and cross streets based on street, city and postal code information.
Entering an Intersection by Street Name
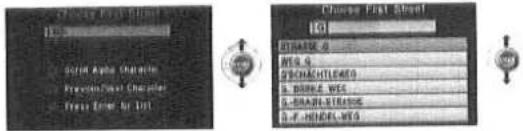
1 Press DEST to open the [Select Destination] menu. Select [Intersection] by moving the joystick, and press ENTER.
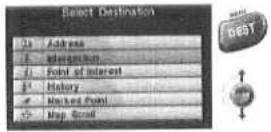
2 Select [Street], and press ENTER.
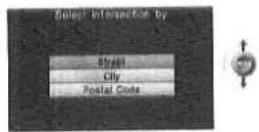
3 Enter the name of the street closest to your destination intersection (→ page 23), and press ENTER.
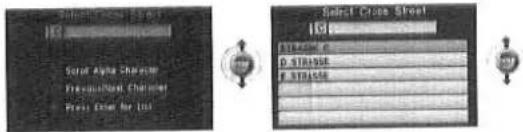
4 Enter the first letters of your destination intersection (→ page 23), select the target Cross Street from the list, and then press ENTER.
Select any of the following routing methods:
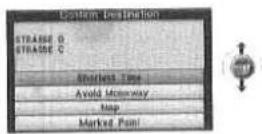
- Shortest Time: The route to reach the destination in the shortest time will be searched for.
- Avoid Motorway: Exclude motorways from route search.
• Map: The vicinal area of the selected street directly from map display.
(When you select [Map], a map of the vicinity of the selected street is displayed. Use the crosshairs cursor to select your destination.)
* Select [Marked Point] on the list if you want to register the point you have just searched for.
Press ENTER.
→ Route search starts.
Destination Input and Route Search
Entering an Intersection by City Name
1 Press DEST to open the [Select Destination] menu. Select [Intersection] by moving the joystick, and press ENTER.
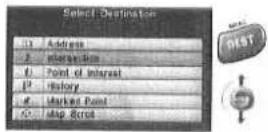
2 Select [City], and press ENTER.
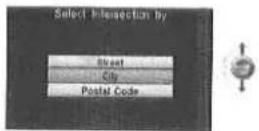
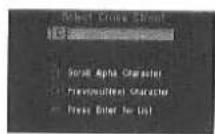
3 Enter the City name where the Intersection exists, and press ENTER.
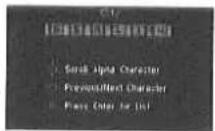
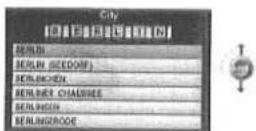
4 Enter the name of the street closest to your destination intersection (→ page 23), and press ENTER.
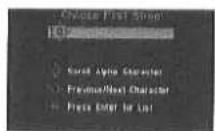
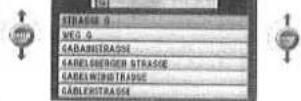
5 Enter the first letters of your destination intersection (→ page 23), select the target Cross Street from the list, and then press ENTER.
Select any of the following routing methods:
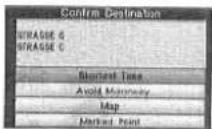

- Shortest Time: The route to reach the destination in the shortest time will be searched for.
- Avoid Motorway: Exclude motorways from route search.
• Map: The vicinal area of the selected street directly from map display.
(When you select [Map], a map of the vicinity of the selected street is displayed. Use the crosshairs cursor to select your destination.)
* Select [Marked Point] on the list if you want to register the point you have just searched for.
7 Press ENTER. → Route search starts.
Entering a POI as Destination
POI Category plus [Name]
1 Press DEST to open the [Select Destination] menu. Select [Point of Interest] by moving the joystick, and press ENTER.
![PANASONIC CN-DV2000 - POI Category plus [Name] - 1](/content/2026/05/989472/images/c227729ef1968e2fa284ab8ea4cbecf5d331c700f9dc425bc755cb23af405e9e.jpg)
2 Select the desired category, and press ENTER. If you do not know the category of your destination, select [ANY TYPE].
![PANASONIC CN-DV2000 - POI Category plus [Name] - 2](/content/2026/05/989472/images/f7537006497c593f29bfe22362d71dcc9d7eef5cd2e4491770c12b5f19cbbf8b.jpg)
3 Select [Name] and press ENTER. → The [Select POI] menu opens with a list in the selected category. * If you select [Dealer], [Hotel] or [Gas Station] as the category, the [Name] item is not available.
![PANASONIC CN-DV2000 - POI Category plus [Name] - 3](/content/2026/05/989472/images/84799563674c6748ef57410fc2969274266ead060e7779c9d2b9fb635fad51fa.jpg)
4 Select your destination from the list on the [Select POI] menu, and press ENTER.
![PANASONIC CN-DV2000 - POI Category plus [Name] - 4](/content/2026/05/989472/images/35a672b5e866389901256b4d2375c397dacf769e174de10c980ff1fcb698ec55.jpg)
Select any of the following routing methods:
![PANASONIC CN-DV2000 - POI Category plus [Name] - 5](/content/2026/05/989472/images/7741c323eeb4c3ba72cbaf8406126bb4b6cfa724f5a7a4d426b3b0dd29cf4fd7.jpg)
- Shortest Time: The route to reach the destination in the shortest time will be searched for.
- Avoid Motorway: Exclude motorways from route search.
- Map: The vicinal area of the selected street directly from map display.
(When you select [Map], a map of the vicinity of the selected street is displayed. Use the crosshairs cursor to select your destination.)
* Select [Marked Point] on the list if you want to register the point you have just searched for.
Press ENTER.
→ Route search starts.
Destination Input and Route Search
POI Category plus [Within City]
1 Press DEST to open the [Select Destination] menu. Select [Point of Interest] by moving the joystick, and press ENTER.
![PANASONIC CN-DV2000 - POI Category plus [Within City] - 1](/content/2026/05/989472/images/d538f0ee374652d045d18fcbb623e6825c7236f44956e2a894e9c9a3084135fb.jpg)
2 Select the desired category, and press ENTER. If you do not know the category of your destination, select [ANY TYPE].
![PANASONIC CN-DV2000 - POI Category plus [Within City] - 2](/content/2026/05/989472/images/f5d45d586b2dec9ae4136eb93563e83b2ff690b2efeedd1818ab1b5ecfef5273.jpg)
![PANASONIC CN-DV2000 - POI Category plus [Within City] - 3](/content/2026/05/989472/images/cd0f364e7671e21605fbd9be5fc555599a1c5de525fd9572a6f0b33353121568.jpg)
![PANASONIC CN-DV2000 - POI Category plus [Within City] - 4](/content/2026/05/989472/images/5949e8d5b7c33846a617497a3704a5b2318b3894c737a8137ebe8b221fb19a75.jpg)
![PANASONIC CN-DV2000 - POI Category plus [Within City] - 5](/content/2026/05/989472/images/435e09b5bfb7316fc709fd8387cff873f6646a3a3d733b937a66af993ed4a946.jpg)
3 Select [Within City], and press ENTER. → The [Select POI] menu opens with a list in the selected category that are located within the city where you currently are.
![PANASONIC CN-DV2000 - POI Category plus [Within City] - 6](/content/2026/05/989472/images/9d2d2bfdcaf8ac2b133cba704ef5ccc4503c7d0fc565a57606bf99c9fa58f752.jpg)
![PANASONIC CN-DV2000 - POI Category plus [Within City] - 7](/content/2026/05/989472/images/15cd1e69121e49cb0bb5288f1a54d4ec4775a06def0777cf2556b00321a42d35.jpg)
4 Select your destination from the list on the [Select POI] menu, and press ENTER.

Select any of the following routing methods:
![PANASONIC CN-DV2000 - POI Category plus [Within City] - 9](/content/2026/05/989472/images/42988655c283ca874094f822a6aa34989cfe0b98f15af2b8b9dbd736add8c931.jpg)
![PANASONIC CN-DV2000 - POI Category plus [Within City] - 10](/content/2026/05/989472/images/55245271a6abb95411ba9c396f8078397bf52fdbbfd63777d3d3e77fda8e0076.jpg)
- Shortest Time: The route to reach the destination in the shortest time will be searched for.
- Avoid Motorway: Exclude motorways from route search.
• Map: The vicinal area of the selected street directly from map display.
(When you select [Map], a map of the vicinity of the selected street is displayed. Use the crosshairs cursor to select your destination.)
* Select [Marked Point] on the list if you want to register the point you have just searched for.
6 Press ENTER. → Route search starts.
POI Category plus [Nearest]
This is how you narrow down your search by limiting in the selected category to those within a 10-kilometer radius of your current location.
1 Press DEST to open the [Select Destination] menu. Select [Point of Interest] by moving the joystick, and press ENTER.
![PANASONIC CN-DV2000 - POI Category plus [Nearest] - 1](/content/2026/05/989472/images/94af7cf082b9b06110fcb82a63830dd03739363ad687ab65f2955728b1872ff3.jpg)
2 Select the desired category, and press ENTER. If you do not know the category of your destination, select [ANY TYPE].
![PANASONIC CN-DV2000 - POI Category plus [Nearest] - 2](/content/2026/05/989472/images/497052b5b96b9b60fdd32b9b25eee1683feb4e30fa4dd260348e0a7d61a1ce83.jpg)
![PANASONIC CN-DV2000 - POI Category plus [Nearest] - 3](/content/2026/05/989472/images/b45c6fac62ac1b6f635b8b7fc26407337f280b64068874231ae7b42d2a2393dd.jpg)
![PANASONIC CN-DV2000 - POI Category plus [Nearest] - 4](/content/2026/05/989472/images/8948eb5e660aa384809b428a3694f89ecc1c2c4a7e75271cd60e828ba2c7315d.jpg)
![PANASONIC CN-DV2000 - POI Category plus [Nearest] - 5](/content/2026/05/989472/images/9b7c8039be330286a833cc150d45438f425b568e5d2996cb02196402aee9e9b7.jpg)
Select [Nearest], and press ENTER.
The [Select POI] menu opens showing a list of places in the selected category within 10 km from the current position.
![PANASONIC CN-DV2000 - POI Category plus [Nearest] - 6](/content/2026/05/989472/images/dd7cd87236da7fe24e21c8efb185d599962da8f16c241c40ac42cc96956daa7c.jpg)
![PANASONIC CN-DV2000 - POI Category plus [Nearest] - 7](/content/2026/05/989472/images/3fdeb85be38526dadc54cca194a82d16fa670c076f9ab68371cc861f4936563f.jpg)
4 Select your destination from the list on the [Select POI] menu, and press ENTER.
![PANASONIC CN-DV2000 - POI Category plus [Nearest] - 8](/content/2026/05/989472/images/1e9694108bf3bc29a6593deaf04a7c90e21ccd53e264b7036c93686c53f9c2f8.jpg)
![PANASONIC CN-DV2000 - POI Category plus [Nearest] - 9](/content/2026/05/989472/images/a98201018a7ce563d41c66124e1c04731311b9bcb14005e12bec50b361261313.jpg)
Select any of the following routing methods:
- Shortest Time: The route to reach the destination in the shortest time will be searched for.
- Avoid Motorway: Exclude motorways from route search.
- Map: The vicinal area of the selected street directly from map display.
(When you select [Map], a map of the vicinity of the selected street is displayed. Use the crosshairs cursor to select your destination.)
* Select [Marked Point] on the list if you want to register the point you have just searched for.
![PANASONIC CN-DV2000 - POI Category plus [Nearest] - 10](/content/2026/05/989472/images/73bd19e6ddc0db584277b97d705fb135e7df76ef61541f5eda66309046d597a8.jpg)
![PANASONIC CN-DV2000 - POI Category plus [Nearest] - 11](/content/2026/05/989472/images/fadfa014773a66203f041e6dc4dbb4551ca6887a229ff66cfe3bc66ad422ac7b.jpg)
Press ENTER.
→ Route search starts.
![PANASONIC CN-DV2000 - POI Category plus [Nearest] - 12](/content/2026/05/989472/images/fc6e90a9fc079610331bb9c1471e510ad6d14b7724bf7d2b8da03c023aff7fc8.jpg)
Destination Input and Route Search
Entering a Destination from Your Destination History
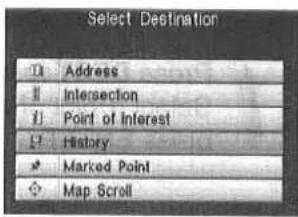
1 Press DEST to open the [Select Destination] menu. Select [History] by moving the joystick, and press ENTER.
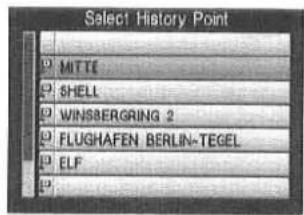
The [Select History Point] menu opens with a list of recent destinations.
2 Select the destination, and press ENTER.

3 Select any of the following routing methods:
- Shortest Time:
The route to reach the destination in the shortest time will be searched for. - Avoid Motorway
Exclude motorways from route search. - Map:
The vicinal area of the selected street directly from map display.
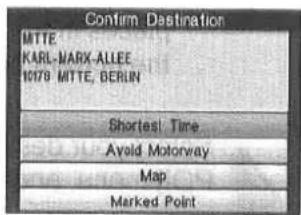
(When you select [Map], a map of the vicinity of the selected street is displayed. Use the crosshair cursor to select your destination.)
* Select [Marked Point] on the list if you want to register the point you have just searched for.
Press ENTER.
→ Route search starts.

Note:
Up to 50 previous destinations, including the last starting point, are retained in memory.
Entering a Destination Stored in Your Marked Point
This is how you specify an address stored in your Marked Point as your destination. For storing addresses in your Marked Point see page 40.
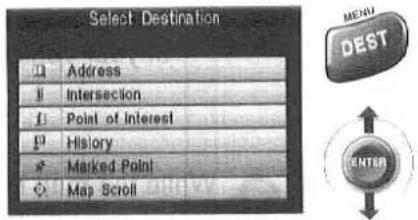
1 Press DEST to open the [Select Destination] menu. Select [Marked Point] by moving the joystick, and press ENTER.
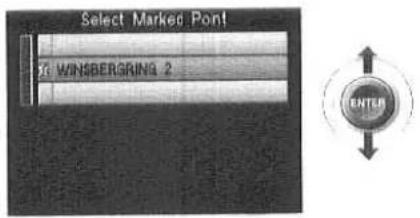
→ The [Select Marked Point] menu opens with a list of locations stored in your Marked Point.
2 Select the destination, and press ENTER.
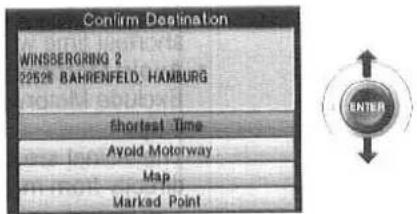
3 Select any of the following routing methods:
- Shortest Time:
The route to reach the destination in the shortest time will be searched for. - Avoid Motorway:
Exclude motorways from route search. - Map:
The vicinal area of the selected street directly from map display.
(When you select [Map], a map of the vicinity of the selected street is displayed. Use the crosshair cursor to select your destination.)
* Select [Marked Point] on the list if you want to register the point you have just searched for.
4 Press ENTER. → Route search starts.

Destination Input and Route Search
Selecting a Destination Directly from the Map Display
1 Press DEST to open the [Select Destination] menu. Select [Map Scroll] by moving the joystick, and press ENTER.
→ A map showing the current position of your vehicle is displayed.
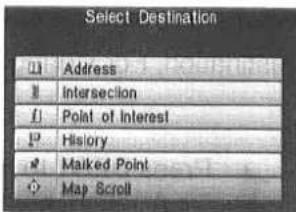
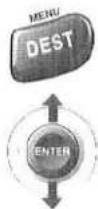
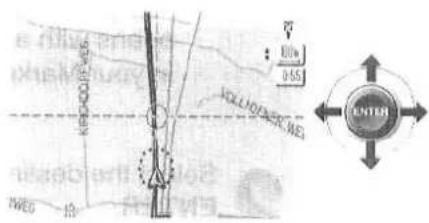
2 While the map is scrolling, move the crosshairs cursor to the desired destination, and then press ENTER.
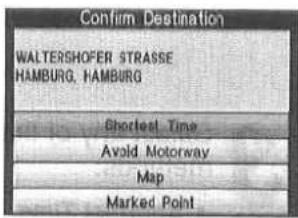
3 Select any of the following routing methods:
- Shortest Time: The route to reach the destination in the shortest time will be searched for.
- Avoid Motorway: Exclude Motorways from route search.
- Map: The vicinal area of the selected street directly from map display.
(When you select [Map], a map of the vicinity of the selected street is displayed. Use the crosshair cursor to select your destination.)
* Select [Marked Point] on the list if you want to register the point you have just searched for.
4 Press ENTER. → Route search starts.

Voice Guidance
Voice guidance has the following functions.
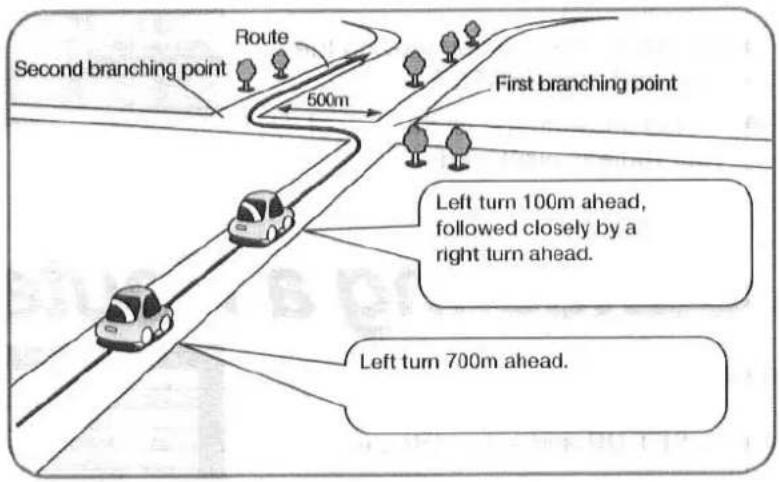
Intersection Guidance
The system vocally announces the distance to an upcoming turn and the turning direction.
→ This guidance function is automatic (i.e., you do not have to set it) and cannot be disabled.
Highway Guidance as Part of Route Guidance
When you approach a branching point or junction on a highway, the distance to that point will be given by voice.
The system vocally announces the distance to an upcoming highway branching point or junction.
This guidance function can be set in the Setup menu. For details see page 47.
Terminating Route Search
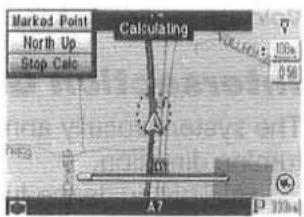
1 While route search is under way, press POP UP.
2 Select [Stop Calc] by moving the joystick, and press ENTER.
→ Route search is terminated.

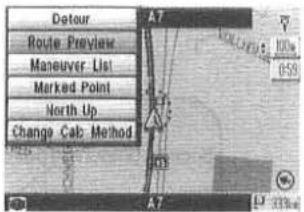
Previewing a Route
A map display allows you to preview the all the way of your route.
1 Press POP UP.
2 Select [Route Preview] by moving the joystick, and press ENTER.
→ A map showing the all the way of your route is displayed.

Canceling a Route
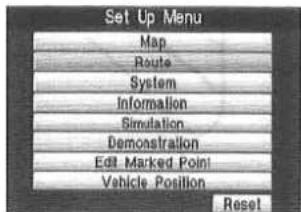
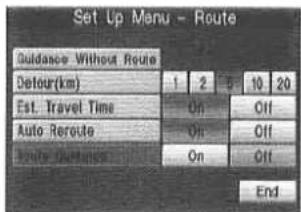
This is how you can cancel a calculated route.
1 Press SET UP and select [Route].
2 Set [Route Guidance] to [Off] by moving the joystick, and then select [End].
→ The calculated route is canceled.


Detouring
The system allows you to choose an alternative route to the same destination in one of the following four ways.
• Alternative Route
- Avoid Streets
- Detour xxKm
- Via Point
Alternative Route
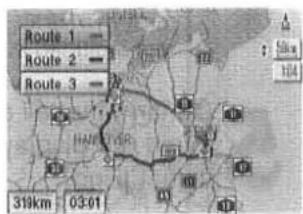
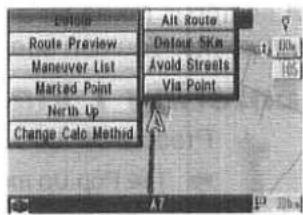
A search is made for routes other than that displayed. Up to three routes can be searched, including the one currently displayed.

Press POP UP.
Select [Detour] by moving the joystick and press ENTER.
Select [Alt Route], and press ENTER.
→ Up to three routes, including the current one, are displayed.
Select a route by moving the joystick, and press ENTER.
Detour xxKm
A search is made for a route that detours the original route by a distance you specify. To specify the distance see page 47.

Press POP UP.
Select [Detour] by moving the joystick.

Select [Detour xxKm], and press ENTER.
A detour route of the specified distance is displayed. The [Detour **Km] item in the menu shows the distance you specified.
Important Note:
The detour may be longer than the distance you specified.
Detouring
Avoid Streets
A search is made for a route that detours specified streets.
1
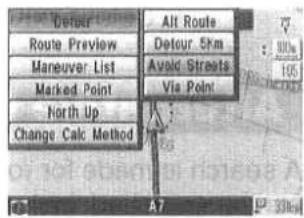
Press POP UP.
2
Select [Detour] by moving the joystick.
3
Select [Avoid Streets], and press ENTER.
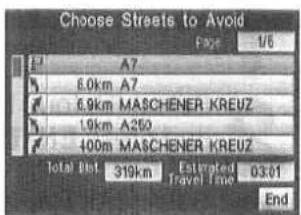
→ The [Choose Streets to Avoid] menu opens, showing a list of street names.
4
Select the streets you want to avoid.
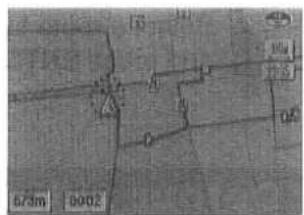
The names of streets to be avoided are shown in gray. Only the remaining streets are included in the route search.
5
Confirm that all streets you want to avoid are displayed in gray, and then select [End].
Via Point
A search is made for a route that takes you to multiple destinations, or via points. You can specify up to five via points.
Entering 1 Via Point
1
Press POP UP.
→ The Pop Up menu opens.
2
Select [Detour] by moving the joystick.
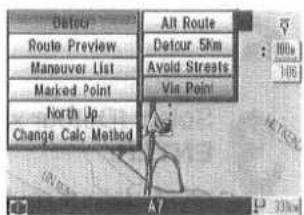
The [Detour] submenu opens.
3
Select [Via Point], and press ENTER.
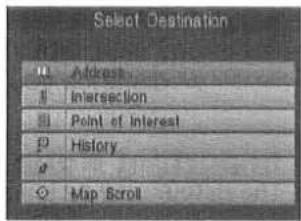
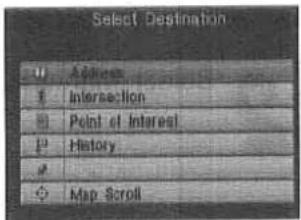
→ The [Select Destination] menu opens. Enter a via point by the same procedure as described for destination input (pages 24 to 34), and start route search.
Entering Multiple Via Points
Enter the first via point as described for "Entering 1 Via Point". To enter all subsequent ones, proceed as follows.
Press POP UP.
→ The Pop Up menu opens.
Select [Detour] by moving the joystick.
→ The [Detour] submenu opens.
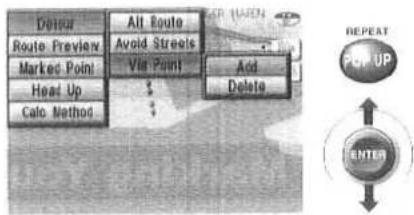
3 Select [Via Point], then [Add], and press ENTER.
→ The [Add] screen opens.
* When selecting [Via Point] to specify the first via point, the submenu items [Add Via] (to add a via point).
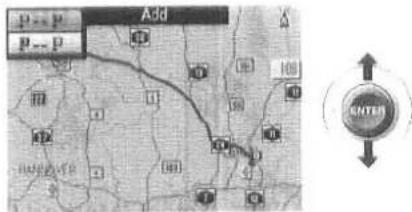
4 Enter the second via point by one of the following methods:
- Add a via point between your current location and the first via point
- Add a via point between the first via point and your destination
* Proceed in the same manner for the third and subsequent via points (adding a via point between your current location and the first via point, and between the second via point and the destination).
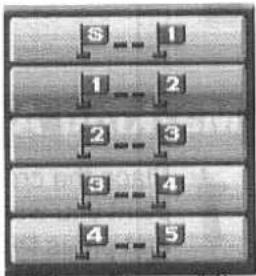
5 Press ENTER. The [Select] Enter the via
The [Select Destination] menu opens. Enter the via points by the same procedure as described for destination input (pages 24 to 34), and start route search.

Important Note:
- You can set up to five via points. If you try to add the sixth point, the [Delete Via] menu opens, prompting you to delete the currently selected via points.
- If you add a via point near your current position when adding via points, Avoid Highway may not be selectable by the route search method in some cases.
To delete a Via Point
To delete a via point, select [Via Point] and then [Delete]. A list of currently selected via points is displayed. Select the via point you want to delete, and press ENTER.
Marked Point
You can store up to 100 points you want to remember in your point memory. Each stored point is memorized with its name and icon and shown on the map. You can rename the marked points and change their icons.
Warning:
Stop your vehicle before the following operations.
Marking Your Current Position
1 Display the Current Position Map, and press POP UP.
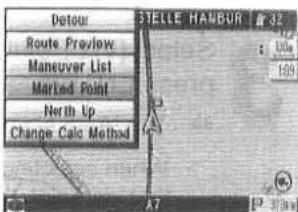
2 Select [Marked Point] by moving the joystick, and press ENTER.
Marking Any Point on the Map
1 Place the crosshairs cursor on the point you want to mark on the map, and press POP UP.
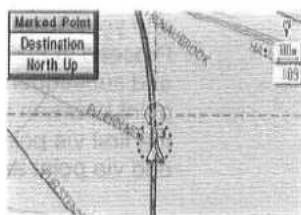
2 Select [Marked Point] by moving the joystick, and press ENTER.
Name and Icon
Each stored point is memorized with its name and icon and shown on the map. You can rename the marked points and change their icons (→ page 41).
Changing a Marked Point Icon
1
Press SET UP.
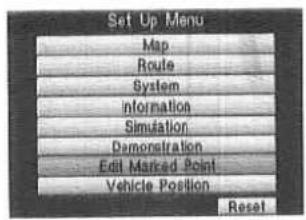

2
Select [Edit Marked Point] by moving the joystick, and press ENTER. Select [Edit], and press ENTER.
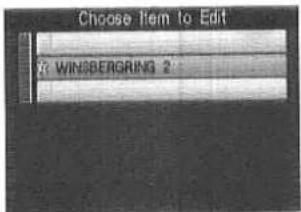
→ A list of marked points is displayed.

3
Select the name whose icon you want to change, and press ENTER.
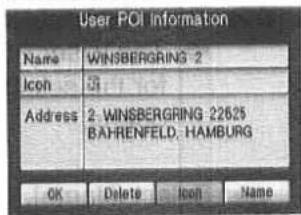
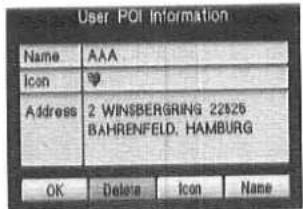
→ The [User POI Information] menu for the selected marked point opens.
4
Select [Icon], and press ENTER.

5
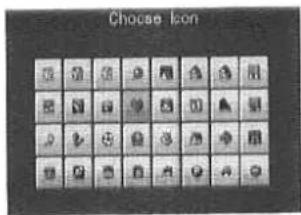
Select an icon, and press ENTER.
→ The screen returns to the [User POI Information] menu.
6
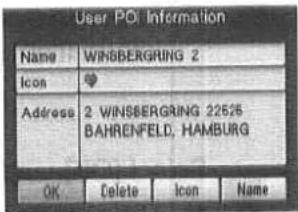
Select [OK], and press ENTER.
→ The new icon is applied.

Marked Point
Renaming a Marked Point
1 Press SET UP.
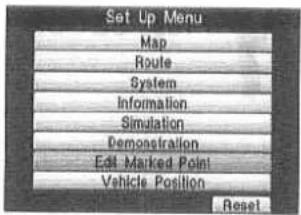

2 Select [Edit Marked Point] by moving the joystick, and press ENTER.
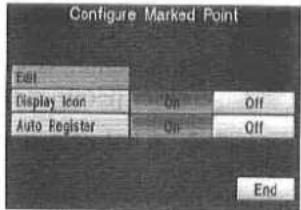

3 Select [Edit], and press ENTER. → A list of marked points is displayed.
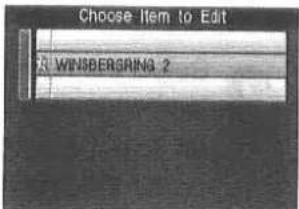
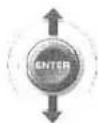
4 Select the point you want to rename, and press ENTER. → The [User POI Information] menu for the selected marked point opens.
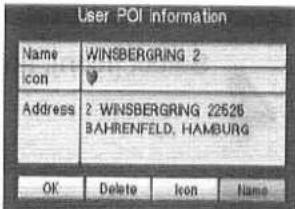
5 Select [Name], and press ENTER.
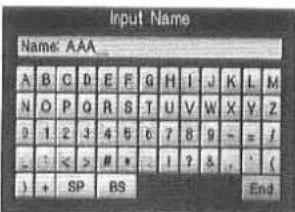
6 Enter a name, select [End], and press ENTER. → The screen returns to the [User POI Information] menu.
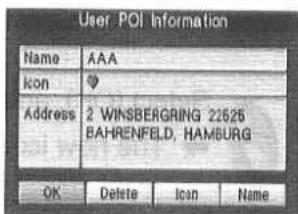

7 Select [OK], and press ENTER. → The new name is applied.
Deleting a Marked Point
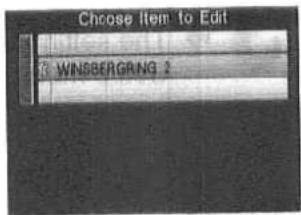
1 Press SET UP. Select [Edit Marked Point] by moving the joystick, and press ENTER.
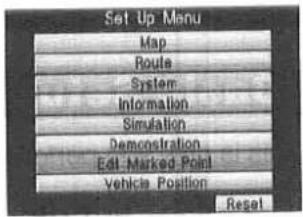
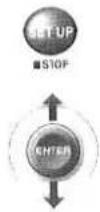
2 Select [Edit], and press ENTER. → A list of marked points is displayed.
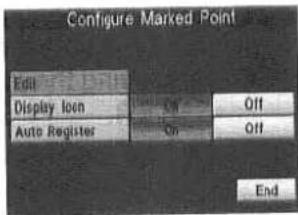

3 Select the point you want to delete, and press ENTER.
→ The [User POI Information] menu for the selected marked point opens.
4 Select [Delete], and press ENTER. The marked point is deleted.

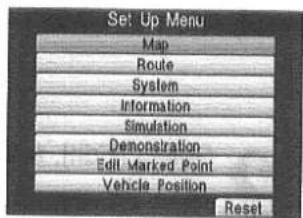
Setup Menu
From the Setup Menu, you can set the basic functions mobile navigation system to suit your preferences.
Basic Setup Menu Operations
This is how you perform basic operations on the Setup menu.
1
Press SET UP.
2
From the menus listed on the [Set Up Menu], select the menu you want to set by moving the joystick and press ENTER.
* The parameters that can be set on each menu are described in detail on the following pages.

3
Select [End], and press ENTER.
→ The setting is applied, and the Setup menu closes.

Reset
To restore the default settings, select [Reset] and press ENTER.
Map
Here you can set your preferences for the map displays.
Day/Night
Lets you choose between a screen color suited to daytime and one for nighttime driving.
• Day Screen color suited to daytime driving
• Night Screen color suited to nighttime driving
• Auto [Day] is automatically switched to [Night] when the headlights are turned on.
Default setting: Auto
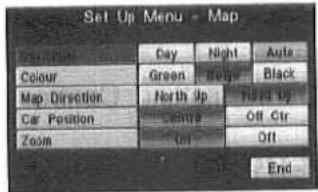
Color
Lets you choose one of the following three background colors for map displays.
• [Green]
• [Beige]
• [Black]
Default setting: Beige
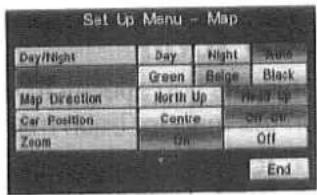
Map Direction
Lets you choose either [North-Up] or [Head-Up] as map orientation.
• [North Up]: The geographic north is always up on the map.
• [Head Up]: The heading direction is always up on the map.
Default setting: North-Up
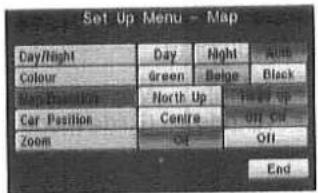
Setup Menu
Car Position
This lets you the current vehicle position indicator displayed in the center or at the bottom of the screen.
• [Centre]: Current vehicle position indicator displayed in the center of the screen
• [Off Ctr]: Current vehicle position indicator displayed at the bottom of the screen (When the Head Up).
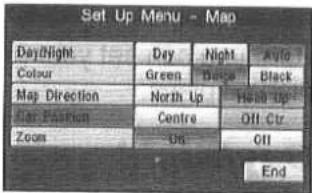
Default setting: Centre
Zoom
This lets you specify to have an enlarged intersection map displayed as you approach the intersection.
• [On]: Intersection Zoom in Map is displayed.
• [Off]: Intersection Zoom in Map is not displayed.
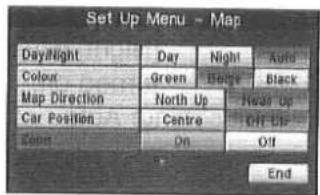
Default setting: On
POI Icon
This lets you specify to have icons displayed on the map for each marked point.
• [On]: Icons are displayed.
• [Off]: Icons are not displayed.
Default setting: On
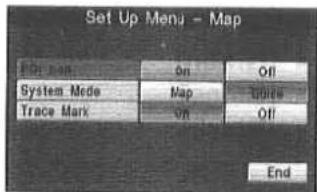
System Mode
Select either map mode or guide mode for map display.
• [Map]: Map mode
• [Guide]: Guide mode
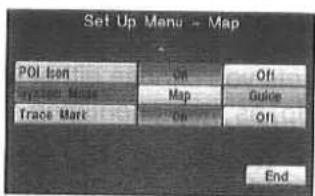
Default setting: Guide
Trace Mark
Select whether or not to mark the route the vehicle troubled.
• [On]: To mark
• [Off]: Not to mark
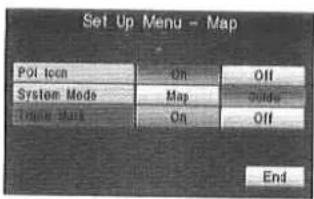
Default setting: On
Route
Here you can set your preferences for route search.
Guidance Without Route
This lets you specify to have voice guidance automatically activated as your vehicle approaches any of the following four types of places. Select [On] to activate any of these features.
• [Merge]: Highway junctions
• [Advisory]: Tunnels, tollgates, etc.
• [Branch]: Highway branching points
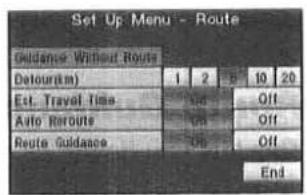
Default setting: On
Detour (Km)
This lets you specify the distance for a route that detours the originally searched route. Select one of the following distances.
• [1]: 1 km
• [2]: 2 km
• [5]: 5 km
• [10]: 10 km
• [20]: 20 km
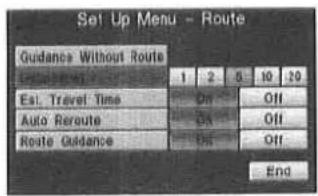
Default setting: 5 km
Est. Travel Time
This lets you choose to have the estimated travel time to on or off as voice guidance.
• [On]: Voice guide On
• [Off]: Voice guide Off
Default setting: On
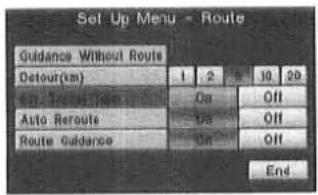
Setup Menu
Auto Reroute
This lets you choose to have another route search made to guide you back to your original route after having deviated from it.
• [On]: To search
• [Off]: Not to search
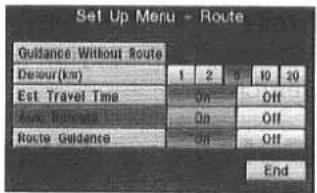
Default setting: On
Route Guidance
This lets you delete all set routes.
• [On]: Not to delete
• [Off]: To delete
Default setting: On
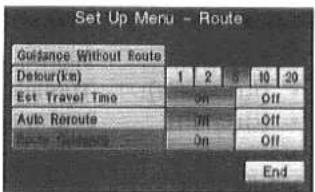
System
Here you can set your system preferences.
Volume Control
This lets you set the sound volume for voice guidance. The volume can be adjusted in five steps.
Default setting: 2
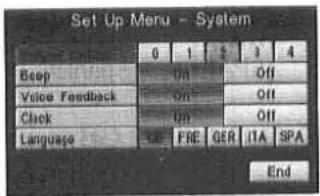
Beep
This lets you enable the beep produced when operating the buttons on the remote control.
• [On]: Beep sounds.
• [Off]: No Beep sounds.
Default setting: On
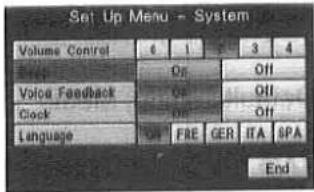
Voice Feedback
Voice guidance will be repeated.
• [On]: Voice Feedback enabled.
• [Off]: Voice Feedback disabled.
Default setting: On
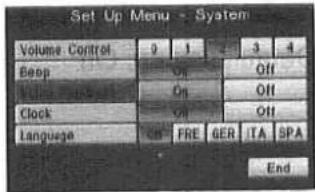
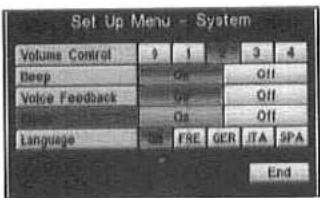
Clock
This lets you choose to have the clock displayed on the screen.
• [On]: Clock displayed.
• [Off]: Clock not displayed.
Default setting: On
Setup Menu
Language Switch
This lets you choose one of the following five display languages.
| [GB]: | English |
| [FRE]: | French |
| [GER]: | German |
| [ITA]: | Italian |
| [SPA]: | Spanish |
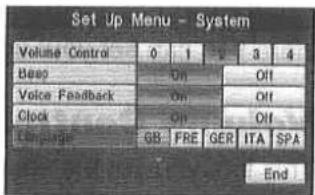
Default setting: GB
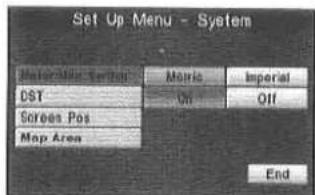
Meter/Mile Switch
This lets you choose to have distances shown in meters or miles.
Default setting: Metric
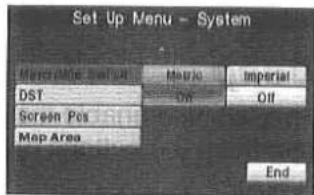
DST (Summer Time)
This lets you activate daylight saving time.
• [On]: Daylight saving time applied.
• [Off]: Daylight saving time not applied.
Default setting: On
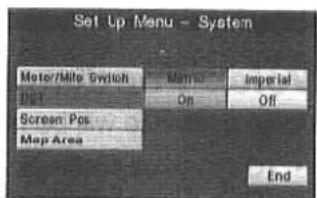
Screen Position
This lets you adjust the display position on the monitor screen.
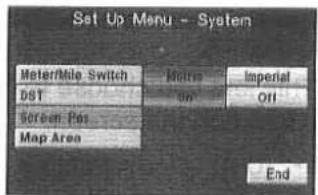
Map Area
Select a map to use if your map disc covers two or more countries.
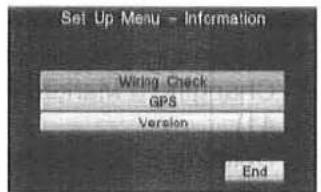
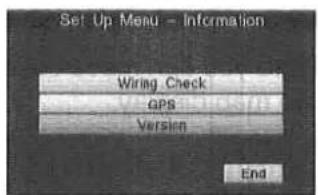
Information
Here you can check the wiring of the mobile navigation system, GPS reception, and the software version.
Wiring check
This lets you check whether the mobile navigation system is properly wired to the vehicle.
GPS Receiving
This lets you check the reception status of GPS signals.
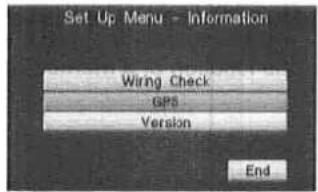
Version
This lets you check the mapping software version of your mobile navigation system.
Simulation
You can check your route from the starting point to the destination.
Stop→Press [DEST].
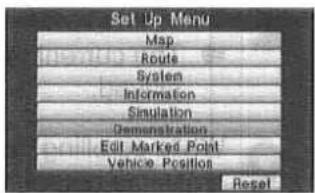
Demonstration
* To stop the demonstration, start driving and [Stop Demo].
Edit Marked Point
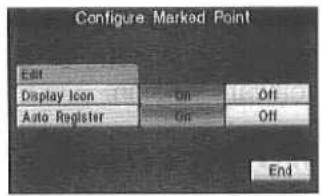
Here you can edit previously marked points by making the changes listed below. For operating procedures and detailed descriptions see the referenced pages.
- Renaming a Marked Point (→ page 42)
- Changing a Marked Point Icon (→ page 41)
- Deleting a Marked Point (→ page 43)
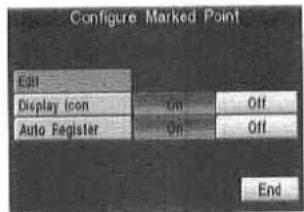
* [Display Icon] lets you choose to have the icon displayed on the map or not. [Auto Register] lets you choose between having a mark positioned automatically at the location of a marked point or not.
Vehicle Position
Here you can move the current vehicle position indicator to any point on the map display.
Important Note:
Normally, this operation is not necessary. Use this function only if the actual position of your vehicle differs from its position on the map. This would be the case, for example, after having installed a navigation system previously installed in another car.
1 Press SET UP. → The [Set Up Menu] opens.
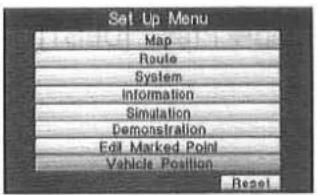
2 Select [Vehicle Position] and press ENTER. → The current position map is displayed.
![Vehicle Position FOREST DUSSEL [1] [1] CARRELLAIS PHASE](/content/2026/05/989472/images/481db4a9bd8ff7987ed03f6a4bf8aa04c15712581ee71f8b77fbc090bad020c8.jpg)
3 While scrolling the map with the crosshair cursor, move the cursor to the position where you currently are, and press ENTER.
GPS
(Global Positioning System)
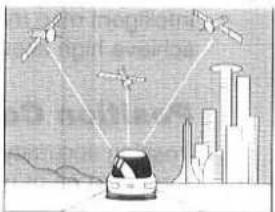
GPS is a position detecting system utilizing the signals from GPS satellites deployed by the U.S. Defense Department.
The Mobile Navigation System uses input from three or more satellites and calculates the vehicle position based on the principle of triangulation.
The positioning accuracy of the system corresponds to the error window of the GPS of about 30 to 200 meters.
natural_image
Illustration of a car with multiple satellites and ground stations, connected by signal lines to a city skyline (no text or symbols)Time to detect the current position
If you are using the system for the first time, or if you have not used it for some time, it takes about 5 minutes (or about 2 minutes in places of open area) to calculate your vehicle's position.
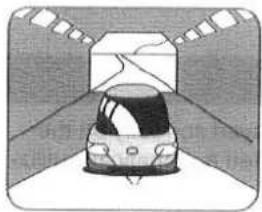
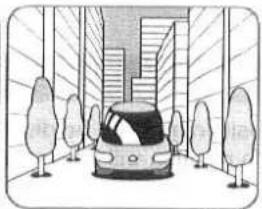
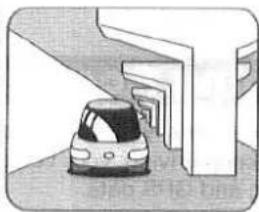
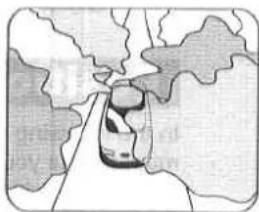
GPS signal reception is poor in the following places:
natural_image
Illustration of a car inside a tunnel with a box on top (no text or symbols)In tunnels
natural_image
Illustration of a car parked in a city street with trees and high-rise buildings (no text or symbols)Among high-rise buildings
natural_image
Cartoon illustration of a car parked under a parking garage (no text or symbols)Under elevated roads
natural_image
Illustration of a car driving on a road with clouds in the background (no text or symbols)In wooded areas
- If you have a roof carrier on your vehicle, install the GPS antenna away from the roof carrier.
- The GPS satellites are controlled by the U.S. Defense Department, which may intentionally
Notes:
- There may be vehicle position deviations for some time till GPS signals are received after turning on the ignition.
- Using a spare tire in place of the regular one may cause vehicle position deviations.
- Any difference between the direction in which your vehicle actually travels and that shown on the map is automatically eliminated by azimuth correction.
Map Matching
This function compares your vehicle's tracking data with the road data on the map CD-ROM, applies dead reckoning to determine the road where you are driving, and displays your vehicle on that road on the map.
Intelligent Map Matching
Intelligent map matching addresses the following problems to achieve high accuracy in vehicle positioning.
Position Correction for Elevated Roads
Position accuracy is improved by detecting whether the vehicle is running on or under an elevated road.
Position Correction for Parking Garages
Position accuracy is improved by detecting whether the vehicle is driving in an elevated or underground parking garage.
natural_image
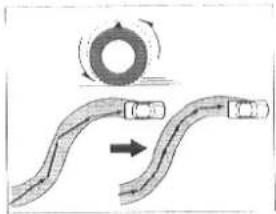
Diagram showing a rotating ring and a curved pipe with directional arrows (no text or symbols)High-precision Gyrosensor
A gyro detects turns with an accuracy of 0.05^ per second. Combined with a speed sensor, it enables the system to display the current vehicle position even in locations where GPS signals may be blocked.
Positioning Accuracy
In the following situations, your vehicle position may not be displayed correctly on the map. But as you keep driving, your vehicle position will be corrected automatically utilizing map matching and GPS data.
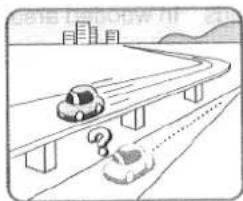
natural_image
Illustration of a car driving on an elevated highway with a question mark and a question mark, no text or symbols present.Running on an elevated road
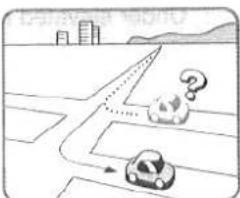
Making a turn after driving on a long straight road
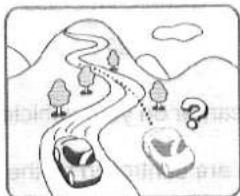
natural_image
Illustration of two cars driving on a winding road through mountainous terrain with trees and a question mark (no text or symbols)Running on a steep mountain road
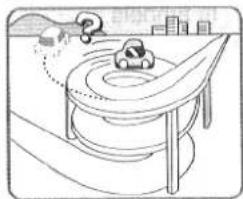
natural_image
Simple line drawing of a boat on a platform with a duck and city skyline in the background (no text or symbols)Running on a spiral road
natural_image
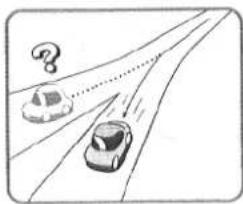
Illustration of two cars driving on a road with a question mark above, no text or symbols presentEntering a fork where a road branches off at a small angle
natural_image
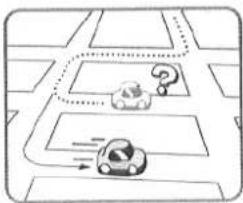
Simple line drawing of a car driving on a road with a question mark and arrow indicating direction (no text or symbols)Running crisscross on a network of parallel roads
natural_image
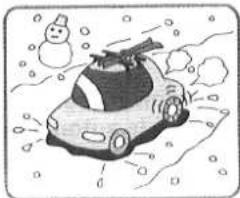
Cartoon illustration of a car with snowflakes and a snowman in the background (no text or symbols)Running on a slippery road with chains on tires
natural_image
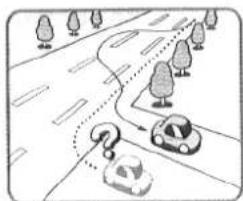
Illustration of a car and two cars on a road with trees, no text or symbols presentSnaking on a wide road
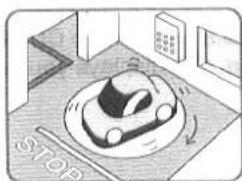
natural_image
Cartoon illustration of a car on a circular platform with 'STOP' written on the floor (no text or symbols on the car or platform)Vehicle on a turntable with ignition turned off
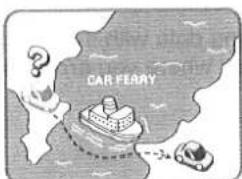
After getting off a ferry-boat or vehicle train
Route Search
The following problems may be encountered in route search, but do not indicate any trouble with the system.
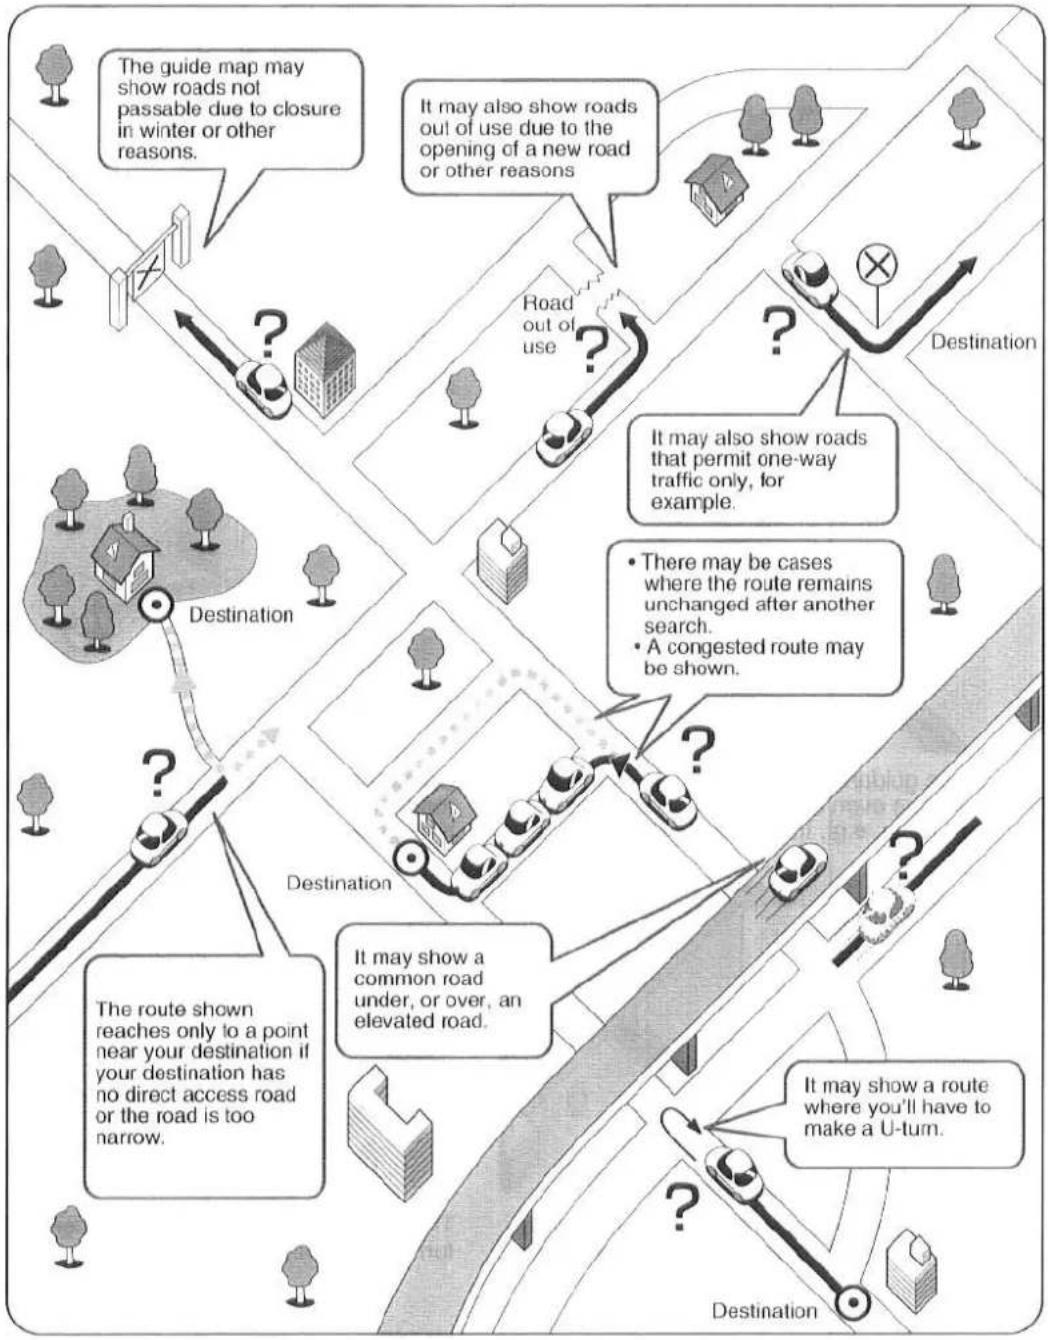
flowchart
graph TD
    A["The guide map may show roads not passable due to closure in winter or other reasons."] --> B["Destination"]
    C["It may also show roads out of use due to the opening of a new road or other reasons"] --> D["Destination"]
    E["Road out of use"] --> F["Destination"]
    G["There may be cases where the route remains unchanged after another search."]
    H["A congested route may be shown."] --> I["Destination"]
    J["It may show a common road under, or over, an elevated road."] --> K["Destination"]
    L["It may show a route where you'll have to make a U-turn."] --> M["Destination"]
    N["The route shown reaches only to a point near your destination if your destination has no direct access road or the road is too narrow."] --> O["Destination"]
Route Guide
The following problems may be encountered in route guidance, but do not indicate any trouble with the system.
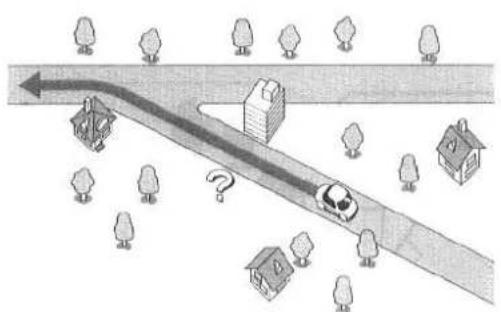
natural_image
Illustration of a car driving on a road surrounded by trees and houses, with a question mark indicating confusion (no text or symbols present)For certain shapes of intersection, the upcoming turn or the name of the intersection may not be announced.
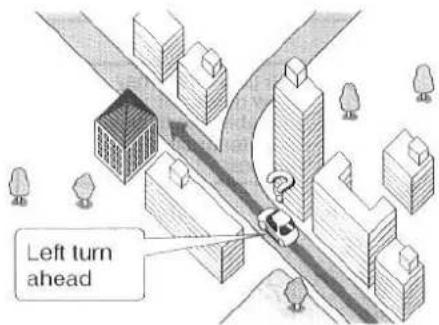
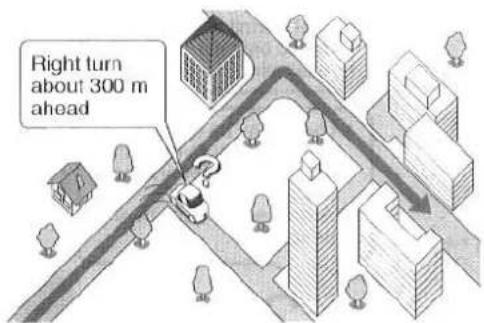
For certain shapes of intersection, you may be prompted to turn right or left when you actually should stay on the same road.
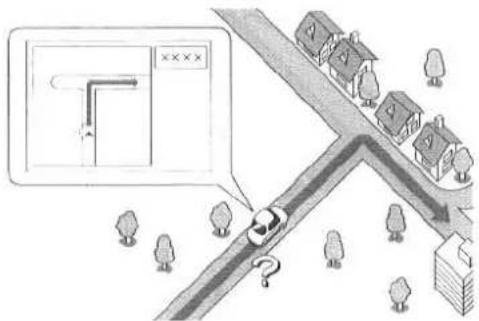
Voice guidance for the planned route may continue even after you have deviated from that route, e.g., turned too early.
natural_image
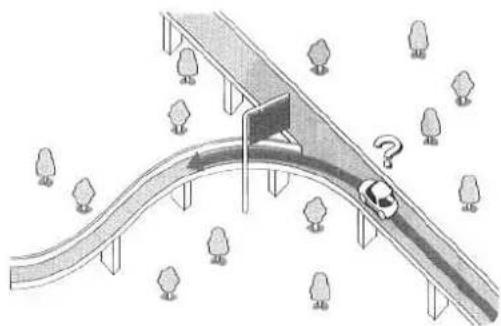
Illustration of a car driving on an elevated road with trees and a question mark, no text or symbols present.Some branching points on highways or toll roads may neither be displayed nor announced.
The Intersection Zoom Map may not always agree with the actual shape of the intersection.
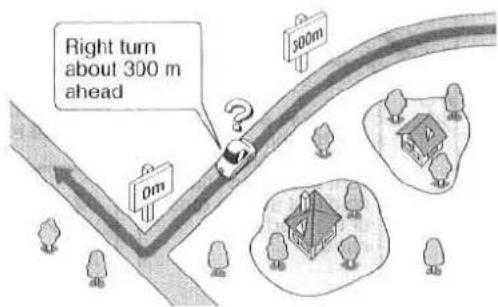
The announced distance to an upcoming turn may differ slightly from reality.
Playing Music CDs
The CN-DV2000EN also allows you to listen to music CDs. To play a music CD, connect the AUDIO output terminal of the CN-DV2000EN to the external input terminal of your car audio system using the optional connection cable. For connecting procedure and other details refer to the separate installation manual and the operating instructions of your audio system.
Operation
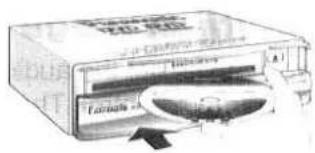
1 Eject the map DVD-ROM and insert a music CD.
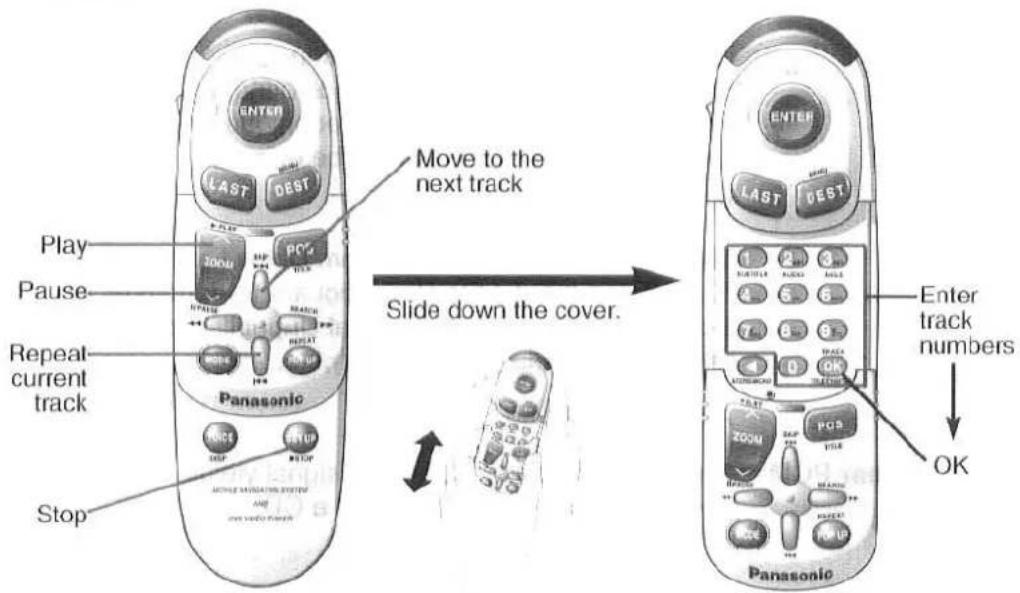
2 Press PLAY on the remote control to play the music.
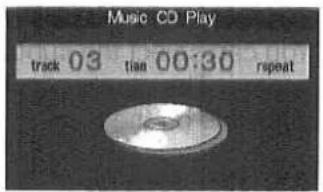
For a music CD, the remote control works to control the playback operations.
The CN-DV2000EN also allows you to play DVD videos and video CDs.
DVD Video
A DVD video is video material using a DVD (Digital Versatile Disc) as storage medium. The DVD's unique features let you enjoy different image and sound functions as explained below.
Multilanguage Soundtrack
You can select the audio soundtrack language by a simple operation on the remote control. The number in the circle shows the number of audio soundtrack languages available on the disc.
Multilanguage Subtitles
You can select the subtitle language by a simple operation on the remote control. The number in the circle shows the number of subtitle languages available on the disc.
Multi-angle
Allows you to view multi-angle recorded images from different angles. The number in the mark shows the number of angles available on the disc.
Powerful Surround-Sound Effect (Dolby Digital and Linear PCM compatible)
Dolby Digital: Dolby Digital is a digital sound compression technique developed by the Dolby Laboratories Licensing Corporation.
Supporting 5.1-channel surround sound, as well as stereo (2-channel) sound, this technique enables a large quantity of sound data to be efficiently recorded on a disc.
Manufactured under license from Dolby Laboratories. "Dolby" and the double-D symbol are trademarks of Dolby Laboratories. Confidential Unpublished Works. ©1992-1997 Dolby Laboratories, Inc.
All rights reserved.
Linear PCM: Non-compressed digital sound signal yielding a sound quality superior to that of a CD.
Playing Specified Titles or Chapters
DVD videos store video material by titles (headings) and chapters (subheadings). You can specify a title or chapter, where you want playback to begin.
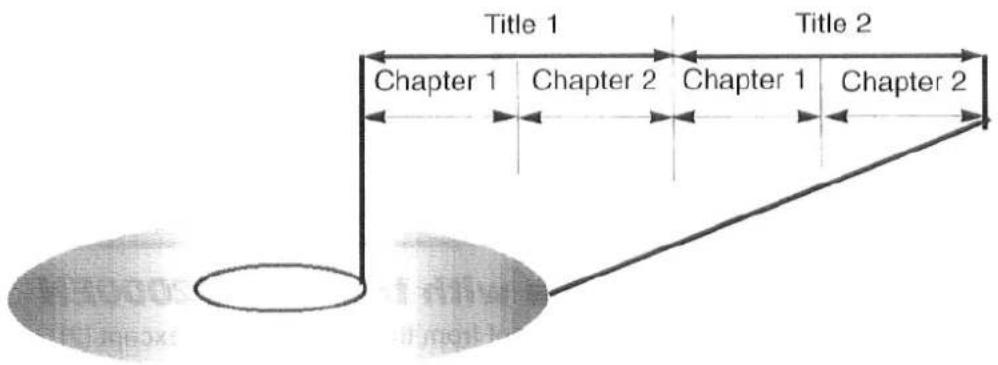
Video CD
A video CD is video material using a CD (Compact Disc) as storage medium. The CD-ROM contains compressed video data divided by contents into numbered tracks. You can specify a track number, where you want playback to begin.
Video CDs labeled "Playback Control" additionally let you make selections, such as a title, on an on-screen menu. The menu contents differ with each CD.
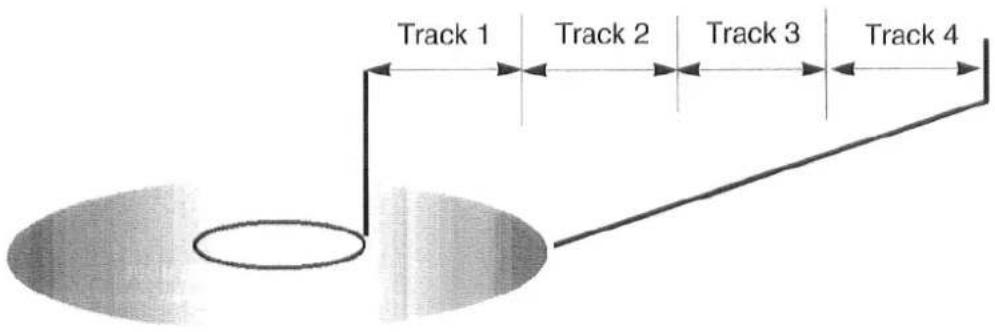
Supported Disc Formats
The CN-DV2000EN supports DVD videos and video CDs bearing the marks shown below. Both DVDs and CDs come in a number of formats. Those not marked as shown below cannot be reproduced.

12cm disc 8cm disc (single-sided disc only)

12cm disc 8cm disc
NOTE: Double-sided discs both 12cm and 8cm are not compatible with this player
Discs not compatible with the CN-DV2000EN
- DVDs with a Region No.* different from that of the player (except [2] and [ALL])
• DVD-ROM, DVD-R/DVD-RAM
• CD-ROM, CDV, CD-G, CD-R, Photo CD, Dts-Audio
* What are Region Numbers?
DVD Region Locking and Region Numbers were established to protect intellectual property rights by controlling which DVD movies and videos play on which DVD players. The world is divided into regions from 1 to 6. A DVD with the Region No. [2] A DVD marked [ALL] will play anywhere in the world.
Individual Property Rights
This product incorporates copyright protection technology that is protected by method claims of certain U.S. patents and other intellectual property rights owned by Macrovision Corporation and other rights owners. Use of this copyright protection technology must be authorized by Macrovision Corporation, and is intended for home and other limited viewing uses only unless otherwise authorized by Macrovision corporation. Reverse engineering or disassembly is prohibited.
ATTENTION!
Screen Display While Driving
The DVD/Video CD screen displays the message shown on the right while your vehicle is in motion. Only audio sound is enabled.
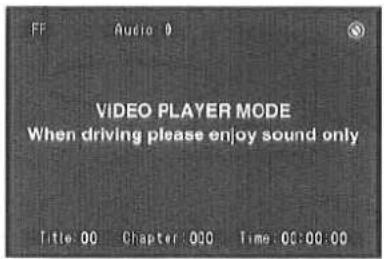
Names and Functions of Remote Control Buttons
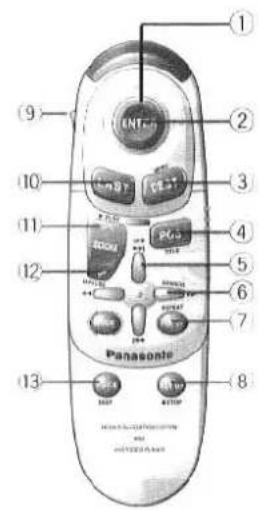

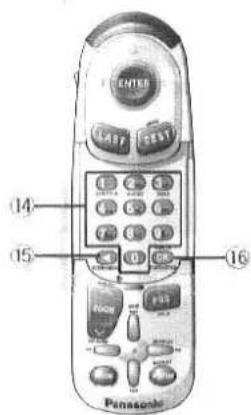
| No. | Operating button | DVD | Video CD |
| 1 | ENTER | Select item | Not used |
| 2 | JOYSTICK UP | Select item | Not used |
| JOYSTICK DOWN | Select item | Not used | |
| JOYSTICK RIGHT | Select item | Not used | |
| JOYSTICK LEFT | Select item | Not used | |
| 3 | DESTINATION | DVD Menu/SETUP MODE | Video CD Menu |
| 4 | POSITION | Title Menu | Not used |
| 5 | 3D KEY UP | Next | Next track |
| 3D KEY DOWN | Previous | Previous track | |
| 6 | 3D KEY RIGHT | Rapid Advance | Not used |
| 3D KEY LEFT | Rapid Reverse | Not used | |
| 7 | POP UP | Repeat | Repeat |
| 8 | SET UP | Stop | Stop |
| 9 | KEY LOCK | Not used | Not used |
| 10 | LAST | Not used | Not used |
| 11 | ZOOM OUT | Play | Play |
| 12 | ZOOM IN | Pause | Pause |
| 13 | VOICE | On-screen message | On-screen message |
| 14 | NUMERIC KEY1 | Switch the language/Title/Chapter number input | Title/Chapter number input |
| NUMERIC KEY2 | Switch the audio soundtrack language/Title/Chapternumber input | Title/Chapter number input | |
| NUMERIC KEY3 | Changes the angle/Title/Chapter number input | Title/Chapter number input | |
| NUMERIC KEY4 | Title/Chapter number input | Title/Chapter number input | |
| NUMERIC KEY5 | Title/Chapter number input | Title/Chapter number input | |
| NUMERIC KEY6 | Title/Chapter number input | Title/Chapter number input | |
| NUMERIC KEY7 | Title/Chapter number input | Title/Chapter number input | |
| NUMERIC KEY8 | Title/Chapter number input | Title/Chapter number input | |
| NUMERIC KEY9 | Title/Chapter number input | Title/Chapter number input | |
| NUMERIC KEY0 | Title/Chapter number input | Title/Chapter number input | |
| 15 | Title/Chapter number input | Stereo/Mono | |
| 16 | OK | Title/Chapter input mode | Not used |
* Some DVD video discs and video CDs may not be usable nor applicable.
Disc Operation
ATTENTION!
To perform these operations, stop your vehicle in a safe location and set the parking brake.
Play
Eject the map DVD-ROM and insert a DVD video or video CD.
→ Playback starts with pressing ENTER. With most DVDs, the Setup menu or Title menu will be displayed when the disc is inserted.
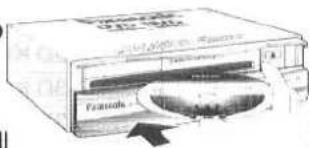
Setup Menu
This menu lets you set up the basic functions for playing DVDs.
Title Menu
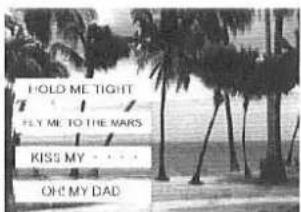
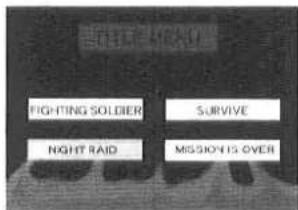
After inserting a DVD video containing multiple titles, or a video CD provided with Playback Control, the Title menu shown on the right appears. Proceed as follows to start playback. (The Title menu is displayed different for each DVD or CD. The one shown on the right is an example. For details refer to the operating instructions of the DVD or CD.)
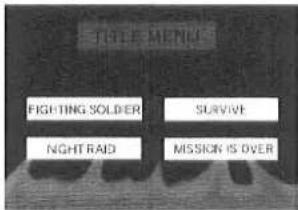
Example of DVD Video opening screen
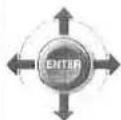
Example of a Video CD opening screen
[To Play a DVD Video]
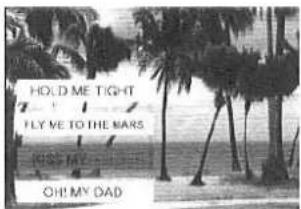
Select the desired title using the joystick, and press ENTER.
→ The selected title is played.
* To open the Title menu while playing a DVD, press TITLE.
[To Play a Video CD]
Enter the number of the track using the numeric buttons, and press PLAY.
→ The selected track number is played.
![PANASONIC CN-DV2000 - [To Play a Video CD] - 2](/content/2026/05/989472/images/ea30c4df5b94b94a1abc843d17b4a8bbd3f295873f59094fc61cf91fdb1bc63b.jpg)
![PANASONIC CN-DV2000 - [To Play a Video CD] - 4](/content/2026/05/989472/images/5a6de5fdeb5f8bf2216b329ce4a593faddf511f95ea395356834fdadeef5f729.jpg)
Stop
Press STOP.
→ Play stops, and the screen is displayed in blue. To continue play from the point where you stopped (Resume Play function), press PLAY.
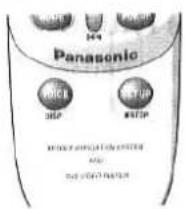
ATTENTION!
- The Resume Play function is cleared if the disc is ejected in the stopped state and reinserted.
- The Resume Play function works only with discs capable of displaying the elapsed playing time.
Rapid Advance/Rapid Reverse
Press SEARCH [▶▶] (Rapid Advance) or SEARCH [◀◀] (Rapid Reverse).
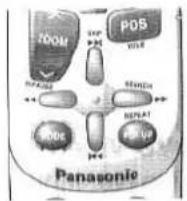
Search Speed
Two search speeds are available.
- Pressing once: 1.5 times as fast as the playback speed
- Pressing twice: 10 times as fast as the playback speed
- Pressing 3 times: 20 times as fast as the playback speed
Skip
Press SKIP [◀◀] (previous chapter or track) or SKIP [▶▶] (next chapter or track).
- Pressing once: Skips to the start of the next (previous) chapter or track.
- Pressing twice: Skips two chapters or tracks forward (backward).
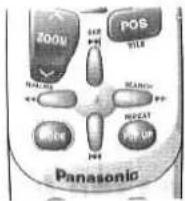
Disc Operation
Pause
Press PAUSE.
→ Play pauses temporarily. To resume play, press PLAY, or press PAUSE again.
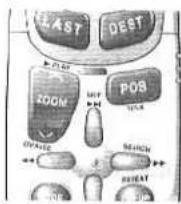
Playing a Specified Title/Chapter/Track
You can specify a certain chapter or track for playback. For DVD videos, you can specify the title or chapter, for video CDs the track.
1 Press TITLE/CHAPTER during play-back.
→ The mode changes as follows each time TITLE/CHAPTER is pressed.

Title Number Input Screen (Example)
- DVD Videos
Title No. input mode → Chapter No. input mode → regular play
- Video CDs
Track No. input mode → regular play
2 Enter the Title No. (max. 2 digits), Chapter No. (max. 3 digits) or Track No. (max. 2 digits) using the numeric buttons.
→ Play starts from the specified title, chapter or track.
When the Invalid Mark Appears

Display of the Ⓧ mark in the upper right corner of the screen means that your last operation was invalid. Which operations are invalid varies with discs.
natural_image
Black-and-white photo of two people standing indoors, one holding a large object (no visible text or symbols)On-Screen Message of Current Playback Information
This function lets you display the following information about the current disc on the screen.
4 Press DISP during play.
→ Information about the playback status of the current disc is displayed.
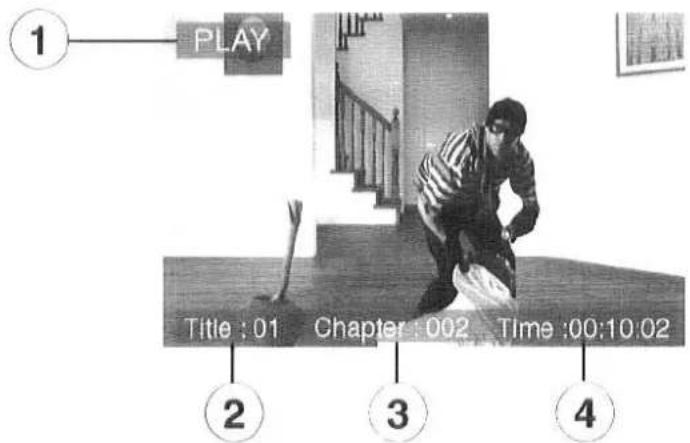
① Mode: Shows the current operating mode.
② Title: Shows the number of the title currently being played.
③ Chapter (Track): Shows the number of the chapter (track) currently being played.
(4) Time: Shows the time that has elapsed since the start of playback. (After resuming playback with the Resume Play function the time elapsed since playback was resumed is shown.)
ATTENTION!
Information on the current disc is not displayed if [On-Screen Messages] on the Setup menu is set to [OFF (Disabled)]. To have the information displayed, first change the setting in the Setup menu to [ON (Enabled)] (→ page 72).
Disc Operation
Changing the Subtitle Language
This lets you change the subtitle language, provided your disc supports multilingual subtitles.
1 Press SUBTITLE during play. → The number of the currently selected subtitle language is displayed.
natural_image
Black-and-white photo of two women in a vintage-style outfit, one looking at the camera (no visible text or symbols)
2 Keep pressing SUBTITLE until the number of the desired subtitle language is displayed.
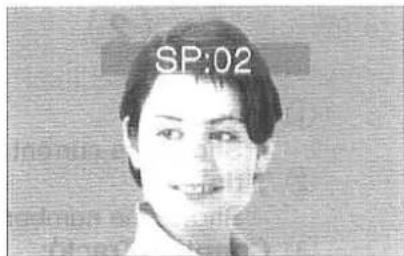
ATTENTION!
- The number of subtitle languages available varies with DVDs (check the indication on the package).
- With some DVDs the subtitle language is changed from the Setup menu. Please check the operating instructions of the DVD.
- Display of the Invalid Mark ⊙ in place of the language number means that no other subtitle languages are available on the disc.
Changing the Audio Soundtrack Language
This lets you change the audio soundtrack language, provided the DVD video supports multilanguage soundtrack.
1 Press AUDIO during play. → The number of the currently selected audio soundtrack language is displayed.
natural_image
Black-and-white photo of a person playing a stringed instrument on stage with a microphone and a sign in the background (no readable text or symbols)
2 Keep pressing AUDIO until the number of the desired soundtrack language is displayed.
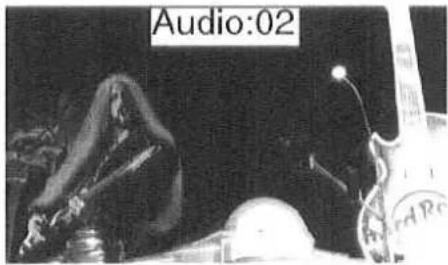
ATTENTION!
- The number of audio soundtrack languages available varies for different DVDs (check the indication on the package).
- With some DVDs the audio soundtrack language is changed from the Setup menu. Please check the operating instructions of the DVD.
- Display of the Invalid Mark Ⓧ in place of the language number means that no other audio soundtrack languages are available on the
Disc Operation
Changing the Viewing Angle
This lets you view multi-angle recorded images from different angles.
1 Press ANGLE during play. → The number of the currently selected angle is displayed.
2 Keep pressing ANGLE until the number of the desired angle is displayed.
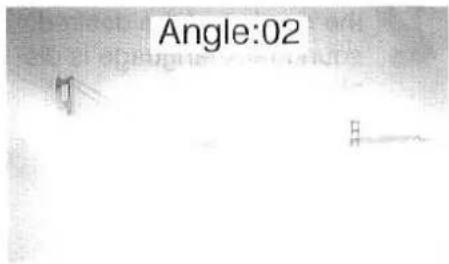
ATTENTION!
- The number of angles available varies for different discs (check the indication on the package).
- With some DVDs the viewing angle is changed from the Setup menu. Please check the operating instructions of the DVD.
- Display of the Invalid Mark ⊙ in place of the angle number means that no other viewing angles are available on the disc.
Setup Menu
This menu lets you set up the basic functions for playing DVDs. With some DVDs, the Setup menu opens automatically as soon as the DVD is inserted.
Menu Language
This lets you select a language for title and menu display. Available languages vary with DVDs. (Default setting: English)
4 Press STOP and press MENU.
→ The [Set Up Mode] menu opens.
2 Select [Menu Language] by using the joystick, and press ENTER.
→ The following languages are displayed.
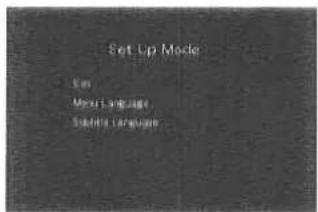
- English - French - German
• Italian • Spanish • Other
Select a language, and press ENTER
([Other] lets you select languages other than the five above. Enter the corresponding Language Code (page 74) with the numeric buttons.)
The setting is applied, and the display returns to the [Set Up Mode] menu.
Subtitle Language
This lets you select a language for subtitles. Available languages vary with DVDs. (Default setting: English)
Press STOP and press MENU.
→ The [Set Up Mode] menu opens.
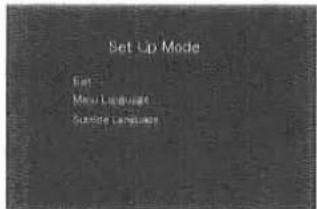
2 Select [Subtitle Language] by using the joystick, and press ENTER.
→ The following languages are displayed.
- English - French - German
• Italian • Spanish • Other
Select a language, and press ENTER.
([Other] lets you select languages other than the five above. Enter the corresponding Language Code (page 74) with the numeric buttons.)
The setting is applied, and the display returns to the [Set Up Mode] menu.
Setup Menu
Audio Language
This lets you select a language for audio soundtrack. Available languages vary with DVDs. (Default setting: English)
4 Press STOP and press MENU.
→ The [Set Up Mode] menu opens.
2 Select [Audio Language] by using the joystick, and press ENTER.
→ The following languages are displayed.
- English
- French
- German
- Italian
- Spanish
- Other
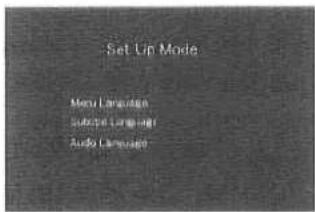
Select a language, and press ENTER.
([Other] lets you select languages other than the five above. Enter the corresponding Language Code (page 74) with the numeric buttons.)
The setting is applied, and the display returns to the [Set Up Mode] menu.
TV Aspect
This lets you select the appropriate TV aspect to match that of the connected monitor. Make sure to first check the TV aspect of your monitor.
4 Press STOP and press MENU.
→ The [Set Up Mode] menu opens.
2 Select [TV Aspect] by using the joystick, and press ENTER.
→ The [TV Aspect] menu opens.
• 4:3 (for 4:3 aspect monitor)
• 16:9 (for 16:9 aspect monitor)
3 Select [4:3] or [16:9], and press ENTER.
The setting is applied, and the display returns to the [Set Up Mode] menu.
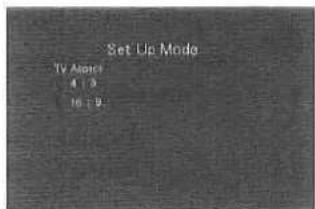
Connecting a 16:9 Aspect Monitor
Video material is played back in full size. With some DVDs, however, a black band may appear on the top and bottom or right and left of the picture as shown below.
natural_image
Black-and-white photo of a person walking along a palm-lined street lined with tall trees (no visible text or symbols)TV Mode
If you have selected TV aspect 4:3, you will need to set the appropriate TV mode for the DVD. There are two TV modes as described below.
(Default setting: Pan&Scan)
Pan&Scan: (When playing a 16:9 aspect DVD video, the outer parts of the picture will be cut off as shown on the right.)
natural_image
Black-and-white photo of a person in traditional robes walking along a tree-lined street (no visible text or symbols)Letterbox: (When playing a 16:9 aspect DVD video, a black band will appear at the right and left of the picture as shown at right.)
natural_image
Black-and-white photo of a person walking through a palm-lined street with trees and distant hills (no visible text or symbols)1 Press STOP and press MENU. → The [Set Up Mode] menu opens.
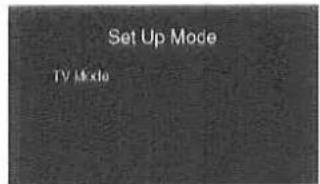
2 Select [TV Mode] by using the joystick, and press ENTER.
→ The [TV Mode] menu opens.
Select the appropriate TV mode for the DVD, and press ENTER.
• For Pan&Scan style DVDs: [Pan&Scan]
- For other than Pan&Scan style DVDs: [Letterbox]
The setting is applied, and the display returns to the [Set Up Mode] menu.
Setup Menu
On-Screen Messages
Here you can choose whether to have information on the current disc displayed or not displayed (→ page 65). (Default setting: ON)
1 Press STOP and press MENU. → The [Set Up Mode] menu opens.
2 Select [On-Screen Messages] by using the joystick, and press ENTER.
→ The [On-Screen Messages] menu opens.
• ON (displayed)
• OFF (Not displayed)
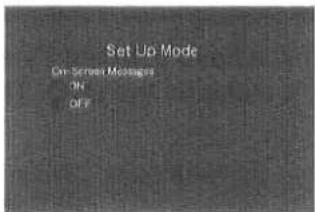
Select [ON] or [OFF], and press ENTER.
→ The setting is applied, and the display returns to the [Set Up Mode] menu.
Audio Output Level
This lets you set the audio output level.
(Default setting: 3)
1 Press STOP and press MENU. → The [Set Up Mode] menu opens.
2 Select [Audio Output Level] by using the joystick, and press ENTER.
→ The [Audio Output Level] menu opens.
• 1: Minimum level
• 2: Default setting
• 3: Medium level
• 4: Maximum level
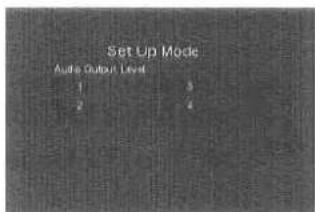
Select a level from 1 to 4, and press ENTER.
The setting is applied, and the display returns to the [Set Up Mode] menu.
Dynamic Range Compression
This lets you specify compression of the minimum to maximum volume range to obtain satisfactory sound quality even at low volume.
(Default setting: OFF)
1 Press STOP and press MENU. → The [Set Up Mode] menu opens.
2 Select [D. Range Compression] by using the joystick, and press ENTER. → The [D. Range Compression] menu opens. • ON (Enabled) • OFF (Disabled)
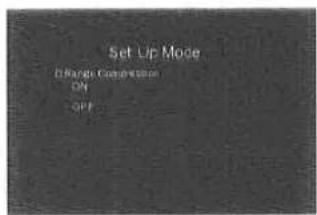
3 Select [ON] or [OFF], and press ENTER. → The setting is applied, and the display returns to the [Set Up Mode] menu.
Display Type
Choose the appropriate type for your monitor.
(Default setting: Type 1)
1 Press STOP and press MENU. → The [Set Up Mode] menu opens.
2 Select [Display Type] by using the joystick, and press ENTER. → The [Display Type] menu opens. • Type 1 (for a Panasonic monitor) • Type 2 (for monitors other than Panasonic)
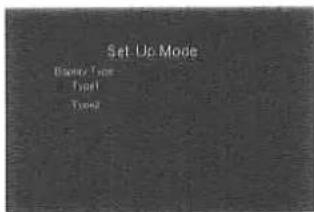
3 Select [Type 1] or [Type 2], and press ENTER. → The setting is applied, and the display returns to the [Set Up Mode] menu.
Language Code List
| Code | Language | Code | Language | Code | Language |
| 6565 | Afar | 7289 | Armenian | 8277 | Rhaeto-Romance |
| 6566 | Abkhazian | 7365 | Interlingua | 8279 | Romanian |
| 6570 | Afrikaans | 7378 | Indonesian | 8285 | Russian |
| 6577 | Ameharic | 7383 | Icelandic | 8365 | Sanskrit |
| 6582 | Arabic | 7384 | Italian | 8368 | Sindhi |
| 6583 | Assamese | 7387 | Hebrew | 8372 | Serbo-Croatian |
| 6588 | Aymara | 7465 | Japanese | 8373 | Singhalese |
| 6590 | Azerbaijani | 7473 | Yiddish | 8375 | Slovak |
| 6665 | Bashkir | 7487 | Javanese | 8376 | Slovenian |
| 6669 | Byelorussian | 7565 | Georgian | 8377 | Samoan |
| 6671 | Bulgalian | 7575 | Kazakh | 8378 | Shona |
| 6672 | Bihari | 7576 | Greenlandic | 8379 | Somali |
| 6678 | Bengali, Bangla | 7577 | Cambodian | 8381 | Albanian |
| 6679 | Tibetan | 7578 | Kannada | 8382 | Serbian |
| 6682 | Breton | 7579 | Korean | 8385 | Sundanese |
| 6765 | Catalan | 7583 | Kashmiri | 8386 | Swedish |
| 6779 | Colsican | 7585 | Kurdish | 8387 | Swahili |
| 6783 | Czech | 7589 | Kirghiz | 8465 | Tamil |
| 6789 | Welsh | 7665 | Latin | 8469 | Telugu |
| 6865 | Danish | 7678 | Lingala | 8471 | Tajik |
| 6869 | German | 7679 | Laothian | 8472 | Thai |
| 6890 | Bhutani | 7684 | Lithuanian | 8473 | Tigrinya |
| 6976 | Greek | 7686 | Latvian, Lettish | 8475 | Turkmen |
| 6978 | English | 7771 | Malagasy | 8476 | Tagalog |
| 6979 | Esperanto | 7773 | Maori | 8479 | Tonga |
| 6983 | Spanish | 7775 | Macedonian | 8482 | Turkish |
| 6984 | Estonian | 7776 | Malayalam | 8484 | Tatar |
| 6985 | Basque | 7778 | Mongolian | 8487 | Twi |
| 7065 | Persian | 7779 | Moldavian | 8575 | Ukrainian |
| 7073 | Finnish | 7782 | Marathi | 8582 | Urdu |
| 7074 | Fiji | 7783 | Malay | 8590 | Uzbek |
| 7079 | Faroese | 7784 | Maltese | 8673 | Vietnamese |
| 7082 | French | 7789 | Burmese | 8679 | Volapük |
| 7089 | Frisian | 7865 | Nauru | 8779 | Wolof |
| 7165 | Irish | 7869 | Nepali | 8872 | Xhosa |
| 7168 | Scots Gaelic | 7876 | Dutch | 8979 | Yoruba |
| 7176 | Galician | 7879 | Norwegian | 9072 | Chinese |
| 7178 | Guarani | 7982 | Oriya | 9085 | Zulu |
| 7185 | Gujarati | 8065 | Panjabi | ||
| 7265 | Hausa | 8076 | Polish | ||
| 7273 | Hindi | 8083 | Pashto, Pushto | ||
| 7282 | Cloatian | 8084 | Portuguese | ||
| 7285 | Hungarian | 8185 | Quechua | ||
Troubleshooting
Important!
There may be some problems due to operational errors or mistakes. Please read this manual again and verify that there really is a problem before calling a service person to ask for repair services.
| Problem | Possible Cause | Probable Solution |
| Nothing shown on the monitor display | Display is not switched on. | Switch it on. |
| Mode is changed. | Press the mode button. | |
| Fuse is blown. | Consult the store where you purchased the product. | |
| Video signal connector is improperly or incompletely | Read the manual and check the connection. | |
| Car battery voltage is low. | Recharge or replace the car battery. | |
| Remote control buttons do not work. | Remote control batteries are week or dead. | Replace the batteries. |
| Batteries are inserted wrong. | Insert the battery correctly. | |
| Remote control is not pointed at the inferred receiver. | Point the remote control at the inferred receiver. | |
| The light sensor is improperly wired. | Read the manual and check the connection. | |
| Your car position is not correctly shown while driving. | Your car position has changed while was ACC OFF.Car transported by ferryCar turned on a turntable at a car parking facilityCar moved by a tow truck or similar vehicle | Drive for some time with receiving GPS signals. |
| The GPS signals can not be received. |
Troubleshooting
| Problem | Possible Cause | Probable Solution |
| The vehicle position is not correctly shown while traveling. | Distance compensation is incomplete. | Check if distance compensation has been completed. (See page 86.) |
| Vehicle speed pulses are not correctly connected. | Read the manual and check the connection. | |
| GPS symbol is not displayed. | GPS signals cannot be received due to an obstacle. | GPS signals will be received when there are not any more obstacles. |
| GPS antenna cable connection is incomplete. | Check GPS antenna connection with the installation check screen. (If the cable is unconnected, read the manual and check the connection.) | |
| Your car location is not shown. | The system is in map mode. | Press thebutton. |
| No voice guide | Voice guide volume is set to zero. | Raise the voice guide volume. |
| The vehicle is off the route. | Check the route guide display on the current position map. Repeat route search. | |
| The vehicle is going backwards on the route. | Check the direction for your destination. | |
| Repeat route search. | ||
| Remote control buttons do not beep. | Beep is set to OFF. | Turn the beep on. |
| Beep was set improperly during monitor setup. | Set the monitor appropriately for the type of monitor connected. | |
| Map is not displayed (Screen blank) | Map disc is wet due to condensation, scratches, or dirts. | Check if the map disc is wet due to condensation, scratches, or dirts. |
What to do with these messages
The following messages will appear in some cases. Take proper action in accordance with the list.
| Message | When | Action |
| Route Calculation failed | Change your destination and route, and repeat route search. | |
| Cannot Read Disk | Map disc was inserted upside down. | Insert the specified map disc. Check the map disc. |
| Accessing Data Please wait.... | Opening screen is on. | Check if the map disc is wet due to condensation,scratches, or dirtis.If the same message is displayed when this operation is repeated after checking, then consult the store where you purchased the product. |
| Various operations were performed. | If the same message appears after repeating the operation, consult the store where you purchased the product. | |
| Unable to select Destination. Please Select another point. | Input Destination. | Change your destination and route, and repeat route search. |
Troubleshooting
| Error message | Remedy |
| Cannot Read Disk | Appears on the display when the disc is dirty, scratched, or upside down, and when the disc cannot be played with this player. Eject the disc and check it. |
| Cannot Read Disk | Appears on the display when the DVD disc with region No. other than "02" is played. Confirm the disc on which the region No. is "02" or All. |
| DVD deck error | Appears on the display when the playback mechanism is seriously damaged. Eject the disc and contact your nearest authorized Panasonic Service Center. |
| Symptom | |
| Play fails to start even when PLAY is pressed.Play starts, but then stops immediately. | Condensation has formed: wait about 1 to 2 hours to allow the player to dry.This player cannot play discs other than DVDs, Video CDs, and CDs.The disc may be dirty and may require cleaning.Ensure that the disc is inserted with the label side up. |
| No picture. | Ensure that the player is connected properly.Ensure that the input settings of the connected dis-play unit are done correctly. |
| No sound from the external speakers of the stereo system or other equipment. | Ensure that the player is connected properly.Ensure that the input settings for the stereo system are correct. |
| No key operations are effective. | Some operations may be prohibited by the disc.Ensure that the KEY LOCK switch of the remote control is released. |
| No menu play for Video CD. | This function works only with Video CDs with play-back control. |
| Picture is distorted during fast forwarding and fast reversing. | The picture will be somewhat distorted at times: this is normal. |
| No subtitles. | Subtitles appear only with discs which contain them. |
Troubleshooting
| Symptom | |
| Alternative audio soundtrack or subtitle language can not be selected. | • An alternative language can not be selected with discs which only contain one language.• The alternative languages on some discs cannot be selected by switching the audio soundtrack/subtitle language. Try selecting it from the DVD menu if one is available. |
| Viewing angle cannot be changed. | • This function is dependent on software availability. Even if a disc has a number of angles recorded, these angles may be recorded for specific scenes only. |
| Audio soundtrack and/or subtitle language is not the one selected at the initial settings. | • If the audio soundtrack and/or subtitle language does not exist on the DVD, then the language selected in the initial settings will not be seen/heard. |
| No 4:3 (16:9) picture. | • Match the setting of [TV aspect] on the Setup Menu to that of the connected monitor. |
| No on-screen display. | • [On-Screen Messages] on the Setup Menu is set to [OFF]. Select [ON] |
| The menu is not displayed in the preferred language. | • Check the setting of [Subtitle Language] on the Setup Menu. |
| The sound volume level is too low or too high. | • Control the volume by setting [Audio Output Level] on the Setup Menu. |
Troubleshooting
(DVD Video)
| Problem | Possible Cause | Probable Solution |
| Not play back | Disc region No. is not 2 or ALL. | Use discs with region No. 2 or ALL. |
| Disc is inserted upside down. | Check if the disc was inserted correctly. | |
| No picture on the monitor | DVD is played back while driving. | Stop the vehicle is set the parking brake, and then play the DVD. |
| No picture, no sound | Screen is in RGB mode. | Read the manual (for TV operation) and change TV mode to video mode. |
| RCA cable is not correctly connected. | See the manual and check the connection. | |
| Picture is distorted when the DVD video is switched back to the navigation screen. | Optional monitor is connected to RGB terminal. | If it is connected to the RGB terminal, then adjust screen position as described on page 19 of the manual for car navigation operation. |
| Remote control does not work. | Batteries are week or dead. | Replace the batteries. |
| Battery are connected wrong. | Insert the battery correctly. | |
| Menu editing cannot be done with a video CD. | The video CD has no playback control. | Use a video CD with playback control. |
| No text on the screen | You are watching a The DVD that has no text. | Check the package. |
| Text is turned off. | Turn text on. | |
| No language switching in play/text mode | The disc contains more than two languages. | Check the package. |
| Text is limited. | Switch on the menu screen. Some discs prohibit switching. | |
| Viewing angle unchangeable | The disc does not contain multiple viewing angles. | Check the package. |
| You haven't come to a scene which permits angle change. | Some discs permit angle change in only part of the disc. | |
| DVD video sound volume is too low, or is too high and distorted. | Volume setting is wrong. | Adjust the volume. |
Note:
It is recommended that you have information on the handling and care of map discs. For details, see the Handling and Care of Map Discs in the Manual for Car Navigation Operation.
Installation Guide
Preparation
- Disconnect the lead from the negative (−) battery terminal (see caution below).
Caution: Do not disconnect the battery terminals of a car with trip or navigational computer since all user settings stored in memory will be lost. Instead take extra care with installing the unit to prevent shorts.
Dashboard Installation
Installation Opening
The unit can be installed in any dashboard having an opening as shown on the right. The dashboard should be 4.5 mm - 6 mm thick in order to be able to support the unit.
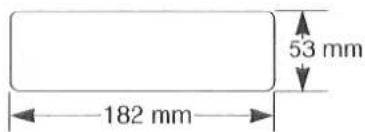
Installation Precautions
If possible, have the equipment installed by a professional installer.
If you should encounter any difficulties, please consult your nearest authorized Panasonic Service Center.
- This unit is designed exclusively for use in cars having a 12-volt negative ground battery system.
- Follow the instructions for electrical connection carefully. Failure to do so may result in damage to the unit.
- Connect the power cord after all other connections are made.
- Be sure to connect the YELLOW lead to the positive (+) terminal of the battery or to the fuse block (BAT) terminal.
- Insulate all exposed wires to prevent short circuiting.
- Secure all loose wires after installing the unit.
- Carefully read the operating and installation instructions of the respective equipment before connecting it to the unit.
Supplied Hardware
| No. | Item | Diagram | Q'ty |
| (1) | Mounting collar |  | 1 |
| (2) | Rear support strap |  | 1 |
| (3) | Tapping screws (5 mmø x 16 mm) |  | 4 |
| (4) | Tapping screws with Washers (5 mmø x 6 mm) |  | 4 |
| (5) | Mounting bolt (5 mm ) |  | 1 |
| (6) | Hex. nut (5 mm ) |  | 1 |
| (7) | Tapping screws (5 mm ) |  | 2 |
| (8) | Infrared receiver (with Double-Sided Tape) |  | 1 |
| (9) | Speed Plus Cord (5 m) |  | 1 |
| (10) | GPS antenna | 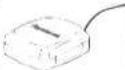 | 1 |
| (11) | Power connector |  | 1 |
| No. | Item | Diagram | Q'ty |
| (12) | Remote control holder (with Double-Sided Tape) |  | 1 |
| (13) | Remote control unit |  | 1 |
| (14) | Batteries (R6PU) |  | 2 |
| (15) | Trim plate |  | 1 |
| (16) | Mounting plates |  | 2 |
| (17) | L-Shaped brackets |  | 2 |
| (18) | Clip connector |  | 4 |
| (19) | Protective Sheet | [YKSY] | 1 |
| (20) | L-shaped Bracket |  | 1 |
| (21) | Cord Clamp (including Double-Sided Tape) |  | 5 |
Cautions
Notes:
- It is natural that the unit becomes warm during prolonged use.
- The unit may not function properly if installed in a location where it is exposed to high temperature such as in the trunk. Preferably install it in the driver's compartment.
Install the main unit on a firm base inside the driver's compartment, such as on the floor or in the console box. Any changes in its position may cause the position of your vehicle to deviate in the screen.
Choose the location for installing the main unit so that it is easy to reach it for inserting and removing the map DVD-ROM and points in a convenient direction.
Do not install the main unit on its side or upside down. This may cause malfunctions.
- Install the main unit in horizontal position. The permissible tilt is within 10^ side to side and within 30^ front to back.
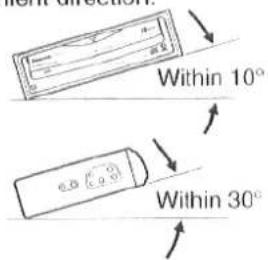
Do not install the main unit in locations that tend to get very hot, such as on the dashboard or in the glove compartment.
This may cause damage to the unit.
To prevent damage, avoid installing the main unit in places where it is exposed to:
- Direct sunlight
● Air flow from the air conditioner
• Heat generated by other equipment
Ensure that the fan outlet at the rear of the main unit is not blocked.
When installing the unit with the L-Shaped Brackets
- Attach the L-Shaped Brackets on both sides of the unit with the Screws with Washers.
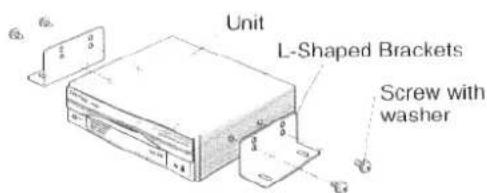
- Install the unit with Tapping Screws.
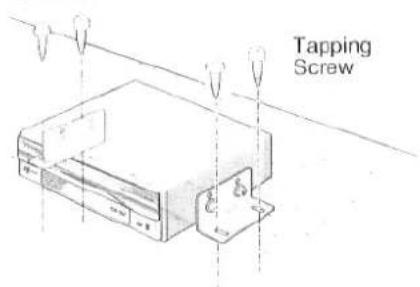
Installation Guide
Precautions
- When bending the mounting tab of the mounting collar with a screwdriver, be careful not to injure your hands and fingers. We recommend that you wear gloves for installation work to protect yourself from injuries.
□ Installation Procedure
Note: Disconnect the cable from the negative (−) battery terminal.
1. Secure Mounting Collar ①.
Insert Mounting Collar (1) into the dashboard, and bend the mounting tabs out with a screwdriver.
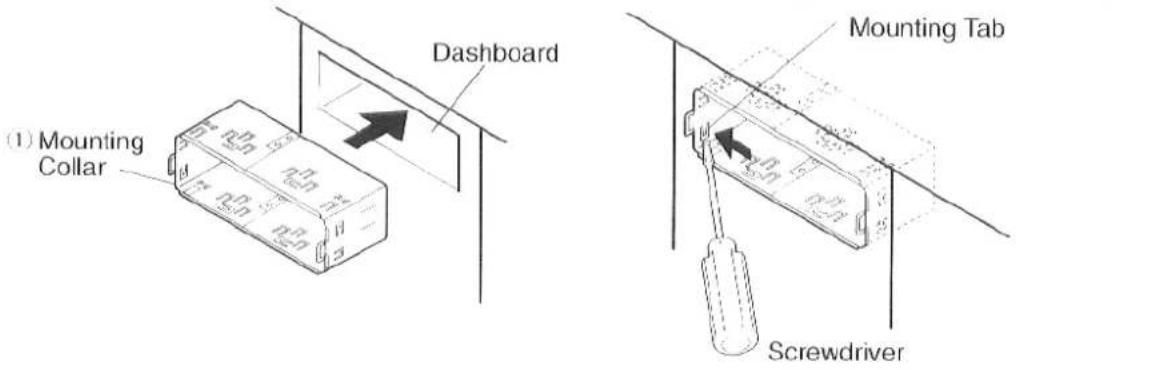
2. Attach Mounting Plates 16.
Secure Mounting Plates (16) on both sides of the unit with a screwdriver.
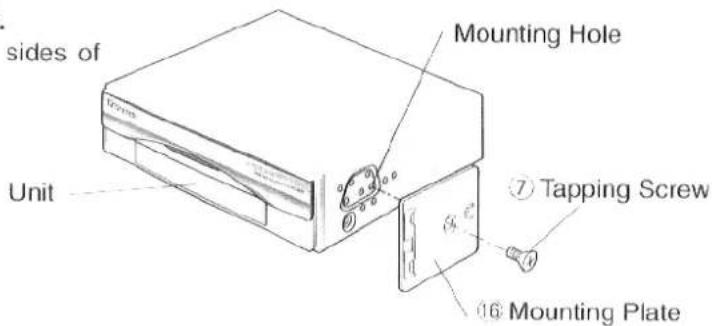
3. Secure the rear of the unit.
a) Check the electrical connections by referring to this operating instructions.
b) Connect Mounting Bolt ⑤, using a suitable wrench.
c) Insert Power Connector ⑪ to the unit.
d) Insert the unit into the Mounting Collar (1) and push it in until a "click" is heard.
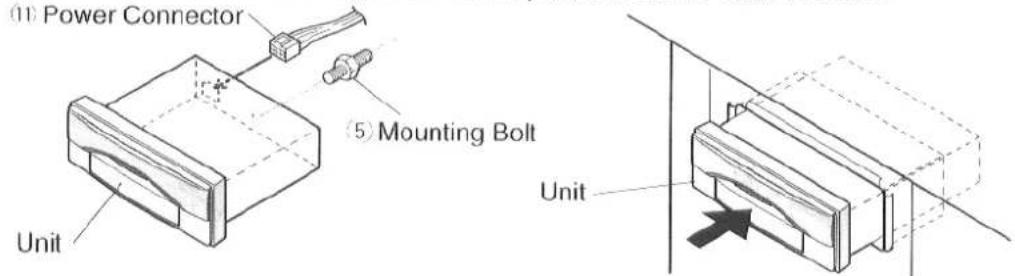
e) Secure the rear of the unit to the car by one of the two recommended methods.
■ Using Rear Support Strap ②
Affix one end of Rear Support Strap ② to the rear of the unit, and the other end to the fire wall of the car, or some other metallic area.
■ Using the Rubber Cushion (Optional)
(If there is an existing Rear Support Bracket on the fire wall of the car.)
Cover the Mounting Bolt ⑤ on the rear of the unit with the Rubber Cushion (Optional), and mount it into the existing Rear Support Bracket.
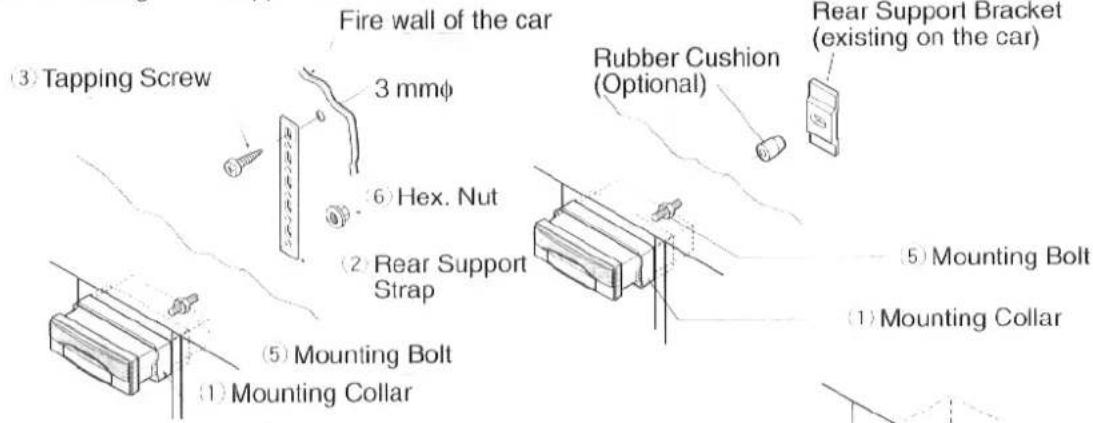
-
INstall Trim Plate ⑮.
-
After installation, reconnect the negative (−) battery terminal.
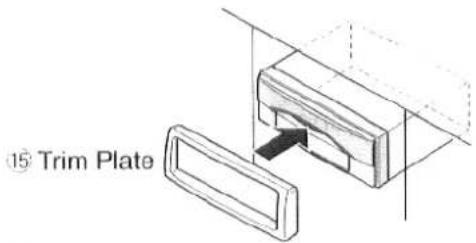
□ Attaching the Remote Control Holder
- Attach the double-sided tape (included) to the back of the Remote Control Holder ⑫.
Double-sided tape for the Remote Control Holder (20 mm x 50 mm)
⑫ Remote Control Holder (included)
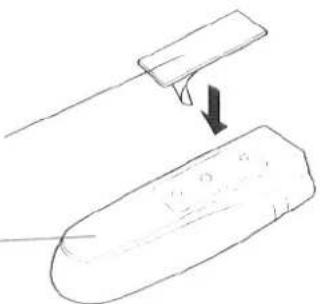
natural_image
Simple line drawing of a tool interacting with a rounded object, showing a downward arrow (no text or symbols)- Remove the backing from the double-sided tape, then press the Remote Control Holder onto the surface where you want to attach it.
⑬ Remote Control Unit ⑫ Remote Control Holder
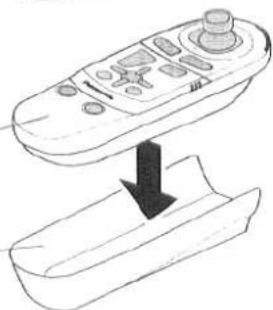
natural_image
Line drawing of a remote control device with a downward arrow indicating a drop or change (no text or symbols present)Note: Place the Remote Control Holder where it will not interfere with driving.
Wiring Connection
HS170NE
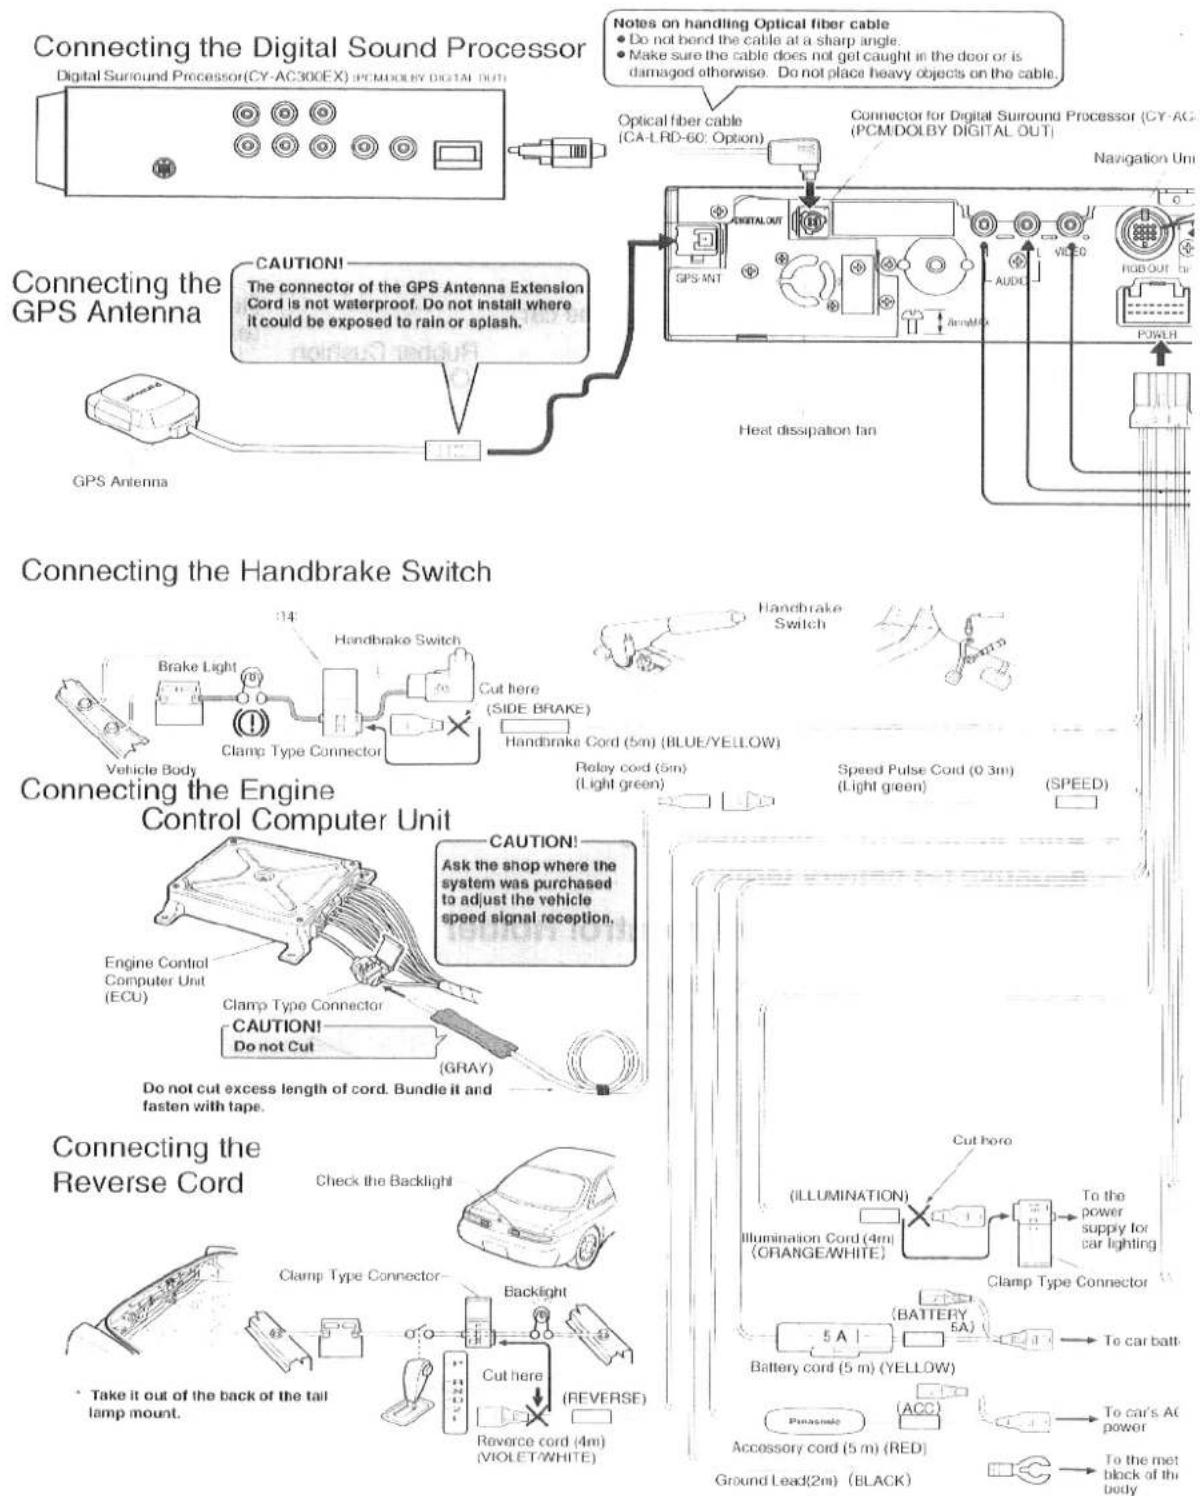
CAUTION!
If noise is generated in proportion to engine revolutions, the earth conductor of the navigation power cord is that of the TV tuner unit should be connected to the same place of the metallic block of the car body. Take same action if the brightness of navigation screen is not constant.
Note: ☐☒ To connect the illumination cord to the power cord of the car, cut off the terminal and use the clamp type connector instead.
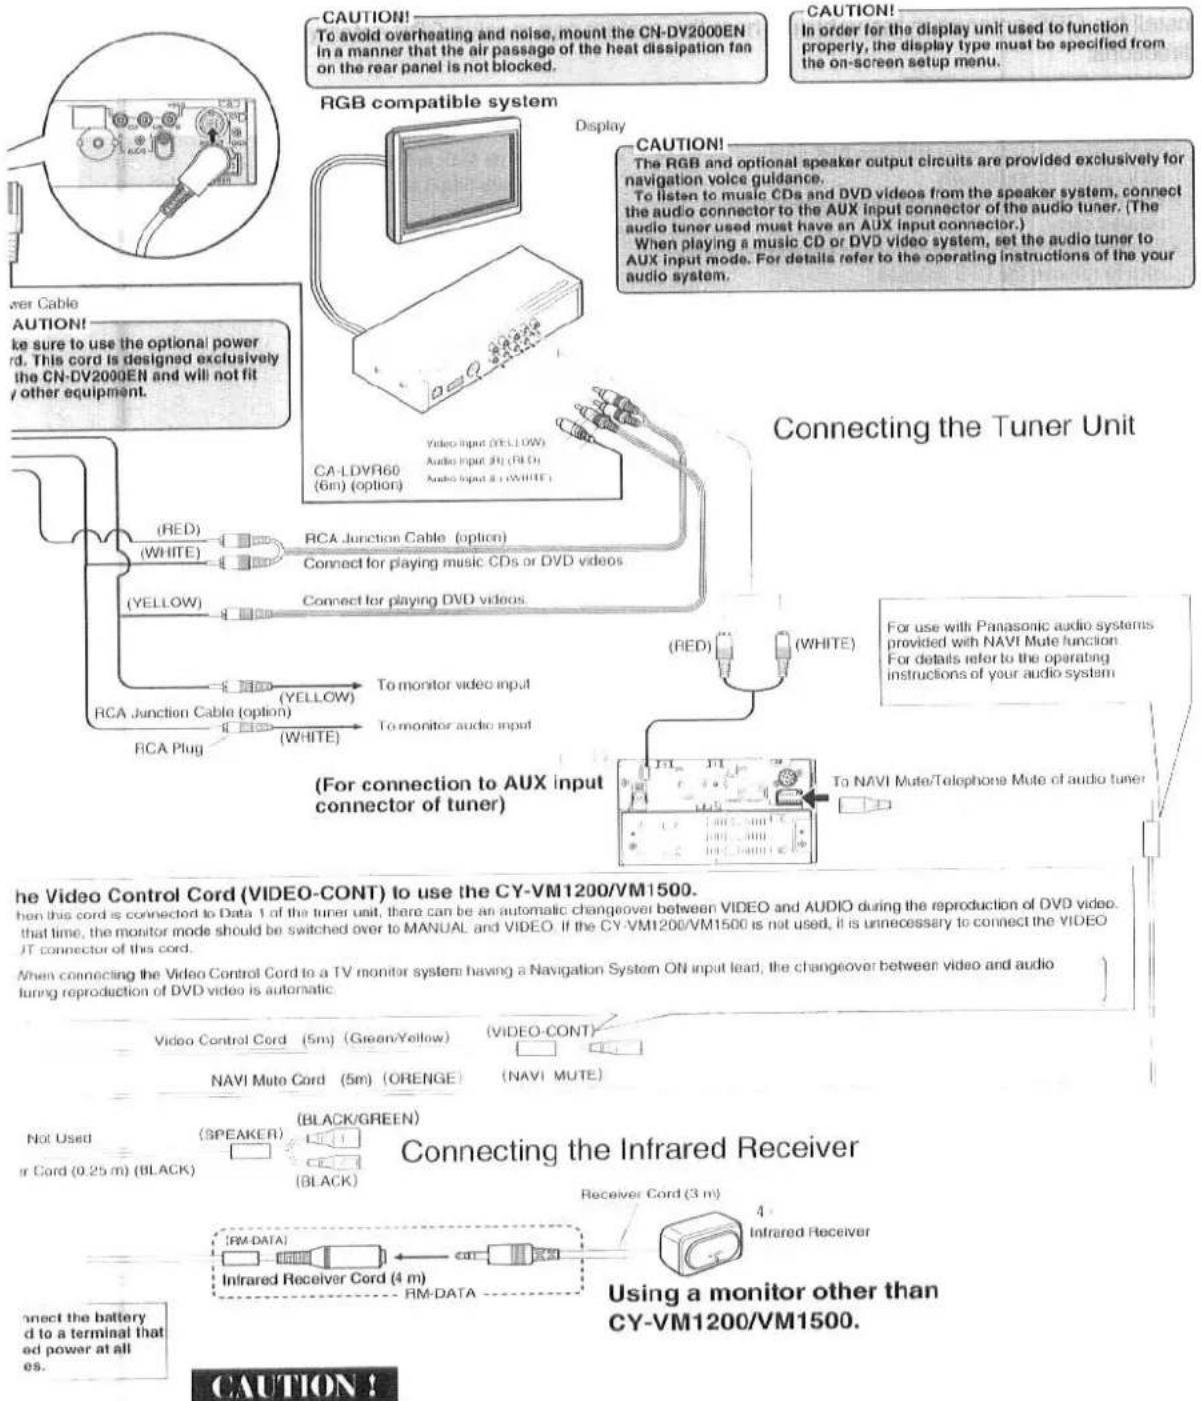
• Make sure the connectors are plugged firmly into all units.
- Do not install this kit in places where it could be exposed to splash water or the air flow from the air-conditioner, or near the vehicle entrance where it could be stepped on.
Installation of GPS Antenna
Install the GPS antenna in the vehicle where the system can receive GPS satellite signals from all directions.
ATTENTION!
- Keep paint and wax away from the GPS antenna as these may reduce its sensitivity.
- Snow also affects antenna sensitivity and should be cleared away.
-
Before taking your vehicle through a car washer, make sure to remove the GPS antenna.
-
Do not pull on the cord to remove the antenna. Otherwise you might disconnect the cord or scratch the vehicle surface.
- Wipe the installation surface clean before attaching the antenna.
Lead the antenna cord inside the vehicle.
1 Secure the cord with clampers up to the point where it enters the vehicle.
2 Lead the cord through the rubber seal and fix the rubber seal with adhesive at the point where the weatherstrip meets the trunk lid.
3 Lead the cord inside the vehicle and secure it to the body with clampers.
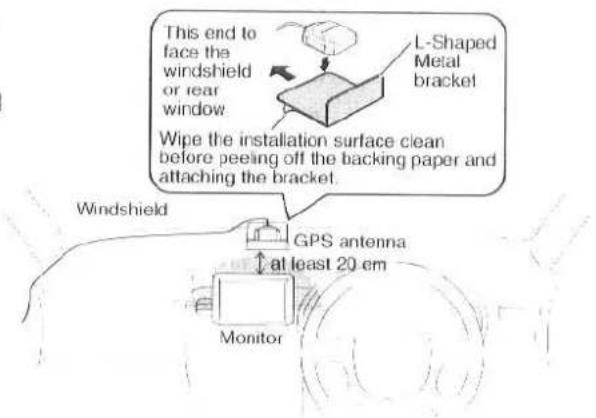
Installation inside the Vehicle (Dashboard or Rear Tray) (Recommended)
Install the antenna in horizontal position on the dashboard or in the center of the rear tray near the rear window.
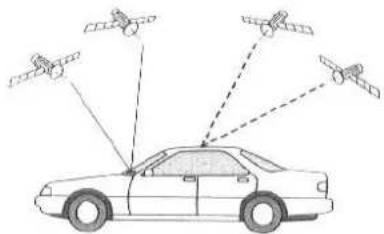
ATTENTION!
• Install the antenna at least 20 cm (recommended clearance) away from the monitor and other electronic components as these may reduce the reception sensitivity.
- Do not bend, cut or otherwise modify the metal bracket (L-shaped).
- The metal bracket is supplied exclusively for installation inside the vehicle. Do not use it for roof installation.
- Use only the supplied metal bracket.
Note:
- The antenna is less sensitive when installed inside the vehicle. At times when GPS satellite signals are weak, this may result in a vehicle positioning error.
• The body shape of some vehicles may interfere with proper signal reception. - Some types of window glass may block signal reception.
- If the reception sensitivity is not satisfactory with the antenna installed inside the vehicle, install it on the roof.
Final Check
Make sure to carry out a final check of connections and GPS reception after installation and wiring.
Connection Check
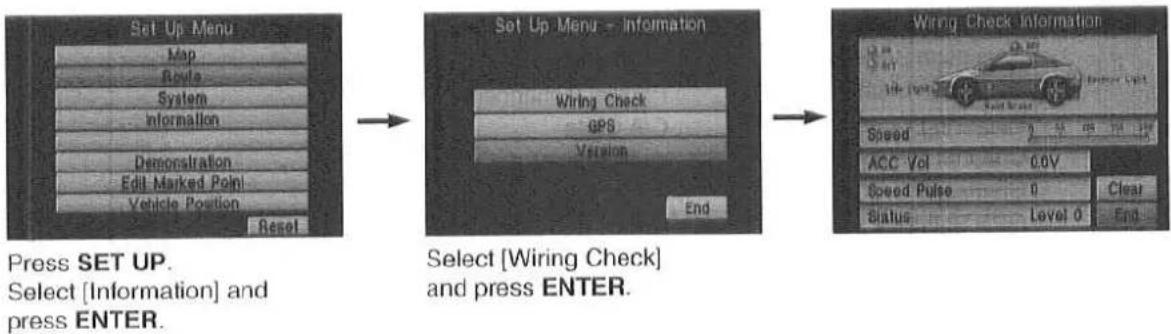
flowchart
graph LR
    A["Set Up Menu"] --> B["Set Up Menu - Information"]
    B --> C["Wiring Check"]
    B --> D["GPS"]
    B --> E["Version"]
    C --> F["Wiring Check Information"]
    D --> F
    E --> F
    F --> G["End"]
GPS Check
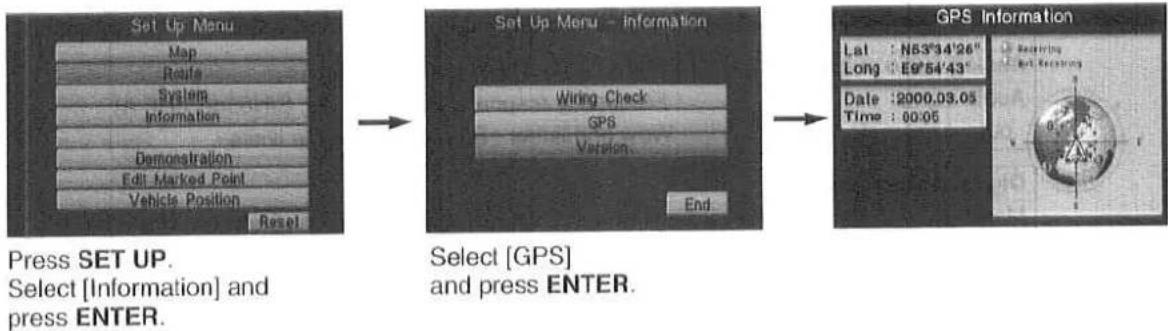
flowchart
graph LR
    A["Set Up Menu"] --> B["Set Up Menu - Information"]
    B --> C["GPS Information"]
    style A fill:#f9f,stroke:#333
    style B fill:#ccf,stroke:#333
    style C fill:#cfc,stroke:#333
Specifications
General
| Power Supply | : DC12V (Test Voltage14.4V), Negative ground |
| Current Consumption | : Less than 2.5A |
| Dimensions | : 178(W) x 50(H) x 170(D) mm |
| Weight | : 2.0kg |
| Reception Frequency | : 1575.42MHz |
| Reception Sensitivity | : -130dBm |
| Reception Method | : Parallel 8 channels |
| Receiving Code | : C/A Code |
| Channel system | : multichannel |
| Channels | : 8 |
| GPS Satellites received | : 8 max. |
| Guide Map | : DVD SDAL FORMAT |
| Media | : DVD-Video, CD, CD-DA, VIDEO CD |
| Picture output | : RGB: Navigation screenNTSC: 1.0 Vp-p, 75 ohms, RCA pin jack(Navigation screen/DVD video)PAL: 1.0 Vp-p, 75 ohms, RCA pin jack(DVD video)PAL-M: 1.0 Vp-p, 75 ohms, RCA pin jack(DVD video) |
| Analog audio output | : Stereo 2ch 1.5Vrms (1kHz 0dB) |
| Audio signaloutput characteristics | : Frequency response 20Hz~20kHz, S/N85dB (IHF A)Wow and flutter : Below measurable limits |
| Digital Audio Output | ||
| Media | Sound recording format | Optical digital audio output from connector |
| DVD | Dolby Digital | Dolby Digital bitstream |
| Linear PCM | ||
| 48kHz/98kHz | LinearPCM (48kHz/16bit) (2ch) | |
| 16/20/24bit | ||
| Video CD | MPEG1 | No output |
| Music CD | LinearPCM | No output |
GPS Antenna
| Type | Microstrip Planer |
| Dimensions | 42(W) x 14(H) x 50(D) mm |
| Weight | 120 g |
Remote Control
| Dimensions | 42(W) x 43(H) x 152(D) mm |
| Weight | 78 g |
Infrared Receiver
| Dimensions | 34(W) x 17(H) x 22(D) mm |
| Weight | 60 g |
- □ Features
- Compatible with PAL DVD (Video CD) and NTSC DVD (Video CD)
- □ Use This Product Safety
- When Driving
- When Car Washing
- When Parked
- Use the Proper Power Supply
- Protect the Disc Mechanism
- Use Authorized Servicenters
- For Installation
- Introduction
- Mobile Navigation System
- Notice to Customers
- CAUTION!
- Map Disc
- Contents
- Inhalt
- AGREEMENT
- PLEASE READ THIS AGREEMENT CAREFULLY BEFORE USING OUR PRODUCT
- Warning
- Warning : DO NOT OPERATE THE SYSTEM NOR LOOK AT THE MONITOR SCREEN WHILE DRIVING.
- caution
- Cautions :
- How to abandon battery cells (Netherlands)
- Accessories and Documentation
- Important Note:
- DOCUMENTATION
- Names and Functions of Remote Control Buttons
- Joystick
- Lock Switch
- LAST
- ZOOM
- MODE
- VOICE
- ENTER
- DEST
- POS
- POP UP
- SET UP
- Preparing the System for Initial Use
- Inserting Batteries into the Remote Control
- Open the battery compartment cover.
- Insert new batteries.
- Close the battery compartment cover.
- When to Replace Batteries
- Battery Removal
- Starting the Mobile Navigation System
- Important Notes:
- Removing the Map DVD-ROM
- Map Displays
- Types of Map Displays
- Current Position Map
- Guide Mode Map
- Intersection Zoom Map
- 2D Mode Map
- Note:
- Changing the Map Orientation
- Changing the Map Scale
- Pop Up Menu
- Wiring Check
- Automatic Distance Correction Check
- Depending on the Vehicle Model
- Checking GPS Satellite Reception
- Operating the System While Driving
- Destination Input and Route Search
- Character Input
- Letter Input
- Numeral Input
- Entering an Address as Destination
- Entering a Destination by Street Name
- Entering a Destination by City Name
- Entering a Destination by Postal Code
- Entering an Intersection as Destination
- Entering an Intersection by Street Name
- Entering an Intersection by City Name
- Entering a POI as Destination
- POI Category plus [Name]
- POI Category plus [Within City]
- POI Category plus [Nearest]
- Entering a Destination from Your Destination History
- Entering a Destination Stored in Your Marked Point
- Selecting a Destination Directly from the Map Display
- Voice Guidance
- Intersection Guidance
- Highway Guidance as Part of Route Guidance
- Terminating Route Search
- Previewing a Route
- Canceling a Route
- Detouring
- Alternative Route
- Detour xxKm
- Avoid Streets
- Via Point
- Entering 1 Via Point
- Entering Multiple Via Points
- To delete a Via Point
- Marked Point
- Warning:
- Marking Your Current Position
- Marking Any Point on the Map
- Name and Icon
- Changing a Marked Point Icon
- Renaming a Marked Point
- Deleting a Marked Point
- Setup Menu
- Basic Setup Menu Operations
- Reset
- Map
- Day/Night
- Color
- Map Direction
- Car Position
- POI Icon
- System Mode
- Trace Mark
- Route
- Guidance Without Route
- Detour (Km)
- Est. Travel Time
- Auto Reroute
- Route Guidance
- System
- Volume Control
- Beep
- Voice Feedback
- Clock
- Language Switch
- Meter/Mile Switch
- DST (Summer Time)
- Screen Position
- Map Area
- Information
- GPS Receiving
- Version
- Simulation
- Demonstration
- Edit Marked Point
- Vehicle Position
- GPS
- (Global Positioning System)
- Time to detect the current position
- GPS signal reception is poor in the following places:
- Notes:
- Map Matching
- Intelligent Map Matching
- Position Correction for Elevated Roads
- Position Correction for Parking Garages
- High-precision Gyrosensor
- Positioning Accuracy
- Route Search
- Route Guide
- Playing Music CDs
- Operation
- DVD Video
- Multilanguage Soundtrack
- Multilanguage Subtitles
- Multi-angle
- Powerful Surround-Sound Effect (Dolby Digital and Linear PCM compatible)
- Playing Specified Titles or Chapters
- Video CD
- Supported Disc Formats
- Discs not compatible with the CN-DV2000EN
- Individual Property Rights
- ATTENTION!
- Screen Display While Driving
- Disc Operation
- Play
- Title Menu
- [To Play a DVD Video]
- [To Play a Video CD]
- Stop
- Press STOP.
- Rapid Advance/Rapid Reverse
- Search Speed
- Skip
- Pause
- Playing a Specified Title/Chapter/Track
- When the Invalid Mark Appears
- On-Screen Message of Current Playback Information
- Changing the Subtitle Language
- Changing the Audio Soundtrack Language
- Changing the Viewing Angle
- Menu Language
- Subtitle Language
- Audio Language
- TV Aspect
- Connecting a 16:9 Aspect Monitor
- TV Mode
- On-Screen Messages
- Audio Output Level
- Dynamic Range Compression
- Display Type
- Language Code List
- Troubleshooting
- Important!
- What to do with these messages
- Installation Guide
- Preparation
- Dashboard Installation
- Installation Opening
- Installation Precautions
- Cautions
- When installing the unit with the L-Shaped Brackets
- Precautions
- □ Installation Procedure
- Secure Mounting Collar ①.
- Attach Mounting Plates 16.
- Secure the rear of the unit.
- ■ Using Rear Support Strap ②
- ■ Using the Rubber Cushion (Optional)
- □ Attaching the Remote Control Holder
- Wiring Connection
- Installation of GPS Antenna
- Lead the antenna cord inside the vehicle.
- Installation inside the Vehicle (Dashboard or Rear Tray) (Recommended)
- Final Check
- Connection Check
- GPS Check
- Specifications
Brand : PANASONIC
Model : CN-DV2000
Category : Gps