
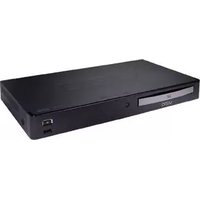
VBR140 - Blu-ray player VIZIO - Free user manual and instructions
Find the device manual for free VBR140 VIZIO in PDF.


| Product Type | Blu-ray Player |
| Brand | VIZIO |
| Model | VBR140 |
| Disc Compatibility | Blu-ray, DVD, CD |
| Video Output | 1080p Full HD |
| Audio Output | Dolby Digital, DTS |
| Connectivity | HDMI, USB, Composite Video/Audio |
| Dimensions (W x D x H) | 430 x 260 x 42 mm |
| Weight | 2.4 kg |
| Power Supply | AC 100-240V, 50/60 Hz |
| Power Consumption | 20 W (standby <0.5 W) |
| Playback Functions | Disc playback, USB media playback, BD-Live |
| Smart Features | Netflix, YouTube, VUDU streaming |
| Blu-ray Profile | Profile 2.0 (BD-Live) |
| Care and Cleaning | Wipe with soft dry cloth; avoid liquids |
| Safety | Class 1 laser; do not open; keep away from moisture |
| Spare Parts and Repairability | Remote control available; service by qualified technician |
| General Information | 1-year limited warranty; user manual online |
Frequently Asked Questions - VBR140 VIZIO
User questions about VBR140 VIZIO
0 question about this device. Answer the ones you know or ask your own.
Ask a new question about this device
Download the instructions for your Blu-ray player in PDF format for free! Find your manual VBR140 - VIZIO and take your electronic device back in hand. On this page are published all the documents necessary for the use of your device. VBR140 by VIZIO.
USER MANUAL VBR140 VIZIO
This product qualifies for ENERGY STAR in the "factory default" setting and this is the setting in which power savings will be achieved. Changing the factory default picture settings or enabling other features will increase power consumption that could exceed the limits necessary to qualify for ENERGY STAR rating.
Table of Contents
Installing the Blu-ray Player 3
Inspecting the Package Contents ....3
Connecting the Player to an Electrical Outlet....3
Connecting the Player to your TV....3
Connecting the Player to your Home Audio System......4
Connecting the Player to your TV and Home Audio System with HDMI ....5
Setting Up your Network Connection....6
Connecting to a Wireless Network 7
Connecting to a Wireless Network with WiFi Protected Setup (WPS)....7
Controls & Connections......8
Front Panel 8
Rear Panel 9
Remote Control 10
Replacing the Batteries 11
Basic Operation 12
Navigating the On-Screen Menu 12
Playing a Disc 12
Basic Playback Functions....13
Advanced Playback Functions ....14
Viewing USB Media - Audio and Images 14
USB Media Playback Controls....15
Playing USB Photos and Audio....15
Adjusting the Player's Settings 17
Adjusting the Display Settings....17
Adjusting the Aspect Ratio 18
Activating Film Mode....18
Adjusting the Deep Color Setting....18
Adjusting the Audio Settings....19
Changing the PCM Downsampling Rate....19
Adjusting the Digital Audio Output 20
Activating or Deactivating Dynamic Range Control (DRC) 20
Changing Language Settings....21
Changing the On-Screen Menu Language....21
Changing the Disc's Menu Language 21
Changing the Audio Language....22
Changing the Subtitle Language 22
BD-Live Storage 22
Using Disc Playback Memory 22
Setting the Parental Controls....23
Setting the Parental Country 23
Activating or Deactivating the Parental Controls .....24
Changing the Parental Code....24
Changing the System Settings....25
Activating or Deactivating the Screen Saver 25
Activating or Deactivating Disc Autoplay 26
Enabling or Disabling CEC Support 26
Setting Power Down Mode....26
Updating the Player's Firmware 27
Restoring the Player's Factory Default Settings......27
Adjusting the Network Settings 28
Adjusting the Wired Settings....28
Setting Up a Wireless Connection Manually .....29
Setting Up a Wireless Connection Using WPS....29
Viewing the Info Screen 30
Table of Contents
Using Internet Apps ....31
Using the Netflix App....31
Opening a Netflix Account 31
Using the VUDU App 31
Opening a VUDU Account 31
Using the Pandora App 32
Opening a Pandora Account....32
Using the HULU Plus App....32
Opening a HULU Plus Account 32
Troubleshooting & Technical Support......33
Specifications....35
Limited Warranty....36
Legal & Compliance....37
Installing the Blu-ray Player
INSPECTING THE PACKAGE CONTENTS
Before installing your new Blu-Ray Player, take a moment to inspect the package contents. Use the images below to ensure nothing is missing or damaged.

CONNECTING THE PLAYER TO AN ELECTRICAL OUTLET
Your player must be connected to a power source in order to work. Connect the power cord to an electrical outlet as shown below:
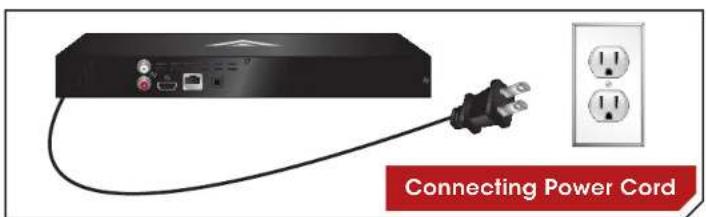
CONNECTING THE PLAYER TO YOUR TV
Your Blu-ray player will easily connect to your TV. Before you begin the installation, ensure your TV has an available HDMI port.
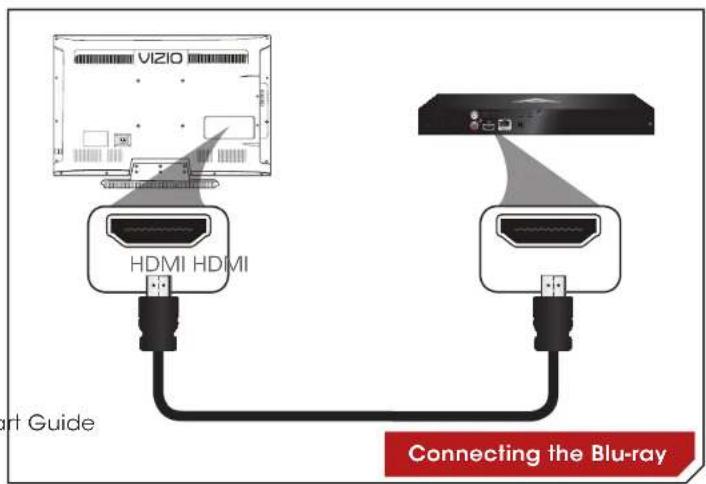
To connect the player to the TV:
- Ensure both the TV and the player are off.
- Connect the player and the TV using an HDMI cable. Ensure each end of the cable is securely connected.
- Turn the TV on.
- Turn the player on by pressing the Power button on the remote, or by touching the Power control on the front of the player.
- When you are ready to use the player, set the TV's input to the proper HDMI input. (Devices differ; see your TV's user manual for details on how to change the input source)
Your player has a digital optical audio port. If your home audio system is equipped with this port, you can connect it to your player so you can enjoy theater-style surround sound.

Remember: You still need to connect the player to your television to view video. See Connecting the Player to Your TV on page 5.
To connect the player to your home audio system:
- Ensure both your home audio system and the player are off.
- Connect the player to the home audio system using an optical cable. See the Home Audio Connection Chart below.
-
Turn the player on by pressing the Power button on the remote, or by pressing the Power button on the front of the player.
-
Turn your home audio system on.
-
When you are ready to use the player, set your home audio system's input to optical. (Devices differ; see your audio system's user manual for details on how to change the input)
If the player is correctly connected, you will hear audio from your home audio system speakers when a disc is played.

For best quality sound, connect your player to your home audio system using an HDMI cable. See the next page for instructions.

CONNECTING THE PLAYER TO YOUR TV AND HOME AUDIO SYSTEM WITH HDMI
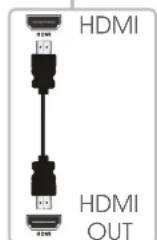
Your player can output high-definition digital audio via the HDMI port, enabling you to enjoy up of 7.1 channels of surround sound using your home audio system.
To connect the player to your home audio system with HDMI:
- Ensure both your home audio system and the player are off.
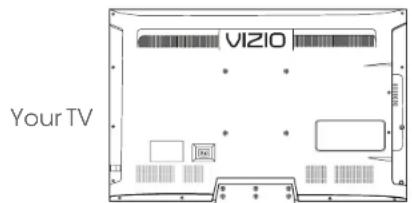
- Connect the player to the home audio system and TV as shown in the HDMI Connection Chart below.
- Turn the power on by pressing the Power button on the remote, or Power button on the front of the player.
- Turn your TV and home audio system on.
- When you are ready to use the player, set your home audio system's input to the player's connection. Set your TV's input to the proper HDMI connection.

natural_image
Illustration of a audio amplifier connected to two speakers (no text or symbols visible)
flowchart
graph TD
    A["VIZIO Blu-ray Player"] --> B["Home Audio Receiver"]
    B --> C["HDMI Cable"]
    C --> D["HDMI HDMI"]
    E["Best Sound and Video Up to 7.1 Channels"] --> C
SETTING UP YOUR NETWORK CONNECTION
Your player is network-ready, and can be connected to your home network using the RJ45 (ethernet) connector on the back panel.
Once you have connected to your home network and the Internet, you can use Internet Apps to deliver popular online content to your player.

For the most reliable network performance, a wired connection is recommended.

Ethernet cables are available from many retailers in lengths of up to 50 feet.
To connect to a wired network:
-
Ensure you have:
-
An ethernet cable long enough to connect the player to your router or modem
• A router or modem with an available ethernet port
• A high-speed Internet connection -
Connect your ethernet cable to the router and to the ethernet port on the back of the TV.
- Turn on the player and your TV. Use the Left/Right Arrow buttons to highlight Settings and press OK. Then highlight Network and press OK. Then highlight Connection Type, press OK and select Ethernet.
Router / Modem VIZIO Blu-ray Player

Setting Up Your Network Connection
Connecting to a Wireless Network

For the most reliable network performance, a wired connection is recommended.
To connect to a wireless network:
- Ensure you have:
• A router broadcasting a high-speed wireless signal (802.11n recommended)
• A high-speed Internet connection
-
Press the Power button on the remote to turn the player on. Turn your TV on and select the input to which the Blu-ray player is connected.
-
Use the Left/Right Arrow buttons on the remote to highlight Settings, then press OK.
-
Use the Up/Down Arrow buttons on the remote to highlight Network, then press OK.
-
Use the Up/Down Arrow buttons on the remote to highlight Connection Type, then press OK.
-
Use the Up/Down Arrow buttons on the remote to highlight Wireless, then press OK. A confirmation window is displayed, highlight Yes to continue.
-
Use the Up/Down Arrow buttons to select Scan to have your player search for available wireless networks.
-
If your network is password-protected, enter your password using the buttons on the remote. When you are finished select Enter, and then Next to continue.
-
When your player has connected, a success message is displayed. Select OK to complete the wireless setup.
Connecting to a Wireless Network with WiFi Protected Setup (WPS)

Ethernet cables are available from many retailers in lengths of up to 50 feet.
Wi-Fi Protected Setup is an easy way to connect the Player to your home wireless network.
To connect using WPS:
-
Ensure you have:
-
A router with a WPS button, broadcasting a high-speed wireless signal (802.11n recommended)
• A high-speed Internet connection -
Press the Power button on the remote to turn the player on. Turn the TV on and select the input to which the Blu-ray player is connected.
- Use the Left/Right Arrow buttons on the remote to highlight Settings, then press OK.
- Use the Up/Down Arrow buttons on the remote to highlight Network, then press OK.
- Use the Up/Down Arrow buttons on the remote to highlight Connection Type, then press OK.
- Use the Up/Down Arrow buttons on the remote to highlight Wireless, then press OK. A confirmation window is displayed, highlight Yes to continue.
- Use the Up/Down Arrow buttons to select Auto WPS.
- Follow the on screen instructions to complete the WiFi Protected Setup.
Controls and Connections
2
FRONT PANEL

Front Panel
2
REAR PANEL

RCA Stereo Audio Out
Connect an RCA cable* to an external audio device.
Rear Panel
REMOTE CONTROL

* Supported discs only.
Remote Control
Replacing the Batteries

- Remove the battery cover.
- Insert two batteries into the remote control. Make sure that the (+) and (-) symbols on the batteries match the (+) and (-) symbols inside the battery compartment.
- Replace the battery cover.

• Use only good quality batteries.
- Inserting the batteries incorrectly may result in cracking or leakage that may cause a fire or result in injury.
- Dispose of old or dead batteries in accordance with local hazardous waste regulations.
- Keep batteries away from children and pets.
Basic Operation
3
In this chapter, you will learn how to:
- Navigate the On-Screen Menu
- Play a Disc
• View USB Media
Navigating the On-Screen Menu

natural_image
Two devices: a black remote control with open button and a white monitor displaying app icons (no readable text or symbols on screen)On-Screen Menu
To highlight an icon or menu setting, press the Arrow buttons on the remote. The highlighted icon or menu setting will glow light blue.
To select an icon or menu setting, highlight the icon or menu setting and press OK button on the remote.

To go back to a previous screen, press the RETURN button.
Playing a Disc
Your player can play several kinds of discs. Use this table to ensure your disc is compatible with the player:
| Type of Disc Logo | |
| Blu-ray |  |
| DVD Video |  |
| Audio CD |  |
| DVD-R DVD+R |  |
| DVD-RW DVD+RW |  |
To play a disc:
- Press the Eject button on the remote or touch the Eject control on the front of the player.
The disc tray opens.

natural_image
Black plastic electronic device with a handle and mounting bracket (no visible text or symbols)- Insert your disc. Place the disc, label side up, into the disc tray.

natural_image
3D rendering of a black rectangular electronic device with a circular disc and a handle, shown against a white background (no text or symbols visible)- Press the Eject button on the remote or touch the Eject control on the front of the player.
The disc tray closes.
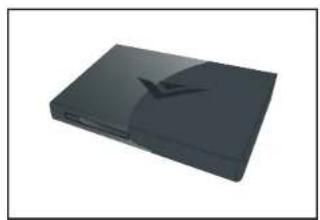
natural_image
Black rectangular electronic device with a triangular lens and lid (no visible text or symbols)- Using the Arrow buttons on the remote, highlight Play Disc and press SELECT. The disc plays.

If Disc Auto Playback is turned ON then the movie will load automatically.
Basic Playback Functions
When playing a disc, you can use buttons on the remote to manipulate the playback in several ways:

Previous: Skip to last chapter or track.
Next: Skip to next chapter or track.
Rewind: Reverse playback. Press repeatedly to increase the speed. Speeds are x2, x4, x8, x16, x32, and x64. Press Play/Pause to resume normal playback.
Play/Pause: Pause playback. Press again to resume normal playback.
Fast Forward: Increase speed of playback. Press repeatedly to increase the speed. Speeds are x2, x4, x8, x16, x32, and x64. Press Play/Pause to resume normal playback.
Stop: Half playback.
Advanced playback functions
Your player also features advanced playback functions.

PIP: Enable picture-in-picture (Supported discs only.)
Info: Display the Info Bar. Press again to close the Info Bar.
TV Res: Change the output resolution. Press repeatedly to cycle through available resolutions.
Angle: Some video discs are recorded using multiple camera angles. Press to change viewing angle. (Supported discs only.)
Subtitle: Open subtitle menu. Press again to close. See Changing the Subtitle Language on page 22. (Supported discs only.)
Audio: Open audio menu. Press again to close. See Adjusting the Audio Settings on page 19. (Supported discs only.)
A-B: Loop a segment of audio or video. Press at the beginning of the desired segment, and again at the end. Segment will loop until the REPEAT button is pressed. (Supported discs only.)
Repeat: Change repeat mode (Supported discs only):
• All - Repeat all tracks in order.
• Random - Repeat all tracks randomly.
• Track - Repeal the currently playing track.
• Off - Resume normal playback.
VIEWING USB MEDIA - AUDIO AND IMAGES
Your player features a USB port where you can connect and share a USB thumb drive containing your photos and music.
The player supports the following file types:
| Media Type File Types | |
| Audio | .mp3.aac |
| Images | .jpg.jpeg.png |
USB Media Playback Controls
When listening to USB audio, you can control the playback using buttons on the remote.
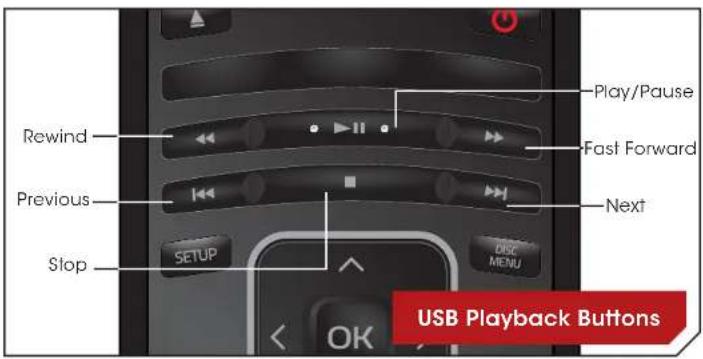
Previous: Play the file listed before the currently-playing file. (Audio only.)
Next: Play the file listed after the currently-playing file. (Audio only.)
Rewind: Reverse playback. Press repeatedly to increase the speed. Speeds are x2, x4, x8, x16, x32, and x64. Press Play/Pause to resume normal playback.
Play/Pause: Pause playback. Press again to resume normal playback.
Fast Forward: Increase speed of playback. Press repeatedly to increase the speed. Speeds are x2, x4, x8, x16, x32, and x64. Press Play/Pause to resume normal playback.
Stop: Half playback.

The REPEAT button can be used with USB audio files as it is with disc media.
Playing USB Photos and Audio
To play USB media, you must first save your music or images onto a USB thumb drive.
Remember:
- The USB thumb drive must be formatted as FAT32.
- Files on the USB thumb drive must end in a supported file extension (.mp3, .jpg, etc).
- The player will not play media from external hard drives or mp3 players.
To play your USB media:
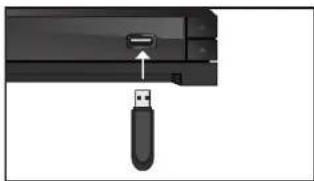
- Turn the player off. Connect your USB thumb drive to the USB port on the front of the player.
natural_image
Close-up of a USB flash drive interacting with a black electronic device (no text or symbols visible)- Press the Power button on the remote or press the Power button on the front of the player to turn it on.


- Use the Arrow buttons on the remote to highlight My Media, then press OK.
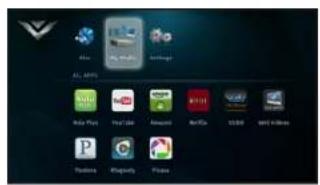
- Use the Up/Down Arrow buttons to highlight the media type you want to play, then press OK.

- Use the Arrow and OK buttons on the remote to locate your media file in the file browser.
Highlight the file and press OK.

The media file will begin to play.

The photo slide show will begin playing automatically beginning with the photo you have chosen.

Do not remove the USB thumb drive while the player is on. Doing so may damage the drive.
Adjusting the Player's Settings
4
Your player is preset to work with most setups out of the box, but if you would like to adjust any of the player's settings, you can use the on-screen menu to do so. The Settings menu is divided into these parts:
- General Setting
- Display Setting
- Audio Setting
• System Information
ADJUSTING THE DISPLAY SETTINGS
From the Display menu, you can adjust the way the player displays your video.
To access the Display menu:
- Turn on the player and your TV. Use the Arrow buttons on the remote to highlight Settings and press OK.
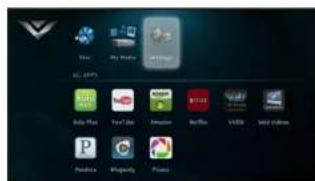
- Use the Arrow buttons on the remote to highlight Display Setting and press OK.

Your current settings are displayed to the right of each menu option.
Changing the Display Resolution
For the best viewing experience, you should adjust the player's settings so that it outputs video in a resolution supported by your TV.
To change the display resolution:
- From the Display menu, use the Up/Down Arrow buttons on the remote to highlight Output to TV and press OK. Then highlight Resolution and press OK.

- Using the Arrow buttons, highlight the highest resolution your TV can display, then press OK.
If your TV is connected to the player using HDMI, select HDMI Auto. The player will detect the best display resolution automatically.

If you choose a resolution unsupported by your TV, you will see an error message. The resolution will revert to its previous setting.

Only HDMI connections can display 1080p video.
Adjusting the Aspect Ratio
If video displayed from the player appears distorted or otherwise incorrect, you may need to adjust the aspect ratio of the player to match that of your TV. (Devices differ; see your TV's user manual to determine its aspect ratio.)
To adjust the aspect ratio:
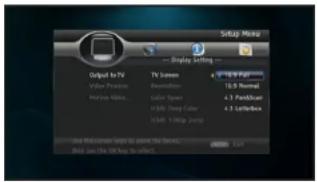
- From the Display menu, use the Up/Down Arrow buttons on the remote to highlight Output to TV and press OK. Then highlight TV Screen and press OK.
-
Highlight the aspect ratio that most closely matches that of your TV and press OK:
-
16:9 Full - Use this setting if you have a "widescreen" television. When using this setting, video formatted in 4:3 will be stretched horizontally to fit the screen.
- 16:9 Normal - Use this setting if you have a "widescreen" television. When using this setting, video formatted in 4:3 will be displayed in the center of the screen. Vertical bars will be displayed on the left and right edges of the picture.
- 4:3 Pan&Scan - Use this setting if you have a "traditional" screen (nearly square). When using this setting, movies in widescreen format will be centered and the left and right edges of the picture may be cut off.
- 4:3 Letterbox - Use this setting if you have a "traditional" screen (nearly square). When using this setting, movies in widescreen format will be fully displayed, with black bars on the top and bottom of the picture.
Activating Film Mode
Movies are recorded on film at a rate of 24 pictures, or frames, per second. Many of the movies on Blu-ray discs are formatted at this frame rate (24 frames/second). However, not all TVs can display this format.
If the player is connected to your TV via HDMI and is capable of displaying 24 frames/second, you can activate Film Mode for a better viewing experience.
To activate/deactivate Film Mode:
- From the Display menu, use the Up/Down Arrow buttons on the remote to highlight Output to TV and press OK. Then highlight HDMI 1080p 24Hz then press OK.

- Highlight On or Off and press OK.
Adjusting the Deep Color Setting
The player is capable of outputting 36-bit color over HDMI. For the best viewing experience, the deep color setting should be adjusted to match your TVs display capabilities.
To adjust the Deep Color setting:
- From the Display menu, use the Up/Down Arrow buttons on the remote to highlight Resolution and press OK.

- Highlight the highest color setting that your TV can display. (Devices differ; see your TV's user manual for details.)
ADJUSTING THE AUDIO SETTINGS
The settings in the Audio Menu configure the player's digital audio outputs (HDMI or Optical/SPDIF).
To access the Audio Menu:
- Turn on the player and your TV. Use the Arrow buttons on the remote to highlight Settings and press OK.

- Use the Arrow buttons on the remote to highlight Audio and press OK.
The Audio drop-down menu is displayed. Your current settings are displayed to the right of each menu option.
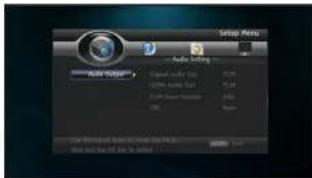
Changing the PCM Downsampling Rate
This setting should be adjusted if your home audio receiver can process high-bitrate PCM signals over the Optical/SPDIF port.

If you are unsure about how to adjust this setting, leave the PCM Downsampling rate at 48 kHz.

Changing this setting has no effect if your audio is connected via HDMI cable.
If you have the player connected to a home audio receiver and your receiver can process high-bitrate PCM signals:
- From the Audio menu, use the Up/Down Arrow buttons on the remote to highlight PCM Down Sample and press OK.

- Highlight the highest downsampling rate your receiver can process and press OK. (Devices differ; see your receiver's user manual for details.)
Adjusting the Digital Audio Output
This setting changes the type of digital audio data the player outputs over HDMI and Optical/SPDIF. Depending on your setup, you may need to try several settings.
- From the Audio menu, use the Up/Down Arrow buttons on the remote to highlight Digital Audio Output and press OK.

- Highlight the digital audio format best suited to your home audio receiver (Bitstream, PCM, or Reencode) and press OK.
Activating or Deactivating Dynamic Range Control (DRC)
When activated, this setting normalizes the volume of a disc's audio track. The loudest parts of the soundtrack will be quieter, and the quietest parts will be louder. This effect can be useful when viewing movies late at night, when others might be sleeping.

To use this setting, your player's audio must be connected with HDMI or Optical/SPDIF, and digital output must be set to Bitstream Mixed or PCM.
To activate or deactivate Dynamic Range Control:
- From the Audio menu, use the Up/Down Arrow buttons on the remote to highlight DRC and press OK.
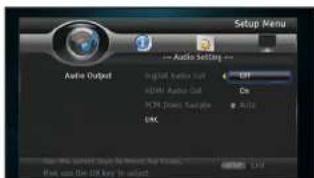
- Use the Arrow buttons on the remote to highlight On, Off, or Auto and press OK.

Selecting Auto for this setting turns on Dynamic Range Control for all Blu-ray soundtracks except Dolby TruHD.
CHANGING LANGUAGE SETTINGS
Changing the On-Screen Menu Language
To access the Language menu:
- Turn on the player and your TV. Use the Arrow buttons on the remote to highlight Settings and press OK.
The Settings menu is displayed.

- Use the Arrow buttons on the remote to highlight Language and press OK.
Your current settings are displayed to the right of each menu option.


The player currently only offers English for the On-Screen menus. Additional languages may become available with future updates.
Changing the Disc's Menu Language
Using this setting, you can change the language that is displayed when a disc's main menu is displayed.

Not all languages are available on all discs. Most discs have only one menu language available.
To change the disc's menu language:
- From the Language menu, use the Up/Down Arrow buttons on the remote to highlight Disc Menu and press OK.

- Use the Arrow buttons on the remote to highlight a language of your choice and press OK.
Changing the Audio Language
This setting changes the spoken language on a played disc.

Not all languages are available on all discs. Most discs have only one or two audio languages available.
To change the disc's audio language:
- From the Language menu, use the Up/Down Arrow buttons on the remote to highlight Disc Audio and press OK.

- Use the Arrow buttons on the remote to highlight a language of your choice and press OK.
Changing the Subtitle Language
This setting changes the default subtitle language when playing a disc.
To change the subtitle language:
- From the Language menu, use the Up/Down Arrow buttons on the remote to highlight Disc Subtitle and press OK.

- Use the Arrow buttons on the remote to highlight a language of your choice and press OK.
BD-LIVE STORAGE
When a USB storage device is connected to the USB port, the player can use its memory for BD-Live storage.
To view the available BD-Live storage:
- From the System menu, use the Up/Down Arrow buttons on the remote to highlight BD-Live Memory and press OK.
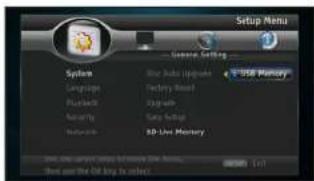
Selecting Format will clear all BD-Live content stored on the USB storage device.
Disc bookmarks are used by the player to resume playback at the point the disc was halted.
To enable or disable Disc Playback memory:
- From the Playback menu, use the Up/Down Arrow buttons on the remote to highlight Last Memory and press OK.
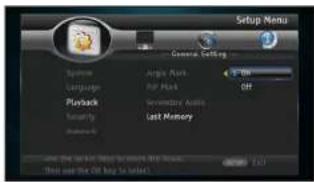
Then highlight On or Off to enable/disable Disc Playback Memory.

You cannot "undo" a memory erase, but it will not damage the player in any way.
SETTING THE PARENTAL CONTROLS
The player's parental controls allow you to prevent the player from displaying certain rated content without a password.
To access the Parental Controls menu:
- Turn on the player and your TV. Use the Arrow buttons on the remote to highlight Settings and press OK. Then highlight Security and press OK.
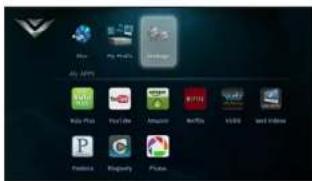
- Use the Arrow buttons on the remote to highlight Parental Control and press OK.


You may be prompted to enter your Parental Code. If you have not yet set the code, enter 0000.
Setting the Parental Country
Because countries have their own rating systems, if you are going to use the Parental Controls, you should set the parental country to match the country in which you live.

Some discs do not support multiple country-based rating systems.

You may be prompted to enter your Parental Code. If you have not yet set the code, enter 0000.
To set the parental country:
- From the Security menu, use the Up/Down Arrow buttons on the remote to highlight Country Code and press OK.


You may be prompted to enter your Parental Code. If you have not yet set the code, enter 0000.
- Use the Up/Down Arrow and OK buttons to highlight the country in which you live.
Activating or Deactivating the Parental Controls
Use this setting to turn the parental controls on or off and restrict playback of discs encoded with a rating level equal to or higher than the level you choose.

You may be prompted to enter your Parental Code. If you have not yet set the code, enter 0000.
To activate/deactivate the parental controls:
- From the Security menu, use the Up/Down Arrow buttons on the remote to highlight Parental Control and press OK.

- Using the Arrow buttons on the remote, highlight the highest rating level you wish to allow, then press OK.
For example, if you only want the player to display content rated PG or below, select PG.
Content ratings will vary according to your country.

Not all discs have parental controls enabled.
Changing the Parental Code
If you use the parental controls, you should change the passcode from the default to prevent children from accessing inappropriate material.

You may be prompted to enter your Parental Code. If you have not yet set the code, enter 0000.
To change the parental code:
- From the Security menu, use the Up/Down Arrow buttons on the remote to highlight Change Password and press OK.
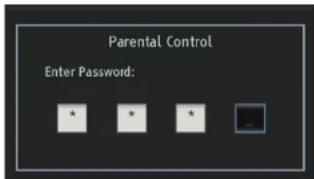
-
Using the Keypad on the remote, enter a new 4-digit parental passcode. Then re-enter the code to confirm it.
-
Write down your passcode and store it in a secure location.
CHANGING THE SYSTEM SETTINGS
The System menu allows you to customize autoplay function, power options, and the screen saver. From this menu, you can also reset the player to its factory defaults.
To access the System menu:
- Turn on the player and your TV. Use the Arrow buttons on the remote to highlight Settings and press OK.
The Settings menu is displayed.

- Use the Arrow buttons on the remote to highlight System and press OK.
Your current settings are displayed to the right of each menu option.

Activating or Deactivating the Screen Saver
The screen saver features a floating Vizio logo that will appear after a period of inactivity. This can prevent image "burn in" on your TV.
To set the screen saver:
- From the System menu, use the Up/Down Arrow buttons on the remote to highlight Screen Saver and press OK.

- Use the Arrow buttons to highlight On or Off then press OK.
Activating or Deactivating Disc Autoplay
When this option is activated, the player will automatically play an inserted disc.
When this option is deactivated, you will need to select Play Disc to play a disc.

Autoplay does not mean that the player will start a movie. The disc will load and usually the disc's main menu will be displayed.
To Activate/Deactivate Disc Autoplay:
- From the System menu, use the Up/Down Arrow buttons on the remote to highlight Disc Auto Playback and press OK.

- Using the Up/Down Arrow buttons on the remote, highlight On or Off, then press OK.
Enabling or Disabling CEC Support
When enabled, CEC (Consumer Electronic Control), allows you to control your Blu-ray player using your TV remote. For CEC to work, your player must be connected to your TV with an HDMI cable, and your TV must support CEC. (Not all manufacturers enable CEC for all products.)
To enable or disable CEC support:
-
From the System menu, use the Up/Down Arrow buttons on the remote to highlight CEC and press OK.
-
Use the Arrow buttons to highlight On or Off, then press OK.
Setting Power Down Mode
The player has two Power Down Modes for you two choose from.
To select the different Power Down Modes:
- From the System menu, use the Up/Down Arrow buttons on the remote to highlight Power Down Mode and press OK.

- Use the Arrow buttons to highlight Energy Saving or Quick Start.
• Energy Saving: Powers the player down to a full standby.
- Quick Start: Keeps the player suspended for a quick power on.
Updating the Player's Firmware
To ensure your player has the most current firmware, you should occasionally update via Disc, USB Storage device, or Network.

Network update requires Internet connection. USB and Disc will update from a USB storage device or CD/DVD.
To update your player's firmware:
- From the System menu, use the Up/Down Arrow buttons on the remote to highlight Upgrade and press OK. Then select either Disc, USB Storage, or Network.
- Confirm that you want to update the player. Highlight OK and press OK.

You must have the proper firmware file on your CD/DVD or USB storage device before upgrading your player's firmware.
Restoring the Player's Factory Default Settings
This setting allows you to restore menu and Internet App options to their factory defaults.
To restore a setting to the factory default:
- From the System menu, use the Up/Down Arrow buttons on the remote to highlight Factory Reset and press OK.

- Use the Arrow and OK buttons to highlight and press OK.
ADJUSTING THE NETWORK SETTINGS
In order to access BD-Live or Internet Apps, your player must be connected to your home network and to the internet.
To access the Network menu:
- Turn on the player and your TV. Use the Arrow buttons on the remote to highlight Settings and press OK.
The Settings menu is displayed.

- Use the Arrow buttons on the remote to highlight Network and press OK.

Adjusting the Wired Settings
If your player is connected to your home network with an ethernet cable, the player will automatically detect the connection. You can manually adjust the settings, but VIZIO recommends this for advanced users only.
To adjust the wired settings:
- From the Network Menu, use the Arrow buttons on the remote to highlight IP Setting and press OK.

- Use the Arrow buttons on the remote to highlight Manual and press OK.

To change the individual IP settings, IP Mode must be set to Manual.
-
Use the Arrow and OK buttons on the remote to change each of the IP Mode settings:
-
IP Address
- Subnet Mask
- Default Gateway
DNS1
DNS2

If you are unsure what values to enter, contact your Internet Service Provider (ISP) for assistance.
- When you are finished, highlight Apply and press OK.
Setting Up a Wireless Connection Manually
If you have a wireless home network, including a wireless router or modem and an internet connection, you can set up the player to connect wirelessly.
To set up a wireless connection manually:
- From the Network Menu, use the Arrow buttons on the remote to highlight Wireless Setting and press OK.

- Use the Arrow buttons on the remote to highlight Scan and press OK.
A list of available wireless networks is displayed.

- Use the Arrow buttons on the remote to highlight the name of your home wireless network, then press OK.

If your network is password-protected, you are prompted to enter a password. Enter your password using the remote.

When finished, highlight Next and press OK.
Setting Up a Wireless Connection Using WPS
Many newer routers feature WiFi Protected Setup, which allows you to setup a wireless network without manually entering connection information. Follow the instructions in this section if your WPS-enabled router has a WPS button.
To set up a wireless connection using a WPS button:
- From the Network Menu, use the Arrow buttons on the remote to highlight Wireless Setting and press SELECT.

- Use the Arrow buttons on the remote to highlight Auto WPS and press OK.

- When prompted by the player, press the WPS button on your router.
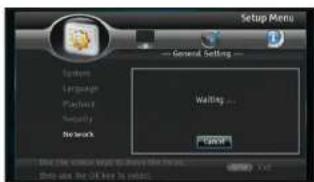
When the router and player have established a connection, the WPS screen will display Success.
VIEWING THE INFO SCREEN
The info screen displays the following information:
- Software Version
- Interface
- MAC Address
IP Address
To access the info screen:
- Turn on the player and your TV. Use the Arrow buttons on the remote to highlight Settings and press OK.
The Settings menu is displayed.

- Use the Arrow buttons on the remote to highlight System Information and press OK.
The info screen is displayed.

Using Internet Apps
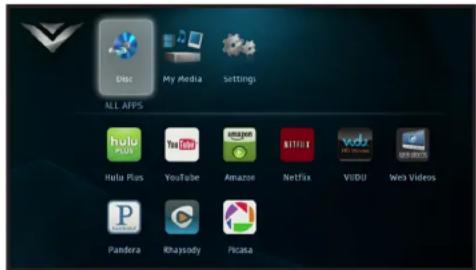

Apps cannot be added manually. Additional apps may become available with future device updates.
USING THE NETFLIX APP
Your player has the Netflix App built-in. With it, you can stream movies, television shows, and other content from the internet to your TV.
To use Netflix, you must first:
- Have a high-speed internet connection and a home computer.
- Connect your player to your home network. See page 28.
• Have a valid Netflix account.
Opening a Netflix Account
To use Netflix, you must first open an account. This can be completed using the on-screen menu and your home computer.
To open a Netflix account:
- Turn on your player and the TV.
Using the Arrow buttons on the remote, highlight Netflix and press the OK button on the remote.
- Netflix will ask you if you are a member. Use the Arrow
buttons on the remote to highlight No and press OK on the remote. Then highlight Start your FREE trial and press OK on the remote. Follow the on screen instructions to begin your free trial.
For Netflix support, go to www.netflix.com/help or call 1-866-579-7113.
USING THE VUDU APP
Your player has the VUDU App built-in. With it, you can stream high-definition movies and TV programs from the internet to your TV. VUDU also features popular applications like Facebook and Twitter.
To use VUDU, you must first:
- Have a high-speed internet connection and a home computer.
- Connect your player to your home network. See page 28.
• Have a valid VUDU account.
Opening a VUDU Account
To use VUDU, you must first open an account. This can be completed using the on-screen menu and your home computer.
- Turn on your player and the TV.
Using the Arrow buttons on the remote, highlight VUDU and press the OK button on the remote. The VUDU Apps screen is displayed.
- Using the Arrow buttons on the remote, highlight VUDU Movies and press OK. The VUDU home screen is displayed.
- Highlight Start Free Trial and press OK.
- Using the Arrow and OK buttons, select New User.
- Use the onscreen keyboard to enter your e-mail address and
press Done. You will now receive an e-mail from VUDU.
- Use your home computer to read the VUDU e-mail. Click the Complete Account Setup button in the body of the e-mail.
Complete the account setup by following the instructions on the VUDU website.
For VUDU support, go to
www.VUDU.com/support or call 1-888-554-8838.
USING THE PANDORA APP
Pandora is a personalized internet-based radio service that is designed to help you discover new music while you listen to music you already know and enjoy.
To use Pandora, you must first:
- Have a high-speed internet connection and a home computer.
- Connect your player to your home network. See page 28.
• Have a valid Pandora account.
Opening a Pandora Account
To use Pandora, you must first open an account. This can be completed using the on-screen menu and your home computer.
To open a Pandora account:
- Turn on your player and the TV.
Using the Arrow buttons on the remote, highlight Pandora and press the OK button on the remote.
The Pandora App Welcome screen is displayed.
- When asked if you already have a Pandora account, highlight No and press OK.
Follow the on-screen instructions. You will need to go to the Pandora web site using your home computer.
For Pandora support, go to www.pandora.com/support
USING THE HULU PLUS APP
Hulu Plus is an online video service that offers a selection of hit shows, clips, movies and more.
To use HULU Plus, you must first:
- Have a high-speed internet connection and a home computer.
- Connect your player to your home network. See page 28.
• Have a valid Hulu Plus account.
Opening a HULU Plus Account
To open a HULU Plus account:
- Turn on your player and the TV.
Use the Arrow buttons on the remote to highlight HULU Plus. Press the OK button.
When asked if you are already a HULU Plus subscriber, highlight No and press OK.
- A welcome screen is displayed. Write down the Referral Code.
- On your home computer, go to www.HULU.com/plus/vizio and follow the account setup instructions.
Enter the Referral Code when prompted.
Troubleshooting & Technical Support
A
DO YOU HAVE QUESTIONS?
LET US HELP!
YOUR PRODUCT INCLUDES FREE LIFETIME TECH SUPPORT

The VIZIO support team is highly trained and is based in the United States.
We can help with:
- New Product Setup
- Connecting Your Devices
• Technical Problems - And More
Phone: (877) 878-4946 (TOLL-FREE)
Email: techsupport@VIZIO.com
Web: www.VIZIO.com/support
Hours of operation:
Monday - Friday: 5 AM TO 8 PM (PST)
Saturday - Sunday: 8 AM TO 4 PM (PST)
We speak English • Se habla Español • Nous parlons Français
A
There is no power.
- Ensure the power cord is securely connected to a working electrical outlet.
- Press the Power/Standby button on the remote or touch the Power/Standby control on the player.
- Try plugging the power cord into a different electrical outlet.
Nothing happens when I press buttons on the remote.
- Place new batteries in the remote. Ensure the batteries are inserted correctly.
- Ensure no objects are blocking the front of the Blu-ray Player
- When using the remote, point it directly at the Blu-ray Player.
- If you see ☑the action you are trying to perform is not allowed by the Player or disc.
My Blu-Ray or DVD disc does not play.
- Ensure the disc is clean and free of scratches.
- If you are using parental controls, the disc may not play.
I cannot connect the Player to my network.
- Unplug the modem/router and the Player. Wait 10 seconds, then turn them back on.
- Ensure the ethernet cable is securely connected to both the Player and your modem/router.
• Refer to your modem/router user guide.
The picture quality seems low.
- Connect the Player to your TV using an HDMI cable for the best picture quality.
- Connect the Player to an HDTV capable of displaying 720p or 1080p for the best picture quality.
- Ensure the cables connecting the Player to your TV are securely connected.
- Watch Blu-ray discs for the best picture quality. DVD discs are limited to 480p resolution.
• To view streaming video (Netflix, VUDU, Amazon, HULU), a high-speed wired/wireless Internet connection is required.
I am having trouble with Internet Apps.
- If you experience issues with Apps, please contact:
Netflix.netflix.com/help or 1-866-579-7113
Pandora.pandora.com/support VUDU.VUDU.com/support or 1-888-554-8838 Amazonct the Contact Us button in the right-hand column of the Help page in the App.
HULU Plusv.hulu.com/help
Specifications
B
| Dimensions: | 12.6 x 1.4 x 8.2 inches320 x 36 x 209 mm |
| Weight: | 2.7 lbs1.2 kg |
| Resolutions Supported: | Blu-ray Disc Resolutions of 1080p (HDMI Out) 1080i / 720p / 480i / 480p (HDMI) DVD, DVD-R, DVD-RW Selectable Resolutions of 1080p (HDMI) 1080i / 720p / 480i / 480p (HDMI) |
| Audio: | CD, CD-R, CD-RW, MP3, WMA Support5.1, 7.1 PCM Digital Audio via HDMI24-bit / 192KHz Audio DAC |
| Dolby: | Dolby Digital / Dolby Digital Plus /Dolby Digital TrueHD |
| DTS: | DTS Digital Surround /DTS HD Advanced Digital Out |
| Ethernet Ports: 1 | |
| WiFi: 802.11n | |
| USB 2.0 Inputs: 1 | |
| HDMI Ports: 1 | |
| Digital Audio Ports: 1 (Optical/SPDIF) | |
| OSD Languages: English | |
| Energy Star Qualified: Yes | |
| Warranty: 1 year | |
Limited Warranty

ON PARTS AND LABOR
Covers units purchased as new in United States and Puerto Rico Only.
VIZIO provides a warranty to the original purchaser of a new Product against defects in materials and workmanship for a period of one (1) year of non-commercial usage and ninety (90) days of commercial use. If a Product covered by this warranty is determined to be defective within the warranty period, VIZIO will either repair or replace the Product at its sole option and discretion.
To obtain warranty service, contact VIZIO Technical Support via e-mail: TechSupport@VIZIO.com or via phone at 877 MY VIZIO (877.698.4946) from 6:00AM to 9:00PM Monday through Friday and 8:00AM to 4:00PM Saturday and Sunday, Pacific Time, or visit www.VIZIO.com. PRE-AUTHORIZATION MUST BE OBTAINED BEFORE SENDING ANY PRODUCT TO A VIZIO SERVICE CENTER. Proof of purchase in the form of a purchase receipt or copy thereof is required to show that a Product is within the warranty period.
Parts and Labor
There will be no charge for parts or labor during the warranty period. Replacement parts and Products may be new or recertified at VIZIO's option and sole discretion. Replacement parts and Products are warranted for the remaining portion of the original warranty or for ninety (90) days from warranty service or replacement, whichever is greater.
Type of Service
Defective Products must be sent to a VIZIO service center to obtain warranty service. VIZIO is not responsible for transportation costs to the service center, but VIZIO will cover return shipping to the customer. PRE-AUTHORIZATION IS REQUIRED BEFORE SENDING ANY PRODUCT TO A VIZIO SERVICE CENTER FOR WARRANTY SERVICE.
Product returns to VIZIO's service centers must utilize either the original carton box and shipping material or packaging that affords an equal degree of protection. VIZIO Technical Support will provide instructions for packing and shipping the covered Product to the VIZIO service center.
Limitations and Exclusions
VIZIO's one-year limited warranty only covers defects in materials and workmanship. This warranty does not cover, for example: cosmetic damage, normal wear and tear, improper operation, improper voltage supply or power surges, signal issues, damages from shipping, acts of God, any type of customer misuse, modifications or adjustments, as well as installation and set-up issues or any repairs attempted by anyone other than by a
VIZIO authorized service center. Products with unreadable or removed serial numbers, or requiring routine maintenance are not covered. This one year limited warranty does not cover Products sold "AS IS", "FACTORY RECERTIFIED", or by a non-authorized reseller.
THERE ARE NO EXPRESS WARRANTIES OTHER THAN THOSE LISTED OR DESCRIBED ABOVE. ANY IMPLIED WARRANTIES, INCLUDING ANY IMPLIED WARRANTY OF MERCHANTABILITY AND FITNESS FOR A PARTICULAR PURPOSE, SHALL BE LIMITED IN DURATION TO THE PERIOD OF TIME SET FORTH ABOVE. VIZIO'S TOTAL LIABILITY FOR ANY AND ALL LOSSES AND DAMAGES RESULTING FROM ANY CAUSE WHATSOEVER INCLUDING VIZIO'S NEGLIGENCE, ALLEGED DAMAGE, OR DEFECTIVE GOODS, WHETHER SUCH DEFECTS ARE DISCOVERABLE OR LATENT, SHALL IN NO EVENT EXCEED THE PURCHASE PRICE OF THE PRODUCT. VIZIO SHALL NOT BE RESPONSIBLE FOR LOSS OF USE, LOSS OF INFORMATION OR DATA, COMMERCIAL LOSS, LOST REVENUE OR LOST PROFITS, OR OTHER INCIDENTAL OR CONSEQUENTIAL DAMAGES. SOME STATES DO NOT ALLOW LIMITATIONS ON HOW LONG AN IMPLIED WARRANTY LASTS OR THE EXCLUSION OF INCIDENTAL OR CONSEQUENTIAL DAMAGES, SO THE ABOVE LIMITATIONS OR EXCLUSIONS MAY NOT APPLY TO YOU. THIS WARRANTY GIVES YOU SPECIFIC LEGAL RIGHTS, AND YOU MAY ALSO HAVE OTHER RIGHTS, WHICH VARY FROM STATE TO STATE. THIS WARRANTY IS SUBJECT TO CHANGE WITHOUT NOTICE.
CHECK WWW.VIZIO.COM FOR THE MOST CURRENT VERSION.
Personal Data
If your VIZIO product is capable of storing personal data and other information, ALL CONTENTS AND INFORMATION WILL BE DELETED IN THE COURSE OF SOME IN-HOME AND ALL SHIP-IN WARANTY SERVICE. If this occurs, your product will be restored to you configured as originally purchased. You will be responsible for restoring all applicable data and passwords. Recovery and reinstallation of user data is not covered under this Limited Warranty. In order to protect your personal information, VIZIO recommends that you always clear all personal information from the unit before it is serviced, regardless of the servicer.
Legal & Compliance

FCC Class B Radio Interference Statement
NOTE: This equipment has been tested and found to comply with the limits for a Class B digital device, pursuant to Part 15 of the FCC Rules. These limits are designed to provide reasonable protection against harmful interference in a residential installation. This equipment generates, uses and can radiate radio frequency energy, and if not installed and used in accordance with the instructions, may cause harmful interference to radio communications. However, there is no guarantee that interference will not occur in a particular installation. If this equipment does cause harmful interference to radio or television reception, which can be determined by turning the equipment off and on, the user is encouraged to try to correct the interference by one or more of the following measures:
- Reorient or relocate the receiving antenna.
- Increase the separation between the equipment and receiver.
- Connect the equipment into an outlet on a circuit different from that to which the receiver is connected.
- Consult the dealer or an experienced radio/TV technician for help.
Notice:
- The changes or modifications not expressly approved by the party responsible for compliance could void the user's authority to operate the equipment.
- Shielded interface cables and AC power cord, if any, must be used in order to comply with the emission limits.
- The manufacturer is not responsible for any radio or TV interference caused by unauthorized modification to this equipment. It is the responsibilities of the user to correct such interference.
RF Exposure Information
This device meets the government's requirements for exposure to radio waves. This device is designed and manufactured not to exceed the emission limits for exposure to radio frequency (RF) energy set by the Federal Communications Commission of the U.S. Government. This device complies with FCC radiation exposure limits set forth for an uncontrolled environment.
DHHS and FDA safety certification
This product is made and tested to meet safety standards of the FCC, requirements and compliance with safety performance of the U.S. Department of Health and Human Services, and also with FDA Radiation Performance Standards 21 CFR Subchapter J.
IC Statement
Operation is subject to the following two conditions:
This device may not cause interference, and
This device must accept any interference, including interference that may cause undesired operation of the device.
This Class B digital apparatus complies with Canadian ICES-003.
This equipment complies with IC RSS-102 radiation exposure limits set forth for an uncontrolled environment. This equipment should be installed and operated with minimum distance 20cm between the radiator & your body.
Copyrights
Because AACS (Advanced Access Content System) is approved as content protection system for BD format, similar to use of CSS (Content Scramble System) for DVD format, certain restrictions are imposed on playback, analog signal output, etc., of AACS protected contents. The operation of this product and restrictions on this product may vary depending on your time of purchase as those restrictions may be adopted and/or changed by AACS after the production of this product. Furthermore, BD-ROM Mark and BD+ are additionally used as content protection systems for BD format, which imposes certain restrictions including playback restrictions for BD-ROM Mark and/or BD+ protected contents. To obtain additional information on AACS, BD-ROM Mark, BD+, or this product, please contact an authorized Customer Service Center.
Many BD-ROM/DVD discs are encoded with copy protection. Because of this, you should only connect your player directly to your TV, not to a VCR. Connecting to a VCR results in a distorted picture from copy-protected discs.
This product incorporates copyright protection technology that is protected by U.S. patents and other intellectual property rights. Use of this copyright protection technology must be authorized by Macrovision, and is intended for home and other limited viewing uses only unless otherwise authorized by Macrovision. Reverse engineering or disassembly is prohibited.
Under the U.S. Copyright laws and Copyright laws of other countries, unauthorized recording, use, display, distribution, or revision of television programs, videotapes, BD-ROM discs, DVDs, CDs and other materials may subject you to civil and/or criminal liability.
Licenses
- Java and all Java-based trademarks and logos are trademarks or registered trademarks of Sun Microsystems, Inc. in the United States and other countries.
• Manufactured under license from Dolby Laboratories. Dolby and the double-D symbol are trademarks of Dolby Laboratories. - Manufactured under license under U.S. Patent #'s: 5,451,942; 5,956,674; 5,974,380; 5,978,762; 6,226,616; 6,487,535; 7,212,872; 7,333,929; 7,392,195; 7,272,567 & other U.S. and worldwide patents issued & pending.
- DTS is a registered trademark and the DTS logos, Symbol, DTS-HD and DTS-HD Master Audio are trademarks of DTS, Inc. © 1996-2008 DTS, Inc. All Rights Reserved.
- HDMI, the HDMI logo and High-Definition Multimedia Interface are trademarks or registered trademarks of HDMI licensing LLC.
- "DVD Logo" is a trademark of DVD Format/Logo Licensing Corporation.
- This product is licensed under the AVC patent portfolio license and VC-1 patent portfolio license for the personal and non-commercial use of a consumer to (i) encode video in compliance with the AVC Standard and VC-1 Standard ("AVC/VC-1 Video") and/or (ii) decode AVC/VC-1 Video that was encoded by a consumer engaged in a personal and non-commercial activity and/or was obtained from a video provider licensed to provide AVC/VC-1 Video. No license is granted or shall be implied for any other use. Additional information may be obtained from MPEG LA, LLC. See http://www.mpegla.com.
- Blu-ray Disc™, Blu-ray™, BD-Live™, BONUSVIEW™, and the logos are trademarks of the Blu-ray Disc Association.
Cinavia Notice
This product uses Cinavia technology to limit the use of unauthorized copies of some commercially-produced film and videos and their soundtracks. When a prohibited use of an unauthorized copy is detected, a message will be displayed and playback or copying will be interrupted.
More information about Cinavia technology is provided at the Cinavia Online Consumer Information Center at http://www.cinavia.com. To request additional information about Cinavia by mail, send a postcard with your mailing address to: Cinavia Consumer Information Center, P.O. Box 86851, San Diego, CA, 92138, USA.*
This product incorporates proprietary technology under license from Verance Corporation and is protected by U.S. Patent 7,369,677 and other U.S. and worldwide patents issued and pending as well as copyright and trade secret protection for certain aspects of such technology. Cinavia is a trademark of Verance Corporation. Copyright 2004-2010 Verance Corporation. All rights reserved by Verance. Reverse engineering or disassembly is prohibited.
Open Source Software Notice
Your VIA device may contain GPL executables and LGPL libraries that are subject to the PL2.0/LGPL2.1 License Agreements. VIZIO offers to provide source code to you on CD-ROM for a processing fee covering the cost of performing such distribution, such as the cost of media, shipping and handling upon request made to VIZIO at www.vizio.com.
This offer is valid for a period of three (3) years from the date of the distribution of this VIA device by VIZIO. You can obtain a copy of the GPL, LGPL licenses from http://www.gnu.org/licenses/old-licenses/gpl-2.0.html and http://www.gnu.org/licenses/oldlicenses/lgpl-2.1.html. You can also obtain a copy of gSOAP public license from http://www.cs.fsu.edu/\~engelen/license.html. Please visit www.vizio.com for attribution of copyrights to any open source software on your VIZIO VIA device. Permission is hereby granted, free of charge, to any person obtaining a copy of any such software and associated documentation files (the "Open Source Software"), to deal in the Open Source Software without restriction, including without limitation the rights to use, copy, modify, merge, publish, distribute, sublicense, and/or sell copies of the Open Source Software, and to permit persons to whom the Open Source Software is furnished to do so, subject to the following conditions:
THE SOFTWARE IS PROVIDED "AS IS", WITHOUT WARRANTY OF ANY KIND,
D
EXPRESS OR IMPLIED, INCLUDING BUT NOT LIMITED TO THE WARRANTIES OF ERCHANTABILITY, FITNESS FOR A PARTICULAR PURPOSE AND NONINFRINGEMENT. IN NO EVENT SHALL THE AUTHORS OR COPYRIGHT HOLDERS BE LIABLE FOR ANY CLAIM, DAMAGES OR OTHER LIABILITY, WHETHER IN AN ACTION OF CONTRACT, TORT OR OTHERWISE, ARISING FROM, OUT OF OR IN CONNECTION WITH THE SOFTWARE OR THE USE OROTHER DEALINGS IN THE SOFTWARE.
VIZIO Internet Applications (VIA) Policy
VIZIO Internet Applications ("VIA") affords the opportunity to access third party Internet product offerings or services ("VIA Services") on certain VIZIO devices incorporating the VIA functionality. The VIA Services accessible herein are provided as per our agreement with these third parties. These agreements are subject to change, interruption, suspension (including termination) at any time and for various reasons. VIZIO makes no warranties or representations that any particular VIA Service will be accessible, available, function in any particular manner or function at all.
Internet Access Required for VIA Services and Updates
To use these VIA Services, you must obtain high-speed/broadband access to the Internet (such as DSL, cable or TI lines), either directly or through devices that access the Internet and pay any service fees associated with such access. In addition, you must provide all equipment necessary to make such connection to the Internet including a modem or other Internet access device. Each individual third party Internet product may require a different minimum Internet connection speed. The usability and availability of a functional VIA device and its Internet connected feature may highly be dependent and varied based on high-speed/broadband Internet access, connection speed, bandwidth, other equipment(s), third party applications, firmware updates and other factors outside of VIZIO's control and/or responsibility which may also be independent of the actual operation of the device. It is further understood that VIA enabled devices are integrated with sophisticated technologies (software and hardware) which may exhibit delayed boot-up/shutdown time and/or interrupted services. You further understand that the VIA Services specifications and functionality are constantly evolving and that we may directly, or indirectly via third parties, update or change the VIA Services, in whole or in part, at any time and without notice to you. Such updates may be required for you to use certain aspects of the VIA services or to continue to connect to the VIA Services.
Availability of Content on VIA Services
VIZIO or said third parties providing VIA Services reserve the right to delete data from their servers, or prevent access to their servers or to change data categories, product offerings or service levels for any reason that VIZIO or said third parties deem sufficient in their sole discretion at any time, without notice. VIZIO may also impose additional or different limits on the use of or access to certain VIA Services, in any case and without notice or liability. Some or all of the data or functionality of VIA Services may require additional payment and/or subscription by you. However, in no event will you be charged for any VIA Services unless those charges are made known to you in advance. VIZIO makes no warranties or representations of any kind as to the accuracy, currency, or completeness of any information contained on the data servers of such third party providers of any VIA Services. Furthermore, we do not review, control, or endorse the content, products or services of VIA Services or their data servers.
VIA SERVICES ARE PROVIDED "AS IS" AND "AS AVAILABLE," WITHOUT WARRANTY OF ANY KIND (INCLUDING ANY IMPLIED WARRANTY OF MERCHANTABILITY, NON-INFRINGEMENT, OR FITNESS FOR A PARTICULAR PURPOSE), TO THE MAXIMUM EXTENT PERMITTED BY LAW. USE OF THE VIA SERVICES IS AT YOUR SOLE RISK. THIS MEANS, FOR EXAMPLE, THAT VIZIO DOES NOT GUARANTEE THAT THE VIA SERVICES WILL ALWAYS WORK PROPERLY OR WORK AT ALL. THIS ALSO MEANS WE DO NOT GUARANTEE THAT THE VIA SERVICES, CONTENT OR PRODUCTS WILL BE FREE FROM VIRUSES, HACKS, OR OTHER POTENTIALLY HARMFUL INTRUSIONS. PLEASE NOTE THAT SOME STATES DO NOT ALLOW SUCH WARRANTY LIMITATIONS, SO THESE LIMITATIONS MAY NOT APPLY TO YOU.
VIA Services Content Disclaimer
Certain VIA Services may include materials from third parties or links to certain third party data servers. You acknowledge and agree that VIZIO is not responsible for examining or evaluating the content or accuracy of any VIA Services, their data servers or related third-party materials. VIZIO does not warrant or endorse and does not assume and will not have any liability or responsibility for any third-party materials or web sites, or for any other materials, products, or services of third parties. Links to VIA Services and any associated links to other data servers are provided solely as a convenience to you. To the extent provided, content types or descriptions of VIA Services are provided for convenience, and you acknowledge and agree that VIZIO does not guarantee their accuracy. You understand that by using any of the VIA Services, you may encounter content that may be deemed offensive, indecent, or objectionable, which content may or may not be identified as having explicit language. Nevertheless, you agree to use the VIA Services at your sole risk and that VIZIO shall have no liability to you for content that
D
may be found to be offensive, indecent, or objectionable.
You agree that you will not use any third-party materials in a manner that would infringe or violate the rights of any other party, and that VIZIO is not in any way responsible for any such use by you.
VIZIO Privacy Policy and VIA Software License Agreement
Your right to use the widget links to access VIA Services is also governed by VIZIO's Privacy Policy and the VIZIO Internet Applications Software License Agreement ("VIA Software License Agreement"), the terms of which are incorporated herein by this reference. The terms of both the Privacy Policy and VIA Software License Agreement may be found in your Product Guide and on VIZIO's website. In the event of a conflict between the VIZIO Internet Applications (VIA) Policy and the VIA Software License Agreement, the VIA Software License Agreement shall control. BY YOUR USE OF THE VIA SERVICES, YOU EXPRESSLY AGREE TO ALL THE TERMS AND CONDITIONS OF THE FOREGOING POLICIES AND AGREEMENT.
VIZIO may change the terms and conditions of this VIA Policy, the VIZIO Privacy Policy and/or the VIA Software License Agreement, at any time and without prior notice. The most up to date versions are available on the Internet at: www.vizio.com. If you do not have Internet access, you should periodically contact our customer service department and we will mail you a current version, free of charge. IF YOU DO NOT AGREE TO ALL OF THE TERMS AND CONDITIONS OF THE VIA POLICY, THE VIZIO PRIVACY POLICY AND/OR THE VIA SOFTWARE LICENSE AGREEMENT OR ANY CHANGES THERETO, YOU MUST IMMEDIATELY CEASE USE OF THE VIA SERVICES.





© 2012 VIZIO INC. ALL RIGHTS RESERVED. 1206050C-A


- Table of Contents
- Installing the Blu-ray Player 3
- Controls & Connections......8
- Basic Operation 12
- Adjusting the Player's Settings 17
- Installing the Blu-ray Player
- INSPECTING THE PACKAGE CONTENTS
- CONNECTING THE PLAYER TO AN ELECTRICAL OUTLET
- CONNECTING THE PLAYER TO YOUR TV
- CONNECTING THE PLAYER TO YOUR TV AND HOME AUDIO SYSTEM WITH HDMI
- SETTING UP YOUR NETWORK CONNECTION
- Connecting to a Wireless Network
- Connecting to a Wireless Network with WiFi Protected Setup (WPS)
- Controls and Connections
- FRONT PANEL
- REAR PANEL
- REMOTE CONTROL
- Replacing the Batteries
- Basic Operation
- Playing a Disc
- Basic Playback Functions
- Advanced playback functions
- VIEWING USB MEDIA - AUDIO AND IMAGES
- USB Media Playback Controls
- Playing USB Photos and Audio
- Remember:
- Adjusting the Player's Settings
- ADJUSTING THE DISPLAY SETTINGS
- Changing the Display Resolution
- Adjusting the Aspect Ratio
- Activating Film Mode
- Adjusting the Deep Color Setting
- ADJUSTING THE AUDIO SETTINGS
- Changing the PCM Downsampling Rate
- Adjusting the Digital Audio Output
- Activating or Deactivating Dynamic Range Control (DRC)
- CHANGING LANGUAGE SETTINGS
- Changing the On-Screen Menu Language
- Changing the Disc's Menu Language
- Changing the Audio Language
- Changing the Subtitle Language
- BD-LIVE STORAGE
- SETTING THE PARENTAL CONTROLS
- Setting the Parental Country
- Activating or Deactivating the Parental Controls
- Changing the Parental Code
- CHANGING THE SYSTEM SETTINGS
- Activating or Deactivating the Screen Saver
- Activating or Deactivating Disc Autoplay
- Enabling or Disabling CEC Support
- Setting Power Down Mode
- Updating the Player's Firmware
- Restoring the Player's Factory Default Settings
- ADJUSTING THE NETWORK SETTINGS
- Adjusting the Wired Settings
- Setting Up a Wireless Connection Manually
- Setting Up a Wireless Connection Using WPS
- VIEWING THE INFO SCREEN
- Using Internet Apps
- USING THE NETFLIX APP
- Opening a Netflix Account
- USING THE VUDU APP
- Opening a VUDU Account
- USING THE PANDORA APP
- Opening a Pandora Account
- USING THE HULU PLUS APP
- Opening a HULU Plus Account
- Troubleshooting & Technical Support
- LET US HELP!
- A
- There is no power.
- Nothing happens when I press buttons on the remote.
- My Blu-Ray or DVD disc does not play.
- I cannot connect the Player to my network.
- The picture quality seems low.
- I am having trouble with Internet Apps.
- Limited Warranty
- ON PARTS AND LABOR
- Parts and Labor
- Type of Service
- Limitations and Exclusions
- Personal Data
- Legal & Compliance
- FCC Class B Radio Interference Statement
- Notice:
- RF Exposure Information
- DHHS and FDA safety certification
- IC Statement
- Copyrights
- Licenses
- Cinavia Notice
- Open Source Software Notice
- VIZIO Internet Applications (VIA) Policy
- Internet Access Required for VIA Services and Updates
- Availability of Content on VIA Services
- VIA Services Content Disclaimer
- VIZIO Privacy Policy and VIA Software License Agreement
Brand : VIZIO
Model : VBR140
Category : Blu-ray player