17A2 - Desktop computer ELO - Free user manual and instructions
Find the device manual for free 17A2 ELO in PDF.


| Product Type | All-in-One Desktop Computer |
| Brand | Elo |
| Model | 17A2 |
| Screen Size | 17 inches (typical) |
| Dimensions (Approx.) | 420 x 330 x 60 mm |
| Weight (Approx.) | 5 kg |
| Power Supply | 100-240V AC, 50-60 Hz |
| Power Consumption | < 100W (typical) |
| Touch Technology | Elo TouchSystems (resistive or capacitive) |
| Biometric Reader | Integrated Fingerprint Reader (FPR) |
| Operating System Compatibility | Windows (drivers provided) |
| Main Ports | USB, VGA/DVI, Audio, Ethernet (typical) |
| Cleaning Instructions | Use a soft, lint-free cloth slightly dampened with water or mild cleaner. Do not spray directly onto the device. |
| Safety Precautions | Disconnect power before installation or cleaning. Ensure device is turned off when attaching peripherals. |
| Spare Parts Availability | Contact Elo Support or authorized distributors |
| Repair Service | Contact Elo Technical Support for service options |
| Manual Location | PDF available from notice-facile.com or Elo support |
| Driver Location | D:\Touch Monitor Peripherals\Fingerprint Reader\Fingerprint Reader 1729 17A2\Drivers\ (on TouchTools CD) |
| For TouchMonitor Models | ET1729L (separate peripheral) |
Frequently Asked Questions - 17A2 ELO
User questions about 17A2 ELO
0 question about this device. Answer the ones you know or ask your own.
Ask a new question about this device
Download the instructions for your Desktop computer in PDF format for free! Find your manual 17A2 - ELO and take your electronic device back in hand. On this page are published all the documents necessary for the use of your device. 17A2 by ELO.
USER MANUAL 17A2 ELO
Note: For ESY17A2 and ESY15A2 touchcomputers, the software for the peripheral is already installed on the touchcomputer. For the ET1729L touchmonitor, refer to the following:
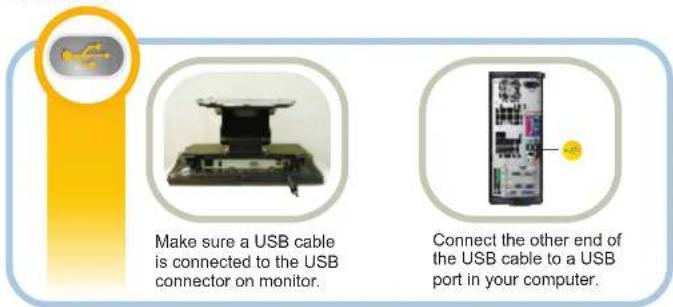
*For necessary drivers please refer to:
D:\Touch Monitor Peripherals\Fingerprint Reader\Fingerprint Reader 1729 17A2\Drivers\
Note: "D" refers to the drive in which the TouchTools CD is located.
natural_image
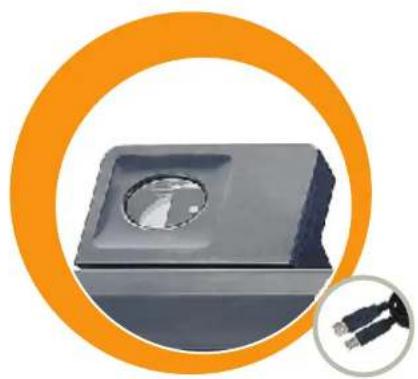
Close-up of a black rectangular electronic component with a circular recess, enclosed in an orange circular frame (no text or symbols visible)Quick Installation Guide
Installing the Biometric FPR for 1729/17A2/15A2
Caution: Before attaching the Biometric FPR to your monitor, make sure that power to the monitor and computer is off.
© 2008 Typo Electronics.


www.elotouch.com


301 Constitution Drive
Kenio Park, CA 94025
www.elclouth.com
Elp Technical Support
Online self-help
www.siccsch.com/vebeap.net
Technical Support contacts in your region:
www.malool.com/avocrissupport
Europe
Tel+32(0)16352100
Fax +32 (0)18 35 21 01
Sales@clouch.com
Asia-Pacific
Tel -01 (45) 478-2161
Fax +81 [45] 476-2180
www.cninfo.com
Latin America
Tel 1-305-428-6210
Fax 1-305-717-4909
www.cicci.com
elo
821107900402

Tyco Electronics
Our commitment. Your advantage
1
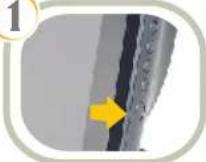

Turn off power to the unit and computer.
2
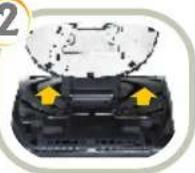

Turn unit upside down and take off the back cover insert
3
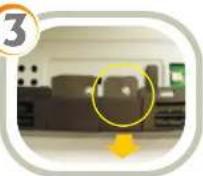

Unsecure the Biometric FPR door from the unit's top side.
4
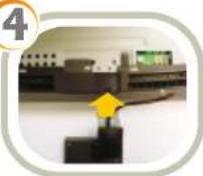

Place the Biometric FPR onto the rear of the unit, along the unit's top side.
5
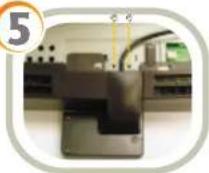

Secure the Biometric FPR to the unit using two screws from the Biometric FPR Kit.
6
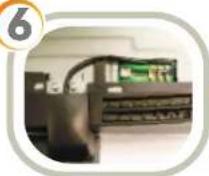

Insert the connector of the cable accompanying the Biometric FPR into the mating connector on the accessory hub in the rear of the unit.
7
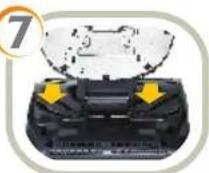

Replace the back cover insert.
8
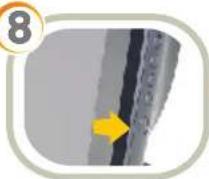

Place the unit upright then turn on.
Brand : ELO
Model : 17A2
Category : Desktop computer