
Stair Climber 3 ST-10 - Exercise Stair LifeSpan - Free user manual and instructions
Find the device manual for free Stair Climber 3 ST-10 LifeSpan in PDF.


| Product Type | Motorized stair climber |
| Brand | LifeSpan |
| Model | Stair Climber 3 ST-10 |
| Dimensions (L x W x H) | 50 x 25 x 44 inches |
| Weight | 120 lbs |
| Maximum User Weight | 350 lbs |
| Power Source | 120V AC, 60Hz |
| Resistance Levels | 10 |
| Display | LCD with time, distance, calories, heart rate |
| Programs | 5 preset programs plus manual mode |
| Heart Rate Monitor | Pulse grip sensors |
| Folding | Yes |
| Assembly Required | Yes |
| Warranty | 2 years frame, 1 year parts |
| Cleaning | Wipe with damp cloth; no abrasives |
| Maintenance | Lubricate step arms every 6 months |
| Safety Key | Included |
Frequently Asked Questions - Stair Climber 3 ST-10 LifeSpan
User questions about Stair Climber 3 ST-10 LifeSpan
0 question about this device. Answer the ones you know or ask your own.
Ask a new question about this device
Download the instructions for your Exercise Stair in PDF format for free! Find your manual Stair Climber 3 ST-10 - LifeSpan and take your electronic device back in hand. On this page are published all the documents necessary for the use of your device. Stair Climber 3 ST-10 by LifeSpan.
USER MANUAL Stair Climber 3 ST-10 LifeSpan
ST-10 Stair Climber 3 Level Stepmill Machine
USER MANUAL


Read all instructions carefully before using this product. Retain this owner's manual for future reference.
! IMPORTANT
All nuts and bolts are to be checked and tightened on a regular basis. This includes pedals and other moving parts. Failure to do so may cause damage to your threads and void your warranty.
NOTE:
Product may vary slightly from the item pictured due to model upgrades. This manual may be subject to updates or changes. Up to date manuals are available through our website at www.lifespanfitness.com.au
TABLE OF CONTENTS
I. Important Safety Instructions 03
II. Maintenance 05
III. Parts List 07
IV. Assembly Instructions 09
V. Stair climber operating instructions 12
VI. Exercise Guide ...... 14
VII. Troubleshooting 15
VIII. Warranty 16
IX. Hand Pulse Technology 17
I. IMPORTANT SAFETY INSTRUCTIONS
! WARNING: Read all instructions before using this machine.
It is important your machine receives regular maintenance to prolong its useful life. Failing to regularly maintain your machine may void your warranty.

DANGER: To reduce the risk of electric shock disconnect your treadmill from the electrical outlet prior to cleaning and/or service work.
Do not use an extension cord: do not attempt to disable the grounded plug by using improper adapters or in any way modify the cord set.
Read all precautions and instructions in this manual before using this equipment.
EQUIPMENT SAFETY:
- The machine is suitable for commercial and domestic use.
- The stair climber is suitable for indoor (climate control) use only. It is not for suitable:
- for outdoor or high humidity; recommended operating temperature: 5-40°C
- does not allow water or other liquids to be splashed on the machine
- does not allow the placement or insertion of any foreign objects on the stair climber
- Stair climber should be installed on solid, levelled surface with a safety space of 100-200cm.
- The stair climber should be used within the allowable range of voltage AC 110V - AC 240V.
- Never operate the equipment if it has a damaged power cord or plug. When damaged, these must be replaced by the manufacturer, its service agent or similarly qualified persons in order to avoid a hazard.
- Keep the cord away from heated surfaces.
- Do not operate where aerosol spray products are being used or where oxygen is being administered. Sparks from the motor may ignite a highly gaseous environment.
- Never drop or insert any object into any openings.
- All fixings should be checked before the equipment is used. Ensure to tighten any loose fixings.
- All manuals relating to the use of the equipment should be retained for future reference.
- Incorrect or overload training may cause the damage of the motor and controller, accelerate the aging transmission system, even bodily injuries. Ensure to allow cool down periods.
- If the equipment has abnormal sound or other abnormal conditions, please stop running immediately and contact our after-sales department in time, or seek professional help.
- Emergency stop: In the lower right corner of the stair climber installed with a photoelectric switch (Sensor), if an object is detected the staircase will immediately stop.

NOTE: The photoelectric switch is a sensitive component. If there is dust or there is a deviation in the installation position, the "emergency stop" will be displayed on the display and the stair machine cannot be used. Therefore, the surface of the photoelectric switch must be clean and the installation position must be correct.
- Check the stop button to ensure the brakes wont before use but pressing the start and stop button and checking the emergency stop at the bottom.
USER SAFETY:
- Keep your hands away from all moving parts.
- Only one person at a time to use this equipment.
- Ensure to hold onto the handrails for safety and start slow if it is your first time using this equipment.
- This appliance is not intended for use by persons (including children) with reduced physical, sensory, or mental capabilities, or lack of experience and knowledge, unless they have been given supervision or instruction concerning use of the appliance by a person responsible for their safety.
- WARNING: heat rate monitoring systems may be inaccurate. If you feel faint stop exercising immediately.
- Children should not be allowed on or around the equipment, even when not in use.
- Children should be supervised to ensure that they do not play with this machine.
- Loose-fitting clothing or jewellery that could become an entanglement hazard should not be worn.
- Training shoes should be worn when using the equipment.
TECHNICAL STANDARDS:
| Input power supply voltage AC 110V - AC 240V |
| Time display range 0:00 - 99:59 |
| Height display range 0.00--999.9m |
| Heat display range 0-999 (Kcal) |
| Level display range 0 - 15 |
| Step number display range 0 - 9999 |
| Power cord specification 10A AC250V |
| Running speed 24 steps / minute - 164 steps / minute |
1. Cleaning
- It is recommended that you clean the equipment before and after each training session. To remove dust from the equipment, use a soft cloth to wet the following cleaning agents and then wipe all exposed surfaces.
NOTE: Before using any cleaning agent to clean the fitness equipment, read and follow the manufacturer's instructions. Do not use a strong concentration of concentrate, or any acidic cleaner; this type of cleaner will corrode the protective layer of the equipment. Use warm and slightly soapy water. Do not spill or spray water or liquid onto any part of the equipment. Wait until the equipment is completely dry before using the equipment.
• Vacuum around the equipment to prevent dust accumulation from affecting the operation of the equipment. Use a soft nylon brush to clean the device recesses and foot pedals.
- Clean the area where the emergency stop sensors are to prevent the dust from triggering the sensors.
2. Daily Inspection
Check the equipment at least once a day for the following problems:
- Belt slip
- Loose fasteners
- Abnormal noise
- Any other signs that the equipment may need to be repaired.
3. Weekly Maintenance
Perform the following maintenance tasks weekly:
- Use water or approved cleaning agents to clean the tracks and wheels.
- Use a vacuum cleaner or wet mop to clean the floor around the equipment.
- Test the console's features, including heart rate monitoring.
- Check that the equipment is stationary on the floor. All feet of the equipment should be in firm contact with the floor and the equipment should not be shaken or shaken when in use. If not, please re-level.
- Tighten any loose bolts or fixings.
Relocation of Equipment
If you plan to move your equipment to a new location, look for adult help and use the right lifting techniques. You may require 2 or more people to help.
GROUNDING METHODS
This product must be grounded. If it should malfunction or breakdown, grounding provides a path of least resistance for electric current to reduce the risk of electric shock.
This product is equipped with a cord having an equipment-grounding conductor and a grounding plug. The plug must be plugged into an appropriate outlet that is properly installed and grounded in accordance with all local codes and ordinances.

DANGER: Improper connection of the equipment-grounding conductor can result in a risk of electric shock. Check with a qualified electrician or serviceman if you are in doubt as to whether the product is properly grounded.
Do not modify the plug provided with the product - if it will not fit the outlet, have a proper outlet installed by a qualified electrician.
This product is for use on a nominal 220-volt circuit and has a grounding plug that looks like the plug illustrated in sketch A in following figure. Make sure that the product is connected to an outlet having the same configuration as the plug.
No adapter should be used with this product.
GROUNDING METHODS

III. PARTS LIST
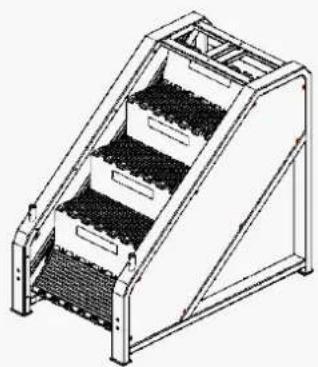
No.1 Stairmaster main frame x 1pc
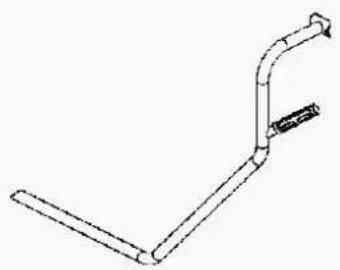
No.2 Left armrest x 1pc

No.3 Right armrest x 1pc
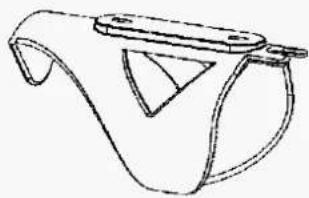
No.4 Water Bottle Holder x 1pc

No.6 Display support assembly x 1pc
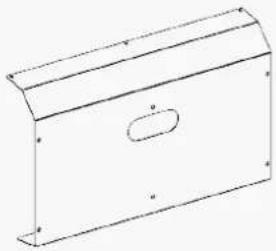
No.11 Upper Shroud x 1pc

No.12 Rear guard x 1pc No.13 Footplate x 2pcs No.33 Display
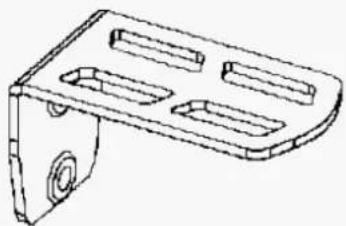

Assembly x 1pc

A: M8X55 Cheese head screws x 2pcs.
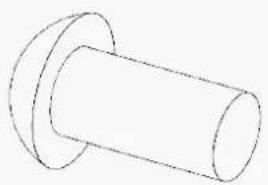
B: M10X20 Flat round head screws x 4pcs

C: M10X150 Cheese head screws x 2pcs.
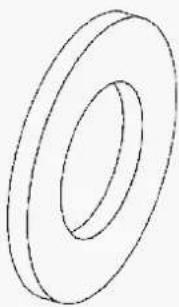
D: φ10 Flatwasher x 6pcs.
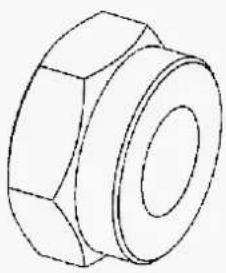
E: M10 Jam nut x 2pcs F: M4X8 Crossed cheese head screws x 15pcs


G: M5X10 Crossed cheese head screws x 2pcs
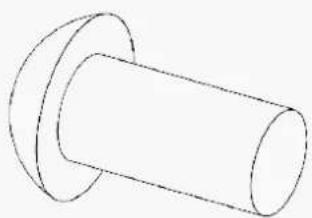
L: M8X16 Flat round head screws x 4pcs.

M: φ8 Gasket x 6pcs

P: M10X60 Flat round head screws x 4pcs
IV. ASSEMBLY INSTRUCTIONS
Please follow the below instructions to ensure the machine is assembled correctly.
• Some parts are pre-fitted to the machine.
- Due to the bulkiness of the item ensure to allow space around the machine and set it up in the designated area. You may need 2 people to move the machine.
- Remove all parts from the packaging and check that the quantity is correct. Do not discard the packing material until assembly is completed in case a part is missed.
- All parts are to be tightened during assembly unless otherwise stated. Ensure all bolts are tighten properly after set-up is complete.
- Ensure all parts are assembled correctly as per the instruction.

STEP 1
Part No. Name Quantity
| 1 Stairmaster main frame 1 |
| 6 Display support assembly 1 |
| 11 Upper Shroud 1 |
| 12 Rear guard 1 |
Part No. Name Quantity
| A M8x55 Cheese head screws 2 | ||
| M φ8 Gasket 2 | ||
| F | M4x8 Crossed cheesehead screws | 15 |
- Connect the Communication line in Fig.1 from the back of stair climber on the frame post.
- Place part 6 through part 11 and secure to Main frame using 2x M8X55 Cheese head screws (A) and 2x φ8 Gasket (M).
- Secure part 11 using 9x M4X8 Crossed cheese head screws (F).
- Secure part 12 using 6x M4X8 Crossed cheese head screws (F).

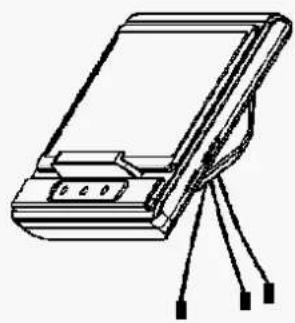
Communication line x 1 Heart rate line x 2
STEP 2
Part No. Name Quantity
| 33 Display | 1 | |
| L | M8X16 Flat roundhead screws | 4 |
Part No. Name Quantity
| M φ8 Gasket | 4 |
- Connect the 1x connection cable in the support post.
- For the 2x pulse sensor cable place them into the support tube and out to the side of the support tube where the hole is present. (To use later to connect to handlebar sensors)
- Connect the communication line.
- Attach the display to the support post using 4x φ8 Gasket (M) and 4x M8X16 Flat round head screws (L).

Part No. Name Quantity
| 2 Left armrest 1 | ||
| 3 Right armrest 1 | ||
| 4 Water Bottle Holder 1 | ||
| 13 Foot plate 2 | ||
| B | M10x20 Flat round head screws | 4 |
| C | M10x150 Cheese head screws | 2 |
Part No. Name Quantity
| D φ10 Flat washer 6 | ||
| E M10 Jam nut 2 | ||
| G | M5x10 Crossed cheese head screws | 2 |
| P | M10x60 Flat round head screws | 4 |
- Secure the bottle holder (4) to the support frame using 2x M5X10 Crossed cheese head screws (G).
- Attach the foot plate (13) to the main frame using 4x M10X60 Flat round head screws (P).
- Attach the pulse sensor cables on the L/R armrest (2 & 3) to the cable on the sides of the support post (Fig.2). Once clicked into place push the excess cables back into the support tube. Ensure not to accidentally clamp onto the cables in the next step.
- Secure the L/R Armrest (2 & 3) to the support post using 2x M10X150 Cheese head screws (C), 2x φ10 Flat washer (D) and 2x M10 Jam nut (E).
- Secure the L/R Armrest (2 & 3) to the main frame on the other end using 4x M10X20 Flat round head screws (B) and 4x φ 10 Flat washer (D).
- Plug the power cord at the back of machine at turn it on as switch.
V. STAIR CLIMBER OPERATING INSTRUCTIONS
The stair machine panel adopts the capacitive touch principle, and the user can use only one touch at a time, and the touch effect is comparable to the mobile phone screen. The surface of the panel is made of acrylic, which is wear-resistant and durable, and has a beautiful color and beautiful appearance. It fully guarantees that there will be no problems such as wear and tear on the paint after a long time of use.


WINDOW DISPLAY:
- "TIME/HIGH" window: Displays the movement time and incline height. The time measurement range is from 0:00-99:59. When it is timed to 99:59, it will be cleared and restart. The climb height measurement range is from 0.0 to 999.9, once it reaches 999.9, it will be cleared and restart.
- "CAL" window: Displays the calorie value of the user, counting from 0.00-999.9. It will be cleared and restarted when the count reaches 999.9.
- "STEP" window: Displays the number of steps of the user, counting from 0-999. It will be clear when the count reaches 999.
- Central dot matrix display area window: This area is WELCOME display area, level, and program progress chart, etc.
- The green display tube above: is a circular runway with a circle of 400 meters.
- Left LED display area window: This area displays the current motion mode indicator.
- Keypad: Level direct selection button, you can directly input the required level, click to confirm.
KEYBOARD FUNCTION:
- "PRO" is the program key: In standby mode, press this button to cycle through "BMI", "TIME COUNT", "DISTANCE COUNT", "CALORIES COUNT" and "PULSE".
| P1 | 3 3 5 5 4 4 6 6 8 8 7 7 8 8 7 7 5 5 4 4 |
| P2 | 3 3 4 4 5 5 8 8 9 10 7 7 6 6 5 5 4 4 3 3 |
| P3 | 3 3 5 5 5 7 7 7 7 9 9 6 6 7 7 5 4 4 3 3 |
| P4 | 3 3 5 5 7 7 10 10 7 7 10 10 5 5 3 3 4 4 4 3 |
| P5 | 4 4 6 6 8 8 10 10 8 8 6 6 4 4 3 3 4 4 3 3 |
| P6 | 2 2 4 4 6 6 8 8 10 10 8 8 6 6 4 4 3 3 2 2 |
| P7 | 1 1 1 1 5 5 5 5 8 8 8 8 6 6 5 5 5 5 4 4 |
| P8 | 2 2 4 4 6 6 4 4 6 6 4 4 6 6 4 4 5 5 3 3 |
- "REST": Is the return button: Press this button to return to the standby interface.
- "START/STOP": Once the power is switched on, press this button to start and stop workout.
- "+" and "-" are the level increase and decrease keys: When in the standby state it is used to adjust and set value. It is used to adjust the level after starting, and the adjustment range is 1 increment at a time.
- "1, 2, ... 9, 0, Delete, ok": Keypad is a level shortcut.
MACHINE CHECKS:
A. Check that the handlebars are steady, and the machine is stable.
B. Turn on the power and run the machine for a few minutes. Start using the equipment and test that all buttons correspond to the function it indicates and in working order.
C. Turn on the Power Key and start the machine at level 1. Check that the cyclic steps are functioning normally.
MANUAL MODE:
In the standby state, press the START/STOP button. The speed will start at level 1 and time will count from 0.
Use the "+" or "-" button to change the speed level.
Click on the Numerical buttons for quick speed adjustments and OK to confirm.
The "Delete" button will undo your setting.
PHOTOELECTRIC SWITCH (SENSOR):
The photoelectric switch is placed in the lower right corner of the step. When the object is blocked, the stair machine will stop immediately, this is used as a safety precaution.
Prior to using the machine, ensure that the photoelectric switch is functioning. In non-emergency situations, the photoelectric opening should not be used as an OFF switch.
! PLEASE NOTE:
Before beginning any exercise program, consult your physician. This is important especially if you are over the age of 45 or individuals with pre-existing health problems.
The pulse sensors are not medical devices. Various factors, including the user's movement, may affect the accuracy of heart rate readings. The pulse sensors are intended only as an exercise aid in determining heart rate trends in general.
Exercising is great way to control your weight, improving your fitness and reduce the effect of aging and stress. The key to success is to make exercise a regular and enjoyable part of your everyday life.
The condition of your heart and lungs and how efficient they are in delivering oxygen via your blood to your muscles is an important factor to your fitness. Your muscles use this oxygen to provide enough energy for daily activity. This is called aerobic activity. When you are fit, your heart will not have to work so hard. It will pump a lot fewer times per minute, reducing the wear and tear of your heart.
So as you can see, the fitter you are, the healthier and greater you will feel.

WARM UP
Start each workout with 5 to 10 minutes of stretching and some light exercises. A proper warm-up increases your body temperature, heart rate and circulation in preparation for exercise. Ease into your exercise.
After warming up, increase the intensity to your desired exercise program. Be sure to maintain your intensity for maximum performance. Breathe regularly and deeply as you exercise.
COOL DOWN
Finish each workout with a light jog or walk for at least 1 minute. Then complete 5 to 10 minutes of stretching to cool down. This will increase the flexibility of your muscles and will help prevent post-exercise problems.


This is how your pulse should behave during general fitness exercise. Remember to warm up and cool down for a few minutes.
VII. TROUBLESHOOTING
There are two types of fault problems:
1. An emergency stop appears on the screen:
Emergency stop problem: Check whether the photoelectric switch under the steps is blocked (clean it with a towel), and then check whether the reflective paper is aligned with the sensor probe light (If you do not understand, ask for manufacturer for a video).
2. The screen display is normal, and the stair climber does not run after "Start".
Step 1: open the protective cover on both sides of the stair climber and loosen the four screws fixing the operating system a little. If the loose screws have no effect, then try the next step (If you do not understand, ask for manufacturer for a video).
Step 2: Turn the wheel of the brake system by hand. If it you cannot turn (or too hard to turn), then the brake system is faulty, and the brake needs to be replaced. If it is easy to turn, then go to the next step.
Step 3: Check whether the signal light of the controller is normal (blinking). If it is not normal, replace the controller.
If the above steps are not resolved, please contact the manufacturer!
VIII. WARRANTY
AUSTRALIAN CONSUMER LAW
Many of our products come with a guarantee or warranty from the manufacturer. In addition, they come with guarantees that cannot be excluded under the Australian Consumer Law. You are entitled to a replacement or refund for a major failure and compensation for any other reasonably foreseeable loss or damage.
You are entitled to have the goods repaired or replaced if the goods fail to be of acceptable quality and the failure does not amount to a major failure. Full details of your consumer rights may be found at www.consumerlaw.gov.au.
Please visit our website to view our full warranty terms and conditions:
http://www.lifespanfitness.com.au/warranty-repairs
WARRANTY AND SUPPORT
Any claim against this warranty must be made through your original place of purchase. Proof of purchase is required before a warranty claim may be processed.
If you have purchased this product from the Official Lifespan Fitness website, please visit https://lifespanfitness.com.au/warranty-form
For support outside of warranty, if you wish to purchase replacement parts or request a repair or service, please visit https://lifespanfitness.com.au/warranty-form and fill in our Repair/Service Request Form or Parts Purchase Form.
Scan this QR code with your device to go to lifespanfitness.com.au/warranty-form

IX. HAND PULSE TECHNOLOGY
This product comes equipped with hand pulse sensors which are used to pick up tiny EKG/ECG signals that run through the body when your heart beats. These electrical EKG/ECG signals are very small and must be amplified 1000 times to make the signal viable for the computer to display your pulse.
To ensure proper operation:
- The user must maintain good, consistent contact on all four sensors.
- The users skin cannot be too dry or too wet.
Other factors that could affect the reading:
- Change of grip on the sensors (during slow pace walking and up to running).
- Tightening of hand muscles will produce small electrical signal.
- Static electricity charges from the air or from walking on the treadmill.
EKG/ECG Sensors may filter through actual EKG/ECG signals and "Noise" factors that may affect the reading. This will cause the pulse reading to be delayed and will take longer to update the display as the heart rate changes. Too much noise will create an incorrect reading. Medical conditions or having no electrical signal in the hands are other factors that may also affect pulse readings.
These are limitations of hand pulse technology and even the most expensive systems (which can cost upwards of \$3,000) used in hospitals have the same problems. The difference is that a patient in a hospital is not running on a treadmill. Hand pulse technologies work well on stationary exercise machines like bikes and even elliptical cross trainers but are not perfect on a treadmill. We offer treadmills with a wireless heart rate receiver which may be the more accurate option.
To test if your hand pulse sensors are working up to specification, hold them while standing on the sidestep rails, not walking, and see if the reading is more in line with what you would expect. This will eliminate the movement and static electricity factors. If your hands are dry, then wet them slightly (saliva works as a great conductor if this doesn't bother you).
- ST-10 STAIR CLIMBER 3 LEVEL STEPMILL MACHINE
- IMPORTANT
- TABLE OF CONTENTS
- IMPORTANT SAFETY INSTRUCTIONS
- WARNING: READ ALL INSTRUCTIONS BEFORE USING THIS MACHINE
- EQUIPMENT SAFETY
- USER SAFETY
- CLEANING
- DAILY INSPECTION
- WEEKLY MAINTENANCE
- RELOCATION OF EQUIPMENT
- GROUNDING METHODS
- PARTS LIST
- ASSEMBLY INSTRUCTIONS
- STEP 2
- STAIR CLIMBER OPERATING INSTRUCTIONS
- WINDOW DISPLAY
- KEYBOARD FUNCTION
- MACHINE CHECKS
- MANUAL MODE
- PHOTOELECTRIC SWITCH (SENSOR)
- PLEASE NOTE
- WARM UP
- COOL DOWN
- TROUBLESHOOTING
- AN EMERGENCY STOP APPEARS ON THE SCREEN
- THE SCREEN DISPLAY IS NORMAL, AND THE STAIR CLIMBER DOES NOT RUN AFTER "START
- WARRANTY
- AUSTRALIAN CONSUMER LAW
- WARRANTY AND SUPPORT
- HAND PULSE TECHNOLOGY
Brand : LifeSpan
Model : Stair Climber 3 ST-10
Category : Exercise Stair