
Motivate 4 - Mobile Phone AT&T - Free user manual and instructions
Find the device manual for free Motivate 4 AT&T in PDF.


| Product Type | Mobile Phone |
| Brand | AT&T |
| Model | Motivate 4 |
| Dimensions | 147.5 x 71.5 x 9.2 mm |
| Weight | 165 g |
| Display | 5.5-inch LCD, 720x1440 pixels |
| Processor | Quad-core 1.3 GHz Cortex-A7 |
| RAM | 2 GB |
| Internal Storage | 16 GB, expandable via microSD |
| Rear Camera | 8 MP, f/2.0, autofocus, LED flash |
| Front Camera | 5 MP, f/2.2 |
| Battery | Non-removable Li-Ion 2500 mAh |
| Operating System | Android 10 Go Edition |
| Connectivity | 4G LTE, Wi-Fi 802.11 b/g/n, Bluetooth 5.0, GPS |
| Ports | Micro-USB 2.0, 3.5mm headphone jack |
| Power Supply | 5V/1A charger (micro-USB) |
| Main Functions | Call, text, email, web browsing, camera, music, video playback |
| Maintenance | Wipe with soft dry cloth; avoid water and extreme temperatures |
| Safety | Do not disassemble; use only approved chargers |
| Spare Parts | Available from AT&T or authorized service centers |
| Repairability | Limited; screen replacement possible but not user-serviceable |
Frequently Asked Questions - Motivate 4 AT&T
User questions about Motivate 4 AT&T
0 question about this device. Answer the ones you know or ask your own.
Ask a new question about this device
Download the instructions for your Mobile Phone in PDF format for free! Find your manual Motivate 4 - AT&T and take your electronic device back in hand. On this page are published all the documents necessary for the use of your device. Motivate 4 by AT&T.
USER MANUAL Motivate 4 AT&T
About the user guide....11
Set up your phone 12
Parts and functions....12
Battery use....15
Install a SIM/SD Card 17
Turn your phone on and off....19
Use the touch screen ....20
Complete the setup screens....21
Basic operations 22
Home screen and Apps list ....23
Phone settings menu 25
Portrait and landscape screen orientation....26
Capture screenshots 27
Applications 27
Phone number 35
Airplane mode 36
Enter text 37
Google account....41
Lock and unlock your screen 44
Home screen basics....45
Status bar and Notification panel....48
Customize the Home screen ....53
Making connections....58
Phone 59
Make a call 59
Call settings....69
Contacts 71
Add a contact....71
Edit a contact 77
Delete a contact....78
Share a contact 79
Messaging....80
Text and multimedia messages ....80
Gmail 87
Internet and social networking....91
Chrome browser 91
Facebook 92
Connectivity 93
Transfer files between your phone and a computer 93
Wi-Fi....96
Bluetooth 97
Apps and entertainment 103
Camera and video....104
Camera overview....104
Take photos and record videos....107
Camera settings....109
View pictures and video using Photos 111
Edit photos....113
Share pictures and videos....115
Productivity 116
Calendar 116
Navigation apps....120
Google Search 123
Calculator 125
Clock 127
Entertainment and activities 133
YouTube 133
Settings....135
Basic settings 136
Network & internet 139
Internet....139
Wi-Fi Calling 142
Mobile network 143
Airplane mode 144
Hotspot & tethering....144
Data saver 146
VPN (Virtual Private Networks)....146
Private DNS....147
Connected devices 148
USB 148
Pair new device....149
Connection preferences .... 149
Bluetooth 149
NFC....152
Cast 152
Printing 152
Chromebook....153
Nearby Share....154
Android Auto....154
Apps....154
Recently opened apps....155
Default apps 155
Screen time 155
Unused apps....155
Special app access 156
Notifications....156
Battery 158
Battery Usage 159
Battery Saver 159
Battery Manager....161
Battery percentage 161
Storage 162
Storage manager....162
Sound & vibration....163
Media volume....163
Call volume 163
Ring & notification volume....164
Alarm volume 164
Do Not Disturb 164
Phone ringtone 164
Media....164
Vibrate & hiptics 164
Default notification sound 164
Default alarm sound....165
Other sounds and vibrations....165
Display....166
Brightness level 166
Adaptive brightness 167
Lock screen....167
Screen timeout 167
Dark theme 168
Display size and text 168
Night Light 168
Colors 168
Auto-rotate screen 168
Network name....168
Screen saver 169
Lift to wake....169
Accessibility 169
Select to Speak 169
TalkBack....169
Display size and text 170
Color and motion 170
Extra dim 171
Magnification 171
Accessibility Menu 171
Switch Access 172
Timing controls 172
System controls 173
Vibration & haptic strength....173
Caption preferences 174
Real-Time text (RTT) call option....174
Audio description 174
Hearing aid 174
Audio adjustment....175
Accessibility shortcuts 175
Text-to-speech output 175
Security 176
Google Play Protect 177
Find My Device 177
Security update....177
Screen lock 178
Face & Fingerprint Unlock 179
Smart lock 179
Device admin apps 180
SIM card lock....180
Encryption & credentials 180
Trust agents 181
App pinning....181
Privacy....181
Permission dashboard....182
Permission manager....182
Camera access 182
Microphone access 182
Show passwords....183
Notifications on lock screen 183
Show clipboard access....183
Autofill service from Google....183
Google location history....183
Activity controls....183
Ads 184
Usage & diagnostics....184
Location....185
Recent access....186
App location permissions 186
Location services 186
Safety & emergency....187
OPEN PERSONAL SAFETY....187
Medical information....187
Emergency information 187
Emergency contacts 187
Emergency SOS....187
Crisis alerts....188
Emergency Location Services....188
Wireless Emergency Alerts....188
Password & accounts....189
Passwords & accounts....189
Add account....189
Automatically sync data 190
Digital Wellbeing & parental controls 191
Your Digital Wellbeing tools....191
Ways to disconnect 191
Reduce interruptions 191
Show icon in the app list 191
Parental controls....191
Google 192
DuraSpeed 193
System 193
Languages & input....193
Gestures....196
Date & time 197
Backup....197
System updates....198
Multiple users....198
Reset options....199
About phone....201
Getting help....203
For assistance....204
Troubleshooting 204
Specifications 207
Licenses 208
Copyright information 208
Safety and use....209
Important health information and safety precautions....210
Electrical safety....210
Safety precautions for proper grounding installation .....210
Safety precautions for power supply unit 211
Take extra precautions....212
Electrical safety....216
General precautions 217
Protect your phone 218
FCC Regulations....222
RF Exposure Information (SAR) 223
Hearing Aid Compatibility 224
Warranty 225

natural_image
Two black AT&T smartphones displaying app icons and home screen (no readable text or symbols on screens)Getting started
The topics in this section will introduce you to your phone, help you get set up with service, provide an overview of the phone screen, and get you started with basic phone operations.
Introduction
The following topics describe the basics of using this guide and your new phone.
About the user guide
Thank you for purchasing your new SL112A Smartphone. The following topics explain how best to use this guide to get the most out of your phone.
Before using your phone
Read the Safety Information Guide that came with your device thoroughly for proper usage. Accessible services may be limited by subscription contract conditions.
Descriptions in the user guide
Note that most descriptions in this guide are based on your phone's setup at the time of purchase. Unless otherwise noted, instructions begin from the phone's Home screen, which is displayed by pressing the Home button . Some operation descriptions may be simplified.
Screenshots and key labels
Screenshots and other illustrations in this user guide may appear differently on your phone. Key labels are simplified for description purposes and differ from your phone's display.
Other notations
In the user guide, the phone may be referred to either as "phone," "device," or "handset." A microSD™ or microSDHC™ card is referred to as an "SD card" or a "memory card."
Set up your phone
The following topics give you all the information you need to set up your phone and wireless service for the first time.
Parts and functions
These topics illustrate your phone's primary parts and key functions.

Note: Your phone's screens and app layouts are subject to change. This user guide uses sample images only.
| Part Description | |
| Fingerprint sensor Unlock your phone with a touch of your finger. | |
| Eject SIM tray | Insert the SIM Card Tray Pin into the card tray slot and remove the SIM card tray. |
| SIM tray | Insert your Nano SIM card and microSD for service and additional storage. |
| Flash | Brighten photos taken indoors or at night.Use as a flashlight to see in dark areas. |
| Front camera | Take pictures and record videos while facing the screen with a 5MP lens. |
| Rear camera | Take pictures and record videos with an 8MP lens. |
| Headset port | Plug in a headset (sold separately) to listen to music or for convenient, hands-free conversations. |
| Microphone | Transmit your voice electronically for a call, voice recording, or Google AssistantTM. |
| Proximity and light sensor | A sensor will automatically dim or brighten the screen according to the environment. |
| Power key | Press and hold to turn the phone on.Press to turn the screen on or off.Press and hold for 3 seconds to access Google AssistantTM.Press along with theVolume upkey to choose to turn the phone off or restart the phone. You can also press and hold for 10 seconds to restart the phone automatically.Press along with theVolume downkey to take a screenshot. |
| Receiver Hear the caller and automated prompts. | |
| Speaker Listen to calls, automated prompts, and music. | |
| Touch screen | View information needed to operate your phone.Access your phone's features and applications. |
| USB charging & accessory port | Connect the USB cable (included) for charging, or connect other accessories. |
| Volume keys | Adjust the volume for ringtones, media, notifications, and system sounds. |
CAUTION! Inserting an accessory into the incorrect jack may damage the phone.
Battery use
The following topics explain how to care for your phone's non-removable battery.

Battery cautions
Storage: Avoid storing or leaving the phone with no charge remaining. Saved information and settings may become lost or changed, or the battery may become unusable. Charge once every six months if storing or leaving unused for a long period of time.
Charge the battery
Follow these instructions to charge your phone's battery using either the included AC adapter or via USB connection on your computer.
Charge using the AC adapter
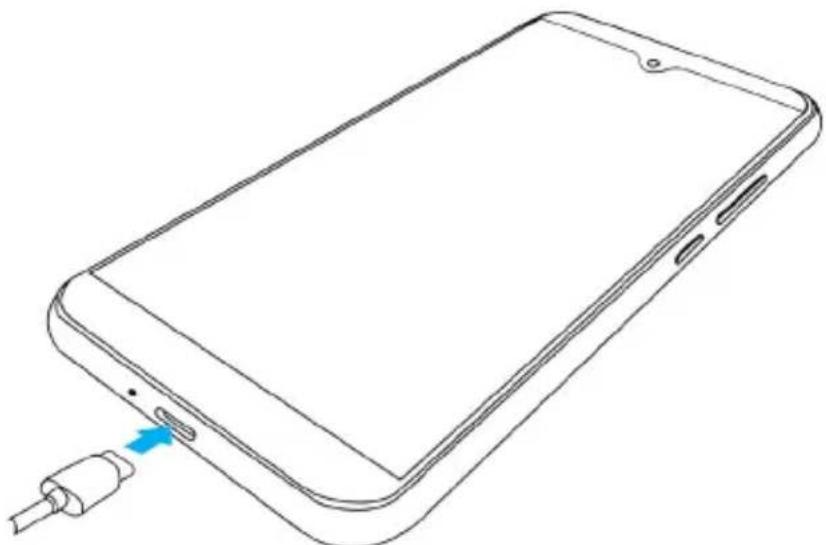
- Connect one end of the data cable to the USB port located on the bottom of your phone.
natural_image
Line drawing of a smartphone with a blue cable inserted into the screen (no text or symbols)-
Connect the other end to the power adapter.
-
Connect the power adapter to an electrical outlet to fully charge your phone.
- Use the power adapter that comes with your phone; using other adapters may damage your phone.
- Charging your phone with a USB cable connected to a laptop will take longer than with the power adapter.
- The phone will power off automatically when the battery is too low. Charge the battery if this happens. When the battery is critically low, the phone may need a few minutes to build a charge before turning back on. Playing games or performing other activities while charging may drain the battery and cause it to power off.
- The battery will gradually discharge if it is left unused for a long period of time. Before using the battery again, you must recharge it in order to power on and use your phone normally.
Install a SIM/SD Card
Insert a Nano SIM/microSD card
- Insert the SIM pin tool (included) into the small hole on the SIM card tray and press until the tray ejects. Remove SIM card tray.
- Place the Nano SIM card (included) and MicroSD card (sold separately) into the tray.
- Gently slide the card tray back into the slot.
Mount an SD card
- With an SD card inserted, swipe up from the Home screen to access Apps and tap Settings

- Tap Storage ≡ and select DISK from the drop down menu.
- Tap SET UP and follow the prompts to complete the set up.
Unmount an SD card
Always unmount an SD card before removing it from your phone to avoid corrupting or damaging the files on the SD card.
- From the Home screen, swipe up to access Apps and tap Settings
- Tap Storage ≡ and select your SD card from the drop down menu.
- Tap Menu in the top right-hand corner and select Eject.
Your SD card is now safely unmounted. To use this SD card again, you will need to remove (see below) and mount it again.
Remove an SD card
Insert the SIM Card Tray Pin into the small hole on the SIM card tray and remove the SIM card tray. Pull out the card tray slot and remove the SD card.
Format an SD card
When you insert an optional SD card for the first time, it is recommended that you format it on your phone.
Note: Formatting your SD card will erase all files on the card. Make sure to back up your files in another location before formatting.
-
From the Home screen, swipe up to access Apps and tap Settings
-
Tap Storage ≡ and select SD card from the drop down menu.
-
Tap Menu and select Format or Format as internal, then tap FORMAT SD CARD to confirm.
All data on the SD card will be erased, and the card will be formatted for use on your phone.

Turn your phone on and off
The instructions below explain how to turn your phone on and off.
Turn your phone on
- Press and hold the Power key until the device turns on.
Turn your phone off
-
Press and hold the Power key along with the Volume up key.
-
Tap Power off.
Restart your phone
-
Press and hold the Power key along with the Volume up key.
-
Tap Restart.

Use the touch screen
Your phone's touch screen lets you control actions through a variety of touch gestures.

Tap or touch
Tap or touch with your finger to type characters into the on-screen keyboard, select and open applications and settings, or press on-screen buttons.
Touch and hold
Touch and hold an item to view available options (for example, a contact or link in a Web page), or to move icons.
Swipe or slide
Quickly drag your finger vertically or horizontally across the screen to swipe or slide.
Drag
Touch and hold your finger with slight pressure, then move your finger slowly across the screen to drag. While dragging, do not release your finger until you have reached the target position.
natural_image
Two smartphones with overlapping screens and a blue arrow indicating rotation (no text or symbols)Rotate
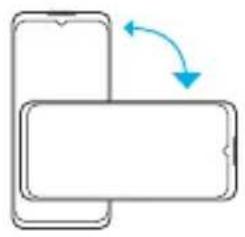
Rotate the phone sideways to automatically change the screen orientation from portrait to landscape. When entering text, you can turn the phone sideways to bring up a bigger keyboard. See "Touch screen keyboards" on page 37 for more details.
Note: To activate Auto-rotate mode, swipe up from Home screen to access Apps and tap Settings > Display > Advanced > Auto-rotate screen, and slide the switch to the On position. You can also activate it by dragging the Status bar down twice and tapping Auto-rotate .

natural_image
Hand icon demonstrating a finger press with two circular buttons, pointing at an upward arrow (no text or symbols)Pinch and spread
Use your thumb and forefinger in a pinching motion on your screen to zoom out, or spread them to zoom in when viewing a picture or a web page. (Move fingers inward to zoom out and outward to zoom in.)
Complete the setup screens
Once your service has been activated, you will need to run Setup. The Setup Wizard will appear to guide you through the basic settings on your device. You will be prompted to select the language you want to use, set up your Wi-Fi connection, enter your name, set a screen lock method, sign in to your Google™ account, select location services, and more.
Follow the remaining instructions to finish your phone setup.

Basic operations
The following topics outline basic features and operations of your phone.
Home screen and Apps list
Most of your phone's operations originate from the Home screen or the Apps (applications) list.
-
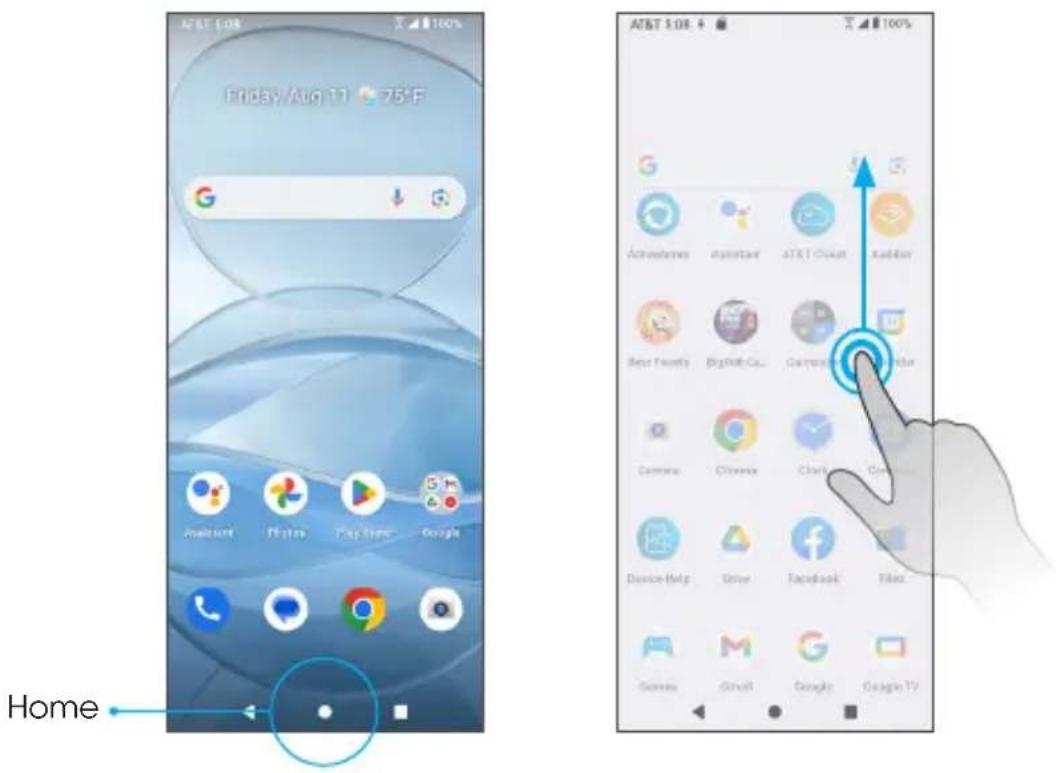
From any screen, press the Home button ● to display the Home screen.
-
From the Home screen, swipe up to access the Apps list.
For information about using the Home screen, see "Home screen basics" on page 45.
Select options and navigate screens
Tap icons, on-screen buttons, and other items to open or activate the assigned function.
- Tap the Back button ◀ to return to the previous screen.
Recent applications
View your recently used applications by tapping the Recent Apps button .
Switch between recently opened apps
You can easily switch between the apps you've recently opened.
Tap the Recent Apps button to see your recently opened apps.

-
To close an app, swipe it up.
-
To close all of the apps and clear the list, tap CLEAR ALL.
You can tap the Recent Apps button ■ twice to quickly switch between the two most recently used apps.
Phone settings menu
You can customize your phone's settings and options in the Settings menu. There are two ways to access the Settings menu:
• From the Home screen, swipe up to access Apps and tap Settings
- From any screen, swipe the Status bar down twice and tap Settings
For more information, see "Basic settings" on page 136.

Portrait and landscape screen orientation
The default orientation for your phone's screen is portrait (vertical), but many apps will change to landscape orientation (horizontal or widescreen) when the phone is rotated sideways.


Note: Not all screens can be used in landscape orientation.
Turn screen rotation on or off
- Swipe the Status bar down twice and tap Auto-rotate to turn it on or off.
- You can also set the rotation option from the Settings menu. From the Home screen, swipe up to access Apps and tap Settings . Tap
Display > Advanced > Auto-rotate screen and slide the switch to the On or Off position to activate or deactivate screen rotation.
Capture screenshots
There are two ways to capture a screenshot:
- Press and hold the Power key and Volume down key at the same time to capture a screenshot of the current screen.
Your screenshots will be stored in the Screenshots folder in the Gallery app. From the Home screen, tap Photos > Library > Screenshots.
Applications
The following topics describe how to access the Apps list and launch applications on your phone.
Launch apps
All installed apps can be accessed and launched from the Apps list.
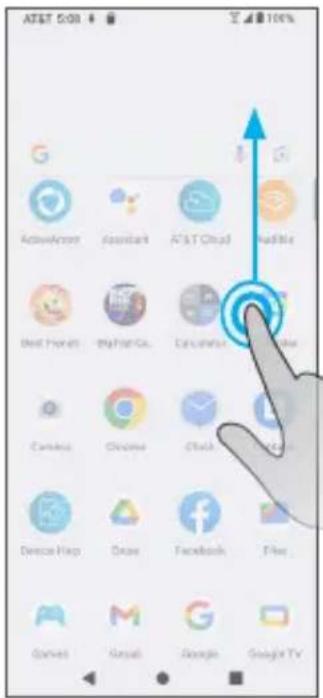
-
From the Home screen, swipe up to access the Apps list.
-
Tap an app icon to launch the app.
Work with apps
Group app folders
- From the Home screen, touch a group app folder to open and tap an app shortcut to launch the app.
- To add more apps to the folder, drag each app over to the folder. See "Add App folders to the Home screen" on page 56.


Control app permissions
The first time you open an app, you'll be asked to grant permissions to access certain data or features. This ensures that you have full control of which apps have authorized access.
If you don't want to grant access for an app, choose DENY. If you choose DENY in a trusted app, you may not be able to use the app or access all the functions. To modify permission settings, follow the steps below:
-
From the Home screen, swipe up to access Apps and tap Settings
-
Tap Apps > Special app access.
-
Select a category and tap the app you want to modify permissions for.
-
Slide the switch to the On or Off position to allow or deny app notification access.
Note: These options may vary.
Set default apps
You can choose default apps for web browsing, text messaging, and more.
-
From the Home screen, swipe up to access Apps and tap Settings
-
Tap Apps > Default apps.
-
Choose your default web browser, phone app, messaging app, and more.
Choose default apps
Some actions can be performed with more than one app. When performing an action for the first time, you may be prompted to choose an app. You can choose to use an app only this time by tapping JUST ONCE, or tap ALWAYS to set that app as the default.
You can change the default app at any time in the Settings menu.
-
From the Home screen, swipe up to access Apps and tap Settings
-
Tap Apps > Default apps.
To change the default app for opening links, continue with the steps below:
-
Tap Apps > Default apps > Opening links.
-
Tap the app you want to set and slide the Open supported links switch to the On position to allow web links to open in the app.

Disable an app
You can disable some default apps which can't be uninstalled to avoid them running in the background and downloading data.
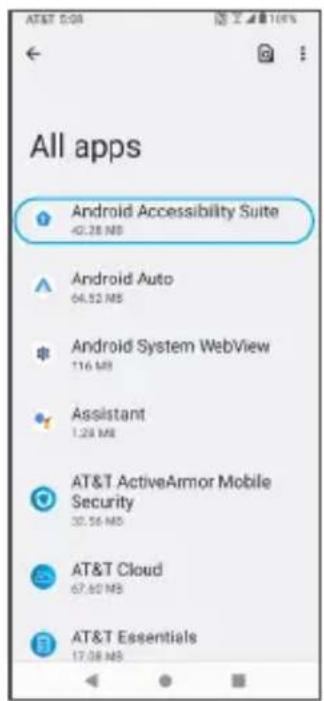
- From the Home screen, swipe up to access Apps, and tap Settings
- Tap Apps > See all apps.
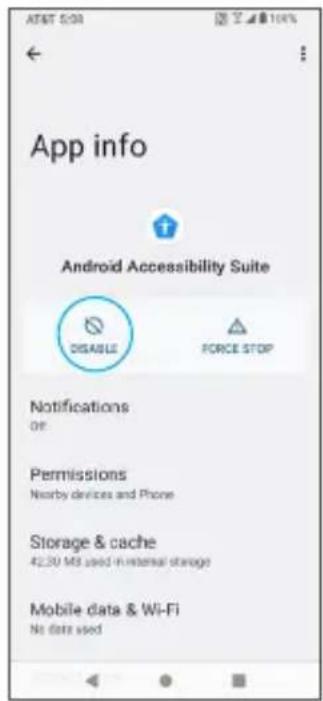
- Tap the app you want to disable to access App info screen.
- Tap DISABLE.

Apps list
The Apps list expands to include any apps you download and install on your phone. The following table outlines the primary apps that have been preinstalled on your phone.
| App Function/Service | ||
 | Assistant | Use voice assistant to trigger apps and devices, ask all kinds of questions, make plans, and carry out a variety of useful tasks. |
 | Calculator | Perform basic and advanced mathematical calculations. |
 | Calendar | Create and manage events, meetings, and appointments, organize your time, and schedule reminders for important events. |
 | Camera Take and share pictures and videos. | |
 | Chrome | Surf the Internet with Google's easy-to-use web browser. |
 | Clock | Set alarms, view time zones around the world, use a stopwatch, set a timer, and use your phone as a desk clock. |
| App Function/Service | ||
 | Contacts Manage | all of your contacts in one place. |
 | Duo | Make free high-definition video calls to your friends and family. |
 | Files | Access all of your documents, pictures, videos, and downloads. |
 | Gmail | Send, receive, and manage your email messages. This app supports email accounts for Gmail, Yahoo®, Hotmail®, and more. |
 | Search for information saved on the phone and within phone applications as well as on the Internet. | |
 | Maps | Determine your location, find directions, browse local businesses and attractions, rate and review places, and more. |
 | Messaging | Send and receive text and multimedia messages. |
| App Function/Service | ||
 | Phone | Place and receive calls, use voicemail, set up and manage contacts, and more. |
 | Photos | Manage your photos and back them up to your Google account. |
 | Play Store | Download new Android apps, books, movies, and music to your phone. |
 | Settings | Adjust options, personalize your phone, view device information, and more. |
 | YouTube | Watch videos or upload your own with the world's largest video-sharing site. |
 | YT Music | Stream and browse playlists, albums, and artists from YouTube Music. |
Phone number
Follow the instructions below to view your phone number.
- From the Home screen, swipe up to access Apps and tap Settings
- Tap About phone .i
- You will see the phone number listed under Phone number.


Phone number
Airplane mode
Airplane mode turns off all functions that emit or receive signals while leaving your phone on so you can use apps that don't require a signal or data.
To turn on Airplane mode
- From the Home screen, swipe up to access Apps and tap Settings
- Tap Network & internet
- Slide the switch to the On position to activate Airplane mode.
You will see the Airplane mode icon in the Status bar.
To turn off Airplane mode
- From the Home screen, swipe up to access Apps and tap Settings
- Tap Network & internet
- Slide the switch to the Off position to deactivate Airplane mode.
Your phone's wireless connection features will be restored.
Tip: You can also access Airplane mode through the Quick Settings menu. Swipe the Status bar down twice to access the Quick Settings menu and tap Airplane mode to enable or disable data transmissions.
Note: If you do not see Airplane mode in the Quick Settings menu, swipe to the right to locate it.
Enter text
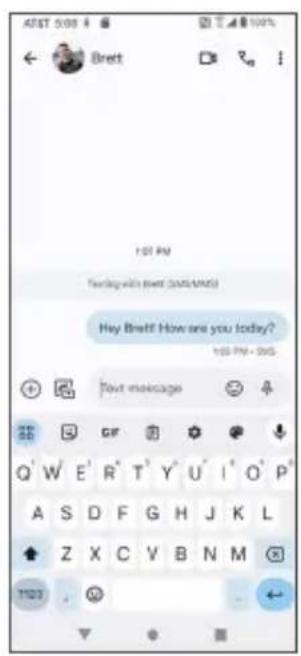
You can type on your phone using one of the available touch screen keyboards or Google Voice Typing.
Touch screen keyboards
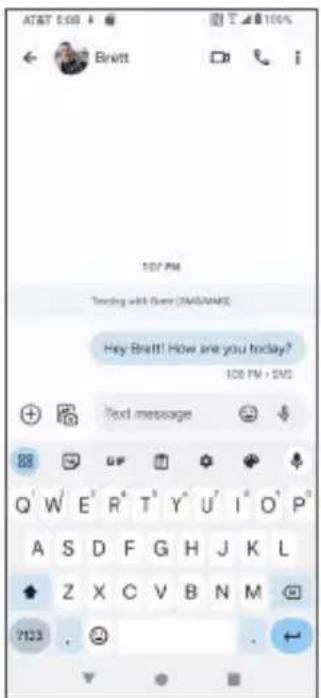
Your phone offers Google touch screen keyboards for entering text. The keyboard appears automatically on-screen when you tap a text entry field, and can be used in either portrait or landscape mode. You can also use Google Voice Typing to enter text using your voice (see "Google Voice Typing" on page 38 for details).
Note: Keyboard layouts and options may change depending on the app currently in use. For example, if you're entering text into a web search, a Search icon may appear instead of an Enter key.


Google keyboard
The Google keyboard offers a traditional QWERTY keyboard setup for entering text by tapping keys (like on a computer), along with options that allow you to enter text faster and more accurately, such as continuous key input, personalized usage dictionaries, and more.
Access Google keyboard settings
- From the Home screen, swipe up to access Apps and tap Settings
- Tap System ⓘ > Languages & input > On-screen keyboard > Gboard.
Google Voice Typing
Google Voice Typing uses Google Voice™ recognition to convert speech to text.
- From Messages, tap ↓ and speak.


Tips for editing text
Your phone has many options to make entering text easier, including copying, cutting, and pasting text, using voice-to-text input, customizing the user dictionary, using predictive text, and more.
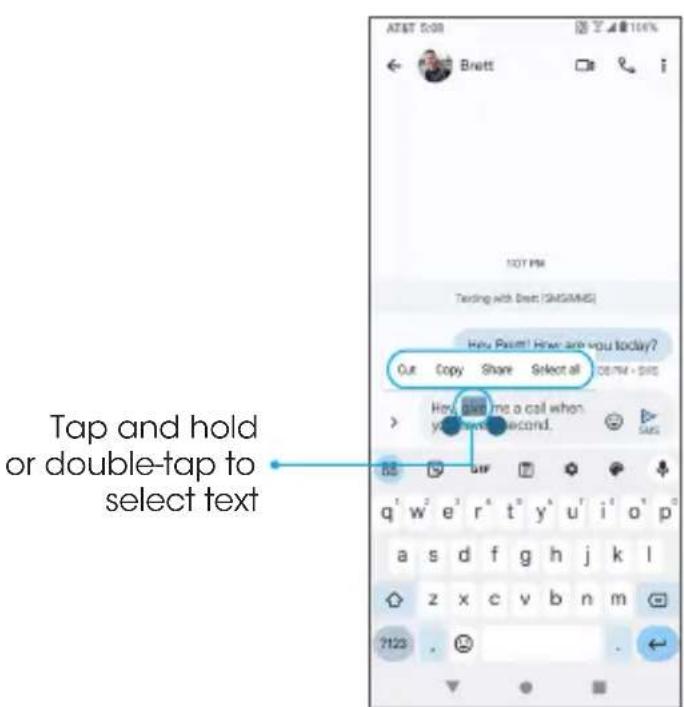
To edit text you have already entered
-
Touch and hold or double-tap the text you would like to edit.
-
Drag the tabs to adjust the highlighted selection.
-
The following options will appear: Cut, Copy, Paste (if you have text copied on the clipboard), Share, and Select all (if there is more than one word available to select).
To insert new text
- Touch where you want to type, the cursor and tab will appear. Drag the tab to move the cursor.
- Tap the tab to view the pop-up menu, then tap Paste to insert any text you have previously copied.
![Tap to insert Brett 107 PM Testing with Brett [MOSUMS] Paste Select all ou today? Hey, give me a call when you have in second. 53 plus q' w' e' r' t' y' u' i' o' p' a s d f g h j k l z x c v b n m 7123 .](/content/2026/05/987135/images/4c45fc98eb13cc3e5441314e5874044e892089f06013181e6de66739782d3ce2.jpg)
Google account
You will need a Google account to access several phone features, such as Gmail, Google Maps, Duo, and Google Play Store. Enter your Google account information to access Google apps. These apps sync between your phone and your online Google account.
Create a Google account
If you do not already have a Google account, you can create one online or using your phone.
Note: You can also create and sign into your Google/Gmail account from the Settings menu.
Create a Google account online
- Using a computer, visit google.com.
- On the main page, click Sign in > Create account > For myself.
- Follow the prompts to set up your account:
a. Enter your first and last name, a desired username/Gmail address, and create and confirm a password.
b. Add a phone number or secondary email for security (optional).
c. Enter basic personal information.
- Tap I agree to accept Google's Privacy and Terms and finish your Google account setup.
Create a Google account using your phone
-
From the Home screen, swipe up to access Apps and tap Settings
-
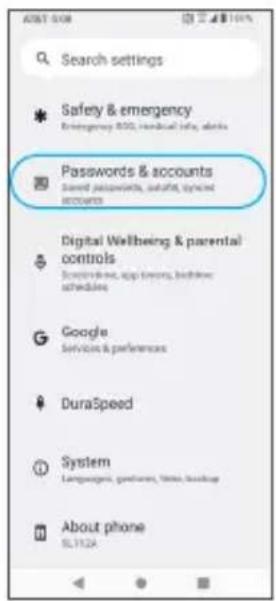
Tap Passwords & accounts > Add account.
-
Tap Google and then tap Create account > For myself.


- Follow the prompts to set up your account. Tap Next to proceed between steps, which may include:
a. Enter your basic information such as first and last name.
b. Enter a desired username/Gmail address.
c. Create and confirm a password.
d. Add a phone number for security, or tap Skip.
e. Review your account info. Tap Next to confirm.
- Tap I agree to accept Google's Privacy and Terms and finish your Google account setup.
Sign in to your Google account
If you have a Google account but have not yet signed in with your phone, follow these instructions to sign in to your Google account.
- From the Home screen, swipe up to access Apps and tap Settings
- Tap Passwords & accounts > Add account > Google.
- Enter your email address or phone number and tap Next.
- Enter your password and tap Next.
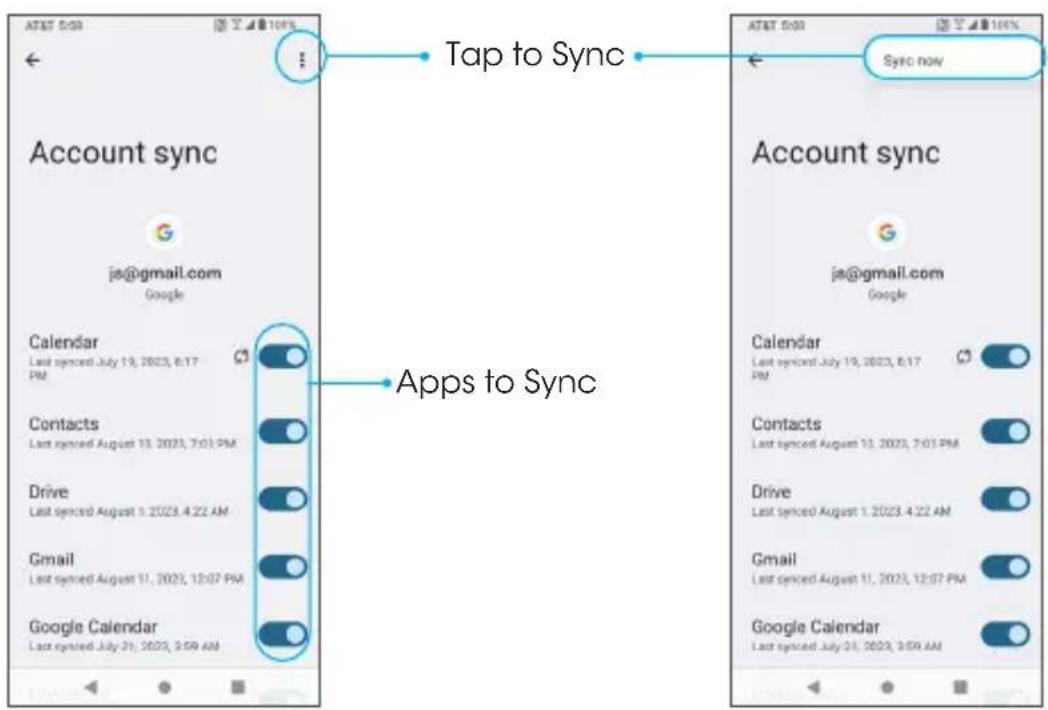
- To sync your account information, tap your account > Account sync and select the apps you would like to sync with your phone. Then tap Menu > Sync now.
Important: Your service provider's policies often do not apply to third-party applications. Third-party applications may access your personal information or require disclosure of your customer information to the third-party application provider. To find out how a third-party application will collect, access, use, or disclose your personal information, check the application provider's policies, which can usually be found on their website. If you aren't comfortable with the third-party application's policies, do not use the application.
Lock and unlock your screen
You can quickly turn your phone screen off when not in use, and unlock it when you need it.
Note: For information on how to adjust the time before the screen turns off, see "Display" on page 166.
Turn the screen off when not in use
To quickly turn the screen off, press the Power key. Pressing the Power key while receiving an incoming call will turn off your phone screen and silence the incoming call.
To save battery power, your phone screen will automatically turn off after being idle for a period of time. You will still be able to receive messages and calls while the phone's screen is off.
Turn the screen on and unlock it
- To turn the screen on, press the Power key.
- Swipe up from the bottom of the screen to unlock it.
If you have set up a screen lock, you will be prompted to unlock your phone. See "Lock screen" on page 167 for details.
The following topics describe how to use and customize your phone's home screen, understand the Status bar, and use the Notification panel.
Home screen basics
The Home screen is the starting point for your phone's applications, functions, and menus. You can customize your Home screen by adding application icons, shortcuts, folders, and more.
Home screen layout
Your Home screen extends beyond the initial screen. Swipe right to display additional screens.
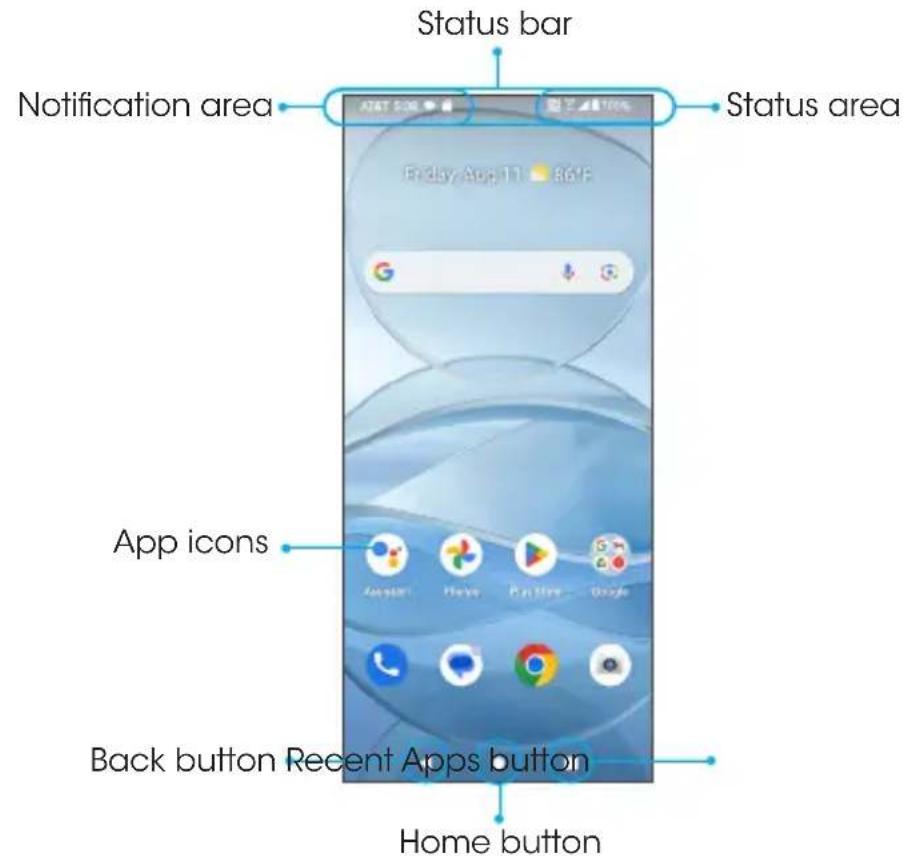
| Item Description | |
| App icons | Add shortcuts to your favorite apps to the Home screen. |
Back button  | Tap to return to the previous screen. |
Home button  to display to display | the main Home screen. |
| Notification area | View notifications for incoming messages, missed calls, application updates, and more. Drag the Status bar down to display the Notification panel. |
Recent Apps button  | • Tap to display a list of recently used apps.• Double tap to swap between your last two used apps.• Tap and scroll to the screen you want to screenshot. Tap Screenshot to capture. |
| Status area | View phone and service status information such as signal strength, battery status, Wi-Fi and data connectivity, ringer status, and time. |
| Status bar | Icons indicate your phone's status (on the right side) and notifications (on the left side). |
Extended home screens
In addition to the main Home screen, your phone features extended Home screens to provide more space for adding icons, and more. Press the Home button to display the main Home screen, then swipe to the right to move from the main screen to an extended screen.
To add a new Home screen, drag an app icon to the right edge of the main screen and release the icon. A new extended screen will be added.
Tip: While on an extended screen, press the Home button ● to return to the main Home screen.

Status bar and Notification panel
Quickly view your phone's status and notifications at the top of the screen.
Status bar
The Status bar at the top of the Home screen provides phone and service status information on the right side and notification alerts on the left. To view the Notification panel or access the Quick Settings menu, drag the Status bar down from the top of the screen.
Main status icons (Right side)
| Icon Status | |
 | 4G LTE data service |
 | Airplane mode enabled |
 | Battery (charging) |
 | Battery (full charge) |
 | Bluetooth® connected |
 | GPS in use |
 | Headphones |
 | Hotspot |
 | Mute on |
 | Network (full signal) |
 | Network (roaming) |
 | No Network |
 | Speakerphone enabled |
 | Vibrate on |
 | Wi-Fi® enabled |
 | Wi-Fi® Calling enabled |
Main notification icons (Left side)
| Icon Notification | |
 | Alarm |
 | Download |
 | Event |
 | Keyboard active |
 | Missed call |
 | New Gmail |
 | New text or MMS message |
 | New voicemail |
 | Warning |
 | Wi-Fi® Calling |
Note: Additional notification icons may appear. All notifications may be accessed through the Notification panel.
Notification panel
Your phone's notifications appear at the left side of the Status bar. Access the full Notification panel by dragging down the Status bar to check notifications, download updates, open messaging apps, access the Quick Settings menu, and more.
Open the Notification panel
- Swipe down on the Status bar.

- To check notifications, tap an item in the list.
Close the Notification panel
Swipe up to close the Notification panel, or tap the Back button
Notification panel layout
The Notification panel gives you access to both notifications and the Quick Settings menu.
To access the Quick Settings menu:
-
Swipe the Status bar down to display the Notification panel.
-
Swipe the Status bar down again to access the full Quick Settings menu.


Customize the Home screen
Learn how to set the wallpaper and add, move, or remove shortcuts and folders from the Home screen.
Operations for rearranging the Home screen
To move app shortcuts icons
From the Home screen, touch and hold an app shortcut, then drag it to the desired location.
To delete app shortcuts icons
From the Home screen, touch and hold an app shortcut, then drag it to Remove at the top of the screen to delete from the Home screen.
To display the Home screen menu
From the Home screen, touch and hold an empty space to display the Home screen menu. Change wallpapers and adjust other Home screen settings from the Home screen menu.
Change the wallpaper
- From the Home screen, touch and hold an empty space, then tap Wallpaper & style on the Home screen menu.
Tip: You can also access the Wallpapers menu from the Settings menu. From the Home screen, swipe up to access Apps and tap Settings > Wallpaper
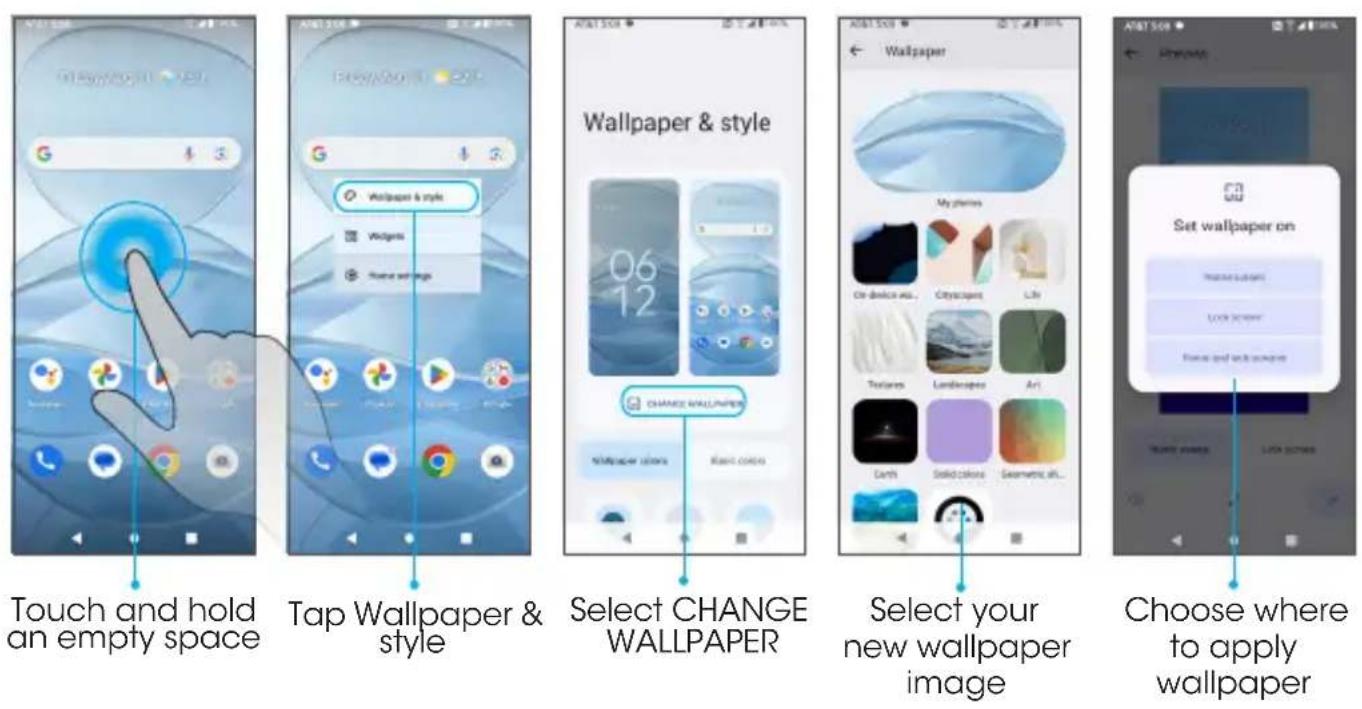
- Choose to select the wallpaper from your My photos or standard wallpapers on the phone.
- Select your new wallpaper, tap on the bottom right and choose to set the wallpaper on the Home screen, Lock screen, or both.
Add shortcuts to the Home screen
Add shortcuts for quick access to your favorite apps from the Home screen.
-
From the Home screen, swipe up to access Apps.
-
Touch and hold an app icon, then drag to move it.
-
Drag the icon to an empty location on one of the Home screens. The shortcut will be added to the Home screen.

Add App folders to the Home screen
You can group Home screen shortcuts into folders for convenient access.
- Drag an app icon and release it over another app icon on the Home screen to create a folder.

- Type a name for the folder, and then tap

- To add more app shortcuts to the folder, touch and hold an app icon and drag it on top of the new folder.
Change folder names
Once you have added folders, you can change the name easily from the folder display.
-
Tap the folder to open it.
-
Tap the folder name, type a new name, and then tap

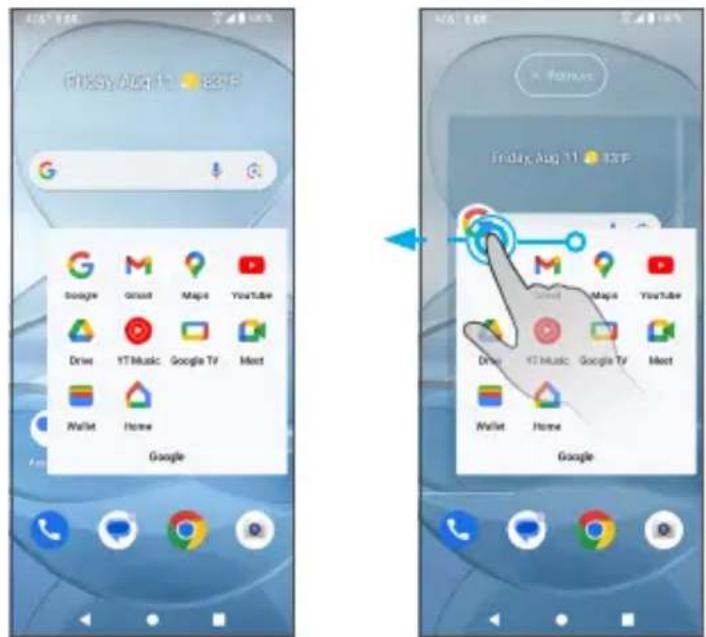
Remove folder
- Touch and hold a folder and drag it to ✗ Remove at the top of the screen.
Remove apps from a folder
-
Tap a folder to open it.
-
Touch and hold an app in the folder and drag it to the Home screen or to Remove at the top of the screen.

natural_image
Side view of a black AT&T smartphone showing front and back views (no text or symbols on body)Making connections
The topics in this section will explain how to help you make connections, from phone calls and maintaining contacts, to text messages, email, Internet, and international services.
Phone
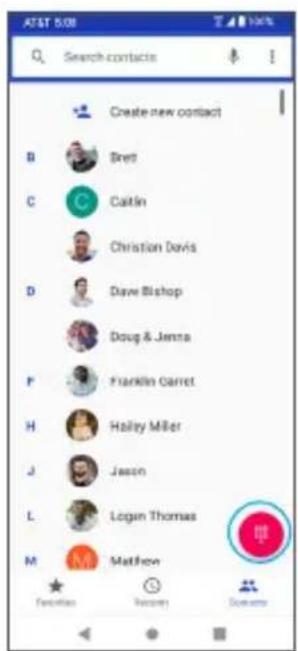
Make a call
From the Home screen, tap Phone

• Make a call by selecting one of the following options:
- Tap the Keypad 🎯, enter a phone number and tap Call 📞.
- Choose a recently called contact in Recents 📊.
- Choose a saved contact in Contacts
-
Choose a favorite contact in Favorites ★.
-
During a call, you can tap 📞 at the bottom of the screen to hang up.
- Calls can also be made from other apps that contain your contact information. Simply tap the phone number to make a call.

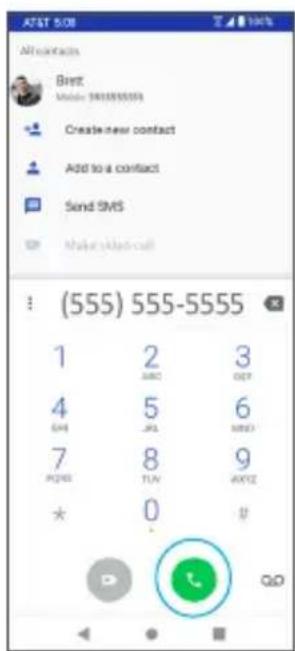
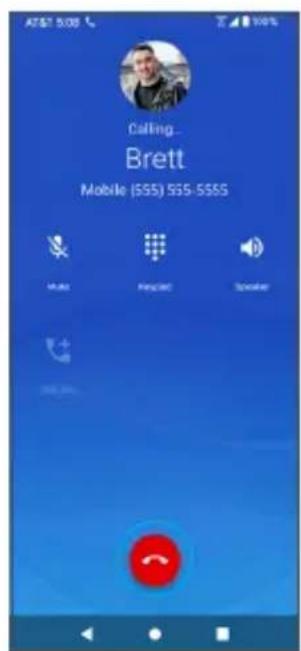
Make a call with Wi-Fi Calling
- From the Home screen, tap Phone
-
If the keypad does not appear on the screen, tap to open it. Enter a phone number in the keypad to make a call.
-
Tap to make the call.
-
During a call, you can tap 📞 at the bottom of the screen to hang up.
- Calls can also be made from other apps that contain your contact information by simply tapping the phone number.


Note: You must have an active Wi-Fi connection to send or receive calls and messages with Wi-Fi Calling. Wi-Fi Calling service must be activated on the device before it can be used.
Receive a call
The Incoming Call screen is displayed when a call is received, along with the caller's numbers and other information you've entered for that contact. When you receive a phone call from someone who is not stored in Contacts, only the default caller ID icon and phone number appear on the Incoming Call screen.

• To answer a call, swipe up.
• To reject a call, swipe down.
- Rejected calls will be sent to voicemail.
- Press any side key to mute the ringer.
• Any missed calls are logged in Recents

Reject a call and send a text message
You can reject an incoming call and automatically send a quick response text message to the caller.
- When a call arrives, hold 📋 and swipe up from the bottom left corner of the screen. The ringtone or vibration will stop, and you will see a list of quick preset responses.

- Tap one of the messages or write your own to send to the caller.
You can edit the preset quick responses from the Call Settings menu. From the Phone app, tap Menu > Settings > Quick responses. Tap Message to edit or create your own quick response.
In-call screen layout and operations
While you're on a call, you will see a number of on-screen options.
In-call screen layout
Tap the on-screen options to activate them during a call.

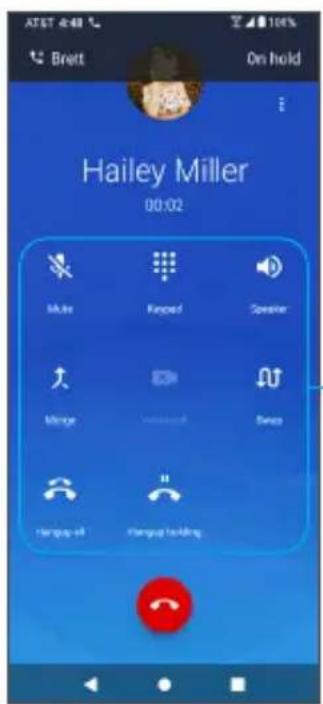
On-screen options
On-screen options
| Item Description | ||
| Overflow Menu | Tap and selectSwitch to RTTto send the caller a Real-time text during a call. | |
| Speaker | Tap to turn the speakerphone on or off.Warning:Because of higher volume levels, do not place the phone near your ear during speakerphone use. | |
| Mute | Mute the microphone during an active call. Tap again to unmute the microphone. | |
 | Keypad | Tap to show the on-screen keypad. Use the keypad to enter additional numbers, for example, an extension or access code. |
 | Hold Tap to hold the current call. | |
| Add call Tap to initiate a 3-way conference call. | ||
 | End call End the current call. | |
 | Merge Join two currently active calls (conference). | |
 | Swap Swap the calls. | |
 | Bluetooth | Route the phone's audio through a connected Bluetooth headset.When the call is routed to a Bluetooth headset, the current call area shows the Bluetooth call icon ( )Note:The Headset button is activated to show the current call is routed to the connected Bluetooth headset.To route the current call back to the phone, tapPhoneto temporarily use the phone. Tap the Bluetooth headset name to route the call back to the connected Bluetooth headset.When Bluetooth or the Bluetooth headset is turned off, the call will be routed through either the receiver or speaker. |
 | Video call Tap | to initiate a two way video call. |
 | Hangup holding | Hang up on calls that are on hold. |
 | Hangup all Hang up all active calls. | |
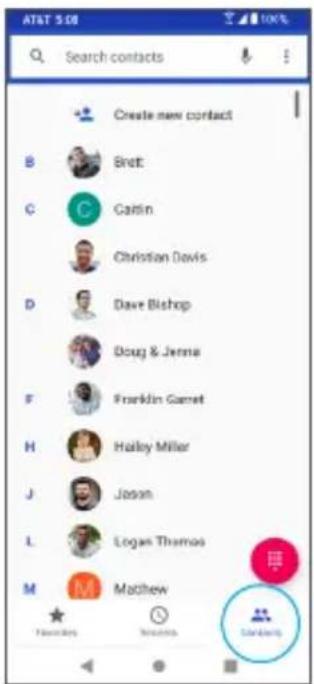
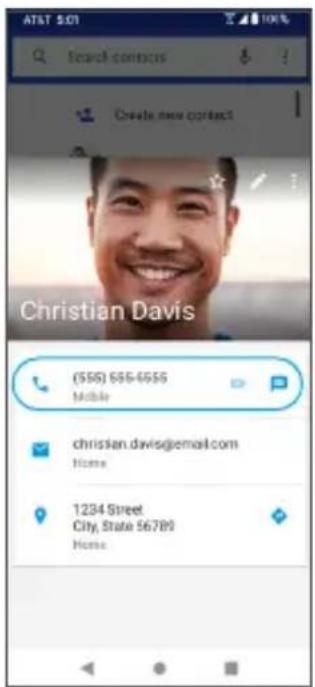
Place a call from Contacts
You can place phone calls directly from your Contacts list.
- From the Home screen, tap Phone

-
Tap Contacts 🎯 to display the Contacts list.
-
Tap a contact.
-
Tap a contact's number to place a call.
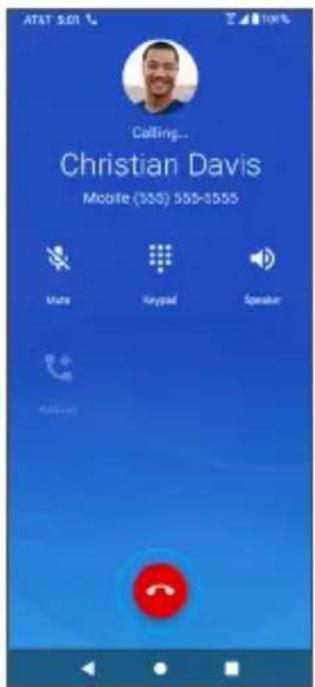
-
To end the call, tap

Call from Recents
The Recents list allows you to view recently received, placed, or missed calls.
- From the Home screen, tap Phone 📞.
- Tap Recents Ⓛ to display the Call Log.
- Tap a recent call to display a list of options.
- Tap to place a call.


- You can tap a contact in the Call Log to display more options.
- Call: Make a call to the selected contact number.
• Video call: Make a video call to the selected contact number. - Send a message: Send a text message to the contact/number.
- Block number: Block the selected number from future contact.
- Call details: View detailed call information.
- You can press and hold a contact in the Call Log to display additional options.
- Copy number: Copy the selected number.
- Edit number before call: Make changes to the selected number before making a call.
- Block number: Block the selected contact number.
- Delete: Delete the call from Recents.


Call settings
Configure your voicemail options and a number of other settings for your calls.
Call settings options
-
From the Home screen, tap Phone
-
Tap Menu > Settings.
-
Configure your phone settings.
Call settings options
| Setting Description | |
| Display options Choose how to sort and display your contacts. | |
| Sounds and vibration | Adjust call and ringtone volume, change your alert tones, activate Do Not Disturb, and more. |
| Quick responses | Edit or create quick response text messages.See "Reject a call and send a text message" on page 62 for more information. |
| Calls | Set Fixed Dialing Numbers, call forwarding, call barring, and more. |
| Blocked numbers | Manage numbers and contacts you have blocked. |
| Voicemail | Set up voicemail, manage notifications, and more. |
| Accessibility | Configure RTT settings, enable or disable hearing aid compatibility, and enable or disable noise reduction. |
| About View more information | on about your phone. |
Contacts
Add a contact
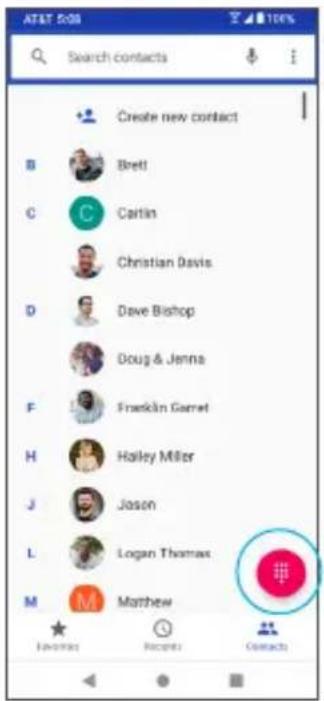
You can add contacts from the Phone app. Enter details such as name, phone numbers, email addresses, mailing addresses, and more.
- From the Home screen, swipe up and tap Contacts B.
- Tap to add a contact.


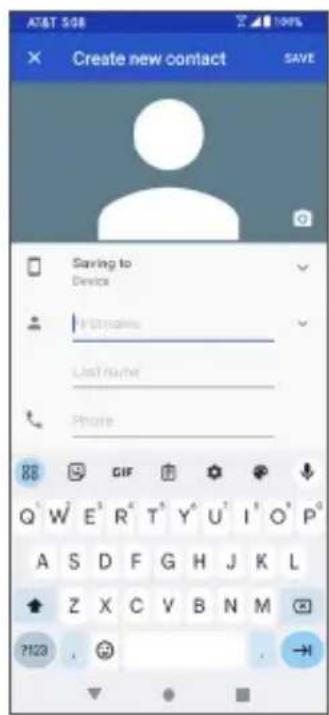
Note: You can also add a new contact from the phone contact screen. From the Home screen, tap Phone > Contacts > Create new contact + at the top of the screen.
-
If you have multiple accounts on your phone, select where you want to save the contact.
-
Select Phone contact to save your contact on your phone only; they will not be synced with your Google account.
- Select an account such as Google to save the contact to that account. These will be synced automatically with your account.

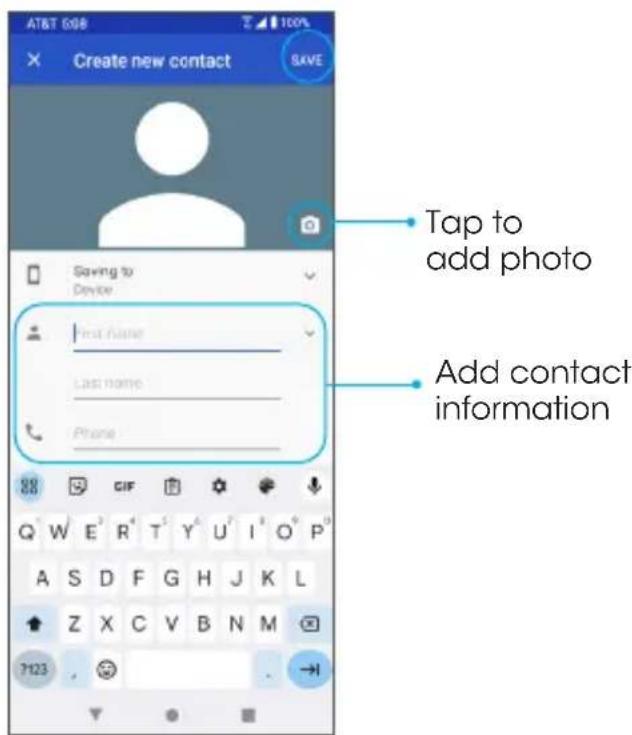
- Use the keyboard to enter information.
Note: To select a type (label) for a phone number, email address or postal address (such as Mobile, Home, Work, etc.), tap the arrow and select the appropriate type.
- When you are finished, tap SAVE to save the contact.
Save a phone number
You can save a phone number to Contacts directly from the phone keypad.
-
From the Home screen, tap Phone > Keypad
-
Enter a phone number and tap Create new contact to add a new contact or tap Add to a contact to add the number to an existing contact.


-
To add the number to an existing contact, tap the contact you want to update and add the number to the desired field. To add a new contact, enter the name and any additional information.
-
Tap SAVE to save.
View contacts
View a contact's details.
- From the Home screen, swipe up and tap Contacts
- Tap a contact to view their details.


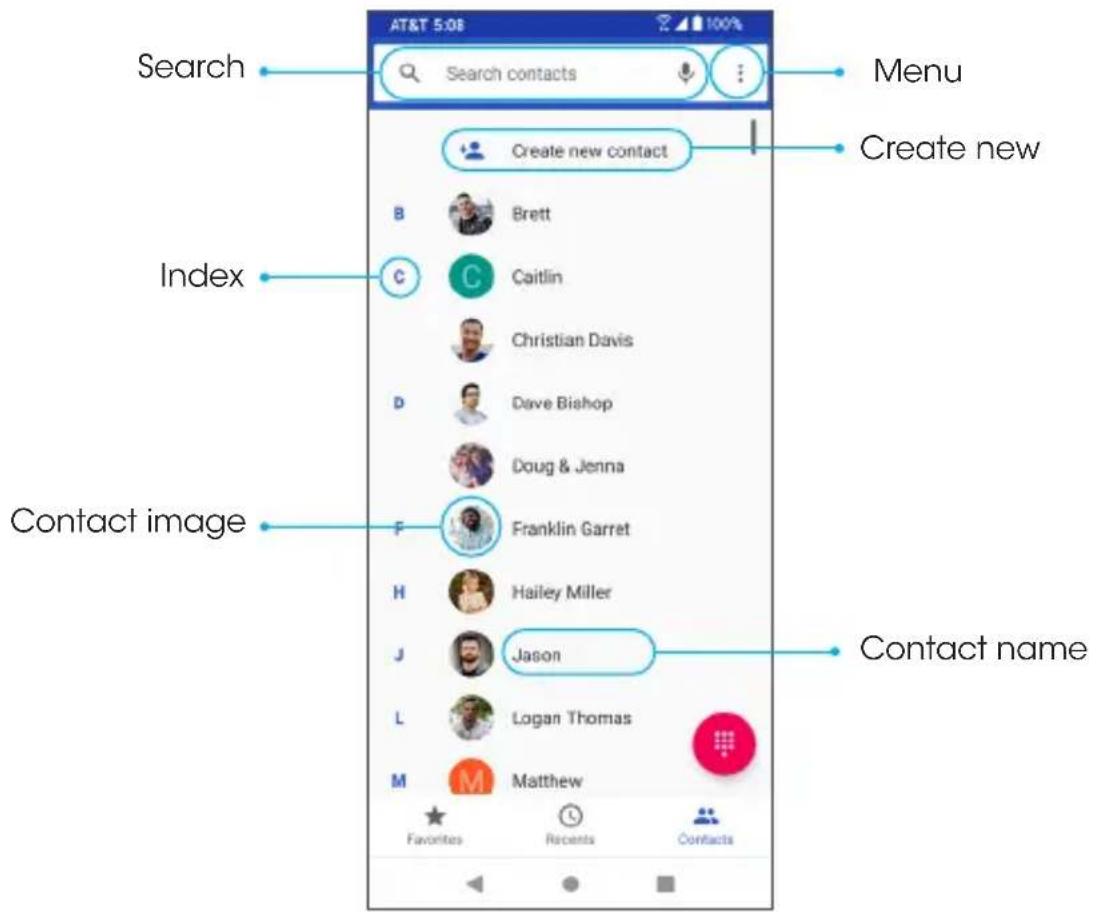
Contacts screen layout
Contacts screen options
| Item Description | |
| Create new contact | Add a new contact. |
| Contact | Tap to show contact's details, place a call, send a message, and more. |
| Index Browse contacts | alphabetically. |
| Menu | View your contacts by labels or accounts, and adjust settings. |
| Search Search contacts. |
Edit a contact
Add or edit a contact's information, assign a photo, customize with a unique ringtone, and more.
-
From the Home screen, swipe up and tap Contacts B.
-
Tap a contact to view their details.
-
Tap Edit .


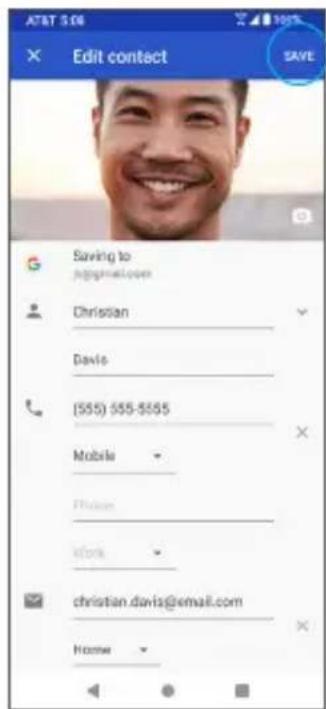
- Tap the field you want to change or add.
- Add or edit the information, and then tap SAVE to save.
Note: To select a category for a phone number, email address, or postal address (such as Mobile, Home, Work, etc.), tap the arrow near the field.
Delete a contact
You can delete a contact from the contacts details page.
- From the Home screen, swipe up and tap Contacts
- Tap a contact to view its details.
- Tap Menu : > Delete.


- Tap DELETE.
Share a contact
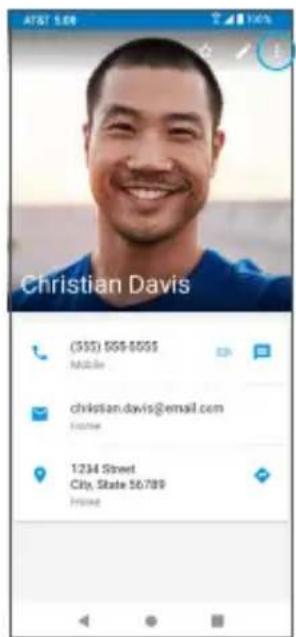
You can quickly share contacts using Bluetooth, Gmail, or text messaging.
- From the Home screen, swipe up and tap Contacts
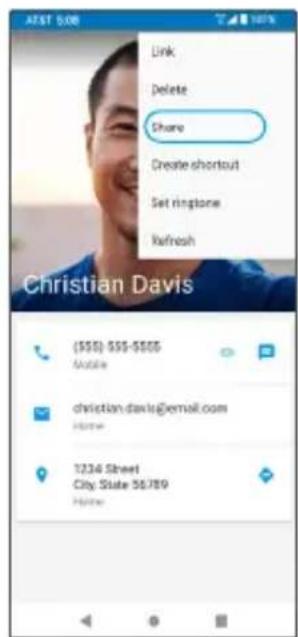
- Tap a contact, tap Menu and tap Share.
- Select how you'd like to share the contact information card (vCard).
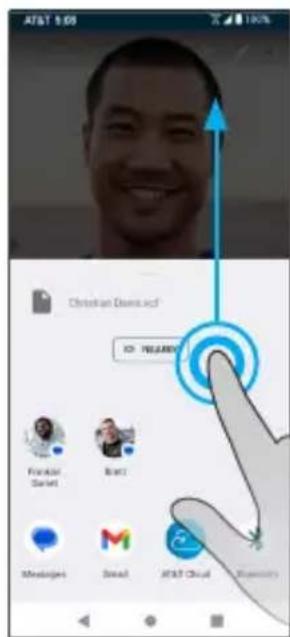

- Gmail: Send the vCard as a Gmail attachment. See "Create and send an email message" on page 87 for more information on sending emails.
- Messages: Send the vCard in a text message. You can send the information in an existing conversation thread, or create a message for a new conversation thread. See "Send a multimedia message (MMS)" on page 81 for more information about sending messages.
- Bluetooth: Send the vCard via Bluetooth. See "Bluetooth" on page 97 for information on pairing and sending via Bluetooth.
- NEARBY: Send the vCard to Android devices near you via Nearby Share. See "Nearby Share" on page 154 for information.
Messages
Send instant messages, media, and more with text and multimedia messages.
Text and multimedia messages
- With text messages (SMS), you can send and receive instant text messages.
- Multimedia messages (MMS) can contain text, photos, audio and video files, contact information cards (vCard), and more.
Note: See your service plan for applicable charges for messaging.
Send a text message (SMS)
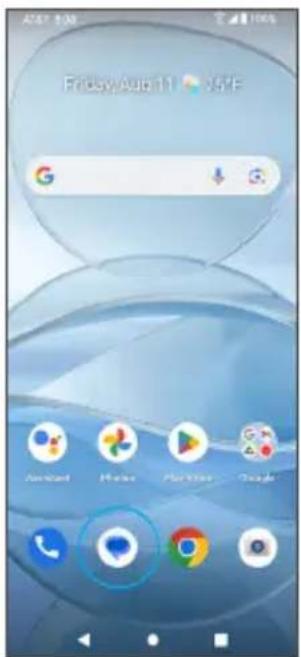
- From the Home screen, tap Messages
- Tap Start chat .
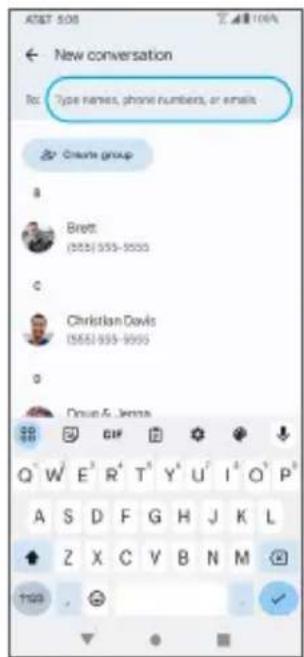
- Enter a contact name or mobile number in the To field.
- Enter phone numbers, contact names, or email addresses directly in the To field. If you're sending the message to several contacts, separate the phone numbers with a comma. As you enter information, any matching phone numbers from your Contacts list are displayed. Tap the matching contact to add them as a recipient.
- Scroll to find and select the contacts to whom you want to send the message. You can also select Contact Groups as recipients.
- Tap the text box and compose your message.

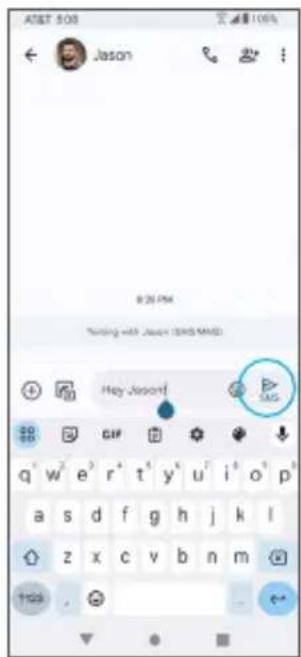
Note: Messages exceeding a limited amount of characters will be delivered as one message but may incur additional charges. A counter appears above Send ▶ to tell you how many characters you have entered and how many characters are left.
- When done, tap Send to send the text message.
Note: Your text message automatically becomes a multimedia message if you enter an email address as the recipient, attach an item, or compose a very long message.
Send a multimedia message (MMS)
- From the Home screen, tap Messaging
- Tap Start chat .


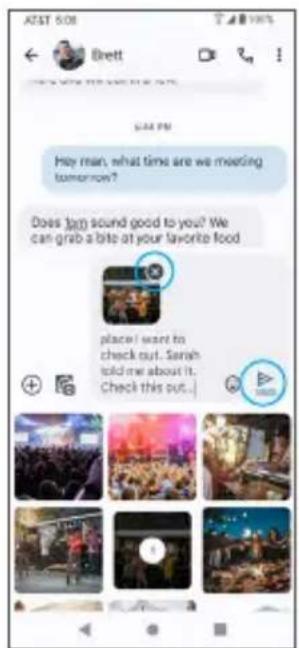

- Fill in one or more recipients. See "Send a text message (SMS)" on page 80 for more information on entering recipients.
- Tap the text box to compose your message.
- Tap Add > to the left side of the text box.
-
Select a multimedia item to attach to your message:
-
Camera or Picture 📄: Take a photo, record a video, or select a saved photo or video.
- File Ⓐ : Select from saved Files, GIFs, Location, Contacts and more.
• Audio ↓ : Record and send a voice recording.
Note: Attachment options may vary.
- After adding an attachment, you can tap to view it, and tap to delete the attachment.
- Tap Send ▶ to send the MMS message.
SMS and MMS options
- From the Home screen, tap Messaging

-
Tap Your Profile 📷 in the top right-hand corner and select Messages settings. You can set the following:
-
RCS chats: View and manage your RCS chat features.
- Turn on RCS chats: Use Wi-Fi or data for messaging when available.
- Send read receipts: Let others know you've read their message.
- Show typing indicators: Let others know when you're typing.
- Automatically resend as text (SMS/MMS): Switch from RCS chats if a message can't send.
- Auto-download files you receive over mobile data: Files up to 10MB will automatically download.
- Auto-download mobile data files: Files received over mobile data will automatically download up to 105 MB.
- Auto-download files received while roaming: Files received while roaming will automatically download. Charges may apply.
- Notifications: Enable or disable notification icons when messages are received. Under the Notifications category you can set the following:
- All Messaging notifications: View your messaging notifications setting.
- Bubbles: Allow bubbles to appear over apps with new notifications. Choose All conversations can bubble, Selected conversations can bubble, or Nothing can bubble.
- All "Default settings" notifications: Enable or disable all default notifications.
- Incoming messages: Enable or disable sound or vibration alerts on your device by toggling between Default or Silent.
-
Background tasks: Enable or disable background tasks.
-
Other notifications: Enable or disable sound or vibration alerts for other notifications by toggling between Default or Silent.
-
Allow notification dot: Enable or disable alert notification dots.
-
Bubbles: Allow bubbles to appear over apps with new notifications. Choose All conversations can bubble, Selected conversations can bubble, or Nothing can bubble.
- Send photos faster: Resolution is reduced for faster sending.
- Hear outgoing and incoming message sounds: Enable or disable outgoing message sounds.
- Pinch to zoom conversation text: Enable or disable the ability to zoom conversation text.
- Message organization: View messages by category.
- Your current country: Set your current country or choose Automatically detect.
- Suggestions: Smart Reply, suggested actions & more.
- Automatic previews: Google scans select information like places or links from your chat history without identifying you to create all previews and identify harmful content. Choose to Show all previews, Show only web link previews, or Only download data on Wi-Fi.
- Spam protection: Enable or disable spam protection.
- Swipe actions: Choose Archive Swipe right or Archive Swipe left.
- Advanced: View and manage advanced settings.
- Group messaging: Choose to send a SMS reply to all recipients and receive individual replies (mass text) or send a MMS reply to all recipients (group MMS).
- Auto-download MMS: Enable or disable the ability to automatically retrieve and download incoming MMS messages.
- Use simple characters: Enable or disable the conversion of special characters in your SMS messages.
- Show iPhone reactions as emoji: Enable or disable iPhone react emoji.
- Wireless emergency alerts: View current and past emergency alerts.
- SIM card messages: View SIM card messages.
- Phone number: View your phone number.
- SMSC: View your SMSC number.
- Help improve Messages: Allow smart features to learn over time. Your conversations stay on your device while privacy-preserving technology combines information from you and many other participants. This lets Google improve Messages features for everyone.
- About, terms & privacy: View your Privacy Policy and Terms of Service.
Messages menu options
-
From the Home screen, tap Messaging
-
Tap a message and tap Menu ≡ in the top left to access the following:
-
Starred: View and manage starred messages. To star a message, open the Messages app. Open the conversation that has the message you want to star. Tap and hold the message you want to star. Tap the star symbol in the top right.
- Archived: View all archived messages. To archive a chat, open the Messages app. Tap and hold the conversation you want to archive. Tap the archive symbol in the top right.
-
Spam & blocked: View and manage spam and blocked messages. To block and report a number as spam, open the Messages app. Tap and hold the conversation you want to block and report. Tap the block symbol in the top right. Check the box next to Report spam and tap OK.
-
Device pairing: Send and receive messages on another device by pairing your device with your phone.
- Choose theme: Choose the visual appearance of your Messages app screen.
- Mark all as read: Tap to mark all unread messages in your inbox as read.
Text messages menu options
-
From the Home screen, tap Messaging
-
Tap a message and tap Menu in the top right to access the following:
-
Add people: Add additional contacts to the chat.
• Details: View details of the chat. -
Notifications: View chat notifications.
- Block & report spam: Block a number from further contact and report it as spam.
-
Add people: Add additional contacts to the chat.
-
Starred: View and manage starred messages.
- Archive: Archive the chat.
- Delete: Delete the chat.
• Show subject field: View and populate a subject line in messages. - Help & feedback: View popular help resources and search for help.
Gmail
Use Gmail to send, receive, and manage your email messages. Before using Gmail, you must sign into your Google account on your phone. See "Google account" on page 41 for details on signing in or creating an account.
Note: You can use the Gmail app to manage email for other accounts, such as Yahoo!, Hotmail, Outlook, and more.
Create and send an email message
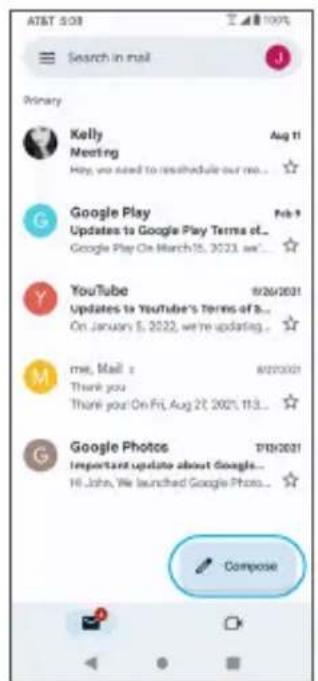
- From the Home screen, tap the Google folder > Gmail
Tip: You can also access Gmail by swiping up on the Home screen. - From the inbox, tap to compose a new email message.
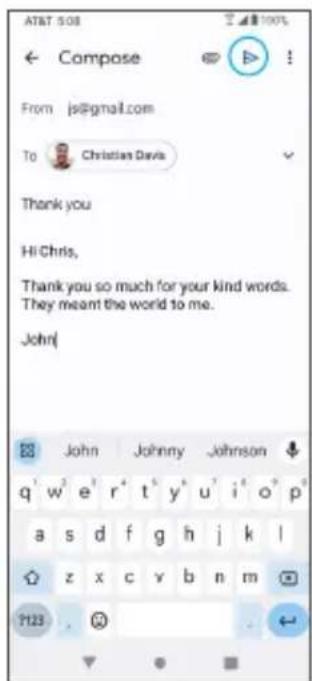
- Enter the message recipient(s), subject, and message, and then tap Send ▶

Email composition options


- Add Cc/Bcc recipients: In the mail composition window, tap √ in the To bar to add Cc/Bcc recipients.
- Attach photos or videos: In the mail composition window, tap > Attach file. Tap the file you want to attach.
- Save as a draft (Send later): While composing your message, tap Menu > Save draft, or press the Back button to save as a draft.
- Delete mail being composed: While composing your message, tap Menu >Discard.
Note: View your drafts and sent mail from the inbox by tapping ≡ > Drafts or > Sent.
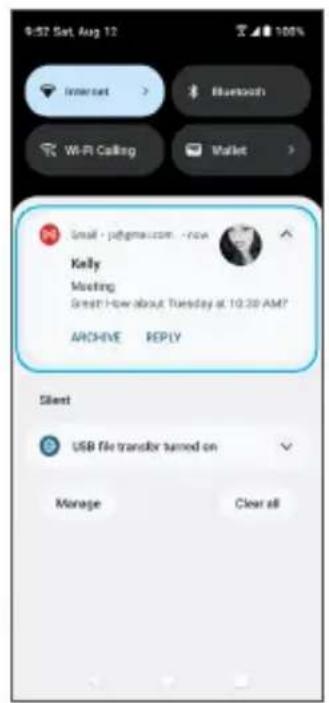
Open an email message from a notification
When a new email is received, you will see in the Status bar.
- Swipe the Status bar down to display the Notification panel.
- Tap the new message from the Notification panel.
If you have two or more new email messages, tapping the notification will open the Gmail app.

Email settings
You can access settings for the Gmail app and for your individual email accounts from the Gmail Settings menu.
- From the Home screen, swipe up to access Apps and tap Gmail M.
- Tap Menu ≡ > Settings.
- Tap General settings to access settings for all accounts, or tap an account name to configure settings for a specific email account.


Note: Available settings are subject to change.
Internet and social networking
The following topics describe how to connect to and use the Internet on your phone and how to access popular social networking sites such as Facebook, Duo, and more.
Chrome browser
From the Home screen, tap Chrome to browse the Internet, search for information, and bookmark your favorite web pages for convenient access.
Browsing web pages
- Tap the address field.
- Enter a web address or a keyword to browse for web pages.
Adding a bookmark
- Open the web page you want to bookmark.
- Tap Menu >. ☆
Opening a bookmark
- From the Chrome browser screen, tap Menu > Bookmarks.
- Select the bookmark of the website you want to view.
Customizing browser settings
- From the Chrome browser screen, tap Menu > Settings.
- In the Settings list, you can select options to customize the browser.
Tip: For more information, visit: google.com/intl/en/chrome/browser/mobile/.
Post updates, see what your friends are up to, upload pictures and check-ins, and more with Facebook.
Sign in to your Facebook account or create a new account
- From the Home screen, swipe up to access Apps and tap Facebook
- Enter your mobile number or email and password and tap Log In, or tap Create New Account to join Facebook.
- Once completed, your Facebook account will be added to your phone.
Use Facebook
Once you've either created an account or signed in, you can post and view updates, upload pictures, tag locations, and more, all from your phone.
- From the Home screen, swipe up to access Apps and tap Facebook
- Tap What's on your mind? to type an update. You can also share photos and videos, start a live video, scroll through your Facebook feed, and more.
Connectivity
The following topics address your phone's connectivity options, including USB file transfer, Wi-Fi, Bluetooth, IR connectivity, and more.
Transfer files between your phone and a computer
You can use the USB cable to connect your phone directly to your computer and transfer music, photos, and other content files.
For example, if you have a music album stored on your computer that you want to transfer to your phone, you can attach your phone to the computer and copy the files to the music folder.
File transfer tips
If you want to save data to an SD card on your phone, make sure the SD card is installed and active. For more information, see "Install a SIM/SD Card" on page 17.
Important: Avoid removing the SD card while transferring data.
Data exchange may use the methods outlined in the following table:
| Method Description | |
| File Transfer | Transfer files between your phone and PC such as photos, videos, and music. |
| USB tethering | Share an Internet connection on the phone or tablet with another device. |
| MIDI | Connect your device to a computer or musical device with MIDI (Musical Instrument Digital Interface). |
| PTP Transfer photo and video files between your phone and PC. | |
Transfer files between the phone and a computer
- Connect your phone to your computer using the USB charging cable.

natural_image
Smartphone with open screen displaying app icons including Google, Play Store, and others, connected to a USB cable (no readable text or symbols)- Insert the Type-C end of the cable to the USB charging and accessory port at the bottom of the phone.
-
Insert the other end (Type-A end) of the cable into an available USB port on your computer. You may need to remove the USB cable from the AC adapter to access it.
-
Drag the Status bar down to display the Notification panel. You will see Charging this device via USB.
-
To transfer files from your phone to your computer:
-
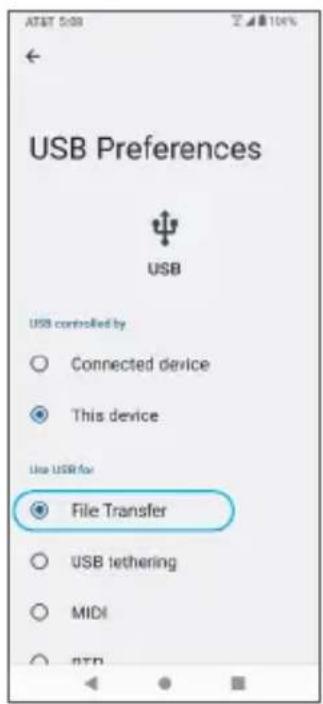
From the Home screen, swipe up to access Apps and tap Settings
- Tap Connected devices > USB.
- Tap File Transfer. You can also select other options available.


- On your computer, navigate to the detected device (such as through the My Computer menu) and open it.
- If available, select a drive (Internal shared storage or SD card).
- Select a folder and copy files from your computer to your phone or from your phone to your computer.
- When completed, disconnect your phone from your computer.
Wi-Fi
Wi-Fi provides wireless Internet access over distances of up to 300 feet. To use your phone's Wi-Fi, you need access to a wireless access point or hotspot.
Turn Wi-Fi on and connect to a wireless network
- From the Home screen, swipe up to access Apps and tap Settings
- Tap Network & internet > Wi-Fi.
- Slide the Wi-Fi switch to the On position.
- Wi-Fi is enabled. Tap Wi-Fi to see the names and security settings of in-range Wi-Fi networks.
- To disable Wi-Fi, slide the Wi-Fi switch to the Off position.
- Tap a Wi-Fi network to connect, enter the password (if applicable), and then tap CONNECT.
Your phone will be connected to the Wi-Fi network. You will see in the status bar. For more information on Wi-Fi, see "Internet" on page 139.
Bluetooth
Bluetooth is a short-range communications technology that allows you to connect wirelessly to a number of Bluetooth devices, such as headsets and hands-free car kits, Bluetooth-enabled handhelds, computers, printers, and wireless phones. Bluetooth communication range is approximately 30 feet.
The following table describes different options and functions available with certain Bluetooth accessories.
| Function Description | |
| Audio output | Wirelessly listen to music, podcasts, etc. |
| Hands-free calls | Call hands-free, using Bluetooth-capable hands-free devices and headsets. |
| Data exchange | Exchange data with Bluetooth devices. |
Enable Bluetooth To enable Bluetooth
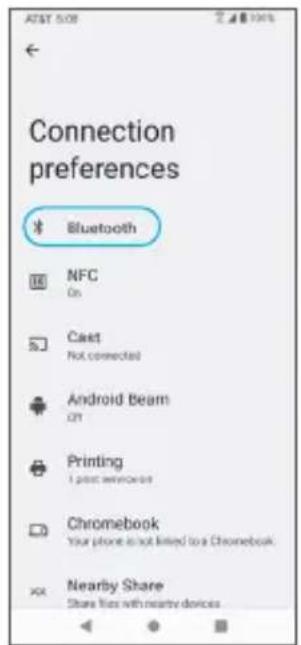
- From the Home screen, swipe up to access Apps and tap Settings
- Tap Connected devices 📄 > Connection preferences > Bluetooth.
-
Slide the Bluetooth switch to the On position.
-
You can also access Bluetooth from Quick Settings menu. Slide the Status bar down twice.
- To disable Bluetooth, slide the Bluetooth switch to the Off position.

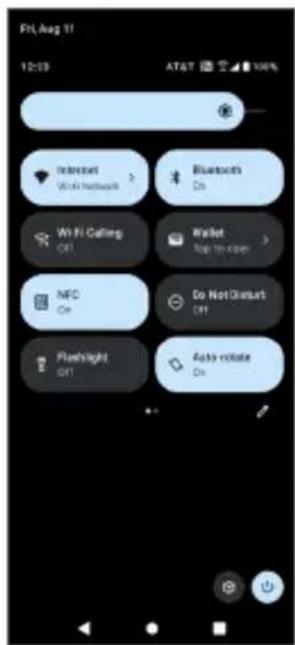
Note: Turning on Airplane Mode disables all network features including calling, messaging, mobile data, Wi-Fi, and Bluetooth. To continue to use Wi-Fi and Bluetooth, turn them on in Settings or in the notification panel.
Tip: Turn off Bluetooth when not in use to conserve battery power.
Pair Bluetooth devices
To pair Bluetooth devices
-
From the Home screen, swipe up to access Apps and tap Settings
-
Tap Connected devices 0 > Pair new device.
• Nearby devices will appear under Available devices.
- If a target device is not detected, ensure that the device is powered on and is discoverable, then tap Refresh to search again.


- Tap a device under Available devices and follow the on-screen instructions to pair with the device.
- Methods to accept a Bluetooth connection differ depending on the devices being used.
To forget a paired device
-
From the Home screen, swipe up to access Apps and tap Settings
-
Tap Connected devices [☐].
-
Tap Settings 🎨 next to the device you wish to forget.
-
Tap FORGET > FORGET DEVICE.
- The device will be unpaired from your phone. To reconnect with the device, you will need to pair again.


Connect to a paired Bluetooth device
- From the Home screen, swipe up to access Apps and tap Settings
- Tap Connected devices
- Tap a paired device to connect.

When the device is connected to your phone, the Bluetooth Paired icon will be displayed in the Status bar. You can then use the headset or car kit to listen to music or make and receive phone calls.
Note: Noise may be experienced with wireless calls and hands-free calls. Due to different specifications and features of other Bluetooth-compatible devices, display and operations may be different, and functions such as transfer or exchange may not be possible with all Bluetooth-compatible devices.
Send information via Bluetooth
You can use Bluetooth to transfer files between your phone and another Bluetooth-enabled device, such as a phone or computer. Send photos, videos, calendar events, contacts, and more.
See "Share pictures and videos" on page 115, and "Share a contact" on page 79.
Receive information via Bluetooth
-
When another device attempts to send a file to your phone via Bluetooth, you will see a request to accept the file.
-
Tap ACCEPT to receive the file.
-
When your phone receives a file, you will see a notification. To download the file immediately, drag the Status bar down to display the Notification panel, and then tap the notification. Select the file you wish to open from the Inbound transfers menu.
- Media files and documents are usually opened directly in a compatible app. For example, if you received and opened a photo, it will open in the Photos app.
- For a Calendar file, select the calendar where you want to save the event, and then tap Import. The Calendar is added to your Calendar events. For more information on using the Calendar, see "Calendar" on page 116.
- For a vCard contact file, if there are multiple vCard files on your storage card, you can choose to import one, several, or all of those contacts to your contacts list.
Tip: For more information on Bluetooth see "Bluetooth" on page 149.

natural_image
Exterior view of a modern smartphone displaying the iPad, Google, and other app icons (no readable text or symbols on screen)Apps and entertainment
The topics in this section will explore the features that make your phone so much more than a phone, from the camera and productivity apps to music, entertainment, and more.
Camera and video
You can use the camera or video camera to take and share photos and videos.
Camera overview
The camera's viewfinder screen lets you view your subject and access camera controls and options.

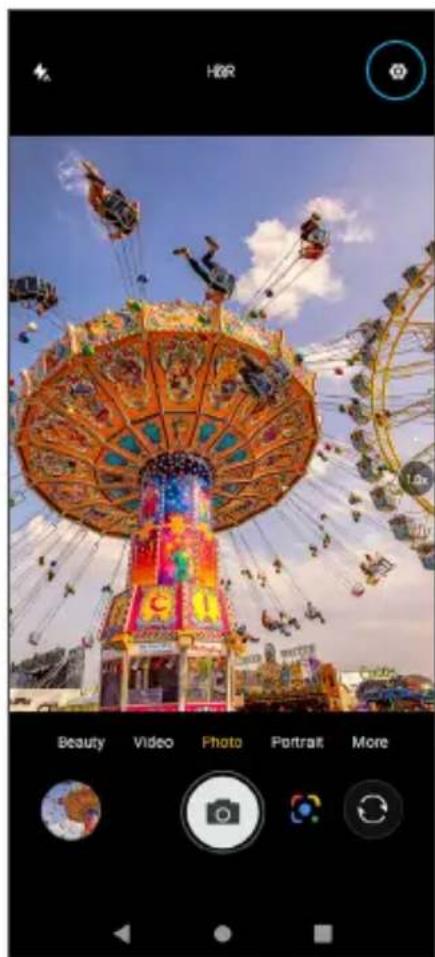
| Icon Function/Service | |
 | Settings Select camera modes and settings options. |
 | Google Lens Search what you see using your camera. |
 | HDR Activate or deactivate High Dynamic Range Boost mode for clearer, more vivid photos. |
 | Flash Activate or deactivate the camera flash. |
 | Photo mode Capture photos and access camera settings. |
 | Video mode Record videos and access video settings. |
 | Beauty mode Smooths imperfections and brightens facial features. |
 | Portrait mode Take a photo that keeps your subject sharp with a blurred background. |
 | Night mode Illuminate your photos. Night mode uses multi-frame processing to combine 8 images into one clear photo. |
| Icon Function/Service | ||
 | Pro mode | Allows you to manually adjust the shutter speed, ISO, white balance, and more. |
 | Time-lapse | Take a series of still images of the same frame at regular intervals over a period of time, then play through the entire sequence rapidly. |
 | Gallery View the last photo or video taken. | |
 | Capture Capture a photo. | |
 | Switch Switch between the front and back cameras. | |
Note: Camera options vary based on mode, camera in use, etc.
Take photos and record videos
The following topics explain how to take photos and record videos with your phone's camera.

Camera cautions
If the lens is dirty: Fingerprints and smudges on the camera lens may result in blurry photos or videos. If this happens, wipe the lens with a soft dry cloth.
Avoid exposure to direct sunlight: Do not to expose the lens to direct sunlight for long periods, as this can affect the color filter and distort the color of photos and videos.
Take a photo
Note: If you have an SD card installed, photos and videos will automatically be saved to the SD card. If no card is installed, photos and videos will be saved to your phone's memory.
- From the Home screen, tap Camera
Tip: You can also access the Camera with one of the following methods:
- From the Home screen, swipe up to access Apps and tap Camera
- Press the Power key twice quickly.
-
From the Lock screen, swipe up from the bottom right corner of the screen.
-
Tap Photo to switch to Photo mode, if necessary.
- Aim the camera at your subject and tap to take the photo.
Record a video
- From the Home screen, tap Camera
Tip: You can also access the camera in one of the methods described under "Take a photo" on page 107.
-
Tap Video to switch to Video mode.
-
Aim the camera at your subject and tap to start recording a video.
- Tap to take a photo while recording.
- Tap to stop recording and save your video.

Camera settings
You can adjust your camera's settings using the icons on the main camera screen and the full camera settings menu.
Set camera functions
- From the Home screen, tap Camera
Tip: You can also access the camera in one of the methods described under "Take a photo" on page 107.
-
Tap Settings to view and/or set the following:
-
Picture size: Choose your picture size ratio.
- Location info: Enable or disable the saving of location information.
- Camera mute: Tap to enable or disable the shutter sound when taking a picture.
- Touch shooting: Tap to enable or disable screen touch to take a photo.
- Self timer: Tap to set a self timer. Choose between a 3, 5, or 10 second delay. Tap again to disable.
- Grid line: Enable or disable the grid line setting.
- ZSD: Tap to set a zero shutter delay. Upon pressing on the shutter, the camera app will take the picture immediately with no delay.
- Volume key feature: Tap to set the function of the volume key. Choose Volume, Shutter, or Zoom.
- Anti flicker: Select the anti flicker setting. Choose auto, 50Hz or 60Hz.
- Storage path: Store photos on your phone's memory or SD card.
- Photo quality: Tap to set the quality of the photos your camera will take. Choose High, Standard, or Low.
- Custom:
- Customize a filter color.
- Customize a camera sound.
- Reset: Tap to restore camera default settings.

View pictures and video using Photos
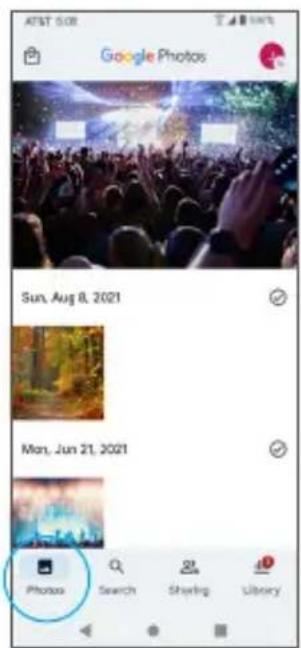
Using the Photos app, you can view photos and watch videos that you've taken, downloaded, or copied onto your storage card or phone memory. For pictures that are on your storage card or phone memory, you can do basic editing such as rotating and cropping. You can also easily assign a photo as your contact photo or wallpaper and share photos with your friends.
View photos and videos
- From the Home screen, tap Photos

Tip: You can also access the Photos app by swiping up on the Home screen to access Apps and tapping Photos

- Tap an image or a video to view.

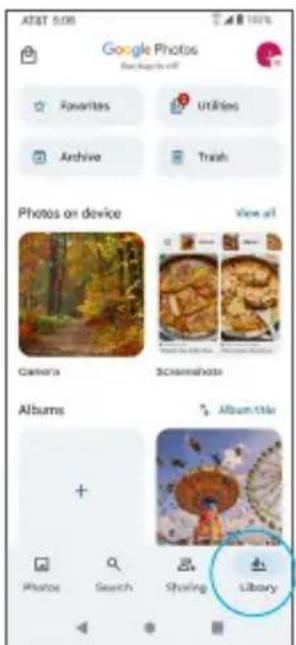
Review photos and videos
After capturing a photo or video, tap the thumbnail image at the bottom right corner of the screen to review it. From there, you can share, edit, or delete the photo or video.
Options while reviewing photos or videos
Zoom in or out on a photo or video: Tap the screen twice or pinch the screen to zoom in or out on a photo or video.
Viewing videos: Use the on-screen controls to play, pause, or stop the video playback.

natural_image
Action photo of a person on a roller coaster with motion blur, captured in a mobile app interface (no readable text or symbols)
natural_image
Child in blue winter jacket swinging on a chain, with motion capture overlay (no text or symbols)
natural_image
Nighttime photo of a Ferris wheel at night with people walking nearby (no visible text or symbols)Edit photos
Rotate and save a photo
- From the Home screen, tap Photos

-
Tap the photo you want to rotate.
-
Tap Edit > Crop > Rotate
-
Tap Save copy. The rotated photo is saved in the album as a copy. The original photo will remain unedited.

natural_image
Action photo of a person in a blue safety vest riding a playground ride, captured with motion blur and no visible text or symbols.

natural_image
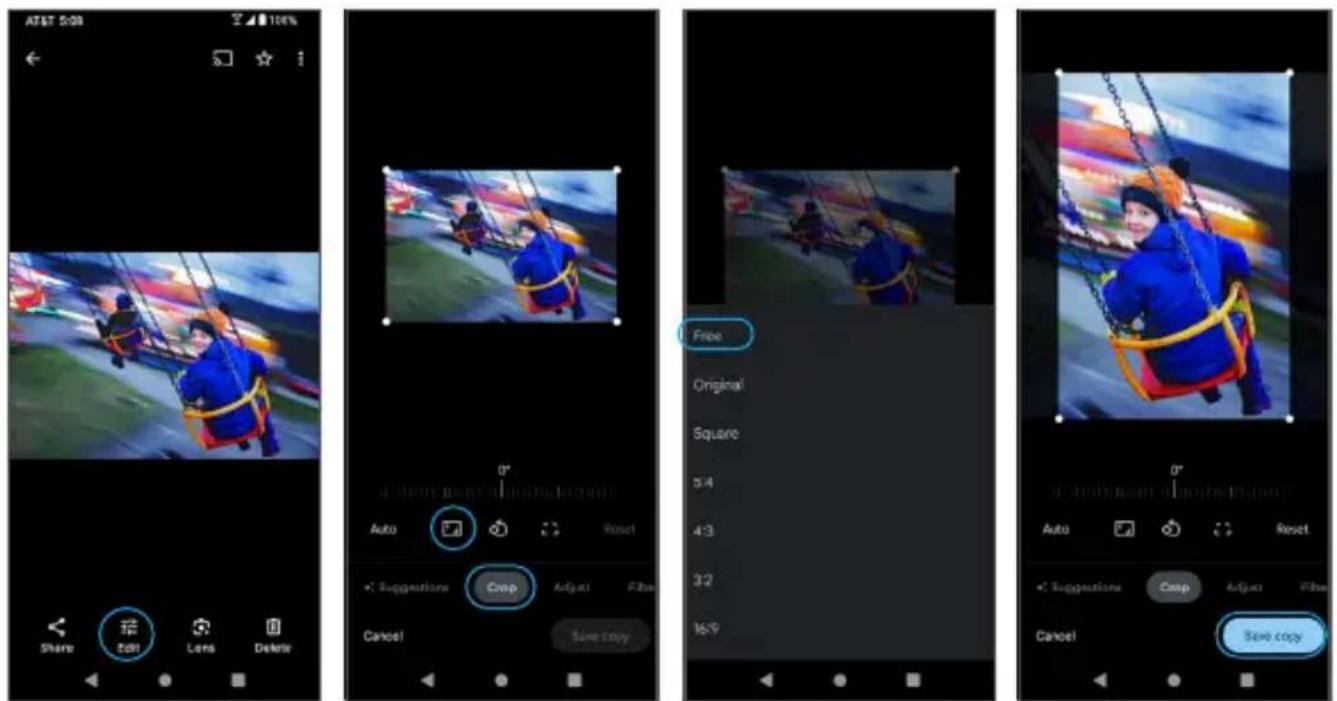
Person in blue safety harness and yellow harness swinging on a roller coaster (no visible text or symbols)Crop a picture
- From the Home screen, tap Photos

-
Tap the photo you want to crop.
-
Tap Edit 节 to access the Edit screen.
-
Tap Crop. A box appears with cropping size ratio options.
-
Choose your size ratio option and a box appears on the photo.
-
To adjust the crop box size, drag the corners inward or outward to resize the crop box.
-
Tap Save copy. The cropped photo is saved in the album as a copy. The original photo will remain unedited.
Share pictures and videos
The Photos app allows you to send photos and videos using email or MMS messages. You can share photos and videos on your social networks, or send them to another phone or your computer via Bluetooth.
- From the Home screen, tap Photos

- Tap the photos or videos you want to share.
Tip: To select multiple items, touch and hold an image to turn on Multi-select mode. Tap to select the items you want to share.
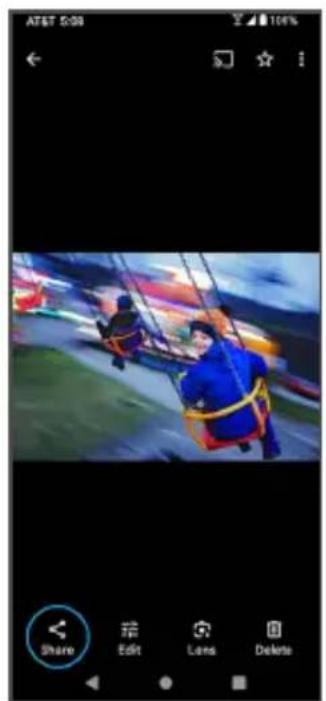
- Tap Share 📁, then select to share using Create link, Nearby Share, Facebook, Bluetooth, Gmail, Messages, or another app. Follow the on-screen prompts to send the photo or video.
natural_image
Action photo of a character on a swing with motion blur, displayed in a mobile app interface (no readable text or symbols)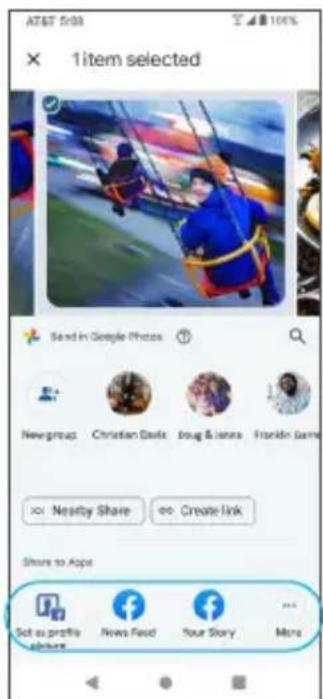
Productivity
Use your phone to stay productive and organized with calendar, navigation, alarm, office, and more productivity apps.
Calendar
Use the Calendar to create and manage events, meetings, and appointments. Your Calendar helps organize your time and reminds you of important events.
In order to sync with your Google calendar, you must sign in to a Google account on your phone. See "Google account" on page 41 for more information on signing in or creating a Google account.
Calendar view
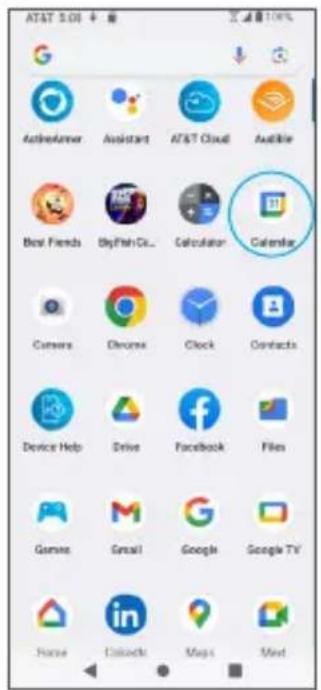
- From the Home screen, swipe up to access Apps and tap Calendar
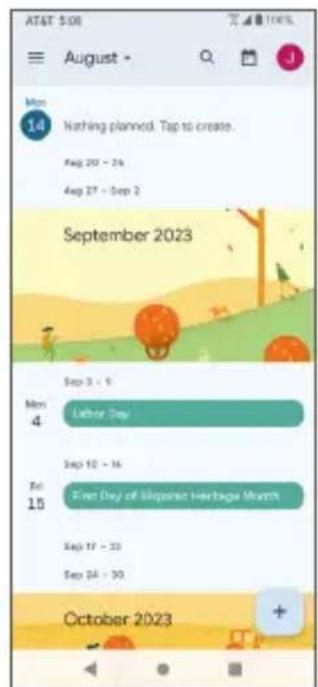
2. Tap Menu

3. Select from one of the following calendar views:
- Schedule: Display all events.
- Day: Display today's schedule by hour. Slide the screen to the left and right to display the previous and the next day, respectively.
• 3 days: Display the previous day, today, and the next day. Slide the screen to the left and right to view the previous and next three days. - Week: Display the current week. Slide the screen to the left and right to view the previous and next week, respectively.
- Month: Display the current month. Slide the screen to the left and right to view the previous and next month, respectively.
Schedule View Day View 3 Day View Week View Month View

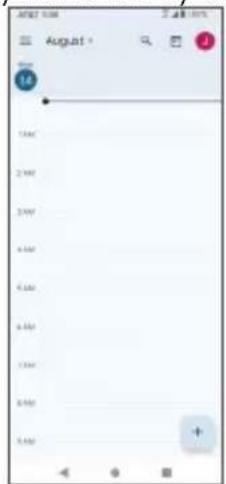


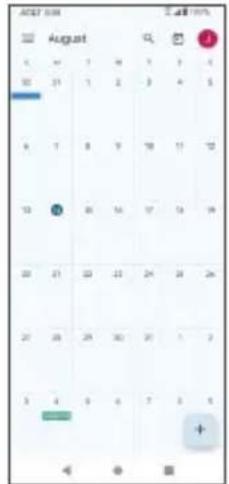
Add an event
- From the Home screen, swipe up to access Apps and tap Calendar
- Tap Add + to add an event.
- Enter event details, and then tap Save.
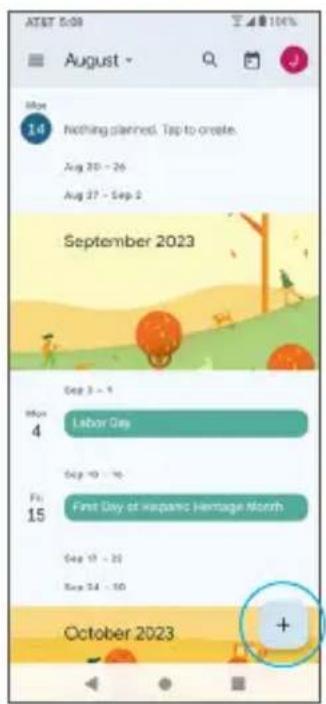

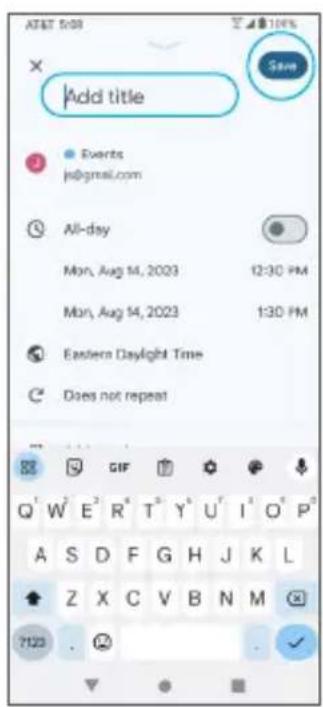
View calendar events
-
From the Home screen, swipe up to access Apps and tap Calendar
-
Tap a date and an event to view the details.


Edit an event
-
From the Home screen, swipe up to access Apps and tap Calendar
-
Tap a date and an event to view the details.
-
Tap Edit to edit the event.
-
When you are done editing, tap Save.
Delete an event
- From the Home screen, swipe up to access Apps and tap Calendar
- Tap a date and an event to view the details.
- Tap Options > Delete to delete the event.
Calendar settings
- From the Home screen, swipe up to access Apps and tap Calendar
- Tap Menu ≡ > Settings > General.
- Tap an option to adjust Calendar settings.
Navigation apps
Your phone offers a number of location-based navigation programs to help you figure out where you are and get you where you're going.
Enable location services on your phone
Before using any location-based services, you must enable your phone's location feature. For information about setting your phone's location options, see "Location" on page 185.
Maps
Use the Google Maps app to determine your location, get directions, browse local businesses and attractions, rate and review places, and more.
Search for destinations
Use Google Maps to locate and map a specific address or destination.
- From the Home screen, swipe up to access Apps and tap Maps

Tip: You can also access the Google Maps app from the Google folder on the Home screen.
- If prompted, follow the on-screen instructions to accept terms of use.
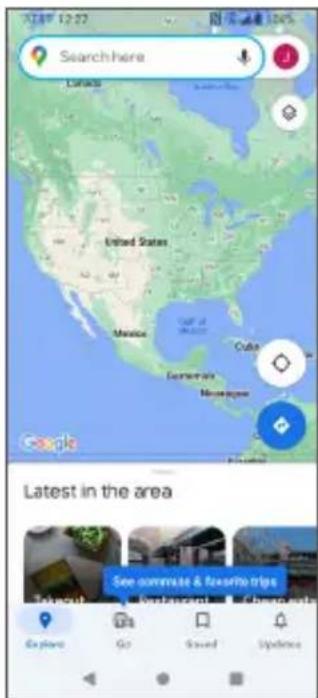
-
Tap Search here.
-
Enter an address, city, facility name, etc., then choose a search result. You will see your location on the map.
Maps operations
- View current location: Tap 🔑 to find your current location on the map.
- Select map types for different views: Tap Menu and select a map view such as traffic, satellite, etc.
- Find a route to your destination: Tap Go 📋, enter your desired start location and destination, tap a method of transportation (car, public transit, or on foot), then tap NAVIGATE IN APP for step-by-step directions to your destination via the Navigation for the Google Maps app.


Google Search
Search for information saved on the phone, in apps, and on the Internet.
Use Google Search
- From the Home screen, tap the Google Search bar.
Tip: You can also access Google Search by swiping up on the Home screen to access Apps and tapping Google 📄, or from within the Google folder.
- Type your search keywords and tap Search . To search by voice, tap Google Voice Search in the search bar and say your search terms.

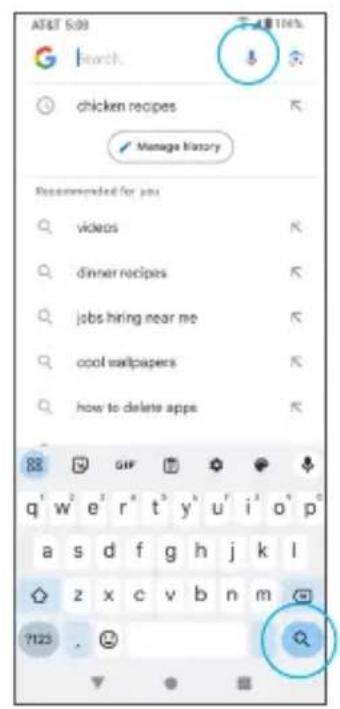
Use Google Voice Search
Tip: To quickly access Google Voice Search from any screen, press and hold Home
- From the Home screen, swipe up to access Apps and tap Google
- Tap Google Voice Search
- Say your search terms and search results will appear.



Calculator
Your phone's convenient built-in calculator lets you perform basic mathematical equations.
- From the Home screen, swipe up to access Apps and tap Calculator
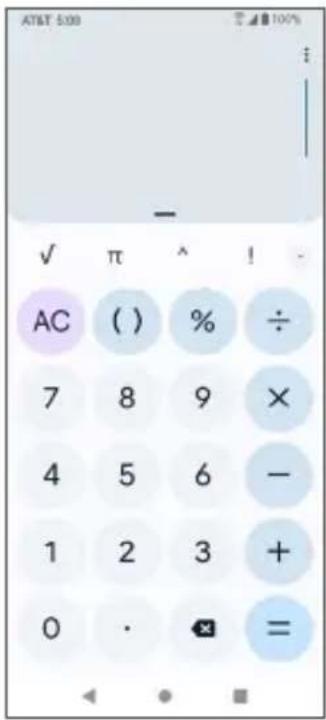
-
Enter the first number.
-
Tap a mathematical function key, then enter the second number.
-
Tap to view the result.
-
Tap to clear the results.
View calculator history

- From the Home screen, swipe up to access Apps and tap Calculator
- Tap Menu: > History, or drag down on the History — bar to view the calculator history.
- To clear the calculator history, tap Menu > History > Menu > Clear.
- To return to the calculator, drag the History — bar back up or tap the Back button .


Clock
The Clock app allows you to set alarms, view different world times, use a stopwatch, set a timer, and use your phone as a desk clock.
Set the date and time manually
Your phone uses the wireless network to automatically receive the current date and time. You can also set the date and time manually.
- From the Home screen, swipe up to access Apps and tap Clock.

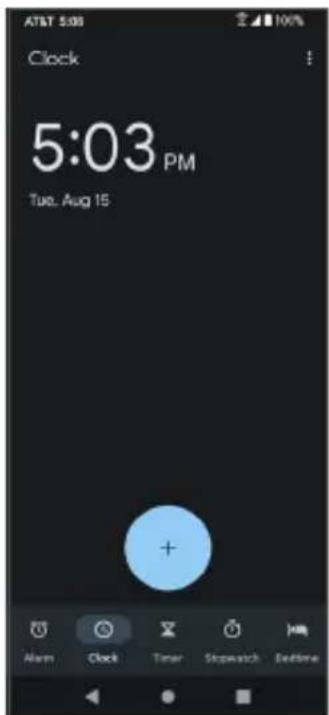
-
Tap Menu > Settings > Change date & time > Automatic time zone and slide the switch to the Off position to disable.
-
Set the date and time manually.
Create a new alarm
- From the Home screen, swipe up to access Apps and tap Clock
- Tap Alarm
- Tap .
- Set the time for the alarm and tap OK. You can also tap to enter the time directly.
- Set more alarm details, if desired.


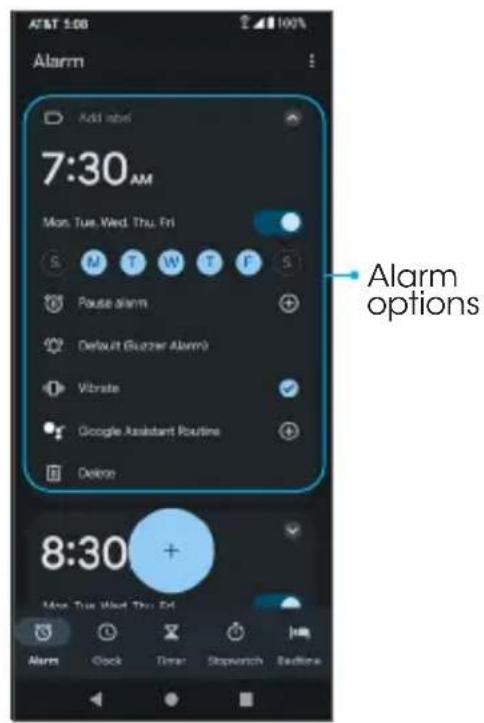
Alarm options
| Feature Description | |
| Add label Enter a name for the alarm. | |
| Repeat Select the days to repeat the alarm. | |
| Alarm sound Select a sound to play for the alarm. | |
| Vibrate Activate alarm vibration. | |
| Google Assistant Routine Add alarm to your Google Assistant Routine. | |
| Delete Delete the current alarm. |
Turn an alarm off
-
To turn an alarm off, tap STOP STOP
-
To snooze the alarm for 10 minutes, tap SNOOZE (SNOOZE).

Delete an alarm
- From the Home screen, swipe up to access Apps and tap Clock
- Tap the alarm you want to delete from the alarm list.
- Tap Delete.
Timer
-
From the Home screen, swipe up to access Apps and tap Clock
-
Tap Timer ☒ to access the Timer screen.
-
Enter the amount of time into the Timer and tap to begin timing.
-
Tap taipause timing.
- Tap to resume timing.
- Tap to reset the timer back to zero.
- Tap to delete the timer.
- Tap to add one minute to the current timer.
-
Tap to add another timer.
-
Swipe up and down to view other active timers.


Stopwatch
-
From the Home screen, swipe up to access Apps and tap Clock
-
Tap Stopwatch to access the Stopwatch screen.
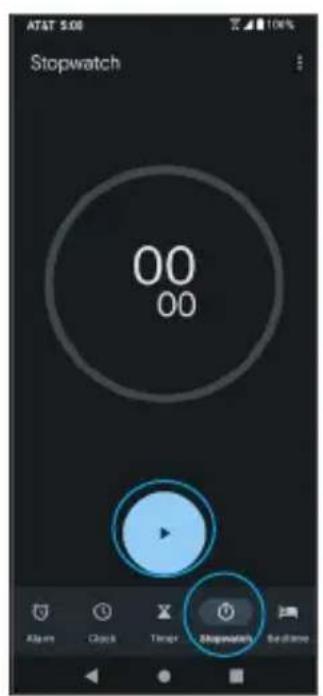


-
Tap to begin the stopwatch.
-
Tap to stop the stopwatch.
- Tap again to resume timing.
- Tap to reset the stopwatch to zero.
- Tap 🔒 to add an additional stopwatch. The original stopwatch time will be stopped and recorded below the new one.
Entertainment and activities
The following topics provide an overview of your phone's entertainment apps.
YouTube
View videos uploaded to YouTube and upload your own videos.
View YouTube videos
Note: You can use the YouTube app to view videos on YouTube even if you aren't signed in to a YouTube account.
- From the Home screen, swipe up to access Apps and tap YouTube
Note: You can also access YouTube from the Google folder on the Home screen.


- If you are prompted to provide confirmation to use the site, follow the on-screen instructions to continue.
-
Browse YouTube channels and tap a video to view.
-
The video will play on your phone screen. Tap the screen to pause or resume play while watching.
Post a video to YouTube
You can post videos to your YouTube account from your phone. Before posting, you must set up a YouTube account and sign in on your phone.
-
From the Home screen, swipe up to access Apps and tap YouTube
-
Tap Record/Post Video ⊕ .
Note: You may be prompted to allow access to your photos, camera, and microphone. Tap ALLOW ACCESS to continue.
- Select a video to upload, record a new video to upload, or stream a live video. Enter a title, description, and tags, and select a privacy setting.
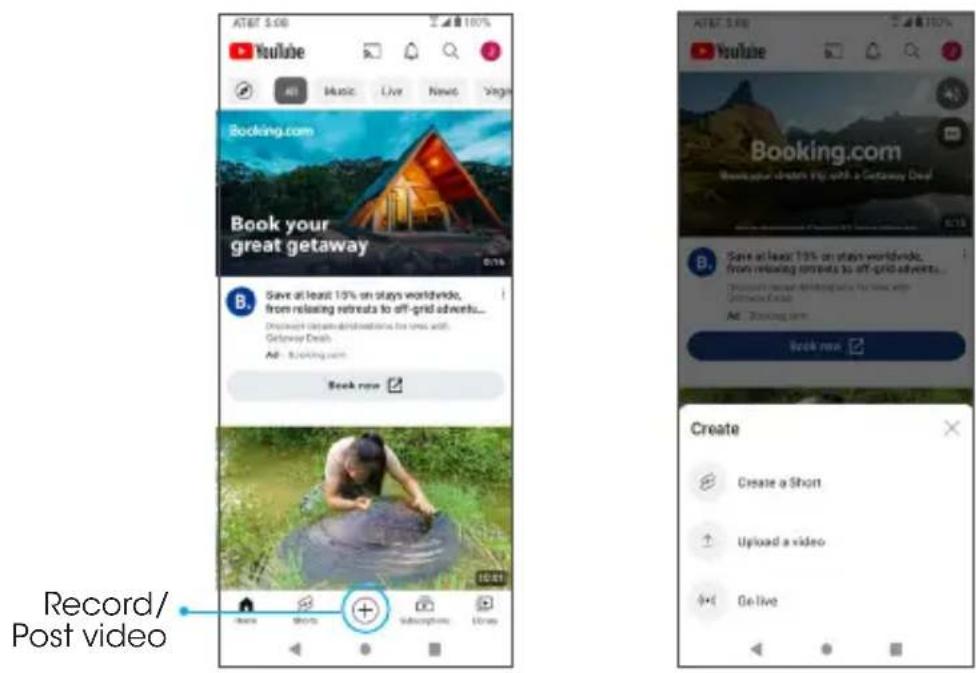

natural_image
Exterior and interior views of a black AT&T mobile phone showing front, back, and side screens (no readable text or symbols on device body)Settings
The topics in this section will cover your phone's settings and options.
Basic settings
From the Home screen, swipe up to access Apps and tap Settings 📋 to access your phone's Settings menu. You can also access the Settings menu from the Status bar. Swipe the Status bar down twice and tap Settings ⚙️. The table below outlines the Settings categories.
| Category Description | ||
 | Network & internet | Set Wi-Fi, mobile network, Hotspot, VPN, airplane mode, and view data usage. |
 | Connected devices | Manage the settings on devices connected by Bluetooth, USB, etc. |
 | Apps View your recently opened apps. | |
 | Notifications | Manage settings for notifications, permissions, etc. |
| [SWTY] | Battery Monitor your phone's battery usage. | |
 | Storage | Manage internal storage on your phone and provide menu choices for an optional SD card (not included). |
 | Sound & vibration Set ringtone, operation tones, etc. | |
| Category Description | |
 Display Set brightness, font size, screen timeout etc. Display Set brightness, font size, screen timeout etc. | |
 Wallpaper style Set and manage wallpaper settings. Wallpaper style Set and manage wallpaper settings. | |
 Accessibility Accessibility | Set accessibility options such as screen magnification, hearing aid compatibility, etc. |
 Security Security | Turn on Find My Device, set screen lock methods, password settings, etc. |
 Privacy Privacy | Manage app permissions, set your account activity and personal data, etc. |
 Location View and manage apps using your location. Location View and manage apps using your location. | |
 Safety & emergency Safety & emergency | Manage your emergency SOS, medical information and alerts. |
 Passwords & accounts Passwords & accounts | Manage saved passwords, autofill, and synced accounts for all your email, social networking, and picture and video sharing accounts. |
 Digital Wellbeing & parental controls Digital Wellbeing & parental controls | Statistics screen usage time, app timers, bedtime schedules, manage notifications, etc. |
 Google Check and set Google service options. Google Check and set Google service options. | |
| Category Description | ||
 | DuraSpeed | Provides continual optimized high speed.Helps boost foreground app speed by restricting background apps. |
 | System | Set language and time, manage reset options, enable backup, check phone updates, and view more important information about your phone. |
 | About phone View information about your device. | |
Network & internet
Manage network and connectivity settings.
Internet
Connect your device to a Wi-Fi network
-
From the Home screen, swipe up to access Apps and tap Settings
-
Tap Network & internet


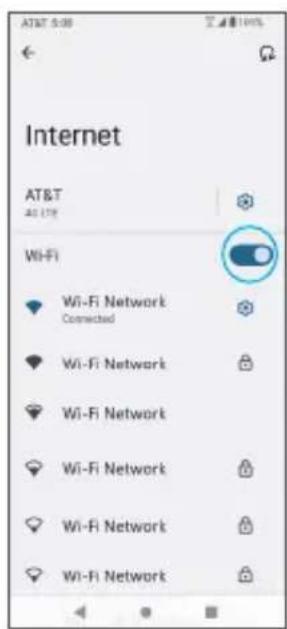
-
Tap Internet.
-
Slide the Wi-Fi switch to the On position to turn it on.
- Your phone will automatically search for available networks and you will be able to see the names and security settings of in-range Wi-Fi networks.
- To disable Wi-Fi, slide the Wi-Fi switch to the Off position.
- Tap the Wi-Fi network you want to connect to, enter the password (if applicable), and tap CONNECT. Your phone will be connected to the selected Wi-Fi network.

- The password, for a household wireless LAN router is sometimes found on a sticker on the router (WEP, WPA, KEY, etc.) or QR code. Contact the router manufacturer for information. For the password for a public wireless LAN, check with user's service provider.
- Entering a password is not required if an access point is not security protected.
Manually connect to a Wi-Fi network
- From the Home screen, swipe up to access Apps and tap Settings
- Tap Network & internet > Internet.
- Slide the Use Wi-Fi switch to the On position to turn it on.
- Tap + Add network.
- Enter the required information.

• Network name: Enter the network name.
• Security: Select a security option and enter your password.
- Advanced options: Show advanced options, such as IP settings and Proxy settings.
Network preferences
Create and manage wireless access points.
- Notify for public networks: Notify when a high-quality public network is available.
• Install certificates: Allow authentication to access files. - Wi-Fi Direct: Connect to devices with Wi-Fi Direct.
Saved networks
View your saved Wi-Fi networks.
Wi-Fi data usage
View and track your Wi-Fi data usage.
Wi-Fi Calling
-
From the Home screen, swipe up to access Apps and tap Settings
-
Tap Network & internet > Wi-Fi Calling.
- Wi-Fi Calling: Slide the switch to the On position to enable Wi-Fi Calling.
Note: To use Wi-Fi Calling, you will need to set up an Emergency Address. When the Emergency Address is successfully set, you will see the Wi-Fi Calling icon in the Status bar.
- About Wi-Fi Calling: Tap to view more information about Wi-Fi Calling.
- Update Address: Tap to update your emergency address to help emergency services find you if you call 911.
Note: You must have an active Wi-Fi connection to send or receive calls and messages with Wi-Fi Calling.
Mobile network
- From the Home screen, swipe up to access Apps and tap Settings

-
Tap Network & internet > Mobile network.
-
Mobile Data: Slide the Mobile Data switch to the On position to enable data access on your mobile network.
- International Data Roaming: Slide the switch to the On position to enable international data roaming.
- Mobile data usage cycle: Tap to view data usage of each app on the mobile network.
- Data warning & limit: View the following data management options:
- App data usage cycle: Set the date the data usage cycle resets.
- Set data warning: Slide the switch to the On position to enable alerts when your mobile data usage reaches the amount set.
- Data warning: Set the data usage amount. Your phone will notify you when it reaches the amount set.
Note: Data usage measured by your phone is an approximate amount, and it may differ from the actual amount.
- Set data limit: Slide the switch to the On position to enable data limits.
- Data limit: Set a data limit. Your phone will turn off mobile data when it reaches the limit set.
- Carrier video calling: Slide the switch to the On position to enable carrier video calling.
- Automatically select network: Slide the switch to the On position to enable allow.
- Choose network: Manually choose a mobile network.
- Mobile Network Diagnostics: Slide the switch to the On position to enable sending diagnostic data automatically to the provider to improve service.
- Access Point Names: Select or add APNs.
Airplane mode
Disable all network communication.
- From the Home screen, swipe up to access Apps and tap Settings
- Tap Network & internet > Airplane mode.
- Slide the Airplane mode switch to the On position to activate Airplane mode.
Note: You can also access Airplane mode by dragging the Status bar down twice, scrolling to the right and tapping Airplane mode.
Hotspot & tethering
Share your phone's internet connection with other devices.
Note: Using your phone as a mobile hotspot increases battery consumption and data usage.
Use your phone as a Mobile hotspot
- From the Home screen, swipe up to access Apps and tap Settings
- Tap Network & internet 📋 > Hotspot & tethering > Wi-Fi hotspot.
-
Slide the Wi-Fi hotspot switch to the On position to activate the hotspot.
-
Hotspot name: Set the hotspot name.
• Security: Turn hotspot security on or off. - Hotspot password: Tap to set a hotspot password.
- Manage devices: Tap to manage connected devices or to connect a new device.
- Turn off hotspot automatically: Slide the switch to the On position to turn off the hotspot automatically if no devices are connected.
- Extend compatibility: Slide the switch to the On position to enable.
USB tethering
Share your phone's internet connection via USB.
- Connect your phone to the device that you want to share your internet with using a USB Type-C cable before continuing to the next step.
- From the Home screen, swipe up to access Apps and tap Settings
- Tap Network & internet 📤 > Hotspot & tethering > USB tethering.
- Slide the USB tethering switch to the On position to enable USB tethering.
Bluetooth tethering
Share your phone's internet connection via Bluetooth.
- From the Home screen, swipe up to access Apps and tap Settings
- Tap Network & internet > Hotspot & tethering > Bluetooth tethering.
- Slide the Bluetooth tethering switch to the On position to enable Bluetooth tethering.
Data saver
Reduce data usage by preventing some apps from sending or receiving data in the background. An app you are currently using can access data, but may do so less frequently.
-
From the Home screen, swipe up to access Apps and tap Settings
-
Tap Network & internet > Data saver.
-
Tap to slide the Use Data Saver switch to the On position to enable the data saving feature.
- Unrestricted data: Tap to set up apps that will function with unrestricted access to data at all times.
VPN (Virtual Private Networks)
Note: You need to set a screen lock PIN or password before you can use a VPN.
Add a VPN profile
- From the Home screen, swipe up to access Apps and tap Settings
- Tap Network & internet >VPN.
- Tap + in the top right corner of the VPN screen to add a VPN profile.
- Follow the prompts to set up a VPN.
Edit and delete a VPN
- From the Home screen, swipe up to access Apps and tap Settings
- Tap Network & internet > VPN.
-
Tap next to a VPN.
-
Edit the VPN and tap SAVE, or tap FORGET to delete the VPN.
Connect to a VPN
-
From the Home screen, swipe up to access Apps and tap Settings
-
Tap Network & internet >VPN.
-
Tap a VPN, enter your login information, and tap CONNECT.
- To disconnect, tap the VPN, and tap DISCONNECT.
Mobile plan
-
From the Home screen, swipe up to access Apps and tap Settings
-
Tap Network & internet
-
Tap Mobile plan to view.
Private DNS
-
From the Home screen, swipe up to access Apps and tap Settings
-
Tap Network & internet > Private DNS.
-
Select your Private DNS mode.
Connected devices
Manage settings for connected devices.
USB
Connect your phone with a computer using a USB cable to transfer data, share network connectivity, or charge your phone.
- From the Home screen, swipe up to access Apps and tap Settings
- Tap Connected devices > USB.


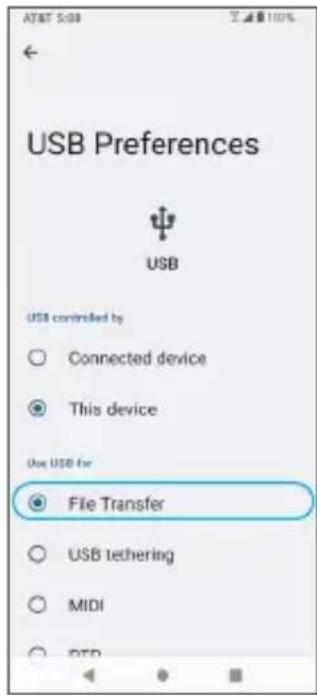
- USB controlled by:
- Connected device: Set the connected device to control the USB.
• This device: Set your phone to control the USB.
- Use USB for:
- File Transfer: Select to transfer files between your phone and your computer.
- USB tethering: Select to set the USB tethering mode.
- MIDI: Select to set this device as MIDI.
- PTP: Select to transfer PTP photos.
- No data transfer: Select to set No data transfer mode.
Pair new device
- From the Home screen, swipe up to access Apps and tap Settings
- Tap Connected devices ☐ > Pair new device.
- Pair with a device shown in the Available devices list.
Connection preferences
Manage various connection preferences.
Bluetooth
Wirelessly answer calls, connect speakers, transfer data, and more.
Activate Bluetooth
- From the Home screen, swipe up to access Apps and tap Settings
- Tap Connected devices > Connection preferences > Bluetooth.
- Slide the Bluetooth switch to the On position to turn it on.
Pair a Bluetooth device
- From the Home screen, swipe up to access Apps and tap Settings
- Tap Connected devices 📄 > Connection preferences > Bluetooth.
- Tap Pair new device.
-
Select the device you want to connect with in the Available devices list and follow the prompts to connect.
-
Make sure the device you want to connect with is discoverable via Bluetooth.
- Depending on the device, you may be required to enter or accept a passkey.
Rename a paired device
- From the Home screen, swipe up to access Apps and tap Settings
- Tap Connected devices
- Under Saved devices, tap Settings 🎨 next to a paired device name.
- Tap Edit , enter a new name, and tap RENAME to save.
Disconnect from a paired device
- From the Home screen, swipe up to access Apps and tap Settings
- Tap Connected devices 📄 > Tap Settings 📍 next to a paired device name, and tap DISCONNECT.
Search for other devices
- From the Home screen, swipe up to access Apps and tap Settings
- Tap Connected devices [☐] > Connection preferences > Bluetooth > + Pair new device.
Receive data via Bluetooth
When a device attempts to send a file to your phone using Bluetooth, you will be prompted to accept or decline the request.
- Swipe the Status bar down and tap Bluetooth: Incoming file. Tap ACCEPT or DECLINE.
- To view the file received, swipe the Status bar down and tap Bluetooth share: Received files and tap the file to view it or locate the file from Bluetooth settings menu.
Photos received via Bluetooth
- From the Home screen, tap Photos > Library > Download.
- Tap an item to open it.
Files received via Bluetooth
- From the Home screen, swipe up to access Apps and tap Files.
- Tap Downloads.
- Tap an item to open it.
NFC
Allow data exchange when the phone touches another NFC-capable device.
- From the Home screen, swipe up to access Apps and tap Settings
- Tap Connected devices ○□ > Connection preferences > NFC.
- Slide the NFC switch to the On position to turn it on.
- Tap Contactless payments to select your default form of payment.
Cast
Scan for nearby devices to connect to and set them up. A notification will appear when there are available devices to connect to.
- From the Home screen, swipe up to access Apps and tap Settings
- Tap Connected devices ☐ > Connection preferences > Cast.
- Tap Menu > Enable wireless display.
- Tap device to connect.
Android Beam
When this feature is turned on, you can beam app content to another NFC-capable device by holding the devices close together.
Printing
Connect your device to a printer on the same Wi-Fi network.
Add printer
-
From the Home screen, swipe up to access Apps and tap Settings
-
Tap Connected devices [☐] > Connection preferences > Printing.
- Tap Default Print Service.
- Slide the switch to the On position to turn it on.
- Tap Menu > Add printer.
- Tap an option to add a printer by IP address or by Wi-Fi Direct.
Chromebook
- From the Home screen, swipe up to access Apps and tap Settings
- Tap Connected devices > Connection preferences > Chromebook.
- Tap to manage connections with your Chromebook.

Nearby Share
Share files with nearby devices.
Android Auto
Use apps on your car screen.
Apps
View current running applications and manage notifications, permissions, and more.
-
From the Home screen, swipe up to access Apps and tap Settings
-
Tap Apps .


Recently opened apps
- From the Home screen, swipe up to access Apps and tap Settings
- Tap Apps > See all apps to view recently opened apps.
- Tap an app to view detailed information. Tap DISABLE to disable this app, or tap FORCE STOP to stop this app.
Default apps
- From the Home screen, swipe up to access Apps and tap Settings
- Tap Apps > Default apps.
- Tap to set the default app for the browser, phone, messages, etc. You can also set default apps for opening links.
Screen time
Set timers for your apps to set daily timers for most apps. When the app timer ends, the app is paused for the rest of the day.
- From the Home screen, swipe up to access Apps and tap Settings
- Tap Apps > Screen time.
- Tap the app you would like to set a timer for and then tap App timer.
- Follow the prompts on the screen to complete the timer set up.
Unused apps
View and manage unused apps.
- From the Home screen, swipe up to access Apps and tap Settings
- Tap Apps > Unused apps.

Special app access
- From the Home screen, swipe up to access Apps and tap Settings
- Tap Apps > Special app access.
- Tap to view app access for special fuctions, such as battery optimization, display over other apps, unrestricted data, usage access, etc.
Notifications
Manage notifications, permissions, and more.
-
From the Home screen, swipe up to access Apps and tap Settings
-
Tap Notifications .
Manage
- App settings: Tap to manage application notifications and permissions.
- Notification history: Slide the switch to the On position to enable notification history.
Conversation
- Conversations: Tap to set priority conversations.
- Bubbles: Slide the switch to the On position to allow apps to show bubbles when a new notification is available.
Privacy
- Device & app notifications: Tap to control which apps and devices can read notifications.
- Notifications on lock screen: Tap to show conversations, default, and silent.
General
- Do Not Disturb: Tap to turn on and manage Do Not Disturb settings.
- Wireless Emergency Alerts: Tap to manage wireless emergency alert notification settings.
- Hide silent notifications in status bar: Slide the switch to the On position to allow.
- Allow notification snoozing: Slide the switch to the On position to allow.
- Notification dot on app icon: Slide the switch to the On position to allow.
- Enhanced notifications: Slide the switch to the On position to allow suggested actions, replies, and more.


Battery
Monitor your phone's battery usage through the Battery settings menu. Check the battery consumption and percentage.
-
From the Home screen, swipe up to access Apps and tap Settings
-
Tap Battery .
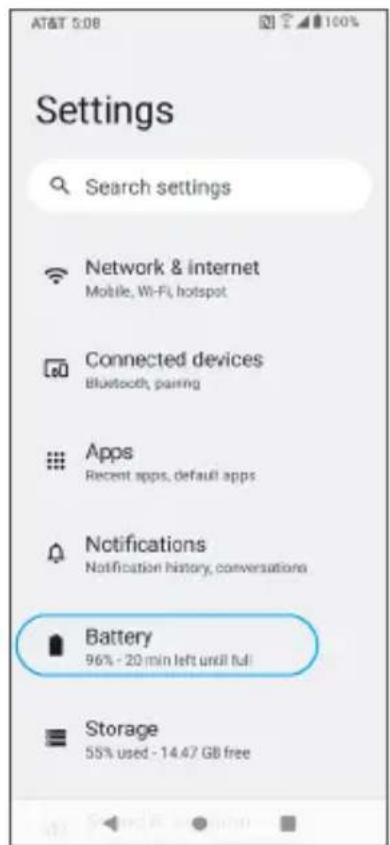

Battery Usage
Monitor the amount of battery being used by apps. If battery usage increases too much, your phone will suggest actions you can take.
- From the Home screen, swipe up to access Apps and tap Settings
- Tap Battery 📁, then tap the Battery Usage to ensure apps are running normally.
Battery Saver
-
From the Home screen, swipe up to access Apps and tap Settings
-
Tap Battery > Battery Saver.
- Slide the switch to the On position to Use Battery Saver. The Battery Saver will automatically turn off when the phone is plugged in and turn back on when the phone is unplugged.


- Set a schedule: Tap 📄 Based on percentage and drag the slider to the percentage you need. The Battery Saver will turn on automatically when your phone reaches that battery percentage.
- Turn off when charged: Slide the switch to the On position to allow the Battery Saver to automatically turn off when the phone charges above 90%.

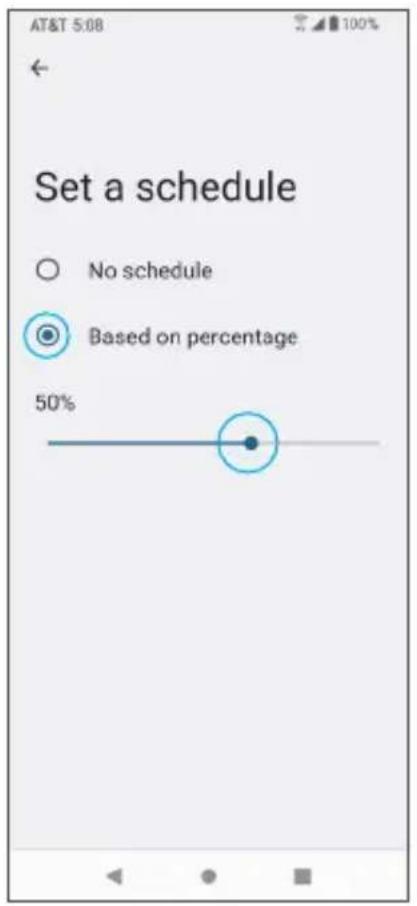
Battery Manager
Detect when apps are draining the battery.
-
From the Home screen, swipe up to access Apps and tap Settings
-
Tap Battery > Battery Manager.
-
Manage apps automatically: Slide the switch to the On position to enable the battery manager.
- Restrict apps: Tap to view and manage apps that are restricted from background battery usage.
Battery percentage
- From the Home screen, swipe up to access Apps and tap Settings
- Tap Battery > Battery percentage.
- Slide the switch to the On position to show the battery percentage in the Status bar.
Storage
The Storage settings menu allows you to manage internal storage on your phone and provides menu choices for an optional SD card (not included).
-
From the Home screen, swipe up to access Apps and tap Settings
-
Tap Storage .
-
Delete backed up files by tapping Free up space.


Storage manager
Storage manager removes backed up photos and videos from your device.
- Slide the switch to the On position to enable Storage manager.
Sound & vibration
The Sound settings menu lets you control your phone's audio, from ringtones and alerts to tap tones and notifications.
-
From the Home screen, swipe up to access Apps and tap Settings
-
Tap Sound .


Media volume
Drag the slider to adjust the media and alert notification volume.
Call volume
Drag the slider to adjust the call volume.
Ring & notification volume
Drag the slider to adjust the ring volume.
Alarm volume
Drag the slider to adjust the alarm volume.
Do Not Disturb
Tap to manage Do Not Disturb settings. Some notifications will be silenced when Do Not Disturb is turned on.
Phone ringtone
Select a ringtone for incoming phone calls. You can customize your own ringtone by tapping Add ringtone.
Media
Tap to show player and manage preferences.
- Pin media player: Slide the switch to the On position to quickly resume playback, media player stays open in Quick Settings.
• Show media recommendations: Slide the switch to the On position to allow media suggestions based on your activity.
Vibrate & haptics
Slide the switch to the On position to Use vibration & haptics.
Default notification sound
Select the default notification sound. You can customize your own notification sound by tapping Add ringtone.
Default alarm sound
Select the default alarm sound. You can customize your own alarm sound by tapping Add ringtone.
Other sounds and vibrations
- Dial pad tones: Slide the switch to the On position to enable dial pad tones.
- Screen locking sounds: Slide the switch to the On position to enable screen locking sounds.
- Charging sound and vibration: Slide the switch to the On position to enable the charging sound and vibration.
- Touch sounds: Slide the switch to the On position to enable touch sounds.
- Always show icon when in vibrate mode: Slide the switch to the On position to always show icon in vibrate mode.
Display
Use the phone's Display settings menu to adjust items such as wallpaper, brightness, screen timeout, and more.
-
From the Home screen, swipe up to access Apps and tap Settings
-
Tap Display


Brightness level
Tap to adjust the screen brightness level. Drag the slider to manually adjust the brightness level.
Adaptive brightness
Slide the switch to the On position to enable Adaptive brightness. When turned on, your phone will automatically adjust screen brightness based on the lighting conditions.
Lock screen
Manage what will show on the lock screen.


Screen timeout
Tap to set screen timeout. Your screen will automatically go to sleep after the set amount of time.
Dark theme
Slide the switch to the On position to enable Dark theme.
Display size and text
- Font size: Drag the slider to adjust the font size.
- Display size: Drag the slider to adjust the display size.
- Bold text: Slide the switch to the On position to bold text.
- High contrast text: Slide the switch to the On position to change the text color to black or white and maximize the contrast with the background.
- RESET SETTINGS: Tap to reset these settings to your device factory default.
Night Light
Tap to set a Night Light schedule and intensity. You can also enable automatic Night Light until sunrise.
Colors
Set the color settings on the phone. Choose from Natural, Boosted, or Adaptive.
Auto-rotate screen
Slide the switch to the On position to enable screen rotation.
Network name
Slide the switch to the On position to display the network name in the status bar.
Screen saver
Slide the switch to the On position to use a screen saver.
Lift to wake
Slide the switch to the On position to allow lift to wake. You screen will turn on when you pick up your phone.
Accessibility
The Accessibility settings menu allows you to manage accessibility-related apps. Accessibility services are special features to make the device easier to use for those with certain physical disabilities.
-
From the Home screen, swipe up to access Apps and tap Settings
-
Tap Accessibility .
Select to Speak
-
From the Home screen, swipe up to access Apps and tap Settings
-
Tap Accessibility > Select to Speak.
-
Slide the switch to the On position to enable the Select to Speak shortcut.
TalkBack
-
From the Home screen, swipe up to access Apps and tap Settings
-
Tap Accessibility >TalkBack.
-
Slide the switch to the On position to use TalkBack.
Display size and text
Tap to manage text and display settings.
-
From the Home screen, swipe up to access Apps and tap Settings
-
Tap Accessibility > Display size and text.
-
Font size: Drag the slider to adjust the font size.
- Display size: Drag the slider to adjust the size of the items on your screen.
- Bold text: Slide the switch to the On position to bold text.
- High contrast text: Slide the switch to the On position to enable high contrast text display.
Color and motion
- From the Home screen, swipe up to access Apps and tap Settings
-
Tap Accessibility > Color and motion.
-
Color correction: Tap and slide the switch to the On position to use color correction.
- Color inversion: Tap and slide the switch to the On position to use color inversion.
- Dark theme: Slide the switch to the On position to activate dark theme. Dark theme will never turn on automatically.
- Remove animations: Slide the switch to the On position to reduce movement on the screen.
- Large mouse pointer: Slide the switch to the On position to make the mouse pointer more noticeable.
Extra dim
- From the Home screen, swipe up to access Apps and tap Settings
- Tap Accessibility > Extra dim.
- Slide the switch to the On position to dim the screen beyond your phone's minimum brightness.
Magnification
- From the Home screen, swipe up to access Apps and tap Settings
-
Tap Accessibility > Magnification.
-
Magnification shortcut: Slide the switch to the On position to enable zooming in on the screen by pinching or touching and holding.
- Magnification type: Switch between full and partial screen.
- Magnification type: Slide the switch to the On position to enable magnification following text as you type.
Accessibility Menu
Control your device via large menu.
- From the Home screen, swipe up to access Apps and tap Settings
- Tap Accessibility > Accessibility Menu.
- Slide the switch to the On position to enable the Accessibility Menu shortcut. When the shortcut function is turned on, you can lock your phone, control volume and brightness, take screenshots, and more.
Switch Access
Control your device with switches.
-
From the Home screen, swipe up to access Apps and tap Settings
-
Tap Accessibility > Switch Access.
-
Use Switch Access: Slide the switch to the On position to use Switch Access.
- Switch Access shortcut: Slide the switch to the On position to enable switch access shortcut.
Timing controls
Adjust the settings for the Touch & hold delay, Time to take action, and Autoclick.
- From the Home screen, swipe up to access Apps and tap Settings
-
Tap Accessibility > Timing controls.
-
Touch & hold delay: Set the touch & hold delay to Short, Medium, or Long.
- Time to take action (Accessibility timeout): Choose how long to show messages that ask you to take an action.
- Autoclick (dwell timing): Enable automatic clicking when using a mouse. When enabled, you can drag the slider to adjust the amount of time between the mouse stopping and the click.
System controls
Adjust the settings for the System navigation, Power button ends calls, and Auto-rotate screen.
-
From the Home screen, swipe up to access Apps and tap Settings
-
Tap Accessibility > System controls.
-
System navigation: Set the system navigation to Gesture navigation or 3-button navigation.
- Power button ends calls: Enable ending calls by pressing the Power key.
- Aut-rotate screen: Enable or disable screen rotation. See "Portrait and landscape screen orientation" on page 26 for more information.
Vibration & haptic strength
Enable or disable ring, notification, and touch feedback vibration.
- From the Home screen, swipe up to access Apps and tap Settings
- Tap Accessibility > Vibration & haptics.
- Slide the switch to the On position to use Vibration & haptics.
- Ring vibration: Tap to turn Ring vibration On or Off.
- Vibrate first then ring gradually: Tap to turn this setting On or Off.
- Notification vibration: Tap to turn Notification vibration On or Off
- Alarm vibration: Tap to turn Alarm vibration On or Off
- Touch feedback: Tap to turn Touch feedback On or Off
• Media vibration: Tap to turn Media vibration On or Off
Caption preferences
Enable or disable captions. You can also set caption display language, text size, and caption style.
-
From the Home screen, swipe up to access Apps and tap Settings
-
Tap Accessibility > Caption preferences.
-
Caption size and style: Tap to set the text size and caption style settings.
- More options: Tap to set your language preferences.
Real-Time text (RTT) Call Button
- From the Home screen, swipe up to access Apps and tap Settings
- Tap Accessibility > RTT Call Button.
- Manage RTT call options.
- RTT operation mode: Tap to set RTT preferred.
- Visible during calls: Allow access to the RTT call button during calls.
- Always visible: Always allow access to the RTT call button, and to turn the transcript of history on and off.
Audio description
Hear a description of what is happening on screen in supported movies and shows. Tap to enable or disable this feature.
Hearing aids
Tap to view all hearing aid devices paired to your phone. If you have not yet paired hearing aids, follow the prompts on the screen to pair new hearing aids.
Audio adjustment
Quickly access accessibility features.
-
From the Home screen, swipe up to access Apps and tap Settings
-
Tap Accessibility >Audio adjustment.
-
Mono audio: Enable combining channels when playing audio.
- Audio balance: Drag the slider to adjust the audio balance from the left to right speaker.
Accessibility shortcuts
Quickly access accessibility features such as TalkBack, which is a built-in screen reader.
- From the Home screen, swipe up to access Apps and tap Settings
- Tap Accessibility >Accessibility shortcuts.
- Accessibility button: Quickly access accessibility features from any screen.
Text-to-speech output
- From the Home screen, swipe up to access Apps and tap Settings
-
Tap Accessibility > Text-to-speech output.
-
Preferred engine: Tap to set the text-to-speech engine (Google is default). Tap to manage text-to-speech settings.
- Language: Tap to set the language for using this function.
- Speech rate: Drag the slider to adjust speech rate.
- Pitch: Drag the slider to adjust pitch.

- Tap PLAY to play the example.
- Tap RESET to reset all Text-to-speech settings to the default settings.
Security
The Security settings will help you to secure your device, protect your data, and keep your privacy.
-
From the Home screen, swipe up to access Apps and tap Settings
-
Tap Security .


Google Play Protect
Google will regularly check your device and prevent/warn you of potential harm. Only apps from Play Store will be checked.
-
From the Home screen, swipe up to access Apps and tap Settings
-
Tap Security 📋 > Google Play Protect.
-
Tap Scan to start scanning your device for harmful apps.
- Tap Settings 📍 to view Play Protect settings:
- Slide the Scan apps with Play Protect switch to the On position to enable regular scanning for harmful apps on your device.
- Slide the Improve harmful app detection switch to the On position to enable sending unknown apps to Google for better detection.
Find My Device
Find My Device helps you locate your device remotely, keeping your data safe in the event that your phone is lost.
- From the Home screen, swipe up to access Apps and tap Settings
- Tap Security 🔒 > Find My Device.
- Slide the switch to the On position to activate Find My Device.
- There are several methods available to locate your device.
Security update
Check for new software updates for your device.
- From the Home screen, swipe up to access Apps and tap Settings
- Tap Security 🔒 > Security update.

- Tap Check for update to check for the latest updates.
Screen lock

-
From the Home screen, swipe up to access Apps and tap Settings
-
Tap Security 🔒 > Screen lock.
• None: Disable any screen lock.
- Swipe: Tap to set swipe to unlock.
- Pattern: Tap to set an unlock pattern. Follow the prompts to finish the settings.
- PIN: Tap to set a PIN code as the screen unlock method.
- Password: Tap to set a password as the screen unlock method.
Important: To protect your phone and data from unauthorized access, it is recommended that you use the highest security level available (Password protection). It is also recommended you frequently change your password to ensure the safety of your phone and personal data. If you failed to enter the
correct pattern, PIN, or password, after five attempts, you will be prompted to wait for 30 seconds before you can try again.
-
Tap 📋 next to Screen lock to adjust some settings on screen lock.
-
Make pattern visible: Slide the switch to the On position to make the pattern visible.
- Automatically lock: Tap to set an automatic lock timer.
- Power button instantly locks: Slide the switch to the On position to activate instant lock with the power button.
Note: "Make pattern visible" is only available when pattern screen lock is set.
Face & Fingerprint Unlock
Tap to use Face Unlock and choose your backup screen lock method.
-
From the Home screen, swipe up to access Apps and tap Settings
-
Tap Security 📋 > Face & Fingerprint Unlock.
-
Pattern + Face + Fingerprint: Tap to set an unlock pattern. Follow the prompts to finish the settings.
- PIN + Face + Fingerprint: Tap to set a PIN code as the screen unlock method.
- Password + Face + Fingerprint: Tap to set a password as the screen unlock method.
More security settings
Smart Lock
Unlock your device automatically in certain conditions. For more information about Smart Lock, tap Menu > How it works or Help.
-
From the Home screen, swipe up to access Apps and tap Settings
-
Tap Security 🔒 > Smart Lock.
-
On-body detection: Tap and slide the switch to the On position to activate. Your device will now be kept unlocked while it is on you.
- Trusted places: Tap to add a trusted location where the device can remain unlocked.
- Trusted devices: Tap to add a second device that keeps your device unlocked when it is nearby.
Device admin apps
- From the Home screen, swipe up to access Apps and tap Settings
- Tap Security 🔒 > Device admin apps.
- Enable or disable Device admin apps according to your preference.
SIM card lock
- From the Home screen, swipe up to access Apps and tap Settings
- Tap Security > SIM card lock.
- Slide the Lock SIM card switch to the On position to enable SIM card lock. SIM lock will require you to enter a PIN to use your device.
- Tap Change SIM PIN to change the PIN code.
Encryption & credentials
-
From the Home screen, swipe up to access Apps and tap Settings
-
Tap Security 📋 > Encryption & credentials.
- Encrypt phone: Your phone is already encrypted.
- Trusted credentials: Tap to view trusted security certificates.
- User credentials: Tap to view and modify stored credentials.
- Install a certificate: Tap to install certificate from SD card.
- Clear credentials: Tap to remove all certificates.
Trust agents
-
From the Home screen, swipe up to access Apps and tap Settings
-
Tap Security 🔒 > Trust agents.
-
View your trusted agents. Slide the switch to the On or Off position to turn them on or off.
App pinning
-
From the Home screen, swipe up to access Apps and tap Settings
-
Tap Security 🔒 > Advanced > App pinning.
-
Slide the switch to the On or Off position to turn it on or off. When turned on, you can use app pinning to keep the current screen in view until you unpin.
Privacy
The Privacy settings will help you to secure your device, protect your data, and keep your privacy.
-
From the Home screen, swipe up to access Apps and tap Settings
-
Tap Privacy
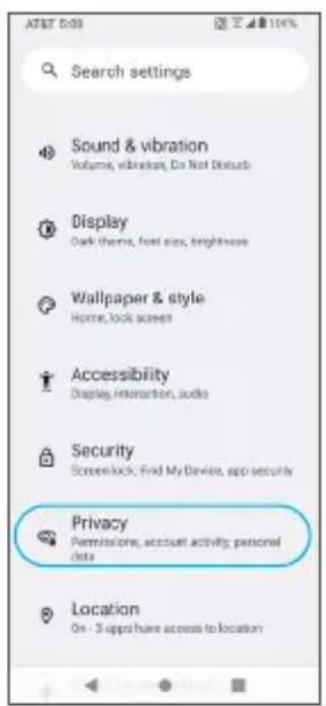


Permission dashboard
View permissions for apps that use your camera, location, microphone, contacts, storage, etc.
Permission manager
Control permissions for apps that use your data.
Camera access
View camera access for all apps and services.
Microphone access
View microphone access for all apps and services.
Show passwords
Slide the switch to the On or Off position to turn it on or off. Display characters briefly as you type passwords.
Notifications on lock screen
Choose to show or hide notification content on the lock screen.
Show clipboard access
Slide the switch to the On or Off position to turn it on or off. When turned on, a message will show when apps access text, images, or other content you've copied.
Autofill service from Google
Autofill your information from your Google account.
-
From the Home screen, swipe up to access Apps and tap Settings
-
Tap Privacy 📄 > Autofill service from Google > CONTINUE.
-
Fill in the categories with information you'd like to autofill such as address, payment methods, etc.
Google location history
Tap to view your location history.
Activity controls
Choose the activities and information you allow Google to save.
Ads
Tap to control advertising ID and personalization.
Usage & diagnostics
Share data to help improve Android.
-
From the Home screen, swipe up to access Apps and tap Settings
-
Tap Privacy > Usage & diagnostics.
- Slide the switch to the On position to enable Usage & diagnostics.
Location
The Location settings will help you to secure your device, protect your data, and keep your privacy.
- From the Home screen, swipe up to access Apps and tap Settings
- Tap Location .
- Slide the use location switch to the On position to turn location services on.


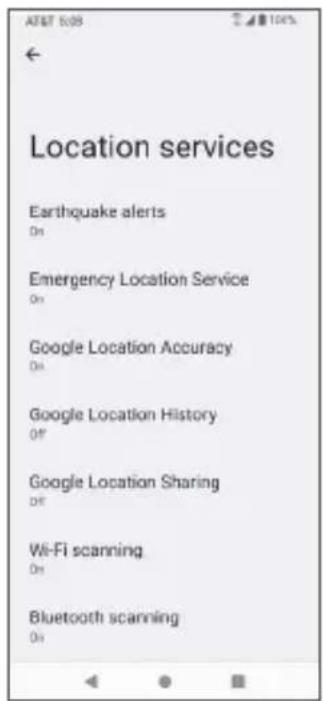
Recent access
View a list of apps that have recently requested your location.
App location permissions
Tap to view which apps have permission to access location services.
Location services
Click to vier and manage a list of location services permissions.
- Emergency Location Services: Slide the switch to the On position to turn Emergency Location Services (ELS) on. When you call or text an emergency number, your device will use ELS to automatically send your location to emergency responders.
- Google Location Accuracy: Slide the Google Location Accuracy switch to the On position to use GPS, Wi-Fi, Bluetooth, mobile networks, and sensors to determine your location.
- Google Location History: Slide the switch to the On position to turn Google Location History on. Tap to view your location history.
- Google Location Sharing: Slide the switch to the On position to turn Google Location Sharing on. Tap to share your location.
- Wi-Fi scanning: Slide the switch to the On position to turn Wi-Fi scanning on. Wi-Fi scanning improves location accuracy by allowing system apps and services to detect Wi-Fi networks at any time.
- Bluetooth scanning: Slide the switch to the On position to turn Bluetooth scanning on. Bluetooth scanning improves location accuracy by allowing system apps and services to detect Bluetooth devices at any time.
Safety & emergency
Set up and manage emergency SIS, medical information, alerts, and more.
OPEN PERSONAL SAFETY
- Tap to view and edit your personal emergency information and emergency contacts.
- Tap Name to add your name.
- Tap + Add information to add your Name, Address, Blood type, Allergies, Medications, Organ doner information, and Medical notes.
- Tap + Add contact to add an emergency contact.
Medical information
Tap to view and edit your personal medical information. Adding medical information can help first responders in an emergency.
Emergency contacts
Tap to view and edit your emergency contacts. Adding emergency contacts can help first responders in an emergency.
Emergency SOS
Slide the switch to the On position to turn emergency SOS on. Press the Power button quickly 5 times or more to start the actions below.
- Play alarm sound: Slide the switch to the On position to automatically play a loud sound when emergency SOS is started.
- Call emergency services: Slide the switch to the On position to
automatically call your emergency contact number. The default is 911, but you can tap to change it.
Note: If you enter a non emergency number, your device must be unlocked to use Emergency SOS and your call might not be answered.
- Share info with emergency contacts: Sign in and slide the switch to the On position to add emergency contacts. These contacts can be accessed without unlocking your phone in case of an emergency.
- Record emergency video: Sign in and slide the switch to the On position to record, back up, and share an emergency video.
Crisis alerts
Get notified about natural disasters and public emergencies affecting your area.
Emergency Location Services
Slide the switch to the On position to turn Emergency Location Services (ELS) on. When you call or text an emergency number, your device will use ELS to automatically send your location to emergency responders.
Wireless Emergency Alerts
View and manage your Wireless Emergenct Alert settings.
-
Slide the switch to the On position to enable Wireless Emergency Alerts.
-
You can enable or disable some alerts by sliding the switch to the On or Off. There are alerts that can not be disabled.
- National alerts: National warning messages. Can not be turned off.
• Extreme threats: Extreme threats to life and property.
- Severe threats: Severe threats to life and property.
- AMBER alerts: Child abduction emergency bulletins.
- Public safety messages: Recommended actions that can save lives or property.
- State and local tests: Receive text messages from state and local authorities. Can not be turned off.
- Emergency alert history: Tap to view all past emergency alerts.
- Vibration: Slide the switch to the On position to enable vibration.
- Alert reminder: Tap to set an alert reminder sound. Sound will play at regular volume. Choose Once, Every 2 minutes, Every 15 minutes, or Never.
- Spanish: Slide the switch to the On position to receive emergency alerts in Spanish when possible.
Passwords & accounts
Set up and manage all of your passwords and accounts, including your Google Account and other social networking accounts, through the Passwords & accounts settings menu.
Add account
- From the Home screen, swipe up to access Apps and tap Settings
- Tap Passwords & accounts 📷 > + Add account.
- Tap the type of account you want to add.
- Follow the prompts to enter your credentials and set up the account.
- For more information about setting up a Google account, see "Google account" on page 41.
Automatically sync data
- From the Home screen, swipe up to access Apps and tap Settings
-
Tap Passwords & accounts > Automatically sync data.
-
Slide the Automatically sync data switch to the On position to activate automatic data syncing and press OK to confirm.


Digital Wellbeing & parental controls
Your Digital Wellbeing tools
Use app timers and other tools to keep track of screen time and unplug more easily.
-
From the Home screen, swipe up to access Apps and tap Settings
-
Tap Digital Wellbeing & parental controls 💙 .
Ways to disconnect
- Dashboard: View your screen time and set timers for your apps.
- Bedtime mode: Silence you phone and change your screen to black and white at bedtime. Only alarms and important calls will reach you.
- Focus mode: Pause distracting apps when you need time to focus.
Reduce interruptions
- Manage notifications: Enable or disable the notifications of apps.
- Do Not Disturb: Mute your device, but allow exceptions such as calls or texts from certain contacts.
- Heads Up: If you're walking while using your phone, get a reminder to focus on what's around you.
Show icon in the app list
Slide the switch to the On position to enable icons in the app list.
Parental controls
Add content restrictions and set other limits to help your child balance their screen time.
Configure your device's Google settings. Available options depend on your Google account.
- From the Home screen, swipe up to access Apps and tap Settings
- Tap Google .G
- Select an option to customize your Google account settings.

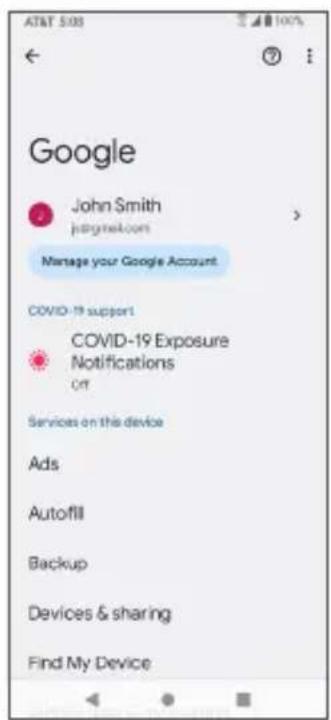

DuraSpeed
DuraSpeed is a booster providing continual optimized high speed. Helps boost foreground app speed by restricting background Apps.
- From the Home screen, swipe up to access Apps and tap Settings
- Tap DuraSpeed
- Slide the switch to the On position to enable DuraSpeed.
- Slide the switch to the On position next to apps to allow them to run in the background.
System
Manage detailed settings for your phone, including language and input settings, battery and storage, date and time, etc.
Languages & input
Set the language for the phone's menus and keyboards, select and configure keyboard settings, configure speech input settings, and more.
Languages
- From the Home screen, swipe up to access Apps and tap Settings
- Tap System ⓘ > Language & input > Languages.


3. View your languages.
- When more than one language has been added, you can touch and hold the language, then drag it up to the first position to set as the default display language.
• To add a language, tap + Add a language, then select the language you want to add.
• To remove a language, tap Menu: > Remove > check the box next to the language or languages you would like to remove > click the Trash Can and tap REMOVE.
App Languages
Set the languages for each app.
Keyboards
- On-screen keyboard: View your On-screen keyboard settings.
- Manage On-screen keyboards: Activate or deactivate your virtual keyboards.
- Physical keyboard: View your physical keyboard settings.
- Use on-screen keyboard: Slide the switch to the On or Off position to enable or disable displaying a virtual keyboard while a physical keyboard is active.
- Keyboard shortcuts helper: Tap to set keyboard shortcuts.
Speech
• Voice input: Speech Services by Google.
- Add a language and manage offline languages.
• Auto update languages.
- Advanced: Download languages.
- Text-to-speech output: Manage settings on the text-to-speech function.
- Select your preferred engine.
- Set your preferred speech rate by adjusting the slider.
- Set your preferred pitch by adjusting the slider.
Tools
- Spell checker: Slide the switch to the On or Off position to
enable or disable the spell checker.
- Personal dictionary: Add custom words to your personal dictionary. Tap Add to add a word to the dictionary.
- Pointer speed: Set the speed of the pointer for a mouse/track pad.
Gestures
Quickly open camera
Open the Camera app from any screen by quickly pressing the Power key twice. Slide the switch to the On position to enable.
System navigation
Tap next to Gesture navigation or 3-button navigation to select.
- Gesture navigation: To go Home, swipe up from the bottom of the screen. To switch apps, swipe up from the bottom, then release. To go back, swipe from either the left or right edge.
- 3-button navigation: Go back, Home, and switch apps with buttons at the bottom of your screen.
Press and hold power button
Slide the switch to the On position to allow. When enabled, you can press and hold the Power key for three seconds to access Google Assistant.
Prevent ringing
To enable, first change "Press and hold power button" to the power menu.
Date & time
-
From the Home screen, swipe up to access Apps and tap Settings
-
Tap System ⓘ > Date & time.
-
Set time automatically: Tap to automatically use the time and date provided by a connected Wi-Fi network. Disable this function to manually enter the date and time.
- Set date: Tap to set date manually. This option is available only when the Use network/GPS-provided time function is disabled.
- Set time: Tap to set time manually. This option is available only when the Use network/GPS-provided time function is disabled.
- Automatic time zone: Slide the switch to the On position to automatically set the time zone.
- Select time zone: Manually select your time zone. This option is available only when the Automatic time zone function is disabled.
- Use locale to set time zone: Slide the switch to the On position to use your devices location to set the time zone.
- Use locale default: Slide the switch to the On position to use the default time format.
- Use 24-hour format: Slide the switch to the On position to enable the 24-hour time format.
Backup
Your phone's Backup settings let you back up your phone's data and settings to Google servers before resetting your phone to the original factory settings.
-
From the Home screen, swipe up to access Apps and tap Settings
-
Tap System ⓘ > Backup.
-
Select Turn on to enable Back up your device with Google One, or select Not now to go back to the previous screen.
-
Back up automatically: Your phone is backed up when it's on, locked, and connected to power and Wi-Fi.
- Store your data securely: Backups are securely encrypted and uploaded to your Google Account. Some data is also encrypted using your phone's screen lock.
- Manage your backup easily: You can turn off backups or view details in your device settings.
System updates
Check for system updates.
Multiple users
You can share this device with other people by creating additional users. Each user has their own space, which they can customize with apps, wallpaper, and so on. Users can also adjust device settings like Wi-Fi that affect everyone. Slide the switch to the On position to enable Multiple users.
Edit your profile
- From the Home screen, swipe up to access Apps and tap Settings
- Tap System ⓘ > Multiple users
- Tap You (Owner).
-
Enter a name.
-
Tap to add a photo.
- Tap OK to confirm.
Add a new user
- From the Home screen, swipe up to access Apps and tap Settings
- Tap System ⓘ > Multiple users.
- Tap + Add user then enter a name for the new user and tap OK.
Switch users
- From the Home screen, swipe up to access Apps and tap Settings
- Tap System ⓘ > Multiple users.
- Tap the name of the user you want to switch to.
- Restart the phone to switch back to the Owner/Admin profile.
Delete users
- From the Home screen, swipe up to access Apps and tap Settings
- Tap System ⓘ > Multiple users.
- Tap the user profile you want to delete and tap Delete user 📄 > DELETE to remove the user.
Note: All apps and data stored on the user's profile will also be deleted.
Reset options
- From the Home screen, swipe up to access Apps and tap Settings
2. Tap System ⓘ > Reset options.
- Reset Wi-Fi, mobile & Bluetooth: Reset all network settings, including Wi-Fi, Mobile data, and Bluetooth. Tap RESET SETTINGS to reset.
- Reset app preferences: Reset all app preferences, including disabled apps, disabled app notifications, default apps, background data restrictions, etc. Tap RESET APPS to reset.
- Erase all data (factory reset): Completely erase all data from your phone's internal storage and reset the device to factory settings. Tap Erase all data to reset.
Note: Performing a factory reset will also erase any data on an installed SD card. Unmount the card to avoid losing any data you may have stored on it.
About phone
Access important phone information, search for and apply updates, and view legal and safety information.
-
From the Home screen, swipe up to access Apps and tap Settings
-
Tap About phone .i
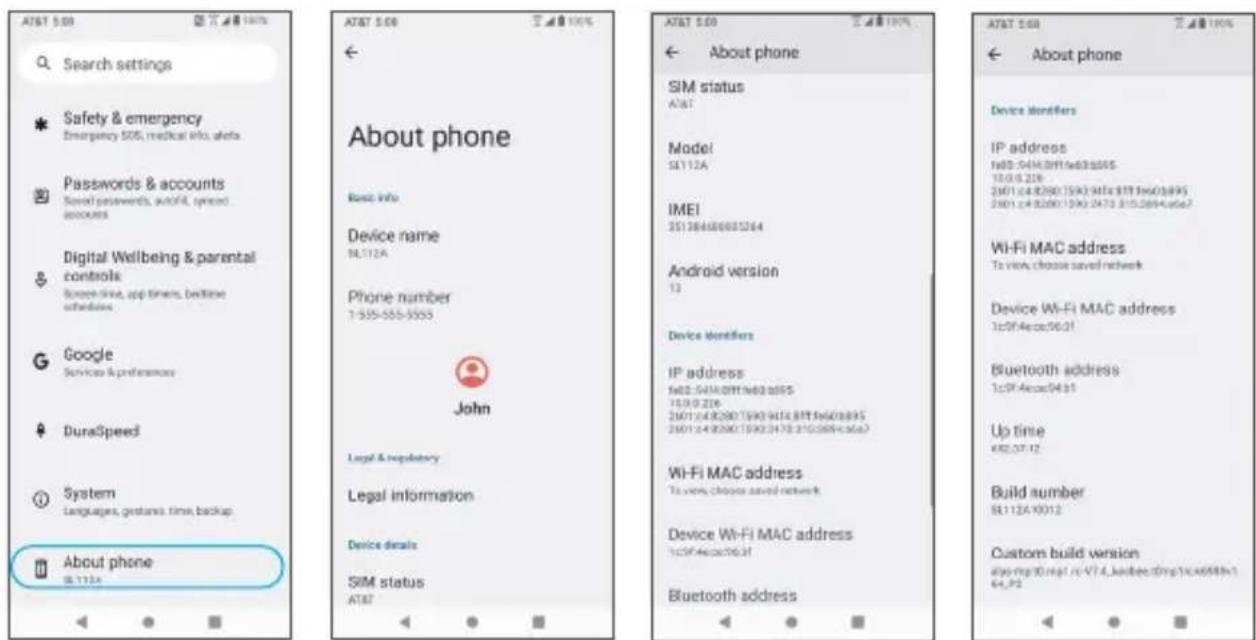
- Device name: Tap to edit your phone's display name.
• Phone number: Display your phone number. - Legal information: View your device's legal information, including third-party licenses, Google legal, system web view licenses, etc.
- SIM status: View your SIM status information, such as the Network, Phone number on SIM, Mobile network state, etc.
-
Model: View your device model information.
-
IMEI: View your IMEI.
- Android version: View your device's current Android version and other relevant information.
- IP address: View your IP address.
- Wi-Fi MAC address: View your Wi-Fi MAC address.
- Device Wi-Fi MAC address: View your Device Wi-Fi MAC address.
- Bluetooth address: View your Bluetooth address.
- Up time: View your current running up time.
- Build number: View your build number.
- Custom build version: View your custom build version.

Getting help
The topics in this section will cover troubleshooting tips and phone specifications.
For assistance
Troubleshooting
Check below for solutions to common problems you may experience.
Problem: The phone freezes or operations are unstable.
Solution: Restart the device. Press and hold the Power key along with the Volume up key, then tap Restart.
Note: Data that was being edited will be erased when the device is restarted.
Problem: The device starts freezing after installing a new app.
Solution: The newly-installed app may be causing the device to freeze. Uninstall the app in Safe mode. To enable Safe mode:
- Press and hold the Power key along with the Volume up key, then touch and hold Power off. Read the disclaimer for Safe mode, and then tap OK.
- After turning the phone on in Safe mode, "Safe mode" will appear at the bottom left corner.
• After restarting in Safe mode, your phone can be powered on as usual.
- Before enabling Safe mode, it is recommended that you back up important data.
- To exit Safe mode, restart the device. Press and hold the Power key along with the Volume up key, then tap Restart. The phone will reboot in normal mode.
Problem: The phone will not make calls, send messages, check email, or connect to the Internet.
- Solution 1: The network signal may be too weak or you may be out of the service area. Return to an area with a strong network signal.
- Solution 2: Restart the device. Press and hold the Power key, then tap Restart.
- Solution 3: Make sure Airplane mode is not active. From the Home screen, swipe up to access Apps and tap Settings > Network & internet > Advanced > Airplane mode and ensure the switch is in the Off position.
- Solution 4: Make sure mobile data is enabled. From the Home screen, swipe up to access Apps and tap Settings > Network & internet > Mobile network and ensure the switch is in the On position.
Problem: The battery drains too quickly.
Solution: Making calls or connecting to a mobile network outside of your service area will drain the battery. Certain apps and functions can also drain the battery.
Tip: You can enable the Battery Manager to help identify which apps are draining the battery. From the Home screen, swipe up to access Apps and tap Settings > Battery > Battery Manager and slide the switch to the On position.
Problem: An app will not download or install.
- Solution 1: Make sure the device has room for the app. Apps may not be installed with minimal free space on the phone or SD card. To check free storage space, see "Storage" on page 162.
- Solution 2: The app is not supported by your phone. Make sure your software version is up to date and download any updates.
Problem: The phone will not unlock.
- Solution 1: Make sure you entered your pattern/PIN/password correctly.
- Solution 2: Restart the device. Press and hold the Power key along with the Volume up key, then tap Restart.
Note: Data that was being edited will be erased when the device is restarted.
Specifications
The following tables list your phone's and battery's specifications.
Phone specifications
| Specification Description | |
| Weight Approx. 195g / 6.88oz | |
| Continuous talk time Up to 12 hours | |
| Continuous standby time Approx. 720 hours | |
| Charging time Approx. 2.65 hours | |
| Dimensions (W x H x D) | 3.05 x 6.60 x 0.36in |
| Display | 6.5" HD+ 1600 x 720 resolution 20:09 Aspect Ratio |
| Processor MediaTek MT6761V/WB, Quad-Core 2.0 GHz | |
| Cameras | Rear: 13MP with LED flash, Front: 5MP with Display flash |
| Memory | 3GB RAM, Up to 32GB internal memory microSD support up to 128GB |
| Communication speed | UMTS: B2, 4, 5LTE: B2, 4, 5, 12, 14, 30 |
| Android version AndroidTM 13 (Chrome) | |
Battery specifications
| Item Description | |
| Voltage 3.85 V | |
| Type Lithium Polymer (Non-removable) | |
| Capacity Typical capacity: 4000 mAh |
Licenses
microSD Logo is a trademark of SD-3C LLC.
The Bluetooth word mark and logos are owned by the Bluetooth SIG, Inc. and any use of such marks by its affiliates is under license. Other trademarks and trade names are those of their respective owners.
The Wi-Fi Logo is a certification mark of the Wi-Fi Alliance.
Copyright information
Google, Android, Google Play and other marks are trademarks of Google LLC. All other trademarks are the property of their respective companies.

natural_image
Exterior and interior views of a black AT&T smartphone showing front, side, and back panels with app icons (no readable text or symbols on main body)Safety and use
The topics in this section will introduce how to use your mobile device safely.
Please read before proceeding
THE DEVICE IS NOT FULLY CHARGED WHEN YOU TAKE IT OUT OF THE BOX. DO NOT ATTEMPT TO REMOVE THE BATTERY PACK.
Important health information and safety precautions
When using this product, the safety precautions below must be taken to avoid possible legal liabilities and damages. Retain and follow all product safety and operating instructions. Observe all warnings in the operating instructions on the product.
To reduce the risk of bodily injury, electric shock, fire and damage to the equipment, observe the following precautions.
Electrical safety
This product is intended for use when supplied with power from the designated battery or power supply unit. Other usage may be dangerous and will invalidate any approval given to this product.
Safety precautions for proper grounding installation
Warning: Connecting to improperly grounded equipment can result in an electric shock to your device.
This product is equipped with a USB Cable for connecting with a desktop or notebook computer. Be sure your computer is properly grounded (earthed) before connecting this product to the computer. The power supply cord of a desktop or notebook computer has an equipment grounding conductor and a grounding plug. The plug must be plugged into an appropriate outlet that is properly installed and grounded in accordance with all local codes and ordinances.
Safety precautions for power supply unit
Use the correct external power source
A product should be operated only from the type of power source indicated on the electrical ratings label. If you are not sure of the type of power source required, consult your authorized service provider or local power company. For a product that operates from battery power or other sources, refer to the operating instructions that are included with the product.
This product should be operated only with the following designated power supply unit(s):
Travel charger: Input: 100-240V, 50/60Hz, 0.35A. Output: 5V, 2000mA.
Battery must be used with caution
This product contains a Lithium-ion battery. There is a risk of fire and burns if the battery pack is handled improperly. Do not attempt to open or service the battery pack. Do not disassemble, crush, puncture, short circuit the external contacts or circuits, dispose of in fire or water, or expose a battery pack to temperatures higher than 113°F (45°C). The operating temperature for the phone is 4°F (-20°C) to 131°F (55°C). The charging temperature for phone is 32°F (0°C) to 131°F (55°C).
Warning: Battery is non-removable. Do not attempt to remove the battery for danger of explosion.
To reduce risk of fire or burns, do not disassemble crush, puncture, short circuit the external contacts expose to temperature above 113°F (45°C), or dispose of in fire or water. Do not attempt to replace the non-removable battery. The phone and battery as a unibody device must be disposed of in accordance with locally applicable environmental regulations or guides supplied with your product.


natural_image
Symbol of a trash bin crossed with no text or labelsTake extra precautions
- Do not disassemble or open, crush, bend or deform, puncture or shred.
- Do not short circuit a battery or allow metallic conductive objects to contact battery terminals.
- Only use the USB cable provided with the phone or that bear the USB-IF logo or have completed the USB-IF compliance program.
- Do not modify or remanufacture, attempt to insert foreign objects into the battery, immerse or expose to water or other liquids, expose to fire, explosion or other hazard.
• Device usage by children should be supervised.
- Only use the battery with a charging system that has been qualified with the system per CTIA Certification Requirement for Battery System Compliance to IEEE1725. Use of an unqualified battery or charger may present a risk of fire, explosion, leakage or other hazard.
- Avoid dropping the phone. If the phone is dropped, especially on a hard surface, and the user suspects damage, take it to a service center for inspection.
- Improper battery use may result in a fire, explosion or other hazard. If the battery leaks:
- Do not allow the leaking fluid to come into contact with skin or clothing. If already in contact, flush the affected area immediately with clean water and seek medical advice.
- Do not allow the leaking fluid to come into contact with eyes. If already in contact, DO NOT rub; rinse with clean water immediately and seek medical advice.
• Take extra precaution to keep a leaking battery away from fire as there is a danger of ignition or explosion.
Safety precautions for direct sunlight
Keep this product away from excessive moisture and extreme temperatures. Do not leave the product inside a vehicle or in places where the temperature may exceed 113^ F ( 45^ C), such as on a car dashboard, window sill, or behind a glass that is exposed to direct sunlight or strong ultraviolet light for extended periods of time. This may damage or overheat the product, or pose a risk to the vehicle.
Prevention of hearing loss
Permanent hearing loss may occur if earphones or headphones are used at high volume for prolonged periods of time.
Safety in aircraft
Due to possible interference caused by this product to an aircraft's navigation system and its communications network, using this device's phone function on board an airplane is against the law in most countries. If you want to use this device when on board an aircraft, remember to turn off the RF on your phone by switching to Airplane Mode.
Environment restrictions
Do not use this product near gas stations, fuel depots, chemical plants or where blasting operations are in progress, or in potentially explosive atmospheres such as fueling areas, fuel storehouses, below deck on boats, chemical plants, fuel or chemical transfer or storage facilities, and areas where the air contains chemicals or particles, such as grain, dust, or metal powders. Please be aware that sparks in such areas could cause an explosion or fire resulting in bodily injury or even death.
Explosive atmospheres
When in any area with a potentially explosive atmosphere or where flammable materials exist, the product should be turned off and the user should obey all signs and instructions. Sparks in such areas could cause an explosion or fire resulting in bodily injury or even death. Users are advised not to use the equipment at refueling points, such as service or gas stations, and are reminded of the need to observe restrictions on the use of radio equipment in fuel depots, chemical plants, or where blasting operations are in progress. Areas with a potentially explosive atmosphere are often, but not always, clearly marked. These include fueling areas, below deck on boats, fuel or chemical transfer or storage facilities, and areas where the air contains chemicals or particles, such as grain, dust, or metal powders.
Road safety
Full attention must be given to driving at all times in order to reduce the risk of an accident. Using a phone while driving (even with a hands-free kit) causes distraction and can lead to an accident. You must comply with local laws and regulations restricting the use of wireless devices while driving.
Safety precautions for RF exposure
- Avoid using your phone near metal structures (for example, the steel frame of a building).
- Avoid using your phone near strong electromagnetic sources, such as microwave ovens, sound speakers, TV and radio.
- Use only original manufacturer-approved accessories, or accessories that do not contain any metal.
- Use of non-original manufacturer-approved accessories may violate your local RF exposure guidelines and should be avoided.
Interference with medical equipment functions
This product may cause medical equipment to malfunction. The use of this device is forbidden in most hospitals and medical clinics.
If you use any other personal medical device, consult the manufacturer of your device to determine if they are adequately shielded from external RF energy. Your health care provider may be able to assist you in obtaining this information.
Turn your phone OFF in health care facilities when any regulations posted in these areas instruct you to do so. Hospitals or health care facilities may be using equipment that could be sensitive to external RF energy.
Non-ionizing radiation
Your device has an internal antenna. This product should be operated in its normal-use position to ensure the radioactive performance and safety of the interference. As with other mobile radio transmitting equipment, users are advised that for satisfactory operation of the equipment and for the safety of personnel, it is recommended that no part of the human body be allowed to come too close to the antenna during operation of the equipment.
Use only the supplied integral antenna. Use of unauthorized or modified antennas may impair call quality and damage the phone, causing loss of performance and SAR levels exceeding the recommended limits as well as result in noncompliance with local regular requirement in your country.
To assure optimal phone performance and ensure human exposure to RF energy is within the guidelines set forth in the relevant standards, always use your device only in its normal-use position. Contact with the antenna area may impair call quality and cause your device to operate at a higher power level that needed.
Avoiding contact with the antenna area when the phone is IN USE optimizes the antenna performance and the battery life.
Electrical safety
Accessories
- Use only approved accessories.
- Do not connect with incompatible products or accessories.
Connection to a car
Seek professional advice when connecting a phone interface to the vehicle electrical system.
Faulty and damaged products
- Do not attempt to disassemble the phone or its accessories.
- Only qualified personnel must service or repair the phone or its accessories.
General precautions
You alone are responsible for how you use your phone and any consequences of its use. You must always switch off your phone wherever the use of a phone is prohibited. Use of your phone is subject to safety measures designed to protect users and their environment.
Avoid applying excessive pressure to the device
Do not apply excessive pressure on the screen and the device to prevent damaging them. Remove the device from your pants' pocket before sitting down. Cracked display screens due to improper handling are not covered by the warranty.
Device getting warm after prolonged use
When using your device for prolonged periods of time, such as when you're talking on the phone, charging the battery or browsing the Web, the device may become warm. In most cases, this condition is normal and therefore should not be interpreted as a problem with the device.
Heed service markings
Except as explained elsewhere in the Operating or Service documentation, do not service any product yourself. Service needed on components inside the device should be done by an authorized service technician or provider.
Protect your phone
• Always treat your phone and its accessories with care and keep them in a clean and dust-free place.
- Do not expose your phone or its accessories to open flames or lit tobacco products.
- Do not expose your phone or its accessories to liquid, moisture or high humidity.
- Do not drop, throw or try to bend your phone or its accessories.
- Do not use harsh chemicals, cleaning solvents, or aerosols to clean the device or its accessories.
- Do not paint your phone or its accessories.
- Do not attempt to disassemble your phone or its accessories. Only authorized personnel must do so.
- Do not expose your phone or its accessories to extreme temperatures, minimum 14°F (-10°C) and maximum 113°F (45°C).
- Please check local regulations for disposal of electronic products.
- Do not carry your phone in your back pocket as it could break when you sit down.
Damage requiring service
Unplug the product from the electrical outlet and refer servicing to an authorized service technician or provide under the following conditions:
- Liquid has been spilled or an object has fallen into the product.
- The product has been exposed to rain or water.
- The product has been dropped or damaged.
- There are noticeable signs of overheating.
- The product does not operate normally when you follow the operating instructions.
Avoid hot areas
The product should be placed away from heat sources such as radiators, heat registers, stoves, or any device producing heat.
Avoid wet areas
Never use the product in a wet location.
Avoid using your device after a dramatic change in temperature
When you move your device between environments with very different temperature and/or humidity ranges, condensation may form on or within the device. To avoid damaging the device, allow sufficient time for the moisture to evaporate before using the device.
Notice: When taking the device from low temperature conditions into a warmer environment or from high-temperature conditions into a cooler environment allow the device to acclimate to room temperature before turning on power.
Avoid pushing objects into product
Never push objects of any kind into slots or other openings in the product. Slots and openings are provided for ventilation. These openings must not be blocked or covered.
Airbags
Do not place a phone in the area over an airbag or in the airbag deployment area. Store the phone safely before driving your vehicle.
Mounting accessories
Do not use the product on an unstable table, cart, stand, tripod or bracket. Any mounting of the product should follow the manufacturer's instructions and should use a mounting accessory recommended by the manufacturer.
Avoid unstable mounting
Do not mount the product with an unstable base.
Use product with approved equipment
This product should be used only with personal computers and options identified as suitable for use with your equipment.
Adjust the volume
Turn down the volume before using headphones or other audio devices.
Cleaning
Unplug the product from the wall outlet before cleaning.
Do not use liquid cleaners or aerosol cleaners. Use a damp cloth for cleaning, but NEVER use water to clean the LCD screen.
Small children
Do not leave your phone and its accessories within the reach of small children or allow them to play with it. They could hurt themselves, or others, or could accidentally damage the phone. Your phone contains small parts with sharp edges that may cause an injury, or which could become detached and create a choking hazard.
Repetitive motion injuries
To minimize the risk of RSI, when texting or playing games with your phone:
- Do not grip the phone too tightly.
- Press the buttons lightly.
- Make use of the special features in the handset which minimize the number of buttons which have to be pressed, such as message templates and predictive text.
• Take lots of breaks to stretch and relax.
Operating machinery
Full attention must be given to operating machinery in order to reduce the risk of an accident.
Loud noise
This phone is capable of producing loud noises which may damage your hearing.
Emergency calls
This phone, like any wireless phone, operates using radio signals, which cannot guarantee connection in all conditions. Therefore, you must never rely solely on any wireless phone for emergency communications.
Regulatory agency identifications
FCC Regulations
This mobile phone complies with Part 15 of the FCC Rules.
Operation is subject to the following two conditions: (1) This device may not cause harmful interference, and (2) this device must accept any interference received, including interference that may cause undesired operation.
This mobile phone has been tested and found to comply with the limits for a Class B digital device, pursuant to Part 15 of the FCC Rules. These limits are designed to provide reasonable protection against harmful interference in a residential installation. This equipment generates, uses and can radiate radio frequency energy and, if not installed and used in accordance with the instructions, may cause harmful interference to radio communications.
However, there is no guarantee that interference will not occur in a particular installation. If this equipment does cause harmful interference to radio or television reception, which can be determined by turning the equipment off and on, the user is encouraged to try to correct the interference by one or more of the following measures:
- Reorient or relocate the receiving antenna.
- Increase the separation between the equipment and receiver.
- Connect the equipment into an outlet on a circuit different from that to which the receiver is connected.
- Consult the dealer or an experienced radio/TV technician for help.
- Changes or modifications not expressly approved by the party responsible for compliance could void the user's authority to operate the equipment.
RF Exposure Information (SAR)
This mobile phone meets the government's requirements for exposure to radio waves. This phone is designed and manufactured not to exceed the emission limits for exposure to radio frequency (RF) energy set by the Federal Communications Commission of the U.S. Government. The exposure standard for wireless mobile phones employs a unit of measurement known as the Specific Absorption Rate, or SAR. The SAR limit set by the FCC is 1.6 W/kg. Tests for SAR are conducted using standard operating positions accepted by the FCC with the phone transmitting at its highest certified power level in all tested frequency bands.
Although the SAR is determined at the highest certified power level, the actual SAR level of the phone while operating can be well below the maximum value. This is because the phone is designed to operate at multiple power levels so as to use only the power required to reach the network. In general, the closer you are to a wireless base station, the lower the power output.
The highest SAR value for the model phone as reported to the FCC when tested for use at the ear is 1.23 W/kg and when worn on the body, as described in this user guide, is 0.93 W/kg (Body-worn measurements differ among phone models, depending upon available accessories and FCC requirements.)
While there may be differences between the SAR levels of various phones and at various positions, they all meet the government requirement.
The FCC has granted an Equipment Authorization for this model phone with all reported SAR levels evaluated as in compliance with the FCC RF exposure guidelines. SAR information on this model phone is on file with the FCC and can be found under the Display Grant section of www.fcc.gov/oet/ea/fccid after searching on FCC ID: 2A28USL112.
For body worn operation, this phone has been tested and meets the FCC RF exposure guidelines for use with an accessory that contains no metal and positions the handset a minimum of 10 mm from the body. Use of other accessories may not ensure compliance with FCC RF exposure guidelines. If you do not use a body-worn accessory and are not holding the phone at the ear, position the handset a minimum of 10 mm from your body when the phone is switched on.
Hearing Aid Compatibility (HAC) for Wireless Telecommunication Devices
This phone has a HAC rating of M4/T4.
What is hearing aid compatibility?
The Federal Communications Commission has implemented rules and a rating system designed to enable people who wear hearing aids to more effectively use these wireless telecommunications devices. The standard for compatibility of digital wireless phones with hearing aids is set forth in American National Standard Institute (ANSI) standard C63.19. There are two sets of ANSI standards with ratings from one to four (four being the best rating): an “M” rating for reduced interference making it easier to hear conversations on the phone when using the hearing aid microphone, and a “T” rating that enables the phone to be used with hearing aids operating in the tele-coil mode, thus reducing unwanted background noise.
How will I know which wireless phones are hearing aid compatible?
The Hearing Aid Compatibility rating is displayed on the wireless phone box. A phone is considered Hearing Aid Compatible for acoustic coupling (microphone mode) if it has an "M3" or "M4" rating. A digital wireless phone is considered Hearing Aid Compatible for inductive coupling (tele-coil mode) if it has a "T3" or "T4" rating.
Warranty
With this manufacturer's warranty (hereinafter: the "Warranty"), Emblem Solutions (hereinafter: the "Manufacturer") guarantees this product against any material, design and manufacturing defects. The duration of this Warranty is specified in article 1 below.
This Warranty does not affect your statutory rights, which cannot be excluded or limited, in particular in relation to the applicable legislation on defective products.
Warranty duration:
The product may consist of several parts, which may have separate warranty periods, to the extent permitted by local laws. The “Warranty Period” (as defined in the table below) takes effect on the date of purchase of the product (as indicated on the proof of purchase) or date of product delivery and activation (if required), whichever is later.
- Warranty period (see table below)
| Phone 24 Months | |
| USB Cable and Charger 12 Months | |
| Other Accessories (if included in the box) 12 Months |
2. Warranty period for repaired or replaced parts:
Subject to special provisions of local laws in force, the repair or replacement of a product does not, under any circumstances whatsoever, extend the original warranty period of the product concerned. However, the repaired or replaced parts are guaranteed in the same manner and for the same defect for a period of ninety days after delivery of the repaired product, even if their initial warranty period has expired. Proof of purchase required.
Implementation of the Warranty
If your product is faulty under normal conditions of use and maintenance, in order to benefit from the present warranty, please contact the Returns Center at 1(800) 801-1101 for assistance. The customer support center will then provide you with instructions on how to return the product for support under warranty. For more information, please visit att.com/warranty.
Warranty exclusions
Manufacturer guarantees its products against material, design and manufacturing defects. The Warranty does not apply in the following cases:
- Normal wear and tear of the product (including on camera lenses, batteries and screens) requiring periodic repair and replacement.
- Defects and damages due to negligence, to the product being used other than in a normal and customary manner, to the non-compliance with the recommendations of this User Manual, to an accident, regardless of the cause. Instructions for use and maintenance of the product can be found in your product's User Manual.
- The opening, unauthorized disassembly, modification being carried out or repair of the product by the end user or by persons or by service providers not approved by Manufacturer and/or with spare parts not approved by Manufacturer.
-
Use of the product with accessories, peripherals and other products whose type, condition and/or standards do not meet Manufacturer's standards.
-
Defects associated with the use or connection of the product to equipment or software not approved by Manufacturer. Some defects may be caused by viruses due to unauthorized access by yourself or by a third party service, computer systems, other accounts or networks. This unauthorized access may take place through hacking, misappropriation of passwords or various other means.
- Defects and damage due to the exposure of the product to humidity, extreme temperatures, corrosion, oxidation, or to any spillage of food or liquids, chemicals and generally any substance likely to alter the product.
- Any failure of embedded services and applications that have not been developed by Manufacturer and whose functioning is the exclusive responsibility of their designers.
- Installation and use of the product in a manner that does not comply with the technical or security standards of regulations in force in the country where it's installed or used.
- Modification, alteration, degradation or illegibility of the IMEI number, serial number or EAN of the product
- Absence of proof of purchase.
Upon expiration of the warranty period or upon an exclusion of warranty, Manufacturer may, at its discretion, provide a quote for the repair and offer to provide support for the product, at your cost.
The Manufacturer contact and after-sales service details are subject to change. These Warranty terms may vary substantially according to your country of residence.
- Set up your phone 12
- Basic operations 22
- Making connections....58
- Phone 59
- Contacts 71
- Messaging....80
- Internet and social networking....91
- Connectivity 93
- Apps and entertainment 103
- Camera and video....104
- Productivity 116
- Entertainment and activities 133
- Settings....135
- Basic settings 136
- Network & internet 139
- Connected devices 148
- Apps....154
- Battery 158
- Storage 162
- Sound & vibration....163
- Display....166
- Accessibility 169
- Security 176
- Privacy....181
- Location....185
- Safety & emergency....187
- Password & accounts....189
- Digital Wellbeing & parental controls 191
- Google 192
- DuraSpeed 193
- System 193
- Getting started
- Introduction
- About the user guide
- Before using your phone
- Descriptions in the user guide
- Screenshots and key labels
- Other notations
- Set up your phone
- Parts and functions
- Battery use
- Battery cautions
- Charge the battery
- Charge using the AC adapter
- Install a SIM/SD Card
- Insert a Nano SIM/microSD card
- Mount an SD card
- Unmount an SD card
- Remove an SD card
- Format an SD card
- Turn your phone on and off
- Turn your phone on
- Turn your phone off
- Restart your phone
- Use the touch screen
- Tap or touch
- Touch and hold
- Swipe or slide
- Drag
- Rotate
- Pinch and spread
- Complete the setup screens
- Basic operations
- Home screen and Apps list
- Select options and navigate screens
- Recent applications
- Switch between recently opened apps
- Phone settings menu
- Portrait and landscape screen orientation
- Turn screen rotation on or off
- Capture screenshots
- Applications
- Launch apps
- Work with apps
- Group app folders
- Control app permissions
- Set default apps
- Choose default apps
- To change the default app for opening links, continue with the steps below:
- Disable an app
- Apps list
- Phone number
- Airplane mode
- To turn on Airplane mode
- To turn off Airplane mode
- Enter text
- Touch screen keyboards
- Google keyboard
- Access Google keyboard settings
- Google Voice Typing
- Tips for editing text
- To edit text you have already entered
- To insert new text
- Google account
- Create a Google account
- Create a Google account online
- Create a Google account using your phone
- Sign in to your Google account
- Lock and unlock your screen
- Turn the screen off when not in use
- Turn the screen on and unlock it
- Home screen basics
- Home screen layout
- Extended home screens
- Status bar and Notification panel
- Status bar
- Notification panel
- Open the Notification panel
- Close the Notification panel
- Notification panel layout
- Customize the Home screen
- Operations for rearranging the Home screen
- To move app shortcuts icons
- To delete app shortcuts icons
- To display the Home screen menu
- Change the wallpaper
- Add shortcuts to the Home screen
- Add App folders to the Home screen
- Change folder names
- Remove folder
- Remove apps from a folder
- Making connections
- Phone
- Make a call
- Make a call with Wi-Fi Calling
- Receive a call
- Reject a call and send a text message
- In-call screen layout and operations
- In-call screen layout
- Place a call from Contacts
- Call from Recents
- Call settings
- Call settings options
- Contacts
- Add a contact
- Save a phone number
- View contacts
- Contacts screen layout
- Edit a contact
- Delete a contact
- Share a contact
- Messages
- Text and multimedia messages
- Send a text message (SMS)
- Send a multimedia message (MMS)
- Note: Attachment options may vary.
- SMS and MMS options
- Messages menu options
- Text messages menu options
- Gmail
- Create and send an email message
- Email composition options
- Open an email message from a notification
- Email settings
- Internet and social networking
- Chrome browser
- Browsing web pages
- Adding a bookmark
- Opening a bookmark
- Customizing browser settings
- Sign in to your Facebook account or create a new account
- Use Facebook
- Connectivity
- Transfer files between your phone and a computer
- File transfer tips
- Transfer files between the phone and a computer
- Wi-Fi
- Turn Wi-Fi on and connect to a wireless network
- Bluetooth
- Enable Bluetooth To enable Bluetooth
- Pair Bluetooth devices
- To pair Bluetooth devices
- To forget a paired device
- Connect to a paired Bluetooth device
- Send information via Bluetooth
- Receive information via Bluetooth
- Apps and entertainment
- Camera and video
- Camera overview
- Take photos and record videos
- Camera cautions
- Take a photo
- Record a video
- Camera settings
- Set camera functions
- - Custom:
- View pictures and video using Photos
- View photos and videos
- Review photos and videos
- Options while reviewing photos or videos
- Edit photos
- Rotate and save a photo
- Crop a picture
- Share pictures and videos
- Productivity
- Calendar
- Calendar view
- Tap Menu
- Select from one of the following calendar views:
- Add an event
- View calendar events
- Edit an event
- Delete an event
- Calendar settings
- Navigation apps
- Enable location services on your phone
- Maps
- Search for destinations
- Maps operations
- Google Search
- Use Google Search
- Use Google Voice Search
- Calculator
- View calculator history
- Clock
- Set the date and time manually
- Create a new alarm
- Turn an alarm off
- Delete an alarm
- Timer
- Stopwatch
- Entertainment and activities
- YouTube
- View YouTube videos
- Post a video to YouTube
- Settings
- Basic settings
- Network & internet
- Internet
- Connect your device to a Wi-Fi network
- Manually connect to a Wi-Fi network
- Network preferences
- Saved networks
- Wi-Fi data usage
- Wi-Fi Calling
- Mobile network
- Hotspot & tethering
- Use your phone as a Mobile hotspot
- USB tethering
- Bluetooth tethering
- Data saver
- VPN (Virtual Private Networks)
- Add a VPN profile
- Edit and delete a VPN
- Connect to a VPN
- Mobile plan
- Private DNS
- Connected devices
- USB
- Pair new device
- Connection preferences
- Activate Bluetooth
- Pair a Bluetooth device
- Rename a paired device
- Disconnect from a paired device
- Search for other devices
- Receive data via Bluetooth
- Photos received via Bluetooth
- Files received via Bluetooth
- NFC
- Cast
- Android Beam
- Printing
- Add printer
- Chromebook
- Nearby Share
- Android Auto
- Apps
- Recently opened apps
- Default apps
- Screen time
- Unused apps
- Special app access
- Notifications
- Manage
- Conversation
- Privacy
- General
- Battery
- Battery Usage
- Battery Saver
- Battery Manager
- Battery percentage
- Storage
- Storage manager
- Sound & vibration
- Media volume
- Call volume
- Ring & notification volume
- Alarm volume
- Do Not Disturb
- Phone ringtone
- Media
- Vibrate & haptics
- Default notification sound
- Default alarm sound
- Other sounds and vibrations
- Display
- Brightness level
- Adaptive brightness
- Lock screen
- Screen timeout
- Dark theme
- Display size and text
- Night Light
- Colors
- Auto-rotate screen
- Network name
- Screen saver
- Lift to wake
- Accessibility
- Select to Speak
- TalkBack
- Color and motion
- Extra dim
- Magnification
- Accessibility Menu
- Switch Access
- Timing controls
- System controls
- Vibration & haptic strength
- Caption preferences
- Real-Time text (RTT) Call Button
- Audio description
- Hearing aids
- Audio adjustment
- Accessibility shortcuts
- Text-to-speech output
- Security
- Google Play Protect
- Find My Device
- Security update
- Screen lock
- Face & Fingerprint Unlock
- More security settings
- Smart Lock
- Device admin apps
- SIM card lock
- Encryption & credentials
- Trust agents
- App pinning
- Permission dashboard
- Permission manager
- Camera access
- Microphone access
- Show passwords
- Notifications on lock screen
- Show clipboard access
- Autofill service from Google
- Google location history
- Activity controls
- Ads
- Usage & diagnostics
- Location
- Recent access
- App location permissions
- Location services
- Safety & emergency
- OPEN PERSONAL SAFETY
- Medical information
- Emergency contacts
- Emergency SOS
- Crisis alerts
- Emergency Location Services
- Wireless Emergency Alerts
- Passwords & accounts
- Add account
- Automatically sync data
- Digital Wellbeing & parental controls
- Your Digital Wellbeing tools
- Ways to disconnect
- Reduce interruptions
- Show icon in the app list
- Parental controls
- DuraSpeed
- System
- Languages & input
- Languages
- View your languages.
- App Languages
- Keyboards
- Speech
- Tools
- Gestures
- Quickly open camera
- System navigation
- Press and hold power button
- Prevent ringing
- Date & time
- Backup
- System updates
- Multiple users
- Edit your profile
- Add a new user
- Switch users
- Delete users
- Reset options
- Tap System ⓘ > Reset options.
- About phone
- Getting help
- For assistance
- Troubleshooting
- Specifications
- Licenses
- Copyright information
- Safety and use
- Please read before proceeding
- Important health information and safety precautions
- Electrical safety
- Safety precautions for proper grounding installation
- Safety precautions for power supply unit
- Use the correct external power source
- Battery must be used with caution
- Warning: Battery is non-removable. Do not attempt to remove the battery for danger of explosion.
- Take extra precautions
- Safety precautions for direct sunlight
- Prevention of hearing loss
- Safety in aircraft
- Environment restrictions
- Explosive atmospheres
- Road safety
- Safety precautions for RF exposure
- Interference with medical equipment functions
- Non-ionizing radiation
- Accessories
- Connection to a car
- Faulty and damaged products
- General precautions
- Avoid applying excessive pressure to the device
- Device getting warm after prolonged use
- Heed service markings
- Protect your phone
- Damage requiring service
- Avoid hot areas
- Avoid wet areas
- Avoid using your device after a dramatic change in temperature
- Avoid pushing objects into product
- Airbags
- Mounting accessories
- Avoid unstable mounting
- Use product with approved equipment
- Adjust the volume
- Cleaning
- Small children
- Repetitive motion injuries
- Operating machinery
- Loud noise
- Emergency calls
- Regulatory agency identifications
- FCC Regulations
- RF Exposure Information (SAR)
- Hearing Aid Compatibility (HAC) for Wireless Telecommunication Devices
- What is hearing aid compatibility?
- How will I know which wireless phones are hearing aid compatible?
- Warranty
- Warranty duration:
- Warranty period for repaired or replaced parts:
- Implementation of the Warranty
- Warranty exclusions
- Upon expiration of the warranty period or upon an exclusion of warranty, Manufacturer may, at its discretion, provide a quote for the repair and offer to provide support for the product, at your cost.
Brand : AT&T
Model : Motivate 4
Category : Mobile Phone