
IPD-TSB2.0 - Soundbar SoundTube - Free user manual and instructions
Find the device manual for free IPD-TSB2.0 SoundTube in PDF.


| Product Type | Soundbar |
| Brand | SoundTube |
| Model | IPD-TSB2.0 |
| Channels | 2.0 |
| Dimensions (W x H x D) | 40.0 x 3.5 x 2.5 inches |
| Weight | 5.5 lbs |
| Power Supply | AC 100-240V, 50/60Hz |
| Power Consumption | 50W |
| Speaker Drivers | 2 x 3.5" full-range |
| Frequency Response | 60Hz - 20kHz |
| Audio Inputs | Bluetooth, 3.5mm AUX, Optical |
| Bluetooth Version | 5.0 |
| Remote Control | Included |
| Wall Mountable | Yes |
| Cleaning Instructions | Wipe with a dry, soft cloth. Do not use liquids or cleaners. |
| Safety Warnings | Do not expose to water or extreme temperatures. Keep away from children. |
| Spare Parts Availability | Contact SoundTube customer service |
| Warranty | 1 year limited |
| Manual Languages | English, French, Spanish |
Frequently Asked Questions - IPD-TSB2.0 SoundTube
User questions about IPD-TSB2.0 SoundTube
0 question about this device. Answer the ones you know or ask your own.
Ask a new question about this device
Download the instructions for your Soundbar in PDF format for free! Find your manual IPD-TSB2.0 - SoundTube and take your electronic device back in hand. On this page are published all the documents necessary for the use of your device. IPD-TSB2.0 by SoundTube.
USER MANUAL IPD-TSB2.0 SoundTube
Install Instructions for:
IPD-TSB2.0 Dante-Enabled Soundbar
Box Contents
IPD-TSB2.0 Soundbar (x1)


Mounting Brackets (x2)
Mounting Pins (x2)
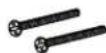

Leveling Screws (x2)
Table Top Mounting Feet (x2)


Table Top Feet Screws (x4)


Table Top Mounting Screws (x2)
Thank you for purchasing the SoundTube IPD-TSB2.0 soundbar. This high-definition 2-channel soundbar provides outstanding dialogue and clarity along with an open, wide sound stage.
The IPD-TSB2.0 soundbar speaker is an ultra-thin design made to fit seamlessly under a panel TV. Both table top and wall mounting options are included with the product. For on-wall applications, the mounting bracket has adjustments for lining up and vertically leveling the speaker with the TV. The soundbar cabinet also has threaded inserts for mounting the IPD-TSB2.0 to a display wall bracket mechanism.
Note: Please check with the display mount manufacturer for compatibility and ensure the display mount will support a 12-pound soundbar.
Regardless of application, we recommend that you take the time to read this manual thoroughly before connecting speakers to network switch or Dante device. In the unlikely event that you should experience a problem with set-up or operation, please contact an authorized SoundTube dealer for assistance, or contact us directly via mseaudio.com or our tech support line: 800-874-7076.
1.855.663.5600 | www.soundtube.com
UL Listed
© 2020 MSE Audio, and SoundTube Entertainment, Inc. All rights reserved. P# INS-IPD-TSB2.0 | Rev 10.23.2020
Warning/Avertissement Warning/Avertissement
SoundTube speakers must be installed by a professional audio installer/contractor. For safety and for optimum audio performance, installer must follow all directions issued by SoundTube Entertainment.
Do not spec or install speaker near support beam, ventilation duct or other structure that may interfere with speaker function or dispersion.
Install Instructions for:
IPD-TSB2.0 Dante-Enabled Soundbar

CAUTION
RISK OF ELECTRIC SHOCK DO NOT OPEN

CAUTION: To reduce the risk of electric shock, do not remove cover (or back). No user-serviceable parts inside. Refer servicing to qualified service personnel.
-
Read Instructions - All the safety and operating instructions should be retained before the appliance is operated.
-
Retain Instructions - The safety and operating instructions should be retained for future reference.
-
Heed Warnings - All warning son the appliance and in the operating instructions should be adhered to.
-
Follow Instructions - All operating and other instructions should be followed.
-
Water and Moisture - The appliance should not be use near water –for example, near a bathtub, kitchen sink, laundry machinery, in a damp basement, or near a swimming pool, etc.
-
Carts and Stands - The appliance should be used only with a cart or a stand that is recommended by the manufacturer.

-
Wall or Ceiling Mounting - The appliance should be mounted to a wall or ceiling only as recommended by the manufacturer.
-
Ventilation - The appliance should be situated so that its location or position does not interfere with its proper ventilation. For example, the appliance should not be situated on a bed, sofa, rug, or similar surface that may block the ventilation openings; it should not be placed into a built-in installation such as a bookcase or cabinet that may impede the flow of air through the ventilation openings.
-
Heat - The appliance should be situated away from heat sources such as radiators, stoves, or other appliances that product heat.
APPLICABLE FOR USA, CANADA OR WHERE APPROVED FOR USAGE
CAUTION: TO PREVENT ELECTRIC SHOCK, MATCH WIDE BLADE PLUG TO WIDE SLOT, INSERT FULLY.
ATTENTION: POUR EVITER LES CHOCS ELECTRIQUES, INTRODUIRE LA LAME LA PLUS LARGE DE LA FICHE DANS LA BORNE CORRESPONDANTE DE LA PRESE ET POUSSER JUSQU AU FOND.
-
Power Source - The appliance should be connected to a power supply only of the type described in the operating instructions or as marked on the appliance.
-
Power Cord Protection - Power supply cords should be routed so that they are not likely to be walked on or pinched by items placed up or against them, paying particular attention to cords at plugs, convenience receptacles, and the point where they exit from the appliance.
-
Cleaning - The appliance should be cleaned only as recommended by the manufacturer.
-
Non-use Periods - The power cord of the appliance should be unplugged from the outlet when left unused for a long period of time.
-
Object and Liquid Entry - Care should be taken so that neither objects fall nor liquids spill into the inside of the appliance.
-
Damage Requiring Service - The appliance should be serviced by qualified service personnel when: a. The power supply cord or the plug has been damaged, b. Objects have fallen onto or liquid has been spilled into the appliance, c. The appliance has been exposed to rain, d. The appliance dose not appear to operate normally or exhibits a marked change in performance, or e. The appliance has been dropped or the cabinet damaged.
-
Servicing - The user should not attempt to service the appliance beyond those means described in the operating instructions. All other servicing should be referred to qualified service personnel.
-
Grounding or Polarization - Precautions should be taken so that the grounding or polarization means of an appliance is not defeated.
IPD-TSB2.0
Wall/Table Top Mounting Instructions for:
IPD-TSB2.0 Dante-Enabled Soundbar
Step 1. - Choose Location and Run Cable
Determine that the desired mounting location is safe and clear of any physical obstructions that might hinder the proper installation of the speaker. Note: When selecting the IPD-TSB2.0 mounting location, be sure to carefully inspect and measure the wall where you intend to mount the speaker and your flat panel TV display. An inspection of the room, or rooms that back up to the wall you have selected can often alert you to potential obstacles. An electronic stud-finder is a useful tool to assist you in selecting the speaker placement, but be cautious as they often give false readings. For example, if the wall happens to be a common wall for a bathroom or kitchen, there is a good chance you will encounter water or sewer pipes that will not be detected by a stud-finder. It is recommended, that wherever possible, you try to fasten mounting brackets to a vertical stud with the appropriate wood screws. If it is not possible to mount the brackets over the studs, then it is recommended that the appropriate hollow wall anchors or toggle bolts be used to mount the IPD-TSB2.0.
Run CAT5e or CAT6 Ethernet cable to the determined location and be sure to leave about two feet of extra cable for the final speaker installation. Because the IPD-TSB2.0 will mount a little over 0.5" from the wall, use an RJ45 connector without a strain relief. If the wire is run through the wall, then line the hole or J-Box up with the RJ45 connector on the back of the speaker. Note: Special consideration must be taken to run an Ethernet cable to the IPD-TSB2.0 speaker. Be certain that the Ethernet cable will reach the rear of the speaker where you plan to mount it. The speaker, when installed correctly, will be slightly over 0.5" from the wall.
If the flat panel monitor is not yet mounted to the wall, then install the display first to use as a guide for the IPD-TSB2.0. For best appearance and optimal response characteristics, it is recommended that the speaker be centered, and placed below the flat panel display.
Step 2.1. - Wall Mounting
For the best audio experience, the IPD-TSB2.0 should be centrally aligned and mounted directly below the TV display. Each IPD-TSB2.0 speaker comes with two mounting brackets that should be installed to the wall 16 inches apart and centrally located under the TV.
First, locate the center line of your TV display and make a light pencil mark on the wall that is 2.5" below the bottom of your display. Next, measure to the left of this mark exactly 8" and make another mark at that point. Make sure this mark is also 2.5" below the TV. Repeat this process on the right side of the display – making sure that this mark is level with the mark on the left side. This will create two marks that are 16" apart and 2.5" below the bottom of your display. (Figure 1) You have now identified the location for the two wall brackets for the IPD-TSB2.0 speaker.
![Flat Panel Display T 2.5" 16" [FIGURE 1]](/content/2026/05/986222/images/9d217d058b639f5846906461fd0c9a1ae5ef705e7936da8d3dcd110483291034.jpg)
Using a 1/16" drill bit, drill a pilot hole at each of your two marks above. Place one of the wall brackets on the wall and align the pilot hole with the bottom slot on the bracket and drill a second pilot hold in the center of the upper slot on the bracket. (Figure 2) This hole will be 7/8" above the first pilot hole. Repeat this process for the bracket on the other side. These pilot holes will let you know if your mounting bracket location is over a wall stud or not. If it is over a stud then that bracket can be installed with a suitable screw (for mounting on sheet rock walls, we recommend at least a #10 x1.5" pan head screw and a flat washer between the screw and the bracket). If the location for the bracket is not over a wall stud, then suitable drywall anchors that can support 15 lbs each must be used.
![Flat Panel Display [FIGURE 2]](/content/2026/05/986222/images/54209b702f33103c6de4ec4a1f4ac3544375aaef1251fe7ad74177621729ac0b.jpg)
Following the guidelines above, mount the two brackets to the wall. Once they are installed, check that the center distance between the vertical mounting slots on the two brackets is exactly 16" apart.
IPD-TSB2.0
Wall/Table Top Mounting Instructions for:
IPD-TSB2.0 Dante-Enabled Soundbar
![Technical line drawing of a cylindrical mechanical component with mounting holes and internal features, labeled [FIGURE 3] (no text or symbols on the diagram itself)](/content/2026/05/986222/images/9321970e759c941d0669884185d64f802057dea2c76d3c701a680934209ecf15.jpg)
Locate the two holes on the back of the speaker that are 8" apart from the center hole and install the two Mounting Pins in these holes. (Figure 3) The IPD-TSB2.0 is now ready to be mounted to the wall.
Connect the Ethernet cable to the RJ45 input on the rear of the IPD-TSB2.0. Carefully slide each Mounting Pin (a.) horizontally into the slot of the Mounting Bracket, and then (b.) downward into the vertical slot. (Figure 4) The Leveling Screws may be inserted into the bottom of the Mounting Bracket and used to adjust the height and to make sure the speaker is level. Tightening the screw will raise the speaker and loosening will lower it.
![[FIGURE 4]](/content/2026/05/986222/images/37016d1966e3b924fe1f2438c3fda57916f2ecf85f15589c578c54d32b248f7c.jpg)
Step 2.2 - Table Top Mounting
Place the IPD-TSB2.0 face down on a soft clean surface with the grille on. Orient the speaker so the input terminal is on the right hand side. (a.) To attach the Table Top Mounting Feet to the Mounting Brackets, first remove the Leveling Screws from the underside of the Mounting Brackets and attach the Table Top Mounting Feet to the bottom of the bracket using the two supplied Table Top Feet Screws. Make sure that you orient the feet so that the longer side points to the front of the IPD-TSB2.0.
Repeat this for the other Mounting Bracket and Table Top Mounting Foot. Once you have the Table Top Mounting Feet securely fastened to the Mounting Brackets, it is now time to mount them to the IPD-TSB2.0. (b). Align the center of the cross section on the Mounting Bracket with the center of the mounting holes on the rear of the speaker and fasten using the supplied Table Top Mounting Screws for each bracket.
Note: When mounting the table top brackets, fasten the brackets to the far end mounting holes on each side of the speaker cabinet.
![[FIGURE 5]](/content/2026/05/986222/images/03ee05a12b39bd265f3f766a39cd5eb5a4147eb92afba68dd2f9b61ac569485b.jpg)
Step 3 - Final Adjustments
Be sure the RJ45 input connector on the rear of the speaker is tightly in place. Tuck any excess Ethernet cable behind the soundbar cabinet, using tie wraps if necessary to secure the Ethernet cable.
IPD-TSB2.0
Wall/Table Top Mounting Instructions for:
IPD-TSB2.0 Dante-Enabled Soundbar
Caring for your Speaker
All SoundTube speakers are finished with a high degree of craftsmanship. We recommend using a lint-free cloth with a small amount of glass cleaner to maintain your product. Avoid cleaning products containing oil, oil derivatives, or solvents.
Maintenance and Service
Because of MSE Audio's uncompromising quality control programs, it is unlikely that your speaker will need service if connected and used as outlined in this manual. In the event that a problem does occur, please contact your SoundTube dealer. Your dealer will have the necessary factory-authorized parts and trained technicians to quickly restore your speaker to its original performance specifications.
Warranty
SoundTube warrants its loudspeakers to be free from defects in material and workmanship for a period of five (5) years for speaker product, and three (3) years for electronic components to the original purchaser. Purchase must be from either the manufacturer, or an authorized SoundTube dealer.
This warranty does not cover service or parts to repair damage caused by misuse, abuse, damage while in transit, alterations, unauthorized repairs, failure to follow installation or care instructions, fire, flood, or any other cause beyond the reasonable control of SoundTube or MSE Audio. Defects in speaker cabinets or grilles must be brought to the attention of your dealer immediately after purchase. This warranty will be void if the product's serial number has been altered or removed.
Should your SoundTube product require service, or you wish to return your product, please call or email the MSE Audio customer service department, or visit mseaudio.com to complete the appropriate request form. All merchandise returned without prior authorization will be refused.
Parts/Service
www.mseaudio.com/parts-service customerservice@mseaudio.com 855-663-5600
Returns
www.mseaudio.com/return-form customerservice@mseaudio.com 855-663-5600
Specifications
| Description: | Description: 2-Way Ultra-Thin Powered Dante Soundbar |
| Recommended Power: | PoE, PoE+, 40W PoE |
| Frequency Response ±10dB: | 65 Hz - 20 kHz |
| Crossover Frequency: | 3.5 kHz |
| Max SPL @ 1M: | 100 dB |
| Tweeter(s): | Two 0.75" Silk/Synthetic Soft-Dome |
| Woofer(s): | Four 3" Polypropylene w/ NBR Surround |
| Bass Radiators: | Four 3" Polypropylene w/ NBR Surround |
| Inputs: | RJ45 |
| Grille: | Black Powder-Coated Pressure-fit Aluminum |
| Dimensions: | 6.75" H x 43" W x 2.5" D |
| Weight: | 15 lbs |
| Included Accessories: | Wall-Mount Hardware, Horizontal Tabletop Stands |
- BOX CONTENTS
- WARNING/AVERTISSEMENT WARNING/AVERTISSEMENT
- CAUTION
- IPD-TSB2.0
- WALL/TABLE TOP MOUNTING INSTRUCTIONS FOR
- STEP 1. - CHOOSE LOCATION AND RUN CABLE
- STEP 2.1. - WALL MOUNTING
- STEP 2.2 - TABLE TOP MOUNTING
- STEP 3 - FINAL ADJUSTMENTS
- CARING FOR YOUR SPEAKER
- MAINTENANCE AND SERVICE
- WARRANTY
- PARTS/SERVICE
- RETURNS
Brand : SoundTube
Model : IPD-TSB2.0
Category : Soundbar